换一换
换一换 


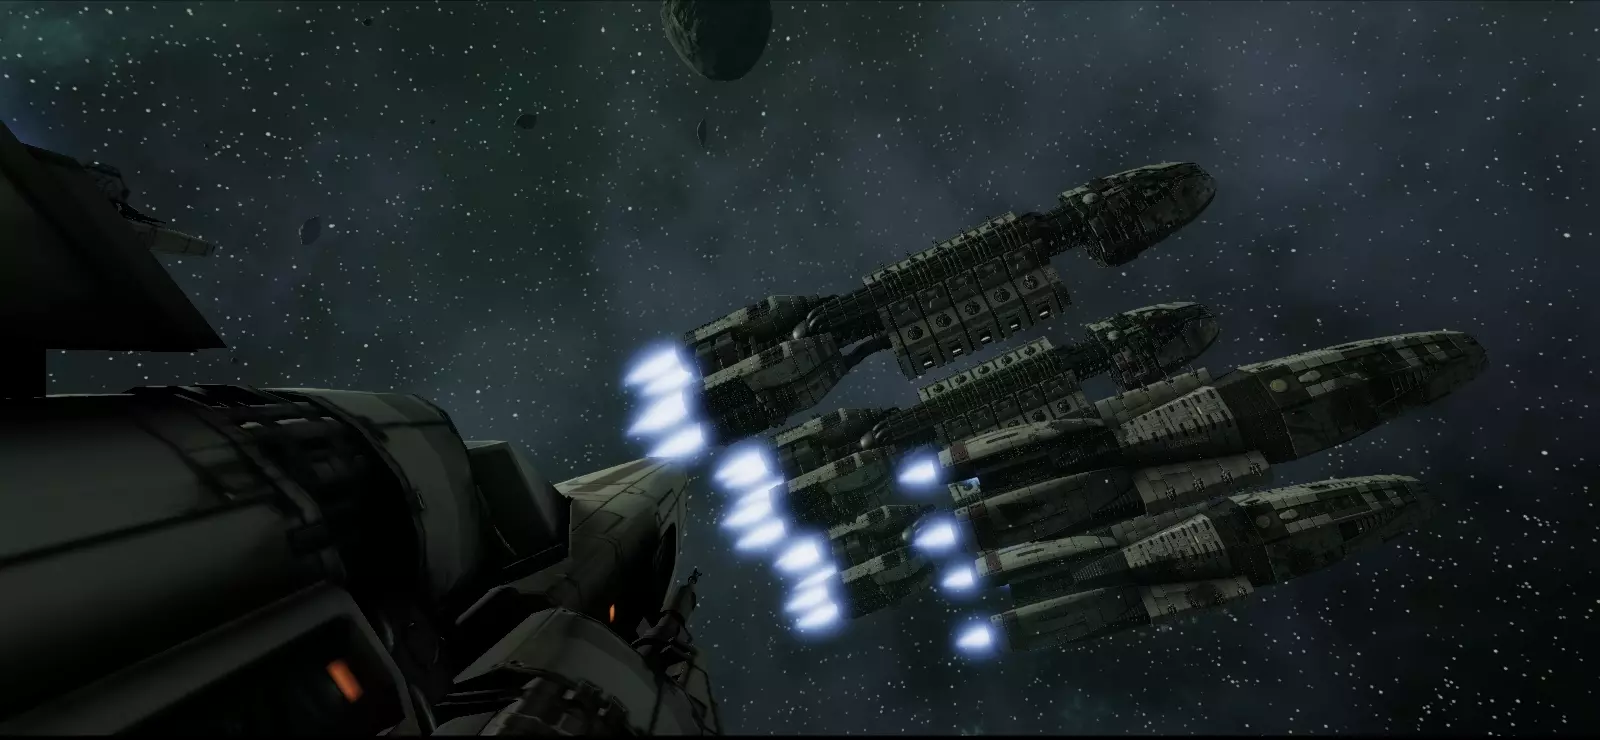
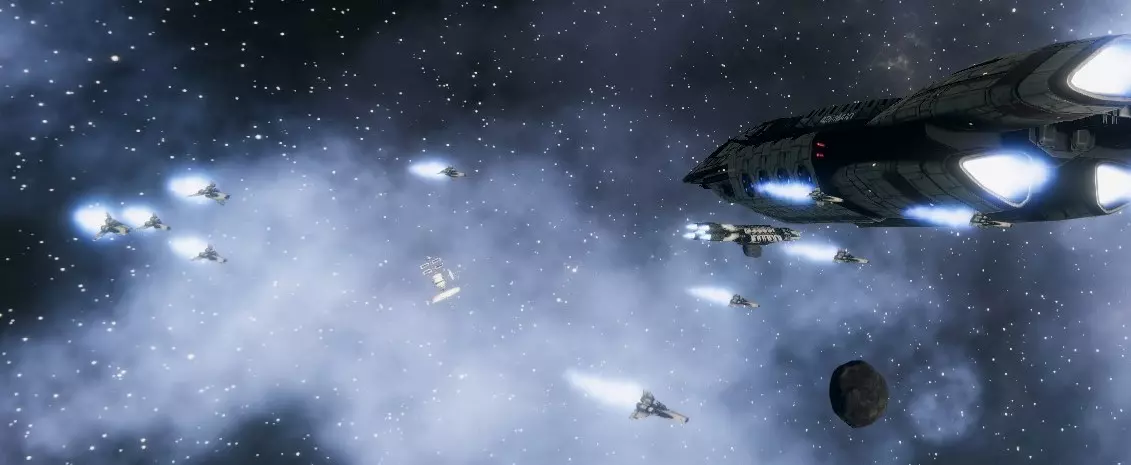
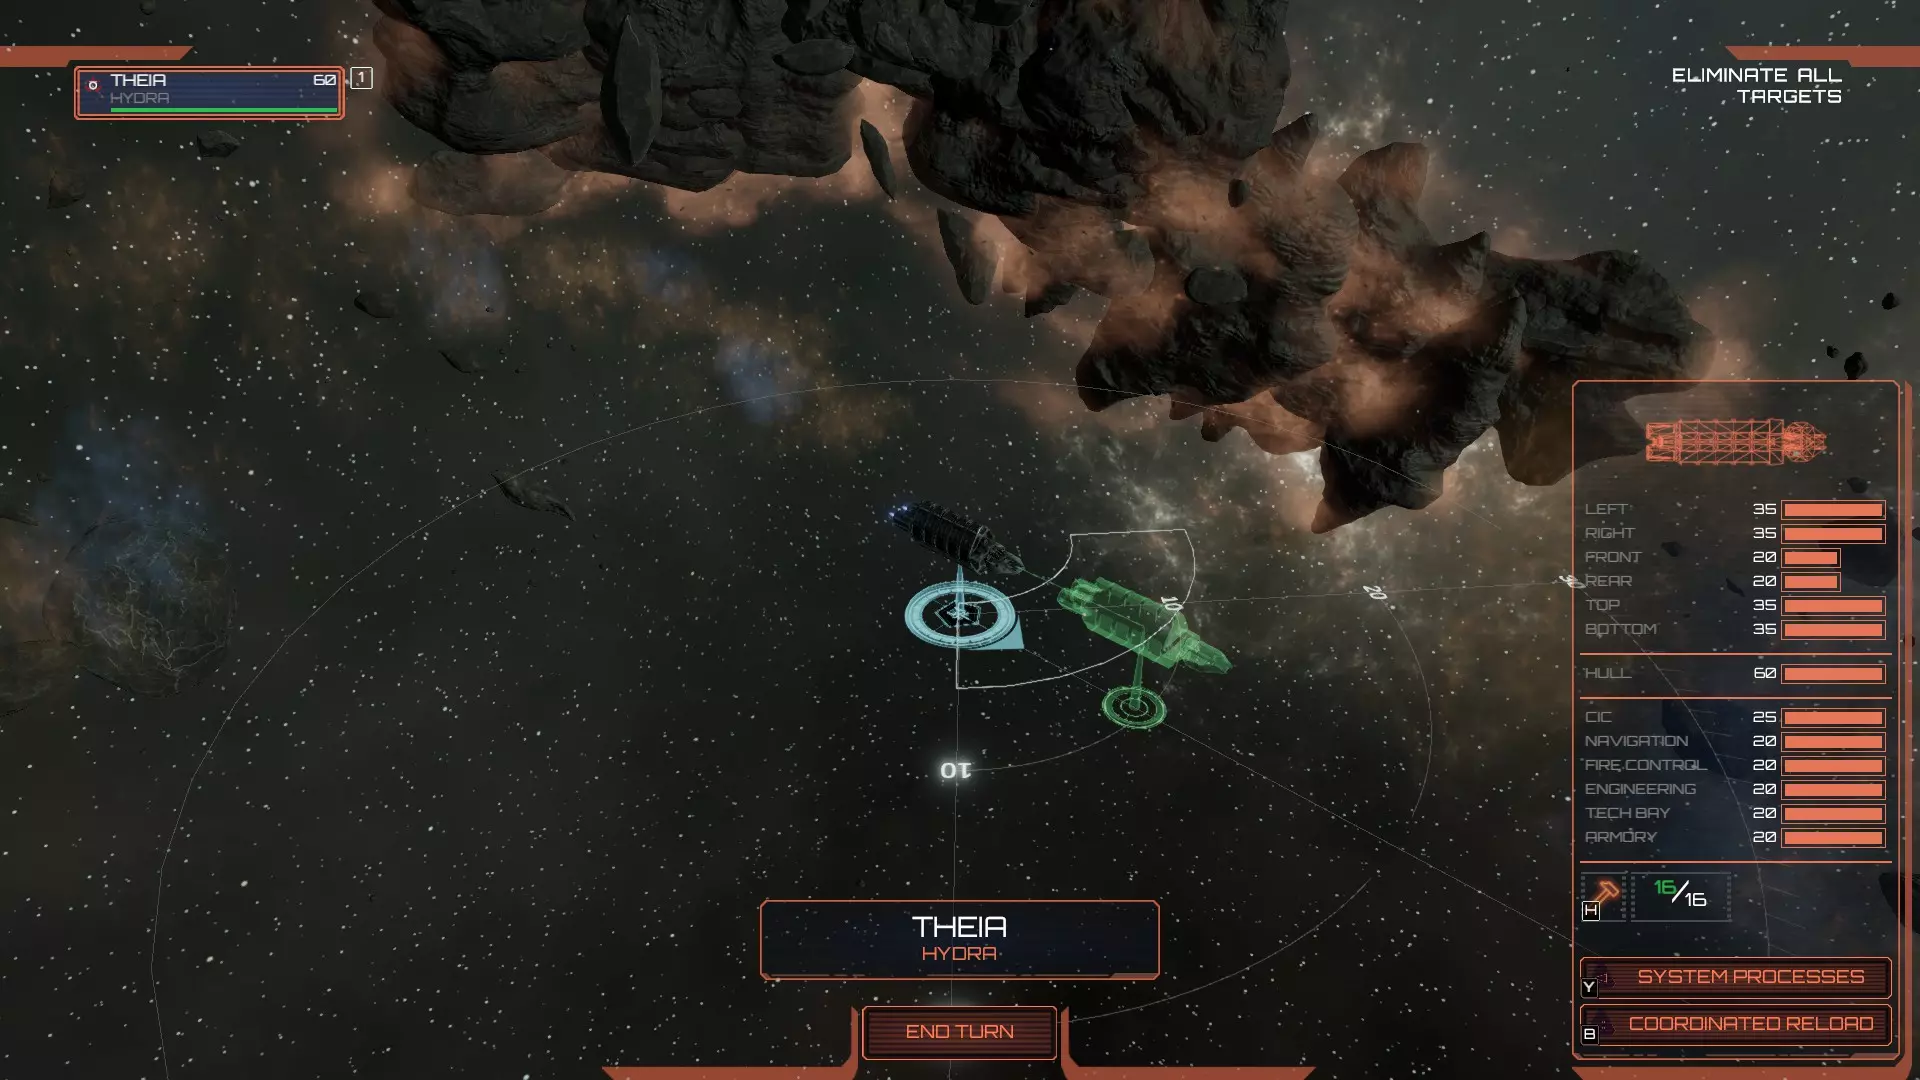
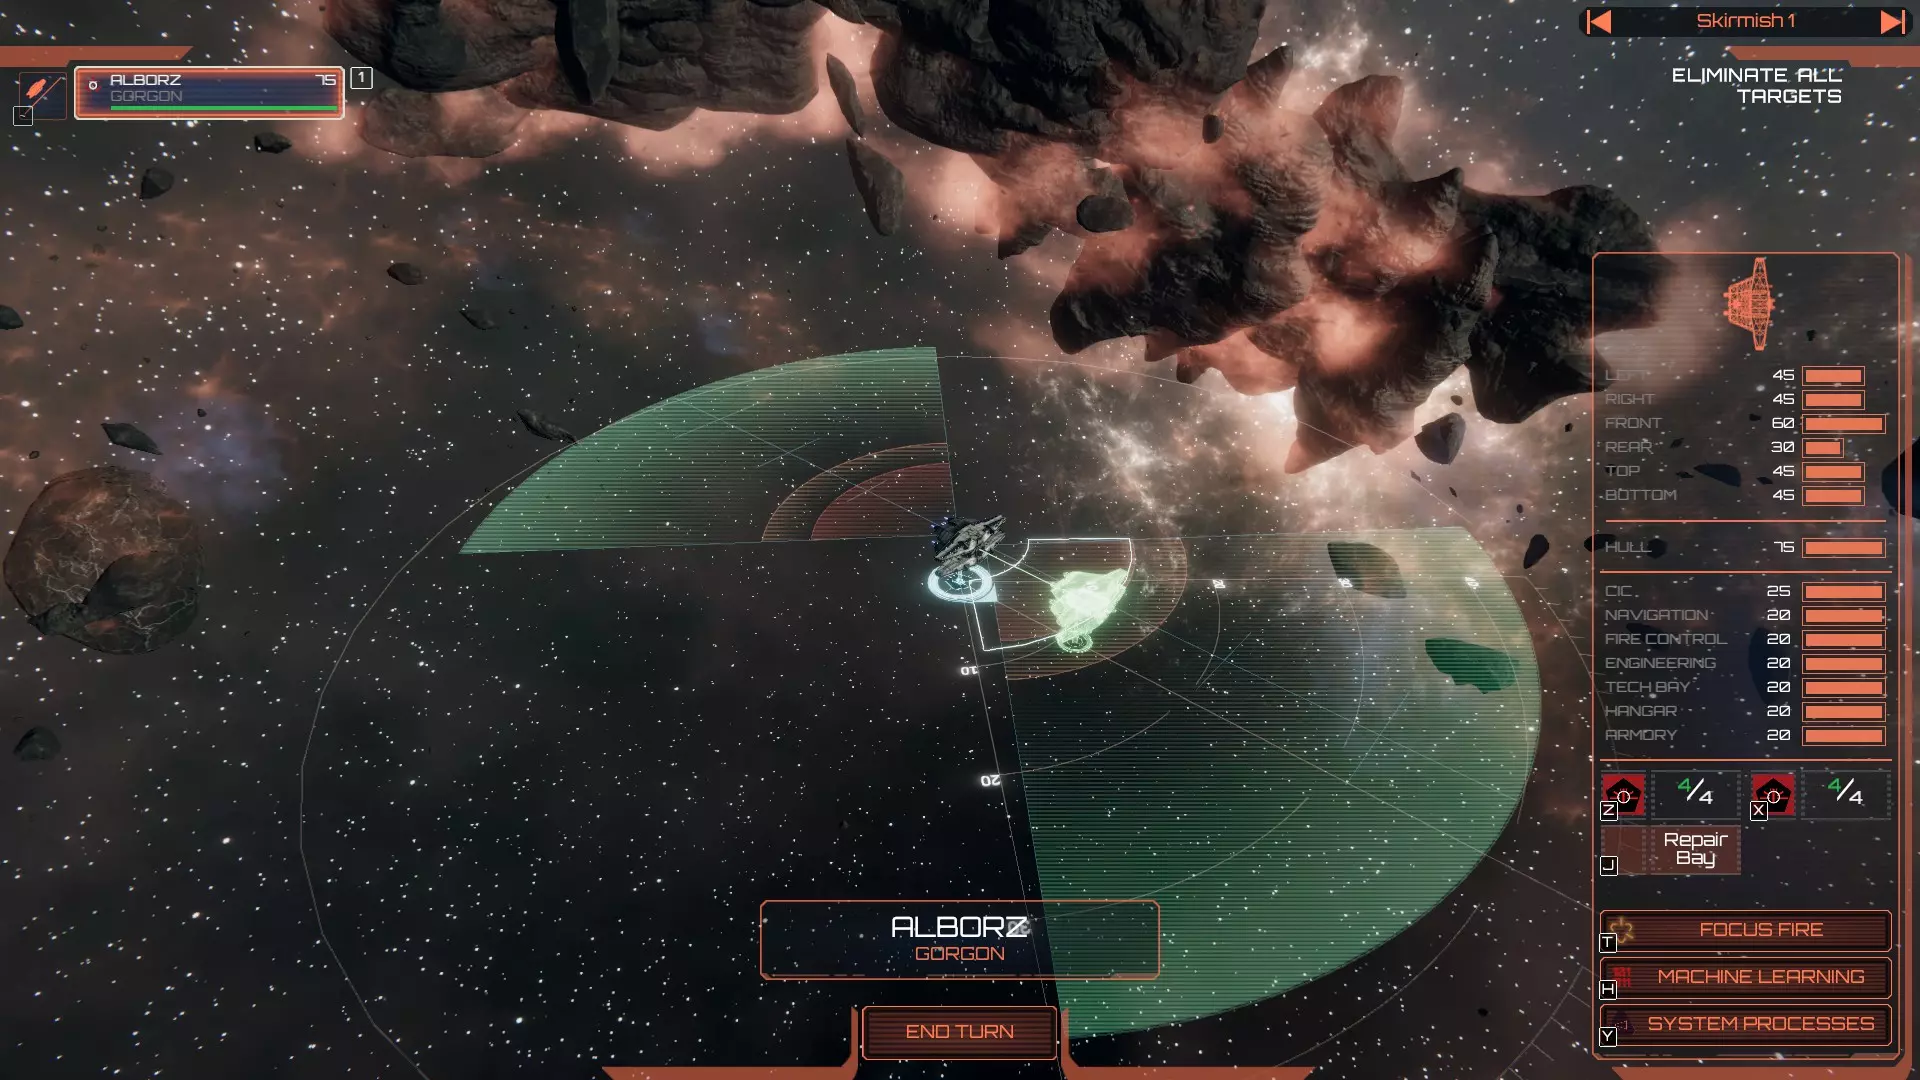
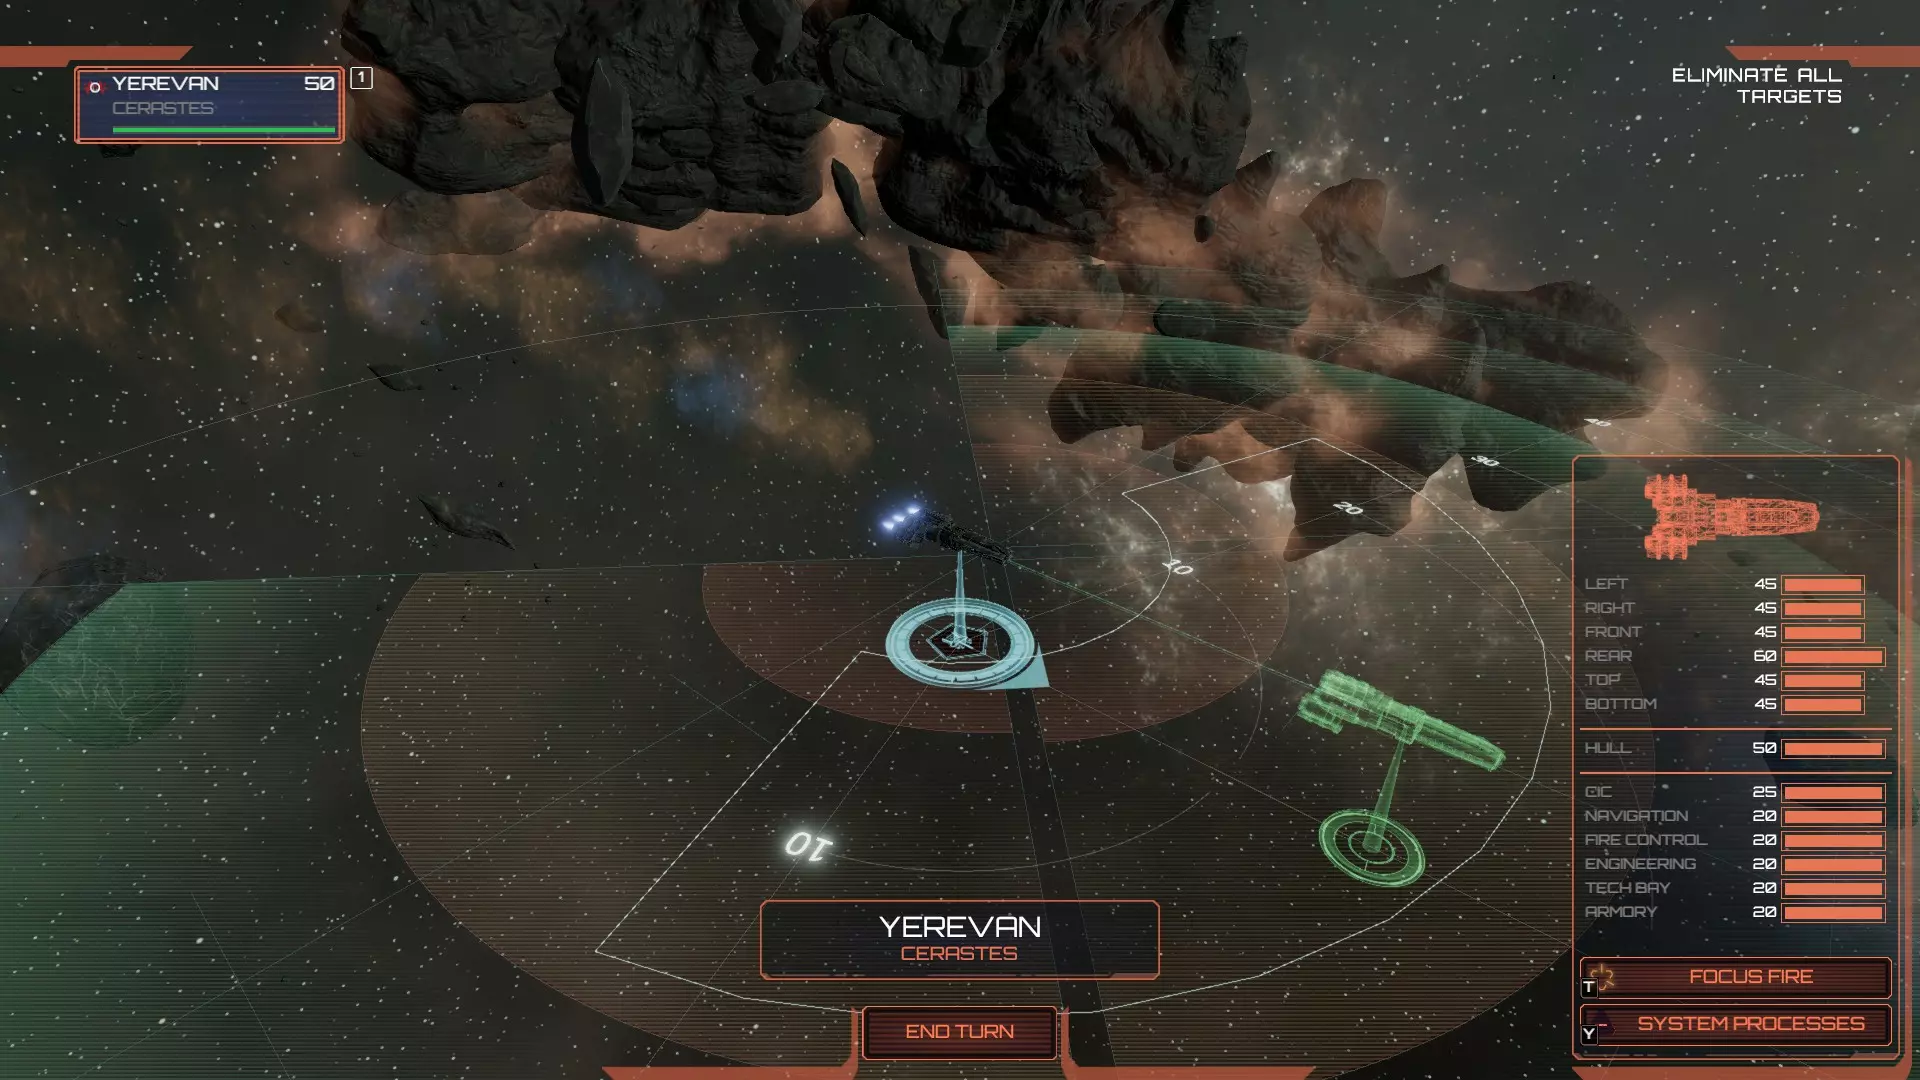
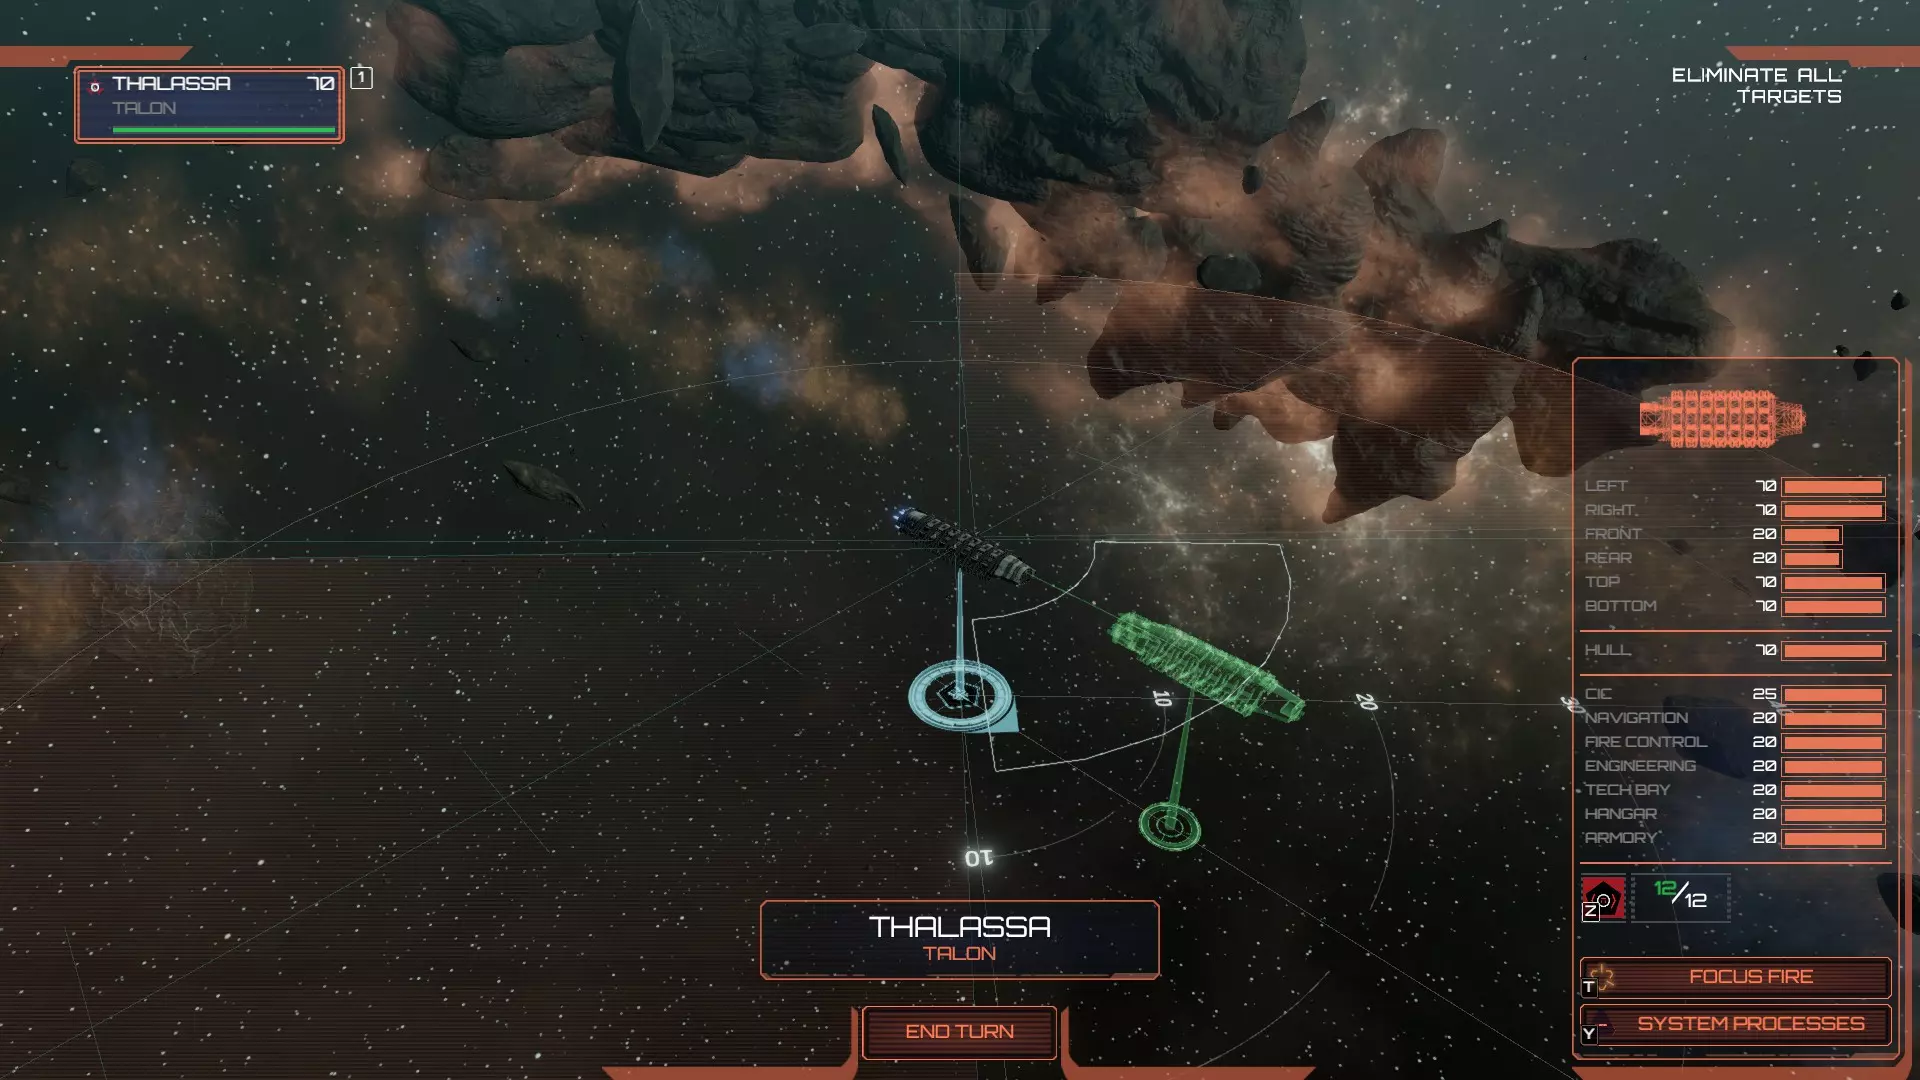
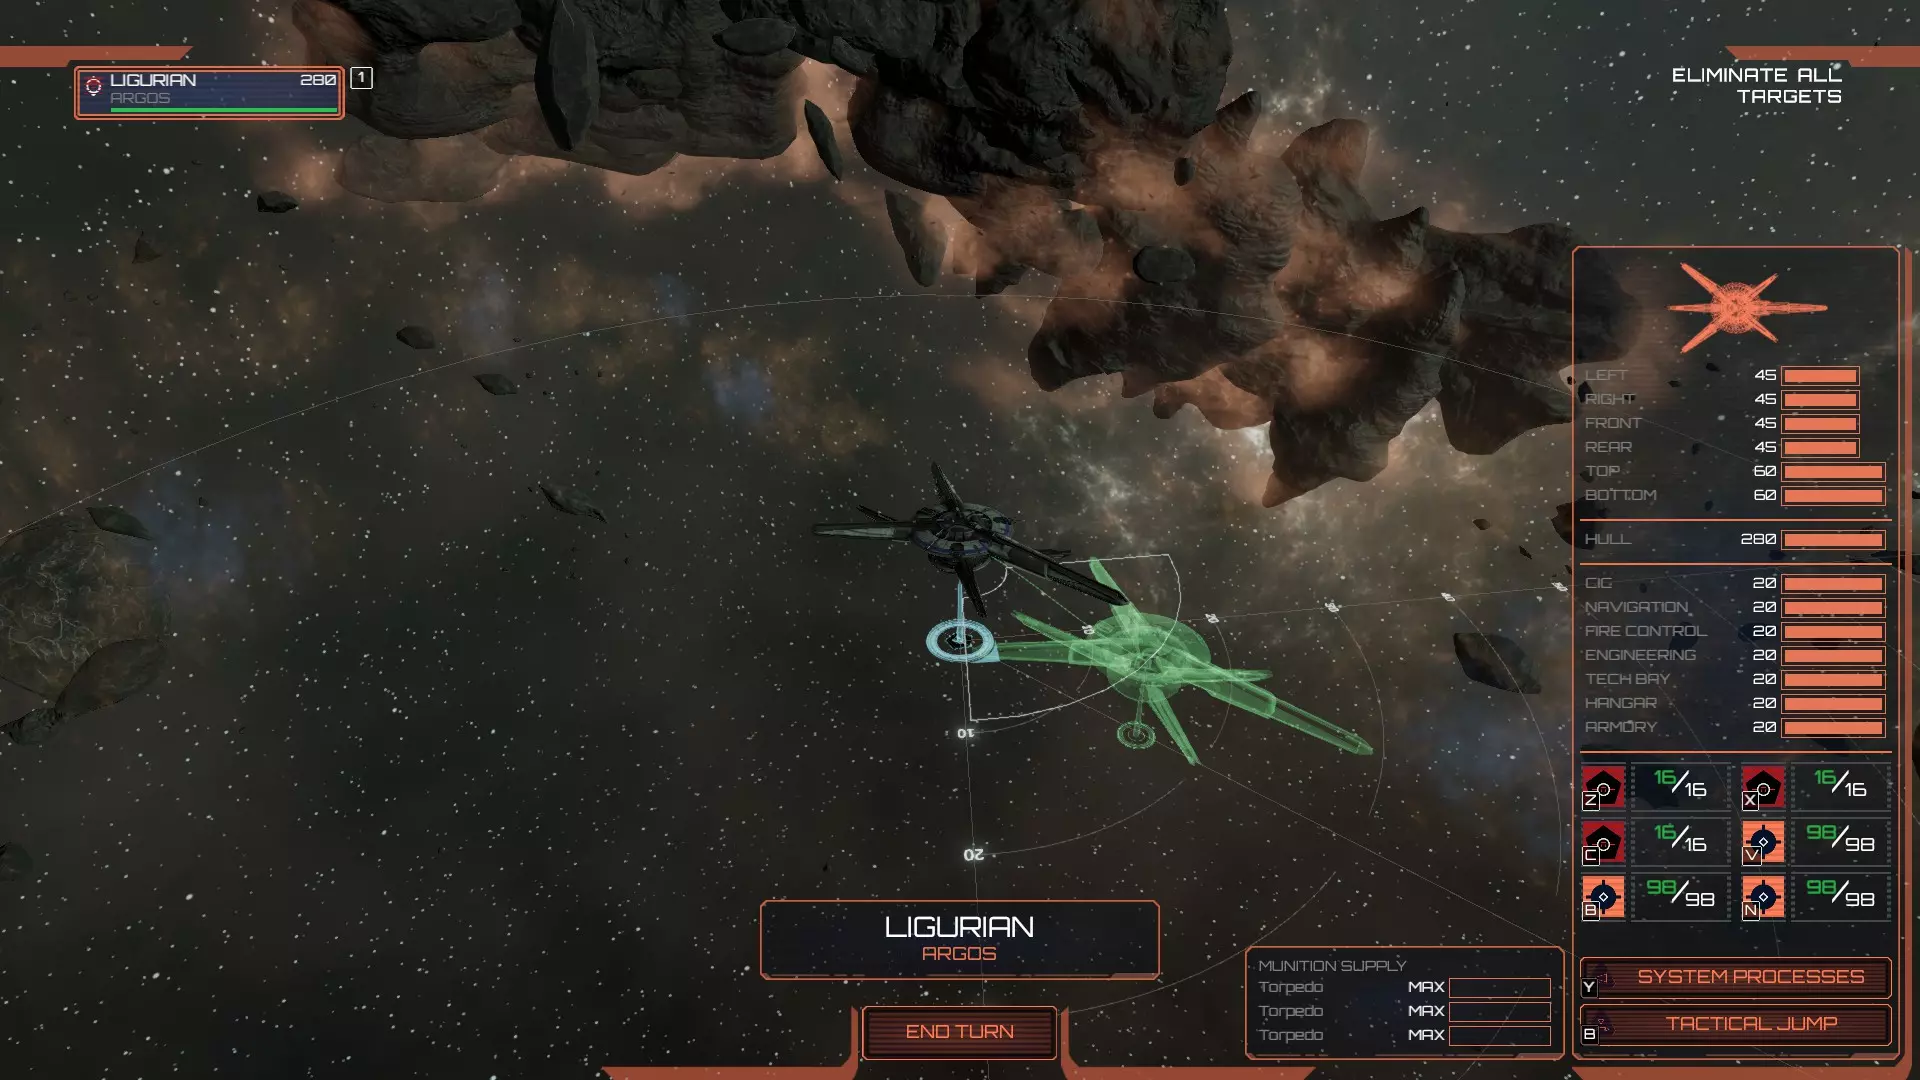
这里是《太空堡垒卡拉狄加:僵局》中所有舰船、支援载具和弹药的原始数据完整列表,汇总于此以便查阅。 本指南将不断更新以获取更准确的数据——有些数据我目前无法获取,例如命中率或射速的具体数值。如果将来能够获得这些数据,我一定会补充进去。 特别感谢lob将所有装甲/武器数据整理到一起,这给了我将所有内容汇总成指南的动力。 基本概述 舰船数据来源于遭遇战/战役/特殊手段。 版本:1.5。112 + 强化包 + 破碎联盟 + 长征 + 罪孽与牺牲 + 复活 + 幽灵舰队攻势 + 停战协议 + 现代舰船包(撰写时)。 殖民舰的射程和精度数值基于中立姿态,赛昂舰则基于默认系统程序。 提及的任何姿态均以+/-标注,例如+4表示4级进攻姿态,-4表示4级防御姿态。 炮塔安装位置负责前方、左方、右方和后方各90度扇区的覆盖。因此,前方安装的火炮可攻击舰船前方90度象限内的所有目标,以及大约20-30度上下范围内的目标。如果说明其还能向下射击,则它也能可靠攻击其下方约40-50度范围内的目标。需要注意的是,按下【特定按键】显示的武器射角预览不会展示武器可射击的额外角度,例如曼提柯尔级的轻型护卫舰火炮,因其在船体上的实际位置,能够向下射击很远的距离。 顶部和底部安装的武器覆盖舰船上下各180度的范围,因此它们也能相当可靠地向前、左右以及后方射击。 注意,弹药装填时间包含发射的那一轮。例如,曼提柯尔级4轮装填时间的流程为:第1轮发射导弹,第2、3、4轮进行武器装填,第5轮武器再次可用。本指南中会以此方式标注时间,因为游戏的示意图中也是如此标注的。老兵系统 启用后,主要战役(核心战役+破碎联盟、罪与牺牲、复活)中的所有殖民舰将通过战斗获得经验。积累足够经验后,舰船将获得被动加成,进一步强化其作战定位。老兵等级分为:熟练(15经验)、老兵(40经验)、精英(80经验)。 自动解决战斗时,舰队中每艘舰船获得3经验;手动操控战斗时,每艘舰船至少获得4经验,此外每艘舰船对敌方主力舰造成伤害可额外+1经验,摧毁敌方主力舰可再额外+1经验。因此,手动参与战斗时,舰队中每艘舰船最多可获得6经验。请注意,塞莱斯特拉作为非战斗舰船,无法通过攻击或摧毁敌方单位获得额外的+2经验值,但它仍会通过跟随舰队缓慢获得经验。 舰船的 veterancy( veterancy )加成不会随等级提升叠加;当舰船从“老练”升级为“精英”时,“精英”等级提供的新加成将覆盖之前“老练”等级获得的加成。此外需要注意,加成是叠加的,而非相乘。例如,朱庇特舰船获得+3%伤害减免后,其基础伤害减免将从25%提升至28%。 veterancy( veterancy )加成会与军官 buff 叠加。例如,精英级狂战士舰载机拥有+15中队闪避,该加成会与机库军官提供的加成叠加,可使狂战士的中队闪避率提升至62.5。在此基础上叠加精英加成后,其舰队闪避率可提升至77.5,这使得精英机库军官狂怒型毒蛇Mk II变得极难被摧毁。有多种组合能让原本不起眼的舰队变得异常强大。我建议大家尝试不同的 veterancy 和军官 buff 组合。 殖民首都舰

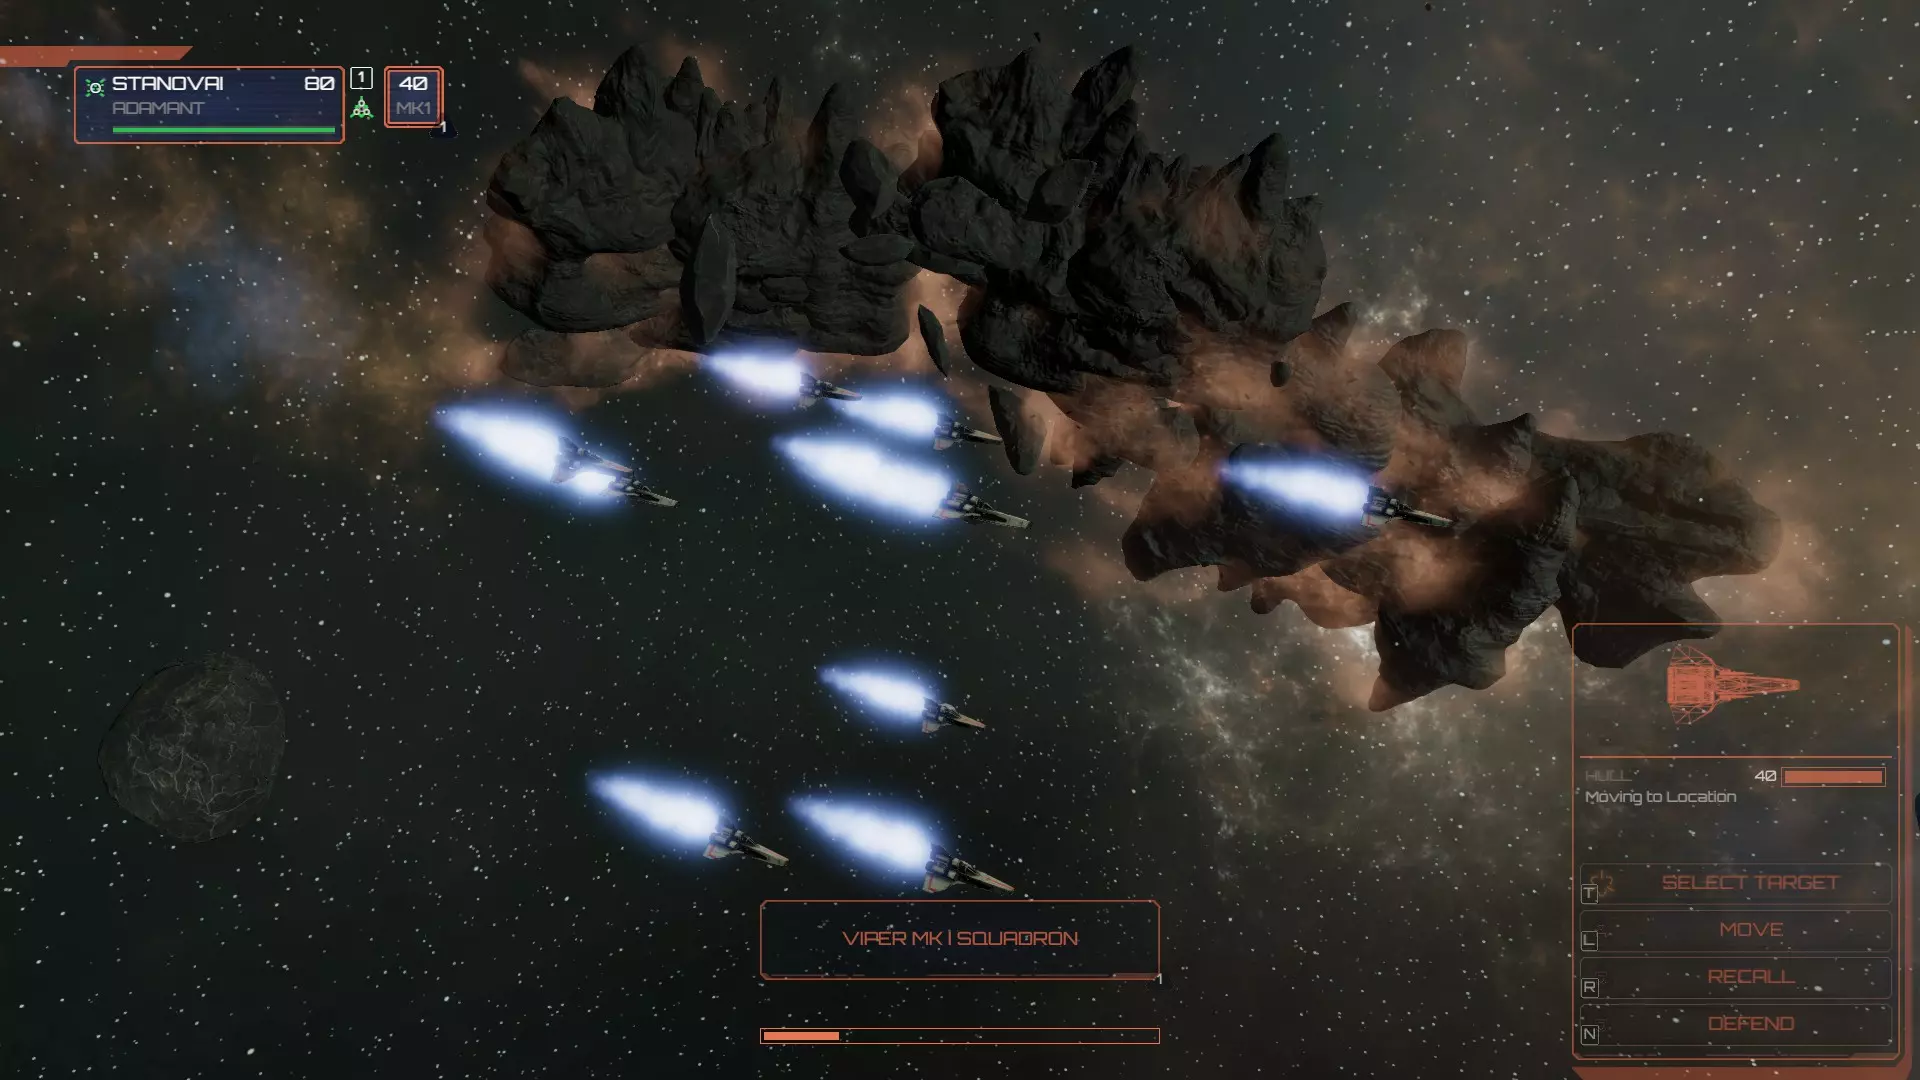
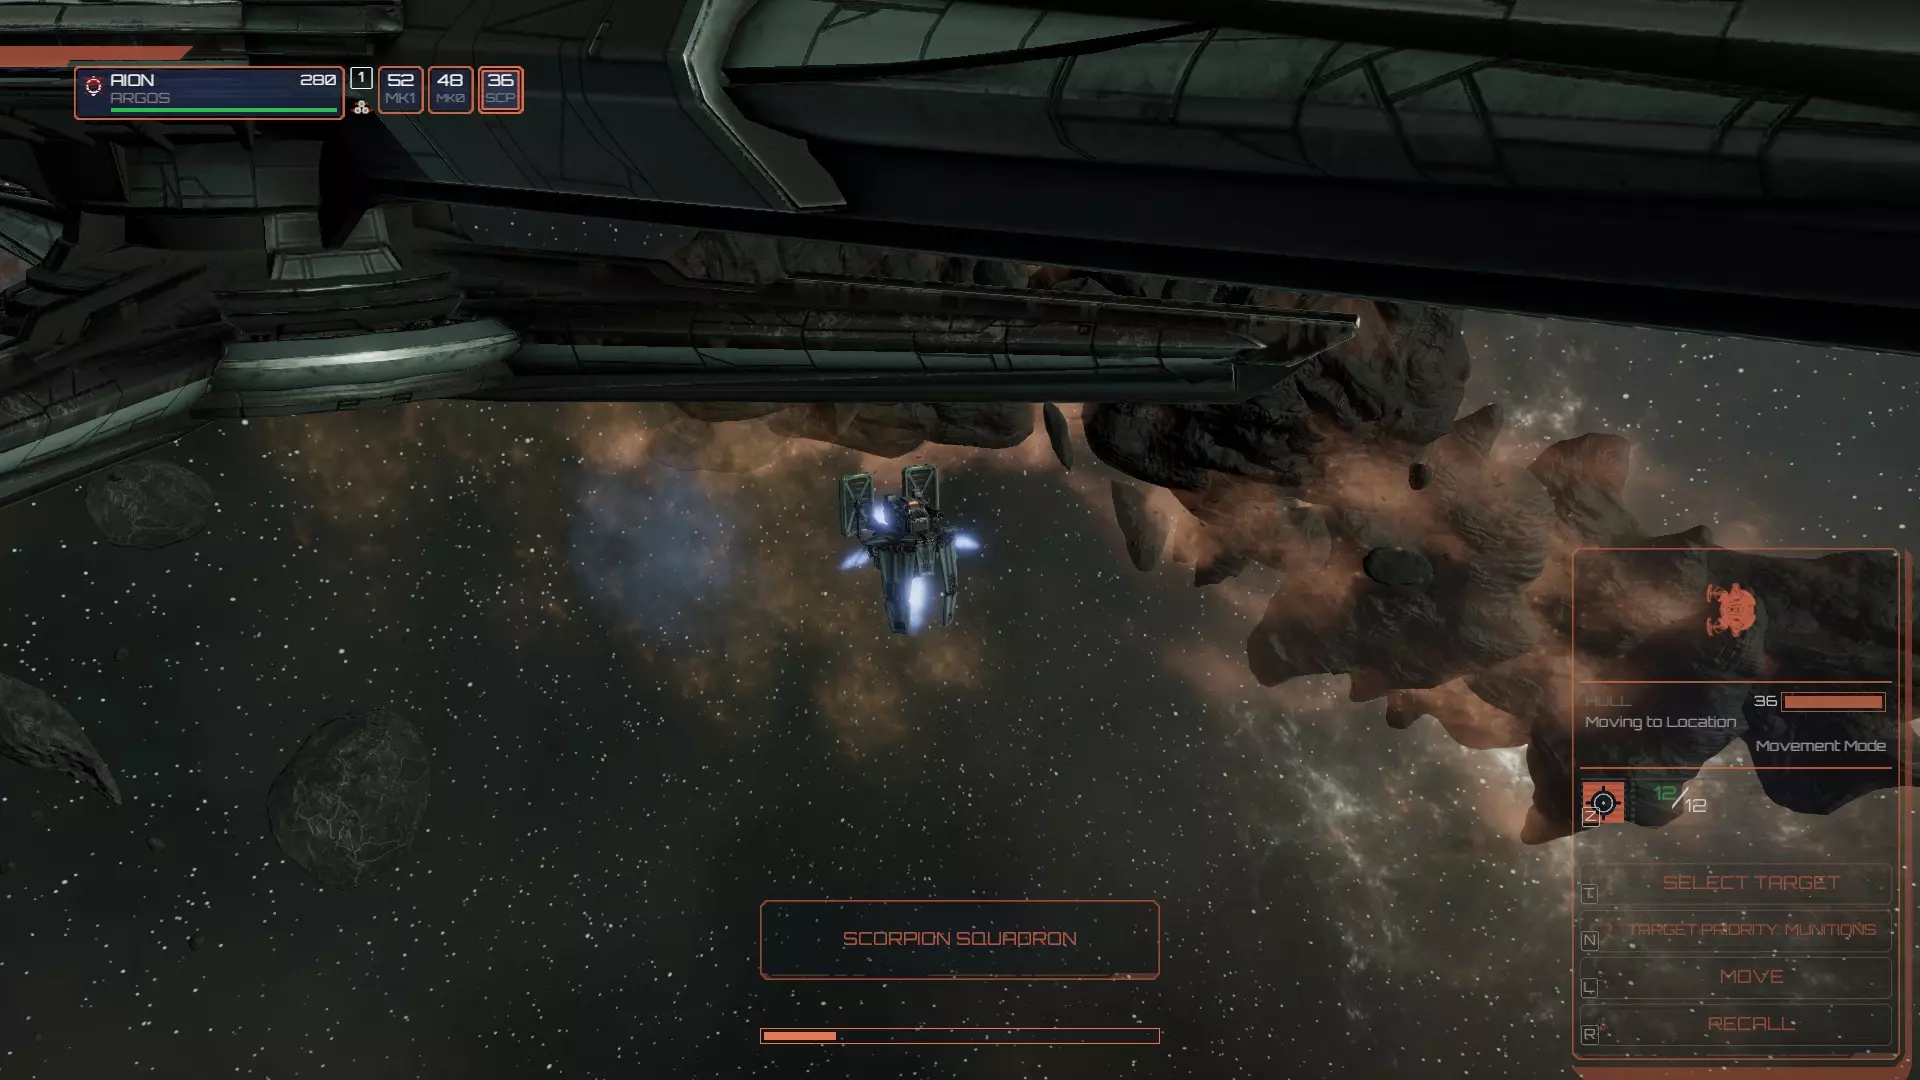
曼提柯尔(轻型护卫舰):500 FP
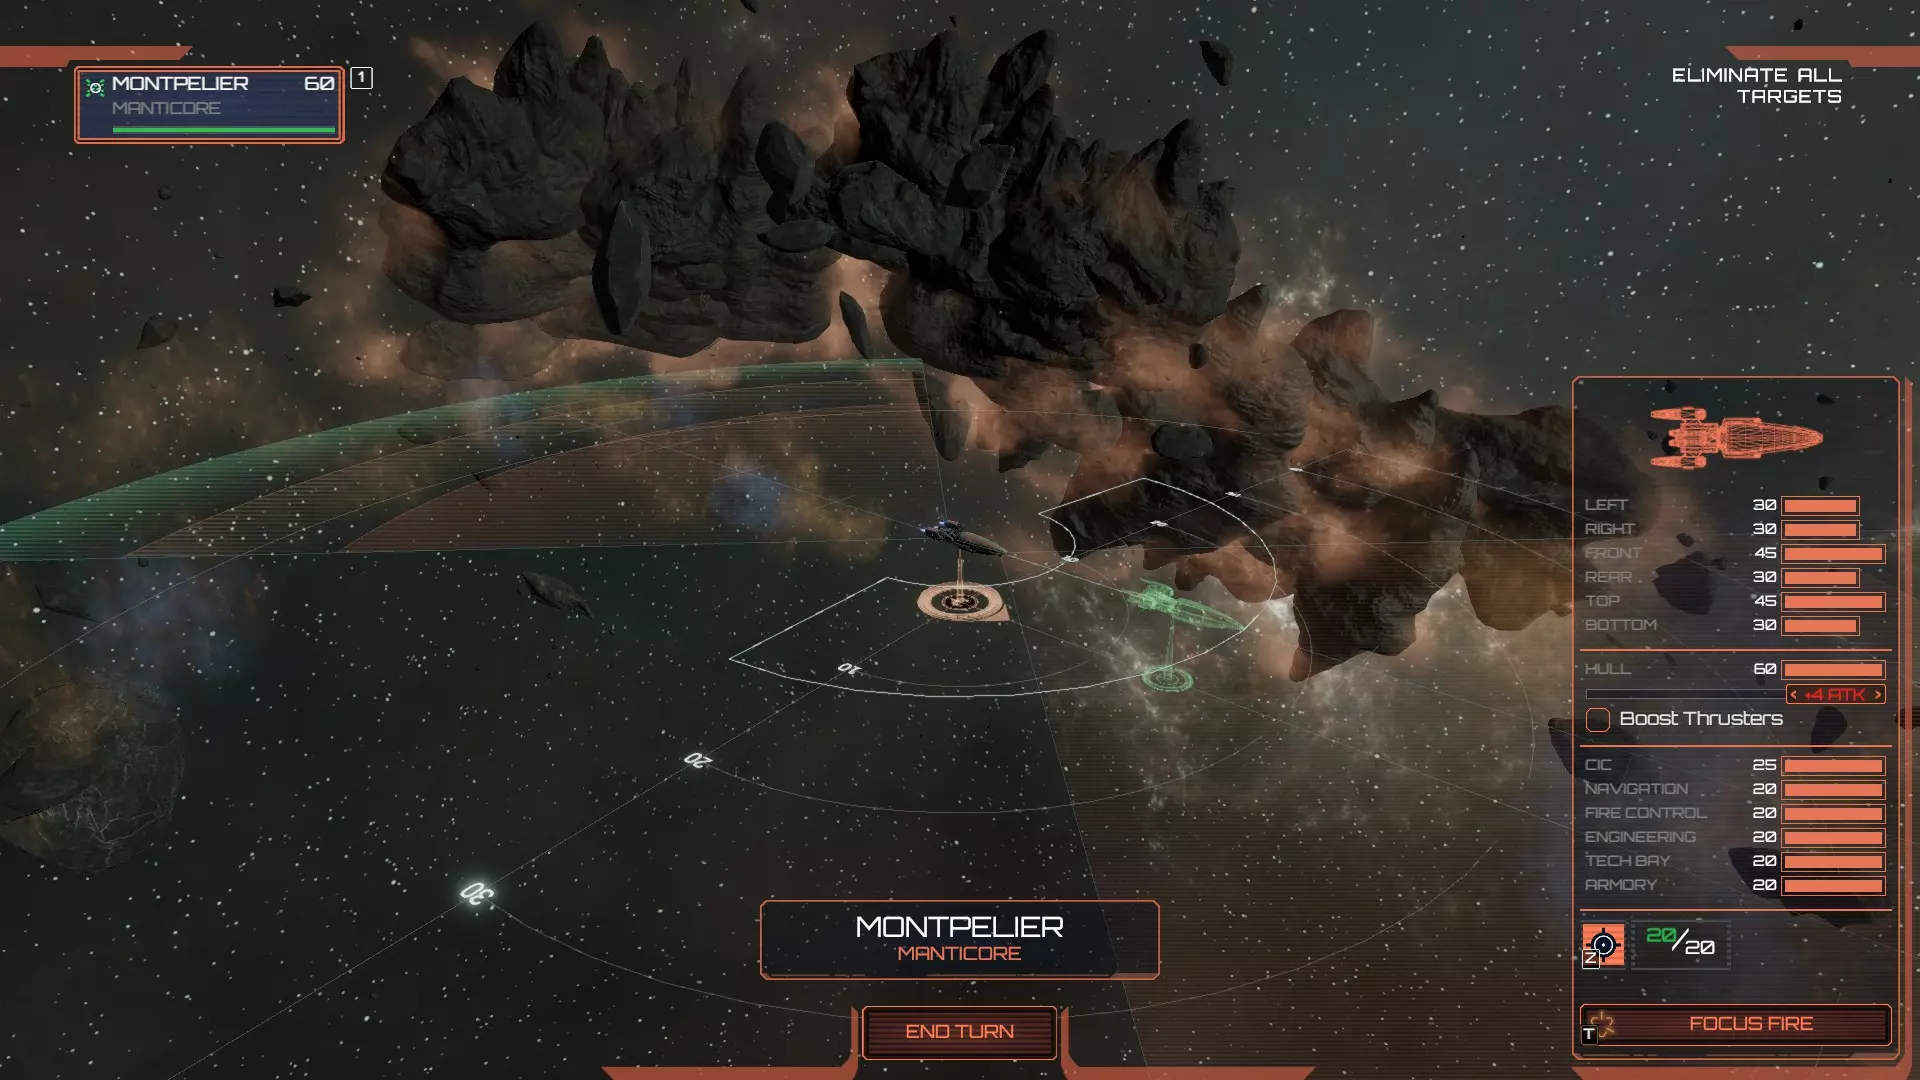
导航 超光速冷却时间:3回合 速度:180米/秒(推进器加速261米/秒,姿态影响147.6米/秒±4) 转向速率:84度/回合(推进器加速58.8度/回合,姿态影响67.2±4度/回合) 俯仰/偏航速率:100%(推进器加速70%,姿态影响80%±4) 船体尺寸:2 船体/装甲/工程 船体:60 左舷:30(军械库) 右舷:30(军械库) 前舷:45(火控系统) 后舷:30(导航系统) 顶部:45(技术舱) 底部:30(工程舱) 伤害减免:20%(姿态影响16%+4,24%-4) 子系统修复:100%(姿态影响88%+4,112%-4) 火控系统 1个弹药槽位,冷却时间4回合 弹药齐射规模:100%(姿态影响116%+4,84%-4) 1门轻型护卫舰主炮,前置安装,可向下射击射程:5000(4200-5800) 射速:极高 精准度:低(极低-中等) 伤害:1 后置2座可向上射击的轻型炮塔。 射程:5000(4200-5800) 射速:高 精准度:中等(低-高) 伤害:0.5 科技/军械库 DRADIS范围:7000米(5740米-8260米) 防火墙恢复:6.0/秒(姿态+4时7.1/秒,姿态-4时4.9/秒) 海军陆战队护甲:40(32-48) 海军陆战队强度:100(姿态+4时82,姿态-4时118) veterancy 等级1 - 最大速度+10% 等级2 - 最大速度+20%,炮塔精准度+5% 等级3 - 最大速度+30%,炮塔精准度+10% Celestra(维修/后勤):550 FP
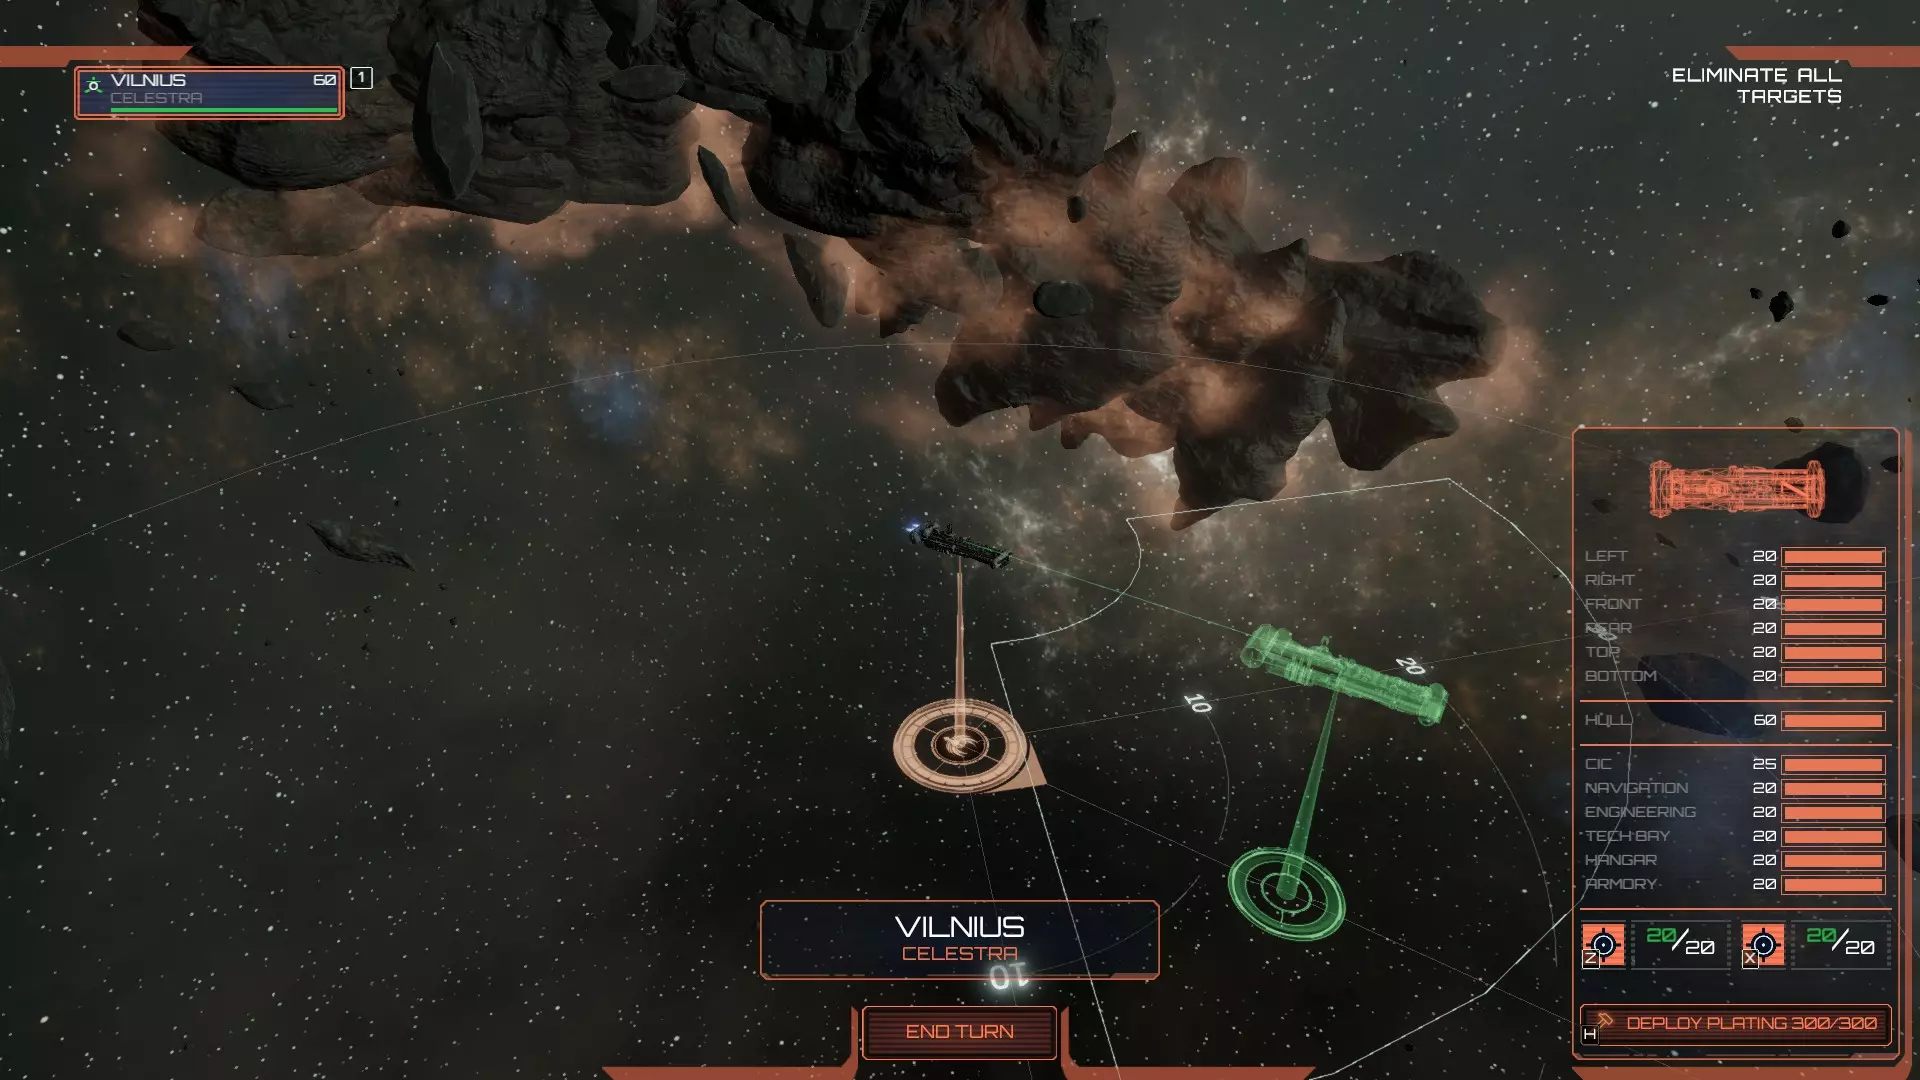
导航 超光速冷却时间:3回合 速度:160米/秒 转向速率:48度/回合 俯仰/偏航速率:100% 船体尺寸:2 船体/装甲/工程 船体:60 左舷:20(军械库) 右舷:20(军械库) 前舷:20(机库) 后舷:20(导航室) 顶部:20(技术舱) 底部:20(工程室) 20%伤害减免 100%子系统修复 火控系统 无 技术/军械库 雷达范围:5000米 防火墙再生:6海军陆战队装甲:40 海军陆战队强度:100 中队/机库 当前无中队部署,但补给猛禽战机与该子系统绑定 +20闪避 3秒发射延迟 100%中队修复 veterancy 等级1 - +2%伤害减免,+5%最大速度 等级2 - +4%伤害减免,+10%最大速度 等级3 - +6%伤害减免,+15%最大速度 特殊能力 弹药补给 - 塞莱斯特拉号配备两个弹药挂载点,可与附近友方舰船进行交换。使用该能力时,塞莱斯特拉号将派出一架补给猛禽战机飞往指定目标,为其安装塞莱斯特拉号的弹药挂载点,同时卸下目标舰船所选的挂载点。当猛禽战机返回后,塞莱斯特拉号的原始挂载点将被目标舰船的原始挂载点覆盖。注意:根据最新补丁,若在塞莱斯特拉号上放置两个相同类型的弹药,现在将对同类型弹药进行“补充”。 部署装甲:塞莱斯特拉号携带400点装甲值,可将其作为烧蚀装甲部署到指定目标上。使用该技能时,一小队无人机将被部署到指定目标,携带40点装甲,并为指定目标上的特定装甲面附加50点装甲。无人机将停留在该装甲面,在受到伤害时使用剩余装甲值主动重新施加装甲。一旦装甲值耗尽,无人机将返回塞莱斯特拉号补充装甲供应。无人机将返回指定目标,并持续为特定装甲面施加烧蚀装甲,直至收到其他指令。无人机施加的烧蚀装甲将在战斗期间持续存在,或直至被摧毁,因此用户可以选择下达新的部署装甲指令,并为多个装甲面(或舰船)进行强化,同时需注意只有无人机正在主动施加装甲的装甲面,才会在受击时自动修复烧蚀装甲。多艘塞莱斯特拉级舰船可以对同一装甲面进行强化,以更快地施加和修复烧蚀装甲,但单个装甲面的装甲值上限+50无法突破。 狂怒(突击航母):650 FP
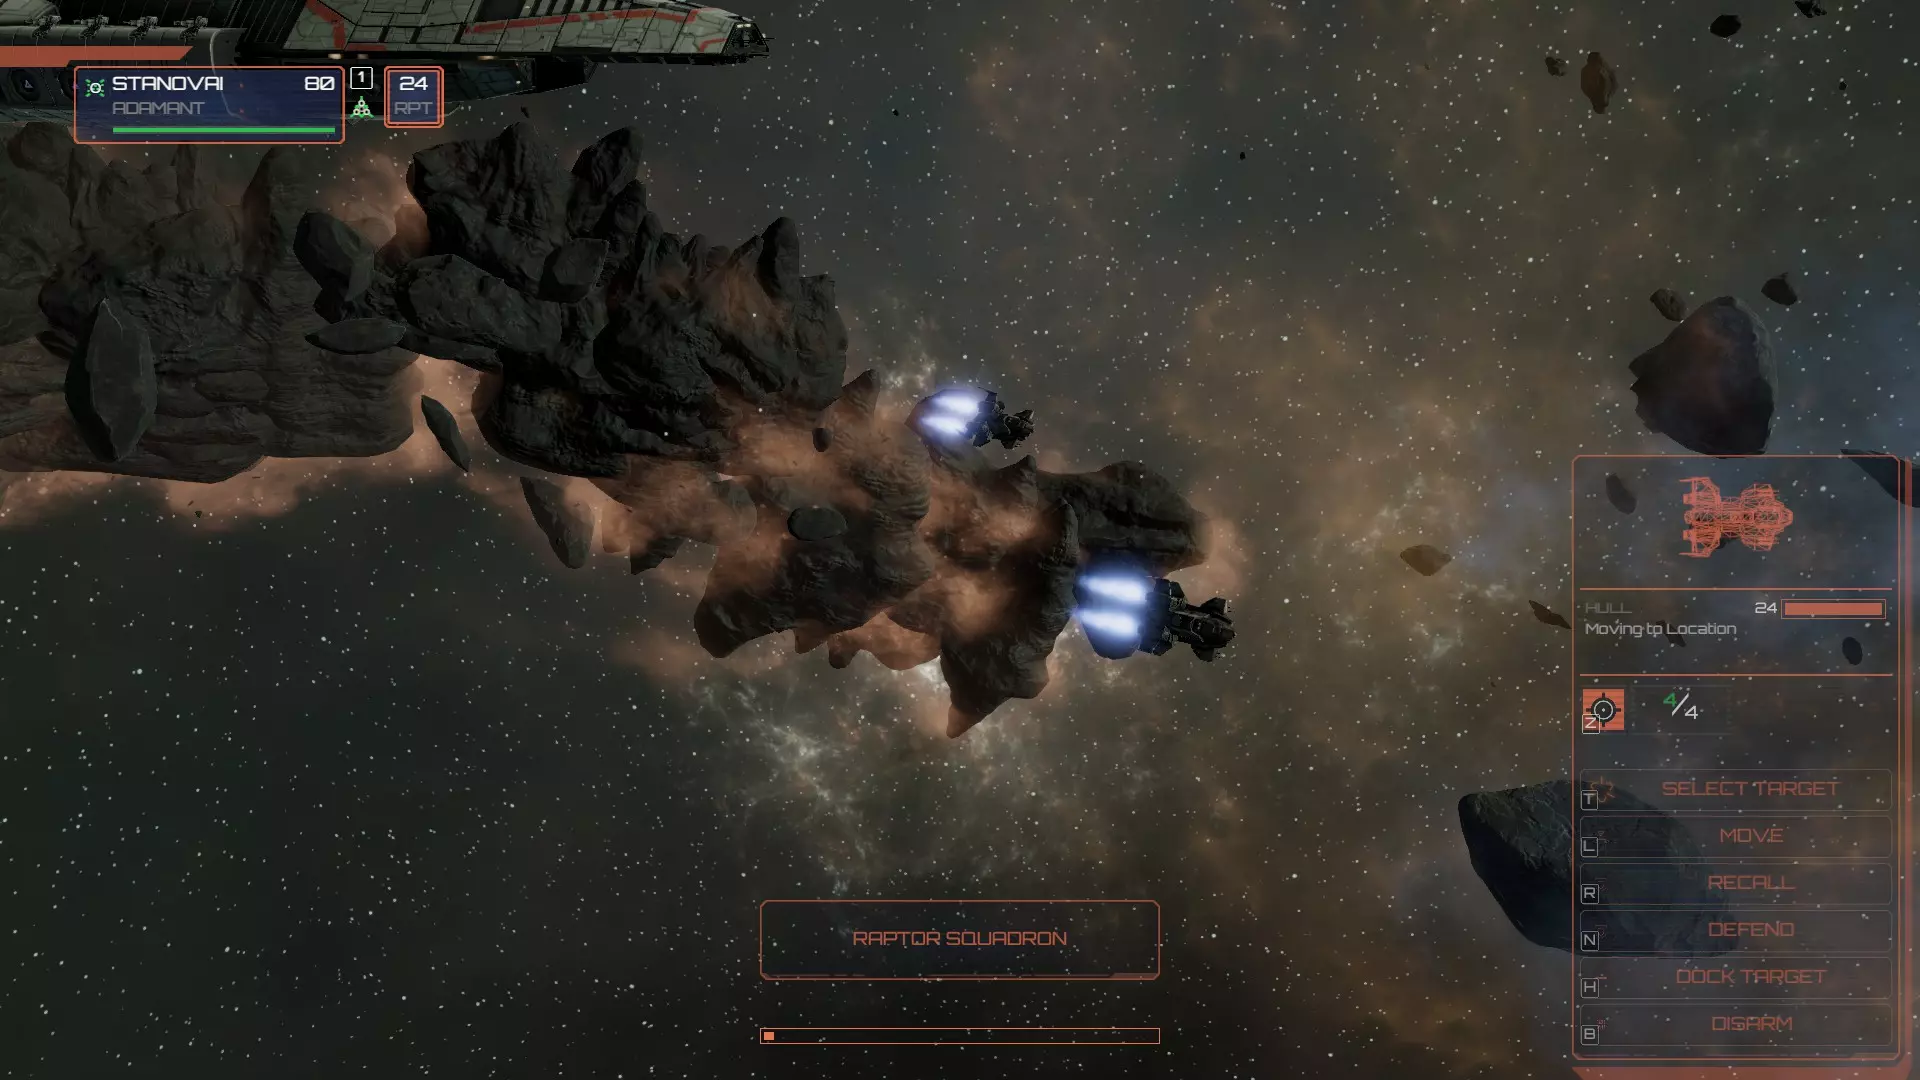
导航 超光速冷却时间:4回合 速度:145米/秒(推进器加速203米/秒,姿态影响118.9米/秒±4) 转向率:60度/回合(推进器加速36度/回合,姿态影响48度/回合±4) 俯仰/偏航率:100%(推进器加速59%,姿态影响80%±4) 船体尺寸:3 船体/装甲/工程 船体:70 左舷:30(军械库) 右舷:30(技术舱) 前舷:40(工程部) 后舷:35(导航室) 顶部:30(火控系统) 底部:30(机库) 伤害减免:20%(姿态+4时16%,姿态-4时24%) 子系统修复:100%(姿态+4时84%,姿态-4时116%) 火控系统 特别说明 - 狂怒级在姿态为0时拥有105%的精度,以下数据已反映此情况 左舷安装5座中型炮塔 射程:5500(4800-6200) 射速:低 精度:低(极低-中等) 伤害:1 右舷安装5座中型炮塔射程:5500(4800-6200) 射速:低 精准度:低(极低-中等) 伤害:1 科技/军械库 雷达范围:5000米(4100米-5900米) 防火墙恢复:6.0/秒(姿态+4时4.1/秒,姿态-4时7.1/秒) 海军陆战队护甲:40(32-48) 海军陆战队强度:150(姿态+4时123,姿态-4时177) 中队/机库 1个中队槽位 +50闪避 3秒发射延迟 100%中队修复(姿态+4时80%,姿态-4时120%) veterancy 等级1 - +5中队闪避 等级2 - +10中队闪避,+5%炮塔精准度 等级3 - +15中队闪避,+10%炮塔精准度 Adamant(轻巡洋舰/航母):750 FP
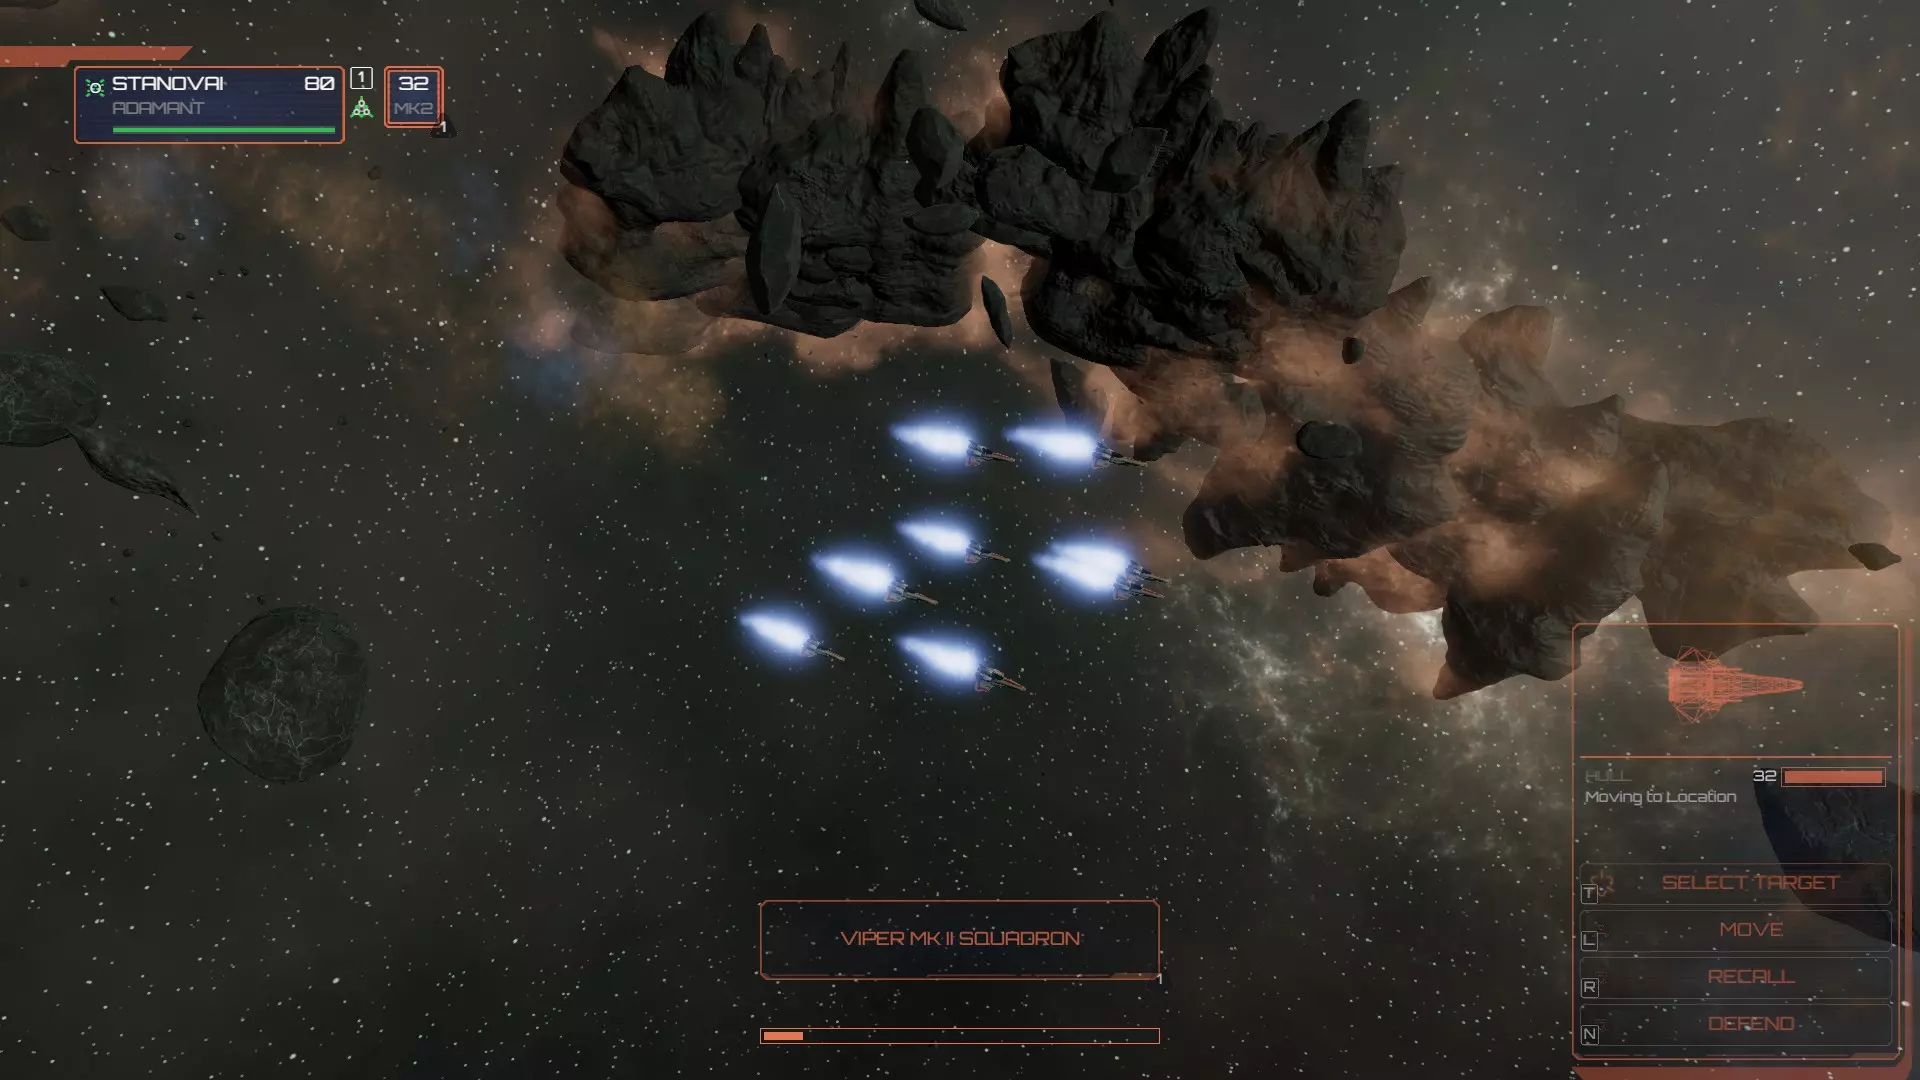
导航 超光速冷却时间:4回合 速度:150米/秒(推进器加速210米/秒,姿态影响123米/秒±4) 转向速率:60度/回合(推进器加速36度/回合,姿态影响48度/回合±4) 俯仰/偏航速率:100%(推进器加速59%,姿态影响80%±4) 船体尺寸:3 船体/装甲/工程 船体:80 左舷:60(工程舱) 右舷:60(工程舱) 前舷:30(机库) 后舷:60(导航舱) 顶部:60(火控系统) 底部:60(技术舱) 伤害减免:20%(姿态+4时16%,姿态-4时24%) 子系统修复:100%(姿态+4时84%,姿态-4时116%) 火控系统 弹药槽:1个,冷却时间4回合 弹药齐射规模:100%(姿态+4时116%,姿态-4时84%) 左舷安装4座可向上射击的轻型炮塔 射程:5000(4200-5800) 射速:高 精度:中等(低-高) 伤害:0右侧安装4座轻型炮塔,可向上射击 射程:5000(4200-5800) 射速:高 精度:中等(低-高) 伤害:0.5 科技/军械库 雷达范围:5000米(4100米-5900米) 防火墙恢复:6.0/秒(姿态+4时4.9/秒,姿态-4时7.1/秒) 陆战队护甲:40(32-48) 陆战队强度:100(姿态+4时82,姿态-4时118) 中队/机库 1个中队槽位 +20闪避 3秒发射延迟 100%中队修复(姿态+4时80%,姿态-4时120%) veterancy 等级1 - +3%伤害减免 等级2 - +6%伤害减免,+5%炮塔精度 等级3 - +10%伤害减免,+10%炮塔精度 防御者(支援护卫舰):750 FP
导航 超光速冷却时间:5回合 速度:120米/秒(推进器加速168米/秒,姿态影响98.4米/秒±4) 转向速率:36度/回合(推进器加速21.6度/回合,姿态影响28.8±4度/回合) 俯仰/偏航速率:100%(推进器加速59%,姿态影响80%±4) 船体尺寸:3 船体/装甲/工程 船体:100 左舷:60(军械库) 右舷:60(技术舱) 前舷:60(工程部) 后舷:60(导航室) 顶部:50(火控系统) 底部:40(机库) 伤害减免:20%(姿态+4时16%,姿态-4时24%) 子系统修复:100%(姿态+4时84%,姿态-4时116%) 火控系统 炮塔射程:90%(防御者固有武器射程较短) 左舷搭载6座点防御炮 射程:4500(3800-5200) 射速:高 精度:中等(低-高) 伤害:0.2 右舷搭载6座点防御炮射程:4500(3800-5200) 射速:高 精度:中等(低-高) 伤害:0.2 底部安装4个中型炮塔。 射程:4500(3800-5200) 射速:低 精度:低(极低-中等) 伤害:1 科技/军械库 DRADIS范围:3200米(2640米-3760米) 防火墙再生:6.0/秒(4.9/秒+4姿态,7.1/s -4姿态 海军陆战队装甲:40(32-48) 海军陆战队强度:240(196+4姿态,284-4姿态) 高射炮伤害:100%(84%+4姿态,116%-4姿态) 中队/机库 1个中队槽位 +30闪避 3秒发射延迟 150%中队修复(120%+4姿态,180%-4姿态) veterancy 等级1-+5%中队闪避,+15海军陆战队强度 等级2-+10%中队闪避,+30海军陆战队强度,+5炮塔精度 等级3-+15%中队闪避,+60海军陆战队强度,+10炮塔精度 特殊能力 技术支援-防御者可以向友方舰船部署一架技术支援猛禽,以增强目标友方舰船上单个子系统的强度。该子系统将获得+4强度,大致相当于该子系统额外获得+4有益姿态。只要技术支援猛禽战机处于停靠状态,此增益效果就会持续存在,即便防御舰被摧毁,该效果依然保留。不过,若防御舰被摧毁,此增益无法分配给其他子系统。防御舰仅配备一架技术支援猛禽战机,若该战机在战斗中任何时候被摧毁,防御舰在剩余战斗时间内将失去为友方子系统提供增益的能力。 高射炮 - 防御舰可在其机库舱的左侧或右侧部署一道高射炮弹幕,以摧毁其作用范围内的所有支援飞行器和弹药。高射炮对战斗机的伤害受军械库属性影响,该属性可通过防御姿态提升,通过进攻姿态降低。增援:防御舰可以抽调自身四分之一的海军陆战队预备队,通过猛禽运输机将其派遣至目标友方舰船,以增强该舰船的海军陆战队兵力。海军陆战队的质量受防御舰当前姿态影响。防御舰拥有四架增援用猛禽运输机,若有任何一架损失,在剩余战斗中无法补充。 维修舱:防御舰设有一个空置的第二中队机位,专门用于维修和整备舰队中其他舰船的中队。当友方中队执行召回命令时,将可以选择返回原属舰船,或任何拥有空置维修舱的防御舰。防御者的维修速度最高可达180%,是殖民舰队中第二快的维修选择。虽然它比不上戈耳工,但仍是一个可靠的维修选项。未受损的中队如果耗尽了弹药,例如猛禽、突击猛禽和清扫者,也可以召回至防御者进行重新装弹。 弥诺陶洛斯(重型炮艇):900火力值

导航 超光速冷却时间:4回合 速度:130米/秒(推进器加速182米/秒,姿态影响106.6米/秒±4) 转向速率:60度/回合(推进器加速36度,姿态影响48±4度) 俯仰/偏航速率:100%(推进器加速59%,姿态影响80%±4) 船体尺寸:3 船体/装甲/工程 船体:105 左舷:75(军械库) 右舷:75(军械库) 前舷:60(技术舱) 后舷:45(导航室) 顶部:60(火控系统) 底部:75(工程室) 伤害减免:20%(姿态+4时16%,姿态-4时24%) 子系统修复:100%(姿态+4时84%,姿态-4时116%) 火控系统 特别说明 - 米诺陶级在姿态为0时拥有105%射程和110%精度,以下数据已反映此特性 左舷搭载6座中型炮塔射程:5250(4500-6000) 射速:低 精度:中等(低-中等) 伤害:1 右侧安装6个中型炮塔。 射程:5250(4500-6000) 射速:低 精度:中等(低-中等) 伤害:1 前方安装2个可向上射击的重型炮塔。 射程:5250(4500-6000) 射速:极低 精度:极低(极低-低) 伤害:3 顶部安装6个重型炮塔。 射程:5250(4500-6000) 射速:极低 精度:极低(极低-低) 伤害:3 底部安装6个重型炮塔。 射程:5250(4500-6000) 射速:极低 精度:极低(极低-低) 伤害:3 科技/军械库 DRADIS范围:5000米(4100米-5900米) 防火墙恢复:6.0/秒(4.9/秒+4姿态,7.1/s -4 姿态 海军陆战队装甲:40(32-48) 海军陆战队强度:150(135+4姿态,165-4姿态) veterancy 等级1 - +5%炮塔精度 等级2 - +10%炮塔精度,+15%偏航控制 等级3 - +15%炮塔精度,+35%偏航控制 Janus(装甲导弹巡洋舰):950 FP
导航 超光速冷却时间:4回合 速度:100米/秒(推进器加速140米/秒,姿态影响82米/秒±4) 转向速率:42度/回合(推进器加速25.2度/回合,姿态影响33.6度/回合±4) 俯仰/偏航速率:100%(推进器加速59%,姿态影响80%±4) 船体尺寸:3 船体/装甲/工程 船体:95 左舷:95(技术舱) 右舷:95(技术舱) 前舷:95(军械库) 后舷:80(导航室) 顶部:80(火控系统) 底部:80(工程室) 伤害减免:20%(姿态+4时18%,姿态-4时22%) 子系统修复:100%(姿态+4时84%,姿态-4时116%) 火控系统 3个弹药槽位,冷却时间4回合 弹药齐射规模:120%(姿态+4时136%,姿态-4时104%) 2座中型炮塔前置,可向下射击射程:5000(4200-5800) 射速:低 精度:低(低-低) 伤害:1 底部安装3座重型炮塔。 射程:5000(4200-5800) 射速:极低 精度:极低(极低-极低) 伤害:3 科技/军械库 DRADIS范围:4000米(3280米-4720米) 防火墙恢复:5.0/秒(姿态+4时4.1/秒,姿态-4时5.9/秒) 海军陆战队装甲:40(32-48) 海军陆战队强度:135(姿态+4时114,姿态-4时156) veterancy 等级1 - +3%伤害减免 等级2 - +6%伤害减免,+10%弹药齐射量 等级3 - +10%伤害减免,+20%弹药齐射量 猎户座(隐形护卫舰):950 FP
Navigation FTL Cooldown: 4 turns. Speed: 175 m/s (245 m/s Boost Thruster, 143.5 m/s +/- 4 Posture) Turn rate: 78 degrees per turn. (54.6 Boost Thruster, 62.4 +/-4 Posture) Pitch/Yaw rate: 100% (70% Boost Thruster, 80% +/- 4 Posture) Ship hull size: 2 Hull/Armour/Engineering Hull: 80 Left: 30 (Engineering) Right: 30 (Engineering) Front: 50 (Fire Control) Rear: 40 (Navigation) Top: 40 (Armoury) Bottom: 40 (Tech Bay) 18% Damage reduction (14% +4 Posture, 22% -4 Posture) 100% Subsystem Repair (88% +4 Posture, 112% -4 Posture) Fire Control Systems 1x Munition slot, 4 turn cooldown. Munition salvo size: 150% (176% +4 Posture, 124% -4 Posture) 6x Light Turret mounted on top. Range: 5000 (4200-5800) Rate of fire: High Accuracy: Medium (Low - High) Damage: 0.5 Tech/Armoury DRADIS range: 5500m (4510m - 6490m) Firewall regen: 6.0/s (4.9/s +4 Posture, 7.1/s -4 Posture) Battery drain rate: 1.68/s (2.28/s +4 Posture, 1.25/s -4 Posture) Battery recharge rate: 2.0/s (1.7/s +4 Posture, 2.3/s -4 Posture) Marine Armour: 40 (32 - 48) Marine Strength: 100 (82 +4 Posture, 118 -4 Posture) Squadrons/Hangar 1x Squadron slot +18 Evade 3 Second launch delay 100% Squadron repair (80% +4 Posture, 120% -4 Posture) Veterancy Level 1 - +10% Max Distance Level 2 - +20% Max Distance, +15% Yaw Control Level 3 - +30% Max Distance, +35% Yaw Control Special abilities Stealth - The Orion enters battle with it's stealth mode online. Whilst the ability is online, the Orion cannot be seen on the map until it enters the DRADIS range of a hostile ship. So long as the Orion stays out of the range of enemy DRADIS and the stealth remains online, the enemy should be unaware of it's existence (Barring application of common sense vs a human player). The Orion cannot fire it's weapons, launch munitions, or launch squadrons whilst the stealth is online. When the Orion has been identified by hostile DRADIS, the stealth mode still provides benefits. No ship mounted weapons can focus fire on the Orion and no guided munitions can target the Orion, leaving only unguided munitions such as torpedoes and squadrons that can intentionally target the Orion. Any ship mounted weapon that auto-fires at the Orion will do so at an accuracy penalty, similar to firing upon an unidentified target. Disabling the Orion's stealth allows the ship to immediately launch munitions the same turn that the stealth is going down, note however that the stealth is placed on cooldown for a turn before it can be activated again, potentially leaving the Orion vulnerable for a short time. Finally, activating the Orion's stealth will temporarily break the lock of any incoming guided munitions. When the stealth goes down, the missiles will re-acquire their lock and turn back on the Orion. High yield salvoes - The Orion has an extremely high munition salvo size, being 150% default and 176% at +4 posture. Offensive munitions such as Guided Missiles, Armour Piercers, and Torpedoes will see an unusually high impact when deployed from the Orion. Utility munitions such as PCM's and Mines will not be able to take advantage of this due to only firing 1 munition per salvo, and should be kept in mind when loading out the Orion. Tactical notes - Many ship mounted weapons default to targeting the closest target which allows a fighter screen to sit between the Orion and a hostile target, preventing the Orion from taking fire. When dealing with Orions, manually setting turrets on ships to prefer Capital targets can get around this, though they will still be firing at a large accuracy penalty due to the stealth and lack of focus fire. Also, docked Raptor squadrons such as Raptors for Firewall protection, or Defender Technical Support Raptors for subsystem boosts are visible even whilst the stealth is online. Docking them whilst the Orion is not in hostile DRADIS range will effectively telegraph the Orion's position to the enemy. Battery note - The Battery capacity is 100, which drains at a constant rate per the "Battery drain rate" stat whilst stealth is online, and recharges at a constant rate per the "Battery recharge rate" whilst stealth is offline. The battery does not recharge whilst online. Ranger (Fast Missile Boat): 950 FP
导航 超光速冷却时间:4回合 速度:135米/秒(推进器加速189米/秒,姿态影响110.7米/秒±4) 转向速率:72度/回合(推进器加速43.2度/回合,姿态影响57.6±4度/回合) 俯仰/偏航速率:100%(推进器加速59%,姿态影响80%±4) 船体尺寸:3 船体/装甲/工程 船体:90 左舷:45(军械库) 右舷:45(军械库) 前舷:60(火控系统) 后舷:45(导航系统) 顶部:60(工程舱) 底部:45(技术舱) 伤害减免:20%(姿态+4时16%,姿态-4时24%) 子系统修复:100%(姿态+4时84%,姿态-4时116%) 火控系统 弹药槽:2个,冷却时间2回合 弹药齐射规模:100%(姿态+4时116%,姿态-4时84%) 左舷搭载4座中型炮塔 射程:5000(4200-5800) 射速:低 精度:低(极低-中等) 伤害:1 右舷搭载4座中型炮塔射程:5000(4200-5800) 射速:低 精度:低(极低-中等) 伤害:1 2座重型炮塔前置,可向下射击。 射程:5000(4200-5800) 射速:极低 精度:极低(极低-低) 伤害:3 2座中型炮塔底部安装。 射程:5000(4200-5800) 射速:低 精度:低(极低-中等) 伤害:1 科技/军械库 雷达范围:5000米(4100米-5900米) 防火墙恢复:6.0/秒(姿态+4时4.9/秒,姿态-4时7.1/秒) 陆战队护甲:40(32-48) 陆战队强度:150(姿态+4时123,姿态-4时177) veterancy 等级1 - 弹药齐射量+10% 等级2 - 弹药齐射量+20%,最大速度+10% 等级3 - 弹药齐射量+30%,最大速度+20% Atlas(Praised Be The Brick!):1100 FP
导航 超光速冷却时间:4回合 速度:85米/秒(推进器加速119米/秒,姿态影响71.4米/秒±4) 转向速率:36度/回合(推进器加速21.6度/回合,姿态影响30.24度/回合±4) 俯仰/偏航速率:100%(推进器加速59%,姿态影响84%±4) 船体尺寸:4 船体/装甲/工程 船体:135 左侧:120(技术舱) 右侧:120(火控系统) 前方:80(机库) 后方:80(导航室) 顶部:140(军械库) 底部:120(工程部) 伤害减免:20%(姿态+4时18%,姿态-4时22%) 子系统修复:100%(姿态+4时84%,姿态-4时116%) 火控系统 左舷安装3座重型炮塔,可向上射击 射程:5000(4200-5800) 射速:极低 精度:极低(极低-低) 伤害:3 右舷安装3座重型炮塔,可向上射击射程:5000(4200-5800) 射速:极低 精度:极低(极低-低) 伤害:3 顶部安装2个中型炮塔。 射程:5000(4200-5800) 射速:低 精度:低(极低-中等) 伤害:1 底部安装2个中型炮塔。 射程:5000(4200-5800) 射速:低 精度:低(极低-中等) 伤害:1 科技/军械库 雷达范围:4000米(3280米-4720米) 防火墙恢复:6.0/秒(4.9/秒+4姿态,7.1/s -4 姿态 海军装甲:40(32 - 48) 海军强度:200(164 +4 姿态,236 -4 姿态) 中队/机库 2个中队槽位,1个支援槽位(仅猛禽、清扫者、ARP可用) +35 闪避 3秒发射延迟 110% 中队修复(88% +4 姿态,132% -4 姿态) 熟练度 等级1 - +20% 中队修复 等级2 - +40% 中队修复,+3% 伤害减免 等级3 - +65% 中队修复,+6% 伤害减免 赫拉克勒斯(重型巡洋舰):1250 火力
导航 超光速冷却时间:4回合 速度:115米/秒(推进器加速168米/秒,姿态影响98.4米/秒±4) 转向速率:48度/回合(推进器加速19.2度/回合,姿态影响38.4±4度/回合) 俯仰/偏航速率:100%(推进器加速59%,姿态影响80%±4) 船体尺寸:4 船体/装甲/工程 船体:120 左舷:60(军械库) 右舷:60(军械库) 前舷:120(技术舱) 后舷:80(导航室) 顶部:100(火控系统) 底部:100(工程室) 伤害减免:25%(姿态+4时20%,姿态-4时30%) 子系统修复:80%(姿态+4时68%,姿态-4时92%) 火控系统 左舷安装10门点防御炮 射程:5250(4500-6000) 射速:高 精度:中等(低-高) 伤害:0.2 右舷安装10门点防御炮 射程:5250(4500-6000) 射速:高 精度:中等(低-高) 伤害:0.2 3座重型炮塔前置,可向下射击。 射程:5250(4500-6000) 射速:极低 精度:极低(极低-低) 伤害:3 8座重型炮塔顶部安装。 射程:5250(4500-6000) 射速:极低 精度:极低(极低-低) 伤害:3 8座重型炮塔底部安装。 射程:5250(4500-6000) 射速:极低 精度:极低(极低-低) 伤害:3 科技/军械库 DRADIS范围:4000米(3280米-4720米) 防火墙再生:4.8/秒(4/秒 +4姿态,5.6/s -4姿态 海军陆战队装甲:40(32-48) 海军陆战队强度:200(180+4姿态,220-4姿态) 高射炮伤害:100%(84%+4姿态,116%-4姿态) veterancy 等级1 - +3%伤害减免 等级2 - +6%伤害减免,+5%炮塔精度 等级3 - +10%伤害减免,+10%炮塔精度 特殊能力 高射炮 - 赫拉克勒斯级可以在其点防御系统的左侧或右侧部署一道高射炮墙,以摧毁其作用范围内的任何支援飞行器和弹药。高射炮对战斗机的伤害受军械库属性影响,该属性可通过防御姿态提升,通过进攻姿态降低。 瓦尔基里(现代战列线战星):1300 FP
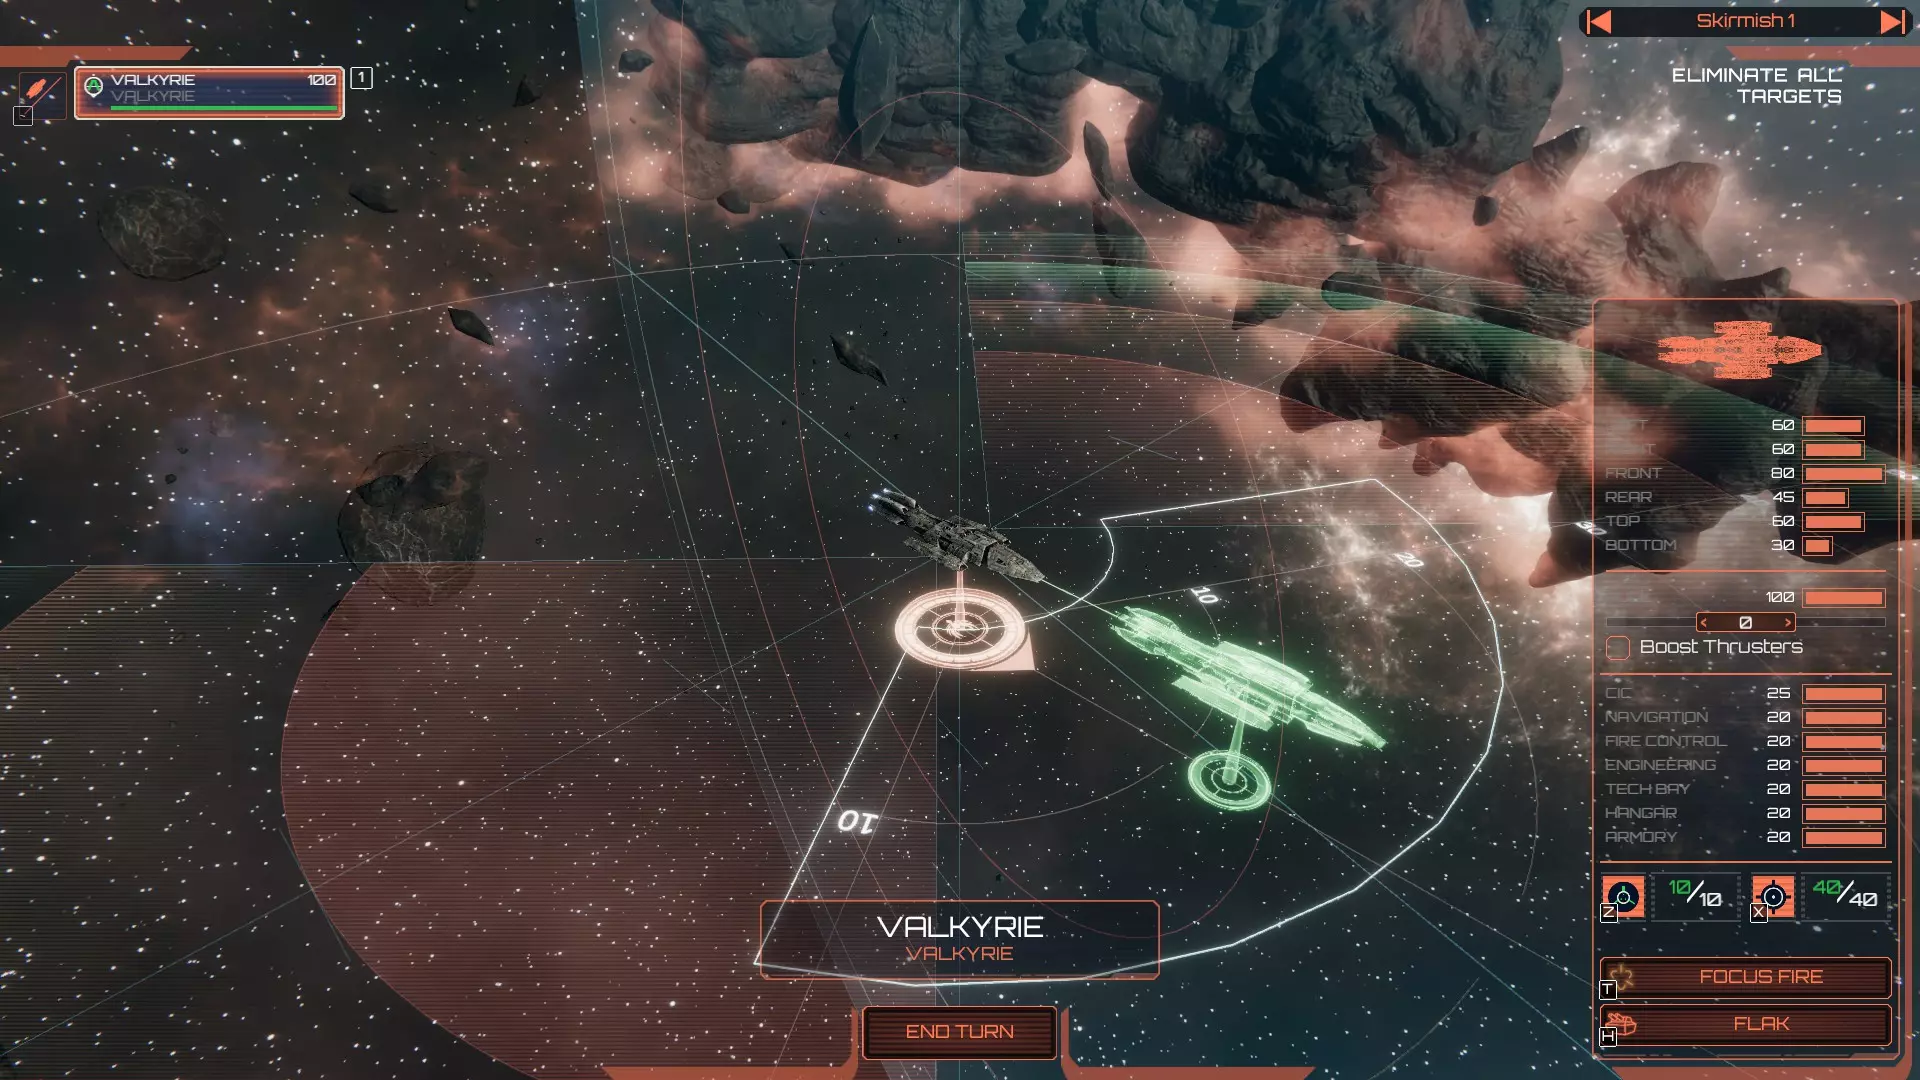
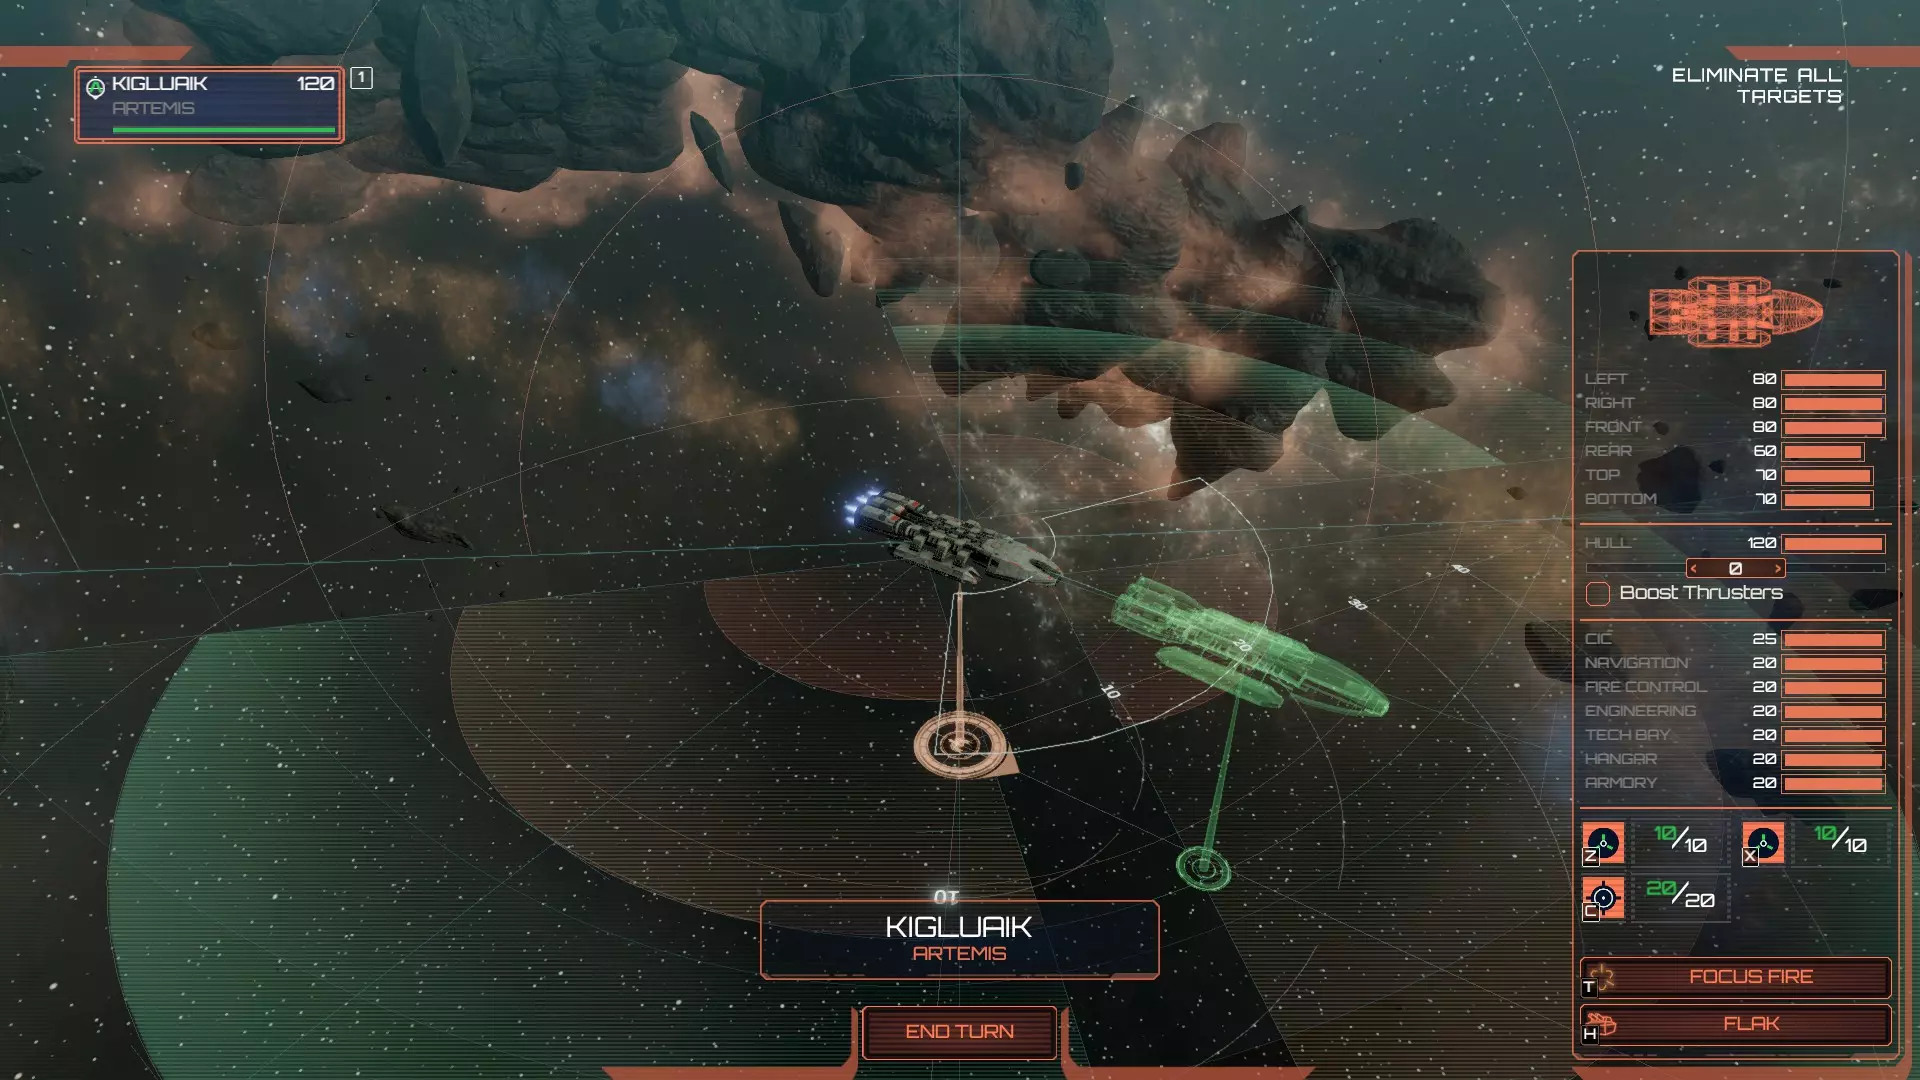
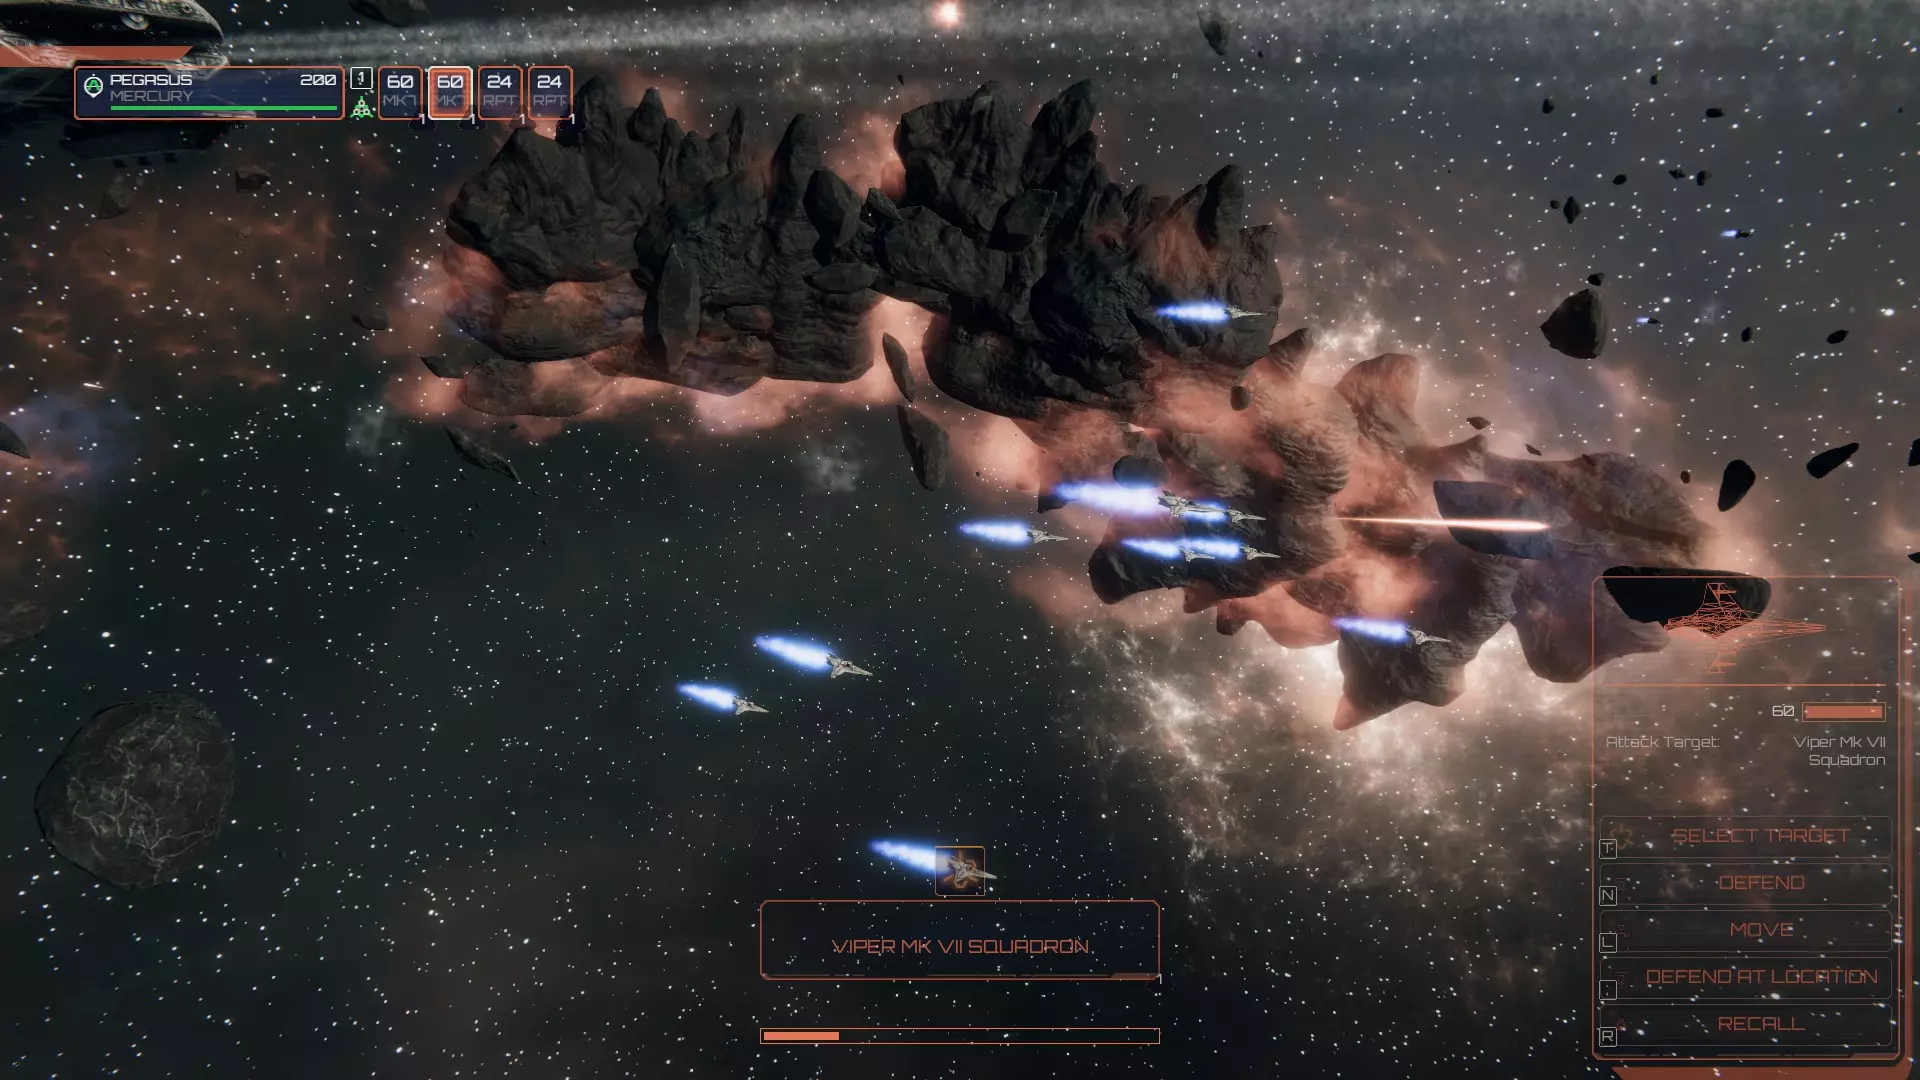
导航 超光速冷却时间:无 速度:150米/秒(推进器加速210米/秒,姿态影响123米/秒±4) 转向速率:60度/转(推进器加速36度/转,姿态影响48度/转±4) 俯仰/偏航速率:100%(推进器加速60%,姿态影响80%±4) 船体尺寸:3 船体/装甲/工程 船体:100 左舷:60(机库) 右舷:60(机库) 前舷:80(火控系统) 后舷:45(导航系统) 顶部:60(工程舱) 底部:30(技术舱) 伤害减免:25%(姿态+4时20%,姿态-4时30%) 子系统修复:100%(姿态+4时80%,姿态-4时120%) 火控系统 弹药槽:1个,冷却时间3转 弹药齐射规模:100%(姿态+4时116%,姿态-4时84%) 左舷搭载8门点防御炮 射程:5000(4200-5800) 射速:高 精度:中等(低-高) 伤害:0.2 右舷搭载8门点防御炮射程:5000(4200-5800) 射速:高 精度:中等(低-高) 伤害:0.2 顶部安装6座重型炮塔。 射程:5000(4200-5800) 射速:极低 精度:极低(极低-低) 伤害:3 底部安装2座重型炮塔。 射程:5000(4200-5800) 射速:极低 精度:极低(极低-低) 伤害:3 科技/军械库 雷达探测范围:6000米(4900米-7100米) 防火墙恢复:6.0/秒(4.9/秒+4姿态,7.1/s -4姿态 海军陆战队装甲:40(32-48) 海军陆战队强度:150(123+4姿态,177-4姿态) 高射炮伤害:100%(84%+4姿态,116%-4姿态) 中队/机库 1个中队槽位(包含蝰蛇Mk VII) +15闪避 3秒发射延迟 100%中队修复(80%+4姿态,120%-4姿态) veterancy 不适用 - 女武神无法在主线战役中使用,因此无法获得veterancy。 特殊能力 高射炮 - 女武神可以在其机库舱的左侧或右侧部署一堵高射炮墙,以摧毁其作用范围内的任何支援飞行器和军械。高射炮对战斗机的伤害受军械库属性影响,该属性可通过防御姿态提升,通过进攻姿态降低。 阿尔忒弥斯(战星):1550 FP
导航 超光速冷却时间:4回合 速度:120米/秒(推进器加速168米/秒,姿态影响98.4米/秒±4) 转向速率:60度/回合(推进器加速36度/回合,姿态影响48度/回合±4) 俯仰/偏航速率:100%(推进器加速59%,姿态影响80%±4) 船体尺寸:3 船体/装甲/工程 船体:120 左舷:80(机库) 右舷:80(机库) 前甲板:80(军械库) 后甲板:60(导航室) 顶部:70(火控系统) 底部:70(工程部) 伤害减免:25%(姿态+4时20%,姿态-4时30%) 子系统修复:100%(姿态+4时84%,姿态-4时116%) 火控系统 弹药槽:1个,冷却时间3回合 弹药齐射规模:100%(姿态+4时116%,姿态-4时84%) 左舷搭载8门近防炮 射程:5000(4200-5800) 射速:高 精度:中等(低-高) 伤害:0.2 右舷搭载8门近防炮射程:5000(4200-5800) 射速:高 精度:中等(低-高) 伤害:0.2 前方安装2座重型炮塔,可向下射击。 射程:5000(4200-5800) 射速:极低 精度:极低(极低-低) 伤害:3 顶部安装8座太空堡垒火炮。 射程:5000(4200-5800) 射速:极低 精度:极低(极低-低) 伤害:6 底部安装2座重型炮塔。 射程:5000(4200-5800) 射速:极低 精度:极低(极低-低) 伤害:3 科技/军械库 DRADIS范围:5000米(4100米-5900米) 防火墙再生:5.0/秒(4.1/秒 +4姿态,5.9/s -4姿态 海军陆战队装甲:40(32-48) 海军陆战队强度:150(123+4姿态,177-4姿态) 高射炮伤害:100%(84%+4姿态,116%-4姿态) 中队/机库 2个中队槽位 +20闪避 3秒发射延迟 100%中队修复(80%+4姿态,121%-4姿态) veterancy 等级1 - +3%伤害减免 等级2 - +6%伤害减免,+10%最大速度 等级3 - +10%伤害减免,+20%最大速度 特殊能力 高射炮 - 阿尔忒弥斯号可以在其机库舱的左侧或右侧部署一道高射炮墙,以摧毁其作用范围内的任何支援飞行器和军械。高射炮对战斗机的伤害受军械库属性影响,该属性可通过防御姿态提升,通过进攻姿态降低。 密涅瓦号(突击战星):1850 FP

导航 超光速冷却时间:4回合 速度:125米/秒(推进器加速175米/秒,姿态影响102.5米/秒±4) 转向速率:60度/回合(推进器加速36,姿态影响48±4) 俯仰/偏航速率:100%(推进器加速59%,姿态影响80%±4) 船体尺寸:4 船体/装甲/工程 船体:135 左舷:60(机库) 右舷:60(机库) 前舷:60(军械库) 后舷:45(导航) 顶部:45(工程) 底部:60(火控) 伤害减免:22%(姿态+4时18%,姿态-4时26%) 子系统修复:100%(姿态+4时84%,姿态-4时116%) 火控系统 弹药槽:2个,冷却时间3回合 弹药齐射规模:100%(姿态+4时116%,姿态-4时84%) 左舷搭载11门点防御炮 射程:5500(4600-6400) 射速:高 精度:中(低-高) 伤害:0.2 右舷搭载11门点防御炮射程:5500(4600-6400) 射速:高 精度:中等(低-高) 伤害:0.2 前方安装2座太空堡垒火炮。 射程:5500(4600-6400) 射速:极低 精度:极低(极低-低) 伤害:6 顶部安装8座太空堡垒火炮。 射程:5500(4600-6400) 射速:极低 精度:极低(极低-低) 伤害:6 底部安装5座重型炮塔。 射程:5500(4600-6400) 射速:极低 精度:低(极低-低) 伤害:3 后方安装4座中型炮塔。 射程:5500(4600-6400) 射速:低 精度:低(低-中等) 伤害:1 科技/军械库 DRADIS范围:4000米(3280米-4720米) 防火墙恢复:6.0/秒(4.9/秒+4姿态,7.1/s -4姿态 海军陆战队装甲:40(32-48) 海军陆战队强度:150(+4姿态时123,-4姿态时177) 高射炮伤害:90%(+4姿态时76%,-4姿态时104%) 中队/机库 2个中队槽位 +15闪避 3秒发射延迟 100%中队修复(+4姿态时80%,-4姿态时120%) veterancy 等级1 - +10%偏航控制,+15海军陆战队强度 等级2 - +25%偏航控制,+30海军陆战队强度,+5%炮塔精度 等级3 - +50%偏航控制,+60海军陆战队强度,+10%炮塔精度 特殊能力 高射炮 - 密涅瓦号可以在其机库吊舱的左侧或右侧部署一堵高射炮墙,以摧毁其作用范围内的任何支援飞行器和军械。高射炮对战斗机的伤害受军械库属性影响,该属性可通过防御姿态增加,通过进攻姿态降低。木星(重型战星):2150 FP
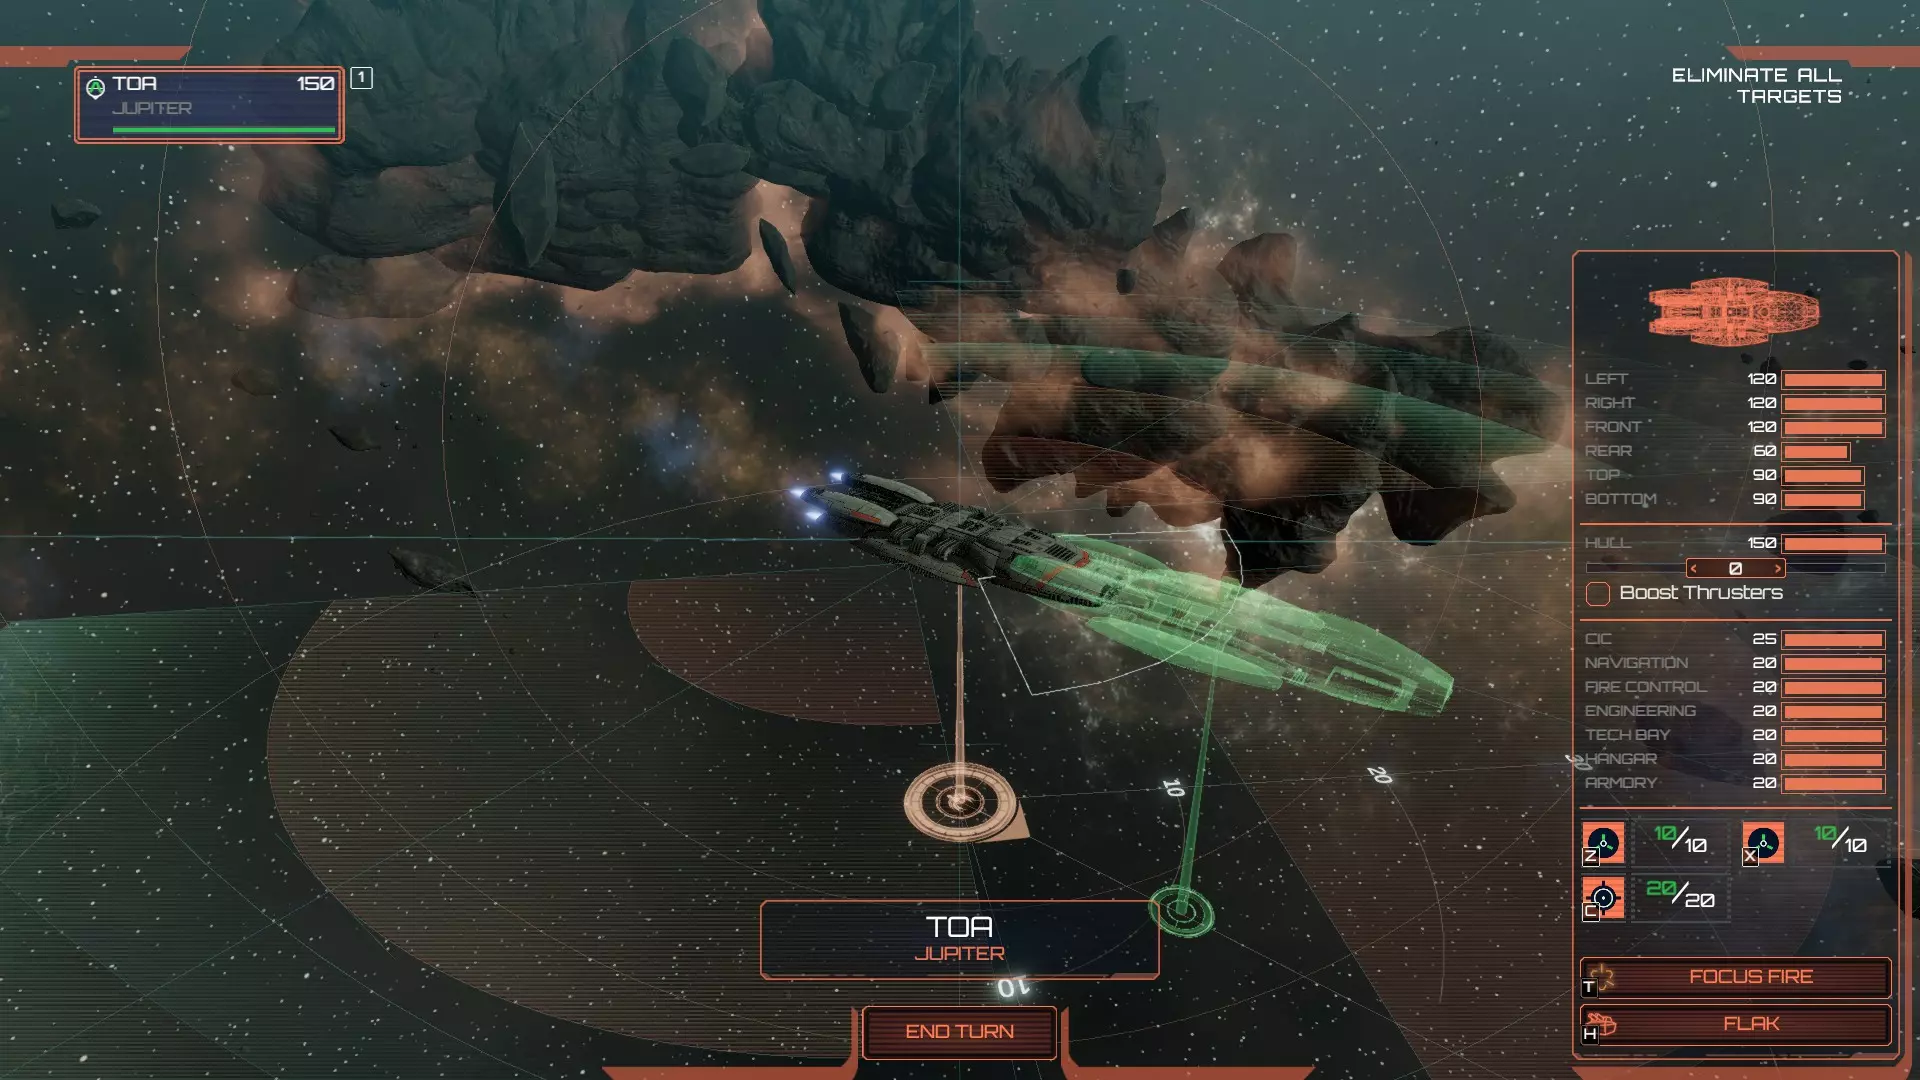
导航 超光速冷却时间:4回合 速度:90米/秒(推进器加速126米/秒,姿态影响73.8米/秒±4) 转向速率:42度/回合(推进器加速25.2度/回合,姿态影响33.6度/回合±4) 俯仰/偏航速率:100%(推进器加速59%,姿态影响80%±4) 船体尺寸:4 船体/装甲/工程 船体:165 左舷:120(机库) 右舷:120(机库) 前舷:120(军械库) 后舷:60(导航室) 顶部:90(火控系统) 底部:90(工程室) 伤害减免:25%(姿态+4时20%,姿态-4时30%) 子系统修复:100%(姿态+4时84%,姿态-4时116%) 火控系统 弹药槽:1个,冷却时间3回合 弹药齐射规模:100%(姿态+4时116%,姿态-4时84%) 左舷搭载8门点防御炮 射程:5000(4200-5800) 射速:高 精度:中等(低-高) 伤害:0.2 右舷搭载8门点防御炮射程:5000(4200-5800) 射速:高 精度:中等(低-高) 伤害:0.2 前方安装2座太空堡垒火炮,可向下射击。 射程:5000(4200-5800) 射速:极低 精度:极低(极低-低) 伤害:6 顶部安装8座太空堡垒火炮。 射程:5000(4200-5800) 射速:极低 精度:极低(极低-低) 伤害:6 底部安装6座太空堡垒火炮。 射程:5000(4200-5800) 射速:极低 精度:极低(极低-低) 伤害:6 科技/军械库 DRADIS范围:4000米(3200米-4800米) 防火墙再生:7.7/秒(6.6/秒+4姿态,8.8/s -4姿态值 海军陆战队装甲:40(32-48) 海军陆战队强度:200(164+4姿态值,236-4姿态值) 高射炮伤害:100%(84%+4姿态值,116%-4姿态值) 中队/机库 2个中队槽位,1个支援槽位(仅可搭载猛禽、清扫者、ARP) +20闪避 3秒发射延迟 100%中队修复(80%+4姿态值,120%-4姿态值) veterancy 等级1 - +10防火墙强度,+10%高射炮伤害 等级2 - +20防火墙强度,+20%高射炮伤害,+3%伤害减免 等级3 - +30防火墙强度,+30%高射炮伤害,+6%伤害减免 特殊能力 高射炮 - 朱庇特号可以在其机库舱的左侧或右侧部署一道高射炮墙,以摧毁其作用范围内的任何支援飞行器和弹药。对战斗机造成的高射炮伤害受军械库属性影响,该属性可通过防御姿态提升,通过进攻姿态降低。 朱庇特Mk II(改装重型战星):2500 FP
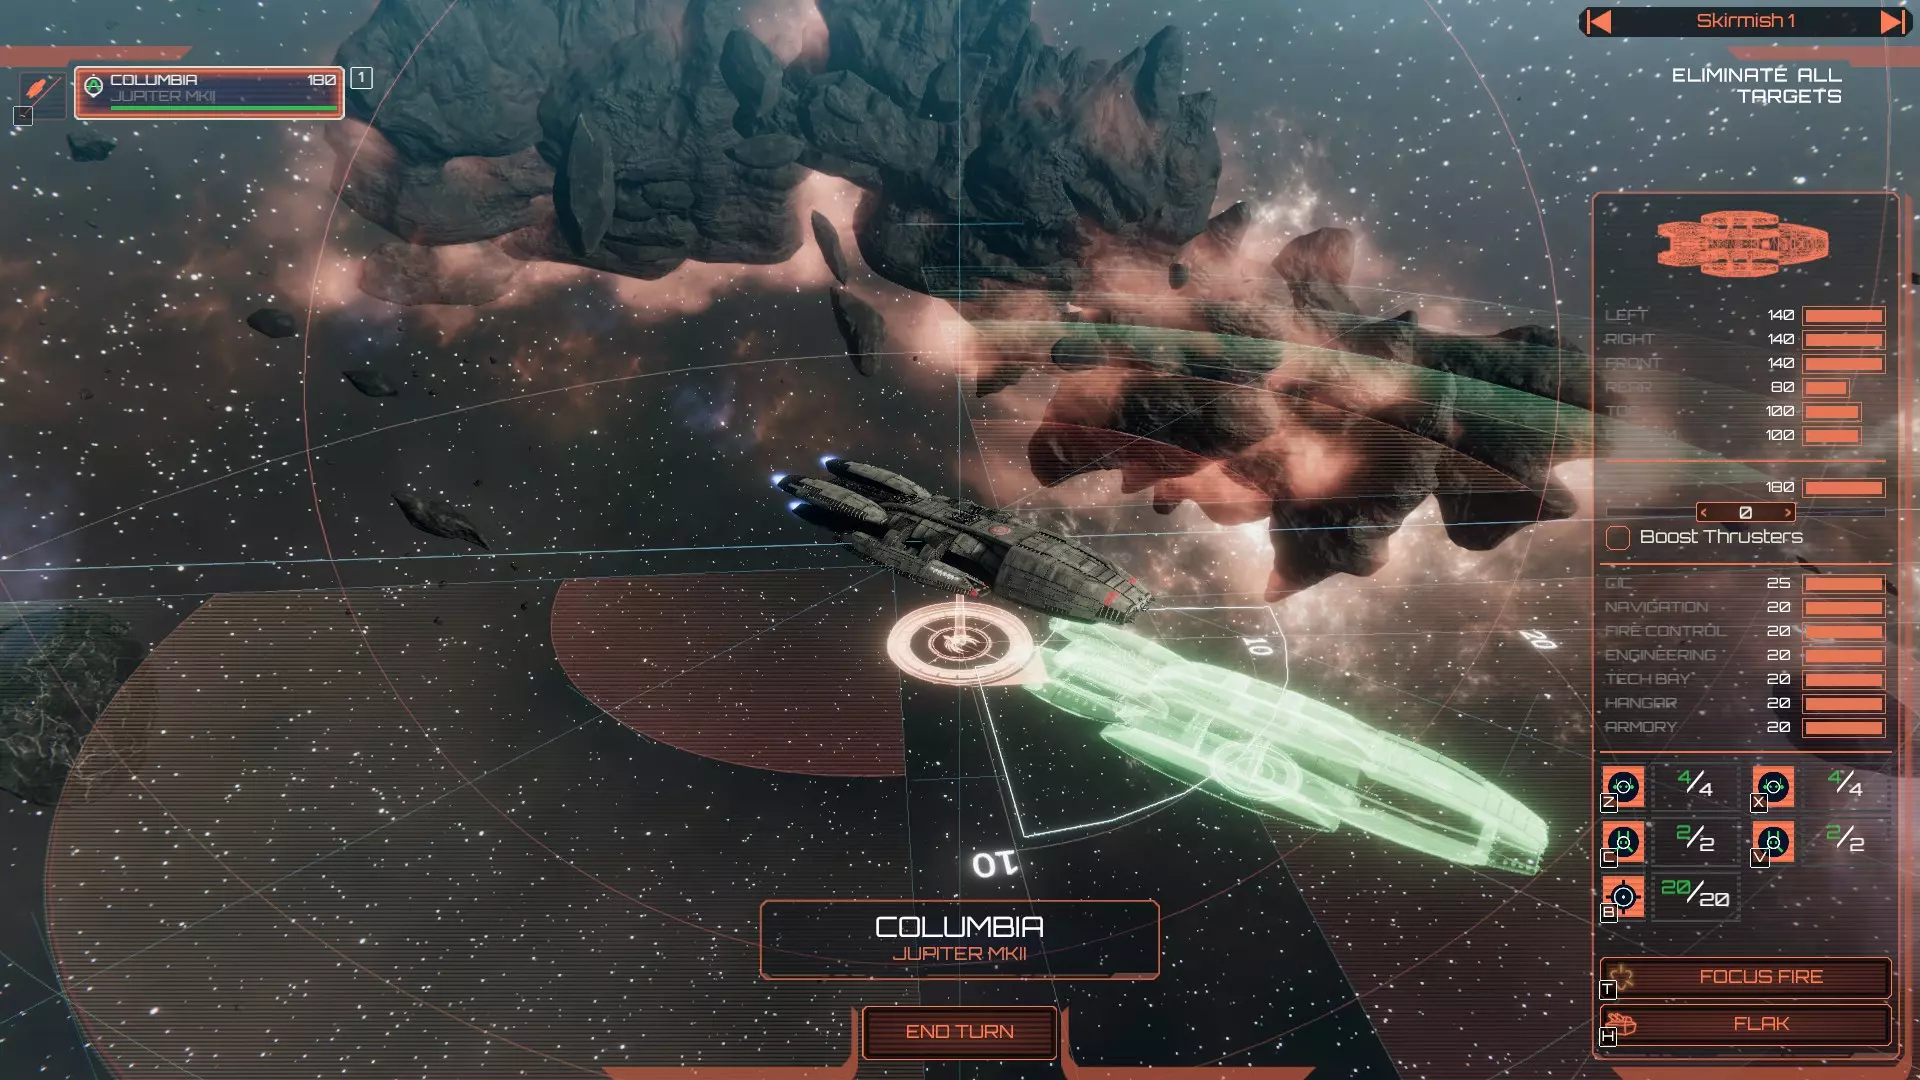
导航 超光速冷却时间:4回合 速度:90米/秒(推进器加速126米/秒,姿态影响73.8米/秒±4) 转向速率:42度/回合(推进器加速25.2度/回合,姿态影响33.6±4度/回合) 俯仰/偏航速率:100%(推进器加速40%,姿态影响80%±4) 船体尺寸:4 船体/装甲/工程 船体:180 左舷:140(机库) 右舷:140(机库) 前舷:140(军械库) 后舷:80(导航室) 顶部:100(火控系统) 底部:100(工程室) 伤害减免:28%(姿态+4时22%,姿态-4时34%) 子系统修复:100%(姿态+4时80%,姿态-4时120%) 火控系统 弹药槽:1个,冷却时间3回合 弹药齐射规模:100%(姿态+4时116%,姿态-4时84%) 左舷搭载8门点防御炮 射程:5000(4200-5800) 射速:高 精度:中(低-高) 伤害:0.2 右舷搭载8门点防御炮射程:5000(4200-5800) 射速:高 精度:中等(低-高) 伤害:0.2 8门太空堡垒火炮前置,可向下射击。 射程:5000(4200-5800) 射速:极低 精度:极低(极低-低) 伤害:6 8门太空堡垒火炮顶部安装。 射程:5000(4200-5800) 射速:极低 精度:极低(极低-低) 伤害:6 8门太空堡垒火炮底部安装。 射程:5000(4200-5800) 射速:极低 精度:极低(极低-低) 伤害:6 科技/军械库 DRADIS范围:4000米(3200米-4800米) 防火墙再生:7.7/秒(6.6/秒+4姿态,8.8/s -4姿态值 海军陆战队装甲:40(32-48) 海军陆战队强度:200(164+4姿态值,236-4姿态值) 高射炮伤害:100%(84%+4姿态值,116%-4姿态值) 中队/机库 2个中队槽位,2个支援槽位(仅可搭载猛禽、清扫者、ARP) +20闪避 3秒发射延迟 100%中队修复(80%+4姿态值,120%-4姿态值) 熟练度 等级1 - +10防火墙强度,+3%伤害减免 等级2 - +20防火墙强度,+6%伤害减免,+10%高射炮伤害 等级3 - +40防火墙强度,+10%伤害减免,+20%高射炮伤害 特殊能力 高射炮 - 朱庇特Mk II可以在其机库舱的左侧或右侧部署一道高射炮墙,以摧毁其作用范围内的任何支援飞行器和弹药。对战斗机造成的高射炮伤害受军械库属性影响,该属性可通过防御姿态提升,通过进攻姿态降低。 重型舷侧齐射——虽然这并非明确记录的特性,但值得注意的是,朱庇特Mk II相较于Mk I的炮塔位置变化使其能够轻松地将顶部和底部的战星火炮对准诸如基地之星等大型目标。由于火炮的俯角限制,在远距离比近距离更容易实现这一点。要持续做到这一点,需要在转弯时通过调整舰船的高度和旋转来仔细控制其位置。 水星级(现代重型战星):2800 FP

Navigation FTL Cooldown: N/A. Speed: 90 m/s (126 m/s Boost Thruster, 73.8 m/s +/- 4 Posture) Turn rate: 40 degrees per turn. (16 Boost Thruster, 32 +/-4 Posture) Pitch/Yaw rate: 100% (60% Boost Thruster, 80% +/- 4 Posture) Special note: Whilst the Mercury's speed is on par with the Jupiter variants, it can climb/dive faster than them. Ship hull size: 5 Hull/Armour/Engineering Hull: 200 Left: 140 (Hangar) Right: 140 (Hangar) Front: 180 (Armoury) Rear: 100 (Navigation) Top: 100 (Fire Control) Bottom: 120 (Engineering) 30% Damage reduction (24% +4 Posture, 36% -4 Posture) 100% Subsystem Repair (84% +4 Posture, 116% -4 Posture) Fire Control Systems 2x Munition slot, 3 turn cooldown. Munition salvo size: 100% (116% +4 Posture, 84% -4 Posture) Special note - The Mercury has 110% Accuracy at 0 posture, and is reflected in the numbers below. 12x Point Defence mounted left. Range: 5000 (4200-5800) Rate of fire: High Accuracy: High (Low - Very High) Damage: 0.2 12x Point Defence mounted right. Range: 5000 (4200-5800) Rate of fire: High Accuracy: High (Low - Very High) Damage: 0.2 10x Battlestar Artillery mounted forward. Range: 5000 (4200-5800) Rate of fire: Very Low Accuracy: Very Low (Very Low - Low) Damage: 6 4x Battlestar Artillery mounted on top. Range: 5000 (4200-5800) Rate of fire: Very Low Accuracy: Very Low (Very Low - Low) Damage: 6 8x Battlestar Artillery mounted on bottom. Range: 5000 (4200-5800) Rate of fire: Very Low Accuracy: Very Low (Very Low - Low) Damage: 6 2x Battlestar Artillery mounted rear. Range: 5000 (4200-5800) Rate of fire: Very Low Accuracy: Very Low (Very Low - Low) Damage: 6 Tech/Armoury DRADIS range: 4000m (3280m - 4720m) Firewall regen: 7.0/s (5.7/s +4 Posture, 8.3/s -4 Posture) Marine Armour: 40 (32 - 48) Marine Strength: 200 (164 +4 Posture, 236 -4 Posture) Flak Damage: 100% (84% +4 Posture, 116% -4 Posture) Squadrons/Hangar 3x Squadron slots (Includes Viper Mk VII), 1x Support slots (Raptor, Sweeper, ARP only) +20 Evade 3 Second launch delay 175% Squadron repair (140% +4 Posture, 210% -4 Posture) Veterancy N/A - The Mercury cannot be used in the main campaign and as such as no veterancy to gain. Special abilities Flak - The Mercury can deploy a wall of flak left or right of it's hangar pods to destroy any support craft and ordnance in it's area of effect. Flak damage vs fighters is influenced by Armoury stat which can be increased through defensive posture and decreased through offensive posture. Rapid squadron repairs - The Mercury has an extremely high squadron repair speed for a Colonial ship, outpacing the repair speed of even the Defender. Should the opportunity arise, recalled squadrons will be repaired in short order. Viper Mk VII - Being a modern ship, the Mercury is one of two Colonial ships that can house the Viper Mk VII. Only second war ships can house this powerful interceptor. COLONIAL SQUADRONS A few notes on squads: Squads do not have any kind of turning circle, they can essentially flip on the spot and as such no turning-related stats are to be found with regards to potential manoeuvrability. After a little testing, it looks like damage is per shot that is fired by the squad. They are just really crappy shots as it turns out. Viper Mk I (Interceptor): 0 FP
通用数据 中队规模:10架战机 船体点数:40(每架战机4点船体) 速度:320米/秒 伤害输出:0.3 武器射程:2500米(有效射程2000米) 雷达范围:2000米 特殊能力 中队维修 - 所有中队可在战斗中奉命返回母舰进行维修,甚至可以补充中队损失的战机,只要中队仍保持完整,无论受损和损失程度如何均可执行。 导弹拦截 - 毒蛇Mk I型可通过命令防御来袭弹药的目标,尝试拦截来袭弹药。命令下达得越早效果越好,因为毒蛇战机需要时间抵达目标弹药位置并将其摧毁。 毒蛇Mk II(高速拦截机):60 FP
通用数据 中队规模:8架战机 船体点数:34(每架战机4.25船体) 速度:380米/秒 伤害输出:0.4 武器射程:2500米 雷达范围:2000米 特殊能力 中队维修 - 所有中队可在战斗中奉命返回母舰进行维修,甚至可以补充中队损失的战机,只要中队仍保持完整,无论受损和损失程度如何均可进行。 导弹拦截 - 毒蛇Mk II型战机可通过奉命防御来袭弹药的目标,尝试拦截来袭弹药。命令下达得越早越好,因为毒蛇战机需要时间抵达目标弹药位置并将其摧毁。 额外说明:在战役中,毒蛇Mk II型战机的储备成本为24泰利姆,而非60FP。后续说明:自1.0.35版本起,蝰蛇Mk II的精准度已提升,如今其战斗效能显著高于蝰蛇Mk I。 taipan(重型战斗机):60 FP
通用数据 中队规模:4架战机 船体点数:32(每架战机8点船体) 速度:380米/秒 伤害输出:1 武器射程:4000米 雷达范围:4000米 特殊能力 中队维修 - 所有中队可在战斗中奉命返回母舰进行维修,甚至可以补充中队损失的战机,只要中队仍保持完整,无论受损和损失程度如何均可执行。 导弹拦截 - taipan战机可通过下令防御来袭弹药的目标来尝试拦截来袭弹药。下令越早效果越好,因为taipan战机需要时间抵达目标弹药位置并将其摧毁。 毒蛇Mk VII(下一代拦截机):120 FP
通用数据 中队规模:10架战机 船体点数:60(每架战机6点船体) 速度:380米/秒 伤害输出:0.45 武器射程:2500米 雷达范围:2000米 特殊能力 中队维修 - 所有中队可在战斗中奉命返回母舰进行维修,甚至可以补充中队损失的战机,只要中队仍保持完整,无论受损和损失程度如何均可执行。 导弹拦截 - 毒蛇Mk VII型战机可通过奉命防御来袭弹药的目标,尝试拦截来袭弹药。命令下达得越早效果越好,因为毒蛇Mk VII型战机需要时间抵达目标弹药位置并将其摧毁。 猛禽(多用途/攻击机):40 FP
通用数据 中队规模:2架战机 船体点数:24(每架战机12点船体) 速度:340米/秒 伤害输出:0.3 武器射程:2500米(可前后双向开火) 雷达范围:4000米 火箭弹容量:4发 火箭弹伤害:4(实际效果显示,命中具有20-25点伤害减免的目标后) 特殊能力 中队维修 - 可命令所有中队在战斗中返回母舰进行维修,即使中队已遭受大量损伤或损失,只要仍保持完整就能执行,甚至可补充损失的战机。补充说明: Raptors(猛禽)与母舰对接后会立即重新装填4发火箭弹,并可在下一回合再次派出。增强防火墙 - 可以命令猛禽机对接友方目标以显著增强其防火墙。这会使目标舰船的防火墙容量增加40点,且效果可以叠加,因此对接两个猛禽机小队将获得80点加成。此操作需要在目标被黑客入侵【之前】完成,否则如果在入侵过程中执行此操作,可能会导致一些……异常情况。这种异常会让黑客入侵成功,因为游戏会认为你的防火墙因开始正常再生而失效。需要注意的是,从1.0.35版本开始,猛禽机在对接至母船时也能提供加成,并且当舰船被选中时,屏幕右下角会显示一个用户界面元素。登舰目标 - 可以命令猛禽号登舰敌方船只,让舰上的陆战队员在敌舰上肆虐。每艘猛禽号拥有50点陆战队员战力(每小队100点),他们将与目标舰上的敌方人员作战。与重型突袭机不同,猛禽号登舰不会造成子系统损伤,而是在友方陆战队员仍在目标舰上时干扰其系统。被猛禽号登舰的船只将受到-15命中率、-25%维修速度的惩罚,赛昂舰船还会减少20点处理能力。多艘猛禽号对接不会叠加负面效果,但会增加陆战队员的存在时间。如果陆战队员消灭了舰上所有敌方人员,负面效果将持续存在于目标舰上,直至其被摧毁。火箭发射 - 猛禽战机可以锁定敌方主力舰并发射4枚无制导火箭弹。下达命令后火箭弹会尽快发射,因此请确保战机处于合适位置再进行射击,因为火箭弹飞行速度较慢。 排雷 - 这是增援包中新增的能力,猛禽战机可奉命清除附近敌方部署的地雷。排雷能力的作用范围略大于DRADIS(雷达)范围,执行任务时猛禽战机会飞往目标区域。 导弹拦截 - 猛禽战机可通过命令防御来袭弹药的目标,尝试拦截来袭 ordnance。但不建议使用猛禽战机执行此任务,不过在紧急情况下,它们可以拦截部分飞行速度较慢的弹药,例如制导导弹。额外说明:在战役中,猛禽战机的储备成本为16泰利姆,而非40 FP。 清扫者(反导弹防御):40 FP
基础数据 中队规模:2架战机 船体点数:24(每架战机12点船体) 速度:340米/秒 伤害输出:0.3 武器射程:2500米(有效射程2000米) 雷达范围:2000米 特殊能力 中队维修 - 所有中队可在战斗中被命令返回母舰进行维修,即使中队遭受大量损伤或损失,只要仍保持完整,甚至可以补充损失的战机。补充说明:清扫者战机在与母舰对接时会立即重新装填箔条,并可在下一回合重新派出。 解除武装 - 这是增援包中新增的能力,清扫者战机可被命令解除附近部署的敌方地雷。扫雷器的目标水雷能力范围略超过4000米,它会飞往目标位置。 导弹拦截:扫雷器可以通过下达防御来袭弹药目标的命令,尝试拦截来袭弹药。和猛禽战机一样,不建议用扫雷器执行此操作,但如果情况紧急,你可以拦截一些速度较慢的弹药,例如制导导弹。 释放箔条:扫雷器可以释放箔条,箔条在接触时会摧毁敌方弹药,同时允许己方弹药不受阻碍地通过。箔条会在扫雷器所在位置释放,并在其移动时以2.5秒的间隔持续释放。扫雷器的箔条储备量为10个,每回合会沿其移动路径释放4个。箔条云会随时间扩散,初始大小与【Adamant】相当,在生效的第二个回合会覆盖整个舰队。自1.0.35版本起,清扫者箔条的持续时间为4回合。 额外说明:在战役中,清扫者的储备成本为12【Tylium】,而非40【FP】。 突击 Raptor(战术打击机):60【FP】
General stats Squadron size: 3 Craft Hull points: 30 (10 Hull per craft) Speed: 300 m/s Damage output: 0.3 Weapon range: 2500m (can fire both forward and rear) DRADIS range: 4000m Missile capacity: 36 Missile salvo size: 6 per craft (18 assuming full squadron) Missile damage: 2 Special abilities Squad repair - All squadrons can be ordered to return to their parent ship and undergo repairs during battle, this can even replace lost craft in the squadron and can be done regardless of how much damage and losses the squadron has taken so long as it is still intact. As an additional note, Assault Raptors will be restocked with it's 36 missiles upon docking with it's parent ship. This is done immediately, and can be sent back out the following turn. Short Range Missile - The Assault Raptor squadron can target a hostile capital ship and let loose 18 guided missiles at the target. The missiles have a maximum range of 4000m and as such the squadron must be within 4000m of the target to be able to give the command to fire, note that the squadron's DRADIS range is 4km so any hostile capital ships within the DRADIS circle are valid targets. The missiles will be fired as soon as possible after giving the command, so ensure the craft are in position before giving the order. As an additional note, keep in mind that missiles will "fall short" upon reaching 4000m so it's entirely possible to fail to hit fast capitals moving away from the Assault Raptor squadron at max range. Wasted salvoes on these targets can be avoided by moving closer than 4000m before releasing the salvo. Short Range Missiles have a 2 turn reload. Paint Target - The Assault Raptor squadron can light up any target in range, including other squadrons, with a laser painter which increases friendly unit accuracy against that target. This order can be given at any point and the target will remain painted so long as the Assault Raptor remains in range. The paint target ability range is roughly as large as the Assault Raptor's DRADIS range of 4000m, and can be useful in allowing Colonial captial ships to hit the more agile Cylon captials such as the Nemesis and Cerastes reliably. Missile interception - Assault Raptors can attempt to intercept incoming ordnance by giving orders to defend the target of incoming ordnance. This really is not recommended with Assault Raptors, but you can stop some of the slower munitions such as guided missiles if you're desperate. **Extra note: Assault Raptors cost 24 Tylium to stock in the campaign, rather than 60 FP. COLONIAL MUNITIONS Notes on munitions: Friendly missiles WILL cause damage to friendly targets, so be mindful of your angles when you fire and where the missiles emerge from on the craft. For example, Manticore guided missiles fire out of the left and right side of the tip of the nose, arcing out to the sides as they launch before heading to the target. Therefore, having a friendly ship directly left or right of the Manticore is not advised when about to fire a salvo. Friendly missiles WILL be destroyed by your own flak. You'll have to bring down the wall to send out your own munitions, and also for the munitions of any friendly craft behind the wall too. Paying careful attention to enemy cooldown timers will allow you to protect yourself whilst still throwing out your own ordnance. Guided Missile: 0 FP General stats Speed: 500 m/s Range: 100,000m Firing delay: 2s Magazine stack: 40 Salvo size: 4 Guidance: Target Hull damage: 6 Armour damage: 6 Special notes Due to the Guided Missile being target-locked, you must have a DRADIS lock on the target before you can fire. However, once you've ID'd a target with DRADIS, you can fire on the target at any point - There's no need to keep a ship or squadron in DRADIS range at that point. Guided Missiles travel 5000m - 6000m in a single turn (Launch time, turning, etc), if you're within 6000m you can generally assume that you will hit or be hit within a single turn. The DRADIS circle on a ship can be used for measuring distance pretty handily. Torpedo: 60 FP General stats Speed: 1000 m/s Range: 100,000m Firing delay: 0.5s Magazine stack: 100 Salvo size: 10 Guidance: Unguided Hull damage: 4 Armour damage: 4 Special notes Due to the Torpedo being unguided, you do not need a DRADIS lock before firing. If you wish, you can unload a salvo immediately on the first turn, but until a target is moving don't expect to hit anything at range as Torpedoes are fired with lead, aimed at where the ship is predicted to be on it's current course. Vertical movement in particular throws off Torpedoes so they are best employed at close range, on slow/large targets, or packed fleet formations where quick vertical movements are not possible. Torpedoes travel 10000m - 11000m in a single turn (Launch time, turning, etc), if you're within 11000m you can generally assume that you will hit or be hit within a single turn. The DRADIS circle on a ship can be used for measuring distance pretty handily. PCM: 20 FP General stats Speed: 450 m/s Range: 10,000m Firing delay: 1s Magazine stack: 16 Salvo size: 1 Explosion Range: 2500m Guidance: Sentry Hull damage: N/A Armour damage: N/A Special notes The PCM is unique in how it behaves compared to the other missiles. When fired, the PCM travels in a straight line towards the location you set to it. If the PCM comes into contact with any hostile ordnance along the way it will detonate, destroying itself and a large chunk of ordnance around it. If it does not come into contact with hostile ordnance on the way to the target position, it will reach it's spot and sit there like a mine until hostile ordnance comes into detonation distance. Note that the explosion will only destroy missiles caught in the blast, and will not do anything for ordnance coming afterwards in the way that Sweeper chaff will. PCM's are exceptional at countering hostile Nukes in MP. Nuke: 120 FP General stats Speed: 400 m/s Range: 60,000m Firing delay: 5s Magazine stack: 1 Salvo size: 1 Missile hull: 4 (Nukes are unique in that they are one of few munitions with a hull stat, and take 10-14 shots from a squadron to be shot down) Guidance: Target Hull damage: 160 Armour damage: 160 Subsystem damage: 15 Area of Effect range: 2500m Special notes Due to the Nuke being target-locked, you must have a DRADIS lock on the target before you can fire. However, once you've ID'd a target with DRADIS, you can fire on the target at any point - There's no need to keep a ship or squadron in DRADIS range at that point. Nukes have considerable blast radius, be mindful of firing them in close quarters or when friendly squadrons are engaged over the target. You can easily deal severe damage to multiple ships in a tightly packed formation, though damage drops off the further a target is from the explosion. Nukes travel 4000m - 5000m in a single turn (Launch time, turning, etc), if you're within 5000m you can generally assume that you will hit or be hit within a single turn. The DRADIS circle on a ship can be used for measuring distance pretty handily. Armour Piercer: 40 FP General stats Speed: 650 m/s Range: 80,000m Firing delay: 1.6s Magazine stack: 41 Salvo size: 4 Guidance: Target Hull damage: 1 Armour damage: 12 Special notes Due to the Armour Piercer being target-locked, you must have a DRADIS lock on the target before you can fire. However, once you've ID'd a target with DRADIS, you can fire on the target at any point - There's no need to keep a ship or squadron in DRADIS range at that point. Armour Piercers travel 5000m - 6000m in a single turn (Launch time, turning, etc), if you're within 6000m you can generally assume that you will hit or be hit within a single turn. The DRADIS circle on a ship can be used for measuring distance pretty handily. Proximity Mine: 40 FP General stats Speed: 450 m/s Range: 8000m Firing delay: 1s Magazine stack: 10 Salvo size: 1 Guidance: Sentry Hull damage: 60 Area of effect range: 1000m Special notes Proximity mines will only arm once they have reached their target destination and then it takes about half a turn for the arming sequence to complete after coming to a stop. Once deployed, the mine will detonate upon the first hostile capital ship coming into detonation range. It is worth noting that any friendly or hostile squadrons will also get caught in the blast, so be mindful of your support craft when deploying mines. Your own craft will not set off your own mines. EMP Mine: 60 FP General stats Speed: 450 m/s Range: 8000m Firing delay: 1s Magazine stack: 6 Salvo size: 1 Guidance: Sentry Temporary subsystem damage: 6 (This deals 6 damage to ALL subsystems besides CIC) Area of effect range: 2000m Special notes EMP mines will only arm once they have reached their target destination and then it takes about a quarter of a turn for the arming sequence to complete after coming to a stop. Once deployed, the mine will detonate upon the first hostile capital ship coming into detonation range. It is worth noting that any friendly capitals will also take damage from the blast, so be cautious when deploying mines in close quarters. EMP mines apply "soft" damage, which is represented as a grey bar over the subsystem health. This damage is not repairable, but will be slowly recovered over the duration of a turn or two. Regardless of the amount of EMP damage taken, it will always take that turn or two to totally recover. EMP damage is best used to create openings to exploit, where the target will be temporarily slowed down, have reduced damage resistance, and reduced weapons range. Targets hit by EMP damage will struggle to dodge torpedoes fired at longer range than usual, for example. Your own craft will not set off your own mines. Debris Mine: 60 FP General stats Speed: 450 m/s Range: 8000m Firing delay: 1s Magazine stack: 6 Salvo size: 1 Missile hull: 4 (Debris Mines are unique in that they are one of few munitions with a hull stat, squadrons cannot intercept them but the 4 hp allows the mine to withstand a Scorpion shot before being destroyed) Guidance: Sentry Damage: 1 (This is the damage vs capitals, and is for the most part negligible) Damage vs squadrons: Severe (Simply flying through one side of a debris field to the other can cut a squadron's total hull points in half, usually destroying multiple craft) Explosion Range: 400m Special notes Deployment of debris mines is unique. They are placed in the same fashion as mines, with the exception that you place a start and end point for the debris cloud to spread along, effectively marking a line of debris or "wall" if used defensively. Debris mines fly out to their target destination and detonate immediately upon reaching the desired point - They will then spread out along the path designated by the user. Note that debris mines inflict severe damage on squadrons, potentially cutting most squadrons in half by just flying through them, nevermind sticking around in the cloud. Debris mines inflict friendly fire so be sure to note your own squadron positions when deploying them, as they can just as easily tear apart your own squadrons too. For example, the combined efforts of a debris mine and then a Battlestar's flak can completely destroy a heavy raider squadron that is making an attempt to board. EMP Generator: 120 FP General stats Speed: N/A Range: 4000m Firing delay: 2.2s Magazine stack: Unlimited Salvo size: 1 Guidance: Ship-bound Temporary subsystem damage: 8 (This deals 8 damage to ALL subsystems besides CIC) Friendly subsystem damage: 4 (This is the subsystem damage dealt to friendlies caught in the EMP radius) Self subsystem damage: 3 (This is the temporary damage done through feedback damage, which recovers after 1 turn) Special notes The EMP Generator is deployed as an area of effect weapon, centred on the ship holding it. Any ships within 4000m, be they hostile or friendly, will fall victim to it's subsystem damage. As well as this, the EMP Generator also disables all squadrons caught in the area of effect for the duration of the turn it is fired. Squadrons disabled in this manner maintain their momentum, and will keep drifting in their original direction of travel until they recover. Once again, this effect applies to both hostile and friendly squadrons, but it is worth noting that squadron deployment time is generally 3 seconds for Colonials, whilst EMP Generator deployment is 2.2 seconds. This allows for the EMP Generator and Vipers to be deployed on the same turn, without disabling the Vipers as they launch and enact standard defend orders. The ship that deploys an EMP Generator is prepared for the deployment, and will resist the effects of it's own EMP Generator. Instead of taking flat 4 subsystem damage, it will instead take 3 temporary subsystem damage that recovers after a single turn. Do note that this preparation will not protect the ship from other ships using EMP equipment, and it will take full subsystem damage from outside EMP detonations. EMP generators apply "soft" damage, which is represented as a grey bar over the subsystem health. This damage is not repairable, but will be slowly recovered over the duration of a turn or two. Regardless of the amount of EMP damage taken, it will always take that turn or two to totally recover. EMP damage is best used to create openings to exploit, where the target will be temporarily slowed down, have reduced damage resistance, and reduced weapons range. (Wagglepuss note: The EMP Generator is the only munition that can easily cause significant damage to your own fleet, I encourage creative thinking in it's deployment to either mitigate or work through this fact.) CYLON CAPITALS

复仇女神级(轻型科技护卫舰):450 FP
导航 超光速冷却时间:3回合 速度:200米/秒(系统进程32%-145%) 转向速率:96度/回合 俯仰速率:??(系统进程20%-146%) 船体尺寸:2 船体/装甲/工程 船体:45 左舷:20(军械库) 右舷:20(军械库) 前舷:30(火控系统) 后舷:20(导航系统) 顶部:20(技术舱) 底部:15(工程舱) 15%伤害减免(系统进程0%-30%) 80%子系统修复(系统进程20%-140%) 火控系统 1个弹药槽位,冷却时间4回合 弹药齐射规模:80%(系统进程20%-140%) 1座前置轻型炮塔,可向下射击 射程:3750(系统进程1500-6000) 射速:中等 精度:极低(系统进程极低-中等) 伤害:04 科技/军械库 处理能力:75 DRADIS范围:5425米(系统进程700米-10150米) 防火墙再生:4.7/秒(系统进程0.6/秒-8.7/秒) 黑客强度:75%(系统进程0%-150%) 百夫长装甲:30(系统进程0-60) 百夫长强度:88(系统进程50-125) 特殊能力 黑客——复仇女神可以入侵范围内的目标,突破目标防火墙后将造成直接子系统伤害。 九头蛇(维修/导弹协同):500 FP
导航 超光速冷却时间:3回合 速度:132米/秒(系统进程10%-145%) 转向速率:48度/回合 俯仰速率:??(系统进程20%-146%) 船体尺寸:2 船体/装甲/工程 船体:60 左舷:35(火控系统) 右舷:35(火控系统) 前舷:20(导航系统) 后舷:20(军械库) 顶部:35(工程系统) 底部:35(技术舱) 伤害减免15%(系统进程0%-27%) 子系统修复84%(系统进程20%-140%) 火控系统 无数据 技术/军械库 处理能力:60 雷达范围:3900米(系统进程0米-9750米) 防火墙恢复:3.8/秒(系统进程0.6/秒-8.黑客强度:78%(系统进程0%-150%)【注:这可能与协同装填范围相关】 百夫长装甲:30(系统进程0-60) 百夫长强度:88(系统进程50-125) 特殊能力 修复船体 - 九头蛇级战舰携带40架无人机,可命令其修复受损友方主力舰的船体。下达命令后,5架无人机将被派往目标。抵达目标后,无人机将立即开始恢复损失的船体点数,直至达到目标原有的最大船体强度。船体修复无人机每次使用后即消耗,不会返回九头蛇级战舰补充。该能力可使用8次,每次将在2回合内修复80点船体(每架无人机在22秒内施加16点船体修复)。协同装填 - 九头蛇可以使用协同装填能力,立即减少范围内所有赛昂舰船的冷却时间。执行该命令后,九头蛇会将范围内所有舰船当前的装填周期减少2回合。该能力对九头蛇下达命令的同一回合正在开火的舰船同样有效,因为弹药发射后会在开火的同一回合开始其装填周期。协同装填的范围与技术舱相关联,其作用范围为6500米。协同装填的效果可以叠加,例如,当一艘阿尔戈斯发射所有3轮弹药齐射时,两艘九头蛇可以在同一回合激活协同装填,这将使阿尔戈斯在接下来的回合立即重新获得弹药。协同装填不会补充任何弹药,相反,当九头蛇在场时,赛昂舰队的弹药储备会消耗得异常迅速。 蛇发女妖(中队支援与维修):550 FP
导航 超光速冷却时间:3回合 速度:140米/秒(系统进程10%-145%) 转向速率:42度/回合 俯仰速率:??(系统进程50%-110%) 船体尺寸:2 船体/装甲/工程 船体:75 左舷:45(军械库) 右舷:45(技术舱) 前舷:60(机库) 后舷:30(导航室) 顶部:45(火控系统) 底部:45(工程室) 伤害减免14%(系统进程0%-27%) 子系统修复80%(系统进程20%-140%) 火控系统 前部安装4座近防炮 射程:3750(系统进程1500-6000) 射速:极高 精度:高(系统进程极低-极高) 伤害:0.15 后部安装2座近防炮 射程:3750(系统进程1500-6000) 射速:极高 精度:高(系统进程极低-极高) 伤害:0.15 科技/军械库 处理能力:90 DRADIS范围:4500米(系统进程0米-9000米) 防火墙再生:4.7/秒(系统进程0.6/秒-8.7/秒) 百夫长装甲:30(系统进程0-60) 百夫长强度:88(系统进程50-125) 中队/机库 2个支援插槽(仅重型突袭机、网络攻击机、蝎子战机、胡蜂战机可用),1个维修舱 +8闪避(系统进程0-15) 4秒发射延迟(系统进程7秒-1秒) 150%中队维修(系统进程0%-300%) 特殊能力 维修舱 - 戈尔贡号设有一个空置的第三个中队插槽,专门用于维修和为舰队中其他舰船的中队重新装弹。当友方中队使用召回指令时,将可以选择返回哪艘舰船;可以是其母舰,也可以是任何拥有未占用维修舱的戈尔贡级舰船。戈尔贡级舰船的维修速度最高可达300%,能让受损中队在极短时间内重返战斗。未受损的中队若耗尽弹药(如毒蝎级和胡蜂级),也可召回至戈尔贡级舰船进行重新装弹。 机器学习 - 戈尔贡级舰船可以与友方中队建立链接,为其提供增益:链接状态下,中队每受到一次攻击,闪避值就增加0.5。该增益上限为额外+40闪避,且会叠加在中队从母舰获得的自然闪避之上。戈尔贡无需维持与中队的连接即可让中队保持增益效果,且维修后增益仍会保留。完成全部机器学习的刻耳柏洛斯中队极难被摧毁,拥有70点闪避值(母机提供+30,机器学习提供+40)。角蝰(反战斗机炮艇):550火力值
导航 超光速冷却时间:3回合 速度:180米/秒(系统进程10%-145%) 转向速率:72度/回合 俯仰速率:??(系统进程20%-140%) 舰船船体尺寸:2 船体/装甲/工程 船体:50 左舷:45(工程) 右舷:45(工程) 前舷:45(技术舱) 后舷:60(导航) 顶部:45(军械库) 底部:45(火控系统) 15%伤害减免(系统进程0%-30%) 80%子系统修复(系统进程20%-140%) 火控系统 左舷搭载6座点防御武器 射程:3750(系统进程1500-6000) 射速:极高 精度:中等(系统进程极低-极高) 伤害:0.15 右舷搭载6座点防御武器 射程:3750(系统进程1500-6000) 射速:极高 精度:中等(系统进程极低-极高) 伤害:0.15 4座点防御炮前置安装。 射程:3750(系统处理范围1500-6000) 射速:极高 精度:中等(系统处理范围极低-极高) 伤害:0.15 科技/军械库 处理能力:75 雷达范围:4500米(系统处理范围0米-9000米) 防火墙恢复:4.7/秒(系统处理范围0.6/秒-8.7/秒) 百夫长装甲:30(系统处理范围0-60) 百夫长强度:88(系统处理范围50-125) 利爪(轻巡洋舰/航母):650 FP
导航 超光速冷却时间:3回合 速度:160米/秒(系统进程10%-145%) 转向速率:42度/回合 俯仰速率:??(系统进程50%-110%) 船体尺寸:3 船体/装甲/工程 船体:70 左舷:70(军械库) 右舷:70(技术舱) 前舷:20(机库) 后舷:20(导航室) 顶部:70(火控系统) 底部:70(工程部) 伤害减免17%(系统进程5%-28%) 子系统修复80%(系统进程20%-140%) 火控系统 左舷安装3座轻型炮塔,可向上射击 射程:3750(系统进程1500-6000) 射速:中等 精度:极低(系统进程极低-中等) 伤害:0.4 右舷安装3座轻型炮塔,可向上射击 射程:3750(系统进程1500-6000) 射速:中等 精度:极低(系统进程极低-中等) 伤害:0.4 顶部安装2座轻型炮塔。 射程:3750(系统处理1500-6000) 射速:中等 精度:极低(系统处理极低-中等) 伤害:0.4 科技/军械库 处理能力:90 雷达范围:4650米(系统处理600米-8700米) 防火墙恢复:4.7/秒(系统处理0.6/秒-8.7/秒) 百夫长装甲:30(系统处理0-60) 百夫长强度:88(系统处理50-125) 中队/机库 1个中队槽位 +12闪避(系统处理0-23) 4秒发射延迟(系统处理7秒-1秒) 75%中队修复(系统处理0%-150%) 亡魂(中型炮艇):850 FP
导航 超光速冷却时间:3回合 速度:145米/秒(系统进程10%-145%) 转向速率:60度/回合 俯仰速率:??(系统进程15%-143%) 船体尺寸:3 船体/装甲/工程 船体:90 左舷:45(军械库) 右舷:45(军械库) 前舷:75(工程部) 后舷:45(导航室) 顶部:60(技术舱) 底部:45(火控系统) 15%伤害减免(系统进程0%-30%) 95%子系统修复(系统进程20%-170%) 火控系统 左舷安装6座轻型炮塔,可向上射击 射程:3750(系统进程1500-6000) 射速:中等 精度:极低(系统进程极低-高) 伤害:0.4 右舷安装6座轻型炮塔,可向上射击 射程:3750(系统进程1500-6000) 射速:中等 精度:极低(系统进程极低-高) 伤害:0.4 1座重型炮塔前置,可向下射击。 射程:3750(系统处理值1500-6000) 射速:低 精度:极低(系统处理值极低-高) 伤害:2 4座重型炮塔顶部安装。 射程:3750(系统处理值1500-6000) 射速:低 精度:极低(系统处理值极低-高) 伤害:2 4座重型炮塔底部安装。 射程:3750(系统处理值1500-6000) 射速:低 精度:极低(系统处理值极低-高) 伤害:2 科技/军械库 处理能力:75 雷达范围:3875米(系统处理值500米-7250米) 防火墙恢复:4.7/秒(系统处理值0.6/秒-8.7/秒) 百夫长装甲:30(系统处理值0-60) 百夫长强度:131(系统处理值75-188) 阿拉克涅(重型巡洋舰/航母):950 FP
导航 超光速冷却时间:3回合 速度:125米/秒(系统进程10%-145%) 转向速率:60度/回合 俯仰速率:??(系统进程30%-135%) 舰船船体尺寸:3 船体/装甲/工程 船体:110 左舷:45(机库) 右舷:45(机库) 前舷:60(军械库) 后舷:45(导航室) 顶部:60(火控系统) 底部:45(工程部) 15%伤害减免(系统进程0%-30%) 80%子系统修复(系统进程20%-140%) 火控系统 1个弹药槽位,2回合装填 弹药齐射规模:87%(系统进程20%-155%) 2座中型炮塔前置,可向下射击 射程:3750(系统进程1500-6000) 射速:低 精度:极低(系统进程极低-中等) 伤害:1 3座中型炮塔顶部安装射程:3750(系统进程1500-6000) 射速:低 精准度:极低(系统进程极低-中等) 伤害:1 科技/军械库 处理能力:90 雷达范围:3875米(系统进程500米-7250米) 防火墙恢复:4.7/秒(系统进程0.6/秒-8.7/秒) 百夫长装甲:30(系统进程0-60) 百夫长强度:131(系统进程75-188) 中队/机库 1个中队槽位 +8闪避(系统进程0-15) 4秒发射延迟(系统进程7秒-1秒) 75%中队修复(系统进程0%-150%) Phobos(中型科技巡洋舰/航母):1050 FP

导航 超光速冷却时间:3回合 速度:120米/秒(系统进程10%-145%) 转向速率:48度/回合 俯仰速率:??(系统进程20%-140%) 舰船船体尺寸:3 船体/装甲/工程 船体:80 左舷:60(军械库) 右舷:60(军械库) 前舷:30(机库) 后舷:45(导航室) 顶部:75(技术舱) 底部:30(工程部) 15%伤害减免(系统进程0%-30%) 80%子系统修复(系统进程20%-140%) 火控系统 1个弹药槽位,冷却时间2回合 弹药齐射规模:80%(系统进程20%-140%) 1座中型炮塔,后置 射程:3750(系统进程1500-6000) 射速:低 精度:极低(系统进程极低-中等) 伤害:1 2座中型炮塔,顶部安装射程:3750(系统进程1500-6000) 射速:低 精度:极低(系统进程极低-中等) 伤害:1 科技/军械库 处理能力:102 DRADIS范围:4250米(系统进程2000米-6500米) 防火墙再生:4.7/秒(系统进程0.6/秒-8.7/秒) 黑客强度:83%(系统进程0%-165%) 跳跃范围:4800米(系统进程1200米-8400米) 百夫长装甲:30(系统进程0-60) 百夫长强度:131(系统进程75-188) 中队/机库 1个中队槽位 +8闪避(系统进程0-15) 6秒发射延迟(系统进程7秒-4秒) 75%中队修复(系统进程0%-150%) 特殊能力 黑客——火卫一型可以入侵范围内的目标,突破目标防火墙后将对其子系统造成直接伤害。战术跳跃 - 火卫一舰可在战斗中进行战术跳跃,使其能快速进行超光速跳跃至中等范围内的任意位置,并从该位置执行一次标准移动。战术跳跃启动需消耗四分之一回合,冷却时间为4回合。 多人/冲突战注意事项:在“宣传战”游戏模式中,赛昂族具备超光速航行能力的舰船在比赛开始时,其超光速引擎处于标准冷却状态,就如同它们在游戏开始时立即使用了跳跃引擎一样,以防止在第一回合就进行跳跃并占领要点。 刻耳柏洛斯(重型航母):1100战力值
导航 超光速冷却时间:3回合 速度:60米/秒(系统进程10%-145%) 转向速率:36度/回合 俯仰速率:??(系统进程60%-120%) 舰船船体尺寸:4 船体/装甲/工程 船体:150 左舷:75(技术舱) 右舷:75(工程舱) 前舷:75(军械库) 后舷:75(导航舱) 顶部:75(火控系统) 底部:60(机库) 15%伤害减免(系统进程0%-30%) 80%子系统修复(系统进程20%-140%) 火控系统 顶部安装3座重型炮塔 射程:3750(系统进程1500-6000) 射速:低 精度:极低(系统进程极低-中等) 伤害:2 底部安装3座重型炮塔射程:3750(系统进程1500-6000) 射速:低 精度:极低(系统进程极低-中等) 伤害:2 科技/军械库 处理能力:90 雷达范围:3100米(系统进程400米-5800米) 防火墙恢复:4.7/秒(系统进程0.6/秒-8.7/秒) 百夫长装甲:30(系统进程0-60) 百夫长强度:175(系统进程100-250) 中队/机库 3个中队槽位,1个支援槽位(仅重型突袭机、网络攻击机、蝎子战机、胡蜂战机可用) +15闪避(系统进程0-30) 4秒发射延迟(系统进程7秒-1秒) 90%中队修复(系统进程0%-180%) 基地之星(重型航母/导弹艇):1150战力

导航 超光速冷却时间:3回合 速度:50米/秒(系统进程10%-145%) 转向速率:48度/回合 俯仰速率:??(系统进程20%-140%) 船体尺寸:5 船体/装甲/工程 船体:200 左舷:60(机库) 右舷:60(机库) 前舷:60(导航) 后舷:60(火控) 顶部:60(军械库) 底部:45(技术舱) 15%伤害减免(系统进程0%-30%) 80%子系统修复(系统进程20%-140%) 火控系统 2个弹药槽位,3回合冷却时间 弹药齐射规模:80%(系统进程20%-140%) 顶部安装2座重型炮塔 射程:3750(系统进程1500-6000) 射速:低 精度:极低(系统进程极低-中等) 伤害:2 底部安装2座重型炮塔射程:3750(系统进程1500-6000) 射速:低 精度:极低(系统进程极低-中等) 伤害:2 科技/军械库 处理能力:90 雷达范围:3500米(系统进程800米-6200米) 防火墙再生:4.7/秒(系统进程0.6/秒-8.7/秒) 百夫长装甲:30(系统进程0-60) 百夫长强度:175(系统进程100-250) 中队/机库 2个中队槽位,1个支援槽位(仅重型突袭机、网络攻击机、蝎子战机、胡蜂战机可用) +8闪避(系统进程0-15) 3秒发射延迟(系统进程5秒-1秒) 75%中队修复(系统进程0%-150%) 美杜莎(舰队支援巡洋舰):1250战力
导航 超光速冷却时间:5回合 速度:120米/秒(系统进程31%-145%) 俯仰速率:36(系统进程20%-140%) 偏航速率:??(系统进程20%-140%) 船体尺寸:4 船体/装甲/工程 船体:120 左舷:75(军械库) 右舷:75(军械库) 前舷:75(火控系统) 后舷:75(导航系统) 顶部:75(工程舱) 底部:60(技术舱) 20%伤害减免(系统进程0%-39%) 110%子系统修复(系统进程20%-200%) 火控系统 2个弹药槽位,冷却时间2回合 弹药齐射规模:61%(系统进程20%-102%) 12座前置近防炮 射程:3750(系统进程1500-6000) 射速:极高 精度:中等(系统进程极低-极高) 伤害:015 科技/军械库 处理能力:75 DRADIS范围:4650米(系统进程600米-8700米) 防火墙再生:4.7/秒(系统进程0.6/秒-8.7/秒) 百夫长装甲:30(系统进程0-60) 百夫长强度:175(系统进程100-250) 特殊能力 R-TPAM - 美杜莎级战舰可通过直接连接增强最多六艘附近友方舰船的处理能力和子系统。使用该能力后,美杜莎级战舰将损失30点处理能力,并将其平均分配给所连接的舰船。单个目标获得30点能力,两个目标各获得15点,三个目标各获得10点,以此类推。此外,所有与美杜莎级战舰连接的目标还将获得所有子系统强度+3的加成,使任何子系统的最大能力达到33,而非标准超频下的30。友方舰船需要处于约4000-5000米范围内才能建立连接,但连接建立后可以自由移开。若美杜莎级舰船被摧毁或技术舱子系统生命值降至0,所有舰船将失去R-TPAM连接及其提供的增益效果。若美杜莎级舰船仍能正常运作提供连接,则需要重新连接才能恢复增益。 更新说明:自1.5.112版本起,美杜莎级舰船的R-TPAM能力不再提高子系统超频阈值,仅提供额外的原始能量,但能量数值从之前的20提升至30。 阿尔戈斯级(重型航母/战术导弹发射器):1750 FP
导航 超光速冷却时间:3回合 速度:65米/秒(系统进程10%-145%) 转向速率:48度/回合 俯仰速率:??(系统进程20%-140%) 船体尺寸:5 船体/装甲/工程 船体:280 左舷:45(机库) 右舷:45(机库) 前舷:45(导航) 后舷:45(火控) 顶部:60(军械库) 底部:60(工程) 伤害减免15%(系统进程0%-30%) 子系统修复75%(系统进程20%-125%) 火控系统 3个弹药槽位,冷却时间3回合 弹药齐射规模:106%(系统进程20%-163%) 科技/军械库 处理能力:108 雷达范围:5460米(系统进程600米-8700米) 防火墙再生:5.5/秒(系统进程0.6/秒-8.百夫长装甲:30(系统进程0-60) 百夫长强度:190(系统进程100-250) 跳跃范围:1820米(系统进程200米-2900米) 弹药补给率:80%(系统进程0%-150%) 中队/机库 3个中队槽位 +7闪避(系统进程0-12) 3秒发射延迟(系统进程5秒-1秒) 63%中队修复(系统进程0%-120%) 特殊能力 战术跳跃 - 阿尔戈号可在战斗中进行战术跳跃,使其能快速进行超光速跳跃至小范围内的任意位置,并从该位置执行标准移动。战术跳跃需四分之一回合启动,冷却时间为4回合。多人/遭遇战注意事项:在“宣传战”游戏模式中,赛昂超光速飞船在比赛开始时,其超光速引擎处于标准冷却状态,就好像它们在游戏开始时立即使用了跳跃引擎一样,以防止在第一回合跳跃并占领要点。 弹药补给——阿尔戈斯号没有配备火炮,完全依靠其弹药和机中队来攻击敌人。为了弥补其缺乏火炮的不足,阿尔戈斯号的独特之处在于它能在战斗中补充弹药储备。舰上的弹药补给工厂由军械库子系统控制,在完全供能的情况下,生产任何一种标准弹药的单次齐射大约需要6个回合。例如,阿尔戈斯号可以发射22发(!!当火控系统完全供能时,单个鱼雷发射点可发射【鱼雷】,但每次仅会补充14枚鱼雷,因为这是标准齐射数量。所有发射器会同时补充弹药,且在任何弹药发射后会立即自动开始补充。请注意,甚至核弹也可通过阿尔戈斯的弹药补给能力进行补充。在右下角的舰船命令面板旁有一个显示,可查看弹药补给的进度。 守护者基地舰(舰队火力/中队支援):1900 FP

导航 超光速冷却时间:无 速度:80米/秒(系统进程31%-145%) 转向速率:48度/转 俯仰/偏航速率:未知(系统进程20%-140%) 船体尺寸:4 船体/装甲/工程 船体:200 左侧:60(军械库) 右侧:60(技术舱) 前方:45(机库) 后方:45(工程部) 顶部:60(导航室) 底部:60(火控系统) 17%伤害减免(系统进程0%-33%) 75%子系统修复(系统进程0%-150%) 火控系统 2个弹药槽位,冷却时间2转 弹药齐射规模:80%(系统进程20%-140%) 12座重型炮塔安装于底部 射程:3750(系统进程1500-6000) 射速:低 精度:极低(系统进程极低-中等) 伤害:2 技术/军械库 处理能力:90 雷达范围:3875米(系统进程500米-7250米) 防火墙再生:47/s(系统进程 0.6/s - 8.7/s) 百夫长装甲:30(系统进程 0 - 60) 百夫长强度:175(系统进程 100 - 250) 中队/机库 2个中队槽位,1个支援槽位(仅重型突袭机、网络攻击机、蝎子战机、黄蜂战机可用) +8 闪避(系统进程 0 - 15) 4秒发射延迟(系统进程 7秒 - 1秒) 75%中队修复(系统进程 0% - 150%) 特殊能力 预测占卜 - 守护者级基地之星是首个搭载混合体的该类舰船。每场战斗一次,守护者级可使用预测占卜立即识别并通过DRADIS锁定任意距离的敌方舰船。 克拉托斯(重型基地之星):2450 FP
导航 超光速冷却时间:3回合 速度:80米/秒(系统进程31%-145%) 转向速率:48度/回合 俯仰速率:??(系统进程20%-140%) 船体尺寸:5 船体/装甲/工程 船体:320 左舷:60(机库) 右舷:60(机库) 前舷:60(导航) 后舷:60(火控) 顶部:120(技术舱) 底部:120(工程舱) 22%伤害减免(系统进程0%-36%) 90%子系统修复(系统进程0%-150%) 火控系统 3个弹药槽位,冷却时间1回合 弹药齐射规模:105%(系统进程20%-162%) 顶部安装10座重型炮塔 射程:4200(系统进程1500-6000) 射速:低 精度:极低(系统进程极低-中等) 伤害:2 底部安装10座重型炮塔射程:4200(系统进程1500-6000) 射速:低 精准度:极低(系统进程极低-中等) 伤害:2 科技/军械库 处理能力:108 雷达范围:4500米(系统进程0米-7500米) 防火墙恢复:4.4/秒(系统进程0.6/秒-6.9/秒) 百夫长装甲:9(系统进程0-60) 百夫长强度:190(系统进程100-250) 跳跃范围:1456米(系统进程160米-2320米) 中队/机库 2个中队槽位 +9闪避(系统进程0-15) 6秒发射延迟(系统进程9秒-3秒) 76%中队修复(系统进程40%-100%) 特殊能力 战术跳跃 - 克拉托斯级战舰可在战斗中进行战术跳跃,使其能快速超光速跳跃到小范围内的任意位置,并从该位置进行标准移动。战术跳跃需要四分之一回合启动,冷却时间为4回合。 多人/遭遇战注意事项:在“宣传战”游戏模式中,赛昂(Cylon)的超光速(FTL)舰船在比赛开始时,其超光速引擎处于标准冷却状态,就好像它们在游戏开始时立即使用了跳跃引擎一样,以防止在第1回合跳跃并占领要点。 快速弹药——这是另一项未明确记录的功能,但值得注意。克拉托斯级舰船的装填时间为1回合;这意味着它可以每回合发射弹药,从而能在极短时间内向对手倾泻大量弹药。虽然这是一项强大的能力,但使用时需谨慎。克拉托斯(Cratus)的弹药并非无限,如果试图持续部署弹药,仅需4-5回合就可能耗尽。 现代基地之星(战略导弹母舰):2500火力值(FP)
导航 超光速冷却时间:无 速度:75米/秒(系统进程31%-145%) 转向速率:60度/转 俯仰/偏航速率:??(系统进程20%-140%) 船体尺寸:4 船体/装甲/工程 船体:280 左舷:40(军械库) 右舷:40(技术舱) 前舷:40(工程部) 后舷:40(机库) 顶部:100(火控系统) 底部:100(导航系统) 20%伤害减免(系统进程0%-30%) 每回合24点船体回复(系统进程4.8点/回合-33.6点/回合) 100%子系统修复(系统进程0%-150%) 火控系统 2个弹药槽位,冷却时间1回合 弹药齐射规模:100%(系统进程20%-140%) 技术/军械库 处理能力:120 雷达范围:7000米(系统进程700米-10150米) 防火墙回复:6.0/秒(系统进程0.6/秒-8.黑客强度:90%(系统进程0% - 135%) 跳跃范围:6000米(系统进程600米 - 8700米) 百夫长装甲:40(系统进程0 - 60) 百夫长强度:200(系统进程100 - 250) 中队/机库 4个中队槽位(包括现代突袭机) +10闪避(系统进程0 - 15) 3秒发射延迟(系统进程5秒 - 3秒) 100%中队修复(系统进程0% - 150%) 特殊能力 黑客——现代基地之星可以入侵范围内的目标,突破目标防火墙后将对其子系统造成直接伤害。 战术跳跃——现代基地之星可以在战斗中进行战术跳跃,使其能够快速超光速跳跃到中等范围内的任何位置,并从该位置进行标准移动。战术跳跃需要四分之一回合启动,冷却时间为4回合。 多人游戏/遭遇战说明:在“宣传战”游戏模式中,赛昂(Cylon)具备超光速(FTL)能力的舰船在比赛开始时,其超光速引擎处于标准冷却状态,就如同它们在游戏开始时立即使用了跳跃引擎一样,以防止在第1回合跳跃并占领要点。 快速弹药——现代基地之星的装填时间为1回合;这意味着它可以每回合发射弹药,从而能在极短时间内向对手部署压倒性数量的弹药。虽然这是一项强大的能力,但使用时应谨慎,现代基地之星的弹药并非无限,一旦耗尽就没有火炮来进行自我防御了。现代基地舰在空载状态下,依靠其黑客能力和自身船体作为武器。 现代突袭机——现代基地舰是唯一能搭载现代突袭机的舰船,它是对传统突袭机Mk I的显著改进。 赛昂机群 关于机群的几点说明: 机群没有任何转弯半径,它们基本上可以在原地转向,因此不存在与潜在机动性相关的转弯属性。 经过少量测试,机群的伤害似乎是每发子弹独立计算的。事实证明,它们的射击精度确实很差。 突袭机原型机(拦截机):0 FP
通用数据 中队规模:12架战机 船体点数:48(每架战机4点船体) 速度:300米/秒 伤害输出:0.3 武器射程:2500米(有效射程2000米) DRADIS雷达范围:2000米 特殊能力 中队维修 - 可命令所有中队在战斗中返回母舰进行维修,甚至可以补充中队损失的战机,只要中队仍保持完整,无论受损和损失程度如何均可执行。 导弹拦截 - 原型突袭机可通过命令防御来袭弹药的目标,尝试拦截来袭弹药。命令下达得越早效果越好,因为突袭机需要时间抵达目标弹药位置并将其摧毁。 突袭机(快速/装甲拦截机):60 FP
通用数据 中队规模:16架战机 船体点数:52(每架战机3.25船体) 速度:360米/秒 伤害输出:0.3 武器射程:2500米(有效射程2000米) 雷达范围:2000米 特殊能力 中队维修 - 所有中队可在战斗中奉命返回母舰进行维修,甚至可以补充中队损失的战机,只要中队仍保持完整,无论受损和损失程度如何均可执行。 导弹拦截 - 突袭机可通过下令防御来袭弹药的目标,尝试拦截来袭弹药。下令越早效果越好,因为突袭机需要时间抵达目标弹药位置并将其摧毁。 现代突袭机(下一代拦截机):80 FP
基础数据 中队规模:16架战机 船体点数:56(每架战机3.5船体) 速度:360米/秒 伤害输出:0.3 武器射程:2500米(有效射程2000米) 雷达范围:2000米 特殊能力 中队维修 - 可命令所有中队在战斗中返回母舰进行维修,甚至可以补充中队损失的战机,只要中队仍保持完整,无论受损和损失程度如何均可执行。 导弹拦截 - 现代突袭机可通过命令防御来袭弹药的目标,尝试拦截来袭弹药。命令下达得越早效果越好,因为现代突袭机需要时间抵达目标弹药位置并将其摧毁。提升精准度 - 尽管未明确记录,但现代突袭者的精准度比突袭者Mk I有所提升,使其在战斗中更具能力。 重型突袭者(登船艇):80 FP
基础数据 中队规模:2架战机 船体点数:32(每架战机16点船体) 速度:300米/秒 伤害输出:0.3 武器射程:2500米(有效射程2000米) DRADIS雷达范围:2000米 特殊能力 中队维修 - 所有中队可在战斗中被命令返回母舰进行维修,即使中队已遭受大量损伤或损失,只要仍保持完整,就可以进行维修,甚至能补充损失的战机。补充说明:重型突袭机与母舰对接后,将立即重新配备百夫长士兵,并可在下一回合重新派出。 登舰 - 可命令重型突袭机登上敌方舰船,让舰上的百夫长士兵对敌方舰船进行破坏。每艘重型突袭机拥有50点登舰强度(每小队100点强度),用于对抗目标舰船上的海军陆战队。子系统将开始承受与目标上海军陆战队强度相关的伤害,剩余海军陆战队越少,子系统受到的伤害就越大。如果百夫长歼灭了目标舰船上的所有海军陆战队,他们将持续对子系统造成稳定伤害,直到百夫长被撤离或舰船被摧毁。多艘重型突袭机可对同一目标进行叠加登舰,这对于摧毁像战星舰这样的大型舰船是必要的。重型突袭机的登舰强度受其所属舰船的军械库子系统功率影响。如果其母船被摧毁,或军械库子系统功率降至0,重型突袭机的登舰行动对目标的作用将微乎其微。额外说明:一旦百夫长单位部署至目标,重型突袭机在整个行动过程中必须保持停靠状态。若驶离目标,登船小队也会随之撤离。 导弹拦截——重型突袭机可通过下达防御来袭弹药目标的指令,尝试拦截来袭弹药。尽管不建议使用重型突袭机执行此任务,但在紧急情况下,你可以拦截部分速度较慢的弹药,例如制导导弹。 网络驱动者(黑客载具):60 FP
基础数据 中队规模:2架战机 船体点数:24(每架战机12点船体) 速度:380米/秒 伤害输出:0.3 武器射程:2500米(有效射程2000米) 雷达范围:2000米 特殊能力 中队维修 - 所有中队可在战斗中奉命返回母舰进行维修,甚至可以补充中队损失的战机,只要中队仍保持完整,无论受损和损失程度如何均可执行。 解除武装 - 强化包新增的能力,可命令【Wardriver】解除附近部署的敌方地雷。锁定地雷的能力范围略超过4000米,【Wardriver】会飞往目标位置。导弹拦截 - 网络驱动者可以通过下达防御来袭弹药目标的命令,尝试拦截来袭弹药。同样,和重型突袭机一样,这真的不推荐,但如果你非常紧急的话,可以拦截一些速度较慢的弹药,比如制导导弹。 黑客 - 网络驱动者和复仇女神级、福波斯级一样,可以对目标进行黑客攻击。该能力的范围略超过4000米,一旦突破目标防火墙,你就可以开始对你选择的系统造成直接的子系统伤害。需要注意的是,网络驱动者的黑客攻击威力不如复仇女神级和福波斯级,但如果不迅速处理,它们仍然是一个合理的威胁。 干扰模式 - 网络驱动者可以重新配置自身,在中队周围形成一个干扰场。激活后,干扰驱动器会在自身周围生成一个半径略超过1500米的球体范围。任何进入干扰领域的敌方机群速度将降低120米/秒,并失去15点闪避值。此外,任何穿过干扰领域的敌方制导弹药有60%的几率被重定向至其发射点。任何依赖制导系统的弹药,包括核武器,都容易被转向发射它们的舰船。无制导弹药,如鱼雷,由于没有可欺骗的制导系统,因此不受此效果影响。干扰驱动器在干扰领域激活期间仍能移动和开火,但无法进行黑客入侵。 天蝎(AMD/反主力炮塔):60火力值
基础数据 中队规模:1架战机 船体点数:36 速度:380米/秒 伤害输出:3 武器射程:5000米 雷达范围:4000米 特殊能力 炮塔式移动 - 这并非明确说明的能力,但天蝎战机的移动方式与传统中队不同。天蝎战机可接受标准移动指令,但必须先部署才能开火或使用制导导弹。天蝎战机到达移动目标点后会自动部署。收起状态下移动无延迟,但部署需要约2.5秒。中队维修 - 所有飞行中队可在战斗中被命令返回母舰进行维修,这甚至可以补充中队中损失的飞行器,且无论中队受损和损失程度如何,只要仍保持完整就能执行此操作。额外说明,【毒蝎】返回母舰后会补充其制导导弹储备,并可在下一回合立即重新部署。 制导导弹 - 【毒蝎】配备12枚制导导弹,以4枚齐射的方式发射。【毒蝎】制导导弹每枚造成2点伤害,且仅在【毒蝎】部署后才可发射。除此之外,制导导弹遵循大型舰载制导导弹的标准规则,例如需要DRADIS锁定才能发射。目标优先级 - 蝎子战机在部署前无法手动选择目标,但可以像主力舰火炮那样设置目标优先级,可优先攻击主力舰、战机中队或最近目标。在未选择目标时,蝎子战机可选择优先攻击弹药库或主力舰。 额外说明 - 蝎子战机对中队规模目标的命中率极低,且会受到拦截机中队(如毒蛇战机和突袭者战机)的全额伤害。不建议使用蝎子战机对抗战机中队。 黄蜂(专用轰炸机):60 FP
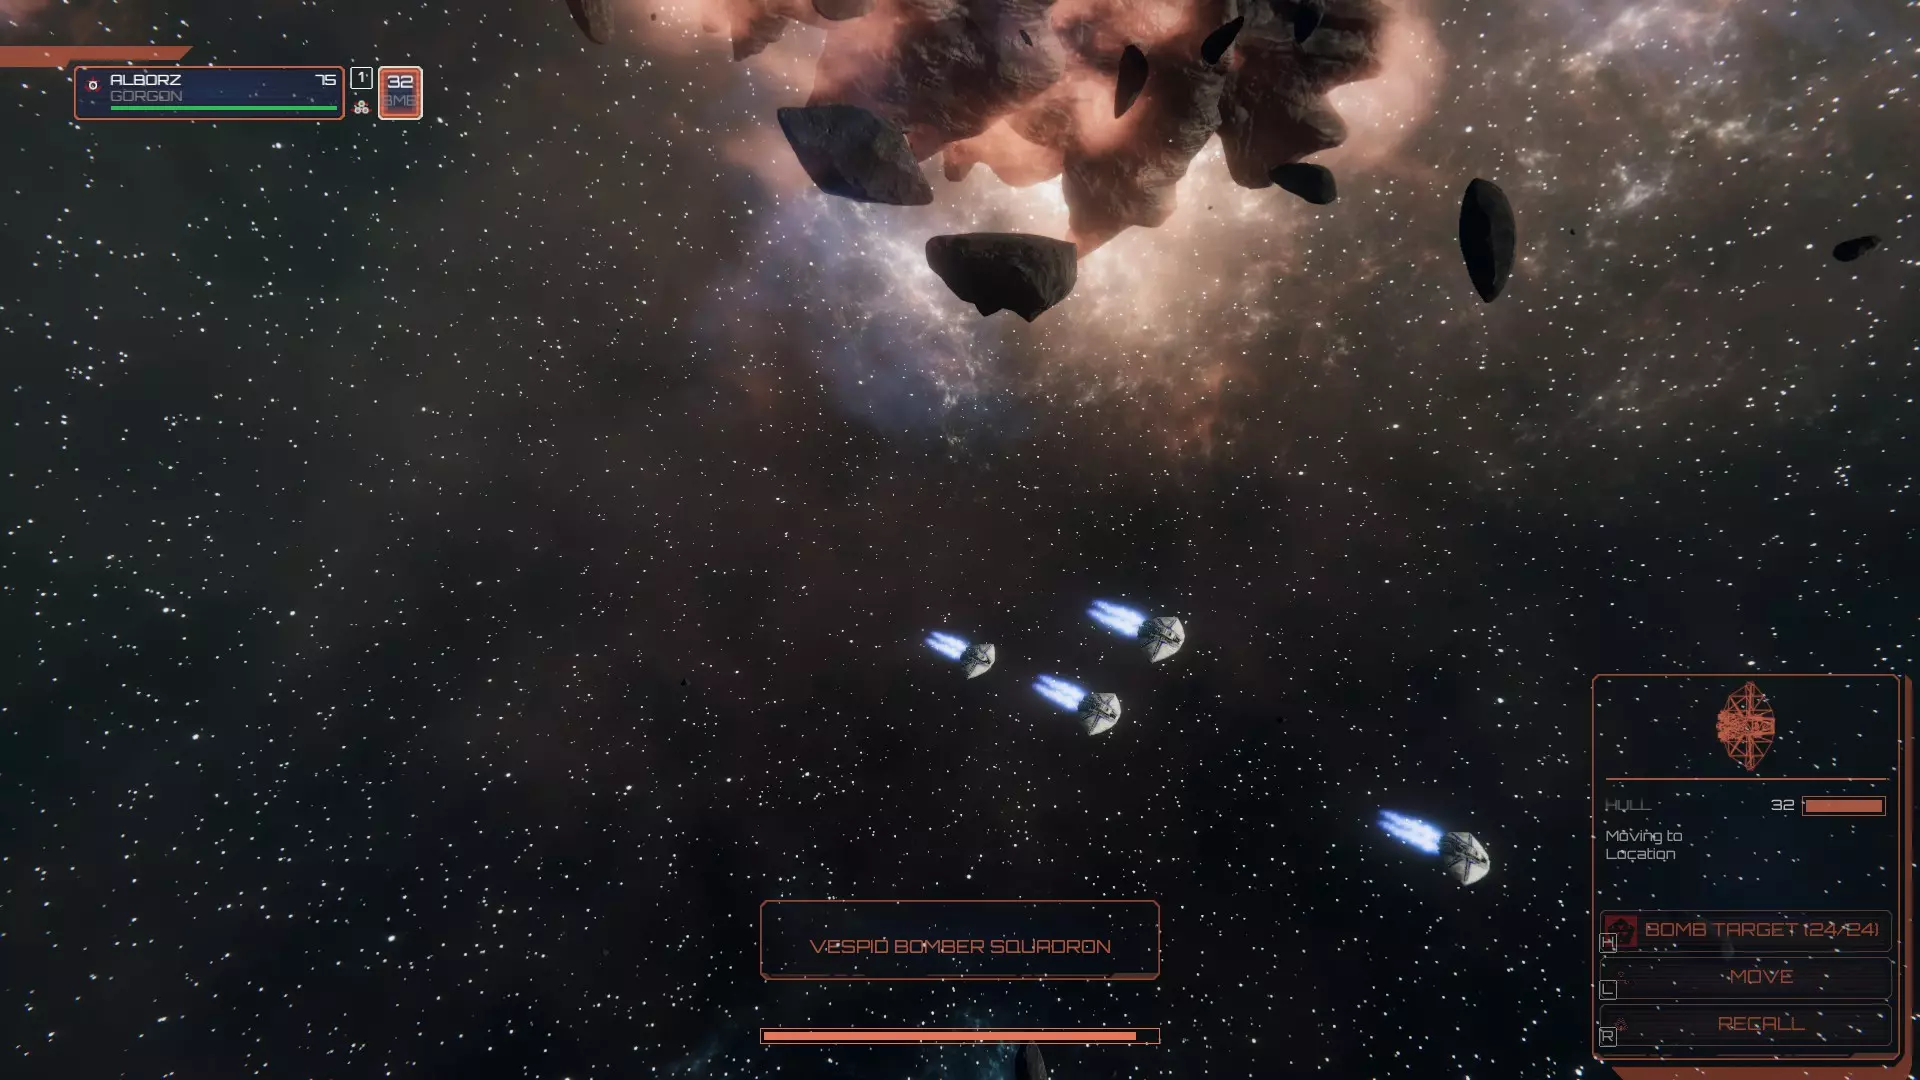
General stats Squadron size: 4 Craft Hull points: 36 (9 Hull per craft) Speed: 340 m/s Damage output: N/A Weapon range: N/A DRADIS range: 2000m Bomb capacity: 24 Bomb damage: 3 Special abilities Squad repair - All squadrons can be ordered to return to their parent ship and undergo repairs during battle, this can even replace lost craft in the squadron and can be done regardless of how much damage and losses the squadron has taken so long as it is still intact. As an additional note, Vespids will be restocked with it's 24 bombs upon docking with it's parent ship. This is done immediately, and can be sent back out the following turn. Bomb target - Vespids can be ordered to attack a specific capital ship, where they will immediately move towards the target via the shortest route and release the squadron's entire payload of short-range bombs to devastating effect. When the order is given, the squadron will move towards and fly along either the top or the bottom of the target, depending on which side is closer when the order is given. Be mindful of the environment when giving the order to bomb a target, as the Vespid will not evade hazards such as flak and debris mines naturally. CYLON MUNITIONS Notes on munitions: Friendly missiles WILL cause damage to friendly targets, so be mindful of your angles when you fire and where the missiles emerge from on the craft. For example, Manticore guided missiles fire out of the left and right side of the tip of the nose, arcing out to the sides as they launch before heading to the target. Therefore, having a friendly ship directly left or right of the Manticore is not advised when about to fire a salvo. Guided Missle: 0 FP General stats Speed: 600 m/s Range: 100,000m Firing delay: 1.5s Magazine stack: 70 Salvo size: 6 Guidance: Target Hull damage: 4 Armour damage: 4 Special notes Due to the Guided Missile being target-locked, you must have a DRADIS lock on the target before you can fire. However, once you've ID'd a target with DRADIS, you can fire on the target at any point - There's no need to keep a ship or squadron in DRADIS range at that point. Guided Missiles travel 5000m - 6000m in a single turn (Launch time, turning, etc), if you're within 6000m you can generally assume that you will hit or be hit within a single turn. The DRADIS circle on a ship can be used for measuring distance pretty handily. Torpedo: 60 FP General stats Speed: 1000 m/s Range: 100,000m Firing delay: 0.5s Magazine stack: 150 Salvo size: 14 Guidance: Unguided Hull damage: 3 Armour damage: 3 Special notes Due to the Torpedo being unguided, you do not need a DRADIS lock before firing. If you wish, you can unload a salvo immediately on the first turn, but until a target is moving don't expect to hit anything at range as Torpedoes are fired with lead, aimed at where the ship is predicted to be on it's current course. Vertical movement in particular throws off Torpedoes so they are best employed at close range, on slow/large targets or packed fleet formations where quick vertical movements are not possible. Torpedoes travel 10000m - 11000m in a single turn (Launch time, turning, etc), if you're within 11000m you can generally assume that you will hit or be hit within a single turn. The DRADIS circle on a ship can be used for measuring distance pretty handily. PCM: 40 FP General stats **The Cylon PCM is functionally identical to the Colonial PCM, this is simply here for the completionist in me. Speed: 450 m/s Range: 10,000m Firing delay: 1s Magazine stack: 16 Salvo size: 1 Explosion Range: 2500m Guidance: Sentry Hull damage: N/A Armour damage: N/A Special notes The PCM is unique in how it behaves compared to the other missiles. When fired, the PCM travels in a straight line towards the location you set to it. If the PCM comes into contact with any hostile ordnance along the way it will detonate, destroying itself and a large chunk of ordnance around it. If it does not come into contact with hostile ordnance on the way to the target position, it will reach it's spot and sit there like a mine until hostile ordnance comes into detonation distance. Note that the explosion will only destroy missiles caught in the blast, and will not do anything for ordnance coming afterwards in the way that Sweeper chaff will. PCM's are exceptional at countering hostile Nukes in MP. Nuke: 120 FP General stats **The Cylon Nuke is functionally identical to the Colonial Nuke, this is simply here for the completionist in me. Speed: 400 m/s Range: 60,000m Firing delay: 5s Magazine stack: 1 Salvo size: 1 Missile hull: 4 (Nukes are unique in that they are one of few munitions with a hull stat, and take 10-14 shots from a squadron to be shot down) Guidance: Target Hull damage: 160 Armour damage: 160 Subsystem damage: 15 Area of Effect range: 2500m Special notes Due to the Nuke being target-locked, you must have a DRADIS lock on the target before you can fire. However, once you've ID'd a target with DRADIS, you can fire on the target at any point - There's no need to keep a ship or squadron in DRADIS range at that point. Nukes have considerable blast radius, be mindful of firing them in close quarters or when friendly squadrons are engaged over the target. You can easily deal severe damage to multiple ships in a tightly packed formation, though damage drops off the further a target is from the explosion. Nukes travel 4000m - 5000m in a single turn (Launch time, turning, etc), if you're within 5000m you can generally assume that you will hit or be hit within a single turn. The DRADIS circle on a ship can be used for measuring distance pretty handily. Armour Piercer: 40 FP General stats Speed: 720 m/s Range: 80,000m Firing delay: 1s Magazine stack: 70 Salvo size: 5 Guidance: Target Hull damage: 1 Armour damage: 8 Special notes Due to the Armour Piercer being target-locked, you must have a DRADIS lock on the target before you can fire. However, once you've ID'd a target with DRADIS, you can fire on the target at any point - There's no need to keep a ship or squadron in DRADIS range at that point. Armour Piercers travel 5000m - 6000m in a single turn (Launch time, turning, etc), if you're within 6000m you can generally assume that you will hit or be hit within a single turn. The DRADIS circle on a ship can be used for measuring distance pretty handily. Clusterbomb: 40 FP General stats Speed: 450 m/s Range: 80,000m Firing delay: 2s Magazine stack: 80 Salvo size: 6 Guidance: Target Hull damage: 2 Armour damage: 2 Subsystem damage: 5 Adjacent subsystems damage: 2 Adjacent subsystems hit: 2 Applies Irradiated status: -15% subsystem repair speed for 3 turns. Special notes Due to the Clusterbomb being target-locked, you must have a DRADIS lock on the target before you can fire. However, once you've ID'd a target with DRADIS, you can fire on the target at any point - There's no need to keep a ship or squadron in DRADIS range at that point. Clusterbombs deal significant damage to targets subsystems, dealing 5 damage per hit on the subsystem it hits, as well as hitting 2 adjacent subsystems for 2 damage each at the same time. However, the target's armour must be destroyed first for the subsystem to take damage. Clusterbombs are best paired with other munitions that can first breach the target's armour, with the Clusterbombs following up to disable the target. Clusterbombs travel 4000m - 5000m in a single turn (Launch time, turning, etc), if you're within 5000m you can generally assume that you will hit or be hit within a single turn. The DRADIS circle on a ship can be used for measuring distance pretty handily. Proximity Mine: 40 FP General stats **The Cylon Proximity Mine is functionally identical to the Colonial Proximity Mine, this is simply here for the completionist in me. Speed: 450 m/s Range: 8000m Firing delay: 1s Magazine stack: 10 Salvo size: 1 Guidance: Sentry Hull damage: 60 Area of effect range: 1000m Special notes Proximity mines will only arm once they have reached their target destination and then it takes about half a turn for the arming sequence to complete after coming to a stop. Once deployed, the mine will detonate upon the first hostile capital ship coming into detonation range. It is worth noting that any friendly or hostile squadrons will also get caught in the blast, so be mindful of your support craft when deploying mines. Your own craft will not set off your own mines. Homing Cluster Mine: 80 FP General stats Speed: 450 m/s Range: 6000m Firing delay: 1s Magazine stack: 10 Salvo size: 1 Guidance: Sentry Hull damage: 80 Area of effect range: 500m Special notes Homing Cluster mines will only arm once they have reached their target destination and then it takes about half a turn for the arming sequence to complete after coming to a stop. Once deployed, the mine will wait for the first hostile capital ship to come into range, where it will then behave like a missile and fly directly at it and explode. It is worth noting that any friendly or hostile squadrons will also get caught in the blast, so be mindful of your support craft when deploying mines. Your own craft will not set off your own mines. Comet PCM: 40 FP General stats Speed: 600 m/s Range: 100,000m Firing delay: 1s Magazine stack: 20 Salvo size: 1 Guidance: Unguided Hull damage: N/A Armour damage: N/A Special notes Any hostile guided munitions that cross paths with the Comet in flight will be immediately hacked and follow the Comet PCM, this essentially has the Comet redirect hostile munitions back at the ship which fired them. Unguided munitions and mines are unaffected by the Comet. The Comet is a munition of opportunity, and is best employed by firing it the same turn hostile munitions are fired. Keeping an eye on the reload cycle of enemy ships is critical to getting the most out of Comet PCM's. Scrambler: 40 FP General stats Speed: 600 m/s Range: 10,000m Firing delay: 1s Magazine stack: 8 Salvo size: 1 Guidance: Sentry Hull damage: N/A Armour damage: N/A Area of effect: 2000m Special notes Scramblers are a utility munition deployed in the same fashion as mines. Upon reaching their target spot, they wait for a ship to enter their radius. Once a ship enters the Scrambler's radius, the munition becomes active and remains so for 3 turns. On activation, Scramblers have a number of effects. Hostile ships in the radius are immediately identified, and they have their Tech Bay subsystem reduced by 15 points until they leave the area of effect or the Scrambler effect runs out. Friendly ships in the area of effect cannot be targeted by hostile munitions, and any hostile munitions currently in flight will immediately lose their lock. Note that munitions spoofed in this manner will continue on their heading, and are potentially still dangerous. Cluster Nuke: 300 FP General stats Speed: 400 m/s Range: 60,000m Firing delay: 0.5s Magazine stack: 1 Salvo size: 1 Sub-munition count: 6 Missile hull: 4 (Nukes are unique in that they are one of few munitions with a hull stat, and take 10-14 shots from a squadron to be shot down) Guidance: Multi-Target (Up to 6 discreet targets) Sub-munition speed: 500 m/s Hull damage: 40 per sub-munition Armour damage: 40 per sub-munition Subsystem damage: 3 per sub-munition Special notes Due to the Cluster Nuke being target-locked, you must have a DRADIS lock on the target before you can fire. However, once you've ID'd a target with DRADIS, you can fire on the target at any point - There's no need to keep a ship or squadron in DRADIS range at that point. Once a Cluster Nuke is approximately half way between the parent ship and the target(s), it will split into it's 6 sub-munitions. The core missile has a speed of 400 m/s, the sub-munitions are faster at 500 m/s. Cluster Nukes travel 5000m - 6000m in a single turn (Launch time, turning, etc), if you're within 6000m you can generally assume that you will hit or be hit within a single turn. The DRADIS circle on a ship can be used for measuring distance pretty handily. Virus Mine: 260 FP General stats Speed: 450 m/s Range: 8000m Firing delay: 0.5s Magazine stack: 8 Salvo size: 1 Guidance: Sentry Area of effect range: 1750m Hacks any hostile capital in range (Approx 40% speed of a Nemesis) Jams any hostile squadrons in range (-120m/s speed, -15 evade) Special notes Virus mines will only arm once they have reached their target destination and then it takes about half a turn for the arming sequence to complete after coming to a stop. Once deployed, the mine will activate upon the first hostile capital ship or squadron coming into trigger range. Your own craft will not set off or be affected by your own Virus Mines.