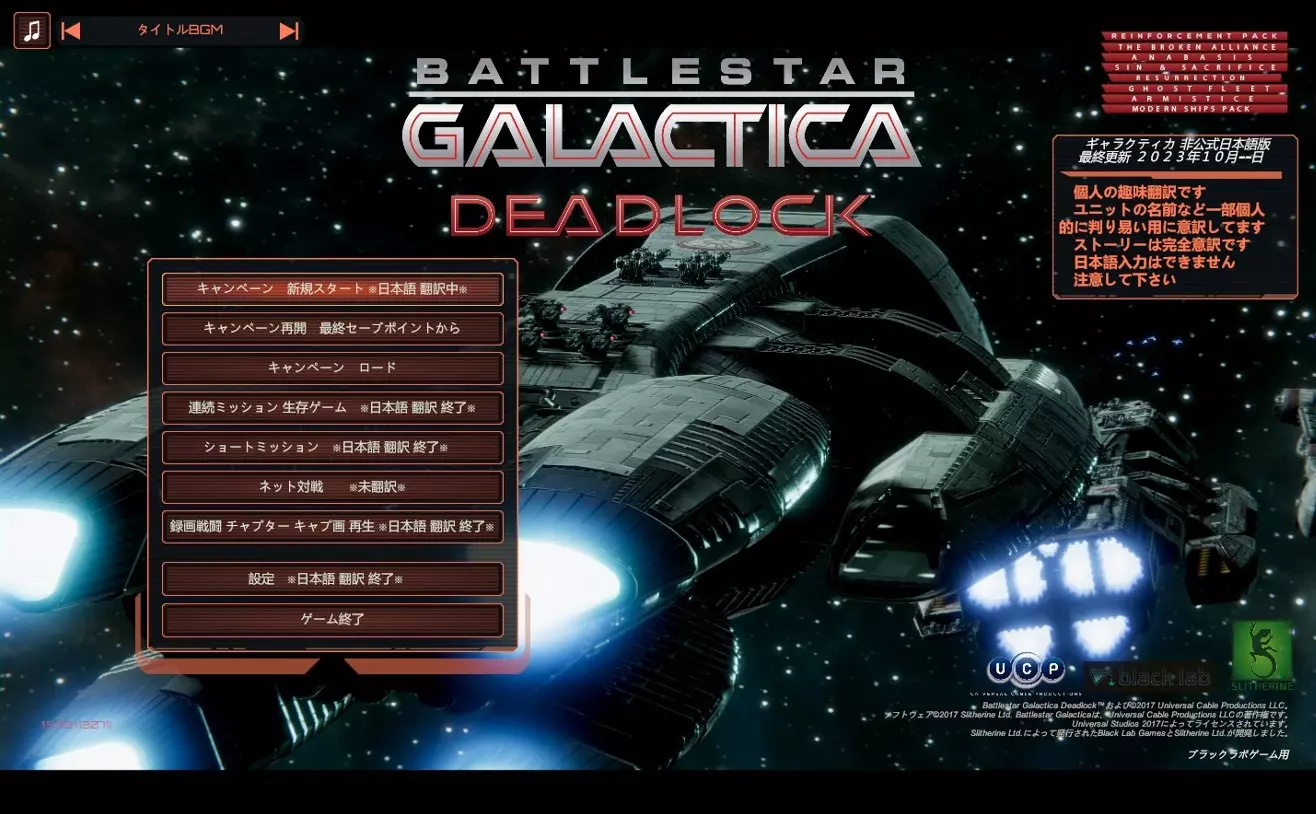
Battlestar Galactica Deadlock


观看完整的战役流程。 这是一个基于视频的指南,展示完整的战役流程,包括“增援”和“破碎联盟”DLC内容。 随着战役的进行,我会增加专门的技巧和窍门部分。 请注意,这仍在制作中! 新手技巧与窍门(第1-4章教程流程) 前四章(教程任务)展示了一些适合新手的最佳实践和关键技巧。 我们使用的关键舰船和战斗机包括: 毒蛇MK I 曼提柯尔 坚定者 狂战士(“增援”DLC舰船) 第一集 - 教程第1和第2章 第1章:代达罗斯 天蝎座 第2章:雅典娜 皮科恩
第2集 - 教程第3章和第4章 第3章:传输 第4章:科卡卢斯 适应更高级战术(主线战役第5-8章) 第3集 - 组建第二舰队并执行支线任务 第4集 - 第5章 - MK II 天蝎座 第6集 - 破碎联盟任务1:塞莱斯特拉·阿奎aria(注:第5集涵盖早期部署战术) 破碎联盟任务可跳至32:00处观看 第8集 - 破碎联盟任务2:监狱站(注:第7集涵盖支线任务) 第9集 - 第6章:化学战 第11集 - 第7章:人马座大屠杀 第12集 - 破碎联盟任务3:导弹指挥 第13集 - 第 舰队部署战术 如何在游戏初期部署舰队 曼提柯尔 阿达曼特 狂暴
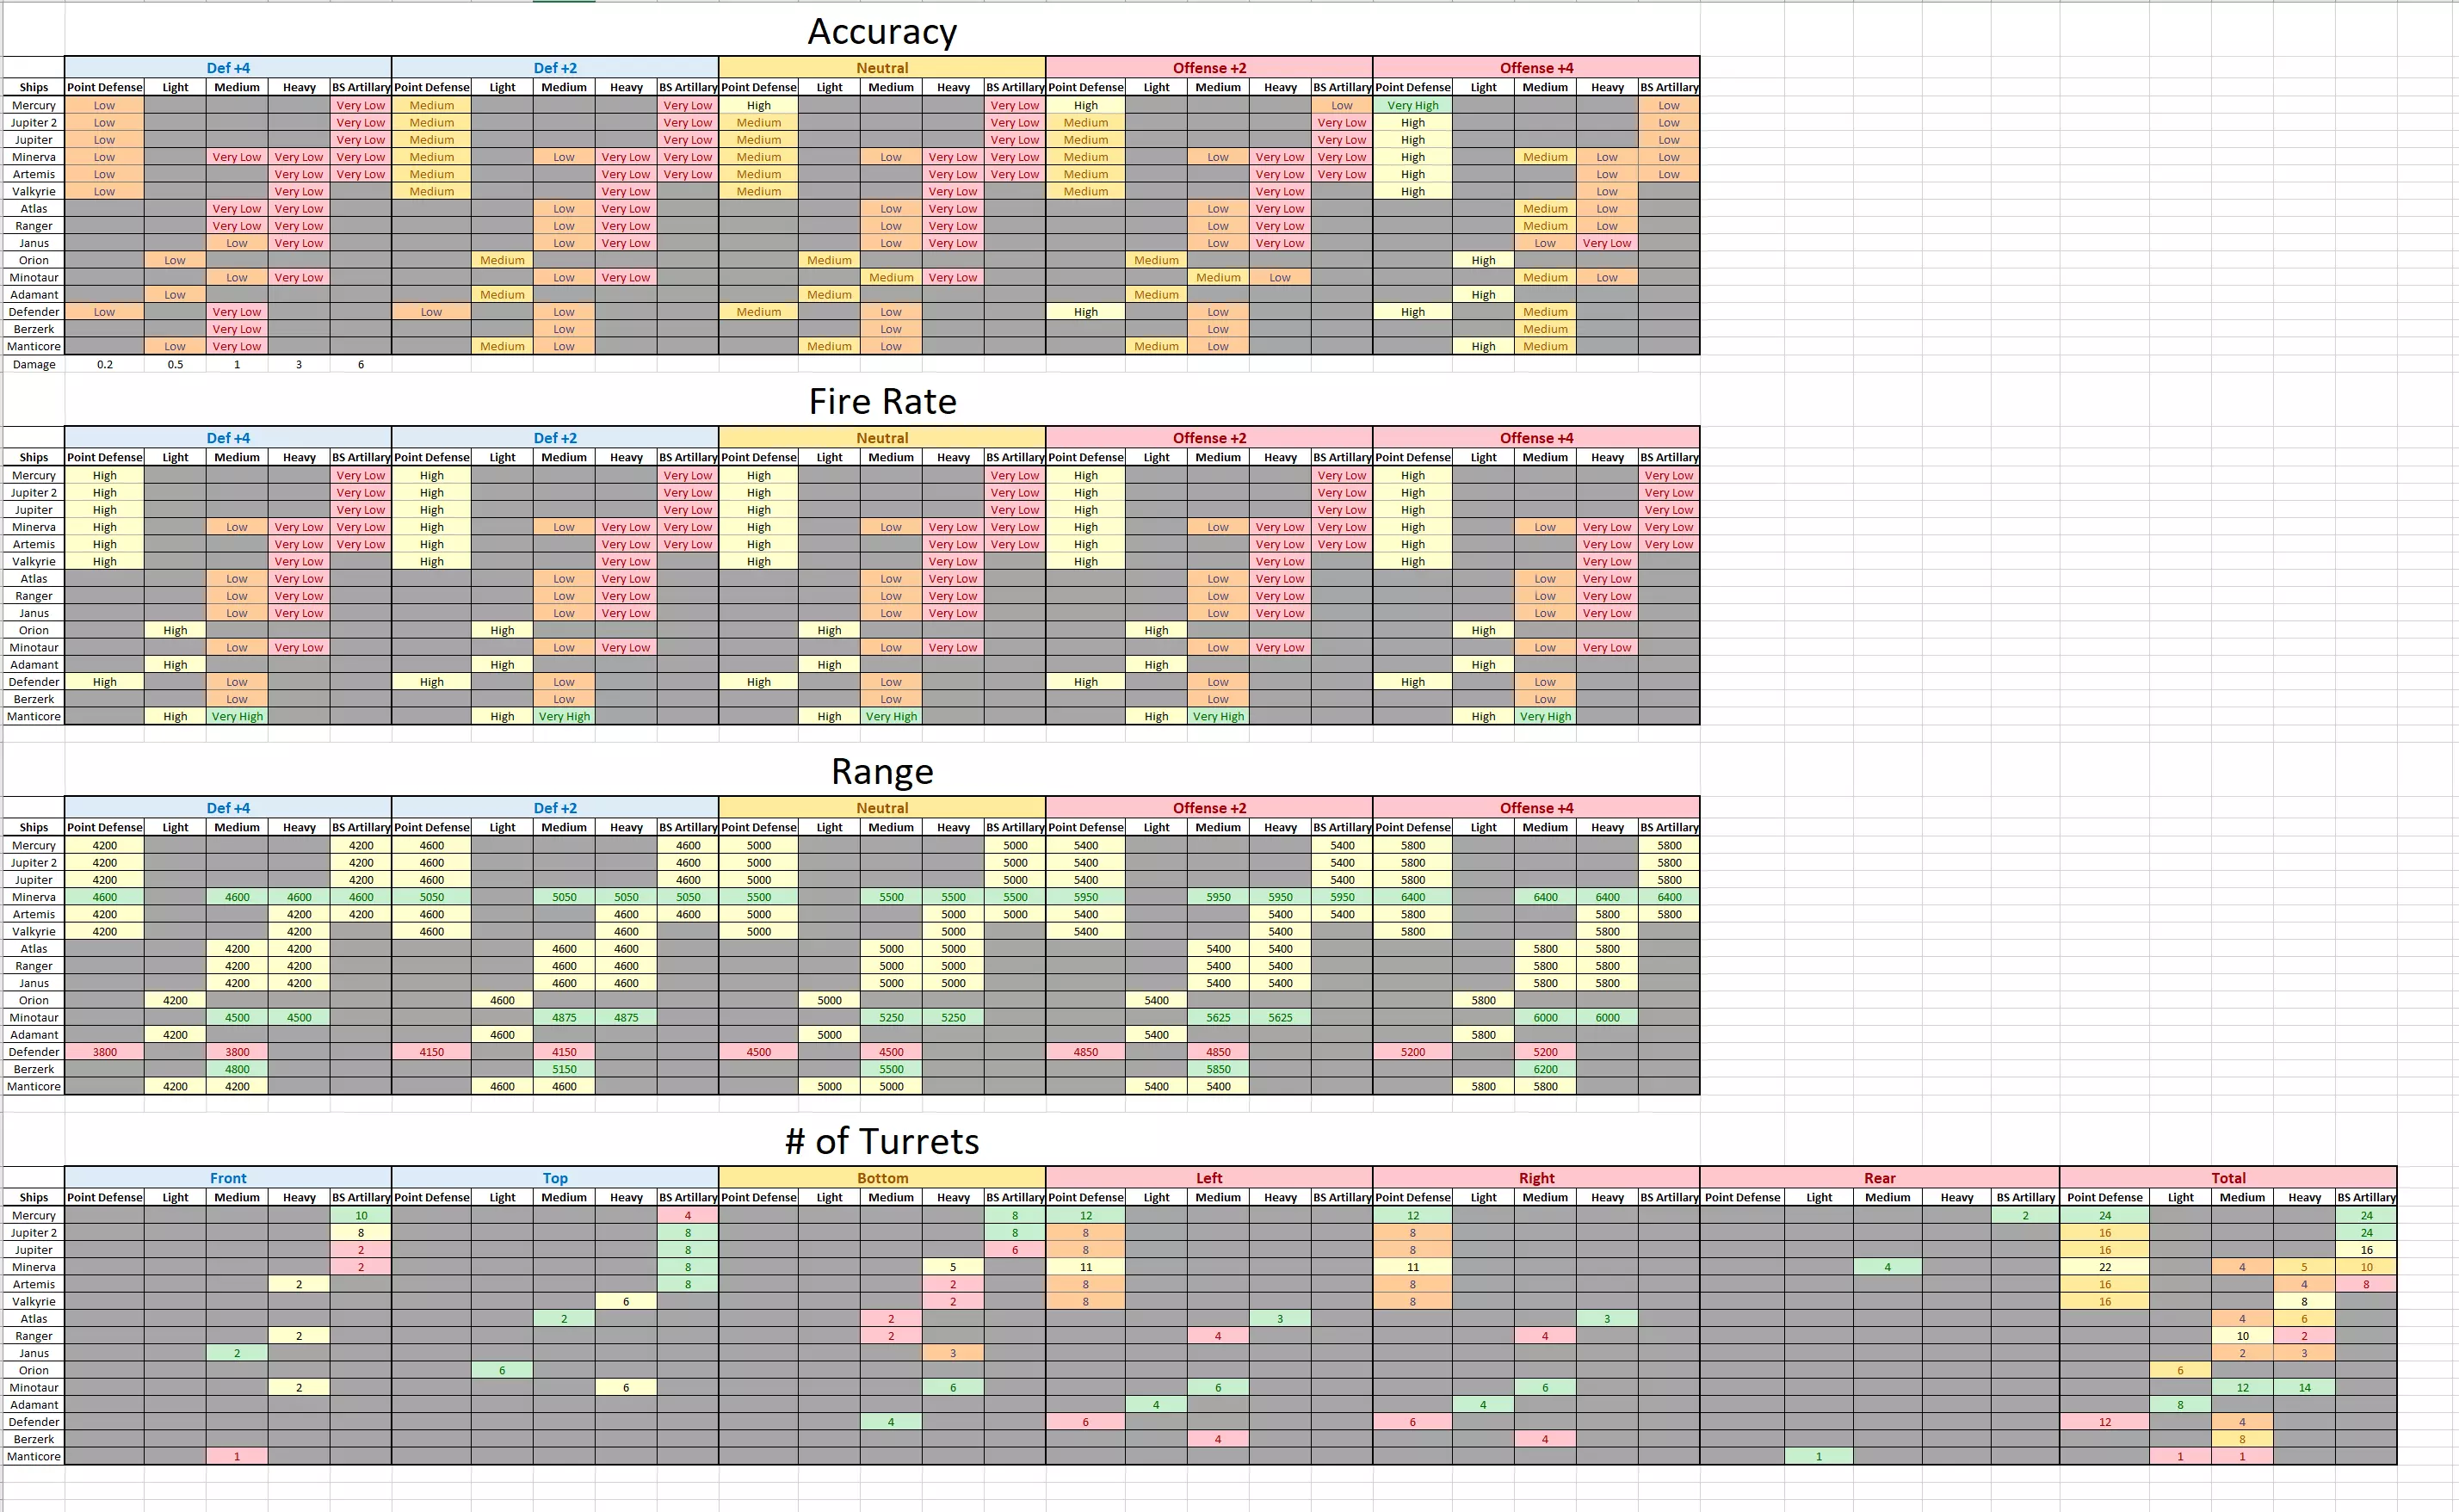
Ranking ships in terms of their value from a MP perspective. Basic knowledge of the ships is expected. Refer to the complete ships guide by Waggle for stats on ships: https://steamcommunity.com/sharedfiles/filedetails/?id=1260056071 Colonial: Colonial battle style prefers generalist vessels, with a bias for speed in Colonial vs Colonial engagements and munition defence + fighter presence when facing Cylons. S Tier The cream of the crop, S tier ships are ships that represent the colonial gold standard in terms of performance and usually a good fit for a fleet, no matter the circumstance. The ArtemisThe 2nd cheapest colonial battlestar, the Artemis packs it all. High firepower, 2 squadron slots, a munitions slot, flak, decent speed, armour and hull stats and a class 3 hull. The Artemis is the pinnacle all rounder in a fleet that values it's generalist. The Artemis is rarely a bad pick for a fleet, forming the back bone of fast manoeuvring fleets or a support components of fleets built around slower vessels. The ValkyrieHow about an Artemis, but cheaper? Enter the Valkyrie. The Valkyrie trades some firepower, armour and hull for even more speed. Whilst it's airwing is limited to a single squadron, it is capable of equipping a Mk7 squadron in that slot, making it's airpower almost match the artemis (and rivalling it in airpower per FP). As an added bonus, the Valkyrie's armour faces are such that the Valk will often use all of it's armour surfaces, making it just as, if not more tanky, than the Artemis. The AdamantWhat do you get if you stick 2 Adamants together? An Artemis. So it's just as well that it costs half as much. With a squadron slot, munition slot, the adamant is extremely flexible before mentioning that it's 4 light guns are among the best guns in the game, able to hit most targets effectively. About the only thing the Adamant lacks is a flack field, but that's generally fine as it's never seen far away from the battlestars that provide one. The OrionWelcome the Orion, the smallest ship in the game. The little frigate that punches up, quite litterally. It's *6* light guns on it's dorsal surface give it incredibly good DPS. Add onto this a munition slot with a salvo size bonus, a fighter squadron, cloaking system and class 2 hull, you have one nasty little frigate that can stealth up to enemy fleets before unleashing a crippling blow of munitions and guns. It just needs to be protected to get there. As an added bonus, Orions on the field demand a response from your enemy, forcing them to act in way they'd rather not do so normally. A Tier: Solid performers in colonial fleet, these ships often excel in their role or demand a response from the enemy in order to counter. Many fleets will want to bring at least one of these ships. The MercuryWhat do you get when you combine the highest DPS in the game at 18BA, the strongest airwing and the most bulk? The answer is Lee Adama's door knocker. As mentioned, the Mercury offers strong performances in all areas except speed. The presence of one on the field requires it to be focused fired down quickly unless the enemy wants to see their capitals destroyed rapidly, as no other vessel can survive a Mercury for long. The support squadron and 2 munitions slots is just the icing on the cake. Unfortunately for the Mercury, it's sluggishness is its downfall and can often find itself separated from the escorts it needs to protect it if opening manoeuvres last too long. Or those escorts find themselves poorly positioned instead. The HeraclesThe best gunship the colonials have, the Heracles offers outstanding firepower and durability on par with battlestars for a fraction of the cost. The flak is a nice bonus, creating a gunship that can operate independently of the fleet with little worry. The heracles can win 2v1 against revenants, 1v1 against minotaurs and solidly beat most battlestars by rising above them and cutting out their fire controls. Basestars struggle in close contact with a Heracles, bar the Cratus and Guardian. The only downside to the heracles is it's speed, making it a poor fit for fleets built for speed, preventing it from being S tier. The AtlasPRAISE BE THE ALMIGHTY BRICK! The colonial's dedicated carrier, the atlas offers the joint 1st most efficient airwing per FP in the game, rivalled only by the mercury. However, the Atlas has the advantage of packing a support squadron whilst being only 40% of the cost, meaning that you can get far more support squadrons with the Atlas per FP. Otherwise, the Atlas offers excellent durability along with firepower that will often surprise the enemy, 3 heavy guns and 2 mediums may not sound like much, but the Atlas survives long enough to get great use out of them. The JanusMunitions are rarely a good fit for colonials in MP, but if you want to bring a dedicated missile boat, it's best to bring the most bang for your buck. Lacking squadron slots, the Janus hampers your fleet in MP where squadrons are often key to victory. The Janus' poor guns loadout and lower accuracy doesn't help either. However, bringing 3 munitions slots on one <1000FP ship is a selling point, making the Janus better than the Ranger if you need lots of munitions that battlestars and frigates are unable to provide. The Janus is also respectably tanky for it's cost too. The BerzerkThe Colonials pocket carrier, the Berzerk brings the highest evade squadron in the game and a nasty amount of firepower on it's broadside in the form of 5 medium guns, at 6200m range, 400m greater than colonial standard. While it is squishy and dies quickly, if protected, the Berzerk will do wonders. B Tier: Ships that are overshadowed in their role by other ships, but do fill a niche or are still decent performers. Often worth picking if their equivalent in S or A tier are too expensive, don't fit with the style of fleet you're building or are banned. The Jupiter MkIIThe J2 offers the second highest practical DPS, highest theoretical DPS (at 16 Battlestar Artillery and 8 PDS) and second most durable ship in the game, beaten only by the Mercury in these regards. It also has the largest flak field and a strong firewall. However, it's fighter wing of 2 Mk2 squadrons is on par with an Atlas, a ship less than half it's price and a second support squadron does little to improve on this. The J2 is an good choice of flagship for slow fleets when the Mercury is banned, or if the Mercury's weak topside firepower is a liability. The RangerThe Ranger offers two munitions slots on a rapid reload, allowing it rapidly dump munitions on target, along with a decent level of firepower in it's guns. However, the Ranger is fragile for it's cost and suffers from poor convergence on it's weapon arcs, its hard to get both the broadside and bottom guns to fire on the same target, far harder than the topside and broadside combination that most ships have. Otherwise, it's speed makes it a better fit for some fleets than the Janus. The MinotaurThe Minotaur offers excellent firepower and durability for it's cost, making it an excellent line brawler in colonial fleets looking to boost their firepower. However, unlike the Heracles, it lacks a defence against munitions, resulting in it depending on ships like the Artemis and Jupiter to protect it. However, in fleets where speed is key, a Minotaur will often fit in better than a Heracles. The CelestraExtra armour plating and munitions reloads, it hard to not like the Celestra. However, more often than not, extra firepower will outweigh the benefits of the armour plating and battles rarely last long to require reloads, making it more often than not suited for switching munitions loadouts on the fly. C Tier: Ships in this tier have niche use, finding value in performing a role that no other ship provides. They're generally poor performers and need to watched to ensure they don't explode prematurely but can offer unique tactics. The MinervaThe longest ranged ship in the game, the Minerva is the Colonials answer to the question "can you have enough guns?" The answer being, No. However, the Minerva suffers from paper thin armour and a tiny flak field and needs constant supervision to ensure it's survival. It also can't run from most attackers whilst continuing to shoot back, making it vulnerable to being focused down. This changes when the Minerva is paired with at least a Defender and possibly even a Celestra. The Defender buffs the Minerva's already incredible range of 6400m to even further heights and the Celestra helps to resolve the Minerva's durability issues. The ManticoreThe highest dradis range in the colonial arsenal, the Manticore offers excellent scouting capabilities to a fleet. It's corvette cannon is the best in the game, unfortunately however, it sports only one. While Manticores can be effective in wolf packs, it's always better to bring better, more expensive ships and use a squadron to scout instead. F Tier: Or J tier, for Jupiter Mk1 The Jupiter Mk1At first glance, the J1 doesn't seem to bad. 3rd best durability in the game, high firepower, 2 squadron slots? What's not to hate? Unfortunately, the J1 has poor firing arc convergence, meaning it's firepower caps out at 8BA + 8 PDCs on the broadside + topside and 8 BA on the bow + bottom, meaning it solidly under performs compared to the J2. The missing 2nd support squadron is just salt in the wound. In addition, due to it's poor bow and bottom gun combination, it can't turn head on to engage targets effectively, locking it out from working effectively with Heracles, unlike the J2 and Mercury. All in all, it's generally worth paying the 350FP extra to get a J2, or saving 600 FP and bringing an Artemis instead. Banned Tier: The ships in this tier are frequently banned, due to their abilities being overpowered compared to other ships. Namely 1 ship resides in this category. The DefenderThe Defender is a ship that has too much going for it. Technical support, buffing nearby ships. Marine reinforcements, for countering boarding and free scouting. A repair bay with high repair speed, to quickly repair damaged squadrons, even those whose mothership has been destroyed. Flak. Good durability. The only downside to the defender is it's poor manoeuvrability and weapon range. What gets the defender banned is the technical support. +4 to any subsystem on another ship is able to break the games balance, as on navigation the extra vertical distance allows a ship to outmanoeuvre its equivalents and get superior firing solutions. On fire control it raises weapons range to 6600m and increase accuracy. It can be impossible to counter an Artemis or Jupiter 2 supported by a defender, due to its superior mobility and firepower. Cylons: The Cylon Fleet is one of specialist vessels. While the colonials have good generalist vessels that fit well into most fleets and approaches, Cylon ship's need to be chosen for the fleet and the role they are expected to play. S Tier The Cylon S-Tier is filled with their Basestars that open up new strategies. This are ships that will form the core of your battle style for each match and will need ships from other tiers to fill the roles they lack in to create a viable fleet. The Modern BasestarWith an incredibly long jump range and 2 rapid reload munitions slots, the Modern Basestar offers unparalleled ability to out flank opposing fleets and launch devastating munitions salvos from unforeseen directions. It's 4 squadron slots able to equip modern raiders also make it unmatched in squadron power in the Cylon fleet. On top of that, the Modern Basestars hull regeneration makes it a near unkillable kite machine or a multi-use battering ram, depending on the situation. The CratusMeet the Cylons answer to the Jupiter. Excessive gun power, 3 rapid reload munition slots, good durability and 2 squadron slots, the Cratus doesn't lack in any department. As a direct assault specialist, the Cratus wants to be in the fray, utilising it's guns and munitions to remodel opposing ships. Typically seen with torpedo loadouts to quickly demolish opposing battlestars, basestars and heavy carriers. The ArgosThe Argos is the sole ship in the game with reloading munitions, leading to it's premier strategy: remain at long range and shell the enemy to death with munitions. With 3 munitions slots on 3 turn reloads, the Argos can either maintain a constant munitions barrage to keep the enemy suppressed or deliver large salvos to punch through enemy AMD. When using the Argos, maintaining distance to the enemy is key. Ships such as the Revenant are vital to keep the enemy away, as once enemies can close the distance, the Argos finds itself extremely vulnerable. A Tier: A Tier Cylon vessels are solid performers, offering good performance in their specialised roles, it's rare to see a Cylon fleet not use one of these ships: The GuardianWhile being a "elite" Basestar variant, the Guardian is here as it doesn't open up the strategies that the other 3 do. What the Guardian does do, is project an inverse umbrella if you will. Anything beneath catches death from it's 12 heavy guns. Otherwise, 2 munition slots, 2 standard squadrons and a support squadron are a good loadout for a basestar of it's cost and it's predictive augurs ability opens up the possibility of firing guided munitions Turn 1, or allowing you to identify some of the most deadly enemy threats and respond immediately. Overall, the Guardian offers oppressive gun fire power, decent munitions and decent squadron presence, allowing it to shape the battlefield beneath it. The CerberusSomehow the Cylons were able to build a ship that manoeuvres worse than the Brick. However, the Cerberus is still the Cylons best carrier in the game for price, offering 3 standard squadrons and a support squadron. Borderline essential for Cylon fleets looking to bulk out their airwing if using the more expensive elite basestars or a large numbers of cruisers. In addition, like the Atlas, while it's gun complement is relatively anaemic, it can do work if given time. However, unlike the Brick, the Cerberus in contact with the enemy fairs extremely poorly, typically as if an enemy gun fleet has pushed through to reach the cerberus, the doctrine has failed, while for the Atlas having to use it's guns is a Tuesday. The RevenantThe Cylon's elite gunship, the Revenant offers a frightening level of fire power. However, the Revenant is also quite fragile compared to it's colonial counterparts, it solidly loses a 1v1 against Minotaurs and loses 2v1 against a Heracles. It's often better to use it's speed to dive under lighter Battlestars such as the Artemis and Valkyrie to where they're vulnerable than attempt to brawl with Colonial big guns. However, the Revenant does have a use even against massed gun fleets in that it forces the colonials to remain in formation and stick close to their heavier gunships, like the Heracles. This can prevent the far faster Artemis and Adamants surging ahead to pursue Argos Basestars. Otherwise the Revenant brings extra punch to help the Cratus in it's role, or an oppressive AA platform. B Tier: The step down from A tier, these ships still perform reasonably well, but are often support vessels or the less price effective versions of other ships. The PhobosOnce the most annoying ship in game due to it's ability to instantly delete another ship via FTL ram, thankfully FTL exclusion zones make this a thing of the past. Unfortunately for the Phobos, it's other capability are mediocre and it is a generalist, which is never a good thing in the Cylon fleet. It escapes C and F tiers solely by it's 8.4km jump range, which allows it to pull of flanking manoeuvres to deliver munitions (frequently nukes and cluster nukes) from unexpected angles. The CerastesWhat do you get if you want to save 300FP on a Revenant? A Cerastes. The Cerastes offers downgrades in firepower against pretty much all targets, as the Revenant's light guns are still very effective against fighters, however, the Cerastes offers greater durability when facing colonial capital ships than the Revenant. Due to being a size smaller, capital ship guns suffer an accuracy penalty when targeting it. However, guided munitions are not so affected and will make short work of the Cerastes. Overall, it's better to pick the Revenant for the greater firepower, especially as the chief counter to the Cerastes and Revenant is still munitions. The GorgonThe Cylon's carrier support, the Gorgon offers 2 support squadrons, a repair bay, PDC coverage and it's machine learning ability. The Gorgon is great for offering quick repairs for friendly squadrons that might not otherwise survive, as well as boosting their survivability with it's machine learning. The 2 support slots are extremely valuable on a ship costing only 550FP, being able to be used as wardrivers or scorpions, to round out the fleets airwing. An all round effective little ship. The NemesisThe Nemesis sits here than than C tier, due to 1 fact, it's excessively high DRADIS range. It doesn't make it into A tier, as the Revenant and Cerastes have the capability to scout reasonably well, however, the Nemesis is capable of reliably identifying the entire enemy fleet turn 1/2 and being able to escape to safety as well. Otherwise, the Nemesis is very weak on gun power and munitions presence. It's use is to scout, but it is a job it does exceptionally well. C Tier: Welcome to C tier, this is the tier of ships that struggle to find a place in cylon fleet compositions but can find a niche use at times. The (Standard) Basestar:A jack of all trades, the Basestar offers average munitions, squadrons, durability, but with mediocre guns. However, unlike other generalist ships that are in F tier or avoid that ranking with special abilities like the Phobos, the Basestar avoids being F tier by being decent value for money. 2 munitions, 2 standard squadrons + 1 support is hard to beat at it's price, rivalling the guardian which is 750FP more. While the Basestar may have no abilities or stats to set the worlds alight, it offers a respectable package of fighters and munitions at a comparatively cheap price The TalonOffering a squadron slot, excellent durability for it's cost and decent firepower, the Talon is a rival for the Berzerk in "surprisingly good pocket carrier status"... until you stop to consider that when compared to the Cerberus, it's air power per FP is low and if you need guns, you're looking at the revenant instead. Indeed, it's the same price to bring a Revenant and Cerberus as it is to bring 3 Talons and you save a ship slot in the process. And gain a support squadron too. Another case of not being specialised enough, but the Talon can offer some value in fleets that need more armour, guns and squadrons but can't bring more Cerberus under competition rules. The HydraThe Hydra offers 2 key abilities: hull repair and munition reload. Starting with the Munition's reload, it's an ability of questionable value, as dumping more munitions can be great, however, if it's going into enemy AMD sufficient enough to handle it, you make no impact and run out of pressure faster. If you can use it to punch through enemy AMD, it brings value, at the cost of opening up your fleet to being attacked sooner. Not to mention the two best munition dump ships in Cylon fleet, the Cratus and Modern Basestar, are munition dump ships due to their high mobility, durability and rapid reload slots. Allowing the Argos to munition dump diminishes it's value as a long term pressure platform, a role it's far better for. Arguably this works best with the Standard Basestar or Guardian, leaving this value open to question. And requires 3 of them to be truly effective at 100% uptime. The repair ability offers little value too, due to it requiring a ship to be damaged before the drones can be dispatched. Chances are, a ship will be destroyed before the drones can reach it. On the off chance a ship does survive, it'll still be lacking armour in at least one facing, making it still quite vulnerable. Overall, the Hydra's 2 abilities are quite worthless, unless going for a excessive munitions dump fleet, leaving it's sole feature of a high DRADIS range... which is beaten by the Nemesis. F tier: The ships in F tier are pretty much always detriments to any fleet they are in, with FP and ship slots better spent elswhere. The MedusaThe Medusa brings 12 PDCs on it's forward arc, 2 munition slots and it's special ability, R-TPAM. However, it's functionally worthless for the Cylon fleet. For 100 FP less, you can get the standard basestar and receive a far more durable ship with 2 standard squadrons, 1 support squadron and the same 2 munition slots, albeit with a 1 turn longer reload. The R-TPAM ability doesn't help it here, as being able to distribute 30 processing power across other ships is insignificant. When deployed onto 3 or more ships, the amount granted per ship is minuscule and when deployed onto fewer, it's better to not bring a Medusa and bring another of that ship instead. The ArachneIn the greatest of injustices, if the Arachne was in the Colonial fleet, it would likely contest the Adamant as viable pick. However, it is in the Cylon fleet, where it must be judged by Cylon standards. Being a jack of all trades in the cylon fleet is a poor position to be in and the Arachne is solidly mediocre in guns, squadrons and missiles. If you need guns, you'll pay 100FP less to get a Revenant, if you need fighters, pay 250FP more and get a Cerberus, if you need fighters and munitions, again, the standard Cylon Basestar is better. Being a master of none is just plain bad in a fleet of specialists.

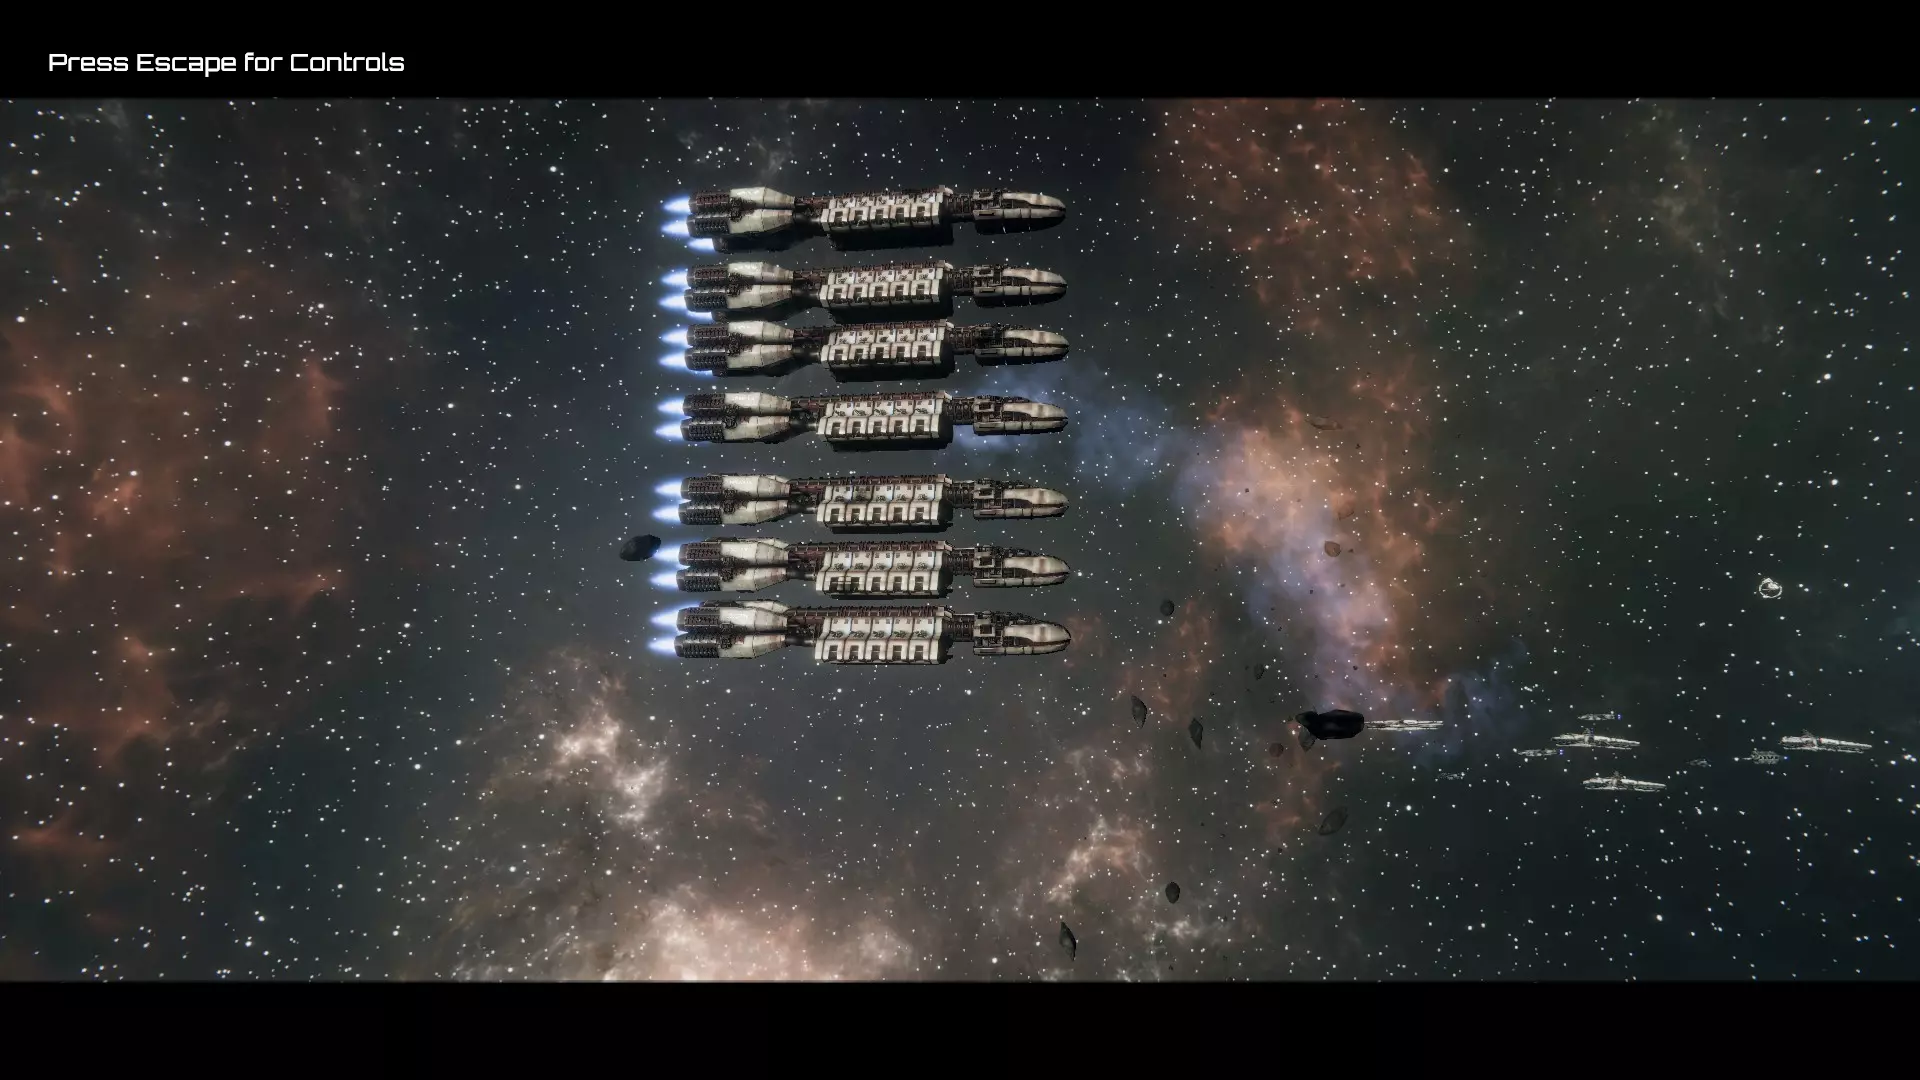
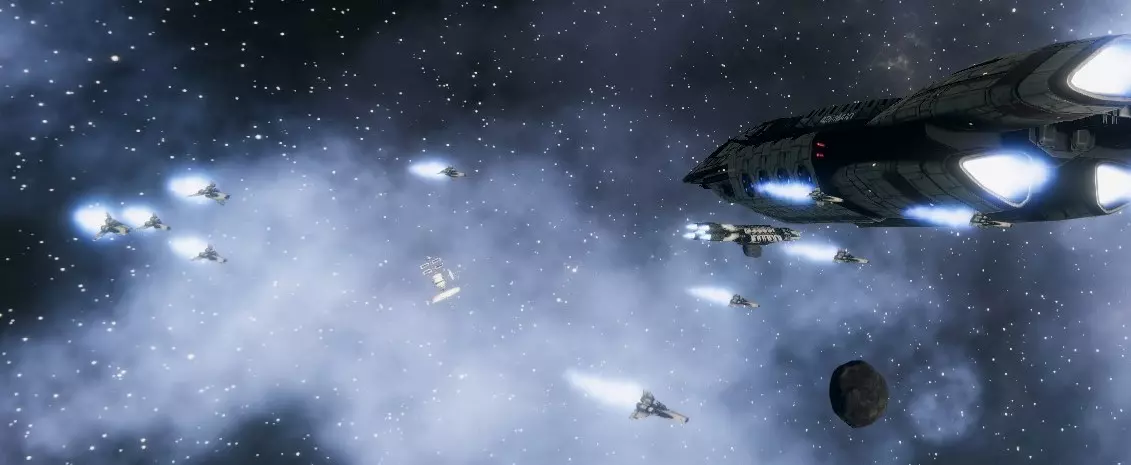
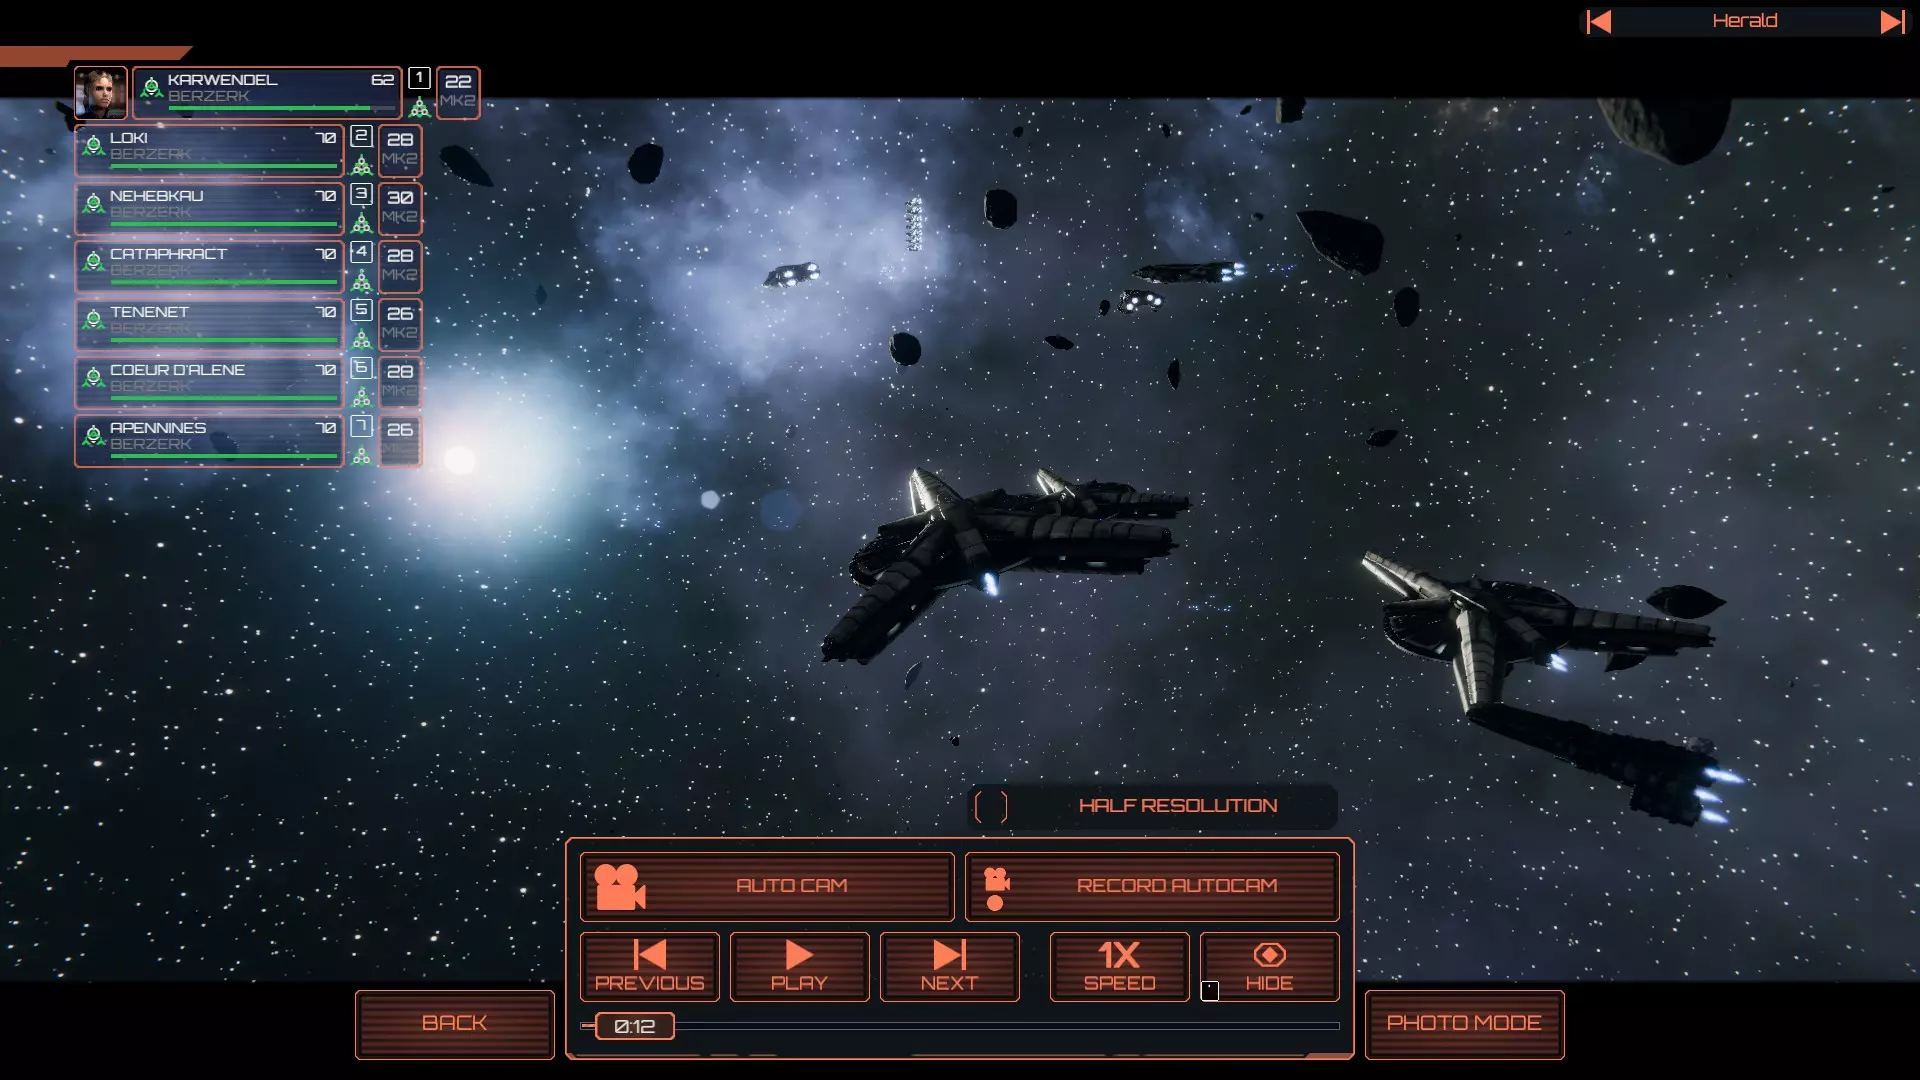
(The guide is still under development, but it's now relevant to the current patch) So this guide is being put together to provide a little insight on the common do's and don'ts of the campaign for BSG Deadlock due to community requests. Getting started First and foremost, is understanding how the campaign works on a basic level. Your ultimate objective is to progress through the story missions to their completion, whilst keeping at least 6 of the Quorum on board. The campaign is extremely forgiving as you can reclaim any Quorum members who withdraw. This means the only true way to lose the campaign is with the destruction of the Daidalos shipyard. That being said, it doesn't mean you can park Daidalos on Ragnar and then watch the colonies burn. You still need to protect them as they are your source of income - Whilst it hasn't happened to me it would be entirely possible to "soft-lock" yourself by having all of the colonies withdraw and then have no resources to ever build up properly and strike back. With the above in mind, the best way to secure more resources and progress towards your ultimate objective would be to build up and expand quickly. However, there is a knack to this. Your first move The first thing to do would be to get yourself up to Chapter 5 of the story - At this point you have passed all of the tutorial style missions and have all of the game's base elements at your disposal regardless of whether you enabled the tutorial or not. The core of your fleet are your Officers, keeping them alive and getting quick experience is essential on them. Your fleet composition itself is also important, some ships are inherently stronger than others at different parts of the campaign. Where you deploy your ships is also crucial to intercepting the Cylons as quickly as possible, as well as gaining exp quickly. So let's break it down into sections. Officers All Officers have three branches of promotion which are fleet size, a buff to a single system for the entire fleet, and unique buffs. As of the current patch, fleets now begin with 4000 points, this puts MUCH less pressure on quickly promoting your officers and dashing for fleet size upgrades. You can now comfortably go straight for system buffs and get the first fleet size upgrade as your officer's second promotion rather than clawing at every opportunity for fleet size upgrades, and having to do constant officer rotations throughout the early game. System buffs are where your promotion points will go if you do not have access to a unique buff at that level, or the buff in question just isn't worth it. For some officers, this can actually be incredibly powerful such as a Navigation providing fleet-wide mobility bonuses, or Engineering providing fleet-wide durability bonuses. The unique buffs are very hit-or-miss in their application. This is because they either provide a powerful bonus such as the CIC Officer's increase for resources or exp boost, compared to say the Tech Officer's bonus to DRADIS range which is pretty underwhelming as your Officer really should not be doing the scouting. Shortly put, the CIC Officer is the best go-to Officer to pick up in bulk. Sometimes you'll roll poorly on the officers you have access to and be forced to grab other officers but the CIC Officer provides the best all-around benefits to your fleet in and out of battle. The reason is because the CIC Officer increases the strength of the CIC subsystem across your fleet, meaning you can put more points into offensive or defensive posture allowing for some pretty insane stuff like the ability to outrange Cylons once you hit the +8/+9 range. As well as this, once you hit rank 6 you unlock Charismatic which grants +50% income for having that Officer parked above a colony. That's not to say other Officers are bad, they just don't shine as brightly. That being said, Navigational Officers and Engineering Officers are pretty solid pickups as are Hanger and Tech Officers. These all provide passive increases to good subsystems across your fleets, especially Hanger Officers (62.5 evasion Vipers on Berzerks are hilarious). The unique buffs are fairly underwhelming in comparison to the capacity to significantly boost your income. Ship choices Very shortly put, everything can be used as a solid option in the campaign. Even the Atlas is a viable option now with the latest patch, as it no longer drags your fleet down so badly. That said, there is an order to things and you don't just get the full Colonial arsenal on your lap from Chapter 1. I'll go over the basics of the ships themselves and how to employ them, then I'll go over how to handle and position yourself vs specific Cylon targets afterwards. Manticore The first ship you get access to, and a very strong one at that. When used for direct combat the Manticore is a pack-hunter at heart, best used in pairs or a pack of three. It's forward mounted Corvette gun is unique in that it has the stats of a medium gun with absurdly high accuracy, particularly when shifted into an offensive posture. It's defensive stats aren't bad either as for it's weight it can take a good beating before giving up the ghost. Manticores are happy both above and below their targets, to an extent. Their gun is on a forward arc but it has quite a lot of vertical clearance - Have both or all three of your Manticores focus the same target and always tear apart the squishiest targets first. Three Manticores can have a Nemesis turned into salsa in two turns without any need for missiles, allowing you to deploy Torpedoes or Guided Missiles on a second target whilst you rip apart the first. Important note - Keep your Manticores vertically staggered. The missiles fire from the sides of the ship so keeping them at the same height as other Manticores can result in a lot of friendly fire incidents. Sadly, the Manticore becomes redundant quickly, especially if you have the Reinforcements pack which gives you the Berzerk from the get-go. If you do not have the pack, Manticores still have a place in early 4x Adamant 1x Manticore fleets. Once the Artemis is available and production is going strong, the Manticore gets benched. But for the early stage of the game, it's a good ship. Adamant Your bread and butter until well into the mid-game. The Adamant brings Vipers, munitions and decent guns to the table whilst being very durable for a 750 point ship. With and without the Reinforcements pack the Adamant will have a place in your fleets until you're looking at 2x Artemis per fleet, and perhaps for even longer if you do not have the Reinforcements pack. Adamants are best placed on the front line, set up with a broadside. You want your Adamants taking the initial brunt of the damage when you make contact with the enemy. With the exception of multiple Arachne's and Revenants, Adamants can be relied upon to take the first turn or two of incoming fire and hold their ground. In the early game, the best friend of the Adamant is the Berzerk as the two ships offset each others weaknessess nicely. The Adamant has poor damage output and the Berzerk has poor durability. When lacking the Berzerk, massed Adamants can achieve the same outcome early game, it'll just happen slower and you'll have greater reliance on your munitions to deal initial damage. For the early game you'll want Adamants being outfitted with Vipers, and then Mk 2 Vipers as soon as they become available. If the mission requires Raptors, or you're coming up against Revenants and you've still not got Artemis in play, the Adamant is the choice platform to mount your Raptors on. Bringing 3x Vipers on your Berzerks and 2x Raptors on your Adamants can provide enough fighter cover to shut down Raiders whilst allowing you to wreck the accuracy and power levels of Revenants or Cerestas giving you a hard time. For munitions, Guided Missiles or Torpedoes are both fine choices for the Adamant. Guided missiles will take you through the early game pretty well vs Nemesis and Talons whilst Torpedoes will allow the Adamant to start cracking open Revenants and Arachnes. Player discretion is encouraged here, as both work well - Just don't waste Torpedoes on Nemesis or Cerastes unless you're kissing distance as they'll consistently dodge them. If you're still running Adamants by the time you get them, Armour Piercers are also a solid choice. A special note for torpedoes: The AI has got a bit better with the latest patch, and will do more to try and match the height of your fleet. If you're well above or below the enemy fleet you should hold off torpedoes unless you're at very close range, as the AI will naturally dodge torpedoes easily by moving up or moving down to match your fleet height. If they are near to your height though, feel free to let torpedoes loose vs Talons, Revenants and Arachne. Celestra The Celestra is pretty much a no-brainer to pick up when you get it as the ship takes up the support slow in a fleet. The only exception is to fleet group Daidalos, where the support slot is already taken. Early game, the Celestra is very handy for keeping Berzerks alive when you're struggling to keep them out of the line of fire, or more importantly for keeping your front line ships in one piece when they are absorbing the heat for the rest of the fleet. It's also quite good for keeping Minerva in the fight, as they have low armour for a Battlestar which can be offset by the Celestra's extra armour plating. Begin deploying armour plating as soon as a battle begins - The drones take time to reach a target and apply the plating, they will not be able to help defend against incoming fire unless the drones are already present. You can also drop a layer of plating on one ship, and then send the drones to armour up another ship, though only the ship which has the drones applying armour will get reactive plating applied. The munition resupply ability it has doesn't really shine unless you're up against a large scale Cylon fleet, or you've reached nukes. Once you've reached nukes you can either bring an extra 2 nukes to the battle without cutting into your ship slots, or bring standard munitions to supply to ships that have fired off their one nuke so they can keep contributing. When placing the Celestra, keep it well behind your fleet. It's built like paper and it can't boost engines. If you have Artemis online, keep it level with your Artemis so it's always behind the flak wall. The Celestra has no business being on the front line, and should never be in a position where it's taking fire. Berzerk Available immediately, the Berzerk is your go-to solution for making Cylon capital ships disappear. 5x Medium guns with solid accuracy and a great rate of fire has the Berzerk tear Nemesis, Cerestas, Talons, and Revenants to pieces in short order. My preferred early game fleet is the 2x Adamant 3x Berzerk fleet, as it allows the Adamants to soak up damage upon making contact with the enemy whilst the Berzerks tear the targets to pieces. The Berzerk-buffed Vipers are the icing on the cake, and the 5x Viper Mk 1's (Or Mk 2's once they are unlocked) from this fleet are more than enough to handle any Raider threats until Cerberus/Basestars start showing up. As of the latest patch, Mk 2's are MUCH better than Mk 1's, and the 2x Adamant 3x Berzerk fleet can actually handle fighter duty with just the 3x Berzerk Viper Mk 2's, allowing your Adamants to have flexibility in the squadrons they have. When deploying the Berzerk, it is best done so as part of a broadside and placed behind Adamants early game or Artemis mid-late game. They have 5500 base range compared to most other Colonial ships 5000 letting them shoot over the shoulder of your fleet whilst sturdier friendlies take the damage. Ensure that if a Berzerk starts taking damage that you turn it off immediately - Berzerks simply melt to focused fire and you'll certainly lose a couple before you get the knack of placing them just right to contribute to the battle but not be in immediate danger. Note that the AI will prioritise the Berzerk upon getting into range if it hasn't targetted something else first, so ensure something durable hooks the AI first. Revenants and Arachne's in particular will shred the Berzerk, as will focused munition strikes - Place and protect the Berzerk accordingly and it'll dish out all the pain you'll ever need. Artemis Congratulations, upon hitting the Artemis you can consider yourself officially at the start of the mid-game. The Artemis replaces the Adamant as your bread and butter - 2x squadron slots, 1x munition slot, very strong hull and respectable armour on a mobile package make for an excellent general purpose frontliner. Now throw it's 8x Battlestar Artillery on top of it into the mix and you've got a ship that can deal out as much damage as it can take. Simply put, you always want your Artemis underneath the Cylons. This is so it's 8x BS-Arty can get to work deleting anything that isn't a Nemesis or a Cerestas - Try not to get too low so the 8x Point Defence Guns can get in on the action too as well as keeping your flak relevant. Diving too low will allow Cylon missiles to fly over your flak shield and hit the top armour of the Artemis, or worse, other ships in your fleet. The Artemis has enough gun strength that you do not need to lean on it's munitions for damage, so you can consider utility when outfitting it. Guided Missiles will allow the Artemis to help deal damage to the fast Nemesis/Cerestas and PCM's can allow the Artemis to provide emergency missile defence when flak isn't an option. Torpedoes aren't necessary unless you want the Artemis contributing to a larger alpha strike against a quickly-ID'd Basestar for example. Armour Piercers are also a solid option to provide help cracking hard or awkward fast targets before you get in flak position. The Artemis is a prime candidate for housing your support squadrons such as Sweepers, Raptors or Assault Raptors. The Artemis has standard +20 evade, so it's alright to house support squadrons, rather than using a valuable +50 evade Berzerk slot which should be used exclusively for Vipers. Ranger Your first optional ship is unlocked alongside the Artemis. The Ranger is not a requirement to bring along, but you most certainly CAN bring it along once you get to the 5000/6000 point mark. The Ranger is a little flimsy for it's cost, but the damage it brings along is significant in the form of 2x rapid reload munition slots. You can effectively pour on a constant stream of ordnance using the Ranger until you run out of ammo by alternating between each missile tube. It's gun loadout isn't anything to scoff at either, being focused on the front and bottom of the ship (2x heavies front, 2x mediums bottom) though you can use it as a rather expensive Adamant by bringing it down with the fleet and using it's 4x light guns either side. Recommended deployment is to have it above your fleet and let it rain Torpedoes down on the Cylons. Deploying them in pairs allows for a constant stream of deadly ordnance on anything that isn't a Nemesis/Cerestas, or outfitting them with Guided Missiles/Armour Piercers allows them to handle speedy threats like the Nemesis/Cerestas handily. PCM's are not recommended for the Ranger as they are better served on the Artemis/Jupiter which can throw them out whilst a flak wall is up. Do note that Rangers deployed above your fleet are very vulnerable to Cylon missile strikes, and should be protected by Vipers, Sweepers or PCM's as deemed appropriate. Atlas As of the latest patch, you can bring the brick without feeling bad now. Before hand, it was a liability for the most part, but now it's a solid ship for a number of reasons. The Atlas can keep pace with the Jupiter now, and it has guns mounted on the bottom of the ship so it can actually contribute to fights by keeping up and shooting down as required. Also, with the Raptor being a nice option, the Assault Raptor being fantastic for bringing along on your Battlestars, and Sweepers becoming a necessity, the Atlas is a very cost-effective way of getting 2 more Viper Mk 2's into your fleet, which get a pretty nice 35 evasion compared to the standard Colonial 20. You can either keep it behind the fleet and let it play fleet support with it's Vipers, or you can throw it on to the front lines to use it's incredible amounts of armour to soak damage. It won't ever be a primary source of damage, but it's 3x heavy guns on the broadside will contribute to a fight, especially if Assault Raptors are present and marking targets for extra accuracy. Just hold in mind that the Atlas is a huge ship and it's as bad as the Jupiter at diving. If you throw it on the front line, you'll either want equally slow ships like the Janus and Jupiter accompanying it or you'll want to be mindful of your faster ship's positions. 2x Atlas, 2x Artemis, 3x Berzerks is a solid fleet for firepower and squadron slots, but it'd be very easy to prevent your Berzerks from properly getting a shot off if you use your Atlas on the front lines, for example. Janus The Janus is what you bring when you want missile support but you want the ship bringing it to not die to a passing breeze. The Janus is a ship that is a question of taste. Due to the very defensive nature of play of letting the Cylons come to you in the campaign, the Janus and Ranger fill very similar roles. It really boils down to whether you want a constant stream of ordnance from the Ranger, or if you want the burst damage that a Janus can bring. The Janus also brings stronger bottom armaments, 3x heavies bottom with 2x mediums forward, allowing it to pack a bigger punch in a gun fight but meaning it MUST be deployed above your fleet to contribute meaningfully to a gun fight. The same rules that apply to the Ranger apply to the Janus when deploying it above your fleet - Be mindful of Cylon missile barrages. Whilst the Janus can work with faster fleets made up of Berzerks, Artemis, etc, it'll feel more at home alongside ships like the Adamant, Atlas and Jupiter. Minotaur The Berzerk, but bigger. That's what I'd like to say at least - As far as gun performance goes that's what the Minotaur brings to the table. The Minotaur does actually bring a LOT of firepower to your fleet in the form of 6x light guns each side and 5x heavy guns top, with 2x heavy guns forward and bottom. The broadside firepower of the Minotaur is staggering for a 950 point ship (Alongside having a 10% buff to it's accuracy built into the ship - check it's FCS ingame) and it has the mobility to get under targets and bring it's battery of heavy guns to bear consistently. It's also pretty durable for it's cost too, which is a bonus. The problem however, is the firepower is all it brings. No squads, no munitions. Bringing the Minotaur means ensuring the rest of your fleet can cover your Viper and missile requirements. Again though, the Minotaur is a ship you get once the campaign is really getting under control, and it's a very good ship for direct combat performance. Just don't bring 2x Minotaurs with 2x Rangers or Janus, or you'll face extreme levels of disappointment when you bump into a Basestar/Cerb heavy fleet that drops a dozen or more Raiders/Heavy Raiders on you or enough missiles to blot out the sun. Bring the Minotaur with discretion. Minerva Colonial fleet decided they needed a literal bucket of guns that could still haul ass, so the Minerva happened. For singleplayer, you can use the Minerva the same way you would an Artemis, but it has a few things to note. The Minerva has the same range as a Minotaur, and it scales a little bit better with posture. It also puts out a silly amount of firepower through it's 11x point defence guns on each side with it's standard 8x BS-Arty mounted on top. This allows the Minerva to be a bit better at hitting the speedy targets like Nemesis and Cerestas if they're still around, as Battlestar point defence guns are deathly accurate. The Minerva also has a LOT of gun coverage. It's one of the few Colonial ships with rear facing guns, having 4x medium guns facing rear - Pretty much a Berzerk strapped to it's back. It also has 4x heavy guns mounted bottom which is better than the Artemis 2x heavies, making it a little better at hitting targets below it though you still want to keep your enemy above you. It also has 2x BS-Arty pointed forwards so you can use the Minerva's speed to have it go directly into a target and from below to have 10x BS-Arty firing all at once as a nice opening salvo. Using it's 2x munition slots with torpedoes would make such an opening all the more potent. For all of it's advantages, it does have a few issues. The Minerva is the lightest Battlestar at 60 armour on it's thickest plates (Though it's 135 hull helps) as well as a slightly lower engineering stat compared to the other Battlestars meaning you need to be very watchful of the damage it takes when being used on the front line. It also has the worst hangar bay in the entire Colonial fleet at +15 evasion, making it an exceptionally bad platform for Vipers. This is definitely a ship to bring your support squadrons on. You can definitely mix things up with a Minerva in your fleet though, as the ship is strong enough to be a flanking element all by itself, whilst still being competent enough to run in a general fleet too. The Minerva is a solid ship to bring along, just be mindful of it's price tag when building a fleet with it. Jupiter The end-all and be-all of Colonial ship design during the campaign. By the time you get the Jupiter, you can field it pretty much however you want. However, keep the following points in mind. The Jupiter is all you'll need for soaking damage in your fleet for singleplayer. One or two Jupiters on the front has enough armour and hull to simply not care about incoming fire. By the time you get them, most of your officers will have at least +/-8 posture so the Jupiter can open fire on incoming Cylons before they even get into range. The Jupiter is SLOW. Your fleet will not be going anywhere fast with the Jupiter present, so if you still want to take side missions, you probably don't want to try taking a Jupiter for any side mission that requests speed from your fleet. The standard Battlestar rules apply that you want it below the enemy to get the most out of the 8x BS-Arty on top and it's 8x point defence guns mounted on the side. However, the Jupiter doesn't mind so much if a target gets under it as it has 4x BS-Arty mounted below too, giving the Jupiter considerable firepower in every direction. Generally speaking though by the time you've got the Jupiter you know what you're doing in your campaign. At this point, it's time to enjoy the silly amount of firepower and durability that the Jupiter brings along and enjoy the end of the ride. Fleet composition early game So you've got a rough idea what your ship strengths are, but which ones do you use? The choice for fleet composition is most important for the early game, you can start to get away with murder once the Artemis hits as it does everything so well. However, failing to bring a good balance early on can lead to a lot of unnecessary losses until you hit that point. Here are some of my suggested fleet compositions based upon available points: 4000 points 4x Adamant, 1x Manticore w/ 4x Viper & 5x Torpedo 2x Adamant, 3x Berzerk w/ 5x Viper & 2x Guided Missile or Torpedo <---- Wagglepuss Favourite early game 1x Artemis, 3x Adamant w/ 5x Viper & 4x Guided Missile or Torpedo 1x Artemis, 3x Berzerk w/ 5x Viper & 1x Guided Missile or Torpedo or PCM Once you get Viper Mk 2's, see that they are used in all fleets wherever possible as they are a direct upgrade to Mk 1's now. With Berzerk fleets, you can safely change out the Artemis or Adamant squadrons for support squadrons without worrying about losing fighter dominance, especially once Mk 2's are up and running. Now that fleets start off at 4000 points, there's much less pressure on rushing officer promotions. Personally, I take it slow and build up 2x Adamant 3x Berzerk fleets one at a time. Fleet composition mid game Once you've hit Artemis production and got some officer promotions rolling, you'll be hitting the mid game. Here's a few suggestions for fleet composition (ALL fleets to have 1x Celestra in the support slot, or Daidalos): 5000 1x Artemis, 5x Berzerk w/ 6x Vipers, 1x Sweeper & 1x munition of choice 1x Artemis, 4x Adamant w/ 5x Vipers, 1x Sweeper & 5x Guided Missile 1x Artemis, 1x Ranger, 3x Berzerk w/ 4x Vipers, 1x Sweeper & 3x Torpedo 2x Artemis, 2x Berzerk, 1x Manticore w/ 5x Vipers, 1x Sweeper & 3x Torpedo 2x Artemis, 2x Adamant w/ 5x Vipers, 1x Sweeper & 4x Guided Missile 2x Artemis, 1x Ranger, 1x Berzerk OR Adamant w/ 4x Vipers, 1x Sweeper & 4x/5x Guided Missile 3x Artemis w/ 5x Vipers, 1x Sweeper & 3x Guided Missile 6000 1x Artemis, 2x Ranger, 3x Berzerk OR Adamant w/ 4x Vipers, 1x Sweeper & 2x Armour Piercer, 3x/6x Guided Missile 2x Artemis, 2x Berzerk, 1x Ranger, 1x Manticore w/ 5x Vipers, 1x Sweeper & 2x Guided Missle, 2x Armour Piercer 2x Artemis, 2x Adamant, 1x Ranger w/ 5x Vipers, 1x Sweeper & 4x Guided Missle, 2x Armour Piercer 3x Artemis, 2x Berzerk w/ 7x Vipers, 1x Sweeper & 3x Armour Piercer As you can see, there's a LOT of ways to build 5000 and 6000 point fleets, a lot more than I've demonstrated here as Atlas and Minotaurs can enter the mix too. Just make sure you've got enough firepower, enough fighter coverage and something to cover you from missiles. Note: Support Squadrons should always be placed on the Artemis where possible, and munition choice is fairly open to user discretion. Until Cerberus hit the field, you only really need 4 Viper squadrons to deal with Raiders, so you have breathing room for things like Raptors and Assault Raptors. Engaging the Cylons So you've got ideas on your ships, your fleet compositions and now you've jumped in. The alert Vipers have been scrambled and it's game time. Your first priority is to check your position relative to theirs. Are they above you? No problem! Are they level with you? Dive a little. Are they well underneath you? Uh oh. Time to slow down and start diving HARD. Being under the enemy is crucial as for most ships in the game firepower is concentrated on the sides and tops of ships, with very little being focused on the bottom. He who is lower has the advantage. For example, the Arachne has 5x medium guns, 2 of them front, 3 of them on top. Diving under it strips it of 60% of it's firepower by doing nothing more than engaging your brain. Your next priority is to find out what you're up against. Before Chapter 5, you don't even need visual contact to confirm what you're up against - If a ship deploys a squadron it's a Talon, if it doesn't it's a Nemesis or Cerestas. After that, Revenants can start popping up so you need eyes on the target, which will also permit missile locks. Get your Vipers out there, send them high above the enemy or low below to avoid taking gun fire (And Cylon ships that have powered up their Fire Control System WILL land consistent hits on your squads) to confirm your targets. Once you've seen the enemy, got into formation and got below the enemy you can let them come to you, and it's time to focus targets. This brings us to dealing with each ship. Nemesis For many, I understand the Nemesis is an ever loving pain in the ass. The reality is that the Nemesis is piece of cake to deal with so long as you don't dive into the enemy fleet head first. The Nemesis arms and armour are pathetic - It's nose mounted gun has nothing on the Manticore and it's armour melts under anything more potent than a stern glance. It's strength lies in it's extreme mobility, it's ability to deploy ordnance from awkward angles, and of course... Hacking. Thankfully, the AI does not take proper advantage of the first two points and is questionable with it's hacking (Likely due to hacking system choice being a bit RNG). For the first couple of missions, 3 Manticores can simply focus down a Nemesis and have it destroyed in 2 turns, which is enough time for the Nemesis to start dealing damage to a single system assuming you started firing the same time it started hacking. Realistically speaking, you should be firing on it before it begins it's hack in the first place because you scouted it using the Daidalos' or an Adamant's Vipers. When engaging a mixed Cylon fleet, destroy the Nemesis first. It's hacking ability is more dangerous the more time it has to work, immediately destroying the Nemesis removes that problem. When Cylons engage you, they come at you head-first and then turn off once they are in gun range meaning the Talon(s) escorting the Nemesis won't usually start firing until 1 turn after the engagement starts. TL;DR: ID it, wreck it first, headache-be-gone. Talon Talons appear from Chapter 2 onwards, and are a pretty reliable gunship / carrier for the Cylons. You can however, remove much of their teeth by diving lower than them. They also have very little options for firing forwards. The Raiders they bring can pose a legitimate problem if you have built your fleet poorly and they act as a check to ensure you've got a pair of Adamants in your fleet at least. Let the Talon come to you to take advantage of it's zero frontal weaponry and horrifically thin frontal armour. If you have Berzerks and are running a 2x Adamant 3x Berzerk fleet, the first Talon that comes into fleet range nose-first will be destroyed the same turn you start firing. Do not allow Talons to gather up and start dumping fire on single ships - The Cylons will focus down squishy or vulnerable targets. Destroy Talons quickly once they enter range, or pull them from their buddies, and avoid giving them the time to broadside you. Cerastes A mild annoyance, or a fleet killer. As a fleet escort and having one or two of them in a Cylon fleet, the Cerastes is a nuisance at best. Spotting them in the enemy fleet just means pulling back your Vipers and engaging their Raiders a bit closer to you than usual. However, there is one particular Cylon fleet that can turn up which is comprised of 5x Cerastes. This fleet is to be engaged carefully as it has a staggering amount of damage output for the early game. You can easily find yourself an Adamant or Berzerk or two down if all 5 of them get the jump on your fleet. Cerastes have an almost fanatical zeal for shooting fighters, and can easily make poor movement decisions, something to keep in the back of your mind if you've got a massive fighter advantage and don't mind risking your own fighters a bit. Cerastes now have a bit of intelligence, and will no longer chase fighters to the death. Be exceptionally careful when engaging a 5x Cerastes fleet and ID it as quickly as possible. Having a pair of Raptors on your Adamants can help a lot for cutting down their speed and firepower. Revenant This is where things can start getting dangerous if you've not got your fleets nailed down right. The Revenant is a pure gunship, with high mobility and pretty decent armour packing a lot of light guns on both sides with heavy guns both top and bottom. Ideally, you want to engage the Revenant from the front where it has the least firepower. It can still bring a decent amount of guns to bear on you even when you dive below it. Unfortunately, it's front armour is it's strongest at 75 armour which is a lot to burn through quickly in the early game. If you're packing Berzerks, you'll have the raw firepower to do it but any return fire has the potential to seriously put the hurt on your Berzerks should they find themselves in range. If you don't have Berzerks, this is where you'll want your torpedoes to be dumped. So long as the Cylons ship's are near to the same vertical level as your fleet, they generally won't move vertically giving torpedoes very good odds of hitting Revenant. Revenants will start making your life difficult if left to deal damage, so make disposing of them a priority once any Nemesis present have been reduced to dust. Arachne Arachne's are to the Cylons what Artemis are to the Colonials. A strong jack-of-all-trades that can give and take a beating. The Arachne will tear apart anything less than an Artemis in short order, but thankfully they have a glaring weakness. Zero bottom weapons. Not one. Being under an Arachne means you've cut off it's ability to use it's 3x medium guns on top, and with a bit of positioning you can avoid it's 2x medium front guns too. The Arachne is dangerous, but only if you let it be. Nemesis and Revenants will take priority as an engagement starts, and the Arachne can be left until after them so long as you've got your fleet below it. If the Arachne starts well below your fleet though, it changes things a bit. You'll want to consider actively falling your fleet back until you can get below the Cylon fleet when Arachne's are present, as the combination of Arachne AND Revenant top-pointed armaments will result in losses trying to take that gun fight, especially when trying to do it with bottom-pointing Colonial guns. Phobos Treat it as a Nemesis on steroids, except you can actually hit it with Torpedoes. Cerberus The next big threat that you'll come across. The Cerberus showing up is a check to make sure that you're fielding enough Vipers, as it's 3x Squadron slots means there will be a LOT of Raiders and Heavy Raiders in the air for any fleets containing a Cerberus. Deal with the Cerberus by avoiding it, the ship is slow and has no munitions. Whilst it does have reasonable gun power for a dedicated carrier, it's only a problem if you allow it to wander into gun range. Cut up it's Raiders, gun down it's supporting ships then pick apart the Cerberus at your leisure. Just don't dive head first into it or let your squadrons wander near it, those 3x heavy guns top and bottom are precise and hit hard. Basestar The biggest ship that the Cylons have to bear is pretty much as simple to deal with as the Cerberus. Avoid it and shred it's support - The added exception being that you keep an eye out for it's missiles. Fleets running Rangers or Janus in particular can find themselves running afoul of Basestar missile salvoes as Basestars have a habit of hanging back high above typical anti-missile deployments. Once Basestars start showing up, it's time to either bring a Sweeper or brush up on your missile vigilance. Argos The Argos is handled in much the same way as the Basestar and Cerberus in that you pick apart it's support elements before taking it on. Even if an opportunity to take it out early presents itself it can still take a while due to it's staggering 280 hull. However, strong missile defence is outright required once the Argos begins taking the field. It's 3x launchers will bring serious levels of pain and all Argos will bring a nuke. Worse still, the Argos resupplies it's own munitions over time - Including it's nuke. Keep a watchful eye on any Argos that takes the field, especially if a battle drags on, and make sure you've got a Sweeper up or multiple PCM's with flak and Viper support. On the bright side, it's squadrons can only get a max of +12 evasion, so your Vipers will use them for target practice. The Argos itself is not too big of a threat, but it's constant pressure from munitions can take it's toll if it causes you to slip up against it's support, or if you slip up in your missile defence. So long as you take your time, the Argos can be handled reasonably well. Where to deploy your fleets So you know your ships, your fleets, your enemy. Where are you putting it all? Fleetgroup Daidalos is best served hovering around Helios Gamma or Helios Delta, where it can park itself over one of the Quorum members to gain the bonuses such as increased resources, longer Cylon FTL cooldowns, cheaper ships, etc. Being on those two sectors means you can also duck out to Ragnar if you feel the situation is not secure enough. Cylons will never go to Ragnar. As for your fleets, you'll want at least one fleet in Helios Alpha, Beta, Gamma and Delta so Cylon fleets can be responded to in short order. Furthermore, you'll want a second fleet placed in Helios Alpha, as this is where Cylon reinforcements will primarily jump in. This means that the fleets in Helios Alpha are liable to get the bulk of your exp as the campaign goes on. To deal with the issue of Officer experience, you can rotate your Officers between fleets to get experience. As the campaign goes on, ship production goes on, you'll want a third fleet placed in Alpha and then a second for Beta, Gamma and Delta with Fleetgroup Daidalos itself eventually heading over to Alpha once you feel it's strong enough. Of course, if you feel like playing the long game you can build fleets for every Quorum member. It's useful to send ships that fall out of favour, such as Manticores and Adamants, to protect backline colonies in Helios Beta, Gamma, and Delta. Extra notes A couple of extra notes for the campaign to keep in mind. Do not immediately field larger fleets as soon as one officer gains enough experience to do it. You can get the promotion, but hold off on reinforcing the fleet with more ships. This is especially important when going from 3500 to 5000 point fleets. The Cylons will match the point value of your largest fleet, so if you are fielding 4 fleets of 2000 points and one fleet of 3500, the Cylons will immediately begin fielding fleets up to and around the 3500 point mark. This is a problem because the Cylons WILL pump ships out faster than yourself. When an officer hits the next mark rotate the officer out and get the next one ranked up rather than diving into it, unless the idea of having your 2000 point fleets jumped by 3500 point Cylon fleets appeals to you. With the 4000 point start you've got a lot more flexibility in what you field and when. 4000 point fleets can hold their own pretty well, even as the game goes on so you can move into 5000 point fleets pretty quickly. It's still recommended to upgrade all of your fleets together though, as smaller fleets will start feeling the crunch when Cylons start pulling out the nasty fleets containing stuff like 6x Arachne. When a battle starts, assume the enemy has Torpedoes until recon proves otherwise. Keep your fleet loose and mobile, long range Torpedoes are easily dodged but no fighters of any description can intercept them worth a damn. If you have Sweepers however, feel free to pack your fleet as tight as you like just mind you don't crash into yourself, overlap lines of fire, cause missile related friendly fire, block quick exit routes for damaged ships, etc. Be very cautious when taking secondary missions (Purple flags with a 5 turn timer on the strategy map) whilst they provide enhanced rewards and the only source of Requisition points outside of story missions, they are also designed to scale around your largest fielded fleet for the most part. It would suck to try one with a 4000 point back line fleet and find out the hard way that it was a mission built to fight your 6000 point fleet on the front lines. Another reason to keep all of your fleets stocked up together, even your back ones with your old gear. On that note, take every secondary mission that you feel you can reasonably take on. Even if you have no ships to research, the Requisition points can be used to promote Officers that need it. Finally... Stay away from Freighter escort missions once Basestars start showing up. It's a headache and not worth it. Trust in Waggle on this.


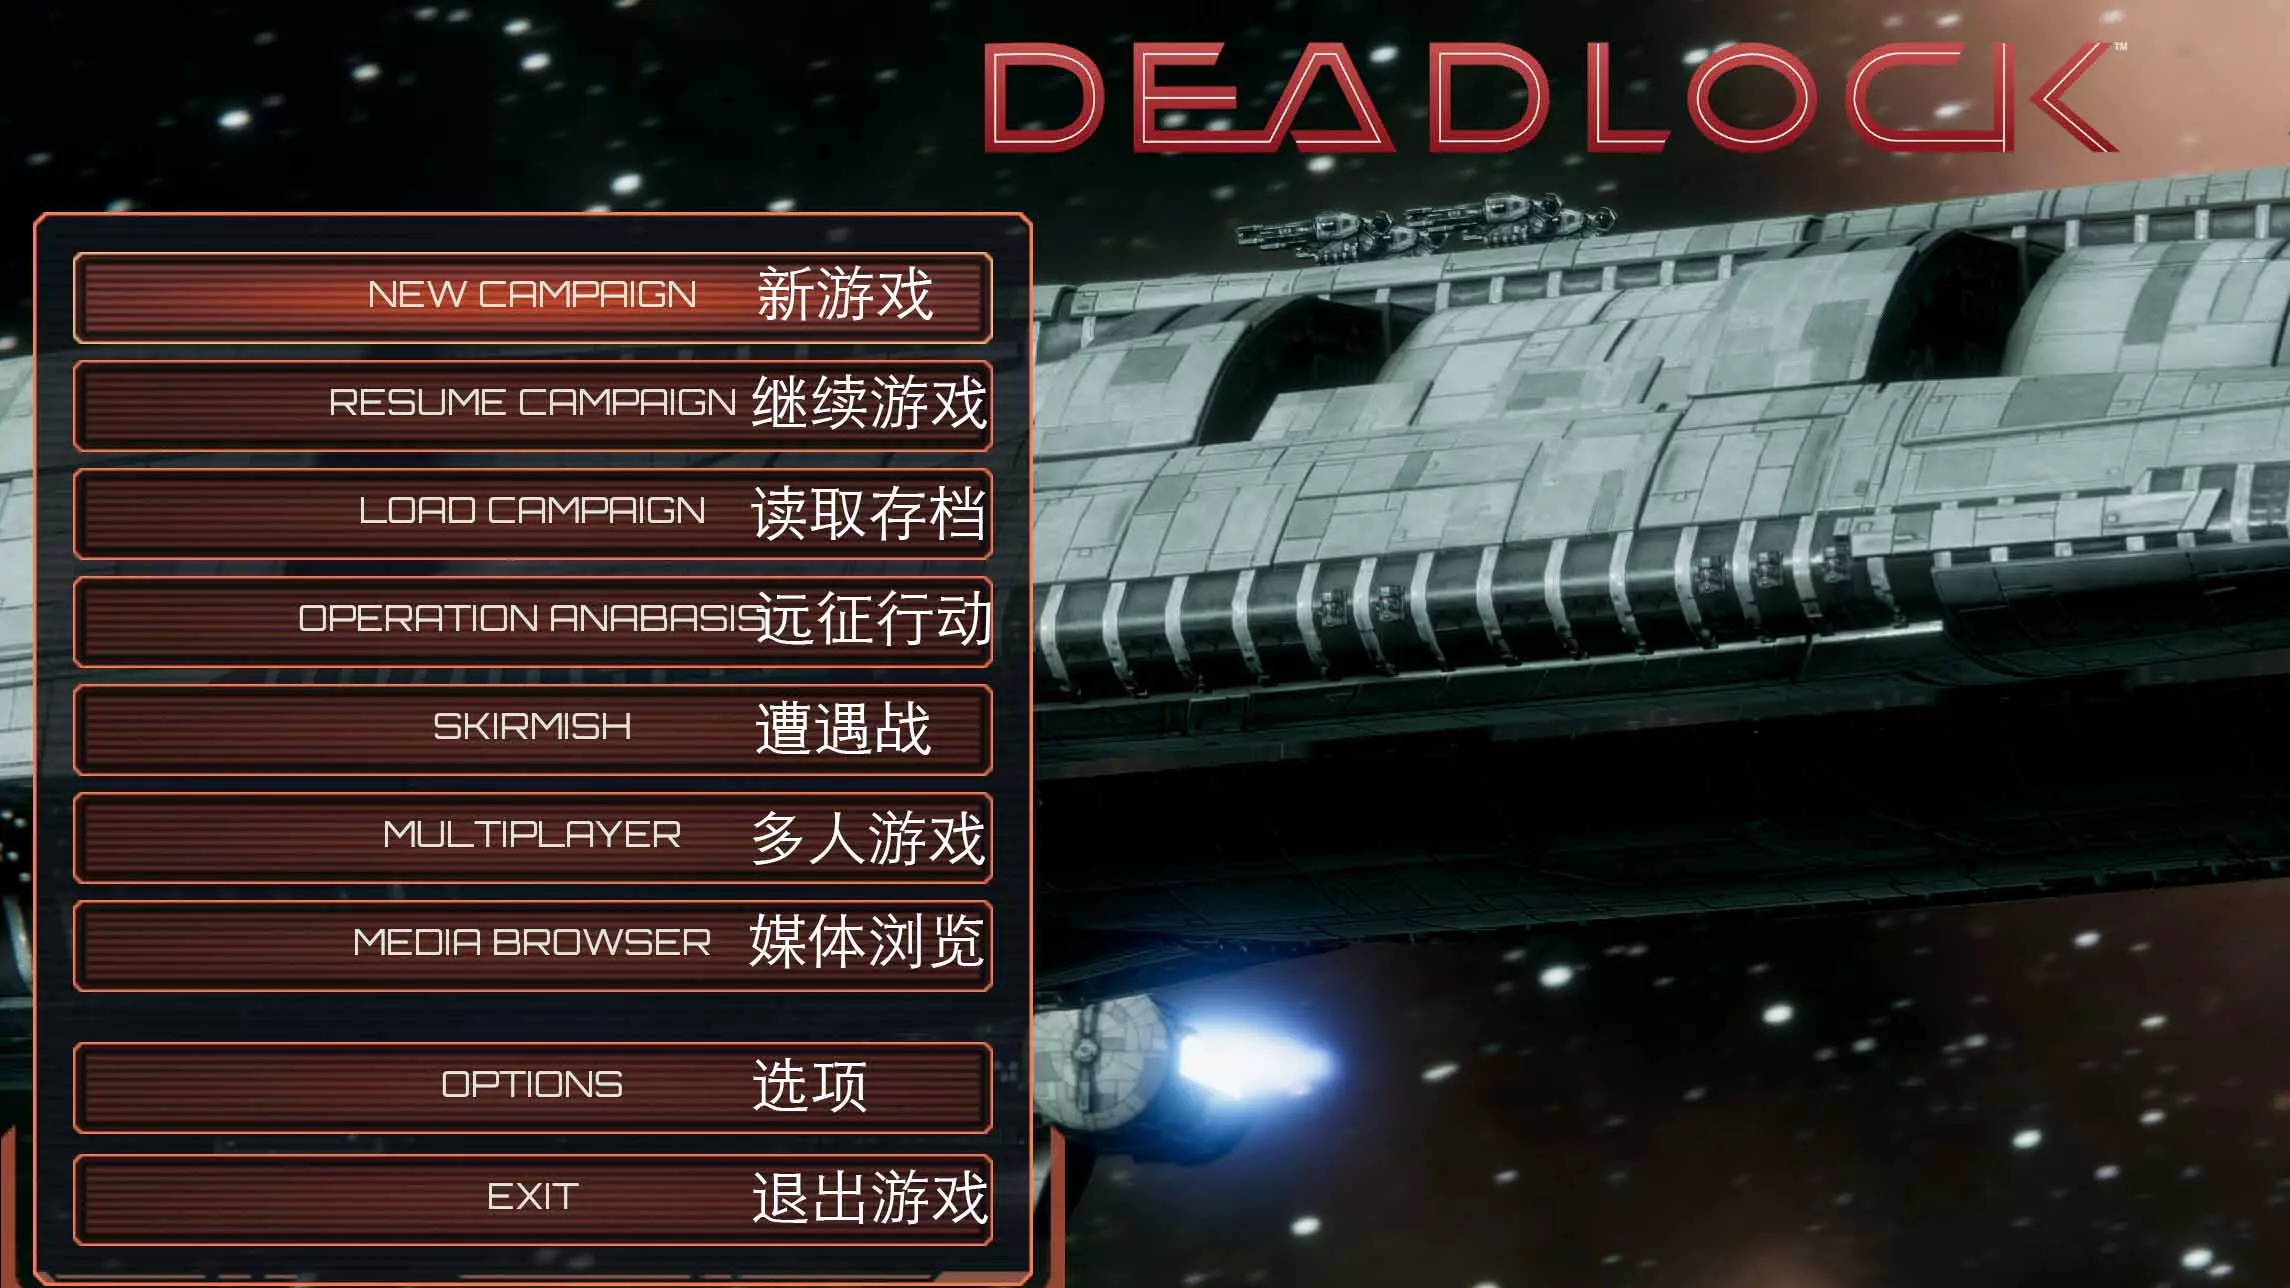

In my prevous guides I've laid out the raw ship statistics, and how to use them against the AI. With a little time and experience, you'll find that you can get away with murder against the AI, and eventually figure out that you can make most any fleet composition work. Against players though? It's a different story entirely. Whilst there are very few inherently "bad" ships in MP, there are most definitely bad ways to use even the best ships in the game. This guide will go over some of the basic concepts and strategies used in MP, how to use them yourself, and why. Expect this one to be wordy, with less pretty pictures. Know your craft I could go through an entire guide listing the pros, cons, and properly deployment methods of all the ships, squads and munitions in MP. That being said, I've lost count of the amount of games I've watched where people are blatantly putting their own ships, their own resources, at a significant disadvantage due to not knowing what they can really do. Open up a skirmish, throw the ships you want to use into a fleet and just start a match vs the AI. Zoom in on your ships, open up the turret menu and look where the firepower is on your ships. For example, all Battlestars have the bulk of their firepower, 8x Battlestar Artillery, focused on the top of the ship. This means that you want your Battlestars to be under your opponent whenever possible. The Janus has it's heavy guns mounted below, and it's medium guns pointed forward so you'll want it above and facing towards your opponent whenever possible. Manticores have a nose mounted gun which can shoot pretty well up or down, so you can have a lot of flexibility in how you field them. Don't throw an Arachne above a target as it has literally no bottom mounted guns... The list goes on. You don't need to go to the lengths I do and have every ships weapon loadout committed to memory (though it helps!), but you do need to employ a bit of common sense. That being said, combat is unpredictable in nature and you'll be forced out of the most optimal places to put your ships or fire your munitions as the battle unfolds. That doesn't mean you need to walk in with an arm behind your back due to not taking the small amount of time to get to know the hardware you're using. Building your fleet When building a serious fleet, there is a little check list that you should go through before committing to saving it. Do your ships make sense supporting each other? This first one is seemingly obvious, but it gets overlooked a lot and it tends to apply more to Colonial fleets. Take a step back and look at the ships present in your fleet. If you've got a Jupiter in there, how is it going to contribute to the fight? If it's paired up with Berzerks and Rangers, something's going a bit wrong as those ships are so much faster than the Jupiter, and will lose a massive advantage staying at the Jupiter's crawling pace. That being said, a Jupiter will work well being a wall for your Janus and Atlas, ships which have a similar speed and can all contribute to hitting an enemy that is inevitably going to dive under you. Make a plan in your mind, picture how the battle is going to pan out and how your ships are going to be interacting with each other. Maybe an Artemis or Minerva would be a much better alternative to bring with your Berzerks and Rangers, as the Artemis can keep up and provide the sturdy front line / flak / firepower that you'll be wanting from a Battlestar. Can you do something about large quantities of missiles? Cylon missile-dispensing fleets are most certainly a thing, and you should be ready for them. A single PCM will not be enough. Ensuring you've got strong flak protection, Sweeper coverage, or a large quantity of fighter coverage will go a long way to ensuring surprise missile barrages do not end you. Be mindful of torpedoes, and know that the faster ships can quite easily dodge them at range by moving up or down, or through making sharp turns if the missiles come from above. Can you do something about Heavy Raiders? You do not want to be skimping out on fighter coverage if your opponent decides they want to pull out a Heavy Raider focused fleet on you. Two Heavy Raiders that dock with most ships will guarantee it's eventual destruction, if you do not have a defensive posture before they dock. Even if you do, your fleet is put at a massive disadvantage as you're forced into a defensive posture or waste 30 power keeping the Armoury subsystem online as Cylons. Stopping the Heavy Raiders from reaching you in the first place is the best option. That being said, Heavy Raiders will not immediately cripple and destroy your ships. A fleet built for speed can simply rush down the enemy and "win the burn race" as it were whilst generally ignoring the boarders. Either way, remember that Heavy Raiders are a thing, and keep a plan in mind as to what your fleet will do if Heavy Raiders show up. If the answer is "Get wrecked" then you should change up your fleet a bit. Can you do something about EMP mines? This one is more of an exercise in common sense. Tightly packed formations are a bad idea in general as the collision detection is not pixel-pefect in MP and you're liable to destroy your own ships maintaining a close profile. EMP mines however, make tightly packed fleets a VERY bad idea. PCM's can be used to destroy EMP mines whilst they are still in flight, but you'll need Raptors/Wardrivers to clear EMP mines or a good sense of how to move your ships without triggering them. Generally speaking, if your fleet relies on making a literal sandwich of ships to actually work, then it's eventually going to run into EMP mines and have a very bad time of it. Recon So you've got a basic understanding of your ships, you've thrown together a fleet that seems to make sense. What next? Well, Deadlock is a game of counters. Finding out what your enemy is using as quickly as possible is critical to starting off your battle right. Unless you've built a fleet with a VERY specific goal in mind, you'll want to know what you're up against. Colonial Recon Manticore's are the Colonials bread and butter for recon. The ship is fast, has a large DRADIS range and is effective both above and below targets due to it's very good depression on it's nose gun. If you're running a very general, jack-of-all-trades style fleet, it's definitely worth considering the 500 FP to slot in a Manticore. They'll contribute solid damage to the fight as well, having one of the most accurate guns in the game which deal solid damage. That being said, boosting out a Manticore and then switching it to max Defensive posture without a plan is a good way to get it destroyed on turn 3. Quite a few Cylon ships match or out-range the Manticore's DRADIS range and you'll be very open to deployed munitions. Consider AMD options for the Manticore when sending it out, such as equipping it with a PCM or immediately attaching your fighter escort to it. For less orthodox fleets, Manticores may not be a viable option. Your squadrons are the next best choice, with varying levels of effectiveness. Vipers can get the job done but have a small DRADIS profile of 2000m, whereas Assault Raptors and Raptors both have 4000m. Always send recon squads either very low or very high above the enemy fleet - DRADIS detection is 2D in nature, you can be half way up or down the map with your squads but the targets only need to enter the DRADIS circle around the squad to get a lock. Cylon Recon The Nemesis is the final word in recon. When the Tech Bay is fully powered, the Nemesis has a staggering 10300m DRADIS range. Full power to Navigation and Tech Bay is a solid way to see your enemy's entire fleet by turn 2. Like the Manticore though, exercise care not to over-extend the Nemesis as it is relatively fragile and can still provide solid support through it's hacking after ID'ing the enemy fleet. Cylons do not have to rely entirely upon the Nemesis though, as even the Revenant can put out 7200m DRADIS range with a fully powered Tech Bay. Odds are, if you're playing as a Cylon and your opponent is Colonial, you're going to see the enemy first. Also note that you do not need to put your entire fleet on DRADIS duty - Only the closest or best DRADIS equipped ship needs to invest in powering the Tech Bay. If you've really gone off the deep end, you can still do recon with your squads in the same way as Colonials. Just be mindful of the enemy's squads and try not to get your recon squads sniped or your main fighter force jumped whilst you're down some squads. Use some discretion when deciding how valuable the intel will be - If you're running a missile spewing fleet then it could be worth sacrificing a Raider or two to make the locks happen or ID the juiciest targets for torpedoes. If you're running a more ship-to-ship oriented fleet, you may want to be more conservative and preserve your squads instead. These principles apply to Colonial squad use too. What to do with your recon now you've got it So you've thrown out your Manticore, ID'd the enemy fleet and you're ready to go. What now? Now you make a decision on how best to approach the situation based upon what fleet you have and what they are deploying against you. For example, If you're running a fairly standard Colonial fleet of Artemis, Berzerks and some missile support and you see a front line of Arachne, Revenants and Phobos, it will be a pretty big hint that the enemy intends to out-dive you and cut you apart from below. You can use this information to know you should rush down the enemy before they gain too much of an advantage on you. There are many fleet compositions that you'll be using or see your enemy using. The main point is to take a moment and do something with the information you've gained. Check their ships and look for nasty surprises like EMP mines, nukes, Heavy Raiders, etc. Very rarely will you want to chug on ahead doing what you were already doing. Engaging the enemy You know what you're against and the shells are flying. Time to get a grasp on what is a priority, and what isn't. Target Priorities As a general rule, you'll want all ships you have in range focusing on the same target whenever possible. Said target should be the squishest and most dangerous ship the enemy has in range. Many ships in Deadlock which throw out a ton of damage are also lightly armoured in comparison. Berzerks are the embodiment of this, and as such are the best example of what to shoot at first when given a choice. The Berzerk throws out incredibly damage for it's size but will be torn apart in but a single turn to any respectable amount of firepower. That's one less ship tearing up your fleet, and one less ship providing support for theirs. If all of the targets you can choose from are pretty similar in durability, bring down the most deadly target first. This can vary based upon your situation, as a Jupiter can stand up to an Arachne's onslaught pretty well, but a Phobos will start doing some seriously bad things if left around to get it's hacking work done. On the other hand, a few Berzerks are going to want to shred the Arachne first, as you'll be taking much more real damage from said Arachne right away. Watching your spacing... And theirs Don't throw your ships into the jaws of the enemy one at a time. Your opponent will happily focus down your ships one after the other without really doing much damage in return. Conversely, keep an eye on how the enemy fleet is laid out. See if you can move your ships so that a few of yours can fire on one of theirs without taking hits from the rest of their fleet. Unless you've got something spicy in mind, keep your ships together, and pay attention to the range you will start engaging the enemy. You can keep your ships range displayed by pressing . Be aware that Cylon ships have a comfortable range advantage over Colonial ships, and deploy your fleet to counter or take advantage of this as required. Keep moving! Rare is the time that your ships are sat in the perfect position and have no need to move. Always keep your fleet in motion, it'll help build good habits for dodging torpedoes. Most importantly though, if you have ships that need to be under targets to deal their damage... DO NOT FORGET TO DIVE. This is incredibly important. In a mirror match between Colonial players that have both built Battlestar-centered fleets, a single turn where you forget to dive can quite literally throw the match. Do not shift Colonial ships into defensive or offensive posture unless there is a very real need for it, as you will cut your ability to dive. For example, the Artemis and Arachne dive at pretty much the same speed when the Artemis is at 0 posture and the Arachne is at full Navigation power. In such a fight, the Artemis will chew up the Arachne using it's side point defence guns whilst the Arachne struggles with only it's 2 forward mediums. Forget to dive for one turn with the Artemis? The Arachne now has 5 medium guns to bare on you and will cleanly out damage you, pulling you apart. Conversely, if the Arachne forgets a turn to dive, it'll get shredded by the 8x BS-Arty in no time. Using your squadrons Your squadrons are a powerful tool, capable of swinging the match in your favour even though their fleet would curb stomp yours in a stand-up fight. Using fighters Unless you're in the position where you need to split a squad or two for recon, you should always keep your fighters together. Always use Viper Mk 2's or Raider Mk 1's whenever possible, as they far outclass their free equivalents. Do not throw your ball of fighters right into the enemy fleet and start brawling in sight of their guns. Cylon ships in particular can contribute a LOT of damage to a fighter brawl due to their high accuracy, and even Colonial guns will start shredding Raiders if they get too close, and that's not counting flak. Keep your fighters in front of your fleet, between yours and the enemy's, ready to react to what the enemy may do yet still in position to help with AMD if it turns out your opponent is bringing all of the missiles today. Check how many squadrons your opponent has compared to yours, and assume they are all fighters until you've managed to ID them. Cylons will need roughly a 3:2 advantage to be able to take on Colonial Vipers (Assuming Raiders to Mk 2's), and having the fighter advantage means you can dictate the pace of the battle. If it turns out they out number you, or have better quality of fighters, not all is lost. You can help mitigate this by luring the enemy fighters into your fleet's gun range, or even by accepting they have the advantage and forcing their fighters into the brawl so they can't attack your fleet or intercept your munitions. Using support squadrons If an experienced player sees a Heavy Raider, Wardriver, Raptor or Assault Raptor, they will usually make an active effort to ensure it is destroyed. The various support squadrons are very powerful, and if left to their own devices, will wreak havoc on the opponent's fleet. With this in mind, be smart about how you deploy your own support squadrons. Throwing your Heavy Raiders right at the enemy is the quickest way to lose them as experienced players will simply pick them out of the crowd and snipe them, regardless of the damage their fighters take in the process. Sending them up high or down low whilst your own fighters tie up theirs will greatly increase the chances they make it to their targets. You can also choose to hold the squads in reserve, and wait for the fighter brawl to end before deploying them. Missiles, missiles, missiles There's an art to having 3 Argos throw 198 torpedoes at your enemy in a single round. Likewise, you don't need to throw out PCM's at every sniff of enemy ordnance. Choosing your munitions Not every munition is ideal for every ship. Whilst guided missiles are a strong and cost-efficient all-rounder, you'll want to consider the right tool for the job. Battlestars for example, are usually a fairly poor platform for direct-damage munitions due to their flak preventing them from firing munitions at the enemy whilst it's up. Don't be that guy who puts a nuke on their Artemis, and promptly fires it into their own flak. Alternatively things like PCM's would be a good fit as the Battlestar can provide it's solid wall of AMD and have a secondary source to throw out to help the Janus above it which is not protected by the flak, for example. There's loads of examples, but the best thing to do is choose munitions with a purpose in mind. I want one of my Janus to crack hard targets, so I want it stocking up on Armour Piercing missiles to guarantee I can strip armour off the targets that matter. Using your munitions Don't just throw missiles directly at the enemy. Well, unless they have precisely zero AMD, in which case feel free to utterly abuse their lack of foresight. Seriously though, check what AMD they have before firing. Don't let loose 3 salvoes from a Janus right at the broadside of a Battlestar - Get an angle around the flak before firing, or find a target not under said cover. Don't throw out PCM's for a single guided missile salvo when you've seen one of their ships is holding an EMP mine or a nuke. An important note with torpedoes though, is that the only thing you're hitting at max range is a Basestar. Even a Jupiter is going to duck a max range torpedo salvo. Either wait until you close the distance, or consider firing from two different angles so the target is forced into eating one salvo or the other. When using mines offensively, ensure you lead the enemy fleet instead of throwing it directly at them, and take into account if they are diving or not. Even if they see it coming, it'll force them into turning off or even better, not diving for a turn so you can get an advantage. Wrapping up Hopefully some of what I've blurted across these pages will prove useful to those looking to help themselves with Deadlock's MP, or perhaps looking to get into it at all. As a game of hard counters, sometimes you can be unlucky and your opponent simply has the hard counter to your fleet. Sometimes ♥♥♥♥ just happens, don't be dismayed through taking losses, just make sure you learn why you lost and take the lessons moving forward. If anybody has anything they'd like to see added to this guide, changed, shaken up, etc, feel free to leave a comment as I appreciate any and all feedback. I could also put together a guide to assess each ship and munition in MP as well, if that were something the community would like to have. I look forward to catching you guys in the field!