换一换
换一换 


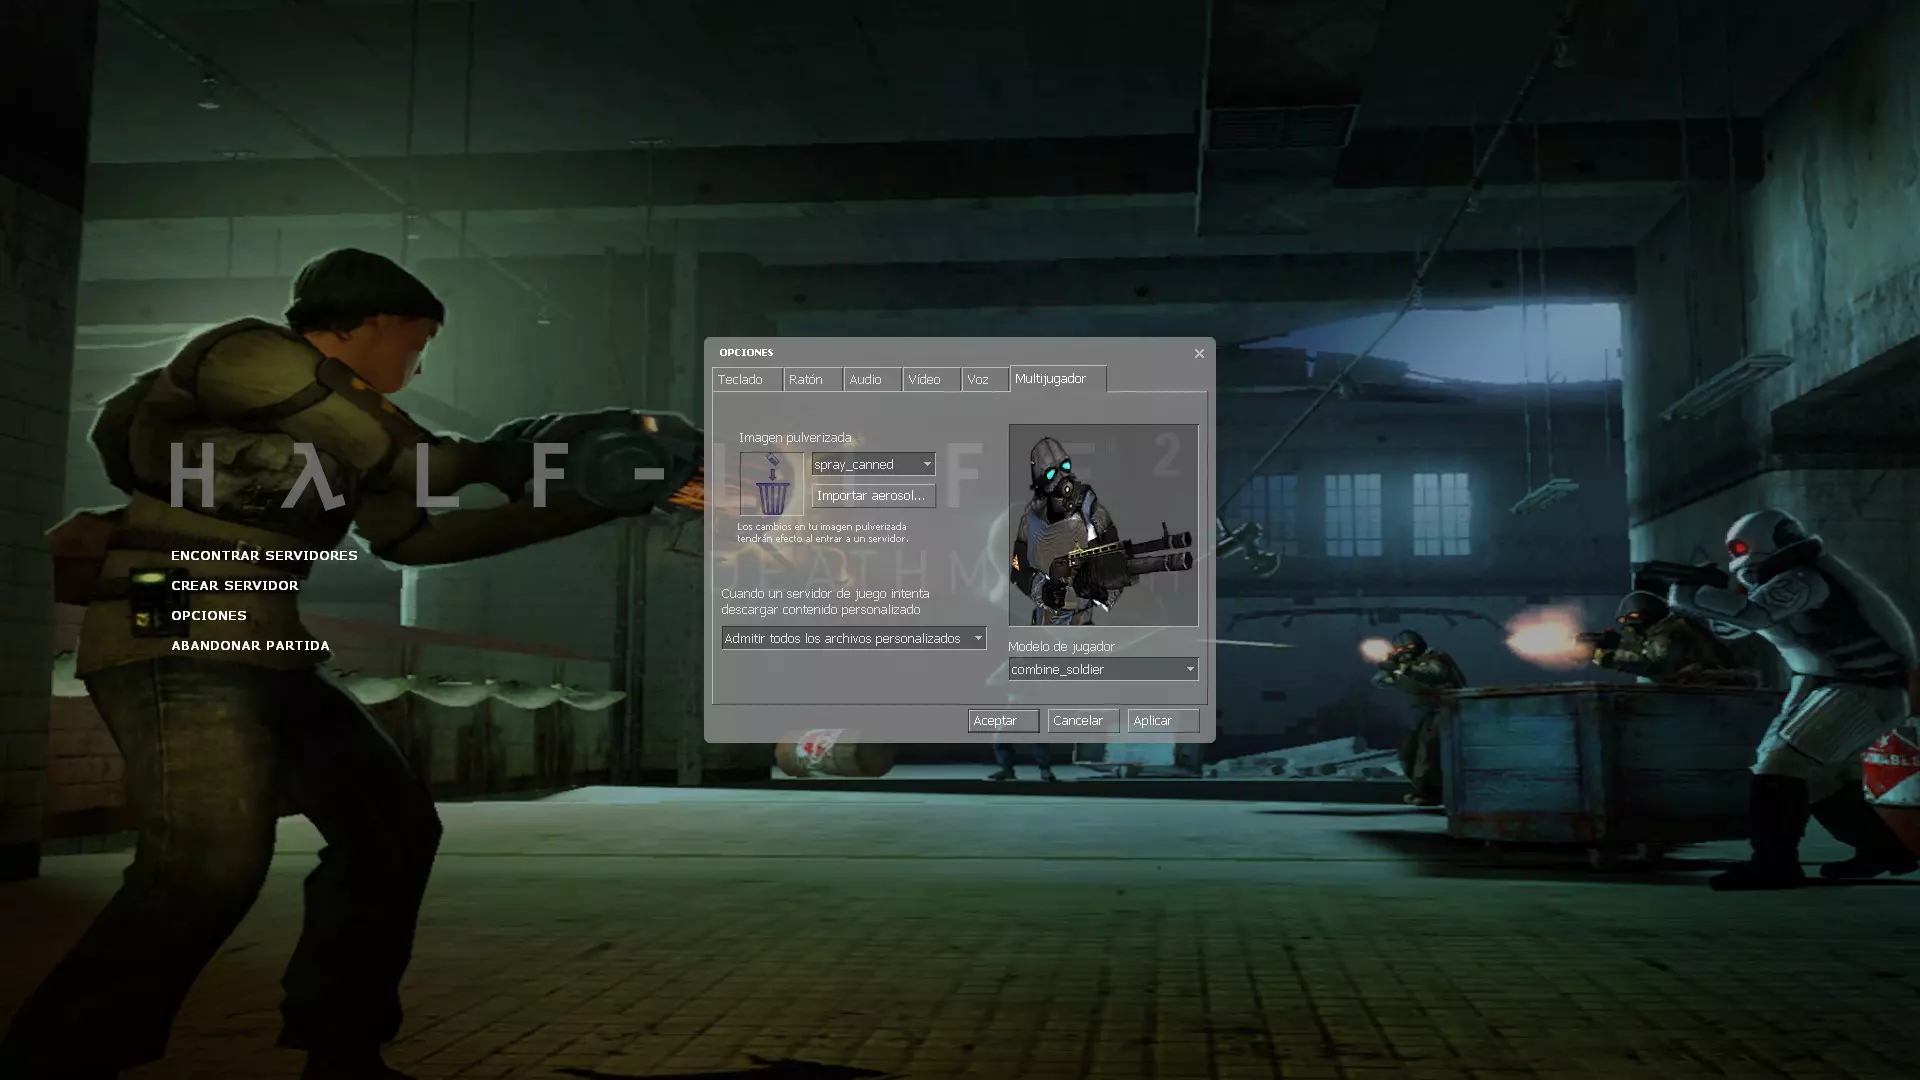
This is a comprehensive guide intended to sanely explain as much as Half-Life 2 Deathmatch as possible . Important: Regarding the 20th Anniversary Update Growing PainsAlong with Half-Life 2, Half-Life 2 Deathmatch also got a major engine update alongside it, too. Unfortunately, while the new update came with some bug fixes, but also created some new ones that need to be ironed out. However, the update to updating the game to 64-bit has a much worse side effect...It unintentionally ended up breaking a lot of dedicated server-related things, such as server plugins, and custom server binaries (custom server code, usually ones that fix long-standing bugs on the server's side). To make things worse, there is no existing Source SDK code to get a 64-bit version of the Source Dedicated Server working for Deathmatch - so the short version is your favourite server had to revert to an earlier version of the game, and ended up being hidden on the server browser because of it. However, it's still possible to both play on, and host on these dedicated servers by reverting the game to a previous patch. How to Revert To The Prerelease Branch1. In your Steam game library, find "Half-Life 2 Deathmatch", either as a recently played game, or on your game list. 2. Right click it, and then click "Properties". 3. On the left hand side, click "Betas". 4. Next to "Beta Participation", click the drop down box, and then click prerelease. What the update actually changedI'll need some time to properly analyse what's actually happened, but from just tinkering around, this is what I've found so far: * Stock map changes - The patch notes are a bit vague, so this will require a good look at * Long standing bug fixes - Some minor UI ones, some that can be patched server side, and some that are very welcome, such as the broken/inconsistent listen server physics bug (things won't randomly fall through the floor as much, a massive annoyance fix for mappers). * Added 64-bit support to the game and existing modding tools- Outside of playing nicer with current operating systems, it should result in less crashes...It should be a pretty big boon once the dedicated server issue has been fixed. * Additional console variables and commands - Some commands, like friction, weapon swaying, and more are now accessible, even without the use of SourceMod. * Added VScript support - This is the holy grail of Source Engine mapping (Squirrel language version). It allows for far greater possibilities and event control for mappers, without needing to rely on server plugins as much. Considering how huge of a game changer this is for modders, it makes you wonder why wasn't this listed in the release notes? What hasn't changed* General gameplay - Bunnyhopping, prop jumping, yo-yoing, and other existing movement tech still work as normal. * Game config - As far as I can tell, there hasn't been any settings that have needed to be changed to get the game to look and play as normal (minus lacking dedicated servers!!!) * Mod installation - The custom folder still works, same as before. * HUD mods - As DM didn't receive the under-the-hood UI changes, HUDs created before this update are likely unaffected, including HPH-made HUDs. However, you might notice that some of the fonts, such as in the console, have changed. ConclusionThe game is mostly the same, or rather will be the same, once a few things get fixed from Valve's end. But until then, I suggest getting you and your mates use the prerelease version, unless you want to toy with VScript. Why Play HL2:DM? Half-Life 2: Deathmatch, or just HL2:DM, plays similar to classic arena shooters like Quake or Unreal Tournament, but with a major focus on both physics and environmental manipulation. Whether it be simply throwing toilets, to launching yourself to the moon with your gravity gun, its like a breath of fresh air compared to other modern multiplayer First Person Shooters that have come out ever since. How to Buy https://store.steampowered.com/app/320/HalfLife_2_Deathmatch/ Half-Life 2: Deathmatch can be bought fairly cheaply by itself, and comes alongside the purchase of Half-Life 2 Episode 1. Steam Game BundlesThere are multiple item bundles on Steam that include HL2:DM with their purchase. As of mid-Feburary 2022, these are the bundles and their listed prices in Australian Dollars (minus 25% for the US Dollar price).
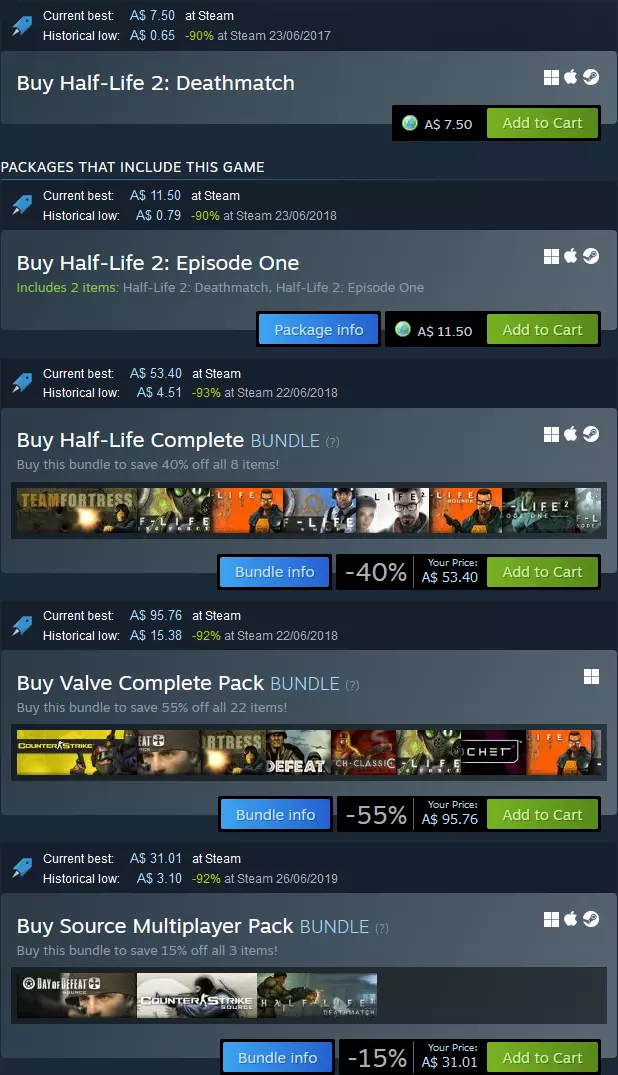
So which bundle?Personally, I recommend purchasing the game from the Valve Complete Pack on sale, as it not only comes with a collection of great games alongside Deathmatch for $20 USD, it additionally bundles games that are a requirement for a lot of popular Garry's Mod servers and mods (such as DarkRP and Trouble In Terrorist's Town). Game Optimisations Important Configuration File InformationYour game configuration files are located in "... steamapps common Half-Life 2 Deathmatch hl2mp cfg". Files in here can opened and edited with any text editor. You do this by either right clicking on the file, and selecting "Open With", or click and dragging the file into your text editor of choice. I recommend you use any modern source-code editor to change your configuration files, such as Visual Studio Code[code.visualstudio.com] or Notepad++[notepad-plus-plus.org]. If you've messed up your game configuration beyond recognition, backup and then delete "config.cfg" & "autoexec.cfg" from "... Half-Life 2 Deathmatch hl2mp cfg" and everything inside "... Half-Life 2 Deathmatch hl2mp custom". The game will then create clean, default configuration files for you on the next startup of the game. Common Configuration Filesconfig.cfg: This lengthy file contains all of your keybindings and almost all graphical options to the game (minus resolution). autoexec.cfg: This configuration file will always apply whatever you write in here to your main "config.cfg" file whenever you launch the game. It also handles special configuration tools, such as aliases. If you do not have this file, create it. overrides.cfg: If you use Xeogin's HL2:DM Community Patch (recommended, see below), put anything you'd usually add to your "autoexec.cfg" here instead. It'll make things much less messy to deal with later. Essential FixesCheck the PCGamingWiki[www.pcgamingwiki.com] for the most up to date fixes for HL2:DM. If you can't find your issue there, try searching your problem but with using other Source Engine games[www.pcgamingwiki.com] as the term instead (such as Team Fortress 2 or Counter Strike:Source). Recommended Fixes Xeogin's HL2:DM Community PatchThis contains optimal game settings from both a gameplay and technical perspective. This also amends some networking issues under certain conditions. Copy and paste the text from Xeogin's GitHub[github.com] to your "autoexec.cfg", then create a file named "overrides.cfg". Stick anything that you'd usually put into your autoexec into this new file (such as keybinds and aliases). Player Model Selection FixThe game has an annoying bug where it won't remember what your character model is in between games. This is important because it influences what melee weapon you start with, stun stick or crowbar. You can either fix this with a mod, or by copy and pasting a fix into your autoexec and hitting a button whenever it changes. Client side mod fix: Download this[gamebanana.com], and extract the "fix_model_change" folder to "... steamapps common Half-Life 2 Deathmatch hl2mp custom" Autoexec Fix: Add the following to your autoexec.cfg: // Alias commands for changing skins (since GUI/options menu is now broken) (Thanks Obama/Valve.) cl_playermodel "models/humans/Group03/male_03.mdl" alias "rebelModel" "cl_playermodel models/humans/Group03/male_03.mdl" alias "combineModel" "cl_playermodel models/combine_soldier.mdl" bind "F1" "timeleft" // Uses console command instead of game chat bind "F2" "rebelModel;jointeam 3;say_team Either joined team red, or will change to a rebel player on next spawn." //Jointeam 3 + change to designated (aliased) rebel skin bind "F3" "combineModel;jointeam 2;say_team Either joined team blue, or will change to a combine player on next spawn." //Jointeam 2 + change to designated (aliased) combine skin bind "F4" "jointeam 1" // Spectator For HPH HUD Users: HPH includes the client-side mod fix with all generated HUDs. Red Tint/Flash FixWhen you get damaged by a very powerful weapon, it will tint your screen red for feedback. While it won't blind you, it does make it hard to see for about a second. Most custom HUDs either reduce or outright remove it, but if you'd rather stick with the default HUD , you can fix it yourself. Vanilla Solution: Download[community.pcgamingwiki.com] Stop Unwanted Downloads From ServersMost servers these days customise the game to some degree, causing longer downloads. For maps, this is fine and arguably is the sole reason why the game has survived for so long. With that said, when you normally first connect into a server, you'll see a welcoming screen with text and a close button on the bottom of the screen. This is called a Message of the Day (MOTD) page. By default, HTML (web browser) MOTDs will be loaded; this can cause lag from loading websites, to potentially triggering exploits on your computer under certain circumstances. Finally, some servers also enable the ability to tag images onto walls called sprays. While most people use joke sprays, there are people out there that will spray unpleasant or unwanted (NSFW) stuff to try to get a reaction from you. Luckily, these can be disabled as well. Solution: Add the following to your autoexec, and uncomment (remove the two slashes) the lines that you don't want. cl_disablehtmlmotd "1" // Disables the webpage HTML add-on for Server MOTD's as they are lame and vulnerable to stuff. // cl_allowdownload "0" // cl_allowupload "0" // cl_playerspraydisable "1" // Disables sprays // cl_downloadfilter"mapsonly" // Skips over server stuff that can massively increase join times Prevent console spamThe game often spams the developer console with sound errors, causing constant scrolling. This is rather annoying if you're trying to change game settings using console commands. Luckily, these errors can be filtered out. Console spam fix: Add the following lines to your autoexec con_filter_enable 1 // 1 filters out completely, 2 displays filtered text brighter Def. 0 con_filter_text_out "Playing sequence" // Prevents annoying console spam involving sound Def. "" Block Fake Servers Such As FastpathThere are fake servers on the server browser, run by rogue administrators that have modified the game to add pay-to-win elements if you "donate" to them. Outside of the likelihood of being illegal to be monetised like this without Valve's consent, they also employ redirect servers to point to their main server (which itself fakes people playing on it), spamming the server browser. There are two ways to fix this; either block these servers on a Firewall level, or to use a blacklist that only works in-game. Either way, the method to do so can be found linked below as a Steam Guide. https://steamcommunity.com/sharedfiles/filedetails/?id=2502626384 Quality of Life Changes These are changes that will make your gameplay better. They aren't essential, but are highly recommended. Enable the Developer ConsoleThe console is used to quickly make changes to your configuration along with other utility functions. It can also be rebound to a key you won't hit by accident. Solution: From the gameplay menu, go to Options > Controls tab > Advanced > Enable console (`) Console Key Rebind: If you find yourself accidently hitting tilde a lot, you can rebind the key and then remove it from tilde. bind "F8" "toggleconsole" unbind "`" Bind Jump To ScrollwheelThis will sound weird at first; using the your mouse's scroll wheel to jump is almost essential for advanced movement tricks. HL2:DM lacks the quality-of-life features for jumping like Quake Live/Champions or Diabotical possess (jump buffering and autohopping), so the best way to consecutively chain bunnyhops is by using the scroll wheel to spam jump commands (without the use of external programs or modifications). Solution: Unbind scroll up and down using the developer console, then rebind jump in the same manner. unbind "MWHEELUP" unbind "MWHEELDOWN" bind "MWHEELUP" "+jump" bind "MWHEELDOWN" "+jump" Note: You may still have jump bound to your Spacebar, or as many keys as you want with no problems. Disable the Weapon Selection MenuWhen you are new to the game, the weapon selection menu on the top of HUD is useful to remember how your keybinds work. However, it does delay your weapon switching enough to get you killed sometimes. Once you've got a rough grip with how the weapon grouping works, its highly recommended to turn this off. You will still be able to toggle through the same weapon categories, but now at a much faster rate. Solution: Open the developer console and type: hud_fastswitch "1" Disable weapon autoswitching on weapon pickupWeapon auto-switching preferences is a surprisingly controversial topic. While it is true automatically equipping weapons from the ground weapons can net you kills you sometimes wouldn't, you will also often pick up low or empty guns and get killed by being stuck in the reload animation. I've found that both myself, and competitive longtime players have found autoswitching to be more of a hindrance than a boon, so we disable it. Solution: Disable auto-weapon switching by typing the following into the developer console: cl_autowepswitch "0" Bind Individual Weapons to KeysSimilar to disabling the weapon selection menu above, this will also cut down your reaction time when switching weapons by a noticeable amount. If you do not wish to do this, at the very least individually bind the Gravity Gun and Grenades, as they are vital to playing well. unbind q unbind g bind "q" "phys_swap" // First press for Gravity Gun, Second for the previously held weapon bind "g" "use weapon_frag" // Press once for normal grenade Keybinding tips Keep your most used weapons as close to your movement keys as possible. In the options menu, the "Gravity Gun" function that isn't in all caps is a straight upgrade to the Previous Weapon key (it works this way: Gravity Gun > Previous Weapon > Gravity Gun > Previous Weapon, and so forth, allowing easy back-to-back grenade combos) It's not practical to bind both Crowbar and Stun Stick separately, so scrolling through the first weapon category is fine. Just keep in mind pressing Weapon Category 1 three times with a full inventory brings up the Gravity Gun. Changing your held spawn weaponYou normally spawn holding the SMG. While it's not an awful weapon when paired with it's impact grenades, it usually ends up being a last resort weapon to finish low health players with. Both the Gravity Gun and Frag (thrown) Grenades typically are more potent starting weapons by far, as they will almost always deal more damage in the same amount of time it takes to fully unload half your magazine (minus outliers from very weak props, weak splash damage or outright missing your target). As Deathmatch is a fast-paced game, manually switching to other weapons can also get you killed due to being stuck in weapon switching animations. As for your held spawn weapon of choice, switching your starting weapon to the Frag Grenade is more often than not the best option, as it has the strongest kill potential when comboed with the Gravity Gun. Solution: Add the following to your autoexec. cl_defaultweapon "weapon_frag"Note: This will not change your starting inventory items or stats. Replace quick zoom with toggle zoomUnlike quick zoom, toggle zoom will let you fire while zoomed in. This turns the Revolver into a proper Sniper Rifle. Solution: Replace the normal zoom function with toggle zoom instead. The commands below replace the default key. unbind z // Default zoom key bind "z" "toggle_zoom" Changing your HUDWhile the default HUD is fine, you may want to change elements such as having an easier to see crosshair, or being always being able to see your Aux Power (sprint). These can be found at https://hl2dm.net/osg/download/list.php and Gamebanana[gamebanana.com]. You can also give HUD customisation a shot, yourself. See the Extra: HUD Modification section for more details. Note: If a mod tells you to replace files, instead go to "...steamapps common Half-Life 2 Deathmatch hl2mp custom", create a folder with a name you'll recognise later, and finally add the mod's files in the same folder structure it came with, or how its readme instructs you to do so. Joining a Game The In-Game Server BrowserHL2:DM does not use a matchmaking system to play online games. Instead, you join games using a server browser. After starting the game, press "Find Game". This will open a list of all publicly available servers.
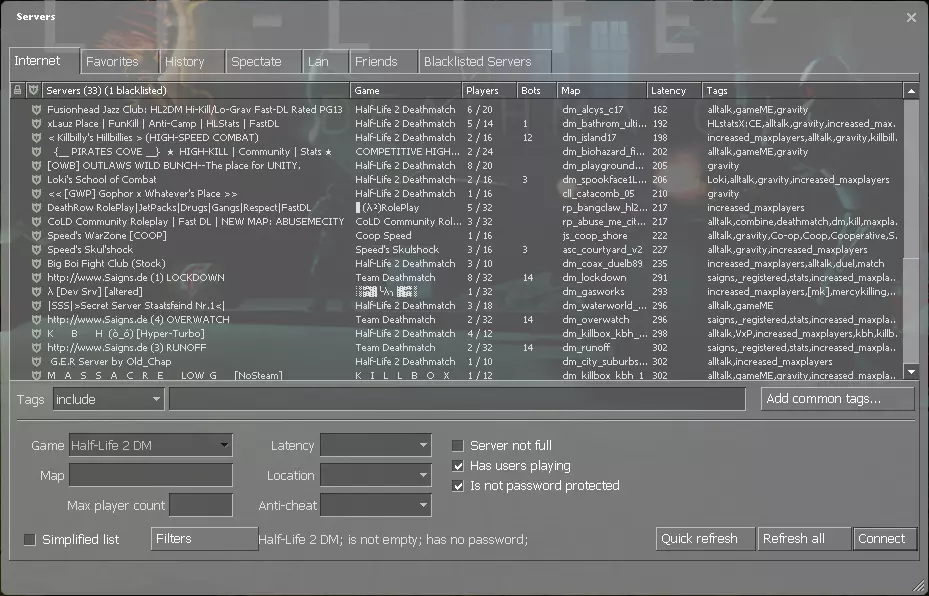
小贴士:禁用左下角的【简化列表】选项,这样可以显示更多服务器。 服务器浏览器分类 你可以通过点击服务器列表顶部的标签快速对分类进行排序。建议按延迟以升序(从低到高)排序。 挂锁图标 - 表示该服务器受密码保护。 盾牌图标 - 表示该服务器启用了Valve反作弊系统(VAC),用于防范和封禁作弊者。不建议加入未启用VAC的公共服务器。 服务器 - 服务器的名称。 游戏 - 显示《半条命2:死亡竞赛》服务器当前运行的模式。如果该字段不是“Half-Life 2 Deathmatch”,则表示服务器正在运行自定义服务器模组。 玩家 - 左侧为当前玩家数量,右侧为最大玩家容量。如果服务器已满,且未获得服务器管理员的优先权限,你将无法加入。 机器人:若此项不为空,则表示当前服务器中非人类玩家的数量。 地图:所选服务器当前运行的地图。地图名称也能提示服务器当前的运行内容。 延迟:服务器对你的操作做出响应所需的时间,通常也称为ping值。数值越低,你的连接质量越好。 标签:这些标签能大致反映服务器的设置情况。 在屏幕底部,你会看到筛选选项。如果你只想寻找有玩家的游戏,勾选【有用户在玩】和【未设密码保护】即可。我不建议在延迟超过200 ping的服务器上游玩,因为高延迟会导致你的操作延迟,同时让低延迟的玩家获得巨大优势。 Steam服务器浏览器 你也可以使用Steam服务器浏览器来连接服务器。这是一种无需启动游戏就能查看你喜爱的服务器的实用方法。 默认情况下,你可以通过点击Steam应用窗口顶部的【查看】,然后点击【服务器】来打开Steam服务器浏览器。请注意,如果你使用自定义Steam皮肤,操作方法可能会有所不同。
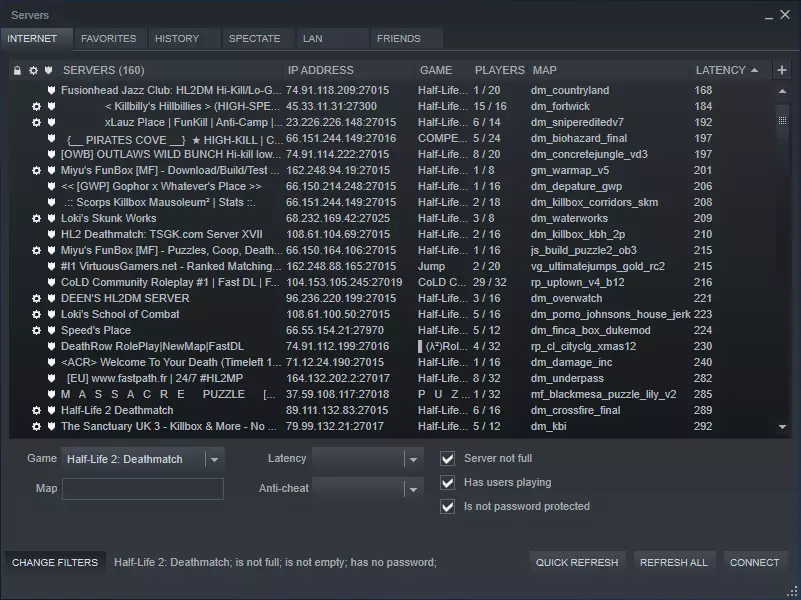
打开服务器浏览器后,点击“游戏”下拉菜单,选择《半条命2:死亡竞赛》。 此服务器浏览器的操作方式与游戏内(以及其他Valve游戏)的浏览器类似,但有一些特点: - 收藏的服务器会在两个浏览器之间共享,但服务器黑名单不会(你会看到原本不会显示的服务器)。 - 无法查看服务器标签。 - “历史记录”标签不会按游戏筛选。 如果没人在玩该怎么办? 如果没有延迟合理的游戏进行中,你可以尝试询问粉丝群体是否有人想一起玩。目前玩家最多的社群是HL2.community Discord服务器,在本指南创建时已有300名用户。该服务器同时也作为其他玩死亡竞赛的Discord社区的枢纽,这些社区列在信息标签下。 如果你更想进行《半条命2:死亡竞赛》的竞技玩法,也可以尝试Half-Life 2: Deathmatch University的Discord服务器。 如果上述方法不行,你可以尝试在其他专用服务器上与机器人对战,或者在自己的电脑上本地设置机器人(例如通过RCBots 2)。设置机器人可能有点麻烦,所以建议在尝试自行设置前阅读相关指南。记住,尽管机器人不能很好地替代人类玩家,但当你嘲笑它们被自己走进的道具卡住时,它们不会感到尴尬。基础游戏玩法 自定义游戏模式 许多服务器运行额外的游戏模式,例如低重力、高击杀速度、夺旗、跳跃、角色扮演(并非你所想的那种)、合作以及解谜地图。 完整的模式列表可在相关指南中找到。 本指南将重点介绍游戏自带的两种主要模式——死亡竞赛和团队死亡竞赛。 基础游戏玩法 在《半条命2:死亡竞赛》中,你的主要目标是在其他玩家中获得最高击杀数,具体取决于你所游玩服务器设定的击杀数或时间限制。 地图中分布着各种资源,你可以拾取或利用这些资源来帮助自己击杀其他玩家。部分物品提供护甲,部分物品恢复生命值,还有部分物品为你可装备的武器补充弹药。
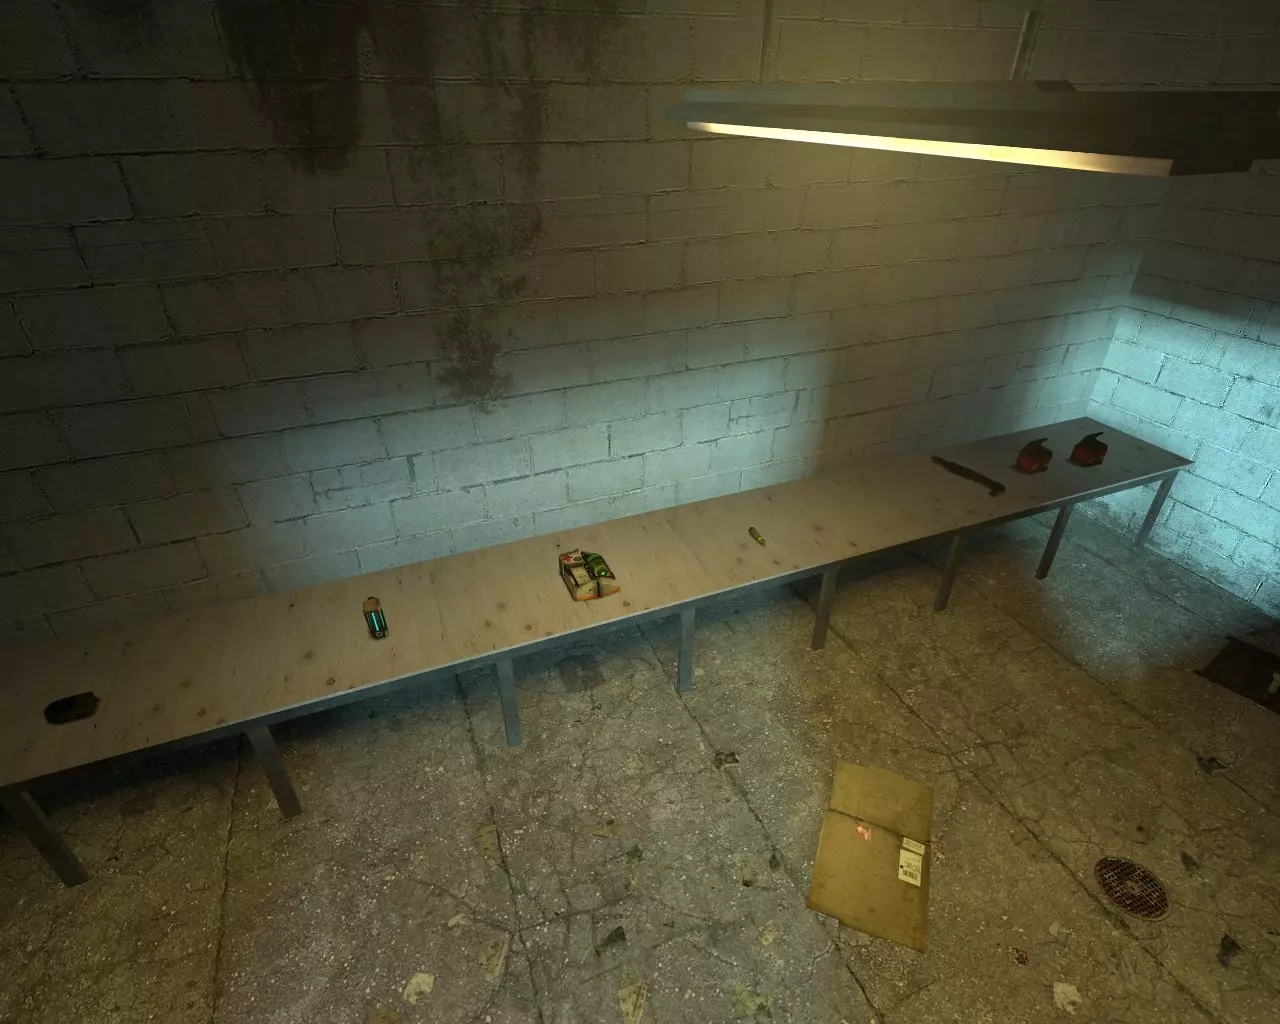
你一出生就得赶紧去获取比初始武器更好的装备;在公平对决中,冲锋枪永远打不过火箭筒!
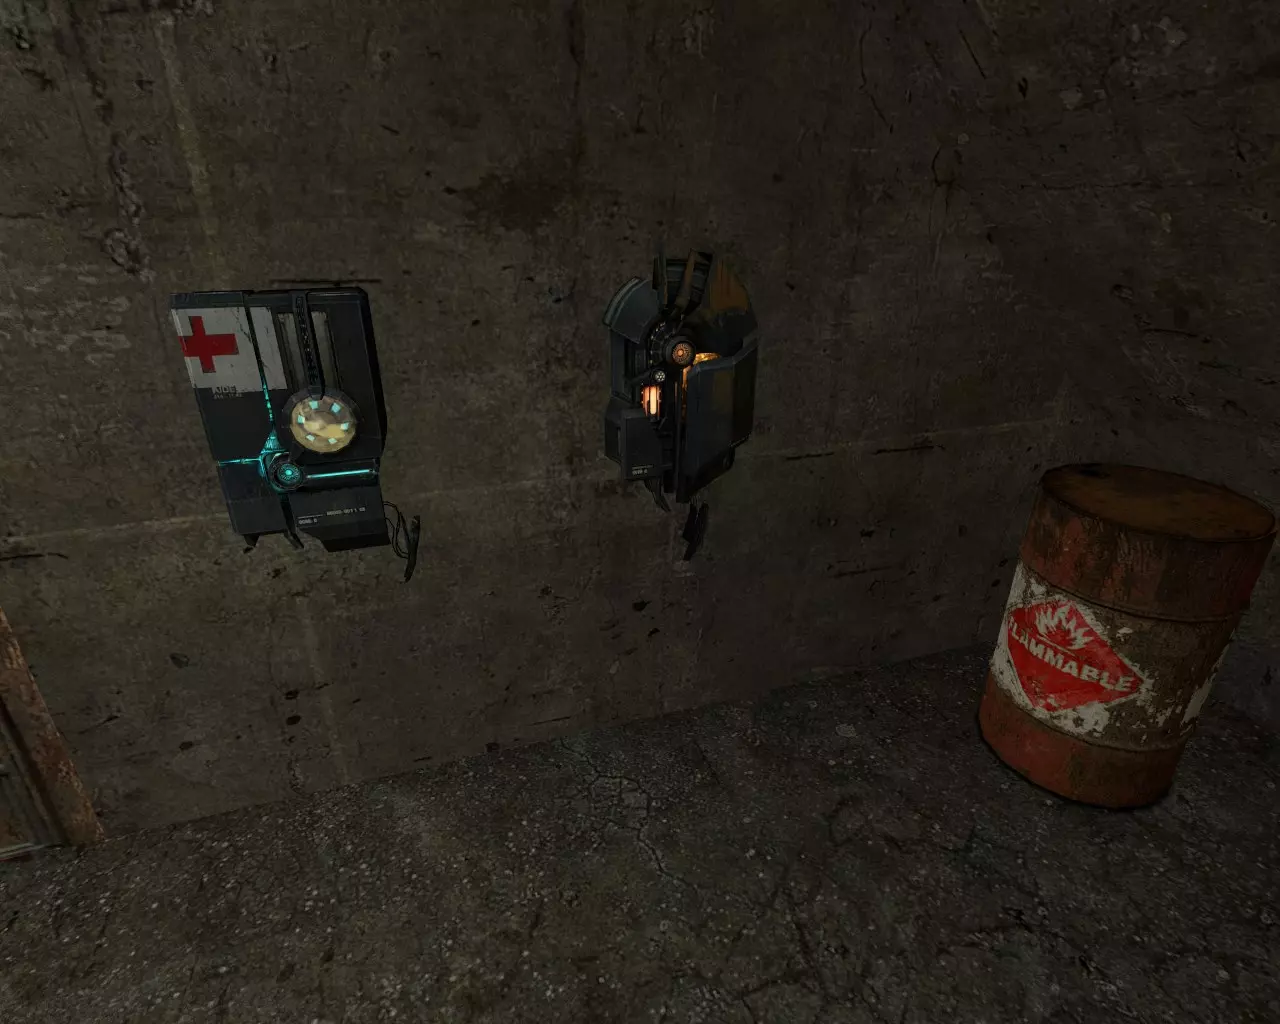
地图周围还分布着一些补给站,面向它们并按住使用键(默认“E”)直至耗尽,即可恢复生命值或获得护甲。
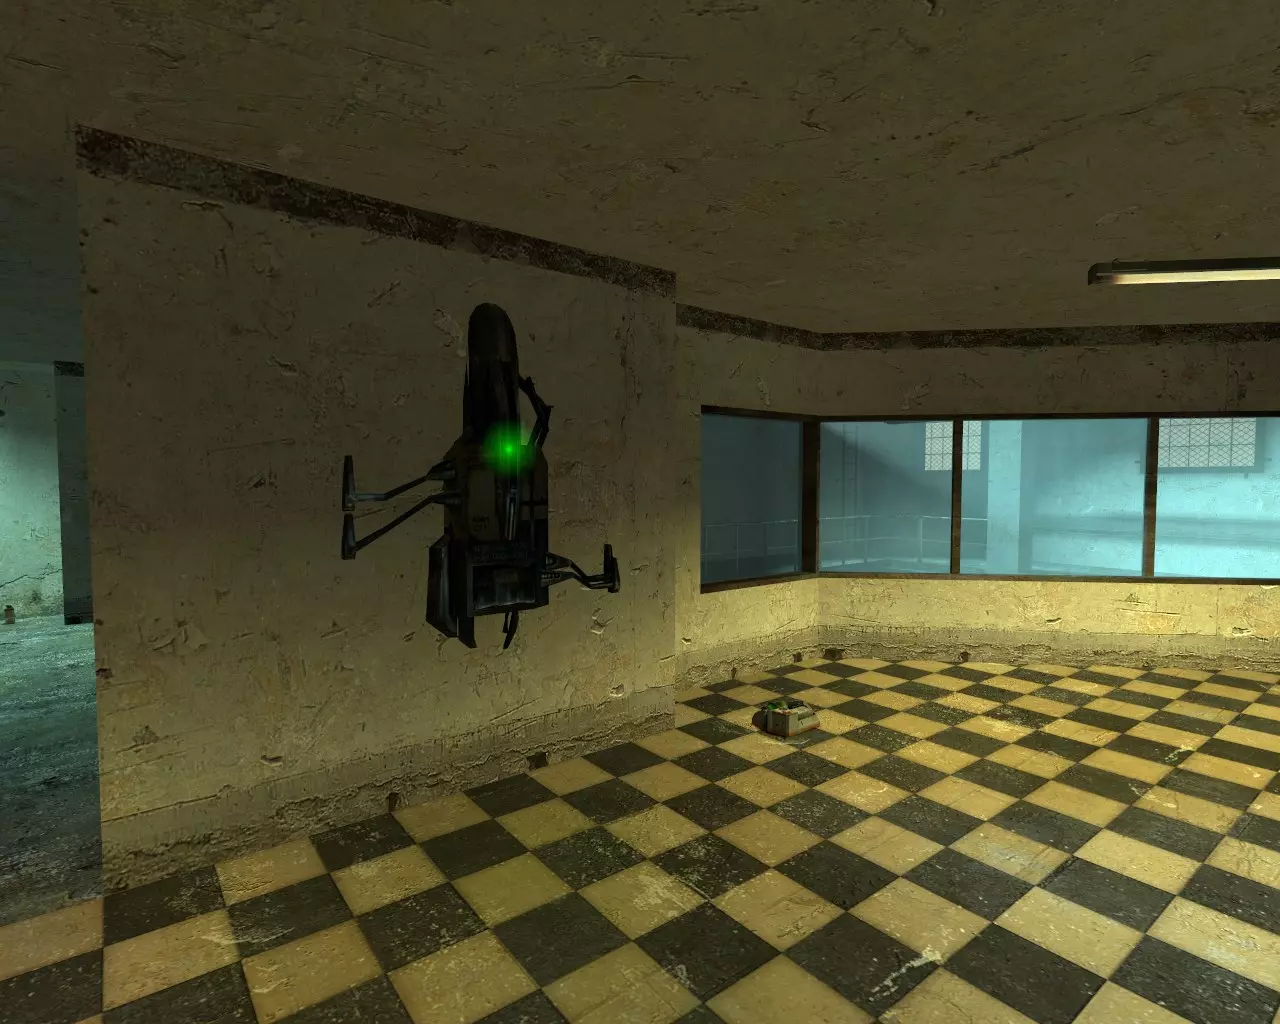
大型充电站不仅能恢复生命值和护甲值,还能将你的护甲过载至200点!不过,长时间面朝墙壁进行过载操作风险极高。 那是什么声音?
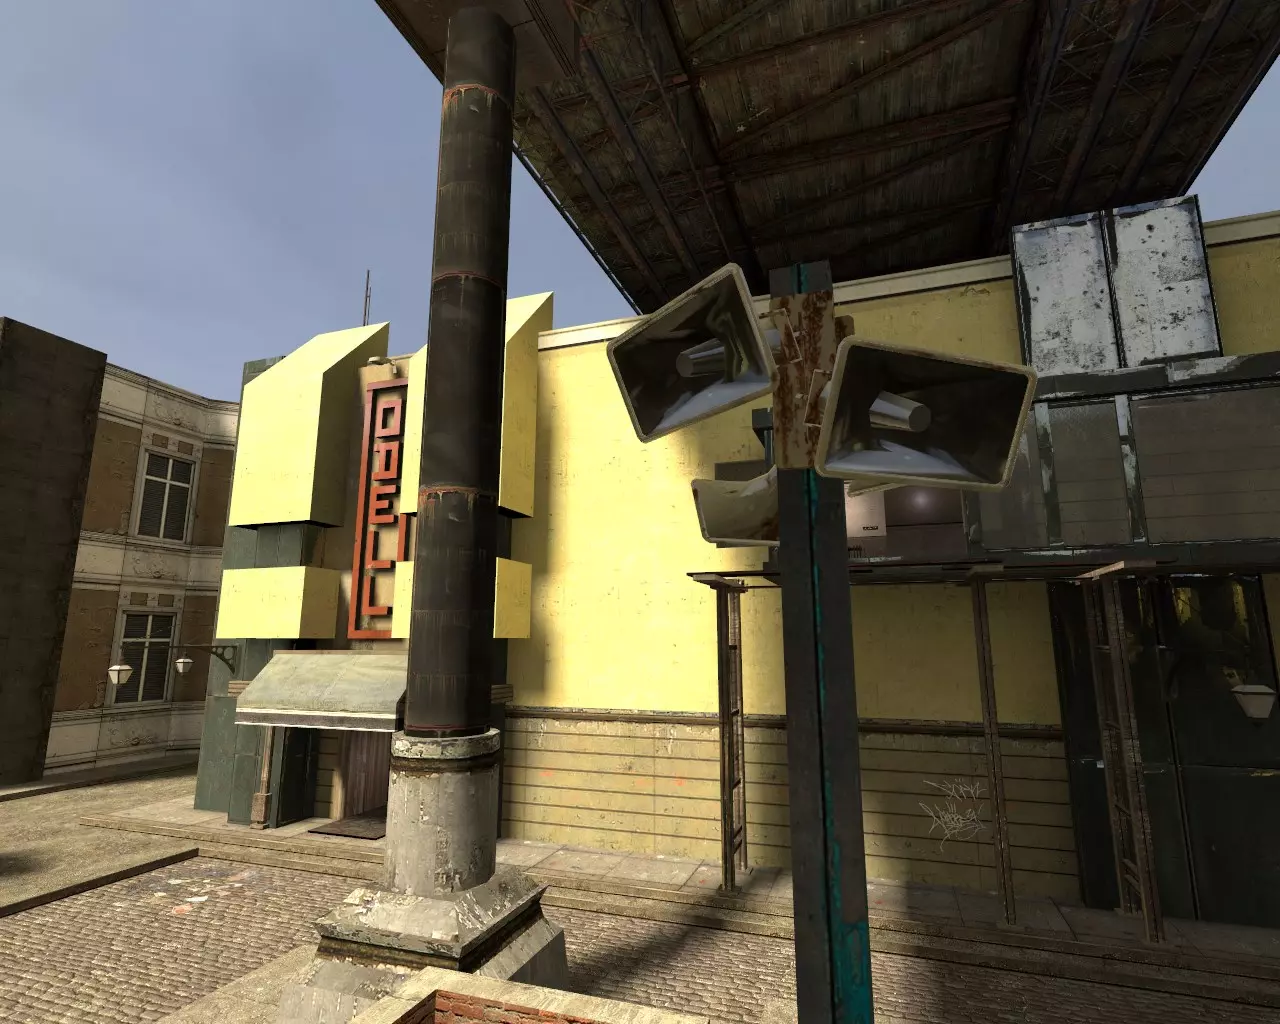
If you hear an alarm, or generally any other strangely loud noise that can be heard across the map, someone has picked up the RPG! In HL2:DM, it's practically a superweapon, so either kill the player that's holding it or get to cover quickly! Standard Player Movement MovementOn the surface, HL2:DM movement is is similar to other First Person Shooters; WASD to move, Space to Jump, Shift to Sprint (Aux Power) and CTRL to Crouch. However, the game has a complex movement system that is easy to learn, but hard to master. Important Considerations Do not bind toggle crouch or toggle sprint; they are bugged and will hinder you in multiple ways! (Toggle crouch is finicky and can't be used quickly, meanwhile toggle sprint burns Aux Power at an insane rate on uneven ground and in the air) Many servers have deviated from the standard movement physics, but the general movement mechanics remains the same. Your weapon's accuracy are not effected by movement, so going fast is usually the optimal way to play. Standard Deathmatch MovementIf you've played Quake 1 multiplayer, or surfed in any Source Engine game, a lot of this will be familiar to you. Crouch JumpThis is a pretty simple maneuver; jumping and then crouching will decrease your height from your legs, making it possible to land in places you wouldn't be previously able to, such as jumping on top of barrels. Basic bunnyhoppingThis one's simple too; after either sprinting or gaining vast amounts of velocity elsewhere, just keep on jumping! This will let you preserve your AUX Power while moving fast around the map. Air ControlYou've got a surprisingly high amount of control when you're in the air, as long as you don't hold forward while doing so (there are exceptions). Turning your mouse in the same direction while moving sideways (strafing) will make you turn in midair and gain speed as long as the cornering's not too sharp. You should do this in but in smaller movements while alternating left or right when you can to gain momentum, then follow up with bunnyhops after you land. On the contrary, if you need to stop moving fast while in midair, tapping your backwards movement key will instantaneously kill all your horizontal momentum. However, you will be briefly vulnerable while you fall in a very predictable descent until you hit the ground. Strafe JumpingThis is the proper way to start a bunnyhop. If you do this right, you'll gain way more speed than just sprinting alone. Start by both sprinting and moving forward While holding sprint, turn your mouse and strafe in the same direction. Release sprint and then jump.Keep up the momentum you've gained by bunnyhopping. Advanced Player Movement Advanced Deathmatch MovementWhile I wouldn't say that performing these are required to do well in public server games, these will help considerably in high level and competitive games. Usable LaddersMost climbable ladders can be grabbed further and exited quicker by pressing the use key (e by default). Note that some custom maps use clip brushes (hidden developer geometry) to go quickly up and down ladders instead, which this technique will not work on. Crouch SlidingCrouching while moving fast will reduce your friction until reaching a standstill, resulting in a crouch slide. This can be used while strafing to glide up staircases, or be exploited with bunnyhopping as described below. Crouch hoppingThis is the reason to bind jump the to scroll wheel. Using your mouse's scrollwheel over using the spacebar for bunnyhopping makes hitting repetitive jumps considerably easier; this is especially important for crouch hopping as the amount of jumping required is more frequent with a shorter time between jumps. To do it, you will initially need momentum to start it, such as from a strafe jump. Hold crouch and repeatably jump. Strafing and turning your mouse in midair will cause you to gain acceleration, eventually surpassing sprint speeds. If you master crouch hopping, you'll never run out of Aux Power again! Prop JumpingThis utilises nearby props with the gravity gun to jump to greater heights. This can let you enter areas that don't naturally connect to different points on the map. You can perform this on most props such as barrels, and even cars: First, grab your prop (if able) with the Gravity Gun. If it's a barrel, flick your mouse upwards and release the prop repeatably it until aligned right side up. Otherwise, release the prop. Crouch jump on top of the prop. Fire your Gravity Gun repeatably while trying to ride the prop for additional height. Lighter props tend to get better results (the toilets and sinks especially), but the momentum from these props can be lethal. Explosive JumpingSimilar to other arena shooters, it is possible to use the damage from explosives to either jump to high places or to gain momentum. In HL2:DM, it's a lot more risky due to the much higher damage of explosives, and the higher presence of useful hitscan weapons such as the Revolver. SurfingThis a very niche trick that lets you move further and faster along slanted surfaces. Servers with high air acceleration settings will make this technique both easier and cause you to gain much higher velocity compared to the game's default settings. Jump parallel to a slanted surface Release the forward/backward movement keys and strafe against the slanted surface Bob your camera up and down to gain momentum Starting Weapons In a normal game, you'll spawn with the following weapons, alongside 100 Health and 0 Armour: Gravity Gun Crowbar or Stun Stick (Rebel/Combine side respectively) Pistol SMG (with no grenade rounds) Grenades (x2) Gravity Gun Mechanics Gravity GunLearning how to use the Gravity Gun is paramount in Deathmatch. It's not just an excellent weapon, but it has an incredible amount of utility once you've mastered it. General Tips For the most part, the mechanics of the Gravity Gun are shared with Half-Life 2 single player; Primary Fire to punt things, and Secondary Fire to grab them. You'll automatically pick up items that you're not fully stocked with. Grabbing items this way is usually quicker and safer than walking over them. You can pick up a lot of environmental props as well, such as explosive barrels and crates. The general rule is wooden items can break when held or thrown, and metal is indestructible. Your grab range is surprisingly high, but it'll take a long time to grab things that are very far away. Prop damage widely varies based on the object's velocity and weight. Generally speaking, props that spin in flight (like propeller and saw blades) are the most powerful, followed by lightweight objects (such as toilets and buckets of paint). The Grenade ComboThe Grenade Combo is essential to learn in Deathmatch. You'll always have access to both the Gravity Gun and a couple of grenades when you spawn, and they can potentially kill a decently armoured and full health player straight off the bat with practice. You will need to have the keys for the Gravity Gun and Grenades easily accessible in order to pull this off successfully: G (Equip a grenade) MOUSE2 (Throw it with Secondary Fire) Q (Equip your Gravity Gun) MOUSE2 (Grab the grenade with its Secondary Fire) Wait until you believe you can both throw it far enough to hit another player, but also have cooked the grenade enough to have to not be returned back by them. MOUSE1 (Push it away with Primary Fire) Fast Orb ComboWhen launched from a Pulse Rifle, the Energy Orb is relatively slow and can be easily avoided or grabbed by enemy players. When pushed by a Gravity Gun, the velocity improves considerably, increasing the total bounces and improving the unpredictable trajectory of an angled orb. 5 (Pull out your Pulse Rifle) MOUSE2 (Fire the Orb using alternate fire) Q (Switch your Gravity Gun) MOUSE1 (Primary fire the Gravity Gun to fastball the orb) Note: There is a glitch where if you switch too quickly from the Pulse Rifle while charging an Energy Orb, it will play the sound and animation when you next pull the AR2 out. This is usually a cosmetic bug, but it uncommonly can fire an Orb out of sync, too. Yo-YoingThis a hard technique to pull off that will let you push and pull objects continuously, as if you were yo-yoing objects horizontally. It has a lot of utility, such as resetting Energy Orb and Grenade timers, and faking-out other players so you can land a better hit. This trick is easiest to perform if the Gravity Gun/Previous Weapon action is bound to an easily accessible key (it can be found in the Options menu called "Gravity Gun"; it is the one not titled entirely in uppercase). I personally have it bound to "Q", so I'll be using it to explain how it works. In it's purest form, yo-yoing is essentially repeating this sequence ad infinitum: Q (Gravity Gun Selected) MOUSE1 (Gravity Gun Push) Q (Previous Weapon Switch) Q (Switched Back to Gravity Gun) MOUSE2 (Gravity Gun Grab) Protip: You can perform yo-yoing on faster objects as well, but you'll need a lot of forward momentum to catch it again. Let's go for a practical example; you want to Yo-Yo an unlaunched Energy Orb (the best thing to practice this trick on, by the way). You have Gravity Gun set to Q, Pulse Rifle as 4, and everything else is on their default keys. This is how you'd combo it: 4 (Pulse Rifle selected) MOUSE2 (Energy Orb Launched) Q (Gravity Gun Selected) MOUSE1 (Gravity Gun Push) Q (Previous Weapon Switch) Q (Switched Back to Gravity Gun) MOUSE2 (Gravity Gun Grab) MOUSE1 (Gravity Gun Push) Gravity Gun Special Interactions The Gravity Gun can reset both grenade timers and energy orb bounces when both punted and grabbed. This means you can grab these, and throw them back to to their original owner! Held items can block bullets, but they will not block other player's thrown props from their Gravity Gun. Some heavy props like cars and dumpsters can be pushed around The Gravity Gun's push can be used to break windows The Gravity Gun does minor damage to props, eventually causing them to break. When punted enough, some volatile ones such as the red Explosive Barrel will explode. Standard Weapon Mechanics Bullet WeaponsBullet weapons are the Pistol, SMG, AR2 Pulse Rifle, Shotgun and the .357 Revolver. All these hitscan-based weapons all share similar mechanics. Bullet Weapon Mechanics Bullets have instantaneous travel time to their destination The bullet spreads are both random and are not effected by the player's movement. Weapon spread is also not effected by your suit's zoom. Alongside bullet spread, bullet weapons also possess both horizontal and vertical recoil (this is most apparent on the revolver). All bullet weapon damage can headshot, multiplying their damage by 3. This includes individual shotgun pellets.Pistol Is potentially a better starting weapon than the SMG due to higher average damage and increased accuracy. Accurate but slow shots when primary fire is held; fast but less accurate shots when primary fire is rapidly tappedSMG It's a weak weapon on spawn due low damage output, especially on armoured targets. Secondary fired impact grenades are fairly powerful, but you'll need to lead your target, alongside calculating the distance and compensating for the projectiles arc. Firing an impact grenade with the secondary fire and then finishing off weak players is the best way to use this weaponAR2 Pulse Rifle It's a heavy machinegun - Higher overall damage than the SMG, but with a slower fire rate. Secondary fire takes about a second to shoot an instagibbing Energy Orb in a line; see "Energy Orb Mechanics" for more info.Shotgun Very overpowered at close range due to it's extremely powerful secondary fire. Best aimed at the head where possible. Has an annoying quirk where it will always need to be pumped after it's been shot; this includes after being backpack reloaded, and after being retrieved from dead players after they've fired it but didn't pump it before dying..357 Magnum Revolver The best overall weapon at long range, but still very strong at close to medium range. Should be treated as a sniper rifle at long range (make sure you've binded toggle zoom to take advantage of it's accuracy). Possesses a combination of high vertical & moderate horizontal recoil after shots. You will always spawn with extra ammo for this gun A revolver headshot is enough to kill almost all players unless they’ve overcharged their armour Projectile Weapons SMG Impact Grenade Mechanics Detonates on impact. Infinite flight time. Travels in an arc. Double damage to armour (impossible to track this in a free for all). Energy Orb Mechanics The Energy Orb is the glowing, bouncy thing of death that will instantly kill anything it touches. It will also push props around that it contacts. The Orb will harmlessly pass through the person who either fired it, or launched it with their Gravity Gun. The Orb's lifetime is reset when pushed by the Gravity Gun's Primary Fire. When shot from a Pulse Rifle, the Orb's velocity can be sped up with the use of the Gravity Gun. See Fast Orb for more details. CrossbowThe crossbow may be Deathmatch's workhorse weapon; it's easy to use at close to medium range, and the bolt will always do enough damage to kill an unarmoured player. It additionally possess a zoom function with the secondary fire, although this does not effect the projectile in any way. The bolt is unique as it can bounce after being fired from acute angles between walls and floors. Aiming just below a player and having the bolt reflect upward to hit them is an effective method of aiming at close range. If you learn a map well enough, you can traject crossbow bolts to ricochet around curved corners as well. Bolt Jumping: For about roughly a second after landing, an enemy crossbow bolt can briefly launch you at high velocity (~2000 Hammer units) if you walk near it. Good luck coordinating it in a typical pub game, though. SLAMS (trip mines)SLAMS are a clunky combination between a thrown remote mine and a deadly tripmine. The Primary Fire will throw it, unless you've been facing close to wall or stable surface for a second or so, then you may place it as a trip mine. Either way, SLAMS will detonate when either shot or within blast range of an explosive. After you've thrown a SLAM, you can detonate it with the secondary fire button; however, the delay between throwing a SLAM and being able to activate it is usually too slow for most encounters. It's best to lay them as trip mines. Trip mines, outside of being shot, can additionally be triggered by props moving into the beam. Overall, the best place to plant trip mines are either low on staircases trim, or above them where players won't usually look. Brightly lit areas will greatly help blend the trip mine's red beam into the background. Protip: All thrown SLAMS will automatically detonate on their owner's death. Due to being obnoxious to play against, SLAMS are uncommon on community maps. RPGThis is Deathmatch's Big ♥♥♥♥♥♥♥ Gun; it's a laser-guided rocket launcher of death. With enough practice (or luck), the rockets can be curved around corners. When either picked up from it's spawn or from dead corpses, you'll always have 3 rockets to play with. To balance out it's power, most maps make the RPG hazardous to obtain, usually by surrounding it with environmental hazards or spawning in a a risky, enclosed area. Teleporter InteractionsAlthough it can vary on a map by map basis, grenades, energy orbs, thrown SLAMs, and other throwables may be relocated to a teleporter's destination. Bullets will never teleport. If you are holding a prop in your Gravity Gun while sprinting forward into a teleporter, you will likely be holding it at the destination. If you are holding a grenade instead, you will almost always be holding it on the other side. Because the Gravity Gun's interactions with teleporters are glitchy, the best way to figure out if you're still holding an item on the other end is to check if Gravity Gun is still glowing and listening out for it's hum. Backpack ReloadingAfter 3 seconds of not holding a weapon, that same weapon will reload in your backpack and be ready to be fired again. The only exception to the rule is the Shotgun, which always must be pumped before it fires. Back-rack TrackbackIf you can't get a feel for the backpack reloading timing, a good reference point is that by the time it takes to run out of SMG ammo and reload it again, you would have completed a backpack reload. Gameplay Annoyances Bugs If you can't move when you spawn, equip the Gravity Gun and try to pick up the prop below you. Failing that, type kill in the developer console to respawn, hopefully elsewhere! You can get stuck if you teleport into another player. The best way to get unstuck is is to kill the other player before they kill you, preferably with a shotgun! The shotgun can sometimes fire ghost bullets (no shells used) when swapped to under certain conditions. It most commonly occurs after alt-firing the shotgun, quickly swapping to the Gravity Gun, grabbing something, and then swapping back to the shotgun. Your weapon models can sometimes become invisible due to a variety of factors (people joining the server, people spectating you, or weapon glitches usually). You can partially negate this bug by using different crosshairs for each weapon. You can sometimes hear loud fire looping without a sound source. You can use two console commands to fix this; either "snd_restart" to flush all sounds, or "retry" to rejoin the server. (This bug is usually caused by ignited explosive barrels.)Other players You can mute other players by pressing "Esc", and then clicking "Player List", and then selecting the offending player and press "Mute in-game voice". Note that this will not stop them from hearing your voice chat. Sometimes you'll get spawn killed. At least the respawns are near instant. Extra: Health Mechanics Basic Health MechanicsThe player starts with 100 Health, and can reach a soft cap of 100 Armour. However, the big Super Charger ignores the soft cap, and can overshield the player's armour to a total of 200. Armour MechanicsIf the damage is low enough, armour will absorb 80% of damage directed at the player, with the remaining 20% damaging the player's health. If the total damage is higher than what the player's armour can absorb, it bleeds through to the player's health. Fall damage and radiation is not reduced by armour. Useful Health Values Health Armour Notes 100 0 This is the player's starting health 100 100 Maximum stats without overcharging or special map mechanics. Gaining 1 extra point of Armour will let you survive a revolver headshot 100 200 You will survive almost anything except an Energy Orb to the face Fall DamageFall damage is always 10 direct damage to the player's Health, and does not change based with height, velocity, or armour value. However, the possibility of taking fall damage is checked based mostly on your fall velocity and total time in the air. Extra: Weapon Damage This assumes the weapons hit, otherwise the value is zero. Melee Weapons Weapon Damage Crowbar 25 Stun Stick 40 Hitscan Weapons Weapon Base Damage Headshot Damage Pistol 8 24 SMG 5 15 AR2 (Pulse Rifle) 11 33 .357 Revolver 75 225 Shotgun [SINGLE] 9 - 63 Base (7 Shots x 9 DMG) 135 Max Headshot Damage (4 shots x 27 damage + 3 shots x 9 damage)* Shotgun [DOUBLE] 9-108 Base (12 Shots x 9 DMG) 216 Max Headshot Damage (6 shots x 27 damage + 6 shots x 9 damage)* *The Shotgun calculates damage differently from other hitscan weapons, so the maximum possible damage is displayed instead. See HL2DM University[university.hl2dm.pro] for more info. Prediction Weapons Weapon Damage Crossbow 100 Energy Orb 1000* *Instant kill Explosive Weapons Weapon Max Damage Splash Radius (Hammer Units) Frag Grenade (Thrown Grenade) 250 256 RPG 250 384 SLAM 300 192 Gravity Gun (Explosive Barrel Launched) 180* 256 SMG Impact Grenade 95 OR 200† 192 *Also deals prop damage on impact before exploding; a direct impact will likely cause an instant kill †The SMG Impact Grenade appears to do x2 damage to armour, and may possibly deal 1 extra prop damage on direct impact due to its mass. See HL2DM University[university.hl2dm.pro] for more info. Gravity Gun Holding ExplosivesThe Gravity Gun universally reduces explosive damage when held, likely to reduce the potential of the explosive wielder dying to their own weapons. Explosive Type Max Damage Splash Radius (Hammer Units) Frag Grenade (Thrown Grenade) 225 192 Explosive Barrel 160 256 SLAM 300 192 Extra: HUD Modification HPH Complete HUD Creation Tool
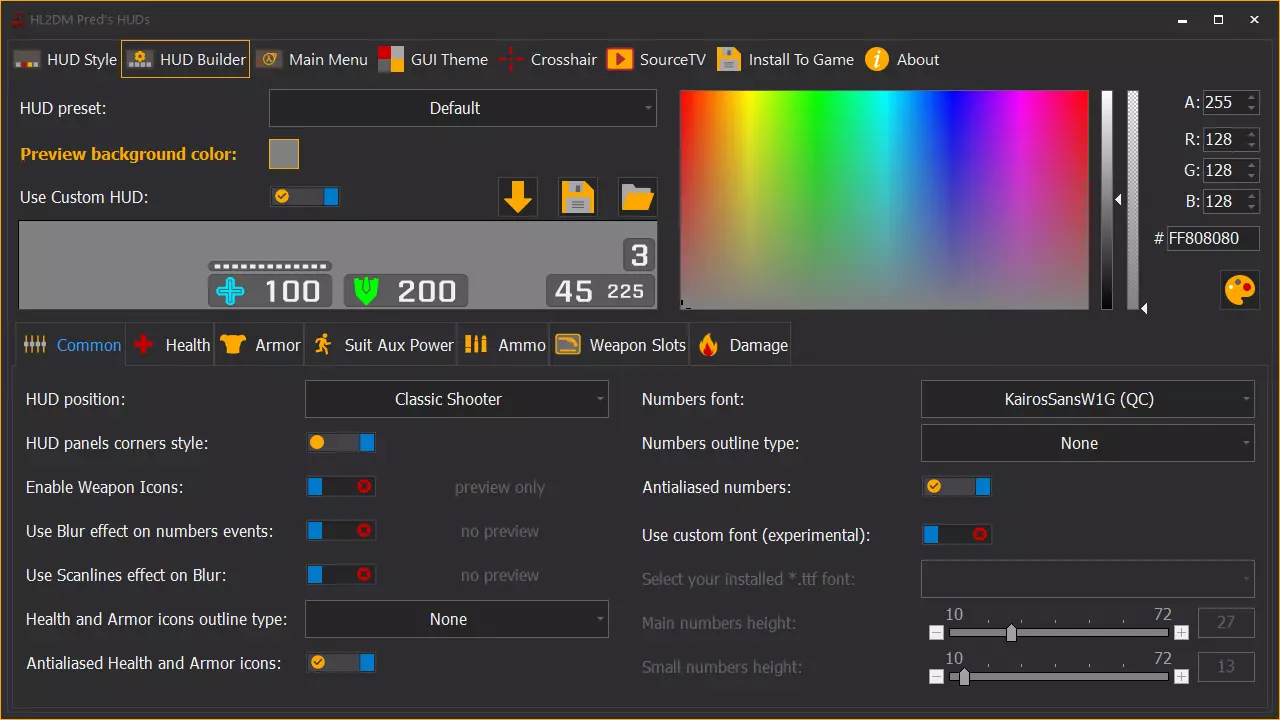
The HPH graphical HUD maker is the simplest way to both create and modify custom HUDs. HUDs generated by this tool also include UI fixes to problems mentioned in the guide above. It allows customisation of elements such as the HUD panels, custom crosshairs (with the option to change it per weapon), and both the pause and main menu. https://youtu.be/63MYdIWTgGI HPH DownloadGame Banana: Download (main)[gamebanana.com] Download Mirror: A mirror download link on Google Drive is found on the S-Force's Steam Group "About" section (near the top): https://steamcommunity.com/groups/SFHL2DM HPH FeedbackAs HPH is still in development, please report issues and bugs to the developer. This can be done by posting to this forum thread. https://steamcommunity.com/groups/SFHL2DM/discussions/0/3044985412473620319/ Installing Premade HUDsInstalling custom HUDs is the traditional way of changing your HUD, and is usually simple to install; after you've downloaded the HUD's files, check the readme.txt file first for any special information the author has included. After doing anything special the author has instructed, copy and paste all files and folders from the part of the zipped file that has folders labelled like resource and scripts to "Half-Life 2 Deathmatch hl2mp custom hud_name_here". Note: If you see a "sounds" folder with a small (1KB in File Explorer/16 Bytes in properties) file inside the file, that's normal. It's the game precaching all sounds in the mod's custom directories (or lack of it for HUD mods). If you delete it, the game engine will recreate it on next startup. However, if your game makes corruption (not normal) sounds after installing the HUD, close Deathmatch, delete the "sound.cache" file and reload the game; that'll usually fix it. Quick Customisation OverviewIf you wish to customise, or even create your own custom HUD, 13rp & Maxtasy have created a great guide on how to modify your HUD. https://steamcommunity.com/sharedfiles/filedetails/?id=161652635 The only other thing you should know is that you don't have to create/copy HUD elements that you don't modify to your HUD's "Half-Life 2 Deathmatch hl2mp custom name_here" folder, as files on that folder only overwrite existing files on load (you don't need to change the HUD if you edit your crosshairs, for example). Anything else about HUD modification that's inconsistent with this guide (Encyclopedia Deathmatchica) should be ignored, as the the linked guide (HUD development guide) above is likely correct. Custom Crosshairs[Unfinished section, resort to the above Steam Guide for now.] If you purely want to replace your default crosshair with a custom one (or more - the game supports it), that is easily accomplished. Custom crosshairs can be downloaded from hl2dm.net's Download page[hl2dm.net] HUDs store their graphics as font files (*.ttf), so they can't be easily edited like normal images. Add the new crosshairs font to "...custom name_here resource fonts". You'll need to precache the new font, otherwise you'll be aiming with the alphabet instead. Add the crosshair's font name to the bottom of "ClientScheme.res", under "Custom Font Files". The added line should look like this. "X""resource/fonts/crosshair_name.ttf"Replace X with the number after the last font listed. You'll then need to add the custom crosshairs for each gun. Create a "scripts folder" inside the base of your custom crosshair's folder, then edit "weapon_weapon_name.txt". You can create a fresh copy of these files by opening "hl2mp_pak_dir.vpk", opening scripts, and then extracting all "weapon_weapon_name.txt" into the custom HUD's "scripts" folder. Extra: Offline Physics Commands Broken Console CommandsIf you ever wanted to test out custom physic settings offline, you'll notice that common commands like "sv_airacceleration", "sv_gravity", and "sv_friction" aren't recognised in the developer console. I don't know why Valve made most of them inaccessible by default, but the commands are still in the game. You can restore the broken console commands by installing SourceMod to your game's directory. Installing SourceMod to your game Download the latest stable[www.sourcemod.net] version of SourceMod. Download the latest stable version[www.sourcemm.net] of MetaMod, as it's needed to get SourceMod working. Extract MetaMod to " steamapps common Half-Life 2 Deathmatch hl2mp". Extract SourceMod to the same base directory as above. Navigate back to "steamapps common Half-Life 2 Deathmatch", right click on "hl2.exe", Send To > Desktop (Create Shortcut). Right click on "hl2.exe - Shortcut", and left click "Properties" at the bottom of the list. Copy and paste the following lines at the end of the Target field, ensuring that you leave a space after the quotation mark: -insecure -novid -game hl2mp +map dm_lockdown +sv_cheats 1 +sv_lan 1The bolded lines are absolutely necessary. In short, this shortcut will launch the game without anticheat, allowing SourceMod to load. Just keep in mind you'll need to quit and relaunch the game normally to join the majority of online servers again. The rest of the commands aren't strictly necessary, but they speed things up and prevent people from joining your game. Launch HL2:DM using the shortcut. If you didn't include the "+map dm_lockdown" line, create a game. To test if see if this works, type (or copy and paste) the following line into chat !sm_cvar sv_friction 0If it worked, the game will tell you the console command worked in chat, and if you or a prop moves, it should slide around like crazy. Type the same command but with "4" again to reset the friction back to normal. Troubleshooting If the command didn't work, you likely didn't launch with the "-insecure" line. Offline SourceMod with VAC is not possible. Most of the default server settings and their values are in this Steam Guide For the purpose of Googling, you're using a listen server, not a dedicated server. Failing the above, consult SourceMod documentation[wiki.alliedmods.net] on the AlliedMods Wiki. Other Game Information Sources This are sites that have helped in the creation of this guide. HL2:DM UniversityCurriculum page[university.hl2dm.pro] An old, but incredible resource that lays out a lot of the intricacies of Deathmatch gameplay. Ade's HL2:DM Weapon Training GuideSteam Guide Poor grammar and formatting aside, this Steam guide has a lot of information about the game that's not listed elsewhere. [+] Himanshu [-]'s HL2:DM Bug GuideSteam Guide This Steam guide is a good general reference for the game's gameplay bugs, with links to video examples to boot. Credits and Thanks CLANG-CLANG - Created and wrote the majority of the guide Xeogin - Created and maintaining the Community patch autoexec config, alongside both supporting and provided a gargantuan amount of assistance to the creation of this guide Harper - Guide name Da11aS - Grammar fixes Arya - Additional info and links Community Links hl2dm.community Discord
目前最大的死亡竞赛Discord服务器,在本指南创建时拥有300名用户。该服务器同时也是其他游戏社区的枢纽。Viperbird的地图制作比赛Discord

自2022年起,这个Discord社区见证了《半条命2:死亡竞赛》地图制作领域诸多令人兴奋的进展。多个优质地图相互角逐,以争夺社区捐赠奖金池中的奖金。2022年比赛诞生的地图展示可在相关视频中查看。
hl2dm.net主页 尽管论坛活跃度已大不如前,但该网站仍有许多关于游戏的讨论,以及大量可下载的自定义文件,如地图和自定义HUD。 关闭通知:hl2dm.net计划于2023年3月底下线。未来若需访问其内容,可能需要使用Wayback Machine。 Gamebanana《半条命2:死亡竞赛》模组页面 作为游戏界最古老的模组库之一,它是发布 Valve 老游戏新模组的主要平台。