换一换
换一换 


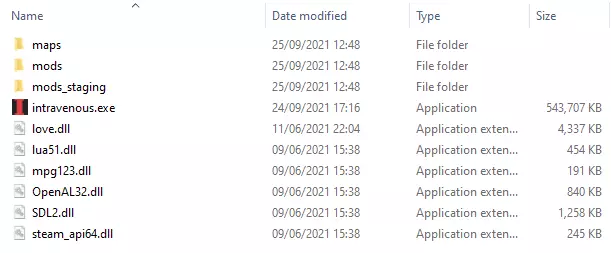
《Intravenous》模组制作入门指南。你需要具备Lua知识和耐心。祝你好运。 简介 欢迎阅读《Intravenous》模组制作指南! 本指南将介绍设置模组文件夹的基础知识,以确保模组能够加载。 前提条件 制作《Intravenous》模组需要具备一些基本的Lua脚本知识,用于设置配置文件,或许还需要编写一些脚本。 如果你不懂如何编写代码,建议你阅读Lua脚本教程,尤其是当你不熟悉Lua时——花几个小时阅读一份枯燥的教程,总比在没有Lua经验的情况下花费数十小时尝试制作《Intravenous》模组,却不明白为什么自己做的所有事情都无法正常运行要好。你需要某种带有语法高亮功能的文本编辑器,我个人推荐以下几款: Notepad++ - 一款不错的编辑器,具有简单的语法高亮和缩进功能。 Sublime Text - 一款非常出色的编辑器,比Notepad++功能更丰富。 我认为你不需要更复杂的工具了。 武器配置文件 在进行新武器的模组制作时,你需要一个基础起点。 因此,你应该下载示例的AS VAL武器模组。 它展示了以下内容: 1. 精灵表加载 2. 新弹药类型注册 3. 注册新弹匣类型,以使武器支持弹匣系统 4. 新武器注册 5. 将新武器添加到现有的基础游戏战役中 66. 文本本地化至其他语言 7. 注册新音效供游戏使用 你还需要下载基础游戏武器配置文件和武器代码。这是一份很有用的资源,因为你可以从中了解不同武器的配置方式。例如,全自动突击步枪是基础武器,意味着所有其他武器的功能都源自这种武器类型。然后,泵动式霰弹枪和手枪使用两种不同的换弹机制,因此它们使用不同的武器基础,而这些基础又源自突击步枪基础。最后,诸如闪光弹、手榴弹、电击枪等 gadgets(装备)都具有专门的功能,且仅为上述武器所独有。 对象类代码 你可以通过点击此处找到游戏中所有对象类的代码。如果你打算尝试制作具有某种特殊功能的自定义物品,以下内容会非常有用。 声音注册代码 如果你想了解更多关于注册音效的信息,相关内容可帮助你注册具有特定音量等参数的声音。 准备模组 若要将模组发布至创意工坊,你需要在游戏根目录下的mods_staging文件夹中创建一个新文件夹。
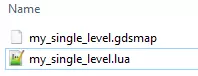
在该文件夹内,你需要创建一个名为【files】的子文件夹。放置在模组根文件夹中的任何图片都将用于选择要上传的图片。

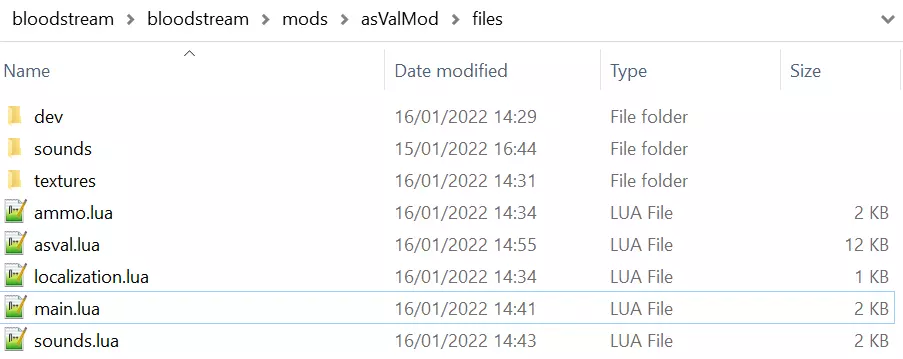
“files”文件夹中应包含main.lua文件,该文件是每个模组的入口点。如果此文件不存在,模组将无法加载。幸运的是,游戏自带的“mods_staging”文件夹中的示例模组已准备好所有内容,你可以将其用作所有模组的基础!请务必查看示例模组的main.lua文件,其中包含非常重要的信息。 最后,如果你仍不确定模组文件夹的布局,应再次参考AS VAL武器示例模组。 通常,它的结构如下:
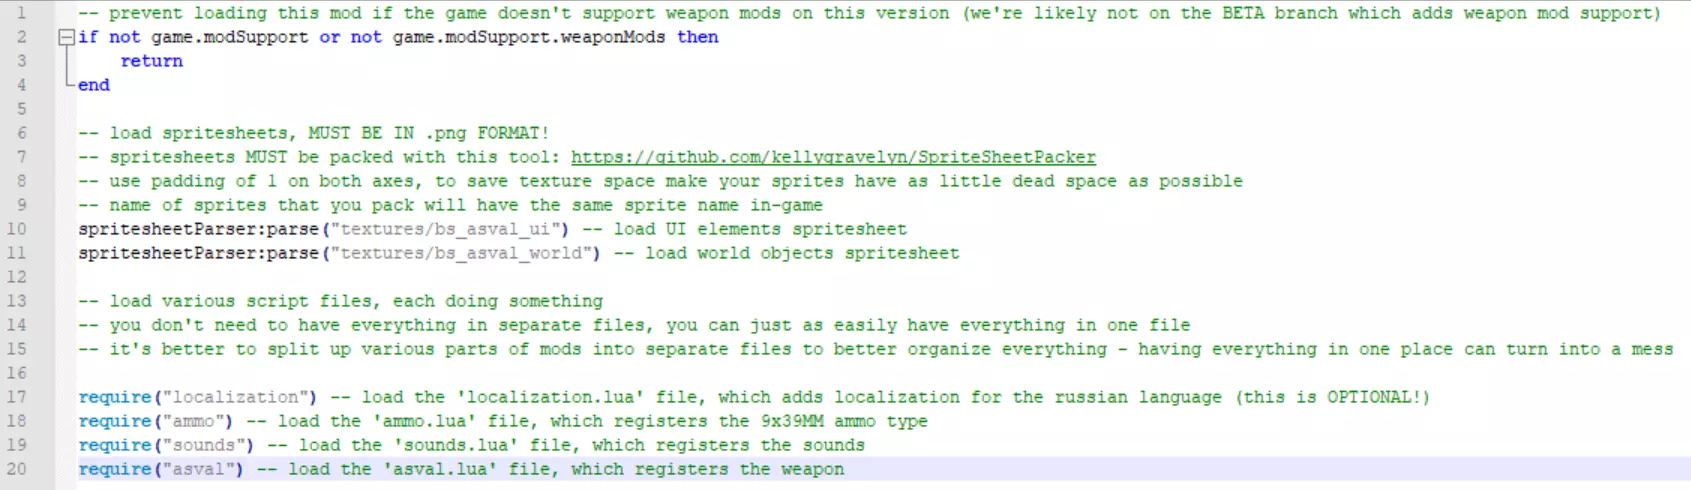
“main.lua”文件 如前所述,“main.lua”文件是模组的主要入口点。如果没有该文件,模组将无法加载。示例模组的main.lua文件如下(点击可放大!):
Setting up a weapon config Setting up a weapon config is the most important part to adding a new weapon. I will not be listing the variables here. If you're serious about modding, simply open up the AS VAL example mod's[www.dropbox.com] main.lua file and take a look at the comments there. If you can't find where to download the AS VAL example mod[www.dropbox.com], then you haven't been reading this guide attentively enough. The variable names, along with the comments, should be enough guidance for people with Lua scripting knowledge to get the ball rolling. If you do not know how to write code, I suggest you read through the Lua scripting tutorial[www.tutorialspoint.com], especially if you're not familiar with Lua - it's better to read a boring tutorial for a couple of hours, than try to mod Intravenous for tens of hours with no Lua experience, and wonder why the hell nothing you do works. There's no other way I can put this: you need to learn Lua if you wish to make mods for Intravenous. Finally, if you're trying to set up a new weapon config and have a question that neither this guide, nor the weapon config files have the answer for, then feel free to ask a question here in the comments. You should also consider doing that on the game's official Discord server[discord.gg] - there might be people that will have an answer to your question! Editing existing weapons' stats If you wish to edit the weapon characteristics of existing weapons, instead of adding new ones, then you will simply need to grab the weapon data, and edit it's variables as if you were preparing a weapon config to register a new weapon altogether. Here's an example: Decreasing existing weapon noise-- this example mod reduces the noise made by the MK23 by 60% local noiseMultiplier = 0.4 -- get the MK23 weapon data local mk23 = weapons:getData("usp") -- the MK23's id in the game files is 'usp' - trippy, I know! -- multiply the registered MK23's noise radius by 0.4 -- this is generally NOT a good idea of doing it! -- you could have 2 mods that do the same, and their effect would be cumulative! -- by multiplying the 'noiseRadius' variable twice by 0.4, the real reduction in noise would be 84%, not 60%! mk23.noiseRadius = mk23.noiseRadius * noiseMultiplier -- the correct way of doing this would be to set it to a specific value -- knowing that the noise radius of the MK23 (from the weapon config files) is 1100 units, we simply do the following: mk23.noiseRadius = 1100 * 0.4 You must edit the same variables as they are in the AS VAL example mod and in the base game weapon config files. Decreasing weapon noise of ALL weapons using a loopIf you wish to do a quick'n'dirty reduction of noise made by all weapons, you could simply do something like this: -- iterate over every single weapon local wepList = weapons.registeredNonBases for idx = 1, #wepList do local this = wepList[idx] -- make sure the 'noiseRadius' variable is present if this.noiseRadius then -- we multiply the existing noiseRadius variable value by 0.5 -- as mentioned earlier in the guide, doing this is not ideal, as you could potentially have 2 overlapping mods which would cumulatively decrease noise across all weapons this.noiseRadius = this.noiseRadius * 0.5 end end OK... so this is not the best way of doing this... How would we go about editing noise levels of a bunch of weapons at once without copy-pasting code? Well, you'd need to use a loop again, except this time it'd act as a map: -- open up the base game weapon config files to see what their noise levels are! -- a list of weapons the noise values of which we want to modify local weaponAdjustList = { {"usp", 500}, -- note the table: the first value is the weapon ID, the second is the new noise value {"ar15", 1300}, {"an94", 1300}, } for idx = 1, #weaponAdjustList do local this = weaponAdjustList[idx] local wepID = this[1] -- grab the weapon ID local newNoise = this[2] -- grab the new noise level local targetData = weapons.registeredByID[wepID] if targetData then -- make sure the weapon data exists (Weapon is registered) targetData.noiseRadius = newNoise -- set the new noise value! end end In the example above we've successfully modified the noise values of 3 weapons: MK23, M4 MOD, and AN-94. You'll notice some of the weapon IDs differ from their names in-game. If this seems confusing, or you don't understand how to write code, then you should read through the Lua scripting tutorial[www.tutorialspoint.com]. There's no other way I can put this: you need to learn Lua if you wish to make mods for Intravenous. Increasing weapon damageLet's say you want weapons to deal even MORE damage. To edit weapon damage, you'd need to modify these two stats: -- this quick'n'dirty script increases MK23's damage by 50% local damageMultiplier = 1.5 -- get the MK23 weapon data local mk23 = weapons:getData("usp") -- the MK23's id in the game files is 'usp' - trippy, I know! -- multiply the max and minimum damage values of the MK23 mk23.damage = mk23.damage * damageMultiplier mk23.damageMin = mk23.damageMin * damageMultiplier Simple! Now apply the same principle from the loops seen above, and you get the idea... If you wish to grab a bunch of these example mod scripts, then click here![www.dropbox.com] Adding new character portraits Adding a new portrait is simple. First, you'll need to pack a spritesheet containing the new portraits with this tool[github.com] - the sprite names used when packing the spritesheet will be the new portrait sprites. Second, your mod will need to load the spritesheets you've just packed. You can do this like so: spritesheetParser:parse("path/to/spritesheet/in/mod/folder") -- if your spritesheet is located alongside the mod's main.lua file, then you can load it like so: spritesheetParser:parse("spritesheetname") -- where 'spritesheetname' is the name of the spritesheet Third, you would want to add your new portraits to the list of available portraits, if you intend to use them when setting up dialogues in the map editor. table.insert(dialogueHandler.portraitList, "my_portrait_name") -- where 'my_portrait_name' is the sprite you packed into the spritesheet -- if you wish to register all the sprites that are present in the spritesheet, you can use the second return argument of the spritesheetParser:parse method local texture, spritesheetData = spritesheetParser:parse("path/to/spritesheet/in/mod/folder") -- spritesheetData contains several fields, one of which is 'quads' - these are the sprites that have been loaded in the spritesheet -- you can iterate over these to add them to the 'portraitList' table, instead of doing it by hand for each sprite for idx = 1, #spritesheetData.quads do table.insert(dialogueHandler.portraitList, spritesheetData.quads[idx]) end Once you've parsed the spritesheet containing the sprites - you're good to go! In Intravenous any sprite that is loaded in the game can be used as a portrait. Adding a new character name Adding a new character name requires you to call a single Lua method. -- the method which is responsible for registering new character names dialogueHandler:addCharacterName(nameID, key, text) -- 'nameID' is the ID of the name you're registering - this is what you'll need to enter when setting up dialogues manually or when choosing a name ID in the map editor for any given dialogue -- 'key' is the localization key used for the name of this character; it is used for localizing the name text to other languages -- 'text' is the default english text used for the name of this character -- here's how the registration of all the base campaign character names looks like: dialogueHandler:addCharacterName("protag", "NAME_STEVE", "Steve") dialogueHandler:addCharacterName("brother", "NAME_CHARLES", "Charles") dialogueHandler:addCharacterName("accomplice", "NAME_ACCOMPLICE", "Accomplice") dialogueHandler:addCharacterName("degenerate", "NAME_DEGENERATE", "Degenerate") dialogueHandler:addCharacterName("baker", "NAME_THE_BAKER", "Baker") dialogueHandler:addCharacterName("junkie", "NAME_JUNKIE", "Junkie") dialogueHandler:addCharacterName("hitman", "NAME_HITMAN", "Hitman") dialogueHandler:addCharacterName("empathetic", "NAME_EMPATHETIC", "Empathetic") dialogueHandler:addCharacterName("mole", "NAME_MOLE", "Mole") dialogueHandler:addCharacterName("shopkeeper", "NAME_SHOPKEEPER", "Shopkeeper") dialogueHandler:addCharacterName("dealer", "NAME_DRUG_DEALER", "Dealer") dialogueHandler:addCharacterName("newsreporter", "NAME_NEWS_REPORTER", "News reporter") dialogueHandler:addCharacterName("unknown", "NAME_UNKNOWN", "Unknown") -- therefore, adding your own custom character name would look something like this: dialogueHandler:addCharacterName("mycoolcharacter", "NAME_MY_COOL_CHARACTER", "My Cool Character") Adding new actor animations If you wish to add new actor animations (ie. weapon reload sounds, etc.), then your first step would be to download the "Slow M4 Reload" mod[www.dropbox.com]. This mod makes Steve incompetent with the M4, and showcases how to adjust existing weapon configs, register new actor animations, as well as how to load actor spritesheets properly. Base game animation setup filesAnother important thing worth downloading are the base game animation setup files for the player and enemies. You can download the player animations setup[www.dropbox.com] and the goon animations setup[www.dropbox.com] file archives. They should serve as pretty good examples alongside the "Slow M4 Reload" mod. Registering a new animationNew animation registration can be done with two methods. The first - is actor.genericRegisterActorAnimation() It allows you to register an actor animation without a frame range. Here's an example - IMPORTANT! the following code is taken from the "Slow M4 Reload" mod provided above. Download it and look at the code to follow along. You'll need to add new spritebatches if you wish to add new custom actor animations. -- register the animation playerAvatar.ANIM_AR15_RELOAD_EMPTY_GREEN = tdas.countGoon("player_ar15_reload_empty_green") -- now setup the animation frames and bind it to the animation we've just registered -- register the animation actor.genericRegisterActorAnimation( playerAvatar.ANIM_AR15_RELOAD_EMPTY_GREEN, -- the animation name to use playerAvatar.SECTIONS.TORSO, -- the draw section to use, can be either LEGS or TORSO 36, -- amount of frames in the animation "player_m4_reload_green_", -- the base animation name { -- animation events, where the numerical index is the frame number, and the value is the function to execute [9] = function(animObj, animOwner) -- animObj is the animation object, animOwner is the actor on which the animation is currently being played animOwner:attemptWeaponEvent(weapons.ANIM_EVENTS.MAGOUT) end, [24] = function(animObj, animOwner) animOwner:attemptWeaponEvent(weapons.ANIM_EVENTS.MAGIN) end, [27] = function(animObj, animOwner) animOwner:attemptWeaponEvent(weapons.ANIM_EVENTS.BOLTPULL) end, [30] = function(animObj, animOwner) animOwner:attemptWeaponEvent(weapons.ANIM_EVENTS.BOLTRELEASE) end, }, { -- draw offset of each sprite, where numerical index is frame number, and value is a table containing offsets on X and Y axes [1] = {1, 11}, [2] = {0, 10}, [3] = {1, 6.5}, [4] = {1, 6.5}, [5] = {1, 6.5}, [6] = {2, 6}, [7] = {2, 6}, [8] = {2, 6}, [9] = {-0.5, 6.5}, [10] = {-1, 6.5}, [11] = {0.5, 7}, [12] = {1.5, 6}, [13] = {1, 6.5}, [14] = {1.5, 6}, [15] = {1.5, 6.5}, [16] = {1.5, 6.5}, [17] = {1.5, 6}, [18] = {1, 6}, [19] = {1.5, 6}, [20] = {1.5, 6.5}, [21] = {1.5, 6.5}, [22] = {0, 7}, [23] = {1.5, 6}, [24] = {2, 6}, [25] = {2, 6}, [26] = {2, 6}, [27] = {1.5, 6}, [28] = {0.5, 7.5}, [29] = {0, 7}, [30] = {-1.5, 6}, [31] = {-0.5, 6.5}, [32] = {0.5, 9.5}, [33] = {-0.5, 9}, [34] = {0, 10.5}, [35] = {0.5, 11}, [36] = {1, 10.5} }, "player_torso_ar_green" -- the spritebatch to use for this animation ) This just scratches the surface. You might be wondering, "I can see this uses a custom spritebatch, how do I add one in a mod?". The answer to that is the "Slow M4 Reload" mod code. Download and look through the code. The second method for registering actor animations is - actor.registerActorAnimationSpriteRange. This method allows you to setup actor animations with sprite ranges This means it will setup animation frames not from a linear range (x-y), but from multiple ranges. Here's an example: actor.registerActorAnimationSpriteRange( playerAvatar.ANIM_AR15_RELOAD_TAC_GREEN, -- the animation name to use playerAvatar.SECTIONS.TORSO, -- the draw section to use, can be either LEGS or TORSO {{1, 2}, {11, 26}, {32, 36}}, -- frame ranges to register for the animation; KEEP IN MIND!: function indexes correspond to frame indexes, in both registerActorAnimationSpriteRange and genericRegisterActorAnimation; but offsets are LINEAR - meaning if you have ranges {10, 20}, {30, 40}, then the offset indexes should be 1-22, and NOT 10-20, 30-40, since you're registering 22 frames. "player_m4_reload_green_", -- the base animation name { -- animation events, where the numerical index is the frame number, and the value is the function to execute [2] = function(animObj, animOwner) -- animObj is the animation object, animOwner is the actor on which the animation is currently being played animOwner:attemptWeaponEvent(weapons.ANIM_EVENTS.MAGOUT) end, [15] = function(animObj, animOwner) animOwner:attemptWeaponEvent(weapons.ANIM_EVENTS.MAGIN) end }, { [1] = {1, 11}, [2] = {0, 10}, [11] = {0.5, 6.5}, [12] = {1.5, 5.5}, [13] = {1, 6}, [14] = {1.5, 5.5}, [15] = {1.5, 6}, [16] = {1.5, 6}, [17] = {1.5, 5.5}, [18] = {1, 5.5}, [19] = {1.5, 5.5}, [20] = {1.5, 6}, [21] = {1.5, 6}, [22] = {0, 6.5}, [23] = {1.5, 5.5}, [24] = {2, 5.5}, [25] = {2, 5.5}, [26] = {2, 5.5}, [32] = {0, 9}, [33] = {-0.5, 8.5}, [34] = {0, 9.5}, [35] = {1, 11}, [36] = {1, 11} }, "player_torso_ar_green" ) There you can see the following ranges: {1, 2}, {11, 26}, {32, 36}. This registers the frames 1 to 2, 11 to 26, and 32 to 36. That means there are 23 frames in this animation in total. Setting up actor animation frame offsets You'll need to access the animation setup utility in-game. To do this start the game with the command line "--debug", and then press F9 in the main menu. From there you'll be able to select any of the registered actor animations and adjust their offsets. Once done, simply copy the offsets and override the ones that you have as a placeholder in your custom animation. Setting up a new spritebatch for use with actor animations This is pretty straight-forward. Step 1 - register a new spritebatch as per the example mod-- init the spritebatch local greenARSpriteBatch = spriteBatchController:newSpriteBatch( "player_torso_ar_green", -- the name of the spritebatch "textures/bs_player_m4_green_animations.png", -- the texture that will be used for it 256, -- the amount of sprites in the spritesheet - 256 is a safe bet as you'll be hard-pressed to have a level with more than 256 NPCs "stream", -- the spritebatch usage hint; read up on those on the LOVE2D wiki; leave at "stream" 45.4, -- render depth, actor torso layer uses this depth, so you should not change this false, -- should sprites be reset after being drawn? leave at false true, -- should the spritebatch be filled with sprite data on demand? leave at true false, -- should the spritebatch be rendered at all times? leave at false, visibility is handled automatically by the game code true -- should we skip adding this spritebatch to the priorityRenderer class? leave at true ) greenARSpriteBatch:setShouldSortSprites(false) -- disable sprite sorting on the spritebatch to reduce CPU load Step 2 - register it as an actor spritesheet -- register the spritesheet texture as an actor shadow-casting texture render:registerActorSpritesheet("textures/bs_player_m4_green_animations.png") Done! Now the spritesheet texture you've just registered (in this case it's the "textures/bs_player_m4_green_animations.png") can be properly used for new actor animations. Finally, a quick reminder to download the "Slow M4 Reload" mod[www.dropbox.com]. It has a lot of important info which you'll need to know if you're serious about making mods for Intravenous. Publishing to workshop In order to publish a map to workshop, you will need to start the game, click on the "Modding" button in the main menu, select "Steam Workshop", and click on the "Publish" button. The mod submission guide in the game should guide you through the rest! You will notice a list of tags to use for the mod you're about to submit. Choose the tags you believe are most fitting for your addon! The general idea of what I personally would pick for a mod for Intravenous are... Gameplay - the mod changes some of the gameplay mechanics or adds new ones, which alters the gameplay. Weapons - the mod changes or adds new weapons. Levels - the mod adds one or more levels. Graphics - the mod adds new graphical features, be it shader effects, particle effects, or anything else. Objects - the mod adds new objects that are present in the game world, and impact the gameplay in some way. Audio - the mod adds/replaces/tweaks audio effects. Miscellaneous - anything that doesn't match any of the other categories should be marked with this tag. Closing comments This guide is still a work-in-progress, expect it to be filled with new information over time, as it reaches completion. If you wanted to mod Intravenous, but found it requires you to learn a scripting language, then I'm sorry, but that's the way it is. Intravenous is highly moddable, but requires you to know Lua. If you arm yourself with enough patience and willingness to learn, then you will be able to make all sorts of crazy mods for Intravenous. The game is very moddable, in fact almost everything can be modded. All it needs is some documentation - something that depends on how active the modding community is going to be in general. As time goes by and if the game's modding scene gets bigger, I will provide more examples and more code samples for modders to make use of. Speaking of code examples/samples - if you're wondering on how to get something done, simply ask here in the comments, and I'll update the guide with examples! I want the modding scene of Intravenous to grow, as I believe it has great potential for mod variety, but my experience with mods of my previous game, Game Dev Studio, is not that good. Ultimately documenting everything was a waste of time, so with Intravenous we'll start small and, hopefully, grow big.