换一换
换一换 


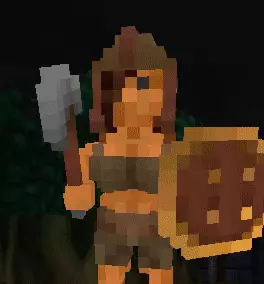
硬核模式很难。我有一些小技巧或许能让它稍微不那么痛苦。 《巴罗尼》

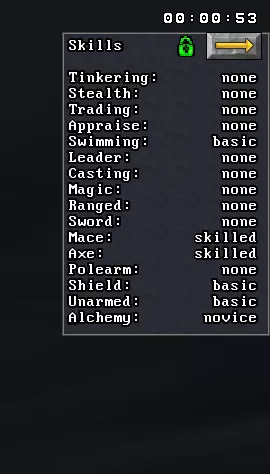
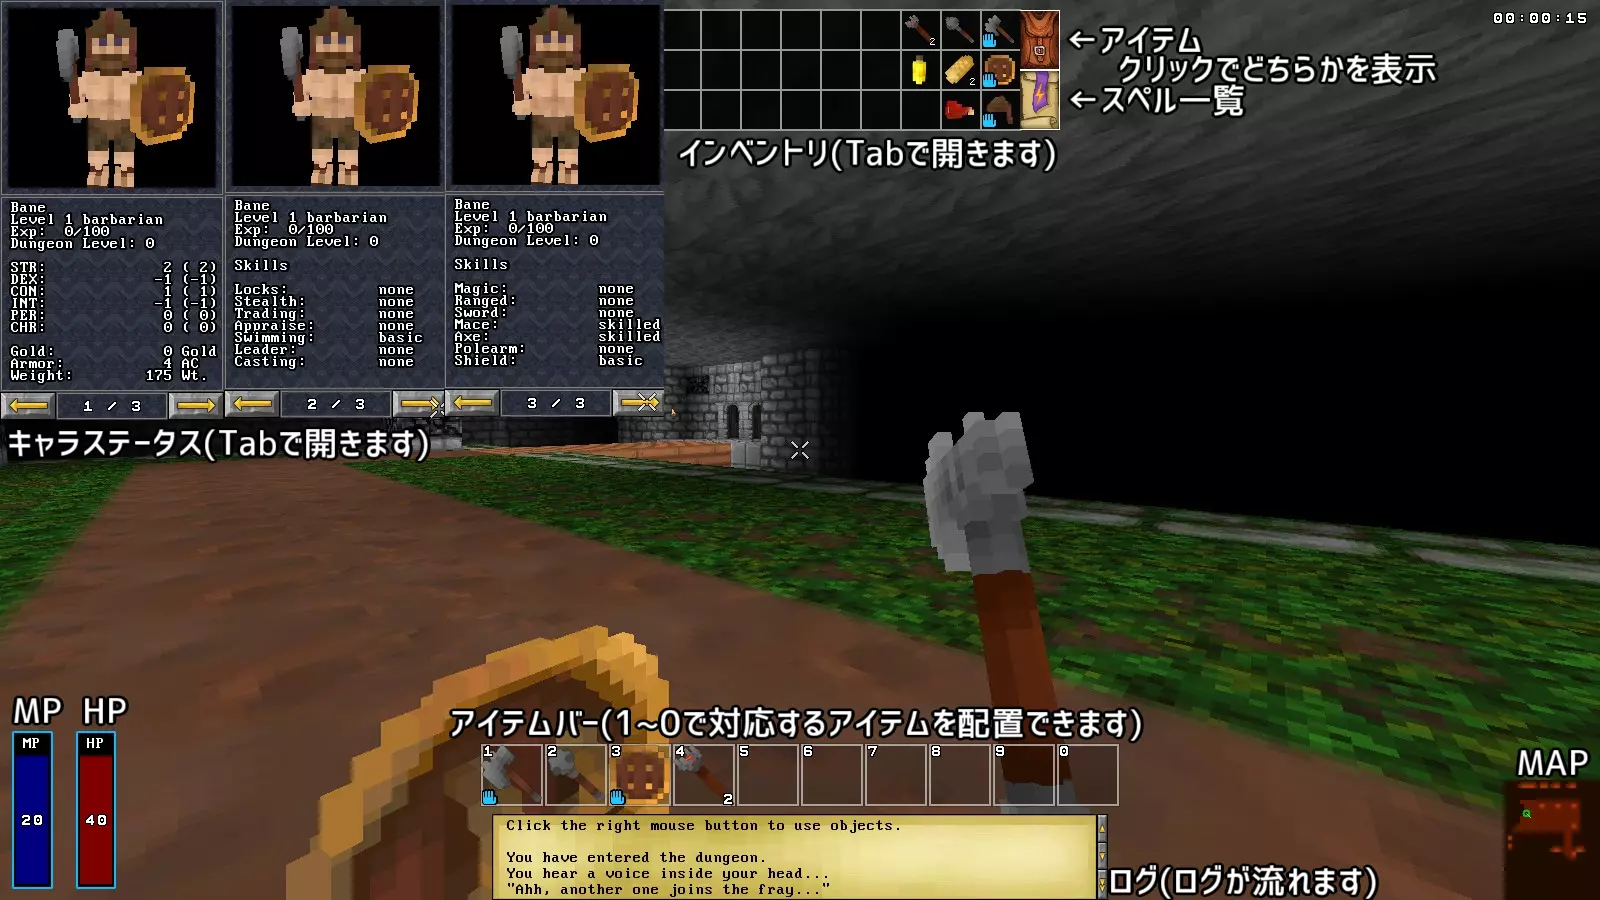
警告:本指南现已完全过时,已经落后了两个主要更新版本。请注意。 说实话:《巴罗尼》恨你。它恨你,并且想让你死。显然你也一样,因为你决定让情况变得更糟,还勾选了“硬核”选项。 你为什么要这么做?是什么让你走到这一步?你本可以如何避免? 好吧,现在已经太晚了。我们现在确实陷入了困境。我们已经深陷其中。我们深陷到甚至在躲避Steam的审查。所以我不妨给你一些在这深邃黑暗的地下生存的技巧。 另外,如果这个指南看起来很糟糕,那是因为它确实很糟糕,我以前从未做过指南。哎呀。 硬核模式有哪些变化?所有敌人的生命值和伤害都大幅提升。提升幅度因敌人而异,但至少生命值会翻倍,伤害会增加50%。 经过初步测试,普通难度的老鼠拥有30点生命值和10点伤害,而硬核难度的老鼠则有60点生命值和15点伤害。 普通难度的骷髅有40点生命值,硬核难度的骷髅则有93点。它们的伤害会因武器不同而有所变化,但都极具威胁。 战斗持续时间更长,造成的伤害更高,那些你原本能够轻松应对的敌人现在几乎成了致命威胁。你可能不得不放下骄傲,避开一些敌人。 你将不得不采取更灵活的战斗策略。我不会告诉你什么最优Build、种族或职业之类的东西,坦白说我用机械人小丑打通了专家模式,觉得挺有意思的,而且我懒得做更深入的攻略。我更希望你能按照自己想玩的方式去摸索。 但你得更用心一点。 心态。 在深入游戏并犯下致命错误之前,你需要先接受一些事情。 永远不要低估任何敌人。 永远不要假设敌人是单独出现的。 永远不要假设拐角处没有落石陷阱。 你不需要杀死楼层里的所有敌人。 永远不要让自己陷入绝境,始终要有退路。 没有“更好的时机”,现在就使用你的消耗品。 不要携带不必要的重量。经常整理你的物品栏。 不要对友方NPC产生感情。可招募的人类不会获得生命值加成。 你的生命值是一种资源。不要不必要地消耗它。 不要让你的法力值长时间处于满值状态。提升那些施法相关的属性。 你最终需要学习炼金术。很抱歉。 职业与种族
没错,我刚才说过,我不会告诉你最优的职业或种族选择。我也确实不会。 你可以让任何组合都发挥作用——关键在于入门。 但说实话,有些组合确实比其他组合要困难得多。 我喜欢把这看作是一种权衡:现在做出牺牲,是为了以后更轻松。 前期游戏较轻松的职业,后期可能无法获得或使用某些工具。 那些一开始没有足够的护甲、武器或法力值来对抗骷髅的职业,在站稳脚跟之前会吃不少苦头。 以物理为核心的职业属于“现在轻松”这一类。远程职业的处境则介于中间,因为在获得更好的弓箭之前,他们很难击穿敌人的护甲。 法师和那些初始没有护甲的职业开局最为艰难。你可能不会输给一只单独的老鼠?不,你绝对会输。但一旦站稳脚跟,获得不错的护甲,或许再来一枚祝福戒指,终于拿到一面非诅咒的盾牌,以及能用来自卫的武器(而不是拳头),你就会拥有物理职业在很长一段时间内都可能没有的王牌。 选择种族只需考虑两个因素,按顺序排列:这个种族是否有趣,以及我是否在意商人。有些角色会让我犹豫片刻,比如无法学习魔法的哥布林,或者可能会被预先祝福的神器武器克制的魅魔/梦魔,但只要有足够的知识,这些问题都能解决,店主的问题也一样。每个角色都有自己的小加成,所以我觉得可以大胆尝试。 除非你选的是骷髅。 学炼金术吧。 求你了。 战术 那么,一个可怜的小小丑仅凭几个奶油派和一枚有趣的绿色戒指,该如何在这地下生存下去呢?
发挥你的创造力。 硬核玩法的关键不在于硬拼,而在于智取。让我给你一些建议。 永远不要无谓地消耗生命值。生命值是你最宝贵的资源。除非你是治疗者,或者是一位懂得制作治疗药水且运气不错的炼金术士,否则你承受不起任何不必要的生命值损失。即便如此,你的法力值或药水也会很快耗尽。 因此,除非你的装备远超敌人,否则永远不要陷入全面的混战。 如果你进行近战攻击,你的攻击范围比敌人略长。只要你足够敏捷和精准,就可以用蓄力攻击击中敌人,然后转身跑开,让他们来不及反击。重要的是要转身逃跑,而不是仅仅后退,后退速度太慢了。 此外,敌人在障碍物周围很难锁定你。椅子和喷泉很容易绕着跑,你可以绕到侧面攻击,而敌人很难进入反击范围;墙壁周围的空间可能会小一些,但你仍然可以在敌人攻击时绕到侧面进行打击。 利用水域(如果你能悬浮的话,也可以利用深坑)在敌人攻击范围外安全地攻击他们。不会飞的敌人永远无法进入水中,所以只要你保持对他们的仇恨,他们就会乖乖站在那里让你攻击。如果其他方法都失败了,你可以用水域来逃生。 如果你进行远程攻击,要使用合适的工具。 敌人的护甲很重要。如果你用普通箭矢搭配破旧的弓——或者更糟,用弹弓——去攻击装备盔甲和盾牌的骷髅,你可能会发现自己真的只能造成0点伤害。 使用高伤害箭矢(银箭、猎箭)或持续伤害箭矢(火箭,猎箭也可以)来穿透这些防御。如果敌人没有盔甲但生命值很高,比如巨魔,速射箭可能会派上用场。 收集箭矢,并谨慎使用。还有,赞美长弓吧。 如果你使用魔法,要记住法力值恢复得很慢。 非常慢。 而且在硬核模式下,法师初始的50点法力值甚至几乎不足以杀死一个骷髅。 所以你必须用其他东西来补充你的魔法。保持较高的魔力值以应对紧急情况,但不要让魔力值一直处于满值状态,也不要完全依赖魔力——你还有属性点需要升级。如果你初始选择了光明系魔法,那就经常使用它,直到无法从中获得更多学习提升为止。如果没有初始选择光明系,那就去寻找它,或者找到最便宜的替代魔法。对于早期提升施法等级来说,这简直是天赐之物。 一个火球术需要消耗40点魔力值才能赢得一场战斗,而一个睡眠术只需4点魔力值就能结束战斗。一旦你击倒了被削弱的胜利者,混乱术可以将一场双人夹击转变为两个被消灭的敌人。你的魔力值恢复速度不足以节省你的时间,所以要高效地使用它。随着你不断深入游戏、变得更强、获得更好的装备和更强大的法术,这些规则的重要性会越来越低。如果你足够细心,最终将能像玩普通《地城霸主》那样游玩它,不过会有少数情况例外。但仍有更多内容等待探索。学习炼金术。

你知道什么能帮你轻松通关吗? 那就是能几乎免费制作出+2额外治疗药水的能力。炼金术很强,非常非常强。一定要用它。如果你找到了蒸馏器,除非它坏了,否则我希望你在游戏剩下的时间里都把它放在 inventory 里。找一份药水指南,放下你的骄傲,多做些实验,除非你知道自己在做什么,否则不要碰酸液,但我保证你会为此感谢我的。 我们都知道,炼金术可以将药水混合在一起制作出不同的药水。但有很多不同的组合,也有很多方法可以得到你想要的东西。那我们想要什么呢? 风暴药水。 恢复魔法药水。 额外治疗药水。 这些将节省你的时间、生命和你的通关机会。这三种是游戏中最重要的药水,一旦你获得蒸馏器,就应该花时间去获取它们。 如果做不到呢? 每种药水都有其用途,即便是看似无用的那些。 调配药水能提升你的炼金术等级,发现配方能提升你的炼金术等级,以任何方式使用药水也能提升你的炼金术等级。 所以,使用你找到的每一瓶药水吧!没有蒸馏器?没关系。把 sickness 药水和 confusion 药水扔向敌人,喝下危害较小的药水,在开始酿造前提升炼金术等级并节省你的背包空间。 因为你需要将炼金术等级提升到100级。我来告诉你原因。 这并非因为在传奇炼金术等级时你能自动制作+2药水。 水瓶其实是极其好用的物品。将其与药水混合时,有一定百分比的几率免费复制该药水。不过,现在你也有几率把药水稀释成水,导致药水丢失,这可太糟了。 但你的炼金术等级越高,成功复制的几率就越大。当炼金术等级达到100时,复制成功率可提升至100%。 这意味着,你在游戏中通过在水龙头接空瓶子积累的那一堆水瓶,现在可以变成一大堆你想要的任何药水了。 在游戏中,没有什么比你一口气喝下30瓶强效治疗药水更能快速救你命的了。 学习炼金术吧,相信我。 利用经验值系统
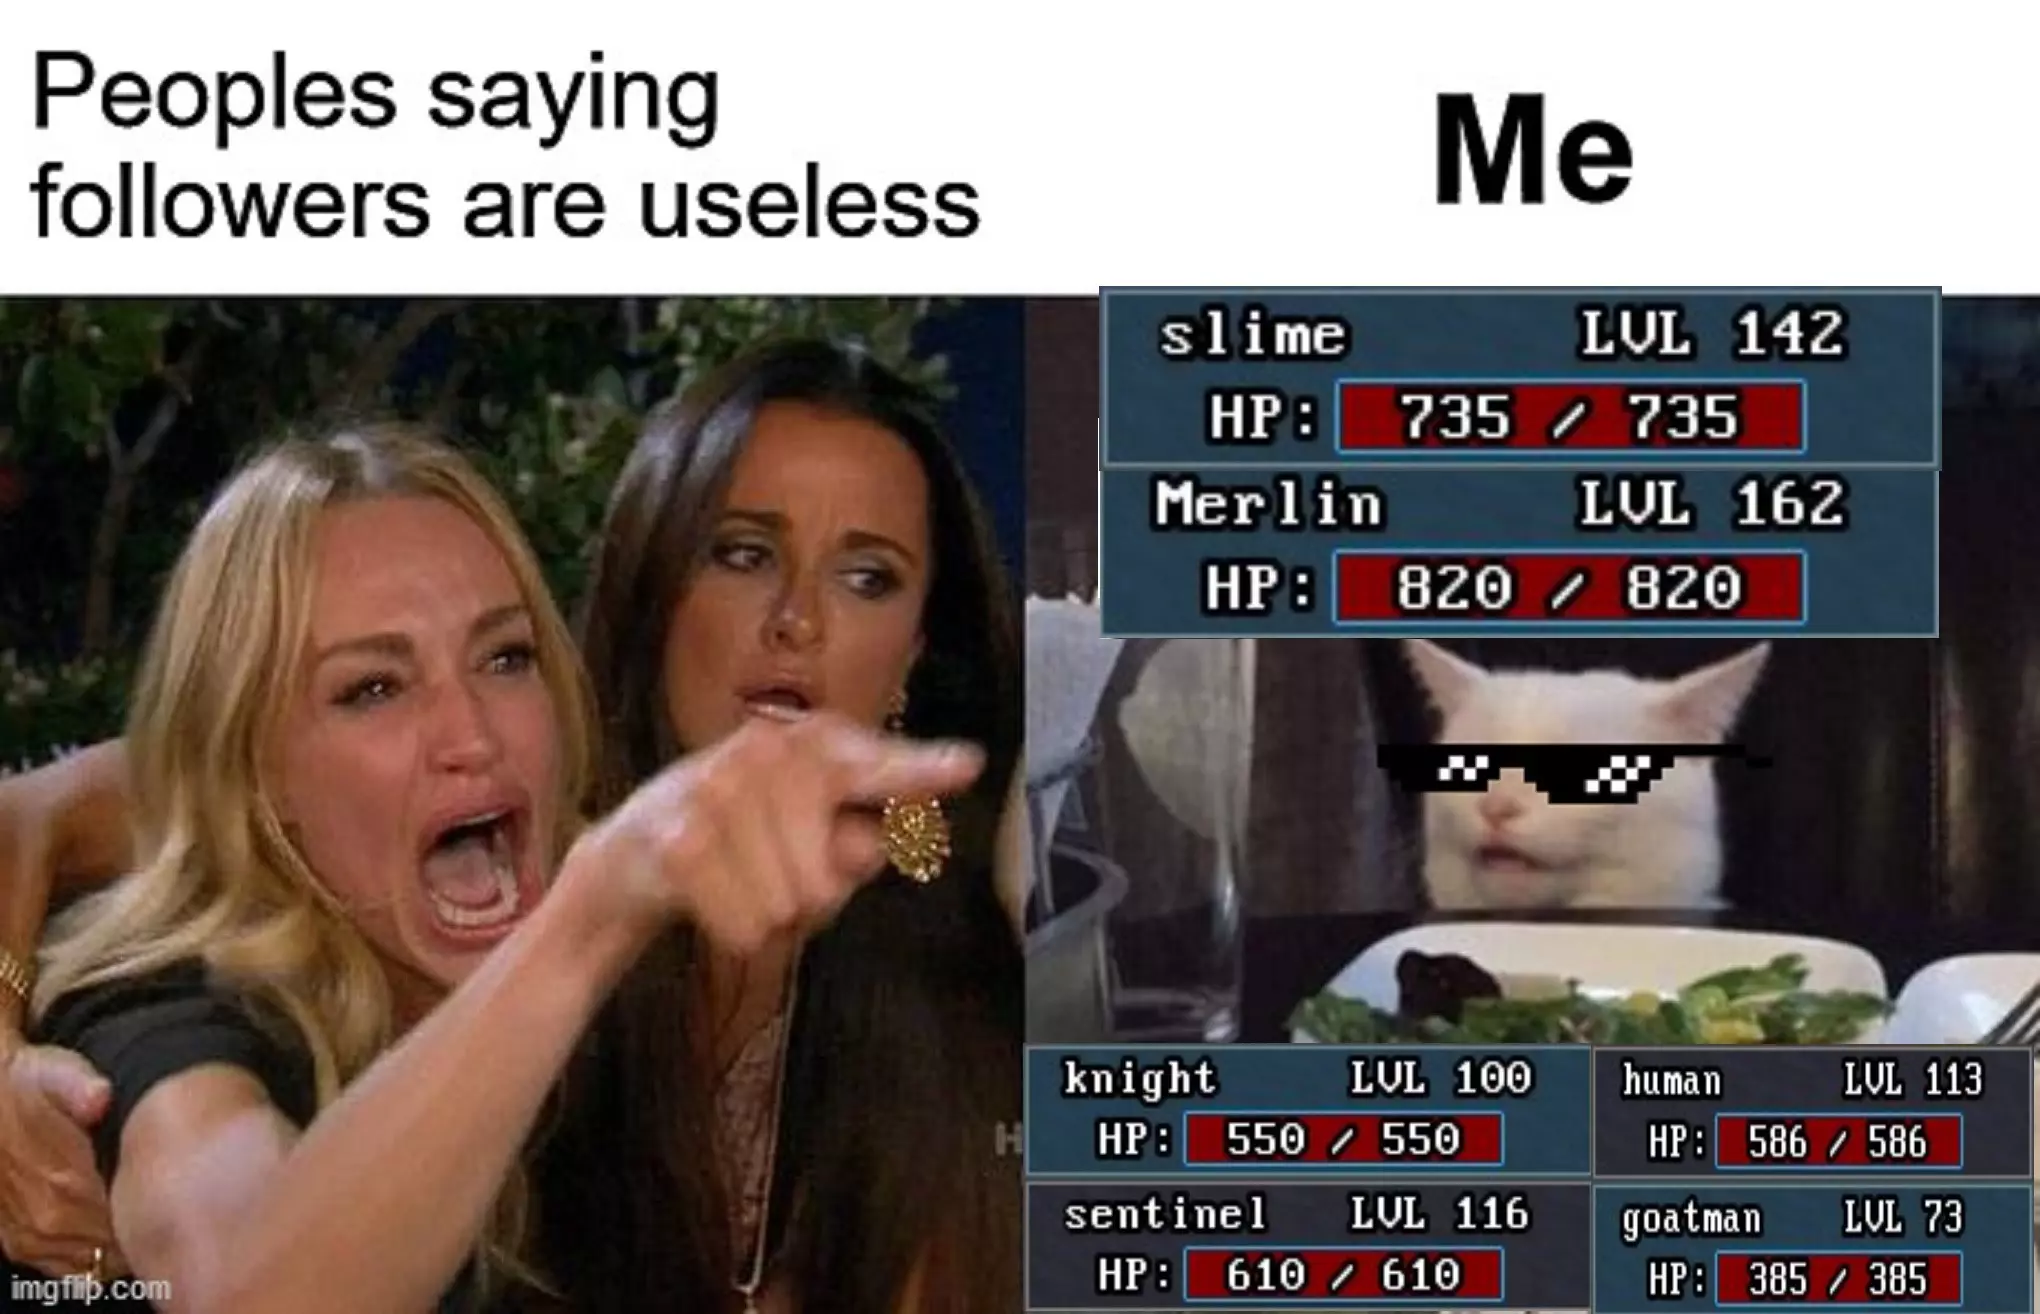
你可以通过击杀敌人获得经验值,也能通过提升技能等级来获取经验。而且有些技能的升级难度比你想象的要低得多。 你知道吗?只要找到第一片水域,你就能将游泳技能升到满级,这样不仅能免费提升等级,还能获得水上行走和熔岩行走的能力。 你知道吗?如果能安全地与店主交易,你基本上可以通过向店主购买物品再卖回给他的方式,用金币来换取等级提升。当然,你会损失一些金币,但在整个游戏过程中你会赚很多,而且到了某个阶段,店主会以相同的价格回购这些物品,同时你的交易技能等级仍会提升。你会惊讶于用这种方法能多快将交易技能升到满级。 当然,你肯定知道鉴定技能有多重要,所以一定要使用它。仔细评估楼层上的每一件物品,没用的就扔掉。这基本上就是免费的经验值。 你知道吗?只需招募、喂养追随者并让他们休息,就能提升领导力等级。即使在硬核模式下,人类追随者几乎没什么用,但这仍然是免费的等级提升,而非人类追随者绝对能独当一面,尤其是装备较好的那些。 即使你是专注的近战战士,最终也会获得足够的智力来学习“光明”法术。一旦学会,就没有理由不将你的魔法值转化为施法和魔法等级,以及未来法术的多样性。 说到这里,你知道吗?用法杖施法可以免费提升你的施法属性。如果不是威力强大的法杖或开门法杖,捡起它、耗尽所有施法次数然后扔掉是很值得的。而且不用担心——即使是诅咒法杖也会自动卸下。不过,我不建议把你的物理战斗技能点得太分散。管理你的物品栏

Your inventory space is valuable, and so should the goodies you lug around in it. But you should focus on practical value, not monetary. A 3000 gold diamond is a worthless paperweight if you never find a shopkeeper accepting it, or are a monster race that can't trade anyway. Don't fall into the trap of filling half your inventory with tens of thousands of gold of gems and deprive yourself of items that could have saved your life. So what's practical? Scrolls. Four in particular. Enchant Weapon, Enchant Armor, Repair, and Blank Scrolls. I know I just told you not to fill half your inventory with things that aren't immediately practical, but these four are different. I honestly WOULD recommend you let half your inventory sit with these, if you must. These give concrete, permanent value-- especially with Artifact items. Have an Artifact weapon? Repair it to Excellent, layer enchantment after enchantment on it. Artifact armor? Repair it to excellent, and bless the Sphinx Veil. You get +1 armor class overall anyway, but you additionally get the +1 bonus to Intelligence every time you bless the Veil. And a Blank Scroll is just whatever you need once you get the Enchanted Feather. You're damn near guaranteed to get one in the Library on floor 16, but you can get one as soon as the Mines. Even start with one as the Shaman. And if you pick up the Blue Orb in the Library, you can give it to the Mysterious Merchant in the Hamlet for a guaranteed feather. The importance of scrolls can't be overstated. Little in the game can withstand the assault of a +15 Artifact weapon. I made myself +31 Spiked Knuckles once, just for the fun of it. You know what that meant? +32 Armor, +32 Unarmed Attack. You want scrolls. And if you can, buy as many of these ones as possible. Potions. As stated previously with Alchemy, every potion has its value. The recipes often lead into eachother, and you'd be shocked what you can make with a seemingly random assortment. Keep as much fruit juice and booze as you can. They're the base ingredients for most potions, and can usually be bought in bulk at most shops. And if you need room? Drink a potion, or toss one at an enemy. You'll still get XP! Whatever your required food is.Unless you're a skeleton. There's usually plenty of food to go around unless you spend half an hour on every floor, so if you can afford to? Be picky. For normal food, it's best not to take chances with mouldy food, unless you're starving. Filling items like Meat and Fish are high-priority and can feed you for a while, especially if they're blessed. You shouldn't need more than two or three slots dedicated to food at any given time. For Automatons, magic scrap fills you a whole lot more than metal scrap, and can fill you far past metal scrap, too. Magic staves and books should be easy to come across. And if you learn the Dig spell, eat rocks. No, i'm not joking. Not only can you eat rocks, but they can superheat your boiler. You basically have free infinite food as long as you have the power to cast the Dig spell-- and in a pinch? A quick lava bath will do the trick just fine. And if you're a vampire, you're living your best life anyway, so. Magical rings and amulets.But only really the Amulet of Poison Resistance and Amulet of Reflection for the amulets. You can refer back to the swimming levels thing if you want my opinion on the Amulet of Olympic Swimming. If you carry around different trinkets, they should be ones that you swap between to let you do certain things that you otherwise couldn't. Like, say, an Ring of Might to let you push boulders and finish Sokoban. Or a Ring of Levitation to let you do just that. Otherwise, the ring you have on should be the one that generally helps you not die whilst spelunking. Like a Blessed Ring of Constitution, or a Magic Resistance ring. Artifacts.But mostly the weapons, since you'll probably just have the armor equipped as soon as you find it. You should realistically just stick with whatever the first Artifact Weapon is that you find, since you can't guarantee that you'll get another one. Not soon, at least. But if you find Sharur, keep it around-- it's a free MP regen stick. We'll get into these more later. A shield or two.Considering you'll probably be swapping these out with torches fairly often, I recommend carrying the best defense shield you can find around with you. And in a pinch, a second one if the first one breaks. If you're lucky enough to find a weirdly expensive steel shield, or see one in the shop, get it. It's a Steel Shield of Magic Resistance, and it's the best shield in the game. Yes, that's including the Crystal Shield that has one more defense than it. No, that one more defense doesn't make up the difference. Bear traps.Yes, they're heavy. They'll also basically win a fight for you for free with no chance of fighting back, because an enemy that steps into a bear trap is paralyzed. This is not only huge and a massive early game boon, it can easily save your life in a pinch. They become less and less important as the game goes on, but they're still massively useful. A stack of torches.Game's dark now, man. Before, once you had high enough perception you basically just had fullbright. Now, even at the end of the game I still seriously consider torches over shields. So aside from the practicality of making an area darker and harder to see for enemies, remember to snag torches off the walls. A pickaxe. No Dig? No dig staff? No problem. A Pickaxe will be polite enough to open up at least three secret levels for you and make your life a lot easier. They're fairly rare, but you're guaranteed to find gnomes holding them in the Gnomish Mines. If you dare go there. Speaking of getting into these more later. The Artifacts.
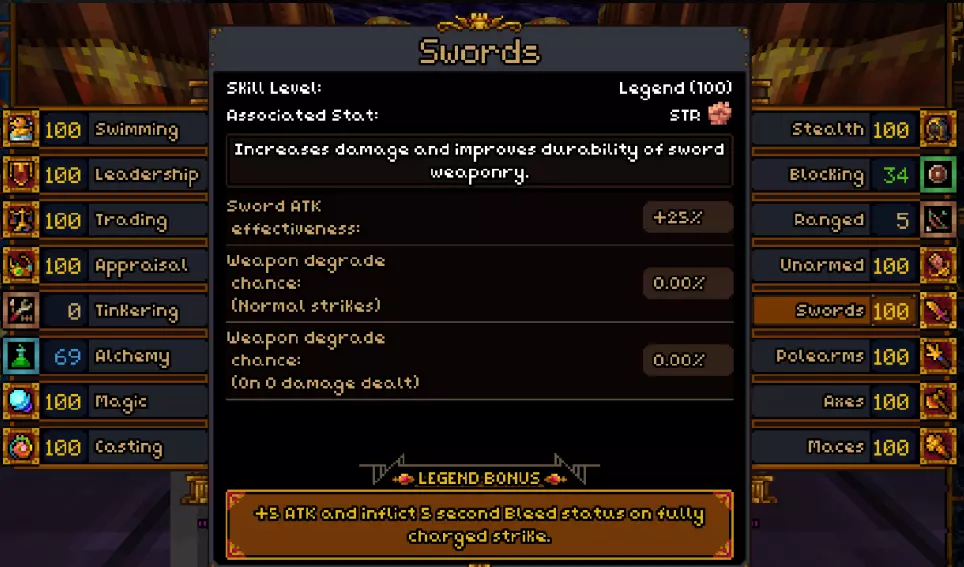
You want them. You need them. The pinnacle of gear, and the holy grail of efficiency and powerful effects. There's a full set of Artifact Armor, and 5 Artifact Weapons, one for each weapon skill. They're going to make your hardcore run infinitely more pleasant. What are they, and where can you get them? Secret levels, that's where. The Sphinx Veil, the Artifact Helmet, has +4 Armor and +8 to Intelligence, and can be found in the Gnomish Mines secret level on floor 2. The Oracle's Treads, the Artifact Boots, have +4 Armor and give Lesser Warning permanently, and can be found in the Haunted Castle on floor 8. The Djinni's Braces, the Artifact Gauntlets, have +4 Armor and give Magic Resistance, and can be found in Sokoban on floor 11. The Dragon's Mail, the Artifact Chestplate, has +6 Armor and gives bonus Health Regeneration, and can be found in the Cockatrice Lair on floor 28. The Wraith's Gown, the Artifact Cape, gives permanent levitation and +1 to magic regeneration, and can be found in Bram's Castle on floor 33.That's all the artifact armor. The weapons are a bit more difficult to get, and far less guaranteed. Dyrnwyn is the Artifact Sword. It deals 10 damage, and has a chance to either burn or smite whatever it strikes, scaling with sword skill. It can be found in two ways: from King Arthur, an incredibly rare human NPC, or Shelob, a slightly less rare but still extremely rare Spider that can spawn in the Mines and Swamp. This one might be the rarest artifact weapon, as it has no guaranteed spawn and is basically a complete bust if you don't roll the dice well before the Sand Temple. But if you do get it, it's incredibly powerful, practical, and seeing how all the bosses are either undead, demonic, or both, you're going to be doing silly damage with those smites. Parashu is the Artifact Axe. It deals 10 damage, and has a chance of dealing 1.5x damage and slowing that scales with weapon skill. Possibly the most practical Artifact weapon. Its only drop source is Funny Bones, a skeleton that can spawn in the Mines, the Underworld, and Bram's Castle. Luckily, considering the sheer volume of skeletons in the Mines, it's not too uncommon to see Mr. Bones himself running around every run or two. He's an incredibly powerful foe on Hardcore, with almost 200 health and a high likelihood of melting anyone who dares to challenge him that early on, but the axe is well worth the risk. Sharur is the Artifact Mace. It deals 10 damage base, and essentially doubles mana regen, easily making it the most useful weapon in the game for dedicated mages. Even for anyone else, its still a hell of a good bonking stick. It's the first weapon here with a guaranteed drop point. It can drop from the Potato King, a powerful goblin most likely to be found in the Swamp, but i've seen him in both the Sand Labyrinth and the Ruins. It can also drop from Anasi, a rare human, like Arthur. And lastly, if you pick up the Blue Orb from the Library, it can be obtained from the Mystic Merchant at the Hamlet. Gungnir is the Artifact Spear. It deals 10 damage base, always does max damage every strike, and has a chance to ignore 50% of an enemy's AC that scales with weapon skill. Definitely the most consistent Artifact weapon. It also has a guaranteed drop point, in the Minotaur Maze secret level on floor 13. If you can take it. It can also spawn with a rare NPC, Vishpala, along the same vein as Anasi and Arthur. Khryselakatos is the Artifact Bow. It deals 16 damage base, and has a high chance to fire off arrows of a random type that scales with weapon level. It's also the most fearsome weapon to get. It has two guaranteed drop points-- the easy way, or the hard way. No random drops. You can either get it at the Hamlet, trading the Green Orb you get from the Temple secret level with the Mystic Merchant.. or breaking into the Underworld during the transition level from the Mines to the Swamp. On the second floor of the Underworld, a specter wielding the bow can be found, and slain. But you really shouldn't do that. I wouldn't even recommend it on normal mode, let alone hardcore.So there you go. Artifact items are insanely practical, and you can basically guarantee the armor with enough moxxie and quick thinking. It's going to be a little more chance based with the weapons-- since you can't guarantee getting another one, i'd recommend sticking with the one that randomly drops first, and picking if you can afford to get a guaranteed one. An early Artifact Weapon can change the entire course of a run.. if you can slay whatever's holding it, of course. Secret levels, part 1.
There's a lot to unpack here.Secret levels are uniquely challenging, often deadly, and always hiding some nice goodies. On Hardcore, these aspects are way ramped up. So you need to ask yourself three questions before you enter a secret level. Can I survive rushing to get the unique loot and go? If so, can I survive snagging some extra loot? And if so, could I possibly clean the level out of enemies and items? The threat level and reward of each secret level varies. Some, like Sokoban, have little threat, and little extra reward. Some, like the Gnomish Mines, have utterly insane threat level and equally high rewards for clearing it out, in XP, magical weaponry, and even more assorted goodies. Don't bite off more than you can chew. NO ONE truly has the Gnomish Mines under control. It's a struggle to even get the Veil and go. But with proper strategy and preparation, you can break most of these levels to your will. Let's discuss. Floor 2: Gnomish Mines.Pac Man from Hell. Easily the deadliest secret level in the game, with the highest long-term rewards. If you NEED to fight anything, use the corners to your advantage, use any projectiles you have, anything to avoid being in the direct sightline of a Staff Gnome. Treat every single corner with the respect it deserves, because you don't know if a Staff Gnome or a Troll is about to instantly kill you. To get the Veil and go, either find your way to the shopkeeper at the top right to flip the level and access the Veil, or kill a gnome with a pickaxe and bust your way in. If you want to start killing, somehow kill a Staff Gnome and use that staff to kill other gnomes for their staffs. And just go from there. But DO NOT drop your guard for even a second. It will cost you. Floor 3: Minetown.In complete aversion to the previous secret level, this one's nothing but nice. It's just a human settlement with 4 shopkeepers and a couple free chests of loot if you can get to them. Even if you're a non-human, always start with 3 Polymorph potions. Pop one, recruit some humies, do some shopping, flip the lever to the chest with gold beside it, and maybe even pop open the gate to the water, if you can. You can find another chest if you can push/destroy the boulder in the way. No unique loot here. Floor 7: Jungle Temple.The risks here are notable, but moderate, and you have the ability to essentially pick your fights as necessary. The trolls are all in cages, the goblins are locked up, and even when released, you can pretty easily slip past the former. You don't need to bother with the goblins at all unless you want access to a triple chest behind them. If you can handle Trolls in whatever way you like, it's a lot of free XP, as trolls are VERY stupid. And once you have the green orb, you can use it to open the doors to the waterways to get free gold. The waterway in the Boulder Trap room has a lever that opens the way to the second one next to the exit, but be warned that goblins will spawn on the exit once you get too deep into the second waterway. Floor 8: The Haunted Castle.This is either the deadliest secret level or the most pathetic. You're under no risk until you enter the castle, and can explore the outer edges for a bunch of free items. In the top right tower is a hatch that leads to free Levitation potions, and that's a surprise tool that will help us later. One of the towers also has a lever that opens the way to three chests at the bottom right behind a pool of water, another surprise tool that will help us later. Once you enter the castle, loot the chests, and grab the Oracle's Treads, then the fun begins. Several hundred billion angry Ghouls spawn outside, and in an outright slugfest, this is doubtlessly the most dangerous and harrowing level in the game. Except for two things: that pool of water, and those levitation potions. If you haul ass to the pool of water and get on the other side of it, you're completely safe. The ghouls can neither reach, nor harm you. If you have a ranged attack, it's just free XP, and if you don't, you can drink a levitation potion and mosey on over to the exit at your leisure. Floor 11: Sokoban.This isn't a skill check so much as a gear check. Did you bring Strength Potions or a Ring of Might? Did you bring a Pickaxe, Firestorm Potion, Dig Spell or Staff to get in? Then you're set. It's just Sokoban! Push boulders into the holes and you win. Preferably with as few screwups as possible. Just take your time and use the minimap so you don't accidentally push one into a corner. You CAN break boulders and still get rewards, but less and less. Also, an angry bug spawns when you break a boulder. The Djinni's Braces and the absolute metric load of gold you get for a perfect run make Sokoban well worth the stop. Floor 13: Minotaur Maze.This isn't a gear check so much as a skill check. This is the saddest way to end your run if you don't know EXACTLY what you're doing. It's dark, there's lever checkpoints with gates, dead ends, and if the Minotaur catches up to you for one solitary second, that's it. You're dead. But this places houses Gungnir and the Red Orb. This might be the first Artifact weapon we get, and we REALLY want it. So how can we minimize our risk? There's two thoughts to this. One, kill the minotaur. Two, haul absolute ass to the end, then kill the minotaur. The first is dependant on two things: being able to get him in a loop where you can outrun him indefinitely, and a way to slow him so you can actually pepper him with ranged attacks. If you have Cold, that'll do the trick. It'll be boring, but it will work. The second is going to require a Map scroll or spell, and your ability to not hesitate for a second when hitting a checkpoint. If you can get the Red Orb to the end, you'll be able to take care of the Minotaur infinitely easier, and get your spear prize. If neither, you can just leave with the Red Orb. But that's not fun. I didn't even realize these had character limits, so we're going to part 2. Secret Levels, Part 2. Floor 16: Mystic Library.It's like Minetown, but for nerds. Tons of chests full of spells and other assorted magical goodies here, NPCs to recruit and laugh at when they die, and most importantly, the Blue Orb. There's also two hidden chests here, but I trust you to figure those ones out. Floor 18: Underworld.You could have gone here at level 5's rest stop, but that's stupid and you shouldn't have, so I put it here. Welcome to Almost Hell! We have flying imps with fireballs, flying shadows, traps, teleporter shenanigans, and pain. There's always good loot, and even a chance for Funny Bones, but the real reason you're here is for a chance to go to Actual Hell. There's no unique loot here, so if you ever need to get the hell out, or change your mind about Hell, the way back out's right at the entrance. You can even go back to it once you go to the second floor. And you'd better make it real fast or have a levitation potion if you do change your mind, because the enemies here can seriously bring the hurt. And since we're here, Hell also doesn't have any unique loot. Just more floors of demons, pain, lava, and a brutal bonus boss that still takes you to the Hamlet. The only reason you'd want to go here and not take down Baron Herx is if you feel the bloodlust. Which I respect. I always go to Hell. Floor 28: Cockatrice Lair. If you've made it to the Crystal Caves, then I have a lot of faith in you to take down the Kobolds here. They shouldn't pose too much of a problem for you, and the Dragon Mail you can get decently early on is a massive reward that makes it well worth the effort. The puzzles to get through the maze aren't too rough once you get a good grasp of the area. It's the end that's the problem. As Cockatrices are your personal boogeyman for a Hardcore run, imagine a beefed up one. That's what waits for you at the end portal. Your only saving grace is that it doesn't like the Kobolds in the room any more than you, so either use that distraction to lay on the damage or get the hell out of dodge. And remember that the Dragon Mail is in a side room, not along the main path, so please don't forget it like I did that one time. It's really sad. Floor 33: Bram's Castle.If you've made it to this point and are properly geared, this place should be a joke. The skeletons are no problem, the succubi are off in their own little rooms, the Shades were scary 10 floors ago, and Mr. Stoker himself isn't much more threatening unless you're on death's door. Cyberbully him with real life violence for his incredibly helpful cape, and make preparations for the final confrontation.Christ, that was more than I thought it would be. Priority Targets and Who To Avoid
几乎每个区域都有你必须击杀的敌人,也有你需要暂时避开、之后再回来对付的目标。我现在有点疲劳,所以长话短说。 矿坑:【滑稽之骨】、【希洛布】和【巨魔】是优先目标。 前两者是独特且超强的敌人,所以你自然需要对它们格外警惕,希洛布尤其如此。但战胜并智取它们的奖励绝对值得冒险。巨魔在近战中极其致命,但它们蠢得像块石头,如果你有任何远程攻击手段,或者只想从背后偷袭,它们简直就是白送的经验值。在此之后的大多数楼层都能遇到巨魔,所以要记住这一点。 【蜘蛛】和【阿尔杰农】是需要避开的敌人。蜘蛛通常成群出现,生命值高,攻击力强,还会施加中毒和减速效果。阿尔杰农(Algernon)如果在早期发现你,基本就意味着死亡。你跑不掉,也无法及时杀死他,而且他总是带着一大群随从。即便奖励也不怎么样,要远离他。 沼泽区域:优先对付土豆王(Potato King)和希洛布(Shelob)。 土豆王的情况和希洛布基本类似,只是他不像希洛布那样快得让人反应不过来。不过他的随从可能更吓人。 要避开法杖哥布林(Staff Goblins)。 如果你觉得普通模式下的高额伤害和持续伤害(DoT)已经很棘手了,那想象一下困难模式。如果必须杀死一个法杖哥布林,先让别的东西吸引它的注意力,然后再全力攻击。否则,你可能眨眼间就死了。沙之迷宫:小型虫形生物和圣甲虫是优先目标。 小型虫形生物是难缠的对手,但它们通常会携带优质装备,以及非常适合弓箭手使用的长弓。圣甲虫基本上毫无抵抗力,而且几乎总会掉落食物,对于这个食物匮乏的区域来说非常有用。 应避开斯克拉布拉格和蝎子。 蝎子非常棘手,精英蝎子同样如此。只掉落无用宝石的精英蝎子更是令人恼火。永远不要以为它们不会在每次攻击时都让你麻痹10秒,尽可能避免与它们进行近战,尤其是周围还有其他敌人的时候。 遗迹:年轻吸血鬼、法杖地精和桑普斯是优先目标。随着你变得更强大,法杖地精不再像全能的威胁,而更像是免费的闪电法杖。你可以这样利用它们。年轻吸血鬼会掉落极其有用的吸血鬼紧身上衣,而桑普斯只是个更大的巨魔,能提供更多经验值。 恶魔 你在这里会开始遇到恶魔,除非你能在战斗开始前基本确保胜利,否则千万不要招惹恶魔。它生命值很高,速度快,会投掷火球,而且能轻易把你打死。它们甚至不会掉落什么好东西。要惧怕恶魔。 地狱:羊魔人是优先目标。它们实际上穿着盔甲,还会时不时好心地掉落药水,所以用暴力手段“礼貌地”让它们交出东西吧。恶魔 水晶洞穴:狗头人和水晶魔像是优先目标。 我不记得上次有哪个狗头人没给我掉过不错的药水了,而且它们通常还会掉落一些相当不错的盾牌,所以综合它们的威胁等级来看,击败它们是很有价值的。水晶魔像属于“很可能一击秒杀你的敌人”之列,但只要像对付巨魔那样小心地与它们战斗,通常就能获得水晶物品。
鸡蛇怪 它们来了。天啊。 你觉得普通模式下的鸡蛇怪很有趣?那你猜怎么着。它们有近1200点生命值,而且游戏中任何护甲都无法让你在正面近战中不被撕碎。你要么聪明地与它们战斗,要么就干脆别打,没有例外。如果它们把你麻痹了?那就再见了。你死定了。它们可能掉落的石血法杖还不错,但鸡蛇怪会让你感到极度恐惧。另外,千万不要,绝对不要在没有装备生命守护护身符的情况下试图控制它们。你会死的。没有例外。 要塞:说实话,到这个阶段,除了鸡蛇怪,基本上所有东西都还算合理。 永远别惹鸡蛇怪。 牛头怪 说真的,我完全忘了牛头怪这回事,我正准备结束这个话题。 好吧。
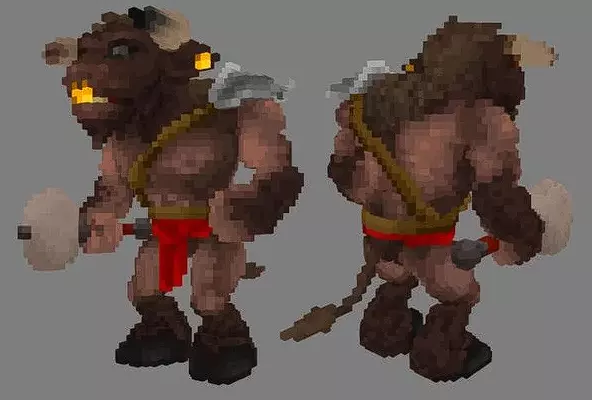
当你看到牛头怪警告时,你必须问自己一个问题。 我有能力杀死牛头怪吗? 我这么说并非是在号召你行动,而是说你是否真的具备杀死牛头怪所需的条件。 也就是,一种能减速它的方法(寒冷、缓慢效果),某种远程攻击手段(弓、投掷武器,或者再次使用寒冷效果),以及一个能让你边周旋边攻击它的循环策略。 如果你具备这些条件,恭喜你!你可以获得大量经验值,自由清理该关卡的其余部分,以及它身上预先鉴定好的宝石。 如果不具备,就别白费力气了,直接离开。你绝对赢不了和牛头怪的近身搏斗,尤其是当你进入水晶洞穴后。到那时,和它战斗完全不值得,而且它速度太快,你根本无可奈何。如果他出现在有隐藏关卡的楼层,一定要确保通往隐藏关卡的路径是安全的,因为一旦牛头怪开始横冲直撞,你就需要一条逃生路线。 没错,如果ZAP小队出现,你可以寻求他们的帮助来打倒牛头怪。但要注意,对于非人类玩家来说,他们的到来很可能是一种诅咒,而且他们甚至可能无法获胜。 大概就是这些了。 这就是我能想到的所有内容。 如果这些对你有帮助,或者你还有其他需要补充的内容,请告诉我。