换一换
换一换 


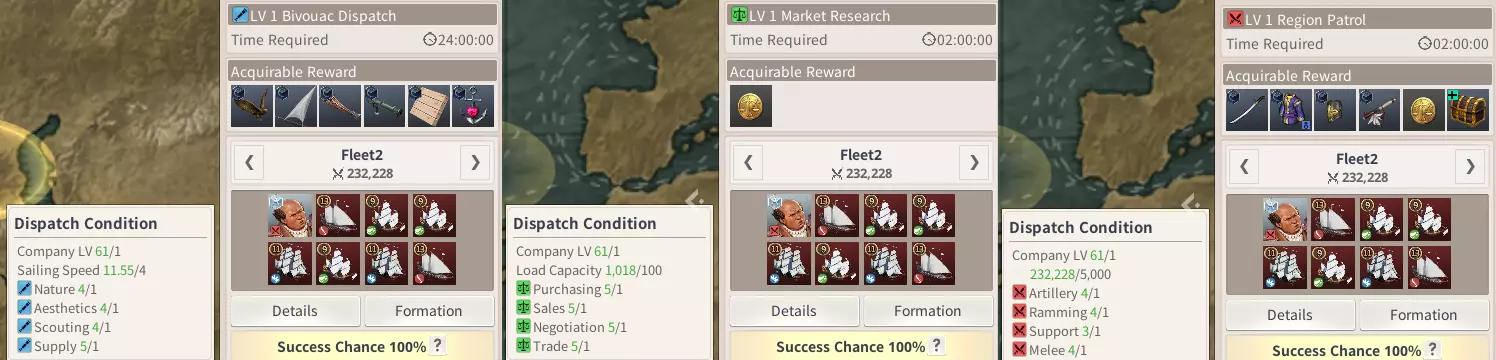
This explains the game's land exploration mechanic. This also lists zone levels, and thus, the implied order of various regions in the game. Basics You can stop near most land in the game for land exploration. Land exploration costs a bedroll each time, but gives you a chance to make discoveries, acquire ship parts, and acquire items that can be turned in at a collector or gifted to mates or inn employees. Land exploration operates by zones. Unlike other Uncharted Waters games, you don't have to drop anchor at particular, small spots to explore. Rather, most of the shore areas are divided into zones. Stopping anywhere within a zone to do land exploration is equivalent to any other place, with only the exception of quests that lead you to a very particular spot. Each land exploration attempt will last two to four days. There are two events per day. Land exploration events are divided between combat, observe, and gather. At the menu to start land exploration, it will give you probabilities of each event type appearing in each particular slot. The last event of the second and third days are always gather events, while the other events are always either observe or combat events. A land exploration attempt continues until either a gather event fails or the fourth day ends. Because gather events take fixed slots, the nominal probability of a gather event is meaningless. The ratio of observe to combat events does matter, though. Every land exploration zone has some difficulty rating. It uses the same difficulty rating for each of the three event types. Your party also has a rating for each of the three event types. Your chances of success at each event depends solely on the difference between your rating and the zone's rating in the relevant event type. All three types use the same formula. I don't know the exact formula, but empirically, this formula seems to be very, very close: success chance (as percentage) = 96.42/(1+exp(-0.05451*((party skill)-(zone difficulty)-18.73)))-1 That formula is so close that the true formula is definitely some sort of logistic curve. It also levels off at something significantly less than 100%. The party skill rating depends mostly on particular skills. The relevant skill, by event type, is: eventskillcombatmeleeobservenaturegathersupply Nature and supply are adventuring skills that have fleet levels. Your skill for land exploration depends on the fleet level, not on the exact skill value. You get 14 points per fleet level in the skill. A table up to level 23 looks like this: skill levelfleet pointsevent skill101428502831490424336056559807069340847134609881832011292393012610302901401141130154125429016813700101821488470196151099402101613462022417162740238181945302521923020026620270000280213159402942236976030823432820322 For levels 3-10, a formula of: 10 * floor(37.4 * level^2 - 74.8 * level + 37) always gives exactly the right number of stat points required. For levels 10-20 (and yes, level 10 fits both formulas), a formula of: 37.425 * level^3 - 76.25 * level^2 + 61.2 * level - 130 is always off by less than 10 points. That formula does not still work at level 21, however. Note that it is only the fleet level, not the total number of points. Having 6300 points in nature or 9300 makes no difference, as either will give you nature level 5. Having 6300 points rather than 6200 makes a big difference, as that's the difference between level 4 and level 5. Combat goes by melee skill, which is calculated separately for each ship. Each ship in your fleet gives a bonus based on its own melee skill. A table up to level 10 looks like this: levelmelee statcombat skill1052870831350124330014562101761218020721220238340502795139032107400040 Thus, which mates are on which ships does not matter for nature and supply, but it does matter tremendously for melee. You can also increase various stats by using exploration items that are sold in item shops. Each land exploration attempt will consume one of each item that you use, so this increases the cost of exploration considerably. The items available to buy are: ItemPriceSkillIncreaseOld Rope2800observe3Hand Axe2800combat3Clean Glass Bottle2800gather3Normal Rope5800observe5Machete5800combat5Flimsy Wheelbarrow5800gather5Superior Rope15200observe7Pancho15200combat7 Prices given are base prices, before the language discount. Every ship gives a large stat bonus to some particular stat, in addition to the stats that the mates in the ship cabins give. The ship stat bonus depends only on the particular ship type, such as a cutter or xebec. You can find the list of them in my ships guide. Be sure to set your ship cabins to have an appropriate mix of adventure, trade, and combat cabins. In particular, you do want some trade cabins, as higher grade trade mates will tend to give you better stats than lower grade adventure or combat mates. You may also want a combat cabin or two on adventure ships so that melee-focused mates can improve your combat rating. Basics (continued) The event difficulty and bedroll type mostly depend on the company level requirement of the zone, at least for zones that do not require seaworthiness of 150 or higher. Rather than listing them separately for each zone, I'll only list the difficulty requirement for the zone. The gear grade is for the highest grade of ship gear available in that zone. There have been some changes to company level requirements since launch, and land exploration parameters generally haven't made corresponding changes. As such, the level requirement in the next table means level requirement at launch, and may not still be accurate today. LevelDifficultyBedrollParts15DC1514DC1814DC2030DC2448DB2765CB3065CB3589CB40108BB45122BB50136BA55155BA60155BA65170AS70175AS75180AS This table fails for top end zones, as those rely on very high requirements of seaworthiness and either momentum or ice breaking to limit access to the zones. Top end zones always require A-grade bedrolls and can give S-grade parts. For top end zones, the difficulty is: SeaworthinessMomentumIce BreakingDifficulty15012001851551250200170012022017013002251851500225200015023521001602602251700310 The name of each zone gives the approximate location. Some are a little misleading, such as that there is a "Near Bahia" zone, but the shore that is actually near Bahia is all part of the "Near Caracas" zone. I give a separate column for my own description of the location. Directions generally mean the coast, so something like "east USA" includes the east coast of Florida but not Vermont, even though the latter is objectively further east. My references to countries use the modern political boundaries, not those from the 1520s. The level column is the company level requirement to reach the zone. As above, that also determines the difficulty rating of the zone, as well as the type of bedroll needed. The S/A/B/C/D columns are the number of discoveries of each grade available in the zone. The sea, mom, and ice columns are the minimum values of seaworthiness, momentum, and ice breaking needed to reach the zone. A lot of zones straddle multiple values of this, so I pick the lowest one. For example, part of "Near Ushuaia" requires 30 momentum and part has no momentum requirement, so I report is as 0. If you just want to get to the zone at all, you don't need any momentum. There are some zone that may spill slightly into a lower level (or seaworthiness or momentum) sea region than the main difficulty rating. These have the level marked with an asterisk. They use the difficulty rating of the main zone level even in the lower level sea zone. I'm not entirely convinced that they really do spill into the lower level region as opposed to the zones marked on the global map simply being wrong, though. Also, Steam censors the name of the largest river in western Africa, which is why I called it the (censored) River below. You can see it for yourself on many real-life maps of the area. Oddly enough, Steam does not also censor Nigeria, which is based on the same root word. Finally, there really are two completely separate regions called Near Cambridge Bay. They should have called one of them near Iqaluktuuttiaq, which would actually be less confusing. Zone list (Europe and Africa) nameleveldiffSABCDseamomicelocationNear Lisboa1501015000Portugal, SpainNear Nantes1501114000west/north FranceNear London1501024000British IslesNear Amsterdam1501023000Netherlands, GermanyNear Bergen1501015000Denmark, NorwayNear Stockholm1501230201Sweden, Finland, PolandNear Archangelsk7017512110130080northeast ScandinaviaNear Narvik7017512110130080northwest ScandinaviaNorth Iceland7017511220130080north IcelandSouth Iceland35891110055040south IcelandNear Marseille1501015000south FranceNear Naples1501015200ItalyNear Athens1501015000Greece, CreteNear Kerch1501211000UkraineNear Trabzon1501015000TurkeyNear Alexandria1501024000EgyptNile River2448012130100Nile RiverUpstream of the Nile River24215102000100Lake VictoriaNear Casablanca1501024000Morocco. AlgeriaNear Arguin151401033000west AfricaNear Benin203001212700Nigeria, Cameroon, Gabon(censored) River2030011131030(censored) River, Benue RiverUpstream of the (censored) River20215121001030western (censored) RiverKongo River24480121215100Kongo RiverNear Benguela2448013121500Angola, Namibia, South AfricaNear Natal2765102133500MozambiqueZambezi River27651022235200Zambezi RiverNear Toamasina2765102123500MadagascarNear Massawa2765013123500Tanzania, Somalia, Red Sea Zone list (Americas and Pacific) nameleveldiffSABCDseamomicelocationNorth Pole Entrance35891000155040east GreenlandSouth Greenland35890121055040GreenlandNear Arviat35890222055040Hudson BayNear Cohasset181401212700east USA, east CanadaBermuda Island18225111001701300BermudaNear Santiago de Cuba1814012121500Greater AntillesLower Mississippi1814012121500south USAMississippi River18140121215100Mississippi RiverUpstream of the Mississippi River182150310015100western Missouri RiverNear Trujillo1814012131500east Mexico, north/east Central AmericaNear Caracas1814012121500north South AmericaLower Amazon18141121215100eastern Amazon River and tributariesUpper Amazon18140121215100western Amazon River and tributariesNapo River182150310015100western Napo RiverNear Bahia3065102223500east BrazilLa Plata River35891102255300Parana, Paraguay, and Uruguay RiversNear Ushuaia3589111215500ArgentinaNear Valparaiso3589111226500ChileNear Tumbes40108111227500PeruNear Guatemala40108112117500south/west Central AmericaNear Acapulco501551121011000west MexicoNear Ohlone6517011301120075British Columbia, Washington, OregonNear Barrow6517011210120075AlaskaAlaska70220111001700120north AlaskaNorth Alaska40260100042100160northeast Alaska, YukonNear Cambridge Bay40260010212100160(Canada) Northwest TerritoriesNear Cambridge Bay40260111102100160central NunavutNorth Cambridge Bay40260012112100160northern NunavutWest Greenland40260012012100160northwestern GreenlandNear Honolulu75185111211501200HawaiiTuamotu Archipelago7017511110130600PolynesiaNear Hagatna7017502110130600GuamNear Suva7518001111140800FijiTongatapu Island75225021001801500TongaNear Whanganui7518002210140800New Zealand Zone list (Asia and Australia) nameleveldiffSABCDseamomicelocationNear Dhofar2765102213500Oman, YemenNear Hormuz3065102214520*0Persian Gulf, Tigris RiverUpstream of the Euphrates River302151110045200Euphrates RiverNear Goa3065102224500west IndiaNear Male40310003102251700MaldivesNear Masulipatnam3489102225500east IndiaA remote island near the Indian Ocean34200002001551250Kerguelen IslandsNear Pegu34891110365*00MyanmarNear Hanoi3489111116500Sumatra, Thailand, VietnamNear Macau37108100417500south ChinaNear Kuching37108112127500BorneoNear Surabaya37108021317500JavaNear Brunei37108112207500Sulawesi, PhillippinesNear Tainan40122010248500Taiwan, east ChinaNear Naha40122020418500OkinawaNear Hangzhou40122111228500east ChinaYangtze River401221121185400Yangtze RiverUpstream of the Yangtze River402150210085400western Yangtze RiverYellow River401221213085400Yellow RiverNear Hanyang40122121208500KoreaNear Jeju40122121118500Jeju IslandNear Nagasaki40122111128500KyushuNear Edo40122121308500HonshuNear Banda37122031307500western New GuineaNear Pinjarra50136030118500west AustraliaNear Port Pirie50136011008500south AustraliaNullarbor Plain50215003008500Great Australian BightNear Kakadu55155021109500north AustraliaNear K’gari55155012119500east AustraliaNear Samarai55155022019500eastern New GuineaNear Yeongil451550213110000east KoreaPaektu Mountain Entrance452150310010000northeast corner of KoreaNear Korf601550020210000Sea of OhkotskNear Ezo451551112110000HokkaidoThe Pacific Northwest601551113110000Kuril IslandsGulf of Anadyr6521501200120075west of KorfChuckchi Peninsula6517011120120075south Chukchi Peninsula, east KamchatkaSiberia70220111001700120north Chukchi PeninsulaNear Dikson40235102012000150north Russia Exceptional zones The general rules above accurately describe most zones, but there are some exceptions. First and most important is the Kerguelen Islands zone. Most zones give one resource when you redo a discovery, but for one of the discoveries, the Kerguelen Islands zone gives five. Furthermore, they're B-grade resources, as that is the lowest grade of discovery. That makes it useful as a way to farm adventuring fame if you're high enough level to get a good success rate. The North Pole Entrance zone gives A-grade ship parts rather than B-grade. It is a small portion of land at the east end of the portion of Greenland that is accessible below company level 70, though it is not clear whether it extends into the level 70 portion of the map. Near Banda is mostly for western New Guinea, which requires 130 seaworthiness. However, you can access the zone at the eastern edge of Seram Island, which requires only 75 seaworthiness. Some other zones that are have only a small portion near the boundary of a level range are genuinely just small zones, however. This includes Near Jeju and the very misnamed The Pacific Northwest, which outside of the game, usually refers to roughly the area of the zone that was instead named Near Ohlone, in spite of not containing Ohlone. C-grade Resources After you make a discovery, if you would have made the discovery again from continued land exploration, you get a resource instead. Such resources can be turned in at collectors for adventuring fame. With the introduction of guild skills, people sometimes want particular resources. Old chests are obtainable everywhere, but other resources are only available in particular zones. The game won't tell you which resources are available where until you make the discovery, but I will. This guide is currently complete, though that can change as new zones are added in future patches. I also include the palace as a source for the resources that are offered there. The zones for a given resource are sorted by increasing order of difficulty. Here are the C-grade resources, other than Old Chest, sorted in the order that the game displays them if multiple such resources are available in the same zone: ResourceLocationsSuperior Writing SuppliesNear London, Near Amsterdam, Near Casablanca, Lower Mississippi, Near Trujillo, Upper Amazon, Lower Amazon, (censored) River, Near Hanoi, Near Tumbes, Near Naha, Near Hangzhou, Yellow River, Near Banda, The Pacific Northwest, Near Honolulu, Gulf of AnadyrSea LobsterNear Marseille, Near Naples, Near Alexandria, Near Amsterdam, Mississippi River, Lower Mississippi, (censored) River, Near Bahia, North Pole Entrance, La Plata River, Near Pegu, Near Guatemala, Near Brunei, Near Naha, Near Banda, Near Pinjarra, Near Yeongil, Chuckchi Peninsula, Tuamotu Archipelago, North AlaskaSculpture by Unknown ArtistNear Athens, Near Trabzon, Near London, Near Casablanca, Near Amsterdam, Near Kerch, (censored) River, Kongo River, Near Hormuz, Near Masulipatnam, Near Ezo, Near Samarai, Near Barrow, Near Narvik, Near Cambridge Bay (west), Near Cambridge Bay (east)Writing Suppliespalace, Near Bergen, Near Nantes, Near Naples, Near Trabzon, Near London, Near Arguin, Near Cohasset, Near Santiago de Cuba, Lower Amazon, Near Dhofar, Near Arviat, Near Pegu, Near YeongilFish CakeNear Lisboa, Near Naples, Near Arguin, Near Trujillo, Nile River, Near Natal, Zambezi River, Near Toamasina, Near Hormuz, Near Valparaiso, Near Macau, Near Kuching, Near Naha, Near Ezo, Chuckchi PeninsulaPicture by Unknown ArtistNear Lisboa, Near Bergen, Near Marseille, Near Casablanca, Near Cohasset, Near Arguin, Upper Amazon, Near Benin, Near Goa, Near Valparaiso, Near Macau, Near Kuching, Near Nagasaki, Near Jeju, Near AcapulcoVillage RecordNear Athens, Near Alexandria, Near Nantes, Near Trabzon, Near Casablanca, Mississippi River, Lower Mississippi, Near Benguela, Near Natal, Zambezi River, Near Toamasina, Near Ushuaia, Near Masulipatnam, Near Pegu, Near Macau, Near Tainan, Near Hanyang, North AlaskaSuperior JournalNear Lisboa, Near Alexandria, Near Amsterdam, Near Benguela, Near Goa, La Plata River, Near Ushuaia, Near Tumbes, Near Banda, Near Korf, Near Dikson, North AlaskaFinNear Athens, Near Lisboa, Near Arguin, Near Benin, Near Natal, Near Goa, Near Hanoi, Near Surabaya, Near Hangzhou, Near Nagasaki, Near Hanyang, The Pacific Northwest, North Iceland, Near Archangelsk, Near Suva, Near Cambridge Bay (west), West Greenland, Near MaleStarfishNear Nantes, Near London, Near Naples, Near Arguin, Kongo River, Near Bahia, Near Dhofar, Zambezi River, Near Ushuaia, Near Tumbes, Near Naha, Near Hangzhou, Yellow River, Near Korf, The Pacific Northwest, Near Hagatna, North IcleandPort RecordNear Bergen, Near Marseille, Near Athens, Near Kerch, Near Trabzon, Near Alexandria, Near Lisboa, Near Nantes, Near London, Near Amsterdam, Near Naples, Near Casablanca, Near Caracas, Near Trujillo, Nile River, Zambezi River, South Greenland, Near Macau, Near Surabaya, Near Tumbes, Near Kuching, Near Tainan, Near Naha, Near Jeju, Near SuvaJournalNear Bergen, Near Nantes, Near Naples, Near Trujillo, Lower Amazon, Near Benin, Near Massawa, Near Valparaiso, Near Masulipatnam, Near Surabaya, Near Tainan, Yangtze River, Near Hangzhou, Yellow River, Near Yeongil, Near Whanganui, Near Honolulu, North AlaskaReptile ScaleNear Trabzon, Near Lisboa, Near Santiago de Cuba, Near Caracas, Near Arguin, Near Bahia, Near Massawa, Near Guatemala, Near Surabaya, Near Tainan, Near Edo, Near K’gari, The Pacific NorthwestClam ShellNear Stockholm, Near Marseille, Near Bergen, Near Athens, Near London, Near Casablanca, Nile River, Near Hormuz, Near Massawa, Near Goa, Near Arviat, Near Macau, Near Brunei, Near Edo, Near Pinjarra, Near Kakadu, Near Cambridge Bay (west), North Cambridge BayBroken RelicNear Stockholm, Near Marseille, Near Bergen, Near Santiago de Cuba, Upper Amazon, (censored) River, Kongo River, Nile River, Near Benguela, La Plata River, Near Hanoi, Near Valparaiso, Near Nagasaki, Near Edo, Near K’gari, Near Yeongil, Near Ohlone, Near Honolulu Higher grade resources Here are the B-grade resources: ResourceLocationsSilk Handkerchiefpalace, Near Nantes, Near Trujillo, Nile River, Near Massawa, Near Masulipatnam, Near Tumbes, Near Yeongil, The Pacific Northwest, Near BarrowGold Butterfly HandkerchiefNear Cohasset, Upper Amazon, Near Bahia, Near Natal, Near Brunei, Near Nagasaki, Near Hagatna, Gulf of AnadyrSeven Treasures Incense BurnerNear Goa, Near Hangzhou, Yangtze River, Near Samarai, Upstream of the Mississippi River, Napo River, Paektu Mountain Entrance, Near DiksonVillage MapA remote island near the Indian Ocean, South Iceland, Near Pegu, Near Korf, Near K’gari, Bermuda IslandSurviving the North Polepalace, Near Stockholm, Near Massawa, Near Kuching, Near Acapulco, Near Cambridge Bay (east), North Cambridge Bay, Near MaleTraveling the WorldNear Santiago de Cuba, Near Dhofar, Near Arviat, Near Brunei, Near Ezo, North Iceland, Near Narvik, Near Archangelsk, Near WhanganuiUrban Topography MapNear Benguela, Near Goa, South Greenland, Upstream of the (censored) River, Nullarbor Plain, West GreenlandGolden Llamapalace, Near Kerch, Near Stockholm, Near Caracas, Near Toamasina, Near Bahia, Near Hanoi, Yangtze River, Upstream of the Nile River, Near MaleFinding India’s MysteryNear Kerch, Lower Mississippi, Near Caracas, Near Guatemala, Near Kuching, Near Port Pirie, Upstream of the Nile River, Upstream of the Euphrates River, Near Honolulu, Tongatapu IslandLinen HandkerchiefLower Amazon, Near Natal, Near Guatemala, Near Hanyang, Near Ohlone, Near Barrow, Near Whanganui, Near MaleBird’s Eye PaintingUpper Amazon, Near Hormuz, Near Massawa, A remote island near the Indian Ocean, Near K’gari, Nullarbor Plain, Near Suva, West GreenlandEmbroidered HandkerchiefNear Benguela, Near Toamasina, Near Masulipatnam, Tuamotu Archipelago, North IcelandMediterranean Sea AdventureNear Santiago de Cuba, Near Benin, (censored) River, Near Hormuz, Near Ushuaia, Near Arviat, Chuckchi Peninsula, Nullarbor PlainSuseokLower Amazon, Zambezi River, Near Dhofar, Near Valparaiso, Near Edo, Near Kakadu, Near Acapulco, Near OhloneJade TurtleNear Trujillo, Kongo River, Near Surabaya, Yellow River, Near Jeju, Near Samarai, Siberia, AlaskaWeather MapMississippi River, Near Benin, Near Benguela, Zambezi River, Near Banda, North Cambridge BayDangerous Poison FangLower Mississippi, Nile River, South Greenland, Near Korf, Near Ohlone, Upstream of the Yangtze River Here are the A-grade resources, sorted alphabetically: ResourceLocationsCeramic CupNear Trabzon, Near Benguela, Near Arviat, Near Pinjarra, Near Barrow, North Iceland, Near Narvik, Upstream of the Euphrates River, Upstream of the Yangtze River, Tongatapu IslandCeramic Flower PotNear Bergen, South Greenland, Near Banda, Near Hanyang, Near Jeju, Near K’gari, Near Suva, Near WhanganuiCeramic PlateNear Amsterdam, Near Brunei, SiberiaClear SloughUpper Amazon, Near Guatemala, Near Surabaya, The Pacific Northwest, Gulf of AnadyrFeathered FanNear Kerch, Near Caracas, Near Massawa, Near Surabaya, Yellow River, Near Samarai, Chuckchi Peninsula, Napo River, Upstream of the Yangtze RiverGneissNear Lisboa, Near Athens, Lower Mississippi, Near Edo, Paektu Mountain Entrance, Alaska, North Cambridge Bay, West GreenlandLimestoneNear Casablanca, Near Hanoi, Near Tainan, Near Hanyang, Near Ohlone, Near Narvik, Near Archangelsk, Paektu Mountain EntranceMahogany PipeNear London, Near Naha, Near Jeju, Near Acapulco, Near HagatnaMarbleNear Trujillo, Yellow River, Near Archangelsk, Upstream of the Mississippi River, Napo RiverMeerschaum PipeNear Arguin, Lower Amazon, Kongo River, Near Arviat, Near WhanganuiMorta PipeNear Cohasset, (censored) River, Nile River, Near Ushuaia, Near Tumbes, Near Banda, Near Pinjarra, Upstream of the Mississippi River, Paektu Mountain EntranceMusa Leaf FanNear Hangzhou, Near Banda, Near Kakadu, Near Samarai, Near Ezo, Upstream of the (censored) RiverOrchid Painting FanNear Nantes, Near Santiago de Cuba, Mississippi River, La Plata River, Near Kuching, Near Edo, Near OhlonePorcelain KettleNear Stockholm, Near Marseille, Near Naples, South Iceland, Near Pegu, Near Port Pirie, Upstream of the Mississippi River, Napo RiverPorcelain PipeNear Alexandria, Near BeninSandstoneNear Nagasaki, Near Pinjarra, Near Kakadu, Tuamotu Archipelago, Upstream of the (censored) River, Bermuda Island, Near Cambridge Bay (west), Near Cambridge Bay (east)Silk FanNear Valparaiso, Yangtze River, Near Yeongil, Near Hagatna, Near Honolulu Finally, the S-grade resources, again sorted alphabetically: ResourceLocationsChamomile TeaNear Ushuaia, Near Pegu, Near Edo, Near BarrowColored StoneLa Plata RiverDiamond BroochZambezi RiverEmerald BroochNear Masulipatnam, Near Hanyang, The Pacific NorthwestFossil PieceYangtze RiverHibiscus TeaNear Jeju, Bermuda Island, Near DiksonLavender TeaNear Valparaiso, Near MacauPatterned StoneNear Bahia, Near Hangzhou, Upstream of the Nile River, Near Cambridge Bay (east)Rose TeaNear Kuching, Near NagasakiRuby BroochNear Guatemala, Near NarvikSapphire BroochNear Dhofar, North Pole EntranceSchneeballNear HonoluluSemiprecious StoneNear Hanoi, Tuamotu Archipelago, North Iceland, Upstream of the (censored) River, Siberia, AlaskaSemlaNear Natal, Near Toamasina, Near HormuzStrange ClawNear Brunei, North AlaskaStrawberry TartNear Goa, Near Ezo, Near Acapulco, Chuckchi PeninsulaWater FlouriteNear Tumbes, Yellow River, Upstream of the Euphrates RiverYanggaengLower Amazon, South Iceland, Near Archangelsk High end stats The current top end land exploration area has difficulty 260, but gives an enormous amount of investment certificates. People farm it for the certificates, but you'll need very high stats to be able to get a good success rate. How high of stats you really need is a judgment call, but I see a threshold of 300 as being about what it takes to justify farming the area. So the point of this section is to explain how to get those very high stats. For observation and gather, it's pretty straightforward. Get nature and supply to level 20, then add in some bonuses from some of the things that you're doing for the sake of your combat level, and that gets you well over 300. Combat is the hard one to get high and always has been. I currently have a clear path to a combat rating of 365.9, which is high enough that you can afford to skip a few points here and there. I can't quite get there quite yet, but as of this writing, will probably be able to within two weeks. So I'll explain the various things that you can stack to add up to a high rating. Let's start with a summary table, then come back for more details later. sourcepointsbase value10ship melee levels224consumables15captain's cabins15flags7national policy3prime minster pledge3mate effects38guild effects9assault rams18Snow10Kirch chronicle6Isaac Newton3golden flying cloud4archaeologists0.9 Some of those values can go higher than I've listed. I've listed what I personally have or will soon get, not the theoretical maximum. Let's explain the values in order. First is the base value of 10 points. Everyone gets this automatically. You get points for the melee level of each ship. I have all ships in my fleet at melee level 8, then use the blue gem buff at a cathedral to raise that to 9. That's 32 points per ship, for 224 points in total. This is the main source of the combat stat, and if you can't at least get all of your ships to melee level 7 without buffs, you're not ready for high end land exploration. If you can't get all of your ships to level 8, then you should rearrange mates to get as many to level 8 as you can, without letting any drop below level 7. There are three consumables that get used on each land exploration attempt. If you use all three, that's 15 points. The table is listed early in this guide. Tier 20 or 21 adventuring ships all give +2 combat in the captain's cabin. A golden flying cloud gives +3. I'm guessing that all flying clouds give +3, but don't yet have a non-golden one. My main fleet has one golden flying cloud and six improved sagyeonseons, which makes 15 points total. Adventuring flags from the investment shop give +1 each. One per ship makes 7 points. If your country has a prime minister and you set all the national policies, then one of them gives 3 combat points. When running for prime minister, a candidate can choose one of the three land exploration stats to give an additional 3 points to. Hopefully he chooses combat. Mate effects are separate for combat against pirates versus beasts. You can theoretically get up to 70 in each. I'm aiming for 38 in each. For beasts, that is done as beast hunting level 10 and beast extermination level 2. For pirates, that is done as pirate hunting level 5 and pirate eradication level 5. Beast extermination and pirate eradication are both potential effects that require the mate to be SS-grade before learning the effect. They also require spending 1000 red gems per mate to learn the effect. Beast hunting and pirate hunting are normal mate effects, so they're easier (and cheaper) to get. In particular, all biologists get beast hunting, as well as a high nature stat, so they're the main way to get your beast hunting level high. If your guild uses adventuring effects, then the novice, intermediate, and high exploration manual effects give 1, 2, and 3 combat points, respectively at level 1. Increase them to level 4 and they add another 1, 1, and 2 points respectively. You're going to have to be in a major guild to get these unlocked. The cap is 10, but I list 9, as that's what CsdaIndia has at the moment. We'll probably get that to 10 within two months of this writing. Each ram from the Maybe Duck assault (weirdly, if I list the whale's real name, then Steam also censors "assault") gives +3 combat, so this can go up to 21 points. The rams mostly give momentum rather than ice breaking, so it is difficult to get 160 ice breaking if you're using momentum rams. I can get a fleet with 6 such rams into the top end areas, so I count 18 points. You can buy various pets for $9 each in the product -> appearance section of the shop. The rabbit named Snow gives 10 combat points. You can only equip two pets at a time, and Snow is the only one that I think is interesting to buy. If you complete the Maria Margarethe Kirch relationship chronicle, you get the "Class 3 Red Eagle Medal" accessory, which gives 3 points to each land exploration stat, but only if equipped on Kirch herself. Furthermore, the three mates from the chronicle each get an extra effect with 3 points to some land exploration stat. Johannes Kepler gets the "Conquer Rough Lands" effect that gives the 3 points to combat. Isaac Newton gives 3 points to each land exploration stat as his unique job effect. He is only available from the season 1 investment shop. The golden flying cloud gets an effect that gives 4 points to all land exploration stats. Finally, each archaeologist in your main fleet gives 0.3 points to combat. I have three of them in my fleet, which adds up to 0.9. In case you want to know which three I use, they are Joseph Eastman, Vasco Nunez de Balboa, and Alvaro de Mendana.
陆地探索

2026-02-18 22:00:37

导读
这是一份《大航海时代》类游戏的陆地探索机制攻略,详解了陆地探索的基础规则,包括消耗、区域机制、事件类型与判定逻辑,还列出了各区域的等级、难度、探索产出,以及不同等级探索资源的获取区域,同时分享了提升探索高难度区域所需的高属性堆叠方法。

评论
共0条评论

攻略 迈达斯科技顶楼的锚点路线开启方法
自己跑的时候从左边跳发现右边也可以跳过去,遂发视频
2026-05-15 23:320赞 · 0评论

游戏中所有失落的书籍
本指南将为你介绍如何在游戏中寻找失落的书籍以及到达它们所在位置的方法。 哈尔比亚 | 《卡里莱和笛木乃》
2026-04-02 01:000赞 · 0评论

破碎象限指南
破碎象限中的所有物品和地点 简介 本指南将列出破碎象限的所有地点,以及每件物品的获取方式和使用方法。 游戏的这部分包含84个独特地点(其中43个是票据地点),可…
2026-03-21 07:000赞 · 0评论

燕云十六声 燕云十六声,快速开启地图所有宝箱,肝满清河开封声望的攻略方法
2025-10-14 17:290赞 · 0评论

奇遇 【燕云十六声善妙州最全最详细保姆级一条龙100%进度全收集】宝箱、蹊跷、曲径通幽、江湖故人、奇遇、万事知、见闻、不平事、前尘旧物、猫戏、妙妙喵、天地万籁等
2025-08-12 01:240赞 · 0评论

【视频】双地图探索来袭?襄州探索最全解析来啦!
2024-12-11 10:100赞 · 0评论

#燕云十六声 【燕云十六声】开封暗涌故事节点全解锁
非常需要您的支持,万分感谢!
2026-05-05 06:050赞 · 0评论
成就指南
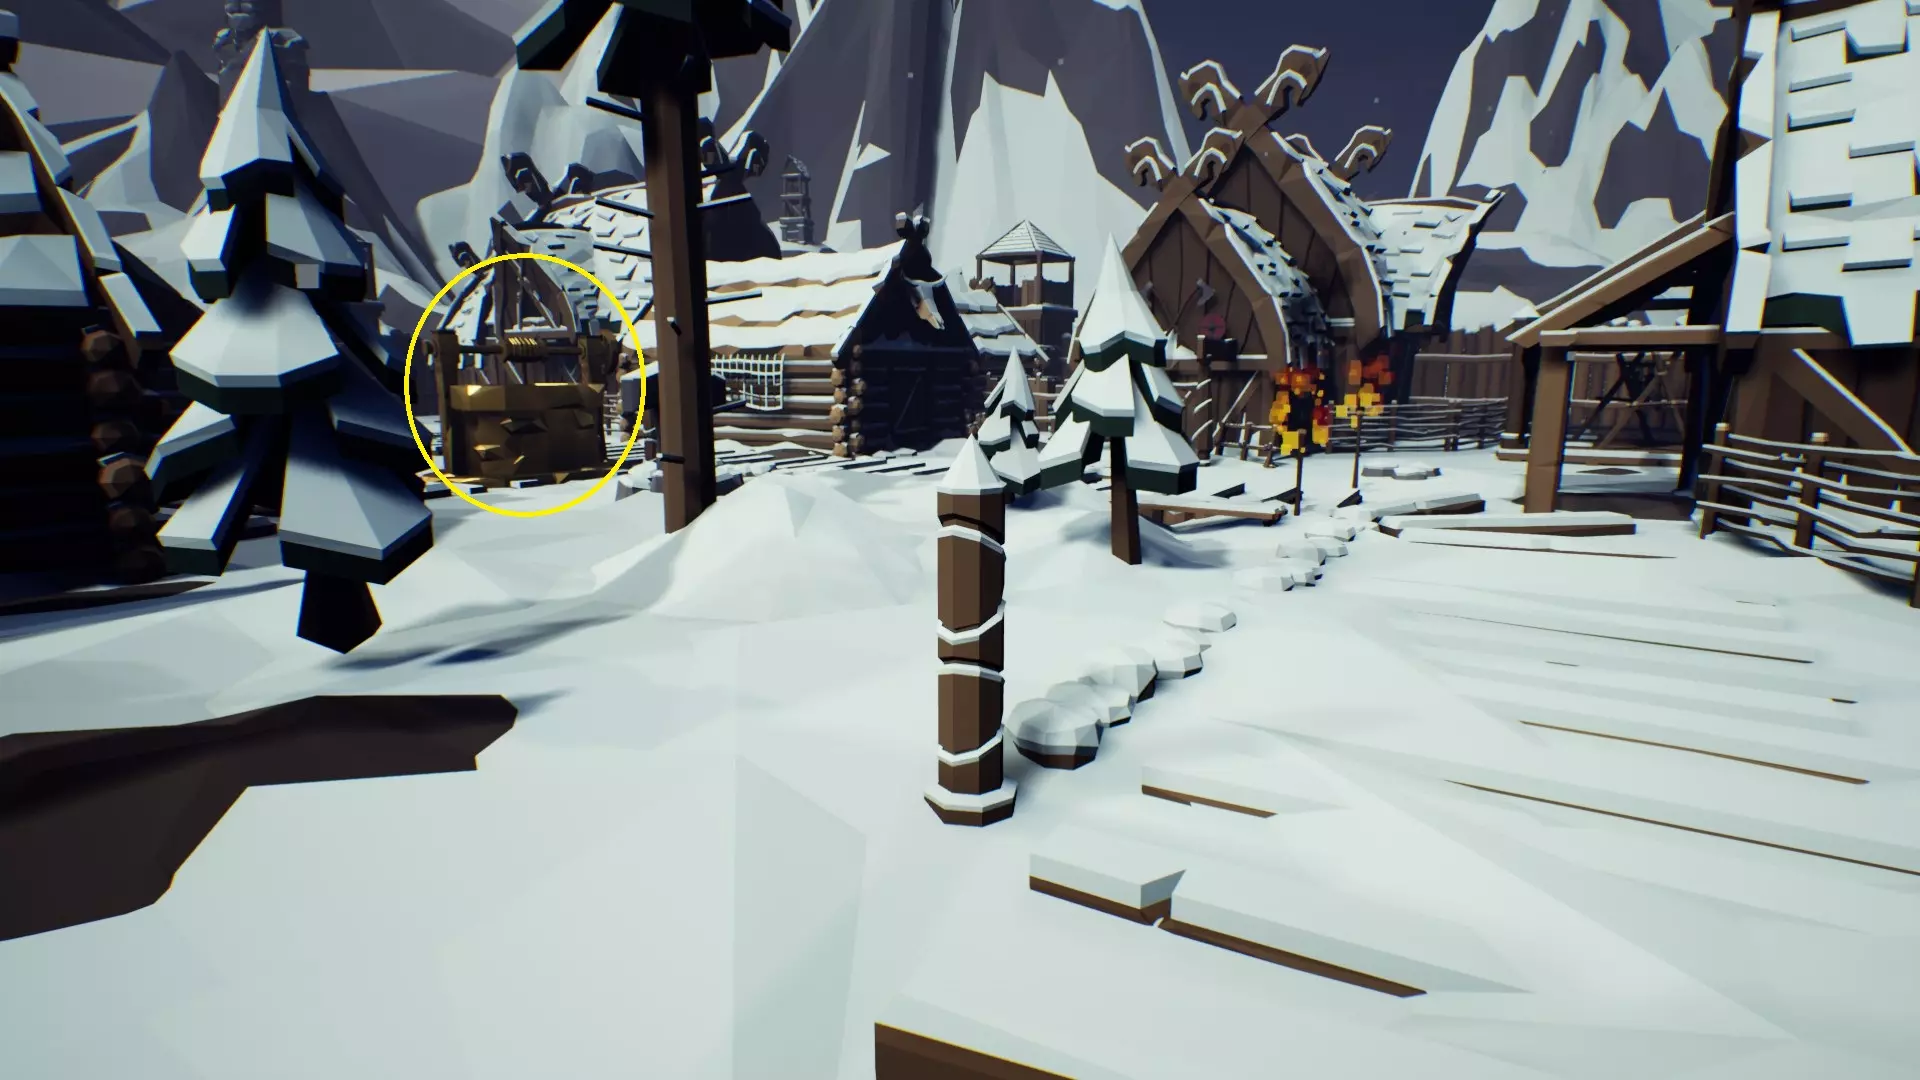
步行模拟类游戏。获取全部成就大约需要30分钟达成100%完成度 攻略 1. 初始阶段找到【黄金井】
2026-03-19 16:000赞 · 0评论
洛克王国世界 【神人洛克】究竟哪个神人教的19个极品精灵蛋
2025-11-09 03:110赞 · 0评论
地图 【终末地】以防你不知道进入非法区域的三秒遣返可以绕过(保姆级教学)
洛茜可爱捏 Ciallo~(∠・ω< )⌒★
2025-10-16 02:250赞 · 0评论

暂无更多
最新更新
- 韩国游戏网站攻略、提示及指南网站信息
- 你应该加入一个公会 — 加入一个优秀的公会(例如CsdaIndia)会带来诸多好处,且没有任何弊端。 简介 公会成员可享受两类福利。一类适用于所有公会,即使你是公会中唯一的活跃玩家也能…
- 晋升与训练 — Even free players can train up C-grade mates to be stronger than natural S-grade…
- č°ĺşŚ — Information about the game's dispatch mechanic Basics You can have up to three d…
- 新手玩家提示 — A collection of important things for new players to understand early on Simple t…
- 红宝石上将 — So you can obtain another red gem admiral and aren't sure which you want? If you…
- 如何游玩20-23级【TRIREME】(进行中) — 这份指南介绍如何从20级快速升到24级。这并非一份全面详尽的升级指南,而是提供一些不同实用性的捷径,帮助你理解并掌握独立升级的方法。尽管这些捷径都是我亲自尝试过…
- ééąź — Catch all the fish Basics Fishing can be done either manually or automatically. …
- 舰船与造船 — What you need to know in order to build the ships you want. List of ships There …
- 陆地探索 — This explains the game's land exploration mechanic. This also lists zone levels,…