换一换
换一换 


这是一份关于在《狂热运输2》中重建现实世界区域的信息汇总。原则上,利用《狂热运输2》的模拟环境来复制真实城市和景观有很大可能性。然而,该主题仍未被充分探索,相关信息也较为零散。本文旨在收集这些信息,并提供一个大致概述,助你开启自己的重建项目。敢于尝试此项目的人相对较少,且他们往往采用不同的方法。并没有唯一正确的方式,你需要尝试最适合自己的方法。 1 引言 在我将本指南翻译成英文时,就从名称开始了。在德语中,有一个非常简单且简短的词来描述它:“Nachbau”。这个词指的是构建旨在模仿现实世界区域的地图的概念。英语中有多个词可以表达类似意思,但它们都有次要含义,没有一个能完全准确对应:重建、重构、再现、复制、重现、重塑。这里我会交替使用这些词。 我不会从零开始讲解。你应该知道如何激活实验性地图尺寸或将PNG高度图加载到游戏中。 我自己的项目主要遵循了Rutel的地图创建指南,但我也会介绍其他已知的替代方法和可能遇到的问题。 本指南有德语版本:Real-Nachbau in TPF 2。
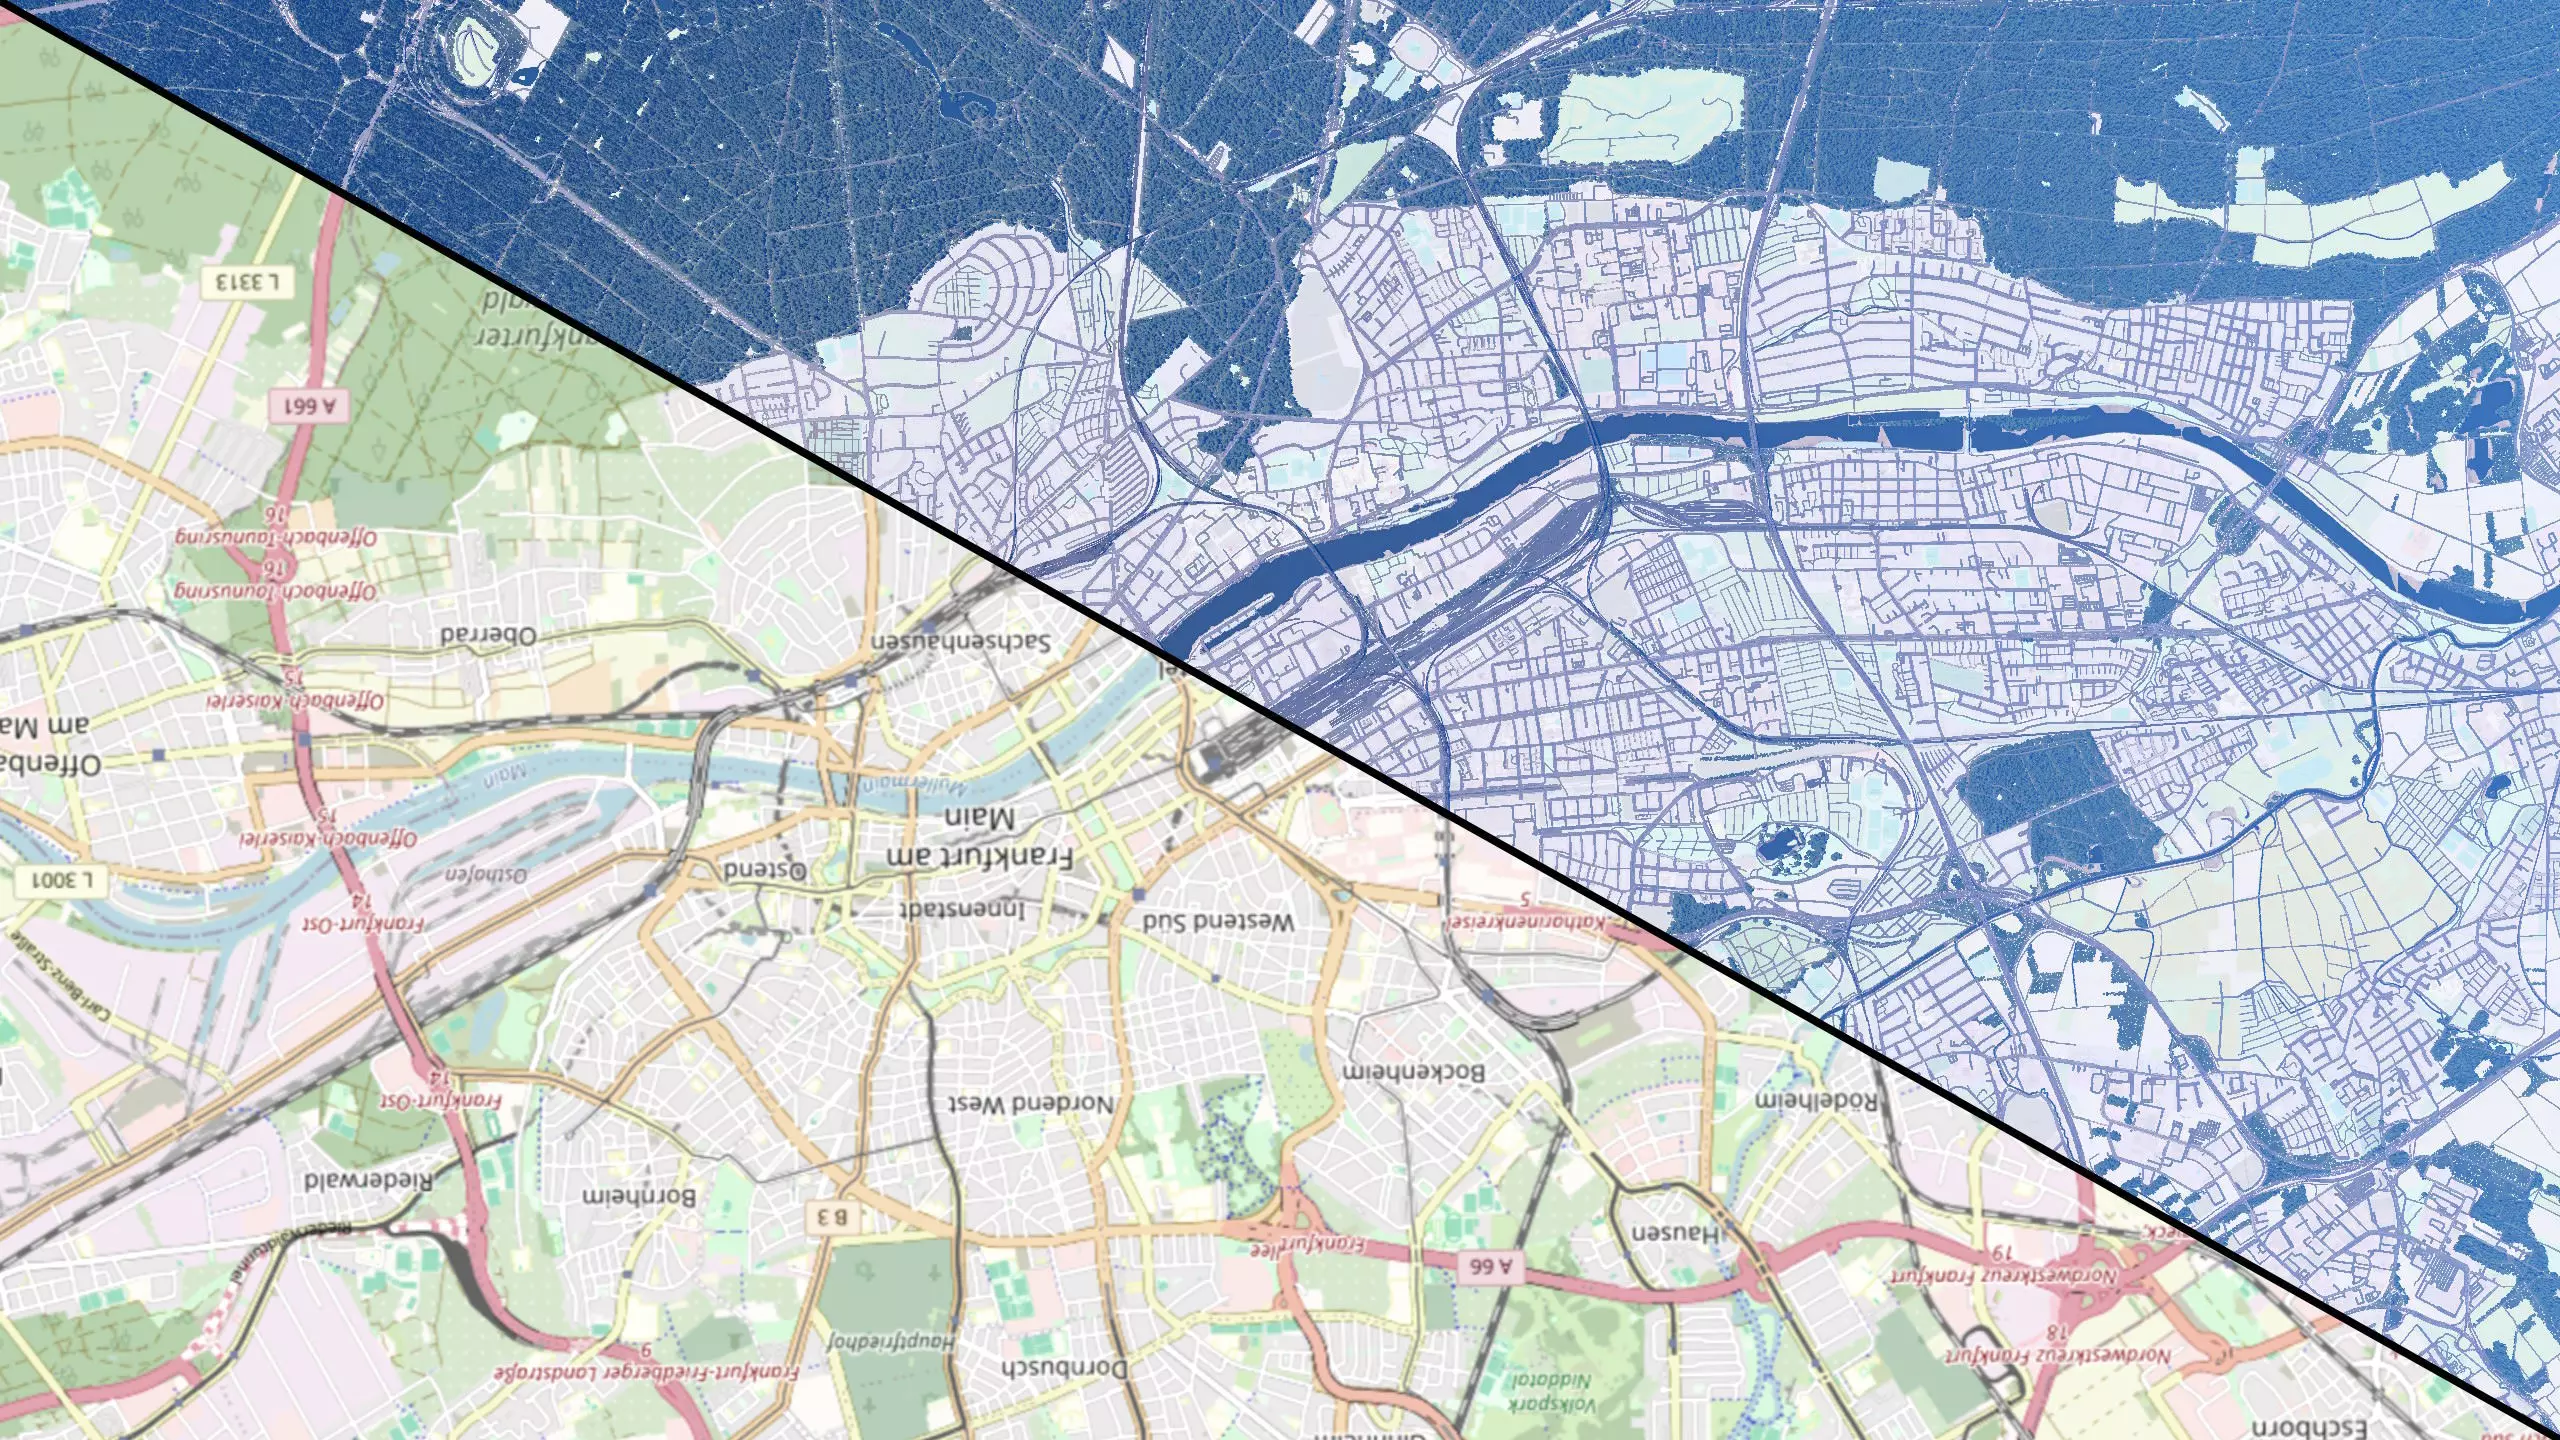
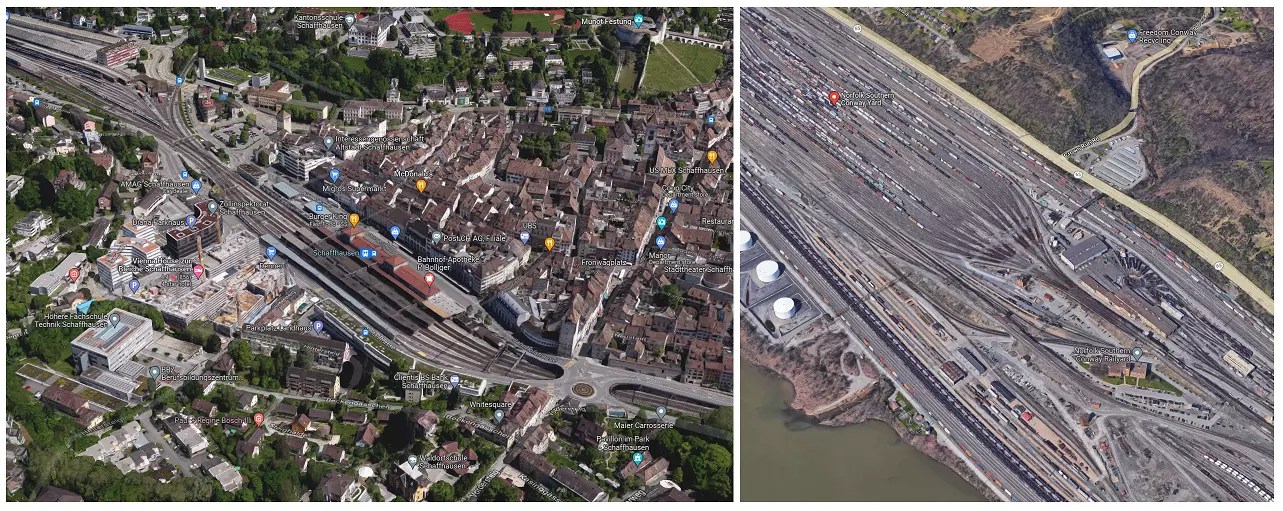
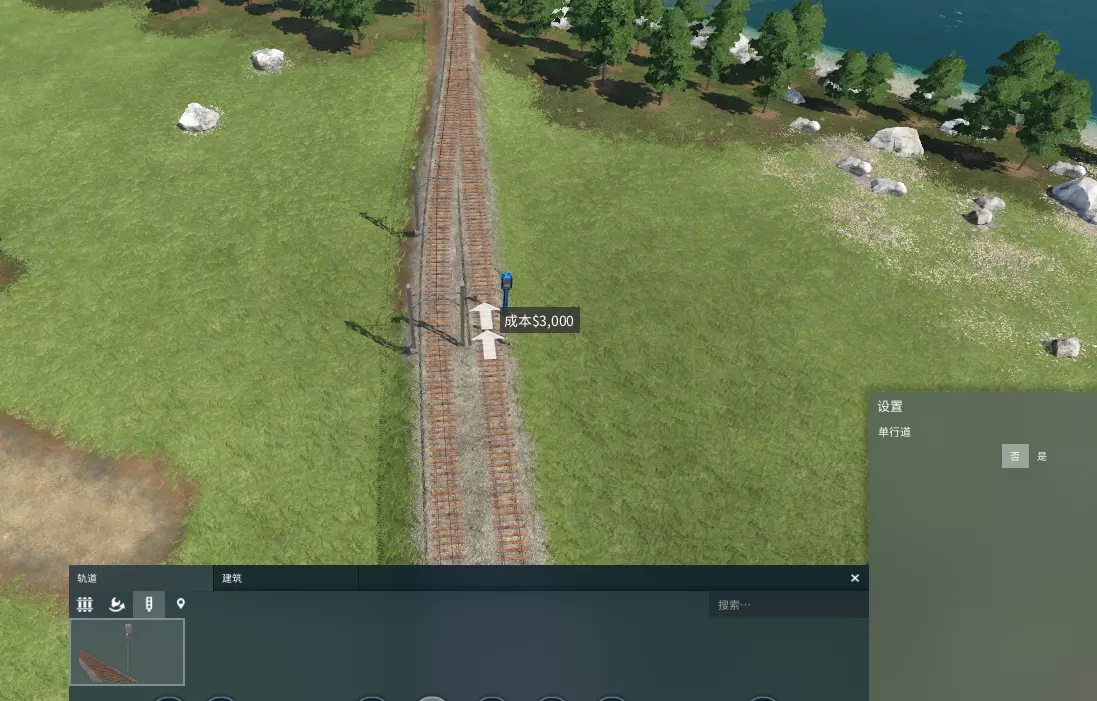
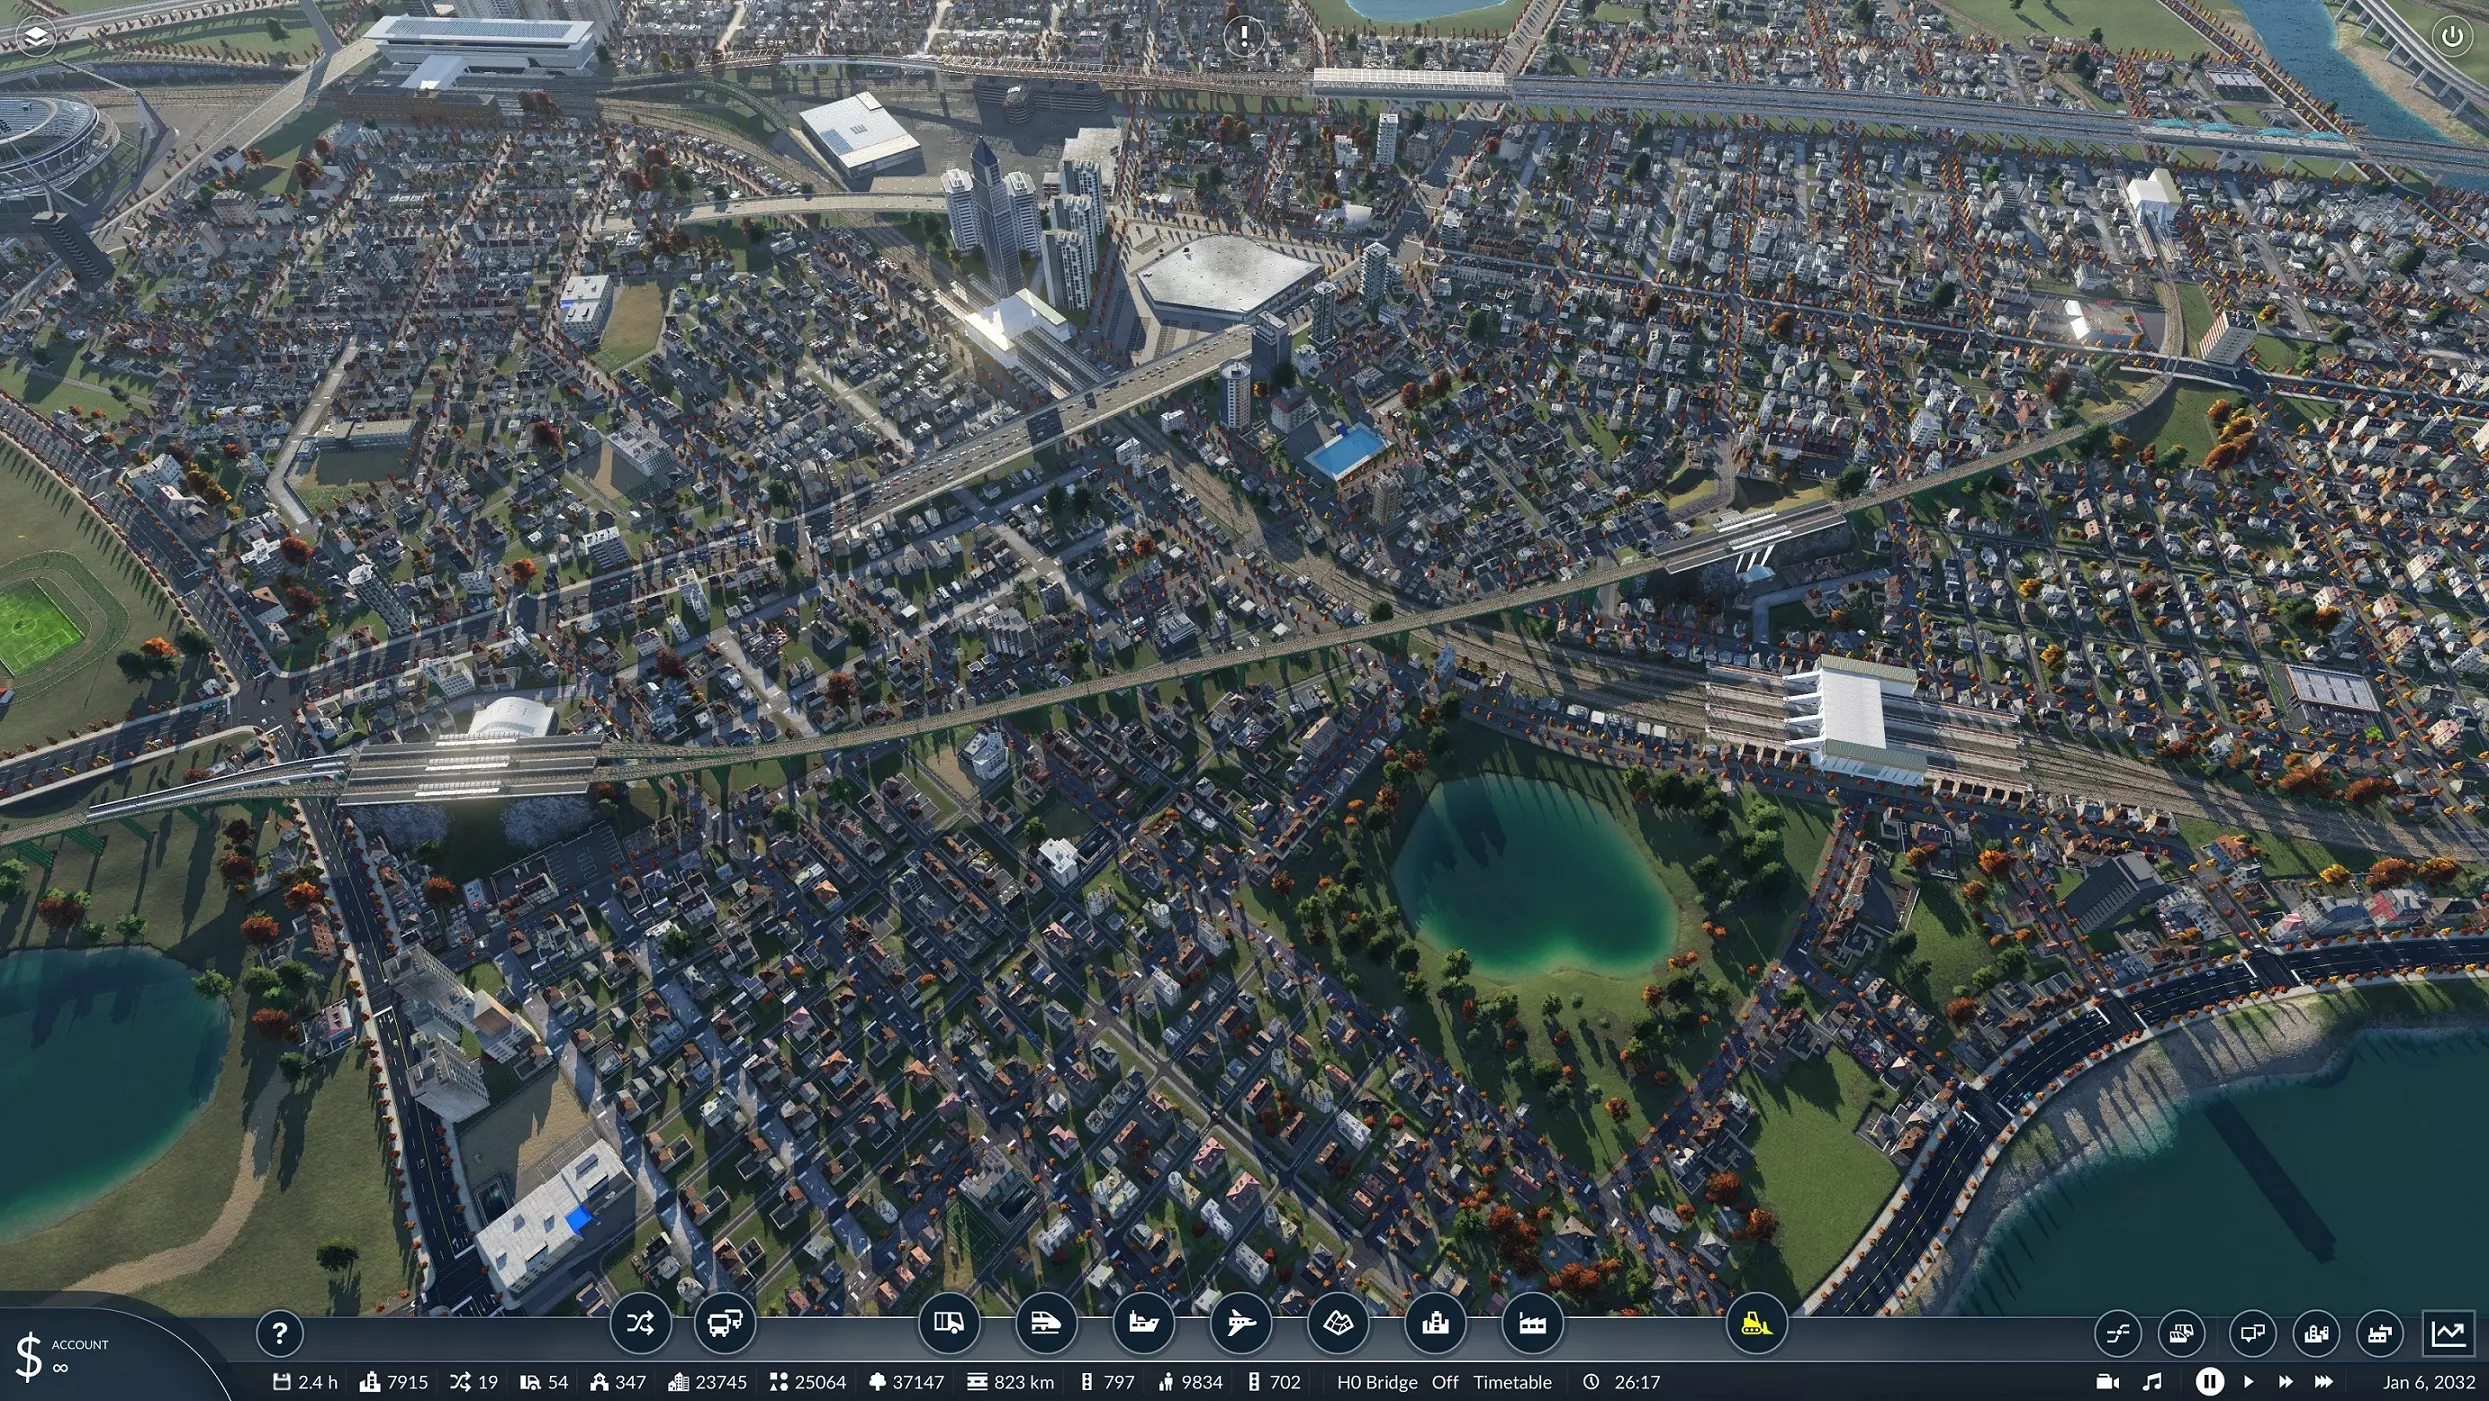
2 Selecting the Area First, you need to consider what you want to rebuild. The range spans from a central station with track field to medium/large cities to entire metropolitan regions. There are even maps for entire countries in the Workshop, though it's obvious that those can't be true to scale. 2.1 Scale Therefore, you need to choose between a 1:1 recreation or a scaled reconstruction. Of course, you want to get as much as possible onto the map, but the maximum map size in TPF2 is limited. With a scaled reconstruction, e.g. 1:2 scale, you can theoretically represent a map twice as long (and four times the area). However, it's impossible to scale everything uniformly because then all distances, trains, platforms, and curve radii would be halved. I'm sure even at 1:2 scale that would be quite a struggle to maintain proportional lengths, especially in densely built areas. While shorter trains can be used, shortened track fields and tighter curves are probably not satisfactory. An alternative is to do a kind of "creative reconstruction": This means deliberately omitting some map areas to focus only on the most important places, such as stations, and tending to build these in original scale. You would then have to improvise in the intermediate areas. However, a 1:1 rebuild makes many things easier because the game is already based on real distances and represents them in meters. 2.2 Map Size Then the question arises, which map size to choose in TPF2. Primarily, performance reasons and your hardware are limiting factors. The lengths can be found in the wiki[www.transportfever2.com] and also in the tfnet Lexicon[www.transportfever.net] with the exact values (always a multiple of 256m). A square map can be up to 24.5 km long and with a rectangular map up to 53.7 km is possible. The map size primarily affects consumed RAM. You must also consider the state of a savegame: An empty map can usually be loaded without problems. Tests with the OSM-Importer have shown that RAM usage can become extremely high solely with the number of street segments (rule of thumb ~1GB per 10,000 edges). Since a comprehensive recreation project requires many mods, you should plan for sufficient buffer or upgrade your RAM. Map SizeConstruction Density: LowMediumHigh*Large (14km)²16 GB24 GB32 GBVery Large (16km)²16 GB32 GB48 GBHuge (20km)²24 GB40 GB64 GBMegalomaniac (24km)²32 GB48 GB80 GB* By high, I mean the reconstruction in full detail (e.g. via OSM-Importer). In normal free games, usually medium is reached at max. This table provides a rough orientation of the RAM size I would recommend. This is just my assessment, based on my previous tests, so don't take it too literally. In sparsely populated areas like rural areas, the requirements are lower. Performance is also affected by other factors, such as non-optimized mods, which can quickly bring the graphics card to its knees. Simply run tests with available maps/savegames and see how smoothly the game runs. Under Windows, you can see the actual RAM usage (including page file) in the Resource Monitor. 2.3 Planning the Area After considering all of this, you can plan your area with the selected dimensions, e.g. via https://heightmap.skydark.pl/ so you can see directly what fits on it. 3 Heightmap This step is optional. Theoretically, you can make a recreation on a completely flat map. Whether that makes sense, depends on the region. Probably for flat topographies, but in a mountainous region, a height map is essential. For regions in between, you should think about it, as a) the effort is there, b) you still have to make corrections (depending on the quality of the height map), and c) you will have to work with the terrain tools in the game either way. You must plan the basic topography and the water height either way. A height map gives you a better feeling for the area's topography and forces you to deal with that earlier. If you directly start building on a flat map, there's the risk that the heights of different parts won't match later. Or that you'll hit groundwater. In the end, the whole map must fit together. Realistic heights and slopes are especially important for railways. 3.1 Rivers First, a few words about water: As we all know, TPF2 only has a constant water level. In reality, rivers have a gradient and there might be lakes at different water heights. Large rivers typically don't change much in height over TPF map dimensions, e.g. about 10m over 24km. Here you can simply take the average value and adjust the shore areas. For small rivers, however, this can become problematic, resulting in actual canyons. There, you must either greatly flatten the surrounding areas or work with water textures. Although rivers in reality are not particularly deep, you should dig about 10m deep for bodies of water. At shallow water depths, there can be Z-fighting with the terrain, which is especially noticeable from above at a great distance. 3.2 Obtaining Heightmap Data Websites for terrain data / DEM (Digital Elevation Model): https://terrain.party/ - The party is over, the site no longer works. https://heightmap.skydark.pl/ - Current alternative from the Cities Skylines community. Only square maps. Best to download all 5 options. (There is also an OSM download for OpenStreetMap data. If you use OSM-Importer, you get the data directly matching the same map section. The bounds coordinates are also included here, in case you need them later.) https://tangrams.github.io/heightmapper/ - Elevation data directly visible with auto-scaling, but precise localization of the map section is difficult. https://www.opendem.info/ - Data from the Copernicus survey, probably good quality, but special file formats. Partially DTMs available. https://www.d-copernicus.de/daten/datenzugang/ - Copernicus survey, (free) registration required. https://sonny.4lima.de/ - DTMs in HGT format, reportedly very good quality. Some states have a geoportal with potentially free, high-resolution DTM.No download, but still practical (for later checks and corrections): https://de-de.topographic-map.com/ https://opentopomap.org/ The skydark site probably offers the quickest and easiest export. However, the quality and resolution are likely better with opendem/copernicus, although the editing effort is higher. Whatever file you get, you must convert it accordingly to a grayscale png. I got my data from opendem and cannot compare the quality/resolution with other sources. A fundamental problem is that the data is often only surface models (DSM), which include trees and buildings. For a proper reconstruction, a proper terrain model (DTM) would be more ideal. The terrain resolution of TPF is 4m horizontally, but the resolution of available (free) data is often significantly coarser (e.g. 25m), so dams of roads and railways are not well depicted. In principle, the worse the heightmap, the more post-processing you have to do in the game, or you have to live with certain inaccuracies. For example, an area with forest might pretend 15m higher terrain, making the transitions difficult. When exporting, it is important to pay attention to the map size. The game editor will simply scale the entire heightmap to the TPF map. Therefore, you must ensure that the export size (or after editing) matches the size of the planned area exactly. In skydark, there is a field for the map length. Additionally, you should write down the minimum and maximum height of the map section, if possible. If you want to use an overlay, you should also write down the coordinates of the map bounds to adjust it precisely later. 3.3 Editing the Heightmap In almost all cases, it will be necessary to edit the obtained heightmap (in whatever format). For simple image formats (png/tif), I recommend GIMP. For more specialized formats, you can use the geoinformation software QGIS. It is important to understand that a heightmap must be a grayscale png file, which encodes the height between black and white. Therefore, you should first check whether your file uses the entire range between pure black (0) and pure white (1). If not, you must linearly transform the values (e.g. via Tools > GEGL > Levels). For a .tif file, you may need to transform from floating point representation to 16-bit integer representation[www.transportfever.net]. Also, contrary to Rutel's instructions, the standard "Perceptual Gamma (sRGB)" should be left set. Other functions, such as contrast, should not be used as they may distort the data non-linearly. Depending on the source, multiple individual images may need to be merged and cropped. Here, you must pay attention to the correct map size and image size[www.transportfever2.com]. You can crop the map using a GIMP layer marked with the map boundaries. If you use an overlay, you should work very precisely here. Make sure to export in 16-bit and check for grayscale; otherwise, TPF will not accept the map. There are a number of tutorials out there about heightmaps in TPF2. This tutorial deals with map editing via QGIS. This Steam guide gives a tutorial on using QGIS to edit DEM or other file formats for elevation data. 3.4 Import The map can then be loaded into the TPF2 map editor[www.transportfever2.com]. Here, the minimum height, maximum height, and water level must be specified to match the elevation of the area correctly. Ideally, you know the values from the data export. Otherwise, you have to determine/find them by hand from a topographic map. When using scales other than 1:1, the heights must be reduced accordingly. Otherwise, the height relations will no longer fit, and the gradients will be too steep. To do this, calculate the maximum value so that the "height range" (max-min) is reduced by the scale factor. Finally, before starting construction, it is recommendable to take test measurements ingame at various locations and compare the heights (e.g. with topographic-map). 4 Overlay An overlay is not necessarily required for rebuilding projects but is extremely helpful for a realistic 1:1 reconstruction. If a heightmap is used, the overlay must be precisely adjusted to it. For this, the exact coordinates of the map are needed. 4.1 Map Type Basically, you can use any map for an overlay. What is most suitable depends on the type of reconstruction project. Common map types are, for example: Aerial Images Google Earth[earth.google.com] Google Maps[www.google.de] OpenStreetMap[osm.org] OpenRailwayMap[www.openrailwaymap.org]I would recommend OpenStreetMap due to the level of detail, especially if you use the OSM-Importer. OpenRailwayMap should only be used if the focus is exclusively on railway facilities. Don't forget you can still check details with another map while building (preferably on a second screen). But also aerial images can be useful to achieve a more realistic reconstruction. Some federal states/cities offer geoportals with various high-quality maps. 4.2 Type of Overlay There are several ways to implement overlays in TPF2. There are simple mods in the workshop from early on, which simpy add a construction as a flat surface with a replaceable texture file (that sinks into the terrain). There are 2 suitable alternatives that adapt to the terrain: the paintable overlay (4.5) and the replaceable ground texture (4.4). I recommend the latter, as you have the overlay on the entire map directly and can easily turn it on and off via mod. This also has the advantage that you can switch between different map types. 4.3 Creating Map Textures for TPF With both methods, you now have the challenge of first gluing the full map together from individual images and then cut them into digestable chunks suitable for TPF2, namely texture files (dds) for the terrain. TPF2 always requires 4096x4096 pixels for terrain textures. With most sources for the map images, you will not get a single high-resolution image directly. The ground texture in TPF has a resolution of 1m. Thus, a megalomaniac map utilizing full resolution, would ideally be 24576 x 24576 pixels. This means, just taking a screenshot won't work as everything will become blurry. Also, with most web maps like OpenStreetMap, details change with the zoom level (different names, details, structures become visible). Therefore, you should consider the zoom level for screenshots (I used 17 in OSM, see the URL). With the FireShot tool, you can take screenshots beyond the screen resolution of the entire page content through automatic scrolling. Instructions can be found here[www.netzwelt.de] (if you find a better tutorial, feel free to add). However, this only worked for me up to 8000 pixels (I am attaching my html file here[www.transportfever.net]). Then, you need to merge the images and ensure proper transitions. In Rutel's tuorial[www.transportfever.net], a tool is recommended, but it is also possible with a little skill in GIMP using transparent layers. It is also very important to pay attention to the boundaries of the map since you want the overlay to match the chosen map section (and heightmap) precisely. If you have the coordinates, you can check the map position by modifying this URL https://www.openstreetmap.org/note/new?lat=47.69997&lon=8.63193Otherwise, you have to load the heightmap as a layer in GIMP and manually position it correctly (e.g. by using river structures). More hints on creating the terrain textures can be found in the instructions of the following two tools. 4.4 Replaceable Ground Texture In Rutel's guide for map creation[www.transportfever.net], this method is described, although I did not follow all the steps exactly. You need to create a mod folder where the created dds map sections go, and place certain files in the shader, climate, and terrain_material folders. You can refer to the attached example. This is a "very large" square map, which amounts to 16 terrain texture files with 4096x4096 pixels. For a megalomaniac map, it would correspond to 36 tiles, although it also works with 9 if a texture file would cover an area of 8192m. You can create multiple mods with different map types, allowing you to quickly switch between them. You can deactivate the mod at any time to remove the overlay. I encountered a bug[www.transportfever.net] with 36 terrain files because the order was not maintained (don't know why), and I had dirt and grass textures between the correct map tiles. I solved the problem with a workaround in the shader file (see attachment[www.transportfever.net]). For testing: you can reload the shaders with AltGr+R. Adding mods that include ground textures can also lead to this behavior. 4.5 Paintable Overlay The paintable overlay can be used wherever you want it, but must be erased later. The advantage is that you can spontaneously add or remove the overlay on any part of the map, but it requires manual effort. Here is the mod and documentation[www.transportfever.net] and a video tutorial (german) (also shows how to merge map sections with GIMP). 4.6 In-GameYou should choose the setting Ground textures: Very high so the overlay doesn't become blurry. 5 Useful Mods There are numerous mods in the workshop and on https://www.transportfever.net that are generally useful for reconstruction. There are also many mods aimed at increasing realism in the game. I don't think it makes sense to create a list here. Many mods are now established and should be widely known. Regarding vehicles, stations, and buildings, you are naturally heavily dependent on the available mods varying with the region and country you are considering. You will likely need to improvise and make compromises. Or start creating mods yourself... 6 Performance Performance is something that must be carefully considered in TPF2. There are limiting factors in the TPF2 engine that cannot be overcome with any current hardware. Large-scale reconstruction projects can lead to a huge number of elements in the game. It is well known that performance in savegames can gradually degrade until stuttering makes a savegame unplayable. Therefore, it is important to assess map size and detail level for your project in advance, depending on the hardware. Performance should be regularly analyzed, for example, with the debug tools. In TPF2, performance can be divided into 2 almost independent kinds[www.transportfever.net]. Graphics performance is represented by the FPS and is mainly influenced by the graphics card and the number of models/meshes to be visualized. Thus, rebuilding dense cities with lots of mods can quickly get critical, but usually only affects the respective part of the map. Script/engine performance refers to the simulation part, which depends on the number of agents/people and vehicles to be simulated. If the simulation is not fast enough, this leads to stuttering of all movements on the map. It has been found that the search for car connections on the road graph is a crucial factor. Therefore, I strongly recommend not using AI towns, but rather placing person magnets so that houses are only connected by footpaths and people use public transport. Moreover, it might be sensible to keep the street network simple in the structure and make cuts where possible to reduce connections. 7 OSM-TPF2-Importer OSM-TPF2-Importer is a tool for the automated import of OpenStreetMap data, especially roads, tracks, and forests. This can significantly speed up a reconstruction project, as importing the infrastructure instantly brings all important structures onto the map. The import should always be done at the beginning on an empty map. Then, the "manual" reconstruction continues with stations, buildings, landmarks etc. This can help maintain motivation for such a project, as building all the roads and tracks would take an extremely long time and become monotonous.
完整文档及详细教程请参考相关资源。运输狂热论坛主题:OSM导入器:利用OpenStreetMap自动重建。希望本指南对部分玩家有所帮助,欢迎提供任何反馈、问题及建议。祝大家项目顺利!