换一换
换一换 


This is a comprehensive walkthrough guide for Slime Rancher 2, focused on aggressive optimization, capital deployment, and systematic automation. The guide takes you from the early game sprint to mobility through endgame empire management. Slime Rancher 2: A Practical Walkthrough Version 0.3.1 - Toys, Trimmings, and Tune-Ups Edition Last Updated: December 2, 2025 About This Guide This is a condensed Steam version of a comprehensive walkthrough for Slime Rancher 2, focused on aggressive optimization, capital deployment, and systematic automation. The full guide (4,750+ lines) is available on GitHub: https://github.com/skelhammer/slime-rancher-2-guide Guide Philosophy - Three Core Principles: Ruthless Asset Progression: Slimes are assets, not pets Capital Must Be Deployed: Immediate reinvestment in high-ROI infrastructure Automate Everything: Eliminate manual labor systematically IMPORTANT DISCLAIMER Game Version: Verified against Slime Rancher 2 v1.0, updated for Patch 1.1.0 (December 2, 2025) Known Issues: Prices and material costs are outdated due to v1.0 recipe overhaul without patch notes. Patch 1.0.3 Changes (November 1, 2025): Quantum Drone Stations: Reduced Strange Diamond cost (confirmed: 2 per station) Shadow Sureshot: Recipe confirmed (20 Sloomber/Twin/Hyper Plorts + Module) Shadow Plort Doors: Reduced costs (unverified) Patch 1.1.0 Changes (December 2, 2025 - "Toys, Trimmings, and Tune-Ups"): Slime Toys: Every slime type now has a favorite toy (25% agitation reduction) Shadow Pots: New breakable pots in Grey Labyrinth release Shadow Slimes (can be moved for strategic farming) New Gadgets: Distributor, decorative lamps, plants, pillows, and slime stage variants Explorer Drones: Can now target Odd Onions; nerfed to prevent excessive passive plort farming Introduction: The Rancher's Mindset Welcome, Rancher. You've arrived on Rainbow Island with a Vacpack and a dream. This isn't a cozy farming sim - this is high-stakes resource management where every decision compounds into exponential growth or stagnation. This guide transforms Rainbow Island into a hyper-efficient, multi-million Newbuck profit engine. Every action is a calculated investment governed by cost-benefit analysis. Deploy capital aggressively. Automate relentlessly. Dominate the market. Core Mechanics: Understanding the Fundamentals The Plort Market: Supply, Demand, and Price Manipulation The plort market operates on dynamic supply and demand. Flood the market with one plort type, expect prices to crash next day. Strategic Implications: Diversify plort production across multiple slime types Sell balanced mix daily to avoid market saturation Advanced: Hoard one plort type while flooding others, sell during price spikes Largo Slimes: Exponential Profit Through Combination Largos form when a slime eats a different species' plort. Largos produce BOTH plort types when fed. The Mathematics: Base slime + normal food = 1 plort (~10 NB) Base slime + favorite food = 2 plorts (same type, ~20 NB) Largo + normal food = 2 plorts (one each type, ~30-50 NB) Largo + favorite food = 4 plorts total (2 of each type, 60-150+ NB) A properly fed Largo quadruples profit per feeding compared to base slimes. CRITICAL WARNING: Tarr Outbreaks and Prevention IF A LARGO EATS A THIRD PLORT TYPE (not one it produces), it transforms into a Tarr - a hostile slime that devours other slimes and ranchers. Tarr produce MORE Tarr when consuming slimes, leading to catastrophic ranch-wide outbreaks in minutes. Mandatory Prevention: Plort Collectors are MANDATORY on every corral They auto-vacuum plorts before slimes can eat them ALWAYS install before leaving slimes unattended A single missed plort = total ranch failure Emergency Response: Water kills Tarr instantly (use Water Tank upgrade) Contain outbreaks immediately - every second counts Consider sacrificing infected corrals (vacuum into Slime Sea) The Agitation System: Managing Slime Behavior All slimes have hidden agitation value affecting behavior and productivity. How Agitation Works: Builds when slimes reach 99% hunger Takes ~12 in-game hours to reach maximum High agitation = negative behaviors: - Rock slimes roll more (contact damage) - Boom slimes explode more (launch plorts everywhere) - Crystal slimes produce damaging spikes - Hunter Largos revert to feral state (hostile) Agitation Management: Feeding: ONLY way to permanently reset agitation to zero Music Box (350 NB): Halves agitation growth rate Slime Toys: Reduce growth by 12.5% (25% for favorites). Patch 1.1.0: Every slime now has a favorite toy! Auto-Feeders (900 NB): BEST SOLUTION - auto-dispense food on timer Optimal Corral Population Overcrowding causes agitation and reduced production. Sweet Spot: 8-10 regular slimes per fully upgraded corral 5-6 Largos per fully upgraded corral More slimes ≠ more profit. It means chaos. Steam Guide Structure This condensed Steam guide is split into 17 sections: Section 1: Introduction + Core Mechanics (YOU ARE HERE) Part 1: The Foundation Section 2: Chapter 1 - Early Game Sprint to Mobility Section 3: Chapter 2 - The Conservatory Foundation Section 4: Chapter 3 - Ember Valley Resource Extraction Section 5: Chapter 4 - Starlight Strand Asset Acquisition Part 2: The Industrial Revolution Section 6: Chapter 5 - The Gully Industrial Core Section 7: Chapter 6 - The Tidepools Passive Income Section 8: Chapter 7 - Powderfall Bluffs Saber Acquisition Section 9: Chapter 8 - The Den Ranch Reorganization Part 3: Automation & Empire Section 10: Chapter 9 - Quantum Drones Automation Section 11: Chapter 10 - Grey Labyrinth Elite Asset Acquisition Section 12: Chapter 11 - The Archway Grey Labyrinth Operations Section 13: Chapter 12 - The Digsite Weather Slimes (OPTIONAL) Part 4: Endgame Mastery Section 14: Chapter 13 - The Endgame Audit Section 15: Chapter 14 - Prismacore Stabilization Story Finale Section 16: Chapter 15 - Post-Game Sandbox Empire Section 17: Quick Reference & Appendices Full guide with 15 detailed chapters, 12 comprehensive appendices, and 4,750+ lines of strategic content available on GitHub. https://github.com/skelhammer/slime-rancher-2-guide License: CC BY 4.0 | Author: skelhammer Part 1: The Foundation Chapter 1: The Sprint to Mobility Primary Objective: Craft the Jetpack and unlock vertical exploration Mindset: This is a 72-hour blitz with one non-negotiable goal: acquiring the Jetpack. Financial Checkpoint Starting Budget: 0 Newbucks (fresh start) Capital Required: ~2,535 NB total - Ranch Setup: 1,185 NB (Plot 1 Corral + Plot 2 Garden + upgrades) - Vacpack Upgrades: 1,350 NB (Resource Harvester, Heart Module, Jetpack) Daily Revenue: 300-500 NB/day from Tabby-Cotton Largos Timeline: 5-7 days to accumulate funds Phase 1: Initial Asset Collection Slimes Needed: 6 Tabby Slimes (throughout Rainbow Fields) 6 Cotton Plorts (from wild Cotton Slimes in grassy areas) Food Stockpile: 20+ Water Lettuce (wild patches near water) Collection Strategy: Capture 6 Tabby Slimes first Collect 6 Cotton Plorts from wild Cotton Slimes Feed Cotton Plorts to Tabby Slimes → creates Tabby-Cotton Largos Harvest Water Lettuce to stockpile for feeding Phase 2: Plot-by-Plot Build Plot 1 - Tabby-Cotton Largos: Build Corral (250 NB) Add High Walls (260 NB) - prevents jumping escapes Add Air Net (425 NB) - prevents flying plorts Total: 935 NB Purpose: Primary revenue stream Feed Water Lettuce (Cotton favorite) = 4 plorts per feeding Plot 2 - Water Lettuce Garden: Build Garden (250 NB) Plant Water Lettuce No upgrades yet (save capital for Jetpack) Will add Nutrient Soil + Sprinkler in Chapter 2 Plots 3-8: LEAVE EMPTY - Strategic hold Conserve capital for Jetpack Total Investment: 1,185 NB (plots + upgrades) Phase 3: Unlock Ember Valley Pink Gordo: Location: Rainbow Fields - Western area near slime statues Feed 30 Any Food (omnivore, eats anything) Reward: Geyser to Ember Valley portal switch + 12 Pink Slimes + 1 jar Why Ember Valley? Radiant Ore spawns abundantly here (required for Jetpack) Access to additional resources for future chapters Phase 4: Resource Gathering for Jetpack Night Hunt - Phosphor Slimes: Wait for nighttime in Rainbow Fields Hunt Phosphor Slimes (spawn near central mountain/western areas) Collect 10 Phosphor Plorts DO NOT ranch them yet (requires Solar Shield = 425 NB) Return before dawn (they burn in sunlight) Ember Valley - Radiant Ore: Enter Ember Valley through portal (after popping Pink Gordo) Harvest 10 Radiant Ore from glowing pink/magenta crystal nodes CRITICAL: Must craft Resource Harvester first (450 NB + 10 Cotton Plorts) Phase 5: Vacpack Upgrades Crafting Order: Resource Harvester (450 NB + 10 Cotton Plorts) - Enables harvesting science resources from nodes - CRAFT FIRST - Required for Radiant Ore collection Heart Module (450 NB + 10 Pink Plorts) - Increases HP: 100 → 150 - Essential for Ember Valley survival Jetpack (450 NB + 10 Phosphor Plorts + 10 Radiant Ore) - Unlocks personal jetpack - PRIMARY GOAL - Enables vertical exploration Total Investment: 1,350 NB (upgrades) Phase 6: Core Mechanics Reference Creating Largos: Feed a slime a different plort type to convert it Example: Tabby Slime + Cotton Plort = Tabby-Cotton Largo Largos produce 2 plort types when fed Largos fed favorite food = 4 plorts total (2 of each type) Refinery vs Plort Market: Refinery (in Lab): Deposit plorts for crafting upgrades - CANNOT withdraw Plort Market: Sell plorts for Newbucks Key Details: Optimal corral population: 6 Largos (8-10 regular slimes) Water Lettuce is Cotton favorite (4 plorts per feeding) Strategic Priorities Revenue First: Establish Tabby-Cotton operation immediately (Day 1) Pop Pink Gordo: Unlock Ember Valley for Radiant Ore Night Hunt Phosphor: Collect 10 Phosphor Plorts at night Craft Resource Harvester: CRITICAL - required before harvesting Radiant Ore Harvest Radiant Ore: Collect 10 from Ember Valley Deploy Capital to Jetpack: Don't expand plots - save for Jetpack Corral Security: High Walls + Air Net prevent escapes End of Chapter Checklist ✅ One corral with 6 Tabby-Cotton Largos (primary revenue stream) ✅ Pink Gordo popped, Ember Valley portal activated ✅ Resource Harvester crafted ✅ Heart Module crafted (150 HP) ✅ Jetpack crafted ✅ High Walls and Air Net installed on main corral ✅ Revenue: ~300-500 NB/day Next Chapter Preparation Chapter 2 expands Conservatory to 4 plots, unlocks Starlight Strand, and crafts Tier I upgrades. Financial Goal: Save 4,500+ NB for: Phosphor-Honey corral operation (2,110 NB) Garden (1,550 NB) Vacpack upgrades (900 NB) Gordo Prep: Stockpile 30 vegetables (or 15 Water Lettuce) to pop Cotton Gordo → unlocks Starlight Strand Asset Collection: Capture Phosphor + Honey Slimes from Starlight Strand for Phosphor-Honey Largos This is a sprint chapter - every Newbuck goes toward the Jetpack. Once crafted, vertical exploration unlocks and the game opens dramatically. Chapter 2: The Conservatory Foundation Primary Objective: Expand from 2 plots to 4 plots with essential crafting plort production Financial Checkpoint Starting Budget: 500-1,000 NB from Chapter 1 Capital Required: ~4,500 NB total - Phosphor-Honey operation: 3,660 NB - Tier I upgrades: 900 NB Daily Revenue: 800-1,000 NB/day (increased from 300-500) Timeline: 5-7 days to accumulate funds Phase 1: Unlock Starlight Strand Cotton Gordo: Location: Rainbow Fields - SE of Refinery Link, top of hill Feed 30 Veggies (Water Lettuce counts 2x) Reward: Cave to Starlight Strand portal + 12 Cotton Slimes + 1 jar Phase 2: Asset Acquisition Slimes Needed: 6 Phosphor Slimes (NIGHT ONLY throughout Starlight Strand) 6 Honey Plorts (from wild Honey Slimes in flowery pink areas) Food Stockpile: 30+ Cuberries (Phosphor favorite - Starlight Strand) Collection Strategy: Wait for nighttime, capture Phosphor Slimes, collect Honey Plorts from wild Honey Slimes during day, harvest Cuberries. Phase 3: Conservatory Expansion New Plots: Plot 3 - Phosphor-Honey Largos: Corral (250 NB) + High Walls (260) + Air Net (425) + Solar Shield (425) + Plort Collector (750) = 2,110 NB Purpose: Produces Phosphor + Honey Plorts for crafting Feed Cuberries (Phosphor favorite) = 4 plorts per feeding Plot 4 - Cuberry Garden: Garden (250 NB) + Nutrient Soil (600) + Sprinkler (700) = 1,550 NB Purpose: Feeds Plot 3 Plots 1-2: UNCHANGED from Chapter 1 (Tabby-Cotton + Water Lettuce) Total Investment: 3,660 NB (new plots) Phase 4: Tier I Upgrades Craft These Immediately: Power Core (450 NB + 10 Cotton Plort) - 100 → 150 Energy Tank Booster (450 NB + 10 Tabby Plort) - 20 → 30 units per slot - CRITICAL QoL Total Investment: 900 NB + materials Strategic Priorities Pop Cotton Gordo: Unlock Starlight Strand for Honey/Phosphor collection Night Hunt: Capture 6 Phosphor Slimes at night Expand to 4 Plots: Add Phosphor-Honey operation for crafting plorts Stockpile Crafting Plorts: Deposit 50+ Phosphor and 50+ Honey in Refinery Craft Tank Booster: CRITICAL - 30 units per slot (massive QoL upgrade) Craft Power Core: 150 Energy for extended exploration End of Chapter Checklist ✅ Cotton Gordo popped, Starlight Strand unlocked ✅ Conservatory expanded to 4 plots ✅ Phosphor-Honey Largo corral producing crafting plorts ✅ Cuberry garden operational ✅ Daily revenue: ~800-1,000 NB ✅ Power Core and Tank Booster crafted Next Chapter Preparation Chapter 3 expands Conservatory to 8 plots and focuses on Ember Valley resource extraction. Financial Goal: Save 10,000+ NB for ranch expansion (8,745 NB) and upgrades (Water Tank, Dash Boots, Extra Tank) Gordo Prep: Stockpile vegetables (Heart Beets), fruit (Pomegranites), and meat (Briar Hens, Stony Hens) for Ember Valley Gordos Asset Collection: Capture Boom, Batty, Crystal, and Rock slimes from Ember Valley for Chapter 3 operations Chapter 3: Ember Valley Resource Extraction Primary Objective: Expand Conservatory to 8 plots while unlocking Tier II Vacpack upgrades Financial Checkpoint Starting Budget: 5,000-8,000+ NB from Chapter 2 operations Capital Required: ~15,395 NB total - Ranch expansion: 8,745 NB (Plots 5-8) - Vacpack upgrades: 3,400 NB - Warp infrastructure: 3,250 NB Daily Revenue: ~2,500+ NB/day (increased from ~800) Timeline: 5-7 days through all operations Phase 1: Gordo Strategy Pop These 5 Ember Valley Gordos: Rock Gordo (50 Veggies) → Jetpack Drive treasure pod + 12 Rock Slimes Batty Gordo (50 Fruit) → Tunnel shortcut + 12 Batty Slimes Crystal Gordo (50 Veggies) → Geyser + 12 Crystal Slimes Boom Gordo (50 Meat) → Grey Labyrinth gate + Strange Diamond + Ember Valley Portal + 12 Boom Slimes Tabby Gordo (50 Meat) → Portal to Rainbow Fields + 12 Tabby Slimes Phase 2: Asset Acquisition Slimes Needed: 6 Crystal Slimes (northern area near chasm) 6 Boom Slimes (volcanic areas throughout) 6 Rock Plorts (feed to Crystal Slimes for Crystal-Rock Largos) 6 Batty Plorts (feed to Boom Slimes for Boom-Batty Largos) Food Stockpile: 30+ Heart Beets (Rock favorite) 30+ Pomegranites (Batty favorite) Alternate Strategy: Pop Crystal and Boom Gordos to get 12 free slimes of each type, skip wild capture. Phase 3: Conservatory Expansion (Plots 5-8) Plot 5 - Crystal-Rock Largos: Corral + High Walls + Air Net + Plort Collector + Auto-Feeder + Music Box = 2,785 NB Feed Heart Beets (Rock favorite) = 4 plorts per feeding Plot 6 - Heart Beet Garden: Garden + Nutrient Soil + Sprinkler = 1,550 NB Feeds Plot 5 Plot 7 - Boom-Batty Largos: Corral + High Walls + Air Net + Solar Shield + Plort Collector + Auto-Feeder = 2,860 NB Feed Pomegranites (Batty favorite) = 4 plorts per feeding Plot 8 - Pomegranite Garden: Garden + Nutrient Soil + Sprinkler = 1,550 NB Feeds Plot 7 Total Investment: 8,745 NB (Plots 5-8) Phase 4: Tier II Upgrades Craft Immediately: Water Tank (450 NB + 10 Deep Brine) - CRAFT FIRST - Essential Tarr safety Dash Boots (450 NB + 10 Boom Plort) - Reduced sprint energy cost Extra Tank (1,500 NB + 10 Rock Plort + 10 Silky Sand) - Adds 4th vac slot Power Core II (1,000 NB + materials + Power Chip) - 150 → 200 Energy Total Investment: ~3,400 NB + materials Required Components: Jetpack Drive (Rock Gordo treasure pod) Power Chip (Batty Gordo treasure pod) Heart Cell (underground ledge before Crystal Gordo) Storage Cell (behind Rainbow Fields portal - 1 Batty Plort statue) Phase 5: Warp Infrastructure Deploy in Ember Valley: Refinery Link (250 NB + materials) - Central geyser area between Batty/Crystal Gordo caves Ember Valley Portal (2,000 NB + materials) - One-way to Ember Valley (place in Conservatory) Red Home Portal (1,000 NB + materials) - One-way to Conservatory (place in Ember Valley central area) Total Investment: 3,250 NB + materials Strategic Rationale: Eliminates 5-10 minutes per resource farming run. Essential for efficient material collection. Strategic Priorities Map First: Activate all 3 Ember Valley Map Data Nodes Pop Key Gordos: Rock, Batty, Crystal, Boom for treasure pod components Ranch Expansion: Expand Conservatory to 8 plots (Crystal-Rock, Boom-Batty operations) Craft Water Tank: CRITICAL - essential Tarr safety before deep exploration Harvest Resources: Stockpile Jellystone, Deep Brine, Primordy Oil, Radiant Ore, Lava Dust, Silky Sand Deploy Warp Infrastructure: Refinery Link + Portal system for farming efficiency End of Chapter Checklist ✅ Conservatory expanded to 8 plots ✅ Crystal-Rock Largos + Heart Beet garden (Plots 5-6) ✅ Boom-Batty Largos + Pomegranite garden (Plots 7-8) ✅ Daily revenue: ~2,500+ NB (increased from ~800) ✅ Rock, Batty, Crystal, Boom Gordos popped ✅ Water Tank, Dash Boots, Extra Tank, Power Core II crafted ✅ Ember Valley Refinery Link + Portal system deployed Next Chapter Preparation Chapter 4 completes Tier II upgrades and explores Starlight Strand. Financial Goal: Save 7,850 NB for Tier II upgrades (Tank Booster II, Heart Module II, Jetpack II, Pulse Wave, Dash Boots II, Tank Guard) Slime Acquisition: Capture Angler, Ringtail, Flutter, and Honey from Starlight Strand for Chapter 5 operations Resource Focus: Buzz Wax, Wild Honey, Moondew Nectar for upgrades and Flutter operations Chapter 4: Starlight Strand Asset Acquisition Primary Objective: Complete Starlight Strand exploration and gather critical resources for Tier II upgrades Financial Checkpoint Starting Budget: 10,000-15,000+ NB from Chapter 3 operations Capital Required: ~11,100 NB total - Tier II upgrades: 7,850 NB - Warp infrastructure: 3,250 NB Daily Revenue: ~2,500+ NB from Conservatory operations Timeline: 3-4 days through continued operations Phase 1: Gordo Strategy Pop All 5 Starlight Strand Gordos: Hunter Gordo (50 Meat) → Azure Bushes + slime doorway shortcut + 12 Hunter Slimes Honey Gordo (50 Fruit) → Tank Liner + Phosphor plort shortcuts + 12 Honey Slimes Angler Gordo (50 Meat) → Up-spout fast return route + 12 Angler Slimes Ringtail Gordo (50 Any - NIGHT ONLY) → Portal to Rainbow Fields + 12 Ringtail Slimes Flutter Gordo (15 Moondew Nectar ONLY) → Research Drone + Teleporter + Grey Labyrinth gate + 12 Flutter Slimes Phase 2: Asset Acquisition for Chapter 5 Slimes Needed: 10-12 Angler Slimes (coastal areas - pop Angler Gordo for 12 free) 10-12 Flutter Slimes (southern pink biome - pop Flutter Gordo for 12 free) 6 Crystal Plorts (for Angler-Crystal Largos in Chapter 5) 6 Tabby Plorts (for Flutter-Tabby Largos in Chapter 5) Food Stockpile: 30+ Moondew Nectar (glowing blue flowers NIGHT ONLY: 5PM-6AM) - CRITICAL for Flutter operations Phase 3: Tier II Upgrades Core Upgrades (delayed from Chapter 3): Tank Booster II (1,000 NB + materials + Storage Cell) - 30 → 40 units per slot Heart Module II (1,000 NB + materials + Heart Cell) - 150 → 200 HP Jetpack II (1,500 NB + materials + Jetpack Drive) - 20% less energy consumption Utility Upgrades: Pulse Wave (450 NB + 10 Flutter Plort + materials) - Push slimes away Dash Boots II (1,500 NB + materials + Dash Boot Module) - Enhanced sprint efficiency Tank Guard (1,500 NB + materials + Tank Liner) - Salvages 20% on damage Total Investment: ~7,850 NB + materials Phase 4: Critical Resources Harvest These Materials: 50+ Buzz Wax (common throughout) 50+ Wild Honey (hives on trees/cliffs) 30+ Moondew Nectar (NIGHT ONLY - 5PM-6AM) - CRITICAL 20-30 Sea Hens (coastal areas - Angler favorite) 20-30 Mint Mangos (pink biome - Honey favorite) CRITICAL: Moondew Nectar only spawns at night (5 PM - 6 AM) in glowing blue flowers. Despawns at dawn. Stockpile 30+ immediately. Phase 5: Warp Infrastructure Deploy in Starlight Strand: Refinery Link (250 NB + materials) - Junction between pink/blue biomes Starlight Strand Portal (2,000 NB + materials) - One-way to Starlight Strand Green Home Portal (1,000 NB + materials) - One-way to Conservatory Strategic Rationale: HIGHEST-priority portal due to Flutter operations requiring regular Moondew Nectar collection (only spawns at night 5 PM - 6 AM). Essential for maintaining Flutter Plort accumulation (300+ needed for Chapter 9 Quantum Drones). Strategic Priorities Map First: Activate all 3 Map Data Nodes (Southern Cliff, Mushroom Forest, Southern Coast) Pop All 5 Gordos: Unlock shortcuts, treasure pods, receive free slimes Collect Moondew Nectar: CRITICAL - only spawns 5 PM - 6 AM, stockpile 30+ Priority Treasure Pods: Tank Liner #1, Dash Boot Module, Starlight Portal blueprint Capture Key Slimes: 10-12 Angler, 10-12 Flutter for Chapter 5 Gully operations Deploy Warp Infrastructure: Portal system for Moondew Nectar farming efficiency Complete Tier II Upgrades: All six upgrades for improved survivability End of Chapter Checklist ✅ All 5 Starlight Strand Gordos popped ✅ All 3 Map Data Nodes activated ✅ Resource stockpile: 50+ Buzz Wax, 50+ Wild Honey, 30+ Moondew Nectar ✅ 6 Flutter Slimes + 6 Angler Slimes captured ✅ Tank Booster II, Heart Module II, Jetpack II crafted ✅ Pulse Wave, Dash Boots II, Tank Guard crafted ✅ Starlight Strand portal system deployed Next Chapter Preparation Chapter 5 unlocks The Gully expansion and transforms it into a food production powerhouse. Financial Goal: Save 10,000+ NB for Gully unlock (2,800 NB) + build-out Asset Acquisition: Collect chicken breeding stock: 8-10 Stony Hens (Ember Valley) 8-10 Sea Hens (Starlight Strand coastal areas) 4 Roostros (breeding males - 2 per coop) Flutter Plort Accumulation: Begin stockpiling in Refinery. DO NOT SELL - needed for Chapter 9 Quantum Drones (300+ target) Part 2: The Industrial Revolution Chapter 5: The Gully Industrial Core Primary Objective: Construct a self-sufficient protein production facility and centralized food distribution network Financial Checkpoint Starting Budget: 15,000-20,000+ NB from Chapter 4 Capital Required: ~13,720 NB total - Gully unlock: 2,800 NB - Full build-out: 10,920 NB Revenue Impact: ~4,000-4,500 NB/day (increased from ~2,500) Daily Increase: +1,500-2,000 NB/day Timeline: 5-7 days through Conservatory operations Phase 1: The Gully Build (5 Plots) Plot 1 - Stony Hen Coop: Coop + High Walls + Spring Grass + Vitamizer = 1,375 NB Stock: 6-8 hens + 2 roostros Purpose: Primary protein (Tabby favorite) Plot 2 - Sea Hen Coop: Coop + High Walls + Spring Grass + Vitamizer = 1,375 NB Stock: 6-8 hens + 2 roostros Purpose: Specialized protein (Angler favorite) Plot 3 - Central Silo: Silo + Tier 1 + Tier 2 + Tier 3 = 2,175 NB Purpose: 12 storage slots for ranch-wide food distribution Plot 4 - Angler-Crystal Largos: Corral + High Walls + Air Net + Plort Collector + Auto-Feeder + Music Box = 2,785 NB Feed Sea Hens (Angler favorite) = 4 plorts per feeding Revenue: ~1,500-2,000 NB/day Plot 5 - Flutter-Tabby Largos: Corral + High Walls + Air Net + Solar Shield + Plort Collector + Auto-Feeder + Music Box = 3,210 NB Feed Stony Hens (Tabby favorite) = 4 plorts per feeding DO NOT SELL Flutter Plorts - Need 300+ for Chapter 9 Quantum Drones Total Investment: 2,800 NB (unlock) + 10,920 NB (build) = 13,720 NB Phase 2: Key Notes Auto-Feeder Setup: Plot 4 (Angler-Crystal): Sea Hens Plot 5 (Flutter-Tabby): Stony Hens CRITICAL - Flutter Plorts: DO NOT SELL - Need 300+ for Chapter 9 Quantum Drones Deposit into Refinery for storage Flutter-Tabby operation produces critical plorts for future automation Strategic Priorities Unlock The Gully: Purchase expansion (2,800 NB) from eastern Conservatory Build Protein Infrastructure: Two chicken coops for sustainable meat production Establish Central Silo: 12-slot Silo for ranch-wide food distribution Deploy Angler-Crystal Largos: High-value plort production with Sea Hens Deploy Flutter-Tabby Largos: CRITICAL - produces Flutter Plorts for Quantum Drones Stockpile Flutter Plorts: Deposit in Refinery, target 300+ for Chapter 9 Install Auto-Feeders: Automate feeding for both corrals End of Chapter Checklist ✅ The Gully unlocked and developed (5 plots) ✅ Stony Hen Coop (primary protein - Tabby favorite) ✅ Sea Hen Coop (Angler favorite) ✅ Fully upgraded Silo (12 slots for food distribution) ✅ Angler-Crystal Largos generating high-value plorts ✅ Flutter-Tabby Largos producing critical Flutter Plorts ✅ Daily revenue from Gully: +1,500-2,000 NB ✅ Total ranch revenue: ~4,000-4,500 NB/day ✅ Flutter Plorts accumulating in Refinery Next Chapter Preparation Chapter 6 unlocks The Tidepools expansion and establishes passive income with Puddle and Fire Slimes. Financial Goal: Save 10,500 NB for Tidepools unlock (6,000 NB) + build-out (4,350 NB) Asset Acquisition: Collect Puddle Slimes (8 total) from Starlight Strand and Fire Slimes (10 total) from Ember Valley lava pools Upgrade Prep: Stockpile materials for Tier III upgrades (Tank Booster III, Power Core III, Heart Module III, Tank Guard II) Flutter Plorts: Continue accumulating from Flutter-Tabby operation. DO NOT SELL Chapter 6: The Tidepools Passive Income Primary Objective: Construct a fully passive income operation requiring minimal daily interaction Financial Checkpoint Starting Budget: 25,000-30,000+ NB from Chapter 5 Capital Required: ~24,350 NB total - Tidepools unlock: 6,000 NB - Build-out: 4,350 NB - Tier III upgrades: 14,000 NB Revenue Impact: ~5,540-6,810 NB/day (increased from ~4,500) Passive Income: +1,540-2,310 NB/day with only 10-15 min management Timeline: 5-7 days through all operations Phase 1: The Tidepools Build (5 Plots) Plot 1 & 2 - Puddle Ponds: Pond (450 NB each) × 2 = 900 NB 4 Puddle Slimes per pond (8 total) Zero-maintenance passive income - generates plorts from water Plot 3 & 4 - Fire Incinerators: Incinerator + Ash Trough (950 NB each) × 2 = 1,900 NB 5 Fire Slimes per incinerator (10 total) Low-maintenance income - feed ash from vegetables Plot 5 - Ash Production Garden: Garden + Nutrient Soil + Sprinkler = 1,550 NB Plant Odd Onions (or any veggie) Throw vegetables into incinerators to generate ash Total Investment: 6,000 NB (unlock) + 4,350 NB (build) = 10,350 NB Phase 2: Tier III Upgrades (MANDATORY for Chapter 7) CRITICAL - Required Before Powderfall Bluffs: Tank Booster III (3,000 NB + materials) - 40 → 50 units per slot Power Core III (3,000 NB + materials) - 200 → 250 Energy Heart Module III (3,000 NB + materials) - 200 → 250 HP Tank Guard II (5,000 NB + materials) - Salvages 40% on damage Total Investment: ~14,000 NB + materials Why MANDATORY: Chapter 7 (Powderfall Bluffs) contains aggressive Saber Slimes requiring maximum defensive capability. Strategic Priorities Unlock Tidepools: Purchase expansion (6,000 NB) from far end of Gully Deploy Puddle Ponds: 8 slimes total for zero-maintenance plort generation Deploy Fire Incinerators: 10 Fire Slimes for low-maintenance income Build Ash Garden: Plant vegetables to generate ash for Fire Slimes Craft Tier III Upgrades: CRITICAL - required for Chapter 7 Powderfall Bluffs survival Establish Passive Income: 1,540-2,310 NB/day requiring only 10-15 min management Zero Tarr Risk: Puddle and Fire Slimes cannot create Tarr End of Chapter Checklist ✅ The Tidepools unlocked and developed (5 plots) ✅ Two Puddle Ponds (8 Puddle Slimes) - zero maintenance ✅ Two Incinerators (10 Fire Slimes) - low maintenance ✅ Ash production garden operational ✅ Passive income stream: 1,540-2,310 NB/day ✅ Tank Booster III crafted (50 capacity) ✅ Power Core III crafted (250 Energy) ✅ Heart Module III crafted (250 HP) ✅ Tank Guard II crafted (40% salvage) Next Chapter Preparation Chapter 7 explores Powderfall Bluffs to capture Saber Slimes and harvest critical endgame resources. Equipment Check: You MUST have all Tier III upgrades before entering Powderfall Bluffs Carnivore Supplies: Stockpile 50+ meat (Thunderclucks preferred) to pop Saber Gordo Objective: Capture 10-12 Saber Slimes + 20-30 Thunderclucks for Chapter 8's Den expansion. Harvest Sun Sap (ULTRA-RARE endgame resource) Chapter 7: Powderfall Bluffs Saber Acquisition Primary Objective: Capture Saber Slimes and establish resource pipeline for late-game upgrades Financial Checkpoint Starting Budget: 35,000-45,000+ NB from Chapter 6 Capital Required: ~5,750-15,750 NB - Extra Tank II: 3,000 NB - Tank Guard III (optional): 10,000 NB - Warp infrastructure: 2,750 NB Daily Revenue: ~6,000-7,000 NB from all operations Timeline: 2-3 days through all operations Phase 1: Accessing Powderfall Bluffs Entry Location: Hidden waterfall entrance in southwestern Ember Valley How to Access: Enter Ember Valley from Rainbow Fields Travel to western volcanic region Look for large waterfall near coastal area Entrance is frozen cave BEHIND the waterfall Requires Jetpack to navigate vertical ice walls Recommended Equipment: Heart Module III (250 HP), Power Core III (250 Energy), Jetpack II, Water Tank, Pulse Wave, Tank Guard II Phase 2: Saber Gordo & Asset Acquisition Saber Gordo: Location: Northern area, high mountain plateau Feed 50 Meat (Thunderclucks count 2x) Reward: Portal shortcut to southern Ember Valley + 12 Saber Slimes + 1 jar Capture Strategy: 10-12 Saber Slimes (pop Saber Gordo for 12 free) 20-30 Thunderclucks (including 2 Roostros for breeding) Use Pulse Wave for crowd control - Sabers are aggressive and fast Transport via Saber Gordo portal → Ember Valley → Rainbow Fields → Conservatory Phase 3: Critical Resource Extraction Priority Resources: Sun Sap (ULTRA-RARE) - From frozen trees (golden sap) - CRITICAL bottleneck for endgame upgrades - MARK ALL TREE LOCATIONS for weekly farming (5-7 day respawns) - Target: 5-10 Sun Sap stockpiled Perfect Snowflakes - Cliff faces (glimmering) - Target: 50+ Slime Fossils - Cave walls - Target: 30+ Priority Treasure Pod: Sun Sap x3 - Top of cliff in forested area (Jetpack required) - Provides 30% of total endgame requirements - Collect immediately Phase 4: Upgrades & Warp Infrastructure Craft This Upgrade: Extra Tank II (3,000 NB + materials) - Adds 5th vac slot - RECOMMENDED for Powderfall resource runs Deploy Warp System: Refinery Link (250 NB) - Central valley plateau near Map Data Node Powderfall Portal (2,000 NB) - One-way to Powderfall (place in Conservatory) Blue Home Portal (500 NB) - One-way to Conservatory (place in central valley) Strategic Rationale: Sun Sap is rarest crafting material with very slow respawns (5-7 days). Portal enables efficient weekly farming runs to check all marked tree locations. Strategic Priorities Map First: Activate Northern Mountain Summit Map Data Node immediately Pop Saber Gordo: Unlock portal shortcut, receive 12 free Saber Slimes Mark Sun Sap Trees: CRITICAL - every tree location must be marked for future weekly farming Collect Thunderclucks: 20-30 Thunderclucks (including Roostros) for breeding program Priority Treasure Pods: Sun Sap x3 treasure pod (30% of endgame requirements), Powderfall Portal Deploy Warp Infrastructure: Portal system for efficient resource farming returns Craft Extra Tank II: 5th vac slot essential for extended resource runs End of Chapter Checklist ✅ Accessed Powderfall Bluffs via waterfall entrance ✅ Saber Gordo popped, portal shortcut activated ✅ Both Map Data Nodes activated ✅ 10-12 Saber Slimes captured ✅ 20-30 Thunderclucks collected (including Roostros) ✅ 50+ Perfect Snowflakes stockpiled ✅ 5-10 Sun Sap stockpiled (CRITICAL endgame resource) ✅ 30+ Slime Fossils stockpiled ✅ All Sun Sap tree locations marked for future farming ✅ Portal placed for quick return access ✅ Extra Tank II crafted (5th vac slot) Next Chapter Preparation Chapter 8 unlocks The Den expansion and executes major ranch reorganization. Financial Goal: Save 17,000+ NB for Den unlock (2,800 NB) + build-out (13,905 NB) Asset Verification: 10-12 Saber Slimes + 20-30 Thunderclucks ready for deployment in Gully Reorganization Scope: Relocates Boom-Batty to Den, creates two new nocturnal operations (Flutter-Phosphor, Batty-Ringtail), rebuilds Conservatory Plot 7 with Flutter-Honey, converts Gully Plot 5 to Saber-Hunter Flutter Plorts: Continue accumulating in Refinery. Target: 300+ by Chapter 9 Chapter 8: The Den Ranch Reorganization Primary Objective: Unlock The Den and consolidate all fruit-eating nocturnal slimes into one expansion Financial Checkpoint Starting Budget: 40,000-50,000+ NB from Chapter 7 Capital Required: ~14,380 NB - Den unlock: 2,800 NB - Den build-out: 11,105 NB - Conservatory rebuild: 475 NB Revenue Impact: ~6,500-8,500 NB/day (optimized operations) Strategic Value: Consolidates all nocturnal slimes, saves 1,275 NB in Solar Shield costs, doubles Flutter Plort production Phase 1: The Den Build (5 Plots) Plot 1 - Boom-Batty Largos: RELOCATED from Conservatory Plot 7 Corral + upgrades = 2,785 NB Feed Pomegranites (Batty favorite) NO Solar Shield needed (Den is permanently dark) Plot 2 - Flutter-Phosphor Largos: NEW - Corral + upgrades (no Solar Shield) = 2,435 NB Feed Cuberries (Phosphor favorite) = 4 plorts per feeding DO NOT SELL Flutter Plorts - Need for Chapter 9 Quantum Drones Plot 3 - Batty-Ringtail Largos: NEW - Corral + upgrades = 2,785 NB Feed Pomegranites (Batty favorite) OR Cuberries Ringtail turns to stone in daylight - Den is dark (perfect habitat) Plot 4 - Pomegranite Garden: Garden + Nutrient Soil + Sprinkler = 1,550 NB Feeds Plots 1 & 3 Plot 5 - Cuberry Garden: Garden + Nutrient Soil + Sprinkler = 1,550 NB Feeds Plot 2 Total Investment: 2,800 NB (unlock) + 11,105 NB (build) = 13,905 NB CRITICAL: Den's permanent darkness eliminates Solar Shields (saves 425 NB per corral = 1,275 NB total across 3 corrals) Phase 2: Ranch Reorganization Conservatory Changes: Plot 7: Replace Boom-Batty with Flutter-Honey Largos (reuses existing Solar Shield) Plot 8: Replant with Mint Mangos (50 NB) Plots 1-6: UNCHANGED Gully Changes: Plot 1: Convert Stony Hen Coop to Thundercluck Coop (from Chapter 7) Plot 5: Replace Flutter-Tabby with Saber-Hunter Largos (deploy Saber Slimes + 6 Hunter Plorts) Plots 2-4: UNCHANGED Phase 3: Key Notes Auto-Feeder Setup: Den Plot 1 (Boom-Batty): Pomegranites Den Plot 2 (Flutter-Phosphor): Cuberries Den Plot 3 (Batty-Ringtail): Pomegranites Conservatory Plot 7 (Flutter-Honey): Mint Mangos Gully Plot 5 (Saber-Hunter): Thunderclucks CRITICAL - Flutter Plorts: Two operations produce 24-36 Flutter Plorts/day (Flutter-Honey + Flutter-Phosphor) DO NOT SELL - Deposit all into Refinery Target: 300+ for Chapter 9 Quantum Drones Strategic Priorities Unlock The Den: Purchase expansion (2,800 NB) from western Conservatory Relocate Boom-Batty: Move from Conservatory to Den (saves 425 NB Solar Shield) Deploy Flutter-Phosphor: Establish second Flutter operation to double plort production Deploy Batty-Ringtail: Create third nocturnal operation Rebuild Conservatory Plot 7: Replace with Flutter-Honey (maintain Flutter production) Convert Gully Plot 5: Replace Flutter-Tabby with Saber-Hunter (upgrade to premium carnivores) Double Flutter Production: Achieve 24-36 Flutter Plorts/day from two sources End of Chapter Checklist ✅ The Den unlocked and developed (5 plots) ✅ Den Plot 1: Boom-Batty Largos (relocated, no Solar Shield) ✅ Den Plot 2: Flutter-Phosphor Largos (NEW, no Solar Shield) ✅ Den Plot 3: Batty-Ringtail Largos (NEW, no Solar Shield) ✅ Den Plots 4-5: Pomegranite and Cuberry gardens ✅ All nocturnal slimes consolidated in naturally dark environment ✅ Conservatory Plot 7: Flutter-Honey Largos (NEW, reuses Solar Shield) ✅ Gully Plot 5: Saber-Hunter Largos (NEW - replaced Flutter-Tabby) ✅ Flutter Plort accumulation: 24-36 per day from 2 sources ✅ Total ranch revenue: 6,500-8,500+ NB/day ✅ Food optimization: Fruit (Den), Veggie (Conservatory), Meat (Gully) Next Chapter Preparation Chapter 9 implements total ranch automation using Quantum Drones. Financial Goal: Save 20,000+ NB for 3 Quantum Drone Stations (15,000 NB) + materials Flutter Plort Requirement: You need 300 Flutter Plorts total (100 per drone station). Your two Flutter operations should be producing 24-36 plorts per day. Continue accumulating until you reach 300+ Material Stockpiling: Gather Strange Diamonds (6 total), Lava Dust (45 total), Wild Honey (45 total), Radiant Ore, Jellystone Drone Hunting: Chapter 9 requires finding 3 Ghostly Drones hidden in ranch expansions to obtain Drone Station Modules Part 3: Automation & Empire Chapter 9: Quantum Drones Automation Primary Objective: Deploy 3 Quantum Drone Stations to automate core ranch operations Financial Checkpoint Starting Budget: 50,000-70,000+ NB from Chapter 8 Capital Required: ~15,000 NB for 3 Quantum Drone Stations Materials Required: 300 Flutter Plorts, 6 Strange Diamonds, 45 Lava Dust, 45 Wild Honey Time Savings: Daily ranch management reduced from 30+ minutes to <10 minutes Timeline: 3-5 days through all operations Phase 1: Finding Ghostly Drones What Are Ghostly Drones? Ethereal, semi-transparent phantom drones that roam Rainbow Island. Interact with one to receive a Drone Station Module, then it disappears permanently. Easiest 3 Locations (for Chapter 9): First Ranch Expansion: 1 Ghostly Drone in whichever expansion you unlocked first (Gully, Archway, or Den) The Tidepools: 1 Ghostly Drone spawn Starlight Strand: By the big two-colored tree (pink/blue biome junction) How to Capture: Approach the Ghostly Drone (within 5 meters) Press interact button Receive 1 Drone Station Module Drone disappears permanently Phase 2: Crafting Quantum Drone Stations Recipe Per Station: 5,000 Newbucks 100 Flutter Plorts 15 Lava Dust 15 Wild Honey 2 Strange Diamonds 1 Drone Station Module Total for 3 Stations: 15,000 NB + 300 Flutter Plorts + 45 Lava Dust + 45 Wild Honey + 6 Strange Diamonds + 3 Drone Station Modules Phase 3: Priority Drone Deployments Drone 1 - Conservatory Automation (HIGHEST PRIORITY): Station Location: Conservatory central area Programming: - Target: Plorts - Source: Plort Collector - Destination: Plort Market (immediate sales) OR Silo (price spike management) Result: Continuously collects ALL plorts from ALL 4 corrals Expected Result: 3,000-4,000+ NB/day with minimal intervention Battery: Charge with Pink/Cotton Plorts (20-30 plorts = weeks of operation) Drone 2 - Gully Plort Collection: Station Location: The Gully central area Programming: - Target: Plorts - Source: Plort Collector - Destination: Plort Market OR Silo Result: Continuously collects plorts from both corrals (Angler-Crystal, Saber-Hunter) Expected Result: 2,000-3,000+ NB/day automated Battery: Charge with Crystal/Hunter Plorts (15-20 plorts = weeks) Drone 3 - Tidepools Passive Income Automation: Station Location: The Tidepools central area Programming: - Target: Plorts - Source: Plort Collector - Destination: Plort Market OR Silo Result: Continuously collects plorts from Puddle Ponds and Fire Incinerators Expected Result: 1,540-2,310 NB/day with ZERO manual intervention Battery: Charge with Pink Plorts (10-15 plorts = weeks) How Quantum Drones Work Two Operating Modes: Rancher Mode (Placed in ranch expansions): - Program with Target → Source → Destination logic - Instantly teleports between locations - Handles all ranch automation Explorer Mode (Placed in wild biomes): - Generates "quantum" resources based on biome - Deposits into shared Quantum Cloud inventory (max 9,999 items) - Passive resource generation while away - (Patch 1.1.0) Can now target Odd Onions; nerfed to prevent excessive plort farming Battery System: Runs on plorts: 0%-100% (green bar) with overcharge to 999% (golden bar) Initial battery: 24% Higher battery % = faster operation speed Battery only drains during active task execution Picking up station resets battery to 24% Important Limitations: Drones only work within same expansion (cannot transfer between Conservatory/Gully/etc.) Food to Auto-Feeders goes to ALL feeders randomly (loses favorite food bonuses) Recommendation: Use drones ONLY for plort collection, manually feed for 4-plort bonus Strategic Priorities Hunt 3 Ghostly Drones: Locate in ranch expansions to obtain Drone Station Modules Accumulate 300 Flutter Plorts: From Chapter 8 operations (DO NOT purchase) Gather Strange Diamonds: Collect 6 from Starlight Strand treasure pods Craft 3 Quantum Drone Stations: Build for ranch automation Deploy Conservatory Drone: HIGHEST PRIORITY - automate largest, most valuable operation Deploy Gully Drone: Automate carnivore plort collection Deploy Tidepools Drone: Fully automate passive income End of Chapter Checklist ✅ 3 Ghostly Drones found, 3 Drone Station Modules obtained ✅ Quantum Drone Station #1 crafted and deployed (5,000 NB + 100 Flutter Plorts) ✅ Quantum Drone Station #2 crafted and deployed (5,000 NB + 100 Flutter Plorts) ✅ Quantum Drone Station #3 crafted and deployed (5,000 NB + 100 Flutter Plorts) ✅ Total investment: 15,000 NB + 300 Flutter Plorts + materials ✅ Drone 1: Conservatory automation (All Plort Collectors → Market Link) ✅ Drone 2: Gully plort collection (All Plort Collectors → Market Link) ✅ Drone 3: Tidepools automation (Puddle + Fire Plorts) ✅ Total daily ranch time reduced from 30-40 minutes to <10 minutes ✅ Daily passive income: 6,500-8,500+ NB with minimal management Next Chapter Preparation With core ranch operations automated, you can now focus on Grey Labyrinth exploration without worrying about daily ranch management. Chapter 10 Preparation: Grey Labyrinth - Elite Asset Acquisition Financial Target: Save ~2,000 NB for Radiant Projector crafting Required Equipment: Verify you have Heart Module III, Power Core III, Jetpack II, Dash Boots II Materials Needed: 10 Hunter Plorts, 10 Boom Plorts, 5 Silky Sand, 5 Lava Dust (for 3-4 Radiant Projectors) Objective: Enter Grey Labyrinth, activate Map Data Nodes, capture Twin/Sloomber/Hyper slimes for Chapter 11 integration Chapter 10: Grey Labyrinth Elite Asset Acquisition Primary Objective: Enter the Grey Labyrinth, capture elite slimes (Twin, Sloomber, Hyper), understand hazard mechanics Prerequisites & Entry Required Equipment: Heart Module III (250 HP), Power Core III (250 Energy), Jetpack II, Water Tank, Pulse Wave, Tank Guard Entry Tool - Radiant Projector: Blueprint from Viktor Humphries (Day 20+ after popping Boom or Flutter Gordo) Craft 3-4 Radiant Projectors (500 NB each + 10 Hunter Plorts + 10 Boom Plorts + 5 Silky Sand + 5 Lava Dust) Required for light puzzles to unlock main entrance Entry Location: Starlight Strand - door directly under where Flutter Gordo was positioned (RECOMMENDED route) Phase 1: Understanding Grey Labyrinth Mechanics Critical Hazards: Prisma Disruptions: Reality-altering energy waves that periodically sweep through zones - All loose food/plorts become "Unstable" - Dangerous plasma/flame energy erupts from ground cracks Unstable Items: Randomly JUMP out of your Vacpack unpredictably - Pop out if you take damage - Eventually vanish if left unstabilized - CANNOT use teleporters while carrying Unstable items Stabilization Methods: - Prisma Stabilizers (yellow portals - one-time use during disruptions) - Ancient Stabilizers (permanent archway structures - reusable) No Slime Sea: Bottom is cloud ocean - anything that falls is PERMANENTLY LOST Tarr Risk: Very common due to high slime variety and abundant food Phase 2: Gordo Strategy & Elite Slime Acquisition Pop These 3 Gordos: Twin Gordo (50 Fruit, Polaricherry counts 2x) → 12 Twin Slimes + Portal to Rainbow Fields - Location: Impossible Sky Sloomber Gordo (30 Meat, Candied Hen counts 2x) → 12 Sloomber Slimes + Portal to Conservatory - Location: Dream Land (North) Hyper Gordo (30 Veggies, Turbo Tater counts 2x) → 12 Hyper Slimes + Key switch - Location: Terrarium (requires Radiant Projector puzzle + 1 Hunter Plort + 1 Angler Plort) Capture Strategy: Twin Slimes: 10-12 from Impossible Sky (pop Gordo for 12 free) Sloomber Slimes: 10-12 from Dream Land (pop Gordo for 12 free) Hyper Slimes: 10-12 from Terrarium ONLY (pop Gordo for 12 free) - WARNING: Hyper Slimes are EXTREMELY bouncy and fast Collect 40-60 of each favorite food (Polaricherry, Candied Hen, Turbo Tater) Phase 3: New Slime Species Grey Labyrinth Exclusive Slimes: Shadow - Cannot be vacuumed or captured - Produces plorts when hit by ANY thrown object (item not consumed) - Jumps when disturbed, then vanishes - Farm for Shadow Plorts (needed for doors + Chapter 14) Twin (Fruit, favorite: Polaricherry) - Alternates blue/pink states, creates portals to snag distant food Sloomber (Meat, favorite: Candied Hen) - Emits sleep cloud that calms other slimes Hyper (Veggie, favorite: Turbo Tater) - Extremely fast, ricochets constantly, requires maximum security Phase 4: Shadow & Prisma Plort Farming (Introduction) Shadow Plort Farming: Hit Shadow Slimes with thrown objects (Pink Plorts, vegetables, anything) They drop Shadow Plorts, then vanish Respawn in same dark corner locations (Patch 1.1.0) Shadow Pots: Break open pots throughout Grey Labyrinth to release Shadow Slimes - can pick up and move pots for strategic farming! Total needed: 1,185 Shadow Plorts (1,165 for doors + 20 for Nullifier) CRITICAL: Store in SILOS, not Refinery (cannot use Refinery plorts for doors) Prisma Plort Farming (Basic): During Prisma Disruptions, feed Unstable food to any slimes They produce Unstable Plorts Walk through Ancient Stabilizer → Unstable Plorts automatically convert to Prisma Plorts in inventory Conversion rate: 1 Unstable → 1-2 Prisma Plorts (typically 2) Total needed: ~245 Prisma Plorts (90 for Gigi trades + 155 for upgrades) CRITICAL: Store in SILOS, not Refinery (cannot trade Refinery plorts to Gigi) Phase 5: Warp Infrastructure Deploy 6 Key Gadgets (Refinery Link + Market Link per zone): Impossible Sky: Refinery Link + Market Link near Twin Gordo area Dream Land: Refinery Link + Market Link in Dream Land North Terrarium: Refinery Link + Market Link in central Terrarium Total Investment: 1,500 NB + materials Benefits: Deposit crafting materials immediately, sell plorts without returning to ranch, prevents loss from falls/Tarr Strategic Priorities Map First: Activate all 7 Grey Labyrinth Map Data Nodes before deep exploration Pop Gordos for Portals: Twin (Rainbow Fields), Sloomber (Conservatory), Hyper (key switch) Capture Breeding Stock: 10-12 of each elite slime type (Twin, Sloomber, Hyper) Collect Favorite Foods: 40-60 of each (Polaricherry, Candied Hen, Turbo Tater) Farm Shadow Plorts Opportunistically: Start collecting for Chapter 13 (1,165 total needed) Store Plorts in Silos: NEVER put Shadow/Prisma Plorts in Refinery until door/milestone objectives complete Do Not Ranch Here: Grey Labyrinth is extraction zone, not ranching expansion End of Chapter Checklist ✅ All 7 Grey Labyrinth Map Data Nodes activated ✅ Twin Gordo popped - Portal to Rainbow Fields unlocked ✅ Sloomber Gordo popped - Portal to Conservatory unlocked ✅ Hyper Gordo popped - Terrarium access confirmed ✅ 10-12 Twin Slimes captured and returned to ranch ✅ 10-12 Sloomber Slimes captured and returned to ranch ✅ 10-12 Hyper Slimes captured and returned to ranch ✅ 40-60 Polaricherry, Candied Hens, Turbo Taters collected ✅ Basic understanding of Shadow/Prisma Plort farming ✅ Shadow/Prisma Plorts stored in SILOS (not Refinery) ✅ Warp infrastructure deployed (3 Refinery Links + 3 Market Links) ✅ Ready to build The Archway expansion (Chapter 11) Next Chapter Preparation With elite Grey Labyrinth slimes captured, you're ready to integrate these valuable assets into ranch operations. Preparation for Chapter 11: Have 12,650 NB saved (Archway expansion + upgrades) Verify you have 10-12 Twin, Sloomber slimes stored Verify you have Polaricherry, Candied Hen stocks Have Saber Slimes available (from Chapter 7) Have Flutter Slimes available (from Chapter 4) Chapter 11: The Archway Grey Labyrinth Operations Primary Objective: Integrate Grey Labyrinth slimes into automated ranch operations and establish highest-value plort production Financial Checkpoint Starting Budget: 50,000-70,000+ NB from Chapter 10 Capital Required: ~12,645 NB - Archway unlock: 2,800 NB - Full build-out: 9,845 NB Revenue Impact: ~8,500-12,000 NB/day (increased from ~8,500) Daily Increase: +2,000-3,500 NB/day ROI: ~4.6 days to break even Phase 1: The Archway Build (5 Plots) Plot 1 - Polaricherry Garden: Garden + Nutrient Soil + Sprinkler = 1,550 NB Feeds Plot 2 Polaricherry from Grey Labyrinth (20 per harvest) Plot 2 - Twin-Flutter Largos: Corral + High Walls + Auto-Feeder + Plort Collector = 2,010 NB Feed Polaricherry (Twin favorite) = 4 plorts per feeding Revenue: ~100-150 NB/feeding Flutter calming aura, Twin portals grab distant food Plot 3 - Candied Hen Coop: Coop + High Walls + Spring Grass + Vitamizer = 1,750 NB Stock: 6-8 hens + 2 roostros Feeds Plot 4 Plot 4 - Sloomber-Saber Largos: Corral + High Walls + Music Box + Auto-Feeder + Plort Collector = 2,360 NB Feed Candied Hens (Sloomber favorite) = 4 plorts per feeding Revenue: ~150-250 NB/feeding HIGHEST VALUE COMBO IN GAME Music Box CRITICAL - Sloomber clouds pacify Saber Plot 5 - Silo: Silo + Tier 1 + Tier 2 + Tier 3 = 2,175 NB Store Twin, Sloomber, Saber, Flutter plorts + food buffer DO NOT put Grey Labyrinth plorts in Refinery yet (needed Ch 13-14) Total Investment: 2,800 NB (unlock) + 9,845 NB (build) = 12,645 NB Phase 2: Key Notes Auto-Feeder Setup: Plot 2 (Twin-Flutter): Polaricherry Plot 4 (Sloomber-Saber): Candied Hens CRITICAL: Music Box on Sloomber-Saber corral is essential (Saber aggression + Sloomber sleep clouds) Use Quantum Drones (from Chapter 9) to automate plort/food transport if desired Strategic Priorities Unlock The Archway: Purchase expansion (2,800 NB) from northwest corner of Conservatory Deploy Twin-Flutter Largos: Establish high-value operation with premium Grey Labyrinth slimes Deploy Sloomber-Saber Largos: HIGHEST-VALUE COMBO in game (150-250 NB per feeding) Install Music Box: CRITICAL - Sloomber clouds pacify aggressive Saber behavior Build Candied Hen Coop: Establish breeding program for Sloomber favorite food Plant Polaricherry Garden: Grow Twin favorite food for maximum plort production Stockpile Grey Labyrinth Plorts: Reserve Twin, Sloomber, Saber plorts in Silo for Chapters 13-14 End of Chapter Checklist ✅ The Archway expansion unlocked and operational ✅ Twin-Flutter Largos established in Plot 2 ✅ Sloomber-Saber Largos established in Plot 4 ✅ Auto-Feeders installed and stocked on both corrals ✅ Candied Hen breeding operation in Plot 3 ✅ Polaricherry garden producing in Plot 1 ✅ Silo storage for Grey Labyrinth plorts ✅ Grey Labyrinth elite slimes fully integrated into ranch automation Next Chapter Preparation The Digsite expansion is OPTIONAL. If you've collected Dervish and Tangle slimes from weather events, Chapter 12 provides a home for them. If you haven't collected weather slimes or don't care about them, skip Chapter 12 entirely and proceed to Chapter 13 (The Endgame Audit). Chapter 12: The Digsite Weather Slimes ⚠️ OPTIONAL CHAPTER: This chapter is for players who have collected Dervish and Tangle slimes from weather events. If you have NOT collected these slimes, skip this chapter and proceed to Chapter 13. Prerequisites You MUST have collected: Dervish Slimes: Spawn during Level 3 Wind Storms (Cyclones) in all biomes Tangle Slimes: Spawn during Level 3 Pollen Storms in all biomes Painted Hens: Spawn during Level 3 Pollen Storms (same as Tangle) If you haven't collected these slimes: Skip this chapter and go to Chapter 13. Financial Checkpoint Starting Budget: 50,000-60,000+ NB from Chapter 11 Capital Required: ~14,445 NB - Digsite unlock: 6,000 NB - Full build-out: 8,445 NB Revenue Impact: ~11,000-15,500 NB/day (IF built) Daily Increase: +2,500-3,500 NB/day (IF built) Timeline: 2-3 days if you have weather slimes ready Phase 1: The Digsite Build (4 Plots) - OPTIONAL Plot 1 - Prickle Pear Garden: Garden + Nutrient Soil + Sprinkler = 1,550 NB Feeds Plot 2 (Dervish favorite) Plot 2 - Dervish-Ringtail Largos: Corral + High Walls + Music Box + Auto-Feeder + Plort Collector = 2,360 NB Feed Prickle Pears (Dervish favorite) = 4 plorts per feeding Revenue: ~150-200 NB/feeding VERY HIGH VALUE COMBO Dervish creates tornadoes (Music Box reduces), Ringtail turns to stone in daylight Plot 3 - Painted Hen Coop: Coop + High Walls + Spring Grass + Vitamizer = 1,750 NB Stock: 6-8 hens + 2 roostros (from Level 3 Pollen Storms) Feeds Plot 4 Plot 4 - Tangle-Hyper Largos: Corral + High Walls + Air Net + Music Box + Auto-Feeder + Plort Collector = 2,785 NB Feed Painted Hens (Tangle favorite) = 4 plorts per feeding Revenue: ~120-200 NB/feeding MAXIMUM SECURITY REQUIRED - Air Net CRITICAL (Hyper extremely bouncy) Tangle vines grab food from 10 units away Total Investment: 6,000 NB (unlock) + 8,445 NB (build) = 14,445 NB Phase 2: Key Notes Auto-Feeder Setup: Plot 2 (Dervish-Ringtail): Prickle Pears Plot 4 (Tangle-Hyper): Painted Hens CRITICAL - Tangle-Hyper Security: Air Net is MANDATORY (Hyper extremely bouncy - WILL escape without it) Tangle vines grab food from 10 units away (keep neighboring plots clear) Music Box on both corrals (Dervish tornadoes, Hyper dashing) Strategic Priorities Unlock The Digsite: Purchase expansion (6,000 NB) from eastern Den passage Deploy Dervish-Ringtail: Establish VERY HIGH VALUE operation (150-200 NB per feeding) Deploy Tangle-Hyper: Create second weather event operation with maximum security Install Air Net on Tangle-Hyper: MANDATORY - Hyper WILL escape without it Build Painted Hen Coop: Establish rare chicken breeding program Plant Prickle Pear Garden: Grow Dervish favorite food Install Music Boxes: CRITICAL - Dervish tornadoes, Hyper dashing End of Chapter Checklist IMPORTANT: This chapter is optional. If you haven't collected weather slimes, skip this expansion entirely and proceed to Chapter 13. ✅ The Digsite unlocked and operational (OR intentionally skipped) ✅ Dervish-Ringtail Largos established (if built) ✅ Tangle-Hyper Largos established (if built) ✅ Auto-Feeders installed and stocked (if built) ✅ Painted Hen breeding operation (if built) ✅ Prickle Pear garden producing (if built) ✅ Weather event slimes fully integrated OR chapter skipped Next Chapter Preparation Chapter 13 (The Endgame Audit) focuses on maximizing Vacpack capabilities and unlocking all final upgrades before the endgame. Preparation for Chapter 13: Shadow Plort Farming: Begin systematically farming Shadow Plorts from Grey Labyrinth. Total needed: 1,185 - Shadow Plort Doors: 1,165 plorts - Strange Dimension Nullifier: 20 Shadow Plorts Prisma Plort Farming: Farm Prisma Plorts during Prisma Disruptions. Total needed: 245 - Gigi's Silo upgrades: 90 Prisma Plorts - Vacpack final upgrades: 145 Prisma Plorts - Prisma Detector: 10 Prisma Plorts Financial Goal: Accumulate 50,000+ NB for final Vacpack upgrades and gadgets Farming Strategy: Use throwable items to hit Shadow Slimes. During Prisma Disruptions, feed Unstable food to slimes, then walk through Ancient Stabilizers Part 4: Endgame Mastery Chapter 13: The Endgame Audit Primary Objective: Systematic completion of all prerequisites for the story finale The Operational Blueprint This chapter is about opening all 25 Shadow Plort Doors and stockpiling resources needed for Prismacore stabilization. Phase 1: Shadow Plort Door Completion Objective: Open all 25 Shadow Plort Doors (1,165 Shadow Plorts total) Shadow Plort Farming Strategy: Shadow Slimes spawn in groups of 2-5 in dark corners throughout Grey Labyrinth Hit them with ANY thrown object (Pink Plorts, vegetables, anything) They drop Shadow Plorts, then vanish Respawn in same dark corner locations Total needed: 1,185 Shadow Plorts (1,165 for doors + 20 for Nullifier) CRITICAL: Store in SILOS, not Refinery (cannot use Refinery plorts for doors) Door Cost Breakdown: Costs range from 25-100 Shadow Plorts per door Total for all 25 doors: 1,165 Shadow Plorts Priority Doors (open first): 25 & 50 plort doors for shortcuts and quality-of-life Phase 2: Prisma Plort Stockpiling Objective: Stockpile ~245 Prisma Plorts total Prisma Plort Uses: 90 for Gigi's milestone trades (Chapter 14) 155 for crafting upgrades (145 Vacpack + 10 Disruption Detector) Prisma Plort Farming Strategy: During Prisma Disruptions, all food becomes "Unstable" Feed Unstable food to any slimes → produces Unstable Plorts Walk through Ancient Stabilizer → Unstable Plorts automatically convert to Prisma Plorts in inventory Conversion rate: 1 Unstable → 1-2 Prisma Plorts (typically 2) CRITICAL: Store in SILOS, not Refinery (cannot trade Refinery plorts to Gigi) Optimal Farming Setup: Temporary Pink Slime operation near Ancient Stabilizer in Grey Labyrinth Collect Unstable food during disruption Feed Pink Slimes → Unstable Plorts Walk through Ancient Stabilizer → conversion to Prisma Plorts Deposit to portable Refinery Link or return to ranch Avoid standing near ground cracks during disruptions (plasma/flame geysers) Phase 3: Final Vacpack Upgrades Required Endgame Upgrades: Heart Module IV (10,000 NB + materials) Power Core V (15,000 NB + materials) Tank Booster V (15,000 NB + materials) Tank Booster VI (20,000 NB + materials) Tank Booster VII (30,000 NB + materials) Tank Booster VIII (50,000 NB + materials) All required resources from: Grey Labyrinth resource nodes (Magma Comb, Tin Petal, Black Indigonium, Aqua Glass, Dream Bubble, Royal Jelly) Chapter 11-12 slime operations (Twin, Sloomber, Hyper, Ringtail plorts) - If you skipped Chapter 12: Farm wild Hyper slimes in Grey Labyrinth Terrarium for 70 Hyper Plorts - Ringtail plorts available from Chapter 8's Batty-Ringtail largos if Chapter 12 skipped Shadow Plort Door rewards (Storage Cells, Power Chips, Heart Cells) Phase 4: Craft Disruption Detector Blueprint: Obtained from Gigi in Impossible Sky area Recipe: 500 NB + 10 Prisma Plorts + 5 Tin Petal + 5 Dream Bubble Usage: Place in Grey Labyrinth to add map pins showing disruption status: White icon = No disruption Yellow icon = Upcoming disruption Red icon = Disruption ongoing This helps optimize Prisma Plort farming timing. Phase 5: Ranch Automation Verification Checklist: ✅ All corrals have Auto-Feeders installed and stocked ✅ All corrals have Plort Collectors installed ✅ Quantum Drones (if installed) are functioning correctly ✅ Food gardens are producing and restocked ✅ Coops are producing chickens ✅ Ranch can operate autonomously while you're in Grey Labyrinth End of Chapter Checklist ✅ All 25 Shadow Plort Doors opened (1,165 Shadow Plorts spent) ✅ ~245 Prisma Plorts stockpiled in SILOS ✅ Heart Module IV, Power Core V, Tank Booster V-VIII crafted ✅ Disruption Detector crafted and placed ✅ Ranch automation verified as self-sufficient ✅ Ready for Prismacore finale Next Chapter Preparation With all Shadow Plort Doors open and Prisma Plorts stockpiled, you're ready to enter the Prismacore and complete the main story. Chapter 14: Prismacore Stabilization Story Finale Primary Objective: Activate 5 Harmonizers, break Tarr barrier, deploy Nullifier to save Rainbow Island Understanding the Threat What is the Prismacore? An extraterrestrial object that crashed into Rainbow Island, source of all Prisma Disruption in the Grey Labyrinth. The Escalating Crisis: Areas surrounding Prismacore are slowly turning to gold, structures failing and vanishing If left unchecked: Dream Land falls, Labyrinth atmosphere collapses, Prismacore energy radiates across Far, Far Range All life—including all slimes—will be lost Your Mission: Stabilize the Prismacore permanently. Phase 1: Navigate to Prismacore Location: Heart of Grey Labyrinth (accessed through Impossible Sky) Access Requirements: Must have opened plort statue doors (Twin, Shadow, Sloomber) to reach Prismacore entrance Follow path from Impossible Sky toward gilded area What to Bring: ~90 Prisma Plorts (for Gigi trades) Throwable items (for Harmonizer activation) Full health/energy (Tarr barrier ahead) Phase 2: Trade with Gigi Location: Gigi's station inside Prismacore area Milestone Trades (one-time rewards): 20 Prisma Plorts → Nullifier blueprint 20 Prisma Plorts → Storage Cell 50 Prisma Plorts → Drone Station Module Total for all milestones: 90 Prisma Plorts Unlimited Trade: 10 Prisma Plorts → 1 Rainbow Coin (repeatable) Use this for Night Market purchases post-game After Trading: Return to The Lab and craft the Nullifier Phase 3: Craft the Nullifier Recipe: 1,000 Newbucks 20 Shadow Plorts 20 Hyper Plorts 20 Twin Plorts 20 Sloomber Plorts All plort types should be available from your Chapter 11-12 operations and Grey Labyrinth farming. Phase 4: Activate the 5 Harmonizers Location: Hidden throughout Grey Labyrinth zones Activation: Shoot any item at each Harmonizer to activate it (fruits, vegetables, plorts, chickens—anything works) Harmonizer Locations: Distributed across Grey Labyrinth zones. Explore each area systematically: Prismacore Surroundings - Check gilded areas near core Dream Land zones (East, West, Central) - Look for elevated platforms and hidden alcoves Impossible Sky zones - Explore vertical structures and floating platforms The Mirage - Search desert-like areas with unstable terrain Shifting Caverns - Check cave systems and tunnels Search Strategy: Harmonizers emit a faint glow and distinctive sound when nearby Use your map to track which zones you've thoroughly explored Some require platforming or navigating around Stabilizers Status Tracking: The game tracks how many Harmonizers you've activated. You must activate all 5 before you can stabilize the Prismacore. Phase 5: Prismacore Stabilization The Tarr Barrier: Giant Tarr barrier surrounds Prismacore's core Cannot be crossed or destroyed with water The Slime Shower: Large facility inside Prismacore designed to break the Tarr barrier. Requires slime sacrifice to activate. Two depositing ports: Choose either one (both work identically) Requirement: Deposit 6 slimes total into a single port Any slime type works: Pink, Rock, Phosphor, Largos—doesn't matter Source options: - Bring 6 slimes from your ranch (vacpack them up before entering) - Catch 6 wild slimes in Grey Labyrinth zones - Mix of both sources Activation Process: Approach either depositing port Shoot 6 slimes into the port (they will be absorbed) The Slime Shower activates automatically The Tarr barrier dissolves, revealing path to Prismacore core Strategic Note: Using wild slimes from the Labyrinth is more efficient than bringing your valuable ranch largos. Pink slimes and common wild slimes work perfectly. Nullifier Deployment: After Tarr barrier is broken, approach the Prismacore core Deploy the Nullifier device Cutscene: Rainbow Island stabilizes, Prisma Disruptions cease Phase 6: Story Resolution Gigi's Departure: After stabilization, Gigi leaves to reunite with her family, then returns to her own timeline She will never be seen again after leaving Most holographic pads become non-interactive Prismacore holographic pad remains functional, showing recorded farewell message World Changes: Prismacore stabilized: All readings normalized, Rainbow Island's future secured Prisma disruption persists: Effects will last for a long time before fully recovering Stabilizers remain necessary: Ancient Stabilizers in Labyrinth zones stay active Post-Game Unlocks: Unlimited Rainbow Coin trading: 10 Prisma Plorts → 1 Rainbow Coin (repeatable forever) Night Market access: Spend Rainbow Coins at ProntoMart for exclusive upgrades and decorations Grey Labyrinth exploration: Remains fully accessible for resource farming Prismatic decorations: New ranch customization options via Night Market End of Chapter Checklist ✅ Traded 90 Prisma Plorts to Gigi for milestones ✅ Crafted the Nullifier device ✅ Activated all 5 Harmonizers ✅ Deployed Slime Shower (6 slimes) ✅ Deployed Nullifier to stabilize Prismacore ✅ Main story complete ✅ Rainbow Coin trading unlocked ✅ Rainbow Island saved Next Chapter Preparation The story is complete. The game is now yours. Chapter 15 (Post-Game Sandbox Empire) is about creative freedom and perfecting your automated empire. Chapter 15: Post-Game Sandbox Empire Mindset: The Creative Endgame With all strategic objectives complete, the focus shifts from guided efficiency to self-directed projects that define your ranching legacy. Phase 1: The Master Economist - Infinite Wealth Advanced Market Manipulation: Objective: Generate massive single-day profit by artificially creating scarcity and demand Strategy: Select a Target Plort: Choose high-value plort (Saber, Ringtail, or Hyper) Hoard: Dedicate several ranch expansions to producing only this plort. DO NOT SELL. Stockpile 1,000+ in Silos Crash the Market: Sell every other plort type daily. Flood market to drive prices down Wait for the Spike: Market algorithm will eventually create "high demand" day for hoarded plort (200%+ spike) Execute the Sell-Off: On spike day, sell entire stockpile for hundreds of thousands of Newbucks Engaging the Endgame Economy: ProntoMart & The Night Market: ProntoMart: Standard shop with Coo-Coo Corner (random daily items) and Polestar Provisions (permanent blueprints) The Night Market: Secret endgame tier - Unlock: After stabilizing Prismacore and speaking with Gigi - Availability: Only open during night (20:00 to 4:00 game time) - Currency: Rainbow Coins (obtained by trading Prisma Plorts to Gigi) - Wares: Exclusive items, prismatic color variants, advanced drone modules, unique decorations, final Sureshot upgrades Phase 2: The Grand Architect - Perfecting the Ranch Themed Expansions: Demolish functional layouts and rebuild entire expansions with single theme: Example Themes: The Volcanic Caldera (The Gully): Boom, Rock, Crystal, Fire slimes. Ash Troughs, Ember Valley trees, lava-themed decorations The Bioluminescent Grotto (The Archway): Phosphor, Batty, Shadow, Twin slimes. Solar Shields, glowing plants, perpetual nighttime environment The Serene Water Gardens (The Tidepools): Puddle, Flutter slimes. Ponds, Starlight Strand flora, zen-like arrangements The Largo Library: Objective: Create a living museum of every possible largo combination in the game Execution: Dedicate The Den and The Digsite to this project Build series of perfectly designed, fully-automated corrals Each corral houses 5-6 largos of a single, unique type Ultimate test of ranch design and automation skills Create visually spectacular and orderly display of biodiversity Phase 3: The Technologist - Ultimate Automation Advanced Drone Deployment: Explorer Mode: Deploy drones to remote locations outside ranch to passively generate rare resources Prime Locations: Place Explorer Drone in Powderfall Bluffs (generates Sun Sap, Perfect Snowflakes), or Grey Labyrinth lava areas (generates Black Indigonium, Magma Comb) Function: Drone automatically generates resources (not from actual nodes, but from "quantum" sources) and deposits into "Quantum Cloud" inventory (max 9,999 items) Access: Quantum Cloud accessible from any Drone Station at your ranch Result: Fully automated, off-site resource generation network Price Spike Management: Program drones to collect plorts to Silos instead of Market Links Monitor Plort Market daily Manually sell from Silos during 150%+ price spikes for maximum profit Phase 4: The Archivist - 100% Completion The Completionist's Checklist: Slimepedia: Discover every slime, food item, resource, and location to complete all entries Gordo Snaring: Pop every Gordo Slime in the game, including all 3 in Grey Labyrinth Treasure Pods: Hunt down and crack open every last treasure pod. Final pods often require maxed-out Jetpack Gadget Crafting: Craft at least one of every single gadget, decoration, and utility item in Fabricator Blueprint Collection: Locate every treasure pod and unlock all available upgrades, gadgets, decorations Phase 5: The Renegade Rancher - Challenge Runs Start a new save file and apply self-imposed rules for completely different gameplay experience: Challenge Ideas: Carnivore Only: You may only ranch meat-eating slimes. Immense pressure on chicken coop management No Automation: No Plort Collectors, Auto-Feeders, or Drones. Manage everything manually Single Largo Base: Every largo on your ranch must be based on single slime type (e.g., every largo must be part-Tabby) Pacifist Rancher: You must prevent creation of Tarrs at all costs. Any Tarr outbreak is failure condition One Expansion Only: You may only purchase one ranch expansion beyond Conservatory for entire game. Choose wisely The blueprint is complete, Rancher. The systems are in place. The wealth, technology, and resources of Rainbow Island are at your command. Now, go build your empire. Quick Reference & Appendices Essential Largo Combinations Summary Tier 1: Early Game (Chapters 1-4)Tabby-Cotton: Vegetable diet, Water Lettuce favorite, High Walls required Phosphor-Honey: Fruit diet, Cuberry favorite, Solar Shield required Crystal-Rock: Vegetable diet, Heart Beet favorite, High Walls required Boom-Batty: Fruit diet, Pomegranite favorite, High Walls + Solar Shield Tier 2: Mid-Game (Chapters 5-8)Angler-Crystal: Meat diet, Sea Hen favorite, High Walls required Flutter-Tabby: Meat diet, Stony Hen favorite, High Walls + Solar Shield Saber-Hunter: Meat diet, Thundercluck favorite, High Walls + Solar Shield + Auto-Feeder (CRITICAL) Ringtail-Phosphor: Fruit diet, Cuberry/Pogofruit favorite, High Walls + Solar Shield Tier 3: Elite (Chapters 10-12)Twin-Flutter: Nectar/Fruit, Moondew Nectar favorite, 57-135 NB/4-plort - ELITE Sloomber-Saber: Meat, Thundercluck favorite, 79-155 NB/4-plort - HIGHEST VALUE IN GAME Dervish-Ringtail: Vegetable, Prickle Pear favorite, Very High Value Tangle-Hyper: Meat, Painted Hen favorite, High-Elite tier Critical Upgrade Path Mobility (Priority Order)Jetpack (3,450 NB) - Chapter 1, HIGHEST PRIORITY Dash Boots (450 NB) - Chapter 2 Jetpack Drive (2,250 NB + materials) - Chapter 3 Dash Boots II (1,800 NB + materials) - Chapter 4+ Vacpack UpgradesTier I (Ch 2): Power Core I (450 NB), Tank Booster I (450 NB) Tier II (Ch 3): Power Core II (1,350 NB + Jellystone/Deep Brine), Tank Booster II Tier III (Ch 6+): Power Core III (2,700 NB + Buzz Wax/Wild Honey), Heart Module I (900 NB) Tier IV-V (Ch 13-14): Heart Module IV (7,200 NB), Power Core V (10,800 NB), Tank Booster IV-VIII Ranch Infrastructure (Per Corral)Plort Collector (750 NB) - MANDATORY, prevents Tarr Auto-Feeder (900 NB) - Essential for automation High Walls (260 NB) - For jumping/flying slimes Solar Shield (425 NB) - For nocturnal slimes Resource Farming Locations Common Resources (Tier I-II Upgrades)Jellystone: Rainbow Fields caves and rock formations Deep Brine: Rainbow Fields pools and geysers Radiant Ore: Ember Valley glowing deposits Uncommon Resources (Tier III Upgrades)Buzz Wax: Starlight Strand bee hives Wild Honey: Starlight Strand hives Perfect Primordy Oil: Tidepools exclusive Rare Resources (Endgame)Sun Sap: Powderfall Bluffs crimson trees (3x/day during daylight) Perfect Snowflakes: Powderfall Bluffs deposits Royal Jelly: Grey Labyrinth (Impossible Sky, Dream Land) Black Indigonium: Grey Labyrinth (Impossible Sky) Aqua Glass: Grey Labyrinth (Waterworks ONLY) Special ResourcesStrange Diamonds: Treasure pods, rarely in Ember Valley caves (2 per Quantum Drone Station) Moondew Nectar: Starlight Strand glowing trees at night (Flutter/Twin favorite) Thunderclucks: Powderfall Bluffs rare chickens (Saber favorite) Prisma Plorts: Grey Labyrinth Prisma Disruption events (~265 total needed for story) Shadow Pots: (Patch 1.1.0) Break open in Grey Labyrinth to release Shadow Slimes - can be moved for strategic farming! Gordo Unlocks Quick Reference Rainbow Fields: Cotton Gordo (30 Water Lettuce) → Ember Valley portal Phosphor Gordo (50 Cuberries) → Starlight Strand portal Ember Valley: Rock Gordo (50 Heart Beets) → Southern Ember Valley Batty Gordo (50 Pomegranites) → Cave system Starlight Strand: Angler Gordo (50 Sea Hens) → Deep strand area Hunter Gordo (50 Roostros) → Upper strand Ringtail Gordo (50 Pogo Fruits) → Treasure pods Flutter Gordo (30 Moondew Nectar ONLY) → Flutter Haven Powderfall Bluffs: Tabby Gordo (50 Stony Hens) → Northern area Honey Gordo (50 Mint Mangos) → Treasure pods Saber Gordo (50 Thunderclucks) → Hidden valley Grey Labyrinth: Twin Gordo (Impossible Sky) → Zone access Sloomber Gordo → Terrarium zone TIP: Favorite food counts as 2x (e.g., 50 normal = 25 favorite) Ranch Expansion Costs Plot Costs (All Locations)Corral: 250 NB | Garden: 250 NB | Coop: 250 NB Silo: 450 NB | Pond: 450 NB | Incinerator: 450 NB Conservatory has 8 plots available Ranch ExpansionsThe Gully: 2,800 NB (5 plots) - Meat production hub The Tidepools: 6,000 NB (6 plots) - Passive income (Fire/Puddle) The Den: 2,800 NB (4 plots) - Nocturnal consolidation The Archway: 2,800 NB (5 plots) - Elite Grey Labyrinth slimes The Digsite: 2,800 NB (4 plots) - Weather slimes (OPTIONAL) Total: 17,200 NB Automation Equipment Quantum DronesQuantum Drone Station (per station): 5,000 Newbucks 100 Flutter Plorts 1 Ghostly Drone Component 2 Strange Diamonds Total for 3 stations: 15,000 NB + 300 Flutter Plorts + 6 Strange Diamonds Essential GadgetsAuto-Feeder (900 NB): Feeds slimes automatically Plort Collector (750 NB): MANDATORY, prevents Tarr Market Link: Direct plort selling from expansions Warp Depot: Fast travel between zones Refinery Link: Resource sharing Slime Toys (Patch 1.1.0)Every slime now has a favorite toy (25% agitation reduction) Non-favorite toys: 12.5% reduction Purchased from ProntoMart's Coo-Coo Corner (1 new toy available daily) Some toys have special "curious effects" beyond agitation reduction Notable toys: Big Rock (Rock), Buzzy Bee (Honey), Stego Buddy (Saber), Rocket Ship (Hyper), Stuffed Sheep (Cotton) Plort Market Values (Baseline) Common PlortsPink: 7-10 | Cotton: 7-12 | Tabby: 18-25 | Phosphor: 18-25 Uncommon PlortsRock: 25-35 | Honey: 25-40 | Crystal: 30-45 | Boom: 25-35 | Batty: 20-35 Rare PlortsHunter: 35-50 | Angler: 30-50 | Ringtail: 42-70 | Flutter: 20-50 | Saber: 42-70 Elite/Special PlortsTwin: 37-85 | Sloomber: 37-85 | Hyper: 30-60 Dervish: 75 | Tangle: High value Shadow: 25-40 (1,165 needed for all doors) Fire: 35-45 (passive) | Puddle: 80-100 (passive, slow) Gold: 150-250 (cannot ranch) Market Strategy: Diversify sales (3-5 types/day), hoard elite plorts for price spikes Revenue Progression Summary Chapter 1: ~500 NB/day (2 plots) Chapter 2: ~800-1,000 NB/day (4 plots) Chapter 3: ~2,500+ NB/day (8 plots) Chapters 5-6: ~5,000-6,500 NB/day (3 expansions) Chapter 8: ~6,500-8,500 NB/day (4 expansions) Chapter 11: ~8,500-12,000 NB/day (5 expansions) Chapter 12: ~11,000-15,500+ NB/day (6 expansions, if built) Endgame Capacity: 77,000-108,500+ NB/week with full automation Full Guide on GitHub This Steam guide is condensed. For complete details: https://github.com/skelhammer/slime-rancher-2-guide Full guide includes: 15 detailed chapters, 12 comprehensive appendices, complete slime/item tables, drone programming strategies, and 4,750+ lines of strategic content. Author: skelhammer | Version: 0.3.1 - Toys, Trimmings, and Tune-Ups Edition |
《史莱姆牧场2》实用攻略指南

2026-02-19 04:00:21
转载

导读
这是《史莱姆牧场2》的实用攻略指南,涵盖从前期到后期的全流程玩法,包含核心机制解析、牧场扩张规划、高收益 largo 组合推荐、自动化运营方案,以及终局剧情通关和沙盒玩法建议,助力玩家打造高效盈利的史莱姆牧场。

评论
共0条评论

沙盒游戏 【史莱姆牧场2】地图开图、资源采集、温室规划、藏宝球收集......全网最细致!最全面!最通俗易懂的攻略!(持续更新ing)
-
2026-05-19 00:330赞 · 0评论

《史莱姆牧场2》1.2.3版本更新内容
《史莱姆牧场2》更新内容 1. 变更:我们不再在游戏内收集玩家数据,并已确保所有可能的身份识别信息以及任何可能关联到身份识别信息的数据均已清除。 2. 因此,我…
2026-05-13 20:020赞 · 0评论
《史莱姆牧场2》1.2版本更新内容
《史莱姆牧场2》光芒史莱姆庇护所更新内容 1. 本次更新推出了受棱镜核心影响而产生的全新史莱姆变种——光芒史莱姆。它们拥有独特的色彩搭配和发光效果,极为稀有,会…
2026-04-16 17:121赞 · 1评论

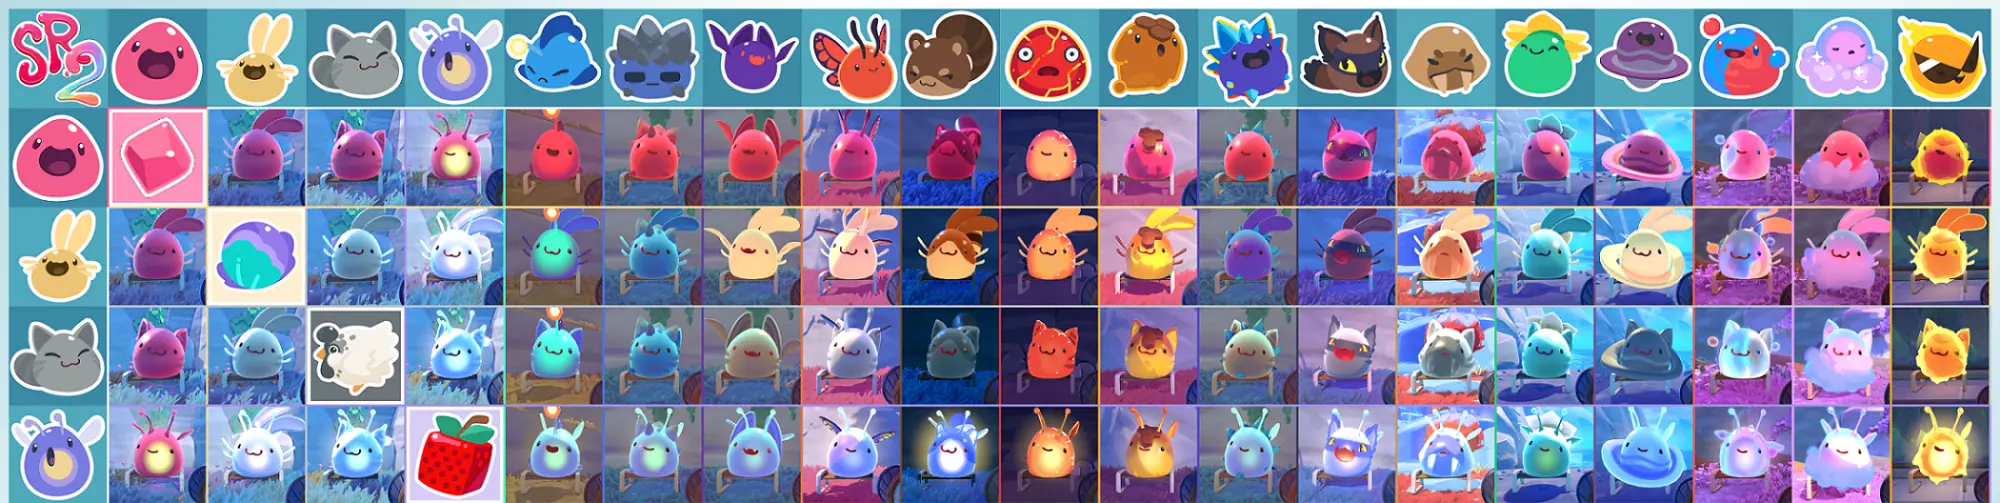
《史莱姆牧场2》大型史莱姆合成表(完整版)
《史莱姆牧场2》全 largo 组合图表(截至2025年12月28日) 我原本想一次性发布完整图表,但由于Steam对图片有2MB的限制,而整个7000像素见方…
2026-02-19 19:000赞 · 0评论
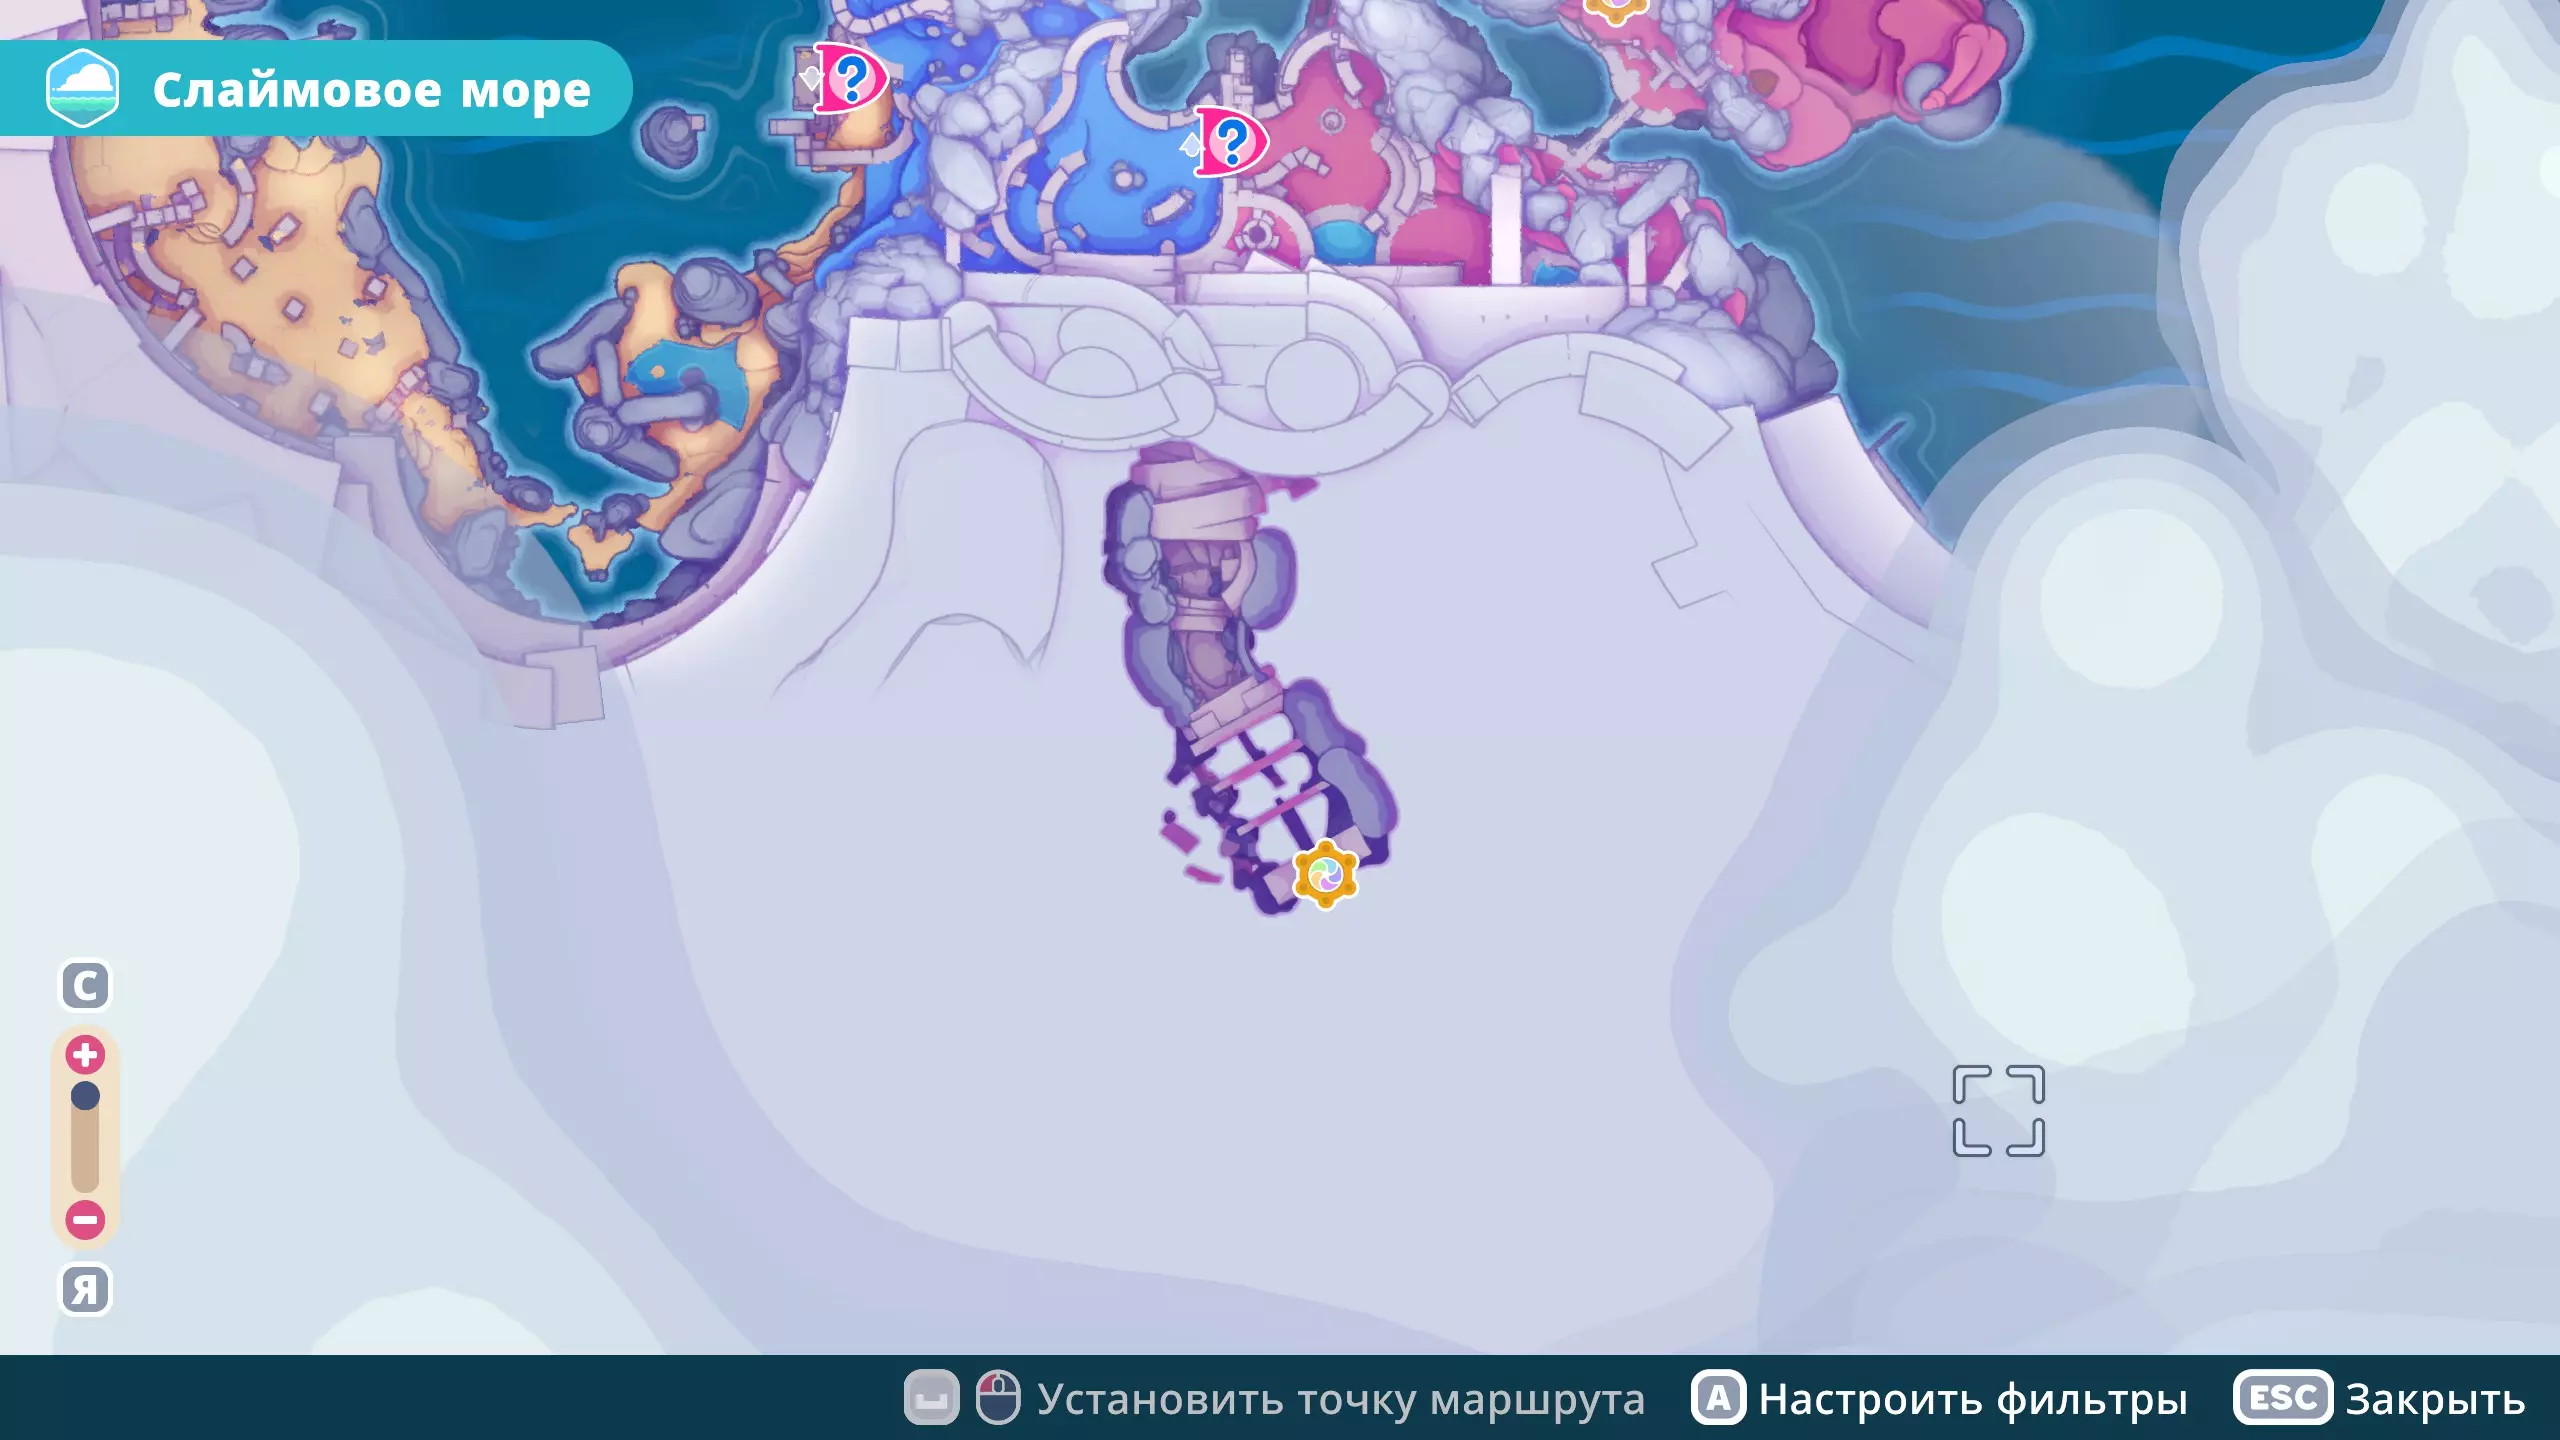
《史莱姆牧场2》中棱镜墙的位置
这是我的第一份指南,所以内容比较简陋。但希望它能帮到你! 在本指南中,我会展示目前我找到的所有需要【中和器】才能通过的【棱镜墙】。(随着发现新的棱镜墙,会持续补…
2026-02-18 07:000赞 · 0评论
极速翱翔成就 史莱姆牧场2怎么完成像小碧一样翱翔成就
在史莱姆牧场2中,“像小碧一样翱翔”成就颇具挑战性,但掌握了方法就能顺利达成。 首先,要清楚达成该成就的关键在于利用喷气背包在不接触地面的情况下飞行一定距离。这…
2025-09-14 12:090赞 · 0评论

提升帧率和降低输入延迟的最佳设置
希望本指南能帮助你在《史莱姆牧场2》中获得更好的性能(和游戏体验)。 我对《史莱姆牧场2》的默认设置感到惊讶。它在默认状态下运行得并不好。 我花了5分钟调整这些…
2026-02-20 07:000赞 · 0评论

《史莱姆牧场2》0.6.0版本完整指南
《史莱姆牧场2》0.6.0版本全新指南 新地点 本次更新中,新增了一座灰色迷宫,该迷宫同时设有2个不同的入口: 第一个入口位于星光海岸南部,彩虹裂隙下方的洞穴中…
2026-02-18 04:000赞 · 0评论

牧场小游戏 最好玩的牧场游戏下载 2025牧场游戏有哪些
越来越多经营游戏很受欢迎,体验可以来自给自足的游戏,像这种游戏当中,大家可以来不断的经营和种植整体的玩法还是非常有趣的,最好玩的牧场游戏下载,通过这种游戏形式,…
2025-11-05 00:040赞 · 0评论

可爱 强迫装饰房间?聊胜于无的更新!软软萌萌史莱姆牧场2(1.2版本特别篇)
游戏:Slime Rancher 2 =================== ☆ 感谢你的收看,有问题都可以下方评论留给我哦!
2025-10-23 11:370赞 · 0评论

暂无更多
最新更新
- 《史莱姆牧场2》1.2.3版本更新内容 — 《史莱姆牧场2》更新内容 1. 变更:我们不再在游戏内收集玩家数据,并已确保所有可能的身份识别信息以及任何可能关联到身份识别信息的数据均已清除。 2. 因此,我…
- 《史莱姆牧场2》1.2.2版本更新内容 — 《史莱姆牧场2》修复公告 1. 多项崩溃问题修复: ① 修复了PS5平台特有的崩溃问题 ② 修复了部分玩家在加载和开始新游戏时出现的崩溃问题 ③ 修复了切换Xb…
- 《史莱姆牧场2》1.2版本更新内容 — 《史莱姆牧场2》光芒史莱姆庇护所更新内容 1. 本次更新推出了受棱镜核心影响而产生的全新史莱姆变种——光芒史莱姆。它们拥有独特的色彩搭配和发光效果,极为稀有,会…
- 《史莱姆牧场2》春季更新即将到来 — 《史莱姆牧场2》下一次内容更新将于4月16日推出!正好赶上迎接春天和一些光芒四射的伙伴们。 下周Steam点数商店也将上架更多好物,记得去看看。 保持活力,牧场…
- 所有胶囊(宝藏) — 本指南包含了游戏中目前所有的胶囊。 彩虹田野地图 胶囊地图 地图上有2个地图数据标记
- 《史莱姆牧场》0.6.0完整指南 — 《史莱姆牧场2》新版本完整指南,据开发者称此次更新是目前已推出的更新中规模最大的,因此本指南篇幅可能会比较长。 新区域: 本次更新新增了灰色迷宫,该迷宫同时设有…
- 无人机能量 1.0 — 本指南将列出每种晶球用于为无人机充电的功率等级。能量
- 【剧透】刷暗影结晶的最佳简易方法 — 此方法仅在游戏后期可行,但如果操作正确,每轮可获得200多个暗影晶体。这是一种相对快速简便的方法,可用于开启所有需要暗影晶体的宝箱和门。 介绍 这是我发现的最佳…
- 提升帧率和降低输入延迟的最佳设置 — 希望本指南能帮助你在《史莱姆牧场2》中获得更好的性能(和游戏体验)。 我对《史莱姆牧场2》的默认设置感到惊讶。它在默认状态下运行得并不好。 我花了5分钟调整这些…
- All Disruption Locations (1.0.0) — 以下是《灰色迷宫》(1.0.0版本)中所有干扰点的位置,或者说主要是放置干扰探测器的位置。 另外,你总共需要18个干扰探测器,不过吉吉会免费给你1个,同时还有蓝…