换一换
换一换 


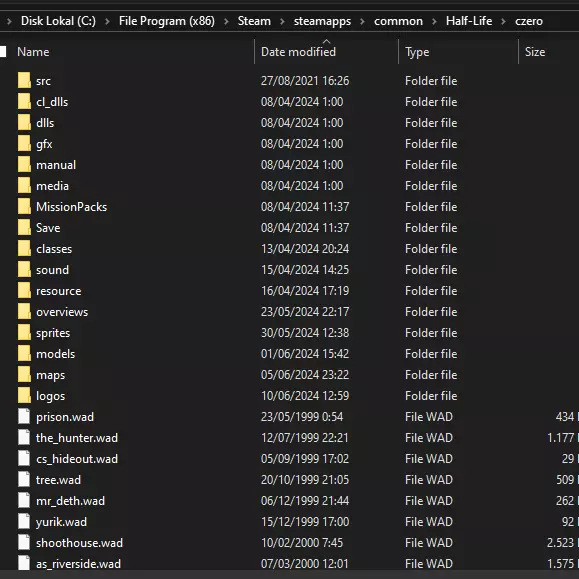
The Custom Mission System allows users to create their own Missions for use with Counter-Strike: Condition Zero. These Mission Packs may include new maps, new challenges, new bot personalities, new bot skins, and so on. The Layout of a Mission Pack Mission Packs are found in the czero MissionPacks folder. Each Mission Pack must have its own uniquely named folder. Below is an example file listing for a Mission Pack called "MyMission": czero MissionPacks MyMission Overview.vdf czero MissionPacks MyMission Thumbnail.tga czero MissionPacks MyMission Easy.vdf czero MissionPacks MyMission Normal.vdf czero MissionPacks MyMission Hard.vdf czero MissionPacks MyMission Expert.vdf czero MissionPacks MyMission BotProfile.db Overview.vdf This file defines includes information such as the mission description, what team the player is on, which bot personality file to use, and so on. Thumbnail.tga The Overview.tga is a 24-bit image displayed as part of the Mission Pack's "splash screen". It must be no larger than 256x256 and is scaled into an area that is 320x68 at a screen resolution of 640x480. Easy.vdf, Normal.vdf, Hard.vdf, Expert.vdf These files define the game rules, map progressions, available teammates, enemies, and per-map challenges. If these files are missing, the corresponding CareerGameEasy.vdf, areerGameNormal.vdf, CareerGameHard.vdf, and CareerGameExpert.vdf files from the czero folder will be used. BotProfile.db: This file defines bot personalities for use as teammates and enemies in the Mission Pack. The Overview.vdf File Below is an example Overview.vdf file in its entirety: "MissionPack" { "Author""Turtle Rock Studios" "Title""My CZ Mission" "Description""This is my custom mission pack for CZ." "URL""http://www.turtlerockstudios.com/" "SoloPlay""1" "CoopPlay""0" "Team""CT" "BGColor1""47 62 90" "BGColor2""0 0 0" "TextColor""255 255 255" "BotProfile""BotProfile.db"} Author:The author of this Mission Pack Title:The title of the Mission Pack Description:A colorful description of the mission URL:A website related to this Mission Pack, often the author’s home page SoloPlay:Unused but reserved for future utilization CoopPlay:Unused but reserved for future utilization BGColor1:Red, green, and blue (RGB) values between 0 and 255 that define the background color used for the Mission Pack user interface screens BGColor2:Unused but reserved for future utilization TextColor:RGB color values used for some Mission Pack text BotProfile:The filename of a file containing the roster of bot personalities to use with this Mission Pack The Easy.vdf, Normal.vdf, Hard.vdf, and Expert.vdf Files These files define the game structure. Each file corresponds to the difficulty selected by the player. In other words, if the player starts your mission with a difficulty of “normal”, the Normal.vdf file will be read. It is highly recommended that you examine the CareerGame*.vdf files. They contain the data for the standard CZ Counter-Terrorist Tour of Duty. InitialPoints:The number of Reputation Points the player starts the game with. MatchWins:The minimum number of rounds a team must win in order to win a match. MatchWinBy:The number of wins a team must lead by in order to win a match. Characters:A space-separated list of bot names defining the roster of teammates that can be purchased with Reputation Points. These bot names must have corresponding personality definitions in the bot database (ie: BotProfile.db). CostAvailability:Each teammate has a Reputation Point cost, from 1 to 5. This section defines how many total Reputation Points the player must have to “unlock” each cost level of teammate. For example, a pair of numbers such as “4” and “15” means that the player must have at least 15 Reputation Points to unlock cost 4 teammates. Maps:The set of maps used in this mission. The name of each map section must match a bsp file located in czero maps, cstrike maps, or valve maps. See the “Defining a Location (Maps)” section for more information. Defining a Location (Map) Maps are organized as “triplets”, or sets of three maps. The first, second, and third maps form the first Tour of Duty, the fourth, fifth, and sixth are the second Tour of Duty, and so on. All three maps in a Tour of Duty must be won in order to unlock the next Tour of Duty. “map name” { “bots”“<list of enemy bot names>” “minEnemies”“<count>” “threshold”“<value>” “tasks”“<list of tasks>” “FriendlyFire”“0” or “1” “commands”“<console command string>”} “map name” The filename of the bsp to load for this location without the .bsp extension. For example, “de_dust_cz”. “bots” This field is followed by a string containing a list of enemy bot names for this map. Bots are added from left to right, in order. For example, the list “Joe Fred Alex Barney” would look up “Joe” in the missions bot database and add a bot with those parameters first, followed by “Fred”, “Alex”, and “Barney” up to the desired number of enemies for that location. “minEnemies” This value defines the minimum number of enemies the player will face on this map. “threshold” This number defines the Reputation Point value above which one enemy is added for every additional Reputation Point until we run out of bots on the “bots” line. “tasks” This field defines a list of tasks/challenges the player must complete to win this map. Each task, and that task’s parameters, must be enclosed within single quotes within the overall string. For example: "tasks" " 'kill 7' 'kill 2 survive' 'winfast 60' " For a full list of tasks, see the Task Reference section. “FriendlyFire” If this is set to zero, friends cannot be hurt by each others weapons. If “FriendlyFire” is “1”, friends can hurt each other. “commands” The “<console command string>” is sent to the console when the map is loaded. This can be used to change system parameters just as if the user had entered the string in the console. Note that certain commands (ie: mp_startmoney) don’t function, as they are reset by the system after these commands have been given. Task Reference For each task listed below, required parameters are enclosed in < >, and optional parameters are enclosed in [ ]. Multiple optional parameters are separated by a vertical bar. The optional parameter “survive” means the player must complete the task in a single round without being killed. The optional parameter “inarow” means the player must complete the task over potentially several rounds without dying. General Tasksinjure <N> [survive | inarow] The player must injure at least <N> enemies. injurewith <N> <weapon> [survive | inarow] The player must injure at least <N> enemies using the weapon or weapon class <weapon>. kill <N> [survive | inarow] The player must kill <N> enemies. killwith <N> <weapon> [survive | inarow] The player must kill <N> enemies with the weapon or weapon class <weapon>. killall The player’s team must win at least one round by eliminating everyone on the enemy team. killblind <N> [survive | inarow] The player must kill <N> flashbang-blinded enemies. headshot <N> [survive | inarow] The player must kill <N> enemies with headshots. headshotwith <N> <weapon> [survive | inarow] The player must kill <N> enemies with headshots using the weapon or weapon class <weapon> winfast <S> [survive] The player’s team must win a round in less than <S> seconds. Bomb Defuse Scenario Tasksplant <N> [survive | inarow] The player must plant the bomb <N> times. defuse <N> [survive | inarow] The player must defuse the bomb in <N> separate rounds. preventdefuse <N> [survive | inarow] The player must prevent any defuse attempts in each of <N> rounds. The task fails if the bomb is not planted or a CT starts to defuse. killdefuser <N> [survive | inarow] The player must kill a CT in the act of defusing a planted bomb <N> times. Hostage Rescue Scenario Tasksrescue <N> [survive | inarow] The player must rescue at least <N> hostages. rescueall The player must rescue all of the hostages in a single round. stoprescue <N> [survive | inarow] The player must kill a CTs who is escorting hostages back to a Rescue Zone <N> times. defendhostages <N> No hostage may be rescued during each of <N> rounds. Hostages may die, but they can't be rescued. hostagessurvive <N> All hostages must be living at the end of each of <N> rounds. No hostage can die, but they can be rescued. VIP Scenario Taskskillvip <N> [survive | inarow] The player must kill the VIP <N> times. Weapon and Weapon Class namesThe names listed here are for use in the <weapon> parameter of tasks that require it. pistol = Any pistol glock = 9x19mm Sidearm usp = KM .45 Tactical p228 = 228 Compact deagle = Night Hawk .50c fn57 = ES Five-Seven elites = .40 Dual Elites shotgun = Any shotgun m3 = Leone 12 Gauge Super xm1014 = Leone YG1265 Auto Shotgun SMG = Any submachine gun tmp = Schmidt Machine Pistol mac10 = Ingram Mac-10 mp5 = KM Sub-Machine Gun ump45 = KM UMP45 p90 = ES C90 rifle = Any non-sniper rifle galil = IDF Defender famas = Clarion 5.56 m4a1 = Maverick M4A1 Carbine ak47 = CV-47 aug = Bullpup sg552 = Krieg 552 sniper = Any sniper rifle scout = Schmidt Scout sg550 = Krieg 550 Commando g3sg1 = D3/AU-1 awp = Magnum Sniper Rifle machinegun = Any machine gun m249 = M249 shield = The Tactical Shield knife = The Knife grenade = The HE Grenade Defining Preview Images for a Location Each location requires two “thumbnail” images for display in the interface. The first one is the small square image used for the location’s button within its Tour of Duty. The second is the large preview image displayed when a location has been clicked on by the player. The small button image must be a Targa image (.tga) that is 128 pixels wide and 128 pixels tall, with a filename identical to the map’s bsp file (except, of course, for the .tga extension). Place this image in the folder: czero gfx thumbnails maps The preview image must be a Targa image that is 256 pixels wide by 110 pixels tall, again with a filename identical to the map (with a .tga extension). Place this image in the folder: czero gfx thumbnails maps_wide. Note that Steam users may have to create these folders if they do not exist. For example, if the map de_mymap_cz.bsp was used in a mission, the following two images would need to be present: czero gfx thumbnails maps de_mymap_cz.tga czero gfx thumbnails maps_wide de_mymap_cz.tga Defining Bot Personalities Defining a bot personality consists of specifying values for a bot’s various attributes and labeling the values with a name, such as “Fred”. These attributes influence and control different aspects of a bot’s behavior, such as how observant they are, or how well they can aim their weapons. While fairly straightforward, a bot personality database does contain a lot of data. It is strongly recommended that interested players refer to the BotCampaignProfile.db and BotProfile.db files which contain the bot personalities for the retail game. Data within a bot database is always contained within a data block which has the following form: <data block type> [<data block name>] <attribute> = <value> <attribute> = <value> … <attribute> = <value> End <data block type> can be: Default This data block defines default values for all attributes. Skin <skin name> This data block defines a “skin” (player model) for later use. It can contain a single attribute of “Model” which should be set to the name of the .mdl file without its extension. The example below defines a skin for czero models player arctic.mdl: Skin TerroristSniperSkin Model = arctic End Template <template name> Templates define values for a related set of attributes. Templates are then used by specific bot data blocks to “inherit” data values. See the Data Inheritance section for more information. <template name>[+<template name> …] <bot name> Defining a data block via the use of one or more template names creates a bot definition. The values the bot’s attributes receive are “inherited” by starting with the values in the Default data block, and then overwriting any attribute values found in the template blocks listed, evaluated from left to right. Attribute Reference Name Value: A string. If the name contains spaces, surround it with quotes (ie: “Cliffe”) Description: The bot’s name. Skill Range: 0 to 100 Description: Defines the overall “skill” of the bot. Low skill bots have terrible aim and don’t look around very much, whereas high skill bots can have extremely good aim, try to check as many corners and hiding spots as they can, and know subtle things like using the knife to run faster, switching to the pistol when out of ammo, and so on. Aggression Range: 0 to 100 Description: Determines how aggressively a bot behaves. High aggression bots pay less attention to “danger” (ie: where teammates have died previously), are more likely to rush, and less likely to retreat. Low aggression bots are just the opposite. ReactionTime Range: 0.2 to 0.5 seconds Description: Determines the reaction time of a bot. A bot’s “reaction time” is the delay between when a visual or audio event occurs and the bot becomes “aware” of it, and can begin to act upon it. This simulates the time it takes a human to process incoming stimuli and become “conscious” of it. AttackDelay Range: Seconds of time before bot will open fire after acquiring a victim Description: After a bot has become aware of an enemy, this duration must also elapse before it will begin firing upon its victim. This attribute is primarily used for easy bots, allowing novice players additional time to react and aim their weapon before the bot opens fire. Teamwork Range: 0 to 100 Description: Defines how cooperative and “team oriented” the bot is. High teamwork bots are more likely to obey radio commands and stay with their teammates. Low teamwork bots tend to “go rogue” and do their own thing. WeaponPreference Value: “none” or a buy alias such as “m4a1” Description: Defines the bot’s weapon preference. A bot can have many WeaponPreference definitions in a row, specifying a prioritized list (earlier ones are favorite over later ones) of weapons the bot will try to buy or pick up from the ground. A preference of “none” will cause the bot to buy a random weapon. Difficulty Value: EASY | NORMAL | HARD | EXPERT Description: Defines the difficulty categories where this bot is used. Note that these flags can be combined, such as “NORMAL + HARD”, meaning the bot can be used on either the Normal or Hard difficulty setting. VoicePitch Value: 85 to 120 (100 is unshifted) Description: Defines the pitch shift value this bot will use for its “chatter”. Lower values create lower pitched voices. Skin Value: 0-4 or <skin name> Description: Defines which “skin” to select when the bot joins the game. Values 1 through 4 map to the associated skins on the player menu in game. A value of 0 selects a skin at random. If a <skin name> is given, the skin must have been previously defined using a Skin data block. Skin data blocks can refer to custom skins other than the default CZ skins. Custom skins should be placed in czero models player <skin name> <skin name>.mdl. Data Inheritance in the Bot Database File Defining a bot personality involves specifying a dozen or more parameters. If you want to create several bots, this means defining quite a lot of data. To help organize and modularize this bot personality data, the Bot Database makes use of a very simple data “inheritance” mechanism. Here is an example of how the inheritance mechanism works: Default Color = Grey Shape = Circle Size = Medium Weight = Average Material = Wood End Template RedSquare Color = Red Shape = Square End RedSquare MyRedSquare Size = Small End The “Default” entry defines initial values of all attributes, in this case “Color”, “Shape”, “Size”, “Weight”, and “Material”. The next entry is a “Template”, which defines a data type named “RedSquare” that sets the attributes “Color” and “Shape” to “Red” and “Square”, respectively. Finally, the last entry actually instantiates an object of type “RedSquare” called “MyRedSquare” which sets “Size” to “Small”. The resulting values for “MyRedSquare” are: Color = Red Shape = Square Size = Small Weight = Average Material = Wood “Weight” and “Material” remain at their default of “Average” and “Wood”, since neither “RedSquare” or “MyRedSquare” changed them. The bot database allows for a crude form of “multiple inheritance” as well: Default Color = Grey Shape = Circle Size = Medium Weight = Average Material = Wood End Template RedSquare Color = Red Shape = Square End Template BigAndHeavy Size = Large Weight = Heavy End RedSquare+BigAndHeavy MyBigRedSquare Material = Iron End In this example, a new entry has been added called “BigAndHeavy” which sets the attributes “Size” and “Weight” to “Large” and “Heavy”. Notice that the instance of “MyBigRedSquare” now lists both “RedSquare” and “BigAndHeavy” as its type, combined with the addition symbol “+”. The final values of “MyBigRedSquare” are: Color = Red Shape = Square Size = Large Weight = Heavy Material = Iron “Color” and “Shape” were inherited from “RedSquare”, “Size” and “Weight” from “BigAndHeavy”, and “Material” was set directly by the definition of “MyBigRedSquare”. Any number of basic types can be “added” together in this way. With multiple inheritance, data is copied to the object in a left to right order. If both “RedSquare” and “BigAndHeavy” had values for the same attribute, the final value would match the one in “BigAndHeavy” since it came after “RedSquare”. How is this actually used with bot data? It is very useful to break bot attributes into “weapon preferences” and “difficulty levels”. For example, here are some example templates for difficulty levels: Template Expert Skill = 90 Aggression = 90 ReactionTime = 0.2 Difficulty = EXPERT End Template Hard Skill = 75 Aggression = 75 ReactionTime = 0.25 Difficulty = HARD End Template Normal Skill = 50 Aggression = 50 ReactionTime = 0.4 AttackDelay = 0.7 Difficulty = NORMAL End Template Easy Skill = 0 Aggression = 20 ReactionTime = 0.5 AttackDelay = 1.5 Difficulty = EASY End … and here are some templates defining weapon preferences: Template Rifle WeaponPreference = m4a1 WeaponPreference = ak47 WeaponPreference = famas WeaponPreference = galil WeaponPreference = mp5 End Template Sniper WeaponPreference = awp WeaponPreference = sg550 WeaponPreference = g3sg1 WeaponPreference = scout WeaponPreference = famas WeaponPreference = galil WeaponPreference = mp5 End Template Shotgun WeaponPreference = xm1014 WeaponPreference = m3 WeaponPreference = famas WeaponPreference = galil WeaponPreference = mp5 End Template Shield WeaponPreference = shield WeaponPreference = m4a1 // in case shield is disallowed WeaponPreference = ak47 WeaponPreference = famas WeaponPreference = galil WeaponPreference = mp5 End Template Spray WeaponPreference = p90 WeaponPreference = tmp WeaponPreference = mac10 WeaponPreference = mp5 End These templates allow the easy creation of a bot named “John” who likes to use rifles and is a pretty hard opponent: Hard+Rifle John Skin = 3 VoicePitch = 97 End Creating a bot named “Fred” who also likes rifles, but is a complete newbie, is just as simple: Easy+Rifle Fred Skin = 2 VoicePitch = 110 End By mixing and matching templates, a large number of bots can be created quickly. This arrangement also facilitates “tuning” bot behaviors - if “hard” bots are too hard, the values can be changed in just one place (the “Hard” template), and all hard bots will be updated as a result. Modularizing bot personality data in this way keeps a large amount of data organized and manageable. Distributing Mission Packs The simplest way to distribute your Mission Pack is to zip up all of your custom assets (maps, user interface graphics, player models, your mission pack folder, and so on) into a single zip file, retaining the required folder structure. This zip file can then be shared with other CZ players, who can unzip the file in their main game folder, start the game, and select your mission from the dropdown menu. For example, MyMission.zip could contain the following: czero MissionPacks MyMission Overview.vdf czero MissionPacks MyMission Thumbnail.tga czero MissionPacks MyMission Easy.vdf czero MissionPacks MyMission Normal.vdf czero MissionPacks MyMission Hard.vdf czero MissionPacks MyMission Expert.vdf czero MissionPacks MyMission BotProfile.db czero gfx thumbnails maps cs_newmap_cz1.tga czero gfx thumbnails maps_wide cs_newmap_cz1.tga czero gfx thumbnails maps cs_newmap_cz2.tga czero gfx thumbnails maps_wide cs_newmap_cz2.tga czero gfx thumbnails maps cs_newmap_cz2.tga czero gfx thumbnails maps_wide cs_newmap_cz2.tga czero maps cs_newmap1_cz.bsp czero maps cs_newmap1_cz.txt czero maps cs_newmap1_cz_detail.txt czero maps cs_newmap2_cz.bsp czero maps cs_newmap2_cz.txt czero maps cs_newmap2_cz_detail.txt czero maps cs_newmap3_cz.bsp czero maps cs_newmap3_cz.txt czero maps cs_newmap3_cz_detail.txt czero newmap.wad czero sound kaboom.wav czero sound crunch.wav Authors Original guide - Valve Corporation Publish - Fa11enLord © 2004 Valve Corporation. Counter-Strike: Condition Zero and Valve are trademarks or registered trademarks of Valve Corporation.
《反恐精英:零点行动》自定义任务系统

2026-02-19 22:00:27

导读
本文介绍《反恐精英:零点行动》的自定义任务系统,该系统支持用户创建包含新地图、挑战、bot设定等内容的任务包,还详细说明了任务包的文件夹结构、各类配置文件的作用、地图任务定义、bot个性设置以及任务包的分发方式。
评论
共0条评论

反恐精英:零点行动 自定义任务系统
Система пользовательских кампаний позволяет пользователям создавать собственные …
2026-02-19 07:000赞 · 0评论

动漫 穿越斗破,你成为萧炎的堂哥,本想一路躺平,等待萧炎突破斗帝之后,利用血脉之力成为斗圣,没想到,突然天降系统。 系统可以自己设置任务。
穿越到斗破苍穹当中,成为萧炎的堂哥。 本想一路躺平,等待萧炎突破斗帝之后,利用血脉之力成为斗圣。 没想到,突然天降系统。 系统可以自己设置任务。 于是,从此开始…
2025-11-18 19:290赞 · 0评论
Ricochet的原始WON菜单
一个由我为《反恐精英:零点行动》特别重现的WON(世界对手网络)时代原版菜单,采用了相同的字体、颜色和几乎相同的效果。 简介 众所周知,Valve去年为纪念《半…
2026-03-21 13:000赞 · 0评论
如何为《反恐精英:零点行动》下载新任务
介绍。
2026-02-18 16:000赞 · 0评论
《反恐精英:零点行动》100%攻略
《反恐精英:零点行动》完整攻略。游戏围绕一支精锐反恐特勤小队展开,他们执行一系列任务以打击全球各地的恐怖威胁。任务发生在多种地点,包括炼油厂、军事基地和地铁站,…
2026-02-14 07:000赞 · 0评论
半条命 《反恐精英:零点行动》剧情战役通关流程(页sir汉化补丁)
《反恐精英:零点行动》Counter-Strike:Condition Zero共有两个版本,一是正常对战版本,另一个是Deleted Scenes单人剧情战役…
2025-11-04 14:010赞 · 0评论
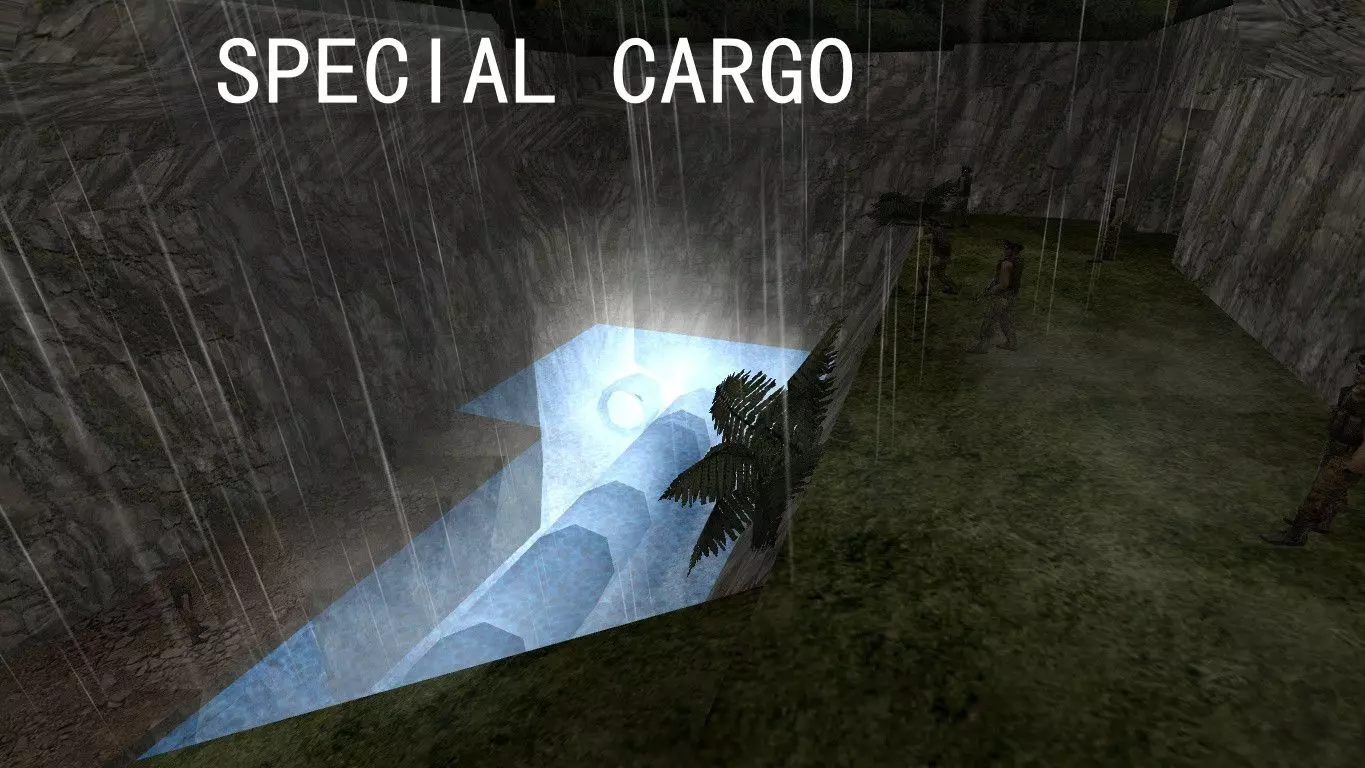
CS 《反恐精英:零点行动》单人剧情模式——“特殊货轮/Special Cargo”关卡流程
本关为社区自制地图,地址:https://gamebanana.com/mods/147401 难度评价7/10,机枪数量不少还容易被火箭伏击一发带走 另外本关…
2026-05-06 06:320赞 · 0评论
如何与好友组队游玩任务
大家好!我想和大家聊聊与一位或几位朋友合作游玩“职责”模式的可能性。你可能已经注意到,也可能玩过单人模式下的人机对战,在该模式中你需要完成各种任务(比如爆头击杀…
2026-02-19 04:000赞 · 0评论
配置机器人使用不同语音
如何编辑BotProfiles以获得不同语音 《反恐精英:零点行动》机器人(混合难度与语音) 对《反恐精英:零点行动》机器人进行一些额外配置 本指南提供的配置会…
2026-02-18 16:000赞 · 0评论
2021年值得购买并游玩《反恐精英:零点行动》吗?
本指南适用于想在2021年购买并游玩《反恐精英:零点行动》的玩家。2021年购买并游玩《反恐精英:零点行动》值得吗?虽然这款游戏的玩家数量不多,但仍有很多巴西玩…
2026-02-18 10:000赞 · 0评论
暂无更多
最新更新
- 如何更改机器人的能力 — 本指南介绍如何将团队中的新手BOT转变为真正的老手。 步骤1 打开“CZERO”文件夹
- 合作模式补丁 + YaPB机器人 — 《反恐精英:零点行动》合作模式补丁 + YaPB机器人支持
- 反恐精英:零点行动 - 简单和普通难度勋章 — 欢迎来到这份休闲玩家指南! 在《反恐精英:零点行动》中,你总共可以获得四枚勋章,对应四个难度等级。本指南将聚焦于简单和普通难度的勋章——这两个都很容易完成。 我…
- 《反恐精英:零点行动》机器人指令与导航网格编辑...权威指南 — 本指南详细介绍了《反恐精英:零点行动》中所有游戏内AI机器人控制台命令和变量,以及所有AI机器人导航网格编辑控制台命令。 机器人命令与队伍平衡 机器人命令 bo…
- 本指南将介绍武器/玩家皮肤及其安装方法。 — 对于想要安装一些自定义皮肤的玩家,本指南会有所帮助。它介绍了武器/玩家皮肤以及安装方法。 武器皮肤/模型
- 《反恐精英:零点行动》自定义任务系统 — The Custom Mission System allows users to create their own Missions for use with…
- 如何避免友军火力误伤 — 本指南将教你如何避免友军伤害。 简介 本指南仅适用于《反恐精英:零点行动》(CZ)的默认机器人(电脑玩家)模式。 CZ不应用于《反恐精英1.6》前的练习,因为这…
- 《反恐精英:零点行动》俄语化(由Фаргус制作) — 由法格斯制作的文本本地化补丁。 说明 本本地化补丁包含《反恐精英》《反恐精英:零点行动》及《反恐精英:零点行动 deleted scenes》的文本翻译。 《零…
- 合作模式补丁 + YaPB 机器人 — 《反恐精英:零点行动》合作通关模式补丁(支持YaPB机器人) 反恐精英:零点行动·合作游戏补丁+YaPB机器人
- FlashDeck 动画 机器人档案 — 所有看过FlashDeck Animations的人,都会知道这是什么。BOT配置文件(需复制粘贴) 困难+狙击手 蹲点型 武器偏好 = AWP 皮肤 = 1 …