换一换
换一换 


This is a fully text-based guide for Quern – Undying Thoughts. It includes a guide that will take you from the start of the game to the end, and also point out where all the Achievements are. Introduction Hi all! So after buying, playing and completing Quern, I decided that it needed a proper full guide on steam. I mean, sure there are a couple of video guides, but personally I find those annoying. I’m old-school and I like text-based guides as they’re easier to deal with. Anyway, as the description for this guide says, this is a fully text-based guide for Quern that will take you right from the beginning of the game all the way to the climactic ending. And I also threw in the Achievements too for good measure, as most of them are relatively easy to get. Enjoy! Oymon General Tips If you’re looking for some advice to help you with the game, but still want to not see the full guide, here are a few tips that might help. - Throughout the game you’ll find a whole bunch of Letters scattered around. They will fill you in on the backstory of the previous inhabitant of the island, as well as offering clues to some of the puzzles that you might encounter. - Pressing the Alt button will make any items or objects that you can interact with glow, which can be very useful for spotting something that you might have missed. Also, if you don’t want to mess around with the Alt key all the time, you can turn this effect on permanently in the Options. - The game has a Map, so I suggest that you use it! All the important areas in the game are labelled, and I’ll be referring to those areas as such in the guide. So if you’re lost and aren’t sure where somewhere is, have a look at the map and it’s sure to jog your memory. - Shortly into the game you’ll get a Notebook in which you can draw Pictures and add Notes. USE IT! I can’t stress enough how useful it can be to not have to run back-and-forth trying to keep information in your head. You could also have a piece of paper and pen on hand in case you want to write stuff down too, which is also an option. - When you go into the Inventory screen, you can often view hints about the items. While these are rather vague, they can sometimes clue you into what you might need to do with the item in question. And there’s no penalty for using them, so Hint away! This is more-or-less the default option when you’re stuck. Part 1 - Welcome To Quern You awake to the sight of a glowing green portal shortly before it closes. Once you’ve picked yourself off the ground, have a look around and take a moment to familiarise yourself with the controls. When you’re ready, look for the small table nearby. There should be a glowing arrow pointing at a letter on the table, which you should read. ‘Welcome. Although I bear responsibility for trapping you in this world, I have no intention of harming you in any way. As a matter of fact, you should consider yourself lucky for I wish to share all my knowledge with you. I will grant you the opportunity to study all of my discoveries and examine my wondrous creations. Eventually, I will require your assistance in an essential matter. You must cooperate with me for you have no reason or chance to resist.’ Well, that’s slightly ominous. Under all the text you’ll find a strange little image, but we’ll get to that shortly. The glowing arrow will them move to the strange object to your left, so pick it up to obtain the Quarter Stone. This is clearly the missing piece from the nearby door, but it doesn’t seem to want to fit. Go into your Inventory with the Q button and then mess around with the Quarter Stone in here by spinning it around to look at its back. Here you’ll see three triangular pegs sticking out that you can rotate by clicking on them. Assuming that the square corner is in the top-right of the object: Press the top-left one seven times, press the top-right one twice and the bottom-right one twice as well. Once you’ve done this, click on the space in the door and the item will fit into place and the door with open! Head on through and you’ll be primed about the Map. This is an essential tool for navigating around the island and I’ll be referring to areas of the game by the names on that map, so pay attention to it. For example, we’re currently in the Main Square which will act as the hub of the whole island. From here, we begin our great voyage! Head right, past the first small set of steps, and then walk up the second one. Follow the platform through the doorway to reach the Hanging Platform. Just around the corner you’ll see a raised bridge with a nearby lever, so pull the lever to lower this half of the bridge, but we’ll have to wait a while before we get to the next half. Further on you’ll find another Letter. ‘When I set foot in this island, I was an enthusiastic archaeologist in search of the remains of an ancient civilisation, the Dulmar. In manuscripts they refer to this place as the forbidden world, they called it gwan Quer’nelok. To simplify it, by the right of the explorer I gave this island a new name, Quern. I soon realised that this world means much more than an archaeological site and my interests expanded. To make you understand the extraordinary nature of this island, and to clarify my deeds for you, I left a series of letters around the island.’ You might also note a second similar image on this letter too, and we’ll get to that shortly. Next to the Letter is the Orange Torch, and this little beauty is gonna be coming with us for the long haul! Head back to the Main Square and go up the small set of steps just to your left that you walked past earlier. Now, if you were paying attention to the two letters you’ve read you’ll have noticed that the two little pictures on there look very similar to the device on the door up here. The device itself is simple enough to use; the sliders on the right side can be moved left or right to the one of the five circles, and the button in the middle moves whatever circle you have selected clockwise by one segment. So you just have to match up the missing part with the two images from the letters. To do so, move the inner circles twice, the next one seven times, the next one once, the next one three times, and then the outer-most one four times. Once that is done, the door will swing open. Inside you will find a bunch of stuff scattered around, including a few drawing that give you very subtle clues about something we’ll be doing later. But the main thing to focus on will be the large chest, that you should totally open up and have a mooch around inside to find the Hexagonal Crank. (Anyone else having a Resident Evil flashback?) With the crank now in our possession, leave the little room and go to the opposite side of the huge tower in the middle of the Main Square. Go up the small set of stone steps and to your left will be a small table, on which you can find the Powdered Pine Cones. We won’t be using them until later, but might as well pick them up now. Turn around from the table and look at the tall wooden device outside the nearby building. One the far side there’s a cage full of bricks, and you can insert the Hexagonal Crank on the side which will allow you to tip it onto its side. Move up the nearby steps to get a better vantage point and you’ll see that you can manipulate the brinks inside. Your task is to move the dark-coloured brink from the bottom-left to the top-right corner of the cage. This is complex and can take a lot of movements, so here’s them in hopefully easy-to-read parts: - Start by moving the three small blocks above the black block to the right side of the cage, and then move the black block up. - Slide the movable small block across one space, then the other small block down to the space it was just in, allowing you to move the black block across to the right and then the small block from the top all the way down to the bottom. - Slide the black block left, then a small block up, and then the small block under the tall block across, allowing you to bring the tall block down. - Move the long block across to the left, and then bring two small blocks up next to it on the top row. - Move the tall block left, then bring the two small blocks above it down on the right. - Move the long block across to the right, and then move the black block up. - Move a small block to the right, move the tall block across, then move the other small block down. - This will then allow you to move the long block down and finally move the black block to the top-right corner. PHEW! With the black block now in the right place, spin the Hexagonal Crank again and then down below you can slide the black block out of the cage. This will open up the entrance to the nearby building, allowing entrance to the Crystal Lab, so head on inside. Achievement Unlocked! First Phase Enter the Professor’s Crystal Lab Part 2 - Following In His Footsteps Things start getting interesting now... Optional Achievement I’m Blue Open the lower part of the Crystal Lab without using blue light You usually only get it by activating a nearby source of blue light, but to complete the achievement you need to enter the right buttons without doing so. As such, if you want the achievement now, just press the following buttons, assuming column 1 is on the left, and row 1 is at the top: - First: Column 5, Row 4 - Second: Column 1, Row 3 - Third: Column 4, Row 5 - Fourth: Column 3, Row 4 - Fifth: Column 5, Row 2 If you make a save beforehand, and then reload it, you can continue the game as normal after getting this achievement. Right in front of you as Letter. ‘I prepared for your arrival for decades, the only thing you need to do is to climb the stairs I have built. This is the place where my journey began, where I became truly aware of the unbelievable power this island possesses. I was rather curious back then, so eager to discover and learn. My mind was so clear and naïve. I miss those times. Your journey must also begin here. I need you to inspect my studies and understand the basic utilities of these crystals. I’ve put an empty notebook right next to this letter. Feel free to take notes and draw sketches for you. Right next to the letter, as it said, is the Notebook that you should pick up. Once you have it, pressing P will take an image of whatever you’re looking at, which is useful for future reference. You can also add text to images so you can easily keep track of whatever information you need. Optional Achievement The brightest of all scholars Draw at least 19 sketches in your notebook This one is very easy, just tap P a bunch of time to get it outright, or you can just naturally gather them over the course of playing the game. 19 isn’t all that many really. To your right will be a grid of square buttons with symbols all over them. We can’t use this yet, so instead go to the other side of the large crystal in front of you to find a book where you can read about the Legend of Quer’nelok. To the left of this is a small shelf area with a piece of paper with some symbols on it that we’ll use later and next to that is a small experiment that shows you how the light from an orange crystal can charge a blue crystal which in turn can reveal secret blue paint. Useful information. Even more to the left of this stuff is another experiment that we’ll be using later. But what we really need to do in here is the lever on the wall right next to the door we came in through. Pull it down and this unlocks two gates in the Main Square. Leave the Crystal Lab and head right around the corner and one of the now unlocked gates will be right in front of you. Open it up to reach the Watchtower. Head down the slope towards the building ahead and on your left you can see a small device against the wall. Pull the lever down and it’ll open the device up. Face the building and head to the right side to find a doorway inside to find another Letter. ‘Through my geological research I discovered that one of the island’s most common endemic minerals can be used as a weak but consistent energy source. To test out their limits, I started to construct simple mechanisms designed to harness the power of these natural energy crystals.’ Next to the letter is the Large Lens which you should pick up. Leave the room and walk up the nearby steps. At the top you’ll find a telescope that you can interact with and look around. Use the Orange Torch on the telescope and you’ll be able to project the light through the telescope. Move the light around so it’s pointing at the device that you opened up earlier and it will activate the device. Leave the telescope and Orange Torch where it is for now and go and check the newly opened pedestal at the device. Press the button and a light will light up. Now, go right along the wooden bridge and when you reach the new Southern Passage area you’ll see another pedestal on the right with another button to press. Once you’ve pressed it go back the way you just came, past the first button and up the slope to the door you went through earlier to find another button to press. Finally, go back down the slope and to the left and just as you get onto the wooden platforms look left at the wall to find one kinda hidden away. With all four buttons pressed something will have activated, but we’ll get to that later. For now continue along the wooden walkway, around the Southern Passage and past several dead ends to find the second door you unlocked earlier, and another way back to the Main Square. Turn around from this, go up the stairs and re-enter the Crystal Lab. On the other side of the room and to the left you’ll find a ring shape, in which you can insert the Large Lens. With that now in place, return to the Watchtower and use the Telescope again, this time pointing your orange light at the Lens you’ve just installed. Return to the Crystal Lab and you’ll see that the walls held invisible clues the whole time! To solve this puzzle, you have to use the paper on the counter next to the crystal light experiment in connection with the grid of symbols on the wall to work out which symbols on the grid of buttons to press and in what order. For example; the first symbol on the paper has four lines next to it, meaning that you find the symbol on the wall grid, and look at the 4th one along to find the correct button to press. Once you’ve matched up the symbols, you can enter them onto the button grid in the order they appear on the paper, top to bottom...or just follow the instructions below: - First: Column 5, Row 4 - Second: Column 1, Row 3 - Third: Column 4, Row 5 - Fourth: Column 3, Row 4 - Fifth: Column 5, Row 2 Once that’s done the stairs down will be revealed, allowing you two go down and find two important items. The first is the Uncharged Torch, and the second is that Glass Tank. With these two items in tow, leave the Crystal Lab and head to the Handing Platforms. There you’ll find a Hook and a Winch. Attach the Glass Tank to the hook, and then add in the Powdered Pine Cones from earlier. Spin the Winch to drop the Glass Tank, and then lift it back up to get the Electric Fish, thankfully safe inside the tank. Take your newly caught fish back to the Crystal Lab. On the left as you walk in, put the Electric Fish into the bowl here, and then place the Uncharged Torch in the stand to its right. With both the items in place, the fish will charge the crystal, allowing you to finally obtain the Blue Torch. Part 3 - Revealing The Unseen With the Blue Torch was can now start revealing hidden things that we missed before. Start by heading back to the Watchtower and up to the Telescope. Pick up the Orange Torch and stick the Blue Torch in its place and then look through it. Point the blue light you’re now protecting to the large rock to the south and it will reveal some symbols. Make a note of them, especially the one above. Does it look familiar? It should. Grab the Blue Torch off of the Telescope and head back to the sliding block puzzle just outside the Crystal Lab. With the Blue Torch equipped (selected using the Mouse Scroll Wheel) you’ll be able to see the same symbols on the blocks from the rock earlier. Obviously your goal is to get the symbols matching up. Flip the lever so you can manipulate the stones, but keep in mind that when standing on the platform above them you’re looking at it upside down, so you need to adjust you’re thinking accordingly. Here’s what you need to do: - Start by moving the tall block down and then the long block to the right. - Move the two blank blocks down one. - Move the % symbol across one and then up one. - Move the L+O symbol down one and then across one. - Move the tall block across. Doing so will reveal the Copper Key. Head back inside the Crystal Lab and down the stairs, using the Copper Key to unlock the door down here. Inside you’ll find a Letter. ‘It is time you learned the truth about this island. As you probably notice by now, this world has no day night cycle nor weather changes at all. In fact the whole concept of time has a different meaning in this place. For one who stays in this world, the relative time in other worlds appears static or fixed. This incredible powerful phenomenon also prevents the aging of living tissue. When I realised this, I was eager to find out what kind of eternal source gives Quern this extraordinary power, it made me forget the task I originally came here for. The archaeological exploration of the Dulmarian city has become irrelevant.’ Along with the letter there’s also a Pentagonal Plug sitting on the side, and if you open the book you can find the Three-Teeth Key. Leave the Crystal Lab and head back to the tower in the Main Square. The pedestal here has a slot for the Three-Teeth Key, but you have to manipulate it first. In your inventory, move the teeth so they form a T-shape, with the downwards part pointing at the handle. You can then fit it inside, and that’s one down and three to go! Turn to the left and you’ll see a stone door on the Northern side of the Main Square. You can fit the Pentagonal Plug in the door itself, and the Six-Button Panel in the slot next to it. With the Blue Torch equipped, you can see lines on the Six-Button Panel that show you how to press the buttons. Assuming that 1 is at the top and 6 the bottom, the order is: 4-3-2-1-2-3-4-5-4-3-4-5-6 Doing so will open the door, allowing access to the North Shore. Walk forward and on the anvil you’ll see another Letter. ‘This shore is special to me. The physical work I used to do here helped me calm my restless mind. Besides preventing the natural decline of organisms, the phenomenon also eliminates any need of nutrition. This means that despite the dry weather, the trees and buses around here could easily be millions of years old. As I realised that time is no longer an obstacle, I had the opportunity to learn and perfect all of my artisan skills. This is the very place where I became a craftsman. After mastering blacksmithing and carpentry I started to practise more advanced mechanical engineering.’ Near to the letter you’ll find a small device with a lever on it. You can pull the lever to the left and right, and depending on your choice it will either move up a step, or fall back down to the bottom. Obviously you need the lever to reach the top, so move it like so: Right, Left, Left, Right, Left, Left, Right The device will open up and you can get the Simple Key 1. With that you can turn around and head to the East (left), where you can find the Simple Key 2 just sitting on the table here. Go back the way you came, past the furnace and on the little jetty you can find a large chest with two padlocks, which you can unlock using your two Simple Keys. Inside the chest you’ll find the Simple Lever, as well as some Symbols that we can use to solve a nearby puzzle. Head back to where you got the second Simple Key and you can see the rather ominous skill with the beams of light coming out of its eyes. Where the light is going you can fit the Simple Lever into the wall, allowing you to activate the device. Using the levers next to the skull you can move the beams of light up and down the four circles across the way. You have to match up the points of light with the symbols from chest, also using the poster near to the anvil earlier and then pull down the lever. Assuming that the upper circles are 1, and the bottom ones are four, do the following: First: Left – 3, Right – 2 Second: Left – 3, Right – 1 Third: Left – 1, Right – 4 Last: Left – 1, Right – 2 Doing this correctly will allow you to get the Large Wind-Up Key, which you can promptly use on the nearby boat. Wind it up three times to go for a little ride. Achievement Unlocked! Shipwrecked Survive the boat ride Part 4 - Shipwrecked Once you arrive at the end of your trip, move up the stairs and through the door to reach the Crossing Island. To your left will be PEAR Clay Pot next to the little bench with the plants, and nearby on the device you can also find the HOURGLASS Clay Pot. Move across the bridge to reach the Alchemy Lab. First go right and along the path to find a locked door, but nearby you can find the PYRAMID Clay Pot. Go back to the main Alchemy Lab. There’s a lot of stuff in this room, but most of it was can’t use yet. You can however pick up the OVAL Clay Pot next to the closed cabinet, the THIN Clay Pot at the back near the curtain, the ROUND Clay Pot on the central table, as well as a Test-tube and a Letter. ‘I hope you enjoyed the ride. Unfortunately the boat was only designed to get you here. This is the place where I dived deeper into learning about the vegetation of the island. Through herbology and chemistry were far from my original expertise, by studying the experiments, recipes and manuscripts of the Dulmarians. At the time I thought the opportunity this place offered me was a blessing. I was a wandered back then, who always enjoyed being alone. I have never been a people person. Though I was undoubtedly on my own, sometimes I had the strange feeling that someone, or something was watching me.’ With all 6 Clay Pots in hand, we can now solve the next little puzzle. First, look up the wall above where you grabbed the THIN Clay Pot, and you’ll see a diagram that looks like music. This is the clue that you need to solve the puzzle. Head back to where you grabbed the first two Pots, and look at the device with the 5 little platforms. You have to place five of the six pots on the little platforms so that they replicate the music from the wall in the lab. Each pot makes a different sound, from highest to lowest: Thin, Pyramid, Hourglass, Pear, Round, Oval. So bearing in mind that the platform rotates in a clockwise direction, to replicate the sounds place the pots on the platforms like so: Pear, Pyramid, Oval, Thin, Round. Pull the lever and the music will play opening the door. And don’t worry about the Hourglass pot staying in your inventory, we’ll be using it much later on in the game for a secret. Head on inside to enter the Gardens. The plants are looking rather dead however, but we’ll fix that soon enough. To your right will be a closed cupboard that you can open to find the Plant Collector, and then follow the path to the left around the corner to find the Revival Scroll. If you check it in your inventory you can find the recipe to bring all the plants back to life. That’ll come in handy. Move back and go through the door that’s now on your left. In here you can find the Rusty Key and a Letter. ‘I often visited these gardens to relax and to admire the beauty of nature. The Dulmarians already separated and named all of the native herbs, I decided to keep their original names. You’re probably wondering why all of these plants are dry, considering the unique attributes of the island. The truth is, they cannot wither naturally here so I had to weaken them myself. It was necessary in order to force you to follow the path I’ve laid out for you. To be able to proceed, it is essential to find a way to revitalise these herbs. There is no reason to be worried. Just barely, but they are alive.’ You’ll likely notice the symbols on the bottom of the latter, and the grid behind them as being the one back in the Crystal Lab. Now that we have the Rusty Key, head back to the Alchemy Lab and down the little path to the right. You can use the Rusty Key to open the door here. Go forward and flipping the nearby lever will drop the second half of the bridge from much earlier in our little adventure, granting us access back to the main area of the island. Head back to the Crystal Lab now and back to the grid of symbols. So you can now enter the symbols from the last letter you read as follows: - First: Column 2, Row 1 - Second: Column 5, Row 1 - Third: Column 5, Row 5 - Fourth: Column 3, Row 3 - Fifth: Column 1, Row 4 This will activate a door on the other side of the room, so wander over and have a look. The trick with this puzzle is that you have to turn on all the lights, which is easier than it looks given that each button you press toggles that button and two buttons opposite. Assuming that the buttons are numbers from 1 to 8, with 1 at the top and going round in a clockwise order, the quickest way I’ve found to do it is as follows: 1, 6, 8, 5, 4, 8. Inside you’ll find the Red Crystal. And that’s it. Yep, all that effort, just for that. It is however a very useful little gem, so let’s start by taking it back to the Alchemy Lab. In there is a large caldron. Next to it is a small lever you can pull to move a small mount, in which you can then place the Red Crystal. It’ll set fire to the wood under the cauldron and drain all the icky stuff in it. This means we can now get working on making some stuff to brings the plants back to life. Pick the Red Crystal back up first though. In order to make the correct potion follow these instructions: - Turn around from the cauldron to look at the four large tanks on the wall. - Use the Test-tube on the pink one and fill it up, dumping the liquid into the cauldron. - Do that a second time too. - On the other side of the room is a shelf covered in colourful powders. - Here you can find a Wooden Spoon. - Pick up a spoonful of the Orange Powder and drop it into the cauldron. - Get a spoonful of the Red Powder and drop it into the cauldron. - Get a second spoonful of Red Powder and drop it into the cauldron. - Pick up a spoon of the Purple Powder and drop it into the cauldron. - Pick up a spoon of the Blue Powder and drop it into the cauldron. - Get a second spoonful of Blue Powder and drop it into the cauldron. - On the right of the cauldron is a handle you can use to pump the concoction into the jug. Pick up the Metal Jug, hopefully with the right stuff inside. If you added the wrong powder or liquid into the cauldron, turn the handle to the left of the cauldron to drain it and start again. If you got it right, head back to the Garden area. As you walk through the door you opened with the sound, on your right you’ll notice the device with the handle. Take the Metal Jug and pour your concoction into the grate there, and give the handle and spin. Doing so will, hopefully at least, revive all the plants in the Garden, as well as giving you an achievement. Achievement Unlocked! ...and don’t forget to water the plants! Revive the plants in the Gardens Part 5 - Alchemical Secrets Now that we’ve got the plants back to life, we can use them to create a special little concoction. Back in the Alchemy Lab you may have noticed a device to the right of the four large vats. Pressing it will squirt a liquid on the clear crystal dissolving it! We’re gonna need some of that stuff, but the nearby recipe says you need all four of the nearby liquids and one of them is missing. Fortunately we can access to a garden full of plants where we can brew some up! Head into the back room of the Garden, and if you equip the Blue Torch you’ll see that a series of recipes is written in a hidden table on the portrait in there. We know that the missing liquid is a word that looks a bit like ‘Taxs’, which is that third column on the table. The rows of the table correspond to the pictures of the plants on the other side of the room, so we can work out which plant is which and how much of each plant we need in order to get the ‘Taxs’ liquid. Near the pictures of the plants is a compressor device. In the little stand at the end of the device you can put the Test-tube to collect the stuff once we’ve made it. Using the Plant Collector from earlier you should grab the following plants and put them in the compressor: - One of the Large Blue Flower - One of the Large Flat Red Plant - Two of the Small Red Berries - One of the Wide Purple Flower - One of the Curly Bright Purple Plant Once all of them have been squeezed you’ll get a Test-tube full of a red liquid. Once you have it, make your way back to the Alchemy Lab and get ready to make some Crystal-melting liquid. Start by returning the Metal Jug to its place on the right of the cauldron. Also, as an extra note, if you don’t want to have to go through all that plant stuff to remake the ‘Taxs’ liquid again, might wanna make a SAVE here, just in case you make a mistake. Either way, do the following: - Start by dumping your red ‘Taxs’ liquid into the cauldren - Get some Aqua liquid next and put that in there too - Now put in TWO lots of the Green liquid in there - Then some of the Purple liquid after that - That’s all the liquids, so move onto the powders, picking up some Green powder and adding it to the mix - After that, add in a spoonful of Yellow powder - Finally add in TWO spoonfuls of the White-Grey powder - With all that done, pump the handle of the right of the cauldron Pick up the Metal Jug once again, and now return to the Watchtower on the other side of the island. In the room under the telescope there’s a large crystal that you can use the Metal Jug on to dissolve it. This allows you to get the Two-Teeth Key that was sealed inside it, but it also allows you to get access to the cupboard behind the crystal, inside of which you’ll find the Wooden Poles. With both items in tow, first head back to the Main Square and to the device in front of the large tower. You can insert the Two-Teeth Key into the bottom slot by manipulating the teeth in the right direction. Now head to the North Shore and walk forward, past the anvil, and you can put the Wooden Poles into the incomplete ladder here. Climb on up to reach the Northern Viewpoint. Follow the path a few steps and you’ll find the Gear Key in a bowl. Keep going and you can also find the Long Lever and a Letter. ‘After decades of hard work, experimenting and prototyping. I achieved a great progress in crystal engineering and it clearly because one of my many expertise. This was the time she first appeared to me. At that moment I realised that I was never really alone. The strange sense of being watched I used to feel was probably her. She introduced herself as the warden of this world. What a miserable lie it was. She had no right to claim such a title.’ How interesting. Head back down the ladder and walk your way around to the Hanging Platform. Head to where the hook is and there’s a small table there with a locked box on it. You can use the Gear Key on it. However rather than revealing some hidden item, the whole table will fold up and some stairs will rise up from the water, allowing you to go down. Here you can find the Rectangle Battery in a pile of scrap metal. You can also unlock the nearby door to get back into the Main Square. Back in the Main Square, to the left of the entrance to the North Shore is a house that’s been locked this whole time. We can now open it up by inserting the Long Lever into the device outside the door. Pull it and we can go inside to find a power generator. You may recognise the symbols on the generator from around the island. On the desk to the left is a Sand Bucket and a Letter. ‘She was convinced that if I stayed, I would soon reach a point upon which I would no longer be myself. I couldn’t understand her point. Although she tried to convince me to leave the island, I did not listen. I knew that the knowledge I gained could have changed my entire civilisation for the better. The gateway was fully operational at the time, but I didn’t know for sure whether I’d be able to find Quern again. It took me fourteen years to locate this world, I could not take the risk. I wasn’t ready to leave all my work behind. Not Yet. ’ Optional Achievement Find What is Hidden I. Find a secret near the Watchtower To find this secret, pick up the Circle Battery out of the machine. Head back to the Watchtower area and the door to the separate room will be closed. Have a close look at the symbol on the door to get the Achievement. Now that we have access to the generator, we can start powering up those locked doors around the island, assuming we can find enough batteries to power it that is. Thankfully we already have one, so stick the Rectangle Battery into the generator to power up two more symbols. Return to the Garden and you’ll see a two of the cupboards have opened up; one containing a Potion Maker, and the other with four different berries and Glass Chalice that you should pick up. Optional Achievement Taste Them All Taste all the berry juices This one is as simple as trying all the potions that the berries can make. Use the four plants in the unlocked cupboard and the two berries that are in the main series of flowers. Now with access to the berries and Potion Maker, there’s one potion in particular that we need. Use your Plant Collector to grab of the Red Berries from the main area. Put the Glass Chalice and the Red Berry into the Potion Maker and make yourself a Red Potion. But don’t drink it yet. Instead, go back to the room with the Generator and turn to the right. You’ll see a device with some dials on it, but more importantly some paper with red paint splashed over it. Drinking your Red potion here will reveal what the Red Paint is hiding, the numbers: ‘3719’. To input this into the nearby device you have to learn about the numerical system of this world, which is actually very similar to Tallying Marks, just flipped on its side. One horizontal mark means 1, two means 2, 5 is a vertical line, and 10 is two vertical lines. Get the ideas? From this, you can work out that: 3 = 3 Horizontal Lines 7 = 2 Horizontal Lines and 1 Vertical Line 1 = 1 Horizontal Line 9 = 4 Horizontal Lines and 1 Vertical Line Push the button and you’ll get the Hexagonal Battery, which you can stick straight into the Generator. Part 6 - We Are Not Alone Here... With two new areas open, first head over to the Crystal Lab and the cabinet at the back of the room on the right will be open now. Wander over and have a look and you’ll see a piece of paper with some symbols on it, and above that two buttons. As you might imagine you have to press the two buttons in the same way as on the picture, so it’s: up, up, down, up, up, down, down, up, down, up. Inside you’ll find the Hexagonal Stand. If you look at it in your inventory you can click the middle to expand the device to its full length. Now that you have that, head around to the eastern side of the South Passage and you’ll find the other area that’s been opened up; an area called The Cave. You can open the door here with the code from the cabinet before: up, down, down, down, up, down, up, up, down, down. On the table to your right is a Rusty Cogwheel and a Letter. ‘By now it must be obvious to you that I connected these marked doors and entrances to the main energy converter unit. Actually, this feature has nothing to do with the crystal battery machine’s main purpose at all. I have implemented this secondary function in order to direct you along the path and prevent you from spoiling my well structured course. When the converter is fully powered, meaning that all the batteries are in place, it supplied energy to the Mechanics. I can only hope that she will not interfere with our work. She is but a desperate echo of a fallen civilisation lingering here agelessly. It is clear that she is not worthy of the gift that has been given to her.’ Now onto solving a pretty tricky little puzzle. There’s a locked door nearby, with a circular series of buttons next to it. There’s 16 in total, and we have to press 8 in the correct order to open the gate. The nearby clues of the pictures near the table tell us how: The one of the left shows which buttons to press, and the one on the right shows the order in which you press them from lowest to highest. In order to solve the puzzle press the following buttons: - Inner Circle, Bottom-Right - Outer Circle, Right-Down - Outer Circle, Left-Up - Outer Circle, Bottom-Left - Outer Circle, Top-Left - Inner Circle, Right-Up - Outer Circle, Bottom-Right - Inner Circle, Top-Left Doing this correctly will cause the cave walls to move, but the metal grate will still block your entry. And the device with the buttons will then turn upside down! Now we need to enter the second code, but the paper has been burnt away, with a drawing of a telescope where it should be. Head back to the Watchtower and head up to the telescope. Place the Hexagonal Stand near the eyehole, and then place the Red Crystal on that to fire the red light through the telescope. Look around, and above the path to the Main Square you can see a red cloth with the wheel symbol on it. Touch the red light against it for a few seconds to set it on fire and burn it away, revealing the second set of symbols that you need to open the gate. However, we don’t want to go back there yet. As you may or may not have suspected, getting the battery out of that cave won’t be so easy, so we need to trick the system. We have a bucket that we can fill with sand that, if we could get to weigh the same, could easily substitute for the battery, so many we can Indiana Jones this thing! Of course to do this we first need a battery to measure it against, so pop back to the Main Square and the generator room and grab one of the batteries (doesn’t matter which) and bring it back to the Watchtower. Enter the room on the left side, and in here you can find a measuring device which is going to come in handy. Place the Battery on the large bowl on the right side, and the Sand Bucket under the device on the left. Using the Wooden Spoon, pour sand into the bucket of the scales until they match; it should be 4 spoonfuls. Now that you know the weight of the battery, you can add the same number to the device about the Sand Bucket. HOWEVER, you don’t want to put 4 spoonfuls in there, as the bucket itself counts for 1 spoonful, which you can see if you put the Sand Bucket on the scales. So, as the Sand Bucket counts for a spoonful, you only need to add in 3 spoonfuls of sand before letting it drop into the bucket. Once you’ve added all the sand, pick up the Sand Bucket and the Battery, and then return that Battery to the generator before returning yourself to The Cave. Using the symbol from the rock you got after burning away the cloth, combined with the numbers on the wall, you can easily work out the order of the buttons. However, after completing the last set of buttons, the whole thing turned upside-down, which means we need to flip that picture upside-down too. Doing this, means we now have to press the following buttons: (Note: To save confusion, these buttons are described as you see them and don't need to be turned upside down.) - Inner Circle, Right-Up - Outer Circle, Right-Down - Outer Circle, Right-Up - Inner Circle, Left-Up - Outer Circle, Left-Down - Inner Circle, Left-Down - Outer Circle, Top-Left - Outer Circle, Bottom-Left The gate will now slide open, allowing you to grab the Diamond Battery from the stand. As I said, the door will now close, trapping you inside, so drop the Sand Bucket in its place to open the door again. As you leave a strange glowing orb will show up and demand that you leave the island... Achievement Unlocked! Friend or Foe? Meet Gamana for the first time It would seem that we’ve finally met the ‘Her’ that was talked about in those letters. Not exactly a warm welcome. Either way, with our new battery in tow, head back to the Main Square and into the generator room to unlock the next two places. From the Main Square, head towards the Watchtower, but before going through the gate look on the left to see a newly opened passage to the Mines. Head on inside and follow the path and you’ll find a small table with ‘The Ancient Gateways’ book on it. To the right of this is a device we can mess with to get the nearby bridge to stay down. You can rotate the lever in the middle to one of the four positions on the main dial, and pull the smaller lever to set the device. Each of the four positions either Adds or Subtracts from the power meter of the device, with the Bottom and Left positions adding to the meter, and the Top and Right positions taking away. Obviously you have to get it to line up with the line on the meter, but you only have five moves in which to do it. So do as follows: - Move the central lever to the left, and pull the small lever twice - Move the central lever to the right, and pull the small lever twice - Move the central lever back to the left and pull the small lever one final time Now walk back up the path and on your right you’ll see a lever on the wall. Pull it to bring down the bridge and it’ll stay put. Cross over the bridge and you can flip a lever on the other side to make it stay put for good. On your left will be a Battery Base as well as a Letter. ‘This is the exact place where I achieved the breakthrough. After hundreds of failed attempts I finally managed to create a much more efficient energy source capable of providing relatively large amount of power constantly. This white luminous mineral is the compressed and purified version of the natural, locally common reddish orange coloured energy crystal. To be able to cast specific machine parts I developed to liquefy this new crystalline material. I thought that a discovery of this magnitude could change the subject of my whole research, even the meaning of my presence here. I was right!’ Behind you is a large device that we can’t use yet, however there’s two items on the table of the right that you need to get: the Battery Mould and the Battery Top. Part 7 - Getting An Upgrade With all those new items collected, we can now set about making the final battery for ourselves. The nearby door here can be opened, allowing you access to the South Passage. Optional Achievement Find What is Hidden II. Find a secret near the Mine Now that the door to the eastern entrance to the Mines is open, head to the generator and remove one of the batteries from the device. Head back to the eastern entrance, and the door you just unlocked, to see the secret symbol. Remember to put the Battery back too! Head back to the Alchemy Lab and have a look at the now open cupboard. Place the Battery Mould under the tank of crystal liquid and flip that handle. Once it’s full, pick the mould back up and head to the North Shore. Just on your left as you enter is a furnace. Open it up and you can stick the Battery Mould inside, and also put the Red Crystal only the little metal plate in there too. Pull the lever and let the mould cook. Once it’s done, pick the mould back up, and don’t forget the Red Crystal too. Now head back to the Mines area. In the area with that large device, head to the table where you picked up the Battery Mould in the first place. You’ll find a little device with a button. Place the Battery Mould in it and press the button to get the Battery Core. Return to the Main Square and head to the generator room. We now have the parts to make the final Battery. On your left as you walk into the generator room is a little device that can make it for us. First place down the Battery Base, then the Battery Core, and finally the Battery Top. Once they’re together you can pick up the final Oval Battery, which you can place in the generator to fully power it up! Return to the North Shore and climb up the ladder to the Northern Viewpoint, following the path around to the end and you’ll find a device that is now active. Time for another little puzzle. The central wheel will spin whichever circles are lit, and the button on the right will alternate which circles are being lit up, switching between four different options. First we need to get all the holes in the circles on to the right side. - Start by pressing the button three times, so that the inner and outer most circles are lit up - Spin the wheel twice - Press the button three times again, so that just one circle is it up - Spin the wheel five times - Press the button twice so that the inner and outer of the middle rings are lit up - Spin the wheel four times - Press the button just once now so the other two circles are lit - Finally spin the wheel twice With the light on the right side now lit, head back down the ladder and you can access the room here now, which is The Mechanics. In here, on the table in front of you, you can find Note with clues about a nearby puzzle, and a Letter. ‘You managed to get into the mechanics. Clearly you’ve completed all of my previous challenges. This could mean that you are a genius fulfilling of my expectations and you are truly worthy of all the further knowledge I am about to offer you. Or you could just as well be a fool, considering the fact that the power of Quern literally give you infinite time to guess the solutions of all my puzzles. One way or the other, I am sure your presence here is no mistake. Your participation in this matter is absolutely essential. If she were to appear to you, she would try to poison your mind with her misleading lies. You must ignore her just as I once did.’ To your right you will find a grid of holes, in which are inserted five pegs, numbered 1 to 5. We have to move them around so that the pegs meet the rules written on the Note near the latter. The pegs go as follows: - 1: Top row, Third column - 2: Second row, Third column - 3: Third row, Fourth column - 4: Third row, First column - 5: Fourth row, Second column With all five in their proper place, pull the lever and the nearby gear will slide into place. We’re done with this side of the room, so return back to the device on the Northern Viewpoint. The device should still have the outer most ring, and one of the inner ones lit up, so spin the handle four times. Press the button three times, and spin the handle another found times once again. This will allow you to access the other side of the room from the Main Square, near the entrance to the Hanging Platforms. Inside you’ll find a device on the left. Pressing the button at the bottom will cause it to play a sequence of lights and sounds that you have to remember and repeat back once it’s finished. First is only 3 light, third is 5, but the last one is 14! Optional Achievement William Says Solve the melody repeat puzzle on your first try This is the trickiest Achievement in the game, so be sure to make a SAVE before you start messing with the device so that if you screw up you can just reload and try again. There are several possible ways you can do this, ranging from tricky, to slight-less-tricky. First is to have a REALLY good memory. Sadly not everyone is blessed to be able to remember 14 buttons in a row, so you could try option number two, which is to set up a video to record the sequence. You can do this on a video capture program, or just use the camera on your phone. Whichever you find easiest. The third way is far more low-tech and requires a quick hand, as you can write down the sequence as it happens. Using lined paper will help. Whatever way you do it, completing the sequence will unlock the grate and allow you to open it and insert the Rusty Cogwheel. With the cogs on both sides now in place, return once again to the device at the Northern Viewpoint and now you can pull down the lever on the left. Watch as the whole Mechanics room changes, so go back down the ladder and head inside. Most of this room can’t be used yet, but on the left side of the long table is the Adjustable Key. Take this key back to the Mines area, for it’s finally time to deal with the large device here. Start by opening your inventory and looking at the Adjustable Key. You can mess with all four of the little dials on here to adjust the height of the four pegs. Assuming that the one by the handle is first, adjust them like so.: - First: turn three times - Second: leave alone - Third: turn once - Fourth: leave alone Inserting the key in the lone part of the device will cause the four pegs to rise at the same height and activate the main part of the larger device. Before messing with it, place the Orange Torch inside the little cage on the right-hand side and close the door. Now we have to manipulate the large device to get those orange bars into the third section at the amount indicated with the line. You do this by moving the handle at the bottom to where you want the energy to go, and pressing the button of where the energy should come from before pulling the lever on the right. It’s simpler than it sounds, just follow these instructions: - Move Tube 4 into Tube 3 - Move Tube 1 into Tube 3 - Move Tube 3 into Tube 4 - Move Tube 3 into Tube 2 - Move Tube 4 into Tube 3 - Move Tube 1 into Tube 3 The energy will drain from be device and begin powering up the Orange Torch. But we’re not done yet... - Move Tube 4 into Tube 3 - Move Tube 1 into Tube 3 - Move Tube 3 into Tube 4 - Move Tube 1 into Tube 2 - Move Tube 4 into Tube 2 - Move Tube 3 into Tube 1 - Move Tube 4 into Tube 3 The cage will start rattling, but there’s still one more set to solve... - Move Tube 4 into Tube 3 - Move Tube 1 into Tube 3 - Move Tube 3 into Tube 4 - Move Tube 4 into Tube 2 - Move Tube 2 into Tube 3 - Move Tube 4 into Tube 2 - Move Tube 2 into Tube 3 The door to the cage will get blown off with the energy contained within, and we’ll finally be able to get the White Torch. Achievement Unlocked! White is the New Orange Create a purified energy crystal Part 8 - Following The Light Run westwards along the South Passage and go to the gate into the Main Square, however rather than going through it, instead turn to the left down a short path and place your new White Torch in the holder there, opening up a new area to explore; the Swamp Isles. Follow the path ahead and for now go past the bridge on your left. Down here you’ll see a large button on the floor, which you can stand on top open a shortcut to the North Shore. Now go back to the bridge you’d walked past and check the two drawers just to the left. The bottom one holds the Remote Control, and the top one has a picture that’s a clue. Recognise the shape? Head back to the Watchtower and go up to the telescope, placing the White Torch in the holder and looking through. Move the white light back to the open device down near the path, the one you used the older version of the torch on. It’ll bring the device back up again, this time to a higher point, so you can go down and grab the Quarter Key 1. Grab the White Torch from the telescope and head back to The Mechanics, dropping it off in the holder on the wall. This will cause the 5 screens here to light up with seemingly random symbols. Only they’re not random, and if you look at the chalkboard on the wall you can see that they likely match, but are also likely not in the correct order. So, how to change them? Looking at the picture on the wall, you might recognise the drawing as one of the batteries from the generator back in the Main Square. Head over there and to work out which battery is which, you can pull it out of the machine and stick it in the device next to the door where you assembled the Oval Battery. Placing any one of the five batteries in there and pulling the lever down will show the correspond symbols in the Mechanics. So, you have to place the Batteries in the generator in the correct order to match up with the chalkboard in the Mechanics, from left to right like so: Diamond, Hexagonal, Circle, Rectangle, Oval. With all five Batteries in the correct order, return to the Mechanics and press the newly revealed button. Wander up the newly created staircase and in the room at the top you’ll find a Letter. ‘Those couple hundred years have passed quickly. I managed to master the use of all the natural resources including all kinds of metals and all the minerals this island had to offer. I felt like a god. Those where the golden ages of my presence here. At that point she tried to convince me again to lease. Naturally, I did not listen. She clearly could not understand the complexity and the importance of my work here. The great power I wish to acquire here could change the lives of thousands, if not millions of people.’ On one wall of the room you’ll see a handle with a blue crystal above it. Flash the Remote Control at the crystal to turn it white and then pull down the lever. The whole dome will rotate and a nearby device will reveal itself to be a projector. Head down and out the door to the North Shore now, and go right towards the chest that you opened earlier. Look up at the rock and you’ll see another blue crystal, which you can activate with the Remote Control. Go back to the projector at the Mechanics and using the four buttons at the open window, rotate the projector around to point at it. You may notice however that the symbol on the projector and the one on the wall don’t match. We can change this however by pulling on the white lever on the projector itself, revealing a bunch of lenses, each with various metal lines inside. Obviously we need to change the order and alignment of the lenses so that the symbols being projected matches the one on the rock. Assuming that the one of the left is number 1, do as follows: - 1: Leave up - 2: Leave up and rotate up three times - 3: Pull down - 4: Missing - 5: Leave up - 6: Missing Flip the while lever again to send the lenses back up to the projector and point the beam of light at the device on the rock. Return to the Swamp Islands now and the door on the other side of the bridge will be open. Gamana will make a brief appearance again and talk about how she couldn’t stop the previous inhabitant of the island from destroying what it once was, before once again flying off. On the other side of the bridge is a large green crystal in a device that you can rotate. Rotate it until it points at the round glass orb, and then rotate the pedestal with the orb on it to point at the green crystal on the other side of the broken robe bridge. They will line up and seemingly connect, so touch the hand symbol near the green crystal to literally teleport across the gap! Follow the path around and on the table at the end you can find the Quarter Key 2 and another Letter. ‘The opportunity I was given was meant to be shared among the worthy. My goal has become to readjust the gateway and to make this world more easily approachable. Although no one has ever been able to even scratch an ancient gateway before, using the purified power I discovered, I managed to disassemble it, and get access to its crystals. Doing so, I also shut down the gateway temporarily. I imprisoned myself in this world for the sake of science. I had to make this sacrifice. To form a testing field for this type of rare mineral, I had to demolish several Dulmarian buildings.’ Now, get ready for what is probably the most annoying puzzle in the game. It’s split into two halves. The device on the right side (near the table), controls which orbs you can control on the left-side panel, indicated by the lights being on or off. The buttons on the bottom of the device alternate set lights, and the lever on the right changes which lights the button changes. The panel on the left side has a lever that will activate/deactivate that panel, and once it’s active it rotates the position that the orbs face, and you need them to all point in the direction indicated on the picture on the table. But it will always change all of the active orbs. So, you need to change the active orbs so you can rotate them all to face the right way by hopping between the two panels. Go it? No? Just follow these instructions then: (Note: On the Right panel, I've numbered the buttons 1-4, going left to right.) - Right Panel: With the lever up, press the 4th button - Left Panel: Pull the lever, press the button three times, and then put the lever back - Right Panel: Pull the lever down, press the 4th button, pull the lever up and press the 2nd button - Left Panel: Pull the lever, press the button four times, and then put the lever back - Right Panel: With the lever up, push the 2nd button, and then the 1st button, then pull the lever down and press the 2nd button - Left Panel: Pull the lever, press the button five times, and then put the lever back - Right Panel: With the lever down, press the 1st button along, and then the 2nd button - Left Panel: Pull the lever, press the button five times, and then put the lever back - Right Panel: Pull the lever up, press the 4th button, then the 3rd button, then pull the lever down and press the 4th button - Left Panel: Pull the lever to activate all the orbs PHEW! (My brain hurts) With all the buttons on the left panel lit, and all the orbs pointing in the right direction and active, go back to the green crystal and pull the lever by the broken bridge. This raises the first orb you ran across, but all the orbs you were just messing with allow you to get back across, so touch the hand button to go for a ride. Part 9 - Getting To The Top Once you’re back, pull the new lever here to bring that first orb back down. Spin it around so that it’s pointing in the other direction, towards the green crystal on the upper platform, and then pull the lever to raise it back up. Rotate the large green crystal here to point up at the elevated orb and then press the hand symbol to get across. Up here you’ll see a cabinet with a light on it. Interact with it to open it up and reveal another puzzle where you have to rotate the pipes to guide the white line to the exit. It’s simple enough to solve, but if you need help: left two, down two, right two, up, right, down two, right, down, right, down, left two. The nearby engine will start up and the closed cabinet will open, allowing you to get the Green Crystal and the Missing Lens 1. Warp back down to the ground level and cross over the bridge, and then head all the way back to the Alchemy Lab. You can place the Green Crystal in the hexagonal stand next to the cauldron and then rotate it so that it points upwards. Warp up to the room above and up here you can find the Quarter Key 3 and a Letter. I want you to know what this journey I called you upon is more important that you or even me. The success or failure of your quest will profoundly affect the whole world. I can only hope you are worth all my efforts.’ You can also find a book with a familiar table in it, however it also seems to contain a new liquid. Off to the side you can see pictures that name the four berries that are in the separate cabinet. But most importantly, just to the left of the table is a metal tube. If you stick the Revival Scroll into it and press the button, the device will swap it out for the Weedkiller Scroll. As you can see, we’re going to need to brew up another concoction once again. This one is quite complicated, so we’ll start with the missing liquid first. Head back to the Garden area. In order to make the ‘Xaeu’ liquid, use the Plant Collector to dump the following plants into the compressor so it can put them into the Test-tube: - Two of the flat Orange plant in the small cabinet - One of the White bell-like flowers from the main garden area - One of the Purple berries from the small cabinet - One of the Aqua berries from the small cabinet - One of the round-ish Golden flowers from the main garden area With the orangey liquid in the Test-tube, take it back to the cauldron in the Alchemy Lab and dump it in. For the rest of the concoction: - Turn around and grab some of the Aqua liquid from the giant vats and pour it in the cauldron - Use the Wooden Spoon to get one spoonful of the Green powder from the side and stick it in the cauldron - Follow that up by sticking in Two spoonfuls of Black powder in there too The last one is tricky, as you have to run all the way back to the Watchtower and grab a spoonful of the Sand from in here. Lug it all the way back and dump it in the cauldron. Be sure that the Metal Jug is in place and pump the concoction into it. Make sure to grab the Green Crystal before you leave, and head back to the Watchtower. Use the Hexagonal Stand on the telescope and then place the Green Crystal on top of it. Then point the green light at the nearby mountain and look up to see a green crystal that you can link it up to, then touch the hand on the Green crystal to warp up there. You’ll find yourself at The Summit! Follow the path to find a table with a book that you can read at your pleasure, and a bit father on Gamana will show up and talk to you again about her history with the previous inhabitant. Once she flies off continue around the corner to see a blue crystal on the wall, which you can flash the Remote Control at to activate. With that pattern now visible, head all the way back down to the Mechanics and head upstairs to the projector. Rotate the room so that you can see the symbol on the mountain opposite, then pull down the white lever on the projector. Now, first we have to insert Missing Lens into one of the free slots; either slot 4 or 6. While it doesn’t matter for solving the puzzle, for the sake of my following explanation I’m going to assume that you put it in Slot 4. - 1: Up - 2: Down - 3: Down - 4: Up, rotate down twice - 5: Down - 6: Missing Once they are aligned, flip the handle again to send it back up, and then point the light at the symbol on the cliff. Once it’s active, head all the way back to the Summit via the Watchtower. Near to where Gamana showed up before you’ll see a familiar looking metal box, however it’s wrapped tightly by a plant. Good job we have something that’ll kill it. Pour the contents of the Metal Jug on it to kill the plant and then open the doors. There’s another Pipe-moving puzzle now, this time with two colours that have to swap sides. For this one, orange has to go: down, right two, up two, left, up two, right, down, right, up two, right two, down. And White has to go: left, down two, right two, down, right three, down. For completing it you’ll get the Missing Lens 2. Before we can use it though, we need to activate the third and final blue crystal. Thankfully it’s easy to find. Head to the Hanging Platforms from the Main Square entrance near the door to the Mechanics. Look up on the rock and you’ll see it within easy reach of your Remote Control. Head back to the projector at the Mechanics and spin the rom around to face the new symbol. Once you can see it, pull the white lever once again. Insert the Missing Lens 2 into slot 6, and then move them as follows: - 1: Down - 2: Up, rotate down twice - 3: Up, rotate up three times - 4: Down - 5: Down - 6: Up, rotate up twice With the symbol set up, return the lenses to the projector and point it at the device. Head down to the Hanging Platform, this time going the lower route, to find the door that you need to open and another pipe-based puzzle to solve. This one requires you to split and then combine the beam to reach the end point. The upper orange route should go up, left, up, left twice, down, left, up, left, down twice, right, and down to the combiner. The lower orange route should go down, left, up, left twice, up, right, down four times, left twice, up twice to the combiner. And the combined energy should go left, down, right five times, down, right. With all that done you can now grab the Magnet. Walk up the stairs right here and attach it to the hook. Lower it down into the water and then pull it up to see it’s hooked a safe, which you can open to get the Quarter Key 4. We finally have all four Quarters! Head back to the Mechanics room and place all four Quarters into the box on the end of the table. Inside you’ll find the Four-Teeth Key. In the inventory you can manipulate the teeth to allow it to fit into the device in the Main Square. Doing so will finally lower the Tower. Achievement Unlocked! Too Lazy to Climb Get access to the tower in the Main Square Note: Once you activate the device in the tower, you can’t return to the main island. Make a SAVE before doing so, in case you want to go back for something. You shouldn’t need to, but fair warning. Head inside the Tower and press the button to ride the elevator up. On either side of the metal pillars is a lever to pull. Pull them both down and then press the button again to lower the whole tower! Once it’s lowered all the way down, flip both levers back up and then press the button again to take the Elevator down. ALL the way down... Part 10 - Going Underground Once you arrive the gate will seal shut behind you, so you’re down here for the long haul now. You might also notice that most of the items from before have been removed from your inventory. Just the various coloured Crystals and the Clay Pot remain. Walk forward and Gamana will show up and talk about finding the caves for the first time. Continue down the path and eventually and you’ll reach a room with a few tables, on one of which you can find a Letter. ‘Most of these tunnels were carved out by the Dulmarians once. After covering the island with my experiments. I was fascinated by the gigantic space this place offered. I am convinced that she has appeared to you by now. I know her quite well. She will probably try to persuade you to turn against me, if she hasn’t yet. She reflects her own past failures onto me. She fears that I will become the monster she once was. Be conscious when she is around, her innocent purity is just a well-rehearsed disguise.’ On the other table is a box with a Large Key. Pick it up, and we can use it to solve this puzzle here. On one table you can see a large keyhole. Inserting the Large Key in there will cause the four squares nearby to light up either Orange or White. On the other table opposite is a note stating that an orange light means you’ve got a correct symbol but in the wrong place and that a white light means you’ve got the correct symbol in the correct place. Next to this is a grid of squares with numbers on them, and you can place the Large Key at the bottom of the device. Pressing the numbers on the grid will change the symbols on the key. So you have to figure out which numbers/symbols are correct through trial and error by testing numbers and see what dose/doesn’t work. If you use up all seven tries the puzzle resets with a different solution. The puzzle is randomised, so you’ll have to keep trying until you get it Once you get it right, pick the Large Key back up, and look at the cabinet to your left. Inside you’ll find the Cross Plug. There’s also a symbol on a plaque which light look familiar. If you place the Large Key back under the numbers grid and press the numbers: 6213 to get the matching set. Head back the way you walked into this area to the locked door you walked past before. You can insert the Cross Plug next to the door, which you’ll get back, and then the Large Key underneath it to unlock the door. Head on inside and look at the large device in front of you. Just to the right of it are a series of dials that you can spin. You have to line up the line on the dials so that the energy flows down to the bottom: - Top: Two Right - Second: Four Right - Third: Leave Alone - Fourth: One Left - Bottom: One Left The nearby draw will open allowing you to grab the Disk Piece 1. Turn around and on the right is a small cupboard, in which you can also find the Gear Plug. Head back to the small room with the two tables and go up the stairs. Place the Gear Plug in the device up there, and then the Cross Plug after that. The grill will drop and you’ll find the block you moved out of the way to get into the Crystal Lab all the way back at the beginning of our adventure! You can grab it now however and you’ll see that it is a Jumper. Take it back to the door you opened earlier and to the right is a torch holder. Stick the Jumper in the hole below it, and then put the White Torch into the holder. This will create a new path, allowing you to cross and reach an elevator, in which you can press a button to go even deeper down. At the bottom you’ll reach the Underground Square. Walk forward and place the Disk Piece 1 into the pedestal in the middle of the room to open the route to the left. Follow the path through the Left Tunnel all the way to the end to reach a large room. You’ll notice three ladders attached to rails around this room, which are in tern connected to the device in the middle of the room. We need to move them to the correct positions by manipulating the device in the middle of the room. First, pull the lever to send the small platform there down, and then it will return with a second stone on it. You can then pick up the Very Light Weight and the Very Heavy Weight. You can place these Weights around the ropes attached to the ladders to pull them along. We can only reach the lowest ladder at the moment, so place both Weights on the corresponding ropes and pull the handle. Climb up the ladder to get the Heavy Weight, and then drop back down. Pull the handle on the main device to get back the other two Weights. With three stones we can now manipulate all three of the ladders. Place the Very Light Weight on the rope for the bottom ladder, the Heavy Weight on the rope for the middle ladder, and you should put the Very Heavy Weight on the rope for the top ladder, just to get it out of the way. Climb up the ladders again to get the Light Weight, and then head back down. Pull the lever to get back your Weights. Now finally, Place the Heavy Weight on the rope for the bottom ladder, the Very Heavy Weight and the Very Light Weight on the rope for the middle ladder, and the Light Weight on the rope for the top ladder. Climb on up the now complete ladder and follow the path to reach The Corridor. This next puzzle is complex, so try to take it one step at a time. One the wall you can see a diagram showing various paths you can take to get from A, which is the pedestal where you are, to either B or C. If you go down the corridor and open the door at the end you can see that B and C are two of the pedestals in the second room, and that B has a green crystal on it. Placing the Green Crystal on the A pedestal will shoot the green beam into the wall, but you can’t use it, as the route isn’t properly aligned. To alight it, you need to rotate the dials in the corridor to match the diagram on the wall, like so: - First (nearest A): Up and Right - Second: Right and Left - Third: Down and Right - Fourth: Down and Left You’ll then be able to warp through to B. Optional Achievement Find What is Hidden III. Find a secret in the Corridor underground This one can be tricky if you don’t know what you’re doing. Once you’ve aligned the green crystal from A to B, make sure to close the door between those two rooms before you warp through. You can find the symbol on the back of the door. Warp through to B and you’ll see another diagram on the wall of how to get from C to D and E. Also, next to C is a chain that you can pull, opening up the roof to reveal that you’re actually in the Underwater Corridor. Spiffy! Part 11 - Restless Memories The nearby door will also open, allowing you to continue down to the end of the corridor. There, you’ll see that D is blocked off with a cap being held in place with a rope. Clearly, this needs to go, and we need to use the Red Crystal to do it. So first we need to get C pointing to E, and to do this we need to alternate the arrows in this corridor like so: - First (nearest B/C): Up and Right - Second: Up-Right and Down-Left - Third: Down-Right and Down-Left - Fourth: Down-Right and Up-Left Once they’re in the right place, warp back to room A and organise the arrows here like so: - First (nearest A): Down and Right - Second: Down-Right and Up-Left - Third: Up and Left - Fourth: Up and Right Go back to pedestal A and grab the Green Crystal back up, placing the Red Crystal in its place. Looking through the door you should see the red laser connect with C, before hearing a far-off clang if you were successful. Pick the Red Crystal back up and put the Green Crystal back once again, and now reorder the arrows so you can get back to room B/C. If you need a reminder: - First (nearest A): Up and Right - Second: Right and Left - Third: Down and Right - Fourth: Down and Left You now have to change the arrows here so that they lead to D, like so: - First (nearest B/C): Left and Right - Second: Up and Right - Third: Left and Right - Fourth: Up and Left Once again warp back to room A, and mess with the arrows in the corridor for one final time: - First (nearest A): Down and Right - Second: Down-Right and Up-Left - Third: Up and Left - Fourth: Up and Right Hit the warp point on last time and you’ll zip through all the way to the Underwater Hideaway. Opposite where you warp in is a shelf with a Letter on it. ‘Wasting time. This phrase has no rhyme or reason. After the centuries I’ve spent working, I needed a calm and quiet place. I originally built this facility to explore the depth of the ocean, and to research but eventually I spent more time resting here. This was the only place where I could hide from her. She judges me for demolishing long forgotten buildings on an abandoned island while she is directly responsible for much greater destruction. And after she told me about their failure she dared asking me to destroy Quern. Her agony is not my concern, and especially not yours. This power is not here to give or take.’ To the right of the shelf with the Letter is the Wrench Key, hanging on a hook. When you pick it up, you’ll turn around and see a Diving Suit be revealed on the other side of the room. Wander over and press the button climb inside, to get dropped into the ocean. Walk forward and right and you’ll see a lever, which you should flip upwards. Walk forward and a little to the right from that one to find another Lever to flip upwards. Turn around and follow the rocks around to your right again to find the third and final Lever to flip up. While wandering around under the water you’ll have likely noticed round plaques on the rocks and walls around here; One leave the first lever, two near the second and one near the third. Noting down what’s written on them you get - 1, IH3 - 2, IIC8 - 3, IIF1 - 4, ID9 Take this information and go back inside the Underwater Hideaway. The information on the plaques relates to the two grids on the room, which will reveal their grid of numbers if you equip the Blue Torch. Obviously the lone number is the order, as seem above. The grid near to the diving suit is numbered I, and the one on the other side of the room is numbered II, which tells you which grid to look at for each number. And the final letter and number tells you where in the grid to look. Using this you get the number: 0835. However, you might have noticed that the device in the room has five dials, not four. Thankfully with four of the numbers inserted we can just guess the last one, so stick the first four in, and then just rotate the bottom dial until it clicks. Should be a 3. Grab the Disk Piece 2 from the draw and then head back to the green crystal, warping all the way back. Pick up the Green Crystal (you can’t leave without it), and head all the way back to the Underground Square. Place the Disk Piece 2 into the pedestal in the middle of the room and a new way forward will open up. Gamana will then show up to help you, but first you have to follow her. Walk towards her when she says and she’ll guide you over the chasm and into the Spirit Corridor. Follow her along the path as she lights the way, and when you reach the end she’ll ask you to find some Blue Crystal Powder. Walk up the stairs of the apparatus ahead and on the baskets at the top you’ll find the Ornate Key. Head back the way you came, and in the corridor on your left you’ll find the Bowl Of Blue Crystal. Pick it up and keep going back to the previous room you walked through before and use the Ornate Key on the door to your right. Walk up and spin the crank up here to raise the nearby rock, before heading back down and around to the rock, dropping the Bowl Of Blue Crystal in the space, from which you’ll get the Empty Bowl. Go back to the other side and pull the lever here to drop the rock and smash the crystals. Now place the Empty Bowl on the dark platform under the rock and the powder will spill into it, allowing you to get the Blue Crystal Powder. Take this back to the large room where Gamana asked you for it, climb up the stairs and at the far end you can place the Blue Crystal Powder on the shovel. Gamana will then explain the whole back story of her and her people. Achievement Unlocked! Good Audience Listen to the story of the Seekers Once she has finished talking to you, follow the path all the way back to the Underground Square, and Gamana will once again lead you across the chasm, this time dropping you on the other end of the destroyed path. In the room beyond you’ll see a green crystal attached to a device. Start by pulling the handle at the end of the small wire to bring down a tray. Place the Green Crystal inside, and then pull the other lever three times to side it to the other end, allowing you to warp up to the top. Pick the Green Crystal once you’re there, and then press the button next to the door to open it up to the Lower Mechanics. Walk forward and on the shelf to your left you’ll find a Letter. ‘These are the lower levels of The Mechanics. It was here, I learned that all the attributes of the different minerals could be harnessed by dividing the energy beam of the white crystal. The shortage of crystalline materials no longer hindered my work. With this knowledge, I was even able to isolate green crystal beams. The exact same energy ray, that the ancient gateways use. This could suggest that there is a connection between this world and the origin of the ancient gateways. Focussing on my work helped me deal with the unbearable loneliness that started to consume my mind. ’ Head back to the door you walked into this area from and on the right you’ll see a large console. Go up to it and you’ll see it’s split into three sections. Focus on the left one for now, which allows you to rotate the rings of the nearby room to allow access through point I or point II. The slider picks which parts the numbers effect, which each number having a different effect on the highlighted parts. First, enter 2, 0, 2, -1 and press the Start button. Head inside to find a familiar room. On the table here it’s a small box, which you can stick the Wrench Key inside to reveal a button. Press it to activate something on the other side of the room. Part 12 - The Final Choice Go back to the device from before and after hitting the Reset button, try the numbers: 1, -1, -3, and 2 before pressing Start. This allows access to the room, but you might notice that the second entrance down here is sealed shut! Staying at the consoles, look over at the other two. The middle one shows the positions of a White room and an Orange room. The Orange room is already down here, and the white room is currently up on the surface. The console on the right controls the room, with the left lever alternating the control between the two rooms, and the right lever moving their position to one of three places. Start by moving the Orange room to point C, and then bring the White room down to B. Head inside the new room, which you should again find familiar, and now climb up the stairs here. On the roof of the room you’ll find the Small Dial 1, and a lever which you should flip. Head back down, out of the room and past the table where you found the letter. Go up the stairs, through the now open door, and up more stairs to be able to reach the other side of the Orange room, allowing you to grab the Small Dial 2. But we still need one more. Return to the large console, and on the right side move the Orange room to point A, and the White room to point C. Go back up the stairs and as you walk through the door look to your right to see a button. Press it and an arm will extend out, allowing you to go into the White room and grab the Small Dial 3. Just outside the while room, you should see where you can insert the three Small Dials. Once they’re in place, pull the lever three times to match the symbols up and reveal the code to the safe: 46, 11, 37, 77. Pull the nearby draw here to get the Disk Piece 3. Head down to the bottom floor and on the other side of the platform where the rooms were you can find the large Safe. As the code above indicated, you have to spin the dial around to the correct numbers and then press the button. Once you’re done it for all four the door will open, letting you back into the room where you first arrived into the Underground to begin with. Go around the pillar and down the corridor to the lift at the end. Call it back up, and then ride it back down to the Underground Square, placing the Disk Piece 3 in the pedestal in the middle. The whole platform will then lower, allowing you to go inside the pillar now left in the middle, as well as getting you an Achievement. Achievement Unlocked! Deeper Underground Going deeper underground Go down the stairs here to reach the Reservoir cave. Ahead of you is a series of gates. Just to your left is a path besides them, with a device that makes noise when you approach. The device and be moved along the rail to sit next to each doors crystal, the sound changing with each one. At the far end of the other path is a chalkboard which shows what seem to be random shapes, but are actually soundwaves. Just before the chalk board is a screen with buttons, each button showing a differently shaped crystal when pressed, and the button itself having a different dotted symbol on each one. Finally there’s a series of numbered dials, which match the symbols on the button for the screen. What you have to do is listen to the noise from a crystal and note its shape. Then look at the chalkboard to get the correct number from the sound, and the screen to get the right number for the crystal before entering it in the correct dial. Or just look at this: - One Dot: 4 - Two Dots: 2 - Three Dots: 7 - Fours Dots: 8 - Five Dots: 1 Press the button near the stairs to open all five doors. Spin the handle of the next door and then open it, doing the same to the on beyond. Despite the warnings, you’ll find yourself in the rather opulent-looking Library. Optional Achievement All Things In Place Return the professor’s most precious item to its place Remember that Hourglass Pot that’s been sitting in your inventory all this time? Near the window in this room you can find another pot on a small pedestal with an empty space next to it, where you can place the Hourglass Pot down to really complete the Feng Shui of the room. On the desk with the M on it you’ll find a Letter. ‘The point came where I slipped. The idea of eternal solitude tortured me beyond imagination. It even overcame my sense of duty, it make me homesick. I felt like I was suffocating. I know that I would have to find a way to escape, but before that I needed to do something. I wanted to reveal Quern to all worlds, to share these incredible power. At the beginning of your journal I asked you to cooperate with me. This is the point where I require your assistance. Help me to give the worthy a chance and the opportunity to make a difference.’ On the other side of the room is a projector which you can stick your Blue Torch into. This allows you to view three different slides, each a clue to finding a series of characters, but from where? All the letters that you’ve collected over the course of this adventure are numbered when you look at them with the L button, and some of those letters have little Latin phrases written at the bottom. The slide with the table tells you which letters to look at, and the other two slides tell you how to find the correct character in the letter. So, for the first one you’d look at letter number 12, latin word 3, character 3, which if you check is an S. Checking all the letters will give you the word ‘SAECULUM’. Typing this into the nearby typewriter will make it print out a series of symbols. These need to be entered into the buttons on the door. Press the two correct ones to recreate the correct symbol and then press the white button before moving onto the next one, like so: - 1: Top, Bottom-Right - 2: Top, Top-Left - 3: Bottom, Bottom-Left - 4: Top-Right, Bottom-Right - 5: Top, Bottom - 6: Top, Right - 7: Top, Bottom - 8: Left, Bottom-Left Follow her into The Backstage, and through the only way available to you. Go down the slope and up the steps to the platform, and pull the lever near the speaker. Grab the Gateway Bridge Key and head back up the slope to unlock the other door up there. Cross the bridge and press the button to open the door at the end. In front of you will be a telescope of sorts that shows you the portal that you entered into this world from. On the other side of the room is a button you can press. Pull the lever and grab the Punch Cards that it spits out. Return back across the bridge and a device will appear. SAVE YOUR GAME NOW IF YOU WANT TO SEE BOTH ENDINGS! Place the Punch Cards in the slot above the device, and the White Torch in the holder on the device. The choice is yours to make. Insert whichever crystal you choose onto the slot for it, and then pull the three levers that appear to send it on its way. Achievement Unlocked! The Follower Follow the Professor’s guidance OR Achievement Unlocked! The Sacrifice Follow Gamana’s guidance Gamana will speak once again, and to the right of where the telescope is you’ll see a Final Key has been revealed. Once you have it, leave the room, cross the bridge, and go down the slope and use the Final Key on the slot down here to extend the bridge. You will then walk through the portal to whatever future you chose... Achievements This is just a simple list of all the Achievements in the game, and which part of the guide you should check out if you want more details. First Phase Enter the Professor’s Crystal Lab Part: 1 Shipwrecked Survive the boat ride Part: 3 ...and don’t forget to water the plants! Revive the plants in the Gardens Part: 4 Friend or Foe? Meet Gamana for the first time Part: 6 White is the New Orange Create a purified energy crystal Part: 7 Too Lazy to Climb Get access to the tower in the Main Square Part: 9 Good Audience Listen to the story of the Seekers Part: 11 Deeper Underground Going deeper underground Part: 12 Taste Them All Taste all the berry juices Part: 5 All Things In Place Return the professor’s most precious item to its place Part: 12 The Follower Follow the Professor’s guidance Part: 12 The Sacrifice Follow Gamana’s guidance Part: 12 The brightest of all scholars Draw at least 19 sketches in your notebook Part: 2 William Says Solve the melody repeat puzzle on your first try Part: 7 I’m Blue Open the lower part of the Crystal Lab without using blue light Part: 2 Find What is Hidden I Find a secret near the Watchtower Part: 5 Find What is Hidden II Find a secret near the Mine Part: 7 Find What is Hidden III Find a secret in the Corridor underground Part: 10 Conclusion Thanks for checking out my guide! I hope it was useful to you, and I hope that you enjoyed play Quern as much as I did, even if you did get stuck a need a little help. If you spot any error or mistakes in my guide, do let me know. There might be the odd typo here or there, but I’m pretty sure that all the facts are correct, and puzzle solutions are accurate and efficient. Only one more thing to mention before I go and that’s that I have a YouTube channel where you can watch me play games and talk about whatever random stuff pops into my brain. Feel free to drop by if you’re so inclinded: Oymon's Channel And with that, we’re done! Bye all!
《Quern - 不朽之念》完整文本指南

2026-04-02 04:00:16
发布在Quern - 不朽之念
转载

导读
这是一份《Quern - 不朽之念》的全文字游戏攻略,涵盖从游戏开局到结局的完整流程,包含全谜题解法、全成就获取方法,还提供了游戏操作、道具使用等实用技巧,帮助玩家顺利通关并解锁全部内容。

评论
共0条评论

《Nephise: Ascension》完整攻略+全成就
本指南提供了游戏的完整流程攻略,以及获取成就的方法说明。 请注意,本指南包含可能会破坏您游戏体验的图片和信息! 《Nephise: Ascension》是一款流…
2026-04-04 10:000赞 · 0评论

全成就指南(制作中)
由《Berry Bury Berry》测试玩家制作。 本指南将介绍如何100%完成《Berry Bury Berry》,包括谜题解法、隐藏秘密的位置,甚至会带有…
2026-02-19 13:000赞 · 1评论

《Kitrinos: Inside the Cube》全流程攻略
《Kitrinos: Inside the Cube》全成就达成及通关指南!简介
2026-03-26 10:000赞 · 0评论

全成就指南 | 游戏100%通关攻略
《塔洛斯法则》全流程攻略,包括获取游戏内所有成就。成就 #1
2026-03-25 10:000赞 · 0评论

全成就指南
本指南包含每个谜题的解法。如果你想自己解决这些谜题,建议不要查看本指南。 总共有67个谜题,且游戏内未对谜题进行编号。 如果你在解决下图中的任何谜题时遇到问题,…
2026-02-19 19:000赞 · 0评论
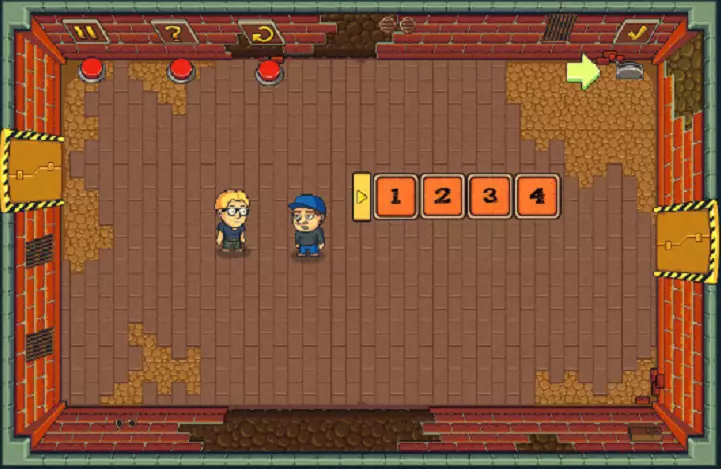
《猩红秘传:被诅咒的孩子》全成就指南、收集品位置及完整视频攻略
《猩红秘传:被诅咒的孩子》100%成就指南,包含全收集品位置以及完整视频攻略,助你解锁所有成就,并展示所有迷你游戏谜题、隐藏物品游戏的解法和收集品位置。 注意事…
2026-03-20 10:000赞 · 0评论
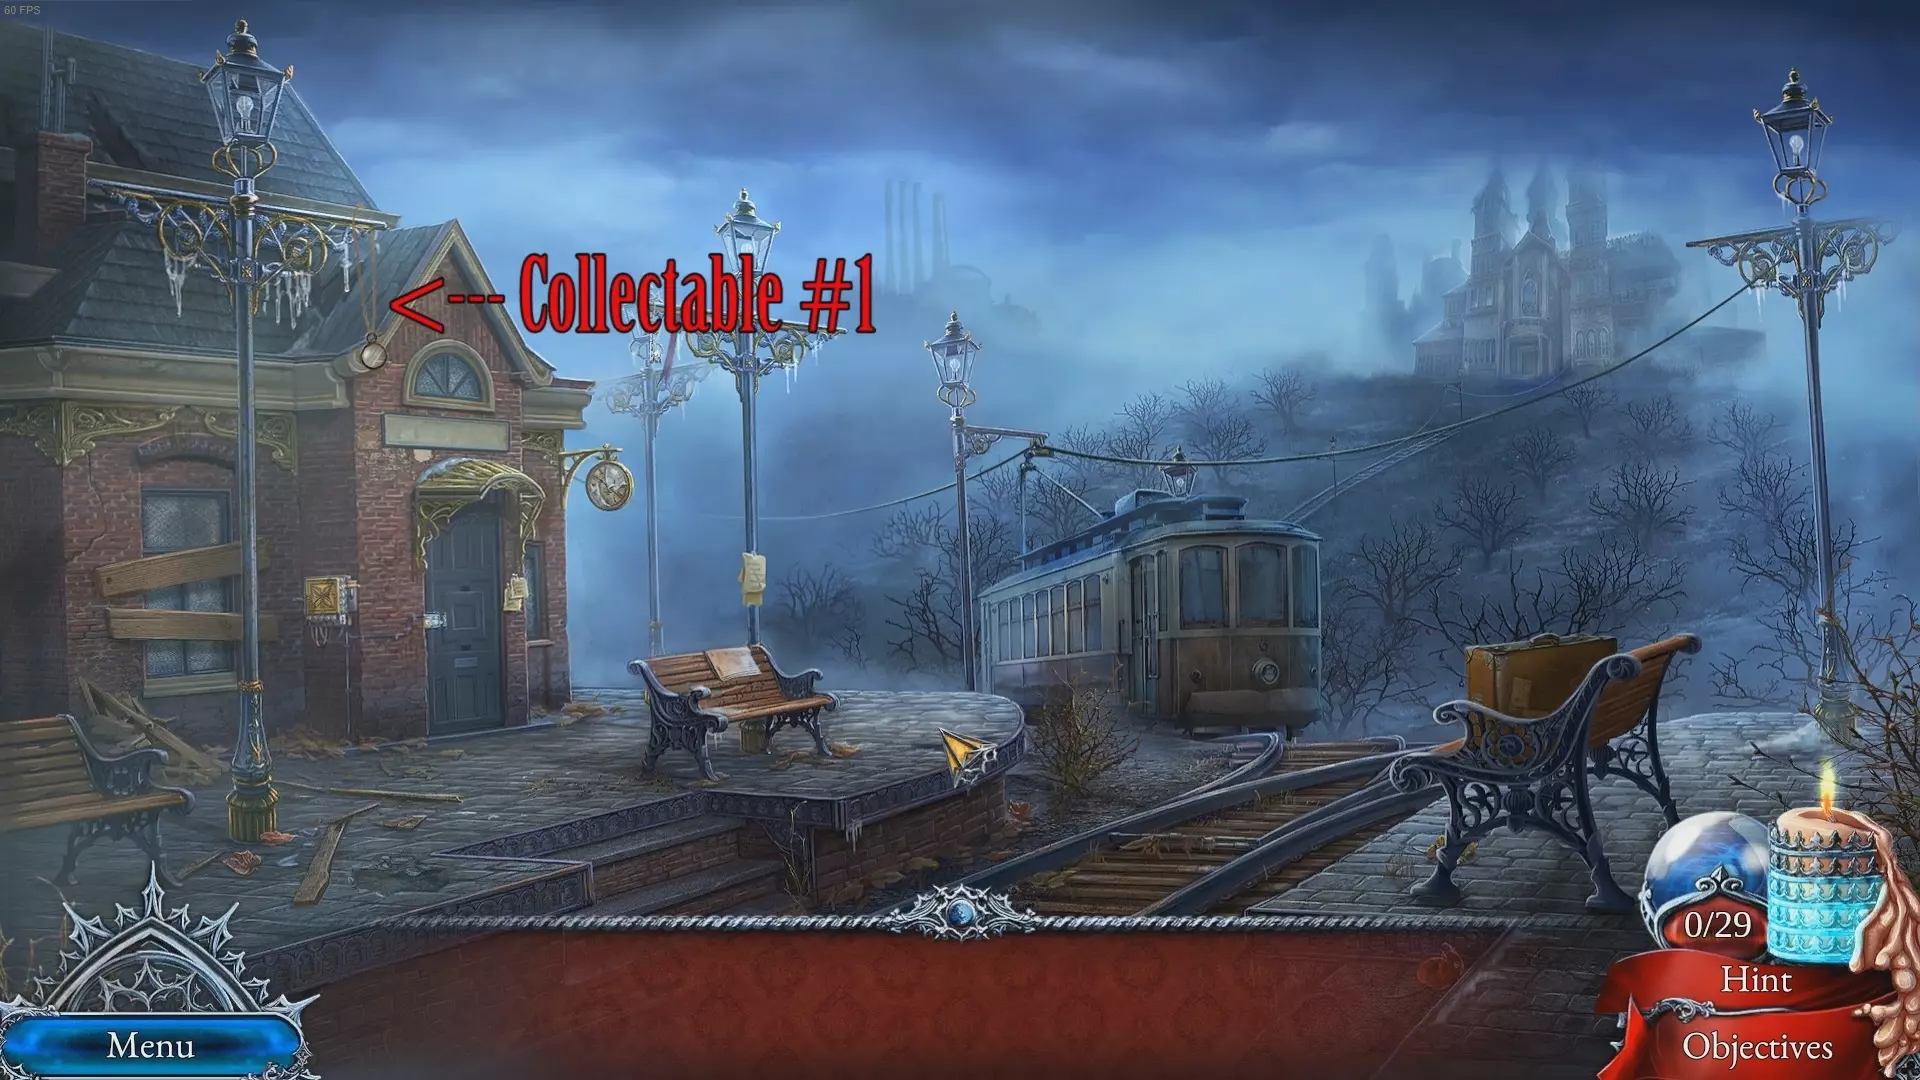
Heartworm 一小时内 / 冲刺成就
Heartworm速通指南:获取Dash成就(一小时内通关游戏) 前言 我想说我并非专业速通玩家。因此视频中可能会有我的操作失误。或许我选择的某些路线从时间消耗…
2026-04-06 22:000赞 · 0评论
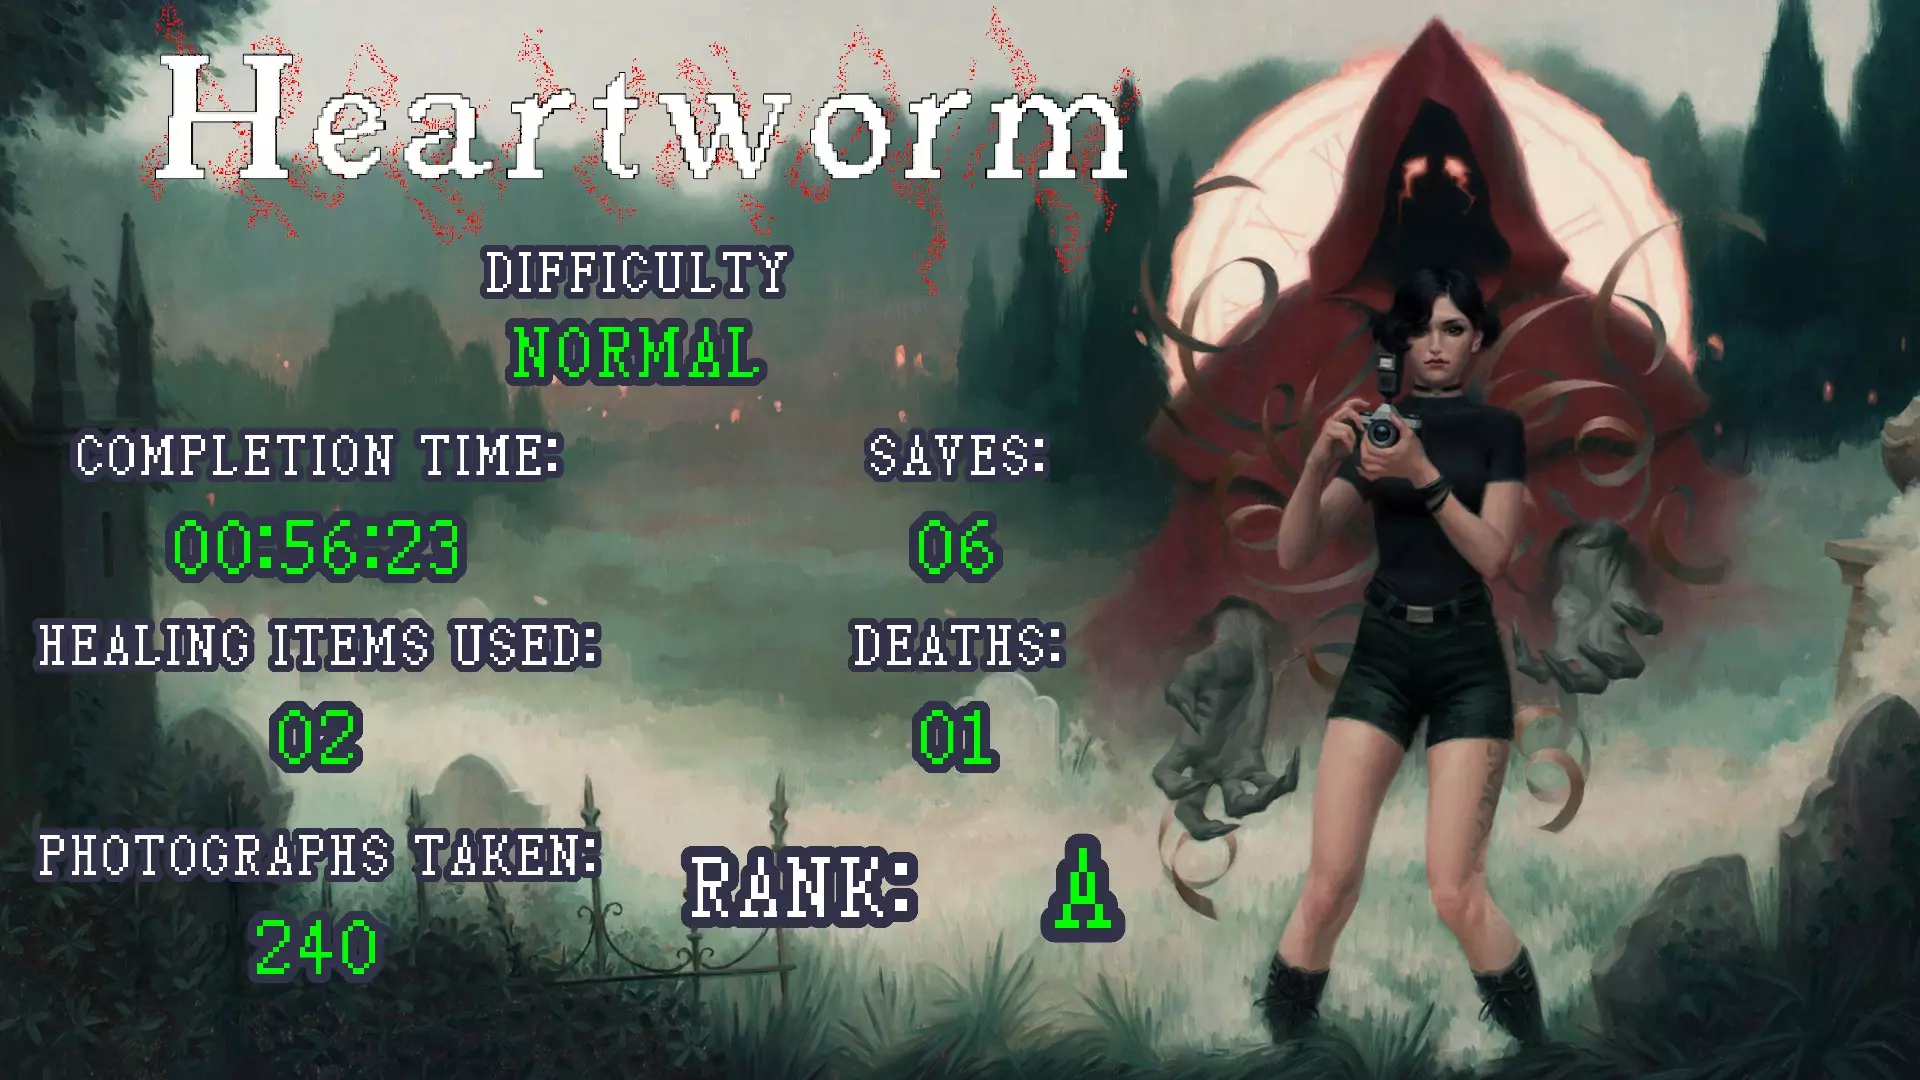
《A Lively Haunt》完整攻略
《A Lively Haunt》全流程攻略,包含游戏所有主要谜题的解法。仅供紧急情况下使用。第一部分:在路上 开场过场动画结束后,执行“打开汽车引擎盖”操作。 …
2026-04-02 13:000赞 · 0评论

《菲尔的镜中世界》官方指南
介绍与提示 本文档是《菲尔的镜中世界》的解谜指南。 请牢记以下几点,以充分享受游戏体验! 谜题线索往往近在咫尺。相信你的直觉! 密切留意日期和图片。 谜题提示隐…
2026-04-01 22:000赞 · 0评论
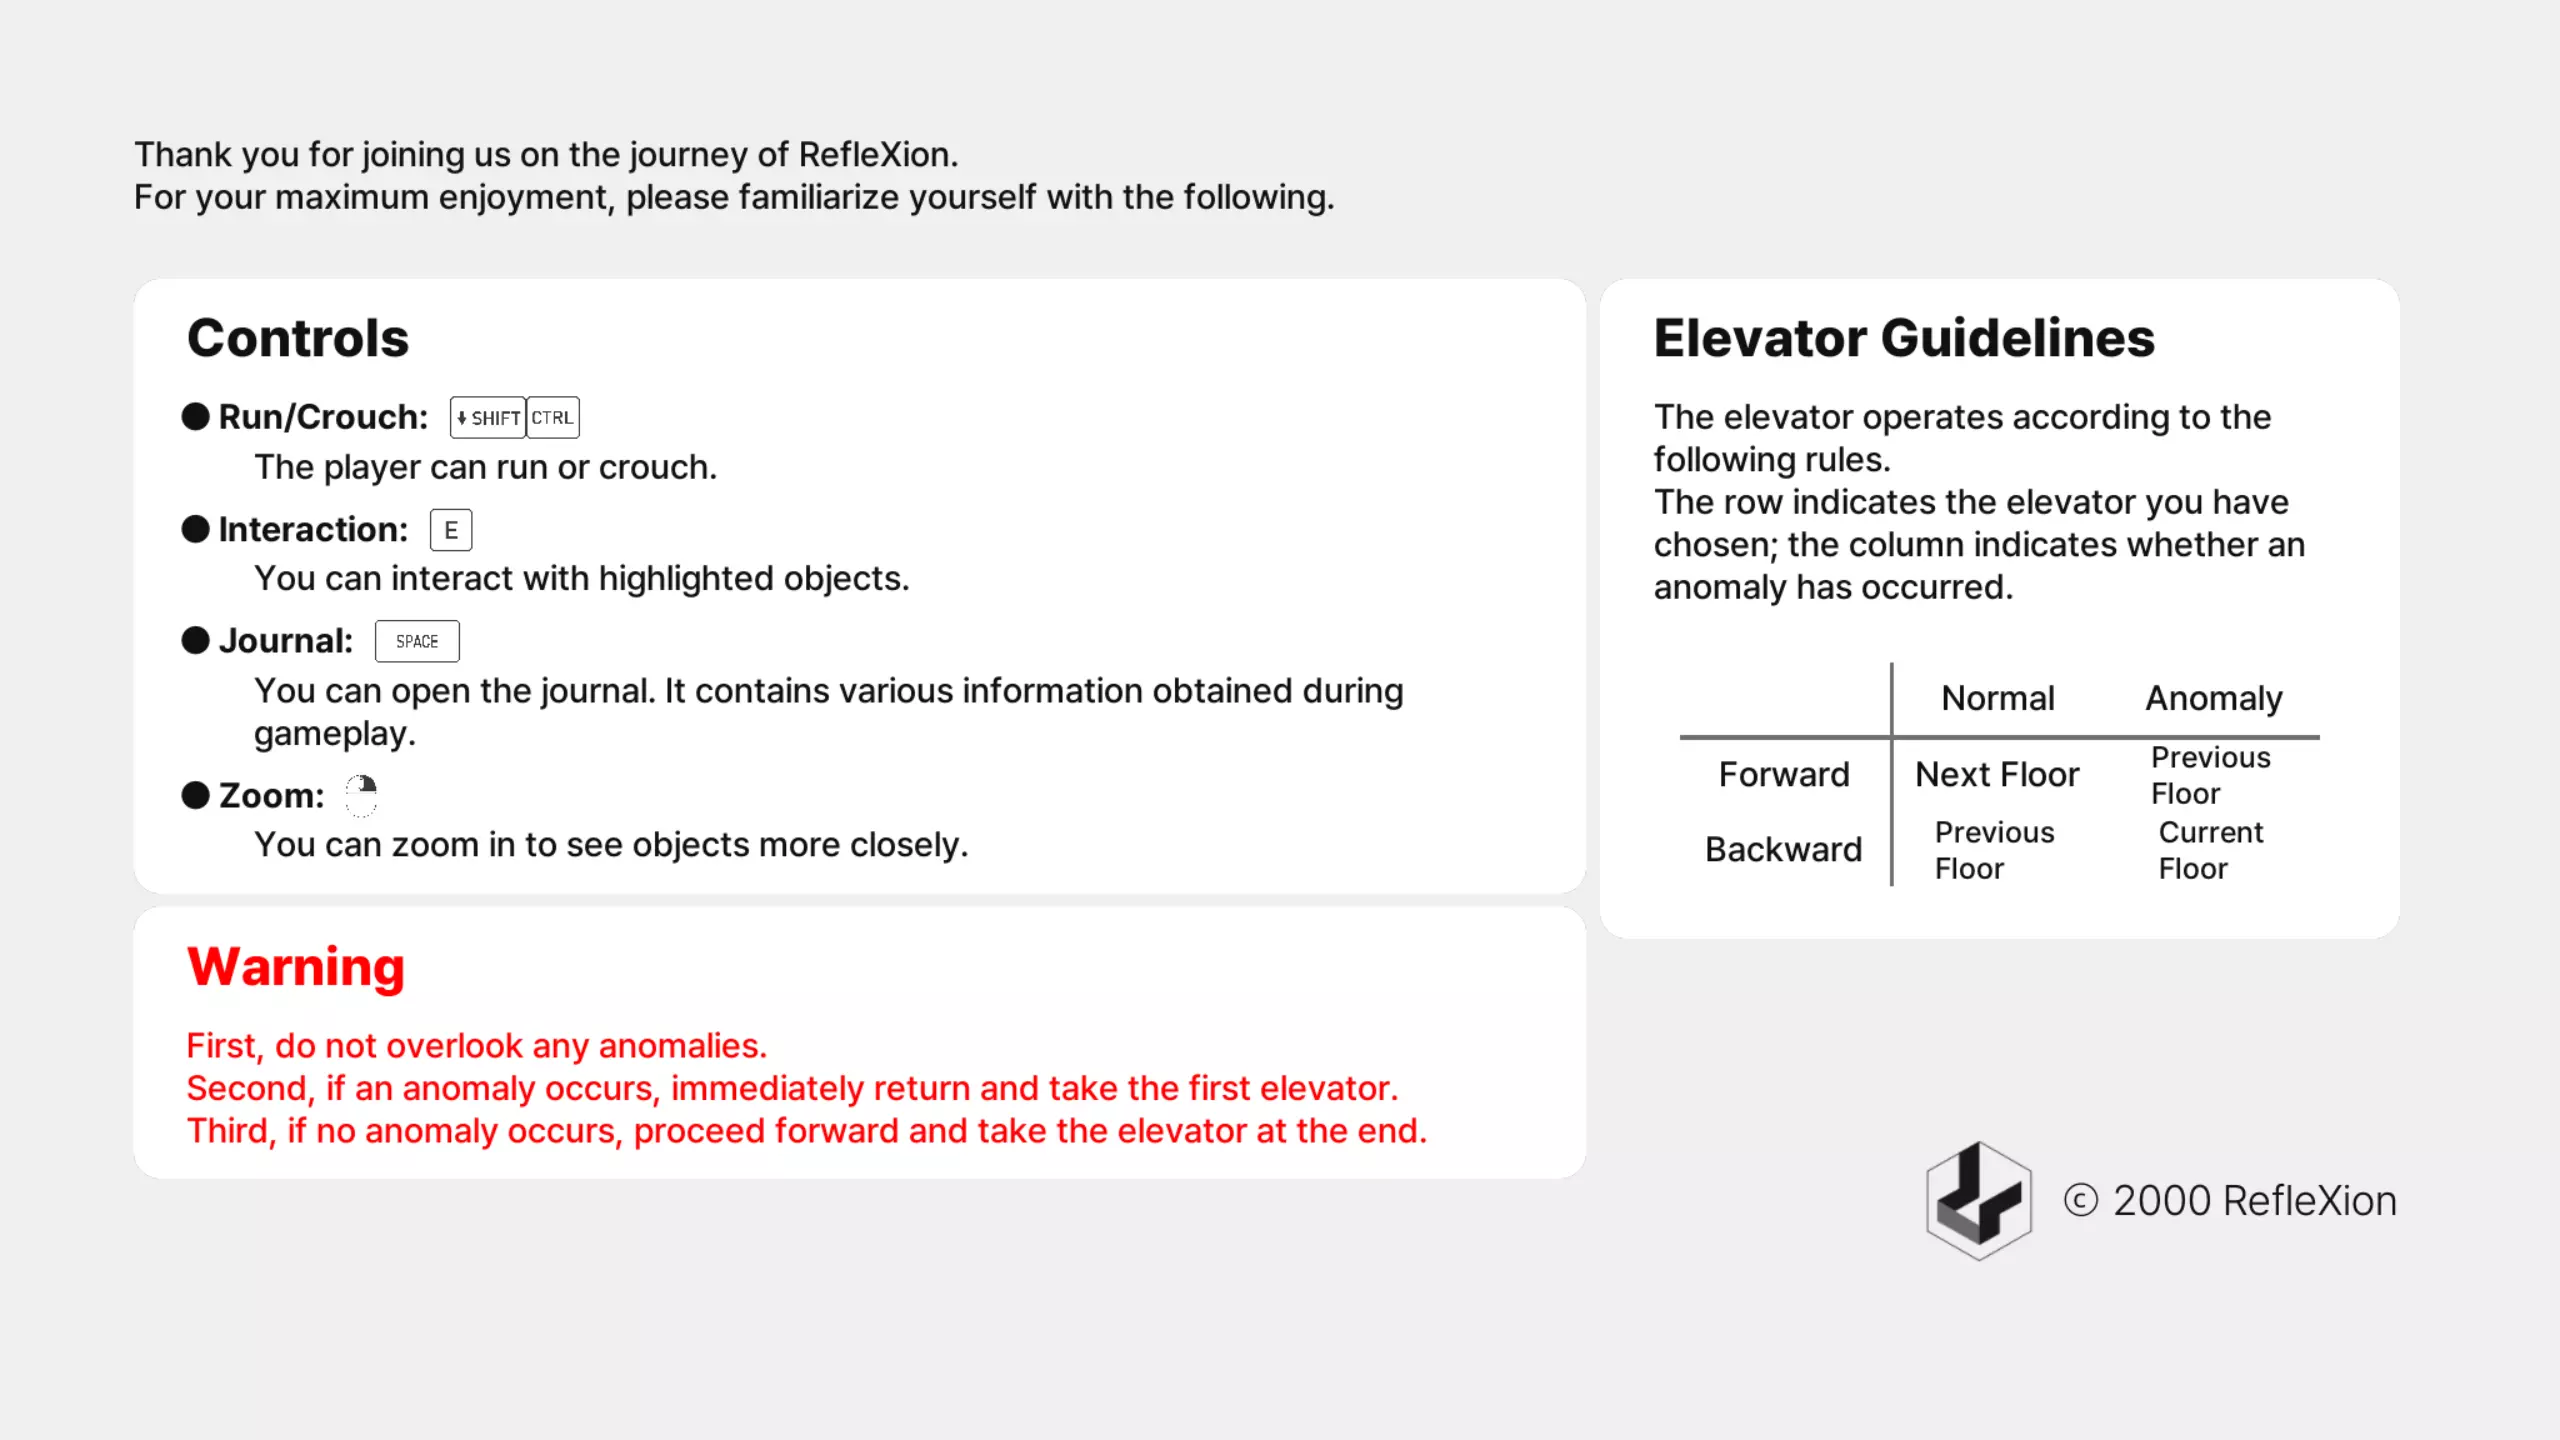
《幻塔》技巧与窍门
《幻兽帕鲁》技巧与窍门 《幻兽帕鲁》如何逃离代顿医院
2026-03-27 01:000赞 · 0评论
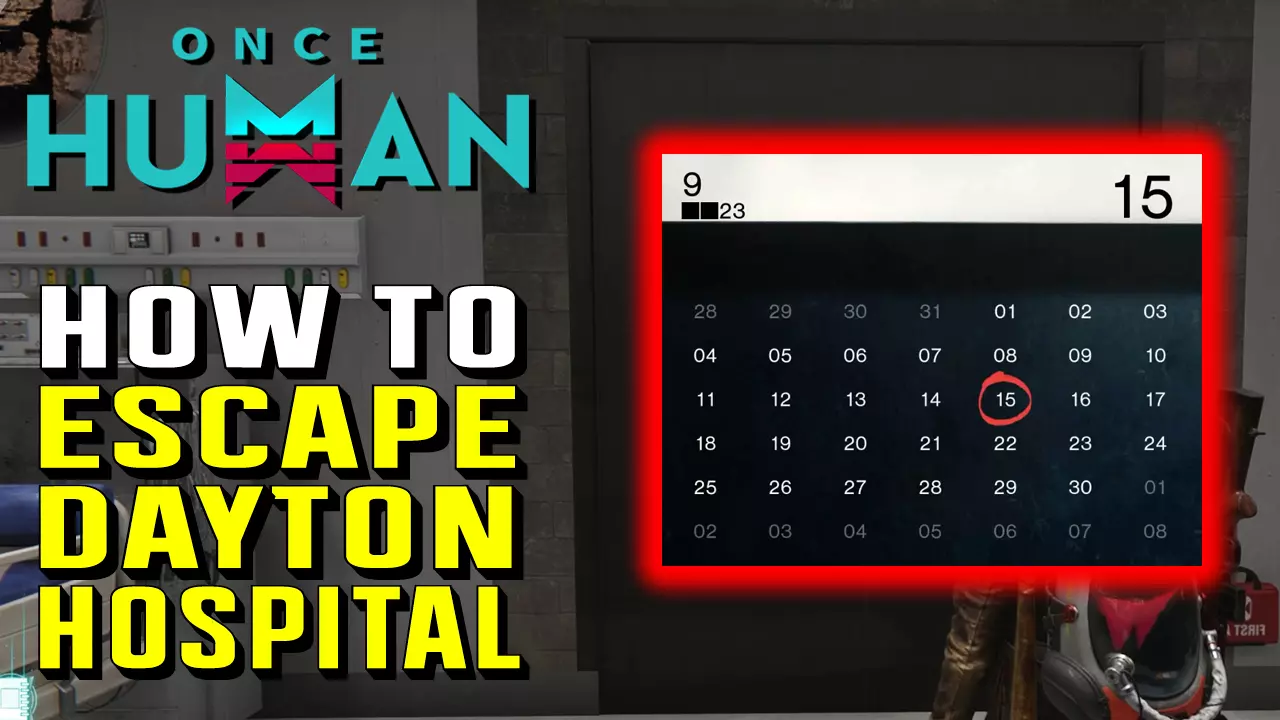
暂无更多
最新更新
- 全成就指南 — 本指南将帮助你获取游戏内的所有成就。除了【I'm Blue】外,本指南不会告诉你如何解决谜题,但会让你了解需要做什么以及需要具备什么条件。许多成就是无法错过的,…