


 换一换
换一换 


This was originally posted to gamefaqs on the 30th of July, 2006, by SaltCod. I have tried to reach out for permission to post their amazing guide to steam, and received no reply after approxomitely half a year, so im counting this as abandonware. Link to original guide https://gamefaqs.gamespot.com/pc/580196-mystic-towers/faqs/44139 If it ever goes down and you want a PDF version, i may be able to help. This is not my guide, and credit goes to the original author whose work i wish to be on steam. I did however had to modify their pretty ASCII illustrations to not look horrid with steam's formatting. I also ordered the towers around in the order you go through them, instead of alternating between the Apprentice and Wizard towers of the same type. That is all. Intro and Table of Contents ___ _ _ .' .' '..' '. |-''.' ' .' | .' .''. .-'.| | |.| | _ . __ . .' ')'..' _ | || - /| | .' ).' ) /._.-.' - | _.') .' '- | .||(.| | | | | || |.( '. | | ( | | |.- _..----._ | |.- / / /-. ) ( | | | |// .' .-- - . .- ._/ > ..).' (--.__. / / _ / .' / || '-' .-..' / /| || _.-. .'/ .-..-. .-._ .--.--. .---.- | || || .- . ( | ).' | // .-.) /._.' / .'|| _.-. | || | | | | | | .' | | _ -- - .' |. .' . . / ('/ / / / ' / '--....= == '-'--''-' '--' '-' -'---' -A BARON BALDRIC GAME- :.:.:.:.:.:.:.:.:.:.:.:.:.:.:.:.:.:.:.:.:.:.:..:.:.:.:.:.:.:.:.:.:.:.:.:.:.:. MYSTIC TOWERS - PC Version 1.0 (07/30/2006) Version History: 1.0: Basic Guide Complete - (07/30/2006) .:.:.:.:.:.:.:.:.:.:.:.:.:.:.:.:.:.:.:.:.:.:.:..:.:.:.:.:.:.:.:.:.:.:.:.:.:.:. Legality: This Guide is Copyright, 2006, Matthew McIntyre This guide may not be used on a website or in any public forum where it is protected by copyright without the consent of the author. To contact me: entropiclobo(at)yahoo(dot)ca or chaos(dot)wolf(at)gmail(dot)com Game by Animation F/X / APOGEE ****************************************************************************** * Table of Contents * ****************************************************************************** *To jump to a section, hold the Control Key and press F, then type in the section number as it appears (ie type MT1) MT1: Intro MT2: Gameplay MT2.1: Basics MT2.2: General Tips MT3: Battle Strategy MT4: Spells and Power-Ups MT5: Tower Geography MT6: Lazarine Towers MT6.0: Using this Walkthrough MT6.1: RIMM E1: Rimm Enemies A1: Rimm Tower W1: Rimm Fortress MT6.2: TOR KARAD E2: Tor Karad Enemies A2: Tor Karad Keep W2: Tor Karad Castle MT6.3: NORTSCAR E3: Nortscar Enemies A3: Nortscar Needle W3: Tor Karad Spire MT6.4: WOLF'S E4: Wolf's Enemies A4: Wolf's Fang W4: Wolf's Claw MT6.5: EBONSCARP E5: Ebonscarp Enemies A5: Ebonscarp W5: Ebonscarp II MT6.5: MARCHWALL E6: Marchwall Enemies A6: Marchwall Hold W6: Marchwall Fort MT7: Secrets MT7.1: Codes MT7.2: Glitches MT8: Credits Mystic Towers is rated "L" for "Lazarine Towers." It contains scenes of deadly traps and giant, vicious Lemon. Player discretion is advised. MT1: Intro -=-=-=-=-=-=-=-=-=-=-=-=-=-=-=-=-=-=-=-=-=-=-=-=-=-=-=-=-=-=-=-=-=-=-=-=-=-=-=- | MT1: Intro | -=-=-=-=-=-=-=-=-=-=-=-=-=-=-=-=-=-=-=-=-=-=-=-=-=-=-=-=-=-=-=-=-=-=-=-=-=-=-=- Back when we had our first PC, we enjoyed picking up old Shareware discs. On these I played many great games including Raptor: Call of the Shadows, God of Thunder, Wolfenstein 3D, Blake stone... but the one that captured my attention most of all was Mystic Towers. Mystic Towers is the reason I went back and played similar (but different) games such as Solstice on the NES and it is probably my favourite isometric game. There's so much style and personality to every Tower. You're going through these five-tiered towers wiping out all of the monsters. It becomes a struggle at times to conserve your high-levelled spells and your food and water levels. There's a decent degree of challenge to this game and that just makes me love it even more. There's a certain muddy, dank quality to the towers themselves. They are dark and univiting. But the monsters are vibrant and full of personality. I have always believed that giving an enemy some sort of personality makes us approach it in a different way. They have identity, even when patterns are shared between the sets of monsters in the different towers, they are still different. There is also enough to do with the Towers themselves, it's not a complete combat-fest. Traps, secrets, and treasure always keep you on the look-out. So, get ready to take the reigns of Baron Baldric and plunge into the Lazarine Towers and the secrets they hold... MT2: Gameplay -=-=-=-=-=-=-=-=-=-=-=-=-=-=-=-=-=-=-=-=-=-=-=-=-=-=-=-=-=-=-=-=-=-=-=-=-=-=-=- | MT2: Gameplay | -=-=-=-=-=-=-=-=-=-=-=-=-=-=-=-=-=-=-=-=-=-=-=-=-=-=-=-=-=-=-=-=-=-=-=-=-=-=-=- MT2.1: Basics ============= Mystic Towers is, I find, best played with the Keyboard. You can play it with the mouse with onscreen commands, but to be honest that can get cumbersome. Still, if it does help you to use hte Mouse, do so. I cannot comment on the Game Pad, as I haven't used one. If you use the Keyboard: Control: Use Spell Alt: Jump Left: Move Southwest Right: Move Northeast Down: Move Southeast Up: Move Northwest 1-0: Spell shortcuts Space: Scroll through spells F1: Controls screen F2: Save Game F3: Load Screen Esc: Leave Current Game P: Pause Press Against an Object to Push. Backspace pulls an item. So, yes the game is in an isometric view like Solstice or Q*Bert. This movement and view style might not be the most inviting if you haven't played a game like this, but I really do urge you to play it as once your reluctance melts away you'll see that isometric games aren't so bad. The premise of Mystic Towers is that you, as Baron Baldric will be working your way through Lazarine Towers to kill enemies, and blow up the Generator. You can kill enemies with any of the five attack spells, and the Generator with a Bomb. There are two modes of play here, Practice and Quest Cycle. Practice gives you two lives and lets you attempt any Tower. Quest Cycle gives you 10 and makes you take them on in order. Pay attention to your screen. There's a mini-map, with Yellow Dots being ladders up, and green being ladders down. There's a blue and brown meter, your food and water levels. The Baron is on in years, so he must keep these up. Your life meter is the long red meter. It will increase over time if your food and water meters are okay, and decrease if either are empty. You'll also see a display for score, the amount of coins you have, your remaining lives, and four boxes to show which key you have. The box in the upper right with the Monster face denotes what monster will appear in that room and it has its own life meter right next to it. MT2.2: General Tips =================== Just a few notes, that would not fit anywhere else. *Conserve Food: Food and water can be found in the Towers, and enemies often drop food. However in later towers, non-enemy food can become a premium. If you don't _need_ food (if your meter is more than half full) then don't eat it. It's a complete waste and you will regret it later. *Check Behind Structures: Treasure and spells are often obscured by tables, fountains, etc... check behind these and you may push an item... take your prize. *Check Under Structures: Also, there are often things such as coins and keys hidden underneath these structures. ~If you can't collect an item to check under it, push it or pull it. *Check the Walls: There may be runes on the wall that give you information about the room. You don't want to stumble around in a room that has a Skull Rune on the wall. *Don't Pull Bombs: If you pull a bomb off its rest, it will blow up - wasting the Bomb and hurting the Baron. *Save Often, and in Two Files: Keep two files on hand at all times. Save one when you reach a new floor and save the other when you need to. This is just to protect against Quest damaging glitches and to have a fresh chance ata Floor if you really botch it. MT3: Battle Strategy -=-=-=-=-=-=-=-=-=-=-=-=-=-=-=-=-=-=-=-=-=-=-=-=-=-=-=-=-=-=-=-=-=-=-=-=-=-=-=- | MT3: Battle Strategy | -=-=-=-=-=-=-=-=-=-=-=-=-=-=-=-=-=-=-=-=-=-=-=-=-=-=-=-=-=-=-=-=-=-=-=-=-=-=-=- Here are a collection of battle tips to consider if you're new to the game, so that you will have a better notion of how to approach enemies. *Line up with the Enemy and Fire: ------------------------------- Line up when the enemy is in a Straight line and rip into it with spells. This will allow you to rack up damage quickly. *Line up with Doors, wait for the Enemy: -------------------------------------- As an aside to the above note, if you line up with a door and fire as an enemy enters the room, you can get a couple of hits in before it moves. *Hit and Run: ----------- Get an enemy to charge you. You can pound away at it while it is running towards you, and move out of the way when it gets near. Reposition yourself and repeat the process, this is the most effective process for killing many enemies of the Lazarine Towers. *Use the Doors: ------------- Doors are really an extension of the Hit and Run strategy. When you are fighting an enemy that is very strong - or fast, then it is best to retreat through a door. *Hit from Above: -------------- o |_ | / +---+ .-. | | (o_o) +---+ ---- Say you want to get out of reach of a powerful Melee enemy like Leman. Well, spells behave differently from up above: o |_--+ | | / | +---+ | .-. | | | (X_x) +---+ +-----*------- Spells will instead be dropped in front of you and skid across the floor to where they will strike whatever gets in their way - hopefully an enemy. This sounds all well and good, but use this strategy only if yoy can get the enemy lined up properly. Standing on a platform limits where you can fire in a stage, and if it is too low the enemy can still hit you. If the enemy is flying, don't rely on this technique at all. *Levitate: -------- As an extension of hit from above, if you cast Levitate enough times you can float out of harms way. This has one serious advantage over standing on a platform - free movement. You can chase an enemy and score good hits on it as long as it stays in the room. *Hit from Behind: --------------- Rather than using an item as something to stand on, you can always stand behind the item or platform/pot/etc and shoot at the enemy, if it's Melee. You will fire the spell over the obstacle and hit the enemy. If the enemy gets around your blockade, jump to the other side and find a new position. If you are shootign from behind an item you can pick up, stand at least one space away so that you do not pick it up while you fire! *Build a Wall: ------------ As an extension of Hit from Behind, consider how to use the items in the room to your best advantage before picking them up. If you place at least three of the obstacles side by side, you will have an effective wall. You will better be able to predict how the monster will move around it, and you can respond much faster. If your wall spans a hallway, you will have created a safe spot where the ground, melee monster will not be able to reach you. *Build a Trap: ------------ The ultimate use of items to block ground-based Melee monsters, a trap is simple in design, but devious in execution. I suggest at least four items for proper execution, you can get away with two, but the monster will likely escape. Here's a real-game scenerio involving an Eggnog: WL: All IT: Item PT: Pot +-----+-----+-----+ /WL / / IT / +-----+-----+-----+ /WL / / IT / +-----+-----+-----+ /WL / / IT / +-----+-----+-----+ /WL / / PT / +-----+-----+-----+ /WL / *A / PT / +-----+-----+-----+ /WL / WL / WL/ +-----+-----+-----+ Basically, you set this trap up for the eggnog when it is out of the room. Then, when the Eggnog starts to chase you, you lead it into position A. Jump out one end, run up to an item and press it in to trap the Eggnog. When you trap a melee enemy like this, you will be able to rapidly pound it with a spell like Ice and still get results. In that sense, you will be saving your items for harder encounters. *Higher Floor Equals Higher Difficulty: ------------------------------------- Essentially, if you have to cut corners and use your weak spells in a struggle against low floor enemies, it will benefit you at the higher floors. Saving your stronger spells for higher floor enemies will allow you to dispatch them more easily. A Shrimpion on floor 1 might have a decent amount of stamina and shoot Ice, but a Shrimpion on floor 5 might be an absolute tank that shoots Venom Clouds. There are, of course, exceptions to this based on the monster. *Look For Alternate Means: ------------------------ If a monster seems really strong, then check out the Floor for Bombs you can drop on it, or a Power-Up to help you dispatch it. There may not be a certain way to approach the monster, btu you can sure look for one. Please note that you can take Power-Ups between floors. *Catch a Monster in a Trap Meant for You: --------------------------------------- If you know the location of a trap, and a monster is chasing you then it is possible to catch the monster in that trap and have it take the hit. This is very risky, however, and is nto recommended against speedy monsters. *Venomous Monsters have Priority: ------------------------------- Honestly, you can walk off most fights and recover enough Health for the next without having to cast Heal. There are soem monsters that cast Venom Cloud, it will hit hard and poison the Baron. When it comes to fighting these monsters, I prefer to destroy them as quickly as possible with Lightning or Fireball. MT4: Spells and Power-Ups -=-=-=-=-=-=-=-=-=-=-=-=-=-=-=-=-=-=-=-=-=-=-=-=-=-=-=-=-=-=-=-=-=-=-=-=-=-=-=- | MT4: Spells and Power-Ups | -=-=-=-=-=-=-=-=-=-=-=-=-=-=-=-=-=-=-=-=-=-=-=-=-=-=-=-=-=-=-=-=-=-=-=-=-=-=-=- Spells are described in the following template: Name: Shortcut Key: Power: Max Payload: Use: Alright, they are listed in the order of Shortcuts on the keyboard. Power-Ups are listed afterwards. Name: Ice Shortcut Key: 1 Power: 1/5 Max Payload: Infiite Use: Your basic, infinite use spell. It is useless for tackling most monsters in teh game after Rimm, but if you can trap a monster later in the game and hit it rapidly with Ice, then you will save castings of higher level spells. If you for soem reason run out of all other spells, you will have no choice but to use ice. If you are groping around somewhere that you can't see for treasure, then you should switch to Ice. This is just so you do not waste any spells. Name: Sulfur Shortcut Key: 2 Power: 2/5 Max Payload: 50 Use: A second level spell that will suffice for simple monsters, or weakened monsters. It loses its use later in the game, but for the early towers it is helpful against many slower Melee monsters. Name: Venom Cloud Shortcut Key: 3 Power: 3/5 Max Payload: 40 Use: Venom Cloud will become the bare minimum spell to use against enemies in the late Towers. It's a mid-range spell that will down most Floor 1 or 2 monsters well enough, and can be used to clean up on higher level monsters if you run out fo stronger spells. It is quite common in most Towers, but as I said it becomes the minimum. Name: Fireball Shortcut Key: 4 Power: 4/5 Max Payload: 30 Use: A mid/high level spell that will be necessary to effectively destroy a lot of late rmosnters, or to clean up if your Lightning runs out against the hardest. Name: Lightning Shortcut Key: 5 Power: 5/5 Max Payload: 20 Use: The most powerful attack magic that should be reserved for the greatest threats in the game. Name: Reveal Shortcut Key: 6 Use: This is a useful spell, it has a number of uses: -Reveal hidden doors or items. -Reveal posion tiles on the floor. -Turn on the lights in any room with a lightswitch or many other dark rooms. If the room is dark and poisonous, then the convenience of using this spell rather than finding the light will cost you 2 castings... Name: Heal Shortcut Key: 7 Use: This spell heals about a third of your energy in one casting, and will also cure poison. Name: Teleport Shortcut Key: 8 Use: Use this on any Teleport pad to make use of it. Name: Levitate Shortcut Key: 9 Use: Levitate is only really important in Wizard Towers 5 and 6. But it does have a number of uses: -Cast it once and move over Pain Tiles without damage. -Cast it multiple times to get above an enemy and drop spells on it. -Use it to skip past the glowing pink panels, without finding the pattern. -Use it under am item on a shelf undtil your head touches the item. Move to make the item fall. -Use it to reach high doors or ladders. *Jump to deactivate the Levitate. Name: Bomb Shortcut Key: 0 Use: Blows up the Generator. Get clear or you'll be caught in the explosion. Power-Up: Invisibility Use: The Baron cannot be seen by enemies unless he is right next to them. This will not protect him from damage and monsters that shoot will still shoot. It is best used to sneak by an enemy or to tackle melee monsters. As an added function, auto-shooters will not shoot when you are Invisible. Power-Up: Meta-Power Use: Meta-Power greatly increases the power fo your staff, allowing you to crush strong monsters quickly even with mid powered spells. When you get a Meta-Power, pick your target carefully. It's also a good deal if you can kill multiple monsters before the power runs out. Power-Up: shield Use: You will be invincible against enemy attacks. Also, enemies will not charge you. This is useful against enemies that would normally get to you and cause a great deal of damage - take it out mostly with a one-level weaker spell while shielded, then finish it with the Stronger spell if the shield runs out. MT5: Tower Geography -=-=-=-=-=-=-=-=-=-=-=-=-=-=-=-=-=-=-=-=-=-=-=-=-=-=-=-=-=-=-=-=-=-=-=-=-=-=-=- | MT5: Tower Geography | -=-=-=-=-=-=-=-=-=-=-=-=-=-=-=-=-=-=-=-=-=-=-=-=-=-=-=-=-=-=-=-=-=-=-=-=-=-=-=- The Towers have a number of aspects that make up their puzzles and geography. This is a catch-all section for every other nuance of the game not previously mentioned. It is very likely that I missed something here. If I did, shoot me a mail. Auto-Shooter: A fireball trap thata utomatically shoots when you are in the room, unless you are invisible. Also, if an enemy walks into their path, it can take damage. Coins: Currency you can collect in the Towerf or use in slots. Coloured Keys: Used to open doors via keyholes. Column: Large structures that extend from the floor to ceiling. Especially in Wizard Towers, these can sometimes be moved. Combination Lock: A series of switches or buttons that must be pressed in or switched to a certain pattern for the door to open. Cupboard: A covered niche that will oepn once you've performed a certain task in the room. Often conceal treasure or an important item. Door: A door often has to be opened by a key or a switch. These switches can If you see a little bubble with a door opening.closing in it - a door has opened or closed in another room. Dotted Line Panel: Often sets off Fireball traps, or opens/closes doors. Drink: A drink that is found laying around like food. The trick here is that many of them will intoxicate you. However, not all do and they all increase your Water level. If there are no enemies around, take the drink anyways and walk it off. Dropping Bombs: A trap that is either set off by pressing a switchm or by stepping on a panel with a green dot. Can harm the enemy and Baldric. Often helpful in killing enemies. Fire: An obstacle, stepping on it will cause damage. Fireball Trap: A fireball shoots out of the wall and will strike whatever is first in its path - enemy, Baldric, or obstacle. Fireplace: A large fireplace on the wall. Not usually important, but something might be hidden against the flames, obscured in the colour. Food: Eating a piece of food will increase your food meter. However, some food does a slight amount of damage to you, and will not increase your meter. Fountain: A reliable source of water, drink up when you see a Fountain and remember their location. Generator: This device is responsible for bringing monsters back to the tower after you have killed them. You must place a bomb in it to destroy it. Get away from the blast area. Glowing Pink Panels: Those blinking areas of pink that you often see in Towers. They are at different heights, you will need to jump on the lowest and make your way up and past them. Green Dot: Small green dots mean that the panel is trapped with dropping bombs. Grey Block: A small nlock that you can often move to block enemies or to find items. Idol: A large statue in the Tower that slot items often drop in front of. There are foten traps ner Idols. Keyhole: Use this to open or close doors. Ladder: Used to travel between floors. Map Piece: In Wizard Towers, they provide a Floor's map. Mushroom: You will regret eating this if you aren't poisoned... but if you are poisoned it will heal you. Mystery Runes: Runes on tehw all that look like fish. A vertical rune _usually_ denotes a hidden door in the wall. Or, it could mean any other mystery of the room. A horizontal rune means that you should cast Reveal, and any number of things can happen then. Niche: A small space in the wall where an item will rest. Pain Tile: A larger, 3x3 Skull Carpet that will damage the Baron to walk on it. Either find some way around, make some kind of bridge, or use the Levitate spell. Platform: These can often be moved afte rthe items they hold are claimed or removed. Underneath them, there may be items or you can bring them over to taller platforms to act as a bottom step. Poison Tile: A small, 1x1 panel that you can see by walking on or casting Reveal. It will poison you if you walk on it. Pot: Like the platform, these are often used as steps or cover items. Red Button: Often controls doors, or drops bombs, controls light, etc... Revealed Door: A door that appears when you cast Reveal. Save before you do this, or pass through it before you save (see Glitches). Skull Rune: Denotes that there are poison panels in the room. Cast Reveal. Slot: Insert a coin for any number of effects. If there's an idol in the room it will usually allow you to buy spells. But that isn't always the case as it can open cupboard or doors or drop treasure, etc... Sludge: Drink this to poison yourself, if you're in a normal condition. If you drink it while poisoned it will heal the poison. Spell: Pick them up to increase your stock of respective spells. Switch: Controls doors or lights, etc.. Teleport Panel: Casting Teleport in the centre of these will take you in their respective directions. For instance a "3" Teleporter will take you to Floor 3. That is, if there is nothing blocking the centre of the target location. Teleporters with arrows take you in the noted direction on that Floor. Tower Key: This large key appears when all enemies and the generator have been taken out. Use it in the starting room to leave the tower. Transmute Niche: A Niche with a lightning symbol. It will increase your stock of a spell. Place the spell in the niche, and insert a coin in the slot. Don't wasye this on weak or common spells. Treasure: Items in the Tower that are there to be fouund (completion) and increase your score. These come in sizes from rubies to larger gold idols. Keep your eye out. Wall Hole: A fireball will fire out of these if there is a trap or auto-shooter in the room... Wall Mask: Faces on the wall. They are also an aspect of Fireball traps or Auto-Shooters, most often. MT6: Lazarine Towers -=-=-=-=-=-=-=-=-=-=-=-=-=-=-=-=-=-=-=-=-=-=-=-=-=-=-=-=-=-=-=-=-=-=-=-=-=-=-=- | MT6: Lazarine Towers | -=-=-=-=-=-=-=-=-=-=-=-=-=-=-=-=-=-=-=-=-=-=-=-=-=-=-=-=-=-=-=-=-=-=-=-=-=-=-=- This is the meat and potatoes of the guide, so to speak. I've tried to describe every room of the game. MT6.0: Using this Walkthrough *---------------------------* Alright, I felt that a standard walkthrough for this game wouldn't work out so well, at least if I were writing it, because the game is so open ended. Instead I have listed the rooms of the Towers in order, and if you are having trouble with a room you can refer to that section. Floor # Map Monster Paths +=========+ +===========+ +--+ +--+ +--+ * | | | | | | +--+ +--+ +--+ +--+ +--+ +--+ | | | | | | +--+ +--+ +--+ +--+ +--+ +--+ | | | | | | +--+ +--+ +--+ This is the Floor map, that will show generally the layout of a Tower Floor. Most importantly, there's the Monster paths described. These are the rooms in which the Monsters will proceed through. What you can do is to check the Monster's path on my Floor map, then go to the respective rooms to see how to best deal with that monster. This is often just instructions to hit and run, but you may find out that there's a bomb switch, or a way to trap the monster, etc. So have fun, and good luck. MT6.1: Rimm [_-_-_-] [_-_-_-] |-_-_|_________________________________________________________________|-_-_| |-_-_| MT6.1: RIMM |-_-_| |-_-_|-----------------------------------------------------------------|-_-_| [__||__] [__||__] The Rimm Towers will begin your Quest Cycle, Apprentice and Wizard. Use these Towers to practice the skills you will need to conquer the game. ****************************************************************************** E1: Rimm Enemies ****************************************************************************** Azurblast: ========== Attack Type: Ranged Movement: Ground Description: A blue, one wheeled monster that spits spells. The only ranged enemy of Rimm Tower, Azurblast is sporadic enough that you should be able to dodge its shots. Attack it from the sides or the back, it will only start firing after a certain amount of damage. Note what kind of shot the Azurblast are using. Use more care than you normally would if it is shooting something like Fireballs or Venom Clouds. Dralek: ======= Attack Type: Melee Movement: Ground Description: A brown, skirted dragon that attacks with its jaws. The Dralek is a dangerous enemy by Rimm standards. It's main weakness is its speed. It does speed up as you hit it, but it's direct and slow enough that if you pound this skirted dragon with spells from a great enough distance it will soak upa ton of punishment before it gets to you. But if you get near enough to it, it will do a number on you. Fungafly: ========= Attack Type: Melee Movement: Air Description: A large, red, flying toadstool. The only flyinge enemy in Rimm, Fungafly start out slow enough, but they really do pick up speed. They will bypass most obstacles you set up for them, so just pound them with spells and rely on doors instead to get out of the way of danger. Jagurota: ========= Attack Type: Melee Movement: Ground Description: A monster with a spinning, bladed body. I find that Jagurota are a little faster than Dralek, but it's essentially the same deal here. If it catches up to you, it will attack with biting and blades. Again, hit and run is an essential tactic here. Scarabite: ========== Attack Type: Melee Movement: Ground Description: A beetle, flat to the ground. Scarabite will attack you up close and pesonal, but they are literally the easiest monster in teh game. You can usually take them out with Ice or Sulfur, and if they get close you can jump on them to kill them... A1: Rimm Tower Part 1 ****************************************************************************** A1: Rimm Tower ****************************************************************************** Rimm Tower is of the more basic layouts in the game, being that it is first. Just work your way from bottom to top, destroying the monsters as you go. It's as simple as you get in this game - take the time to learn the runes and to practice combat techniques. Floor 1 Map Monster Paths +=========+ +===========+ +--+ +--+ +--+ *Scarabite: Rooms 2, 4, 5 |01|-|02|-|03| +--+ +--+ +--+ *Fungafly: Rooms 3, 6, 9 | | | +--+ +--+ +--+ *Azurblast: Rooms 7, 8 |04|-|05| |06| +--+ +--+ +--+ | +--+ +--+ +--+ |07|-|08|-|09| +--+ +--+ +--+ Room 1 ====== There are a few coins on the ground, and a Venom Cloud spell. Collect both of these, then head through the door at the lower right corner. Room 2: ======= There's a watermelon here, and a Sulfur here. Given that you are fighting a Scarabite in this room, use either your Ice spell or jump on it to kill it. Room 3: ======= Use one of the Sulfurss you picked up to take out the Fungafly from a longer distance. You may want to stand on a pot in front of the door, but keep in mind that it will not deter the flying mushroom. It's slow and indifferent enough that you can move out of the way if it charges you. Do not go into the upper left corner, behind the grey block. A bomb will drop from the ceiling to inflict heavy damage. Make sure to pick up the Sulfur and Venom Cloud before you proceed. Room 4: ======= Make sure you pick up the Sulfur and Heal spells. There's an apple if the Baron is hungry. If you want to drink the wine, make sure there are no enemies around as it will make the Baron drunk. If you haven't killed the Scarabite yet, jump on it or cast Ice from afar. Room 5: ======= Pretty stocked room, kill the Scarabite if you haven't already with Ice or a Jump. Grab the Sulfur and the Venom Cloud spells. Take the star shaped spell, Teleport. The Teleporter here leads you to Floor 4, Room 28 and quick access to the Bomb. You can teleport from that room again to Floor 2. If you want to get the Bomb early, then use the 'port. Don't eat the Mushroom unless you have been posioned. Room 6: ======= Don't fight the Fungafly in this room, it's cramped and dark. There is a switch to the southeast of the door which you can flick to turn the lights on. It's at the corner where the two hallways meet. Even with the lights on, you're at a disadvantage with the Fungafly compared to other rooms on its path. When all's clear, there's a leg of meat, a fountain to drink from, and a coin on the ground. The Baron's probably thirsty by now... There is a key under the meat, by the way. If the Baron isn't hungry, pull the meat and grab the Yellow Key. Room 7: ======= Lead the Azurblast into Room 8 and deal with it there. When you're ready for Room 7, grab the ruby treasure, the food, and the Sulfur. Climb the ladder. Room 8: ======= Get the Azurblast into the room, then block the door with the grey block (don't stop for the treasure just yet). Return to the door and jump up the stacks. Fire down on the Azurblast with a spell like Ice or Sulfur. You have to be at the highest point to avoid damage from the Azurblast. When it starts shooting spells it may be a bit harder to predict and you may have to go down after it. It's better to go down after the Azurblast than to have its life regenerate. Pick up the treasure you uncovered. Take the Venom Cloud from the wall and move the block away from the door. Proceed. Room 9: ======= If you haven't fought the Fungafly yet, you may want to block it in this room by pushing the grey block in front of the door, and standing up high dropping spells on it. There is bread in the little cubby if you are hungry. Otherwise, grab the Venom Cloud, jump up to the door, and proceed. Floor 2 Map Monster Paths +=========+ +===========+ +--+ +--+ +--+ *Scarabite: 17, 18, 15 |10| |11|-|12| +--+ +--+ +--+ *Jagurota: 10, 11, 12 | | +--+ +--+ +--+ *Fungafly: 13, 14 |13|-|14| |15| +--+ +--+ +--+ | +--+ +--+ +--+ |16|-|17|-|18| +--+ +--+ +--+ Room 10: ======== The Jagurota should be attacked from a distance with Sulfur. There is a Red Key under the food. If you are not hungry, just pull it off and take it. There's a water fountain here, so drink up. Room 11: ======== The Jagurota should be attacked from a distance with Sulfur. Take the coins and the melon if you need it. The switch is a light switch, leave the lights on. Proceed to Room 10. Room 12: ======== Line up with the door and wait for the Jagurota to appear. Launch some Sulfur at it and run when it gets near. Use a hit and run tactic to take it down. The height of the table will _not_ protect you. Afterwards, grab the Treasure you can clearly see. There is also one behind the table, an ankh that could be hard to see. Move back and forth until you start pushing it to find it. Now, take the Sulfur, Levitate, and Reveal spells. The switch merely controls the door to Room 15. The teleporter takes you to the fifth floor, Room 42. Proceed through the door. Room 13: ======== Line up with the door, it's better to take the Fungafly in here. Both 13 and 14 are cramped, but 13 less so. Use Sulfur to blast the fUngafly. There's a Venom Cloud and an apple here if you need them as well. Proceed to Room 14. Room 14: ======== I recommend taking on the Fungafly in Room 13, using Sulfur. But you can do it here if you wish. Take the treasure in front of the Idol. The slot near the Sulfur will let you spend 2 coins for some Sulfur. Get some if you need it, there are limited uses of the slot. Climb the ladder. Room 15: ======== Hit the switch closest to the door you entered (from 18) to trap the Scarabite in the room with you. Cast Ice at it from a distance and Jump at it if it charges you. It should fall in no time. There are two Sulfurs to grab, and some food. Flip the next switch to open the next door and proceed. Room 16: ======== There's a Venom Cloud and some Water. Take the spell, and drink up. There is a coin below the Venom Cloud. The switch on the wall controls the door. Open it and proceed. Room 17: ======== The Scarabite is locked in Room 15 currently, so don't worry about it. If you do have to fight it here, use Ice. The switch opens and shuts the door you just left. Take the melon and move on. Room 18: ======== The Scarabite is currently trapped in the next room. If you do have to fight it you should use Ice. Grab the Sulfur, and pull the switch to open the door to room 15. Enter it. If the Scarabite enters the room immediately after you open the door, run back and start casting Ice. Floor 3 Map Monster Paths +=========+ +===========+ +--+ +--+ +--+ *Jagurota: 23, 24 |19|-|20|-|21| +--+ +--+ +--+ *Dralek: 25, 26, 27 | +--+ +--+ +--+ *Azurblast: 19, 20, 22 |22|-|23|-|24| +--+ +--+ +--+ -GENERATOR: 22 | | +--+ +--+ +--+ |25|-|26|-|27| +--+ +--+ +--+ Room 19: ======== Due to all of the fire, it is best to fight the Azurblast elsewhere. If you want to geta few shots in on him as you lure him elsewhere, that's fine. Room 20: ======== This room is kind of cramped to fight the Azurblast, but if you must: use Venom Cloud. Grab the levitate spell, hit the red button, and proceed through the door. Stay on the blue carpet lest you be smote by a bomb. A1: Rimm Tower Part 2 Room 21: ======== Grab the Venom Cloud here. The red switch opens/closes teh door you enetered from. The pink/purple glowing panels will block your progress. Head to the glowing panel to teh far southeast of the ladder and face it. Jump over it. The slot here will take two coins per Sulfur, which land by the Idol. Of course there are limited uses here. Take the ladder when ready. Room 22: ======== In this room, you will find the source of the villainous monster scum of this tower. The generator, a hive of evil, must be destroyed with a bomb. If you have a bomb, use it. Otherwise, mark the Generator's position and return once you've found one. Besides the generator, there is an Azurblast. This room is as good as any to fight the monster because the next room is full of fire, and the room after is cramped. Crush his spirits with a Venom Cloud barrage as he enters the door. To one side of the lady statue is a a floor panel that opens teh locked door (if you didn't open it from room 23) and a Venom Cloud spell. Rock it, and head through the door to Room 19. Room 23: ======== The Jagurota is best fought in Room 24, there's not enough room in 23. After you have killed the Jagurota, take the three coins from the cubby and walk on the dark panels near the fire if you want to open the door to room 22. Room 24: ======== That pot is very useful. You can shoot at the Jagurota from behind it. Lay into the beast, then leap to the other side when he comes around. I suggest using Sulfur to get the job done, Venom Cloud if you run out. Room 25: ======== Use a hit and run tactic against the Dralek with Venom Cloud. Grab the treasure that falls from above, and head towards the Sulfur. Don't take the blue carpet path, however, as a bomb will fall from the ceiling and cause a dire explosion. Head through the door. Room 26: ======== Use a hit and run tactic against the Dralek with Venom Cloud. That's it, if the room's clear - proceed. Room 27: ======== Attack the Dralek from a distance with Venom Cloud. A hit and run tactic will save you any greivous injuries here. The Teleport pad leads back to Room 5. Grab the Teleport spell and hurry on through the door. Floor 4 Map Monster Paths +=========+ +===========+ +-----+ +-----+ +-----+ *Scarabite: 29, 30 | 28 | - | 29 | - | 30 | +-----+ +-----+ +-----+ *Dralek: 28, 31, 34 | | +-----+ +-----+ +-----+ *Azurblast: 33, 35, 36 | 31 | - | 32 | - | 33 | +-----+ +-----+ +-----+ | | | +-----+ +-----+ +-----+ | 34 | - | 35 | - | 36 | +-----+ +-----+ +-----+ Room 28: ======== If you entered from Room 29, grab the bomb and run back to the generator (that is, if you didn't teleport here earlier). The Teleport pad takes you back to Room 12. From the other side, take the ladder after grabbing the Sulfur, and moving the mushroom for some coins. If the Dralek is still here, give it a shot of Meta Power sulfur. Room 29: ======== The switch in here again controls the door. Take the key, and for now, head through the northwest door. On your return trip, take the southwest door. Room 30: ======== Fight the Scarabite by shooting either Sulfur or Ice at it, and jumpin on it when it closes in. Take the coin. That horn near the top contains alcholic beverages and will make you drunk. If you step in front of the Idol's face, you will be punished with a bomb from above. Hit the red button and move on to Room 29. Room 31: ======== If you haven't yet, blast the Dralek with a Meta Power Sulfur. Grab the Heal and Venom Cloud, and move on. Room 32: ======== There is a light switch under the painting near the door to Room 29. Flip it. The Skull Rune means there is a poison panel in the room. If you get poisoned, run to room 29 and eat the Mushroom or cast Heal. The panel is located in the middle of the carpets, where they cross. Cast reveal, or grab the Reveal and cast it then, to see what I'm talking about. If you have the key, use it in the keyhole to open the door to the southeast. Enter this door to Room 33. Room 33: ======== That's a Levitate, Food, and Sulfur if you want them. The outlined floor panel opens the door to 36 and the keyhole controls the door you enetered from. The money slot allows you to purchase some Venom Clouds. Switch to Ice or Sulfur and grab the Meta Power. Do the next rooms as quickly as possible. Step on the panel and proceed to Room 36. Room 34: ======== If the Dralek is here, destroy it with a single Meta Power Sulfur. Move on. Room 35: ======== If you haven't destroyed the Azurblast yet, do it now. Grab the sulfur and flip the lower button to open the next door. Proceed. You can always return for a drink later. Room 36: ======== With a meta-power-infused Sulfur, send the Azurblast packing in two hits. The dotted panel controls the door you just used and the water bottle gives you a nice boost to the water meter. Proceed through the next door. *Note! This Azurblast shoots Venom Cloud. Don't get posioned. A1: Rimm Tower Part 3 Floor 5 Map Monster Paths +=========+ +===========+ +-----+ +-----+ +-----+ *Fungafly: 37, 40, 43 | 37 | | 38 | - | 39 | +-----+ +-----+ +-----+ *Jgurota: 44, 45 | | +-----+ +-----+ +-----+ *Dralek, 38, 39, 42 | 40 | - | 41 | | 42 | +-----+ +-----+ +-----+ | | | +-----+ +-----+ +-----+ | 43 | - | 44 | - | 45 | +-----+ +-----+ +-----+ Room 37: ======== Quickly go back down if the Fungafly is near the ladder. Otherwise, get off the ladder to either side of it, but not the blue carpet because there is a Poison Panel near it. For instance +-----+ / / +-----+-----+ / L / P / +-----+-----+ / / +-----+ Where L is the ladder and P is the Posion Panel. Okay, so you're going to have to use Venom Cloud against the Fungafly - pick up the invisibility before you wait if you want. As a reminder, cast Reveal before you lie in wait so you don't posion yourself by accident. When the Fungafly is dead, either hit that red button to open the other door, or head through the door which is already open. The best thing to do with invisibility is to leave it here until you need it. Room 38: ======== Grab the Shield and use a lower spell like Sulfur while you are invulnerable to destroy the Drawlek. If the shield runs out, switch to Venom Cloud. Alright, the slot here gives you Venom Clouds. The buttons control doors. Room 39: ======== Fight the Drawlek, with either invisbility or shield from a distance. The button controls a door and there is a convenient fountain next to it. There is a heal spell in plain sight, and a Teleport behind the pot. Room 40: ======== Take out the Fungafly with Venom Cloud if you haven't already. Take the Sulfur, then pull the platform it was on away to reveal some coins. There is a Venom Cloud near the Statue. Take it. Now, there is a Mystery Rune in this room. If you want to solve the puzzle and enter a hidden room, follow the blue carpet. See how one sections ends at a wall? If you press againt here you will enter a hidden door. When you're done, return to this room, and enter the other door to Room 43. Room 41: ======== To access this hidden room, look at the description for Room 40, or 44. Note that you can solve the mystery of this room by following the green carpet through the wall. Take the melon and the Treasure. There is a levitate hidden on one side of the table. The switch is a lightswitch, you can always turn on the lights with the Reveal Spell if need be. The dotted line panel will open a door to 44. It only stays open for a limited time. Room 42: ======== I suppose you can use Fireball on the Drawlek, but it really is a waste. If you run to Room 38, you can get a Shield. With a Shield, you can take any hit from the Drawlek and use a weaker spell to inflict as much damage as possible while saving the stronger. The third floor Teleport here takes yo to Room 21. Room 43: ======== Grab the fireball. It's a little overkill in this dungeon, but you may want to use it on an enemy coming up. Use Venom Cloud on the Fungafly if you haven't killed it yet. Move the pot for a blue key. Head to Room 44. Room 44: ======== Pelt the Jagurota with Venom Clouds until it gets to close. Use a hit and run tactic to avoid your guts being grinded into a fine pulp. To reach The VEnom Cloud and bread, take the pink panel to the most southeast of the door and leap on it. Face northwest and leap up and across the pink glowing panels until you reach your prize. Jump onto the table and then over the glowing panels to escape. The dark panels around the fire: one of them will open the door to Room 41. Room 45: ======== Blast the Jagurota with Venom Clouds if you so wish. GRab teh Sulfur and take a drink. Proceed through the next room, room 42. Editing the ascii art by hand manually when its so tiny and constantly misaligned sucks. I'll work on this guide piece by piece MT6.2: Tor Karad [_-_-_-] [_-_-_-] |-_-_|_________________________________________________________________|-_-_| |-_-_| MT6.2: TOR KARAD |-_-_| |-_-_|-----------------------------------------------------------------|-_-_| [__||__] [__||__] Tor Karad diversifies the field of enemies, there's still the basic types but they specialize more. ****************************************************************************** E2: Tor Karad Enemies ****************************************************************************** Clawfoot ======== Attack Type: Melee Movement Type: Ground Description: A small, fast enemy that is two eyes attached to a stalk of claws. Clawfoot enemies are very fast, and powerful. Since speed is their main asset, it makes sense to use a fairly powerful spell on them, and the doors to your full advantage. It may catch you quite quickly if you try to run for it all the time. Flip-Flop ========= Attack Type: Melee Movement Type: Ground Description: A bloated monster that has a large slab as its mode of transport. Flip-Flop are very... sporadic. Their random patterns seem geared towards making you miss your shots. Take your shots at it, but watch how it moves - as unless it is chasing you it can be difficult to predict. Puffer: ======= Attack Type: Melee Movement Type: Air Description: A floating, green enemy. The puffer will float over most obstacles, and hit you even high up. It's not too deadly, but the added mobility makes it a force. The Puffer has a considerable speed boost when it is damaged enough - and it is not a complete pushover when it comes to attacking you. So get away if it's chasing you. Shrimpion: ========== Attack Type: Ranged Movement Type: Ground Description: A large monster that looks like a scorpion with a Shrimp's tail. Shrimpion's take a pounding, and even when they're casting Ice they can deal considerable damage. If the Shrimpion possesses a dangerous spell, like Venom Cloud - then find a way to dispatch it quickly. The Shrimpion is slow enough at first that you should be able to get a few clean shots in of your own. Triworm: ======== Attack Type: Melee Movement Type: Ground Description: A large monster with worm-like limbs and a red, cyclopean head. Triworm's aren't slow, but they aren't as dangerously fast as the Clawfoot. It is a large monster with a fair deal of power. You can stick to Venom Clouds when you fight Triworms, but it is paramount that you stay away from it. A2: Tor Karad Keep Part 1 ****************************************************************************** A2: Tor Karad Keep ****************************************************************************** Room 13 on Floor 2 is a point of interest. The Floor 3 Teleport here will take you up to room 23, which has a bomb and is a few rooms away from the Generator. If you want to take it out quickly, you should do it this way... There is a Shrimpion that is the "boss" of the tower on Floor 5, it's thick- skinned and fires Venom Clouds. Use power-ups and powerful spells to down it with greater ease. Floor 1 Map Monster Paths +=========+ +===========+ +--+ +--+ +--+ *Triworm: 6, 8, 9 |01| |02|-|03| +--+ +--+ +--+ *Shrimpion: 2, 5 | | | +--+ +--+ +--+ *Clawfoot: 1, 4, 7 |04| |05| |06| +--+ +--+ +--+ | | | +--+ +--+ +--+ |07| |08|-|09| +--+ +--+ +--+ Room 1: ======= Try to deal with the Clawfoot here. It's a fast and dangerous enemy, so watch out. Dodge it if it gets near. You can use the food, Sulfur, and Reveal spell to actually build a wall over which you can fire at the Clawfoot. Use as many Sulfur as you can on it. After that, Venom Cloud and Ice. Pick up the spells and take the door when you're done. Room 2: ======= The Shrimpion is essentially trapped in this room, and you will have to fight it here unless you find a key. It's going to be a hit and run affair because teh Shrimpion can, of course, fire off Ice spells of its own and they don't necessarily tickle. Test the door as the beast may be in wait right after it.cast reveal. Switch to Sulfur and blast the Shrimpion. Grab the other Sulfur to finish it off. If you're worried, use Venom Cloud. Do _not_ waste a fireball on the Shrimpion if you can help it. Push the pot to get a Yellow Key. If you've dealt with the other rooms you can currently reach... climb the ladder. Room 3: ======= Your starting room, grab the Venom Cloud and the coins. Take the door to Room 6 rather than room 2. Well, the Shrimpion in Room 2 falls quickly to Venom Cloud, but there's a poison tile in there and you want the security of a room where you may not accidentally set off a trap. Room 4: ======= The light switch is in the northwest corner, and the switch to the door to Room 7 is near the door you've netered from. Take the Sulfur, Heal, and Watermelon before you proceed. Do _not_ fight the Clawfoot in the dark... Cast a reveal if you need to. Room 5: ======= Just collect the items in here. A Heal Spell, Fireball, and some water. Head on back to Room 2 when you're ready. Room 6: ======= Try to line up with the other door and blast the Triworm as it appears. This long room is really the best opportunity to deal with this very aggressive enemy, and you can duck through the door if things get hairy. Hit and run is a must. Need some help? Drag the apple out of the wall, then place it one space away from where you are going to be firing. In other words, the apple will be away from the Baron and you won't pick it up when you're firing. You can fire over the apple at the Triworm and it would have to go around it to reach you. You will be able to respond to this very quickly with your makeshift barrier. Heck, you can use Ice for now and conserve your higher spells. When you're done, eat teh apple if the Baron is hungry. Room 7: ======= Way to cramped with an idol and a Poison Panel to fight the agile Clawfoot. You likely don't have any Teleport spells at the moment, so let's continue on. There are a few coins on the ground near the Skull rune. Take them, then take the ladder. Room 8: ======= Now, this is a risky room to fight in if that Triworm is still kickin' around. See that dotted panel on the carpet? If you step on that, the head on the wall will blast you with a fireball. Now, it is possible to get out of the way of the fireball and have it hit the Triworm. This saves time and magic, but it is very risky... I prefer to take the Triworm on in Room 6. Otherwise, grab teh Reveal and head up to room 5. Room 9: ======= I suggest you deal with the Triworm in either Room 8 or 6. Drag the pot to reveal a Blue Key. Take the Sulfur from the floor, then use the key on the keyhole. Floor 2 Map Monster Paths +=========+ +===========+ +--+ +--+ +--+ *Flip-Flop: 10, 11, 12 |10|-|11|-|12| +--+ +--+ +--+ *Clawfoot: 16, 17 +--+ +--+ +--+ *Triworm: 13, 14, 15 |13|-|14|-|15| +--+ +--+ +--+ | | +--+ +--+ +--+ |16|-|17| |18| +--+ +--+ +--+ It's tempting to take the ladder in Room 16, but other paths are more Generator-accessible. Room 10: ======== It may be best to fight the Flip Flop on long distance, or by moving out of its way on the tables. When you've killed it, visit room 12 before proceeding through the Tower. Of course, that wine will get you drunk and the dotted panel will get you shot. A Flip-Flop is far too unpredictable and quick to consider hitting it with the fireball trap. Just avoid it. Room 11: ======== Well, the Flip-Flop here is kind of unpredictable, it's easier to fight in Room 10 for sure. Head to room 10 if the Flip-Flop is present, head to room 12 otherwise. If you are having trouble getting it into Room 10, just carefully aim your Sulfur at it and fire. When out of Sulfur, resort to Venom Cloud or Ice - not Fireball... Take the meat and hop to it. Room 12: ======== Cast reveal right away. There are a few coins under the grey block if you push it. The slot machine provides up to three Sulfurs at 2 coins each. And make sure you grab that Venom Cloud before moving on. Room 13: ======== It's best to take the Triworm on elsewhere. Casting Reveal here will show you the Posion Panel and provide a Teleport spell from above (see the smaller mystery rune?). To reach the key by the mushroom in this room, you'll need to run past the rune and Skull Rune on the wall, you may want to jump across their path so as not to get hit with Ice. Grab the key and return - you may want to also pick up that Sulfur. The key is good for Room 18. If you teleport here, you'll reach Room 23, only a short run away from the Generator. Room 14: ======== Stand near the door and blast the Triworm with Venom Cloud - it only takes about six. As usual, don't waste Fireballs. Duck into the door if it gets too close. The red switch near the door will drop a bomb near the upper northwest door when pressed. If you can catch the Triworm in this blast - great. Grab the Heal spell and take a look in Room 15. Room 15: ======== This room's kind of crowded to fight a Triworm, with no easy escape. Stick to Room 14. You probably don't have the key at the moment, but that's fine. Grab the Sulfur spell. If you don't have the key, check out Room 13, then head to Floor 3 via the ladder in 16. Room 16: ======== Well, you're probably dieing of thirst right now. But you'll need to take on the Clawfoot first. Try him long range with Sulfur and Venom Cloud. But hey - if you get a moment take a drink. You can use that Food and Venom Cloud as a barrier between you and the Clawfoot actually - always think practical! Grab the spell, the food, the coin under the food, and take a drink before you proceed to Room 17. Room 17: ======== A bomb! It would be a _HUGE_ boon to get this, this early - so don't muck 'er up! Seriously, you can lose this bomb. A panel on the carpet will trigger a bomb to fall from the ceiling - the corner where the two carpets meet. Instead, avoid the carpet and take the bomb. There is a teleport to level 3 on this floor (Room 13) and the room you teleport to will have a Bomb anyways, so don't get too hung up. For this reason, the Bomb and the sensitivity of the room, I suggest fighting the Clawfoot in the previous Room, Room 16. A2: Tor Karad Keep Part 2 Room 18: ======== Get the Green Key from Room 13 before coming to this room, as you need it to open the door. Grab the Venom Cloud inside and cast Reveal. The ladder here will lead to room 27. Be careful of the carpet right in front of the ladder as it is a Fireball trap. Floor 3 Map Monster Paths +=========+ +===========+ +--+ +--+ +--+ *Flip-Flop: 21, 24, 27 |19| |20|-|21| +--+ +--+ +--+ *Triworm: 20, 23 | | | +--+ +--+ +--+ *Puffer: 19, 22, 25 |22| |23| |24| +--+ +--+ +--+ GENERATOR: 21 | | | +--+ +--+ +--+ |25| |26| |27| +--+ +--+ +--+ After you've cleaned up the monster Generator in Room 21, try the ladder in Room 26 or 16. Room 19: ======== There is a red key under the food on the table. If you're not hungry, just pull it out of the way. Take the coins as well. There is a Sulfur spell in here to grab, and you can get a treasure underneath... Room 25 is the best room to fight the Puffer in. But if you have to, fight it from afar with Venom Clouds. Room 20: ======== Take the Triworm on from afar with Venom Clouds. Duck away if it gets too close to the Baron. Hit and run is the way to go with this thick-skinned fiend. Grab the Venom Cloud on the platform, and check around this platform for a treasure. Walk around the grey platform and you will eventually push it, grab it and continue. Room 21: ======== You can use the pot in this room to place between you and the Flip-Flop - fire over it at it, and always keep the pot between you and the enemy. Start with Sulfur and finish up with Venom Cloud or Ice. The Generator is in this room, if you picked up a bomb on Floor 2, or after teleporting to level 3 from Room 13 then use it. It will quell the tide of ravenous beasts. Pick up the coins from under the pots, and continue on. Room 21: ======== You'll want to fight the Puffer in Room 25 instead, it's far to cramped here and there is a poison tile. Now, the tile _is_ under the block, but trying to get away from an angry enemy can cause mistakes to be made. There's just a lack of space here. Room 23: ======== Take the Apple and the Bomb (The Generator's in Room 21). Fight the Triworm with Venom Cloud, but I recommend running into Room 20 and using the greater degree of space to your advantage if possible. Room 24: ======== Lead the Flip-Flop into room 27, and fight it over the barricade I've layed out there... if possible. The ruby is a trap... somewhat. If you walk northeast into the next square after the ruby, then a bomb will fall from the ceiling. So, return to the carpet path as you head to pick up the Venom Cloud. Room 25: ======== Cast a reveal to turn on the lights. The Puffer could be a real problem in the dark, after all. Fight the puffer with a Venom Cloud spell. It will pursue you quite quickly so use a variety of items, the treasure, fireball, reveal, and grey block in the room to make some kind of makeshift barrier. It doesn't take many Venom Clouds to down the puffer, but you don't want it hitting you multiple times in the process. Grab the Reveal and Fireball, after you've used them as barriers of course. The brown stick item is a treasure. The switch above it is the light switch. You will need to stand on something, like the block, to reach it. The slot provides Venom CLouds at 3 coins per pack... Room 26: ======== There's plenty of room to fire Venom Clouds at the Triworm. When you've defeated it, use the ladder here or in Room 16. Room 27: ======== If the Flip-Flop is not in the room, you're good to go. Pull the alcohol off the platform and then push both of them into the next hallway, side by side. When the Flip-Flop enters, you can fire over your barrier to hit it, and jump over the barrier when it goes around. Use Sulfur, then Venom Cloud if you have it. Fireballs are a waste here... I know I've been saying that the whole time, but it's true! Anyhow, there was a ruby under the platform, make sure you take that before you proceed. Floor 4 Map Monster Paths +=========+ +===========+ +--+ +--+ +--+ *Clawfoot: 31, 32, 29 |28| |29|-|30| +--+ +--+ +--+ *Shrimpion: 30, 33, 36 | | | +--+ +--+ +--+ |31|-|32| |33| +--+ +--+ +--+ | +--+ +--+ +--+ |34| |35| |36| +--+ +--+ +--+ Room 28: ======== Not bad, you're going up the ladder and no monster should be waiting for you. The slot in this room provides Venom Cloud for 3 poins/pack. If you put the last one out of order and want some more clouds, this one's for you. There's a Sulfur to grab, and a bread. The button controls the door. Proceed when ready. Room 29: ======== If you haven't killed the Clawfoot yet, two Meta Power Sulfurs will do it. Kill the Shrimpion before you loot this room. Pres the second switch from the northeast wall to open teh door to the next room. When you return, take the Teleport spell, then move the platform for a few coins. Take the Watermelon if you're hungry - there is also a Green Key beneath it... The second switch drops a bomb... useful if you didn't take the Meta Power. Room 30: ======== The Shrimpion should be confronted with Meta Power Sulfur if possible, so go to the pink glowing panels, the farthest on the left of your screen, and leap over them to attack the Shrimpion. Take the Treasure by the pot when you return. The Teleport takes you to room 45... Room 31: ======== If you take the Meta Power, use Sulfur to crush the Clawfoot, Venom Cloud at best. If you did take the Meta Power then I suggest you proceed to the Shrimpion and kill it before you run out of juice. I do recommend getting the Meta Power because it will save you Fireballs and Venom Clouds. Look out for the panel one space away (not right next to) the door on the carpet - it is a dotted panel that sets off a fireball trap. You're in a hurry, yes, but try not to get hit all the same. The button controls the door to 28. Room 32: ======== If you haven't, blast the Clawfoot with Meta Power Sulfur. Proceed to the Shrimpion's domain, but return when you've killed it. When you return, cast Reveal to get a Levitate Spell. When you pull back the platform, you will notice a Mystery Rune (larger). There is a hidden door in this room, check the bottom right corner after you've looted the other Rooms of this floor. Room 33: ======== Blast the Shrimpion twice with Meta Power Sulfur if you haven't already. Then, grab the Teleport and Venom Cloud spells. Room 34: ======== Cast Reveal, it will show you the Posion Tile but not turn on the lights. Fight the Puffer in Room 35, it's too crowded here. Search on the northwest wall above the door to room 35 for the lights. When they're on, grab the Treasure. If you've cleared this floor, take the ladder here or in 36. Room 35: ======== Take the Fireball and keep the grey block between you and the Puffer. Cast Venom Clouds at the Puffer ala Hit and Run until it's downed. If you want to use the secret door, it is in the upper right (northeast) corner of the room. Please also note that there are some coins under the mushroom. Pull it out of the wall, and collect your prize. Room 36: ======== Of course, the dotted black panel in front of the snake statue in the wall sets off a Fireball trap, so avoid it. If you've killed the Shrimpion, check out the hidden door in Room 32 - if you haven't yet. Take either staircase you want - Room 34 or 36's. There's just one more floor of Monsters after you've cleared this one (if none regenerated). A2: Tor Karad Keep Part 3 Floor 5 Map Monster Paths +=========+ +===========+ +--+ +--+ +--+ *Clawfoot: 37, 40, 43 |37| |38|-|39| +--+ +--+ +--+ *Shrimpion: 41 | | | +--+ +--+ +--+ *Flip-Flop: 39, 42, 45 |40| |41|-|42| +--+ +--+ +--+ | | | +--+ +--+ +--+ |43|-|44| |45| +--+ +--+ +--+ Room 37: ======== Don't fight the Clawfoot around the idol, the bottom right corner of its carpet is a bomb dropper trap. The slot allows you to buy some Fireballs, if you have the coins. Get any Fireballs you want, the Reveal Spell, and leave. If there's only a few monsters left, finish up any Venom Clouds you have before switching over to fireball. Room 38: ======== The Shrimpion is in the next room, but there's not a whole lot to help you here besides a Sulfur spell. Make a plan, you can run in and use the keyhole and grab the Invisibility before fighting the Shrimpion. _Or_ you can just lay into it with fireballs. Invisibility helps in the cramped room ahead, however. Room 39: ======== Best not to fight the Flip-Flop in here, but it doesn't really matter if you get the Shield in Room 45. Cast the Reveal spell to spy the Poison Panel, then collect the Fireball near the statue. Proceed to Room 38. Room 40: ======== From 41: Grab the Invisibility and use it to attack the Shrimpion in... relative safety. From 43: It's not actually that bad to get a few good hits in on the Clawfoot here because it will have a hard time avoiding you. If you're leading it into a room, stand by a door and wail on it until it gets close, then duck into your target room. Room 41: ======== Don't worry if you can't reach that Shrimpion... we'll get it later. Proceed through the door on the upper platforms. If you fight the Shrimpion, use Fireballs to finish it off quickly. It's a risk but you can hit that keyslot and grab the invisibility in the next room if you are really concerned. Thuis is the only room this Shrimpion calls home, and it is _cramped_. The Invisibility may be really helpful... Keep a Heal on hand because the Shrimpion casts Venom Cloud (or you could use the Mushroom in the previous room...) The damn thing still casts spells though, so just keep your health up and never relent the assault. The bomb here probably isn't of much use to you, as there are certainly sooner and easier bombs in this dungeon. Room 42: ======== Fight the Flip-Flop with Venom Cloud if possible. Grab the shield in Room 45 before you take it on. When you're done, take the Sulfur and Watermelon. If you want to reach teh door up high, push a pot next to the platforms and use it as a bottom step... Room 43: ======== There's a Clawfoot here, use Venom Clouds on it and practice a hit and run tactic. It's easiest to fight in Room 37, however. Grab the Venom Cloud and move on. Room 44: ======== There's coins in the cubby, and a Red Key underneath. The buttons are near the door to the next room, if you want to proceed or turn on the lights. Room 45: ======== Grab the shield and blast the Flip-Flop with Venom Cloud if possible. Don't use too many fireballs as we need them to dispatch the Shrimpion. Cast a Reveal. The Posion Panel is right beneath the Venom Cloud. So grab it and be done with it. When you go to take the coins, the side near the teleporter is trapped with a falling bomb. MT6.3: Northscar [_-_-_-] [_-_-_-] |-_-_|_________________________________________________________________|-_-_| |-_-_| MT6.3: NORTSCAR |-_-_| |-_-_|-----------------------------------------------------------------|-_-_| [__||__] [__||__] The Towers are becoming a bit more complicated, and enemies are just getting more dangerous. Overall, it's a very similar representation of monster abilities as Tor Karad... ****************************************************************************** E3: Nortscar Enemies ****************************************************************************** Cobbla: ======= Attack Type: Melee Movement Type: Ground Description: A large, green snake. Cobbla is a fairly well-rounded enemy, and dangerous up close. It does pick up some speed, but you'll eb safe playing hit and run with it using only mid level spells to do it in. Monobeak: ========= Attack Type: Melee Movement Type: Ground Description: A green bird with one huge foot. As the Monobeak hops toward you, it is easy to hit it and rack up the damage. Monobeaks often ahve a ton of stamina, and are quite powerful. While it is easy to play hit and run with and use teh doors to escape, it may not be the best Podhopper: ========== Attack Type: Melee Movement Type: Ground Description: A small, cyclopean enemy that moves with its single foot and blade arms. Small, fast, and seemingly the most random monster in this Tower. The best way to tackle the Podhoppper is to get it moving towards you and blast away, making a retreat when it draws too near. Snapdragon: =========== Attack Type: Melee Movement Type: Air Description: A flying black dragon. Witha decent amount of speed and great offensive capabilities, the Snapdragon is a killer. Never mind that it can also fly over most obstacles and hit you even up high. So how do you dealw ith it? Fireballs are in order, and use the doors to your advantage as much as possible to retreat when it gets close. Sniper: ======= Attack Type: Ranged Movement Type: Ground Description: A small, flat arthropod that raises its body when it wants to fire a shot. The Sniper is similar to the Azurblast, except it shoots more often and takes more random intervals. Try to attack it from the side or back, but watch how it moves - as it takes odd sudden turns. Be sure to dispatch it quickly when its attack speed takes a jump due to damage it has taken. A3: Northscar Needle Part 1 ****************************************************************************** A3: Nortscar Needle ****************************************************************************** This is teh first tower where sections are really split off from the rest of the building. use your Teleport spells and the ladders to fully explore the areas. Floor 1 Map Monster Paths +=========+ +===========+ +--+ +--+ +--+ *Sniper: 1, 2, 4 |01|-|02|-|03| +--+ +--+ +--+ *Podhopper: 7, 8, 9 | +--+ +--+ +--+ *Snapdragon: 5 |04| |05| |06| +--+ +--+ +--+ | | +--+ +--+ +--+ |07|-|08|-|09| +--+ +--+ +--+ Room 5 can be reached via Teleporting from Room 6. Room 1: ======= A very cramped room, try not to fight the Sniper here. If you insist, use Venom Cloud to minimize any damage to your person. Take the Fireball and proceed. Room 2: ======= The Sniper is a pretty dangerous enemy at this point, you may want to stay up high and fire Ice down at it. It can only shoot forward of course, so try to hit it as it passes by. If you can take it out with minimal damage to yourself using Ice, you're doing fine. Take the Sulfur, melon and Venom Cloud in here and proceed. Room 3: ======= Pick up the coins and Venom Cloud, then hop up to the door. Get ready! Room 4: ======= Try not to fight the Sniper in here, but if you insist - use Venom Cloud. The key to the door is hidden under the Bread. Take it or pull it out of the way and take the key. Stock up on the Heal and Fireball spells here, and open the door. Proceed! Room 5: ======= You may want to save this for last, and use Lightning or Fireballs to put the Snapdragon down quickly. You need to cast Teleport on the panel in Room 6 to get here. Cast Reveal immediately. Running for the light is too risky. Use Fireballs on the Snapdragon, there are a few in this room if you need them. Use hit and run, and watch out for the bomb trap near the Teleport spell. It is right next to it, northwest. When you finish him off, collect the Teleport, Treasure (may be obscured behind the column, so walk around the Room), Coins, and the Fireball if you didn't use it against the Snapdragon. Room 6: ======= If you have a Teleport Spell, you can reach Room 5 from here. Otherwise, look behind that stone platform for a Reveal spell, then climb the ladder. Room 7: ======= Use the two grey blocks and the Venom Cloud to form a wall between you and the Podhopper. Stay behind it and fire in on him. If you can get him close to the door to Room 4 then you're set, because he will be trapped and unable to leave the room. Use Sulfur or Ice on the Podhopper, line up with the door and strike it until it comes close, then leap over your wall and go to town. After this, grab the Venom Cloud and look under the blocks for a coin. Room 8: ======= Less effectively, you can make a wall in this room too. Use the pot, bread, and Heal spell to do it. But if you're building a wall, do it in Room 7. It's much easier. Watch out for the dotted panel on the bleu carpet, it will set off a fireball trap. Grab the heal spell and bread, if needed, and proceed. Room 9: ======= I don't suggest fighting the Podhopper in here, try to fight it from behind a wall of items in Room 7 or 8. Grab the Fireball near the idol, don't walk in front of it or you will drop a bomb on yourself. Grab the Green Key and use it on the keyhole to open a door. Proceed. Floor 2 Map Monster Paths +=========+ +===========+ +--+ +--+ +--+ *Cobbla: 10, 13, 16 |10| |11|-|12| +--+ +--+ +--+ *Snapdragon: 11, 12, 14 | | +--+ +--+ +--+ *Sniper: 17, 18 |13| |14| |15| +--+ +--+ +--+ | | +--+ +--+ +--+ |16| |17|-|18| +--+ +--+ +--+ Room 10: ======== The red button drops a bomb. The best way to deal with the Cobbla is to hit it with this trap. Test where it hits, then try to lure the Cobbla. Cast Reveal before you start to move about the room. After hitting it with the bomb, finish the Cobbla off with a few Sulfur. Grab the Venom cloud. Walk around this room behind the columns until you push a Treasure. Take it. Room 11: ======== Take the Snapdragon on hit and runs tyle with the Venom Cloud spell. The Teleport spell is valuable in this Tower. The Pad in this room brings you back to the Generator Room, but remember you can take it back to Level 1 to reach Room 5. Room 12: ======== Cast Reveal in this room. The slots here give you up to three packs of Sulfur at a price of 2 coins each. Don't approach the Sulfurs from "above" (northeast space) or a bomb will drop on you. Room 13: ======== Don't engage the Cobbla unless you plan to lure it into Room 10. Eat the chicken if you need it. Room 14: ======== The Snapdragon is best handled hit and run style. Make sure it isn't near the ladder when you come down. Blast it with Venom Clouds or Sulfur, and run when it gets near. Take a drink, and grab the key. When you've checked out Rooms 11, and 12 - come back here and use the key to open the door. Room 15: ======== There is a Venom Cloud in the Southeast corner. Take it, and climb the next ladder. Room 16: ======== Don't engage the Cobbla unless you plan to lure it into Room 10. There's food, and a Heal Spell in plain sight. Pick up the heal to reveal some coins. Check behind the platform/column for a Fireball spell. If you have too many because you were saving them, remember this location. Room 17: ======== Take the Sniper on from a distance with Sulfur, then Venom Clouds. Check under the Pot for some coins. Room 18: ======== Take the Sniper on from a distance with Sulfur, then Venom Clouds. Check under the Mushroom for a ruby, before you climb the ladder. Floor 3 Map Monster Paths +=========+ +===========+ +--+ +--+ +--+ *Cobbla: 19, 22, 23 |19| |20|-|21| +--+ +--+ +--+ *Cobbla: 25, 26, 27 | +--+ +--+ +--+ *Cobbla: 20, 21 |22|-|23|-|24| +--+ +--+ +--+ GENERATOR: 22 +--+ +--+ +--+ |25|-|26|-|27| +--+ +--+ +--+ Room 19: ======== Take one of the foods if you need it, there is a Sulfur spell near the Chicken Leg. Take the few coins around the room, and start down the ladder. Room 20: ======== Try to strike down the Cobbla with Meta Power Venom Cloud. If you can't, just use Venom Clouds. The panel with the green dot causes bombs to fall... Check around the fountain for a treasure. Room 21: ======== Try to strike down the Cobbla with Meta Power Venom Cloud. If you can't, just use Venom Clouds. There is a Venom CLoud behind the idol, and of course you can put some coins in the slot for spells. Room 22: ======== The Generator, but do you have a bomb? Most likely not. I suggest you fight the Cobbla as described in room 23, in Room 23. Room 23: ======== Use hit and run on the Cobbla with Venom Clouds. It may be tempting to destroy it utterly with Fireballs, but it is easy enough to stand by the door to Room 24 and strike it when you can. Drink the BLUE water when you finish. ;) Remember, if you drink Green water you can drink it again right away to cure the poison. You can take that ladder, or the ladder in Room 19 when the Cobbla is dead... Room 24: ======== Cast Reveal. Grab the Reveal Spell, Treasure, and Fireball spell. You're pretty stocked up on Fireballs right now, but stick to Venom Cloud for most of the enemies. Room 25: ======== Take the fireball. You can bactrack a little if you want a drink. Don't bother with the posion water or the wine... Climb the ladder if you've destroyed the Monster Generator already. Room 26: ======== The Cobbla is best handled by dropping bombs in Room 27. The lightswitch is to the right of the wall shelf. The Bomb is in this room, take it back to the Generator and destroy it asap. A3: Northscar Needle Part 2 Room 27: ======== The red button is your friend here, where the two carpets meet it will cause a bomb to fall. You can blast teh Cobbla with falling bombs, and finish it off with Sulfur or Venom cLoud if it gets past your barrage of bombs. Stay off the carpet as you go towards Room 26, as there is a fireball trap activated by the dotted panel. Floor 4 Map Monster Paths +=========+ +===========+ +--+ +--+ +--+ *Snapdragon: 34, 35, 36 |28|-|29|-|30| +--+ +--+ +--+ *Sniper: 28, 29, 31 | | +--+ +--+ +--+ *Monobeak: 30, 32, 33 |31| |32|-|33| +--+ +--+ +--+ | | +--+ +--+ +--+ |34|-|35|-|36| +--+ +--+ +--+ There is a Meta Power on this floor, and you must make good use of it to kill the Sniper, Monobeak, _and_ a Cobbla on Floor 2. At least get the monsters on this floor, but the Cobbla would be a great Bonus. Room 28: ======== Run past the Sniper, we're looking for Meta Power. Returning here, take the Fireball and Sulfur. The Slot here gives Fireballs at a rate of 4 coins/pack. Room 29: ======== Grab the Meta Power and blast the Sniper with some Venom Clouds. Grab the Venom Cloud from the Shelf. Set Reveal on and run into Room 32. When you return, feel free to take the melon and teh Red Key. Room 30: ======== From 29: Take the ladder down. Drink after you've killed the Cobbla below. From 33: Kill the Monobeak with Meta Power Venom Cloud, then run back around to take the ladder. Returning from 33, there is a ruby under the pot. Room 31: ======== Run past the Sniper, we're looking for Meta Power. The Flask in this room will make the good Baron drunk. Room 32: ======== Cast reveal and blast the Monobeak. If he's not here, run into Room 33 or 30 along this path and take it out asap. When the Monobeak is destroyed, run to Room 30 via 29 to get down the ladder to face the Cobbla. Be careful running into Room 33 as there is a fireball trap panel very near the door. On your return, after the Cobbla, take the food and Fireball. Room 33: ======== Cast Reveal. Kill the Monobeak with Meta Power Venom Cloud if it's not yet dead, or find and destroy the bird utterly. Return to 30 and take the ladder down to face the Cobbla. There is a secret door here, try it out on your return trip (leads to Room 36). A space away (ie, not right next to) from the door, you can try the Southwest wall for this passage. Also on your return, check out that golden statue. It is treasure, so collect it. Don't stand to the Southeast of it or you may be struck down by a falling bomb, as usual. Room 34: ======== You may want to lead the Snapdragon into one of the following room as this one is cramped. Try to use Sulfur if you can, but if you must use a few Fireballs. Hit and run is the way to go here. Move the grey block for some coins. Room 35: ======== You'll have room to fight the Snapdragon here with Venom Clouds or Fireballs, but watch out for the dotted panel which sets off a fireball trap (it is in the intersept of the lower carpet and teh middle carpet). Venom Cloud is on the platform, proceed when ready. Room 36: ======== Take the Venom Cloud near the table with the wine. Try to do as much of this floor as you can before you use the ladder. See the Mystery Rune? Check the wall in the upper left near the door you entered from. You can slip through the wall one space away (not right next to) the door. Floor 5 Map Monster Paths +=========+ +===========+ +--+ +--+ +--+ *Sniper: 41, 42, 45 |37|-|38|-|39| +--+ +--+ +--+ *Monobeak: 40, 43, 44 | +--+ +--+ +--+ *Podhopper: 37, 38, 39 |40| |41|-|42| +--+ +--+ +--+ | | | +--+ +--+ +--+ |43|-|44| |45| +--+ +--+ +--+ Room 37: ======== A Podhopper is easy to run by, there is a shield in Room 39 if you want an easier time at this. Otherwise, employ some hit and run Fireballs. When you return, take the Lightning. Room 38: ======== A Podhopper is easy to run by, there is a shield in Room 39 if you want an easier time at this. Otherwise, employ some hit and run Fireballs. When you return, take the Food and teleport if you picked up the Treasure in Room 39. Use Fireballs on whatever enemies are still on Level 1. Room 39: ======== Cast Reveal. Take the shield and blast the Podhopper with whatever you have. Venom Clouds and Fireballs primarily, no Lightning. Grab teh Treasure when you're done. Room 40: ======== There's some Sulfur and Reveal to collect, but you may want to use them as a small wall between you and the Monobeak if you haven't killed it yet. Fireball and hit and run tactics are the way to go. Room 41: ======== There's a Fountain to take advantage of in here, and a Teleport spell. Collect your spoils and head into 44. Room 42: ======== If you're invisible, it shouldn't matter if you fight the Sniper here. Use Venom Cloud, and then Fireball. Cast Reveal to have a Fireball spell drop from the ceiling. Collect this, and the coins from behind the statue. Room 43: ======== Use the narrow hallways and doors to your advantage to hit and run the Monobeak with fireballs. When it's dead, move the pot for some coins. Hey, you might even want to use that pot as a block between you and the Monobeak. Whatever works for you. Room 44: ======== Fight the Monobeak from afar with Fireball. Hit and run with this guy, use the doors to escape. There's a bomb in this room, but you should have blown up the Generator long ago. If not, grab the bomb and get to it. There is a Lightning spell behind the Idol. Walk around it to bump into the spell. You may as well save this spell and stick to Fireball. The slot provides Fireballs at 4 coins/spell. Room 45: ======== Cast Reveal just so you can see around the Tower to begin with. The switch is a lightswitch, and there's some invisibility. The Invisibility may help against the Sniper. Use hit and run with whatever Venom Clouds you have left. Fireball's fine. The only item in the room is some wine, and if you've cleared Floor 4 - that should have enough water close enough to backtrack anyways. Besides, there's a fountain in 41. MT6.4: Wolven Towers [_-_-_-] [_-_-_-] |-_-_|_________________________________________________________________|-_-_| |-_-_| MT6.4: WOLF'S |-_-_| |-_-_|-----------------------------------------------------------------|-_-_| [__||__] [__||__] Poison and spell conservation become a real issue in these two towers. All of the monsters can at times warrant a full out assault, but you can't waste your resoruces on every litle Leman that jumps in. ****************************************************************************** E4: Wolf's Enemies ****************************************************************************** Bagfly: ======= Attack Type: Ranged Movement Type: Air Description: A flying set of bagpipes... This enemy usually has a fair degree of stamina and represents the first in a line of flying enemies that attack at a range. Since it also flies, you are not safe even up high. Take advantage of its initially slow speed to get a head start on it before it can speed up. Fireballs are in order. Leman: ====== Attack Type: Melee Movement Type: Ground Description: A giant Lemon. I'd like to believe that Leman is a tribute to Pac-Man. Alas, I have no evidence of this... But that's beside the point. The Leman is slow to start, but once it speeds up a little it can close in on you with little difficulty. It's an enemy you will want to hti and run, and escape through doors while you're facing. If it starts to dig into you - it will leave a dent. While there are more dangerous enemies in the Tower, it's huge degree of stamina requires you to use a decent spell. Leman's also my favourite monster in the game. I love how it goes from a cute lemon into a vicious killer. Ruddimp: ======== Attack Type: Ranged Movement Type: Ground Description: a small brown demon with a fork over its head. This enemy exclusivly uses Venom Clouds - that makes it a true annoyance. Try your best to avoid the Venom Clouds, easier said then done, and destroy it altogether if you do get poisoned. Nothing less than Fireball should be used in most cases, though Venom Cloud can work on low level Ruddimps. Make sure you kill it before you heal the poison. Shillaya: ========= Attack Type: Melee Movement Type: Ground Description: Resembles a Leprechaun. Shillaya is a fairly midrange enemy, and just as deadly up close as the Leman in my experience. It's faster than the Leman from the start, though, but it usually has less stamina. Use the same hit and run tactics, however, and of course run through a door to escape if it draws too near. Stinger: ======== Attack Type: Melee Movement Type: Air Description: A large jellyfish. Stingers are largely powerful enemies that can also fly. Use Fireball and up if possible to hit it as it charges you. It gets pretty fast when it has taken a lot of damage, so you may want to retreat through doors rather than adjsut your positon in the room. A4: Wolf's Fang Part 1 ****************************************************************************** A4: Wolf's Fang ****************************************************************************** You can mostly take this map from bottom to top, only that you will have to return down to the first floor froma different ladder in the second. Enemies are getting more representative of the powerful enemies that you will face in this latter portion of the Apprentice and Wizard cycles. Especially an Enemy like Ruddimp, that revels in Venom Clouds, should be crushed with swiftness. Take tha opportunity to develop strategies for enemies you will face in later Towers. Floor 1 Map Monster Paths +=========+ +===========+ +--+ +--+ +--+ *Ruddimp: 1, 4, 5 |01|-|02|-|03| +--+ +--+ +--+ *Ruddimp: 3, 6, 9 | | | +--+ +--+ +--+ *Shillaya: 7, 8 |04|-|05| |06| +--+ +--+ +--+ | +--+ +--+ +--+ |07|-|08| |09| +--+ +--+ +--+ Room 1: ======= The Ruddimp will fling Venom Clouds when it has taken enough damage. Attack it with the Venom Cloud from Room 2 to finish it off quickly. Or you can try Ice from up high at the door. There's a fireball behing the platform the Watermelon is on. Room 2: ======= Pick up the Venom Cloud found right here in the starting room, then the coins. The Table the Venom Cloud sat on can be pushed over to that tall platform to act as a bottom step. Room 3: ======= Use Venom Clouds on the Ruddimp. Room 6 has another Venom Cloud if you're low. Try to kill it all in one assault because if it starts shooting Venom Clouds at you, it becomes very dangerous. Check under the pot for a Green Key. Take the Fireball, drink up, and proceed. Room 4: ======= Pick the Ruddimp off with Venom Cloud from a reasonable distance. Try to take it our before it starts shooting Venom Clouds itself. Take the apple if you need it, but the green carpet space right next to the table and northwest will set off a Fireball trap. Be careful. Room 5: ======= The lightswitch is near the door to Room 4, and the switch to drop bombs is near the door to Room 2. When all is clear, you can earn a Fireball and a Heal spell in thsi room. Room 6: ======= There's a Venom Cloud in here if you need it. Lay into the Ruddimp with Venom Cloud. Room 7: ======= Cast Reveal. Practice hit and run on the Shillaya with your lower spells first. This room is quite cramped, however. Collect the Lightning, then push the pot to find a Blue Key. Room 8: ======= Wait for the Shillaya to stray from the ladder before you come down yourself. Hit and run is teh way to go when dealing with him. Use the spells Sulfur and Venom Cloud first, before resorting to Fireball. Room 9: ======= There's a Venom Cloud behind the Snake Idol if you need it. Line up with the Ruddimp and blast away at it with Venom Cloud. Try to drop it before it hits you with its own Venom Cloud. Floor 2 Map Monster Paths +=========+ +===========+ +--+ +--+ +--+ *Stinger: 12, 15, 18 |10|-|11|-|12| +--+ +--+ +--+ *Bagfly: 10, 11, 14 | | | +--+ +--+ +--+ *Shillaya: 13, 16, 17 |13|-|14| |15| +--+ +--+ +--+ | | | +--+ +--+ +--+ |16|-|17| |18| +--+ +--+ +--+ Room 10: ======== Stand at the Doorway and blast the Bagfly with Venom Cloud, then Fireball. It will spit fireballs when you've damaged it enough, so finish it quickly. When it's done in, pull the Mushroom off of the platform, then bring the platform over to the high-up doorway. You can place it here to work as a lower step. Grab the coins you've uncovered with your moving of platforms, and the Venom Cloud before you proceed. Room 11: ======== Stand at the Doorway and blast the Bagfly with Venom Cloud, then Fireball. It will spit fireballs when you've damaged it enough, so finish it quickly. There is a panel with a green dot near where the two carpets connect, this is a Bomb Trap. Take the Teleport Spell and proceed as ready. Room 12: ======== Use hit and run tactics on the Stinger with Venom cloud to take it down. It gets pretty fast, so you may want to stay by a door - it will fly over any item barriers you attempt here. Grab the melon (if you need) and Venom Cloud after the battle. Room 13: ======== From Room 10: The Poison Panel is under the brown platform. You may want to pull the platform into the middle of the room and shoot over it at the Shillaya which lurks these corridors. He's pretty tough up close, so it could help. Hit him with Venom Cloud until you run out, finish him with Fireballs. Push the platform now up near the door to use as a bottom step, then stand _beside_, not on, the coins to pick them up. From Room 14: Drink some water and jump over the pink glowing panels to reach the Yellow Key. Room 14: ======== Do _not_ fight the Bagfly in this room. There is a slot machine for Sulfur spells and a Fireball laying around the room. Reveal will not brighten it up. Towards teh lower left corner is a keyhole, but you'll need to progress around the floor before you get the key. When you do, this room is always great access to the fountain in Room 13. Room 15: ======== Line up with the door and fire on the Stinger with Venom Clouds until it gets close. It'll start to move pretty fast as you damage it, but it doesn't take many hits. Take the treasure and continue on. Room 16: ======== You'll have to do hit and run on the Shillaya, or make some kind of wall with the Lightning, Table, and Sulfur. Use Venom Cloud and Fireball on the monster, however. Collect the items when you are done. Room 17: ======== Watch out for the dotted panels in here, they trigger fireball traps. Also, there is a bomb trap in the upper right corner of the large square carpet in front of the door to Room 16. It's kind of risky to fight the Shillaya here, but if you can stand near the door, you can get some hits in before you're forced to retreat. Grab the Reveal, and head back to reveal the Posion Panel in Room 13, Room 18: ======== If the Stinger is near the ladder, head back down and up until it is out of the Room. Grab the Venom Cloud here and use it to smash the Stinger. It's a hit and run affair here because the Stinger is very fast _and_ it can fly so don't consider barriers as an option. Take the food if you need it. Floor 3 Map Monster Paths +=========+ +===========+ +--+ +--+ +--+ *Leman: 21, 24, 27 |19|-|20|-|21| +--+ +--+ +--+ *Stinger: 20, 19, 22 | | +--+ +--+ +--+ *Bagfly: 25, 26 |22| |23| |24| +--+ +--+ +--+ *GENERATOR: 26 | | | +--+ +--+ +--+ |25|-|26|-|27| +--+ +--+ +--+ Room 19: ======== Toast the Stringer from afar with Fireballs, then grab teh coins. Move the block to reveal a Ruby treasure. Collect it. The dotted panel sets off a fireball trap. You could possibly hit the Stinger with the Trap, though it could be risky. Room 20: ======== Toast the Stringer from afar with Fireballs, then collect the Fireball in the room. Move on. Room 21: ======== This room's kind of cramped to fight the Leman. Lead it elsewhere. Move the platform to get the Treasure, flick the switch, and proceed. Room 22: ======== Grab the Venom Cloud. You can also buy up to three packs of the spell here with the slot at 3 coins per pack. You may consider thsi option if you want to conserve your Fireballs and Lightning for Floor 5. Well, head through the door if you haven't blown up the Generator yet. Of course you can use the ladder afterwards. Room 23: ======== You've destroyed the Generator, you can either use this ladder or the one back in 22. Or if you're feelign intrepid, head up to Floor 5 (Room 45). A4: Wolf's Fang Part 2 Room 24: ======== A bomb! Grab it after you pulverize the Leman with Venom Cloud and Fireballs. Play hit and run with the Leman - take full advantage of the doors. You can cast Reveal when you enter, the poison panel is located at the black panels so it shouldn't be too big an issue. Still, better safe... Before you leave, take the Bomb and the coins under the pot. Room 25: ======== The Bagfly can reach you even up high, so jump down and use hit and run with the Venom Cloud, then Fireball spells. When you're done, blow up the Generator in Room 26. Next, you can get the crown on the table by jumping over the set of two (not the one) pink glowing panels. Room 26: ======== Hit and run the Baglfy with Venom Cloud, then Fireball spells. Destroy the Generator, then take the Sulfur. Room 27: ======== Play hit and run with Leman, use Venom Cloud then Fireball. When finsihed, collect the Fireball in the room - but beware! To the southeast, right next to the fireball is a panel with a green dot. Of course, this is a bomb trap. Get it from a different end. Floor 4 Map Monster Paths +=========+ +===========+ +--+ +--+ +--+ *Stinger: 28, 29, 31 |28|-|29|-|30| +--+ +--+ +--+ *Leman: 34, 35 | | +--+ +--+ +--+ *Ruddimp: 30, 33, 36 |31| |32| |33| +--+ +--+ +--+ | | | +--+ +--+ +--+ |34|-|35|-|36| +--+ +--+ +--+ Room 28: ======== Attack the Stinger at a range with Fireballs. You're at an advantage in this room because you can wait facing either door and crush the Stinger as it emerges. After this, grab the Heal Spell. You'll get a Lightning Spell if you cast Reveal in this room. Room 29: ======== It's probably best to attack the Stinger at a range with Fireballs. When you're finsihed, collect the coins, and look under the pot for the treasure. Try the door if you've got some keys (By now, you should at least have Yellow, Blue, and Green). Room 30: ======== Fire on the Ruddimp with Fireballs. It helps if you're Invisible. Heal if you get posioned. When you've finished with the Ruddimp, take up the Watermelon if needed. Room 31: ======== Hit and run the Stinger with Fireballs. It's pretty thick skinned up here on Floor 4, but it doesn't take many Fireballs. That Skull carpet will poison you, so keep off. Take the Fireball. The slot in the wall provides Fireball spells at a rate of 4 coins/pack. Room 32: ======== Unless you teleport, this is your route to Floor 5. Now watch out if you go for the meat - a Bomb trap is located just Southeast of the leg of yummy. Also, in the southeast corner on the southwest wall, there is a blue carpet. Look here for a hidden door. Room 33: ======== Cast Reveal. The Lightswitch must be flipped - do not fight the Ruddimp in the dark whatever you do. Check the "left" or northwest wall, in the bottom left corner. There's a block you can jump up on. Flick the switch on. Hit and run the Ruddimp with Fireball - you don't want it to Poison you with its Venom Cloud, or at worst you can finsih it off quickly and eat the Musroom/ cast Heal. Next up, take the treasure and continue on with the Tower. Room 34: ======== This room is kind of cramped to fight the Leman, but if you can get a few hits on him - great. Please note that the pink panels will NOT deter the Leman. Fire from afar with Fireballs. If you want to cross the Pink panels, you will need to clear the table. There is a Fireball very near the Table, pick it up, or pull it out of the way. The wine should _NOT_ be swilled when you are fighting Leman, or you could stumble your way into defeat. Grab the Venom Cloud before you proceed to 35. Room 35: ======== Fire on the Leman from a distance, use the doors to your advantage while you shoot Fireballs at the Leman. It has a discouraging amount of HP - but Fireball works wonders. If you've been taking the floors one by one, you should have a Yellow, Blue, and Green Key. You'll have no problem entering Room 36, anyways. The Invisibility might be a consideration when fighting the Ruddimp in the coming rooms. OR, you may want to first find teh hidden door, then come back and take the Invisibility to Floor 5... Also, look at that Mystery Rune. You won't have to backtrack to Floor 3 if you want to make it to Floor 5. Test the wall to the right of the keyhole for the hidden door. Room 36: ======== Nothing here but a small room and a Ruddimp. Take it on with Fireballs, and you may want the advantage of Invisibility. If not, use the Invisibility for when you travel to Floor 5. A4: Wolf's Fang Part 3 Floor 5 Map Monster Paths +=========+ +===========+ +--+ +--+ +--+ *Shillaya: 39, 41, 42 |37| |38|-|39| +--+ +--+ +--+ *Ruddimp: 43, 44, 45 | | +--+ +--+ +--+ *Bagfly: 38 |40|-|41|-|42| +--+ +--+ +--+ | | +--+ +--+ +--+ |43|-|44|-|45| +--+ +--+ +--+ Room 37: ======== Cast reveal. The Poison panel is right in front of the window if you want to save a spell casting. Just be careful. Take the Sulfur and the Venom Cloud, useful for regenerated monsters at the bottom, and try the coin slot for some higher spells. Room 38: ======== There's a Teleport spell in the upper left corner. The room is dark, but you should be able to track the Bagfly by its wings anyways. Teleport across when it is away from you and grab the Meta Power. Use Lightning on the Bagfly now to kill it in two hits. Or any other Meta Powered spell. There is also a Lightning in its domain, and treasure behinf the platform the Meta Power was found on. To escape, teleport back across and push the platform the Teleport was on back over to the door. Room 39: ======== This room is too cramped to fight the Shillaya, lead it elsewhere. When you want to progress, make sure you have at least 4 Teleport spells if you want to attempt to make it here with the shield. One set of Teleports for the set-up, and one set for the execution. Teleport across using the arrow panel and push the pot into place against the Tall platforms. Grab the Fireball up here if you want. Teleport back, and head to Room 43. We only need the Shield long enough to get the Meta Power in Room 38, so use it for fighting the Ruddimp in the lower rooms and don't get upset if it runs out before the Bagfly. But give it a hook, nonetheless! Room 40: ======== The Ruddimp should be fought with Fireballs and you should use the Shield Power found in Room 43 to help destroy it as early as possible. You may want to use the shield to make it to the Bagfly and grab the Meta Power in that room, it's up to you. It's not trivial to conserve the Shield that long, however. Abother thing to try would be to take the shield there right off the bat, and try to finish both the Bagfly and Ruddimp with Meta Power Fireballs or something of that nature. Grab the Lightning when you're done. Room 41: ======== The Shillaya on this floor section is _strong_ so I suggest getting the drop on it with Fireball while invisible. Try not to cut into your Lightning Supply just yet... and resort to hit and run when it gets close or when your power runs out. Move the block for some Treasure. Room 42: ======== As described in Room 41's description, the Shillaya will be much easier if you take it on Invisible and with a Fireball spell. There's a Bomb here, but hopefully you've already blown up the Generator. The red switch will drop a bomb where the Blue Carpets connect... this may be an effective tactic against the Shillaya. Room 43: ======== Grab the shield and exploit its power against the Ruddimp. You may want to try and make it to Room 38 with the shield after you kill the Ruddimp, but there is a Meta Power in that room so you're set regardless... Take the Fireball near teh statue. Room 44: ======== Fight the Ruddimp with a shield up and Fireballs as your weapon. Save Lightning for the Bagfly in 38. on the bottom floor if you run out of Fireballs or Lightning up here. Room 45: ======== Cast Reveal. There's a Teleport back to Floor 1 here for when you clear this Floor. Convenient. MT6.5: Ebonscarp [_-_-_-] [_-_-_-] |-_-_|_________________________________________________________________|-_-_| |-_-_| MT6.5: EBONSCARP |-_-_| |-_-_|-----------------------------------------------------------------|-_-_| [__||__] [__||__] Ebonscarp has some fairly severe monsters, and while there is only one type of ranged monster, she can be tough. ****************************************************************************** E5: Ebonscarp Enemies ****************************************************************************** Crocojaw: ========= Attack Type: Melee Movement Type: Ground Description: Look for a pair of eyes on the floor, it emerges to bite you. Crocojaws are fast monsters that can be difficult to spot at a glance. They first appear as a set of eyes, and charge you. When they reach you, they emerge to bite. You can shoot the eyes, so use a mid/high level spell to rack up damage as it approaches you. It's so fast that running within the room is difficult, so use doors. If it traps you in a corner or againsta wall, you can jump on it to damage it. But this is not advised under normal circumstances as it will still probably damage you. Eggnog: ======= Attack Type: Melee Movement Type: Ground Description: A large bird, still in the shell. Eggnog are fairly fast, and have a load of endurance. You should as per usual, use hit and run techniques. Many Eggnogs in the Tower have a certain method to employ to their ends - be they bombs or trapping them. Check your surroundings before fighting them. Hothead: ======== Attack Type: Melee Movement Type: Air Description: A small, flying, green head. These little guys can rack the damage up on you quickly. They're fast and direct, and can pass over most obstacles. You should use at least Fireball on them to take them out quickly. Use the doors, because it's hard to outrun them. Rosie: ====== Attack Type: Ranged Movement Type: Ground Description: A young woman... Rosie are the ranged attackers of the Ebonscarp Towers. They're powerful and have a load of Stamina. They are also very frequent in their attacks. If you can get them from behind or the side, then yes - do so. But don't fully expect to get out unharmed. Under no circumstances shoudl you ever let her reach you, as she is just as brutal up close. Take her out swiftly, Fireball and Lightning are the way to go in most cases. Skelefly: ========= Attack Type: Melee Movement Type: Air Description: A flying skeleton. The Skeelfly are powerful monsters if they get up close and personal, and when they have taken a lot fo damage their speed and random choice of path really pick up. It's this random movement with the usual fast charge for the good Baron that make them dangerous. They seem to be blocked by larger obstacles, but don't rely on them. Hit them as much as possible, from the greatest distance possible. A5: Ebonscarp Part 1 ****************************************************************************** A5: Ebonscarp ****************************************************************************** Again, some parts of the Tower are broken off from the rest, and you'll need to climb back down to them from another part of the building. Enemies here have become very dangerous - especially those like Rosie and the fast-moving Crocojaw. Ebonscarp becomes a real practice in conservation of spells, because higher floor monsters take higher levels spells almost as a rule (unless you figure out a way to exploit there behviour in such a way as to render them useless, as I have described with an Eggnog in this very section). Floor 1 Map Monster Paths +=========+ +===========+ +--+ +--+ +--+ *Rosie: 1, 2, 4 |01|-|02|-|03| +--+ +--+ +--+ *Rosie: 6, 8, 9 | | +--+ +--+ +--+ *Hothead: 7 |04|-|05| |06| +--+ +--+ +--+ | | +--+ +--+ +--+ |07|-|08|-|09| +--+ +--+ +--+ Room 1: ======= Rosie flings fireballs, so try to hit and run her, get her when her back is turned or from the side. She can do a number on you if she engages you directly. Sulfur then Venom Cloud goes the distance here. Grab the other Venom Cloud when you get the chance, and look at the statue, a fireball is hidden behind it. Use teh longer row of pink glowing tiles to reach it via jumping, and exit along the smaller chain. Room 2: ======= Range the Rosie with Sulfur then Venom Cloud, or Venom Cloud if you've come back here. Grab the watermelon if you're hungry. Room 3: ======= Start off by grabing the Venom Cloud, Sulfur, and Coins. If you want to bother fighting the Rosie, use Sulfur then Venom Cloud. She's tough, so beware. You should take the path to Room 2 anyways, the path will eventually take you to a Yellow Key in Room 8. Room 4: ======= It's kind of cramped to fight the Rosie here, lead her into a different room. Take the Sulfur and Heal spells here, at any rate. Room 5: ======= If you want to reach the door up high, push the pot over as use as a bottom step. The carpet has a space, one space from the wall (not right next to, one away) that activates a Fireball Trap - be careful. Room 6: ======= Try to use as many Sulfur as possible against the Rosie, then Venom Cloud. But the best room to fight her is Room 9, because you can drop bombs on her there. That's the ticket! Take the Fireball. Room 7: ======= Definitely use Venom Cloud or Fireball against the Hothead, as it seems to just shrug off Sulfur. Use a hit and run strategy, and try to get a clear shot because every spell counts. This is its only room, and it has space but there is a posion carpet - so stay off that! Take the Venom Cloud, then pull the block to get some coins. Room 8: ======= From Room 5: Grab the Reveal and cast the spell. Jump down and make the pot the bottom step of the platform. Take the key from beneath the pot. Leave back to Room 3 and take the path through Room 6. From Room 9: If the Rosie is in here, wait for her at the button in Room 9 and drop bombs on her. After she is dead, use the yellow key on the keyhole and proceed. Room 9: ======= The red button drops a bomb in the middle of the square carpet. Try to get the Rosie in this trap to make short work of her. Use Sulfur otherwise, or try to lure her into position. This corridor is designed to kill the Rosie, so proceed once you've completed it. Floor 2 Map Monster Paths +=========+ +===========+ +--+ +--+ +--+ *Crocojaw: 16, 17, 18 |10|-|11|-|12| +--+ +--+ +--+ *Eggnog: 11, 12, 15 | | +--+ +--+ +--+ *Hothead: 10, 13, 14 |13|-|14| |15| +--+ +--+ +--+ | | +--+ +--+ +--+ |16|-|17|-|18| +--+ +--+ +--+ Room 10: ======== This is the best room to take on the Hothead. Note the location of the green dot panel which signals a Bomb trap. Now, you can stand in front of the door at the far end of the carpet and fire Sulfurs, Ice, whatever at the Hothead as it enters. When it gives chase, go to the Southeast wall (where you entered from) and then along the Southwest wall (where the next door is). When you trip the bomb trap and teh Hothead is chasing you, it will be stricken. There's food in the room if you want to refill that meter, a few coins, and a slot machine that drops Sulfur by the idol. 2 coins a piece, as usual. Room 11: ======== You may like to follow the strategy in Room 15 for the best way to kill Eggnog. If you can't use this, then trap it in 15 and shoot Venom Clouds, Fireballs at it in a hit and run method. In here, gather the Fireball, then move the grey block for some treasure. If you have the keys up to this point you should have no problem entering Room 10. Room 12: ======== Cast Reveal. Follow the strategy in Room 15 for the best way to kill Eggnog. If you can't use this, then trap it in 15 and shoot Venom Clouds, Fireballs at it in a hit and run method. Climb the ladder when you want to proceed to Floor 3. Room 13: ======== I suggest you use the Room 10 strategy for the Hothead, otherwise hit and run with Fireballs or Venom Clouds. Use the pink glowing panels closest to the door to jump on over to the other side of the room. Move the mushroom for some coins. Room 14: ======== A tiny room that requires the red key and acts as a small path between Rooms 13 and 17. DO NOT fight the Hothead in here. It will be _fatal_. Room 15: ======== Some great supplies here. The switch will open the next door and close the previous. If you are industrious, you can build a wall to shoot at the Eggnog from behind, then trap it once it enters the room... Grab the Coin. Now, look, there is: Lightning, Food, Fireball, Pot. Any of these can be pulled to make your trap. It = Item or Pot Dr = Door Eg = Eggnog +--+ /Dr/ +--+--+--+ / / / / +--+--+--+ / / / / +--+--+--+ /It/It/It/ +--+--+--+ Ok, you've got them set up across the hallway? Great, now open the door! When the Eggnog hops in, shut it. Push the items up one at a time one space, so... +--+ /Dr/ +--+--+--+ / /Eg/ / +--+--+--+ /It/It/It/ +--+--+--+ / / / / +--+--+--+ The Eggnogg is trapped in one little three panel space. Now, push the middle item up as so... +--+ /Dr/ +--+--+--+ / /It/Eg/ +--+--+--+ /It/ /It/ +--+--+--+ / / / / +--+--+--+ The Eggnog is trapped in one little corner! Now just lay into with Ice! It's a great way to stay safe and to conserve your magic. WARNING, if you load the game after the Eggnog is trapped and try shooting it, then your spells will have no effect. In this event, pull the middle item back one to free the Eggnog into the three space passage, then push it back in to trap it once more. Clean up. Gather all of the items and take the Red Key you uncovered under the pot. Room 16: ======== If you see the Crocojaw's eyes, get badck down the ladder. You'll need to jump away from the Crocojaw as it is extremely fast. If it sees you, smash into it with Venom Cloud until you change over to Fireball. Try to kill it all in one line to make life easier on yourself. Hit and run is hard here. Or you can try the dropping bomb in Room 18. Take the Fireball when you get a chance. Room 17: ======== Attack Crocojaw from a distance with Venom Cloud, and then Fireball if you run out of Clouds. Try to kill it all at once, or in minimal exchanges as it is very fast. Or you can try the dropping bomb in Room 18. Take the Venom Cloud. If you've just come to this room, you probably don't have the key yet. A5: Ebonscarp Part 2 Room 18: ======== Cast Reveal. With a Poison Panel, I really do not suggest fighting a Crocojaw here because of its speed. You may try to run from it and poison yourself in the process. This room is best taken at a more reasonable rate. HOWEVER, one of the buttons up ahead drops a bomb, it may be wise to kill the Crocojaw with this if possible. Try to block it with the spells and platform, but this could be very difficult to set up with the Crocojaw's speed. Collect the Venom Cloud from the platform, then pull the platform out of the way to find a Fireball. Press one of the switches to open the door, but close another. Grab the Sulfur and head on through the door. Floor 3 Map Monster Paths +=========+ +===========+ +--+ +--+ +--+ *Crocojaw: 21, 24 |19|-|20|-|21| +--+ +--+ +--+ *Skelefly: 19, 20, 22, 23 | | | +--+ +--+ +--+ *Eggnog: 26, 27 |22|-|23|-|24| +--+ +--+ +--+ GENERATOR: 20 +--+ +--+ +--+ |25|-|26|-|27| +--+ +--+ +--+ Room 19: ======== You may be able to trap the Skelefly in a fireball trap - note that there are two dotted line panels on the carpets - one on each. Grab the Lightning, push the platform to reveal some coins, and take the ladder once you have fully looted this area. Room 20: ======== From Room 19: Just play hit and run with the Skelefly until it dies. Take the Fireball and continue on. From Room 21: The Generator, but no bomb. It's very close though. Cast reveal. Take the Fireball or pull it out of the way if you're full. Take the Heal, then pull the grey block out of the way. Take the Blue Key and head to Room 24. Room 21: ======== Take the Crocojaw on with Venom Clouds or Fireballs, take it down quickly before it can really do a number on you. It is tempting, yes, to use the Venom Cloud in this room as a step to get on the big platform and thus - safety - but good look killing, let alone hitting, the Crocojaw from your lofty perch. Instead, use a Heal or two after your exchange and save your high attack spells for higher floors. When all is said and done, grab the Ruby, Coin, and Venom CLoud and use the keyhole to enter room 20. Room 22: ======== Take the Skelefly on hit and run style with the Venom Clouds. Maybe try it anyways as my game may have glitched or something to that effect. Anyways, there _is_ a trap near the Heal spell, right next to it to the Northeast is a panel with a green dot - a bomb trap. Take care. Room 23: ======== Grab the Bomb and run back to the Generator to blow it up. Return to this Room upon completion fo that vital task. This Skelefly is a relatively... easy enemy by this Tower's standards. Range it with Sulfur attacks, and run away when it gets close. It has a 4-room domain, so just watch out for traps if you chase it. The slot gives up to three Venom Cloud packs with a rate of 3 coins each. Also, check behind the Idol for a Venom Cloud. Room 24: ======== Lots of room for the Crocojaw in here. Take it on with Fireball or Venom Clouds until you down it. The switch is right after the green rectangle with crowns on the wall, flick it to turn on the lights. Grab the Venom Cloud and use the keyhole. Room 25: ======== There's food and treasure here. Take what you need, open the door, and continue on to Room 26. Room 26: ======== Alright, there's an Eggnog bouncing around on the other side. But there's also a Fireball trap you can set off that will strike the Eggnog for you. The dotted line panel closest to the door to 25 will cause a Fireball to shoot out from the head on the other side. This is the ideal way of killing the Eggnog. Avoid all of the other trapped panels, of course. Take the Venom Cloud. Save the Shield for when you're leaving this floor and heading up to the fifth. We may have a use up there... so after you finish with Room 27, grab and run all the way to Floor 5 (two ladders in room 34, one to third and one to fifth). Room 27: ======== Take the Eggnog on with traps as explained in Room 26, and do so in Room 26. Take the Lightning, then move the wine for some coins. Floor 4 Map Monster Paths +=========+ +===========+ +--+ +--+ +--+ *Hothead: 28, 31, 32, 29 |28| |29|-|30| +--+ +--+ +--+ *Skelefly: 30, 33, 35, 36 | | | +--+ +--+ +--+ *Skelefly: 34 |31|-|32| |33| +--+ +--+ +--+ | | +--+ +--+ +--+ |34| |35|-|36| +--+ +--+ +--+ Room 28: ======== You will need to take the Hothead on with fireballs from a distance. A classic hit and run, and use the doors for full effect. Now, as far as looting the room is concerned... check behind the table for a treasure and take the Lightning from the table while you're at it. That's a poison carpet, so just reach in for the Venom Cloud. Room 29: ======== Again, a Fireball hit and run tactic should be used against the Hothead. Take the coins, and the Bomb. Pull the platform and grab the Green Key, you should have all of the coloured keys by now. Place the platform next to the pink glowing panels and use it as a step to jump over them. Open the door and continue. Room 30: ======== Notice that green dot panel in the middle of the floor? Well, of course it is a Bomb trap. You will want to get the Skelefly chasing you, then run over this panel to have the bomb drop on it. Alright, now pull the pot to find a Ruby treasure. Then cast Reveal for some Lightning. Room 31: ======== Again, a Fireball hit and run tactic should be used against the Hothead. There's a dotted line panel very near the door, so take note of that. After you collect the Sulfur you may want to push the grey block onto the space just so you don't forget about it? Alright, the Mystery Rune. At the wall just southwest of the door to room 32, you can walk on through. There's a skeelfly in the room beyond, so be prepared. Room 32: ======== Again, a Fireball hit and run tactic should be used against the Hothead. Grab the treasure when you're done. Room 33: ======== Attack the Skelefly until it gives chase, with Sulfur or Venom Cloud. Lead it into Room 30 and catch it in the Bomb trap. Take the Venom Cloud and drink up when you return. Room 34: ======== Pull the pots into a corner to cover you from either side. This is interesting because the Skelefly will _not be able to reach you. You can then cast Reveal. Venture out and pound the Skelefly with Venom Cloud, then Fireball. Retreat to your little pot fort in the corner when it starts a pursuit. Take the Levitate. The slot gives you up to three Fireballs at 4 coins each. Cast three Levitates to rise up high enough to grab the Teleport. Room 35: ======== Far too cramped to fight a Skelefly, and you can get poisoned. Use bombs from Room 30 or 36 instead. Cast Reveal. The light switch is in the northwest corner. Take the Food and Fireball before you proceed. Room 36: ======== The Bomb is dropped from the ceiling when the red button is pressed. This is an easy way to hurt the Skelefly, but I find the Bomb trap in Room 30 provides a quicker death. You may think this is safer though. Take the Fireball and teh Treasure when you finish. A5: Ebonscarp Part 3 Floor 5 Map Monster Paths +=========+ +===========+ +--+ +--+ +--+ *Crocojaw: 40, 43, 44 |37|-|38|-|39| +--+ +--+ +--+ *Rosie: 41, 42, 45 | +--+ +--+ +--+ *Eggnog: 37, 38, 39 |40| |41|-|42| +--+ +--+ +--+ | | +--+ +--+ +--+ |43|-|44|-|45| +--+ +--+ +--+ Room 37: ======== Try to make it here with Meta Power to utterly crush the Eggnog. If you cannot, use Lightning. Afterwards, take the Venom Cloud and Fireball. Room 38: ======== Try to make it here with Meta Power to utterly crush the Eggnog. If you cannot, use Lightning. Lots of loot in here. Cover all of the ground behind the statue to push on both a treasure and a Lightning Spell. Then, take the watermelon, green key, and coins. Room 39: ======== Cast Reveal. Try to make it here with Meta Power to utterly crush the Eggnog. If you cannot, use Lightning. Room 40: ======== With your shield up (from room 26), damage the Crocojaw as much as possible with Fireball, then finish it off when it charges you when your shield wears off. Take the Venom Cloud, then open the door. Room 41: ======== Grab the Meta Power here and kill Rosie with Meta Power Lightning or Fireballs. After you have killed her, quickly run to the Eggnog's domain and dispatch it in a similar way. Return to this Room, however, as there's some nice loot. Move the pot for a ruby treasure, then grab the other treasure sitting nearby. Also, ata cost of five coins per pack, you can buy Lightning in this room... Room 42: ======== While invisible, sneak past the Rosie into room 41 and grab the Meta Power there. Heal if you get poisoned, and crush Rosie with Meta Power Fireballs. You may want to flip the lightswitch while invisible. It's to the right of the cubby with the food. Kill the Eggnog in the next rooms while still under the influence of Meta Power. But when you return here, take the food and Fireball. Room 43: ======== With your shield up (from room 26), damage the Crocojaw as much as possible with Fireball, then finish it off when it charges you when your shield wears off. Take the Lightning, don't take the Invisibility until you're ready to use it. Room 44: ======== With your shield up (from room 26), damage the Crocojaw as much as possible with Fireball, then finish it off when it charges you when your shield wears off. Take the Fireball and open the Keyhole when ready. Room 45: ======== While invisible, sneak past the Rosie into room 41 and grab the Meta Power there. Heal if you get poisoned, and crush Rosie with Meta Power Fireballs. When you come back, take the coins and Teleport spell. MT6.6: MarchWall [_-_-_-] [_-_-_-] |-_-_|_________________________________________________________________|-_-_| |-_-_| MT6.6: MARCHWALL |-_-_| |-_-_|-----------------------------------------------------------------|-_-_| [__||__] [__||__] The enemies here will be a challenge. There's only one Melee monster, and there are specialized monsters for different spells as well. Fire-Asp and Firebones for Fireball, Writwraith for Lightning, and teh nasty little Toxignats for Venom Cloud. The Towers are more complex here, as well. ****************************************************************************** E6: Marchwall ****************************************************************************** Fire-Asp: ========= Attack Type: Ranged Movement Type: Ground Description: A blue snake wuth one eye that spews fireballs. A fairly common enemy in the towers, and it's somewhat fast. It's about as easy as you get in Marchwall though. It's not as aggressive a shooter as the other monsters, but it is still powerful. You should try to take it on from the side or back if possible. Firebones: ========== Attack Type: Ranged Movement Type: Air Description: A floating skeleton bathed in flames. Firebones seem a bit more aggressive than Fire-Asps, though they share the same spell. It likes to charge the Baron and attack it up close. And since it flies, it gets that job done more easily. Try not to get charged too many times, and certainly use the doors to escape it as running around in the room is not an effective avenue of escape. Toxignat: ========= Attack Type: Ranged Movement Type: Air Description: A small insect, flying after you with no soul and evil intent. What's fast, flying, strong, and able to poison you at a distance? Evil, that's what. Seriously, if you try to get out of a fight with a Toxingat unscathed you will likely be disappointed. That's not to say you shouldn't try - certainly you should. But if you do get poisoned - just crush the vile beast, this very image of Beelzebub, utterly. Use Lightning or Fireballs ina direct assault and Heal after the fight. Verdragon: ========== Attack Type: Melee Movement Type: Air Description: A flying green dragon. This dragon is the only Melee monster of Marchwall, but it doesn't help that it is rather powerful and can fly. However, if you use the doors in a proper hit and run strategy. There is _one_ Verdragon that spits Venom cLouds in Marchwall Fort though. This could have been a glitched Toxignat... In that case, you can use Meta-Powered Lightning for an easy win though. Writwraith: =========== Attack Type: Ranged Movement Type: Air Description: A floating, disembodied spirit charged with electricity. Arguable the most powerful monster in the game, they are a formidable foe that toss Lightning spells at you. And let them up close? They'll down you in an instant. You will need to take them out fromt eh side and back as much as possible, and run through a door if you are charged by it. Use Lightning to kill it if possible. A6: Marchwall Hold Part 1 ****************************************************************************** A6: Marchwall Hold ****************************************************************************** As suual, some sections are broke off from the rest of the Tower... Fire-Asp is a prolific enemy here, so get sued to dealing with it. Get used to to dealing with ranged enemies period, as the only melee enemy in the Tower is Verdragon (though that changes in Marchwall Fort). Floor 4 is polluted with Writwraiths, and the Tower houses a number of the poisonous Toxignats. You can throw some of what I said previously to the wind about conservation of Fireballs and Lightning here - spare _no_ expense to down these two enemies in particular before they do too much damage to you. When I say to spare no expnese, I still mean to make every shot count - don't miss with too many shots. Floor 1 Map Monster Paths +=========+ +===========+ +--+ +--+ +--+ *Fire-Asp: 1, 2, 4, 5 |01|-|02| |03| +--+ +--+ +--+ *Verdragon: 7, 8, 9 | | | +--+ +--+ +--+ *Firebones: 3, 6 |04|-|05| |06| +--+ +--+ +--+ | | +--+ +--+ +--+ |07|-|08|-|09| +--+ +--+ +--+ Room 1: ======= There is a Fireball behind the platform, and a Venom cloud on it. You're safe to use the previous Venom Cloud and Ice against the Fire-Asp, however. Room 2: ======= The Fire-Asp should be a few rooms away. You will want the Venom Cloud in the next room before fighting the Asp. Grab the coins and continue on. Room 3: ======= Fight he Firebones with Bombs in Room 6. Grab the Sulfur and Heal and head up the ladder. Room 4: ======= Hit the Fire-Asp with all Venom Clouds, and finish it off with Ice. If it gets close to you, run trhough a door. Eat some food and open the locked door when you're ready to move on. Room 5: ======= Grab the Venom Cloud and use it on the Fire-Asp. If you hit it with every Venom Cloud, then it is safe to finish him with Ice. Or, head to room 1 for more spells before starting the fight. The Red Key is under the Venom Cloud. Room 6: ======= The red switch in here drops bombs. This should account for the bulk of the damage you inflict on the Firebones. Finish it with Venom Cloud or Fireball if it tries to get near you. The only other point of interest in the room is the food. Take it if you need it. There is a panel to set off teh Fireball trap under the platform, and the Poison Panel - since you don't have Reveal yet, is right next to the Skull Rune so it is easy to avoid. Room 7: ======= Wait at the doorway and fire Venom Clouds, then Fireball at the Verdragon. Run when it gets near. There's a riskier, but more conservative way to do this: in the next room, there is a bomb trap. But the room is in darkness, so it becomes a hassle... Push the grey block for coins. Room 8: ======= If you're leading the Verdragon into a trap, it's to the right of the carpet on the passage heading northeast. Otherwise, stay on the carpet or to the left of it. Snack the watermelon and be on your way. Room 9: ======= Hit and run tactics or the bomb trap in room 8 will land you the Verdragon's head. Afterwards, take the Fireball and Venom Cloud, open the door, and continue on. Floor 2 Map Monster Paths +=========+ +===========+ +--+ +--+ +--+ *Fire-Asp: 10, 11, 12 |10|-|11|-|12| +--+ +--+ +--+ *Toxignat: 13, 14, 15 +--+ +--+ +--+ *Fire-Asp: 16, 17, 18 |13|-|14|-|15| +--+ +--+ +--+ | +--+ +--+ +--+ |16|-|17|-|18| +--+ +--+ +--+ Room 10: ======== You may want to use the middle of the middle circle pattern on the carpet next to the Northwest wall to drop bombs on the Fire-Asp. Otherwise, stick to medium attack power spells (Venom Cloud and Fireball). Grab the Sulfur and climb the ladder. Room 11: ======== Don't fight the Fire-Asp here. Take the Venom Cloud and the Coins from under the block. The posion panel is in the middle of the middle circle pattern on the middle (diagonal up/down) carpet. Leap over the pink glowing panels at their far right side. Room 12: ======== You can line up with the door and use Venom Clouds, then Fireballs against the Fire-Asp. There's a bomb trap in room 10, but you may take too much damage and waste too much time getting there. At any rate, there is treasure under the pot. Room 13: ======== Don't fight a Toxignat in here. The toxic carpet makes it a real pain. Due to the larger, damaging carpet - cast Reveal. Take the food in the room and look behind the statue for a Lightning. Cehck the upper left (northwest) corner for a Treasure. Room 14: ======== Hit and run on the Toxignat with Venom Cloud. Move the platform for a Yellow key (can be used on the locked door here) and take teh Heal spell. Room 15: ======== Use Venom Clouds at worst against this Toxignat, hit and run to the best of your ability and remember to Heal when needed. Grab the Venom Cloud here, and the Lightning. You won't need to use Lightning on this enemy, at least. Room 16: ======== Take out the Fire-Asp with Fireballs and cast Reveal. Put a coin in the slot to Reveal some treasure. Room 17: ======== Hit and run on the Fire-Asp with Venom Cloud and Fireball until you drop the writhing beast. Do not resort to Lightning. Collect the Lightning, a panel that sets off a fireball trap rests underneath. Room 18: ======== Cast Reveal to see, then collect the gear in here. A Fireball would help against teh Fire-Asp possibly. Floor 3 Map Monster Paths +=========+ +===========+ +--+ +--+ +--+ *Firebones: 19, 22, 25 |19| |20|-|21| +--+ +--+ +--+ *Toxignat: 26, 27, 24 | | +--+ +--+ +--+ *Firebones: 20, 21, 23 |22| |23| |24| +--+ +--+ +--+ GENERATOR: 21 | | +--+ +--+ +--+ |25|-|26|-|27| +--+ +--+ +--+ Room 19: ======== Take the Firebones on hit and run with Venom Cloud, then Fireball. Use the doors to your full advantage. Take the Fireball. Room 20: ======== Try to take the Firebones out in Room 23 with the bomb trap. Otherwise, hit and run with Fireballs. Approach the Treasure from the upper right (northeast) because the lower right is a bomb trap (southeast). Move the pot for some coins. The slot in this room provides up to three Venom Cloud packs at 3 coins each. Take the Sulfur and continue in. Room 21: ======== Do not fight the Firebones in here, it is very cramped. Alright, let's destroy the Generator. Jump up the glowing pink panels nearest the door. Your escape route is located southwest of where you gain access to the Generator. Test your escape route before Bombing the Generator. Place the bomb and quickly get out. Room 22: ======== Take the key and Venom Cloud after you deal with the Firebones. Again, range it with your medium powered spells, and use the doors to your full advantage. Drink up. Room 23: ======== Make sure the Firebones is away from the ladder as you descend to avoid any damage. When you hit the ground, equip Fireball and make your way to the red buttons. The left buttons turns on the lights, the right button drops bombs... The bomb will obliterate the Firebones utterly, but it can be hard to get him in this room. If you have to hit him at a distance with Fireballs, then you have to. But the Bomb drop is easily the best way. Head to Room 21 to blow up the Generator, then come back here and grab the Heal. Room 24: ======== Toast the Toxignat with Fireballs to the best of your ability. Use a heal if it flies away or after the fight. An extremely dangerous enemy, don't let it anywhere near you. Take the Sulfur and the Green Key underneath. Head down the ladder. Room 25: ======== Don't really mull over many plans on actually trapping the Firebones, it's not an easy task. Hit and run is still your best bet. When you're done, collect the Teleport and Treasure, then use the Green Key to open the door. A6: Marchwall Hold Part 2 Room 26: ======== Toast the Toxignat with Fireballs to the best of your ability. Use a heal if it flies away or after the fight. An extremely dangerous enemy, don't let it anywhere near you. Take the fireball, and watch out for the dotted panel as it sets off a Fireball trap. Room 27: ======== Far, far too cramped to fight the toxignat. If you notice it in here, head back the way you entered from. Grab the Reveal spell and continue along. Floor 4 Map Monster Paths +=========+ +===========+ +--+ +--+ +--+ *Writwraith: 30, 32, 33 |28|-|29| |30| +--+ +--+ +--+ *Writwraith: 31, 34, 35 | | | +--+ +--+ +--+ *Writwraith: 28, 29, 32 |31| |32| |33| +--+ +--+ +--+ | | +--+ +--+ +--+ |34|-|35|-|36| +--+ +--+ +--+ Room 28: ======== Line up with the Writwraith and let loose with Lightning. If you need to chase after it, take the Sulfur and Lightning and use the table to jump over the pink panels. Take the spells before you leave, regardless. Watch out for the Bomb Trap on the carpet after you clear the pink panels. Room 29: ======== Dispatch the floor's third Writwraith with Lightning. There's a piece of food in here. Take it, then move the block for treasure. Room 30: ======== Use Lightning to take the Writwraith down asap. Save the Invisibility maybe for Floor 5. Take the Heal Spell and the Blue Key underneath it. Grab the fireball, then pull the Wine out of the way if you want to use the slots. The slots give Fireballs at 4 coins each. There's a real premium on spells in this Tower, so you might just consider it. Room 31: ======== Don't fight the Writwraith here as it's too dark. When you've killed the monster, open the door and take the Venom Cloud. Proceed to room 28. Room 32: ======== The room really isn't well suited for fighting wiht Writwraiths, try one of the longer rooms. The bomb is in this room, and the path to the Generator is down those stairs. Don't ask me why a downstairs ladder is yellow on the minimap here... Take the Bomb, a Teleport, and a Treasure hidden behind the platform. Grab the Fireball, equip it, and head down the ladder. Room 33: ======== Don't kid around with a Writwraith. Hit and run it using Fireballs then Lightning. Take the Fireball before you proceed. Room 34: ======== Play hit and run with the Writwraith using Lightning spells. Every hit counts, so line up with him and let loose. There's a mushroom, food, and wine here. Take the food if you need it. Room 35: ======== Blast the Writwraith with Lightning as it enters the door. Take the Lightning from the cubby and continue on. Room 36: ======== Use Lightning to take the Writwraith down asap. There's a Fireball near the fire and switch. Take it, then flip the next door open... there's a Writwraith beyond so beware. Floor 5 Map Monster Paths +=========+ +===========+ +--+ +--+ +--+ *Fire-Asp: 37, 38, 40 |37|-|38| |39| +--+ +--+ +--+ *Firebones: 41 | | +--+ +--+ +--+ *Verdragon: 42, 43, 44, 45 |40|-|41|-|42| +--+ +--+ +--+ | +--+ +--+ +--+ |43|-|44|-|45| +--+ +--+ +--+ Room 37: ======== Cast Reveal. I really don't recommend fighting the Fire-Asp in this highly dangerous room. Take the Venom Cloud, then move the platform for a ruby. Room 38: ======== There's not a whole lot to do here besides fighting the Fire-Asp. Line up with the door and let loose with as many fireballs, then Lightning, as you can. Room 39: ======== If you are Invisible, run now to Room 43 and grab the Shield. While Shielded or under Meta Power, blast the Verdragon with Lightning until it is no more. GRab teh watermelon, Bomb, and Fireball. Room 40: ======== Don't waste the Meta-Power on the Fire-Asp, instead save it for the Firebones in the next room. And consequently, the Verdragon after that room (hidden passage). Take the coins, open the door, and grab the Meta Power just before you leave. Room 41: ======== Please note, there is a posion panel just below the Skull Rune. Quickly dispatch the Firebones with Meta Power Fireballs or Lightning. Afterwards, leave via a hidden door next to the Skull carpet. It's underneath the carpet on the southeast wall. Just beneath. Try to get through here and to find the Verdragon before your Meta Power runs off. When you return here, drink up and buy Lightning from the slots if you need more ammo. Room 42: ======== Check out room 39 first, then the rest for the Verdragon. Try to slay it while you still have Meta Power from Room 40. Or, make your way into room 43 for a Shield. Either way, let loose with Lightning. There is a secret door close to the door to room 45 on the Northwest wall. Note that there is a green dot panel near the secret door, it's on the blue carpet. Avoid it unless you want to be hit with a bomb. Eat the food and take the Fireball. Yes, the switch drops bombs but Meta Power or Shield are the most reliable here. Maybe use the Bomb drop if your shield runs out? Room 43: ======== Note that fi you have Meta Power, the Shield I believe will cancel it. But if you came here on the run with Invisibility, teleport over and grab the shield. Return and blast the Verdragon with Lightning. Make sure to grab the Treasure. If you're returning to the entrance, the Floor 2 teleport here could proove useful. Room 44: ======== If you are Invisible, run now to Room 43 and grab the Shield. While Shielded or under Meta Power, blast the Verdragon with Lightning until it is no more. Grab the Venom Cloud, and push the pot for some coins. Continue! Room 45: ======== If you are Invisible, run now to Room 43 and grab the Shield. While Shielded or under Meta Power, blast the Verdragon with Lightning until it is no more. Grab the Sulfur and continue. 100% secrets are possible on this tower, but its not obvious how. There's a broken mystery rune in room 37 which indicates an illusory wall you can walk through, but that is not possible because two of its four sides are the edges of the tower, and the other two are inner walls which are never passable. Thanks to K1n9_Duk3's datamining efforts, we know that walking through an illusory wall increments the secret counter by one, and the last missing secret in this tower isnt the mystery rune in room 37, but an eye rune in room 39. My bet is on the eye rune being behind the pillar and blocking it from being visible to us. Or maybe it was never placed on the walls in the first place. Cast reveal and it'll drop a lightning. MT6.7: Wizard Towers Originally the guide put the apprentice and wizard towers in pairs based on their locale but i decided to order them according to the game's progression, and im not sure what to write here. Prepare for a handful of new mechanics, and significantly increased difficulty! The real challenge begins now! W1: Rimm Fortress Part 1 ****************************************************************************** W1: Rimm Fortress ****************************************************************************** To beat the Tower, you will need to reach the fifth floor, and then proceed to the fourth. Either get the green key from Floor 3, on the Dralek path and use it in Room 32 to open a door on Floor 5, or teleport to Floor 5 from Floor 3. Once on the fifth floor, make your way to a downwards ladder. Room 35 holds the Bomb. Collect it and rush back to the Generator on the third. Floor 1 Map Monster Paths +=========+ +===========+ +--+ +--+ +--+ *Scarabite: 1, 2, 3, 6, 9 |01|-|02|-|03| +--+ +--+ +--+ *Fungafly: 5 | | +--+ +--+ +--+ *Azurblast: 4, 7, 8 |04| |05| |06| +--+ +--+ +--+ | | | +--+ +--+ +--+ |07|-|08|-|09| +--+ +--+ +--+ Room 1: ======= Keep Ice equipped, but take the coins and the Venom Cloud in the room. Pay one coin in the slot for a map piece. Go hunt down the Scarabite. Room 2: ======= Cast Ice at the Scarabite, and jump on it when it gets near. When it is dead, take the Yellow Key and continue on. Room 3: ======= Cast Ice at the Scarabite, and jump on it when it gets near. When it is dead, take the Sulfur, Food, Heal, and drink up. Room 4: ======= While you must approach the Azurblast from this direction, this is certainly not the best room to fight. Take it on with Sulfur if you have to, but try to make it into room 7 or 8. You'll need to use the southeastern start of the pink glowing panels to make it over. There's a Venom cloud and Apple in the room as well. Room 5: ======= If the Fungafly isn't near you, you're good to go. Head to the lower left (southwest) corner and flip the switch on the northwest wall to turn on the lights. Attack the Fungafly hit and run style with the Sulfur spell, then Venom Cloud. When it's done for, take the Sulfur, Reveal, and Food. The dotted panel just controls the door. Room 6: ======= Cast Ice at the Scarabite, and jump on it when it gets near. When it is dead, take the Teleport spell and flip the switch. Don't walk on the carpet in front of the heads, however, as they are fireball traps. Room 7: ======= Grab the Blue Key and run quickly to the keyhole. Try to kill the Azurblast with the dropping bombs in Room 8. In this room is a Transmute Niche, if you place a spell within, and insert a coin then it will gain an extra shot. This is more useful for more powerful spells. Take the Venom Cloud anyways. Room 8: ======= Run into the room and to the red button by the door to Room 5. It'll drop bombs from the ceiling when pressed. Trap the Azurblast in an explosion to end it quickly. You'll need to push the grey block under the taller switch to reach and flip it. Enter Room 5. Room 9: ======= Cast Ice at the Scarabite, and jump on it when it gets near. When it is dead, take the Levitate spell and push the block for a Red Key. Grab the Sulfur, hit the red button, and conintue on. Floor 2 Map Monster Paths +=========+ +===========+ +--+ +--+ +--+ *Scarabite: 15, 18 |10|-|11|-|12| +--+ +--+ +--+ *Jagurota: 10, 11 | | +--+ +--+ +--+ *Fungafly: 13, 14, 16 |13|-|14| |15| +--+ +--+ +--+ | | +--+ +--+ +--+ |16|-|17|-|18| +--+ +--+ +--+ Room 10: ======== Excellent long corridors to hit and run with the Jagurota. Fire Sulfurs at it and retreat when it nears. It should go down fairly quickly. There's Food and a Venom Cloud to collect when you finish and if you need them. Room 11: ======== Wait for the Jagurota to emerge and pund it with Sulfurs. Just back off through the door if it gets close. By now you are probably very thirsty, if you need to, duck up to the fountain on the Thrid Floor, room 21 if need be. But we'll eb returning to this room after we loot the next few rooms, so keep the ladder in your mind anyways. Room 12: ======== The Fireballs fire one at a time. Wait for the one nearest you fires off before you jump over the glowing pink panel in teh centre of the hallway. Now, when moving past the traps, let the trap in front of you fire off in front of you before you continue. If you can grab the Venom Cloud and Sulfur on the way by, do so. Room 13: ======== Grab the Sulfur, look on the square setup of red blocks where the grey block is located. There is a green dot on one, signifying a bomb trap. But, the red button will aslo drop bombs here for you. Good deal, yes? If you've been diligent, you should have the key. Use it, then run over to the red button and get ready to hit the Fungafly with bombs as it emerges. It may not kill the Fungafly in a single hit, but it certainly helps. Room 14: ======== You should use the bombs in Room 13 to kill the Fungafly. There is a Venom Cloud and a treasure in this room for you to pick up when you have disposed of it. The second upwards ladder of the floor is also here. Room 15: ======== Blast the Scarabite with Ice and jump on it when it gets near. Don't walk right in front of the Idol, as a bomb will drop on your head. Grab the Reveal, the slot gives you Sulfurs at 2 coins each (up to three packs). Room 16: ======== There's not much here besides a Mushroom. The dotted panel will set off a fireball trap. It might be possible to kill the Fungafly with this trap, but the bombs in room 13 are much, much better. Room 17: ======== There's no lightswitch here, nut you don't have to waste a Reveal. Head into the southeast door for now. There is a keyhole near the door on the opposite end of the room from the southeast door, but let's start in 18. Room 18: ======== Blast the Scarabite with Ice from a distance, and jump on it when it gets near. Grab the Venom Cloud and Sulfur before you continue. Floor 3 Map Monster Paths +=========+ +===========+ +--+ +--+ +--+ *Jagurota: 23, 24 |19|-|20|-|21| +--+ +--+ +--+ *Azurblast 19, 20, 22 | | +--+ +--+ +--+ *Dralek: 25, 26, 27 |22| |23|-|24| +--+ +--+ +--+ GENERATOR: 27 | | +--+ +--+ +--+ |25|-|26|-|27| +--+ +--+ +--+ Room 19: ======== Use the doors to hit and run the Azurblast. Use Venom Clouds to bring it down. Take the apple and the treasure when you're done. Room 20: ======== Use the doors for cover as you fight the Azurblast. Take it out with Venom Clouds. Room 21: ======== Water has been scarce, so drink up. As for the switches and the fireball trap: Su = Switch pointing up Sd = Switch pointing down Fb = Fireball Trap +--+ /Sd/ +--+ <-- You only really need that top switch to be set down. /Su/ +--+ It will cause the shut door in this room to open. /Fb/ +--+ /Su/ +--+ /Su/ +--+ Take the Levitate. You're going to want to wait on that Meta Power. To the northeast of the Levitate (above it, right next to it) is a bomb trap. Take it from the sides. Room 22: ======== You need to cast Reveal right away. Take the Reveal and jump up on the glowing panel on which it was placed. The red button here causes bombs to drop. Take the Watermelon, then walk down along the southeast wall. The Venom Cloud is placed on top of a poison panel, so just grab it and don't step on the panel. Room 23: ======== I suggest you enter from room 24, as it gives more control to Baldric during the battle with the Jagurota. Take the map pieces and treasure when you're ready. The slot provides Sulfur at 2 coins each. HEad on up to fourth floor when ready. W1: Rimm Fortress Part 2 Room 24: ======== Alright, well the switches in here mostly control the door to room 21. There is a lightswitch thrown in, but the lights should already be on. For the door to room 21 to be open, have them set as such: Su = Switch pointing up Sd = Switch pointing down Ls = Lightswitch +--+ /Su/ +--+ /Ls/ +--+ /Sd/ +--+ /Sd/ +--+ /Su/ +--+ The red button opens the door to room 23. You can get over to it via the bottom left pink glowing panel. Flip and and get back. Pound into the Jagurota with Sulfur then Venom Cloud. Proceed when finished. Room 25: ======== Don't worry about the Dralek, it is locked up in Room 27. Under _no curcumstances_ shoudl you fight the Dralek in here... Alright, cast Reveal in here so you can see the fireball shooters. When a a trap is done firing, jump past it. There are three items of interest in here: Sulfur, Venom Cloud, and Food. You can stand between shots to collect the Food and Sulfur, you may have to risk a hit if you really want Venom Cloud. Proceed when ready. Room 26: ======== After you flip the switches up, you can hot the Dralek as it enters with a succession of Venom Clouds until it drops. _OR_ lead it into the dropping bomb on the panel directly southwest of the Venom Cloud in this room (see the green dot?). The switches should be flipped to this conformation: Sd = Switch Down Su = Switch Up +--+ Sd +--+ Su +--+ Sd +--+ If you'd like, position the Venom Cloud over the trap panel and use it as a wall between the Dralek and yourself. Room 27: ======== The poison panel is directly in front of the slot, so it may not be worth it to buy here. If you do use the slot, it will give you a mushroom to heal the poison. Ah well, curiosity probably got the better of you! Three items of note: A Sulfur, a Green Key, and a Treasure in the fireplace (it's a ruby, so it;s trying to disguise itself!). Now, the generator is in this room. Of course, if this is your first time here then you probably don't have a bomb. Either take that green key and backtrack up the ladder, or use the Teleport pad here to reach room 40. Floor 4 Map Monster Paths +=========+ +===========+ +--+ +--+ +--+ *Scarabite: 29, 30, 33 |28|-|29|-|30| +--+ +--+ +--+ *Azurblast: 35, 36 | | +--+ +--+ +--+ *Dralek: 31, 34 |31| |32| |33| +--+ +--+ +--+ | | +--+ +--+ +--+ |34| |35|-|36| +--+ +--+ +--+ Room 28: ======== Cast Reveal. Take the Dralek hit and run style with Venom Clouds if at all possible. There's a Sulfur here if you want it, and a mushroom in case you get poisoned. Room 29: ======== Your entrance into Floor 4. If you can take the Scarabite on in here, then for sure use an Ice/Sulfur + jump combo on it. Drink up if need be. Room 30: ======== Use Venom Cloud + jumping on the Scarabite in htis room where the pink panels make using Ice a bad idea (the Scarabite regenerating while you can't move to hit it properly). Move the drink to find a treasure (the drink will intoxicate the Baron, and with a fountain in room 29, it's useless anyways). The slot provides VEnom Clouds (they cost 3 coins each, up to three packs). To proceed, take the Sulfur and jump up and over here. You can walk a path to the next door. Room 31: ======== Use Venom Clouds on the Dralek, run when it nears. Flip the switches to turn on the lights and open the door. Room 32: ======== You'll need the Green Key for use in this particular room. Take the Reveal spell, and head through the door. Room 33: ======== Jump over the glowing panel that's farther from the rest. Take the items and continue through the door. Room 34: ======== If the door is locked then you won't need to worry about the Dralek here. Just go over to the slot and insert a coin for some treasure. Grab the Teleport spell, then walk through the wall at the "upper right" corner of the Teleport pad (note the mystery rune). Room 35: ======== The Bomb! If the Azurblast lives, you're so much better off fighting it in room 36 with dropping bombs. It can poison you, so it is a major threat here. Watch where and when the Fireballs shoot. Grab the Bomb and loot the room now - or if you worry about the Generator, later. Take the Venom Cloud, then come up on the Levitate from the southwest. If you are in line with the table you should be safe from the traps in the Northeast. Still approaching the table from the southwest, bull the drink from the table, then leap up and grab the Treasure. Leap down from the table and grab the Heal spell. Now to finish the room, walk through the wall to the southwest (left) of the Fireplace (note the mystery rune) and back after you grab the items in Room 34. Room 36: ======== If the Azurblast is not in the room yet - great! The red button causes a Bomb to drop, and it will do a serious number on the Azurblast. Two should be enough to kill it. This is definitely the way to go - this Azurblast fires Venom Clouds and as is such especially dangerous. Mark where teh Bomb falls - there is a bomb trap here as well. Take the Venom Cloud, drink if you need it, and head into Room 35 for the Bomb. W1: Rimm Fortress Part 3 Floor 5 Map Monster Paths +=========+ +===========+ +--+ +--+ +--+ *Fungafly: 37, 40 |37|-|38|-|39| +--+ +--+ +--+ *Jagurota: 44, 45 | | +--+ +--+ +--+ *Dralek: 39, 41, 42 |40| |41|-|42| +--+ +--+ +--+ TOWER KEY: 44 | | +--+ +--+ +--+ |43| |44|-|45| +--+ +--+ +--+ The map piece is in Room 39. Room 37: ======== Take the Fungafly on with Venom Cloud, it has a load of stamina, so break off when it comes near. Drink up, and cast Reveal to earn a Fireball. You may want to save that for the Dralek. Room 38: ======== The ladder here is access to Floor 4, where the Bomb waits. Other than that, it is a monster free room. Room 39: ======== This room may be a little cramped in which to fight the Dralek, but if you must then hit it with Fireballs at a distance, and make every shot count. If all seven hit, a few Venom Clouds after will down it. Take the Venom Cloud and map piece when done. Room 40: ======== If you teleported here, be aware of the Fungafly and take action to destroy it ASAP. Hit and run with Venom Cloud will do it in this case. It has a load of stamina, so it will keep you on the run. When you drop it, collect the Sulfur, Coins, and Venom Cloud. Save the Shield either for running down to Floor 4 and cutting a swath to the shield or for fighting the Dralek. Note the Teleport pad. If you ported to Floor 5, take this back to Floor 3 after you earn the Bomb. Room 41: ======== You must open the door here from Room 32's keyhole. It is best to take on the Dralek coming from the teleport pad in room 27, however. Room 42: ======== One slot will provide you with Venom Clouds, get a few as they are useful in this Tower for most of the monsters. The other slot controls a Transmuting Niche. The Invisibility in this room may be wise if you didn't kill the Dralek with Fireballs, _or_ for sneaking into Room 35 on the fourth floor (choose only one to take: Shield or Invisibility). The closed door must be opened from Room 32's keyhole. Take the coins and head through the raised door, instead. Room 43: ======== Do not, do _not_ even think about fighting a Fungafly in a room this small. Grab the Heal spell and coin. Watch out for the dotted line panel - it sets off a Fireball trap. Room 44: ======== Collect the items in the room, then note the yellow pedestel - the Tower Key will appear in this room. After you snag the key, after killing all monsters and dealing with the Generator, you can take teh Teleporter back to Floor 1. Room 45: ======== Press the red button to drop Bombs on the Jagurota. Try to kill it this way, or at least hit it once. IF you can't kill it outright with bombs, jump down and use Venom Clouds. Keep the fight in this room anyways. Cast Reveal to gain a Lightning. It could come in handy against a monster like an Azurblast that can be damgerous at a range. Take the Sulfur and Venom Cloud when you finish, then open and enter the door. W2: Tor Karad Castle Part 1 ****************************************************************************** W2: Tor Karad Castle ****************************************************************************** The Castle isn't layed out in too confusing of a manner. You can basically take it on like an Apprentice Tower up until the GEnerator - that is, it's a straight-forward climb as you colelct keys and clear out floors. Once you get the bomb on the second floor, and blow up the Generator on the third floor, however, it gets a little more complicated. In order to get to the Fourth Floor, you must climb to the Fifth floor and grab a Teleport Spell. Then, you must use the Floor 4 teleport on Floor 2 to reach Floor 4. On Floor 4, you must find a Blue Key which will open a path to the second two enemies on Floor 5. There's a number of keyholes in this Tower that open doors in different rooms. These are necessary for progressing through the Tower. Floor 1 Map Monster Paths +=========+ +===========+ +--+ +--+ +--+ *Triworm: 3, 6, 9 |01|-|02| |03| +--+ +--+ +--+ *Clawfoot: 5, 7, 8 | | | +--+ +--+ +--+ *Shrimpion: 1, 2, 4 |04|-|05| |06| +--+ +--+ +--+ | | +--+ +--+ +--+ |07|-|08|-|09| +--+ +--+ +--+ Room 1: ======= Grab the treasure on the teleport panel, then the Sulfur. The Shrimpion is trapped in Room 2, when you open the door you should use Sulfur, then Venom Cloud. It only shoots Ice, so it shouldn't be too difficult. Room 2: ======= Take on the Shrimpion with Sulfur, then Venom Cloud. It only fires Ice so there is no need for any higher spell. Grab the Venom Cloud and Yellow key before you proceed. You will likely need to enter Rooms 1 and 2 from 4. Room 3: ======= Take the Triworm on at a distance with Sulfur from here and Room 9. You may want to collect some items on this floor before you use the ladder in this room to start your climb. Take the Venom Cloud and Coin as well when the Triworm is taken down. Room 4: ======= As you enter from Room 5, do not walk on the carpet or you'll set off a Bomb Trap. Make it to the switch on the wall to flip on the lights, grab the map piece and use teh Keyhole to open the door. The Shrimpion is trapped in 02. Room 5: ======= Clawfoot enemies are dangerous due to their speed, so take advantage of the Venom Cloud you picked up and make sure you hit it with every shot. Finish it with Ice. If you want to save ammo, use the bomb dropping in Room 7. The Columns here can be pushed. You need to push the column near the pink panels if you want to pass from one side of the room to the other. This _seems_ to be the Mystery of the room. Alright, there's an apple to take, and also a Fireball (save it). Room 6: ======= The long narrow hallway gives you plenty of opportunities to strike down the Triworm. Use Sulfurs from Rooms 3 and 9 to kill it. Take the Reveal and proceed. Room 7: ======= The red button allows you to drop Bombs from the ceiling. Note the location and use them to blow away the Clawfoot. Collect the Watermelon, underneath is another Yellow Key. If you already have one, there's always points to collect. Take also the Venom Cloud. The keyhole controls a door in the previous room. Open and shut it anyways just in case it counts towards the Secrets percentage. Room 8: ======= If you choose to fight the Clawfoot in here, use the grey block as a means of blocking its progress and make every shot of Venom Cloud count. It should be simple enough to finish it with Ice. Or, you can alternatively take it into Room 7 and drop bombs on it. Room 9: ======= You can use the block, drink, and Sulfur as a wall against the Triworm if you wish. But the Sulfurs are useful for taking it down to begin with. Either way, loot the area when done. There is a Yellow Key under the drink, which can be used on the door here. Of course, take the coins near the keyhole. Floor 2 Map Monster Paths +=========+ +===========+ +--+ +--+ +--+ *Clawfoot: 15, 18 |10|-|11|-|12| +--+ +--+ +--+ *Triworm: 11, 14, 17 | | | +--+ +--+ +--+ *Flip-Flop: 10, 13, 16 |13| |14| |15| +--+ +--+ +--+ | | | +--+ +--+ +--+ |16| |17|-|18| +--+ +--+ +--+ Room 10: ======== The Flip-Flop should be taken out with Venom Clouds at a distance. It's a hit and run affair here. Take the Bomb when the beast is dead. Now, you're probably really thirsty, and so you should head to Room 16 for a fountain... and you'll get a map piece to boot. Room 11: ======== Grab the Venom Cloud and keep it ready. You will want to use the red button here to crush the Triworm with bombs from above. Finish it with Venom Cloud if you can't with bombs. The other switch opens the door to Room 12. Room 12: ======== No monsters, but you'll need the Yellow Key from down below to proceed. When you have the key, use it and proceed to Room 15. Room 13: ======== This is certainly too cramped to fight an enemy as unpredictable as a Flip-Flop in. If you must, hit it from across the room then run into Room 10 to finish it off. The pink panels, jump onto the one glowing panel sticking out from the rest in the lower left. Move forward to the next (the line of three), then leap north- east (up/right) to the other wall, proceed along the pink panels here until you drop off near the pillar in the wall. Grab the map piece here. You may want to position the pot near the glowing pink panels before you proceed into Room 16 - essentially it will act as a bottom step for your return through the Room when you head to Floor 3. Room 14: ======== Run into Room 11 and use Bombs to kill the Triworm. There's a ladder here, but make sure you get the Bomb in Room 10 before you proceed any further up the Tower. Room 15: ======== You may want to use the Apple and platform as some kind of wall against the Clawfoot while you fire Venom Clouds at it. If you keep away from it, you should get away relatively unharmed. Room 16: ======== You are likely very thirsty now, drink up. If you have to fight the Flip-Flop in this room, use hit and run wiht Venom Clouds. There may be a little too much space for it to flit around in, however. Take the Sulfur, Venom Cloud, Coins, and Treasure when ready. After destroying the Generator and grabbing a Teleport spell on Floor 5, return here and use the Spell to reach Floor 4, Room 33. Room 17: ======== Make a break for the door and run to Room 11. There isa switch in that room to drop Bombs on the Triworm. If you want to stand and fight, use Venom Cloud. But it isn't advised. When you return, the Venom Cloud near the light switch should be taken. Room 18: ======== Hmm. Well, there's a load of space here, it's really better to fight the Clawfoot in 15 since it is so fast it can easily stay out of range in here. BUT, uf you do want more room to move yourself, then this may be choice. Grab the map piece, the Venom Cloud, and the Red Key. From the slot, you can buy Sulfurs at 2 coins/pack. It may be something to consider as you're likely low on spells. W2: Tor Karad Castle Part 2 Floor # Map Monster Paths +=========+ +===========+ +--+ +--+ +--+ *Triworm: 20, 21, 24 |19| |20|-|21| +--+ +--+ +--+ *Flip-Flop: 26, 27 | | | +--+ +--+ +--+ *Puffer: 19, 22 |22| |23|-|24| +--+ +--+ +--+ GENERATOR: 19 | | +--+ +--+ +--+ |25|-|26|-|27| +--+ +--+ +--+ Room 19: ======== Hit the Puffer with Venom Clouds, especially if you get a few hits in while invisible, it shouldn't be any grave threat. After that, blwo up the Generator, then loot the room. The Sulfur is not on top of the Venom Cloud, though it looks that way. So don't waste a spell hitting the fire button twice! Room 20: ======== There's bread if you're hungry - as well as the map piece for the Third Floor. When you flip the switch, the door will open. A Triworm lurks around these parts, you can crush it with Venom Clouds. Of course, it's a dangerous monster up close, so take care to run away when it gets too near. Room 21: ======== You have plenty of room to move in this room, but there is a Bomb Trap towards the lower end. It's in the middle of one of the large square designs on the floor, that green dot. If you can remember this, then it may not be a bad area to fight the Triworm in at all, and if it chases you, you _could_ get the bomb to fall on it. It does have a load of Stamina, so use nothing less than Venom Cloud on it. When the worm is dead, collect the items of this room: Coins, Treasure, and a Venom Cloud. The slot provides Sulfurs. They may not be effective on enemies higher up in the Tower. Room 22: ======== While still invisible, turn right and leap up onto the pink panels. Even if you can't fight the Puffer while Invisible, try to get clear of this spot first as really, you're at a huge disadvantage otherwise. The Puffer really gains speed as you hit it, but hit and run with Venom Clouds should be enough to do it in. It shouldn't take many at all, especially if you get a few hits in while invisible. Grab the coins, then head into Room 19 for the Generator. You can leave back to room 25 by using the pink panels on the northwest side as the lower steps. Room 23: ======== There's a Transmute Niche in here, and two closed doors. There's also the ladder back to the second floor, and one to forth. You can open a door through a combination lock found on the walls. The door to Room 20 would be open as such: Si: Switch In So: Switch Out +--+ Si +--+ Si +--+ So +--+ Take the Treasure before you proceed. Room 24: ======== If it comes down to fighting the Triworm in this room, try to lead it into 21. The lower switch controls the Doors, it will open the door to 23 but close the door to 21, and vice-versa. You should open the door to 23 if you've already killed the Triworm. Just to make progress a little faster after you destroy the Generator. Room 25: ======== There's some good advice in this room. Until it's lit up and Revealed, this shooting room should be bypassed with the Invisibility from Room 27. Try to make it quick, and to get through the room and use the Invisibility in the coming fight before it runs out. Press the red button as you proceed to light up the room. Push the upper column up one space while you are still invisible, as well. This will prevent the upper fireball shooter from hitting you on your return trip. For all of the others, you can predict them. Take the Reveal spell and leave back to Room 26 on your return trip, in front of the second trap from the bottom while the first trap from the bottom is firing. Room 26: ======== Flip the middle switch on the Northwest wall to turn on the lights before you try fighting the Flip-Flop. Hit and run it with Venom Cloud, there's one in the room to add to your stock as well. Maybe clear off the table of the Sulfur and Green Key first, and use it as a block between you and the Flip-Flop? When you're ready to Proceed, head over to the combination of switches once more, it's a combination lock. Sd: Switch Down Su: Switch Up Ls: Light Switch +--+ /Su/ +--+ /Sd/ +--+ /Ls/ +--+ /Sd/ +--+ /Su/ +--+ Room 27: ======== Hit and run the Flip-Flop with the Venom Clouds. The Invisibility isn't needed here. But feel free to use the door to escape the Flip-Flop's path at any time. The Invisibility is helpful in room 25. Make sure you've solved teh combination lock in Room 26 first, however. Floor 4 Map Monster Paths +=========+ +===========+ +--+ +--+ +--+ *Puffer: 28, 31, 34 |28|-|29|-|30| +--+ +--+ +--+ *Clawfoot: 29, 30 | | +--+ +--+ +--+ *Shrimpion: 35, 36 |31| |32| |33| +--+ +--+ +--+ | | +--+ +--+ +--+ |34| |35|-|36| +--+ +--+ +--+ Room 28: ======== If you've got the Puffer in this room, you can probably take it out with relative ease. Switch to Venom Cloud and stand across from the doorway, but also in line with the other doorway. Hit it and take to the other doorway when it gets too close. Room 29: ======== The red button drops a bomb in the bottom right corner (it also lands on a Bomb Trap tile, so note that). It's hard to get the Clawfoot down into the bottom right corner. I prefer to use the shield and spells, but you may want to try and trap it. In fact, you could build an elaborate trap around the blast area with the items found in the room. That is, block the Clawfoot in with the items and then let loose with the bombs (or say, Ice). That's an effective way to kill it, but Clawfoot enemies are so fast that you may be much worse for the wear in this attempt. have your defense? When the monster is dead, grab the two Sulfurs and the Venom Cloud. Drink up, and continue on. Room 30: ======== Hmm, well the Clawfoot is a dangerous foe. The shield _could_ be used against the Shrimpion but it isn't a huge threat from afar with a Fireball or Venom Cloud. I suggets then that you grab the shield and let loose on the Clawfoot. I used Sulfur, but I had 32 and basically used them all up plus a few Venom Clouds. But that's the ticket, really, to wear it down with the weak spell while you're shielded, then finish it off with a couple of stronger spells. There _is_ a Bomb you can drop in the next room, but it's difficult to position properly. To get over the Pink Panels, leap on the one sticking out on the bottom and jump along up to the top. Room 31: ======== The Puffer moves way too fast when damaged to make this room effective for fighting to it. Hit it for sure, and run to Room 28 when it gets too close. When the beast is dead, use the Keyhole. It opens a door to Room 35. Now, collect the food and Reveal spell. Room 32: ======== Before heading up here, you will have wanted to have destroyed the Generator, and also have grabbed teh map piece for this floor on the second floor. You won't be sticking around here long, however. Avoid the dotted panel, and head up the next ladder when you're ready. Room 33: ======== You should be in Room 33 after Teleporting from Room 16. Make sure you've done this after you destroy the Generator. Cast Reveal, you'll earn some more Teleport spell charges. Room 34: ======== Avoid fighting the Puffer in this room. It's dark, it's poisoned, and it's cramped. Cast Reveal, and scour the room for any and all items, avoid walking on the posion tiles. Instead, equip Ice so you don't accidentally waste a spell. The items to be had are: -4 coins (all at once) -Blue Key (found on the bottom left Poison Panel) -Sulfur Check the southeast wall for a secret passage. W2: Tor Karad Castle Part 3 Room 35: ======== You must open this room from Room 31. Or you could have taken the Mystery Passage from 34. Above the Idol, there is a bomb trap. The Shrimpion is slow enough that you can cause the trap to damage it while you escape harm. Finish it off with Venom Clouds. Take the coins, and the Treasure. The slot provides Venom Clouds at 3 coins a piece. Some restocking might be in order at this point. The mystery rune denotes a hidden passage in the northwest wall. It's toward the upper left corner. Get in and get out. Room 36: ======== The Shrimpion attacks with Ice, and can be easily taken out at a distance with Venom Clouds as long as you stick to its back or sides. There's a Bomb trap (not switch) in Room 35 if you want to catch it in that. Room 35 must be opened from Room 31. However, there's alsoa Mystery Passage from Room 34. Check behind the bust of the old Baron to find a Venom Cloud, also grab the Sulfur before you leave. Floor 5 Map Monster Paths +=========+ +===========+ +--+ +--+ +--+ *Flip-Flop: 43, 44 |37|-|38|-|39| +--+ +--+ +--+ *Shrimpion: 37, 38, 39 | | +--+ +--+ +--+ *Clawfoot: 42, 45 |40| |41| |42| +--+ +--+ +--+ TOWER KEY: 45 | | | +--+ +--+ +--+ |43|-|44| |45| +--+ +--+ +--+ Room 37: ======== The Shrimpion here is venomous. Run past it. There is a Meta-Power coming up that you will want to use on it. Return after the Shrimpion and Clawfoot are dead and grab the Sulfur. Room 38: ======== The Shrimpion here is venomous. Run past it. There is a Meta-Power coming up that you will want to use on it. Grab the Invisibility. You may still get hit by a Venom Cloud, but it won't pursue you. You can run and heal, in other words. Room 39: ======== The Shrimpion here is venomous. Run past it. There is a Meta-Power coming up that you will want to use on it. Run into Room 42 for the Meta-Power. Crush the Shrimpion with Meta-Powered Venom Clouds. Nice room to loot when you're done, there's Treasure, a coin, Sulfur, and a Venom Cloud. Be careful near the table - there is a green dotted platform at the southwest end. Room 40: ======== You'll need to open the door in here from the previous room, and you will need the Blue Key from the Fourth Floor. Cast Reveal. Jump on the pink panel nearest the door and leap over. Take the Bomb if you need it. Room 41: ======== There's no Monsters here, but you may want to use the Transmute Niche to increase your stock of more powerful attack spells. One coin is on a dotted panel, and there's another panel in the room (two Fireball Traps). Note their location, take the coins and Teleport spell and proceed through the door if you have the Blue Key. Otherwise, use the Floor 4 Teleport back on Floor 2, Room 16 (we needed to get the Teleport spell here is all). Room 42: ======== The Meta-Power is there for the Shrimpion, but if you kill it quick enough, feel free to come back and crush the Clawfoot. So, open the Door on the way out (it requires one coin in the slot) and the Clawfoot may even be in here on your return. Room 43: ======== Use the space to your ultimate advantage against the Flip-Flop as you lay into it with Fireballs, then Venom Clouds. It is uopredictable and it takes a beating. Hit and run is the way to go. Hit the red switch to turn on the lights, then take the Reveal and the Map Piece for this floor. There are three keyholes here - and you will need to get the blue key from Floor 4 in order to progress. You can, however, try the keyhole in the corner. It opens a door somewhere else in the Tower, and you may as well open it. The rightmost keyhole opens the door to the next room, however that room has a locked door and you will need the Blue Key to get beyond that, and Room 40 has a Bomb if you need to blow up the Generator still. Room 44: ======== The switch in here opens the door for a Flip-Flop. Hit and run it with Fireball and then Venom Cloud. It can take a real beating, so watch out. Room 45: ======== Destroy the Clawfoot with Meta-Power Venom Cloud. Take the Teleport spell, Treasure, and the Tower Key when it appears. The red button actually drops a bomb in here, so if you run out of Meta-Power you can still take it on with relative ease. The slot also gives Fireballs at a cost of 4 coins so you can just strike it down if you want. Teleport to the first floor if you're ready to leave. W3: Nortscar Spire Part 1 ****************************************************************************** W3: Nortscar Spire ****************************************************************************** This Tower can be a challenge if you're not practiced in combat. Essentially, there are no Heal spells, food is a real premium, and you have to crawl up the Tower from top to bottom at a decent rate. The limit on supplies and spells, at least until floor 4 and 5 really make it important that no monsters regenerate. On Floor 2, there is a door that you must cast Reveal to use. I suggest you save before you cast Reveal, rather than after. Why? Because if you load the game up after you've called the door itmay be gone and Reveal will simple tell you that there's nothing there. You need to use this door to reach a monster, so it will ruin your progress if it disappears. The Bomb is located on Floor 4, and should be reached immediately after you get to that Floor. The Generator is in Room 22, it's not too far away. The biggest problems caused by no Heal Spells is that you must keep up your Water and Food so that you can regenerate. And Poison is _deadly_. Unless there is a mushroom or sludge to remedy your condition, Poison cannot be healed. This also means the big abd Sniper, which uses Venom Clouds, on Floor 5 must be handled with a vengeance. There _is_ a Meta-Power on Floor 5, and this will be paramount in killing the Sniper. If the Meta-Power is not an option, then make the Sniper you absolute last stop, so you can grab the Tower Key in 44 and get out (there's a Floor 1 Teleport as well) before the Poison kills you. Floor 1 Map Monster Paths +=========+ +===========+ +--+ +--+ +--+ *Sniper: 1, 2, 3 |01|-|02|-|03| +--+ +--+ +--+ *Podhopper: 4, 5, 6 | +--+ +--+ +--+ *Snapdragon: 7, 8, 9 |04|-|05|-|06| +--+ +--+ +--+ | +--+ +--+ +--+ |07|-|08|-|09| +--+ +--+ +--+ Room 1: ======= There's a decent amount of space, plus long hallways to fight the Sniper here. Take it out with VEnom Clouds, and try to get it from behind. Before moving on to Room 4 or climbing the ladder, take the Sulfur and Fireball spells here. Room 2: ======= The room is somewhat cramped to be fighting a Sniper. The table can't be moved and will offer no protection against the Sniper. TAke it down with Venom Clouds and try to get at it from behind. Take the map piece before you leave. Room 3: ======= Staring near a Sniper, which has a fairly powerful projectile, can be a dangerous proposition. Take the Sulfur and Venom Cloud. Use Venom Cloud to destroy it from afar, taking care to approach it from the side or back. Finish it with Ice, save the Sulfurs for another monster. Take the Reveal spell before you leave. Room 4: ======= Decent room in which to fight the Podhopper, duck in and out of the room when it gets close. Use your Sulfurs first. Room 5: ======= Up near the upper left corner, there is a lightswitch. This is to the right, or southeast of the Venom Cloud (right next to it, on the wall). Hit and run the Podhopper, run through a door if it gets too close. Room 6: ======= I don't suggest fighting the Podhopper in this room due to limited mobility. If it is in here, stay near the door but don't try chasing it through the room. When you want to proceed through to Room 9, push the pot over near the glowing pink panels and use it as a lower step to get over them. Once over, grab the bread and Venom Cloud. Room 7: ======= There's a lot of space to move here, you may actually want to take the Snapdragon on in a different room, 8 or 9 due to their more restrictive halls (in other words, you won't be missing as often). The Venom Cloud rests on a bomb trap panel. You may want to get the Snap Dragon chasing you, then hit it with this as you run over it? Risky business. This is a decent room to loot before heading higher up in the tower. Your spoils include Sulfur, Venom Cloud, coins, a map piece and a flask of what must be water because it didn't intoxicate. And if it does, you have plenty of rooms to walk it off. Room 8: ======= Long corridors and two doors make this area decent for fighting the Snapdragon. Take it out ala hit and run wiht Venom Clouds. Escape through a door when it gets too close. Take the apple if you're hungry. Room 9: ======= The Snapdragon isn't in this room, yet. When it enters, Venom Cloud assaults while you hit and run should work. However, there is a bomb button in this room, the bomb would land next to the Baron and harm him as well. The switches are set up as follow, and form a combination lock: Si: Switch In So: Switch Out B!: Bomb Dropping Switch +--+ /B!/ +--+ /Si/ +--+ /So/ +--+ /Si/ +--+ Press teh button switches into that pattern to open the door to the Snapdragon's lair. If you _can_ take a third of your HP in damage then you may consider trying to crush the Snapdragon with this Room's bomb switch after all. It's more trouble than it's worth, however. Floor 2 Map Monster Paths +=========+ +===========+ +--+ +--+ +--+ *SnapDragon: 10, 11, 13, 16, 17 |10|-|11| |12| +--+ +--+ +--+ *Sniper: 14 | | | +--+ +--+ +--+ *Cobbla: 12, 15 |13| |14|-|15| +--+ +--+ +--+ | | +--+ +--+ +--+ |16|-|17|-|18| +--+ +--+ +--+ Room 10: ======== The map piece to Floor 2 is back in Room 7. Take the Snapdragon on, hit and run style with Venom Clouds, then Fireball. It has a huge domain. You may want to run until you get to the room with the Bomb dropping switch, but it is a fair distance away. If it's going to be an issue to lead the Snapdragon there, then to avoid many new monsters generating it may be best to just blast it. Drink up when you've finished. Room 11: ======== This room is too cramped, and is also trapped, to fight the Snapdragon. Stay off the carpet (bomb trap) until you reach the column. Push the column to reach the other end of the room. Take teh Fireball, use the Yellow Key in the keyhole and continue. Room 12: ======== There's a lot of room here for the Cobbla, and the Baron, to move. Cast Reveal If you can manage it, duck through a door between assaults. Now, collect the map piece and coin. For Lightning and Teleport, head over to both slots and insert some coins to bust some cupboards open. Collect your spoils. The slot on the right is Lightning, and the left is Teleport - that's fyi if you're low on coins and want to pick and choose. Now, to reach the top of the tall platforms, remove the Mushroom from the smaller platform. Move the smaller platform over to the tallers for use as a bottom step. Excellent. You'll also get a Blue Key on top of the platform. Climb the ladder when you get up to it, and have cleared this floor of its loot. Room 13: ======== If you've chosen between standing and fighting, or running to the bomb room then act accordingly. These hallways are decent for fighting the Snapdragon in that they don't allow it much room to avoid your shots. The slot here gives Sulfurs (uop to three packs) at 2 coins each. It's in all honesty not the best spell for the higher monsters of this Tower. Room 14: ======== From 17: You reached this room via using Reveal in Room 17. There's a Sniper in here which you should use Fireballs, then Venom Clouds, to destroy. It's a very cramped room, but you won't be fighting it anywhere else. The loot in this side of the room includes: Venom Cloud, Sulfur, Fireball, and some Coins. From 11: The Sniper is not accessible from this side, but you can reveal the hidden door I suppose. It'd be best to wait until Room 17 to do so, however. This portion serves as a way to reach the Cobbla's domain. W3: Nortscar Spire Part 2 Room 15: ======== From 18: Search the northwest wall to find the lightswitch. Then, collect a coin and Venom Cloud before leaving. From 14: The Cobbla is very dangerous, so have the light turned on by entering from 18 prior to coming in from 14. You can take it out simply enough with Venom Clouds, but you will _need_ to use the doors because it's brutal if it gets too close to you. Duck back to Room 14 if it gets to you. Room 16: ======== The dotted panel locks the door to Room 13. If the Snapdragon is where you want it, you can trap it off from the rest of the Floor so you can better get it to the dropping Bomb. There is a coin hidden under the grey block. Room 17: ======== Try to hit the Snapdragon with dropping bombs as much as possible. Finish it with Venom CLouds if you can't finish it with bombs. Take the Venom Cloud and Sulfur when you've finished. Cast Reveal to make a hidden door show up. You will want to save before casting Reveal, in case the door is gone when you load. This is very important, and frustrating, so beware the disappearing door and the Baron saying there's nothing here. Room 18: ======== Eat the bread and use the table as a bottom step to clear the pink panels. Make sure to pick up the Yellow Key. Floor 3 Map Monster Paths +=========+ +===========+ +--+ +--+ +--+ *Cobbla: 20, 21, 23 |19|-|20|-|21| +--+ +--+ +--+ *Cobbla: 24, 26, 27 | | | +--+ +--+ +--+ *Cobbla: 19, 22, 23 |22| |23| |24| +--+ +--+ +--+ GENERATOR: 22 | | | +--+ +--+ +--+ |25|-|26|-|27| +--+ +--+ +--+ Room 19: ======== I'd suggest dealing with this Cobbla in Room 22, where you can drop Bombs on it via a red button. If you have to fight it head on, use hit and run tactics with Venom Cloud. When this Floor has been looted, take teh Venom Cloud here and head up the ladder. Room 20: ======== Dispatch the Cobbla from the door with Venom Clouds. If it closes in, run back to Room 21. Don't try fighting it in Room 23, it's too dark and cramped. When you've finished, I suggest that you take the coins here, and the Fireball. The switch on the wall will open the Door to 19, but close tehw ay to 21. In that sense, you _could_ trap a Cobbla in one room so that you could have a greater degree of control over the battle, but it isn't necessary. When you've killed the Cobbla, take the opportunity to loot Room 23. Room 21: ======== Take a drink, collect the Venom Cloud, and open the door via the Keyhole. Heading into Room 24 will lead to an easy kill (read that Cobbla's respective Rooms in this walkthrough). The Cobbla in this set of rooms can be dealt with swiftly enough with Venom Clouds. Try to take it on in here, or in Room 20 - but Room 23 is out of the question. If is dark and cramped. Use the doors to your advantage and escape when it gets too near. Room 22: ======== The red button drops Bombs, and two of them would make for an easy Cobbla kill. You really should take advantage of this. If you can't finsih it with Bombs, choose Venom Cloud instead. The Generator is in this room, and unless you use my Bomb glitch you probably aren't equipped to deal with it on your first trip here. If you do have a Bomb, blow it up. Otherwise, mark teh position and return here later. Loot in this room includes a Fireballa nd some coins (behind the grey block). Room 23: ======== You have literally no room to move until you get over the pink panels. Your lesser degree of freedom here makes this a horrible room in which to fight a Cobbla. The lightswitch is near the door to 20. Entering from either side, test the pink panels to jump over. There is a Treasure on the table, and Lightning near it. You may need the table to get out of the middle of the room, position it as a bottom step. The keyhole opens the door to Room 26. There is a matching keyhole in that room which leads here. Room 24: ======== There are some auto-firing fireballs in Room 27 that can be exploited to kill the Cobbla. Watch out for the dotted panel, as it too sets off a Fireball trap in this room. When you're done, take the coins and buy some Venom Clouds (3 coins/pack) if you need them. Room 25: ======== The Cobbla should be dispatched in Room 22, where there is a switch to drop Bombs. If this is not an option, choose hit and run with Venom Cloud. When it has been slain, take the Reveal spell, the ruby on the pedestel, and the Teleport spell behind the pedestel. The Transmute Niche may not be a bad idea if you have coins to spare. For Lightning or Fireball, I mean. But by now, you have a considerable stock (hopefully) saved up. Look out for the Bomb trap on the thin brown path. Room 26: ======== The Cobbla should be dealt with in Room 27 if possible, let the automatic Fireball traps take care of it for you. Take the Venom cloud when done. The keyhole opens a door to Room 23. Only loot this room if the Cobbla on that path is already dead. 23 is a miserable room to fight a Cobbla. Room 27: ======== If you can get on the opposite side of the Fireball shooters than the Cobbla, then there's a chance _it_ will be hit by the traps. Maybe even enter and leave the room until it's on the other side, and tries to cross. It's an easy way to save some spells. When you're done, insert a coin... for a coin, and take the Sulfur. Be careful crossing the traps. The traps fire: Middle, Left, Right. In that pattern. Jump to the middle after it fires, then leap across the green face after it fires. Floor 4 Map Monster Paths +=========+ +===========+ +--+ +--+ +--+ *Sniper: 28, 29, 30, 33 |28|-|29|-|30| +--+ +--+ +--+ *Monobeak: 34 | | +--+ +--+ +--+ *Snapdragon: 32, 35, 36 |31|-|32| |33| +--+ +--+ +--+ | | +--+ +--+ +--+ |34|-|35|-|36| +--+ +--+ +--+ Room 28: ======== Alright, there's a combination lock here, and the one button that is not in a group on the wall drops a Bomb, which is quite useful for killing the Sniper. If you wan tto make a run for Room 33, you'll find a Bomb there and you should take it back to Room 22 before continuing further into the Tower. So, about the button switches in this room: they're a combination lock. Some have to be in (black) and some have to be out (red). It should look something like this: B!: Bomb Dropping Switch Si: Switch In So: Switch Out +--+--+ /B!/ So +--+ +--+ Si +--+ Si +--+ So +--+ These will let you into room 31, make sure you have some Teleport castings. Room 29: ======== Try to deal with the Sniper in Room 28. Drop bombs on it and finish it with Fireballs. Take the Apple and drink some water when you come in here. You will want to save the Shield until you have a use for it. Room 30: ======== Try to deal with the Sniper in Room 28. Drop Bombs on it, and finish it with Fireballs. Take the Venom Cloud when you get a chance. Room 31: ======== You'll need a Teleport spell to cross over to the other side. It may be hard to avoid damage doing this, Teleport after the bottom Fireball has shot and run out of reach. Note! If you don't want to Teleport, you can reach the room across the way via the door at Room 35. Take the Sulfur, Venom Cloud, and Coins. The keyhole opens a path to Room 32, and if you want to climb the ladder, you will need to leap up on the glowing pink panels. You'll want the Map Piece and some Fireballs from Room 36 first, most likely. Room 32: ======== The lightswitch is on the northeast wall, one space away from the door (not right next to it). Use the door to your advantage as you blast the Snapdragon with Fireballs. A hit and run strategy is useful to take the beast down. There's a Watermelon and Venom Cloud to take when it's down. W3: Nortscar Spire Part 3 Room 33: ======== The Bomb! If you've already dealt with the Sniper via the bomb switch described in Room 28, or you are making a break for it, take it and return to Room 22 to blast the Generator. Besides the Bomb, there's a bount of loot here. There's a map piece, a Green Key under the map, coins, and a Fireball. Room 34: ======== The Monobeak calls this room home. It is limited to this room only, and it never gets exceptionally fast. That's a great thing, of course. You will be able to use the door to your advantage here. Pound the Monobeak from afar with Fireball, and duck through the door to safety. It often charges you, giving a clear shot, and as I mentioned it never gets _really_ fast so you should be able to make every hit count. When it's dead, take the food, the treasure, and the Venom Cloud. Cast Reveal to earn a Fireball. Room 35: ======== There's a light on the wall, but you're best off just casting Reveal here. Take the Snapdragon on from a distance with Fireballs, and make full use of the door to escape it when it draws near. Room 36: ======== Fight the Snapdragon in 35 or 32, as it is too cramped in here to effectively do battle with the deadly beast. There's two poison panels, and the Snapdragon is very powerful. Come back into this room later and cast Reveal, instead of fighting it in here. There's Treasure and a map piece to be had in here. Also, the Slot gives Fireballs at 4 coins per pack, you may want to stock up for the final push into Floor 5. Floor 5 Map Monster Paths +=========+ +===========+ +--+ +--+ +--+ *Podhopper: 37, 38, 40 |37|-|38|-|39| +--+ +--+ +--+ *Monobeak: 39, 41, 42 | | | +--+ +--+ +--+ *Sniper: 43, 44, 45 |40| |41|-|42| +--+ +--+ +--+ TOWER KEY: 44 | | +--+ +--+ +--+ |43|-|44|-|45| +--+ +--+ +--+ Room 37: ======== Take the Podhopper on at a distance with Lightning. Run through a door when it gets close. It shouldn't take too many hits to take it down. The red key is somewhat puzzling to collect. Take the Venom Cloud and Coins from the table and stand where they were. We're going to be using the pink panels. From where you are standing, jump Northeast onto the first panel, then walk one space Northeast. Turn and jump Northwest. Turn and jump Northeast. Turn and jump Southeast. Take one step Southeast. Turn, face the Key, and collect it. Alright, the Sniper can be accessed now from Room 40, but you should instead form your course and approach it when you have Meta-Power. Collect the other items in this room before you continue, two Sulfurs. Not too useful unless you need to destroy some regenerated Monsters at the bottom. Room 38: ======== Long corridors, but only one door. It could be disadvantageous to fight the Podhopper in here since you only have one method of escape. But if you can get it with enough Lightnings from far enough away it should drop before it gets to you or shortly after. Now then, there's a slot here - use it to reveal a Meta-Power once you've determined the fastest path to the Sniper. On the Large square mat, there is a Secret Door to its lower end. Make sure you get this, and it will prove useful in reaching the Sniper as well. Room 39: ======== This is a tight little room, and though there is the _threat_ of a fireball trap, there doesn't appear to be a panel available. Check all of the squares hidden from sight by the Fountain for some Lightning, then use the Lightning to destroy the Monobeak. Room 40: ======== You may want to come up here with the Shield from Floor 4, and use it to fight the Podhopper. Hit and run the Podhopper with Lightning. Don't worry about the other enemies on this floor so much as there _is_ a Meta-Power to deal with the Sniper and the Monobeak won't be much of a challenge compared to the Podhopper's speed. The slot in here gives Fireballs at 4 coins per pack. ___SAVE A COIN TO UNLOCK THE META-POWER.___ Room 41: ======== Cast Reveal. In the lower left corner, there is a button that will drop Bombs. If you don't wish to kill the Monobeak with Lightning, then for sure use the Bombs and finish it with Fireballs. There's plenty of loot in here when you finish: Food, Treasure, Sulfur, Fireball and teh Transmute Niche. The secret passage in the Northeast wall should be found now. It will be essential in your gaining of Meta-Power and getting to the Sniper in time to eliminate it. Room 42: ======== A thin room, and there's a bomb trap on the carpet leading to the Door to Room 44. The Monobeak can either be destroyed with Lightning here (run through the door when it gets near) or by Bomb dropping in Room 41. Take the Sulfur if you need it before proceeding. Before going into Room 44, make sure you get the Meta-Power. Room 43: ======== Crush the Sniper with Meta-Powered Lightning or Fireballs. If you get poisoned by its Venom Clouds, then you will need to return to Floor 4 and eat a mushroom or drink some sludge as there are no Heal spells in this Tower. If he's your last monster, simply return to the first floor and exit the Tower. You can do this from Room 44. There's not much else here besides a Venom CLoud. Room 44: ======== Crush the Sniper with Meta-Powered Lightning or Fireballs. If you get poisoned by its Venom Clouds, then you will need to return to Floor 4 and eat a mushroom or drink some sludge as there are no Heal spells in this Tower. If he's your last monster, simply return to the first floor and exit the Tower. The Tower Key and Floor 1 Teleport are in here. Room 45: ======== Crush the Sniper with Meta-Powered Lightning or Fireballs. If you get poisoned by its Venom Clouds, then you will need to return to Floor 4 and eat a mushroom or drink some sludge as there are no Heal spells in this Tower. If he's your last monster, simply return to the first floor and exit the Tower. The Tower Key and Floor 1 Teleport are in Room 44. There is a coin under the Invisibility if you need it for the Meta-Power. I'd recommend returning for the Meta-Power rather than trying to fight under the influence of Invisibility. But if you've wasted your Meta-Power, it's better than nothing. Or, hey, you could use it to fight the Monobeak if you so desire. There are two Venom Clouds and a Treasure to loot when the Sniper is dead. W4: Wolf's Claw Part 1 ****************************************************************************** W4: Wolf's Claw ****************************************************************************** An interesting aspect of the Wolf's Claw is that there are only 14 enemies. They are no less deadly, however. The monsters here are very powerful, and take a beating. Nothing less than Venom Cloud will do for most fo them, and Fireball and Lightning are essential for the higher floors. Similar to Nortscar Spire in the respect that resoruces are low, until you hit the third floor water is pretty much unavailable. There are drinks, and when I played through the Tower they did not intoxicate me. But they were, after all, finite, and the sooner you clear out the monsters and proceed, the better. You can deal with this level from Floor to Floor until you clear out Fourth. You will be required to use the Teleporter on the second floor to reach the fifth. I do recommend clearing out first through fourth before attempting fifth, of course. The Bomb is on the fourth floor, and so it becomes a point to get there and eliminate the Generator before you attempt the fifth floor, where one puzzle might have you perplexed for a little while unless you look for the slightest of differences. Levitate, I should mention, has two uses in this Tower, so it comes to pass that Levitate is a really useful spell. The Tower Key is on the second floor. There is of course a Teleporter to second on the Fifth, and a Teleporter to first on the Second. Floor 1 Map Monster Paths +=========+ +===========+ +--+ +--+ +--+ *Ruddimp: 1, 2, 4 |01|-|02|-|03| +--+ +--+ +--+ *Ruddimp: 5, 7, 8 | | +--+ +--+ +--+ *Shillaya: 3, 6, 9 |04| |05| |06| +--+ +--+ +--+ | | | +--+ +--+ +--+ |07|-|08|-|09| +--+ +--+ +--+ Room 1: ======= Take the Ruddimp on all at once with Venom Clouds, then use Heal. Honestly, it is best to get this little devil out of the way as quickly as possible. Take the map piece and Sulfur before leaving. Room 2: ======= The Ruddimp is close by, right from the start. Before it enters, grab the Venom Cloud, Fireball, and Heal Spell. If you have teh chance, push the pot for some coins. Crush it with Venom Clouds, then finish it with Ice. Heal after the Fight. Room 3: ======= There are two Venom Clouds in the Room, and yous hould use them to take out the Shillaya. Hit and run tactics are in order, and run through the door when it draws near. The dotted panel near teh door closes and open the door, make sure you avoid it when fighting the Shillaya (for instance, gettign caught in one place and having it wail on you). Make sure to collect the Fireball and Reveal before you leave. Room 4: ======= Take the Ruddimp on all at once with Venom Clouds, then Ice. It's best to take the Ruddimp out altogether, and Heal your posion afterwards. Eat the food if you're hungry. Room 5: ======= Drop Bombs on the Ruddimp and finish it off with Venom Clouds. Look out for the skull carpet and take the Venom Cloud before climbing the ladder. There's also a Floor 3 Teleporter here. Room 6: ======= Take the Shillaya out with Venom Clouds, and keep your distance. Use either door to retreat if it gets too near. There's a Venom Cloud in this room to take when it's down, as well. Room 7: ======= Blast away at the Ruddimp with Venom Clouds, then heal your poison in Room 8 with the mushroom. Or! Fight it in Room 5 by dropping bombs. It's really no problem to cross the pink panels here, just jump on the Table and walk off on the other side. Just be careful you don't step on the lined platform as it is a Fireball trap. Make sure you take the two Venom Clouds before proceeding. Room 8: ======= Take the Ruddimp on all at once with Venom cLouds, it shouldn't take too many. Use the mushroom here to heal your poison if your damage is minimal. Otherwise, use Heal. Or what you could do is go in Room 5 abd drop bombs on the Ruddimp. Whatever you think is best (It'd save some spells, anyways). There is a coin under the Mushroom to take, and when you use it in the slot some sludge will start to flow. Big deal? I suppose, but it will be a spot where you can always return to heal your Poison. So, it's actually decent if you have Ruddimps regenerating before you blow up the Generator on Third. By the way, I didn't get drunkw hen I drank the bottled liquid in thsi room. Regardless, attempt it after fighting the Ruddimp. Room 9: ======= Cast Reveal to show a Poison panel, then head to the lower left (southwest) corner. On the Northwest wall at the corner is a lightswitch, and next to the map piece is a door control switch. The Shillaya should be fought ala hit and run with Venom Clouds. There are some nice, tight corridors in this room to rack up the damage on it. Take the bread, coin, and Venom Cloud before you leave. Floor 2 Map Monster Paths +=========+ +===========+ +--+ +--+ +--+ *Shillaya: 10, 11, 13 |10|-|11|-|12| +--+ +--+ +--+ *Bagfly: 12, 15 | | | +--+ +--+ +--+ *Stinger: 16, 17, 18 |13| |14| |15| +--+ +--+ +--+ TOWER KEY: 13 | | +--+ +--+ +--+ |16|-|17|-|18| +--+ +--+ +--+ Room 10: ======== It's a decent room to take the Shillaya on as teh ahllways are tight and there are two doors. Pound it with Venom clouds and duck through the doors when it gets too close. Take the Green Key, the Lgihtning, and Heal when you've finished. Room 11: ======== Jump down and take the Shillaya on hit and run style with Venom Clouds. Use the door if it gets too close. Take the Fireball off of the table, then push the Table over near the taller platforms for use as a lower step later. Room 12: ======== Run past the Bagfly for the time being. We will drop bombs on it in Room 15. When you return, take the coin, food, and Venom Cloud. Room 13: ======== Take out the Shillaya at a distance here, with Venom Clouds. Duck through the door if it gets near. Alright, the slot here gives you Sulfurs. You aren't getting much use of that spell at this time, so I'd pass for now. Be sure to take the Lightning. You don't have to worry about the pink panels, you can walk freely beside the Idol. The Tower Key will appear in this room, and there is a Floor 1 Teleport. Room 14: ======== In the southwest corner, there is a table. Take the Levitate and coin from the table. Next, take the table over to the taller platforms and use it as the bottom step. There's a Floor 5 Teleporter here, by the way. Room 15: ======== If the Bagfly isn't in this room, great. There is a bomb trap on the Green panel next to the Teleport tile. The red switch also drops a bomb in proximity to this. USe the dropping bombs to crush the Bagfly utterly. Finish it with Venom Clouds if need be. Room 16: ======== It's a little cramped to fight the Stinger here, geta few shots on it and duck away. When you come back, use the Yellow Key on the keyhole. You'll need to move that platform under the Keyhole to reach it. There's coins and a Venom Cloud to grab before heading up to Floor 3. Room 17: ======== This room will always be dark, so it may not be the best battleground. You can get a few hits on the Stringer ebfore ducking into a brighter room, however. Grab the Venom CLoud and Sulfur when you can. Room 18: ======== Cast Reveal. If you have Venom Clouds, shoot the Stinger at a distance and duck through the doors when it nears. Otherwise, Fireball is in order. Take the Yellow Key, and the food if you need it. W4: Wolf's Claw Part 2 Floor 3 Map Monster Paths +=========+ +===========+ +--+ +--+ +--+ *Bagfly: 22, 25 |19|-|20|-|21| +--+ +--+ +--+ *Stinger: 19, 20, 23 | | | +--+ +--+ +--+ *Leman: 21, 24, 26, 27 |22|-|23|-|24| +--+ +--+ +--+ GENERATOR: 19 | | | +--+ +--+ +--+ |25|-|26|-|27| +--+ +--+ +--+ Room 19: ======== The Stinger should be taken on with Fireballs. It's rather fast and it does do considerable damage when it gets close up. Run from it when it gets near, and use the door to your full advantage. Take the Venom Cloud and the drink (it doesn't seem to be wine) when you've finished. Push the red Table over near teh tall platform for use as a lower step. If you have a bomb, blow up the Generator. Otherwise, return here once you do. Room 20: ======== Attack the Stinger with Fireballs, and run through the door if it gets near. It's quite powerful if you let it get near... The keyhole in here can be opened if you've collected both keys to date, Yellow and Green. Not that both are needed, but you're safe if you have both. Room 20: ======== Take the Venom Cloud, Fireball, and Teleport. Move the pot for a red key. Maybe use the pot as a block against the Leman. The Leman can be taken down with Venom Clouds at a distance, run through the door when it nears. It has a lot of stamina, but if you get a few solid hits on it every time it comes in the room, it should go down. You'll be okay as long as spells aren't wasted. There's a fountain, at last, to sooth your aching throat. Also, the slot gives Venom Clouds at 3 coins per pack. It might not be a bad idea to get one or two. At the end of the carpet leading away from the ladder, there is a Bomb trap. Room 22: ======== Cast Reveal when you enter the room. Climb up to the tall platforms and grab the Lightning. The red button up here can drop buttons. The northwest corner seems to be a safe place from the Bagfly, so jump here when it gets near and back to the button when it goes away. Room 23: ======== Cast Reveal. I don't recommend fighting the Stinger in this room. Each hall is kind of small and there is a poison panel on top of that... There is a map piece and some coins to loot here. The room really serves as a hub to the rest of the Floor. It opens in four directions. But it may be best that you complete the floor along its perimeter first. Room 24: ======== Attack the Leman with Venom Clouds and run through a door when it draws near. It takes a fair number of them, but at least you'll be saving some Lightning and Fireballs. Flip the switch to open the door to the central hub of the third floor, and take the Sulfur and Yellow Key. The Transmute Niche is also here if you so wish. The dotted panel sets off a fireball trap. Room 25: ======== Run from the Bagfly into Room 22, where we can drop bombs on it. When you return, take the treasure and push the brown platform over by the tall platforms and it can be put to use as a bottom step after a bit. Push the grey platform for some coins. Floor 26: ========= Don't fight the Leman here, you'll be sorry. There's not much room to move at all, and it may not even line up enough that you can hit it at a distance. You can climb up to the door at the pink panel in the lower left (southwest) corner and move between pink panels up here. But it isn't worth getting confused and killed by the Leman when you fall down and need to search for a low spot on which to jump. Floor 27: ========= Hit and run the Leman with Venom CLouds. Duck through the door when it gets near. Just be sure to watch out for the large skull carpet. There's a Venom Cloud and Fireball to take when you've finished. Floor 4 Map Monster Paths +=========+ +===========+ +--+ +--+ +--+ *Leman: 30, 33, 36 |28|-|29|-|30| +--+ +--+ +--+ *Ruddimp: 29, 32, 35 | | | +--+ +--+ +--+ *Stinger: 28, 31, 34 |31| |32| |33| +--+ +--+ +--+ | | | +--+ +--+ +--+ |34|-|35|-|36| +--+ +--+ +--+ Room 28: ======== Crush the Stinger with Meta-Powered Venom Clouds. Take the Venom Cloud and food when you've finished. Room 29: ======== Destroy the Ruddimp with Fireballs while you are Shielded. Take the Fireball, then use the Keyhole. Take the Meta-Power only when you are ready to proceed - switch to Venom Clouds for the Stinger. Meta-Powered Venom Clouds will be enough to deal with it. Room 30: ======== This Leman is quite powerful, with a load of stamina. You may want to use Fireball or Lightning, and hit and run tactics, to down it as quickly as possible. Take the Sulfur when you finish, and move the Grey Block for a Blue Key. Grab the map piece, then maybe pay teh slot for Fireballs. They cost 4 coins per pack. Room 31: ======== Attack the Stinger with your Meta-Powered Venom Clouds. There is a bomb trap on teh green panel corner piece leading to the large carpet in front of the door to Room 34. Take the Lightning when you're done. The Invisibility is useless now that the enemies are cleared out? Not so, in Room 34, the auto traps will not be firing. Mark the position of the lowest trap and note that across from it on the opposite wall is the secret door between 34 and 35. then come back and get the Invisibility here. Loot and leave that room in safety. Room 32: ======== Cast Reveal. While shielded, pound the Ruddimp with Fireballs. When it's done, take the watermelon and Fireball. Room 33: ======== It's a thin room, hit the Leman with Lightning or Fireball then duck through a door when it nears. Later, drink up and take the coin and treasure. Room 34: ======== Cast Reveal. Next, destroy the Stinger with Meta-Powered Venom Clouds. Alright, next mark where the lowest trap hits the southeast wall. It's a secret door. Return to Room 31 and grab the Invisibility. Now the the Autotraps aren't firing, loot the room of its food, map piece, Lightning, and Bomb. Run through to the secret door with the Bomb and blow up the Generator back on the third floor. The teleporter to Floor 5 is on the second floor, Room 14. Room 35: ======== Notice that there are no ladders up to Level 5? Well, that means you're free to just take that shield and make use of it here. Take the shield, then hunt the Ruddimp down and crush it with fireballs. Take the coins when you're done. You shouldn't need to heal your posion if you were shielded, but there's sludge here if you do. If you need to return to the second floor, there is a Teleport tile here. But you will want to grab the Bomb in 34 and return to the Third floor, I imagine. The mystery rune signals a secret door on the upper left, or northwest, wall towards its lower end. This takes you to a room with the bomb, but also a Fireball trap that you should avoid as you enter room 34. Get the Mystery for the sake of your Secret completion percentage, but you will want to approach the Stinger from another direction, once you have your Meta-Power. Room 36: ======== Upon entering the room, turn northwest and hit the red button on the wall to flip on the lights. The other button drops a bomb... right next to you. And, where the bomb falls (on the green path) there is also a Bomb Trap. Unless the Leman is chasing you and you can set off the trap on it, you should instead just focus on killing it with Fireballs and Lightning. Take the Treasure and open the next door when you're ready. You should have all of the keys by now, if you've been cleaning out the floors one level at a time. W4: Wolf's Claw Part 3 [code[ Floor 5 Map Monster Paths +=========+ +===========+ +--+ +--+ +--+ *Shillaya: 43, 44, 45 |37| |38|-|39| +--+ +--+ +--+ *Bagfly: 38, 39 | | +--+ +--+ +--+ |40|-|41| |42| +--+ +--+ +--+ | | +--+ +--+ +--+ |43|-|44|-|45| +--+ +--+ +--+ Room 37: ======== Alright, if you've cleared out the other four floors then we'll be starting this. Take the coin from the grey block, then move the block. The dotted panel you will reveal controls the door. Before you leave, take the Teleport and Venom Cloud spells. Room 38: ======== While shielded, rip into the Bagfly wiht Fireballs. When you've finished, take the food, and drink up. Loot the rest of the room and buy some Lightning (5 coins) if you need it. Room 39: ======== Cast Reveal to turn on the lights. There is a light switch here, but this is the safest way to get over to the switches where there's Fireball traps here anyways. As for the switches: Su: Switch Up Sd: Switch Down Ls: Lightswitch +--+ /Sd/ +--+ /Ls/ +--+ /Sd/ +--+ /Sd/ +--+ /Sd/ +--+ Ha! Some combo, right? Once the door is open, the Bagfly can enter this room at will so, go grab the Shield and take it out with Fireballs. Use Lightning if you aren't shielded. Of coruse, the Bagfly will also take damage from the auto-shooters. Bonus! Grab the Fireball and Treasure before you leave. Room 40: ======== Take the apple, and use Teleport on the panel. Grab the Sulfur, then cast Reveal. Enter the door before you try to save. Room 41: ======== From 40: Don't bother wasting a Reveal, the poison panels are right in front of the Skull runes. Just take the coins and use teh keyhole to open a door at a remote location. From 42: Take the Lightning, Reveal, and Treasure. Room 42: ======== Grab the loot in Room 41, then return here. Teleport across, save, then cast Reveal. Room 43: ======== Cast Levitate 3 times and grab the Meta-Power. Jump down and crush the Shillaya with Meta-Powered Venom Clouds. Make sure to take the Levitate and coins before leaving. Room 44: ======== Destroy the Shillaya with Meta-Powered Venom Clouds. There's a Transmute Niche here if you need it, but we are almost done no? Room 45: ======== Destroy the Shillaya with Meta-Powered Venom clouds. If you want to pass over the skull carpets, cast Levitate (once). While floating, grab teh treasure, then head over to the next door (yes, I know it's closed, but we can open it from over there). Make sure you don't jump down on the green dot panel, and disembark from your Levitate. Look at the skull carpet to the northwest, there's an inconsistency on it. That is, it's upper right or northeast corner is slightly different. Step on this portion of the carpet to open the door. Tricky! [/code] W5: Ebonscarp II Part 1 ****************************************************************************** W5: Ebonscarp II ****************************************************************************** This Tower isn't so bad, it's more or less a combat oriented Tower against a number of powerful melee monsters (and a couple of strong Rosies). It's essential to ahve a plan of action for the first three floors in order to conserve your Spells, until you get a better stock on the higher floors or through Transmute Niches. Clean out every floor as you climb up. You will have to take the secon downward ladder on Floor 2 to reach the seconbd portion of Floor 1. Floor 5 is cut off from the rest of the Tower, you will need to Teleport here. An interesting thing about this Tower is the importance of Levitate to your success. Be it crossing deadly floors, getting the Bomb, or collecting a key - this si the first Tower to make significant use of Levitate so don't waste your charges. Floor 1 Map Monster Paths +=========+ +===========+ +--+ +--+ +--+ *Hothead: 3, 6, 9 |01|-|02| |03| +--+ +--+ +--+ *Rosie: 7, 8 | | | +--+ +--+ +--+ *Rosie: 1, 2, 4 |04|-|05| |06| +--+ +--+ +--+ | +--+ +--+ +--+ |07|-|08|-|09| +--+ +--+ +--+ Room 1: ======= Crush the Rosie from a distance with Fireballs. Try to hit her from the side and the back, and get through a door if she draws too close. Venom Cloud, Fireball, and a Heal wait for you once she is dead. Room 2: ======= The Rosie should be taken on with Fireballs. Try to hit her from behind or from the side. Take the Lightning when you get a chance. The pot will be your bottom step to reach the door again. Room 3: ======= Grab the Fireball and use it to destroy the Hothead. It's either that, Lightning, Ice or Sulfur. Venom Cloud would be ideal, but it isn't here so use Fireball. Take the Lightning and Reveal before you continue along. Room 4: ======= From Floor 2: Flick the light on beside the ladder, take the food and Venom Cloud before leaving. From Room 1: Blast away at the Rosie with Fireballs. It's kind of a tight room to fight in, but you can rack up some damage and escape when she gets near. Take the Green Key when ready. Room 5: ======= Collect the Fireball and Venom Cloud. Move the grey block and take the coins. There will be a level 3 Teleport here as well. Get ready to fight he Rosie, jump up to the door. Room 6: ======= Hit and run the Hothead with Fireballs. Duck through a door when it draws near. The poison panel is on the green panel in front of the Skull Rune, one space away. Take the Sulfur before you continue on. Room 7: ======= Kill the Rosie in Room 8 with dropping bombs. Take the Venom Cloud here upon killing the Rosie. There's also food, if you're hungry. Room 8: ======= Pitch black, and there's a Rosie in here. Cast Reveal, there's four poison tiles to be wary of. Cast a second Reveal to turn on the lights... Alright, that pot must be taken under the red button. If the Rosie is not in the room, place it in front of the door. Bring the apple over, then replace the pot with the apple. Place the pot under the switch, take the apple, and run back over and start dropping Bombs on the Rosie. If you need to, finish her off with Lightning. Besides the Apple, also take the Heal, gold, and Venom Cloud. Room 9: ======= Don't fight the Hothead in here, if you can help it. The pink tiles and skull carpet limit your motion far too much. Push the block for a map piece, and take the coin and the bread, if needed. Cast Reveal to find a door, then jump onto the lone pink panel (away from the group). Turn and face the other panels and jump to them, then down to the Revealed door. Floor 2 Map Monster Paths +=========+ +===========+ +--+ +--+ +--+ *Crocojaw: 10, 11, 13 |10|-|11| |12| +--+ +--+ +--+ *Hothead: 14 | | | +--+ +--+ +--+ *Eggnog: 12, 15, 18 |13| |14| |15| +--+ +--+ +--+ | | | +--+ +--+ +--+ |16| |17|-|18| +--+ +--+ +--+ Room 10: ======== Take advantage of the long hallway to blast at the Crocojaw from a distance witha barrage of Venom Clouds. Run through a door at either end when it gets too close. Due to the room's length, you should have dealt considerable damage in the exchange. There's a map piece, a Heal, and a drink here as well. I was not intoxicated by the drink, and it restored quite a bit of water. You're probably thirsting by now, so drink up. Make sure the Crocojaw is dead first, just to be sure. Room 11: ======== This is not a good room in which to fight the Crocojaw, far too cramped. If you must, hit it a few times with Venom Clouds, or wait in Room 10 for it to come after you. The drink here will intoxicate you, but it does restore a decent amount of your water meter. To cross the pink panels, jump on the panels directly in front of the shield, walk to the next, then jump across to the next (southwest). Take the Lightning and continue along your way. Room 12: ======== The Eggnog should have been taken out in Room 18 with the dropping bombs. If you didn't, hit and run it with Fireballs. Take the two coins (they are not one on top of the other fyi, I know you'd be upset if you wasted a Fireball or Lightning over a coin!) and the food if needed. Before climbing the ladder, get that Blue key. Jump on the Pink panel farthest out fromt he group, and again across to the Blue key. Exit at the opposite end from where you entered. Room 13: ======== The poison panel is right in front of the Skull Rune. Blast the Crocojaw from a distance with Venom Clouds, and run when it nears. Be sure to duck in the doors if it gets too close. There should be enough space thatw alls won't be needed - but there are enough items in this room to create something of a wall. When finished, take the Lightning and Fireball. The slot provides Sulfurs... not the most useful in this Tower... Room 14: ======== The Hothead in here can be taken on at a distance with Fireballs, it is only in this room and you must duck through a door if it gets close. It can do considerable damage if it gets close, so make sure you play evasion. From the entrance, turn to take the Venom Cloud and then turn on the light. Before you leave, grab the food, coins, and Levitate. Room 15: ======== The Eggnog should have been destroyed in Room 18 with dropping bombs. If you didn't then you will want to use Fireballs and hita nd run tactics. There's food if you're hungry. Continue along. Room 16: ======== There's no monsters in here, take the Treasure and be on your way. Room 17: ======== No monsters, but there is Fireball and Lightning. Move the platform over to the taller platform by the door to act as a bottom step. Notice that you uncovered a Reveal mystery rune? Cast Reveal for a Treasure. Room 18: ======== Alright, _stay_ on the tall Platforms and begin pressing the red button to drop bombs. Make sure you get the Eggnog this way. Otherwise, you'll have to shoot Fireballs at it. Take the food if needed, and the Fireball. Move the platform down near the door you came from for use as a bottom step. Under the platform, there's a Yellow Key for you to take. W5: Ebonscarp II Part 2 Floor 3 Map Monster Paths +=========+ +===========+ +--+ +--+ +--+ *Crocojaw: 21, 23, 24 |19|-|20|-|21| +--+ +--+ +--+ *Eggnog: 25, 26, 27 | | +--+ +--+ +--+ *Skelefly: 19, 20, 22 |22|-|23|-|24| +--+ +--+ +--+ GENERATOR: 19 | | +--+ +--+ +--+ |25|-|26|-|27| +--+ +--+ +--+ Room 19: ======== The Generator! Blow it up if you have a bomb. As for the Skelefly, hit and run it with Fireballs, and then Lightning. Note that there is a bomb trap _behind_ the Generator. It is possible to catch the Skelefly in this trap if it is chasing you, but it's risky business. When you're ready, clean up. Take the Lightning, Venom Cloud, Sulfur, and coins. There's also a Treasure behind the Generator, wait until you low it up to go back there and get it. For safety's sake. Room 20: ======== If you're fighting the Skelefly in here, hit the keyhole to open the other door as it will make traversing the floor much easier and will give you an extra avenue of escape. Hit and run the Skelefly with Fireballs and then Lightning if you run out. Take the Venom cloud, and climb the ladder. Room 21: ======== The light is in the bottom left (southwest) corner, near the fountain. Blast the Crocojaw from a distance with Fireballs and run when it draws near. If it backs you into a corner, jump on it and run. When it's dead, you can collect the Fireball and Teleport spells, and drink. Room 22: ======== The keyholes in this room control the immediate surrounding. The middle Keyhole will open the door to Room 23, which we'd looted previously. Open it anyways, as an extra avenue of escape from the Skelefly. Take the Skelefly out with first Fireball, then Lightning. Run when it gets near as it gets very fast and it takes a beating. Take the Sulfur if you need it. Room 23: ======== Take the Teleport, and the map piece. There's arrow Teleports in here, and a Floor 5 Teleport. For now, Cast Reveal to have a treasure fall from above and teleport over to get it. Grab the Fireball, Lightning, and Treasure. The Red Key is also in this room. Stand where the Lightnign was, and cast Levitate three times. The key should be on Baldric's head. Move to have it fall to the ground. Collect, and proceed with the floor. Room 24: ======== Blast the Crocojaw with Fireballs and run into Room 21 when it gets too near. Take the apple if you need it, and push the pot for coins. Use the keyhole and proceed to 27. Room 25: ======== You should have killed the Eggnog previosu to this room. But if not, use your Fireballs to roast it. Loot the room before proceeding, there's: Heal, Venom Cloud, Levitate, and Sulfur. Look out at the edge of the table (wide, northeast side) as there is a dotted panel that sets off a Fireball trap. The keyhole in the lower left corner of the room (left of all the keyholes) will open the door to Room 22. Room 26: ======== If you're going after the Eggnog, then make sure to cast Reveal rather than groping around for the Lightswitch on the Northwest wall. Kill the Eggnog with a Fireball assault, it has a ton of Stamina so when it nears, run back into Room 27. The Bomb... can be reached by casting Levitate 4 times, floating over the Bomb, jumping down, and picking it up. Room 27: ======== The Eggnog will enter once the middle keyhole is used. Use Fireballs to pulverise it, and run through a door when it gets too near. Press the rightmost keyhole to open the other door in 24. Head back there, and into Room 23 to seize the Red Key now. Before you open the door for the Eggnog, place a platform betweenw here you will line up and where it will enter. The slot here gives Venom Clouds. Make use of them if you're low on spells. Do not forget to take the Lightning. Floor 4 Map Monster Paths +=========+ +===========+ +--+ +--+ +--+ *Skelefly: 31, 32, 33 |28|-|29|-|30| +--+ +--+ +--+ *Hothead: 28, 29, 30 | | | +--+ +--+ +--+ *Skelefly: 34, 35, 36 |31|-|32|-|33| +--+ +--+ +--+ | | | +--+ +--+ +--+ |34|-|35|-|36| +--+ +--+ +--+ Room 28: ======== Destroy the Hothead at a distance with Lightning. If you're entering from room 31, youc ould even be shielded. If not, use the doors to escape when it gets close. Take teh Sulfur and the Coin near teh doorway to Room 31. The Lightswitch is the closest to the door. For instance, this is the effective combination (or you could just open it from Room 31). Ls: Lightswitch Si: Switch in So: Switch out +--+--+ /Ls/ Si +--+ +--+ /So/ So +--+ +--+ /Ls/ So +--+ +--+ Take the food, coin, and Fireball when you're leaving. Room 29: ======== Shoot at the Hothead with Lightning, and run through a door when it nears. There will be no need to use a Levitate to reach that Lightnign across the skull carpet. Just deal with the two Skeleflies under teh influence of the Meta-Power in Room 30. Room 30: ======== Blast the Hothead froma distance with Lightning. Run through a door if it gets too near. Take the Sulfur and the map piece. Save, make sure a Skelefly is in Room 33. Grab teh Meta-Power and switch to Venom Cloud. Crush taht Skelefly with Meta-Powered Venom Clouds. Room 31: ======== Take out the Skelefly as described in Room 33. Or, you could grab the shield and pound it with Fireballs/drop bombs on it when it nears you. The Shield may be best saved for the other Skelefly, however, if you can't make it to it before yoru Meta-Power runs out. Push a pot near the platforms for use as a lower step, and also press the red button in the _corner_ to open the door to Room 28. Room 32: ======== Take out the Skelefly as described in Room 33. You'd have to cast Reveal twice in thsi room if you want to see the location of the poison tile, and the watermelon and Lightning spell. If you don't need these, then don't bother asting Reveal twice. Room 33: ======== When the Skelefly si in this room, grab the Meta-Power from Room 30 and return to crush it with Meta-Powered Venom Clouds. It'll save you your Lightnings, at any rate. If you ahve any juice left, head down into 36 and hunt down the second Skelefly here. There's water and a Venom CLoud to take here. The slot provides Fireballs at four coins a piece. Maybe stock up for the Fifth floor here. Room 34: ======== Take the Skelefly on with either Meta-Powered Venom Clouds, or with Shielded Fireballs. Take the Teleport and Food. Drag the platform over near the raised door for use as a bottom step. Take the map piece you uncovered. Grab the Venom Cloud, and proceed. Room 35: ======== Eliminate the Skelefly with Meta-Powered Venom Clouds, or use the Shield from room 31 with Fireballs to destroy it. Move the block for some coins, there's also sludge here if you get poisoned in 32. Room 36: ======== Cast Reveal. Destroy the Skelefly with Meta-Powered Venom Clouds, finish it with Lightning if your power runs out. As the Friendly Giant would say, look up, look waaaaaaaaaaay up! There's a Treasure on that shelf up there. Test the Pink panels to find the lowest, then jump between Pink Panels until you are one space away from the Treasure. Move one space in, and take the prize. Grab the Venom Cloud, and proceed. W5: Ebonscarp II Part 3 Floor 5 Map Monster Paths +=========+ +============ +--+ +--+ +--+ *Eggnog: 37, 38, 40 |37|-|38|-|39| +--+ +--+ +--+ *Crocojaw: 39, 42, 43, 44, 45 | | +--+ +--+ +--+ *Rosie: 41 |40| |41| |42| +--+ +--+ +--+ TOWER KEY: 39 | | +--+ +--+ +--+ |43|-|44|-|45| +--+ +--+ +--+ Room 37: ========= You'll reach this room from the third floor's Teleport. Make sure that you have a decent stock of Fireball and Lightning before coming here. You will need at least one casting of Levitate to get you through Room 40 and on to Room 43. There is another casting in there. Set a trap for the Eggnog here. While you can, set up something like this with the Pots (Pt) or Items (It) in the room in the bottom left or Southwest corner, near the Wall (Wl): +--+--+--+ /Wl/ /It/ +--+--+--+ /Wl/ /It/ +--+--+--+ /Wl/ /It/ +--+--+--+ /Wl/ /Pt/ +--+--+--+ /Wl/*A/Pt/ +--+--+--+ /Wl/Wl/W1/ +--+--+--+ Alright, you don't need it this long, but try to make it at least using two pots and two spells for safety. Lead the Eggnog down towards point *A, then jump out over the pot. Run up, and push in one of the items, effectively _trapping_ the Eggnog. It still has far too much life energy to be taken down with Sulfur or Ice in good time, so use Venom Clouds. It won't be moving out of the way, anyways! Don't start firing next to a spell, or you'll ruin your trap. When you've finished, you can take the Fireball, Sulfur, and Heal. Move the pots to find some coins. I'd suggest you progress through room 40 rather than 38. Room 38: ======== Deal with the Eggnog as described in Room 37, and do so in that Room. Cast levitate once and Float above the treasure and the food. From here, just hit control to pick them up. Room 39: ======== It's dangerous to fight the Crocojaw here, since there are only skull carpets outside. If you must, hit and run with Fireballs. The tower key will appear in this room when you've finished off every last monster. So, take the Treasure and the Teleport spell, and flip the switch to open the door, for use later when you will want to skip the skull carpets. Room 40: ======== Set a trap as I described in Room 37 for the Eggnog and deal with it there. Cast Levitate, the apple seems to damage you anyways. Get to the other side, jump down and grab the Venom Cloud. Continue on to 43. Room 41: ======== The Rosie here is very strong, and she casts a mean Fireball. While Invisibility is the lesser in this case of the three power-ups, it still helps. Blast her with Lightning, then Fireballs if you run out. Keep the items in the room for now to act as obstacles for her. Run if she gets too close to you, and blast Lightning relentlessly as she approaches. Ok, it's time to loot the room. You have a Fireball, two coins, Lightning, Levitate, and a Treasure. Cast Reveal for another treasure. The slot gives Lightnign at 5 coins per. It'd be risky to do this mid-fight, but this Rosie is likely the last monster you will fight in the Tower, so after you kill her there is no point in buying any. Notice that there is no Teleporter out of the room? Nope, head down the green carpet towards room 44, and down to the little space at teh end, and into the southwest wall (at the green carpet). Walk through the wall and be on your way. Room 42: ======== Don't fight the Crocojaw here, it's cramped and there's a Poison Tile. Cast Reveal, then move the pot under teh red button to reach the Light. Take the Venom CLoud and be on your way. Room 43: ======== Watch out for the Autoshooters in here, the Crocojaw is typically too low to be hit so try to hit it and duck out of the room. Use your own Fireballs, and Venom clouds if you run out when it is a third or less life left. USe Lightning otherwise. Jump down and grab the Fireball. For safety, jump on the table, then down to grab the Levitate. Wait for the shooter firing at the table to stop before you make your way over. Room 44: ======== Look out for the dotted panels in here. Placing a pot where the two lines of fire intersect will protect you from being hit. The Crocojaw should be blasted with Fireballs, primarily, and if it back you into a corner, jump on it and run. Typically, you should duck through doors, however. when you've looted every other room use the Teleport here to reach the central room of Floor 5. Room 45: ======== The Crocojaw should be taken on at as far a distance as possible, with Fireballs. Run through a door if it gets near. The Invisibility here might be useful for Room 43, with the Auto-shooters, though you may want it for the final Monster... Cast levitate once and float udnerneath the Invisibility to dislodge it. There's also Lightning and a Transmute Niche here if you so desire. W6: Marchwall Fort Part 1 ****************************************************************************** W6: Marchwall Fort ****************************************************************************** This one allows for more freedom in how you approach the Tower. As with the previous Wizard Tower, Leviate is quite useful here and you'll be Teleporting quite a bit as well. But the real deal with this Tower is that it is a dungeon crawl up to fifth Floor to get to the Bomb. After you receive the Bomb, take it down the stairs in that room (it's in Room 43). The path will eventually lead you to the Generator. So, sounds easy, right? Well, the enemies are very powerful here. There's even this Verdragon on fifth that spits Venom Clouds. The tower is also primarily split in two section. If you taek teh right path up the Tower, there'll be more enemies to face (or at least stronger) than the left side and you won't get as many map pieces until you go back down the left end. The advantage, of course, is that the left side will be much easier to deal with once you ahve a large stock of Fireballs and Lightning from Floors 4 and 5 in your initial crawl. Also, near the Generator room is a room which has a Floor 1 and 5 Teleport. When you have killed all monsters, you will _need_ to take that Floor 5 Teleport into room 43 for the Tower Key. Floor 1 Map Monster Paths +=========+ +===========+ +--+ +--+ +--+ *Fire-Asp: 1, 2, 4, 7 |01|-|02|-|03| +--+ +--+ +--+ *Firebones: 5, 8 | | | +--+ +--+ +--+ *Verdragon: 3, 6, 9 |04|-|05|-|06| +--+ +--+ +--+ | | | +--+ +--+ +--+ |07|-|08|-|09| +--+ +--+ +--+ Room 1: ======= Unload Venom Clouds at the Fire-Asp, escape through the door if it gets too close. Keep the fight in Rooms 1 and 2, there's no sue chasing it between 4 rooms. Take the Fireball, Map Piece, and Food before climbing the ladder. If you want, open the lcoked door with the Green Key. Room 2: ======= It's going to be a rough start, with few spells and tough enemies right on this Floor. You may want to start with the Verdragon, but if you move the grey block you can gain access to fight the Fire-Asp instead (dotted panel controls the door). Take the Sulfur and leave the food for now. It seems to damage, anyways. Unload Venom Clouds at teh Fire-Asp and escape to Room 3 if it gets too close. Room 3: ======= Well, we can save a few spells against the Verdragon. Grab the Venom Cloud and check out the panel just after the carpet leading to Room 2, it's trapped. You can try to catch the Verdragon in a few of these traps. Just run into Room 2 as it follows you, and re-enter the room to reset its position. Room 4: ======= The Fire-Asp is locked in Room 1, leave it there for now. Drink up and take the Fireball. Loot Room 7 before you go to fight the Fire-Asp, and attack it from Room 2, where you can escape into Room 3 (if you've killed the Verdragon). Room 5: ======= This room is too dark to fight the Firebones. Destroy it in Room 8, and then return to this room. Find and move the pot, as there is a Green key beneath it. Room 6: ======= Try to get the Verdragon angry by casting Ice at it. Lead it into Room 3 and get it hit by the dropping bomb as described (it's not a button, it's a trap). It's a risky move, but it will save a few spells. When you've killed it, loot the room of its Lightning, Fireball, coins, and food. Room 7: ======= You should attack the Fire-Asp from Room 1. From 4: Grab the two Venom Clouds, and move the block for a coin. From 8: Pull the pot over for use as a bottom step. Or, jump from the pot to the Venom Cloud if you're feeling adventurous. Room 8: ======= Unleash your payload of Fireballs on the Firebones. Finish it off with Lightning. Loot the room of Teleport, treasure, and food. Cast Reveal for a Lightning. Push the brown platform over near the highest platform for use as a bottom step and proceed through the Tower. Room 9: ======= Don't fight the Verdragon here as it's cramped, dark, and poisonous. From the doorway to Room 6, check the northwest wall for the lightswitch. Hit it. The two poison panels in the room are after the ends of the narrow carpets. Take the Reveal before you continue. Floor 2 Map Monster Paths +=========+ +===========+ +--+ +--+ +--+ *Fire-Asp: 10, 13 |10| |11|-|12| +--+ +--+ +--+ *Fire-Asp: 16, 17 | | +--+ +--+ +--+ *Toxignat: 11, 12, 14, 15, 18 |13|-|14|-|15| +--+ +--+ +--+ | | +--+ +--+ +--+ |16|-|17| |18| +--+ +--+ +--+ 14 is split in two rooms. Room 10: ======== The Fire-Asp can be destroyed by droppign bombs in Room 13. Run in there to set it up, and watch out for the Fireball trap (dotted panel). When you return, loot the Sulfur, Coin, and Food. Room 11: ======== Destroy the Toxignat outright with Fireballs. If you do get poisoned, finish it off anyways, then proceed down the path until you find a mushroom. Loot the room of the Venom Cloud, Treasure, and Levitate. The slot gives Sulfurs, which will not serve you too well in this Tower. Room 12: ======== Destroy the Toxignat utterly with Fireballs or Lightning, take no reluctance when fighting it. It's a full out assault on its back and sides, try not to get poisoned, and if you do - finish it off wiht greater fervor. When it is dead, take teh coins and food. Put a coin in the slot to reveal a Venom Cloud. Room 13: ======== We can kill the Fire-Asp with dropping bombs. Collect the Fireball and Lightning when it is dead - but remember to watch out for a Bomb Trap where your bombs will be falling... Alright, the bomb button is way up there. Head down along the Northwest wall from where you enter from Room 10 and jump up on the pink panel. Jump Southwest to the next. Turn, take two steps southeast. Turn, jump Southwest. Turn, take two jumps Southeast. Head northeast until you drop to a lower pink panel. Jump northeast to the next taller panel. Jump northeast until you hit the wall. Step one space to the southeast to be in front of the Bomb switch and let loose. Room 14: ======== From 13: The Toxignat can't currently reach you as you are across the way from it. There's a Floor 5 Teleport here. From 12/15: Eliminate the Toxignat with Fireballs. Even if you get poisoned, finish it off and take the Mushroom from Room 15. Collect the map piece when it has been destroyed. Room 15: ======== Kill the Toxignat outright, with Fireballs. Waste no time or spells to dispatch this most heinous of threats. Take the Sulfur, and Levitate from the room and cast Reveal. Take the mushroom if you're poisoned. Levitate over the skull carpet and through the door. Room 16: ======== The Fire-Asp can be taken on with Fireballs. Levitate would be useful, but unless you are approaching here from above then it may not be well stocked to deal with the Fire-Asp, and get back up the ladder. You can use Teleport to get between the sections. The apple will harm you, and the slot drops a Lightning. You can reach the ladder with Levitate. Room 17: ======== Blast away at the Fire-Asp with Fireball, or Lightnign failing that. Use the doors to your full advantage. Cast Reveal, and collect the Teleport and Levitate prior to leaving. Room 18: ======== Destroy the Toxignat completely with a Fireball assault. Finish it off, then take the Mushroom from Room 15 if you were poisoned. Take the Venom Cloud, then move the platform for some coins. Then, take the Lightning which was behind the platform. Grab the Yellow Key and Heal Spell as you head for the ladder. W6: Marchwall Fort Part 2 Floor 3 Map Monster Paths +=========+ +===========+ +--+ +--+ +--+ *Firebones: 21, 24, 27 |19| |20| |21| +--+ +--+ +--+ *Firebones: 19, 22 | | | +--+ +--+ +--+ *Toxignat: 23, 25, 26 |22|-|23| |24| +--+ +--+ +--+ GENERATOR: 20 | | +--+ +--+ +--+ |25|-|26| |27| +--+ +--+ +--+ Room 19: ======== Cast Fireballs at the Firebones, you may want to cast four Levitates prior to doing this. When it is dust, collect the Lightning, Coins, and Venom Cloud. There is also a Treasure partially obscured by the table. The dotted panel, of course, sets off a Fireball trap. Room 20: ======== You should be coming here from up on the Fifth floor room where you picked up the Bomb. Well, it's time to tear the roof of this sucker - plant the Bomb and get clear. It's time to loot: Take the Treasure, the food, and open the door. Put a coin in the slot to reveal a Red Key. Room 21: ======== Well, try to drop bombs on the Firebones (note that there is a bomb trap where the bombs hit). But it can be tricky to get the placement right. If you have to fight it outright, use Fireballs and hit and run tactics. Or try to lead it over the trap (very dangerous). There's a few spells for you to take before going up the ladder. Venom Cloud, Lightning, and Heal. Room 22: ======== If you must fight the Firebones in this cramped little room, cast Levitate four times and drop Fireballs on it. There are Venom Cloud and Lightning spells to be had in this room. You can move across teh pink flowing panels by first jumping on the one nearest to the door to Room 19. Then jump to the next (southwest). Jump again to the Southwest, once to the Southeast, once more to the Southwest, then one step down to the southwest. Leap off to the Southeast. From the other end, move the platform near the panels and use it as a bottom step. The dotted panel near the door to 23 controls said door. Room 23: ======== From 20: Take the Teleport, and the drink, and head up to Fifth. This will take you to a room split off from the rest of the fifth Floor, come here if you are finished for the Tower Key. After you get the Tower Key, blow this joint by using the Floor 1 Teleport here. From 22/23: Blast the Toxignat with Lightning, take it out quickly. In the middle of the room, a Bomb trap is placed (middle of the middle square). Room 24: ======== Cast Fireballs at the Firebones and duck through a door when it gets near. You may want to cast Levitate once, to be able to skip over the pain tile easily and with safety. Or, drop bombs on the Firebones in Room 21. Grab the Fireball, Map Piece, and Venom Cloud before you leave. Room 25: ======== Blast the Toxignat with Lightning. Waste no time in killing it. Grab the Fireball and Map piece before you leave. Room 26: ======== Blast the Toxignat utterly with Lightning until it drops. Run through a door and heal if you need to, but waste no time in doing this. When it is dead, take the Lightning and proceed. The slot provides Venom Clouds which are useful for any newly generated monsters on Floor 1, but nothing up here and beyond. Room 27: ======== Take the Firebones on at a distance with Fireballs. Crush it utterly, if you plan to use the doors cast Levitate. If you want to make a break for it, there is a bomb droppign switch in Room 21. There's a northwest/southeast hallway here, there are three square designs on the carpet in clear view. At the upper left, first square is a ruby. The middle square of the carpet holds a Bomb trap. Before you leave, grab the Fireball and coins. Floor 4 Map Monster Paths +=========+ +===========+ +--+ +--+ +--+ *Writwraith: 30, 33, 32, 34, 35 |28| |29| |30| +--+ +--+ +--+ *Writwraith: 36 | | | +--+ +--+ +--+ *Writwraith: 28, 31 |31| |32|-|33| +--+ +--+ +--+ | +--+ +--+ +--+ |34|-|35|-|36| +--+ +--+ +--+ Room 28: ======== Grab the Meta-Power in Room 31, and smash the Writwraith with Meta-Powered Lightning before looting either room. Take the food and Treasure, then cast Reveal for some Lightning. Room 29: ======== This room is full of Auto-shooters. Watch where they fire, and proceed towards the stairs. Jump past them afte rthey fire. Collect the Fireball and Venom Cloud en route. Room 30: ======== The Writwraith is extremely dangerous. Hit it with Lightning from the back or side if possible, then run if it gets too near. Take it on outright if you have to - just down it as quickly as possible. Take the Lightning and Venom Cloud when you've dispatched the Writwraith. Room 31: ======== Cast Reveal. Take the Meta-Power and slay the Writwraith with Lightning. Watch out for the dotted panel that sets off a Fireball trap. Collect the Map Piece, Heal, and Venom Cloud. Now for the slots, the slot near the stairs opens the cupboard for some Lightning. The other slot allows you to buy Fireballs at 4 coins per pack. Room 32: ======== From Floor 5: Cast Reveal, this room is littered with poison panels. Grab the Blue key, open the door, and proceed. From 33: Invisibility won't help too greatly against the Writwraiths, but it can be a bit of help if it doesn't see you. Blast it to oblivion with a crushing barrage of Lightning. Fall back through a door if it gets too close. Room 33: ======== From 30: The room is kind of cramped to fight the Writwraith, but blast it to ashes with Lightning and duck through a door when you get the chance. You will probably have to heal after this. Try the two levers to turn on the Lights. The other controls the door to 32. From 36: cast Levitate four times, and move over the pink panels. Take the Levitate prior to doing this. From Floor 5: You can simply jump over the pink panels starting nearest to you. Watch out fro the green dot on a panel on the floor... it's a Bomb trap. Room 34: ======== Kill the Writwraith hit and run style with a Lightning assault. Duck through the door if it gets near. It may be best not to even fight it in this room, if it means having to cross over the auto-shooters in Room 35 again. Take the Reveal, and two Venom Clouds. Save, cast Reveal, and walk through the door. Room 35: ======== From 32: Make sure the Writwraith is dead before you try to cross. If it's beyond this room, fire Lightning at it as it enters, and let the auto-shooters hit it as well. Take the Invisibility from room 32 before you pass. Make sure to collect the red key en route. From 34: The... watermelon seemed to amke the Baron drunk. May not be the best item to eat. Cast Levitate, float over and Collect the Levitate. Drop down, open the door, and proceed to 36. Room 36: ======== The Writwraith is limited to this room, and like its comrade ont his floor, it is a handful. You would be wise to use any Lightning you have in stock, follwed by Fireball. If you need to, run back into Room 35. Heal when you're done. Loot the room: take the Fireball, Treasure, and coins. Press the red button to open the door, and head through the door to 33. W6: Marchwall Fort Part 3 Floor 5 Map Monster Paths +=========+ +===========+ +--+ +--+ +--+ *Verdragon: 44, 45 |37|-|38|-|39| +--+ +--+ +--+ *Firebones: 38, 39, 41, 42 | | | +--+ +--+ +--+ *Fire-Asp: 37, 38 |40| |41|-|42| +--+ +--+ +--+ TOWER KEY: 43 | | +--+ +--+ +--+ |43| |44|-|45| +--+ +--+ +--+ Room 37: ======== Float above the Fire-Asp and drop Fireballs on it. Cast Reveal before you drop down, take the Venom CLoud and Levitate, then be on your way. Room 38: ======== Destroy the Firebones as described in Room 42, in Room 42. There's Meta-Power there, and if you want to use it on two monsters you'll have no choice but to kill the Firebones there. Stay off the carpet unless you want to get hit by a Bomb Trap. Room 39: ======== Kill the Firebones in Room 42, with Meta-Powered Lightning. Cast Reveal. A Teleport will drop. Cast Levitate four times to be able to cross over the second set of pink panels. Drop down and take the Fireball, Teleport (revealed), Levitate, Treasure, and Coins. The Teleporter leads to room 45. Room 40: ======== Grab the Shield here, and either pound the Fire-Asp with dropping bombs, or with Fireball. There are coins under the por, and there's a Venom Cloud and Fireball in the room. Take a drink, then cast Levitate before you enter Room 37. Room 41: ======== From 42: Take the Firebones out in Room 42, the door here is locked so it is likely trapped between 41/42 anyways. If not, open the door and let it in. Kill it with Meta-Power in Room 42. Use Lightning. Cast Reveal. Open the door and proceed after you get the coins out from under the Mushroom. From 44/Floor 3: The Bomb! Room 42: ======== Okay, head to the Meta-Power and wait for the Firebones to enter. You will need to grab that power-up and destroy teh Firebones with a few well-placed Lightnings. Next, it is paramount that you keep the Meta-Power to kill the Verdragon in 44/45. Run down to the ladder, and check the wall in the corner, just Southwest of it. Walk throught he wall, and unleash Lightning on the the Verdragon. When you're done - there's Lightning, treasure, and food. Also, a fountain. The lower left, or southwest, square carpet has a bomb trap in the middle. The slot provides you with Lightning. Room 43: ======== Teleport here from Room 23. Grab the treasure, Lightning if needed, and the Tower KEy if it is here. Exit via the teleporter, then again through the Floor 1 Teleporter in room 23, then leave witht he game's completion at your heels! Room 44: ======== The Verdragon here actually shoots Venom Clouds... I have to wonder if maybe it is justa Toxignat with the incorrect sprite? At any rate, there's a Meta-Power in Room 42. Combine this with Lightning and this enemy is squashed. There's food, a ruby, a Heal, and coins to collect when you're done. The light is in the lower left (southwest) corner. Room 45: ======== The Verdragon in here is special - it fires Venom Clouds! Yikes, just when you though you could enjoy some old fashioned Melee monster slaying, they pull a venomous dragon out. But no matter - in the top left corner of the Teleport pad is a secret door (on the Northeast wall). In here is a Meta-Power, grab it and unleash your powered up Lightnings on it in a raining fury of electrical ire. Take the Lightning when you're done. The teleport pad leads to Room 39. MT7: Secrets -=-=-=-=-=-=-=-=-=-=-=-=-=-=-=-=-=-=-=-=-=-=-=-=-=-=-=-=-=-=-=-=-=-=-=-=-=-=-=- | MT7: Secrets | -=-=-=-=-=-=-=-=-=-=-=-=-=-=-=-=-=-=-=-=-=-=-=-=-=-=-=-=-=-=-=-=-=-=-=-=-=-=-=- The game has a few glitches and codes. Note that most of these are game-breaking in that they will either damn your chances of winning or make the game far too easy. Codes do eliminate any and all battle strategy from the game, so I really do urge you to play this game fairly at first. But it's your choice. MT7.1: Codes *-----------------* During a game, type: BALDRIC At any time after entering Cheat Mode, press the following (left shift + a key) to activate the effects. Left Shift+W = Weapons, 30 of each spell. Left Shift+K = Keys, the four coloured keys. Left Shift+C = Sets coins to 10, it will not stack. Left Shift+H = Refill HP, Water, and Food Left Shift+R = Teleport. Type a number between 01 and 45 after putting in the code. MT7.2: Glitches *-------------------* These are a few glicthes I picked up on while I wrote the Quest Cycle. As with any glitch, I don't know all of the variables that can contribute so don't get too frustrated if they will not work. *Free Bombs: ---------- When a Bomb Trap or Bomb switch is pressed, bring up the Save/Load screen just before it hits the ground. If you time it right, when you exit the save/load screens you will see the Bomb on the ground. You can pick it up and make use of it as with any bomb. If you do this with a switch bomb, that switch will no longer drop bombs... so make sure hte resident monster is dead first. *Free Levitate: ------------- Save your game, cast Levitate, then load your game. You should still be under Levitate but your stock will not have decreased. This is useful if you need to cross pain tiles again and again... *Vanishing Doors: --------------- If you save after a Reveal door has been cast and you have not gone through it, then when you load that file there is a chance the door will be gone and cannot be revealed again. This can _ruin_ Quest Cycles. Save before you cast Reveal, and as always keep two files for safety. MT8: Credits -=-=-=-=-=-=-=-=-=-=-=-=-=-=-=-=-=-=-=-=-=-=-=-=-=-=-=-=-=-=-=-=-=-=-=-=-=-=-=- | MT8: Credits | -=-=-=-=-=-=-=-=-=-=-=-=-=-=-=-=-=-=-=-=-=-=-=-=-=-=-=-=-=-=-=-=-=-=-=-=-=-=-=- Thanks to Animation F/X / Apogee for the great game. It really does have a place in my heart and it was a joy to write this guide. Thanks to 3drealms for allowing these games to stay afloat. They still offer many of them for download or purchase: http://www.3drealms.com/downloads.html http://www.3drealms.com/games.html Might I also mention that 3dRealms has a very pleasant support staff? Being that I am not the most adept in getting old PC games to run... heh... they answered my question regarding a product not in their jurisdiction (Dosbox) in a timely and supportive manner. Nothing but thumbs up from me. The chap that helped me out was Bryan Turner. Thanks a lot Bryan! Mystic Towers is not yet free, but you can get the Shareware version there. Thanks also to Lon Matero's Apogee page: http://apogeegames.com/towers/ From there I used the image on monsters to more quickly have their names on hand for spelling purposes. Also, I picked up on the term "pain tile" from this wiki (I am not responsible if you visit this site and objectionable material has been added): http://en.wikipedia.org/wiki/Mystic_Towers And last, but not least, I'd like to thank everyone behind DOSBOX as it is a very efficient tool in getting these old games to run. Thummer up, dudes. That concludes important parties to this project, but I can't forget to mention my hosts, as they are the reason you can view this document in the first place. Source for A6's missing secret https://pckf.com/viewtopic.php?t=5956 Their comment in full: "I've spent a coule of days trying to understand how this game's code works. This is just an educated guess on my part, but based on what I've found out, I would say that the only way get 100% of the secrets in a level/tower is to use the Reveal spell in every room that has a secret in it. But it is possible that the total number of secrets in one level/tower is stored in the data file instead of being calculated by the game based on the actual number of secrets present in the level. I know for a fact that the game reads the total number of secrets from a buffer that was filled with data from the level files... yet. It's possible that the files for Marchwall Hold say the level has two secrets, but only one secret actually exists in the level, so you'll never be able to get more than 50% secrets. If my calculations are correct, the toal number of secrets in each tower is stored at position 14012 (0x36BC) in the tower file (APPx or WIZx inside RGMYSTUS.DAT, where 'x' stands for the level number). The file for Marchwall Hold (APP6) has the value 2 at this position, so the tower should have two secrets. According to the files, this is what you need to find in each tower: A1: 1 secret A2: 3 secret A3: 2 secrets A4: 2 secrets A5: 2 secrets A6: 2 secrets W1: 3 secrets W2: 2 secrets W3: 3 secrets W4: 3 secrets W5: 4 secrets W6: 6 secrets You can also find the par time (in minutes) at offset 14010 and the total amount of treasure at offset 14011 in the tower files. The treasure count could have the same issues as the secrets. Edit: Okay, there is one more way to "find" a secret. I ran some tests on the tower files and all of the apprentice towers appear to have such a hidden door in them. At least the amount of "secret" markers that require the use of the reveal spell in order to count as finding a secret is smaller that the total amount of secrets stored in the files. All the apprentice towers are "missing" one secret, so I guess they must have at least one hidden passage that also counts as a secret at the end of the tower. The room that requires the reveal spell in A6 should be room number 39. That room is at the top floor of the tower, top-right corner of the map. I found this Let's Play on youtube, but the guy also missed one secret in Marchwall Hold. He did find the secret passage, so I guess if you take that passage at least once and use the reveal spell in room 39, that should give you 100% of the secrets. I didn't watch all of his videos, just enough to see the secret passage and the statistics screen for Marchwall Hold, so I don't know if he used a reveal spell in room 39." 100% treasures in W1: As far as i can tell, it seems to be bugged. There is supposed to be a ruby in the fireplace in room 27, however, sometimes it just doesnt appear. By beelining straight to the generator room from the start, you can reliably get it to spawn. The guide actually says this but i wanna repeat because i somehow missed it. Use he coin slot in room 34 for the last piece of treasure.
由SaltCod撰写的指南与攻略

2026-04-02 07:00:38
转载

导读
这是《Mystic Towers》的完整游戏攻略,涵盖学徒塔(A1-A6)、巫师塔(W1-W6)全楼层的怪物打法、宝箱收集、解谜技巧,还包含作弊码、游戏 glitch 等秘密内容,助力玩家通关并达成全收集。

评论
共0条评论

《看门狗2》主线任务网络车神怎么过?最高难度全收集视频攻略第十五期
【重制】 《看门狗2》主线任务“网络车神”怎么过?本期带来最高难度全任务全收集视频攻略解说第十五期,手把手教你通关技巧与收集品位置,助你轻松完成挑战!
2026-06-04 12:020赞 · 0评论

《最终幻想16》序章怎么过 最终幻想16PC版攻略 全任务全收集全成就 黄昏迫近流程解说
《最终幻想16》PC版序章“黄昏迫近”怎么玩?本视频带来4KHDR高清游戏解说与全流程攻略,包含序章任务详解、关键道具收集位置以及成就解锁技巧,助你从开局就掌握…
2026-06-01 15:090赞 · 0评论

重制版 【零红蝶重制版】第一刻全收集
2026-05-12 03:050赞 · 0评论

《德波尼亚:世界末日》中文图文攻略
目前好像都没人做《德波尼亚:世界末日》的中文图文攻略,自己写一个吧,尽量只写操作部分,减少剧透。 包含全成就以及全收集 注意事项 *人名* [地名](场景道具)…
2026-03-25 22:000赞 · 0评论
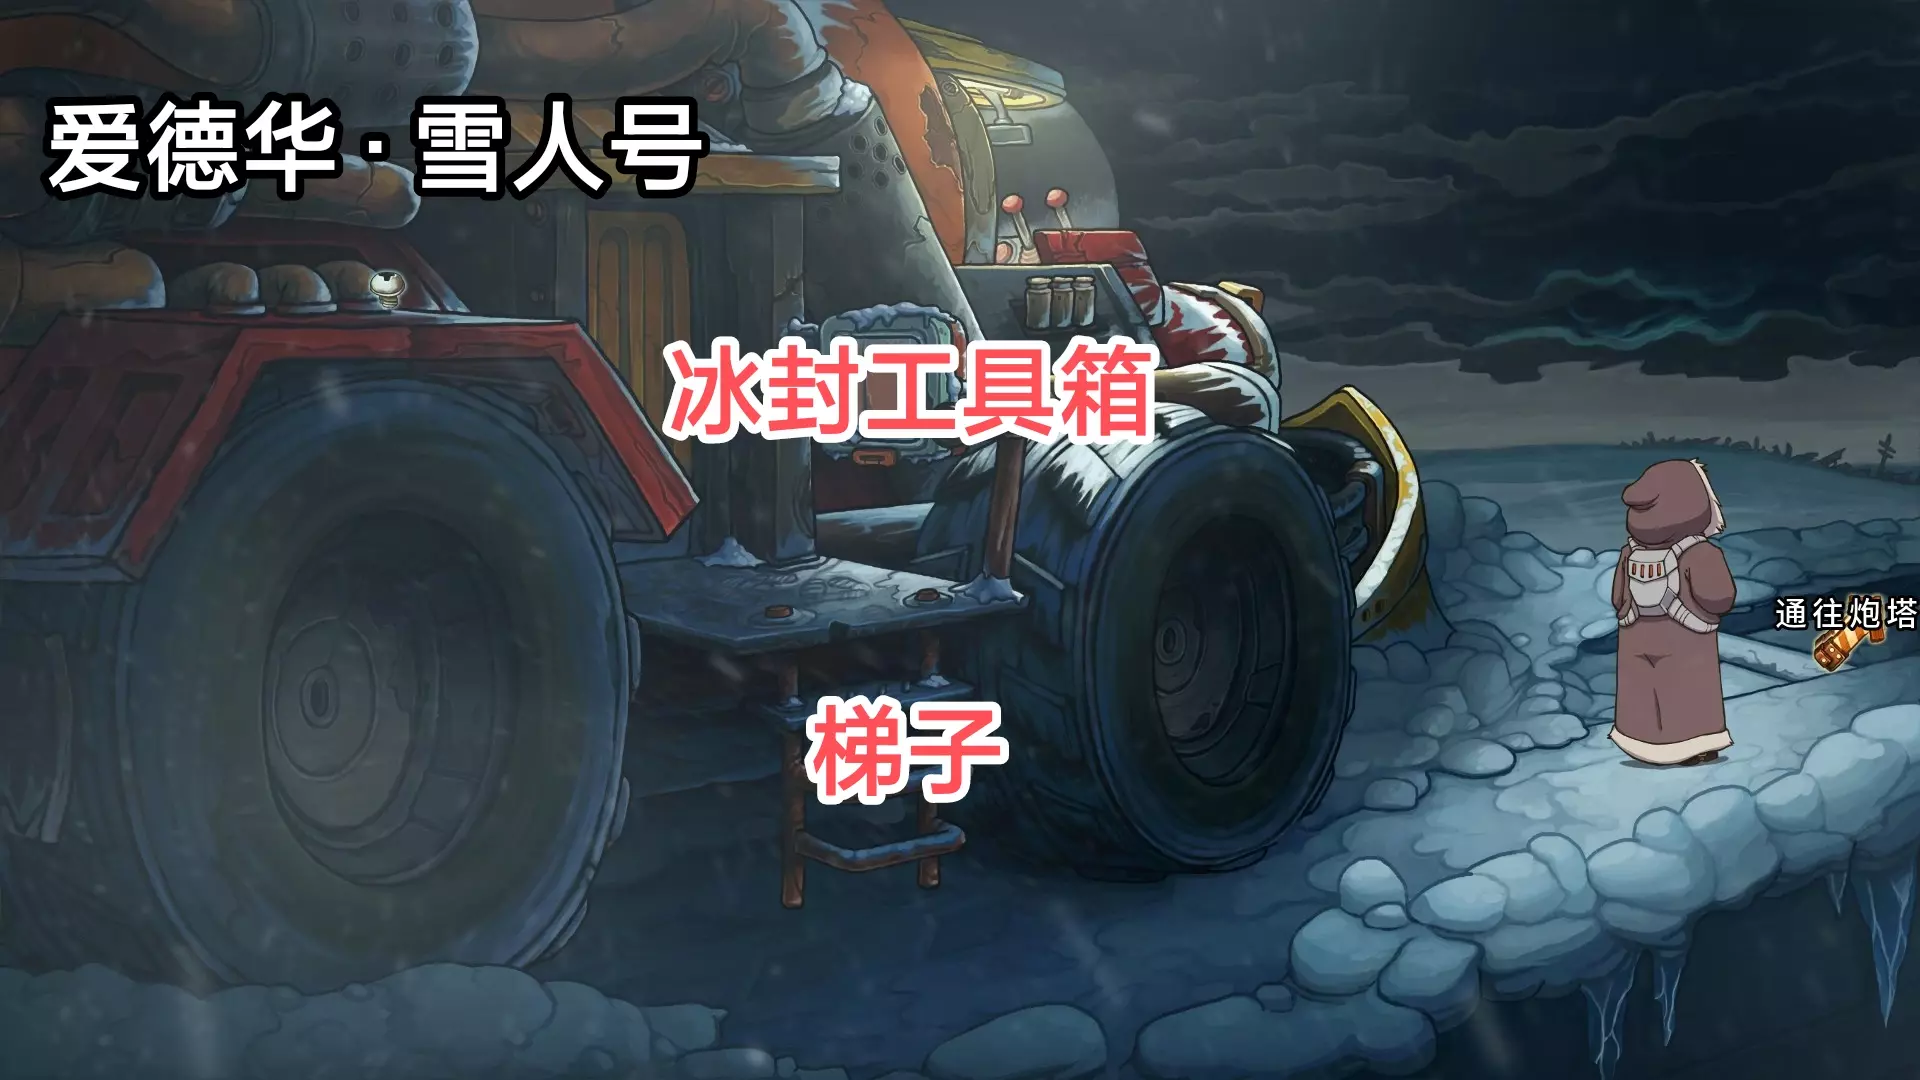
《英雄传说:空之轨迹》简明攻略
大多数攻略都包含不必要的信息。 本攻略则不然。 它只会告诉你为达成游戏100%完成度需要做什么以及按什么顺序去做。 序章 大多数攻略都包含不必要的信息。 本攻略…
2026-03-20 22:000赞 · 0评论

《恶灵附身2》收集品与成就指南
包含图片和视频的指南,用于在战役章节中获取各种收集品和成就 简介
2026-02-18 01:000赞 · 0评论

仁王 随义【仁王3:正式版】第一期 猛男全收集攻略流程解说 序章:江户沦陷(德川国松)
感谢光荣特库摩提前两天提供正式版key。 捏脸代码:N3S-5DS&b3F=ezKZr
2025-12-09 05:490赞 · 0评论
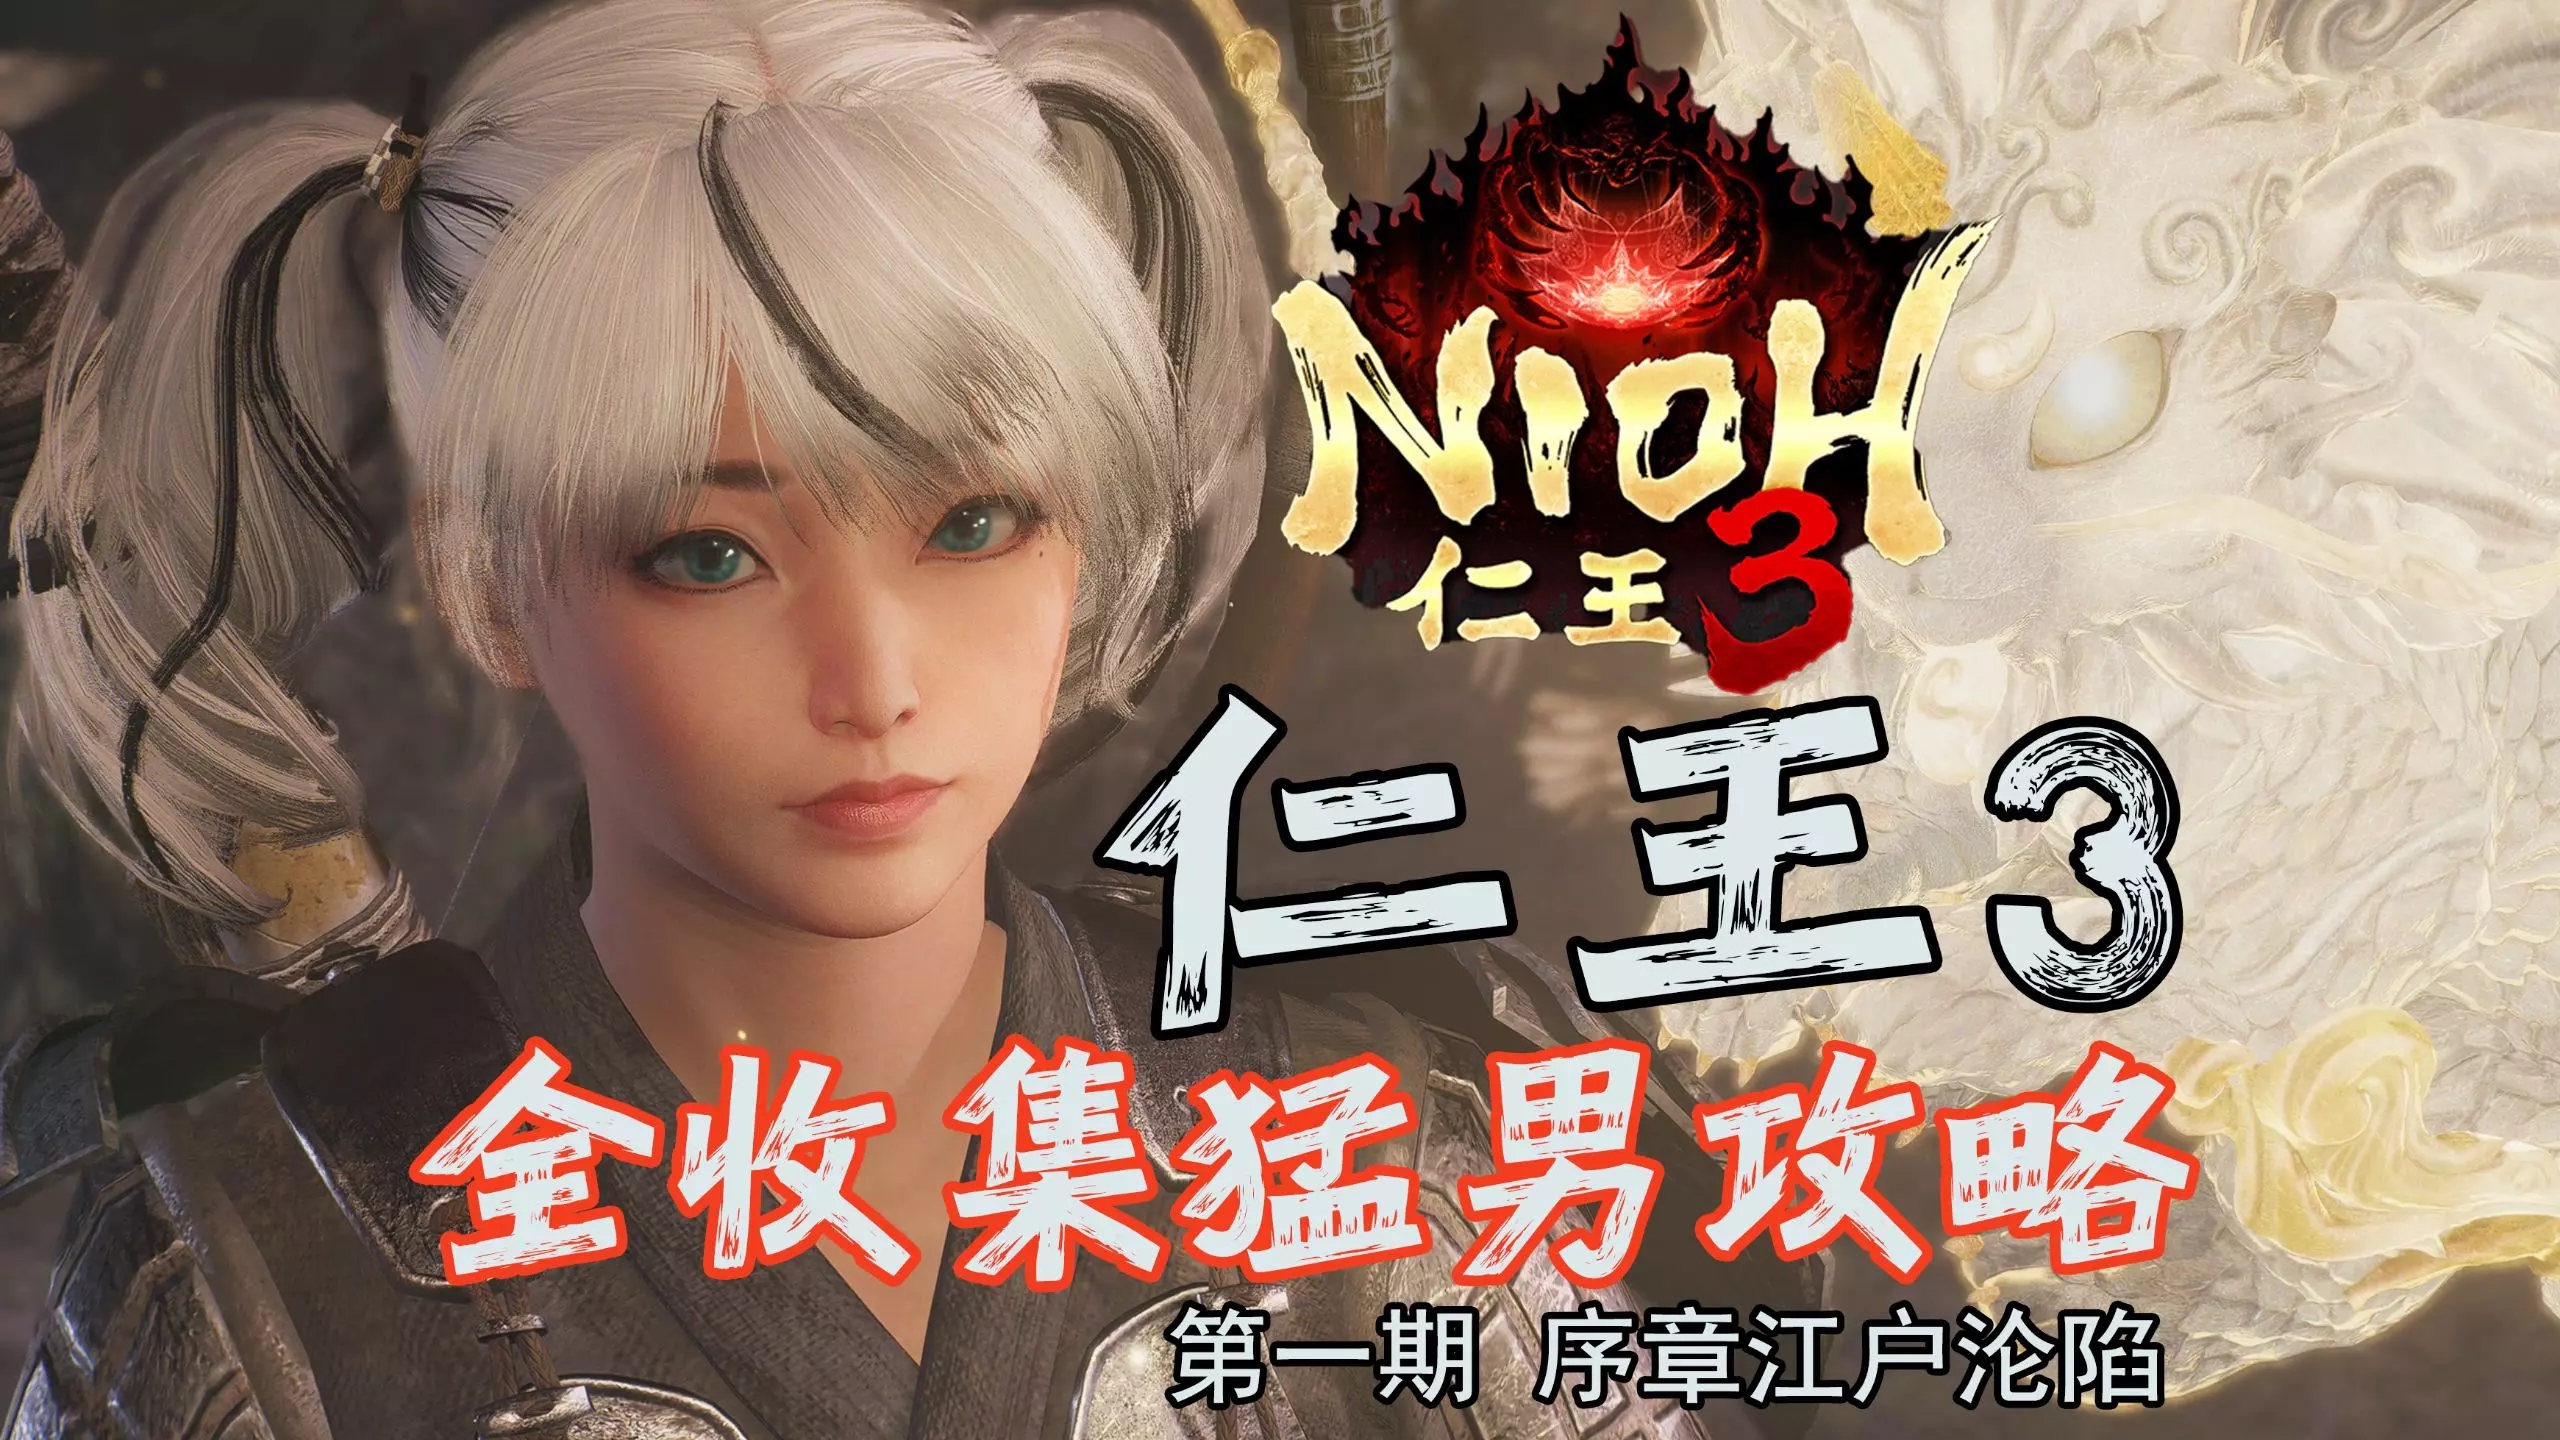
STEAM 【博德之门3】活点地图!可互动攻略神器~可以不用,但不能没有~~ #steam游戏 #博德之门3 #游戏攻略
地址:H塔塔Pmap.caimogu.cc/bg3/nautiloid.html
2025-11-26 23:210赞 · 0评论

《时间猫》全收集.9-客栈
转自B站玩家:Ay球球
2025-10-20 03:160赞 · 0评论

DLC 【完结】4K《匹诺曹的谎言+DLC》地毯式流程攻略解说合集 剧情解析【全武器、BOSS、支线、唱片、饰品全收集+剧情解析】《匹诺曹的谎言:序曲》
-
2025-09-28 18:530赞 · 0评论

暂无更多


