可运行家庭共享创意工坊

--

+关注

--

热度

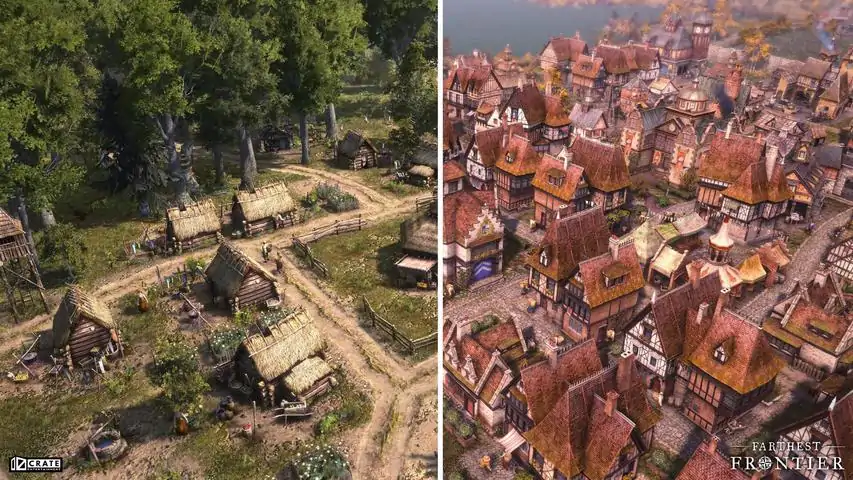
保护并领导一小群拓荒者,在已知世界边境的原始荒野中打造出一座城镇。通过收集原材料、狩猎、捕鱼和耕种来维持小镇的不断发展。为村民制造物品来进行交易、消费、装备和战斗,并在与自然和外部威胁的对抗中生存下来(有专为不想参与战斗的玩家提供的和平主义者模式)。主要特性收获、种植、制作 - 获取 16 种不同的原材料,包括木材、石头、粘土、金属矿石、野生草药和蜂蜜等。种植和饲养 19 种食物,包括采集类食物、鱼类和兽禽,以及 12 种不同特性的粮食作物。在不同等级的经济体制下生产 32 种具有多个等级的物品和材料。建造与升级 - 建造 190 多种不同类型的建筑物,将你的小镇从一个简陋的定居点打造成为一个繁华的城市。伴随小镇繁荣度和吸引力的增长,以及拥有 140 多个节点的科技树的不断进步,小镇中心和住宅会沿多个建筑等级不断升级。将生产类建筑升级会提高其效率,并能够生产更高级的物品。建造庙宇,通过挖掘到的遗物来打造人民的信仰。史上最细致的耕作系统 - 从 12种 具有独特生长特性的作物中进行策略性挑选,配置作物轮作以保持土壤肥力,避免高温和霜冻的破坏,防止病害的累积。随着时间的推移,培育你的田地,清除杂草和岩石,提高肥力并调整土壤混合比例,以实现最大的作物产量,从而满足不断增长的人口的需要。高级城镇模拟 - 村民会主动过自己的生活,并实时执行任务。你可以看着村民从偏远的工作地点搬运商品穿过小镇,之后这些再将其加工成材料或制作成物品。看着食物和货物被运往住宅、交易站或被储存起来以备后用。发展道路和运输货车,改进储存方法,使货物得以在小镇内高效运输,并能防止变质。随机生成的地图 - 《Farthest Frontier》具有高度的可重玩性,没有一款游戏能像这样生成如此美丽、完全随机的地形和资源分布。独特的生态及地图主题提高了可重玩性,极端地图会为玩家带来独特的挑战。设置选项可让玩家指定他们想要的水域或山地的数量,甚至可以调整地图上有哪些可用资源。从恬静田园到残酷荒野 - 可自定义难度选项,玩家可以关闭入侵者和疾病等特性,以获得更安逸的体验,也可以选择让难度最大化,来真正检验他们的城镇建设能力。启用自定义游戏选项,按自己的理想设计游戏体验。环境互动 - 根据当地资源情况发展经济,生产贸易物品来换取所缺乏的物资。竖起栅栏,防止鹿靠近农田,阻止熊糟蹋食物。管理树木的覆盖面积,防止地下水枯竭。平衡需求,清理重要自然资源(如野生药用植物和采集类食物)周围的农业用地。大量旧时疾病! - 为防止痢疾和霍乱的爆发,确保村民的饮用水足够干净。收集浆果并种植绿色蔬菜来防止坏血病,确保健康饮食。确保村民有鞋子和衣服穿,以减少感染破伤风、狂犬病和被冻伤的几率。建造治疗师诊所,隔离受感染者,并提供草药和药品来进行治疗。通过收集垃圾、安全地储存食物和使用捕鼠器来控制老鼠的数量,以抵御可怕的腺鼠疫。击退潜在的入侵者 - 选择和平主义模式,避免战斗,或与不同等级的掠袭者战斗,提高城镇的生存风险。从木栅发展为石墙,建造塔楼和兵营,招募并装备士兵来保卫城镇,因为城镇的繁荣吸引了掠袭者和寻求掠夺的外国军队的注意。支持 Steam 创意工坊 - 完全支持由免费 Unity 开发工具进行创作并以 Steam 创意工坊发表的 mod,玩家可以在游戏稳固的基础上将其按自己最狂野的想象来改造。 Crate Entertainment是一家完全独立的开发商和发行商,位于马萨诸塞州波士顿市郊外。Crate最知名的游戏是备受好评的动作角色扮演游戏《Grim Dawn》。快来加入Crate社区,帮助我们塑造游戏的未来,并通过参与论坛上的投票和讨论,第一时间收到关于Farthest Frontier的消息。
游戏圈
共43条帖子
虚拟存在
2026-02-15 22:00:09 · 发布在 「Farthest Frontier」
布局与常规游戏玩法综合指南
一份全面详细的建筑布局与科技树优化指南。 单市场住宅区布局 以下是住宅区布局,以单个市场为中心规划,为其范围内的住宅提供加成并配送生活物资。 设计目标是打造易于建造的道路系统,包含足够数量的住宅,并配备“所需”的短程装饰,以便顺利升级到4级城镇中心(旧版本中400人口要求是关键限制因素)。 幸运的是,新的2级市场配送范围扩大了3格,相当于增加了整整一层住宅。此布局具体包含75栋住宅(若要达到400人口,在旧版本中至少需要67栋住宅,且其中除2栋外均需升级到3级)。如果你想尝试和实验的话,是可以再塞进大约5个甚至更多房屋的,尤其是在不考虑道路的情况下。作为参考,我也必须兼顾简单性,这样才更容易理解。双市场住宅布局与生产核心 这是一个针对大规模最终人口的规划(请考虑加工限制!)。 该规划还包含了游戏内的大部分生产设施,其布局经过优化,甚至可支持多层加工。 规划中包含2组63户住宅(主要限制因素是剧院的125人容量——总会有人无法获得娱乐!)。 除此之外,基本原则保持不变,你可以尽情尝试。我最初在每侧成功安置了74户住宅,因此有足够空间容纳更多人口。The Production Core's smaller nodes can be separeted well enough, if you have a more limited space to set up your base, the main thing to watch out for in relocation plans, to have 9+ tiles space for the sawmill and similar buildings (the Compost Yard is 11+ tiles - people seems to dislike the smell of sh*t more, than loud noises). Research Tree Absolute first pick: Natural Philosophy Affects the whole game, after ~4-5 research point, you're net positive already Resource techs are a high priority to improve gathering speed, so Stonecutting and Silvaculture are a high priority too. I'm not sure what's wrong with the townsfolk, but they're snorting clay and bricks, so start Mining through Stonecutting as soon as your population numbers allow at least 1 full clay deposit to be operational. Also high priority to unlock Market Forces through Taxation, after the key resources. Food wasn't that big of an issue for me, so outside of unlocking barns with Animal Husbandry, so you can slowly breed them, when you need them, there's no need to rush food techs in the first 10-15 points. Only unlock Healer's Home through Nursing, if you have the income to support it or for some reason, you have significantly moret, han 2-3 sick people at a time.or they start to die from sickness. When you're at tier 2 town center and stabilized the growth, look for Forging and Smithing through Production Logistics and Production Management, and look for an Iron source. Around this point, start looking for Forestry, so you can upgrade the Work Camps and replant trees, so you don't have to micromanage them anymore. Once you've built an Academy, Scientific Method is the same as Natural Philosophy, simply a must have. Paper Press is also a great single point investment, although the building is quite expensive, a single worker can provide enough paper to sustain the Academy indefinitely. It's roughly a 30% research time cut, if they have paper available at the Academy. The other Researches are not too crucial inthe city development. Around 200+ pop, you should start investing into food techs, but I haven't entered Grains even with 400+ pop. These techs are more map dependent, on how early you should invest into them. Personal Pick order: T1 - Natural Philosophy, Stonecutting, Production Logistics, 2x Taxation T2 - Mines, Market Forces, Nursing, Production Management, Forging, Smithing; Forestry, Animal Husbandry, Farming startup T3 - Quarry, Woodworking, Trade Center, Convenience tax, Wagon upgrades, Heavy science T4 - Heavy weapon production, then slowly grind out Citadells General Gameplay Early Game: Although it's dependent on the map, I'm personally opening up with 2-3 hunters all the time for food and 1 forager. After rushing Fletchery, I'm going up to 4-6 (depending on ow many hunts are close) hunters, but after that, I'm often adding on fishermans and 2-3 foragers (also depends on the area). Farm management:I'm using 5x15 plots (first build 5x7 or 8, but not longer, then expand to the required direction by 7 or 8 tiles - important note, that you need to expand at least 7 tiles or you'll get the error of 'too small'). Based on my experience, it was enough to employ 3/8 workers on the fields. 3 5x15 plots makes it easy to create the rotations. My preffered setup for slowgrowing fertility from the very start as a set and forget: (other version is to set Maintenance; 2x Clover for 3-4 years, then start using the fields properly) Flax-Hay setup: - Maintenance; Hay - Clover; Flax - Pea; Clover; Turnip Flax only setup: - Maintenance; Flax - Turnip; Clover; Turnip - Pea; Clover; Turnip Animal feeding (Hay only) setup: - Maintenance; Hay - Turnip; Clover; Turnip - Pea; Clover; Turnip So you get a bit more Turnip if you break them up on 2 separate fields - good when you grew 500+ pop. Lategame Grain setup: - Maintenance; Hay - Clover; Wheat - Vlover; Clover; Turnip Naturally, there are other good setups, like a year of /Carrot; Beans/ or so, but these are working well for me. Woodcutting: After the storages are filled, you only need 1 Forester Camp (upgraded Work Camp) to sustain the need for firewood and other wood requirements for ~400 pop. Mining: The claysnorters must be appeased, so Mining is a tech rush for me personally, but can be delayed 2-3 picks after unlocking the potential to get mines. I was not able to generate enough clay to get any surplus until I've employed 3 full clay deposits and same goes for bricks with 2 Brickyards. And this is also after the settlement is already at tier 3 mostly. Before that, even these won't be able to mine enough for those maniacs. Around 10-12 iron miners are enough for the fully employed Foundry and Forge (only tools and heavy tools, but with clear surplus production). 2 Charcoal kilns are great to have, just set up 2 Firewood Splitters early. Storage Management: In general, I'm mainly specializing one Stockyard for building materials, and the other for ores and heating materials. The Storehouses are harder to set up, I like to use one for Hay around the grazing areas, the others are as you can see, in between the production and the residential area for optimized logistics and they store whatever production is close by and the required materials. Important note, it's good to have a full Storehouse for arrows in the lategame just to be safe, if you plan to go survival mode, they'll start chewing through arrows like candy. Defenses: Don't bother too much with it, just get crossbows and constant supply of fur for the Tannery. Hide coated hunters are perfect for the first 2-3 raids. 4-6 hunters can easily kill up to 20-30 raiders without loss, maybe ~50 with good micro and expectable loss of a few. Around 10-15 years, you'll start to get raided a bit more heavily, I'm still fine with 12 archers from a Fort or two. 12-24 archers (with crossbows) are doing fine (with obvious losses expected against 40-60+ raiders), but I had no problems defending with slowly built up archer-only forces before jumping to the heavy infantry teck. Don't even bother with Horses outside of roleplay, they're too expensive for what they provide. You can get 6 archers for the cost of a single Lancer... guess which one is more Valuable, but 2 Heavy infantry is also significantly more useful. They're definitely not bad and it might just be my playstyle, but 1,5 extra fully employed Citadell with 12-12 split seems better, than 12 Lancers (or alternatively, 3 full archer eployed citadells). Relics:I found the best setup to be: - Coin purse (a must for late game army) (20% upkeep cost reduction) - Ashes of the Martyr (25% extra HP) - Markovian's Blade (15% Soldier and Guard damage) Tusk and Eye of the Hunter might also be great alternatives, especially Eye replaced for Blade, but I'm not sure about the effects - haven't datamined anything - Markovian's, based on the wording, might be the same bonus as the Eye for the army, since it says all soldiers, so it should also affect archers. If not, then naturally the Eye is probably better. Lategame transition and setups: Important notes for lategame preparation (T4-T5 homes): - Get food production surplus and ~12-18 months of storage capacity, so you have a buffer. - Prepare fields preemtively! - Buy Food if you fall under 6 month even with the preparations The jumps are quick and brutal in terms of food drain and say goodbye to your planks, bricks, and glass at T5 during the transitions. From 450 to 600 will be the most intense if you we just geting by with food, but it's managable. (Still, don't underestimate the 600-750 transition either.) Triple Turnip + some extra rotations are realy good for burst food productions, you can even sacrifice some fertility to get extra if you've miscalculated something. Once you max out T5 population: Woodworking: 2 Foresters, 2 Sawmills and 2 Firewood Splitters are needed to keep up with the material burns, fortunately 1 Furniture Workshop is more than enough. Food: - 3 T2 Barns (6-6 handlers); 4 Chicken Coops (2-2 handlers) - (for T2 Bakery pastry massings egg requirements) - 2 Cheesemakers with 3-3 people employed were able to use all the milk from the 3 Barns - 2 sets of Wheat fields were enough for me to provide flour for 4 Bakeries at max capacity; they need 3-4 Windmills too - Glass Recycling is crazy, once you unlock that, and set up a Guild Hall for Miners Guild, you will only need 1 full Deep sand mine and 8 people in the Glassmaker to provide a surplus of Glasses for everything in the town, including a fully employed Preserver and Apothecary - Little space management trick for Barns and fruits: use 16x16 fields instead of 15x15 and put an Arborist inside, use the grazing area for fruit trees too, they fit perfectly; same goes with the 4 grazing areas for the chickens - Honey... well, just spam those, Medicine and Pastry will burn it all, don't expect a too large surplus of it once you start using it Industry: - 1 Deep mine were enough in most cases... except Gold - Paper is fine, after you've built up your reserves and you're only refreshing used up books; 1-2 fields on Flax are more than enough to keep up with clothing and everything - Although I'm only using 4 Hunters on top of the Barns, Pelts are a bit scarce, soyou might want some trap-heavy hunters to get more pelts, maybe goats (haven't tried them), but it's managable with 2 Cobblers and 1 Tannery with some occasional trader extra - 1 full Soap is also producing significant surplus if materials are provided for continuous work - 4/8 Pottery is already producing surplus, so you won't need more than that, unless you want to also bump up clay miners to sell it to traders - For all the iron and gold incoming from the mines, I'm using 3 smelters; 2 for iron only and 1 for iron-gold at 1-1 ratio So at the moment with not too much surplus, 1 full deep iron, 1 full deep sand and 1 full deep coal were doing fine; 4/16 quarry and 8/16 Clay also seems to be fine, after heavy building phase is finished, but I like to keep around 2 Brickyards, because they work slow :/ This setup is able to field 4-5 full Barracks with 12-12 archer-heavy infantry setup, but it needs trader gold income occasionally, since the gold-flow otherwise slightly negative. I personally get so much gold, that I'm often paying the attackers if it's an option, just to get rid of it. Building capacity info In case you want to expand the cores, here are some info about the building limitations. I haven't tested if the Temple and Altar are providing the same or not (they provide spirituality). Library - 100 Residences Temple (T1) / Grand Temple (T2) - 100 / 120 Residences Theatre (T1) - 125 Residences Festival Pole (T1) / Paved Festival Pole (T2) - 80 / 100 Residences Shrine (T1) / Altar (T2) - 18 / 18 Residences Storehouse (T1) / Warehouse (T2) - 2000 / 4000 unit capacity Stockyard (T1) / Large Stockyard (T2) - 1500 / 3000 unit capacity Root Cellar (T1) / Brick Root Cellar (T2) - 1500 / 2500 unit capacity Market-centered large module <> Old baseplan, concept remains valid <> This is a rotateable module (around the theater, but can be redesigned for solo-use for smaller scale settlements too just by using the additional areas inside the / gray / lines, but naturally those are just guides. The goal of this layout was to squeeze in the absolute maximum number of houses around a single market, school and healer. (which is 65 homes) There is a lot of 'spare' area around the corners, where you can fit in any neutral facilities or even forts as you like. In a rotated module use, the 4 sections support each other with the bakeries and other decorations/ facilities. In a singular use, you should build a 3rd well and bakery roughly in a triangulated form around the houses to cover the whole. NOTE: 2 Rat Catchers can't cover all the houses, you need a 3rd one in singular use and even in the rotated modul version, there might be issues, so you'll either need a 3rd one or just micromanage a single one in case of a rat infestation :)
冰豆鲨
2026-02-16 01:00:28 · 发布在 「Farthest Frontier」
新手储物指南与技巧
《最远的边疆》存储系统新手讲解及技巧 介绍 本指南旨在向新玩家展示《最远的边疆》中存储系统的基础知识,以及一些优化存储的技巧,帮助解决食物腐烂和运输时间过长的问题。 本文主要面向新玩家,或在理解和优化城镇存储方面遇到困难的玩家。 与任何抢先体验游戏一样,所有信息都可能发生变化,我会关注更新日志,确保本指南保持最新,以帮助大家。 好了,让我们开始吧。资源存储指南 一开始,你无法获取所有资源,因为大部分资源都需要通过后期建筑的生产才能解锁。不过在大规模生产开始前,你可以收集到大量原材料进行储备。 原材料 指从世界中直接采集且未经任何加工的资源,这些资源之后会通过多种方式用于生产其他材料。例如:木材、石头、铁、草药等。 食物 可以说是游戏中任何阶段最重要的资源,包括生食材和精制食品。妥善储存至关重要,因为大多数食物都会变质,只是有些食物的变质速度较慢。例如:肉类、鱼类、浆果、面包等。 生产材料 由前述原材料加工或提炼而成的材料,对于建造和升级城镇以及生产更特定的物品至关重要。例如:木板、木柴、砖块、面粉等。 可用物品 最后一类本质上是任何材料的最终生产阶段,这些物品供你的工人生存、收集和生产更多资源。例如:衣物、工具、啤酒、肥皂等。 存储建筑 大多数情况下,游戏初期你就能使用所有存储选项,但目前需要按顺序建造它们。 存储推车 这是游戏开始时你获得的第一个存储建筑,它的存储容量处于低到中等水平,但可以存储任何物品,并且具有移动性——你可以通过点击车轮图标将其移动到任何地方。 它在游戏初期的存储方面很有效,尤其适合存储建筑材料,因为你可以将推车移到靠近建造/升级地点的位置,这样工人就不必走那么远的路去取用材料。用途:前期游戏存储/原材料/可用物品 不适用:食物/原材料(后期游戏) 堆料场 堆料场与储物车基本相同,但以无法移动为代价提供了稍多的存储空间。 它适用于前期游戏存储,应用于存储建筑材料/原材料。如果计划这样使用,请注意建筑的放置位置,显然存在资源重量机制,工人搬运某些较重的原材料时会移动得更慢。用途:原材料/加工材料 禁用:食物 地窖 地窖是一种小型存储建筑,仅可存储食物和部分草药。 它在食物存储方面效果显著,是防止食物腐烂的理想选择,升级后效果更佳。用途:所有易腐烂物品(主要是食物/草药) 不适用:无 仓库 仓库是所有建筑中容量最大的存储建筑。 它在游戏初期的存储方面非常实用,适合用来存放建筑材料/原材料。不过如果你打算用它来存放这些材料,要注意建筑的放置位置,因为游戏中存在资源重量机制,工人搬运某些较重的原材料时移动速度会变慢。用途:原材料/生产材料/可用物品 不适用:食物储存(除非你还没有地窖) 储存技巧与优化 有几种方法可以优化你的储存,使其更有效地工作。随着更新发布或发现更多技巧,我会继续补充和修改本节信息。 分配储存 你可以通过点击每个资源左上角的复选框,来为每个建筑简单地分配储存,开启或关闭该建筑的储存功能。我已经在建筑部分提到过这一点,但下面我会列出每个建筑的存储建议。只需取消勾选除以下为每个建筑列出的内容之外的所有选项。 存储推车:使用【早期游戏】|【原材料】和【可用物品】 堆料场:【原材料】和【生产材料】 地窖:所有它能存储的物品(主要是【食物】和【草药】) 仓库:【原材料】、【生产材料】和【可用物品】 存储位置 存储位置相对于生产和分配的位置很重要,因为过长的移动时间会降低生产力,这对食物来说尤其重要。 其实很简单,只需将你的存储设施放置在生产和分配区域的中间位置,如下方图片所示。如果无法放在正中间,尽量让它稍微靠近生产区域以保持生产数量,分配工作应随之进行。暂时完结 我知道这总体上是一份相当基础的指南。 正如之前所说,这份指南是面向那些刚接触这款游戏或整个游戏类型的新手。随着时间推移,这份指南会变得更详尽。我会随着游戏的更新,或者当我发现更多需要分享的内容时,继续对其进行更新!

下载233乐园APP

专心推荐好游戏

关于我们 · 联系我们 · 隐私政策 · 营业执照

侵权投诉 · 开发者中心 · 用户协议 · 免责声明

不良信息举报中心

纠纷处理及不良内容举报电话:

4006600910 (工作时间: 9:00-12:30,14:00-18:00)

北京市朝阳区启阳路4号院2号楼15层1803室

本公司产品适合10周岁以上玩家使用 未成年人家长监护

首页 / Farthest Frontier

抵制不良游戏 拒绝盗版游戏

注意自我保护 谨防受骗上当

适度游戏益脑 沉迷游戏伤身

合理安排时间 享受健康生活

京ICP备18003564号-3

经营许可证编号:京B2-20181741

京公网安备:11010502052873

Copyright © 2025 233leyuan.com All Rights Reserved

北京龙威互动科技有限公司版权所有

热门游戏: 我的世界 | 三角洲行动 | 原神 | 王者荣耀 | 超自然行动组 | 蛋仔派对 | 和平精英 | 火影忍者 | 二重螺旋 | 英雄联盟 | 梦幻西游 | 明日方舟 | 斗罗大陆 | 光遇 | 鸣潮 | 无畏契约 | 模拟山羊3 | 樱花校园模拟器