换一换
换一换 


如何为常规游戏、刷材料和线上活动打造武器 Centurion Youtube 频道 Centurion Youtube 频道 等级限制挑战 周末生存者 - 楼层指南 技巧与窍门 等级限制挑战护手
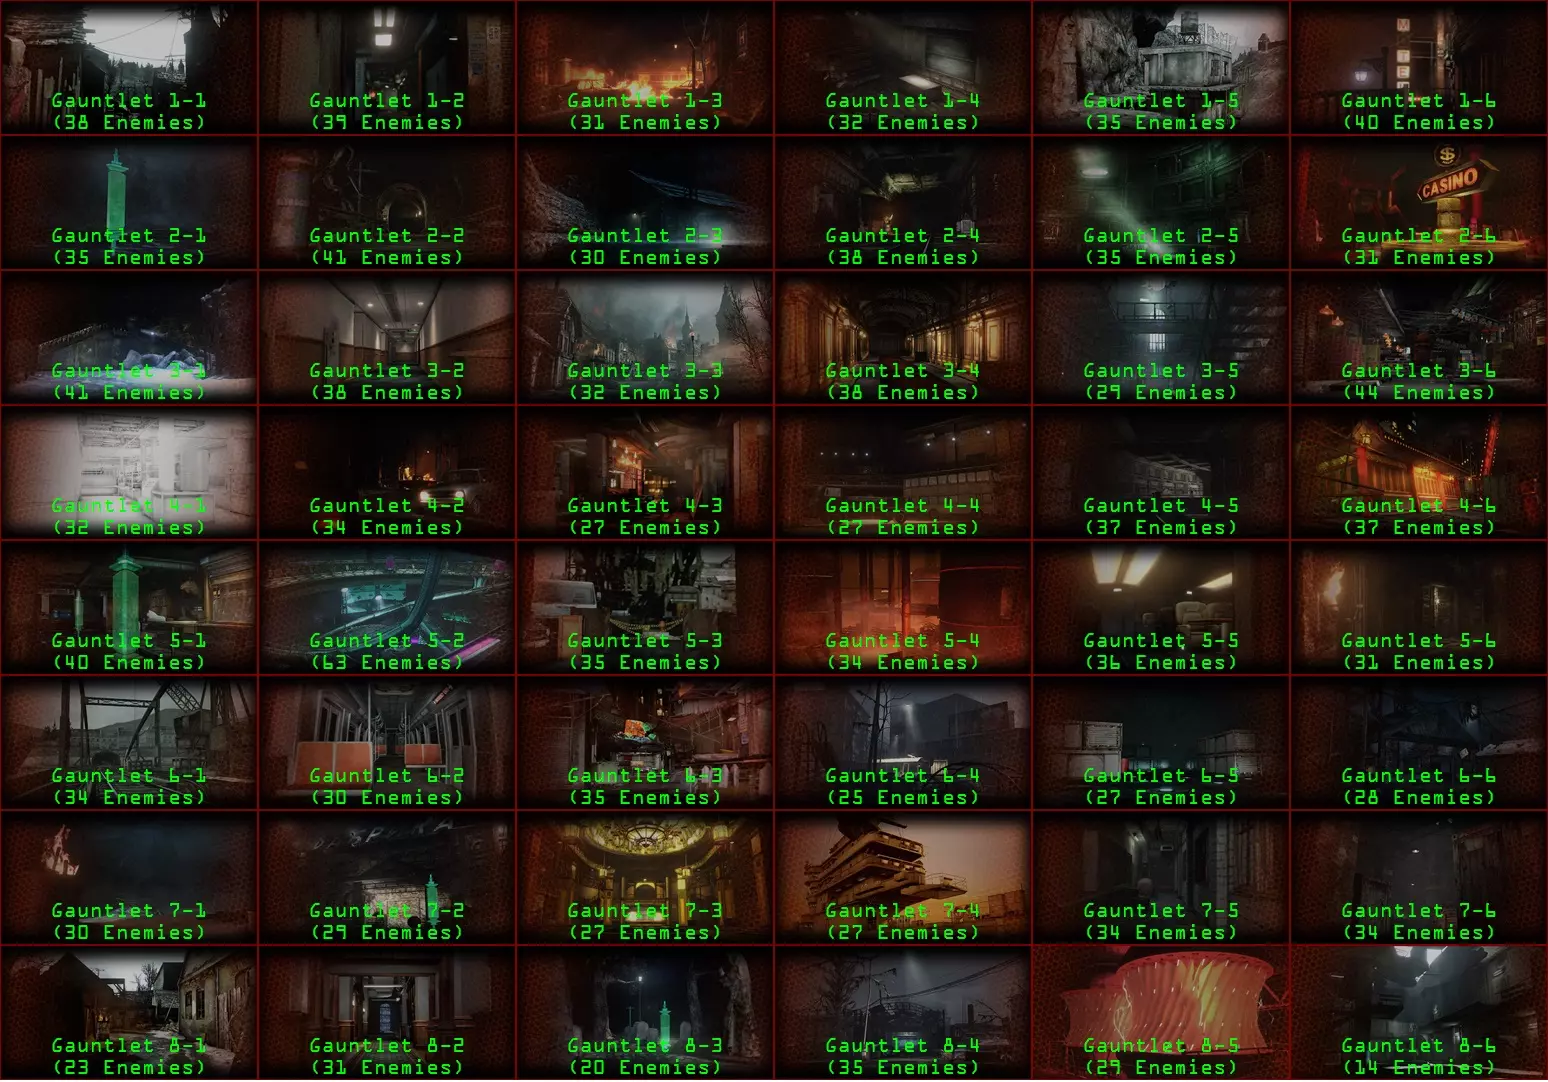
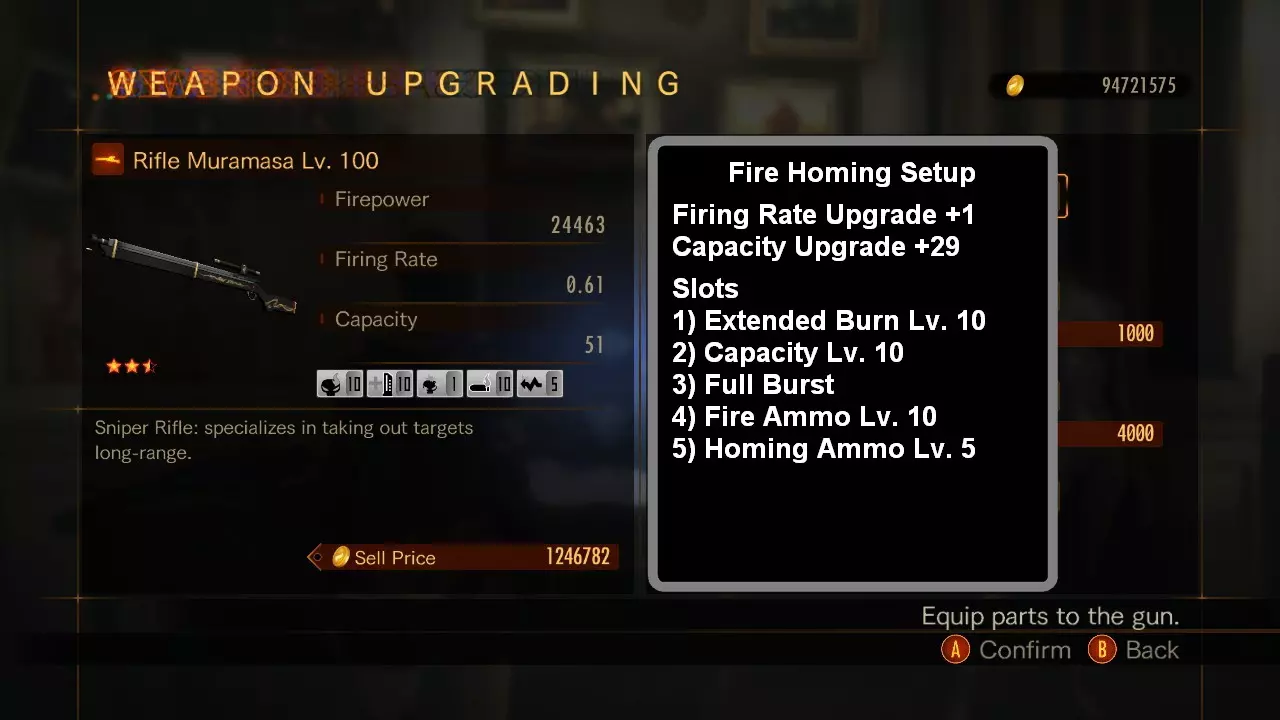
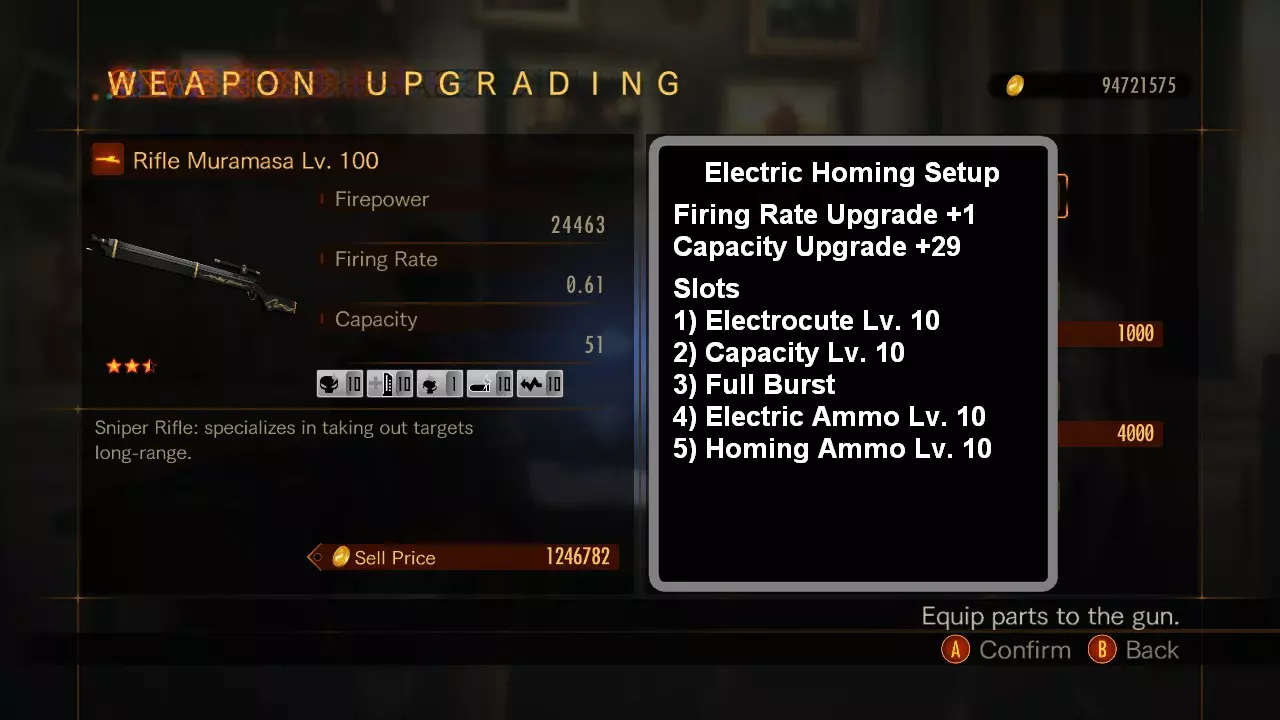
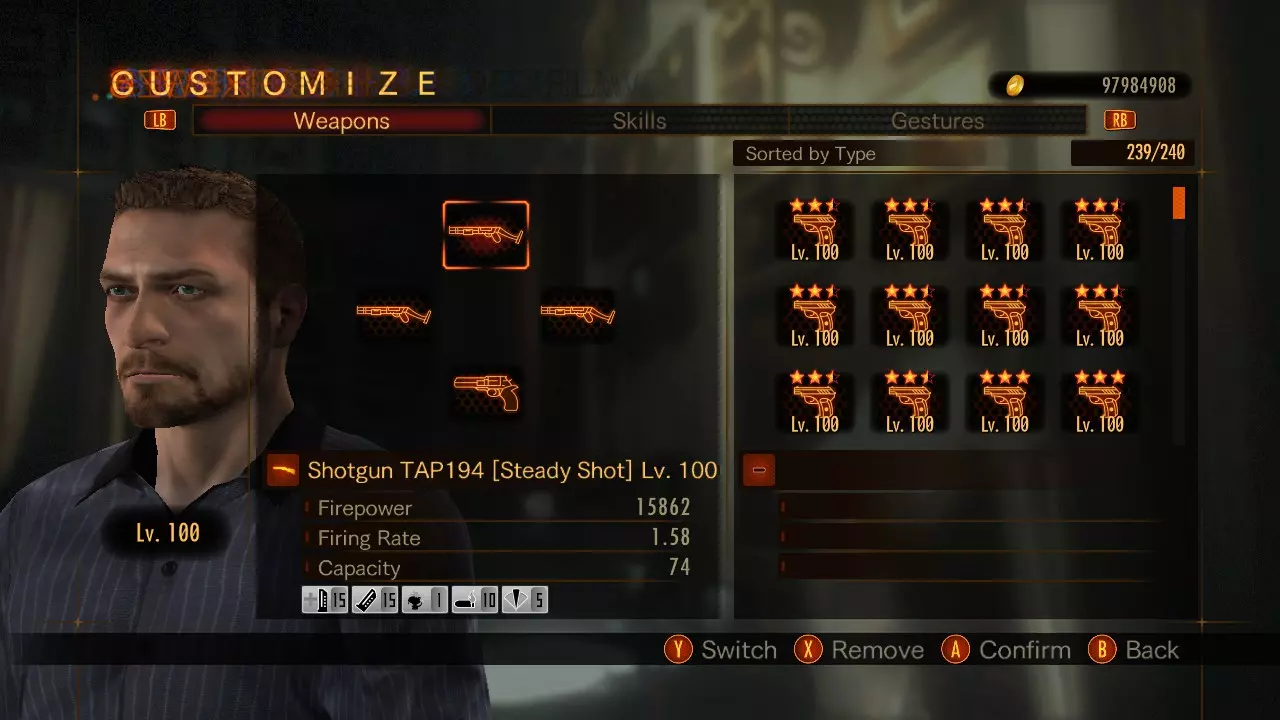
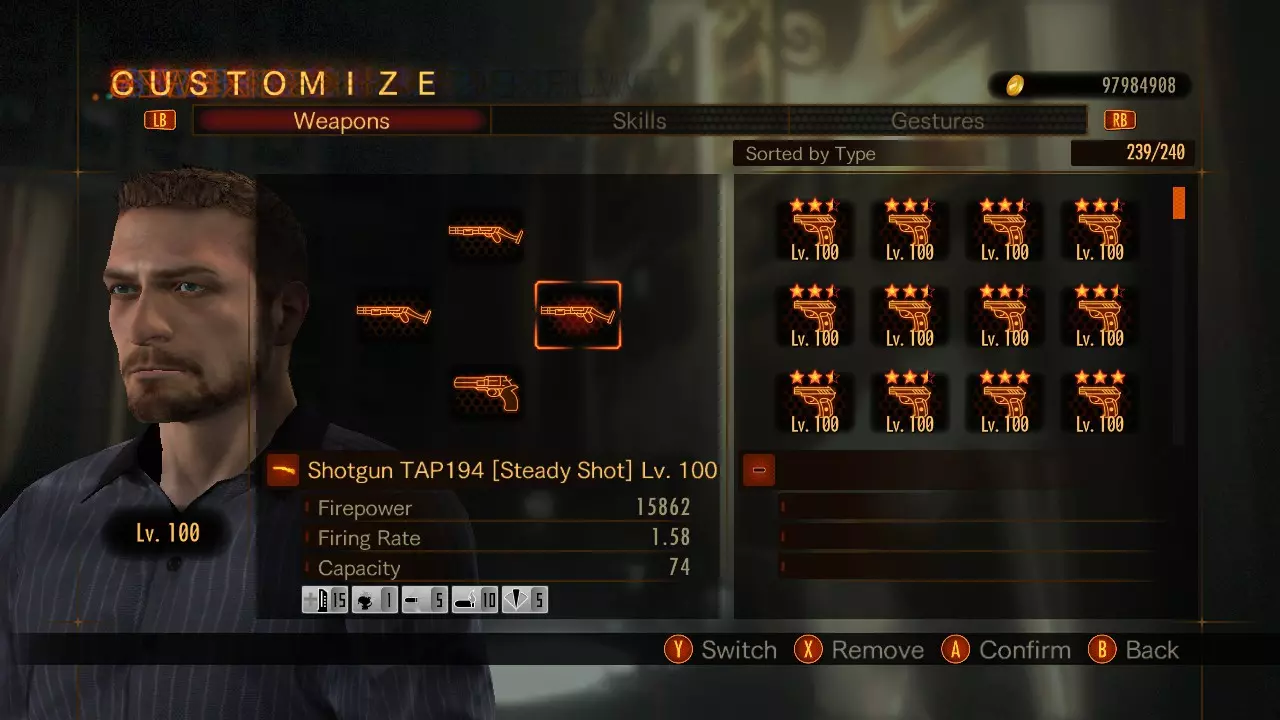
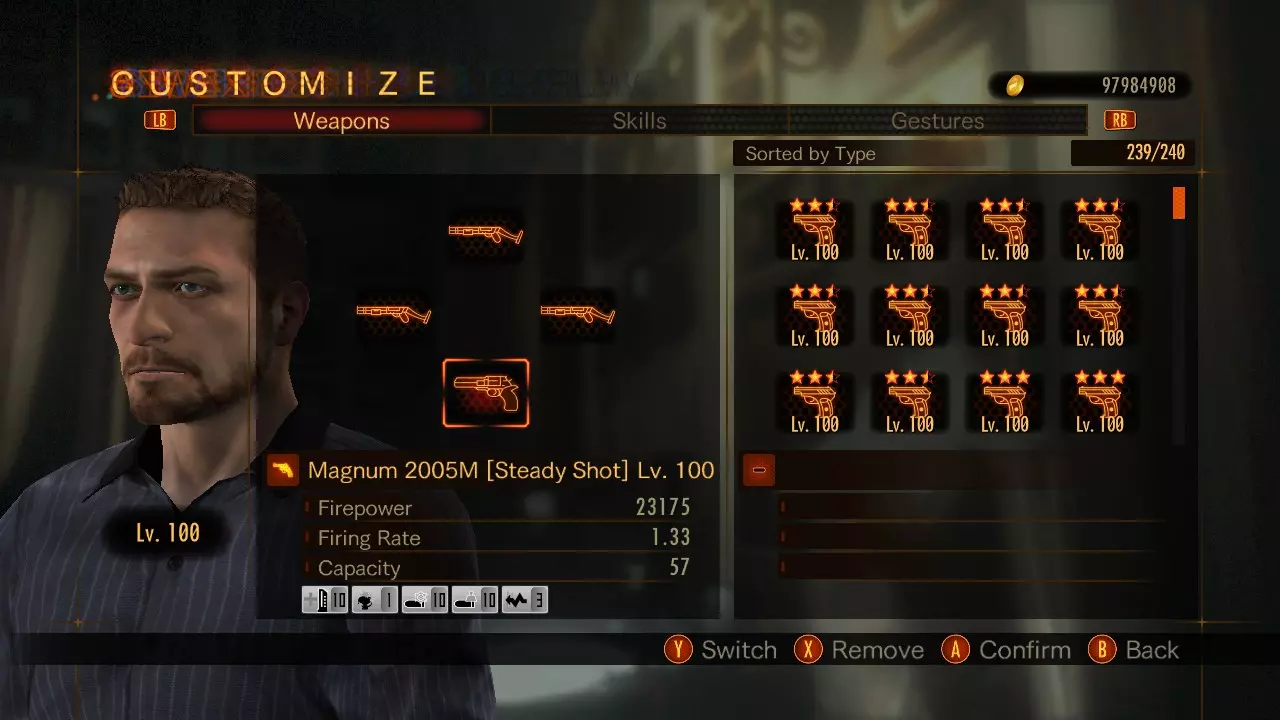
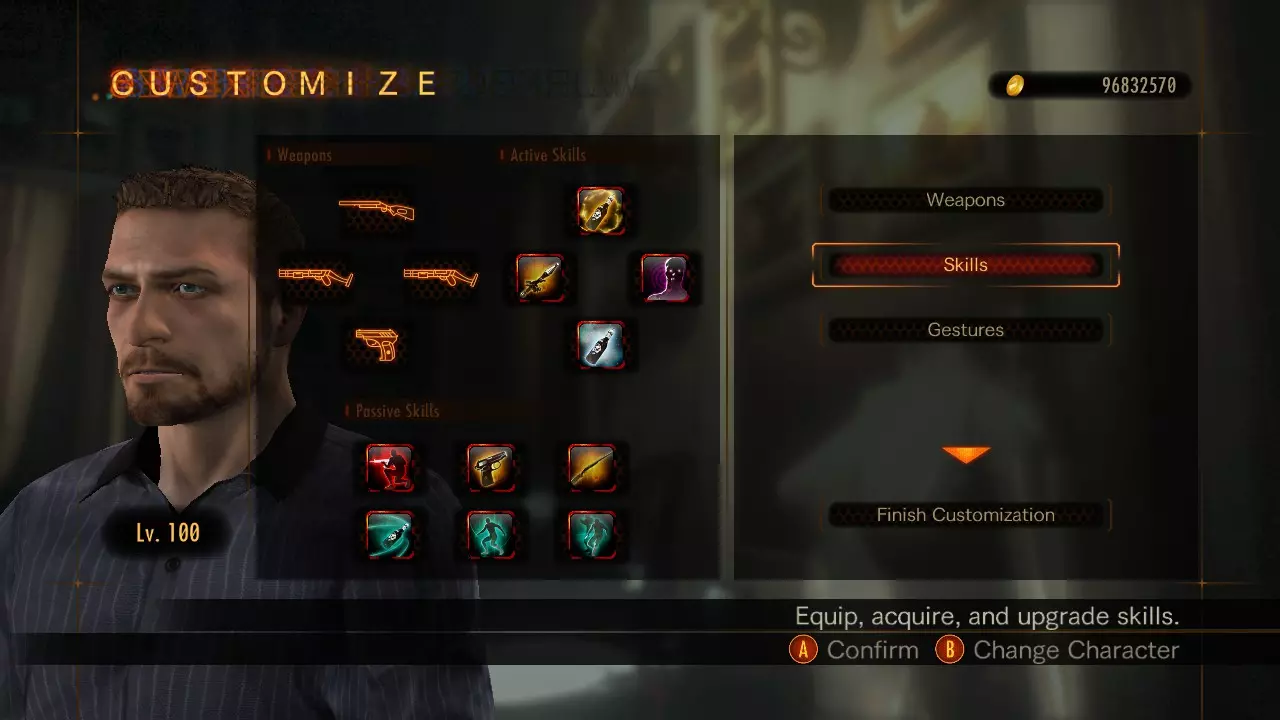
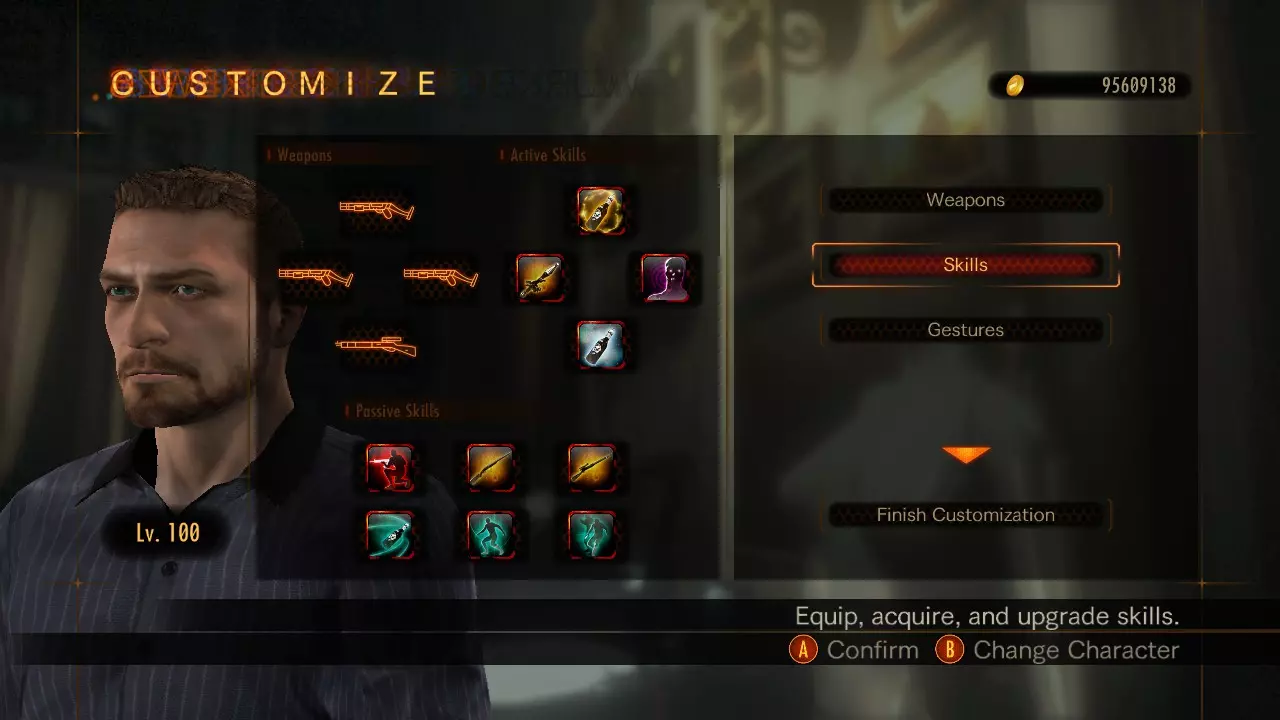
武器属性计算方式 所有武器属性均根据对应武器的无标签属性进行计算,不受标签带来的加成/减益影响。 所有属性均来自100级武器。 示例1: 火力[无标签]型号329:火力25750 附加伤害等级20(增加60%火力) 25750(无标签武器火力) + 15450(无标签武器火力的60%) 最终伤害:41200 -------------------------------------------------------------------------------------------------------------------------- [稀有标签]票据打孔器:火力30900(稀有标签增加20%火力) 附加伤害等级20(增加60%火力) 25750(无标签武器火力) + 15450(无标签武器火力的60%) + 5150【稀有标签】(无标签武器火力的20%) 最终伤害:46350 -------------------------------------------------------------------------------------------------------------------------- 【无标签】水蟒:火力30900 附加伤害等级20(增加60%火力) 30900(无标签武器火力) + 18450(无标签武器火力的60%) 最终伤害:49440 示例2:射速 无标签M147S:射速3.00 附加射速等级20(增加30%射速) 3.00(无标签武器射速) + 0.90(无标签武器射速的30%) 最终射速:3.[快速装填] M147S:射速 2.70 装备射速等级20(增加30%射速) 2.70 [快速装填](未标记武器射速的-10%) + 0.90(未标记武器射速的30%) 最终射速:3.60 有效武器射程 武器类型 近距离威力 中距离威力 远距离威力 手枪 正常 正常 降低 霰弹枪 增强 正常 超出射程 冲锋手枪 增强 正常 降低(射程有限) 突击步枪 正常 正常 降低 狙击步枪 正常 正常 正常 马格南左轮 正常 正常 降低 武器标签 [快速装填] 弹匣容量 +30% 装填速度 +20% 射速 -10% [速射] 弹匣容量 +30% 射速 +15% 装填速度 -10% [稳定射击] 射速 +8% 后坐力 -60% 暴击率 +20% 命中范围 -50% [近距离] 4米或以内伤害增加+22% 6米及以上伤害降低17% ____________________________________________________________________________ 【近距离强化】4米及以内伤害增加+36% 6米及以上伤害降低22% 射速+10% ____________________________________________________________________________ 【远距离】6米及以上伤害增加22% 4米及以内伤害降低-17% ____________________________________________________________________________ 【远距离强化】6米及以上伤害增加36% 4米及以内伤害降低-22% 暴击率+20% 射速-10% 后坐力+15% ____________________________________________________________________________ 【声波辅助】命中半径+50% ____________________________________________________________________________ 【索尼克辅助+】攻击范围+100%,穿透+1 ____________________________________________________________________________ 【稀有标签】火力+20%,射速+10%,穿透+1 ____________________________________________________________________________ 【1】100级武器 100级武器可通过火力、射速、弹容这3个类别进行总计30次的“超限升级”。 获取100级武器 除线上活动外,仅可在“红色代码”难度下,使用90级及以上角色获取100级武器。开启宝箱会随机获得武器和/或零件图鉴(每个关卡包含4个黄金宝箱),其中一个或多个可能为100级武器。
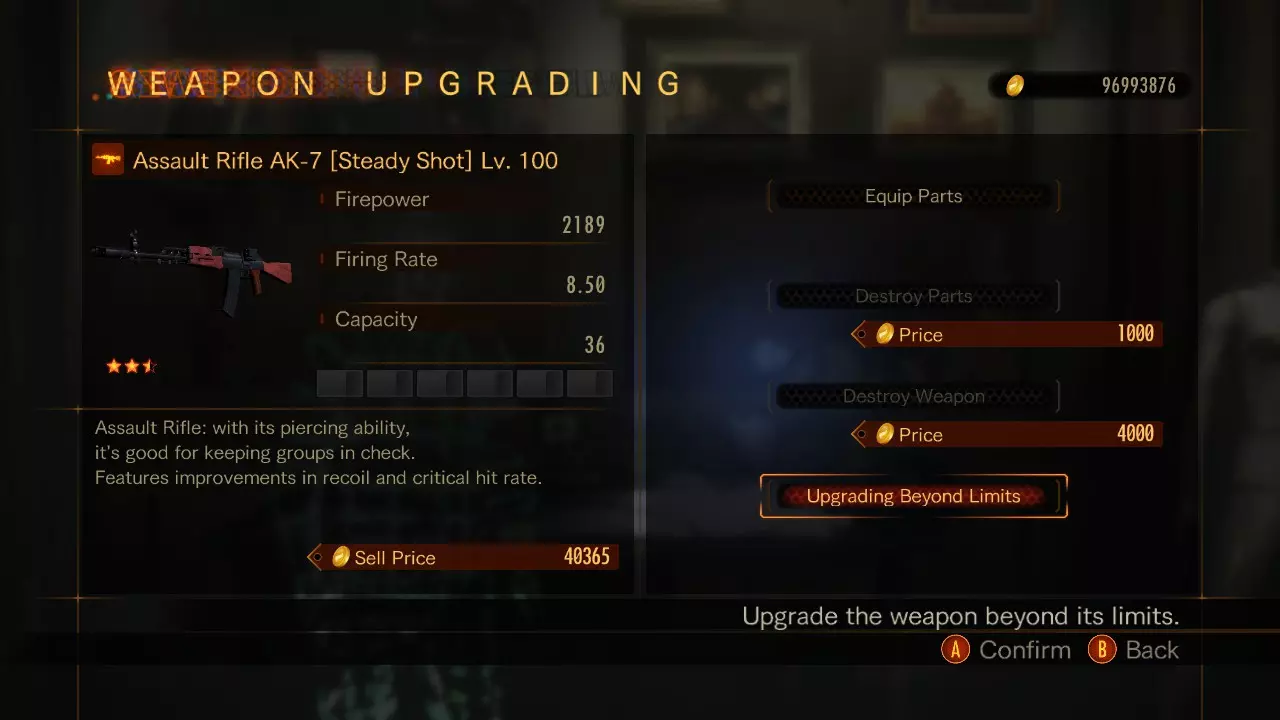
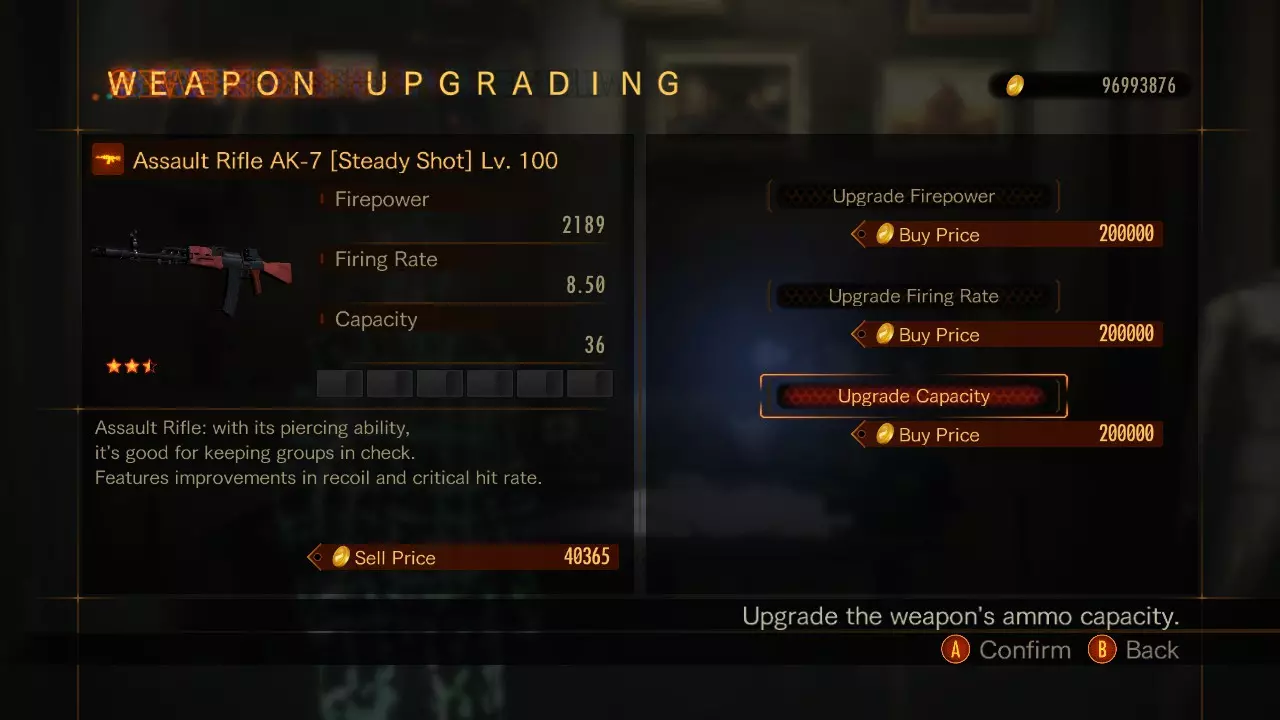
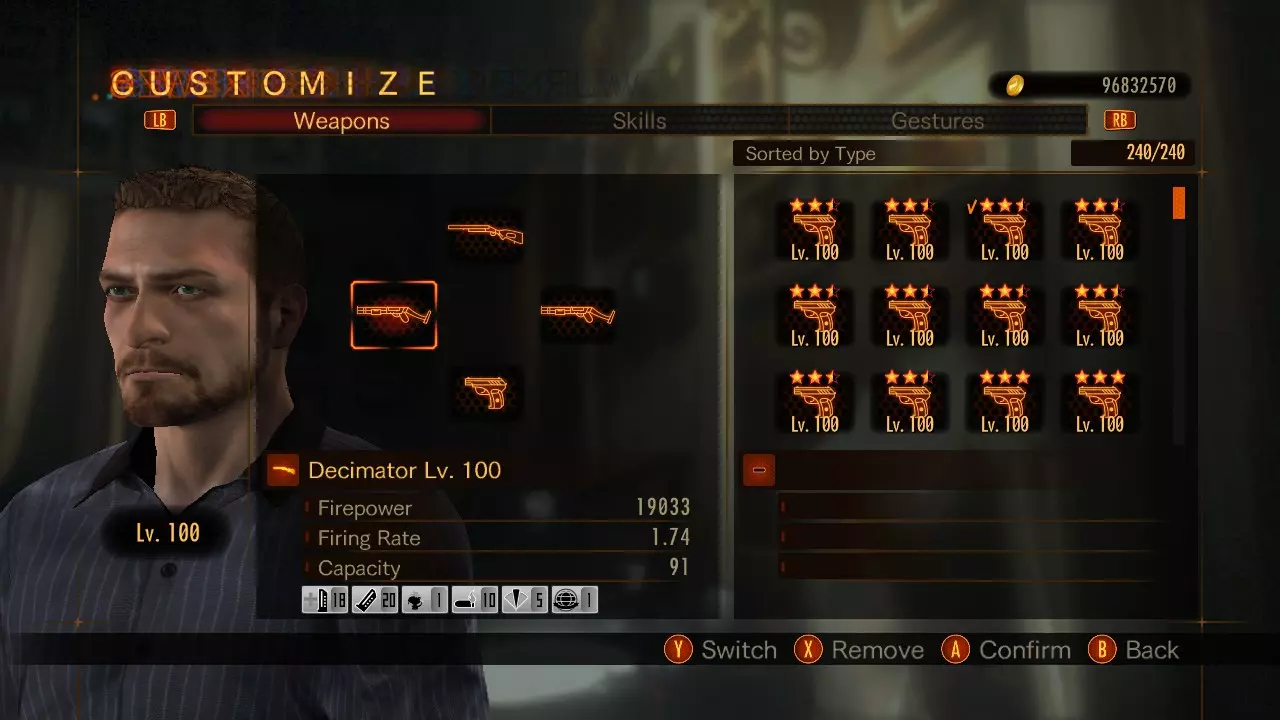
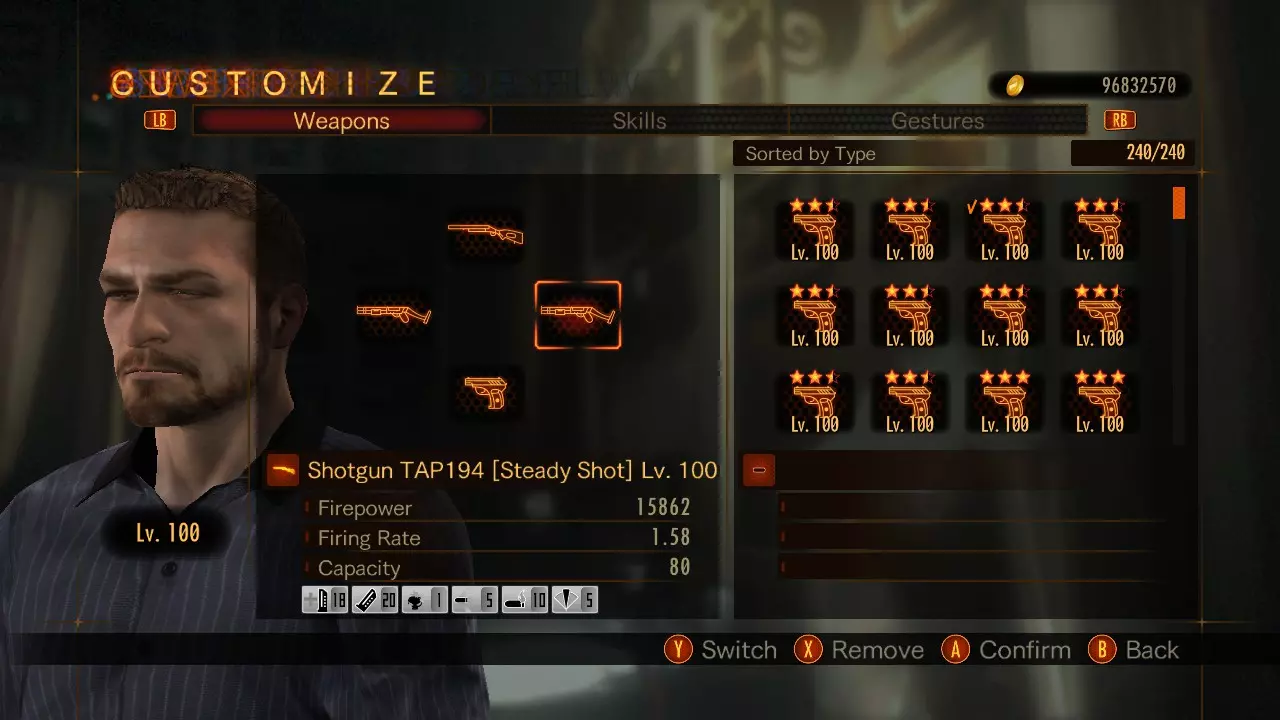
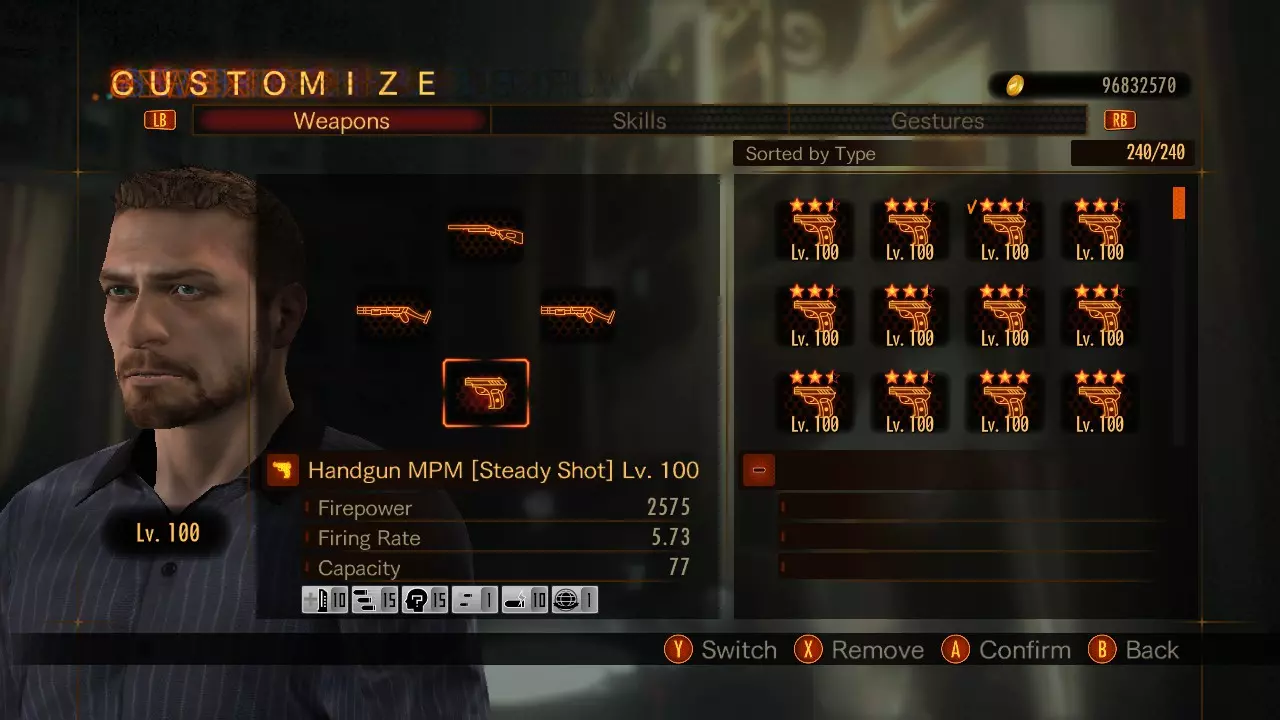
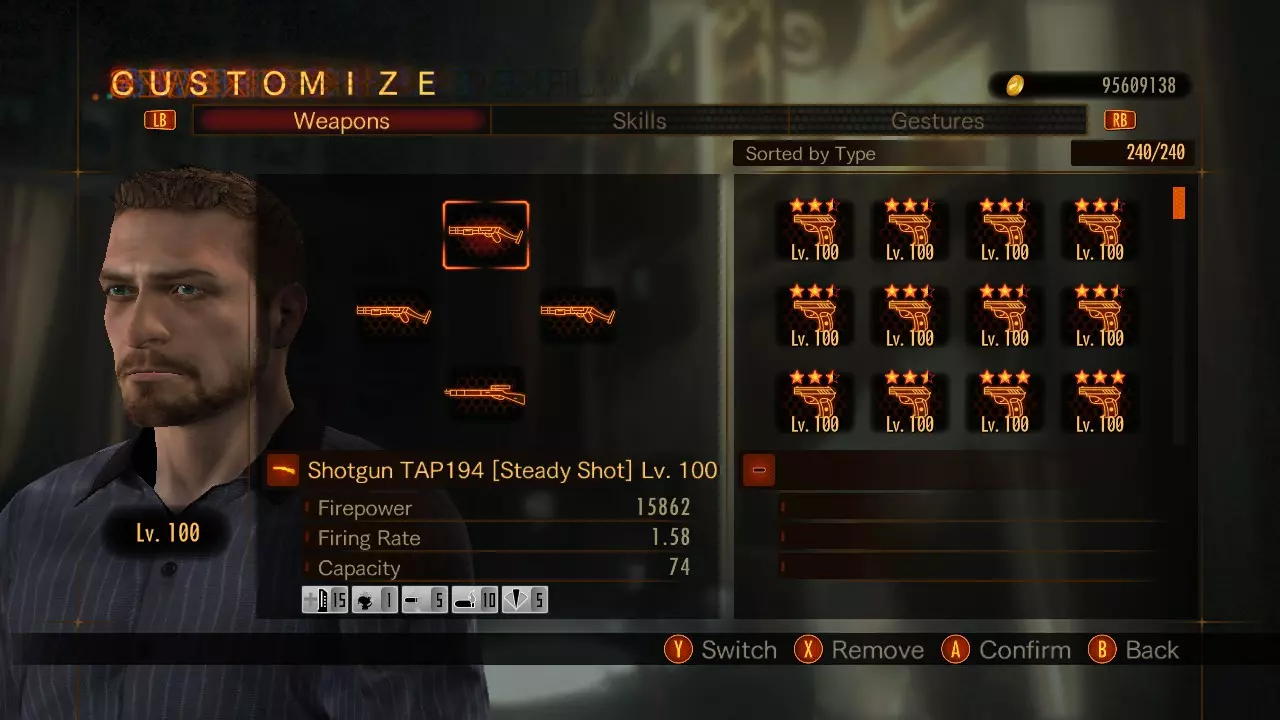
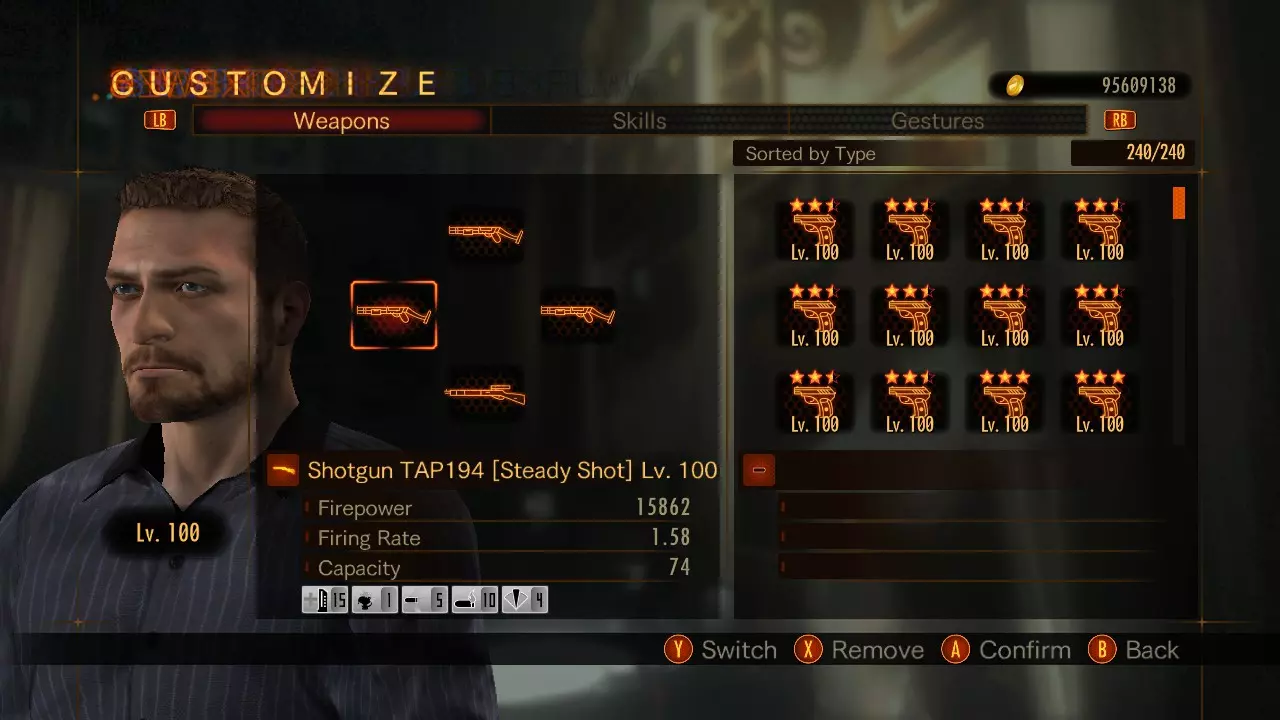
Once a Lv. 100 weapon is obtained you go to the workbench select it and choose the option "upgrading beyond limits". READ THE NEXT 3 SECTIONS BELOW FOR FURTHER DETAILS [2] Firepower For Lv. 100 weapons, there is absolutely no reason to ever upgrade firepower. It will NEVER benefit you over capacity at normal gameplay or any event. DO NOT UPGRADE FIREPOWER, PERIOD Example of why not to upgrade firepower Lv. 100 Python Firepower - 24205 Capacity - 8 Firepower Upgrade +30 Firepower - 31466 Capacity - 8 Total Damage Potential - 251728 Capacity Upgrade +30 Firepower - 24205 Capacity - 38 Total Damage Potential - 919790 The way the weapon mechanics work in this game upgrading capacity will benefit you over firepower upgrades. You can youtube online events to get a better understanding of the correct way to play the game. Revelations 2 Online Events Level Restricted Challenge Weekend Survivor Invasion of the Huge Creatures [3] Firing Rate For certain Lv. 100 weapons upgrading the firing rate 1, 2 or 3 times will increase the performance of the weapon. Meaning your firing rate should never be upgraded more than 3 times. NORMAL PLAYERS ONLY "the 99%" If a weapon has a tag that increases firing rate then it DOES NOT need firing rate upgrade, in that case you upgrade capacity 30 times. Tags that increase firing rate Speed Shot Steady Shot Short Range+ Rare Tag Weapons that will benefit from firing rate upgrade (If they do not have a firing rate tag) Shotguns - M147S, TAP194 Sniper Rifles - M1891/30, Muramasa Magnums - Model 329, 2005M Fast firing rate Any weapon with a tag that increases firing rate has “fast” firing rate built-in and does not need any firing rate upgrades. For other tags you can add a firing rate part or BSAA and/or up to 3 firing rate upgrades if needed. Some examplesM147S - 3.03 TAP194 - 1.48 [Long Range+] Muramasa - .61 (firing rate upgrade +2, BSAA, capacity upgrade +28) [Long Range+] Muramasa - .61 (firing rate part Lv. 6+, capacity upgrade +30) Professional players might need the extra ammo that BSAA provides. PROFESSIONAL PLAYERS ONLY "the 1%" High speed firing rate Some weapons have a high speed firing rate that require a combination of firing rate upgrade, high level to max level firing rate part and BSAA. Some examplesM147S - 4.53 MP-AB50 & MP-AB50G - 22.50 MP-AF - 25.73 Chicago Typewriter - 24.00 [4] Capacity For Lv. 100 weapons, 99% of the time you want to upgrade capacity 30 times. In certain cases you will need to upgrade firing rate also to meet competitive speed. If you have no intention of ever playing competitively, then you should upgrade capacity 30 times for all level 100 weapons. Example 1[Untagged] Muramasa 5 Slots Upgrade: Firing Rate +1, Capacity +29 New Stats: Firing Rate 0.61, Capacity 34 Example 2[Steady Shot] M147S Upgrade: Firing Rate +3, Capacity +27 Parts:Firing Rate Lv.20, BSAA Enables high speed mode for the M147S (firing rate at least 4.53) Anti-materiel Rifles Always capacity upgrade +30 [1] The Lv. 20 Parts - Damage, Capacity, Firing Rate, Quick Load Damage Tags[Short Range], [Short Range+], [Long Range], [Long Range+] and [Rare Tag] increases firepower. Only [Rare Tag] firepower increase will be reflected on the weapon stats. Damage PartPart Level 1. Increases firepower by 3% 2. Increases firepower by 5% 3. Increases firepower by 6% 4. Increases firepower by 7% 5. Increases firepower by 9% 6. Increases firepower by 11% 7. Increases firepower by 13% 8. Increases firepower by 15% 9. Increases firepower by 18% 10. Increases firepower by 21% 11. Increases firepower by 23% 12. Increases firepower by 27% 13. Increases firepower by 30% 14. Increases firepower by 34% 15. Increases firepower by 38% 16. Increases firepower by 42% 17. Increases firepower by 46% 18. Increases firepower by 51% 19. Increases firepower by 55% 20. Increases firepower by 60% Capacity Tags[Speed Shot] and [Speed Load] tag increases capacity. Capacity PartPart Level 1. Increases ammo capacity by 5% 2. Increases ammo capacity by 10% 3. Increases ammo capacity by 15% 4. Increases ammo capacity by 20% 5. Increases ammo capacity by 25% 6. Increases ammo capacity by 30% 7. Increases ammo capacity by 35% 8. Increases ammo capacity by 40% 9. Increases ammo capacity by 45% 10. Increases ammo capacity by 50% 11. Increases ammo capacity by 55% 12. Increases ammo capacity by 60% 13. Increases ammo capacity by 65% 14. Increases ammo capacity by 70% 15. Increases ammo capacity by 75% 16. Increases ammo capacity by 80% 17. Increases ammo capacity by 85% 18. Increases ammo capacity by 90% 19. Increases ammo capacity by 95% 20. Increases ammo capacity by 100% Firing Rate Tags[Short Range+], [Speed Shot], [Steady Shot] and [Rare Tag] tag increases firing rate. Firing Rate PartPart Level 1. Increases firing rate by 4% 2. Increases firing rate by 5% 3. Increases firing rate by 7% 4. Increases firing rate by 8% 5. Increases firing rate by 9% 6. Increases firing rate by 11% 7. Increases firing rate by 12% 8. Increases firing rate by 13% 9. Increases firing rate by 15% 10. Increases firing rate by 16% 11. Increases firing rate by 18% 12. Increases firing rate by 19% 13. Increases firing rate by 20% 14. Increases firing rate by 22% 15. Increases firing rate by 23% 16. Increases firing rate by 24% 17. Increases firing rate by 26% 18. Increases firing rate by 27% 19. Increases firing rate by 28% 20. Increases firing rate by 30% Quick Load Tags[Speed Load] tag increases reload speed. Quick Load PartPart Level 1. Increases reload speed by 5% 2. Increases reload speed by 7% 3. Increases reload speed by 9% 4. Increases reload speed by 11% 5. Increases reload speed by 13% 6. Increases reload speed by 16% 7. Increases reload speed by 18% 8. Increases reload speed by 20% 9. Increases reload speed by 22% 10. Increases reload speed by 24% 11. Increases reload speed by 26% 12. Increases reload speed by 28% 13. Increases reload speed by 30% 14. Increases reload speed by 32% 15. Increases reload speed by 34% 16. Increases reload speed by 37% 17. Increases reload speed by 39% 18. Increases reload speed by 41% 19. Increases reload speed by 43% 20. Increases reload speed by 45% [2] The Lv. 20 Parts - Daze Daze PartIncreases the power to stun enemies. Percentage stun power per bullet or shot (7 per shell) is based on weapon type and part level. Part Level 1 2 3 4 5 6 7 8 9 10 Pistols 48% 76% 106% 135% 164% 193% 222% 252% 280% 309% Shotguns 56% 89% 124% 158% 191% 225% 259% 294% 327% 361% Machine Pistols 40% 64% 89% 113% 137% 161% 185% 210% 234% 258% Assault Rifles 40% 64% 89% 113% 137% 161% 185% 210% 234% 258% Sniper Rifles 42% 67% 93% 118% 143% 169% 194% 220% 254% 270% Magnums 40% 64% 89% 113% 137% 161% 185% 210% 234% 258% Part Level 11 12 13 14 15 16 17 18 19 20 Pistols 338% 367% 397% 426% 454% 483% 512% 542% 571% 600% Shotguns 394% 428% 463% 497% 530% 564% 597% 632% 666% 700% Machine Pistols 282% 306% 331% 355% 379% 403% 527% 452% 476% 500% Assault Rifles 282% 306% 331% 355% 379% 403% 427% 452% 476% 500% Sniper Rifles 296% 321% 347% 372% 397% 423% 448% 474% 599% 525% Magnums 282% 306% 331% 355% 379% 403% 427% 452% 476% 500% Easy Hit Tags[Sonic Assist] tag increase bullet hit zone by 50%. [Sonic Assist+] tag increase bullet hit zone by 100% and adds piercing +1. Easy Hit PartPart Level 1. Increases bullet hit zone by 10% 2. Increases bullet hit zone by 20% 3. Increases bullet hit zone by 30% 4. Increases bullet hit zone by 40% 5. Increases bullet hit zone by 50% 6. Increases bullet hit zone by 60% 7. Increases bullet hit zone by 70% 8. Increases bullet hit zone by 80% 9. Increases bullet hit zone by 90% 10. Increases bullet hit zone by 100% Hit Zone Demo
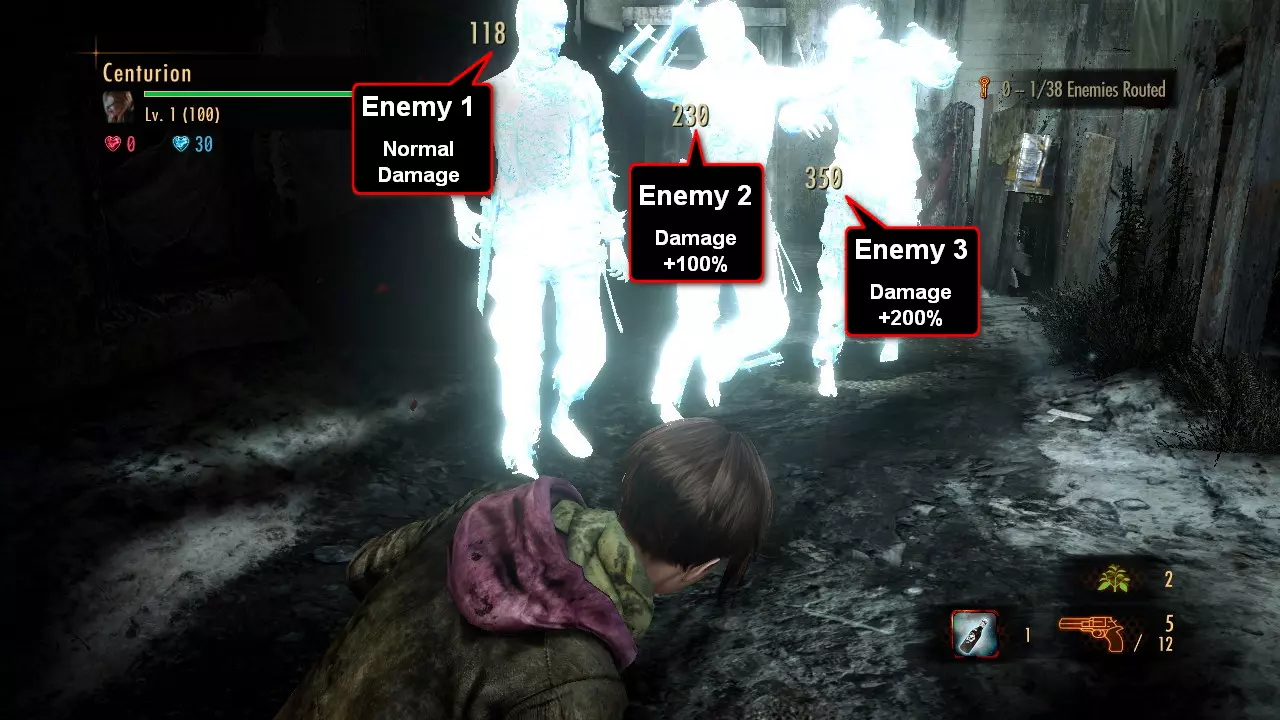
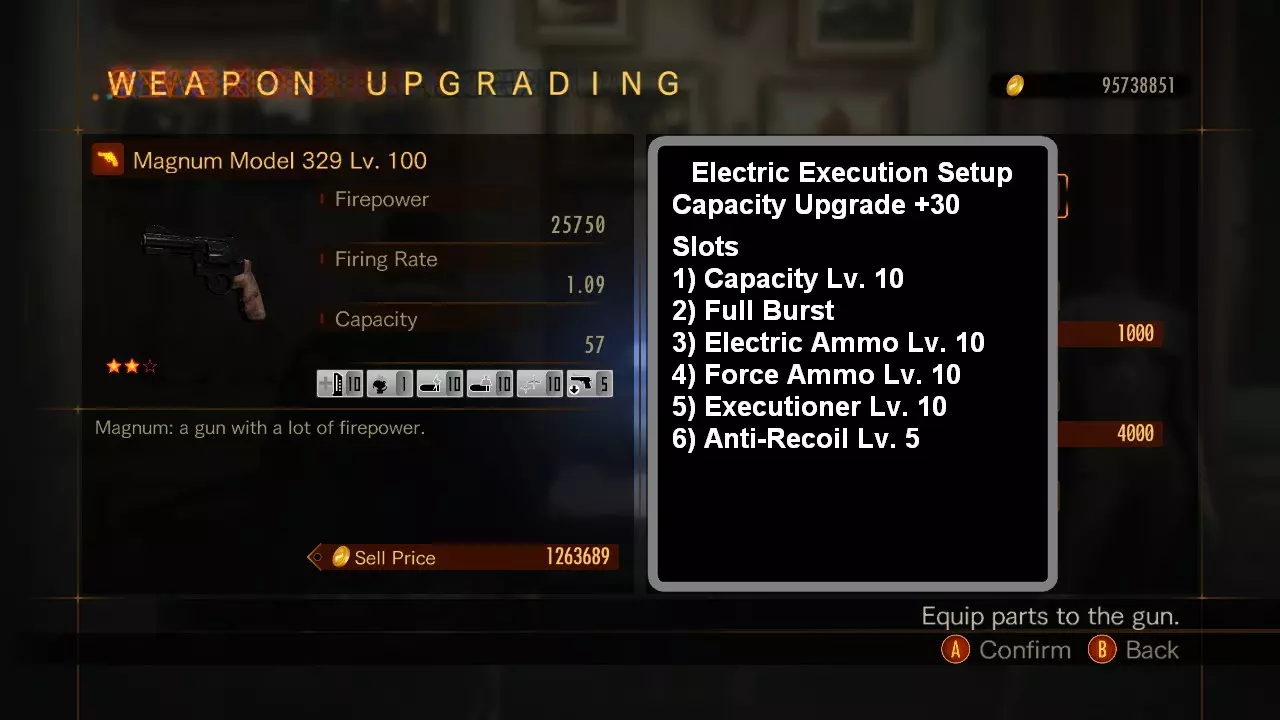
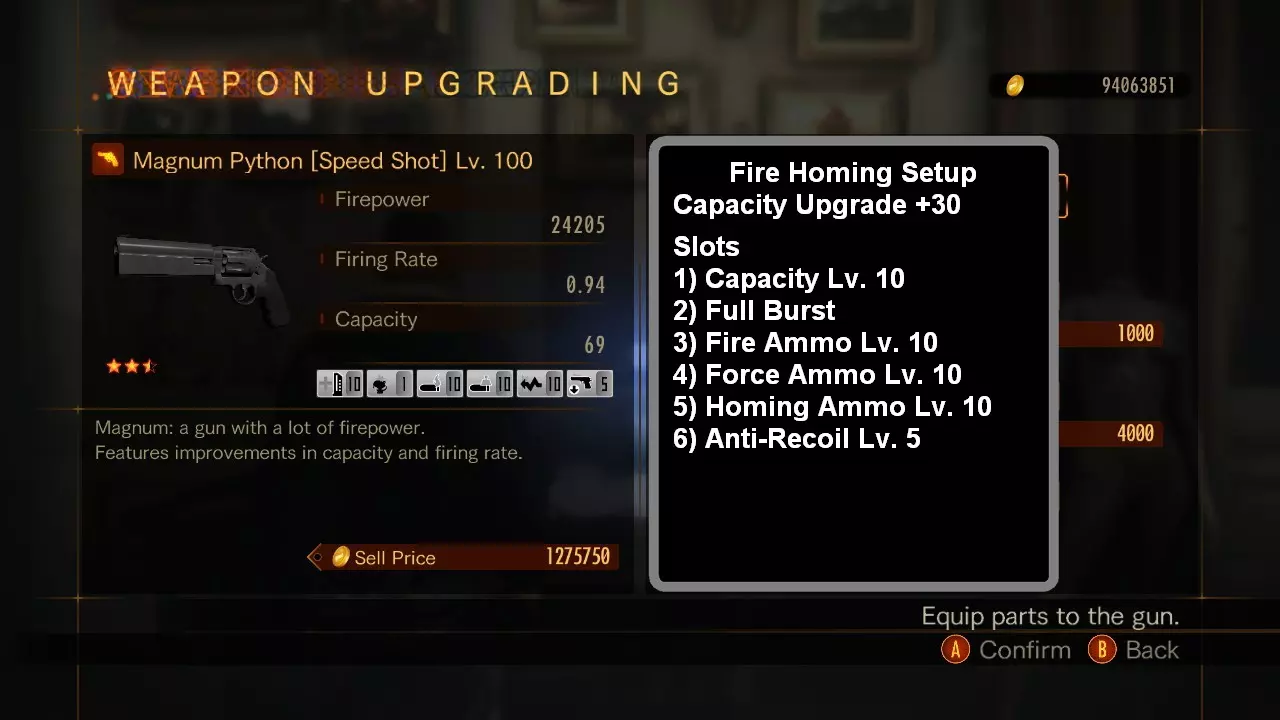
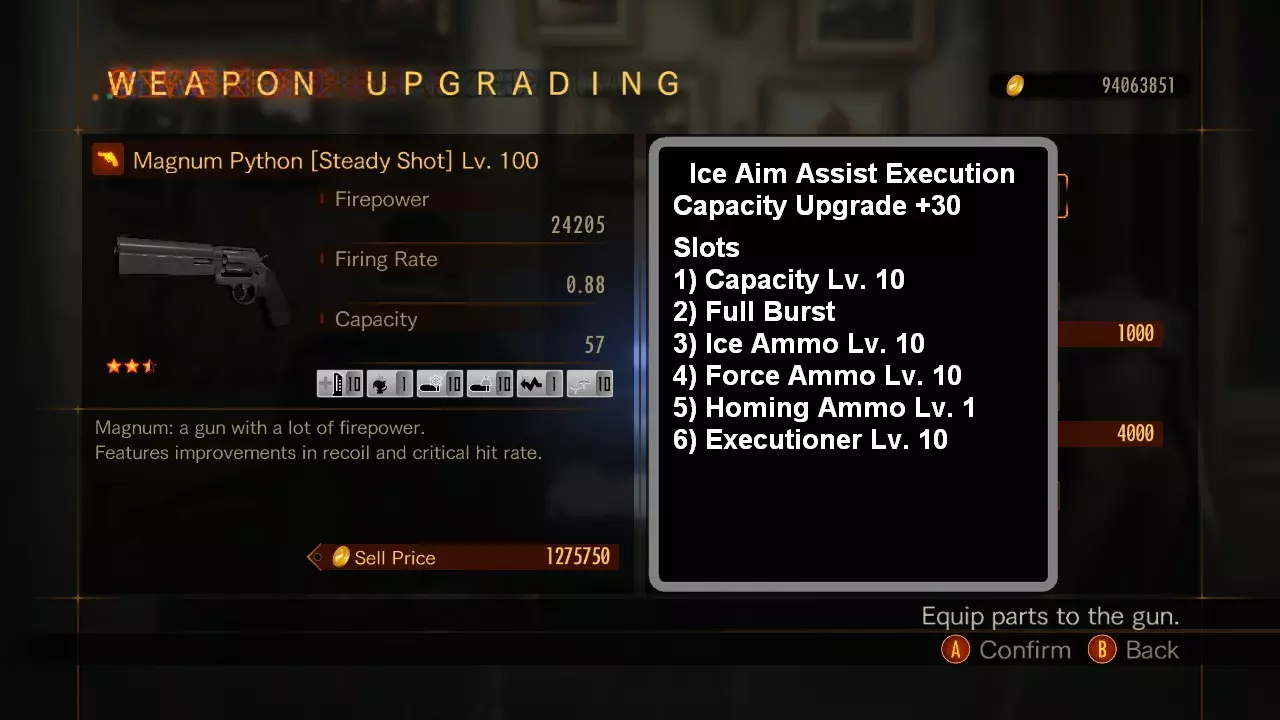
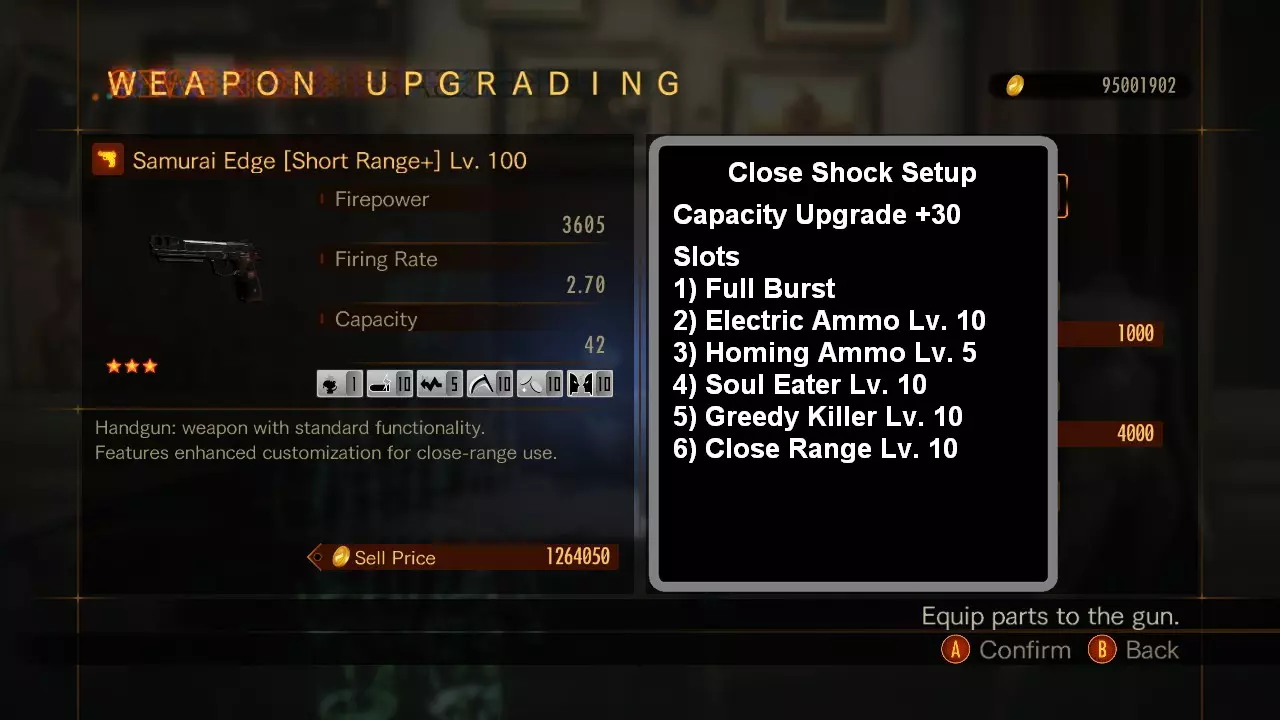
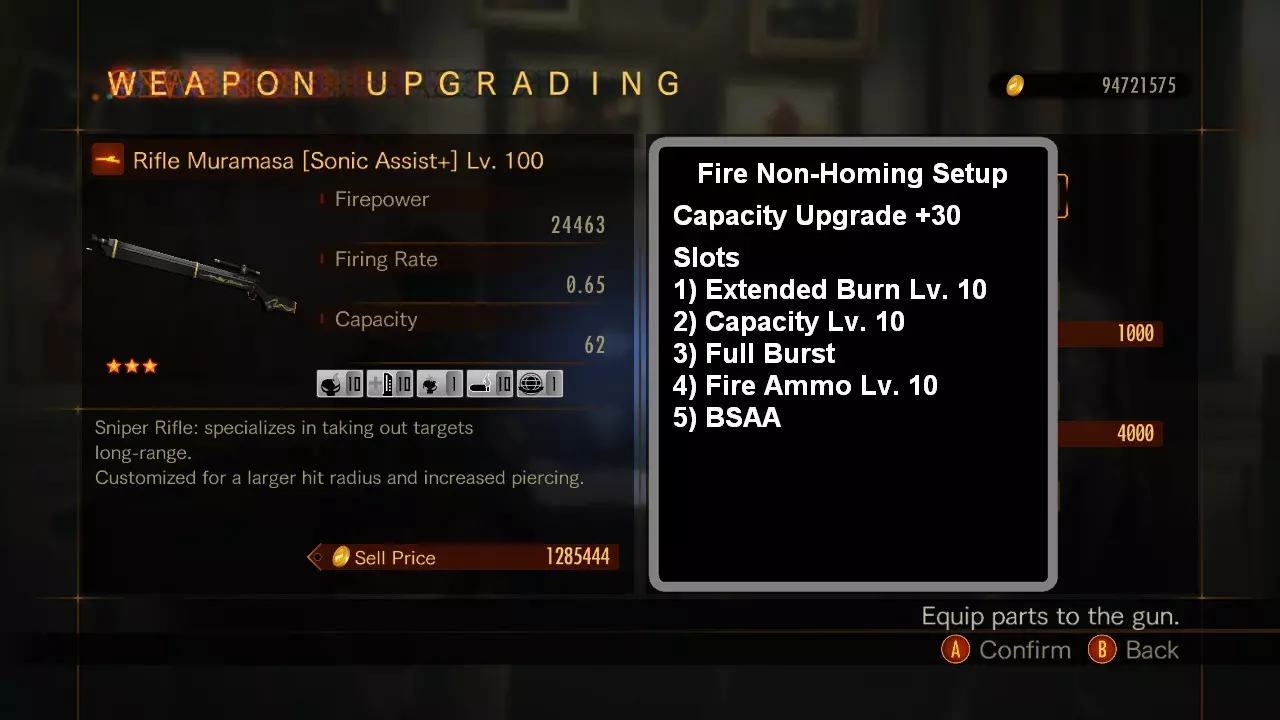
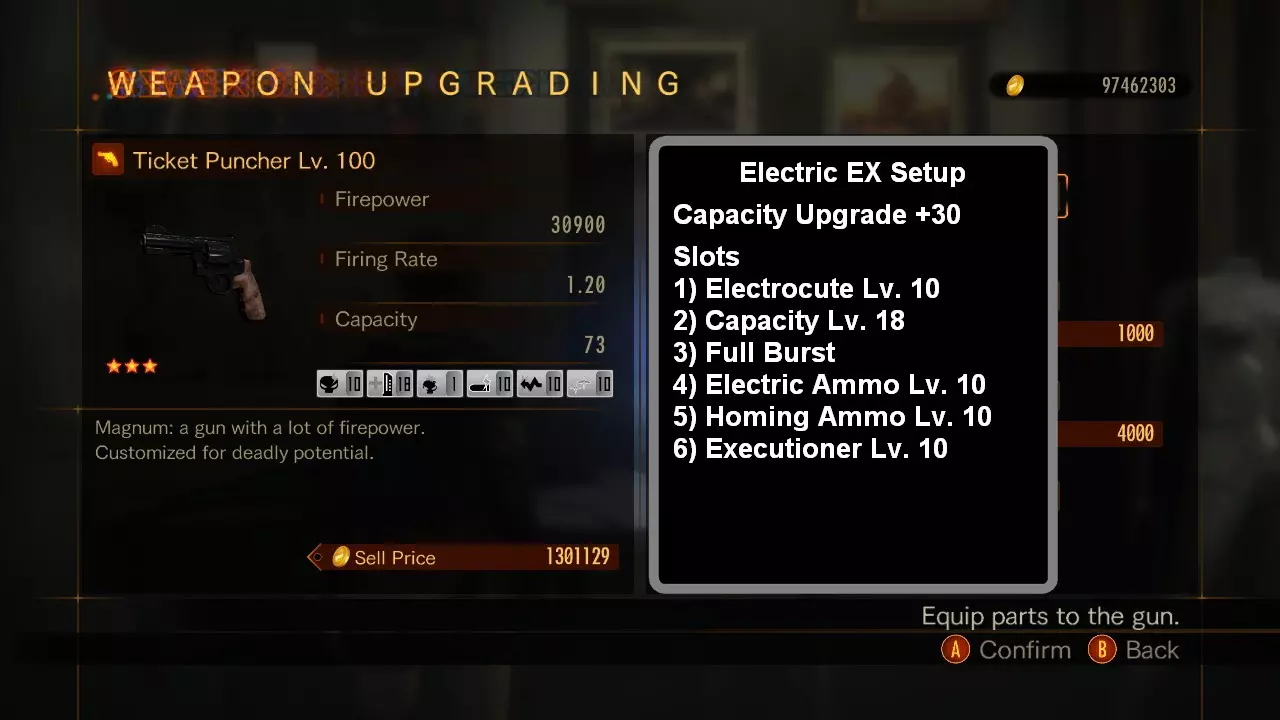
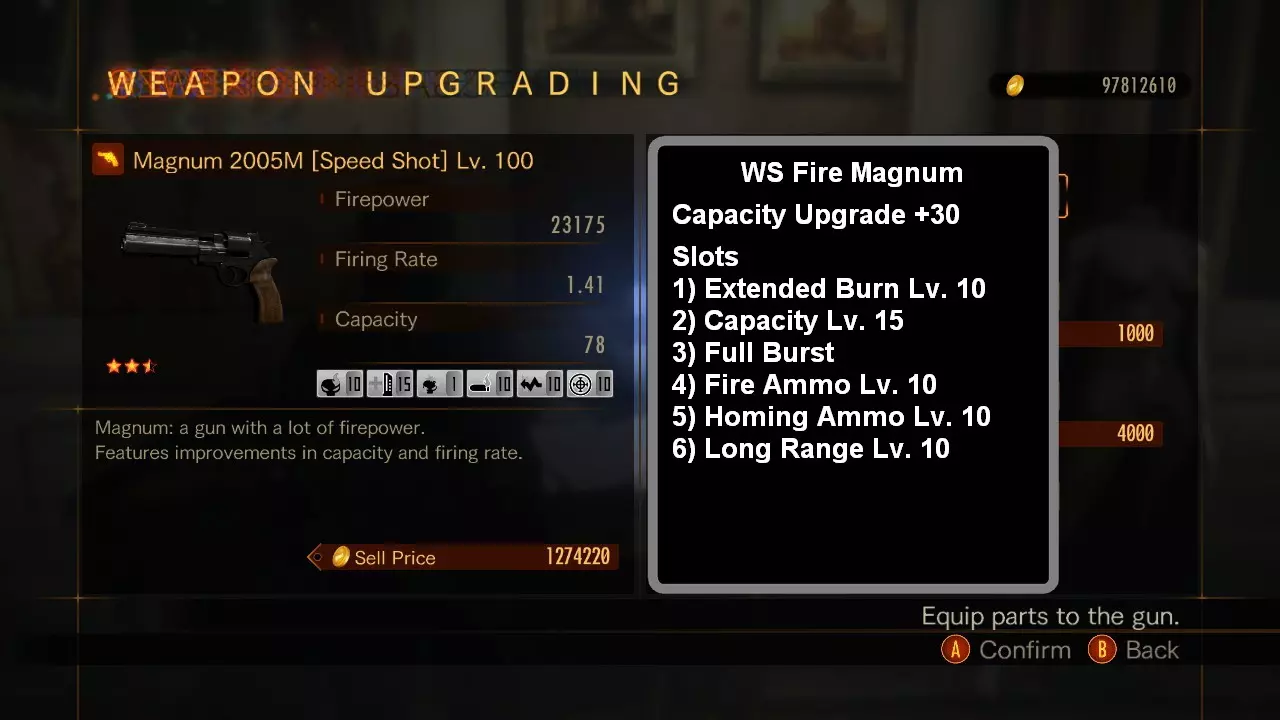
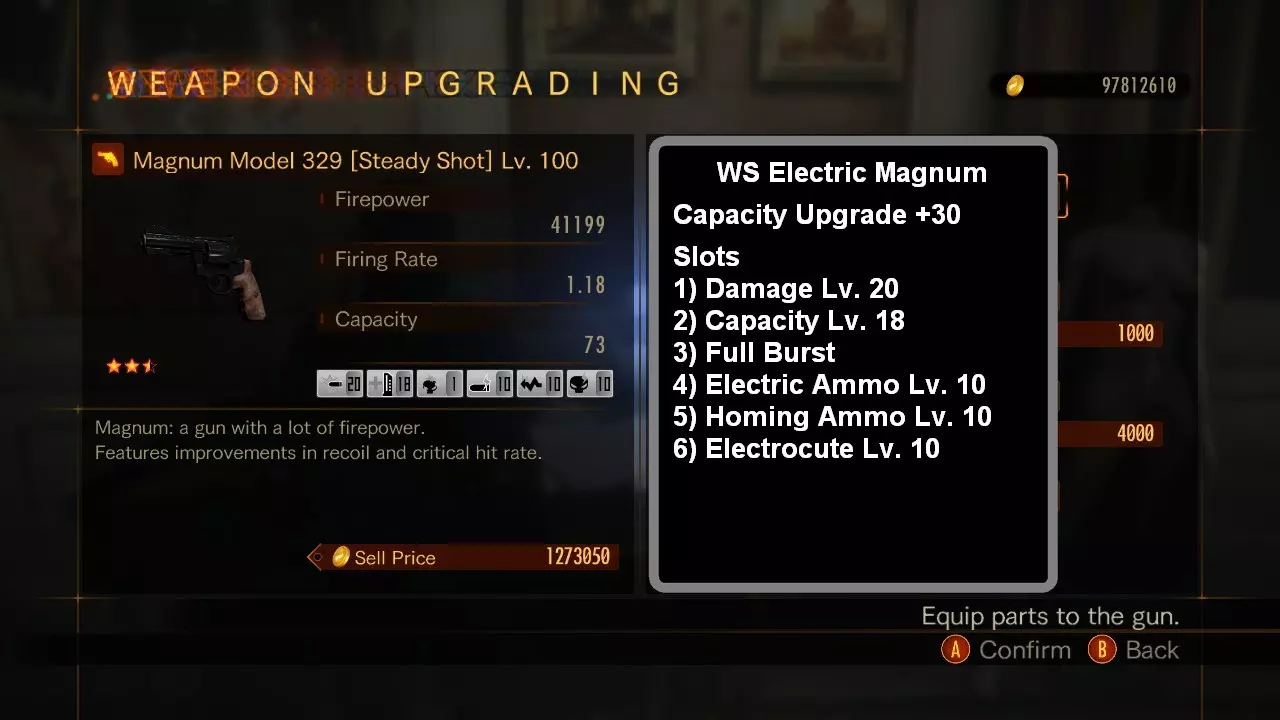
最大命中区域提升200%([Sonic Assist+]标签和易击中10级部件)。 命中区域提升对所有武器均有效,但搭配狙击步枪使用效果最佳。 该效果不适用于追踪弹药。 **爆发部件** - Burst +1:一次发射2发子弹 *搭配三连发手枪时,一次发射4发子弹* - Burst +2:一次发射3发子弹 *搭配三连发手枪时,一次发射5发子弹* - Full Burst:一次发射所有子弹 使用全爆发部件时,需要被动技能“闪避取消”。 闪避取消可从阿尔伯特·威斯克处继承。 **暴击** - 标签:[Steady Shot]和[Long Range+]标签可提升20%暴击率。 - 暴击部件等级: 1. 暴击率提升6% 2. 暴击率提升8% 3. 暴击率提升11% 4.暴击率提升14% 5. 暴击率提升17% 6. 暴击率提升19% 7. 暴击率提升22% 8. 暴击率提升25% 9. 暴击率提升27% 10.暴击率提升30% 武器 按武器类型划分的内置暴击率和暴击伤害 |武器类型|暴击率|暴击伤害| |----|----|----| |手枪|15%|+75%| |霰弹枪|2%|+50%| |冲锋手枪|3%|+50%| |突击步枪|5%|+50%| |反器材步枪| | | |M1890/30|10%|+50%| |SVD|5%|+50%| |村正(Muramasa)|10%|+100%| |马格南左轮|10%|+50%| 暴击计算示例 马格南左轮 - 329型 [稳定射击] 等级100 6槽位 |槽位| | |----|----| |1|伤害等级20| |2|弹容量等级|18 3 全力爆发 4 火焰弹药 Lv. 10 5 追踪弹药 Lv. 10 6 暴击 Lv. 10 暴击率 麦格农武器类型增加10%暴击率 + 【稳定射击】标签增加20%暴击率 + 暴击 Lv. 10部件增加30%暴击率 最终暴击率:60% 暴击伤害 火力:25750 + 伤害 Lv. 20增加60%火力:15450 = 最终火力:41200 + 暴击伤害为最终火力的50% 20600 最终暴击伤害:61800 穿透 标签【声波辅助+】和【稀有标签】增加穿透+1 对于内置穿透的武器(突击步枪、狙击步枪和麦格农),穿透等级将提升一级。【无标签】Python - 穿刺 +1 【声波辅助+】Python - 穿刺 +2 【稀有标签】Python - 穿刺 +2 穿刺部件等级 1. 穿刺等级提升+1 2. 穿刺等级提升+2 3. 穿刺等级提升+3 4. 穿刺等级提升+3,穿刺攻击伤害增加40% 5. 穿刺等级提升+3,穿刺攻击伤害增加100% 穿刺等级5级示例 敌人1 - 普通伤害 敌人2 - 伤害增加100% 敌人3 - 伤害增加200% 敌人4 - 伤害增加300%
武器 未标记武器的内置穿透等级 穿透等级 武器 0级 MPM、P10、武士之刃、三连发、M147S、TAP194、九头蛇、MP-AF、MP-AB50、MP-AB50G、芝加哥打字机 1级 德雷克、AK-7、NSR47、豪赌者、M1891/30、SVD、村正、蟒蛇、329型、2005M、苍白骑士 2级 水蟒 3级 反器材步枪 元素弹药 发射带有元素属性(火焰、冰冻或电击)的子弹。 每发子弹或每发射击(每发炮弹7次)的元素触发概率基于武器类型和部件等级。等级 1 2 3 4 5 6 7 8 9 10 手枪 9% 12% 16% 19% 23% 26% 30% 33% 37% 40% 霰弹枪 4% 5% 7% 9% 10% 12% 14% 15% 17% 19% 冲锋手枪 6% 6% 7% 8% 8% 9% 10% 10% 11% 12% 突击步枪 7% 9% 10% 11% 12% 14% 15% 16% 17% 19% 狙击步枪 50% 55% 61% 66% 72% 77% 83% 88% 94% 100% 马格南 63% 67% 71% 76% 80% 84% 88% 92% 96% 100% 火焰弹药:火焰弹药会在一段时间内造成燃烧伤害。燃烧伤害由角色等级、武器类型和堆叠数量决定。 冰冻弹药:冰冻弹药造成冰冻伤害并使敌人进入冰冻状态,降低其移动速度。 - 1层冰冻:降低敌人50%移动速度 - 2层冰冻:使敌人停止移动约2秒 电击弹药:电击弹药会使敌人进入电击状态。1层电击效果会使敌人在约3秒内受到50%额外伤害 2层电击效果会使敌人在约3秒内受到100%额外伤害 *BUG* 有时,在麦林枪或步枪上使用10级元素弹药时,某一发子弹可能无法造成元素伤害。这只是一个bug,正常情况下元素触发率应为100%。 强制弹药与武器 会使子弹对敌人造成一定程度的击退效果。 击退幅度由武器类型和部件等级决定。部件等级 1 2 3 4 5 6 7 8 9 10 手枪 20 25 30 35 40 44 49 54 59 64 霰弹枪 5 9 13 17 21 25 29 33 37 41 冲锋手枪 6 8 10 12 13 15 17 19 21 23 突击步枪 9 12 14 17 19 22 24 27 29 32 狙击步枪 35 48 60 73 85 98 110 123 135 148 马格南 35 46 57 68 79 90 101 112 123 134 **手枪** 原力手枪可用于室内场景或需要近距离击退的场景。 **通用设置** 所有非追踪设置均需要【稳定射击】标签。 你可以降低追踪弹药等级,以获得“瞄准辅助”的非追踪手感。追踪弹药等级2只会击退你瞄准的敌人。 **元素效果** 由于10级部件的元素触发概率最高为40%,因此你可以组合如10级冰弹药和眩晕等部件。 示例


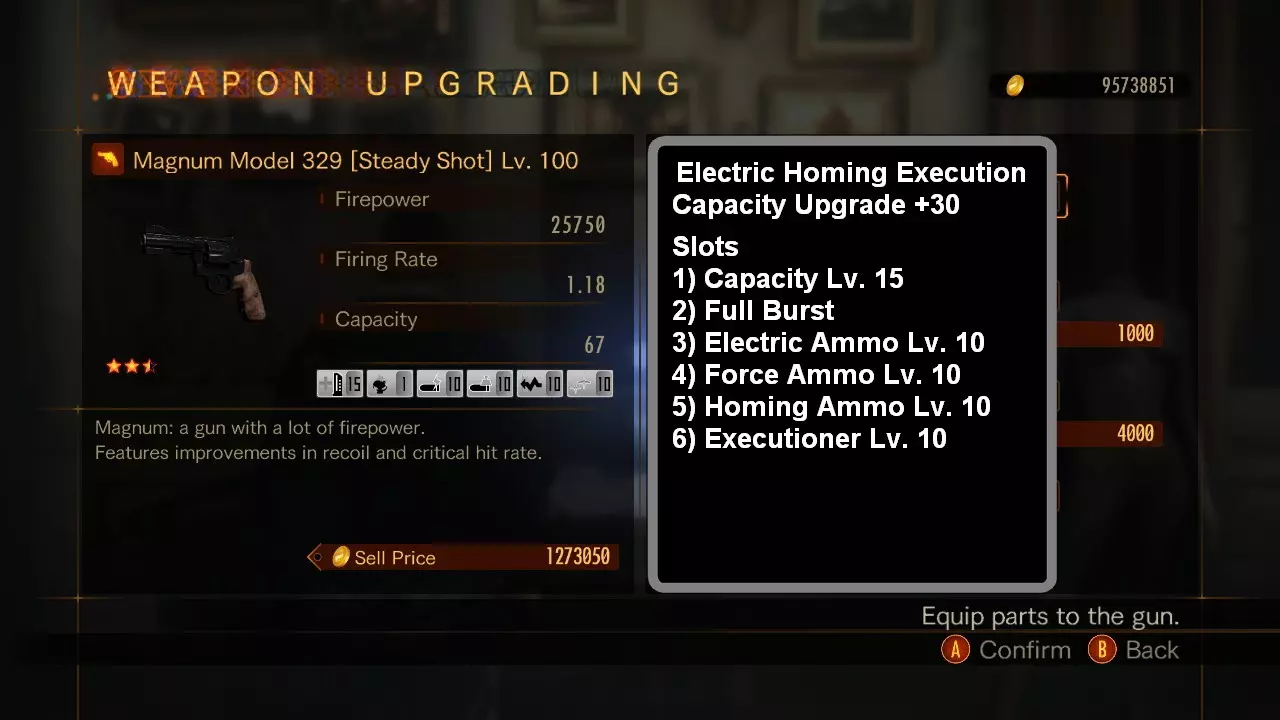
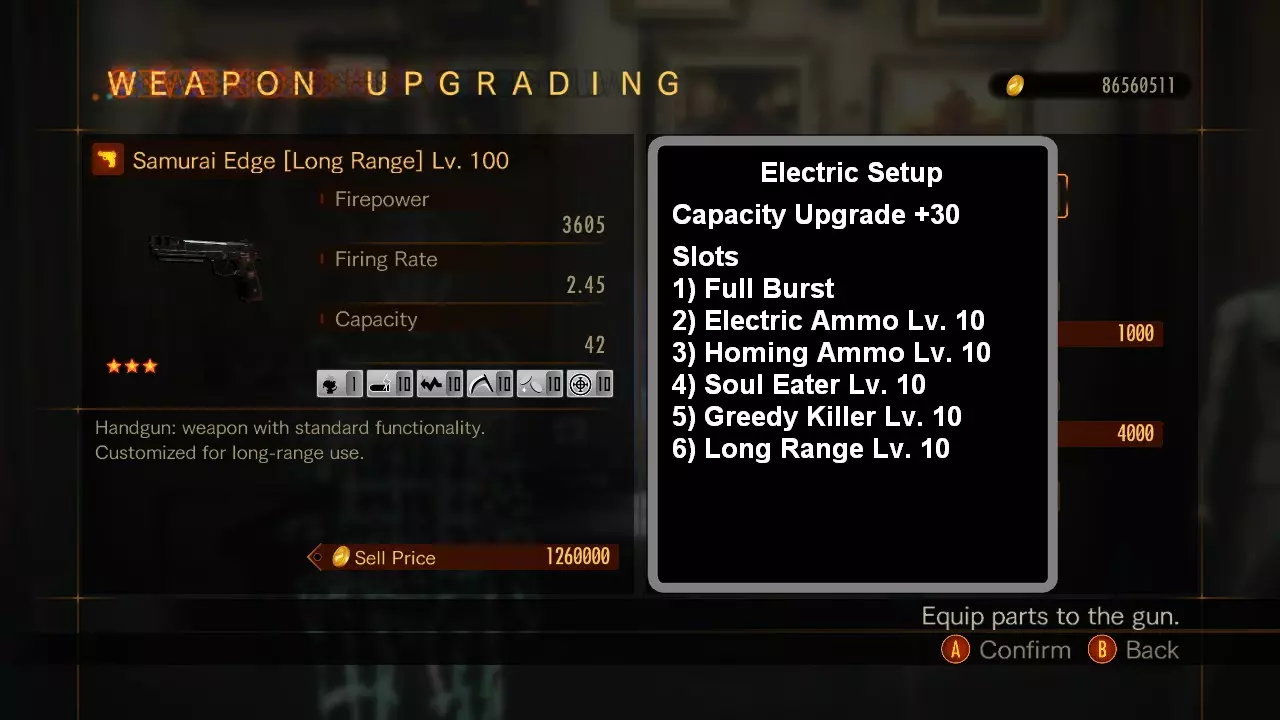
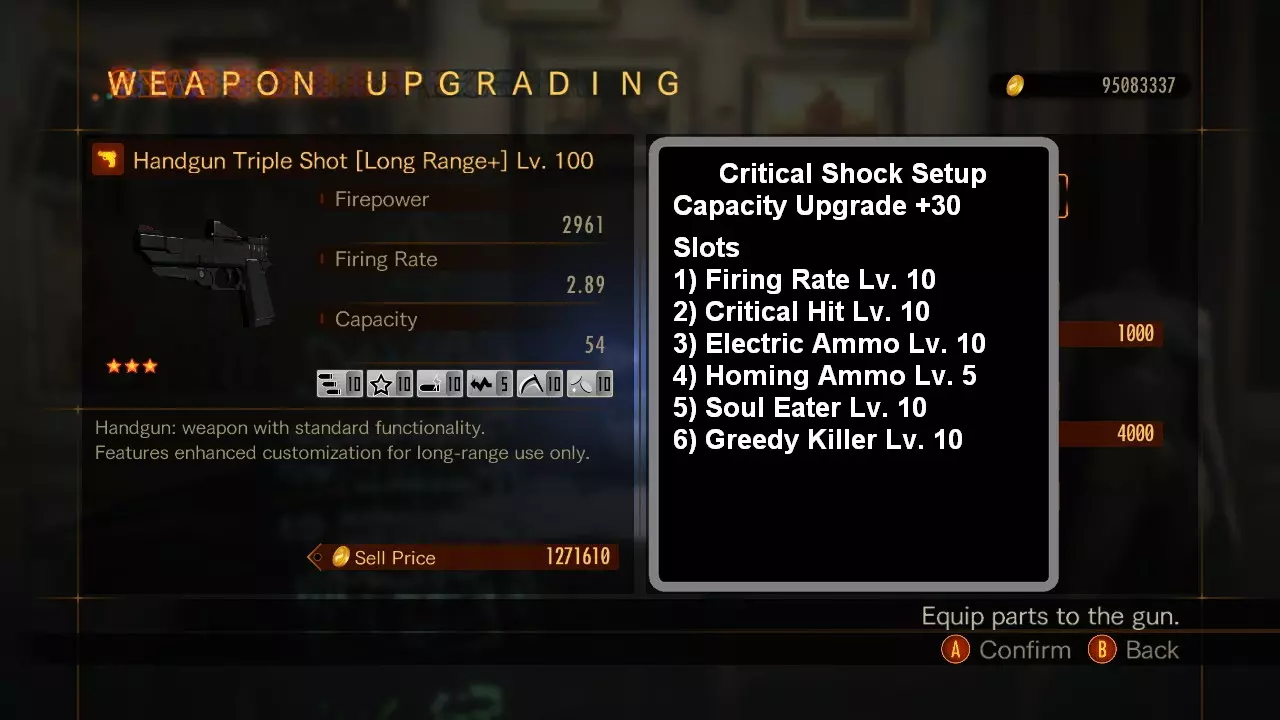
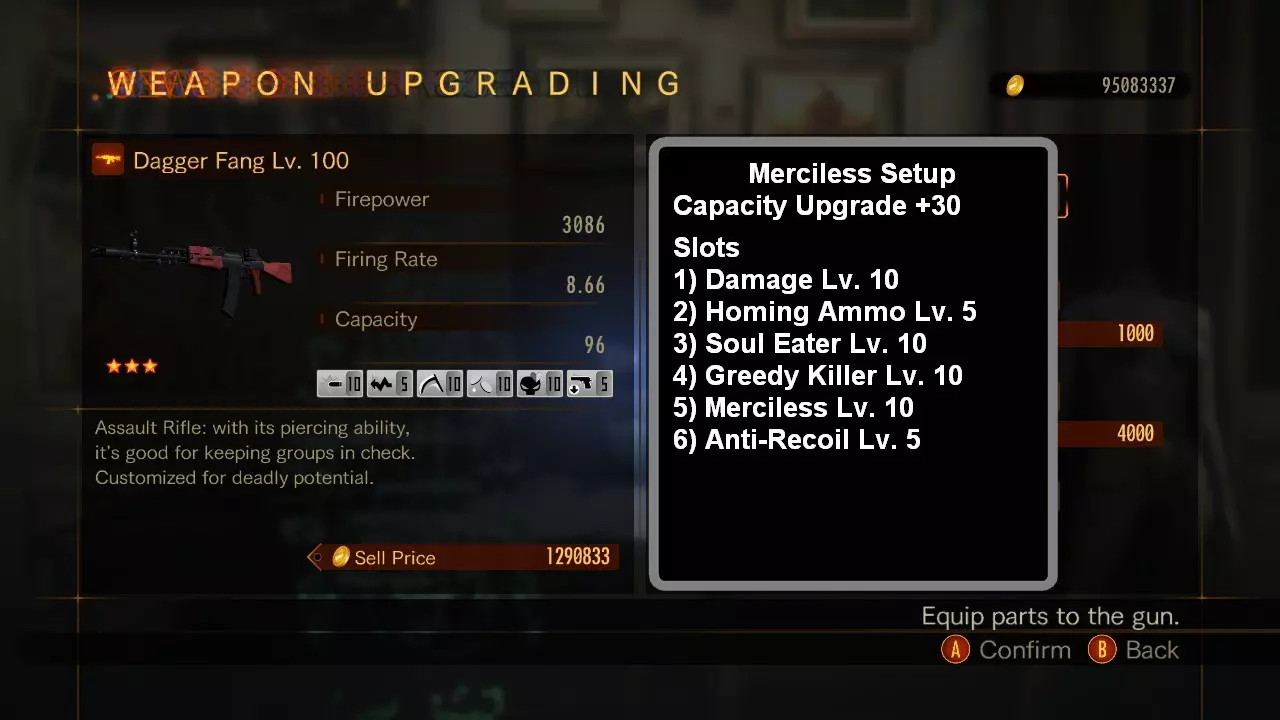
马格南***对于未标记的Model 329或2005M,将射速提升+1至+3可显著影响其性能。*** 你可以降低制导弹药等级,以获得“瞄准辅助”的非制导手感。制导弹药等级2只会推动你瞄准的敌人。 示例


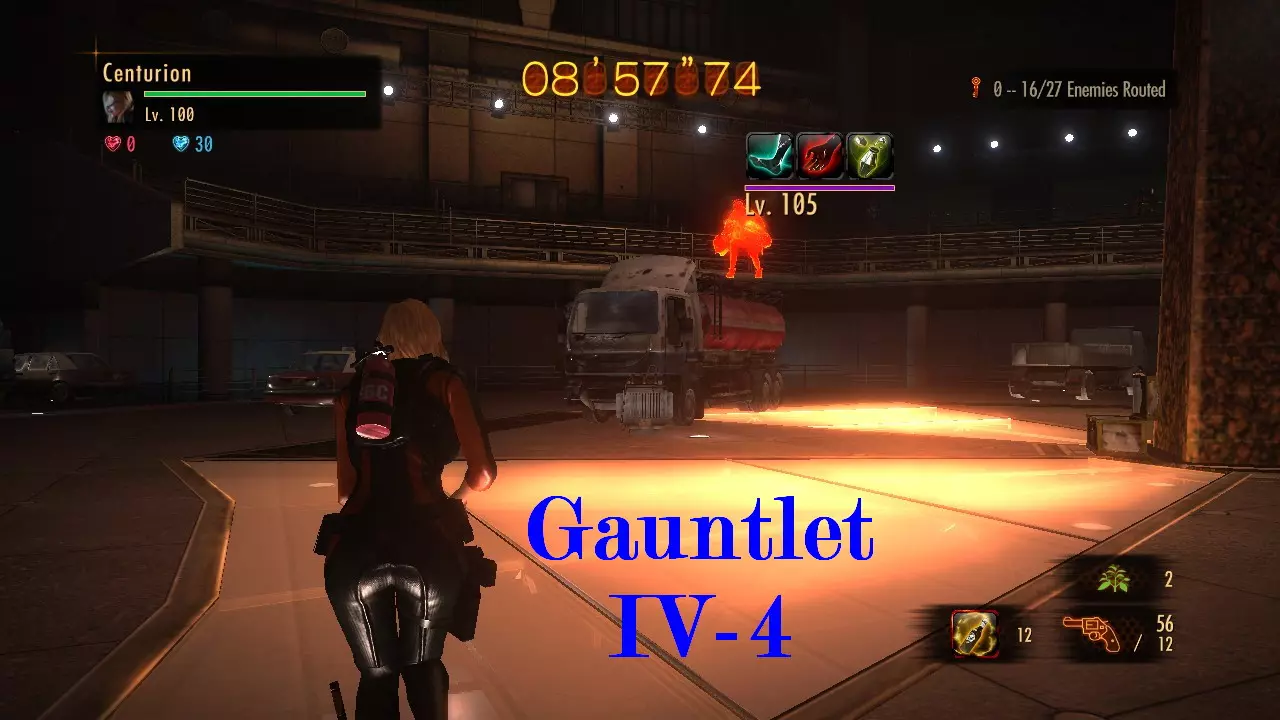
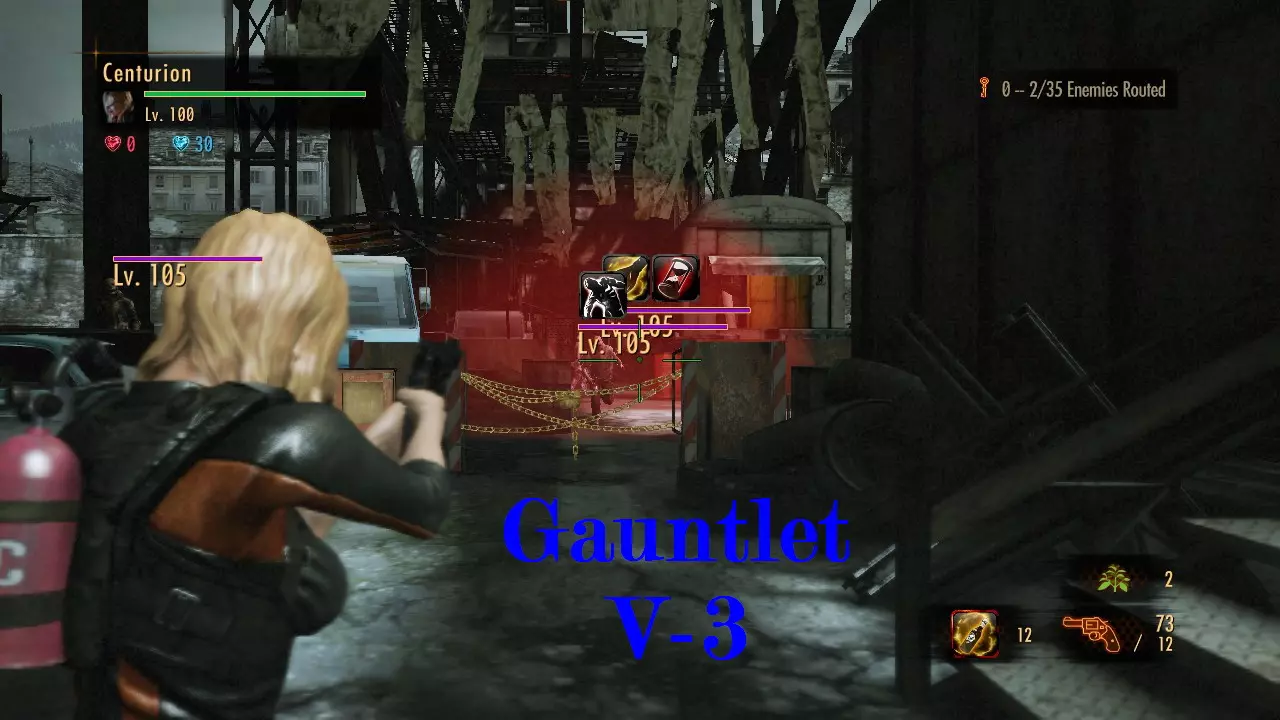
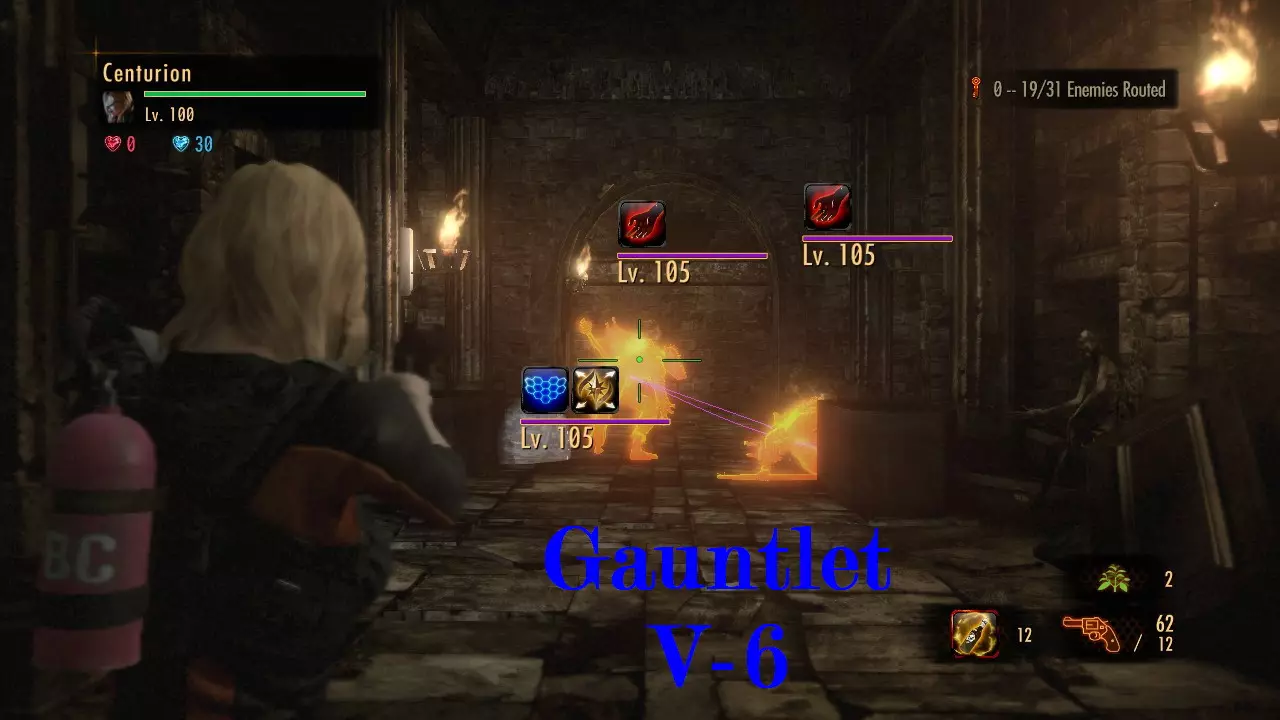
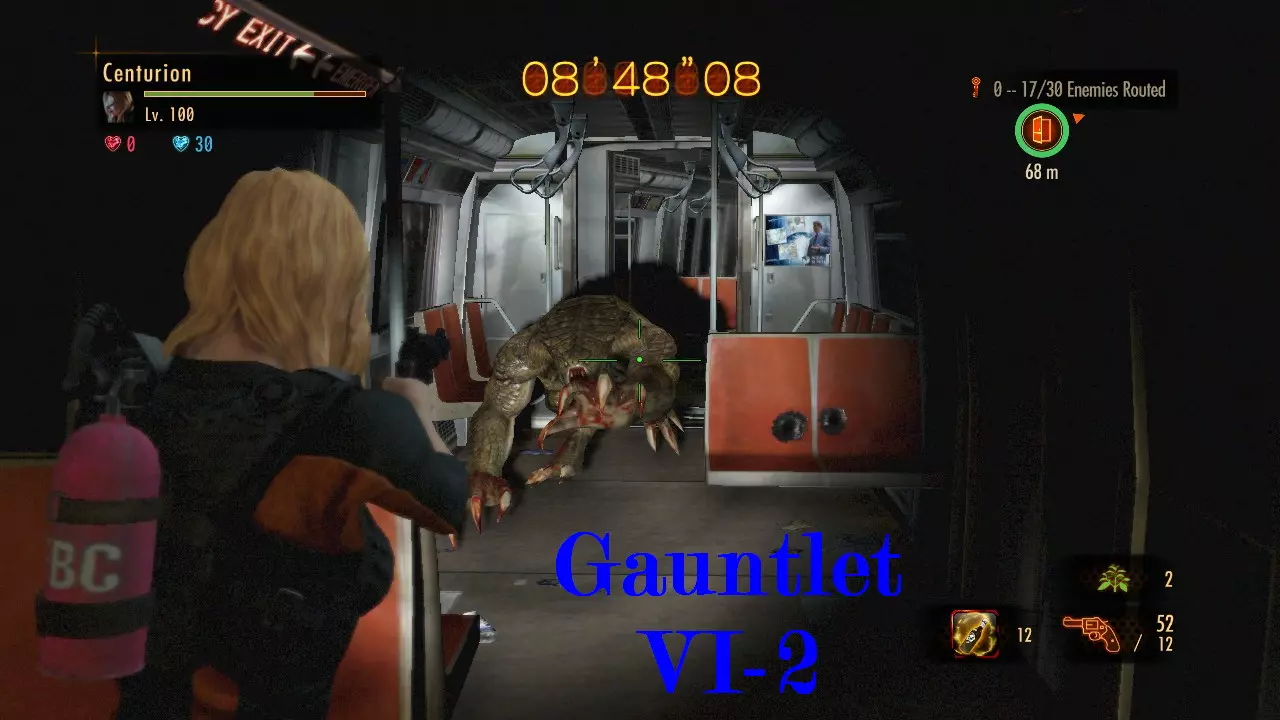
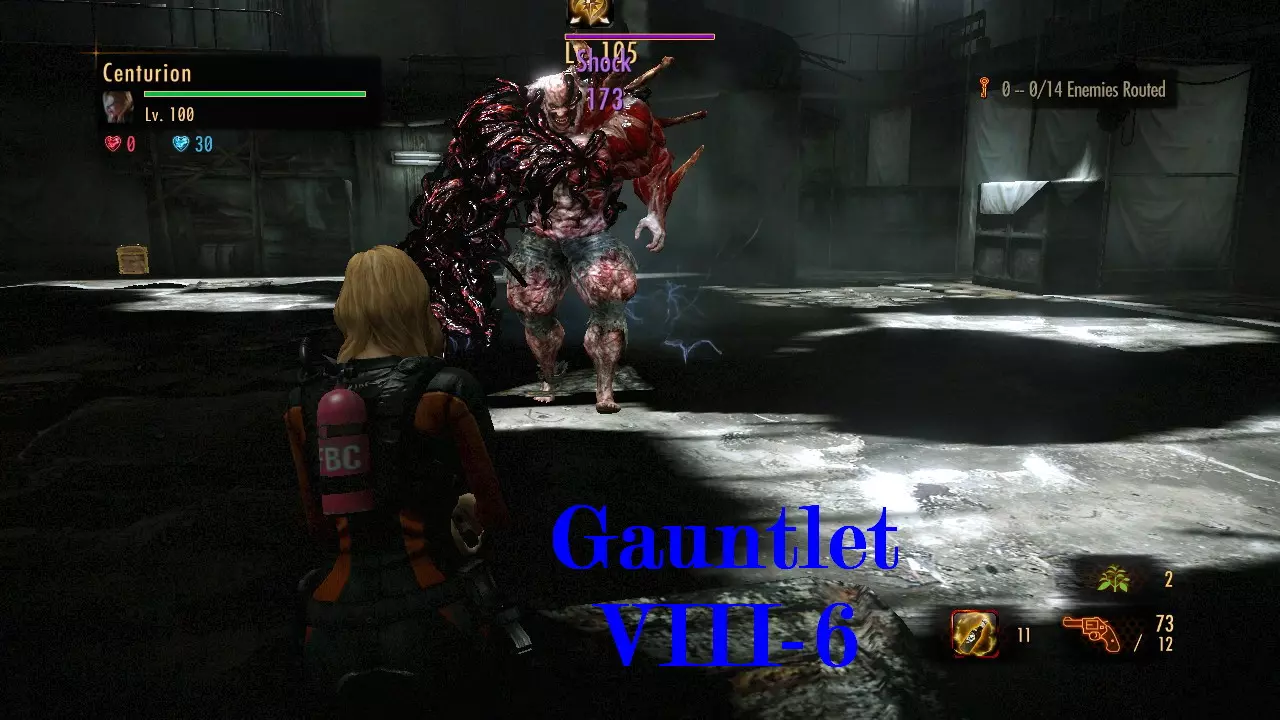
Homing Ammo Homing ammo works with every weapon type except shotguns. Allows bullets to automatically track enemies. Part Level 1. Tracking Degree 5 2. Tracking Degree 10 3. Tracking Degree 15 4. Tracking Degree 20 5. Tracking Degree 25 6. Tracking Degree 30 7. Tracking Degree 35 8. Tracking Degree 40 9. Tracking Degree 45 10. Tracking Degree 50 Enemy Homing OrderIf all enemy types were on-screen at once, homing ammo will work in the following order regardless of distance. 1. Normal enemy types (humanoid, monsters, four-legged) 2. Insects Distance Range Homing OrderHoming ammo homes in on targets closest to your character position within it's homing degree NOT closest to your reticle laser aim. Charge Shot A, B, C Charge Shot AAble to charge pistol and sniper rifle shots for 1 second to increase firepower by x% Part Level 1. 1 sec charge, firepower increased by 30% 2. 1 sec charge, firepower increased by 35% 3. 1 sec charge, firepower increased by 40% 4. 1 sec charge, firepower increased by 45% 5. 1 sec charge, firepower increased by 50% 6. 1 sec charge, firepower increased by 55% 7. 1 sec charge, firepower increased by 60% 8. 1 sec charge, firepower increased by 65% 9. 1 sec charge, firepower increased by 70% 10. 1 sec charge, firepower increased by 75% Charge Shot BAble to charge pistol, shotgun and sniper rifle shots for 2 second to increase firepower by x% Part Level 1. 2 sec charge, firepower increased by 60% 2. 2 sec charge, firepower increased by 70% 3. 2 sec charge, firepower increased by 80% 4. 2 sec charge, firepower increased by 90% 5. 2 sec charge, firepower increased by 100% 6. 2 sec charge, firepower increased by 110% 7. 2 sec charge, firepower increased by 120% 8. 2 sec charge, firepower increased by 130% 9. 2 sec charge, firepower increased by 140% 10. 2 sec charge, firepower increased by 150% Charge Shot CAble to charge pistol, shotgun, sniper rifle and magnum shots for 3 second to increase firepower by x% Part Level 1. 3 sec charge, firepower increased by 100% 2. 3 sec charge, firepower increased by 115% 3. 3 sec charge, firepower increased by 130% 4. 3 sec charge, firepower increased by 145% 5. 3 sec charge, firepower increased by 160% 6. 3 sec charge, firepower increased by 175% 7. 3 sec charge, firepower increased by 190% 8. 3 sec charge, firepower increased by 205% 9. 3 sec charge, firepower increased by 220% 10. 3 sec charge, firepower increased by 235% Life Stealer Life StealerIncreases your health recovered by x% when you deliver the finishing blow to an enemy. Part Level 1. Health recovery 3% 2. Health recovery 4% 3. Health recovery 6% 4. Health recovery 7% 5. Health recovery 8% 6. Health recovery 10% 7. Health recovery 11% 8. Health recovery 12% 9. Health recovery 13% 10. Health recovery 15% Mainly used by beginners with non-level 100 characters and weapons. Executioner Executioner Part*For use with skills that require cooldown time after a use* Skill cooldown time is reduced by x% of normal time when you deliver the finishing blow to an enemy. Part Level 1. Skill cooldown reduced by -3% 2. Skill cooldown reduced by -6% 3. Skill cooldown reduced by -9% 4. Skill cooldown reduced by -12% 5. Skill cooldown reduced by -15% 6. Skill cooldown reduced by -18% 7. Skill cooldown reduced by -21% 8. Skill cooldown reduced by -24% 9. Skill cooldown reduced by -27% 10. Skill cooldown reduced by -30% Soul Eater & Greedy Killer Soul Eater Increases your EXP gained by x% when you deliver the finishing blow to an enemy. Part Level 1. Increases the EXP by 30% 2. Increases the EXP by 37% 3. Increases the EXP by 47% 4. Increases the EXP by 60% 5. Increases the EXP by 76% 6. Increases the EXP by 94% 7. Increases the EXP by 116% 8. Increases the EXP by 141% 9. Increases the EXP by 169% 10. Increases the EXP by 200% Greedy Killer Increases the gold gained by x% when you deliver the finishing blow to an enemy. Part Level 1. Increases the gold by 30% 2. Increases the gold by 40% 3. Increases the gold by 55% 4. Increases the gold by 75% 5. Increases the gold by 100% 6. Increases the gold by 130% 7. Increases the gold by 165% 8. Increases the gold by 205% 9. Increases the gold by 250% 10. Increases the gold by 300% The actual shot from your weapon has to kill the enemy in order to receive the EXP and/or gold. Burn damage kills do not count. Mundane Murderer & Elite Killer Mundane Murderer Increase damage dealt to regular enemies. Enemies without icons over their lifebars. **All Creature Event Enemies are Mundane** Part Level 1. Damage Increased by 9% 2. Damage Increased by 12% 3. Damage Increased by 16% 4. Damage Increased by 19% 5. Damage Increased by 23% 6. Damage Increased by 26% 7. Damage Increased by 30% 8. Damage Increased by 33% 9. Damage Increased by 37% 10. Damage Increased by 40% Elite KillerIncrease damage dealt to elite enemies. Enemies with icons over their lifebars. Part Level 1. Damage Increased by 9% 2. Damage Increased by 12% 3. Damage Increased by 16% 4. Damage Increased by 19% 5. Damage Increased by 23% 6. Damage Increased by 26% 7. Damage Increased by 30% 8. Damage Increased by 33% 9. Damage Increased by 37% 10. Damage Increased by 40% Merciless Merciless PartIncreases damage to enemies with less than half their health remaining. Part Level 1. Damage increased by 9% 2. Damage increased by 12% 3. Damage increased by 16% 4. Damage increased by 19% 5. Damage increased by 23% 6. Damage increased by 26% 7. Damage increased by 30% 8. Damage increased by 33% 9. Damage increased by 37% 10. Damage increased by 40% Follow-Up Strike Increases damage dealt to down enemies Part Level 1. Damage Increases 16% 2. Damage Increases 22% 3. Damage Increases 28% 4. Damage Increases 34% 5. Damage Increases 40% 6. Damage Increases 46% 7. Damage Increases 52% 8. Damage Increases 58% 9. Damage Increases 64% 10. Damage Increases 70% When Follow-Up Strike Works1. When an enemy has been knocked down. 2. When an enemy is in rising spawn animation. example: when an afflicted is spawning follow-up strike will work until his hands leave the ground. Element Booster Parts Element booster parts work by increasing damage to an enemy afflicted with the required element (fire, ice or shock). ***As with any other stat increasing part the damage is calculated using the firepower of the untagged weapon*** Extended BurnIncreases damage dealt to enemies on fire Part Level 1. Damage Increase 12% 2. Damage Increase 16% 3. Damage Increase 21% 4. Damage Increase 25% 5. Damage Increase 29% 6. Damage Increase 33% 7. Damage Increase 37% 8. Damage Increase 42% 9. Damage Increase 46% 10. Damage Increase 50% FrostbiteIncreases damage dealt to frozen enemies Part Level 1. Damage Increase 15% 2. Damage Increase 20% 3. Damage Increase 25% 4. Damage Increase 30% 5. Damage Increase 35% 6. Damage Increase 40% 7. Damage Increase 45% 8. Damage Increase 50% 9. Damage Increase 55% 10. Damage Increase 60% ElectrocuteIncreases damage dealt to enemies being electrocuted Part Level 1. Damage Increase 9% 2. Damage Increase 12% 3. Damage Increase 16% 4. Damage Increase 19% 5. Damage Increase 23% 6. Damage Increase 26% 7. Damage Increase 30% 8. Damage Increase 33% 9. Damage Increase 37% 10. Damage Increase 40% Close Range & Long Range Parts *Long Range or Close Range parts damage is based on range *All damage type parts stack or reduce damage accordingly *Example: Damage Lv. 20 + Long Range Lv. 10 (at range) stack [(60% weapon base damage) + (plus or minus 60% weapon base damage based on range)] Close and long range parts are a double edged sword but if used correctly it can replace damage parts in any setup. Close RangeIncreases firepower as the enemy draws closer to you (max +60%) Close Range Lv. 10 Over 8m ---distance increasing--- [4m - 6m] ---distance decreasing--- 0m < (-60%) ------------------------------ 0% > < 0% ------------------------------ (60%) > ENEMY As your distance from the enemy decreases from about 4m to 0m, damage increases from 0% to 60% As your distance from the enemy increases from about 6m and over, damage decreases from 0% to 60% Long RangeIncreases firepower as the enemy moves further away (max +60%) Long Range Lv. 10 Over 8m ---distance increasing--- [4m - 6m] ---distance decreasing--- 0m < (60%) ------------------------------ 0% > < 0% ------------------------------ (-60%) > ENEMY As your distance from the enemy increases from about 6m and over, damage increases from 0% to 60% As your distance from the enemy decreases from about 4m to 0m, damage decreases from 0% to 60% Anti-Recoil Anti-RecoilReduces the recoil of a machine pistol, assault rifle or magnum when firing. Part Level 1. Recoil reduced by -20% 2. Recoil reduced by -40% 3. Recoil reduced by -60% 4. Recoil reduced by -80% 5. Recoil reduced by -100% Final Shot Final ShotIncreases the firepower of the last shot in the magazine. Part Level 1. Increases final shot by 46% 2. Increases final shot by 52% 3. Increases final shot by 58% 4. Increases final shot by 64% 5. Increases final shot by 70% 6. Increases final shot by 76% 7. Increases final shot by 82% 8. Increases final shot by 88% 9. Increases final shot by 94% 10. Increases final shot 100% It's mainly used for non-level 100 weapons or low capacity setups. It can be used with a magnum for Creature Event by canceling reload after one round is loaded. Auto-Shot, S.T.A.R.S., FBC, DSO, BSAA Auto-ShotWeapon will fire automatically upon placing the reticule on an enemy. Auto-Shot is useful for learning exactly when to fire when an enemy is spawning. S.T.A.R.S.Increases weapon firepower by 9%. Increases critical hit rate by 8%. FBCIncreases damage dealt to elite enemies by 17%. Firepower increases the closer the enemy is (max +9%), which is up to 26%. DSOIncreases damage dealt to regular (mundane) enemies by 17%. Firepower increases the further the enemy is (max +9%), which is up to 26%. BSAAIncreases firing rate by 9%. Increase capacity by 25%. Farming [Section 1] Farming Solo Demo Farming Co-Op Demo StagesThe best time vs reward farming/leveling are stages that have elite Hunters, Ironheads or Napads and can be completed in about a minute solo or co-op. Gauntlet IV-4 Gauntlet V-3 Gauntlet V-6 Gauntlet VI-2 Gauntlet VIII-6
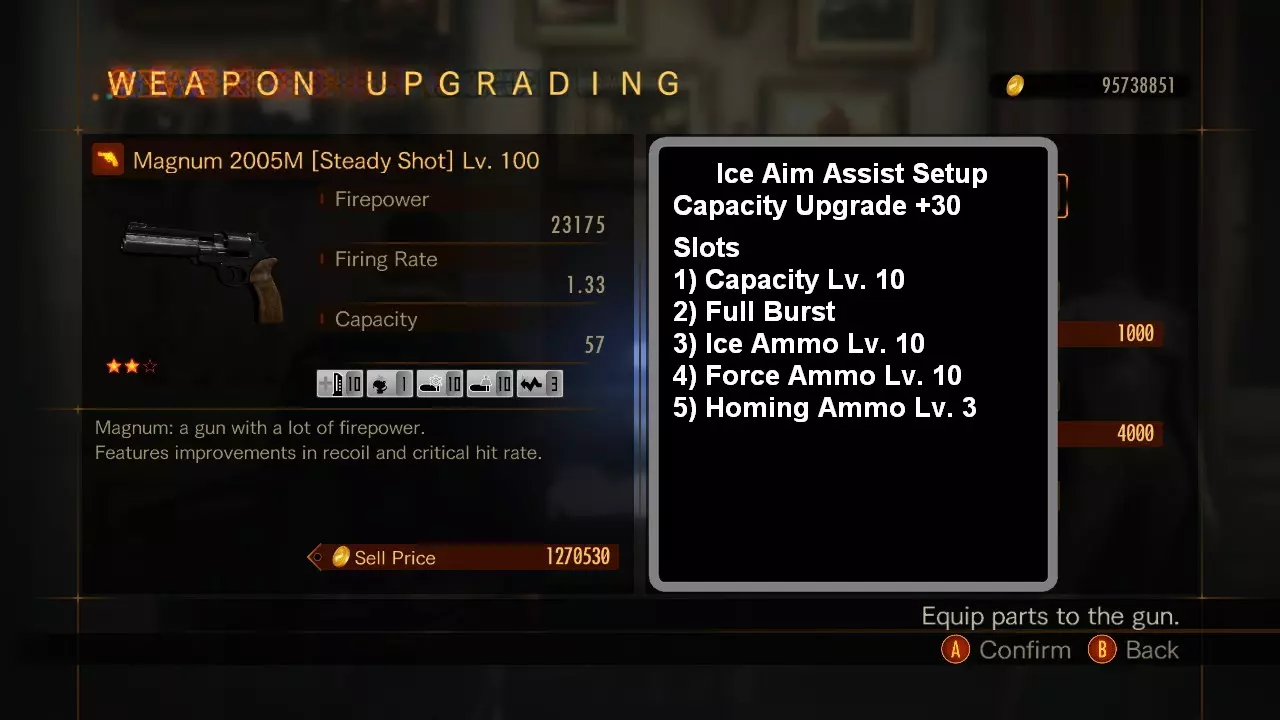
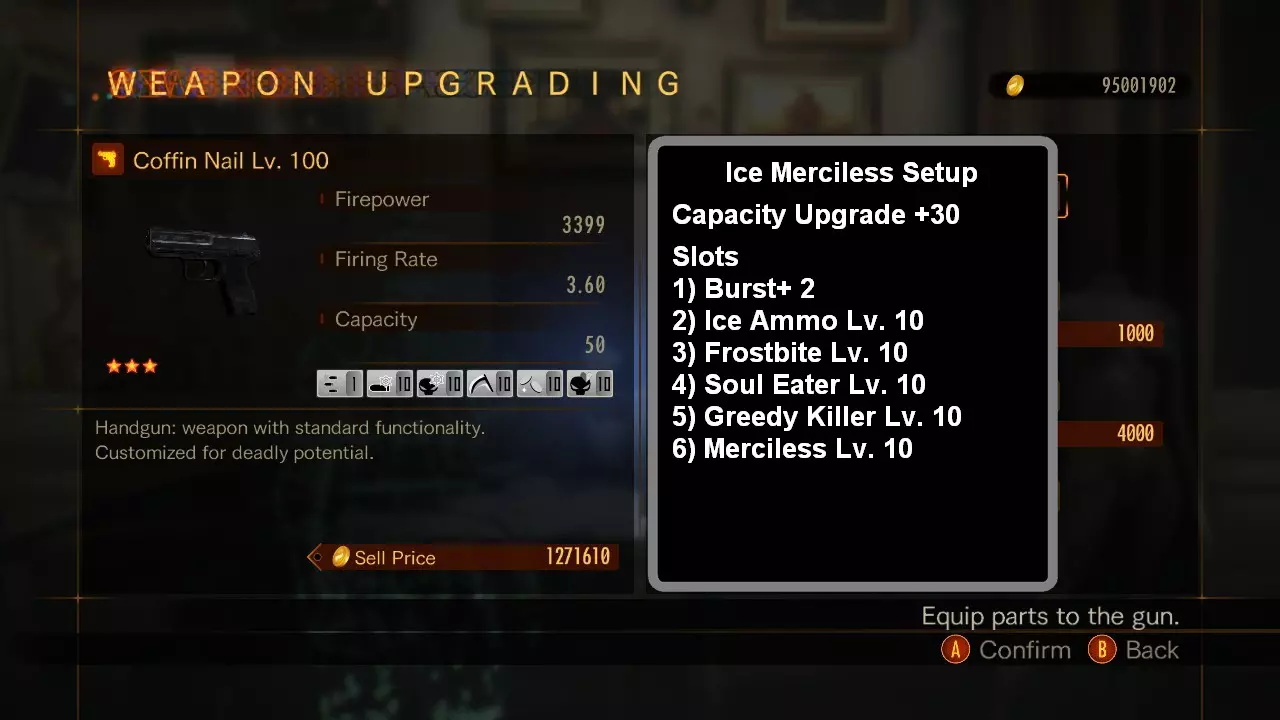
武器 *所有配置均适用于100级武器* 请勿在最终的刷怪武器配置中使用高等级的伤害或弹容量部件,这些部件将用于活动武器配置。 请勿将火焰弹药与噬魂者和/或贪婪杀手搭配使用,为了获得额外金币和/或经验,击杀一击必须来自武器本身,而非燃烧伤害。 在这些配置中,无需全力爆发。一旦习惯了常规刷怪流程,你就会意识到其速度优势。 5至10级的追踪弹药适合在这些配置中使用。 5至10级的暴击可以与【稳定射击】或【远程强化】标签搭配使用,以替代伤害部件。这些标签可增加20%的暴击率。 示例: 手枪武器类型 - 15%暴击率 稳定射击标签 - 20%暴击率 暴击等级 -10-30% 暴击率 最终暴击率 65% 手枪 槽位 电击属性 1 伤害 2 弹匣容量 3 全力爆发 4 电击弹药 5 追踪弹药 6 贪婪杀手或噬魂者 示例

霰弹枪示例

冲锋手枪(Machine Pistols)
农场 [第二部分] 突击步枪示例
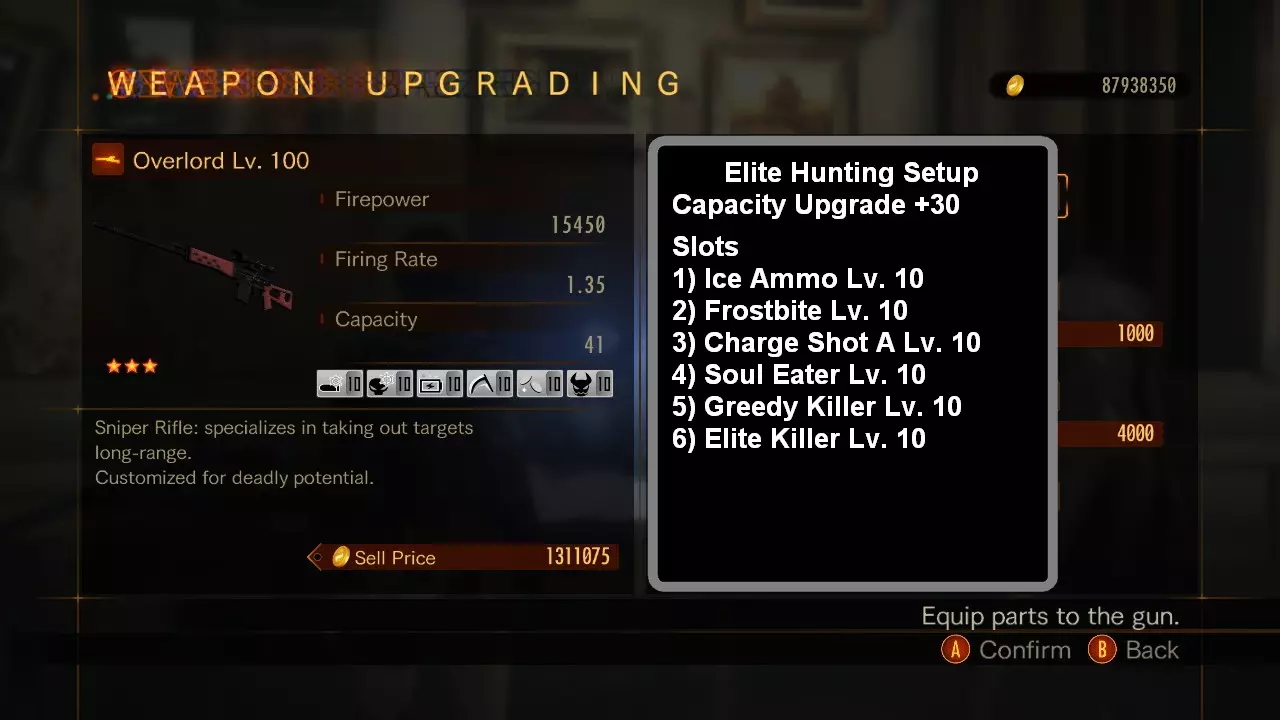
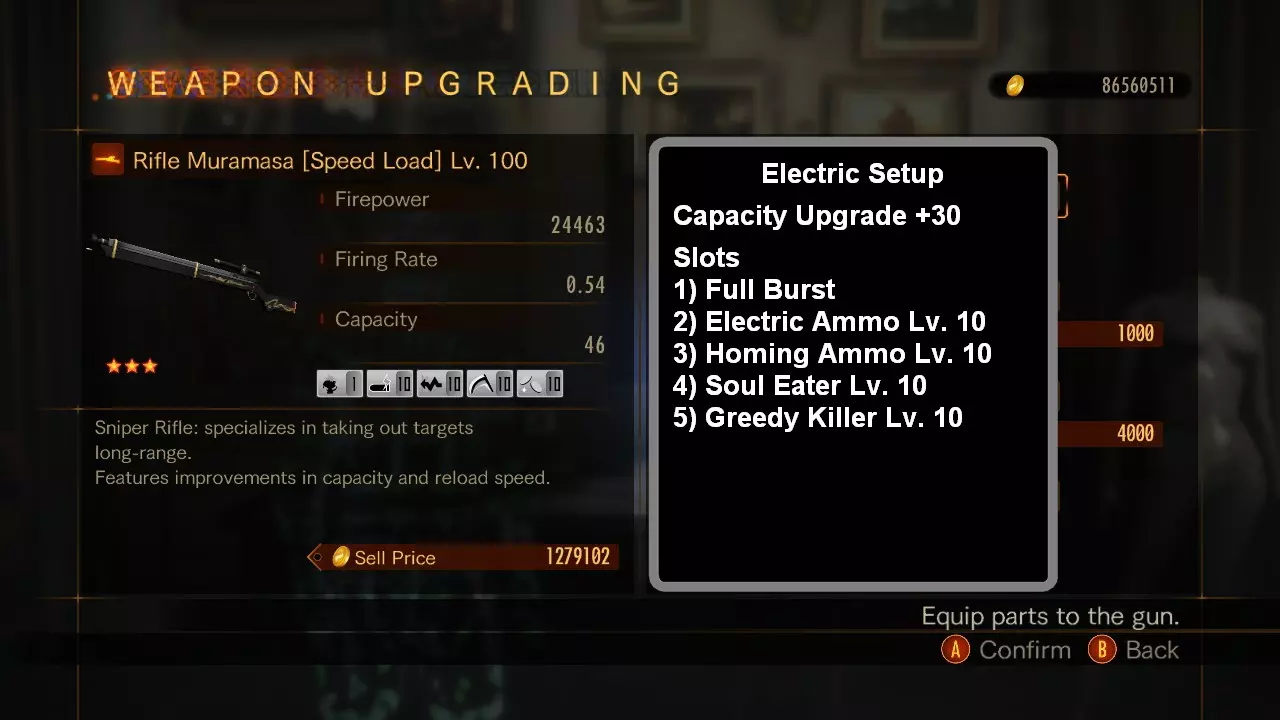
狙击步枪 槽位 电击属性 冰冻属性 1 全力爆发或爆发+2 全力爆发或爆发+2 2 电击弹药 冰冻弹药 3 追踪弹药 冻伤 4 噬魂 追踪弹药 5 贪婪杀手 噬魂或贪婪杀手 6 S.T.A.R.S.或远程 S.T.A.R.S.或远程 示例
麦林枪 [未标记] 槽位 电击 冰冻 1 全力爆发 全力爆发 2 电击弹药 冰冻弹药 3 追踪弹药 冻伤 4 噬魂 追踪弹药 5 贪婪杀手 噬魂或贪婪杀手 6 S.T.A.R.S. S.T.A.R.S. 示例

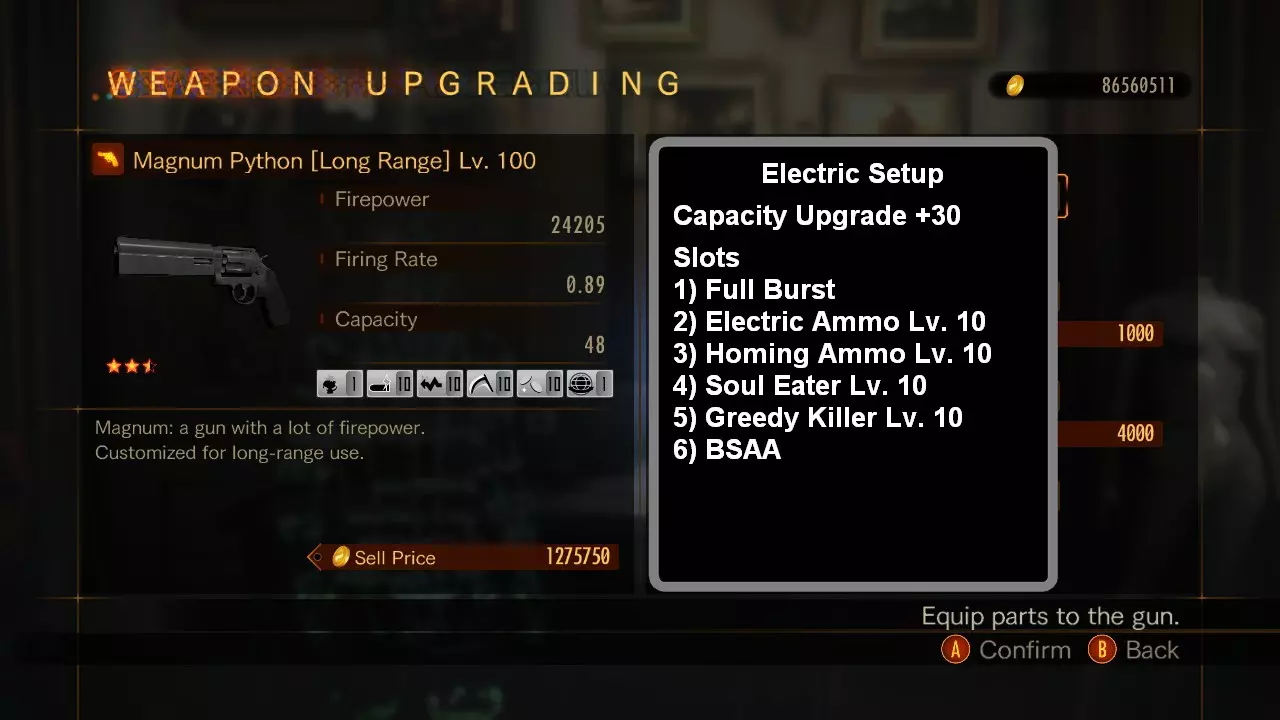
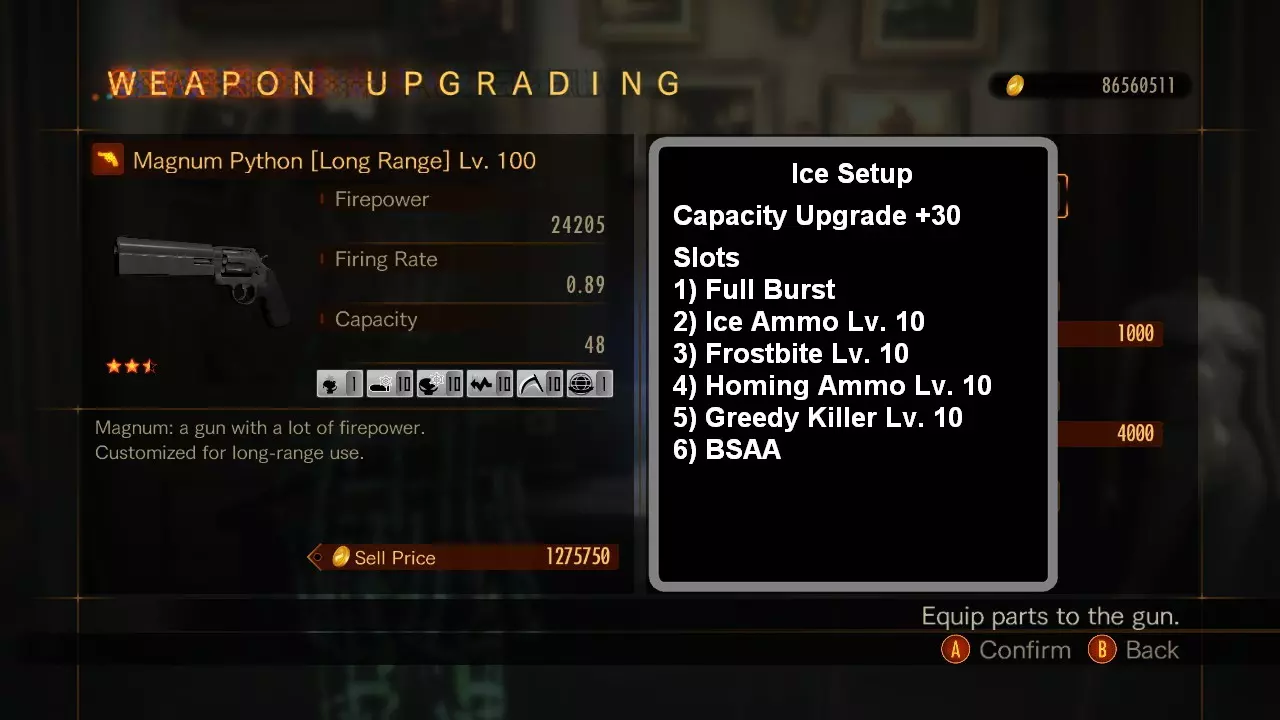
麦林左轮 [远程] 槽位 电击 冰冻 1 全弹发射 全弹发射 2 电击弹药 冰冻弹药 3 追踪弹药 冻伤 4 噬魂 追踪弹药 5 贪婪杀手 噬魂或贪婪杀手 6 BSAA BSAA 示例
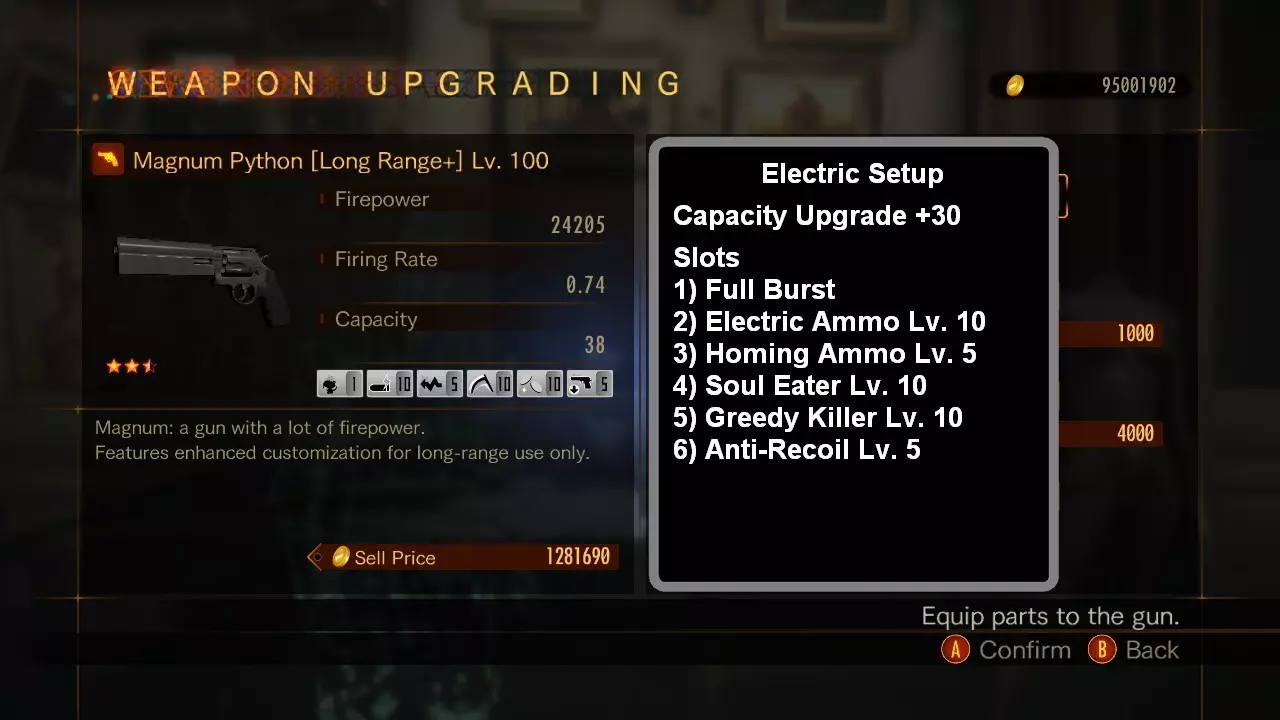
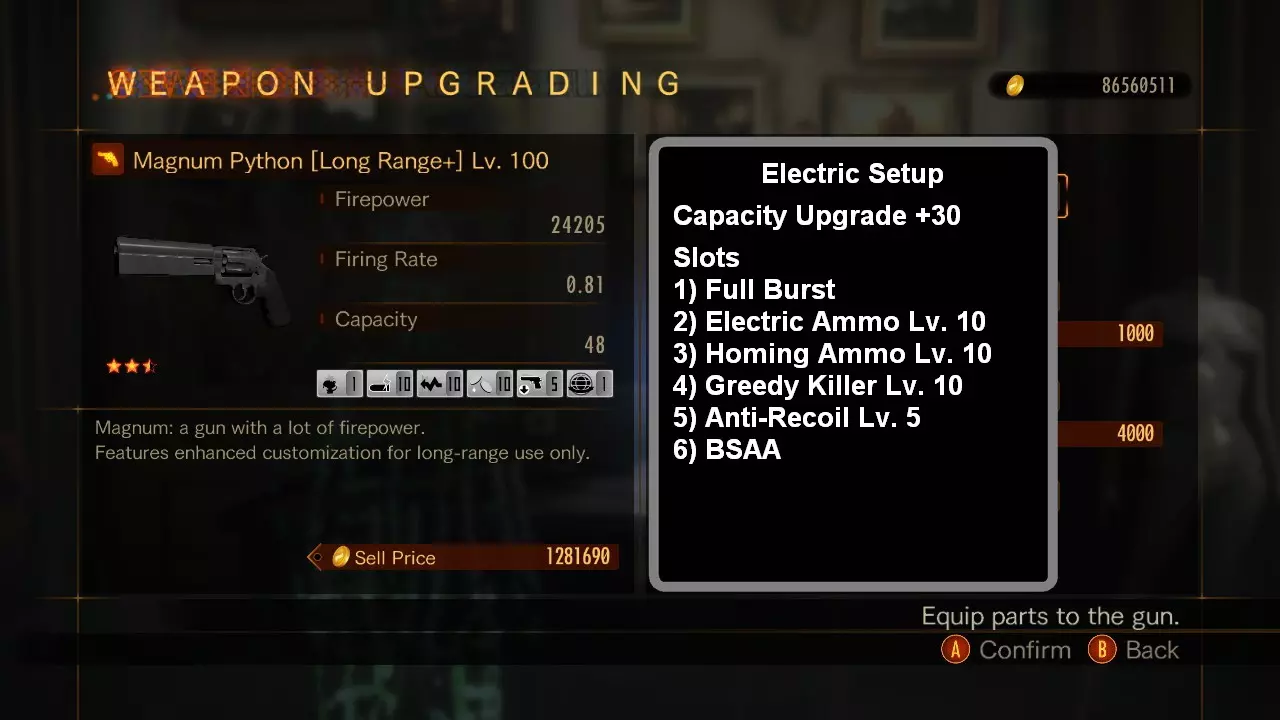
麦林左轮 [远程强化] 插槽 电击 冰冻 1 全弹发射 全弹发射 2 电击弹药 冰冻弹药 3 追踪弹药 冻伤 4 噬魂者或贪婪杀手 追踪弹药 5 反后坐力 噬魂者或贪婪杀手 6 BSAA 反后坐力 示例
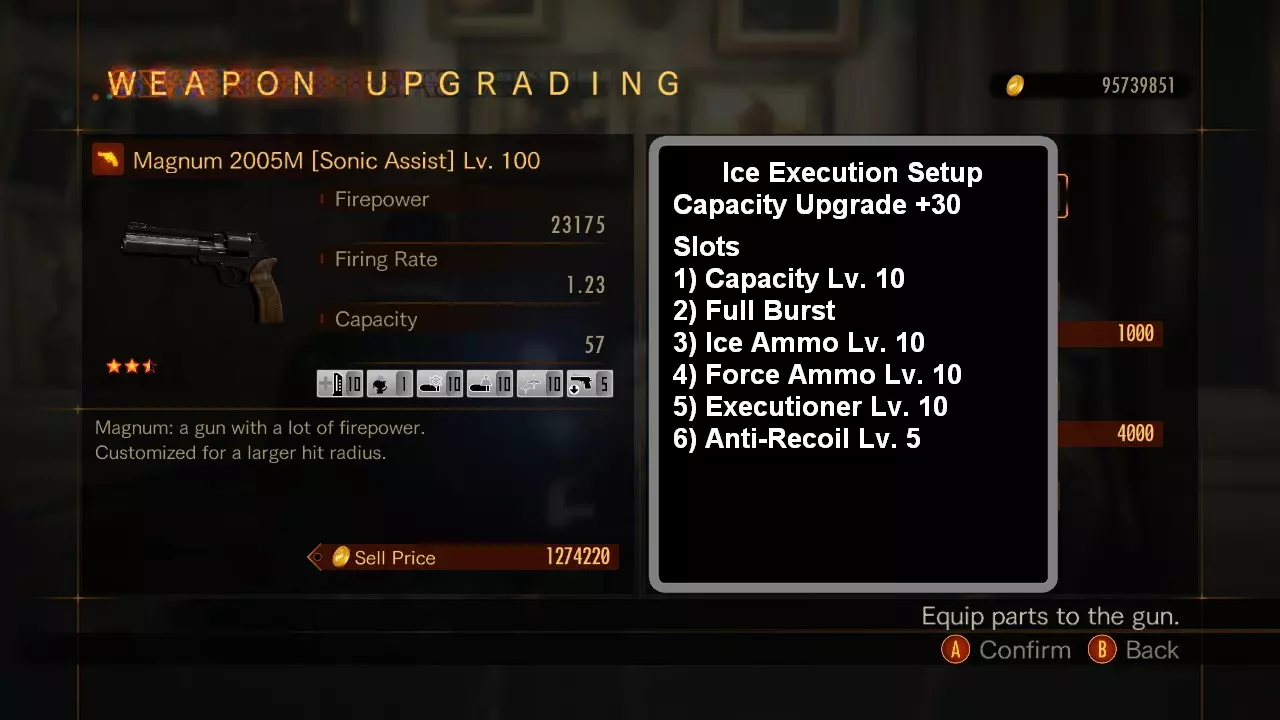
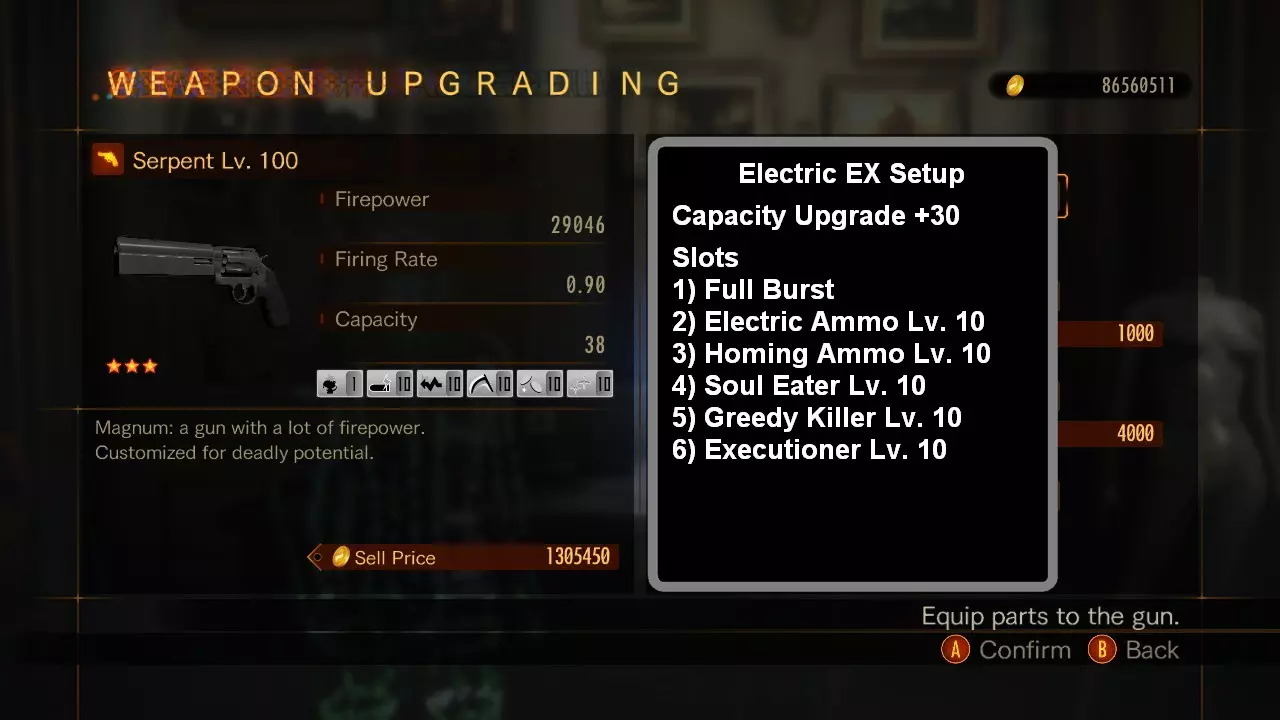
马格南行刑者 插槽 电击 冰冻 1 全力爆发 全力爆发 2 电击弹药 冰冻弹药 3 追踪弹药 冻伤 4 噬魂者 追踪弹药 5 贪婪杀手 噬魂者或贪婪杀手 6 行刑者 行刑者 示例
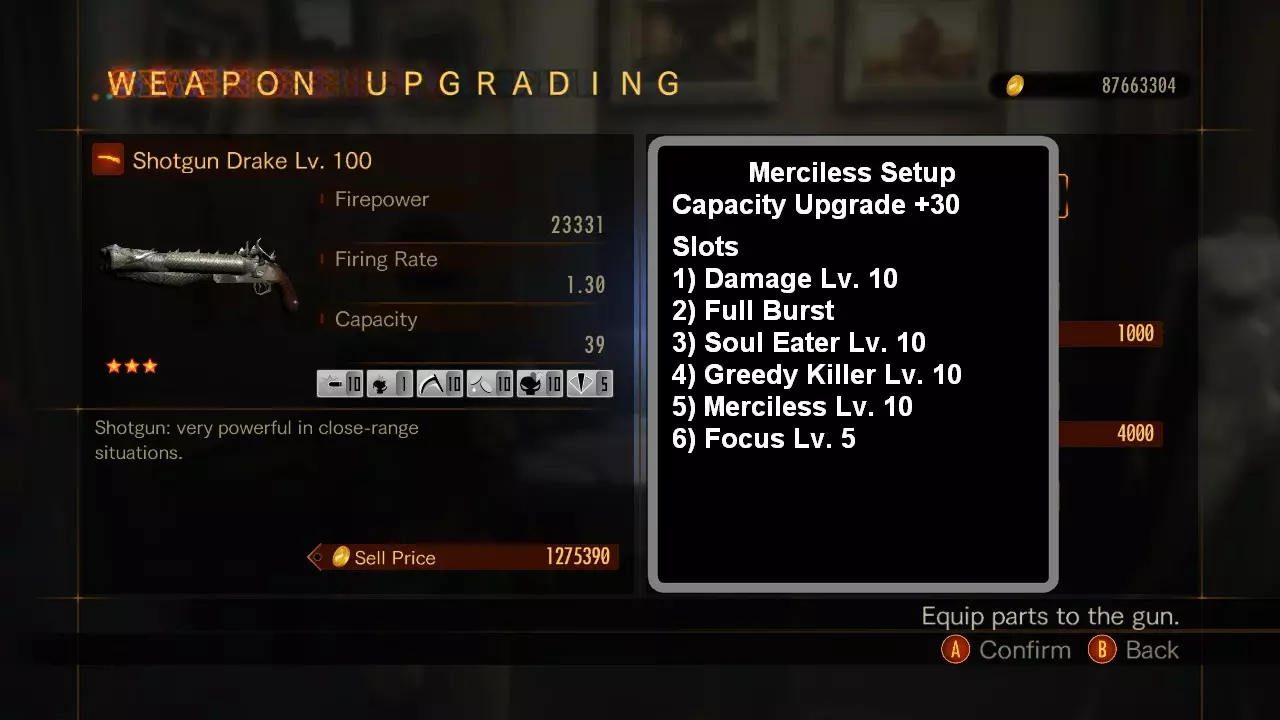
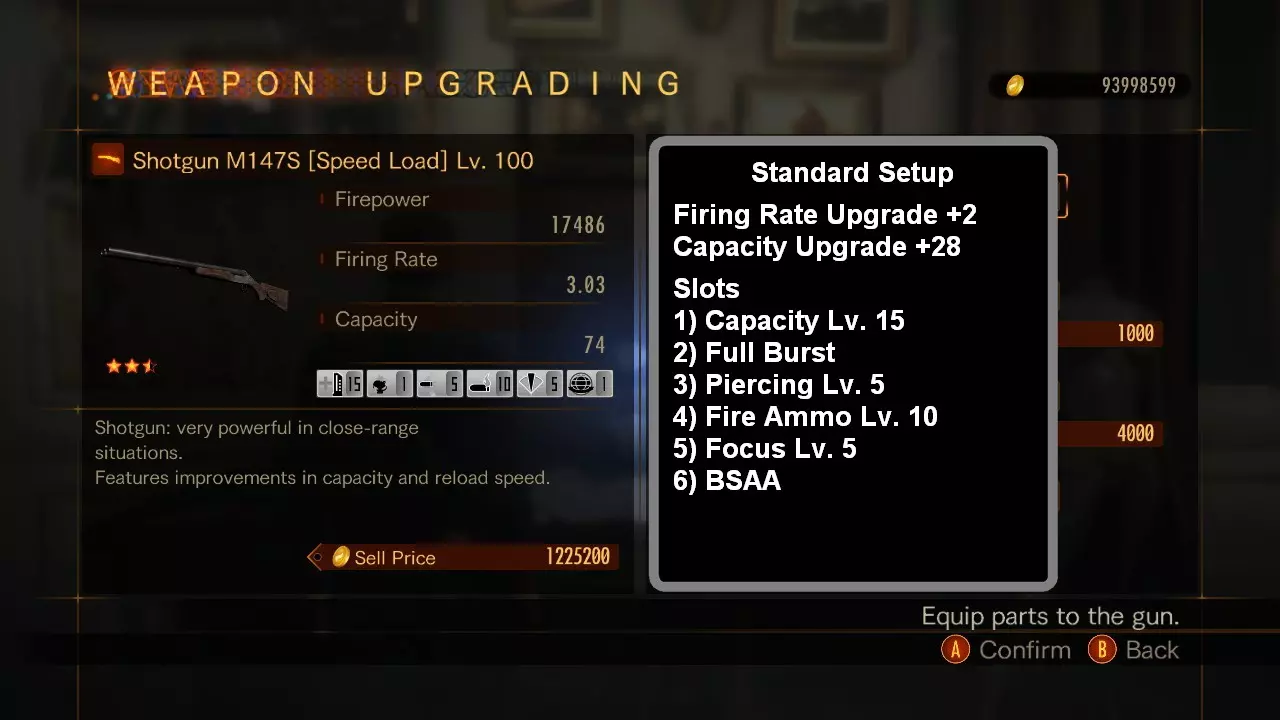
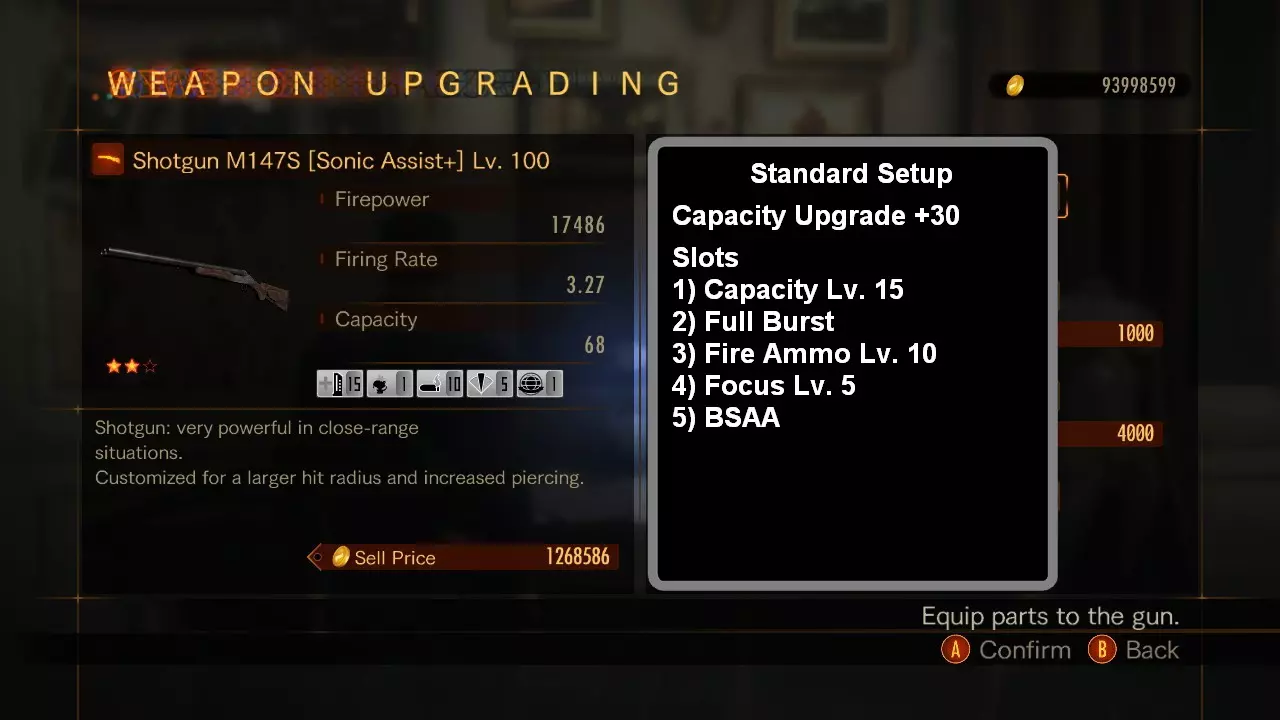
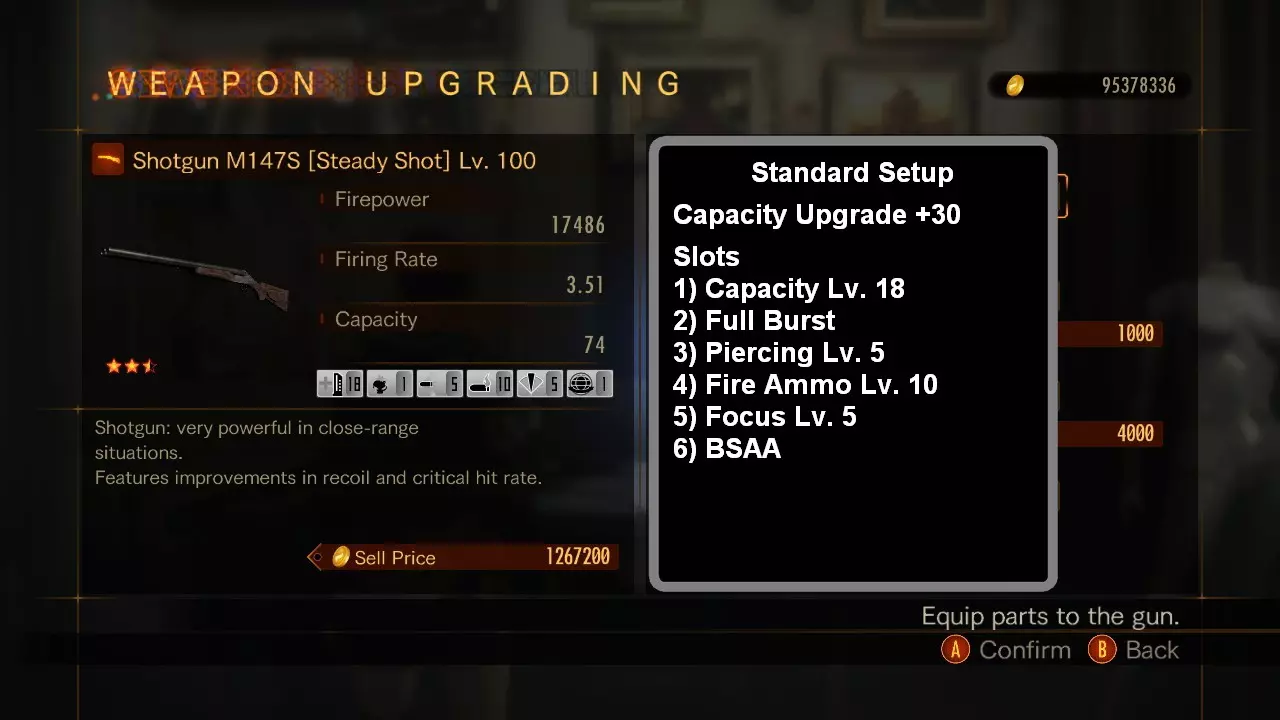
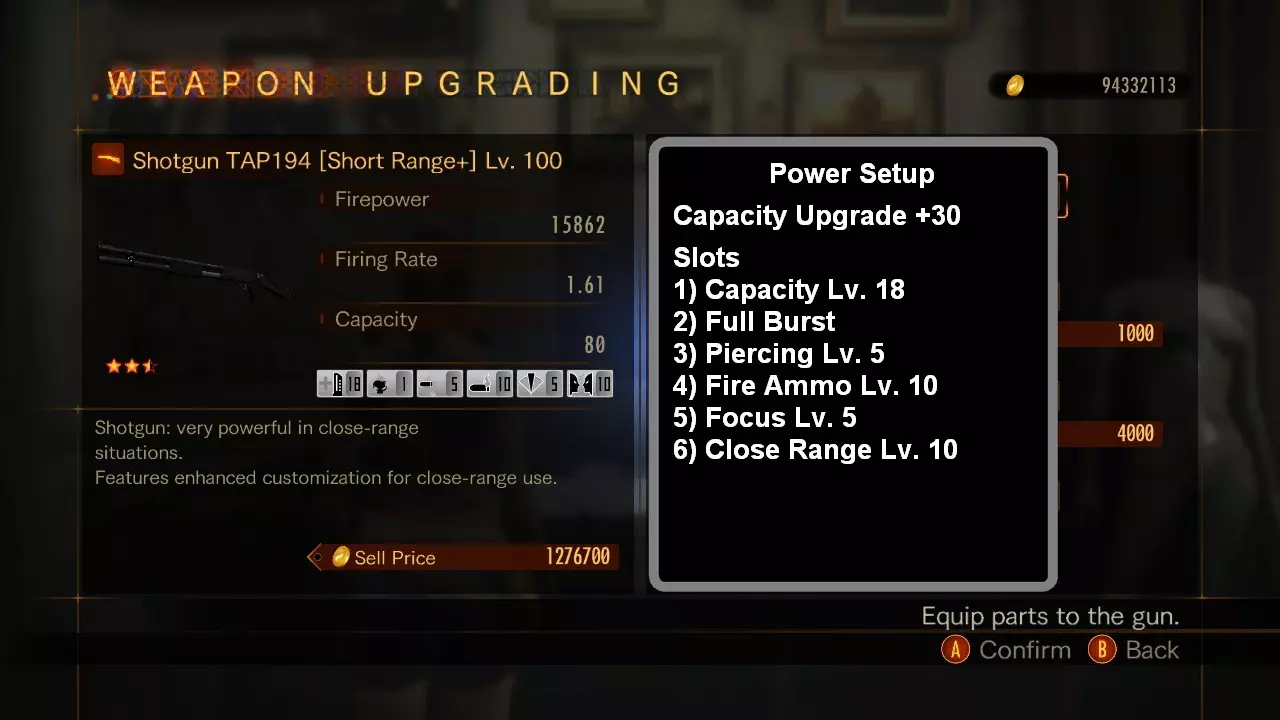
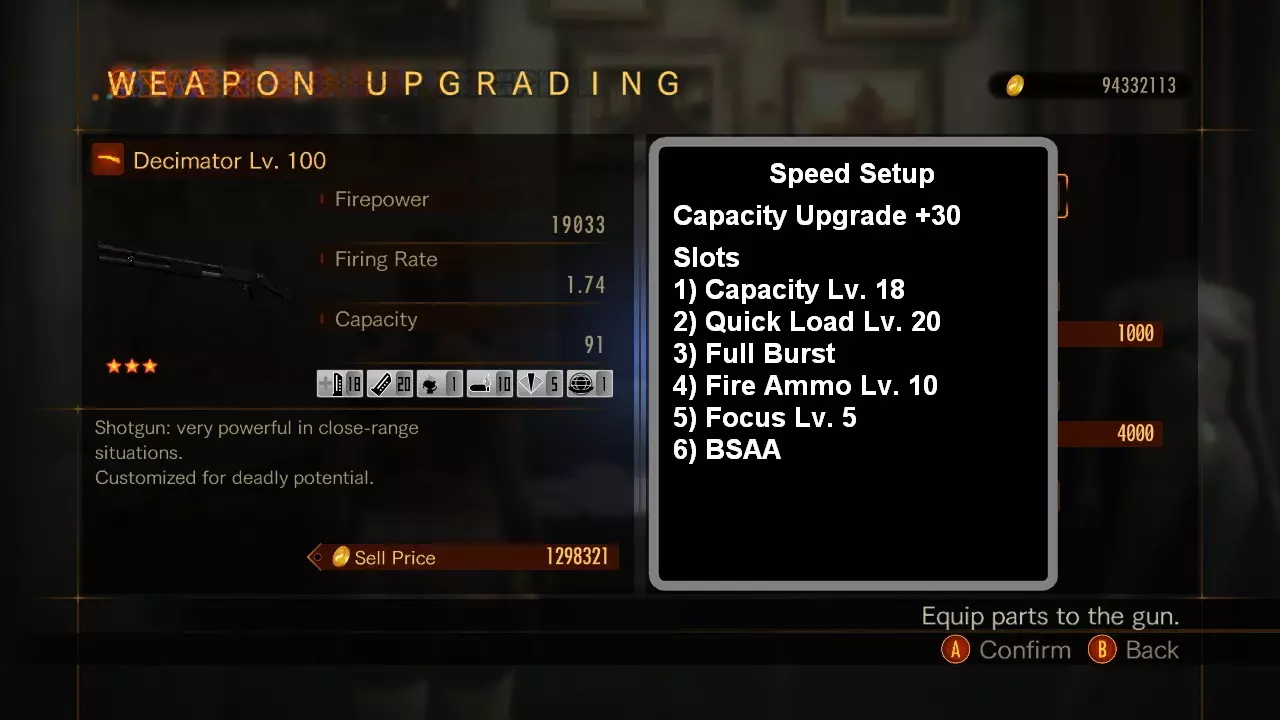
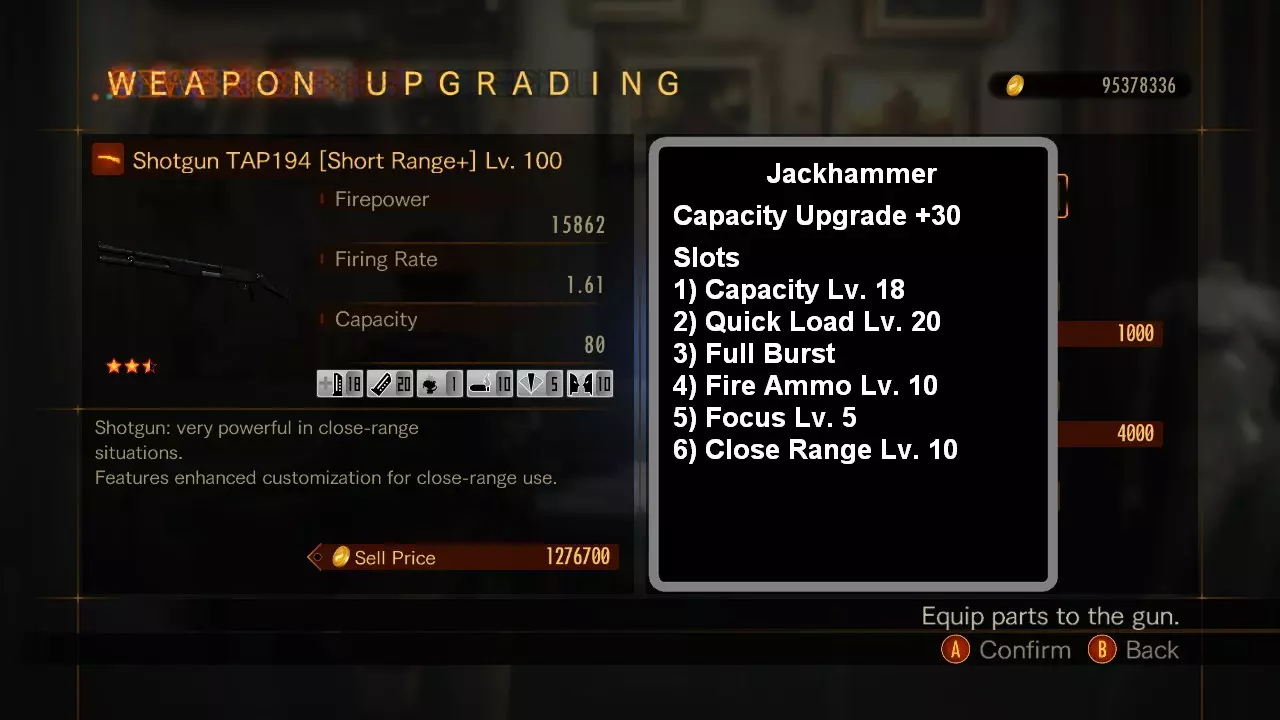
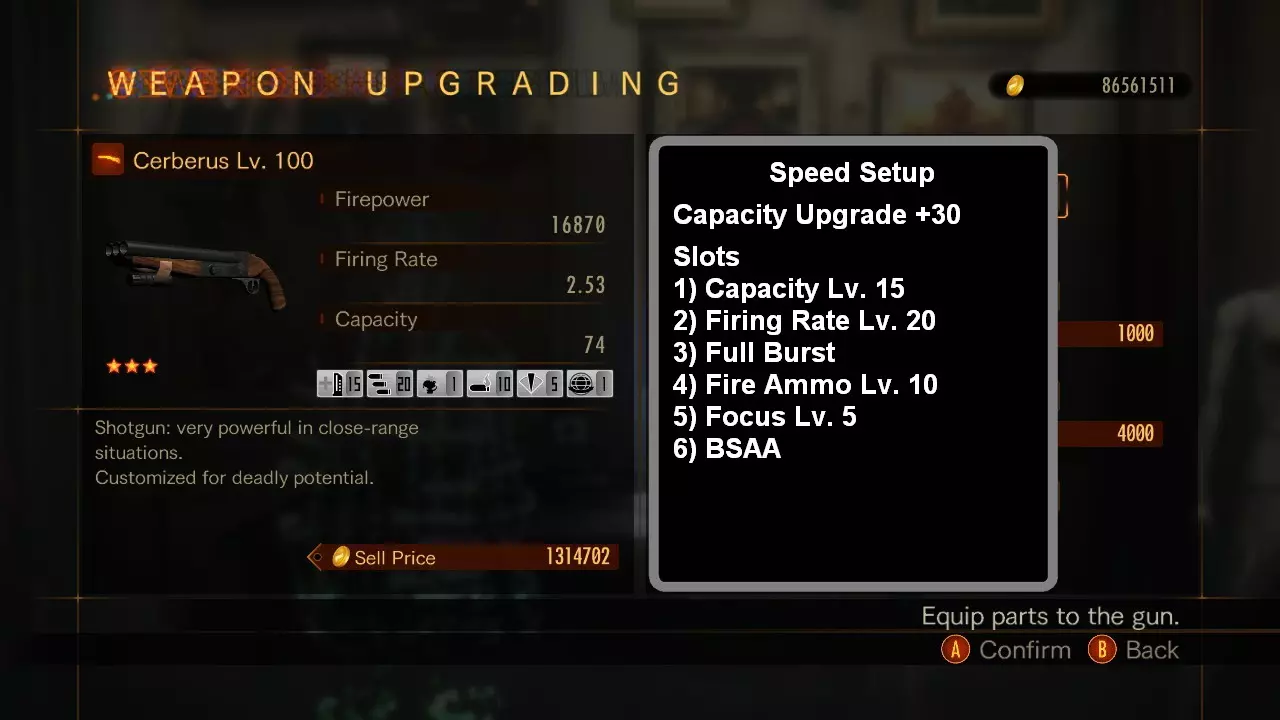
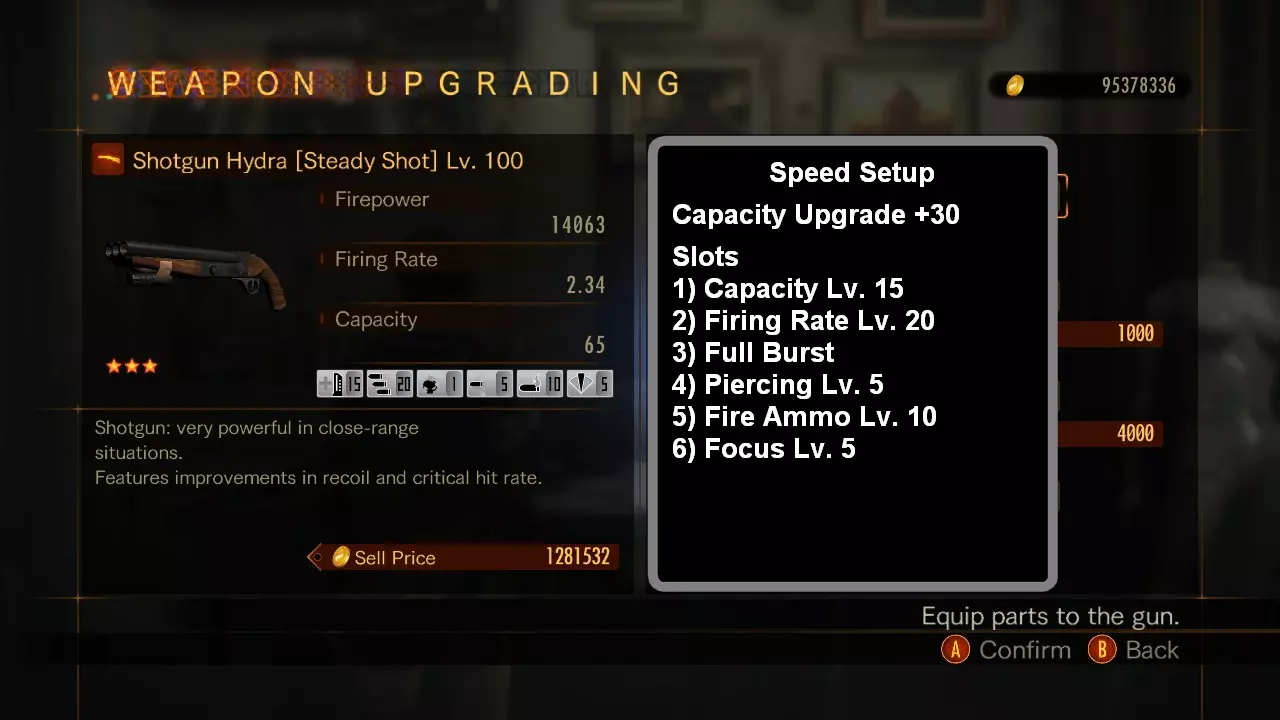
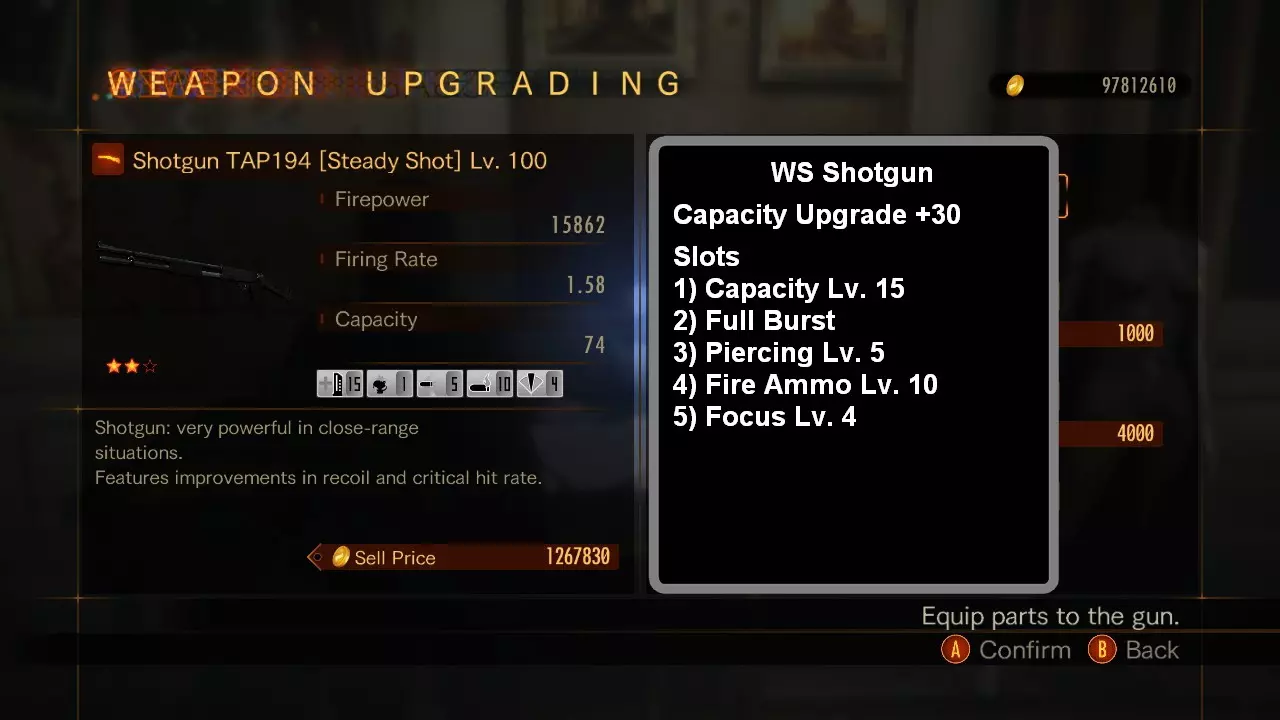
聚焦部件与散射部件(霰弹枪专用部件) 聚焦部件:减少霰弹枪的扩散角度,减少量为-x° 部件等级: 1. 减少扩散角度4° 2. 减少扩散角度6° 3. 减少扩散角度8° 4. 减少扩散角度10° 5. 减少扩散角度12° 散射部件:增加霰弹枪的扩散角度,增加量为x° 部件等级: 1. 增加扩散角度4° 2. 增加扩散角度6° 3. 增加扩散角度8° 4. 增加扩散角度10° 5. 增加扩散角度12° 霰弹枪 [第一节] *所有配置均适用于100级霰弹枪* 所有霰弹枪每发弹壳发射7颗弹丸。 每把霰弹枪都有一个最低射速,确保在全自动射击时不再出现枪支后坐动画。只要射速达到或高于此数值,霰弹枪就能发挥最佳性能。 M147S - 30.03 TAP194 - 1.48版本 九头蛇(Hydra):需要装备射速部件才能有效用于等级限制挑战 德雷克(Drake):仅在常规游戏或周末生存者(Weekend Survivor)模式中有效 聚焦部件(Focus Part) 聚焦部件的重要性:当触发火焰效果时,**所有7发子弹均可造成燃烧效果,且当所有子弹命中目标时,燃烧伤害会更快达到最大速率**。对于霰弹枪,在角色1级时其数值为1890。 M147S 等级限制挑战 等级若标记为[Sonic Assist+]或[Rare Tag],则将“穿刺”替换为“快速装填” 槽位 标准 速度 威力 1 弹匣容量 弹匣容量 弹匣容量 2 全爆发 全爆发 全爆发 3 穿刺 穿刺 穿刺 4 火焰弹药 火焰弹药 火焰弹药 5 专注 专注 专注 6 BSAA 射速 近距离 等级限制挑战 等级若标记为[Sonic Assist+]或[Rare Tag],则将“穿刺”替换为“快速装填” 槽位 标准 速度 1 容量 容量 2 全爆发 全爆发 3 穿刺 穿刺 4 火焰弹药 火焰弹药 5 专注 专注 6 BSAA 射速 示例

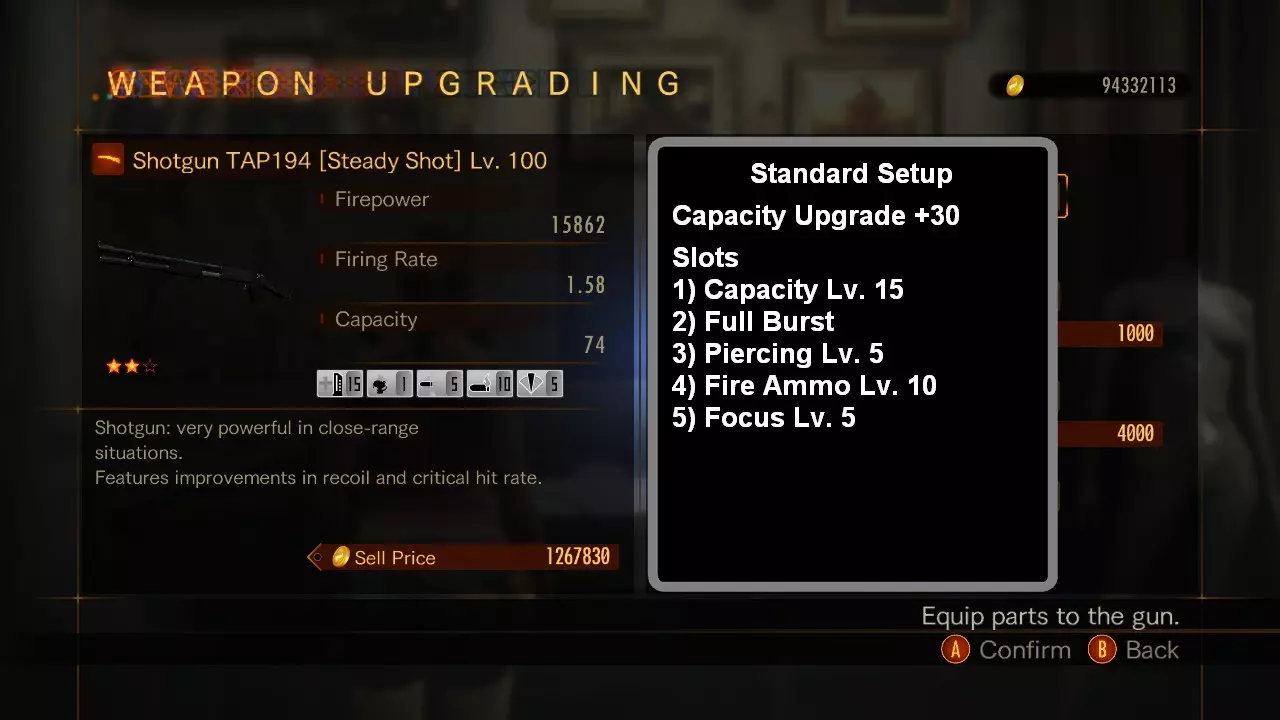
TAP194等级限制挑战 等级40 若标记为[Sonic Assist+]或[Rare Tag],则将“穿刺”替换为“射速”或“快速装填” 槽位 标准 速度 威力 1 弹匣容量 弹匣容量 弹匣容量 2 全爆发 全爆发 全爆发 3 穿刺 穿刺 穿刺 4 火焰弹药 火焰弹药 火焰弹药 5 专注 专注 专注 6 BSAA 快速装填 近距离 等级限制挑战 等级若标记为[Sonic Assist+]或[Rare Tag],则将“穿透”替换为“射速”或“快速装填” 槽位 标准 速度 1 弹匣容量 弹匣容量 2 全爆发 全爆发 3 穿透 穿透 4 火焰弹药 火焰弹药 5 专注 专注 6 BSAA 快速装填 示例

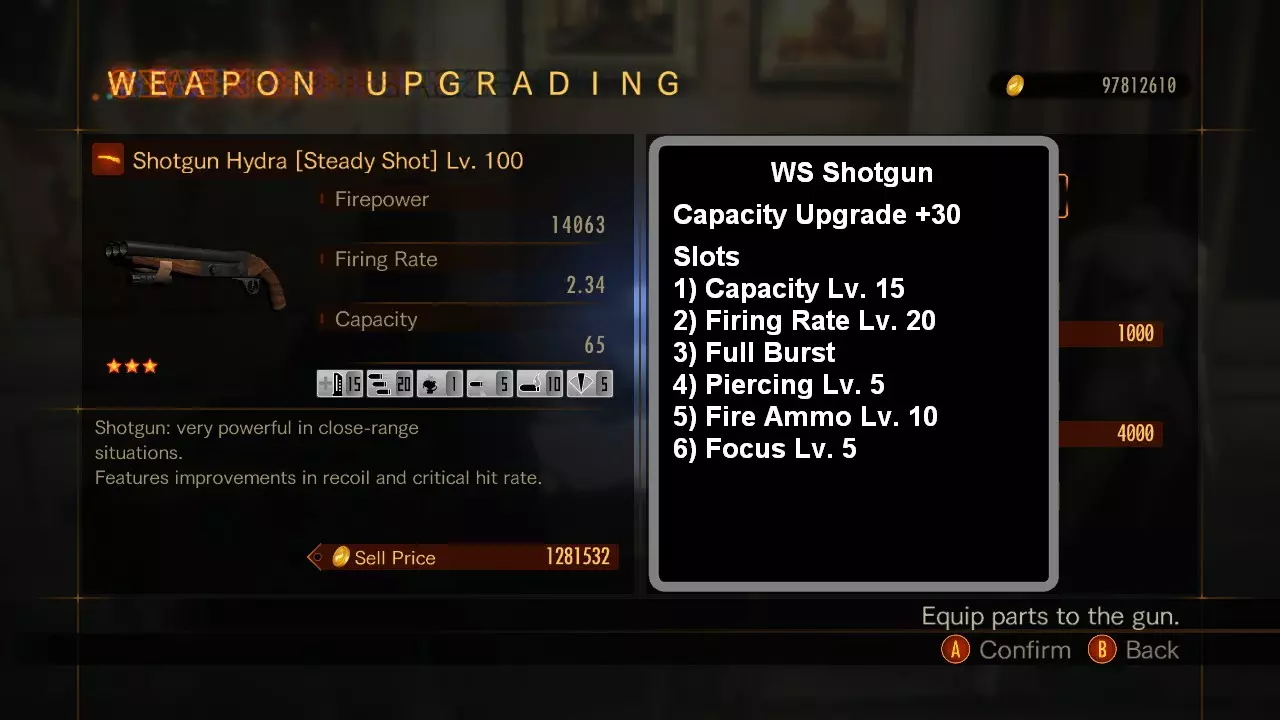
霰弹枪 [第2节] 九头蛇(Hydra) 等级限制挑战 40级 *最低射速等级 18 插槽 速度 1 弹容量 2 射速 3 全爆发 4 火焰弹药 5 专注 6 BSAA 等级限制挑战 100级 *最低射速等级 18 插槽 速度 1 弹容量 2 射速 3 全爆发 4 火焰弹药 5 专注 6 BSAA 示例
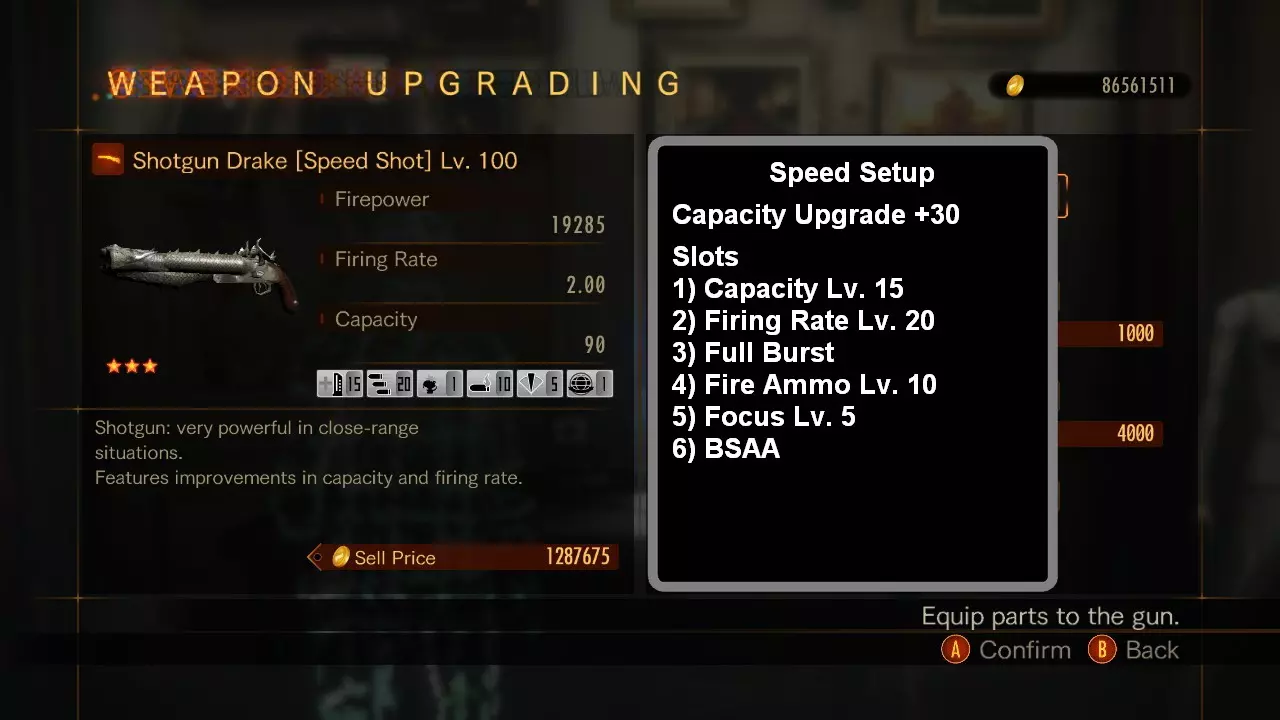
德雷克周末生存者 *最低射速等级18 插槽 速度 1 弹容量 2 射速 3 全爆发 4 开火弹药 5 专注 6 BSAA 示例
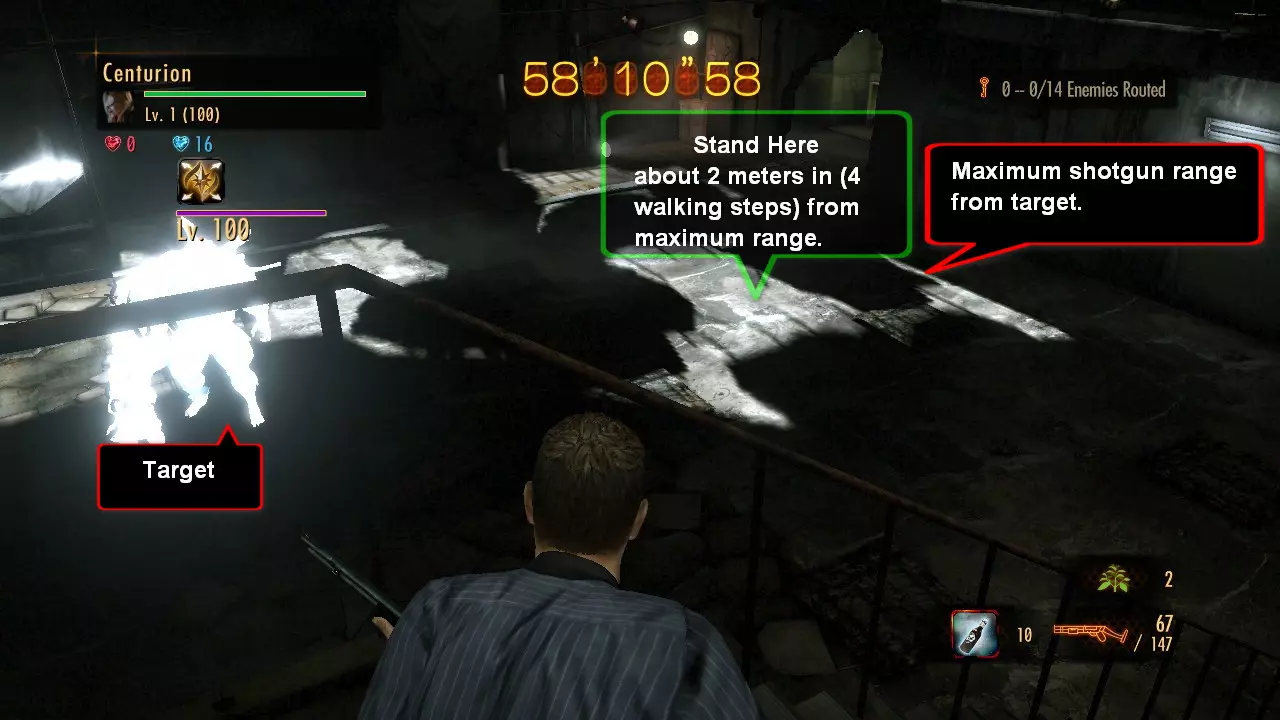
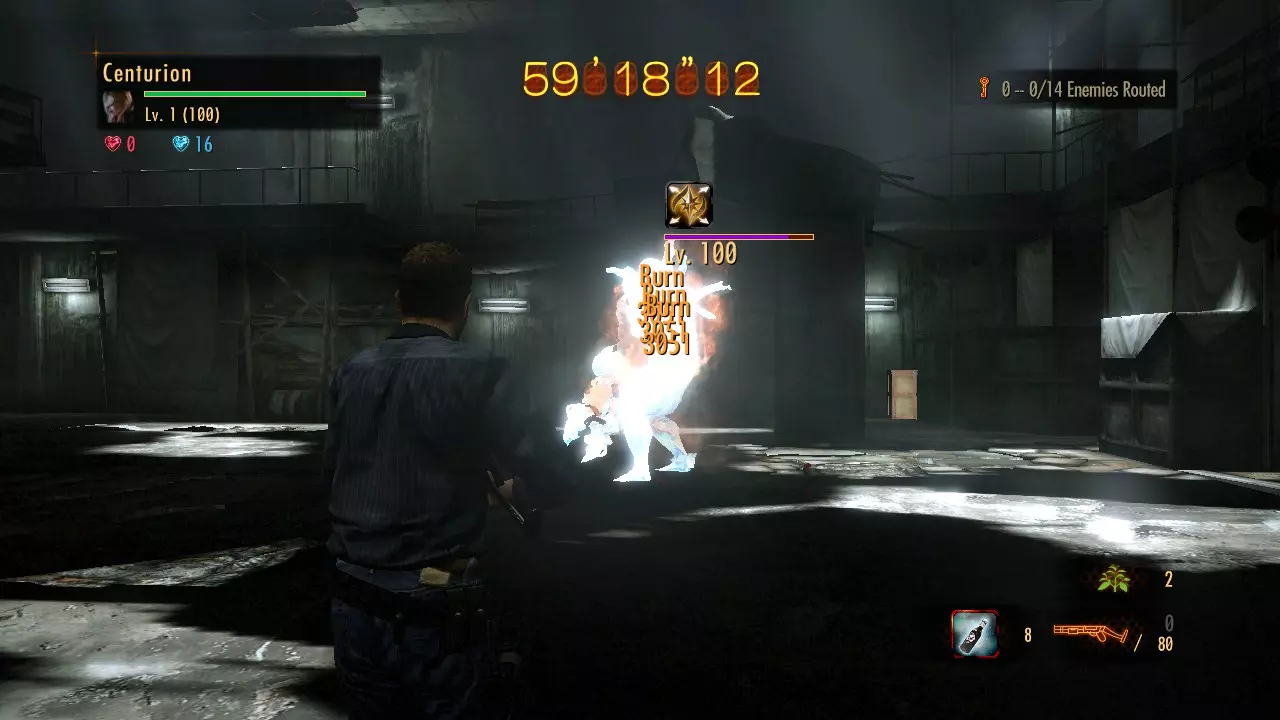
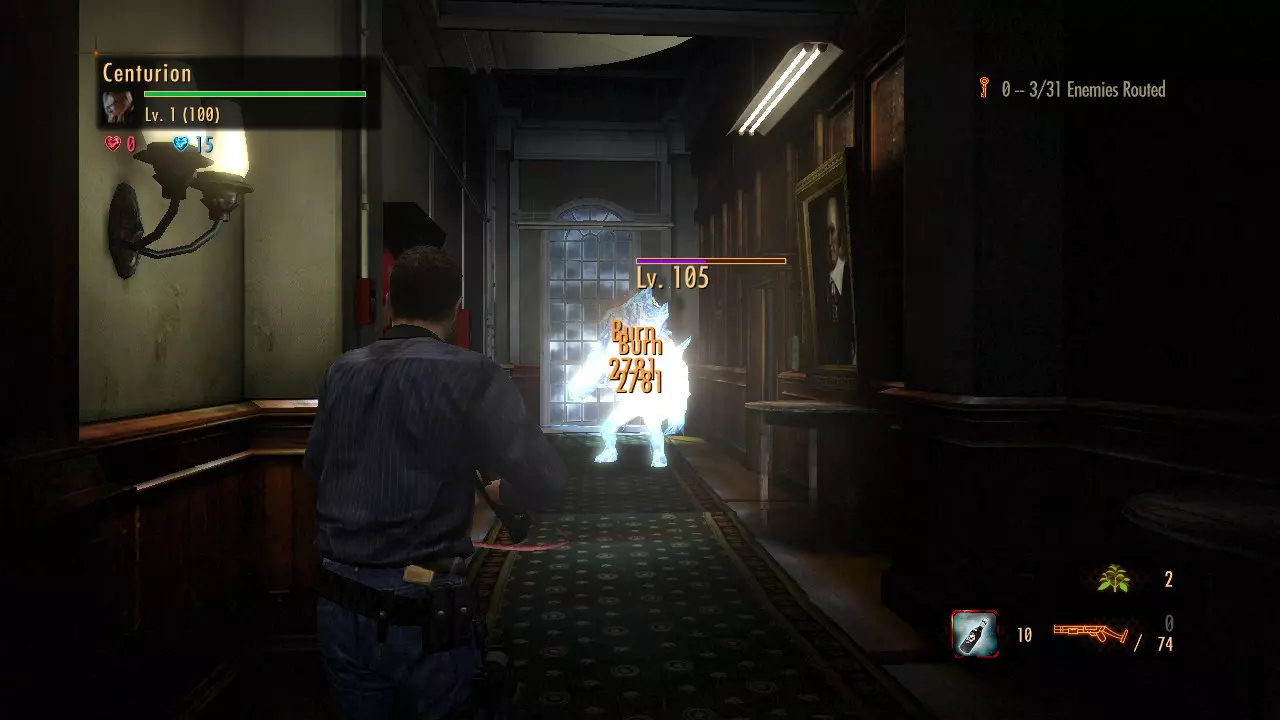
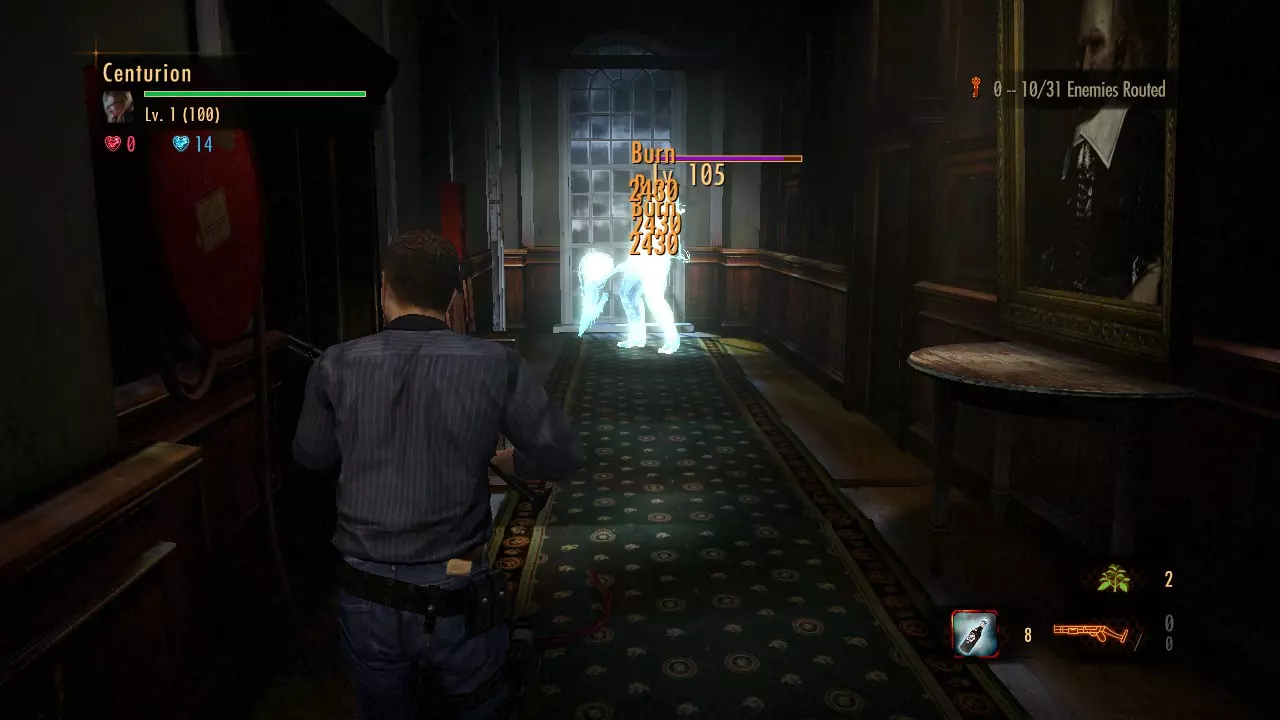
*双弹夹霰弹枪燃烧伤害帧率30/60 在帧率30和60下均可生效 帧率30 - 适用于任何具备穿透能力的速射霰弹枪 帧率60 - 仅适用于射速至少为4.53且具备穿透能力的M147S 霰弹枪双弹夹射击演示 原始来源发现于2016年7月16日 你们中有些人可能曾经遇到过这种情况,但找不到解释。 在游玩《LRC No. 128》(尼尔的关卡)时,我注意到有时用霰弹枪射击尼尔时,火焰伤害会超过1890。我原以为这可能与尼尔的自燃有关,于是决定进行一些测试…… 经过数小时的测试,我发现了如何让1级霰弹枪的火焰伤害对所有敌人叠加至最高3780。要求 - **强烈推荐携带“稳定射击”标签**,除非你能在霰弹枪的极限射程附近精准瞄准。 - **穿透属性为必备**。 - **聚焦部件为必备**。 - **FPS30(30帧)** - M147S和TAP194至少需要+8%的射速(搭配稳定射击标签)。 - **FPS60(60帧)** - 仅适用于射速至少为4.53的M147S。 - **此方法不适用于无法稳定维持至少25-30帧(针对FPS30情况)的低配置系统**。 操作方法 若要实现霰弹枪伤害的双重叠加,你需要站在距离敌人大约2米(4步)的位置,该位置需在霰弹枪的极限射程以内。当你瞄准敌人时,若中心准星变暗,则表示已处于极限射程。对于体型较小的敌人,你需要站在距离极限射程约2.5米(5步)的位置。以下截图将为你提供需要站立位置的参考。
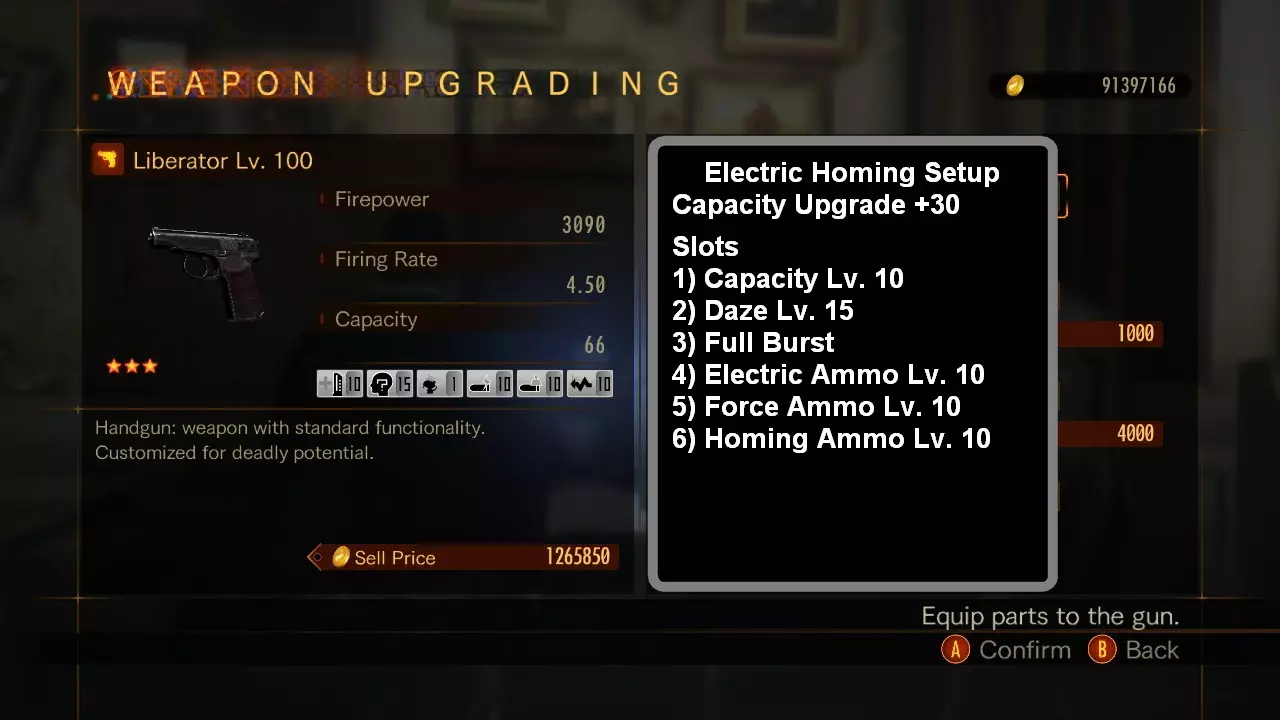
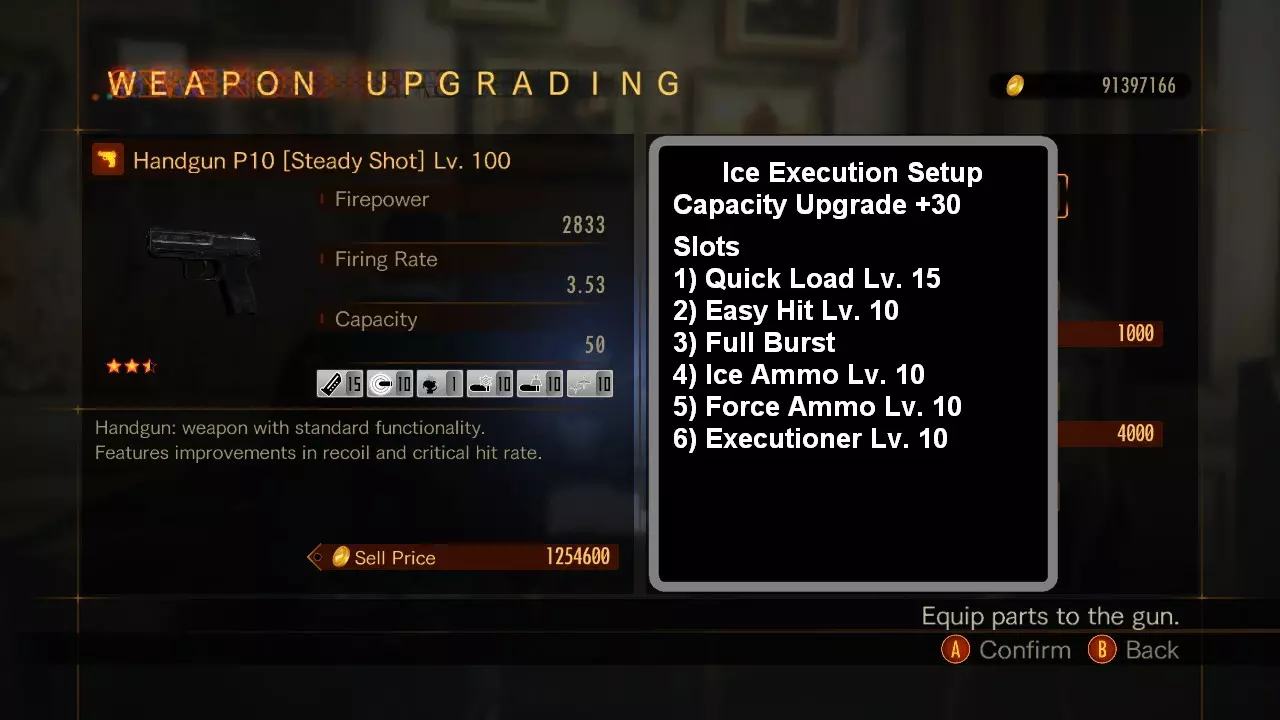
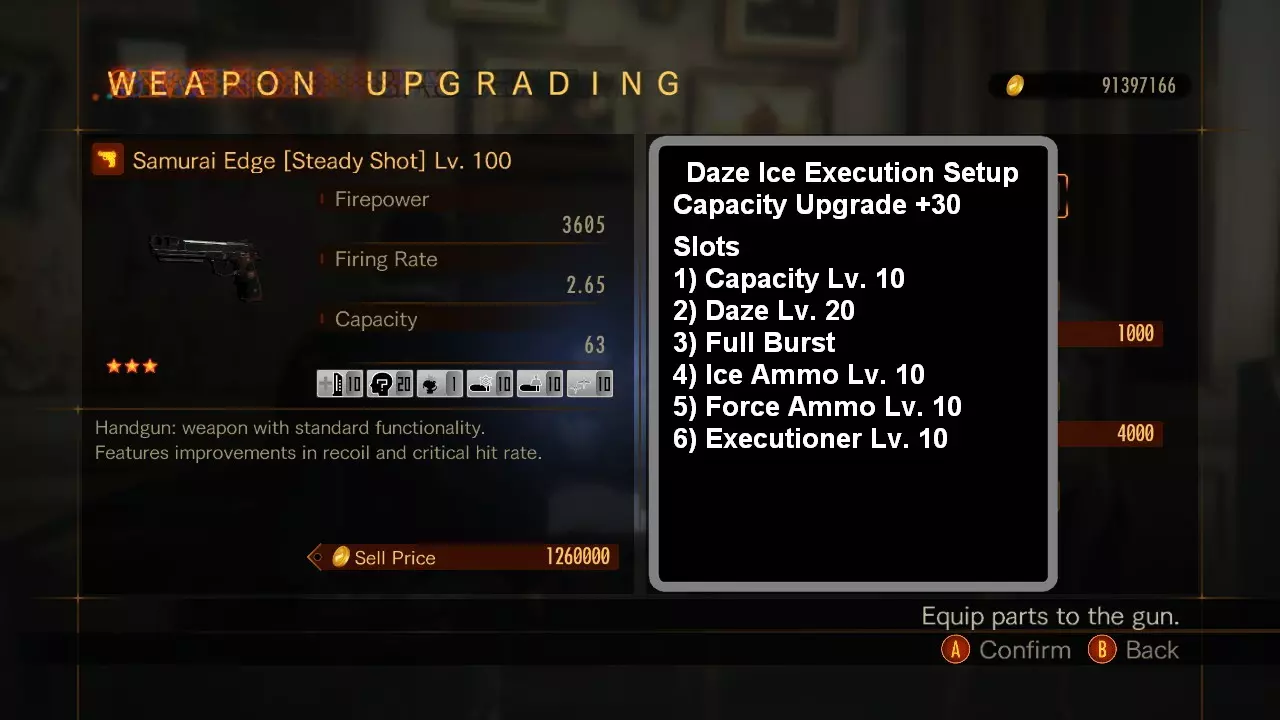
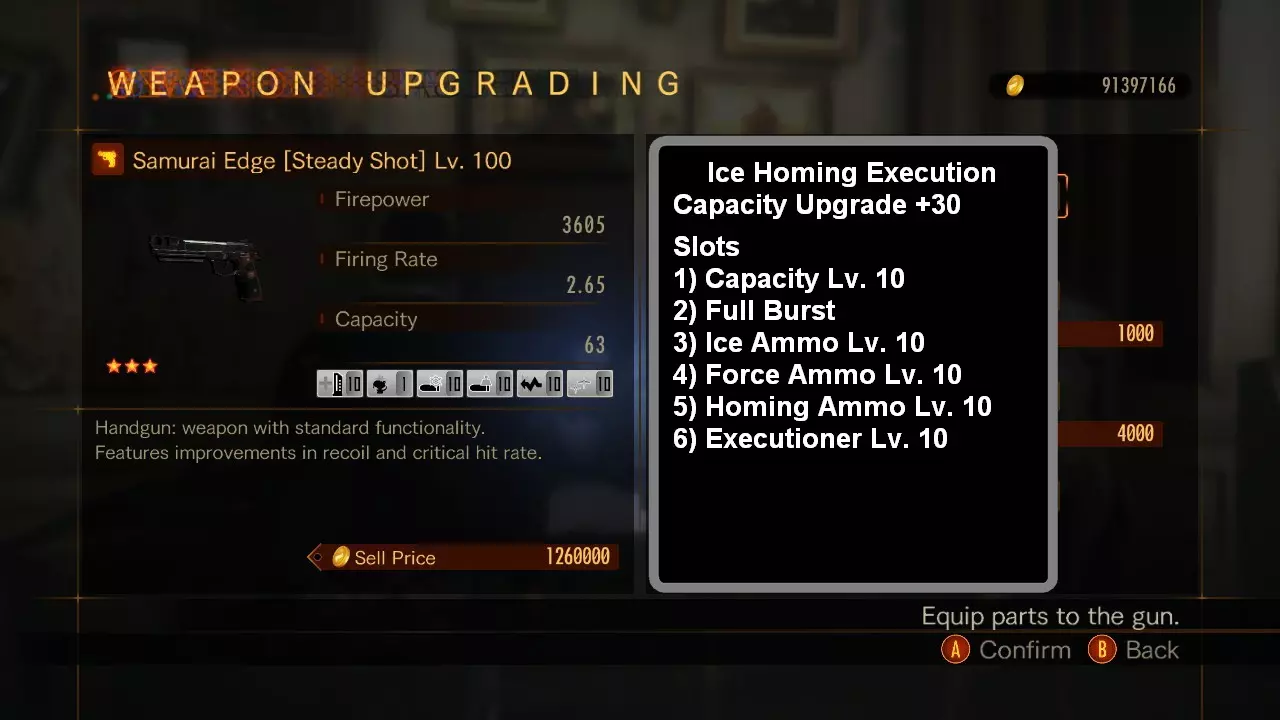
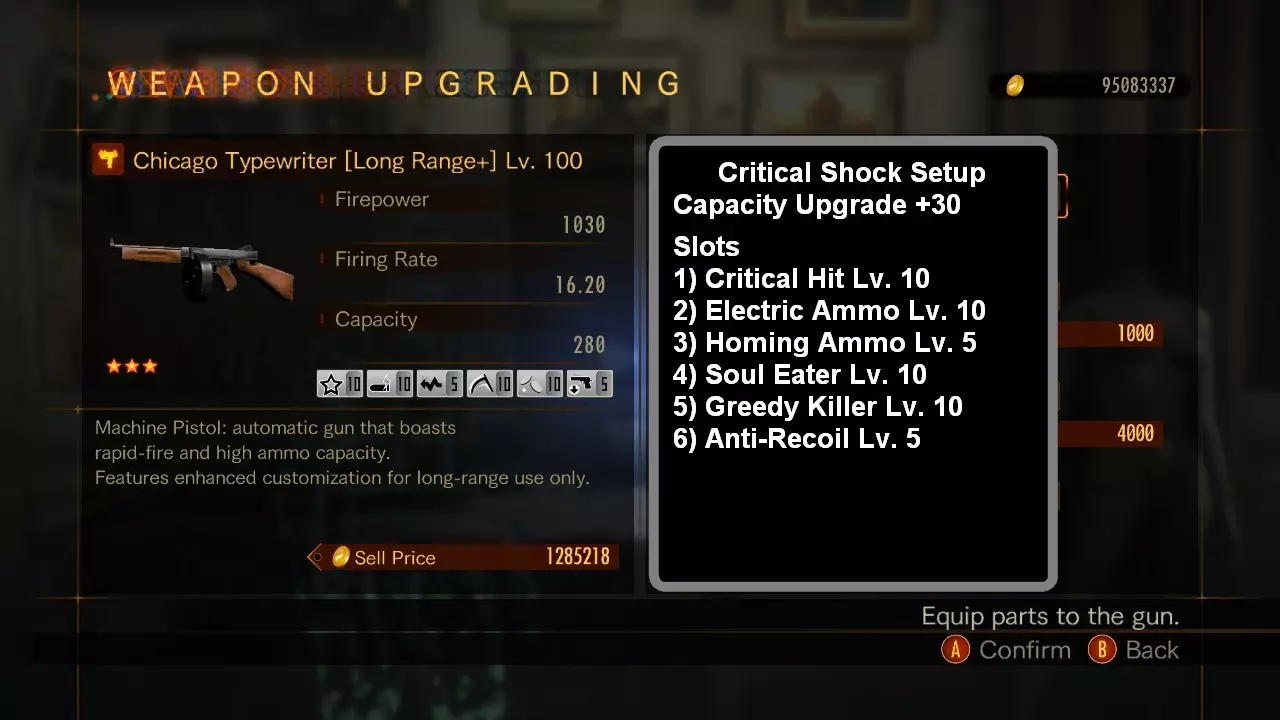
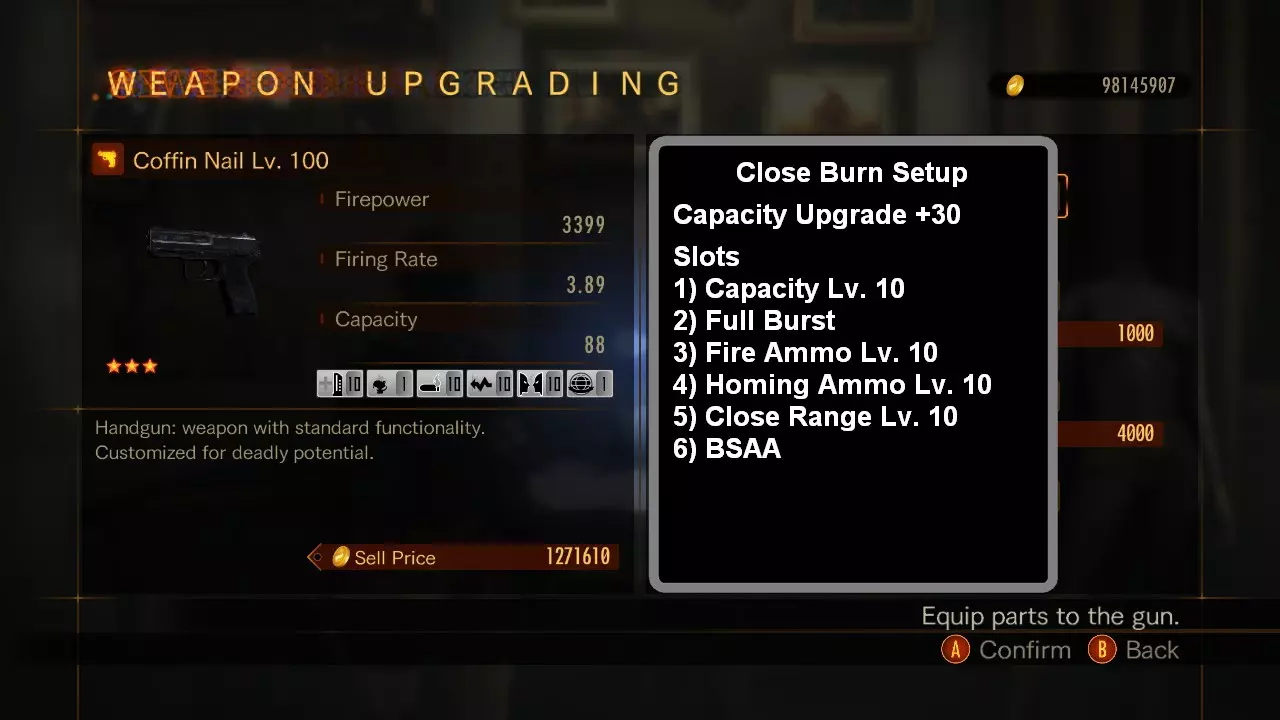
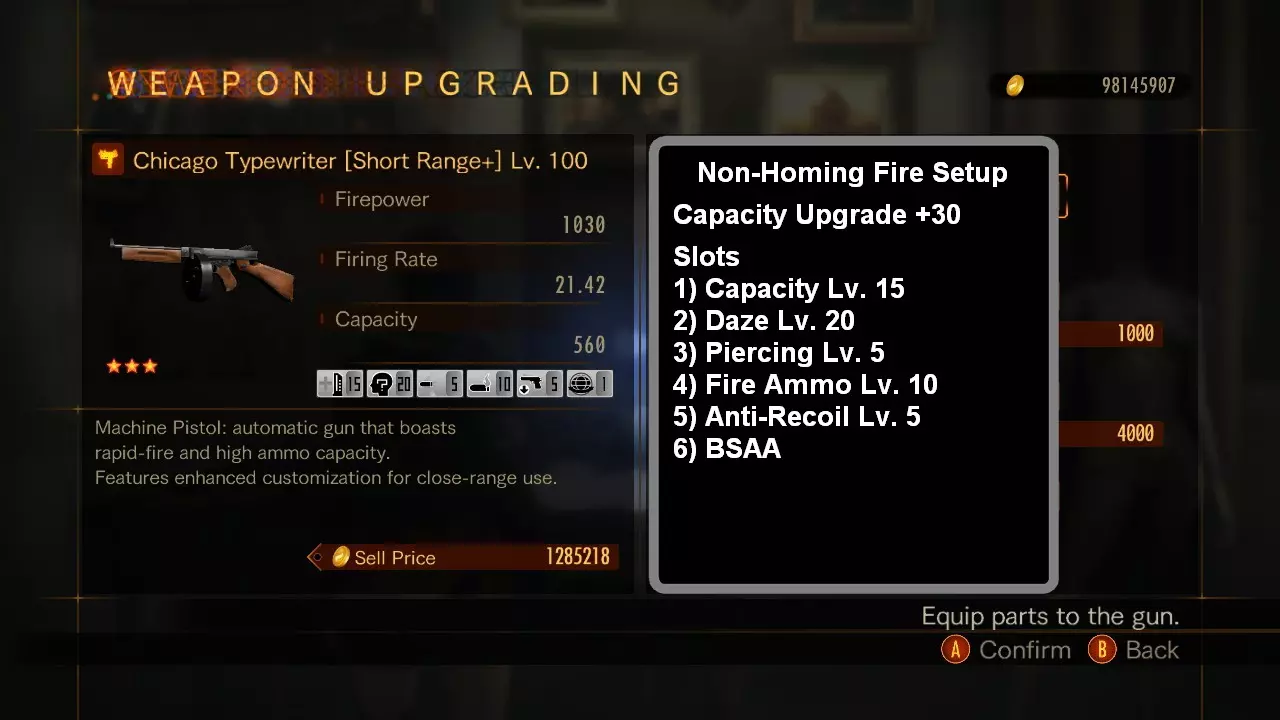
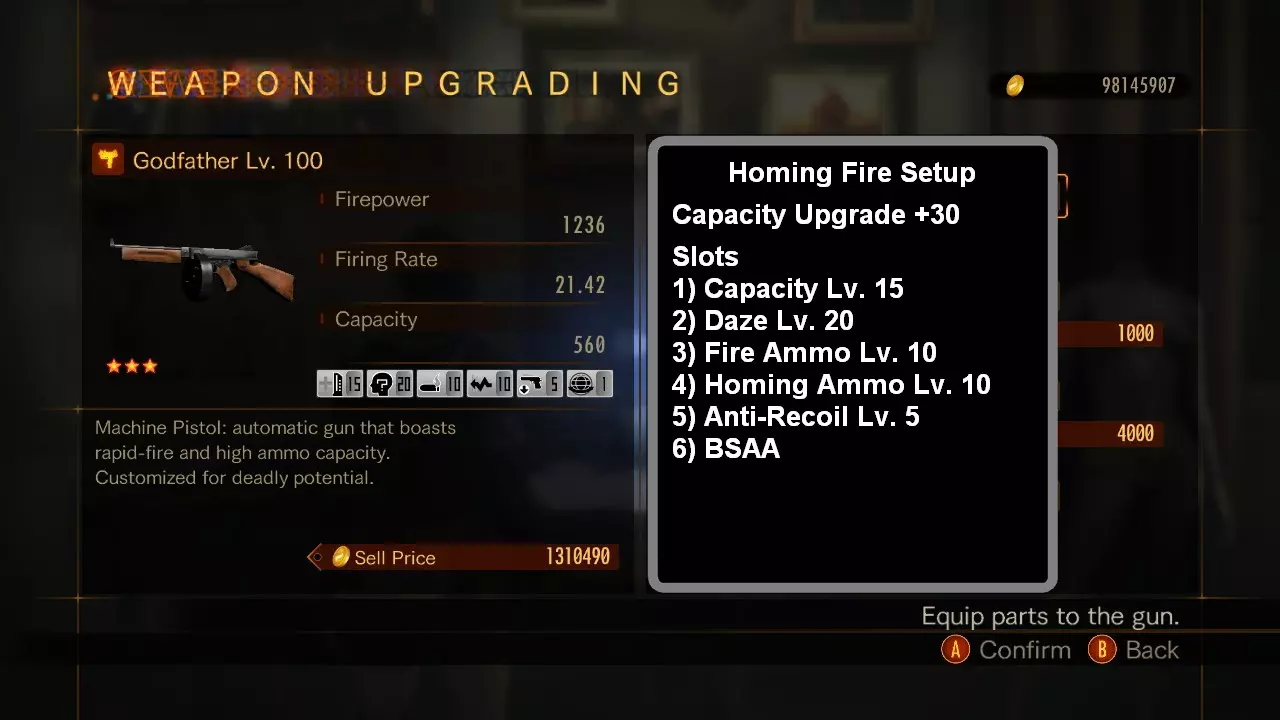
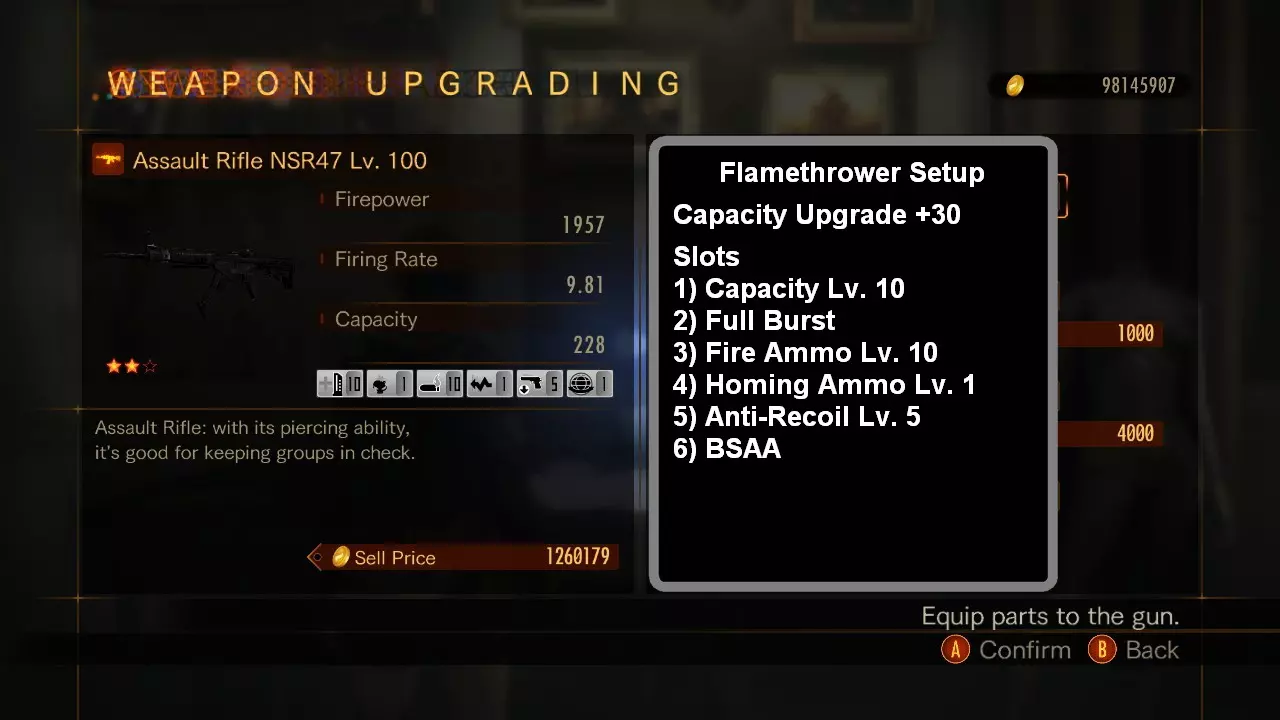
Using this technique it is very possible to do the Graveyard (Guantlet VIII-3) at level 1. Invasion of the Huge Creatures Event Primary Weapons *FOR ALL Lv. 100 CREATURE EVENT WEAPONS YOU UPGRADE CAPACITY 30 TIMES* *For all primary weapons the preferred tags are [Long Range], [Long Range+] or [Steady Shot]. Needed skills are rocket launcher, crouch power, sniper rifle master and magnum master* Parts setup will vary based on the creatures weakness. For example in Invasion of the Huge Creatures No. 9 the creatures weakness was fire. This is the basic maximum damage setup. Weapon 1 - Anti-Materiel Rifle Slot 1. Damage 2. Capacity 3. Charge Shot 4. Mundane Murderer 5. Long Range 6. Critical Hit Weapon 2 - Anti-Materiel Rifle Slot 1. Damage 2. Capacity 3. Charge Shot 4. Mundane Murderer 5. Long Range 6. Critical Hit Weapon 3 - Sniper Rifle - Best Weapon: Muramasa Slot 1. Damage 2. Capacity 3. Charge Shot 4. Mundane Murderer 5. Long Range 6. Critical Hit Weapon 4 - Magnum - Best Weapon: Pale Rider Slot 1. Damage 2. Capacity 3. Charge Shot 4. Mundane Murderer 5. Long Range 6. Critical Hit Support Weapons *FOR ALL Lv. 100 CREATURE EVENT WEAPONS YOU UPGRADE CAPACITY 30 TIMES* Support weapons are used by the second player (local or online) to increase your damage. *For all support weapons the preferred tags are [Speed Shot] or [Speed Load]. The preferred weapons are P10, Chicago Typewriter, NSR47, SVD, Model 329, 2005M and Python* Handgun - P10 - When shock occurs it will always be 2x Slot 1. Capacity 2. Burst +1 3. Electric Ammo Lv. 10 (40% Chance) 4. BSAA 5. Firing Rate (Optional) 6. Machine Pistol - Chicago Typewriter - **IMPORTANT READ BELOW Slot 1. Capacity 2. Burst +1 3. Electric Ammo Lv. 10 (12% Chance) 4. Anti-Recoil Lv. 5 5. BSAA 6. Firing Rate (*Required*) **Increasing the firing rate actually increases the chance of burst +1 dealing shock 2x, but it DOES NOT increase the chance of shock occurrence. Assault Rifle - NSR47 - **IMPORTANT READ BELOW Slot 1. Capacity 2. Burst +1 3. Electric Ammo Lv. 10 (19% Chance) 4. Anti-Recoil Lv. 5 5. BSAA 6. Firing Rate (*Required*) **Increasing the firing rate actually increases the chance of burst +1 dealing shock 2x, but it DOES NOT increase the chance of shock occurrence. Sniper Rifle - SVD - When shock occurs it will always be 2x *Due to the SVD's recoil you can use [Steady Shot] tag if possible* Slot 1. Capacity 2. Burst +1 3. Electric Ammo Lv. 10 (100% Chance) 4. BSAA 5. 6. Magnum - Model 329, 2005M or Python - When shock occurs it will always be 2x Slot 1. Capacity 2. Burst +1 3. Electric Ammo Lv. 10 (100% Chance) 4. Anti-Recoil Lv. 5 5. BSAA 6. *Creature Event Damage Calculation Formula [Total Damage] ÷ [Number of Times Data Received] x [Event Duration] All reset times for Daily Missions, Creature Event and Weekend Survivor is: 3 pm (15:00) LOCAL TIME For creature event a day starts and ends at 3 pm (15:00) Japan Standard Time. If your reset time allows you to play twice within this 24 hour period then +1 will be added to number of times data received. When a day progresses then +1 will be added to the event duration. Example Session 1 - 5,000,000 Session 2 - 6,000,000 Session 3 - 5,500,000 Event Duration - 2 Days [16,500,000] ÷ [3] x [2] = 11,000,000 will be posted if the next leaderboard update is before 3pm JST. -------------------------------------------------------------------------------------------------------------------------- Session 1 - 5,000,000 Session 2 - 6,000,000 Session 3 - 5,500,000 Event Duration - 3 Days [16,500,000] ÷ [3] x [3] = 16,500,000 will be posted if the next leaderboard update is after 3pm JST. Level-Restricted Challenge Lv. 40 The LRC level 40 weapon setups and loadout vary depending on the stage, but for the most part you can use your Weekend Survivor weapons for LRC 40 events. Event Demo PistolsAll Lv. 100 Pistols: Capacity Upgrade +30 Slot Standard Power 1 Capacity Damage 2 Burst Part Capacity 3 Fire Ammo Burst Part 4 Homing Ammo Fire Ammo 5 BSAA Homing Ammo 6 *** *** ***The 6th part can be anything that assist the pistols tag or your gameplay style. Example
霰弹枪 详见霰弹枪部分 冲锋手枪 所有100级冲锋手枪:弹匣容量提升+30 |插槽|非制导|制导| |----|----|----| |1|弹匣容量|弹匣容量| |2|眩晕|眩晕| |3|穿透|火焰弹药| |4|火焰弹药|制导弹药| |5|防后坐力|防后坐力| |6|BSAA|BSAA| 示例
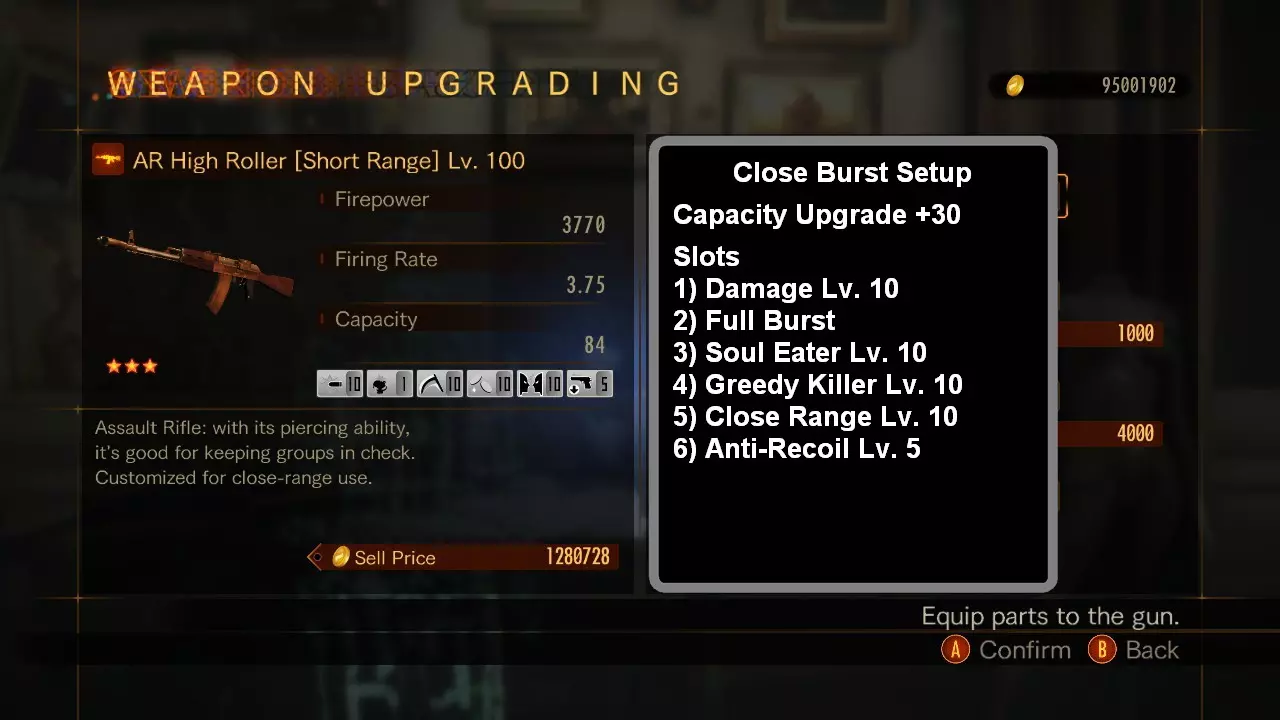
突击步枪 所有100级突击步枪:弹匣容量提升+30 不要在LRC活动中使用High Roller(豪赌者),其射速过慢,无法保持稳定且有效的输出效率。 |槽位|非制导|制导| |---|---|---| |1|弹匣容量|弹匣容量| |2|眩晕|眩晕| |3|火焰弹药|火焰弹药| |4|防后坐力|制导弹药| |5|BSAA|防后坐力| |6|***|BSAA| ***第6个配件可以是任何有助于持续射击的属性(如射速、快速装填、全连射等)。 示例
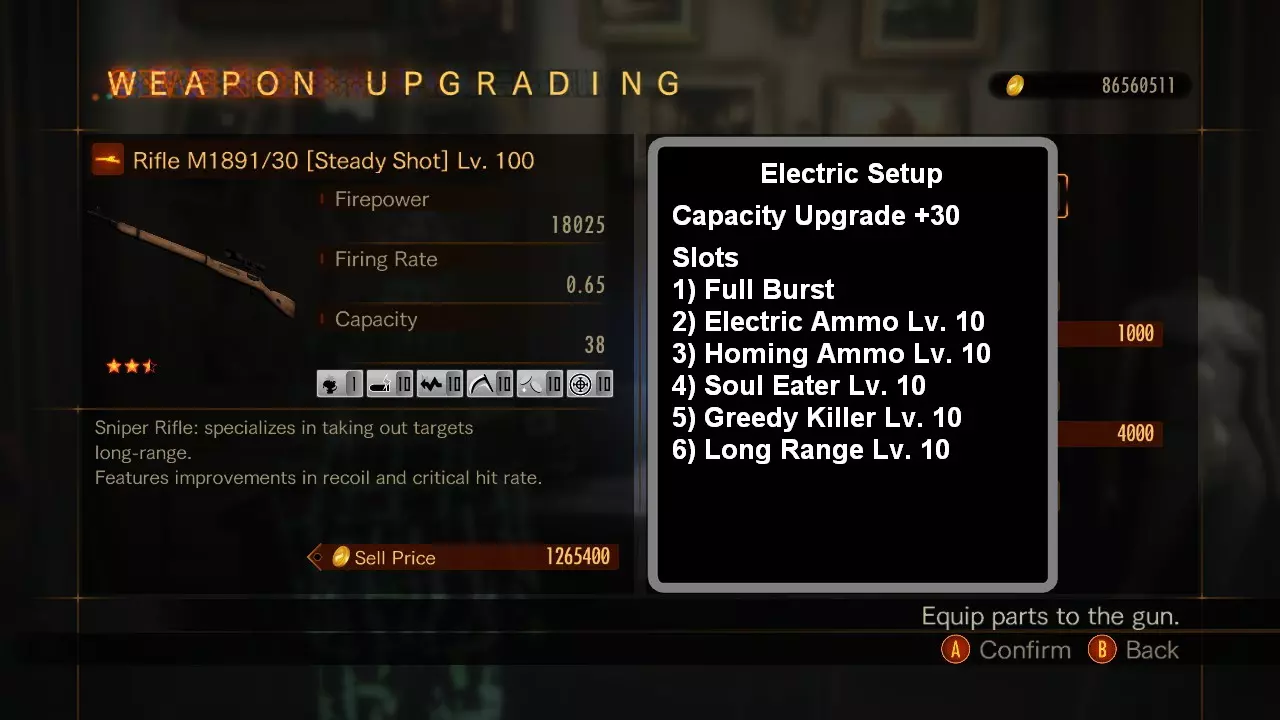
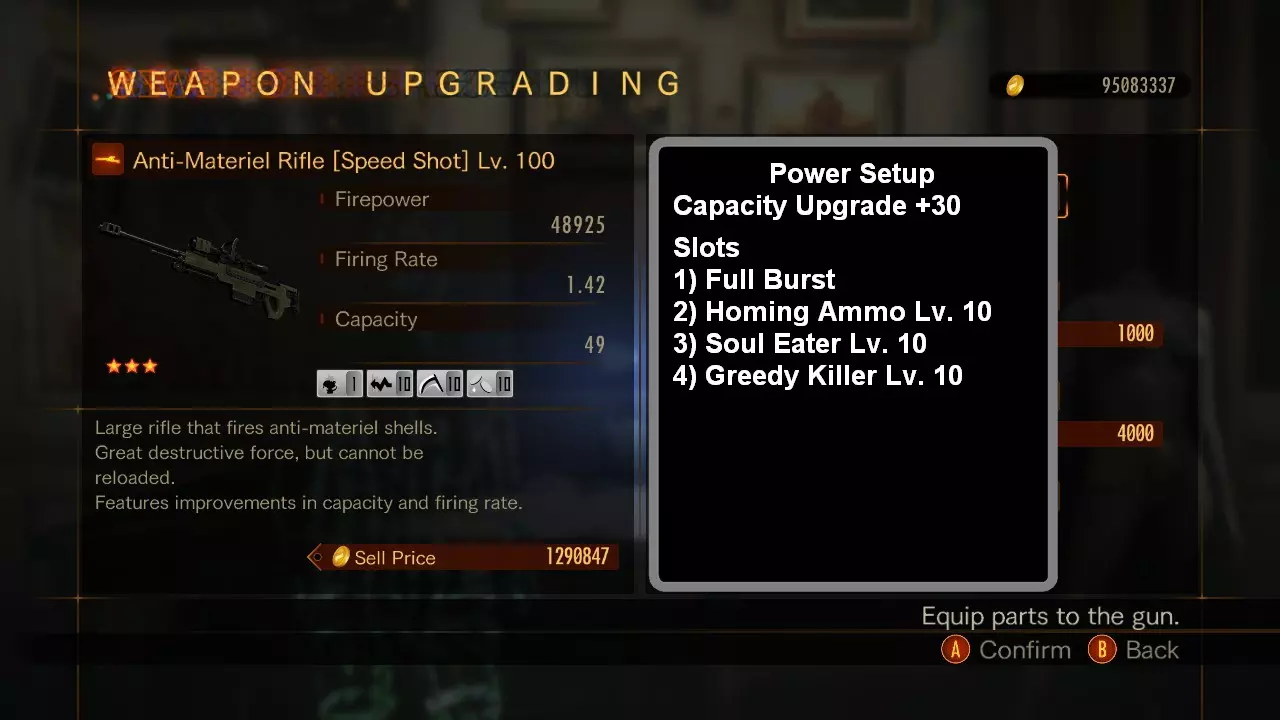
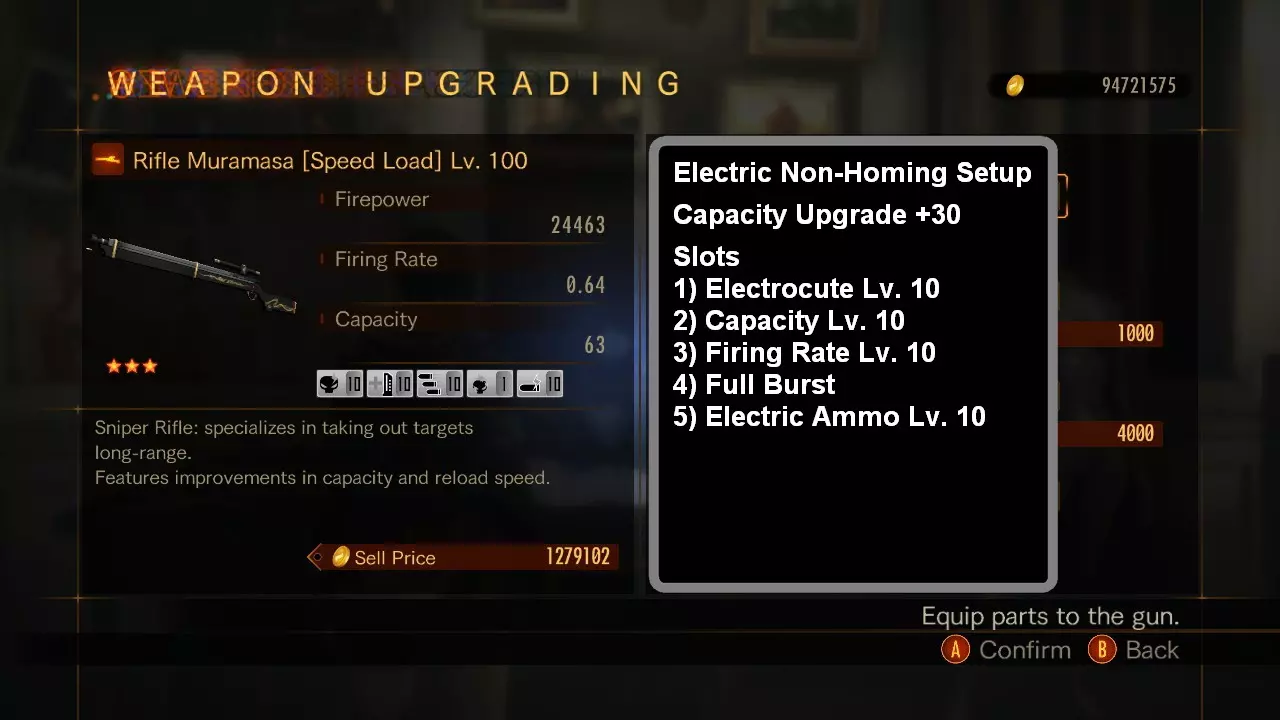
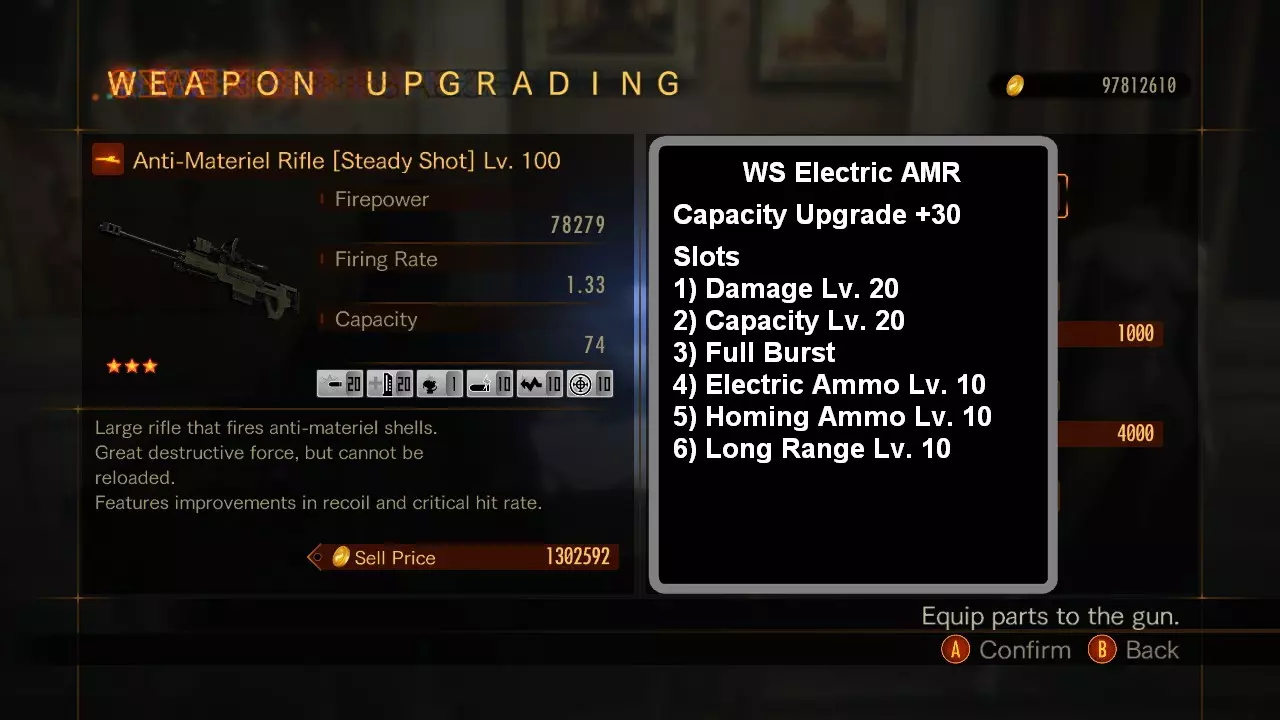
狙击步枪 所有标记为射速的100级狙击步枪:弹匣容量提升+30 *有关射速的更多详细信息,请参见射速部分* 电击配置需要高等级乃至满级的伤害和容量部件才能发挥效果。伤害部件至少需要18级,容量部件至少需要15级。插槽 火焰 电击 1 伤害 伤害 2 容量 容量 3 爆发部件 爆发部件 4 火焰弹药 电击弹药 5 追踪弹药 追踪弹药 6 持续燃烧 触电 对于反器材步枪而言,第6个部件可以选择远程部件,因为其火力足以弥补因使用远程部件而导致的近距离伤害降低。 示例
马格南全射速标记 100级马格南:弹匣容量提升+30 *有关射速的更多详细信息,请参见射速部分* 请勿在LRC活动中使用“苍白骑士” 电击配置需要高等级乃至满级的伤害和容量部件才能发挥效果。伤害部件至少18级,容量部件至少15级。插槽 火焰 电击 1 伤害 伤害 2 容量 容量 3 爆发部件 爆发部件 4 火焰弹药 电击弹药 5 追踪弹药或反后坐力 追踪弹药或反后坐力 6 延长燃烧 电击效果 ***如果你拥有[短射程]或[短射程+]麦格农(Magnum),则可以在第6插槽使用近距离(属性)。 示例

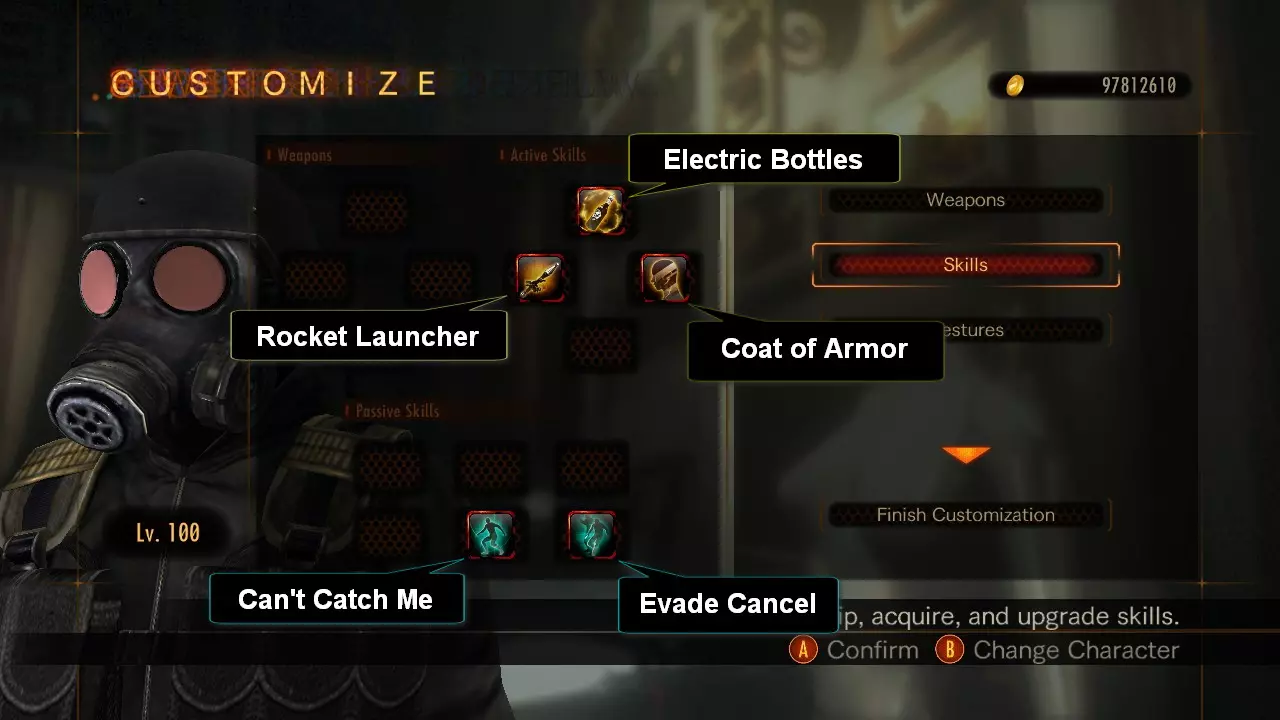
等级限制挑战 100级 通常100级等级限制挑战的配置包括3把霰弹枪(配置详见霰弹枪部分)和1把力场手枪或麦林左轮(配置详见力场弹药与武器部分)。 技能配置会因关卡而异,但最常用的副武器为电击瓶、冰冻瓶、火箭筒和迷惑装置。 活动演示 装备示例技能
ćŚĺ¨
*LRC 100 VIII-3(墓地) 开发中…… 游戏内两个最难的LRC关卡之一的简易指南。敌人生成顺序 生成编号 敌人类型 信息 1 纳帕德(Napad) 关卡开始时生成 2 纳帕德(Napad) 1号纳帕德被击杀时生成 3 纳帕德(Napad) 2号纳帕德被击杀时生成 4 纳帕德(Napad) [速度-倒计时-中毒] 3号纳帕德被击杀时生成 [5] 拉斯科拉潘耶(Rasklapanje) 4号纳帕德被击杀时生成 <6> <纳帕德(Napad)> 拉斯科拉潘耶 [5]被击杀时生成 <7> <纳帕德(Napad)> 与<6>号纳帕德一同生成 (8) (纳帕德(Napad)) <6>号和<7>号纳帕德被击杀时生成 (9) (纳帕德(Napad)) 与(8)号纳帕德一同生成 (10) (纳帕德(Napad)) [速度-治疗者-中毒] (8)号或(9)号纳帕德被击杀时生成 [11] 拉斯科拉潘耶(Rasklapanje) (8)号、(9)号和(10)号纳帕德被击杀时生成 *12* *纳帕德(Napad)* 拉斯科拉潘耶 [11]被击杀时生成 *13* *纳帕德(Napad)* 与*12*号纳帕德一同生成 =14= =纳帕德(Napad)= [速度-治疗者-倒计时] *12*号和*13*号纳帕德被击杀时生成 =15= =纳帕德(Napad)=生成 Napad =14= [16] Rasklapanje 在 Napad =14= 和 =15= 被击杀时生成 17 Napad 在 Rasklapanje [16] 被击杀时生成 {18} Doruga 在 Napad 17 生成后约 15 秒生成 19 Napad 在 Napad 17 被击杀时生成 20 Napad 在 Napad 19 被击杀时生成 *LRC 100 VIII-6(尼尔的关卡)游戏中两个最难的 LRC 关卡之一的快速指南。敌人生成顺序 生成编号 敌人类型 信息 {1} 尼尔(Neil) 当你接触地面层时生成 *2* 铁头(Ironhead) 当尼尔生命值约为75%时生成 [3] 纳帕德(Napad) 当尼尔生命值约为50%时生成 <4> 铁头(Ironhead) 当尼尔生命值约为25%时生成 *5* 铁头[火焰-治疗者-毒素](Ironhead [Fire-Healer-Poison]) 当*2*号铁头被击杀时生成 [6] 纳帕德[冰霜-治疗者-毒素](Napad [Ice-Healer-Poison]) 当[3]号纳帕德被击杀时生成 <7> 纳帕德(Napad) 当<4>号铁头被击杀时生成 *8* ***铁头***(Ironhead) 当*5*号铁头被击杀时生成 [9] 纳帕德(Napad) 当[6]号纳帕德被击杀时生成 <10> 纳帕德(Napad) 当<7>号纳帕德被击杀时生成 [11] 纳帕德(Napad) 当[9]号纳帕德被击杀时生成 <12> 纳帕德(Napad) 当<10>号纳帕德被击杀时生成 <13> 纳帕德(Napad) 当<12>号纳帕德被击杀时生成 <14> 纳帕德(Napad) 当<13>号纳帕德被击杀快速参考 2、5、8 3、6、9、11 4、7、10、12、13、14 -***铁头(Ironhead)8*在其生成后可用于击杀剩余敌人。在敌人发动攻击前使用电击武器对其电击,这样他很可能会在敌人爆炸中存活下来。 -你很可能会耗尽电击瓶,因此在单人电击时使用快速非制导支援枪(参见截图 5)。 -强力弹药(Force ammo)为可选。 -蓝色氮气罐只能秒杀铁头(Ironhead),射击罐子前至少使用 1 次电击。 -如果第一个铁头(Ironhead)(生成 #2)是治疗者和/或坦克,直接重新开始。 装备示例 技能
ćŚĺ¨

等级限制挑战 128(Gauntlet VIII-6) 技能
ćŚĺ¨


周末生存者 [技能] 以下是周末生存者(全等级)最常用的技能。其余技能需根据你的武器配置和游玩风格来选择。
周末生存挑战 60级 [武器] 周末生存挑战包含30层(任务),需按顺序进行。 初始角色等级固定为60级、70级或100级 周末生存挑战 60级 敌人等级:1层 - 40级 敌人等级:30层 - 110级 周末生存挑战 70级 敌人等级:1层 - 50级 敌人等级:30层 - 120级 周末生存挑战 100级 敌人等级:1层 - 80级 敌人等级:30层 - 120级 ***所有精英配置均需满级部件*** 周末生存挑战 等级60武器1 - 麦林枪槽位 标准精英 1 伤害 伤害 2 弹容量 弹容量 3 全爆发 全爆发 4 火焰弹药 电击弹药 5 追踪弹药 追踪弹药 6 反后坐力 电击 武器2 - 麦林枪槽位 标准精英 1 伤害 伤害或持续灼烧 2 弹容量 弹容量 3 全爆发 全爆发 4 火焰弹药 火焰弹药 5 追踪弹药 追踪弹药 6 反后坐力 远程 武器3 - 狙击步枪槽位 标准精英 1 伤害 伤害或持续灼烧 2 弹容量 弹容量 3 全爆发 全爆发 4 火焰弹药 火焰弹药 5 追踪弹药 追踪弹药 6 BSAA 远程 武器4 - 霰弹枪槽位 标准精英 1 弹容量 弹容量 2 全爆发 全爆发 3 穿透 穿透 4 火焰弹药 火焰弹药 5 专注 专注 6 BSAA或快速装填 近距离 示例


周末生存挑战 70级 [武器] 周末生存挑战包含30层(任务),需按顺序进行。 初始角色等级固定为60级、70级或100级 周末生存挑战 60级 敌人等级:1层 - 40级 30层 - 110级 周末生存挑战 70级 敌人等级:1层 - 50级 30层 - 120级 周末生存挑战 100级 敌人等级:1层 - 80级 30层 - 120级 ***所有精英配置均需满级部件*** 周末生存挑战 70级武器 1 - 麦林枪槽位 标准 精英 1 伤害 伤害 2 弹匣容量 弹匣容量 3 全爆发 全爆发 4 火焰弹药 电击弹药 5 追踪弹药 追踪弹药 6 防后坐力 电击 武器 2 - 麦林枪槽位 标准 精英 1 伤害 伤害或持续燃烧 2 弹匣容量 弹匣容量 3 全爆发 全爆发 4 火焰弹药 火焰弹药 5 追踪弹药 追踪弹药 6 防后坐力 远程 武器 3 - 狙击步枪槽位 标准 精英 1 伤害 伤害或持续燃烧 2 弹匣容量 弹匣容量 3 全爆发 全爆发 4 火焰弹药 火焰弹药 5 追踪弹药 追踪弹药 6 BSAA 远程 武器 4 - 反器材步枪槽位 标准 精英 1 伤害 伤害 2 弹匣容量 弹匣容量 3 全爆发 全爆发 4 火焰弹药 电击弹药 5 追踪弹药 追踪弹药 6 BSAA 远程 示例
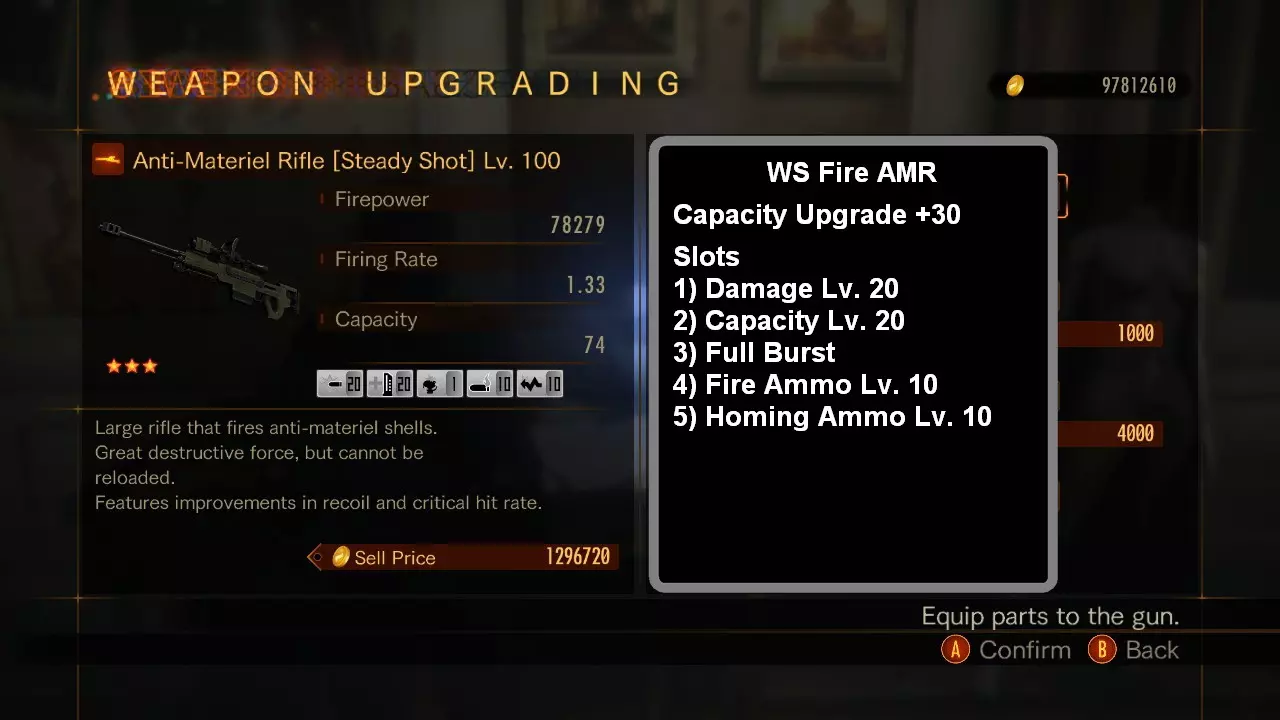
周末生存挑战 100级 [武器] 周末生存挑战包含30层(任务),需按顺序进行。 初始角色等级固定为60级、70级或100级。 周末生存挑战 60级 第1层敌人等级 - 40级 第30层敌人等级 - 110级 周末生存挑战 70级 第1层敌人等级 - 50级 第30层敌人等级 - 120级 周末生存挑战 100级 第1层敌人等级 - 80级 第30层敌人等级 - 120级 ***所有精英配置均需满级部件*** 周末生存挑战 Lv.武器1 - 麦林枪槽位 标准精英 1 伤害 伤害 2 弹容量 弹容量 3 全爆发 全爆发 4 火焰弹药 电击弹药 5 追踪弹药 追踪弹药 6 反后坐力 电击 武器2 - 麦林枪槽位 标准精英 1 伤害 伤害或持续燃烧 2 弹容量 弹容量 3 全爆发 全爆发 4 火焰弹药 火焰弹药 5 追踪弹药 追踪弹药 6 反后坐力 远程 武器3 - 狙击步枪槽位 标准精英 1 伤害 伤害或持续燃烧 2 弹容量 弹容量 3 全爆发 全爆发 4 火焰弹药 火焰弹药 5 追踪弹药 追踪弹药 6 BSAA 远程 武器4 - 反器材步枪槽位 标准精英 1 伤害 伤害 2 弹容量 弹容量 3 全爆发 全爆发 4 火焰弹药 电击弹药 5 追踪弹药 追踪弹药 6 远程 远程 示例