


如何为《碧海黑帆》安装模组
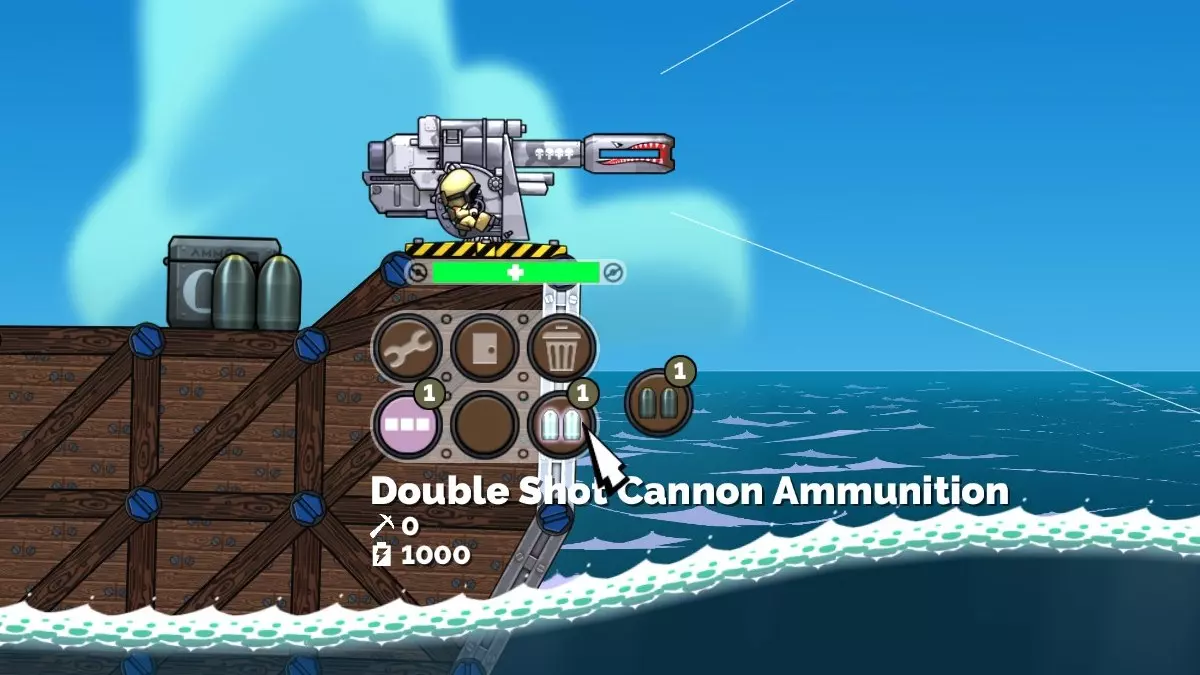
Discover the new modding features of the High Seas DLC, and how to use them to create new content. Introduction The High Seas DLC adds a boat load of exciting features to the Forts modding landscape. The new ammunition system allows weapons to dynamically change their fire power. Planes can be created to drop bombs, launched from the runway. Orbital lasers can attack from the sky, splitting ships in two, sinking parts into the depths. Build queues supply new constraints to balance powerful weapons. Arbitrary forces can be applied to any part of a structure. Projectiles can be spawned in thin air, without the need of a weapon. And more! If you haven't already read the How to mod Forts guide, you should do that first. This guide will will take you through these new features, but it won't make much sense if you don't understand the fundamentals. Depending on High Seas For some functionality in this guide (planes and orbitals) you will need to force on the High Seas mod, which is named dlc2. In your mod.lua script, simply add: Include = { "dlc2" } The control functionality is in a separate script. If you are creating your own control projectiles you may want to enable that alone, or in addition to dlc2. Include = { "dlc2", "dlc2_control_base" } Triggering High Seas dependencyThe use of any symbol containing "dlc2_" will cause your mod to depend on High Seas. The check is a simple string search, so it will pick up instances within comments too. You can decide to handle the use of this functionality by requiring High Seas, or by supporting High Seas. Read on to learn about the difference. Requiring High SeasIf your mod makes no sense without High Seas, then you can signal this to players browsing the Workshop, and to Forts itself (which will make it unavailable for selection if High Seas is not installed) with the following in mod.lua: RequiresHighSeas = true Supporting High SeasLets say you want your mod to take advantage of High Seas features if it's installed, but if not then it should still work, but perhaps with some elements non-functional (or better yet, removed). This is quite possible, as your mod is allowed to run still, and can query whether High Seas (i.e. dlc2) is active. To achieve this, and have a High Seas badge next to your mod in-game, simply set the following flags in your mod.lua: SupportsHighSeas = true Then, within your mod's Lua files you can adjust execution based on the dlc2Var_Active and dlc2Var_Value variables, which are automatically set by the game. You might use them dlc2Var_Active to avoid adding a weapon to the Weapons table, if it simply wouldn't work without High Seas, for example. dlc2Var_Value can be used where arithmetic is needed, as its value is set to 0 when High Seas is not active, and 1 when it is. if dlc2Var_Active then table.insert(Weapons, { -- High Seas dependent weapon } end You can still add "dlc2" to your Include table in this case, so it will prefer to force on the High Seas mod if it's possible. You may receive a warning on upload of your mod - just understand that the contents of the dlc2 mod may not be available at run time. Ammunition The Ammunition system ('ammo' for short) is a powerful way of changing the behaviour of weapons. The base game allows weapons to have only one firing mode. That is, a weapon can fire only one type of projectile, for a number of rounds, with a number of projectiles per round, with a fixed reload period. Commanders can change the behaviour while active, but otherwise weapons are very inflexible. With the High Seas DLC, a weapon can fire any number of ways. This is the way it works: the firing parameters that are in the root of the weapon script become the default values for all ammunition types. The game then looks for the dlc2_Ammunition table, which holds a list of values to override for different firing modes. If that doesn't exist, or is empty, a single ammo type is created using the default values. This is how the legacy weapons from the base game and Moonshot work. If it does exist, it reads the values, using the default values for any that aren't specified. Each entry in the list is a different firing mode, and can overwrite many of the weapon's firing parameters, listed below. At the launch of High Seas, not all of the parameters were supported, but this will be corrected. Projectile RoundsEachBurst ProjectilesEachRound RoundPeriod ReloadTime MinFireSpeed MaxFireSpeed MetalFireCost EnergyFireCost RetriggerFireEffect RetriggerFireEffectOnce FireEffect FireRetriggerEffect FireEndEffect CutOffEffects BeamRetriggersImpactProjectile BeamsCutOffEffects BeamsRecycleEffects BeamCollidesWithBackground BeamDuration BeamThicknessMultiplier BeamDamageMultiplier BeamPenetrationRotationThreshold BeamPenetrationDistanceThreshold BeamEndEffectTimeNote that the beam related values can optionally be placed in a Beam table for better organisation. Projectile weapons can fire beams and visa versa. A Simple Example: An Alternate Firing ModeLet's mod the Cannon to have a mode that fires two projectiles instead of one. You can subscribe to the completed Double Shot Cannon mod to copy and customise it. weapons/cannon.lua: dofile("ui/uihelper.lua") if dlc2_Ammunition == nil then dlc2_Ammunition = { {}, -- use default values } end table.insert(dlc2_Ammunition, { Sprite = "hud-context-ammo-doubleshot", RoundsEachBurst = 2, -- use default values except RoundsEachBurst }) table.insert(Sprites, ButtonSprite("hud-context-ammo-doubleshot", "context/HUD-Ammo-DoubleShot", nil, nil, nil, nil, path))
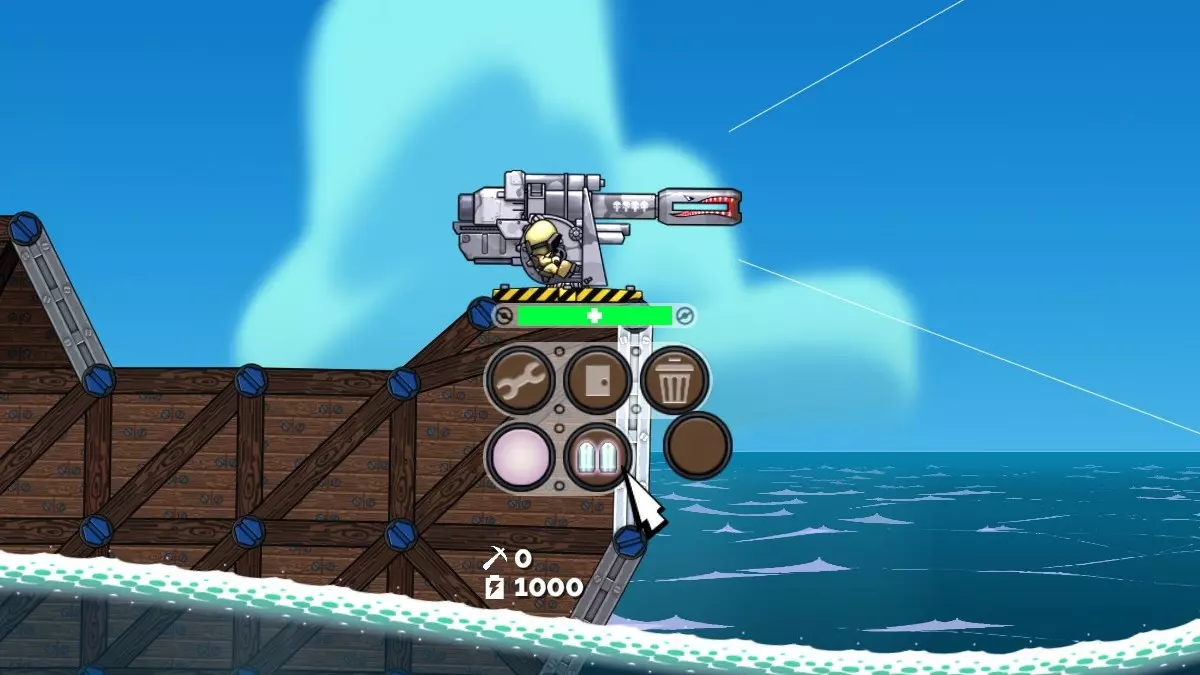
首先,需要确保dlc2_Ammunition数据表存在。虽然基础的cannon.lua脚本中并未创建该表,但其他模组可能已经创建了该表并添加了自定义弹药。在这种情况下,如果该表尚未被修改,我们需要创建一种与火炮默认发射方式完全相同的弹药类型。这可以通过插入一个空表来实现。这样一来,该弹药类型的所有发射参数都会从武器脚本根目录中的默认值读取。如果未指定任何图标,游戏将使用空白的上下文按钮精灵,如截图所示。 现在要添加新的弹药类型,需在dlc2_Ammunition中再插入一个条目。这次我们将覆盖两个数值,其他所有发射参数仍从武器脚本根目录读取。精灵值(Sprite value)允许我们为弹药类型添加一个上下文按钮,用于识别和选择该弹药。你可以使用游戏中包含的ui textures context HUD-Buttons-Blank-*.tga文件作为模板来创建自己的按钮。我们已为演示模组制作了一个新的精灵作为示例。 在这种情况下,RoundsEachBurst(每轮爆发弹数)被设置为2,覆盖了默认值1。当选择此弹药类型并开火时,武器将依次发射两枚 projectile(投射物)。开火消耗、后坐力、装填时间等保持不变,因为它们使用默认值。你可以修改任何受支持的值,使弹药表现出不同的效果。你甚至可以将投射物武器改造成光束武器。 所需设备:上面的示例使弹药在资源允许开火的情况下始终可用。假设我们希望玩家建造一个升级中心才能使用我们的弹药。 table.insert(dlc2_Ammunition, { Sprite = "hud-context-ammo-doubleshot", RoundsEachBurst = 2, Devices = { { Name = "upgrade", Consume = false } }, -- 需要建造升级装置 })
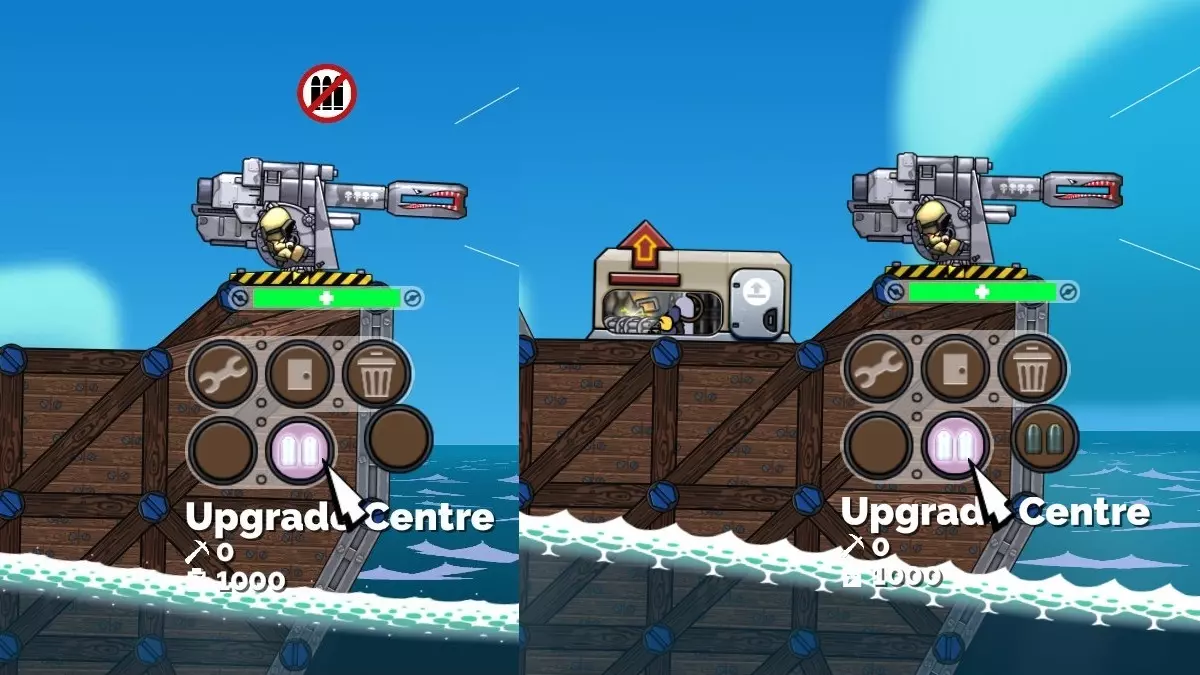
如果你运行此程序,会发现需要建造升级中心才能使用我们的新型弹药。将鼠标悬停在弹药的上下文按钮上时,现在会显示“升级中心”。这是从弹药“设备”表中列出的第一个设备获取的信息。这可能没什么用处,因此你可以使用StringId值手动进行设置。 table.insert(dlc2_Ammunition, { StringId = "Weapon.CannonDoubleShot", -- 上下文菜单显示名称 Sprite = "hud-context-ammo-doubleshot", RoundsEachBurst = 2, Devices = { { Name = "upgrade", Consume = false } }, })
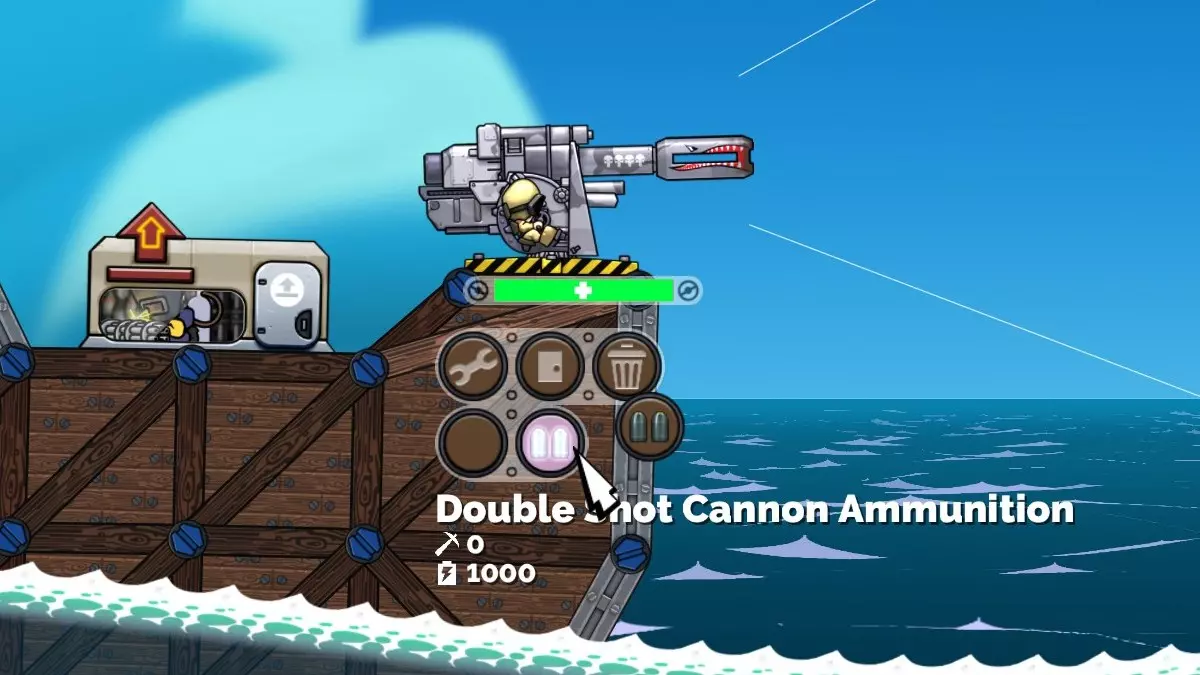
请参阅《如何制作《forts》模组》指南的“本地化”部分,了解如何添加翻译字符串。 消耗性弹药 到目前为止,我们已经介绍了始终可用的弹药以及至少建造一个相关装置后才可用的弹药。现在我们将介绍会消耗装置的弹药。只需在弹药的“Devices”表格中将物品的“Consume”标志设置为“true”,即可实现这一点。 table.insert(dlc2_Ammunition, { StringId = "Weapon.CannonDoubleShot", Sprite = "hud-context-ammo-doubleshot", RoundsEachBurst = 2, Devices = { { Name = "ammo_cannondouble", Consume = true } }, })
将此设备放入新文件中十分重要:devices/ammo_list.lua。该文件与devices/device_list.lua的格式完全相同,不同之处在于其中的设备会显示在HUD的“弹药”选项卡中。这样能让玩家更清楚地知道在哪里可以找到它,以及它是武器的弹药。 例如(修改devices/ammo_list.lua): table.insert(Devices, { SaveName = "ammo_cannondouble", FileName = path .. "/devices/ammo_cannondouble."lua", Icon = "hud-ammo_cannon_doubleshot-icon", Detail = "hud-detail-ammo_cannon_doubleshot", Enabled = true, Prerequisite = "munitions", BuildTimeIntermediate = 5, BuildTimeComplete = 15, ScrapPeriod = 1, MetalCost = 200, EnergyCost = 6000, MetalRepairCost = 100, EnergyRepairCost = 3000, MaxUpAngle = StandardMaxUpAngle, BuildOnGroundOnly = false, SelectEffect = "ui/hud/devices/ui_devices", }) 弹药装置可设置新的ConsumeEffect(消耗效果)值。通常情况下,你需要将其设置为标准的公海效果: ConsumeEffect = "mods/dlc2/effects/ammo_consumption.lua" 弹药 - 高级 本节将讨论可选功能,这些功能可让弹药的使用更加便捷或用户友好。在设备脚本中指定弹药 武器用于所有射击参数的弹药类型可放置在弹药设备配置脚本中,而非武器配置脚本。这使得向现有武器添加新弹药类型(消耗品或其他类型)更加简便。注意武器表,该表列出了指定弹药将被添加到的一种或多种武器。 在devices/ammo_cannondouble.lua中: dlc2_Ammunition = { { StringId = "Weapon.CannonDoubleShot", Sprite = "hud-context-ammo-doubleshot", RoundsEachBurst = 2, Devices = { { Name = "ammo_cannondouble", Consume = true } }, Weapons = { "cannon" }, -- 将此弹药添加到这些武器(并从中获取默认值) } } 我们将在后面的章节中使用此方法为轨道激光添加弹药和射击模式。修改武器精灵 使用“跑道”和“轨道激光”武器时,你会注意到武器图形的一部分会根据所选发射弹药的不同而变化。例如,若“雷霆弹”已准备好发射,“跑道”上会显示一枚“雷霆弹”已装填完毕并准备发射。这为玩家提供了一个明显的视觉提示,让他们知道即将发射的是什么弹药。这种设计可能并不适用于所有武器,但如果你要为已具备此功能的现有武器添加弹药,这一点就非常重要。若要更改一个或多个武器精灵,可使用 dlc2_Ammunition 表项中的 AmmoSprites 表,如下所示: AmmoSprites = { { Node = "Head", Sprite = "thunderbolt-head-thunderbolt", }, }, 这将把相关武器的 Head 节点更改为如下所示的 thunderbolt-head-thunderbolt 精灵。请注意,此精灵可以像常规武器精灵一样具有 Normal(正常)、Idle(闲置)和 Reload(装填)状态,这些状态会被触发以实现整合。
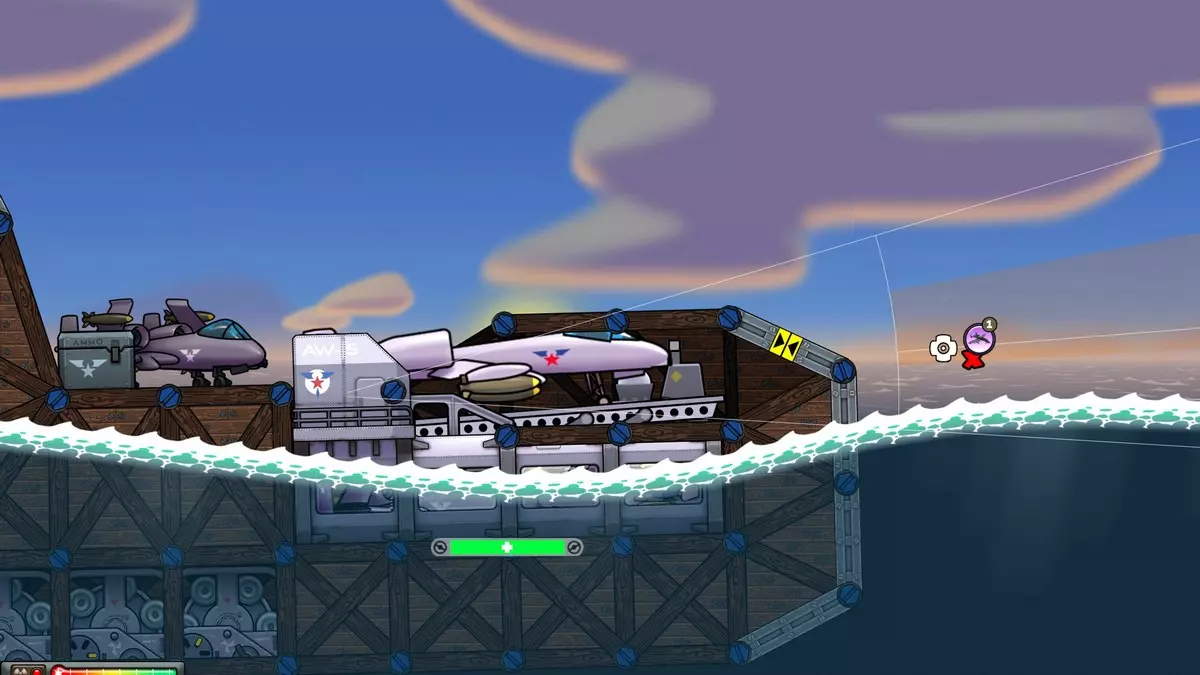
Build Queues By default, devices and weapons build simultaneously. The player needs to have collected enough resources to start construction, so there is already a natural limit on how quickly firepower can be brought to bear. As the size of maps increases, the rate at which resources can be gathered also increases, and resource limiting becomes less meaningful. High Seas introduced weapons and ammo more powerful than the existing ones - we needed to be careful not to allow them to come out too quickly, to avoid making existing weapons obsolete. We also wanted to have boats full of valuable but explosive items, leading to battles that could turn dramatically, since gravity was no longer as relevant when the 'fort' is supported at all locations, and with a wide base. Build queues were the answer: only one of each kind of ammo could be built at a time. This makes it easier to balance very powerful weapons with high instantaneous fire rates. The runway can launch planes in less than a second, rapidly delivering bombs to overwhelm an opponent, for example. Creating a Build QueueThere can be any number of independent build queues. With High Seas there is a build queue for planes (dlc2_runway), one for orbital laser beacons (dlc2_ol_ammo), and one for the Harpoon (dlc2_harpoon). This allows planes, beacons, decoys and control ammo to build simultaneously, while having to wait for their own kind to complete. Continuing our example above, let's only allow one 'Double Shot Cannon' ammo device to built at once, in its own queue. This can be called whatever you like, and any device or weapon can be a part of the queue. Just make sure it's reasonably unique and meaningful. If you are integrating with another mod that already has a build queue then you don't need to create another one - see the next heading on how to join a queue. In our devices/ammo_list.lua file: BuildQueueConcurrent["cannon_ammo"] = 1 The value assigned to the build queue represents the number of devices associated with that queue that can be constructed at once. So for example if you use the value 2, then 2 devices in that queue can build simultaneously. Joining a Build QueueTo make a device or weapon a member of a build queue, you simply need to assign the dlc2_BuildQueue value for the item in the appropriate device_list.lua, weapon_list.lua or ammo_list.lua. For our example, we can update our devices/ammo_list.lua file like so: BuildQueueConcurrent["cannon_ammo"] = 1 table.insert(Devices, { SaveName = "ammo_cannondouble", dlc2_BuildQueue = "cannon_ammo", FileName = path .. "/devices/ammo_cannondouble.lua", Icon = "hud-ammo_cannon_doubleshot-icon", Detail = "hud-detail-ammo_cannon_doubleshot", Enabled = true, Prerequisite = "munitions", BuildTimeIntermediate = 5, BuildTimeComplete = 15, ScrapPeriod = 1, MetalCost = 200, EnergyCost = 6000, MetalRepairCost = 100, EnergyRepairCost = 3000, MaxUpAngle = StandardMaxUpAngle, BuildOnGroundOnly = false, SelectEffect = "ui/hud/devices/ui_devices", }) A device can be a member of only one build queue. Creating a build queue does not trigger High Seas dependency, but joining one does. Modifying and Limiting a Build Queue It's possible for a device or weapon to change the simultaneous build capacity of one or more build queues. This feature was added to allow the upgraded runway to build two planes at once. This is done by setting the BuildQueueModifier table of the item in device_list.lua or weapon_list.lua, like so: runway2.BuildQueueModifier = { ["dlc2_runway"] = 1 } This means for every weapon of type "runway2", add 1 to the build queue capacity. You can add more build queues to this table if you want other build queues to be modified. To limit the effectiveness of this, the build queue has a limit enforced. There is an alternate form of adding a build queue to do this: BuildQueueConcurrent["dlc2_runway"] = { Default = 1, Min = 1, Max = 2 } This means that no matter how many weapons of type runway2 there are, only up to 2 planes can be build simultaneously. The modifier can be negative, which is why there is also a minimum. Planes Planes can be used to break through light anti-air, and attack from above. In High Seas the runway weapon is used to launch two planes, the thunderbolt and nighthawk. These two projectiles have similarities, but drop different bomb projectiles, and a different number of them. The High Seas mod (dlc2) has a script that allows the runway weapon to track projectiles and drop bombs when they near the end of their life. They can also bank away instead of crashing. This is all configured by the dlc2_Bombs table in projectile_list.lua. Thunderbolts, for example have the following in their projectile_list.lua entry: dlc2_Bombs = { Count = 4, Period = 0.06, Speed = 1000, OffsetX = 0, OffsetY = 180, Projectile = "bomb", FireEffect = path .. "/effects/bomb_release.lua", BankEffect = path .. "/effects/thunderbolt_banking.lua", AIAnticipatesDelivery = true, BankingLookahead = 2500, AbortLookahead = 0, }, This causes the thunderbolt projectile to release 4 bombs of type bomb. The spacing, horizontal speed, position and effects can also be adjusted. BankEffect is used to make the plane appear to turn away to the horizon after the bombs are released, or it detects an obstacle within a distance of BankingLookahead. AIAnticipatesDelivery is useful for some forms of anti-air - specifically the Dome. Since the bombs don't exist while the plane is en-route, the dlc2 script creates a 'virtual projectile' and moves it such that if the Dome fires at that, it has a good chance of intercepting the actual bombs when they arrive. If you want to enable this for your own form of anti-air, this is the line used to mod ai/ai.lua: data.AntiAirFiresAtVirtualWithin["dome"] = 1 Where the assigned value is the duration in seconds approaching the release point that the virtual projectile will be valid for. At the moment planes only work with the runway. To add your plane ammo, see the details above in the Ammunition section with the heading Specifying Ammo in the Device Script. Orbital Bombardment Creating an attack from the heavens is a little more complicated than for planes: Create a beacon projectile with a dlc2_orbital table, telling the dlc2 mod script which ammo type orbital_laser_source will use and how to move it. Add an ammo type to orbital_laser and orbital_laser2 to fire this new beacon projectile. The ammo type specified in step 2 is added to the orbital_laser_source weapon, which describes which projectile or beam to fire and related parameters. Create a new beam or projectile type for the attack.Let's create a new mod. It will add a new ammo device for the orbital laser. This ammo will fire a new beacon projectile. When it lands the satellite will sweep over the target area, firing 20mm projectiles. You can subscribe to, copy and customise the Orbital 20mm Cannon Sweep Ammo. To start with, we need to create the beacon projectile. Let's copy the ol_marker_sweep projectile and make some modifications. This includes the dlc2_orbital table, telling the dlc2 script that it is an orbital attack, which ammo to use, and how it moves (Step 1). In projectile_list.lua: ol_marker_sweep = FindProjectile("ol_marker_sweep") if ol_marker_sweep then local ol_marker_20mm_sweep = DeepCopy(ol_marker_sweep) ol_marker_20mm_sweep.SaveName = "ol_marker_20mm_sweep" ol_marker_20mm_sweep.dlc2_orbital = { Ammo = "ol_20mm_sweep", Delay = 0.1, Speed = 200, LeadTime = 3, Duration = 6, } table.insert(Projectiles, ol_marker_20mm_sweep) end The Ammo value in the dlc2_orbital table corresponds to the Tag value in the ammo below. This needs to be unique. Now in the new ammo device script (devices/ammo_orbital_20mm_sweep.lua), we add a dlc2_Ammunition table. This adds two ammo types: one for the orbital_laser and orbital_laser2 weapons to fire a new beacon (Step 2), and one for the orbital_laser_source weapon (the satellite in the sky) to fire at the target (Step 3). The beacon ammo is consumed, but the attack is always available, and so its Devices value is left as nil. dlc2_Ammunition = { -- beacon ammo { Sprite = "hud-context-ammo-20mm-sweep", StringId = "Weapon.Orbital20mmSweep", -- context menu display name AmmoSprites = { { Node = "Head", Sprite = "orbital_laser_head_sweep", }, }, Devices = { { Name = "ammo_ol_20mm_sweep", Consume = true, }, }, Projectile = "ol_marker_20mm_sweep", RoundsEachBurst = 1, RetriggerFireEffect = true, FireEffect = path .. "/effects/fire_ol_laser_sweep.lua", Weapons = { "orbital_laser", "orbital_laser2" }, }, -- attack ammo { Tag = "ol_20mm_sweep", -- corresponds to the Ammo value in the ol_marker_20mm_sweep projectile Projectile = "cannon20mm", RoundsEachBurst = 15, RoundPeriod = 0.5, MinFireSpeed = 6000, MaxFireSpeed = 6000.1, Weapons = { "orbital_laser_source" }, } } Since the cannon20mm type already exists there isn't any further work in this example for Step 4. If we wanted to add a new projectile or beam this goes in the weapons/projectile_list.lua file as normal. Adding Beam Types for use by AmmoPrior to High Seas, beam width and damage functions were specified in the weapon configuration script only. Since weapons can now fire different beams this was no longer flexible enough. These functions can now be specified within the projectile type. If they are not specified there then they fall back to what's in the weapon's configuration script. The sweep beam projectile for example looks like this: dofile("scripts/interpolate.lua") table.insert(Projectiles, { SaveName = "ol_beam_sweep", ProjectileType = "beam", -- regular beam values omitted for brevity BeamThickness = function(t) return InterpolateTable(BeamTableOrbitalSweep, t, 2) end, BeamDamage = function(t) return InterpolateTable(BeamTableOrbitalSweep, t, 3) end, BeamCollisionThickness = function(t) return InterpolateTable(BeamTableOrbitalSweep, t, 4) end, } -- UNIQUELY NAMED BEAM TABLE (see warning below) -- first column is time keypoint -- second coloumn is thickness at that keypoint -- third column is damage at that keypoint BeamTableOrbitalSweep = { { 0,1,0,0,}, { 1,10, 0,0.25,}, { 1.25,100,1500,1,}, { 3.25,100,1500,1,}, { 4.25,0,0,0,}, } WARNING: name your beam table something unique to your mod. Using the same table name will overwrite previous values and change the behaviour of other beams. Tagged Effect Visibility for Beam ImpactsWe wanted to adjust the Orbital Laser impact effect depending on which direction it was moving, so sparks would trail the impact point. We couldn't do this without duplicating the entire projectile type, since you can specify only one impact effect. The solution was to allow effect components to be switched off. The effects within an effect script can be tagged with a name using the Tag variable, and then we call the SetWeaponEffectTag script function, like so: if config.speed ~= 0 then ScheduleCall(config.delay, SetWeaponEffectTag, id, "Right", config.speed > 0) ScheduleCall(config.delay, SetWeaponEffectTag, id, "Left", config.speed < 0) end If you are adding new beams to the Orbital Laser, you can create effects with components tagged with "Left" and "Right", and these will be automatically made visible depending on the direction it's travelling. Control Projectiles The High Seas DLC adds built-in support for what we call 'control projectiles', which have powerful new capabilities. Under specified conditions they can spawn a device on a remote structure and/or assume control of it. In the DLC campaign they are used to take control of a disabled or neutral structure. In skirmish mode it only works on neutral structures, as having it work on disabled structures can bypass armour and immediately end the game. It was considered overpowered. To make use of this functionality first make sure your mod.lua includes the dlc2_control_base mod at least: Include = { "dlc2_control_base" } Then in the projectile definition you will need to set up the dlc2_control table. This has three possible entries to specify what happens when the projectile collides with other structures: Friendly, Neutral and Enemy. Each of these tables can specify two values: ControlFlags and Spawn. ControlFlags specifies what happens when the projectile collides with an appropriate structure. Appropriate flag values are defined in scripts/forts.lua. They can be combined to customise the effect. CONTROL_CONVERTALL = 1 CONTROL_CONVERTDISABLEDONLY = 2 CONTROL_SPAWNUNPOWEREDONLY = 4 Spawn specifies what type of device is created on the hit structure, if any. Let's look at some examples to put it together. Example: Taking Control of Neutral StructuresThis is the behaviour of the control projectile in skirmish and multiplayer. To achieve this we set dlc2_control within our projectile like so: dlc2_control = { Neutral = { ControlFlags = CONTROL_CONVERTALL + CONTROL_SPAWNUNPOWEREDONLY, Spawn = "minireactor", }, }, Since only the Neutral table is set, nothing will happen if the projectile hits a friendly or enemy structure. When it does hit a neutral structure it will always convert it (CONTROL_CONVERTALL). The next flag (CONTROL_SPAWNUNPOWEREDONLY) prevents spawning of a minireactor device in the case that the neutral structure already has a Reactor, Shockenaugh barrel, or other structure claiming device. The structure will simply be taken over without the device being created. Example: Taking Control of Neutral and Enemy StructuresThe High Seas campaign has slightly different behaviour to facilitate the missions objectives. The dlc2_control for this projectile is like so: dlc2_control = { Neutral = { ControlFlags = CONTROL_CONVERTALL, }, Enemy = { ControlFlags = CONTROL_CONVERTDISABLEDONLY, } }, In this case upon colliding with a neutral structure it would convert the structure to the team of the projectile (CONTROL_CONVERTALL). If the structure doesn't already having a claiming device, however, the structure will revert back to neutral. When it collides with an enemy structure, it will only attempt to convert it if all claiming devices, such as reactors, have been disabled. Example: Sending a Care PackageLet's say your ally is in a death spiral and you want to help them out. Shoot them a care package projectile and spawn a device on their fort that they can salvage when it's convenient for them. You will want to create your own carepackage device that perhaps costs a little more to fire than redeem. Perhaps in a few denominations. Do you want it to spawn on the enemy base too, for consistency? dlc2_control = { Friendly = { Spawn = "carepackage", }, Neutral = { Spawn = "carepackage", }, }, Example: Sending a BombThe original Shockenaugh active randomly spawned a barrel in each enemy fort. We could revive this in a different form by spawning a barrel where a projectile hit. The enemy could try to scrap it before it was hit by another weapon. You might want to avoid spawning it for friendlies to avoid the inevitable team killing. dlc2_control = { Neutral = { Spawn = "barrel", }, Enemy = { Spawn = "barrel", }, }, Dynamic Terrain Surfaces and Splashes The surface of a typical block of terrain in Forts is static. Now with High Seas it can be animated to look like water. The surface can also be configured to automatically produce impact effects for structures and projectiles hitting it, used in High Seas to make splashes. We'll also look at extruded edging for the water surface graphics. Starting from the Basic High Seas EnvironmentThe easiest way to make a customised water environment is to use our built-in dlc2_oceans_base mod. This will supply everything you need, but allow you to add background layers, extra props, ground textures, etc. Do this by including it in your mod.lua: Include = { "dlc2_oceans_base" } From there add your background.lua and associated textures as usual. Try that to see what you get, and then add anything else you need such as ground textures and props. You can even add new terrain surface types in the usual way. Dynamic SurfacesTo make your own water surface, add the dlc2_DynamicAnim table to your terrain surface. This table has two values: MaxDivision and Script. MaxDivision tells how far apart, at most, the water should be subdivided. To get a whole number of subdivisions the actual distance may be slightly less than this, depending on the edge length. Script is a file path that describes how to animate the subdivisions. dlc2_DynamicAnim = { MaxDivision = 100, Script = dir .. "water_anim.lua", }, The surface animation script included in dlc2_oceans_base includes the following water_anim.lua script. The script first sets up randomised wave heights in the Load function. Then implements two functions which separately control the x and y position of the subdivided terrain node. Two sine waves with different time rates are superimposed to make the water look satisfying. dofile("scripts/core.lua") function Load() Waves = 50 WaveHeight = {} SeedRandom(5); for i=1,Waves do local val = GetRandomFloat(0.4, 1) table.insert(WaveHeight, val) end end function UpdateDynamicNodeX(time, basePos) local mult1 = 2 * math.pi / 1000 --Smoothness of surface return basePos.x + 50*math.sin(mult1*basePos.x + time) end function UpdateDynamicNodeY(time, basePos) local index = math.floor(basePos.x/1000 + time/(2*math.pi))%Waves local factor = WaveHeight[index + 1] local mult1 = 2 * math.pi / 1000 --spacing of small waves local mult2 = 2 * math.pi / 1500 local result = basePos.y + factor*20*math.sin(mult1*basePos.x + time) + 20*math.sin(mult2*basePos.x + -2*time) return result end Projectile and Structure SplashesProjectile splash effects are set up for the surface in the ImpactBySize table. Each item in this table includes a number which is associated with the ImpactSize variable of the projectile. If this is not set, then ProjectileDamage is used instead. Splash effects for falling structure uses a separate table called NodeSoftImpactByVelocity. The number in each item for this represents the speed at which the node is falling into the water. Code listing below. Extruded Terrain EdgingIf you look closely at the High Seas water, the surface graphics don't look the same as what we have published previously. It's an edge type called 'extruded edging'. This takes a single Sprite value (which can be animated), and continuously tiles it over the edges of the terrain, instead of making a patchwork of separate sprites with randomised size and rotation. The Offset value can be used to move this continuous sprite up or down. Code listing below.

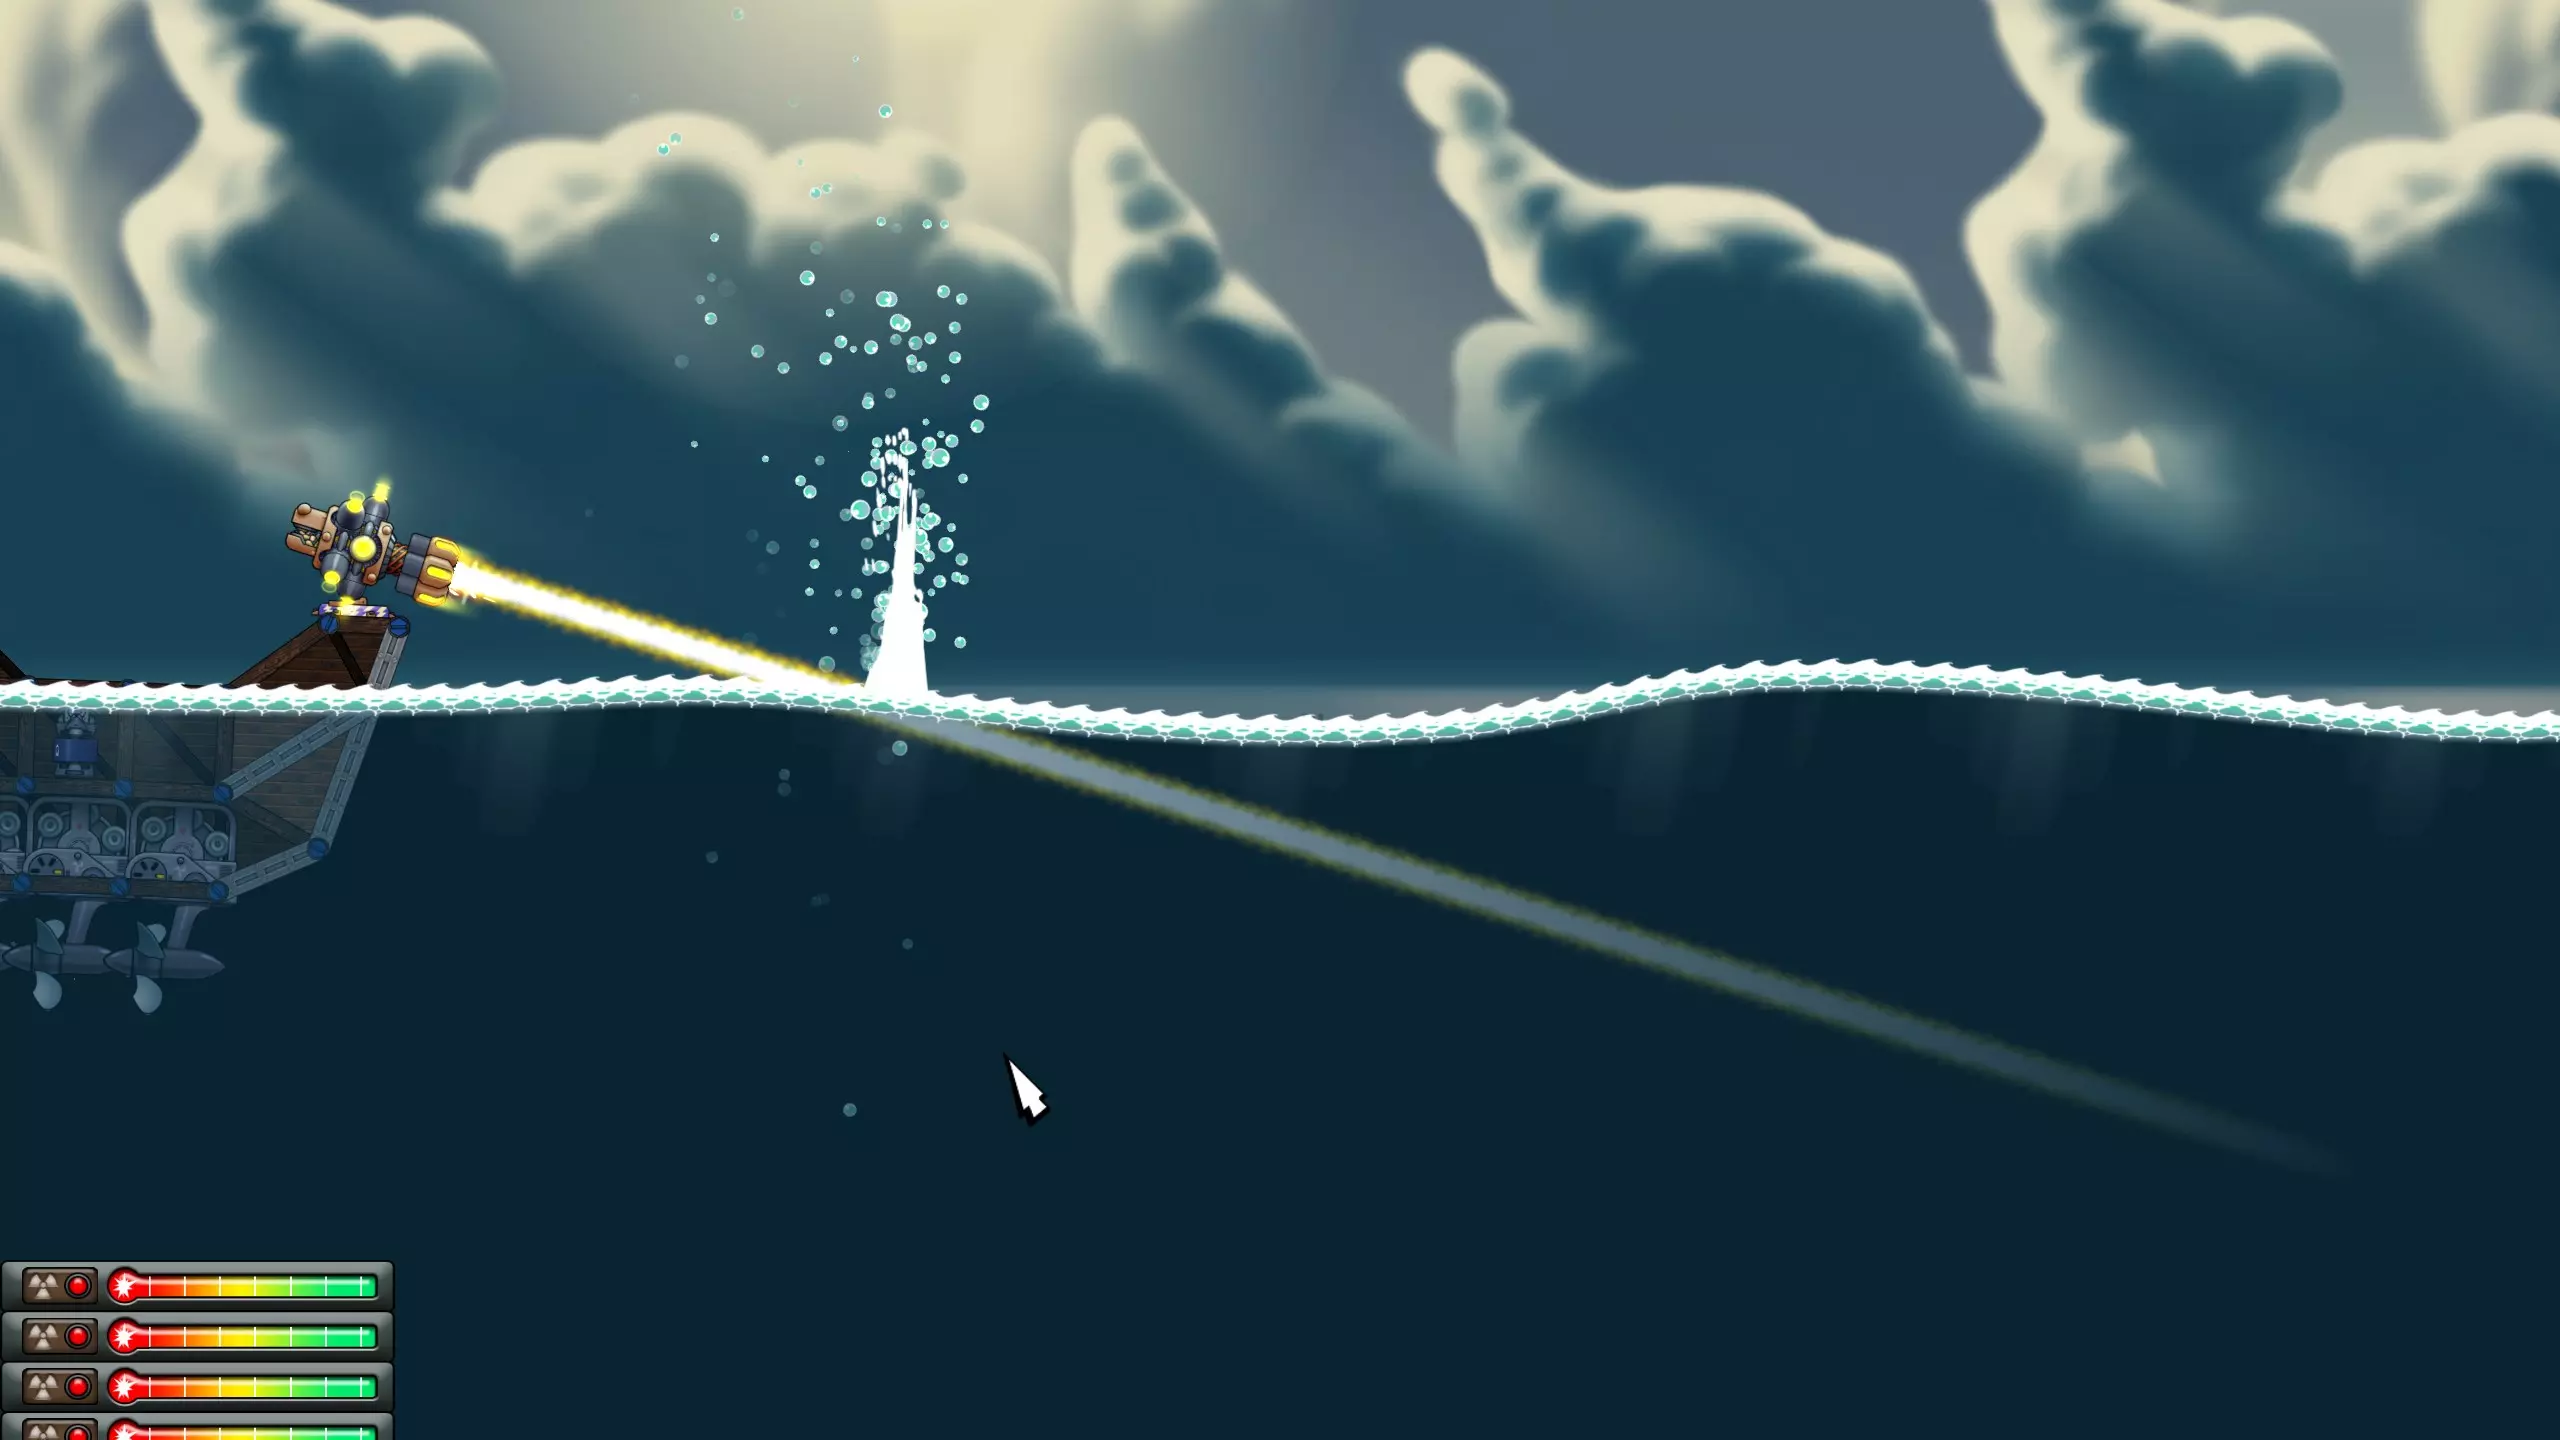
The whitecaps surface configurationPutting it all together, here is the way the water surface (whitecaps) in High Seas is set up: dir = path .. "/surfaces/" Sprites = { -- omitted for brevity } Bubbles = { Effect = path .. "/../../effects/bubbles_large.lua", AlignedToVel = true, } WhiteCaps = { SaveName = "whitecaps", IconSprite = dir .. "ocean_icon.png", ImpactBySize = { { 0, { Effect = path .. "/../../effects/splash_small.lua", AlignedToVel = false, Terminate = false, Chain = { Bubbles }, Splash = false, }}, { 30, { Effect = path .. "/../../effects/splash_medium.lua", AlignedToVel = false, Terminate = false, Chain = { Bubbles }, Splash = false }}, { 100, { Effect = path .. "/../../effects/splash_large.lua", AlignedToVel = false, Terminate = false, Chain = { Bubbles }, Splash = false }}, }, NodeSoftImpactByVelocity = { { 400, { Effect = path .. "/../../effects/splash_small.lua", AlignedToVel = false, ImpactDirFilterY = 1.0, Terminate = false }}, { 800, { Effect = path .. "/../../effects/splash_debris_medium.lua", AlignedToVel = false, ImpactDirFilterY = 1.0, Terminate = false }}, { 1200, { Effect = path .. "/../../effects/splash_large.lua", AlignedToVel = false, ImpactDirFilterY = 1.0, Terminate = false }}, }, { NormalAngleBrackets = { { -180, 180 } }, Layers = { { ExtrudedEdging = true, Sprite = "whitecaps", Offset = -0.4, }, } }, dlc2_DynamicAnim = { MaxDivision = 100, Script = dir .. "water_anim.lua", }, } Water Physics The water in High Seas is modelled as a flat, horizontal line across the world. The graphical water has no effect on the physics. It is set in the mission script via the dlc2_WaterLevel variable: dlc2_WaterLevel = 5200 The parameters that adjust the water physics is set in the db/constants.lua script. You can modify these to adjust its behavior. Read on to learn how these values are used. Physics.Water = { Force = 120, ForceNeutral = 0.05, Power = 1.5, MaxDepth = 400, Drag = 100, FillPeriod = 6, DrainPeriod = 30, } Each structure node has a value which represents how 'full of water' it is. When it is owned by a player that water level decreases down to zero. When the node becomes neutral the water level increases up to 1. This water level is used to interpolate between the Force and ForceNeutral values in the Physics.Water table to calculate the size of the buoyancy force. This system allows a structure that is cut off from the reactor to stay afloat for a short period, and then gracefully sink. FillPeriod and DrainPeriod control how fast the structure takes on water and recovers when reconnected. The magnitude of the force also increases with depth, up to a limit. This allows larger structures to keep most of their bulk outside of the water in order to field more weapons. The Power value determines the exponential relationship between depth and force, and MaxDepth determines how large the force can get and where. The actual C code to calculate the force is: const float force = currNode->mWaterLevel*mWaterForceNeutral + (1.0f - currNode->mWaterLevel)*mWaterForce; buoyancy = -force*pow(depth, mWaterPower); It's also possible to adjust the Drag value to limit how fast structure can move underwater. Underwater Projectiles There are new parameters that can be used to control how projectiles behave underwater: MaxAgeUnderwater and UnderwaterFadeDuration. MaxAgeUnderwater controls the total lifespan of a projectile for one instance of being underwater. That is if the projectile dips underwater, and then turns and exits the water, the timer is reset. A new entry to the water requires the full lifespan to pass before the projectile is de-spawned. If this variable is not set it defaults to 0.4. UnderwaterFadeDuration determines how soon before the lifespan expires the projectile starts fading out. It should be less than or equal to MaxAgeUnderwater. If the projectile starts fading and then exits the water it will reset to full opacity. If this variable is not set it defaults to 0.2. By default weapons won't fire if their barrel position plus clearance distance is underwater. This behaviour can be changed by setting the CanFireUnderwater variable of the weapon configuration script to true. Fading Beams Underwater In the open air beams will continue indefinitely (*), and they can be weakened by passing through smoke. With High Seas beams can also fade out over a distance underwater. This is simply a matter of setting the BeamOcclusionDistanceWater value in the projectile item. If it is not set it will default to BeamOcclusionDistance, which defaults to 1200, which is also used to weaken the beam through smoke. You could set BeamOcclusionDistanceWater to a high value to prevent noticeable fade in water. It does not invoke High Seas dependency, so you can be compatible with High Seas even if you don't need it. BeamOcclusionDistanceWater = 1000,
There is also a new projectile value added with the High Seas update, called BeamMaxTravel. This value will terminate the beam once it has travelled that distance including via reflections and portals. (*) This is not quite true. There is a maximum beam segment length limit, which is long enough to allow beams to go between any two points inside the maximum extents of a map. Water and Land Devices In order to make ships look and feel more like ships, we decided to add new resource collectors to High Seas: the propeller to gather metal and the smokestack to gather energy. It doesn't make sense to build these on land, and it doesn't make sense for mines and turbines to be available on ships. The same goes for the land missile silos vs marine missile silos. There are now device and weapon flags to control where devices can be built. These are set on the item in device_list.lua, weapon_list.lua or ammo_list.lua: For a land only device, you would write: RequiresLand = true, RequiresWater = false, For a water only device, it would be: RequiresLand = false, RequiresWater = true, If these are not specified they both default to false, making them available everywhere. All devices can also have the MinBuildDepth variable set in the same Lua files, which prevents construction above water, or at depths shallower than specified. This is used on propellers. By default this is set to 0, which allows construction above water and at any depth. Script Functions High Seas added some new functions that can be used from mission and mod scripts exclusive to the DLC. This section will describe them briefly, as well as some that can be used without causing a High Seas dependency. There were quite a few other functions added that could be used without the DLC, but these won't be covered here. Please refer to the Forts Scripting API Reference[www.earthworkgames.com] for details on all functions. dlc2_CreateFloatingDeviceThis function allows you to create a device or weapon anywhere. That is, it doesn't need to be on a platform or the ground to succeed. The device or weapon must have dlc2_BuildAnywhere set to true in its device_list.lua, weapon_list.lua or ammo_list.lua item for this to work. This is how the orbital_laser_source weapon is spawned just outside of the view extents. // C prototype int dlc2_CreateFloatingDevice(int deviceTeamId, const char* saveName, const Vector3D& position, float angle) dlc2_ApplyForceThis function will add an instantaneous force to a node, including structure and projectile nodes. If you want the force to be applied continuously you must call it every physics frame. Since weapon recoil can move ships, High Seas uses this to keep ships in the position they started. It is applied to one of the platform nodes of each reactor. // C prototype void dlc2_ApplyForce(int nodeId, const Vector3D& force) dlc2_SetDevicePositionTo animate the position of the Orbital Laser, we use this function over a series of physics frames. At the moment it requires BuildOnGroundOnly to be set to true. // C prototype void dlc2_SetDevicePosition(int deviceId, const Vector3D& pos) dlc2_CreateProjectileThe planes in High Seas use this function to create bomb projectiles at specific location along their trajectory. Other uses are limited by your imagination. Note that the weaponSaveName parameter is optional. When dlc2_CreateProjectile is called it will also call the OnWeaponFired event for all scripts, and will pass the value of weaponSaveName as the second parameter. Some scripts may expect a valid weapon save name. If it doesn't make sense this can be set to an empty string. // C prototype int dlc2_CreateProjectile(const char* saveName, const char* weaponSaveName, int teamId, const Vector3D& position, const Vector3D& velocity, float lifespan) dlc2_ConvertStructureWhen the control projectile hits a structure, the High Seas script, depending on the relevant ControlFlags, it will attempt to convert the structure to the team of the projectile. This is the function it uses. Use NodeStructureId to discover the structureId of a particular node. // C prototype void dlc2_ConvertStructure(int structureId, int structureNodeId, int teamIdFrom, int teamIdTo) GetStructureOnLand, GetStructureInWaterThese allows you to query whether a structure is at least partially on land or water. It some circumstances a structure can be considered both on land and in water, in which case they both will return true. // C prototype bool GetStructureOnLand(int structureId) bool GetStructureInWater(int structureId) GetWaterDepthAt, GetWaterLevelThese functions allow you to query the depth below the water level, or the water level itself (which is a flat line unrelated to the animated terrain surface) at various positions in the map. // C prototype float GetWaterDepthAt(const Vector3D& pos) float GetWaterLevel(float x) SetWeaponSelectedAmmoYou may have a weapon that has more than one ammo type, and want to control which type of ammo it tries to fire. You can use this function for the purpose, just make sure that your ammo has the Tag variable set. Passing an empty string will make it use the default: queue mode or the first ammo if no consumable types are available. // C prototype void SetWeaponSelectedAmmo(int deviceId, const char* tag) GetProjectileTypeIndex, HasProjectileParamNodeByIndex, GetProjectileParameter*Prior to the High Seas update, if a script wanted to customise the behaviour of a projectile it would have to specify the required data itself. This is problematic, since the most logical place to keep it is with the rest of the projectile configuration data. Planes and Orbital Lasers have a large number of configuration variables, which would be inconvienent to implement and mod like this. Instead, we have added a series of script functions which allow the query of arbitrary values. These have default values, so the script can decide what to use if the variables are not set. The High Seas mod, for example, queries the duration of the orbital laser strike movement like so: config.duration = GetProjectileParamFloat(sourceSaveName, teamId, "dlc2_orbital.Duration", 0) You can see the complete list of these functions in the FortsAPI document, starting here[www.earthworkgames.com]. Type Reference This section will give you the type names and file paths used in High Seas, so that you may mod them. mods/dlc2: Devicespropeller: (devices/propeller.lua) propeller2: (devices/propeller2.lua) smokestack: (devices/smokestack.lua) smokestack2: (devices/smokestack2.lua) shipping_container: (devices/shipping_container.lua) comms: (devices/comms.lua) welder: (devices/welder.lua) flag: (devices/flag.lua) buoy: (devices/buoy.lua) mods/dlc2: Weaponsharpoon: (weapons/harpoon.lua) dome: (weapons/dome.lua) hardpoint: (weapons/hardpoint.lua) turret: (weapons/turret.lua) turret2: (weapons/turret2.lua) turret2_focus: (weapons/turret2_focus.lua) turret3: (weapons/turret3.lua) turret3_focus: (weapons/turret3_focus.lua) orbital_laser: (weapons/orbital_laser.lua) orbital_laser2: (weapons/orbital_laser2.lua) orbital_laser_source: (weapons/orbital_laser_source.lua) subswarm: (weapons/subswarm.lua) sublauncher: (weapons/sublauncher.lua) runway: (weapons/runway.lua) mods/dlc2_skirmish: Weaponsrunway2: (mods/dlc2/weapons/runway2.lua) mods/dlc2: Ammo Devicesammo_thunderbolt: (devices/ammo_thunderbolt.lua, queue: dlc2_runway) ammo_nighthawk: (devices/ammo_nighthawk.lua, queue: dlc2_runway) ammo_orbital_sweep: (devices/ammo_orbital_sweep.lua, queue: dlc2_ol_ammo) ammo_orbital_focus: (devices/ammo_orbital_focus.lua, queue: dlc2_ol_ammo) ammo_decoy: (devices/ammo_decoy.lua, queue: dlc2_harpoon) mods/dlc2: Projectilesdecoy dome_barrier dome thunderbolt bomb nighthawk paveway turret ol_marker_sweep ol_marker_focus ol_beam_sweep ol_beam_focus flaming_boulder flamingthunderbolt flamingnighthawk flamingbomb flamingpaveway flamingturret mods/dlc2_ammo_control: Devicesminireactor: (devices/minireactor.lua) mods/dlc2_ammo_control: Ammo Devicesammo_control: (devices/ammo_control.lua, queue: dlc2_harpoon) mods/dlc2: Projectilescontrol Effects Reference mods/dlc2/effectsalert_warning.lua ammo_consumption.lua battery_eject_small.lua bomb_release.lua buoy_idle.lua comms_explode.lua container_explode.lua cs_prologue_dreadnaught.lua cs_whiteout.lua debris_trails_bubbles.lua deck_gun_projectile_fly.lua decoy_fly.lua device_explode_submerged.lua device_explode_submerged_large.lua device_explode_submerged_small.lua dome_explode.lua dome_fx.lua dome_weapon_explode.lua explosion_airburst.lua explosion_airburst_electrical.lua fire_deckgun.lua fire_deckgun_2.lua fire_deckgun_3.lua fire_dome.lua fire_harpoon.lua fire_nighthawk.lua fire_ol_laser_focus.lua fire_ol_laser_sweep.lua fire_thunderbolt.lua flaming_boulder_trail.lua harpoon_weapon_explode.lua impact_bombs.lua impact_decoy.lua impact_ol_projectile.lua impact_ol_projectile_sweep.lua impact_paveway.lua impact_turret.lua jet_explode.lua nighthawk_banking.lua nighthawk_explode.lua ol_beam_focus_hit.lua ol_beam_hit.lua ol_focus_projectile_fly.lua ol_sweep_projectile_fly.lua orbital_laser_source_fire.lua orbital_laser_source_fire_focus.lua orbital_laser_source_fire_sweep.lua propeller_bubbles.lua propeller_idle.lua shell_eject_ol.lua smokestack_idle.lua smokestack_steam.lua thunderbolt_banking.lua thunderbolt_explode.lua thunderbolt_weapon_explode.lua trail_nighthawk.lua trail_thunderbolt.lua welder_explode.lua mods/dlc2_ammo_control/effectscontrol_trail.lua fire_control.lua impact_cp.lua mods/dlc2_oceans_base/effectsbubbles_large.lua buoy_idle.lua smoke_idle.lua splash_debris_large.lua splash_debris_medium.lua splash_large.lua splash_medium.lua splash_small.lua
2026-02-13 22:00:05 发布在  Forts
Forts


说点好听的...
收藏
0
0