换一换
换一换 


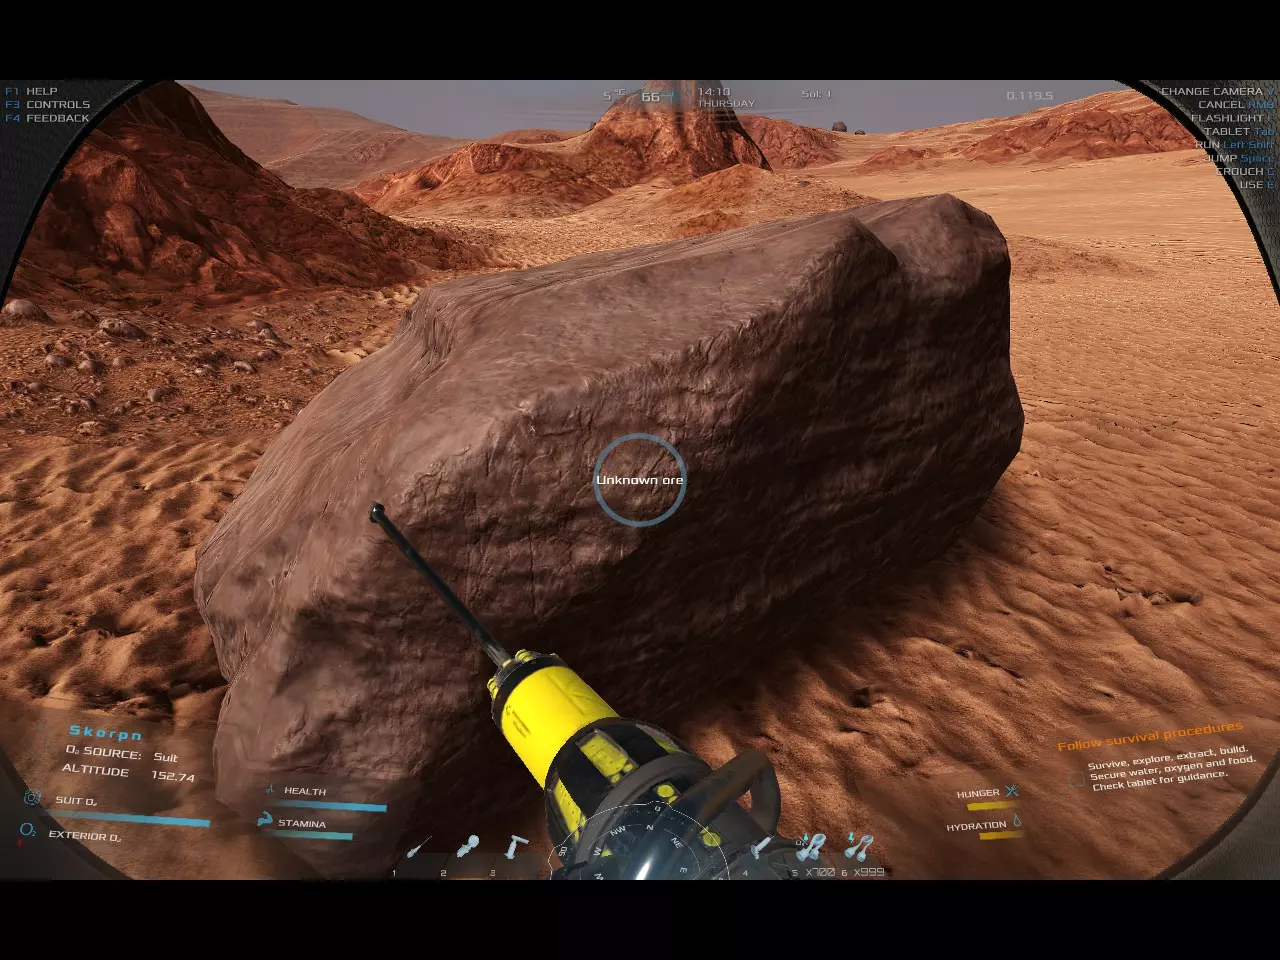
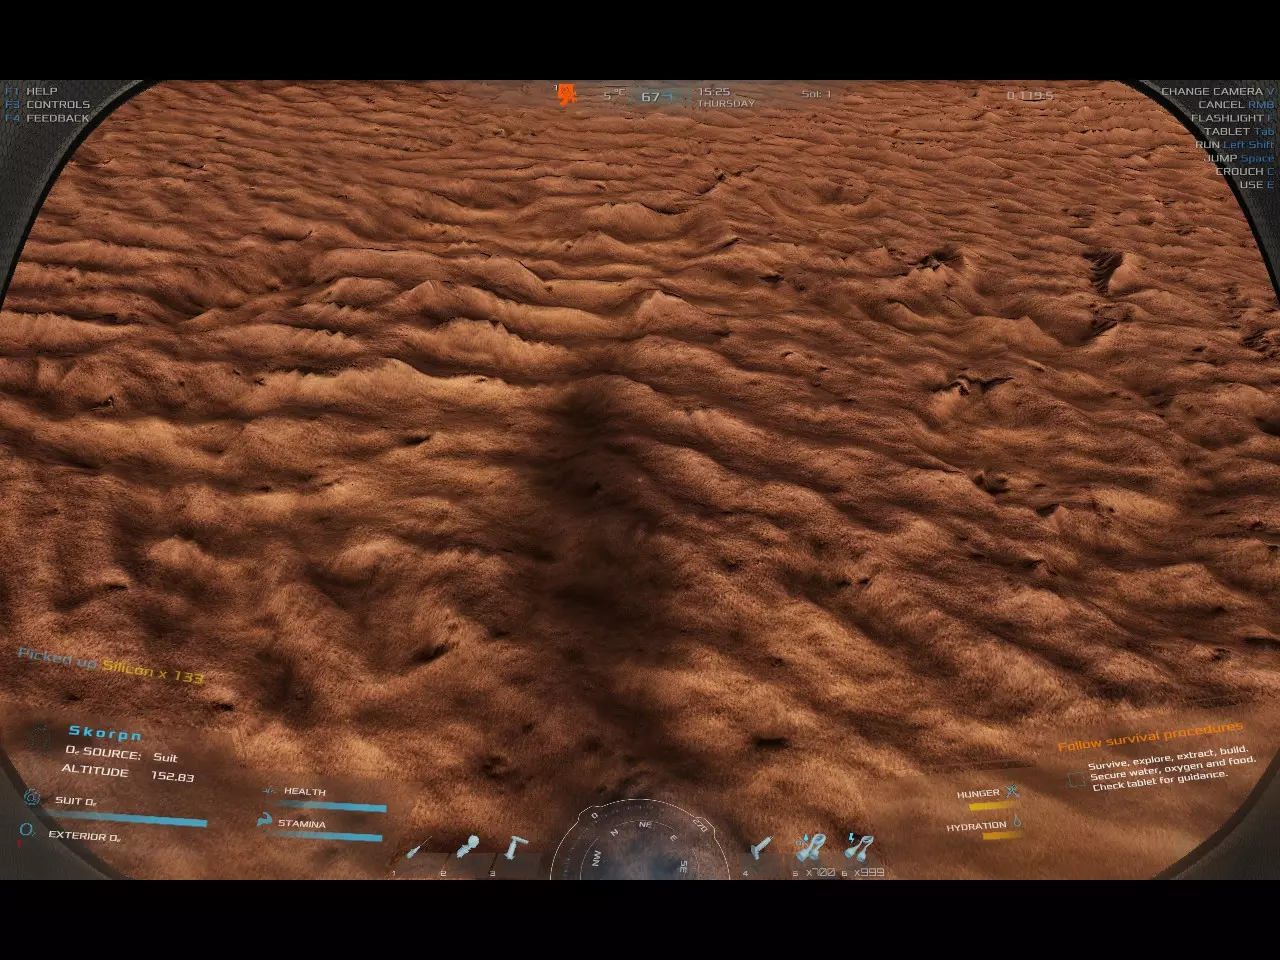
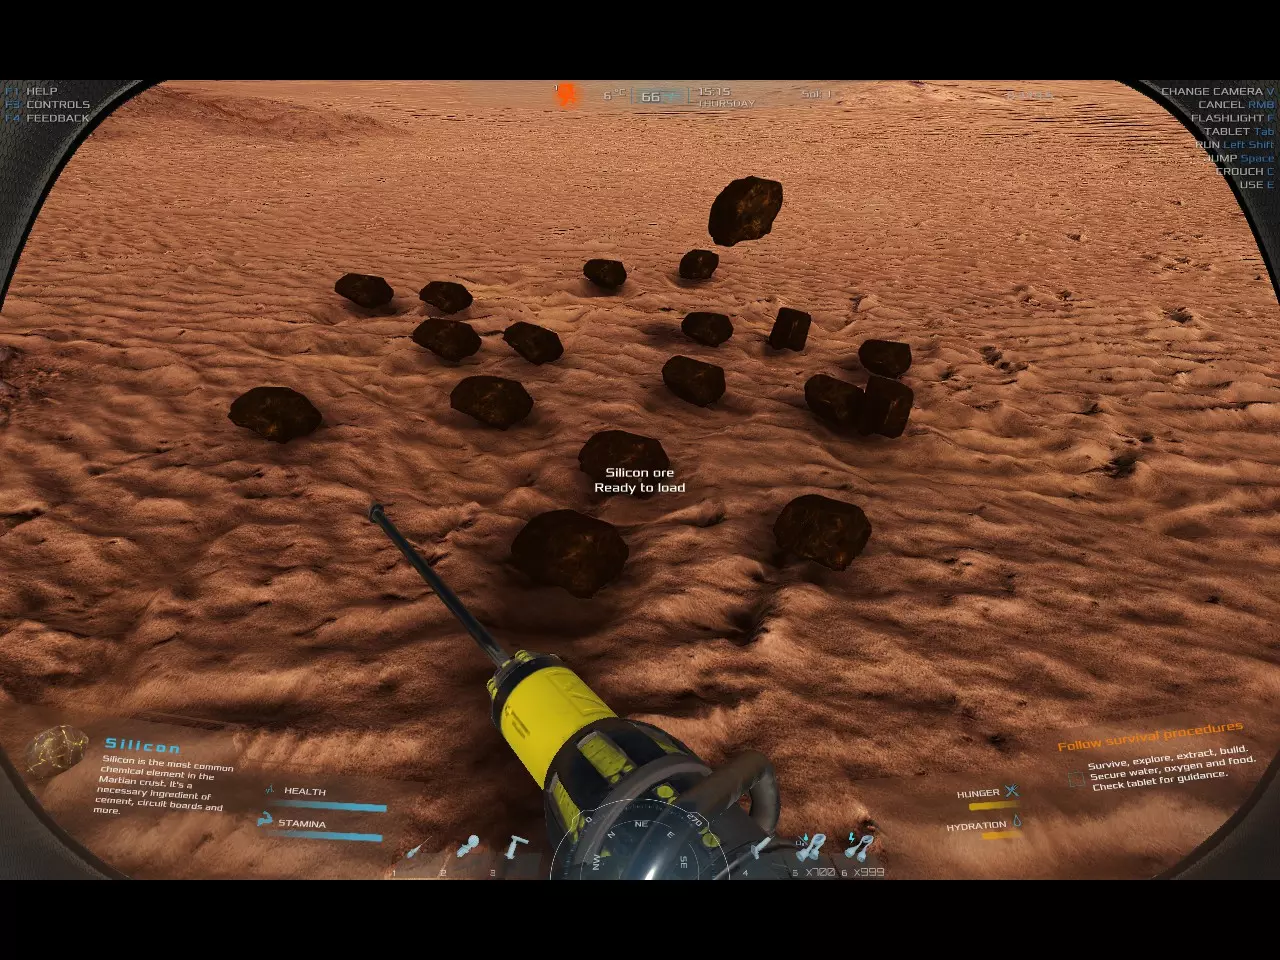
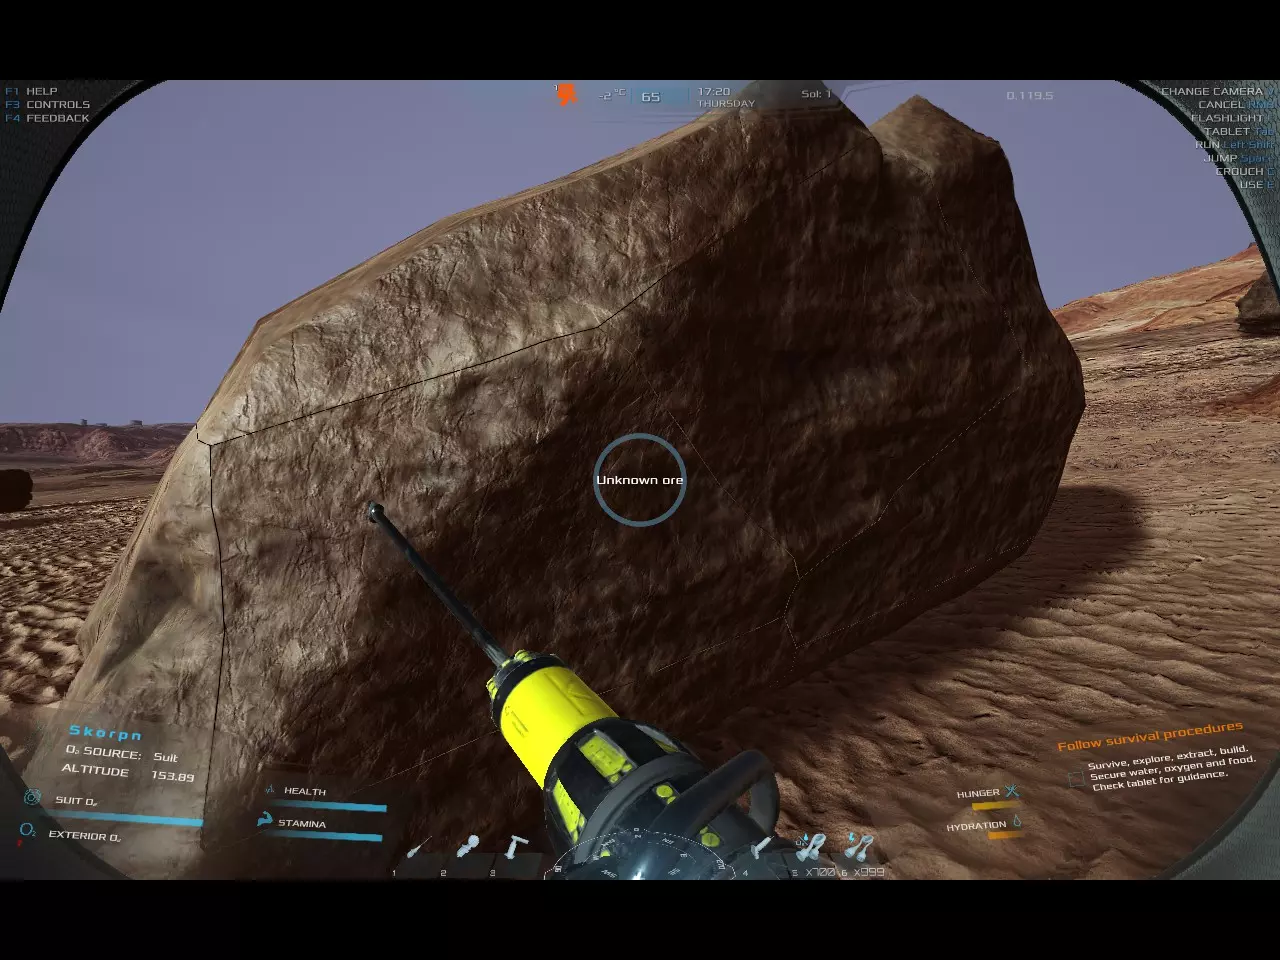
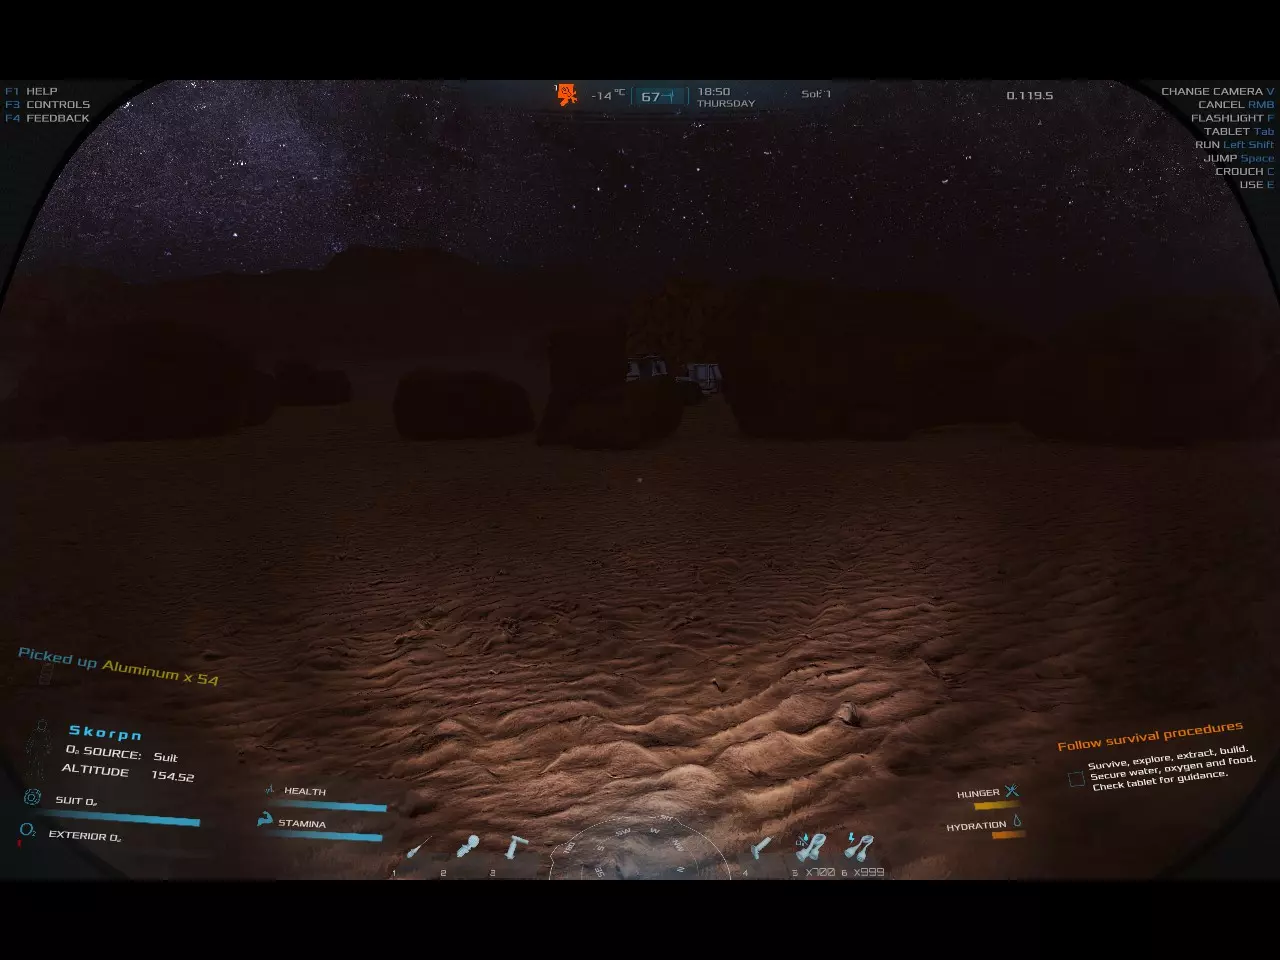
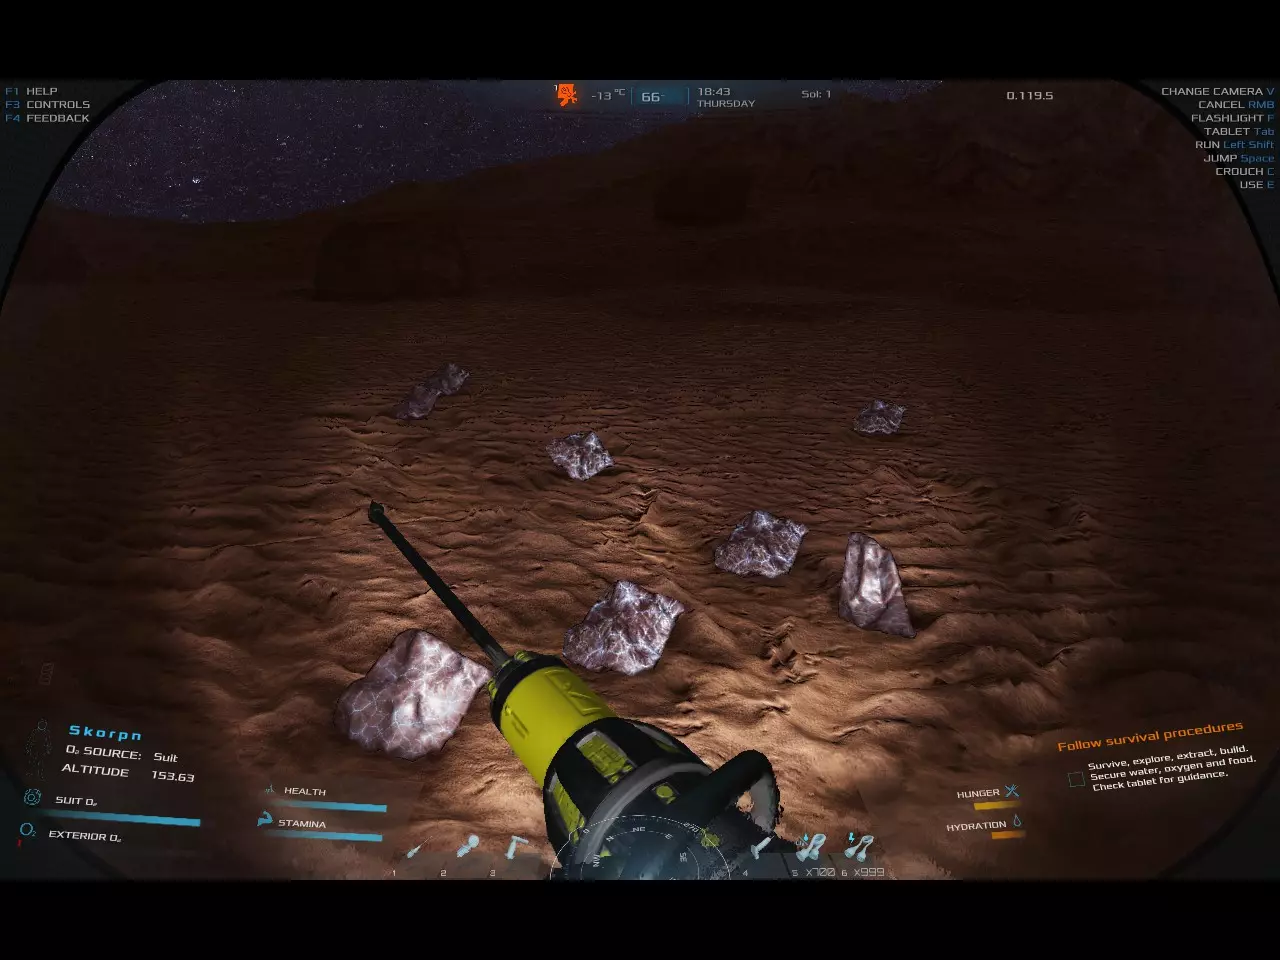
A comprehensive guide through, the first few days on mars. From basic crafting to running your power through the night and everything in between. Guides & Changes https://steamcommunity.com/sharedfiles/filedetails/?id=2986863922 https://steamcommunity.com/sharedfiles/filedetails/?id=2982401041 Please click "Revision" in the guide index to see latest revisions on 09/02/26 Introduction Thank you for checking this out and I hope it helps you with your basic tasks and the confusion on the way the power works, or if you just want to get a clearer understanding. I will be breaking down what you should do from the moment you take your harness off (seatbelt) and explain the power grid that you need to operate overnight so your plants don't die (Not too worried about your death). I will cover the basics to get you up and running and what to do when your power goes out when your alone in the dark. Cue music (Play while you read) A quick thing before we dive in. This will get remedied, but until then retain this and do it if you have troubles. - If you do not find a tablet in a base and you've searched to your hearts content, save the game, esc key back and load your last save. Use your Z key and do a quick search around. Pod - Touch Down So to start off I will explain from the view of landing on the planet with just what's in your pod. You have a printer and oxygen generator. Print anything you need from ores you've collected. For oxygen, all you need to do is hit the fill bottle and do not worry when it starts alarming because you have no oxygen. It'll be back, I promise. Collect everything in your pod, open up every compartment and take everything you see (up to you, but you use it all within 15 sols). Any excess you can put in the pod printer storage (I save 4 slots for ores). So before you exit your Pod, you need to set up your hot-bar with 6 items. Madman Note: In madman you start off with a Jackhammer and Spectral Detector, which means you need to make a Torch before you can build a well. My setup is as follows, you choose yours.Jackhammer Grinder Blow Torch Spectral Detector Hose Electrical Cable Last 2 are optional. I usually use hotkey 5 as the key for swapping stuff The pod will be your go to for printing, unless you don't like running and enjoy wasting power before you have enough. *Note: If you are doing the campaign, If you follow the mission line right out of the gate, your base and such will be in a different location. If you decide to stay where you put down your well and build around that, you will still get the mission updating you to build at a specific area. (you are able to bypass it, by just building where you are and tearing down. Dealers choice. Tools - Love 'em or Hate 'em, You Still Need Them There are a vast variety of tools, but for now I will touch down on 4 tools that will help you and what each stage does. JackhammerThe jackhammer has one function. it's objective is to cause carnage on Rocks! Each of the 3 stages increase speed (damage) and durability. GrinderThe grinder is your nemesis when you first start grinding. Try to level this up to Grinder II pretty quickly, examine your tree for this. The 3 stages in this change drastically ultimately giving you full base break down. Stage 1 is your basic grinder. You can grind basic things such as scrap metal, and most objects inside a base, which is how you get a lot of materials. Stage 2 is noticeably much better with a higher durability. You can now grind installations such as wells, solar panels (Yay!), and containers. Stage 3 is your godsend, with this you can demolish bases. I know you just want to destroy bases, but the objective still is to gain as much material as necessary. So still do what you did in stage 1, but you do have to be more careful, because 1 to many slips will destroy everything. Spectral Detector (WIP)The spectral detector is not used as often as it should be. This tool helps you locate water sources as well as classify rock contents. As of now, I only have stage 2. I'll update further soon Stage 1 is used to locate water sources Stage 2 is used to identify rocks and collectable (posters, cups, chairs, etc.) Stage 3 I am unsure as of now BlowtorchThe blowtorch is generally used for building and repair. The 3 stages just increase the speed at which something is built or repaired. Other Tools (WIP) I will touch base on this a little later when I get them Ore Collecting & Grinding - Your First (or Second) Steps on Mars So, if you don't have the resources you need to break out your trusty jackhammer to claim some ores. There are 5 ores so far along with what chemicals and such that they provide. AluminumChlorineCalciumChlorine & Phosphorus IronTitanium and SulfurSiliconSodium, Chlorine & Potassium Uranium From my discoveries I have found, and perhaps you have too, that the amount varies depending on the rocks you choose to break down. Two types are, for lack of a better term, browns and greys. The Brown ones have a lot of unnecessary hammering. Another observation you may have noticed was your chosen rock starts to glow. This glowing is an indication of weak spots in your resource and will consume less wear on your jackhammer. Grey's
布朗的

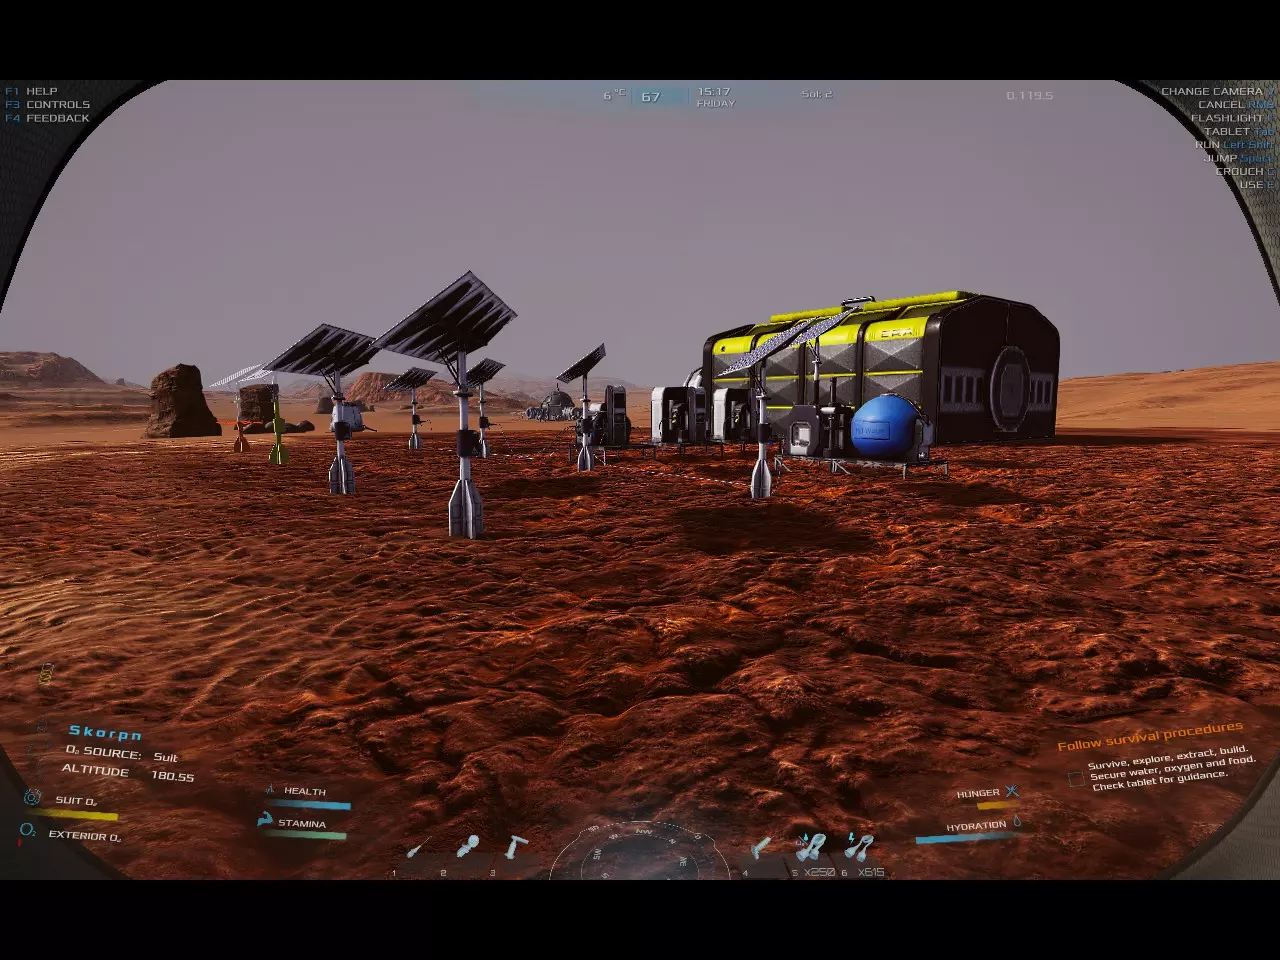
灰矿石是经过再次破碎和锤击处理的矿石。这类灰色岩石包含所有矿石类型,但铝或铁的含量较为稀少(需进一步测试观察)。棕矿石似乎是内部压缩了矿物的岩石。通常从中获得的资源不多,但在紧急情况下可以应急使用。 总之,灰矿石能提供更多资源以及更多机械点数(每块矿石可获得1点)。 刷资源有时会让你感到抓狂。不过不必担心,这很正常。随着火星地表废弃基地的移除,刷资源已成为游戏不可或缺的一部分。 为了获取足够材料搭建你的第一个基地,你需要搜刮遇到的每个基地,积少成多。凭借这种积极肯干的态度,你将获得足够的材料来建造你的第一个基地,这个基地将配备4个或更多的太阳能电池板、2个电池、1个变压器、2个气闸和1个斜坡,尽管它仍然很简陋。这确实能给你时间为电池充电,如果你有足够材料的话,甚至可以充2个电池。 仅通过拆解逃生舱西边的基地,我就建造了“基地——你的第一个家”照片中展示的所有东西。 【注意】值得记住的是,如果你拆解的物品上或里面有可收集物品,在大多数情况下,这些可收集物品会消失。 【注意】你看到的那些发光部件类似于使用电钻时的情况。对着它们进行拆解,它们会发光然后消失,从而加快你的拆解速度。此外,当一个发光部件消失后,另一个通常会在其他地方出现。基地——你的第一个家 你的第一个家总是特别的,好好装饰它,别怕犯错! 首先,拿出你的光谱探测器找到水源。你可以在跑向目标地点时手持光谱探测器,或者如果距离较远,按Y键将其添加到地图上。请查看地图使用方法部分。 到达地点后,按B键调出建造菜单,或者按鼠标左键(左撇子除外!)。在这里,从资源选项卡中选择水井。你可能拥有立即建造它的资源,除非你在战役模式中,或者在自由模式的殖民者或狂人难度下。 因此,你主要需要收集铝、铁和硅矿石,或者拆解其他基地获取材料,为建造你的第一个行动基地做准备。开始前,你需要在科技树中解锁一些东西,但访问几个基地后,几天内就能获得所需物品。 所需物品: 1口井 1个工坊 2个气闸 1个斜坡 8块太阳能电池板 2个变压器(其中1个配备变压器升级件用于输入电力)或3个变压器 1个配备电池组升级件的电池组 布局顺序:太阳能电池板→带升级件的变压器→带升级件的电池→变压器→工坊(或其他你可能需要的设备,例如夜间运行的井) 如果你选择使用2个变压器和1个电池组,将需要3块小板材。(你可以在离你最近的第一个基地找到所需的几块板材以及一辆全地形车。)查看【提示与技巧】以获取有关更轻松突出显示周围环境的信息。 获取电池升级不需要太长时间,只需继续建造你所需的设施,当你准备好铺设电力时,你就会拥有它。 当你获得其中一个或两个升级后,你可以移除第三个变压器。(别忘了先拔掉小板子) 这是一个包含2个电池和1个变压器的基本设置。电力系统有6块太阳能电池板,仅够为基地的基本设施供电。
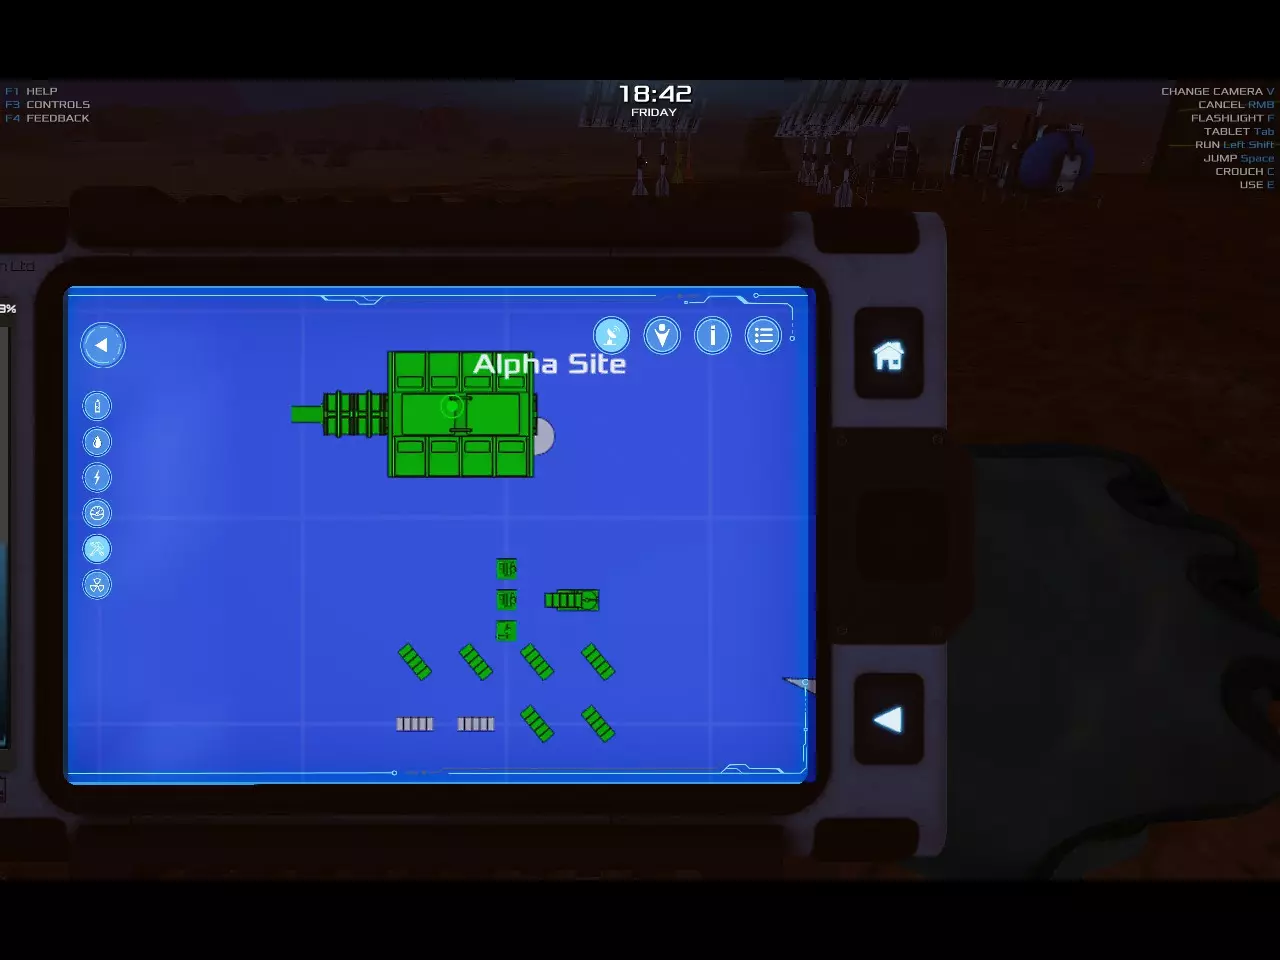
地图?哼,我才不信那玩意儿。所以我才会迷路!——出处:《落水狗》 接下来我会给大家演示我是怎么使用地图以及做标记的。这些方法对我来说很有效,但或许你们也能找到自己的方式。不过我的方法才是最棒的 =) 和所有PC游戏一样,按M键可以调出你的平板地图。这只能在站立时使用(我真希望能在骑行时用,但可惜不行)。如果你在载具上或里面,必须下车或站起来(比如在漫游车里面时)。 我本不想解释怎么缩放的,不过……算了! 你要做的就是在地图上找到一个看起来像深灰色圆圈的地点,用你的方形准星对准它的中心,然后放大。接下来,我通常会右键点击建筑右侧,然后从下拉菜单中选择【追踪】选项。颜色方面没有特殊要求,但我会用红色和黄色来标记接下来的导航目标。绿色则用于标记进入舱,或者当准备好转移所有物品时,我会把它用作主基地或【行动基地】(Base of Operations的缩写)。 现在我来解释一下下拉菜单。它有5个选项:移除、命名、追踪、图标和列表(本部分底部有图片)。 移除 - 删除已标记的点 命名 - 可以为目标命名 追踪 - 提供3种颜色供选择(实际有白色、黄色、红色和绿色),选择后会显示到每个已标记颜色目标的距离。白色不追踪距离图标 - 允许你选择一张图片来关联你的发现。列入列表 - 当你开始建造前哨站、加油站、休息站、紧急停留点等设施时,这一点稍后会很重要。这本质上是将你放置的标记保存到一个列表中,你可以轻松调出该列表来找到最近的……嗯……目的地。
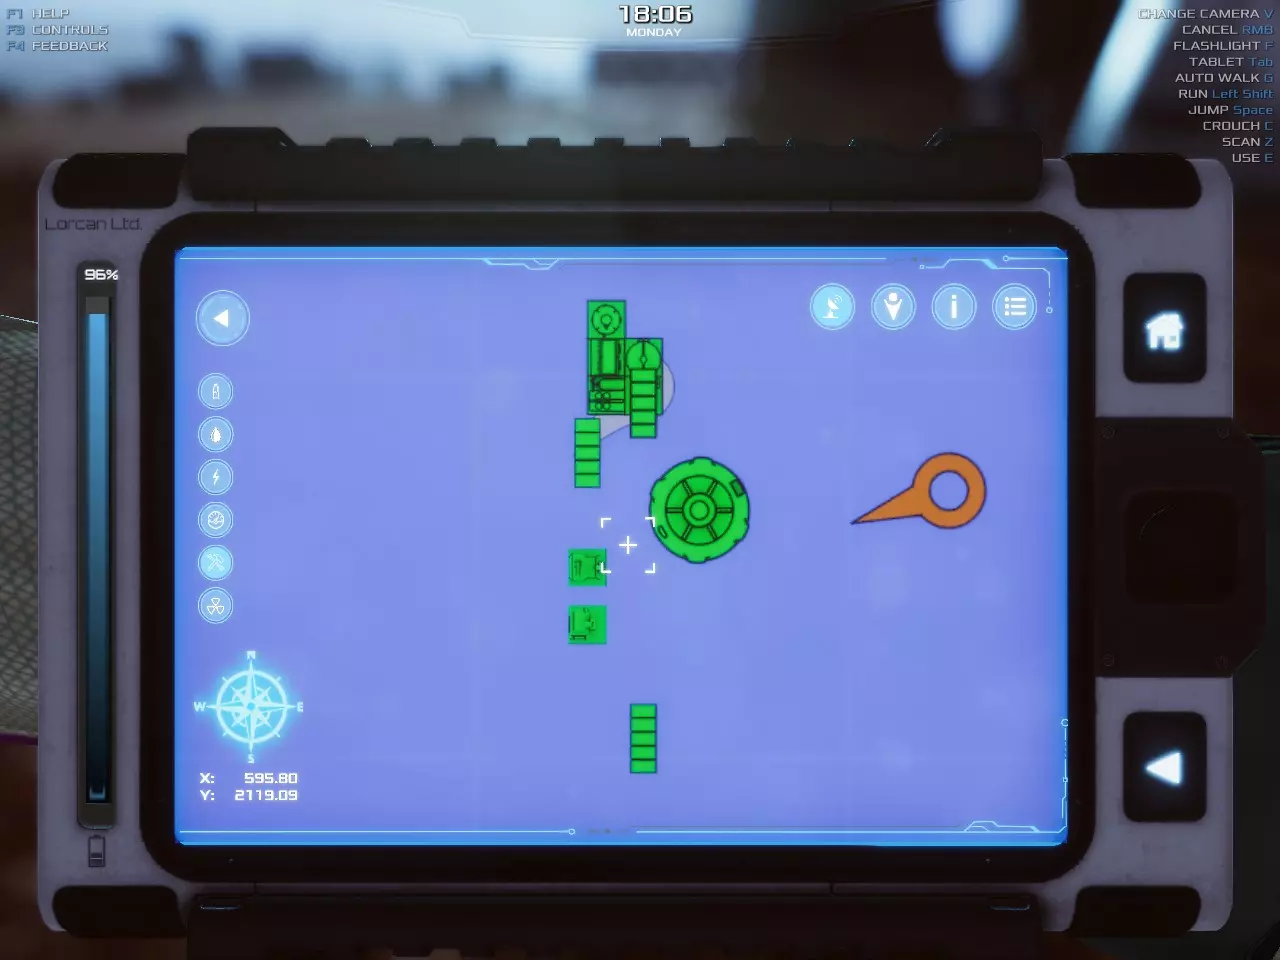
下面为你解析上图地图中的所有图标。从左侧开始向下依次为:返回键、氧气、水、电力、建筑(仅显示你自己的)、电力使用情况、辐射。 红色基本表示未通电。 橙色表示能源来源有能量输出和存储(即电池)。 绿色表示能源来源、路径以及由该公共设施供电的设备。 右侧顶部的4个图标依次为:雷达塔及其覆盖范围、你的位置、地图使用说明(我现在正在讲解)、你的位置列表(你的“待办事项”列表)? 地图左下角是指南针(据我所知它不会移动)以及你的经纬度坐标。 下面我会提供一些小提示,例如。如果你点击电源图标,再点击太阳能板、电池或其他设备,就能查看所选设备的输入和输出数据。 来说说我标记地图的方法。由于只有3个标记点,我会标记去过的所有地方以及完成的事项。具体来说,我会带着1级、2级或3级研磨机前往某个基地,拆除能拆的东西(主要在游戏初期,这很有帮助)。完成1级研磨后,我会在建筑右侧右键点击,将其命名为【G1】。这样我就知道自己去过那里,最重要的是拿到了数据板,并用1级研磨机拆除了能拆的东西。2级研磨也是同样的道理,标记为【G2】即可。

Advanced map usage coming soon to a screen near you! Basic Electricity - In Depth and Personal So you need power. Your base is almost set to go but don't rush. Try to get your battery upgrade unlocked first so you can save some energy for those long nights. The energy starts flowing at 6:30 until 18:30 which gives you 12 hours to work with. Which also means 12 hours of darkness. So if there aren't any fluctuations like our planet has, it is a 1:1 Ratio. The power from the 4 Solar Panels you installed will equal 20kW. The workshop and 2 airlocks runs at 15kW means that you have 5 spare kw. So that spare 5kW can be stored by the batteries. Now, herein lies the issue. There is roughly 12kwh (kilowatt hours) of solar charging (Day) and 12kwh of drain (Night). Now if your not putting anything in your base (workshop) it'd be great. But, I am assuming you would like breathable air and a stable temperature to start planting right away. You will need to create a few more things to accomplish that. • CO2 Scrubber - 32kW to 100kW working range (I got 91.01 temp.) • Plant Incubator - power will vary with seed type • Hydroponics Table - power will vary with seed type So the CO2 scrubber parameters (that I have) • 11.82 l/h Oxygen • 91.01 Temperature • 7.11 kW This increases my power by 7.11 (you can adjust, I havent played with minimum values yet) to a total of 22.11kW, with my current 4 solar panel 20 KW setup it is not even going to start up. Now your question is, how can I make it so I survive the night? So some math, complex for some and simple for others. But I'll break it down so you don't have an anyeurysm or rage quit like some posts suggest. Over night I need 265.32kW in battery storage to last 12 hours. During the day I need to produce 265.32kW over 12 hours as well. The 265.32kW comes from the 22.11 that I need to power the base. Fomula - 22.11 x 12 = 265.32kW - Night time kW needed from storage - 22.11 x 12 = 265.32kW - Day time kW usage - 265.32 + 265.32 = 530.64kW - Overall kWs needed to keep everything running smooth day and night - 530.64 12 = 44.22kw/h - Overall kW per hour that you need to produce So by this statement, you need 44.22kW per hour to run throughout the night without any hiccups. With 44.3kW (rounded up) of power needed, I need a minimum of 9 solar panels at 5kW's each. That will leave me with 0.7kW per hour over 12 daylight hours giving me an extra 8.4kW per day that goes into storage. Kinda scary if anything happens. This is without planting anything yet, this is just for running the CO2 scrubber. With potato seeds being grown in the workshop (The Greenhouse will have different effects), the current power drain with 1 seed or full is 0.7kW in the incubator and 1.3kW in the hydroponics table. Totalling 2kW if you'll be using them simultaneously. So you would add 2kW to 22.11kW which totals 24.11kW. The formula is where the adjustments need to be done. The hours are fine, the kWs for day and night need to be changed. I hope you can do it, the answer is 48.22kW Now, how many small solar panels do you need? Each small solar panel produces 5kW. 48.22 / 5 = 9.644 Now we don't have 9.644 solar panels. So we'll round up to 10 Solar panels. This energy produced will leave an excess of 1.78kW/h or 21.36kW per day that will be added to your battery storage each day. The idea and conclusion here is as follows. Your power output should be minimum twice that of your input in order to maintain full-time power. *Note: More efficient panels I - Increases your output by 10% **Note: Industrial energy converters I - Increases by 10% Setting up your Hydro Grid (WIP) So you want to be a top notch utilities provider? You my friend are in luck, I have 0 qualifications. I do however have ideas to help you build your hydro grid, and the math to back it up. So starting out gave you an example of the inner workings of maintaining your grid, as well as what happens when you don't have enough stored energy. Well, I'll help you out with that issue and even try to set you up with some fail safe ideas to keep you running even during the long drawn out storm and damages you incur. Botany - How to Grow your Flora So when you first think of laying down some roots, literally, the way to do it is with your seeds. I'm going to help you out so you don't overload your grid with this by giving you more information on what seed types have effects on water and power drains. SeedMachine1 seed kW Usage1 seed Water UsageFull Machine kW UsageFull Machine Water UsagePotatoIncubator0.7 kWh0.1 l/h0.7kWh2 l/hPotatoHydroponic Shelf1.3 kWh0.3 l/h1.3 kWh3.6 l/h In the workshop both the incubator and hydroponic shelf increased my base power usage by 2kWh and water consumption by 5.6l/h. Your Seeds So you may not know as of yet, or you may. All the seeds you collect have tiers, and there are 4. Tier 1 seeds (50%) are Potato & BeetrootTier 2 seeds (33%) are Corn, Lettuce, Soy, Coffee & TomatoTier 3 seeds (16.5%) are Cabbage, Apple, Pepper & PumpkinTier 4 seeds (16.5%) are Trees - Oxygen, Poplar & Spruce Each of these Tiers can be started in the Plant Incubator. Each tier will last from 50% down to 16.5% in the Incubator. Please see above percentages in regards to incubator use. Your tier 1 seeds will fully mature on the hydroponics shelf. Tier 1 seeds can mature on the Hydroponic Shelf and higherTier 2 seeds can mature in the Fields and higherTier 3 & 4 seeds can mature only in the Domes Water Pump The water pump doesn’t work as intended I believe, but you can figure out how much % you actually need instead of keeping it at 100% Simple math is to divide what is required by what's coming in. Eg. 3 wells, producing a total of 17.33 l/h, my needs are 12.2 l/h. Use a calculator and divide 12.2 / 17.33 which totals 0.7039. To get the percent you times it by 100, so 100 x 0.7039 = 70.39% round up to 71% Feed 29% into your water pump and voila, now you can store water and watch those tanks fill up. *note: It is more accurate to add up the 3 wells from their screen individually. **note: Gathering a variety of seeds seems to be more apparent the further from the base you are. I just recently gathered 10 new seed types from a few bases from 8600m to 9700m from my base ***note: During your seed run, it may be best to not reload your game. I have went to 2 bases early on and some items were out of reach (underground). But the further out I went Nothing was out of place and the seeds came in quick. usually 3 each base ****note: You can mix your seeds within each planter. However, these increase a base electricity rate for mix. (I will conduct further tests with the tiers)
建立你的水资源帝国 其实这并不复杂,只需要一些简单的计算,以及理解你所看到和寻找的东西。 对于任何水资源热点,你真正需要考虑的只有一个因素,那就是【每小时补给的升数】。你可以使用【光谱探测器】来查看这一数据,详见下图。
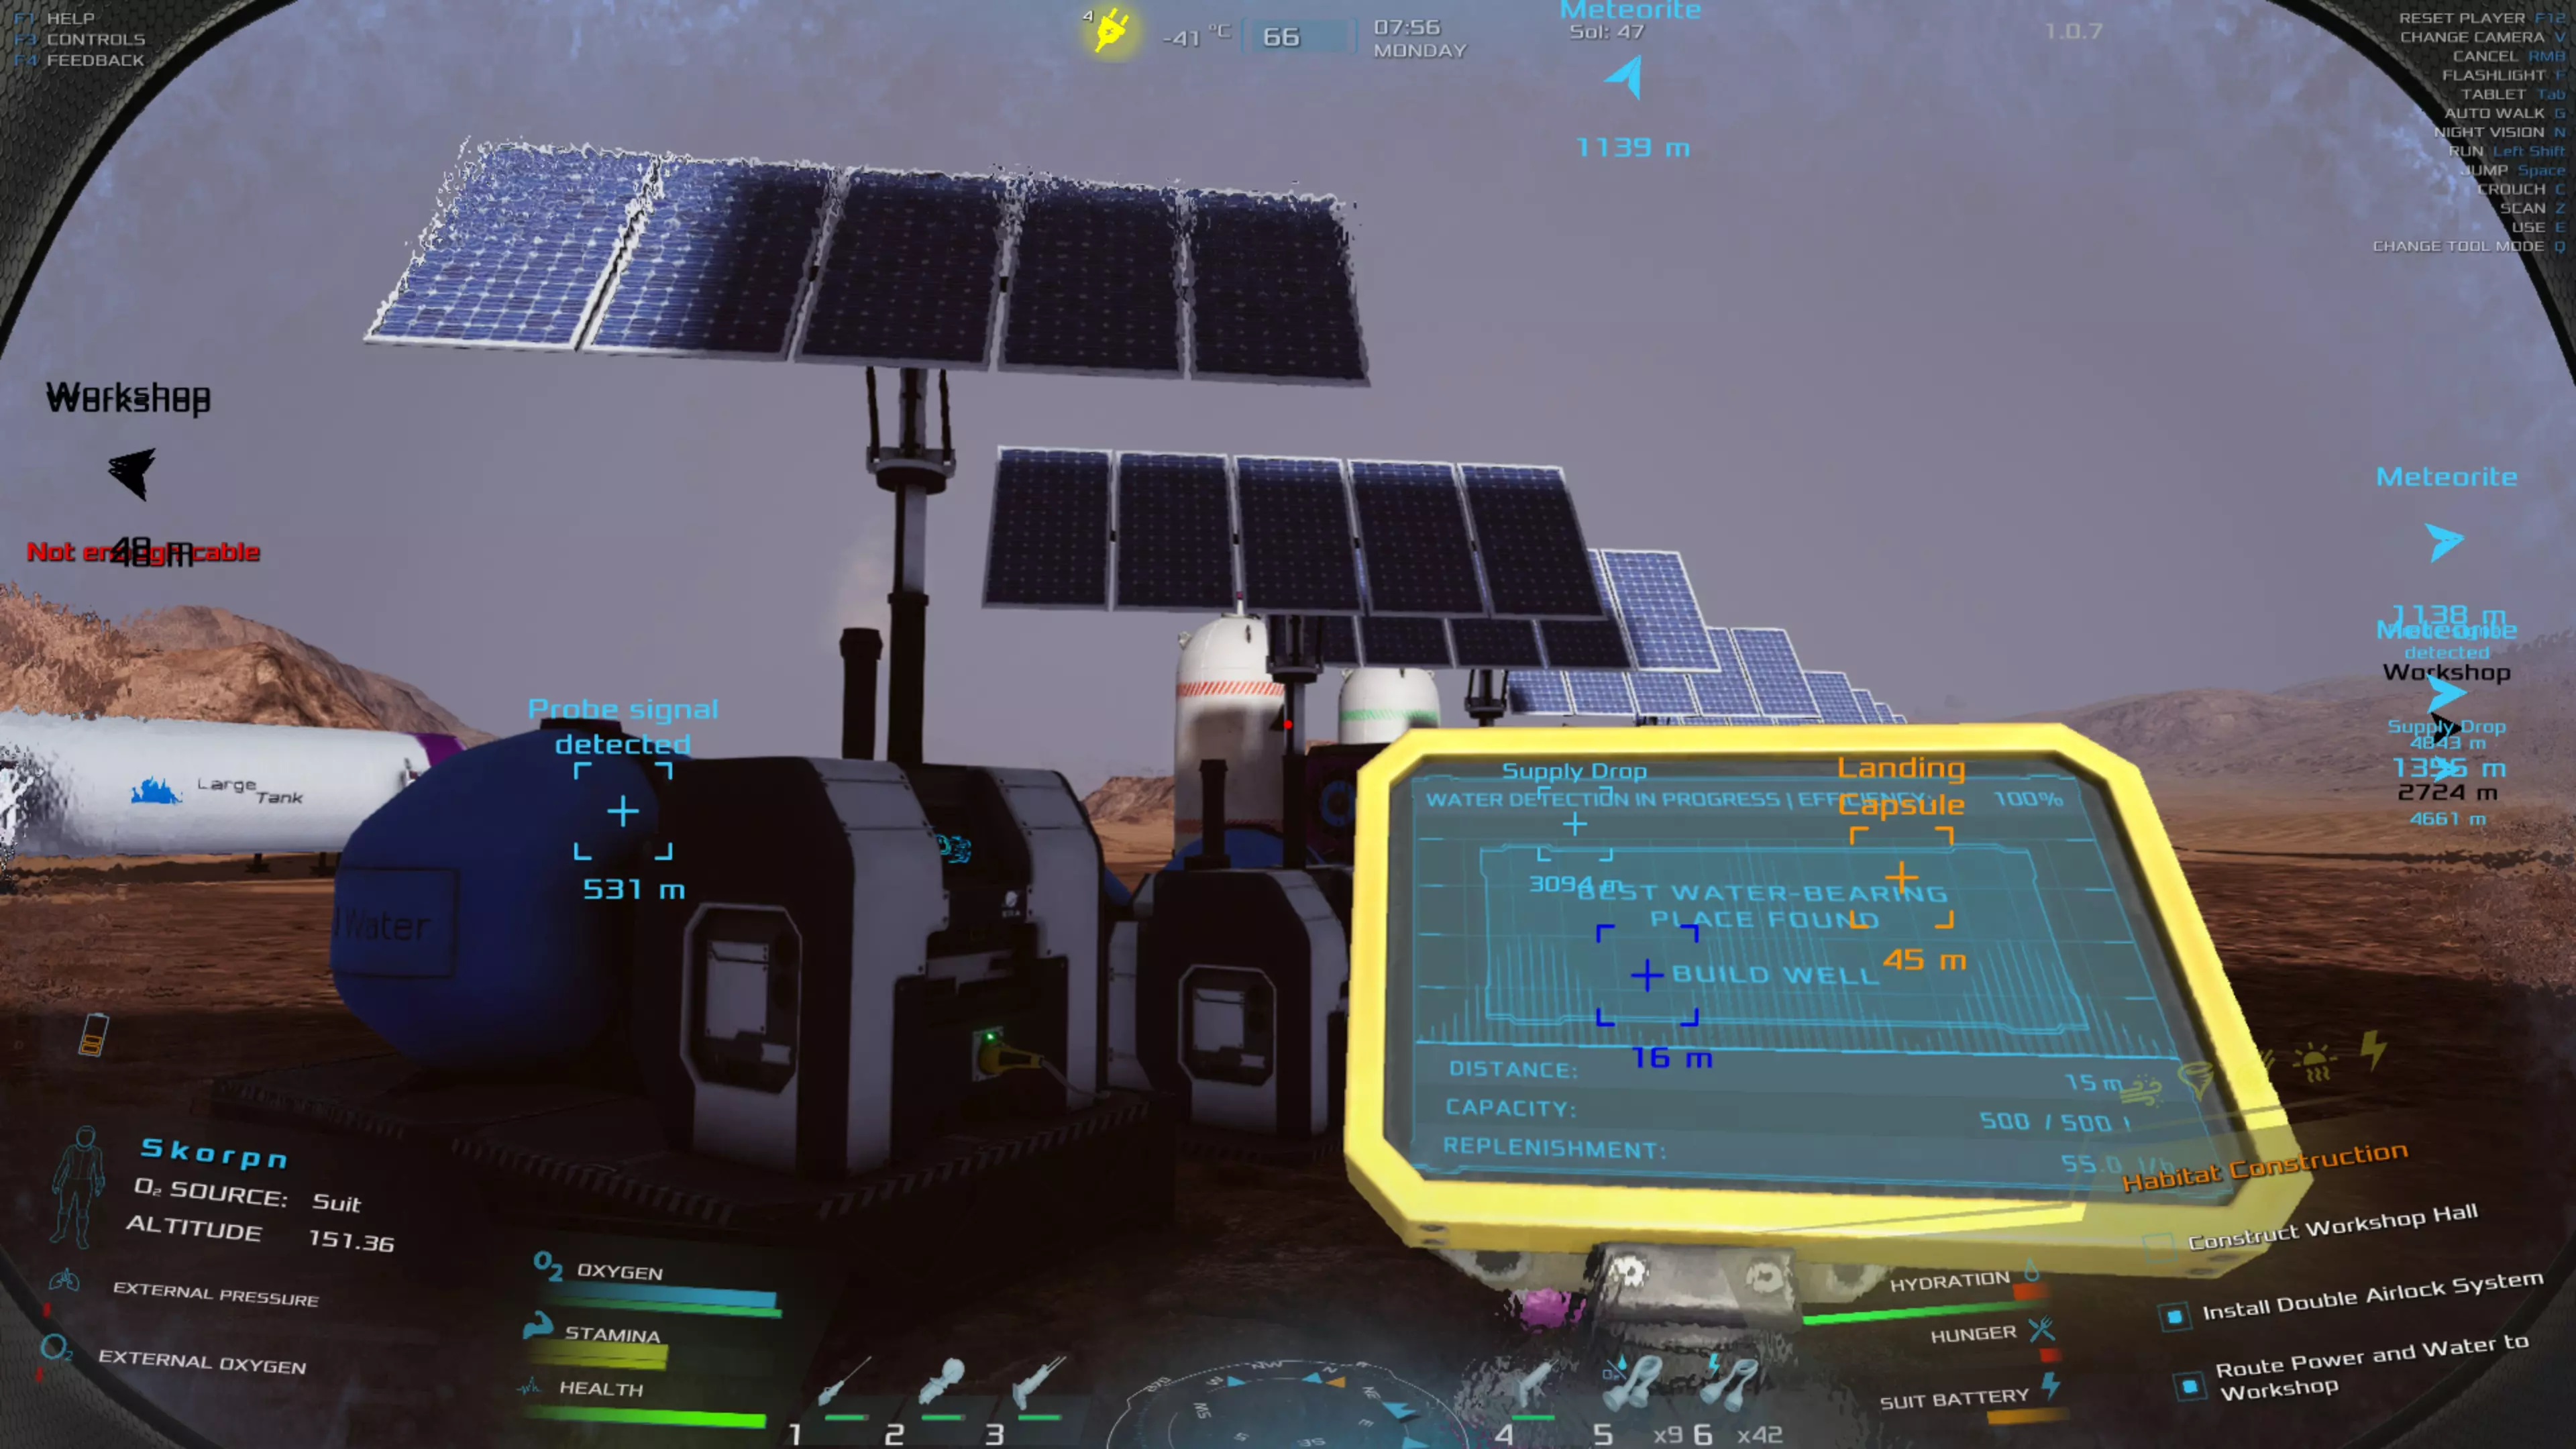
在我的设想中,每小时有55升的补给量。现在来说说有趣的部分。 水泵在没有萨巴蒂尔装置时每小时可抽水6升,配备萨巴蒂尔装置后,每个水泵每小时可抽水3升。 你的目标是保持在每小时55升以下。 55除以6等于9.17,向下取整后,9乘以6等于54。 因此,为了避免井水耗尽,你最多可以支持9个水井。我知道你想说:“这看起来是大量的水”。确实如此,但如果你运营着温室和穹顶建筑,这与你所需的水量相比就像一个分子那么少。所以你可能需要外购,并且要小心橙色关税。 在整个地图中,你会在距离你位置1000公里范围内找到更多热点区域,美国的朋友们可以理解为621英里范围内。你只需按照之前的设置重复该过程,然后就可以铺设一条水管到你当前的基地。 注意:后续将测试水管的距离限制。 美味食物食谱 通常,当你尝试制作某些东西时,食谱会自行出现。我正在尝试自己获取食材。所以请耐心等待。当我弄清楚后,会尽快告知大家,除非我食物中毒了,或者正在设施里。食谱 材料 结果 苹果蜜饯 1个苹果、1个水瓶 1份苹果蜜饯 烤土豆 1个土豆、1份食盐 1份烤土豆 水煮甜菜 1个甜菜、1个水瓶 1份水煮甜菜 植物奶咖啡 1份咖啡、1份榛子奶 1杯植物奶咖啡 玉米粉 1份玉米粉 玉米糖浆 1个玉米、1个水瓶 1份玉米糖浆 干 soy 面条 1份 soy、1个水瓶 1份干 soy 面条 炖牛肉 1个南瓜、1个甜菜根、1份胡椒、1个水瓶 1份炖牛肉、6份南瓜籽 榛子蛋糕 1份玉米粉、1份花生酱、1份玉米糖浆、1个水瓶 1份榛子蛋糕 榛子奶 1个榛子、1个水瓶 1份榛子奶 榛子植物奶酪 1个榛子、1份食盐、1个水瓶 1份榛子植物奶酪 热咖啡 1份咖啡、1个水瓶 1杯热咖啡 花生酱 3个榛子 1份花生酱花生酱南瓜汁 1个南瓜 1个水瓶 1份南瓜汁 6颗南瓜籽 南瓜泥 1个南瓜 1个水瓶 1份南瓜汁 6颗南瓜籽 大豆榛子棒 1份花生酱 2份大豆 1份榛子奶 1份大豆榛子棒 南瓜青酱大豆面 1份干大豆面 1份南瓜泥 1个水瓶 1份食盐 1份南瓜青酱大豆面 番茄酱汁大豆面 1份干大豆面 1份番茄酱 1个水瓶 1份食盐 1份番茄酱汁大豆面 酱油 3份大豆 1份食盐 1个水瓶 1份酱油 炖卷心菜 1个卷心菜 1份食盐 1个水瓶 1份炖卷心菜 甜咖啡 1份咖啡 1份玉米糖浆 1份甜咖啡 甜牛奶咖啡 1份咖啡 1份榛子奶 1份玉米糖浆 1份甜牛奶咖啡 番茄酱 1个番茄 1份食盐 1份番茄酱 蔬菜汤 1个土豆甜菜根1个 水瓶1个 蔬菜汤 沙拉 生菜1个 番茄1个 辣椒1个 沙拉??? 注:更多食谱将在发现后补充 科技树 - 选择正确的发展方向 注:于09/02/26更新并重做 章节注:笔记本电脑和U盘将为你解锁科技。补给空投(地面上的火箭)通常会提供化学笔,因此一定要去获取它们,这样你就可以把笔记本电脑留到更重要的事情上使用。 随着游戏进程,你可能会因为把点数用在了一些无关紧要的地方(比如像软糖之类的东西),而导致自己在某些方面陷入困境。我会尽力帮助你找到正确的发展方向。 在获得最初的几点技能点后,你可能会想要尽情挥霍,但建议你谨慎选择。

https://en.wikipedia.org/wiki/Cloudy_with_a_Chance_of_Meatballs_(film) Materials Essentially you need 2 Material points. Check How To Gain Tech Tree Points The first 2 you get should be Workshop and CO2 Scrubber (If you prefer to live in your habitat quickly. I grow flora and that produces oxygen), then Pump After those 3 points are acquired, the next few options are Well Extension, Leveling Corridors, Standard Corridors and Small Crusher. - The pump will open you up to the Sabatier (Well Extension) when you get the blue print. - The CO2 scrubber is not super important, but if you want O2 in your base go for it - The workshop printer is not necessary for now depending on how far you are from your pod and/or if you want another 8 slots of storage space in your workshop. - The leveling corridor is just to open up to the Small Crusher and Science Bench eventually. ElectricityThis tech tree levels up so fast after your base is set up that you will have excess points and no blueprints to unlock. In time though. First things to acquire in this line is Transformer, Battery Pack, Battery Pack Expansion, Workbench, Transformer Expansion, More Efficient Panels I and Meduim Solar Panels. - Work on getting the quickest line to Medium Solar Panels. If there are things you need or want before hand, it's fine but not necessary. - Workbench is important to get fairly quick as you're blocked from progressing in Mechanic line. It allows you to create, repair and upgrade your tools. As well you can fix your circuitry there. - The transformers are necessary for you to direct your incoming power - The batteries store your unused excess for evenings or weather related outages - The battery pack upgrade will increase your unused energy storage capacity by 337.5 with each upgrade to a maximum of 1912.5 for 5 extensions for a whopping 750% increase from the first battery pack. - The transformer upgrade will allow you to connect an additional 16 receptacles. 8 for incoming power and 8 for outgoing power. - The more efficient panels upgrades will increase the output of each solar panel you have by 10%. MechanicsThis one here is chalked full of blueprint blocks that its a soul crusher, it looks horrible but with your exploration they quickly come undone. This line in my opinion is the hardest to level up early game, but hold up on spending point with this one, your exploration may bring you what you needed right when you need it. That's Deep Bruh! The mechanics tree line you should try to follow is Blow Torch, Grinder I, Jackhammer II, Grinder II, Bigger Inventory, Box for Circuits, Spectral Detector II, All-Terrain Vehicles, Bigger Inventory II, Grinder II and Science Bench. - The Bigger Inventory may jump up higher on your list, it is extremely valuable in inventory space saving. - All Tools are necessary but the Spectral Detector II will allow you to analyze your rock formations and increase your EXP. The blow torch and jackhammer just increases the speed in which you build and break down rocks. The Grinder II increases your speed as well as allows you to Grind more things in and out of a derelict base. The quickest way I level up Mechanics is get the Spectral Detector and analyze the crap out of rocks and generally work up to get Jackhammer II and destroy the "Greys" and the largest rock formations until I get to Grinder II. BotanyThis will have it's burst of points usually when you start repotting or basically anything to do with Botany. The Botany line to follow would be Fridge, Seed Machine, Genetic Engineering, Small Plant Crate, Lower Oxygen Usage I. Then Depending on where you stand in terms of unlocks, you can go for the Science Bench then Greenhouse or Slower WIthering I, Faster Growth I and Food Processing (Depends how much food you find). - The seed machine gives you a seed modification machine which paired together with genetic engineering will allow you to increase its growth speed and number of seeds you get per flora. - The small plant crate is for ease of movement from the plant incubator to the hydroponics shelf - Food Processing converts your fruits/vegetables into processed food packages. Adjustments can be made to the amount of yield or nutritional value. The food processing is not a big thing I think to worry about, but it depends on you really and your exploration. There is so much processed food packages strewn about that in my opinion it isn't all that necessary early game. I Personally shot right from Lower Oxygen Usage I to the Science Bench and then Greenhouse. Chemistry*Note: This is the most important line, it holds the unlock keys/ingredients for many things throughout all Technology. Working at the chemistry table you will have to either unlock reactions or create the reactions, or both. You can gain recipes either through usbs or the tablets. As you create each recipe, some may be available at a reduced cost, ie. Pure Silicon, through your printer. The Chemisty line to follow would be Silicate Glass Production, Silicon Purification(*), Aerogel Synthesis(*), Sabatier Process, Polymer Synthesis, and Rubber Vulcanization(*) In order to unlock the ones that are underlined and any other in chemistry that have an item attached in their unlock, you need to create that said item. So to create Pure Silicon, you need Silicon Purification unlocked from either the Laptop or from a Chemistry Pen. Then you can create Pure Silicon, this should be available in the chemistry bench, as well as the printer. Simple enough right? -- wrong You need to unlock other things in order to create what you need. Sabatier Process for example needs 1 Carbon Dioxide Bottle and 4 Hydrogen chemicals. Easy enough, that was your first unlock, Water Electrolysis which gives you 8 Hydrogen. But here is the fun part, Aerogel Synthesis. You need Pure Silicon and Ethanol, there is only one way to get Ethanol, Biomass Fermentation and in order to get it, you need to unlock Waste Recycling. I can't recall of the top of my head if you need a laptop or chem pen, but you need to create it at your Chemistry Station to be able to unlock and then craft Ethanol. So if you read this far, I hope you did, you do the first 2 then continue with Waste Recycling then Biomass Fermentation. This is a tough line, but I believe in you… Even if you don't believe in yourself!!

如何获取科技树点数 你可能不清楚如何获取各个类别的科技点数。下面为你详细说明,助你顺利上手。 植物学 收获 加工 种植 使用播种机 生产肥料 收集废弃物容器 化学 化学台反应:无点数,仅通过制造来解锁 电力 生产能源 为载具充电 清洁太阳能板和设备 维修电路板 材料学 建造 维修 拆解(研磨) 打印 将漫游车内容物卸载到破碎机中 机械学 分裂岩石 使用光谱探测器检查矿石成分 为载具充电 将漫游车内容物卸载到破碎机中 使用漫游车机械臂 从安全地点出发(全地形车或火星卡车) 注意:完整版发布后,此内容可能已过时。虽然这可能对硬核模式有用,但我很快会进行测试。 既然你决定离开新手区,那很好。我会尽力帮你在游戏初期延长生存时间,这些经验对你后期的探索也会有帮助。 首先,在准备好一些物品之前,不要远行探索。以下是需要优先获取的物品: 电池组、变压器、材料、生存舱、萨巴蒂尔装置和氧气罐(同一解锁项) 这些物品能让你在荒芜的野外生存下来。其他值得拥有的物品包括光谱探测器II、研磨机II和电钻II,它们能帮助你更快、更高效地完成任务。在游戏初期且没有漫游车的阶段,这种简单的装置优势明显,能让你像萨拉丁的庞大移动军队一样行动。从一个水源移动到另一个水源,驾驶着你找到的那辆破旧、吱呀作响还时不时回火的全地形车。你可以偶尔停下来查看地图,除了寻找基地获取新技术和零件外,还要留意这个小符号。 (图片即将更新) 找到水源后,我会这样搭建,实现自给自足,除了食物外,充电和获取其他所需资源基本不会有太大问题。 这张图片大致展示了现场的布局。从左到右依次是:带萨巴蒂尔装置和氧气瓶的水井、小型太阳能板、太空舱、电池组、变压器和小型太阳能板。太阳能电池板可根据你的需求进行升级,但对于这种电缆布局来说,当前配置已经足够了。
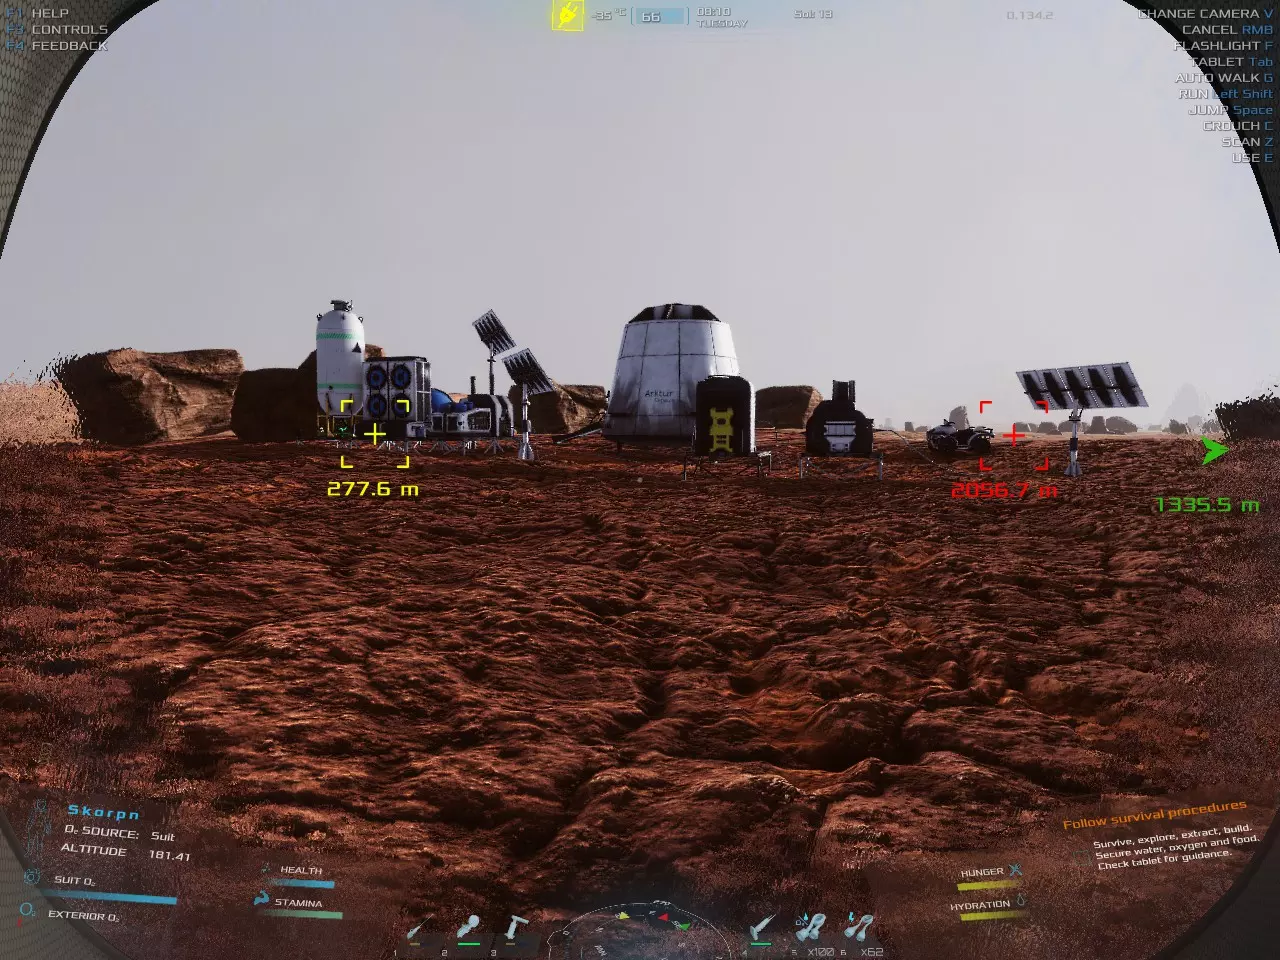
这张图片展示了我的布局
总材料成本如下(凭记忆计算,如有错误请告知): 小管道 - 34个 太阳能电池 - 15个 小型发动机 - 12个 螺丝包 - 28个 电子元件 - 17个 铝板 - 31个 玻璃板 - 3个 小型电路板 - 2个 钢板 - 16个 所以在出发旅行前,确保你至少拥有这些材料。不过别担心,这也是你配备光谱探测器和胶囊的原因,你可以在路上自行制作材料。 提示与技巧: 这一点非常重要。似乎每个基地都有一个平板电脑,所以如果你没找到平板电脑,可以在此时保存游戏并退出到主菜单。点击继续,然后重新开始寻找你的平板电脑。 *难以找到的位置是储物柜 研磨机设置: 我的研磨机设置。我随身携带2台研磨机。一个是2级研磨机,另一个是3级研磨机。 这样能更轻松地拆解基地内部的物品,而不会意外摧毁基地及其所有内容物。 10秒规则 不是5秒规则。游戏中有一个10秒的间隔,你的充能、电力等所有内容都基于此。你可能已经注意到了,但现在你肯定会注意到。 高亮显示周围环境 提示:如果你想知道是否遗漏了什么东西或不确定,只需按Z键。这是避免忘记那些大家都在抱怨的小板子的关键。 另一个选项 在游戏选项菜单的界面设置中,找到两个可交互部分。第一个是设置显示方式(始终显示、按Z键显示或从不显示)。其次是范围,你可以将其滑动到任意位置。 固定建筑需求:在建造菜单中,右键点击你想要建造的配方,它会一直显示在右侧(信息区域),直到你再次右键点击该配方。 早期全地形车(近点):在战役模式中,离你的逃生舱最近的基地通常有一辆损坏的全地形车。在那个基地里,你应该能找到一块小型电路板,用它可以让全地形车重新启动。 背包:你的背包上有4个黄色指示灯,它们各有含义。右图中从左到右依次为:氧气容量、耐力、饥饿度、水分。

如图所示。你的红色背包表示当前存在危险(温度、天气等)。橙色表示温度即将下降或即将发生事件的警告。蓝色表示一些重要的系统信息。 修理 你可以通过右键点击装备然后选择修理来修复装备。请注意,你需要拥有所需的材料才能进行修理。有时修理会成功,有时则不会。当你再次捡起该物品时,它会替换6号槽位中的物品,并给你一个已修复的物品。 电钻与矿石弱点:当你开采资源时,会注意到三种颜色:白色、淡红色和绿色。这三种颜色在早期(光谱探测器II之前)可以帮助你选择所需资源。红色代表铁和硅,白色代表铝和钙,绿色代表rananium(弱点较少)。 研磨机:那些发光的点很棒,对吧?小提示:只需持续研磨并围绕物体移动,这样会快得多,而不是寻找另一个研磨点(电钻也是如此)。 火星卡车(阿尔法基地):你可以在游戏中立即获得一辆火星卡车,它会立即取代ATV。着陆后,先搭建水井,然后前往最近的基地获取全地形车(ATV)。修理好全地形车,保持物品栏轻量化。你需要一块中型木板来修理火星卡车,卡车本身应该已经有一块了,我当时是多备了一块。到达阿尔法基地后,清理卡车周围的残骸,更换木板,并从货架上取下卡车电池。重要的是,将电池放入你的快捷栏(1-6号)并通过快捷栏放置。极其重要:如果在保存前死亡,你将彻底失去电池。这样一来,如果你回去取卡车,就一无所有了。 攻略更新 目前,我相信已经为你介绍了游戏的基本要点。如果你有任何问题或建议,我很乐意倾听,并会尽力满足合理的需求。在那之前,我会像大白一样去追逐蝴蝶。

感谢您的支持,希望我能帮到您。请随时回来查看更新。 修订记录: 10-02-26 - 登陆 - 从安全地点出发 09-02-26 - 美味食谱 - 科技树 - 做出正确选择(重做完成) - 基地 - 你的第一个家 07-02-26 - 美味食谱 - 植物学 - 建立你的水帝国 03-02-26 - 矿石收集与研磨 - 技巧与窍门 - 电钻和岩石弱点 - 随机修正 01-02-26 - 技巧与窍门 - 火星卡车(阿尔法基地) - 如何获得科技树点数 - 化学 - 科技树 - 做出正确选择 - 化学 05-04-25 - 矿石收集与研磨 - 植物学 - 你的种子和笔记 - 技巧与窍门 - 使用电钻 - 技巧与窍门 - 研磨 - 工具 - 光谱探测器 - 工具 - 研磨机 - 其他超级有用的内容信息13-09-23 地图?我才不信那玩意儿。所以我才迷路了! 其他实用信息 技巧与窍门 - 研磨机设置 09-09-23 从安全区出发旅行 04-09-23 太空舱 - 着陆 科技树 - 机械学 03-09-23 技巧与窍门 - 修理与10秒规则 17-06-23 添加了GIF参考(2个)09-06-23 战役指南 30-05-23 植物学 29-05-23 内容 - 反陨石防御指南 23-05-23 介绍、矿石收集 22-05-23 科技树(电力与材料)20-05-23 矿石收集与研磨 19-05-23 植物学 电力 工具 技巧