换一换
换一换 


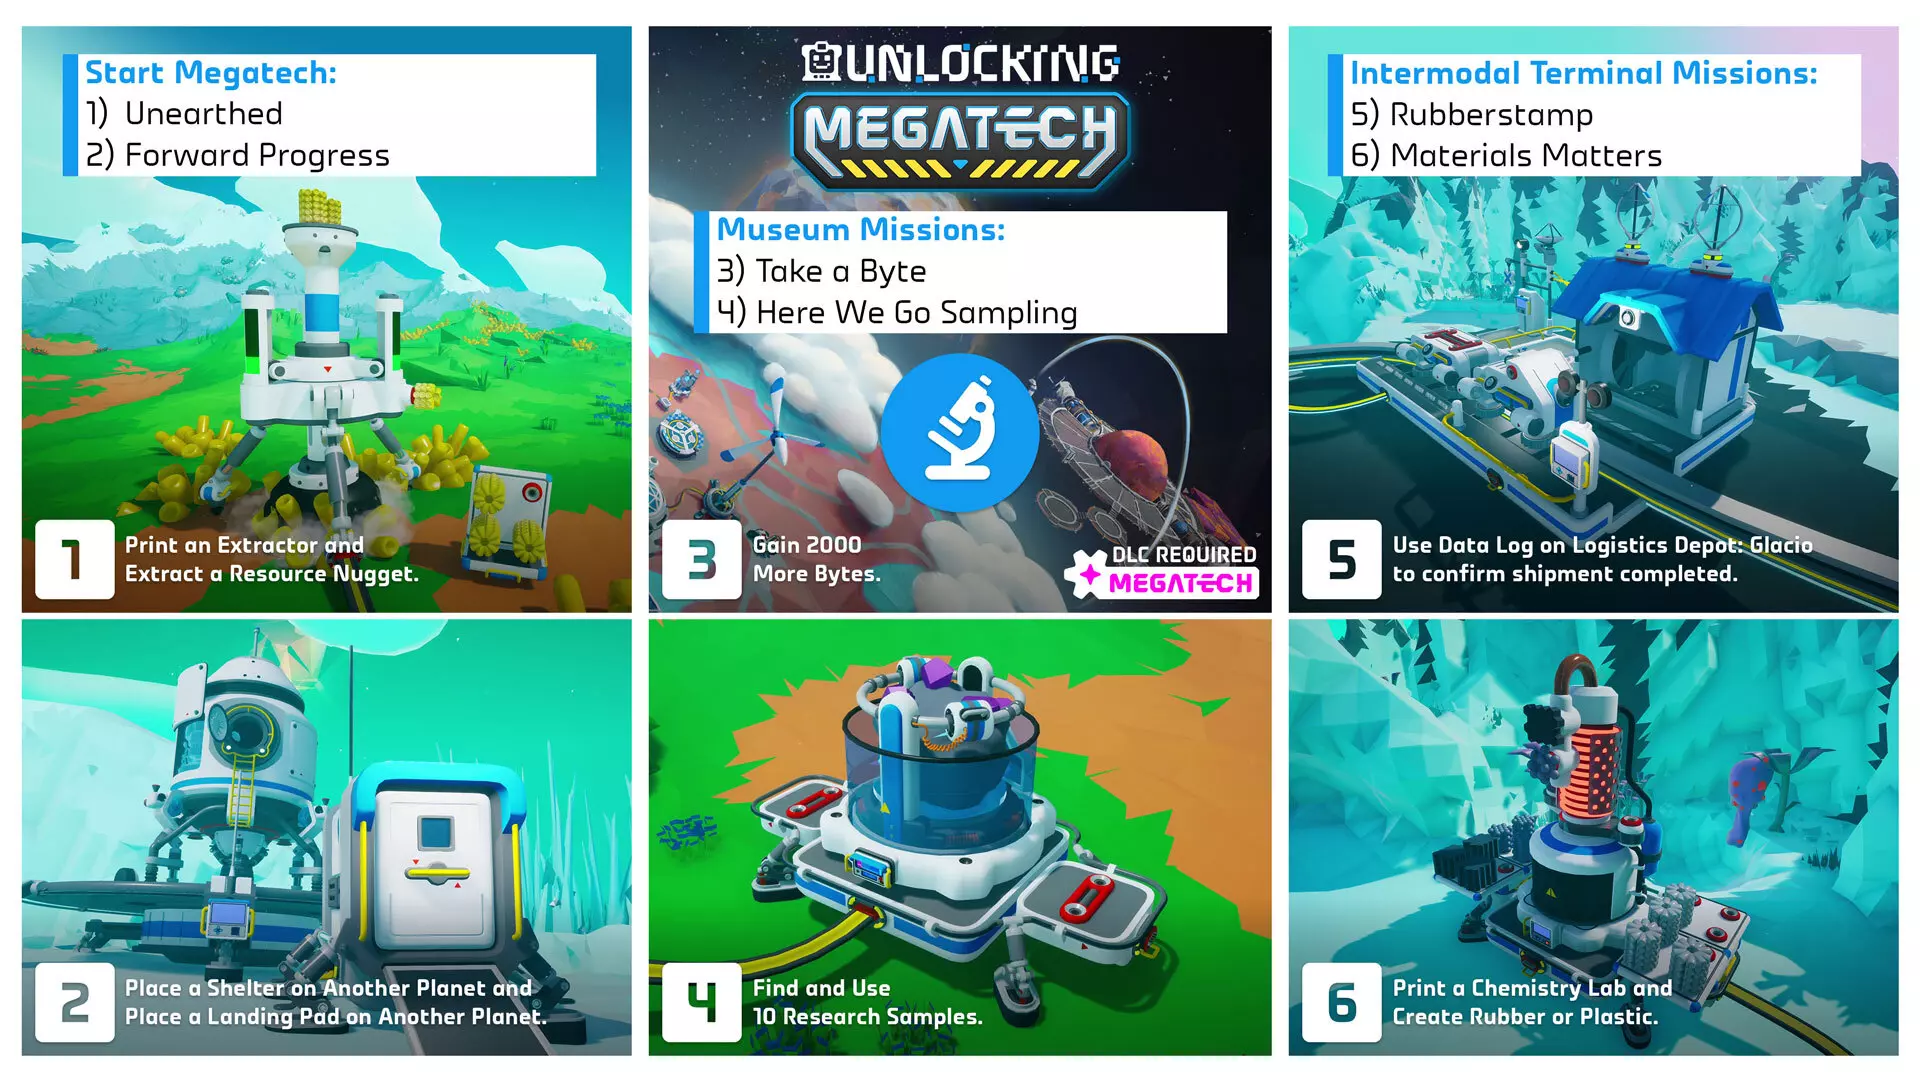
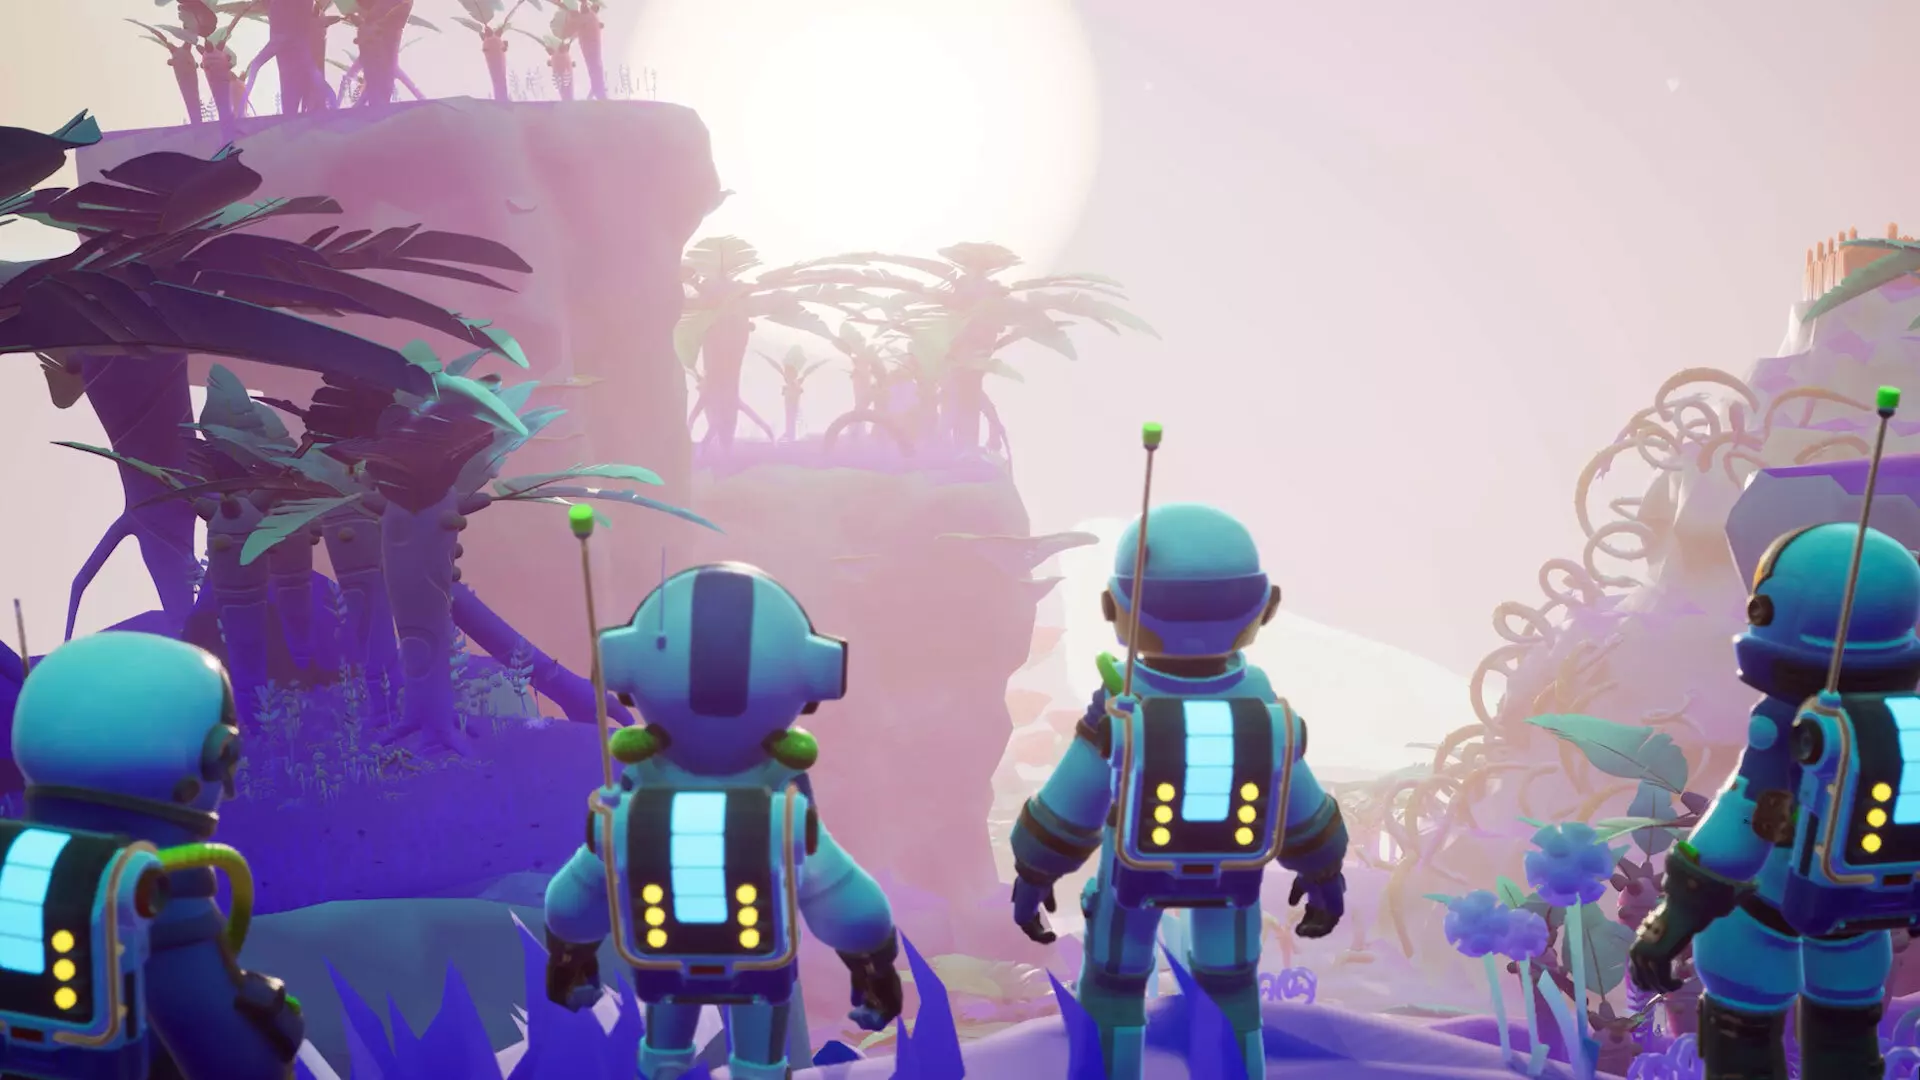
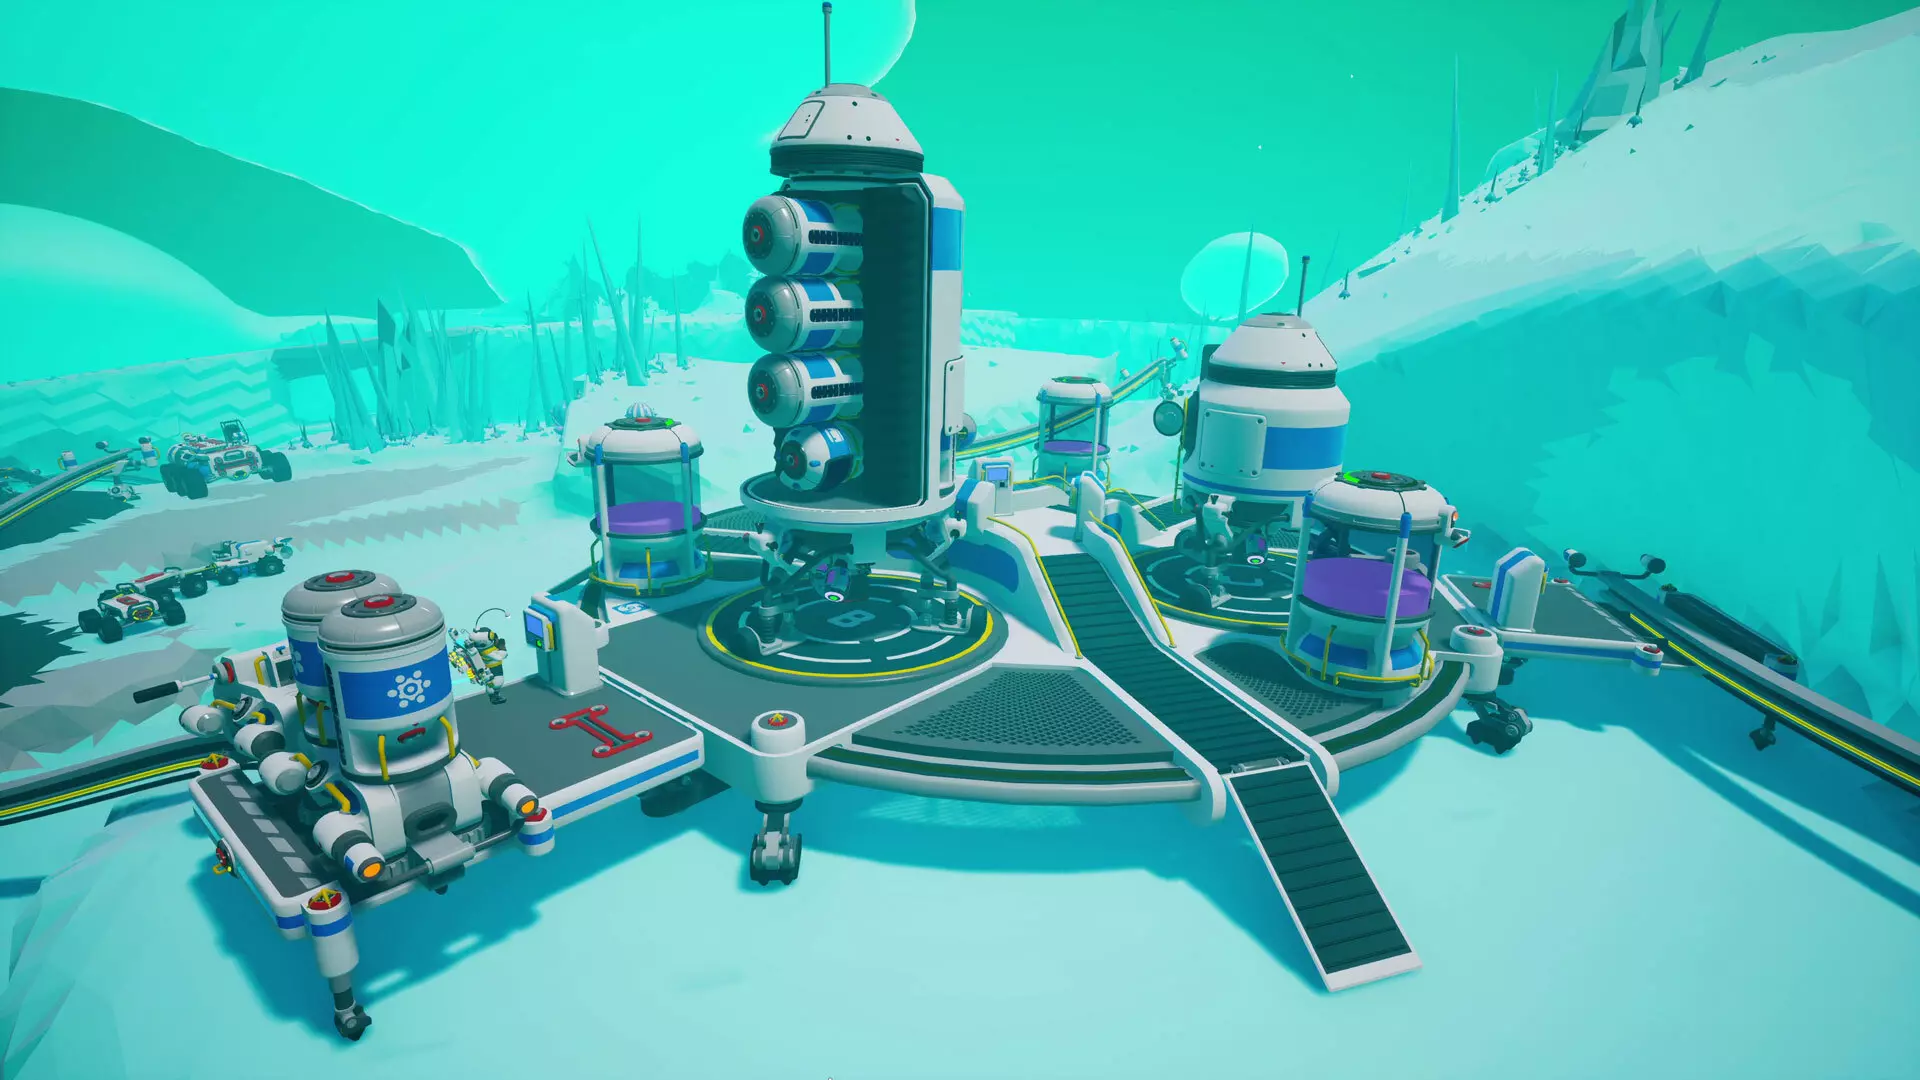
《异星探险家》即将推出的Megatech DLC和免费更新将为你的基地建设增添一些新的高科技选项,尤其适合那些热爱自动化的玩家!虽然不深入研究自动化也能体验新的Megatech内容,但尝试新的巨型建筑仍然充满乐趣。 本指南旨在作为《异星探险家》自动化基础的入门介绍,足以让你尝试一些有趣的项目。我们还将展示新的Megatech内容如何为你的自动化带来更多便利,或开启全新的可能性。从何处开始 在深入研究自动化的细节之前,有一些通用技巧需要考虑,它们能帮助你快速上手: 1. 在创意模式中进行实验:当你需要收集资源来打印所有物品时,要弄清楚所有事情会格外困难,所以在创意模式中进行实验可以让你更容易地了解所有物品如何组合在一起,然后你可以将这些知识运用到你的主游戏中。毕竟,自动化的一半乐趣就来自于自己摸索。 2. 查看研究目录:首先要熟悉目录中的每一个物品,并了解它们的工作原理。有时你会发现一些意想不到的有趣功能,比如平台可以无需自动机械臂就能移动小人与资源。多进行实验,这样你就能确定优先将研究字节花费在何处。 维基是你的好帮手:本指南仅旨在帮助你入门。查阅社区维基可以填补你知识上的空白,并获取更深入的信息。 YouTube上有大量教程:幸运的是,YouTube上有许多内容创作者分享了各种各样关于自动化及其他主题的教程和指南。随着游戏更新,部分信息的相关性可能会降低,但基本原理仍然适用。有一些不错的频道,不过你可以选择自己喜欢的任何频道。 什么可以自动化? 这是一个相当开放性的问题。在生产方面,你可以自动化游戏中任何资源的生产,包括研究和电力。但你也可以针对非常具体的场景发挥创意,比如设计一个贴心的自动机械臂,让它在你每次离开基地时直接将联氨装入你的背包。归根结底,你可以为任何你认为最重要或觉得最有趣的事情设定自己的目标。
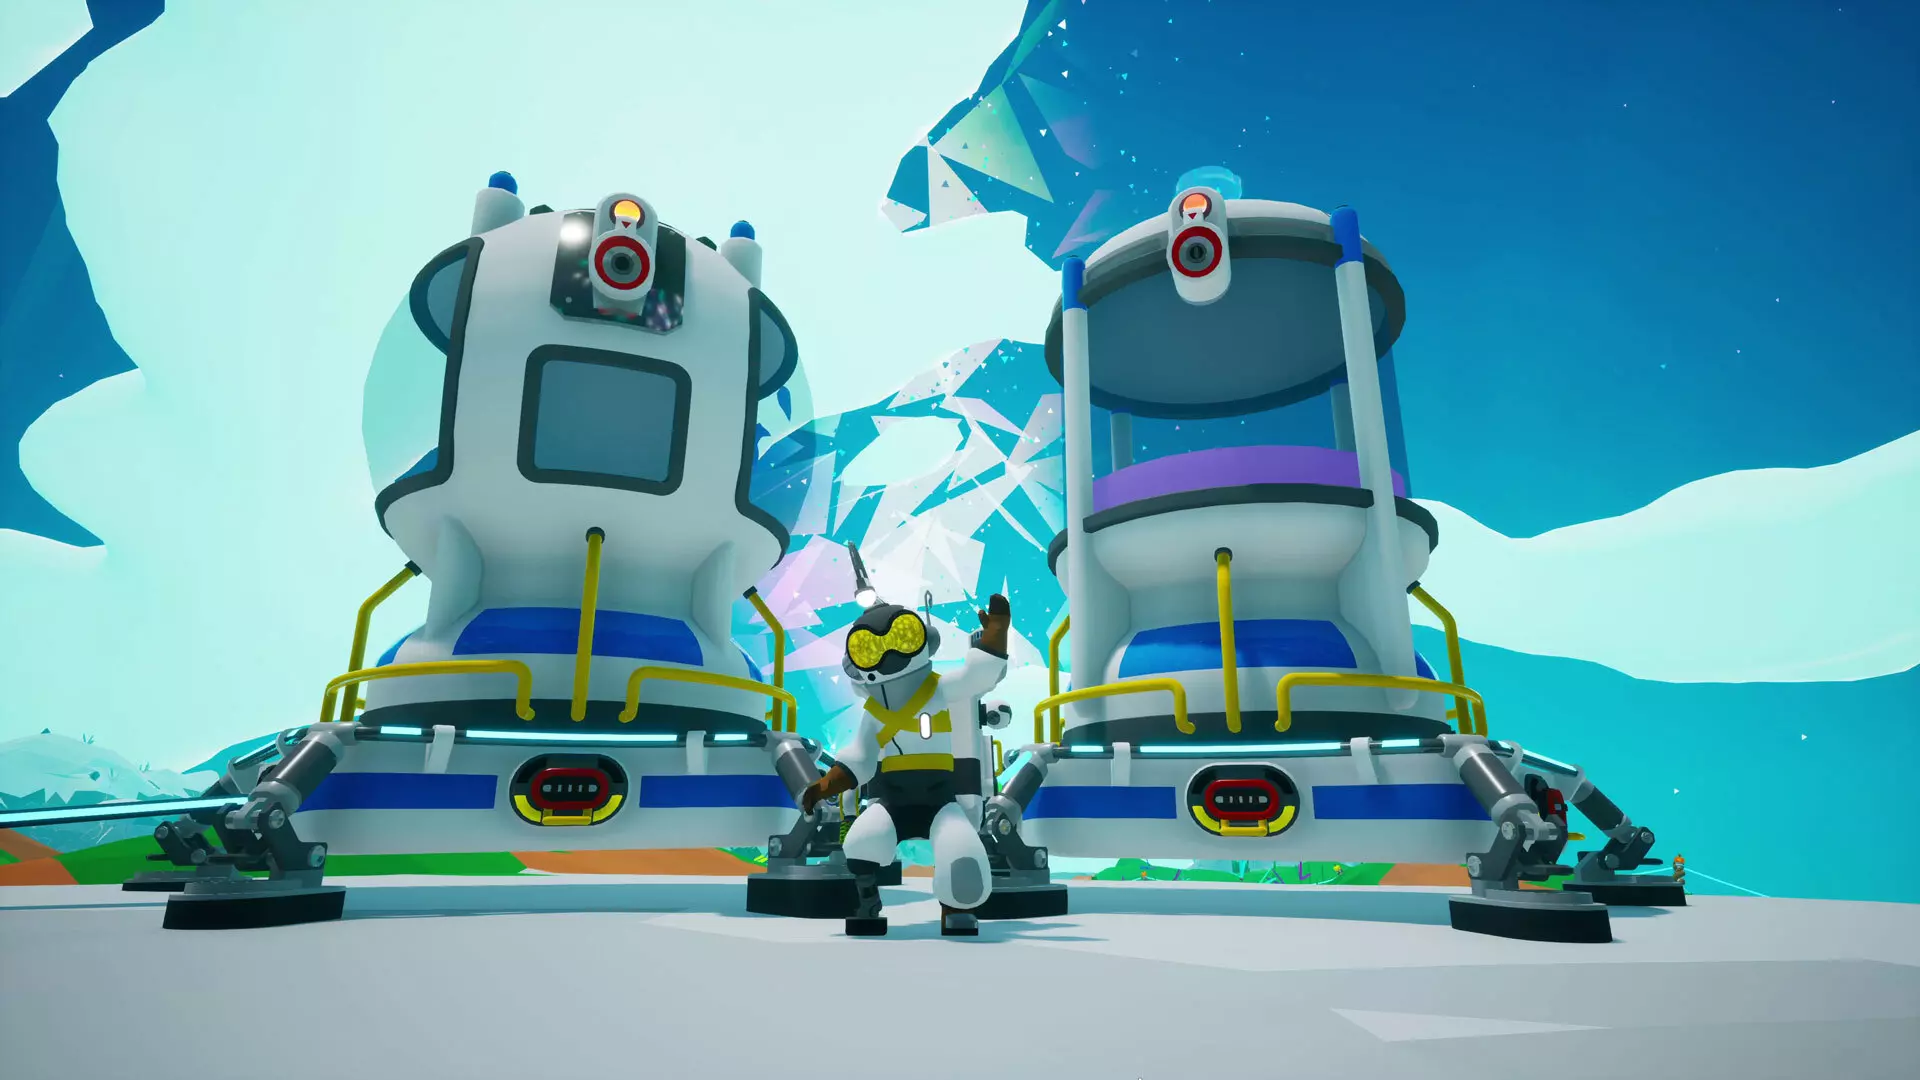
How does it work? Let’s start by looking at some of the tools in your toolbox and explaining how each of them works. You might be familiarized already with some of them, while others you might have decided you weren’t going to bother with because they looked too complicated. But, once you start using them, you might find that they weren’t as complicated as you thought. Auto Arms This is probably the most iconic bit of tech for automation, and don’t let its compact form fool you; it can extend quite a bit, especially vertically. Place it on any powered platform and it will move resources from one end to the other. Mouse over it to see two colored holographic spheres where green is the input and blue the output. Fun facts: You can place a specific item on the open slot in the middle of its base to filter for only moving that kind of item. If the Auto Arm can’t find an open slot to place an item in, it will hold said item until a slot within reach opens up, which might include your Backpack. Platforms You might not think Platforms play much of a role in automation, but the wide variety of shapes available means some Platform types can be most beneficial to certain arrangements. For example, the Large Extended Platform and XL Extended Platform are the ideal length for an Auto Arm, and Platforms also automate the movement of resources on them, so choose the right one for your needs. Consult the Wiki for reference. Auto Extractors Unlocking these is an important milestone to automating your resource extraction and production game. They’re far more efficient at extracting resources than your Terrain Tool, if somewhat slower. You can extend power to one from your base, but many choose to use a local source, since you’ll end up moving them once they exhaust a deposit. Fun facts: The Auto Extractor has a slot on top where you can add a Medium Resource Canister, Medium Storage, or Medium Storage Silo to directly store into. You can also add a Portable Smelting Furnace to the top so it can directly produce finished metals. Rail Networks It’s less useful to automate a resource if you have to run around gathering it all, so Rails help automate this part too, they’ll even help with power and oxygen distribution. You can equip Rail Cars with storage and set them up to be loaded/unloaded by Auto Arms, using Storage Sensors to automatically transport goods between Auto Extractors and your base. Keep reading for details on a Starter Project. Sensors & Repeaters If you’ve been opting out of automation, then these might be a set of items you’ve never used before. These are what will allow you to customize the behavior of your automation, versatile enough to allow for the creation of some elaborate contraptions, like a music player, or even a crazy display capable of doing math for you! But let’s think small for now. Sensors: Place them down by themselves or directly on to the item you want to be sensing, then extend the Pin from the top and place it on the item you want the Sensor to activate when its condition has been met. You can also extend additional Pins from the first Pin, but only the ones at the end of the wire will activate items. Storage Sensors: Useful for resource management, like keeping your supply of Resin topped up but deactivate your Auto Extractors once your storage is full to save up on power. Cycle through its Modes to activate when its attached storage is either “Full or Empty”, “Empty or Not Empty”, or “Full or Not Full”. Power Sensors: Useful for keeping your power flowing when your renewable sources run out, like shifting from Solar Panels at night over to your Generators. Cycle through its Modes to activate when it “Gains Power Flow”, “Loses Power Flow”, or every time it either “Gains or Loses Power”. Battery Sensors: Useful for keeping your Battery supply charged up, like activating your Generators only once your Batteries are all drained to save up on Carbon. Cycle through its Modes to activate when its attached battery “Gains or Loses Charge”, is “Empty or Not Empty,” or it’s “Charged or Not Charged”. Motion Sensors: These work a little differently, as you don't place one on anything you want to sense. Instead, it will activate whenever anything passes through it. You can directly slot small items on to some of them like Horns to announce when a buddy returns to base or extend Pins to anything else you want one to activate. Repeaters: Unlike most Sensors, you don’t place Repeaters directly on to other items; you either place them down by themselves or on a small slot, but you can also stack them for combined effects. Alternatively, attach small slot items you want to activate directly to the top of them. They also have Pins that work the same way as they do for Sensors. Proximity Repeater: When one of these is activated, it will in turn activate everything within a small radius, which you can see as a green holographic circle when you mouse over it. It can be useful when you want to activate multiple nearby things at the same time, and it can even collect research items in its proximity. Button Repeater: This is pretty straightforward. It's a simple button that will activate anything you connect it to via its Pins. This is the best Repeater to combine with any of the other Repeaters in order to combine their effects, particularly the Delay Repeater and the Count Repeater. Delay Repeater: These don’t activate anything by themselves but instead create a delay between receiving a signal and sending one out. It can be useful, for example, for activating an Auto Arm to collect an Organic nugget from a Tapper that’s finished producing a full nugget, so the Auto Arm isn’t spending power the whole time. Count Repeater: Like the Delay Repeater, it doesn't activate anything by itself. It can send out a signal only after a set amount of input signals have been received. For example, a Solid Fuel Thruster can make 2 interplanetary round trips. A Sensor Ring with a Count Repeater could print a new Thruster only when needed. Power Switches, Extenders, and Splitters Your power production is certainly something you can automate, but fiddling with the direction of your power flow can also help ensure your usage of power stays efficient. You can cut power to entire sections of your base that currently aren’t needed, like in the case of resource production setups when you run out of storage. Power Switches: These are simple On/Off Switches that can either let power pass through or get cut off. If you ensure power flows into an automation set up from a single point, then a Switch will allow you to easily shut it all down. They can also act as transistors for complex logic gate set ups, but that’s advanced stuff. Power Extenders: Not only do they carry power and oxygen, but they also have the interesting property of being able to set what direction you want power to flow in. This can be useful for automated backup Generator set ups, ensuring a Power Sensor only turns it on when it runs out of power coming from the base. Splitters: These allow you to divert the flow of power down separate circuits. For example, assuming you only have enough power to keep automation for one resource running at any given time, a Splitter could allow you to quickly divert power from one set up to the other or even deactivate them entirely to free up power. Starter Projects Theory is all well and good, but there’s nothing like a little hands-on demonstration. Below you’ll find a few project ideas to get you started, ordered from simplest to most advanced. Bear in mind that these are just examples, and there are countless different arrangements you could use to achieve the same results. Feel free to experiment. Give them a try and tag us on social media if you share your results!
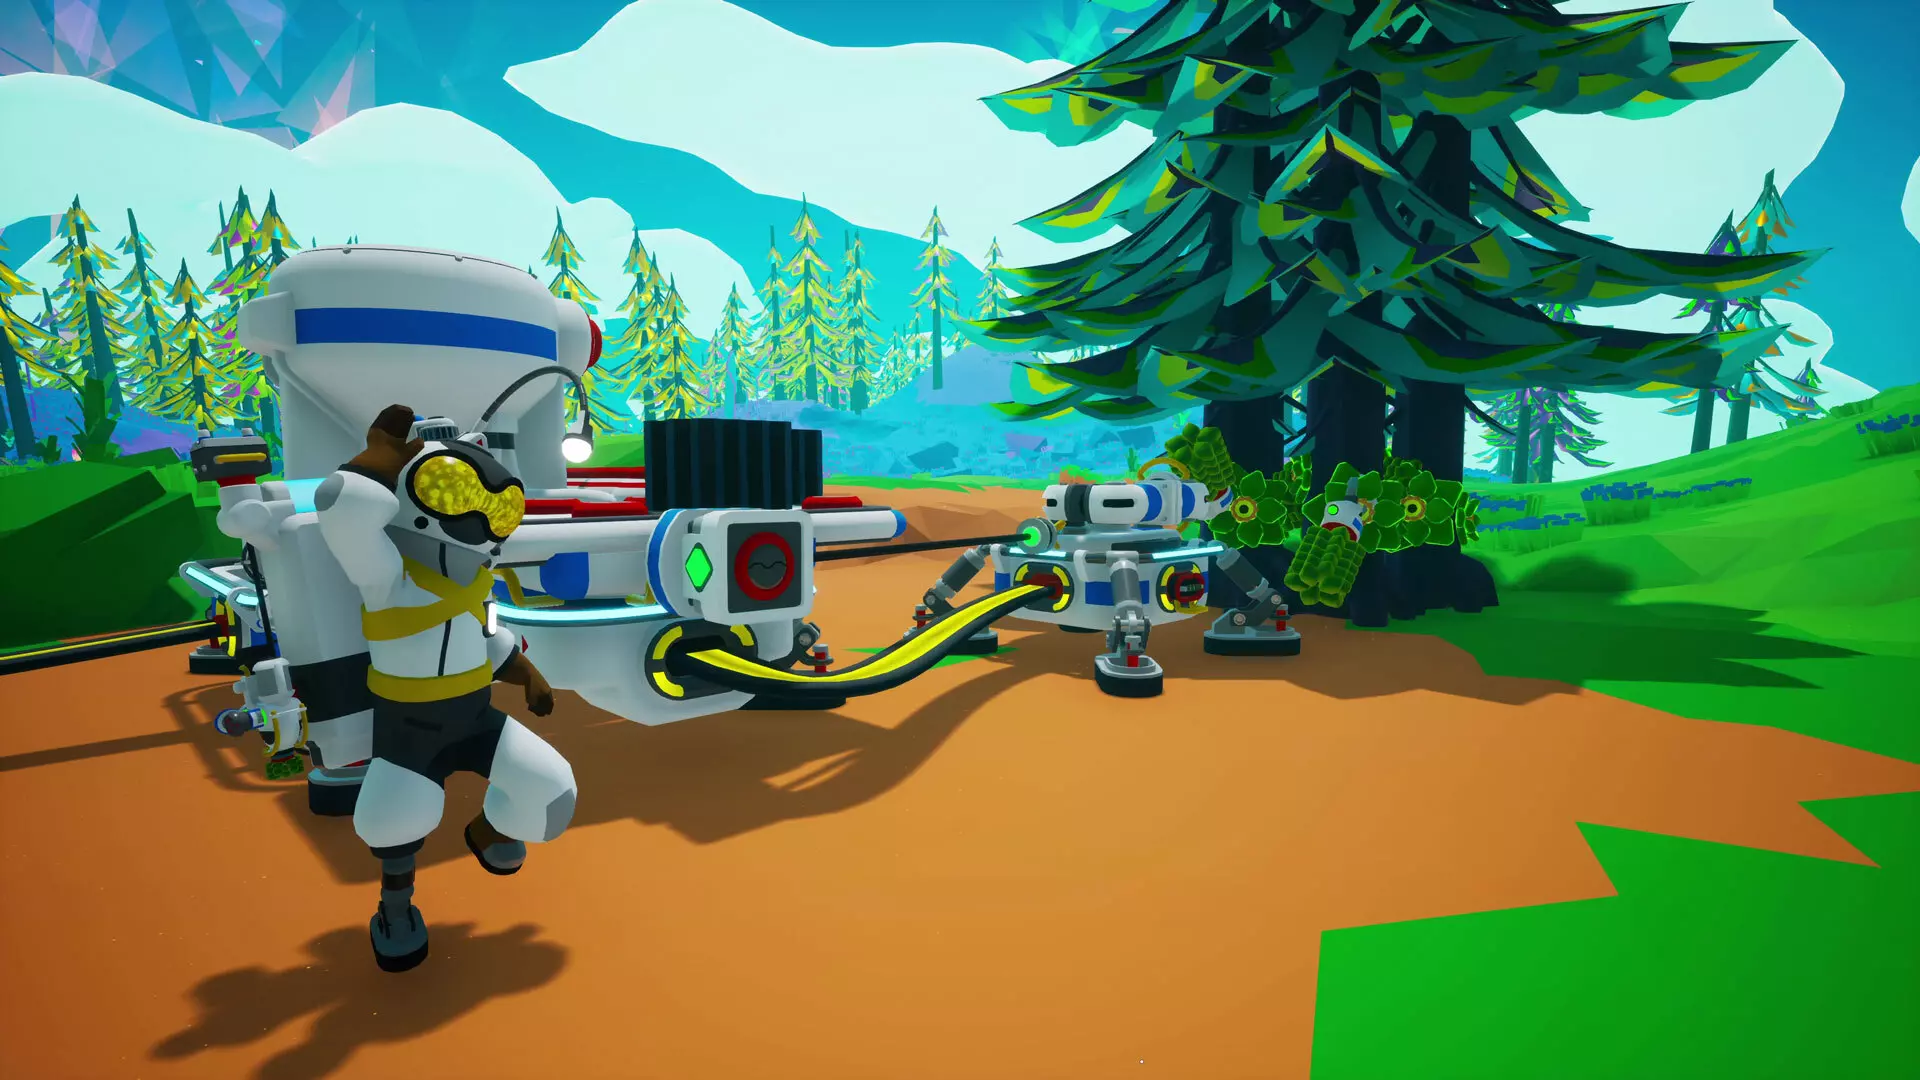
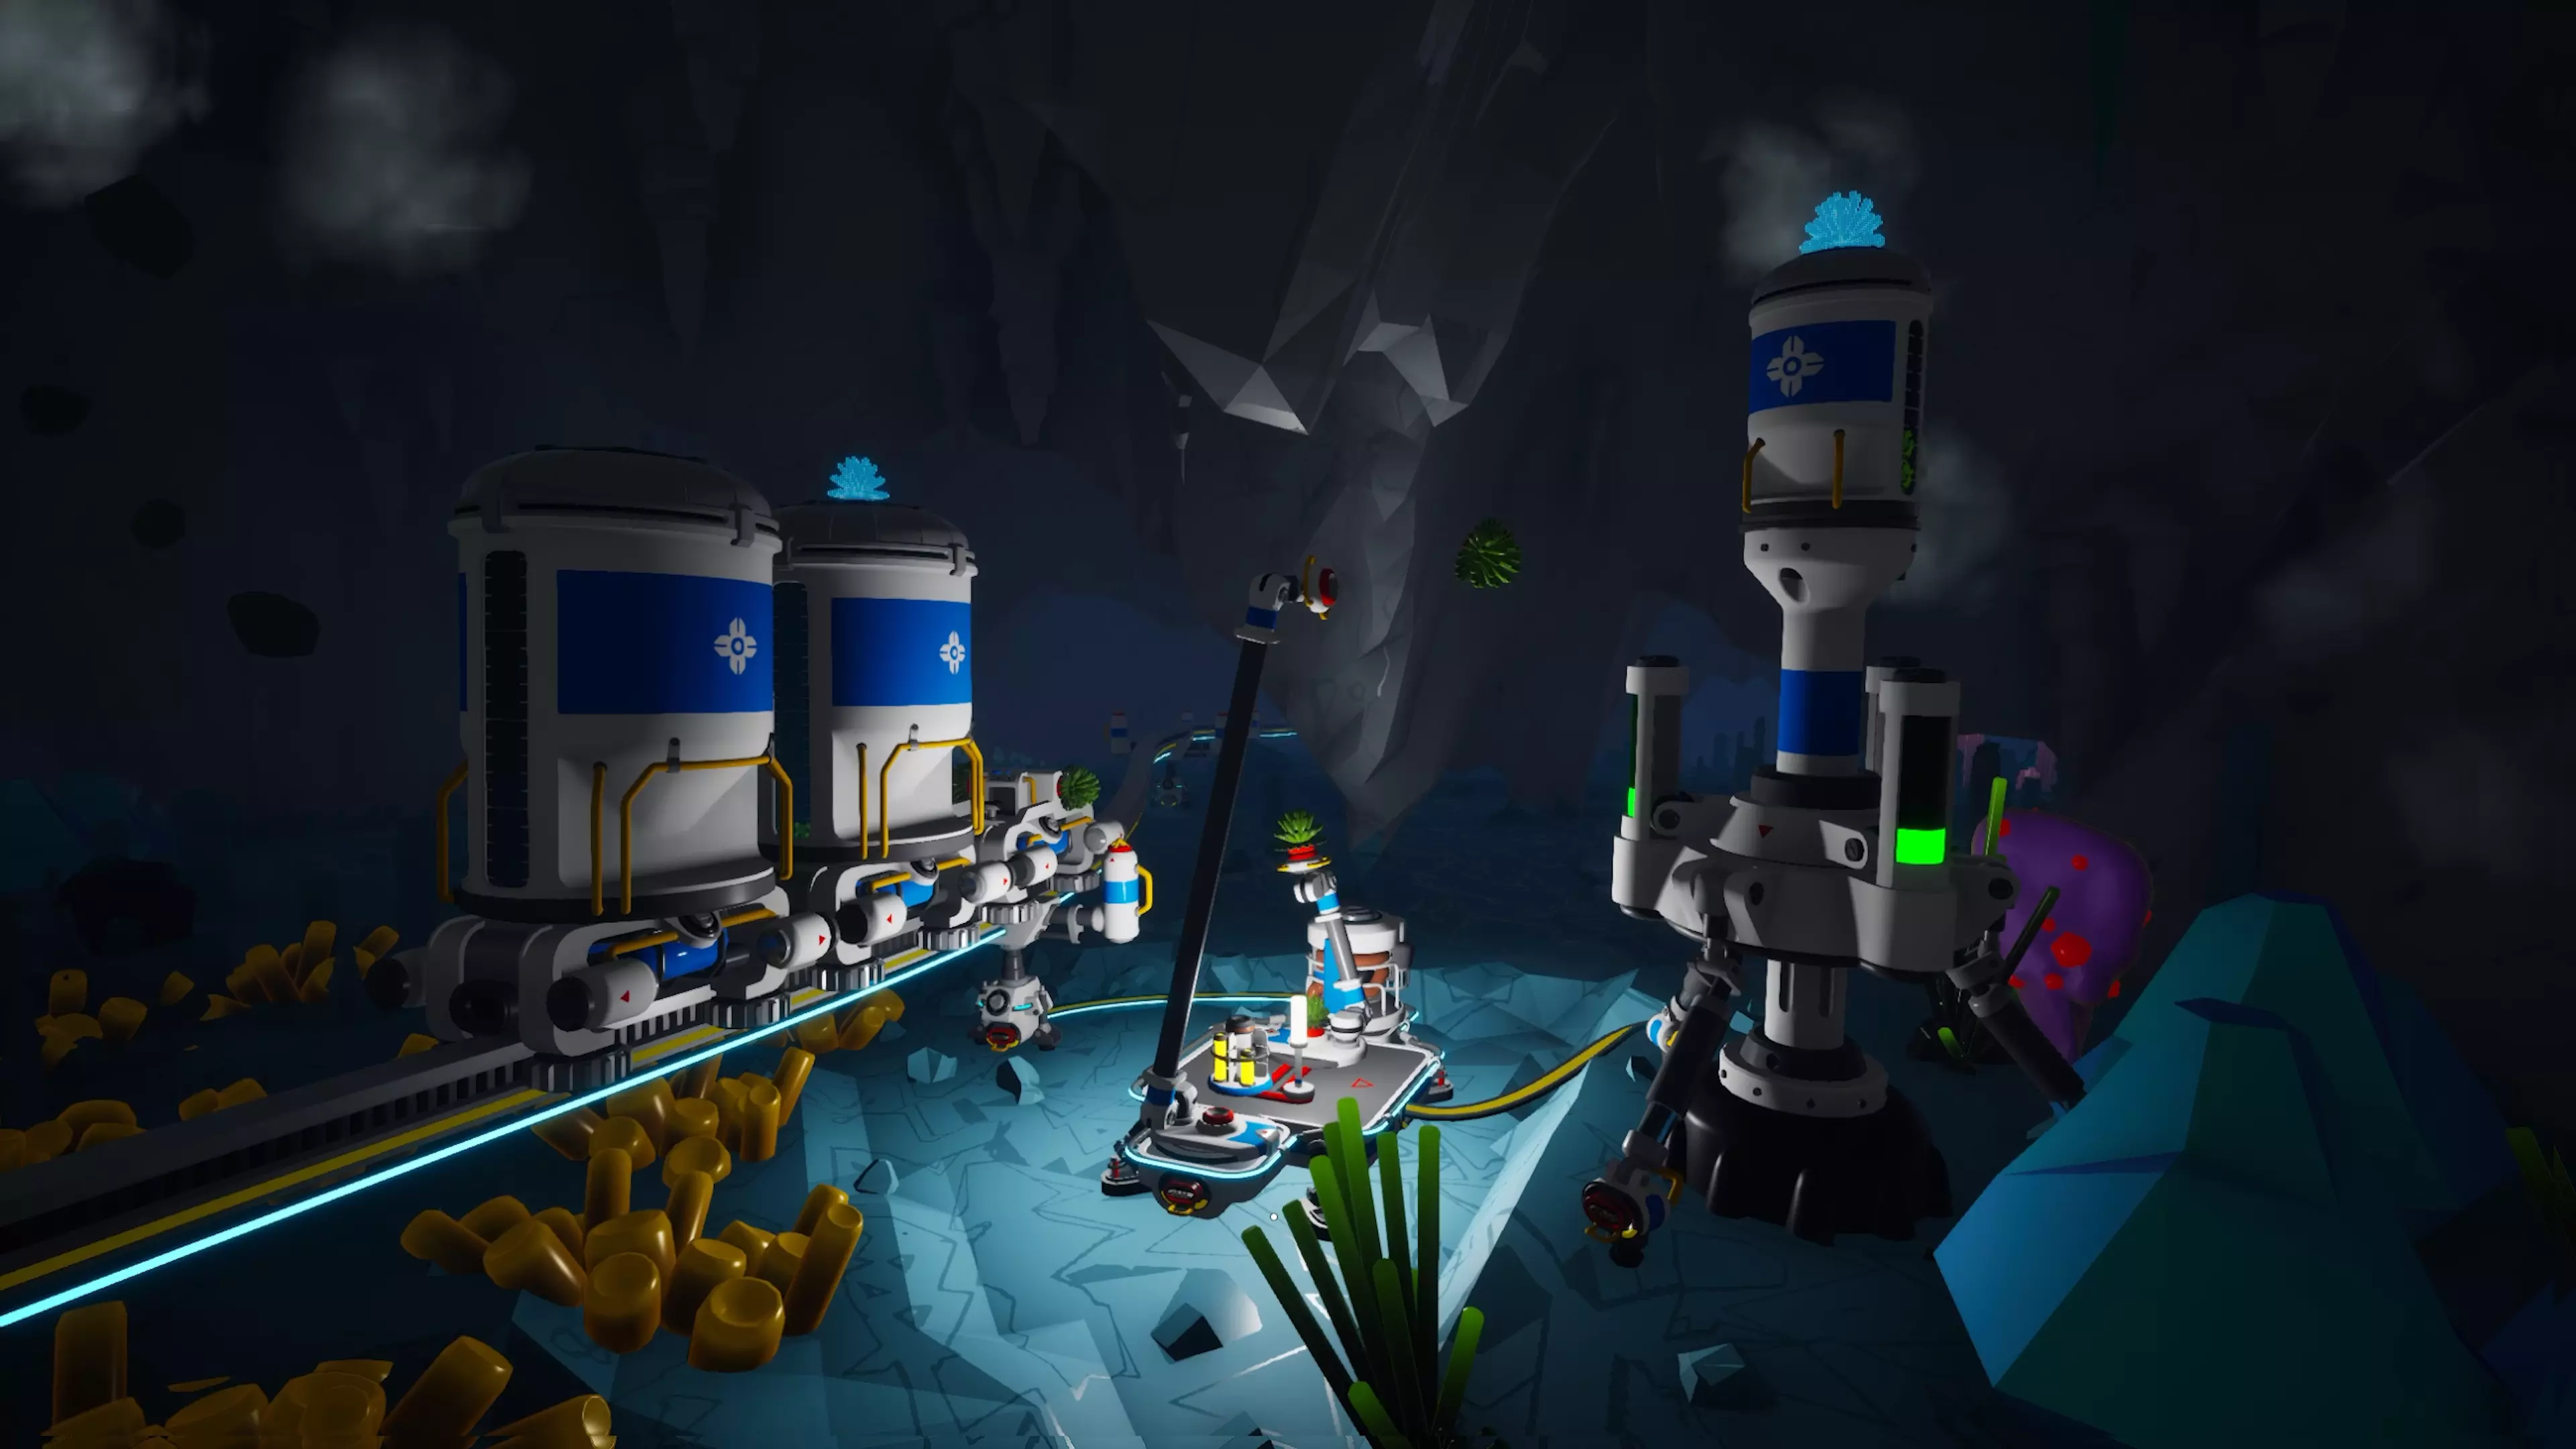
碳能源农场 碳农场和发电机可以在可再生能源供应减少时帮助维持基地电力。按照以下步骤进行基础设置,并根据需要扩展。 所需物品: - 在小范围内密集种植几株可采集植物 - 每株植物至少配备一个采集器(每株植物的采集器越多,采集速度越慢) - 1个自动机械臂 - 1个存储传感器 - 1个中型储物箱 - 1个中型平台A - 1个大型平台B - 1个熔炼炉 - 1个中型发电机
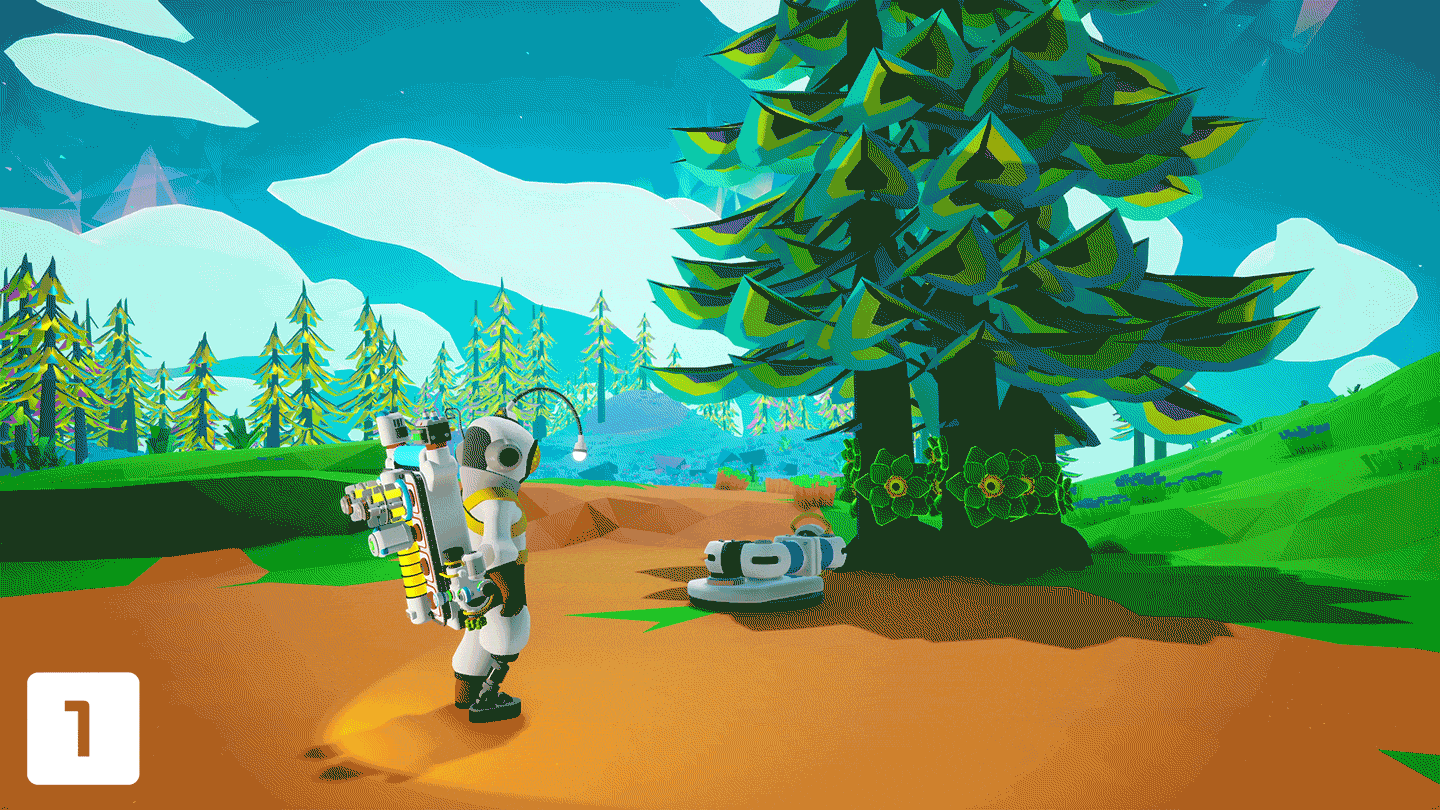
建造步骤: 1. 在基地附近找一处平坦的空间,将可采集植物种植在彼此靠近的位置。将鼠标悬停在自动机械臂上,查看绿色全息球体的范围,植物需要种植在这个范围内。希尔瓦星球的羽杉树是不错的选择。 2. 等待植物完全生长后,在每株植物上安装一个采集器,确保采集器都位于自动机械臂的绿色球体范围内。记得激活每个采集器,使其开始生产有机物质。 3. 放置一个中型平台A,并在上面安装自动机械臂,确保所有采集器都在绿色全息球体内。 4. 放置一个大型平台B,使其一端位于自动机械臂的蓝色全息球体内。将中型储物仓安装在大型平台的这一端,冶炼炉放在中间,中型发电机放在另一端。 将储物传感器安装在中型储物仓上,设置为“已满或未满”,并将其引脚连接到自动机械臂。 用电缆将中型平台A连接到大型平台B,然后将你的电力网络接入大型平台B,确保它有足够的电力启动。确保冶炼炉、中型发电机和采集器都处于开启状态。 扩展思路:你可以用产生的电力为电池充电,并进行设置,仅在电池电量耗尽时才启动发电机。尝试将中型电池连接到发电机平台,并在电池上放置电池传感器,同时将引脚连接到发电机。 熔炼炉会消耗中型发电机产生的部分电力,因此使用更大的平台(如超大型平台C)可以腾出空间,放置额外的中型发电机,甚至更多的中型存储设备来收集产生的碳。 你可以储存一些未燃烧的碳。将所有设备放置在更大的平台上,可以腾出空间放置存储设备来收集碳。当碳的数量超过发电机需求时,自动臂会将多余的碳存入附近的资源罐中。存储传感器可以在碳存储满时才激活。

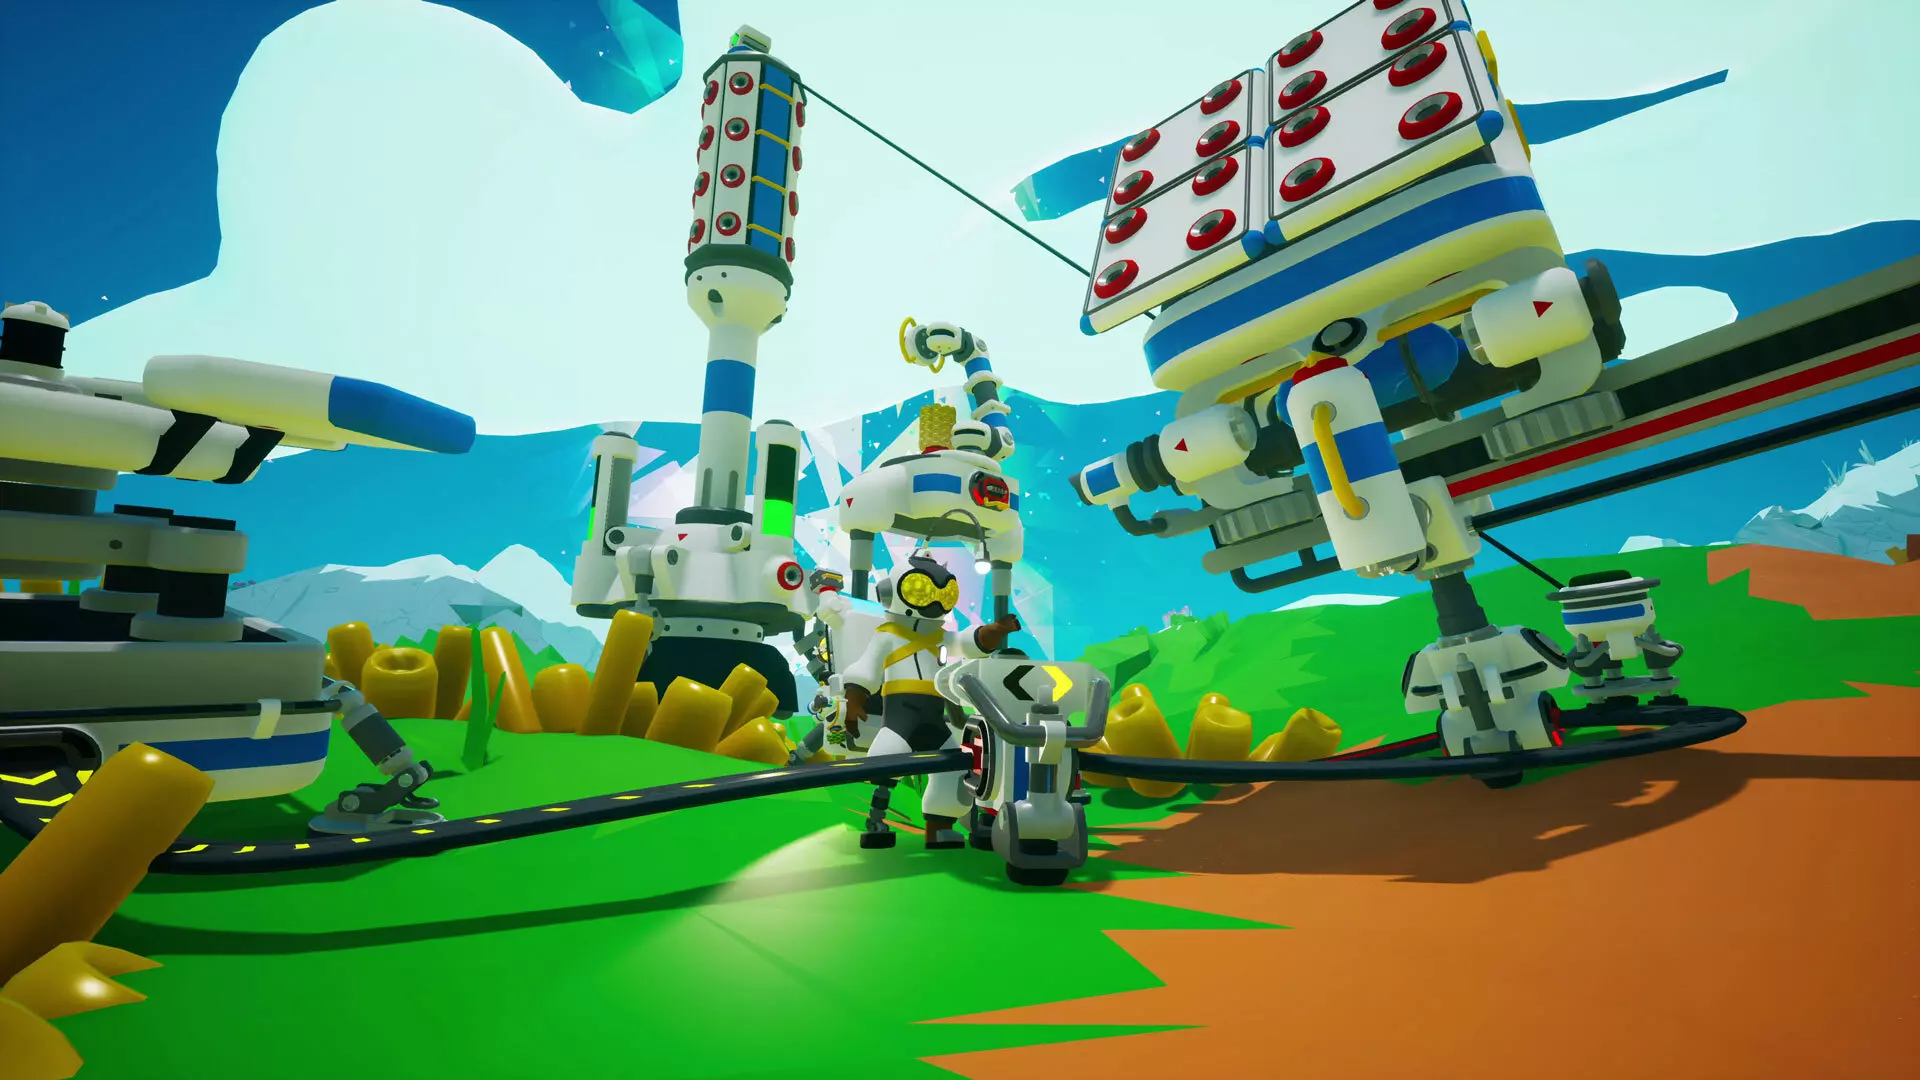
自动资源传输 自动化最大的便利之一就是让资源主动来到你身边。开始搭建连接你的基地和自动提取器的铁路网络吧。 所需物品: 1个自动提取器 2个自动机械臂 1个中型堆叠平台 1个大型扩展平台 1个中型存储仓 1个中型资源罐 1个轨道车 1个大型存储箱 4个中型存储箱 2个存储传感器 1个接近中继器 1个电源开关 以及连接自动提取器和基地所需数量的轨道支柱。

建造步骤: 1. 将自动提取器放置在你想要收集的资源上。激活后,注意绿色条会显示该资源点剩余的资源量。 2. 将设置为“满或空”的存储传感器连接到中型存储仓,并将其安装到自动提取器的振动器顶部。 3. 将自动机械臂安装到中型堆叠平台的顶部,然后移动平台,直到绿色球体全息图位于自动提取器的中心。自动机械臂可以垂直延伸相当长的距离,所以如果它不够高也不用担心。 4. 在自动机械臂蓝色球体全息图的内边缘放置一个轨道柱,使其几乎接触到中型堆叠平台。将【接近中继器】放置在这个【轨道柱】旁边,并从【料仓】上的【存储传感器】延伸出【引脚】,连接到【中继器】的侧面。确保【堆叠平台】位于【接近中继器】的感应范围之外。之后,继续放置更多【轨道柱】,直到将它们一直连接到你的基地。 在你的基地,将另一个【自动机械臂】放置在【大型扩展平台】上,使其绿色输入端朝向平台外侧。移动平台,直到绿色球体全息图覆盖铁路末端,然后在平台另一端放置【中型资源罐】。 在铁路末端旁边放置【电源开关】,并将其电源线连接到开关上。当你将铁路连接到基地的电力网络时,确保通过此开关进行连接。将另一个存储传感器连接到附近用于存放你正在收集的资源的中型资源罐上,将其设置为“满或空”,并延伸其引脚以连接到电源开关的侧面。 在轨道车上安装大型存储单元,并在其顶部安装四个中型存储单元。延伸它们以获得更好的外观。现在将轨道车放置在轨道上。 将所有提到的平台连接到最近的其他平台以及两端的轨道柱,这样你就可以将电力从基地一直输送到自动提取器。确保所有设备都已通电,并且自动提取器已激活。扩展思路: 在铁路两端使用火车站可以省去自动机械臂或传感器的需求。你可以通过控制面板将自动提取器旁的车站设置为禁用停止模式并启用装载停止车辆,而另一端的车站则设置为禁用停止模式并启用卸载停止车辆。 你可以在铁路沿线增加更多站点,以从其他由自动提取器开采的资源点收集更多资源。如果是不同的资源,可以添加一节带有相同存储的额外铁路车厢,并在装载自动机械臂上使用资源过滤器,将其放置在只能在停止时够到第二节车厢的位置。
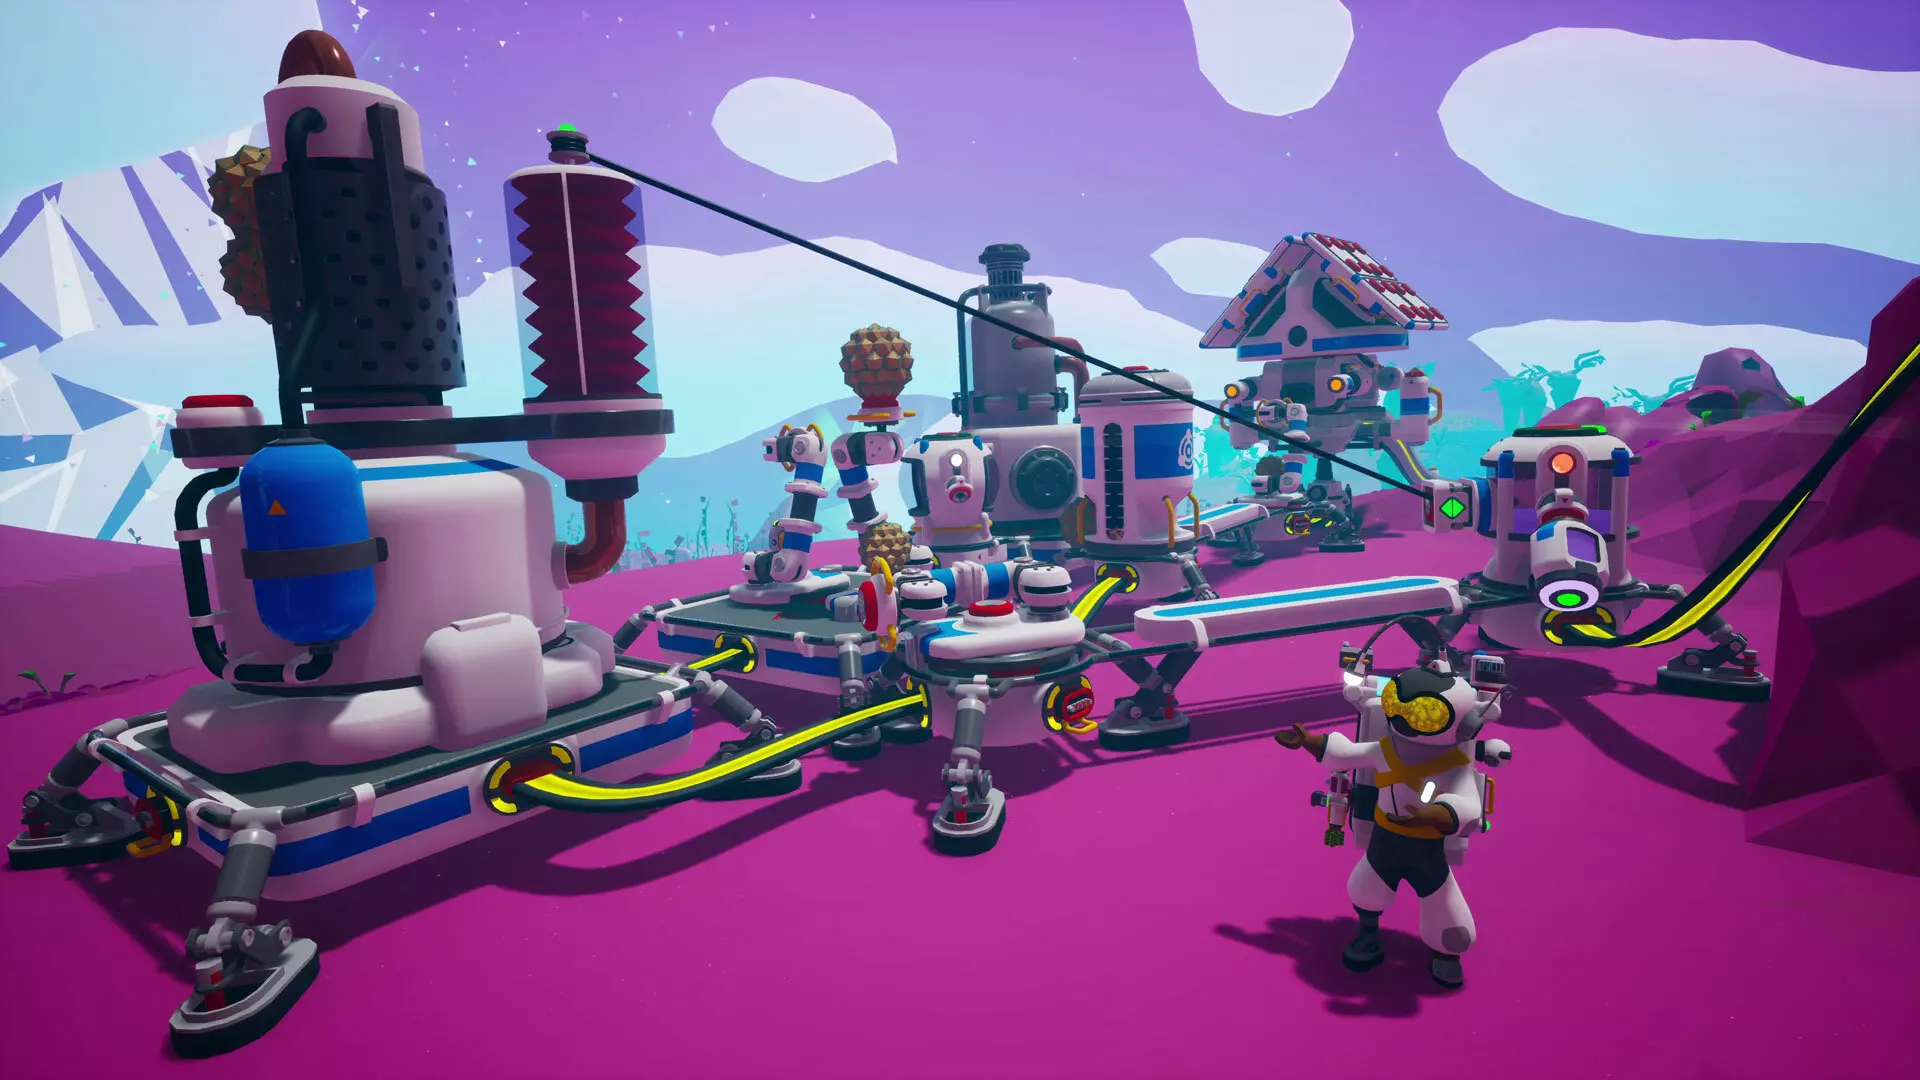
肼农场 你在所有飞行需求中总会需要肼,如果你已经按照之前的方案搭建了自动化氨传送装置,那么你只需要氢气和化学实验室就能实现肼的自动化生产。可以尝试从以下设置开始。 所需物品: - 如之前方案中详细说明的自动化氨传送装置 - 3个大型平台A - 1个大型平台B - 1个大型扩展平台 - 3个自动机械臂 - 1个大气冷凝器 - 1个化学实验室 - 1个中型流体与土壤罐 - 2个中型气体罐 - 1个存储传感器
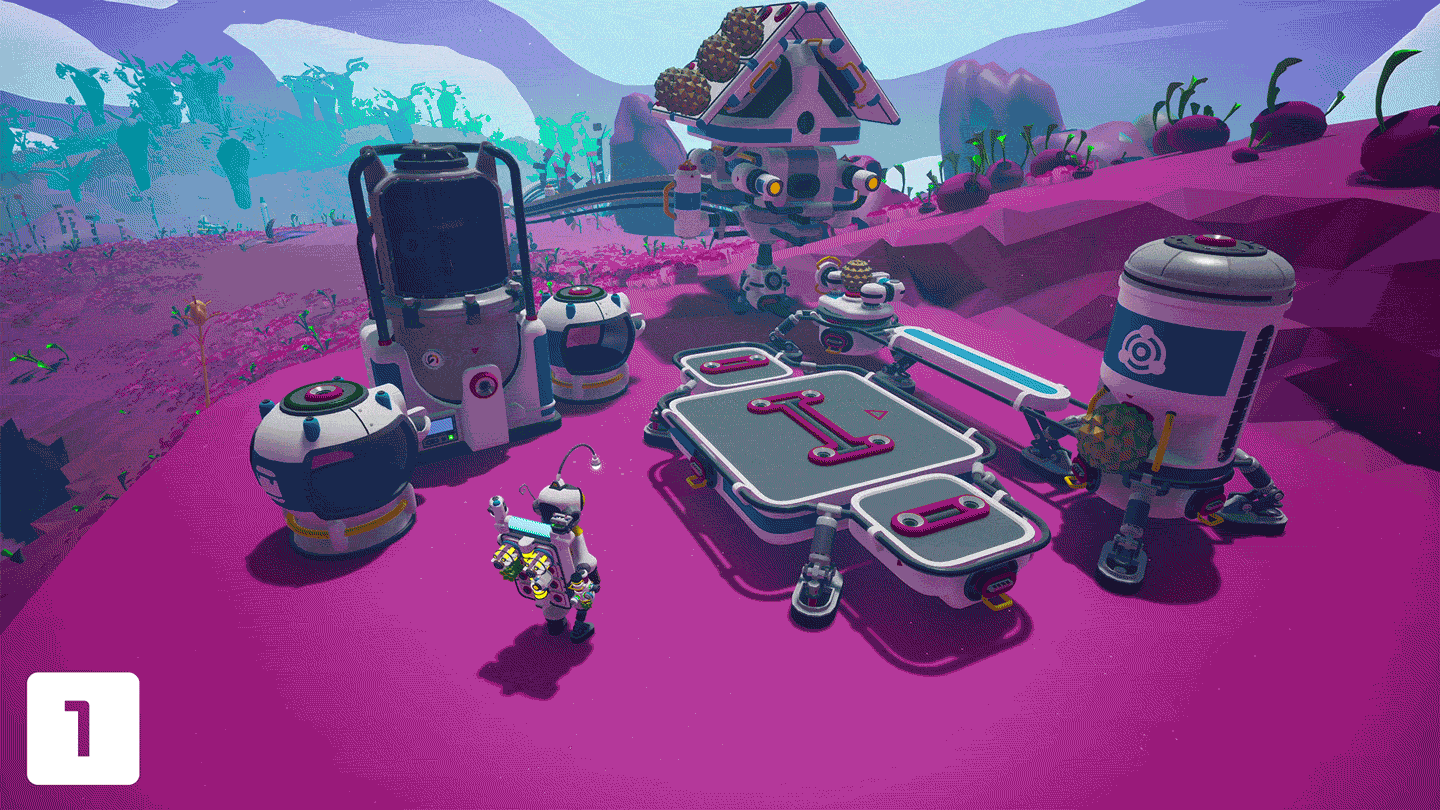
建造步骤: 1. 将大型平台B放置在氨气瓶旁边,使其一侧的“翼板”最靠近氨气瓶。然后,将大气冷凝器安装在中间位置,并在两端各安装一个中型气瓶。按下持续模式按钮,将冷凝器设置为生产氢气。 2. 在一个大型平台A上安装两个自动机械臂,保持方向一致,一端为绿色球体全息图,另一端为蓝色。放置平台时,确保每个机械臂的绿色输入端分别能够够到氢气瓶和氨气瓶。必要时使用自动机械臂过滤器。 3. 将化学实验室安装在一个大型平台A上,并移动该平台,使其处于上一步中那对自动机械臂的蓝色球体全息图可及范围内。使用持续模式按钮将实验室设置为生产联氨。 在大型扩展平台的一端安装最后一个自动机械臂,将绿色球体全息图朝外,并在另一端放置用于联氨的中型流体与土壤罐。放置平台时,确保自动机械臂的绿色端能够触及化学实验室。 将存储传感器连接到联氨罐,并将引脚延伸至化学实验室,设置为“已满或未满”。用最近的相邻平台之间连接电源电缆,确保所有设备都已通电。确保自动机械臂也已激活。 扩展思路: 单个用于储存联氨的中型流体与土壤罐可能很快就不够用了。可以考虑将它们集中放置在更大的平台上。或者留意【Megatech】更新中即将推出的大型流体与土壤罐。复制这种相同的设置可以同时生产更多的联氨,而不会受限于单个化学实验室的速度。
《异星探险家》自动化扩展包 恭喜你开始探索《异星探险家》自动化的奇妙世界!如果你已经是老手,那么之前的内容对你来说可能就像在太空公园里漫步一样轻松(当然,人们确实会这么说)。那么“Megatech”是如何融入这一切的呢?大型自动化系统能否容纳巨大的“Megastructures”(巨型建筑)?答案是肯定的! 联运终端 该终端可以自动为你的穿梭机装载本地资源,并将其运送到缺乏这些资源的星球。尝试自动化生产像纳米碳合金这样的物品可能是一项艰巨的任务,因为所需资源分布在多个星球上。如果不去埃奥卢兹星,你可能需要进行多次往返运输,但联运终端可以自动将所有资源集中到一个地方。轨道平台 虽然轨道平台是一个巨大的建造空间,拥有诸多便利设施,但有一个有趣的特点可能会让土壤农场主们格外兴奋。除了提供的创意建造选项外,巨型迷你小行星还是一个可无限再生的纯土壤来源。你无需担心挖掘隧道留下的混乱,因为你可以随时免费再生小行星,并选择你想要的可用形状。 生物穹顶 我们看到社区中已经建造了一些大型有机农场,但这些农场往往包含许多活动部件。这正是乐趣所在,但生态穹顶的设计初衷是提供一种更便捷的方式来实现类似效果,它能自动生产有机块和种子。这些种子既可以用来种植更多植物,也可以投入博物馆的捐赠站,所有这些都能在一个地方完成。 博物馆 说到捐赠站,自动化大师们往往拥有大量闲置资源,而博物馆为这些资源开辟了一条途径,可用于解锁实用奖励和新特权。此外,填满所有捐赠站的全息展示,绝对是值得吹嘘的终极资本。
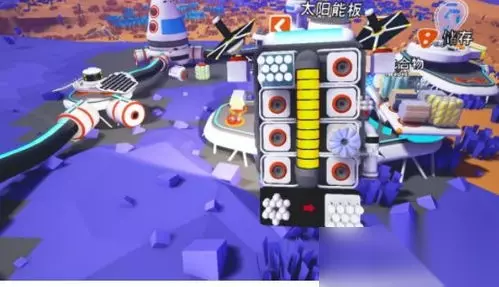
新大型容器 建造所有这些新的巨型建筑将需要大量资源,这也是随着“巨型科技免费更新”加入新的大型气体容器以及大型土壤与液体容器的一个重要原因。两者都将占用3级大型插槽。 【大型气体容器】的打印成本为1个硅酮、1个玻璃和1个钛合金,容量是中型容器的4倍。 【大型土壤与液体容器】的打印成本为1个塑料、1个玻璃和1个钛合金,容量是中型容器的3倍。EXO芯片存储:正如一些眼尖的评论者在我们最新的预告片中已经指出的那样,Megatech免费更新还将添加新功能,允许将EXO芯片存储在资源罐中,以实现更整洁的存储解决方案。

希望这能让大家深入了解自动化系统以及“Megatech”带来的大量新增内容。接下来,我们将分享更多关于解锁和建造大部分新内容所需条件的细节。请持续关注! 常见问题 【ASTRONEER: Megatech的发布日期是什么时候?】 2025年11月20日。任天堂Switch版本将在稍后推出。我们会尽快分享更多信息。 【ASTRONEER: Megatech DLC的价格是多少?】 9.99美元。不同货币的价格可能略有差异。 现有游戏存档是否与Megatech DLC兼容? 是。 Megatech DLC是否会同步发布免费内容? 是。付费DLC发布的同时,还将推出免费内容更新。 我应该在游戏中推进到什么进度才能开始游玩Megatech DLC? 你可以在开始新游戏后立即访问Megatech DLC。不过,大部分新内容将需要解锁科技树的相当一部分内容以及完成一些任务(包括新旧任务)才能体验。