换一换
换一换 


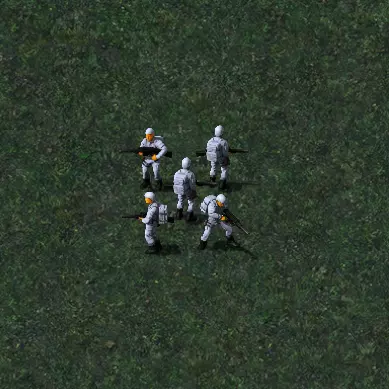
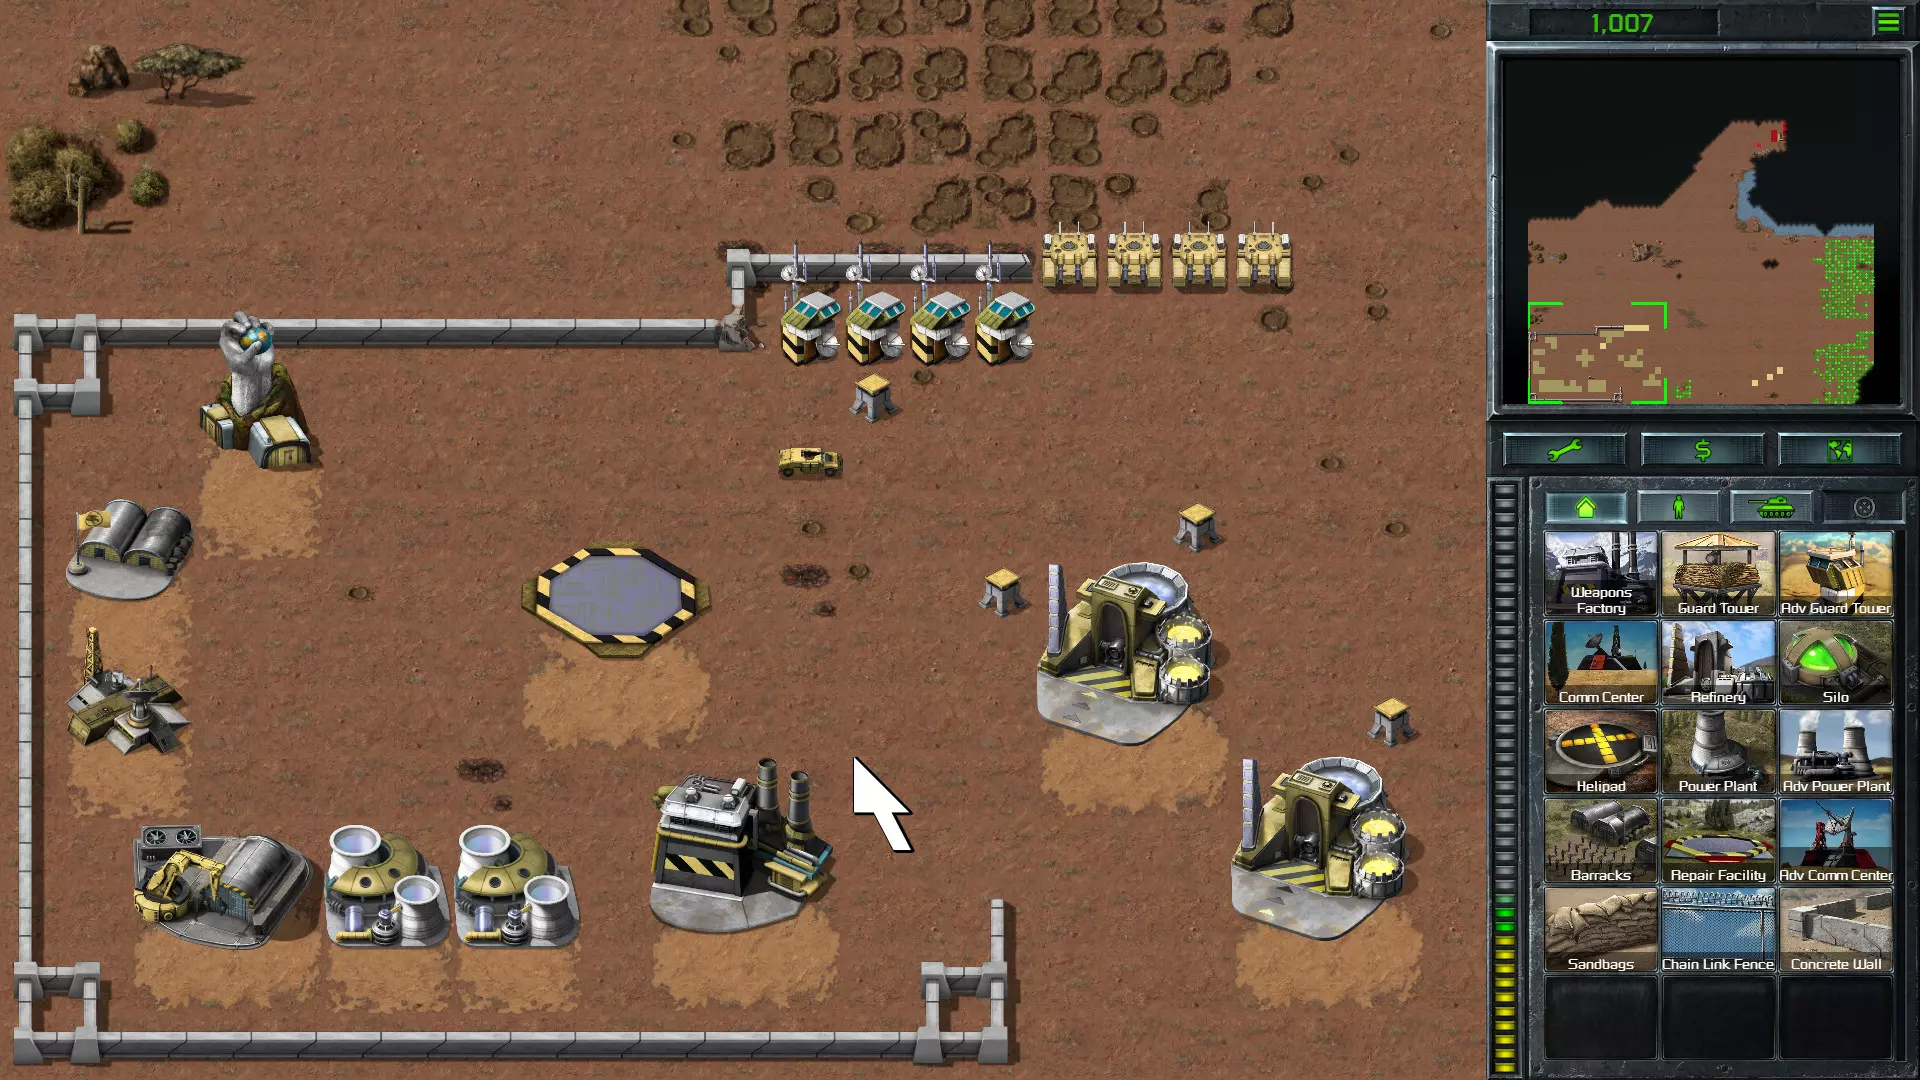
大约一半的秘密行动任务都包含一些方法,可以将原本漫长艰难的建造征服战斗转变为快速但需要大量微操作的渗透任务,从而以某种方式削弱人工智能。本指南旨在详细介绍这些任务中隐藏的所有机制,专门帮助玩家……以及一些可能并非有意设计的机制。我曾使用这些方法在困难模式下通关游戏,因此本指南可用于获取【The Best Around】成就。 预先说明 归功声明:本指南中描述的许多战术(以及取巧方法)均借鉴自YouTube上的视频。特别是RC1985的YouTube频道中的速通视频,对完成这些战术帮助巨大。虽然我制作本指南的目的并非速通任务,但展示的捷径对于避免长时间战斗往往至关重要。不过,大多数利用任务脚本特性的技巧都是我自己研究的成果。 别压我,兄弟!在许多情况下,能用机枪兵或其他近战步兵(如“泰伯利亚应变”中的化学战士)摧毁敌方坦克是绝对关键的。安全做到这一点的方法是确保你的部队处于既能攻击坦克,又不会使坦克进入碾压模式的精确位置。由于无法手动命令步兵进入特定子单元格,这需要一些精确的操作才能正确实现。 这就显示了那些最佳位置:
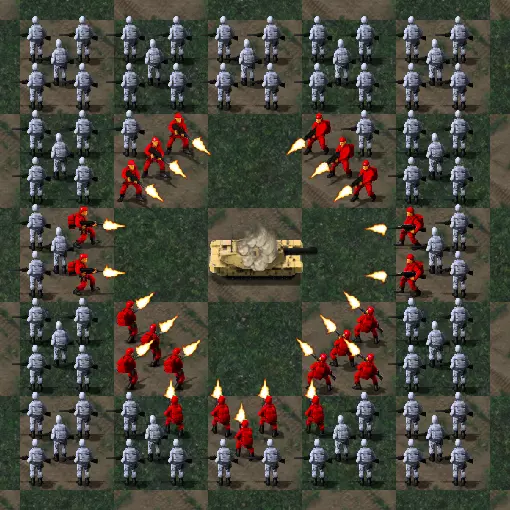
是的,存在南方优势。南方优势一直都存在…… 五五制!每个单元格有五个子单元格用于部署步兵。如上所示,控制子单元格在完成这些任务时起着非常重要的作用。这不仅能让你更容易地摧毁坦克,且通常损失极小,还能让诸如火箭筒士兵安全摧毁警戒塔之类的操作成为可能。 不过,这需要一些技巧来掌握。其中一个关键工具是使用【Alt】键点击进行强制移动的命令。大多数人只知道这个命令可以用来碾压敌方部队,但它在将步兵移动到已包含己方士兵的子单元格时也非常有用。一般规则是它们会走最短的距离,但存在一些特殊情况,所以我建议玩家多尝试移动步兵,观察不完整小队在不同方向移动时的行为,这取决于己方和目标单元格中哪些位置是开放的。 火箭筒对 guard towers 的示意图:
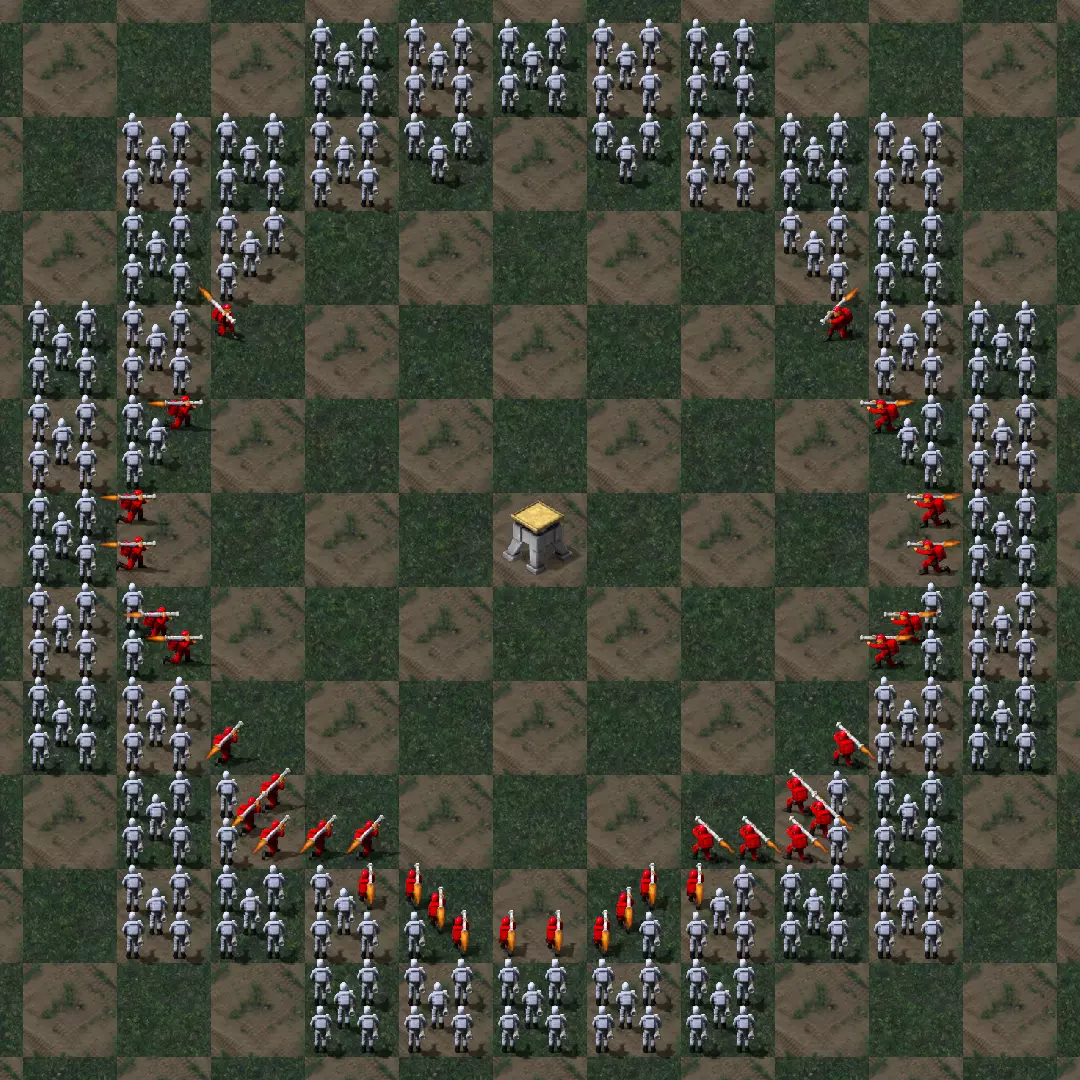
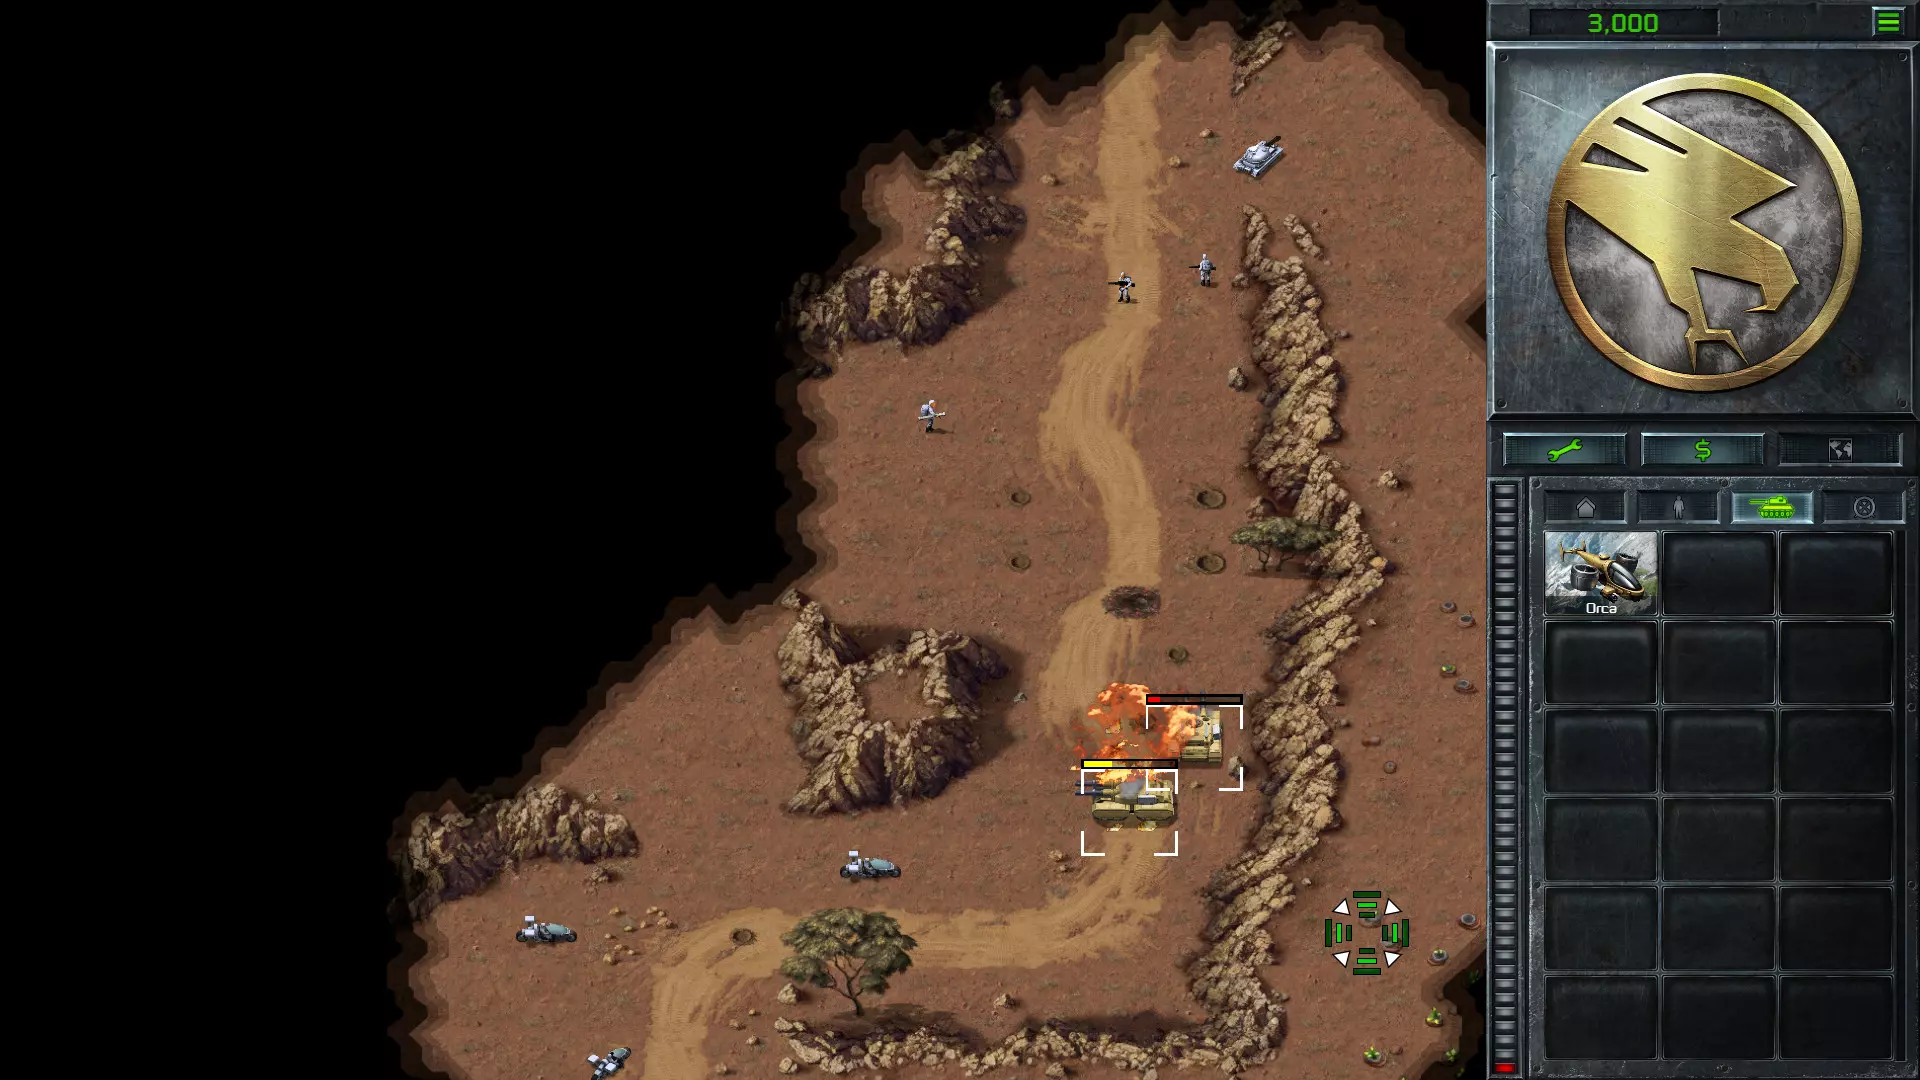
许多博萨人火箭筒手为了给我们带来这些信息而牺牲。说真的,牺牲了很多人。 关于子单元控制的更多详细信息,请参阅相关指南。 当你想进行空中突击时,打地鼠式的萨姆防空导弹阵地往往是个大麻烦,而且你可能也知道,它们能在离子炮的攻击下存活。不过,当它们升起时,就不再受到地堡的保护,任何攻击对它们造成的伤害都会加倍。 所以,要用离子炮摧毁萨姆防空导弹阵地,只需命令一架奥卡战机攻击它,当萨姆防空导弹阵地升起时,用离子炮将其摧毁。你甚至不需要担心奥卡直升机的控制问题;如果你命令它攻击同一个地对空导弹发射井,用离子炮摧毁该发射井后,奥卡直升机就会失去目标并返回其停机坪。
现在没那么 tough 了吧?! 这也意味着,相比同等数量的地面部队,奥卡战机(Orca)摧毁萨姆防空导弹阵地(SAM Site)的速度要快得多,这仅仅是因为它们出现时萨姆防空导弹阵地会打开。即便奥卡战机不发动攻击,在你的坦克攻击萨姆防空导弹阵地时,让奥卡战机进行几次低空掠过,也能让萨姆防空导弹阵地更快被摧毁。 另外需要注意,在那些摧毁所有萨姆防空导弹阵地后获得空袭能力的任务中,即便 AI 重建了这些阵地,你也只需摧毁每个萨姆防空导弹阵地一次。游戏脚本无法将重建的建筑纳入考量,因此只需对每个萨姆防空导弹阵地发动一次打击,你就能使用那些威力强大的凝固汽油弹空袭了。猛犸象的獠牙 使用猛犸坦克时,你需要能够随意使用它们的火箭发射器,以确保能迅速消灭敌方步兵。猛犸坦克发射火箭的规则很简单:当它想要射击时,如果炮塔没有直接瞄准目标,就会使用火箭。所以诀窍是使用移动和停止等其他指令,让坦克将炮口转向远离步兵的方向,然后迅速重新瞄准目标使其发射导弹,接着再次取消攻击指令,让炮塔再次转开。
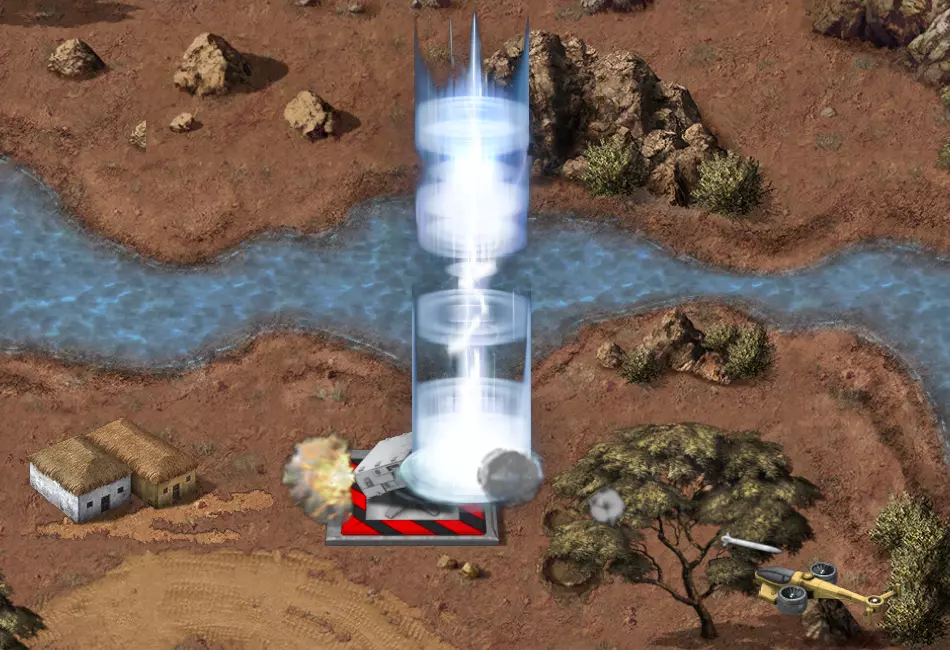
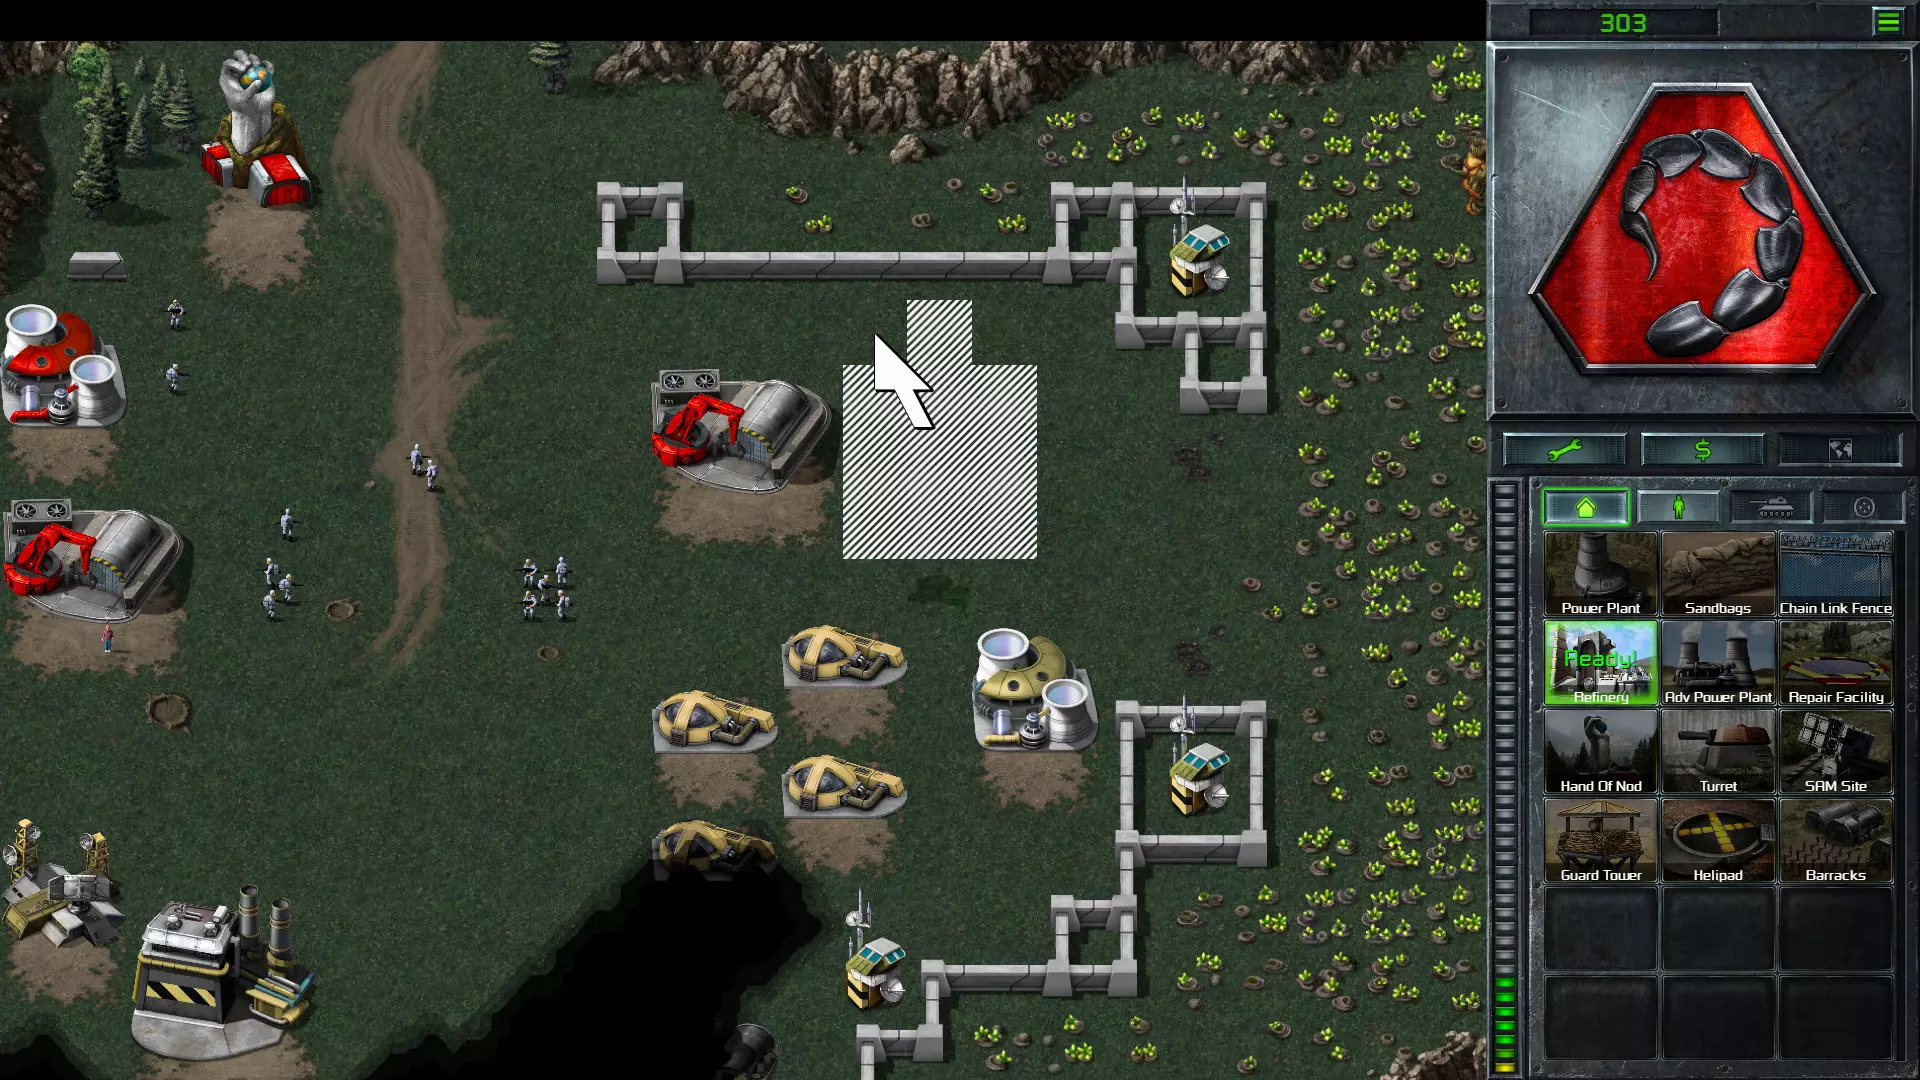
Boom, beech! (Okay, they're really more birch than beech, in terms of colour) This tactic is not only viable versus infantry; it also does massive extra damage to lightly armored structures. Danger: Construction AreaIn some of the missions, you will find that the enemy base is either not built from the start, or only partially built. Very often, the only missing building is the Refinery, and this is just a mechanism to give the player some reprieve while they're accomplishing some primary objective. However, if substantial parts of the base are unbuilt from the start, especially base defenses, this will absolutely always be intentional, and these situations are specifically set up so the player can take advantage of them with some early strike or infiltration. So rest assured, any section in this guide that tasks you with an early infiltration in an unbuilt base is not cheese; it's completely intended that players are able to finish it this way. Otherwise, the mission designer would not have bothered setting it up like that in the first place. It takes less effort to slap down a bunch of buildings in a map editor than it is to mark them all as "unbuilt" from the start and then meticulously get their rebuild order right to be a logical way for a base to build up from nothing. Woah, Not So Fast!Game speed is a vastly underrated tool in your arsenal. Just think: you have the literal super power to slow down time! This can help immensely to pull off tricky pieces of micromanagement and get out of tight situations. In extreme cases, you may even crank down the game speed all the way to minimum, and manage your combat in slow motion. There are a few situations described in this guide that specifically require this, since you need to do three or four actions pretty much simultaneously. Do note, the Remaster's "Normal" game speed is actually faster than the default speed in the original game; after installing the original C&C, its game speed is set one tick below halfway, which is equivalent to the "Moderate" speed in the Remaster. Mice AdviceThroughout this guide, you will see spoilered sections indicated as [CHEESE ALERT]. The text hidden within will give you tricks that abuse parts of the mission scripting you're not supposed to know. They usually give a really quick and cheap way to beat the mission, but be warned; knowing these tricks may forever spoil the enjoyment of beating them the intended way. That said, none of the tricks in these Cheese sections will ever require you to abuse the AI's weakness to dealing with sandbags. Usually, they are ways to disrupt or completely avoid starting the enemy's unit and building production, in ways not explicitly intended by the mission developers. Given the fact that many missions have intended mechanics to do more or less the same thing anyway, using these methods is usually not necessary. But if you either played a mission several times already and are simply curious, or if you genuinely don't manage to beat the mission even with the legitimate tactics described in this guide, you can check it out. GDI Covert Operations: Blackout Quick overview: Grab the crate from the Church, make your way to the bridge, target an Airstrike at the Flame Tank to destroy it, and take out the power so your MCV can pass the canyon safely. This is a rather fun mission, no matter whether you rush it or play it as hard build-and-conquer battle. The only annoyance is the second Construction Yard they build after a while. Notable scripts: Getting close to the Flame Tank gives you the Airstrike ability. But if you ever tried the mission before, you probably already know that. The enemy base isn't built from the start, and neither is the second Construction Yard in the north-west corner. Lots of options to take out their Construction Yard early. Enemy production (and thus, base building) starts only when your Commandos cross the bridge, so from that point on, you need to hurry up. The Temple fires a nuke only once, when it is attacked.Detailed guide: Make your way to the bridge, take out the Flame Tank with your Airstrike, blow up the Power Plants, and get your MCV through the canyon. Rush your Commandos and MCV straight into the enemy base. You could even ignore the canyon Turrets to make sure the Commandos remain healthy. Deploy inside the base, build Barracks, take over everything starting with the Construction Yard. Take out the turrets at the west side of the Nod base with some Bazookas or Minigunners, build a Refinery, harvest a bit, and you're all set to clean up the rest of the map.How to make things easier: Destroying only a single Power Plant at the start is enough to power down the Obelisks around the canyon. Though, once Nod starts building up their base, it might be best to remove them all to avoid them coming back online too soon. You may be tempted to destroy the Obelisks at the canyon, but if you leave them, the enemy base will remain at low power for longer. Once they built up everything, though, they will come online again, so this is only useful if you're rushing their base. As mentioned, there is a money crate under the Church right next to your Commandos at the start. Note that killing civilians reduces your score as GDI. To avoid that, move a Commando south-west of the Church, then order to bomb it, and from the moment you see the dollar symbol animation, abort the attack by moving it somewhere else. To avoid the nuke, blow up the Temple of Nod with a Commando, so the Temple never gets the chance to fire. [CHEESE ALERT] Two possibilities. The first is slightly tricky. The second is ridiculously easy. Instead of targeting the Flame Tank with the Airstrike, you can use it to take out the enemy Construction Yard from the start of the mission. The spot to target is in the north-east corner of the map, one third of a screen down from the top of the map when fully zoomed out, and exactly above the first cell on the first bridge your Commandos need to cross. Remember to immediately stop the MCV when it arrives so it doesn't get destroyed by the still-powered Obelisks. Since enemy production only starts once the Commandos go fully across the bridge, you can simply move your Commandos north to the point where you get the Airstrike and can see the Power Plants, but before they walk off the bridge, and then use the Airstrike against the Power Plants. As mentioned, taking out a single Power Plant is enough to make the Obelisks black out, allowing your MCV to pass safely. So if you simply keep your Commandos down there for the entire mission (or, at least, until you take care of their Construction Yard), the AI will never produce anything. GDI Covert Operations: Hell's Fury Quick overview: Use the infantry to destroy the outpost, and your heavy stuff will arrive to set up a base. A flare will be lit at the top of the map, giving you a location to go to, but not a way to actually get there. Notable scripts: Shortly into the mission, you get a flare showing you where to drop off troops to take out their power base. Build a Helipad and you get a Transport Helicopter so you can do the assault at the flare. You need to be fast though since the centre base isn't built yet, but once it is, it will have SAM Sites. As usual, taking out all the SAM Sites that are built from the start will give you Airstrikes. The ones that get built in the centre base don't count; only pre-placed buildings can have scripting attached to them. Enemy production starts when you enter the threshold of the lower outpost.Detailed guide: Take out the Turrets, destroy the fence, rush in and destroy the Hand of Nod, and pick up the two money crates. Use the remaining infantry and the vehicles to mop up the remaining Turrets, then take out the SAM Sites. Deploy your MCV and set up your base. You can capture the Advanced Power Plant and Communications Centre there to get them cheaper than usual, but don't waste too much money on that at the start. I just captured the Advanced Power Plant to build my Refinery to the east of it. Once you have a Refinery, build a Helipad as soon as possible. You will receive a Transport Helicopter. Make a team of five Grenadiers, and a team of four Bazookas and an Engineer. If you managed your troops well before, you can use your starting infantry for this, but don't use Grenadiers that have less than 2/3rd of their health. The health of the Bazookas is less important since they will stay farther away. Load the troops into the helicopter and fly them to the flare at the top of the map. You should have enough time to make two trips. By now, enemy infantry will start attacking you. Build a Guard Tower to assist your Medium Tanks, Light Scout and remaining Grenadiers in taking care of them. Back at the top, order the Grenadiers and Bazookas to go east, take out both Turrets, and break through the walls. Move the Engineer inside and capture an Advanced Power Plant, then clear three vertical cells of the inner fence so you can build and place down a Barracks. Save up for a second Refinery so you can get money faster. While you do this, use your troops to clear out the remaining SAM Sites in the north-east base. Once you have the second harvester, build more Engineers from the north Barracks and take over all Advanced Power Plants. Do not sell them; the AI will just rebuild them. Take a few Bazookas or Grenadiers from the top assault team and move them west, and you'll see that the Obelisks guarding the second outpost there are offline. Leave the defences alone; just punch through the walls and retreat, and get an Engineer into their Construction Yard as soon as possible. If you execute this fast enough, they should not have an Airstrip yet, and you just need a single Advanced Guard Tower at your base in the south to hold off all their attacks, forever. Take over the remaining Advanced Power Plants in the west outpost, and they should be crippled forever. Do note there are a few more Power Plants built in the centre base by now.How to make things easier: At the mission start, they start producing once you cross the fence perimeter. To make sure you don't get destroyed by Flamethrowers, remove the choke point in advance by destroying the whole fence, top to bottom. Then rush in all your troops at once to destroy the Hand of Nod. After you take over the Construction Yard, clear out the SAM Sites in the north-west outpost, while carefully avoiding the Obelisks and Flame Tanks (using 10 Minigunners works best), and you'll get Airstrikes, which can help a lot to mop up the stuff they already built up in the centre.[CHEESE ALERT] As mentioned, crossing the fence at the outpost at the start will trigger the AI's production. However, the mission maker seems to have forgotten to include the very top cell of that fence, so if you destroy that corner and move all your units through that one cell, and make sure to never cross any of the other cells, the AI will never construct a single thing. GDI Covert Operations: Infiltrated Quick overview: Get rid of the infiltrating enemies and secure the base, then it's classic build and conquer. Notable scripts: The enemy builds inside your base. Three Stealth Tanks will patrol the far east tiberium field later on in the mission, so keep an eye on your harvesters. Blocking the enemy rebuilding is literally the only way to beat this mission. This has the side effect that it also ruins the enemy base rebuilding. Because the mission designer expected this, none of the actual enemy base is scripted to be rebuilt, except for one Advanced Power Plant that is built at the start, and which seems to mostly just serve as delay between the Gun Turret and the Hand of Nod popping up in your base. As usual, taking out all the enemy SAM Sites will give you Airstrikes.Detailed guide: To survive the initial situation, sell your Refinery; it is the focal point of the Engineers, and the infantry coming out of the Refinery should kill all of them. Make your Medium Tank and both Guard Towers attack the Light Tank at the east side. Start repairing the Guard Tower. You can make the Minigunners from the Refinery sale assist in taking out the Light Tanks. Move the Light Scout south to make the APC lose interest in it, then use it to take out the Flamethrowers attacking your Power Plants. Start building a new Refinery, and a Medium Tank. Move your Medium Tank out of the base perimeter so it won't be targeted by the Turret later. Make sure to keep targeting the Light Tank though. Take out the second Light Tank and the APC at the base entrance. Ignore the APC attacking your Communications Centre for now. Check if your Harvester to the far east has finished harvesting. When it has, move it to the south-east corner of your base perimeter, on the outside of the fence. When the Turret pops up, your Medium Tank should be out of its range, so it targets the Guard Towers or infantry instead. Once it's locked on a target, attack it with everything you got around. Your second Medium Tank should be finished to help destroy it. After the Turret is gone, use one of the Medium Tanks to kill the final APC (if your old one still has above red health, use that one). Sometimes, they will also build a Hand of Nod in your base, in the north-west corner. If they do, it's an interesting opportunity to capture it, but if you destroy the turret and block its rebuild spot fast enough, it probably won't appear, so you can kind of regulate that yourself. I usually don't find it worth the effort of dealing with the Gun Turret for longer just to get my hands on the ability to build Flamethrowers. If you do want to capture it, start building an Engineer early enough, along with the Refinery and Medium Tank. Place your Refinery down outside your walls, at the eastern Guard Tower, and immediately order your original harvester into it. When it comes out later, target it on the closer tiberium. A Light Tank will attack the Refinery. Use the Light Scout to lure it to your Guard Tower and tanks. Start constructing a Repair Bay to cover the spot where the Turret popped up. You could build a sandbag north of the Weapons factory first, to position the Repair Bay better. Two Stealth Tanks will come. Your two tanks plus the Guard Towers should handle it. Losing one of the tanks here is not a real problem, but keep the Guard Towers alive. Place down the Repair Bay to block the Turret rebuild spot. Build a Guard Tower to the east of the Refinery to intercept Engineers.
The secured situation, a few Advanced Guard Towers and Mammoth Tanks later. Since they won't rebuild anything else, it's pretty easy from that point on. I usually go for Orcas and an Advanced Communication Centre to take out their SAM Sites and get access to Airstrikes. GDI Covert Operations: Elemental Imperative Quick overview: Go to the village in the north-west to get a Transport Helicopter to evacuate the guy's wife, as per the mission briefing. Once she is evacuated, he will go through the enemy's heavy defense troops and light a flare at the location you need to go. Notable scripts: Reaching the village will give you a Transport Helicopter Putting the female civilian inside and evacuating her will make the civilian at your start position move through the Nod troops and light a flare at your destination. This will also make a substantial chunk of the guarding Nod army move south, out of your way.How to make things easier: If you don't evacuate the guy's wife, and instead use the heli to hop across the river and cliff east of the village with your Commando, you can get to the target crates while avoiding all the enemy vehicles. GDI Covert Operations: Ground Zero Quick overview: Kill the visible enemies with the available troops to get reinforcements. Once you got enough to get past the Flame Tank in the north, make your way to the Prison Tech Centre Conference Centre in the north-west town, free the delegates, and move them south to the evacuation point. This mission requires a lot of infantry micromanagement, which, unfortunately, there are no real shortcuts for. You just have to figure that stuff out. Force-firing on the ground (holding [Ctrl] and clicking) can make you slightly abuse the splash damage of grenades to get a bit more range, but that's pretty much all. Note that due to limitations in the game's scripting, the helicopter will fly off after only one of the delegates is put inside, and this is enough to win the mission. So don't worry about getting them all in. Notable scripts: You get reinforcements for each group of enemy troops killed in the first part. The nuke is timed, so hurry up. When you go south past the Tech Centre, and leave the village, the timed nuke will be cancelled, and replaced by an immediate nuke, so vacate the area before going there. After the nuke, Flame Tanks will start wiping out the rest of the town.How to make things easier: Unlike in Red Alert, evacuation helicopters in Tiberian Dawn are controllable. Once the Tech Centre is safely evacuated (and nuked), you can rush one Light Scout south to the pickup spot, and then fly the helicopter north to pick up the conference attendees, skipping the entire second part of the mission. GDI Covert Operations: Twist of Fate Quick overview: Tough hard battle. Practically all your forces in the canyon will die from the start, but before your MCV arrives from the north, you need to somehow clear the place anyway. Notable scripts: Nod has Airstrikes in this mission. These always have two A-10 planes. Taking out the Communications Centre in the north-west outpost disables them. Destroying or capturing the Construction Yard in the centre base will trigger a one-time airstrike, but this one has four A-10 planes, making it extremely destructive. There is a repeating nuke strike scripted, but its time is really long. Even in a long hard battle, you'll probably only get nuked once from that. Attacking the Temple immediately fires a nuke, independent from the timed one. As usual, taking out all SAM Sites gives you Airstrikes. This is really hard to achieve in this one though.Detailed guide: Crank the game speed all the way down at the start. Move the Grenadiers out of the way to clear a path into the outpost, and order the Medium Tank far south into it. Target one of the Light Tanks with the Orcas. Immediately scroll to the north of the map, and move the Mammoth Tanks to the open spot a bit farther south. Doing this has the effect of aiming their turrets away from the nearby Bazookas, and making the Light Tank in the north lose interest when they get too far away from it. While moving, give the tanks alternating orders between moving south, attacking the Bazookas, and attacking the Flame Tank, making sure to make them fire missiles at the Bazookas. Do this until all nearby Bazookas are gone, then focus on finishing off the Flame Tank. If the Recon Bike from the south-west comes to attack, shoot at it immediately; it does massive damage but should die right away. The main goal here is to keep both Mammoth Tanks alive at all costs. Once the Mammoth Tanks are safe, check the outpost at the bottom, and kill the second Light Tank with the Orcas if necessary. Don't repair the Guard Towers. Put your game speed back to something more normal, and leave the Mammoth Tanks to regenerate for a moment, then kill the rest of the units in the north. Use the Light Scouts to take out the infantry along the canyon. Once the enemy Attack Helicopter appears, target it in mid-air with your Orcas (yay, new Remaster controls!). You will probably need to make the Light Scout hold still so the Orcas can hit their target, but with some micro you can make it survive while also taking out the Attack Helicopter. Use the Mammoth Tanks to clear the remaining Bikes in the canyon. When the MCV appears, deploy it at the north tiberium field, not at the flare. Use the troops from the south to mop up the rest of the forces in the canyon. Be careful using your Orcas though, since there is a SAM Site in the centre outpost. Once cleared, rejoin your forces in the north, and leave the outpost to just serve as Orca airbase. Once you have some excess money, you can use it to repair the Guard Towers.How to make things easier: There is no anti-air protecting the outpost that controls the Airstrikes, so some quick work with a group of four Orcas should clear all defences there, allowing you to overrun it. The tiberium fields are full of Stealth Tanks. An auto-repaired (half health) Mammoth Tank can take on a Stealth Tank, but only one at the time. So be very careful to use them to clear the tiberium fields. If you have some money, it might be better to use expendable groups of three Grenadiers for it.
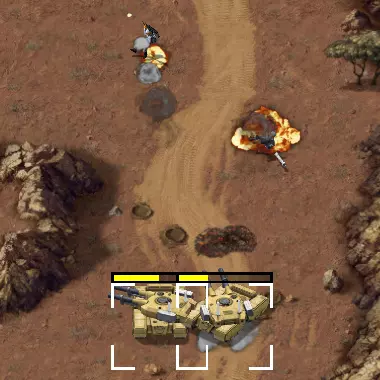
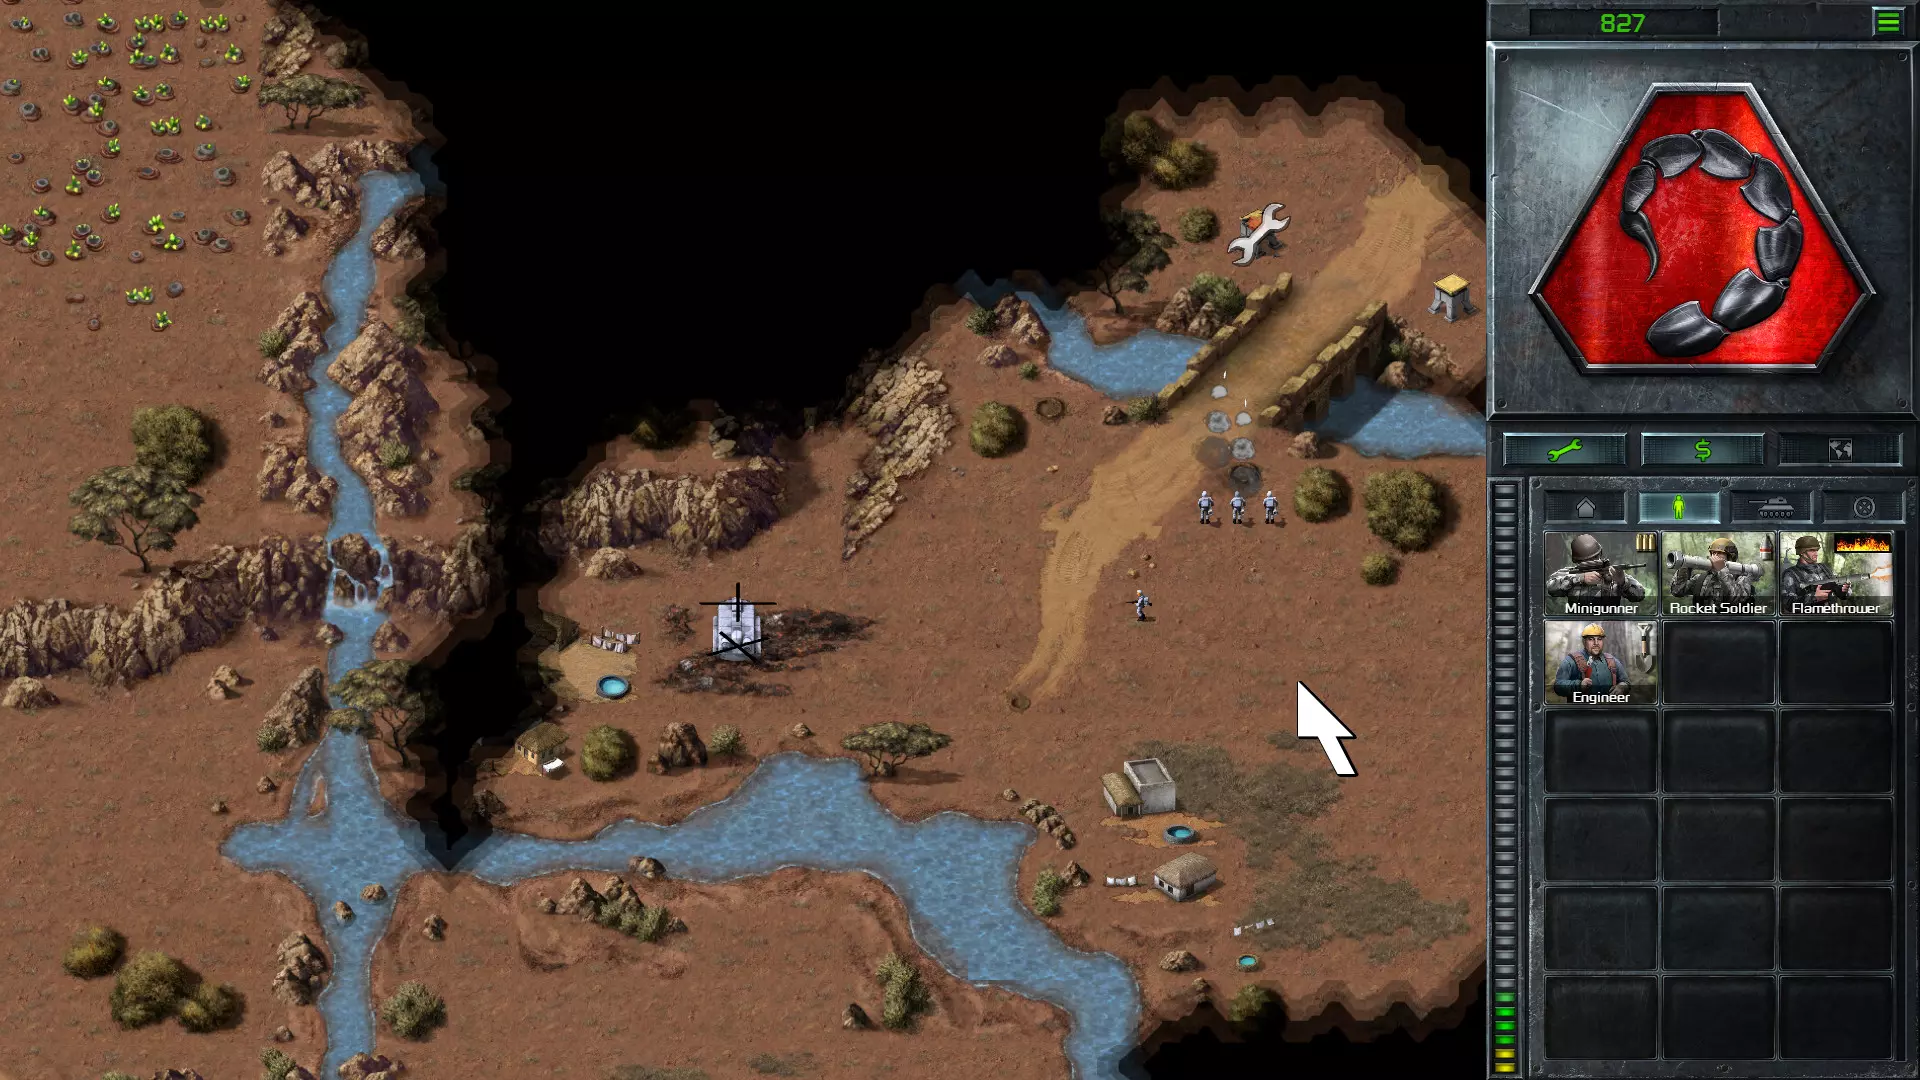
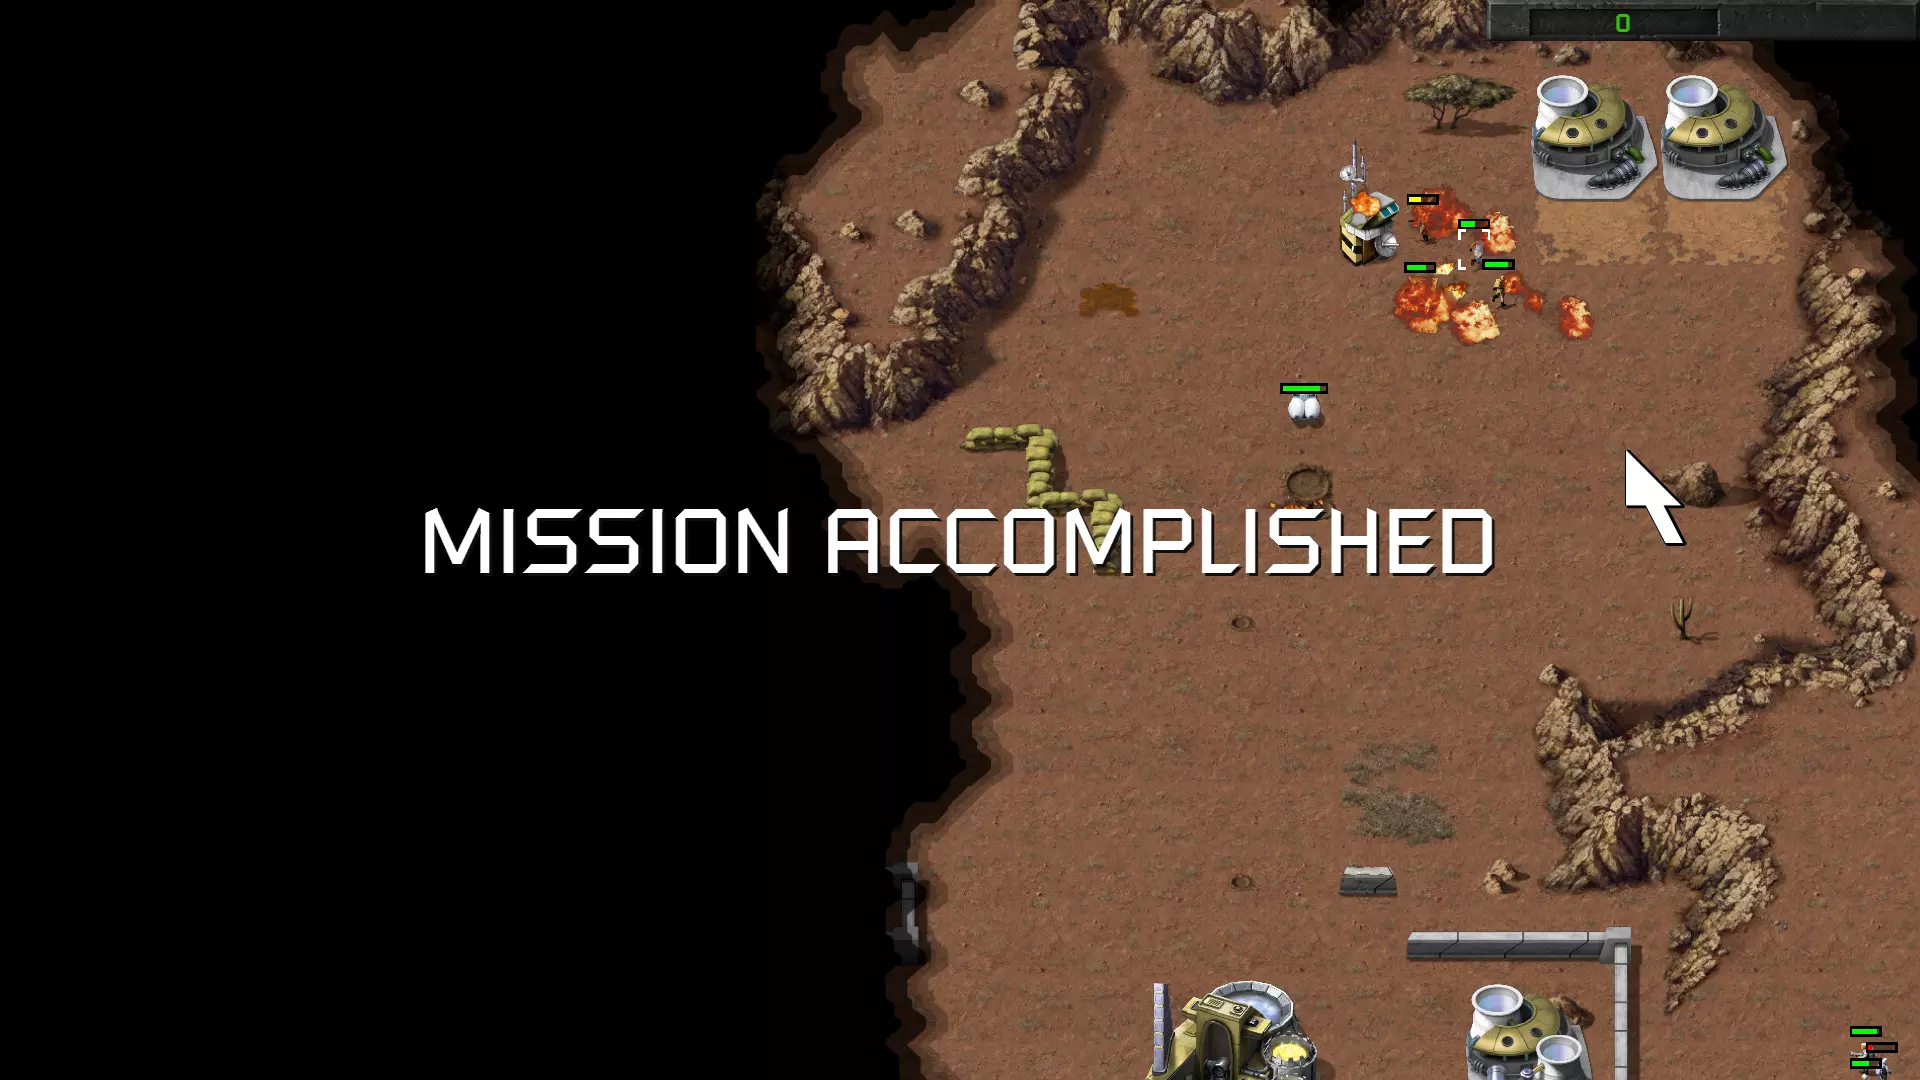
There goes the Flame Tank. Mammoth Tanks successfully rescued. GDI Covert Operations: Blindsided Quick overview: Take over the outpost at the west side, use it to make a mass of Minigunners, and use that to overrun the outpost at the east side and capture its Refinery. Then make more Engineers to capture the rest. Finally, land on the north mainland and build up your base there. Notable scripts: You will receive Engineers by Transport Helicopter drop when destroying all SAM Sites in the south-west outpost. You will get Airstrike capability when destroying the SAM Sites in the south-east outpost. You will receive a Transport Helicopter when destroying all buildings in the south-east outpost. Enemy production starts when you move a unit onto the flare-indicated landing spot or anywhere in the outpost above it. Mixed into the cells that start the production script in the outpost are cells triggering scripts for specific attacks, so be prepared for some really heavy attacks.How to make things easier: In the south part, to assault the eastern base, send an expendable soldier / technician into the base in advance to reveal the Obelisk and Turrets; it'll help you to avoid the harvester when attacking. Attack when the harvester starts going back after it finished harvesting to have the most time to clear everything before it comes back. The second part of this mission is hell. I'm not sure it's possible on Hard mode without cheesing it. If you do decide to take it on the normal way, I suggest prebuilding an Airstrip and placing it in the outpost immediately, so you can quickly start cranking out vehicles.[CHEESE ALERT] Two different ways of cheesing this one: You have infinite Airstrikes that can be used before you land and trigger their production start. You can take the time to take out all Construction Yards, Refineries, Hands of Nod, Helipads and preplaced units in advance. Another way to do this is to just not land at the location of the flare at all. Instead, unveil the top left Construction Yard with an Airstrike and drop Engineers there with your Transport Helicopter. You'll have to get rid of an Attack Helicopter once you land there though, so be ready to immediately place down a SAM Site. You could also take out the Helipad with an Airstrike so you only have to deal with the SAM Sites. Nod Covert Operations: Bad Neighborhood Quick overview: The briefing on this one seems rather vague, but it is actually 100% correct; civilians in the area will alert GDI, and once GDI is alerted, the attacks will start. Most players will make the mistake of interpreting this as "avoid the civilians at all cost". In reality, even if the civilians never come in contact with you, they will still alert GDI after a set time. So in typical Nod style, instead of avoiding them, you need to be a bit more 'proactive' to prevent that from happening. Notable scripts: The enemy's production will be started from the start of the mission. This means that, while they won't actively send out attack teams, they will rebuild destroyed structures, and will build some reserve units. There are three scripts in the mission that will make civilians move out to alert GDI. One is triggered when you cross any of the bridges to the village. Another is triggered when you discover any of the civilians. A third is a timed trigger. The result, in all three cases, is that a team of civilians will rush to the GDI base. The enemy's attack teams creation ("Autocreate" trigger) will be started only when at least one of them actually reaches the GDI base. There is another script that if you cross over a certain line close to the GDI base, they will spot you, and attack teams production is also started. If the civilians survive, one will eventually come to your base to scout you out, causing you to get attacked with the Ion Cannon separately from the normal timed Ion Cannon attacks. You will see he sets off a flare near your start location when that happens. But if you follow this guide, that will never happen.Detailed guide: Deploy your MCV, build a Power Plant, build a Refinery, and build an Airstrip. Immediately build three Buggies and send them to the south-east of the map. Find the three bridges accessing the village, but do not get close to them; once you get on a bridge, or any nearby civilian spots you, they will make a run for it and try to reach the GDI base. Ignore the Mammoth Tank around the area; it will lose interest once you get far enough away from it. Once all three Buggies are in position at a bridge, move on and block the three bridges with all three Buggies at the same time. This will trigger the civilians to try to reach GDI. Kill them all. You could use a fourth Buggy to send inside to wipe them all out. Build up your forces and prepare to steamroll the base. Be careful, there are some scripted APC drops at your starting area that happen regardless of what happens with the civilians.[CHEESE ALERT] I honestly considered not making this a "Cheese Alert" section but just a "How to make things easier" one. You can kind of figure this one out yourself from the non-spoilered information in the rest of the guide. It does make the remainder of the mission ridiculously easy, though. So, your choice whether to read it or skip it: As seen in Cloak and Dagger, cloaked units don't trigger the cell triggers that activate mission scripts, meaning you can still safely sneak Stealth Tanks into the GDI base perimeter to scout out the whole place and find the ideal place to launch your nuke at, all without them ever really retaliating. And now for the real "cheese" part, though it's kind of minor compared to the first bit: The checks for Nod entering the GDI base area are three lines of detection areas placed in the three openings towards their base; one on the bridge to the west, and two more on the cliff openings towards the south-west and south. However, the detection does not go on all the way inside the base. So you can go inside that area with Stealth Tanks and attack stuff, steal that money crate, or mop up after the nuke, and they still won't start sending out attacks. Nod Covert Operations: Deceit Quick overview: Use your Commandos to liberate the base to the west. You will find a GDI Transport Helicopter to capture with your Engineer, so you can hop into the base safely. Notable scripts: If your entire three-man starting team is wiped out before you uncover your Construction Yard, you lose the mission. GDI's base is not built from the start. This means all Advanced Guard Towers are missing from the base at the start. If you attack their Barracks, the enemy will drop off a Transport Helicopter full of Engineers at the south of your base. Once you take out all Communications Centres spread around the map, the enemy will drop off a Transport Helicopter full of Engineers at the south of your base. The civilians on this map are friendly to you, but the lone civilian at the south of your base is a spy. If you don't kill him, he will signal in... that's right, another Transport Helicopter Engineer drop. Honestly, I have no idea how the players were ever supposed to figure that one out. If you attack either of the Mammoth Tanks guarding the entrances to the inner perimeter of the GDI base, you will get attacked by the Ion Cannon. Strangely enough, and I do believe this is a bug, this strike happens regardless of whether they still have the Advanced Communications Centre. Detailed guide: Take out the troops threatening you, and move north-west to find the sandbag-marked area containing a crate. A GDI Transport Helicopter will land there after a while. Before crossing the gap in the cliff to get to the Transport, move a Commando north a bit to scout the tiberium field over the cliff. Take the crate and capture the Transport Helicopter with your Engineer. Forces will be dropped off just north of them. Take them out with your Commandos. Move your Commandos south and take the second crate under the Church in the village there (force fire if you have to), and continue to the west to get to your base. You could speed this up by splitting up your Commandos, moving one south for the crate and the other west to the base, but you have to be very, very careful then; multitasking between the two is not easy. Use the Transport Helicopter to hop over the cliff, and unload your Commando(s) to scout and activate the base.Now, there are two ways to do this mission. One is basically to build a refinery, punch through the enemy Guard Towers, get harvesting and build up your defenses. This can be done quite easily by placing your refinery at the north, in range of the Guard Towers, and then blowing up the Guard Towers with your Commandos while they're solely focused on that Refinery. You should have enough money to make a decent Turret defence and then get your Airstrip built. The second, more interesting way, is a cheeky infiltration; taking advantage of the fact the enemy base is barely built from the start, you can drop your troops straight into the enemy base, and wipe them out before they have a chance to do anything. This is the one I will explain here. Note that you need to be really fast to pull this off. Don't waste any time. Reduce the game speed if it helps you. Build two Engineers and load everything in the Transport Helicopter, Engineers first, Commandos second. Prebuild a SAM Site, and put a few Minigunners at the south of your Construction Yard to kill any incoming Engineers from there. If you're fast enough, there should be empty spots left in the previously-scouted tiberium field, north-east of where you got the Transport Helicopter. Move the Transport there, unload one Commando, and then take off to cancel the unload. Run the Commando north and slightly east, but not far enough to come into the Mammoth Tank's range. Once both Orcas have come, run the Commando to the west to distract them, so they don't target the Transport. Fly the helicopter over the ridge into the inner perimeter, unload, capture the nearest Advanced Power Plant, plop down the SAM Site to take care of the Orcas, and use the remaining Commando to clear the way for the other Engineer to get to the Construction Yard. You could put in more Engineers to immediately capture other stuff, but time is of the essence. If you have the chance, take a moment to order the Transport Helicopter back to your base to get it out of the hot zone. Blow up the Advanced Communications Centre with the Commando, build a Hand of Nod, build Turrets to defend against any surrounding enemies, and capture everything. Capture their Silos and Refinery to get more money.How to make things easier: The Communications Centres spread around the map, and their Advanced Communications Centre, take up a lot of power. This means it is really easy to bring their base offline by capturing a few of their Advanced Power Plants, even if they start constructing those Advanced Guard Towers. Nod Covert Operations: Eviction Notice Quick overview: Use the Flame Tanks to take out the Mammoth Tank, and make your way to the east. Destroy the village to make space for the base. You'll find several money crates under the destroyed buildings. After that, this is a classic long and hard battle, with not much to help you. Notable scripts: Destroying any of the oil derricks in the village will cause GDI to send a one-plane Airstrike at you. Surviving civilians will make their way to the GDI base, causing a team of two Medium Tanks and two Rocket Launchers to get sent out. Not sure if that can be avoided, to be honest. When all civilians are killed, GDI Engineers are dropped off in the south-east. Moving any (non-cloaked) units close to their Communications Centre will trigger an Airstrike. For some odd reason, capturing their normal Communications Centre gives Airstrikes. By the point you are in a situation to get an Engineer in there, this is generally not very useful anymore, though. (And Airstrikes are generally not very useful when the enemy has Advanced Guard Towers...) Note that this mission does not have the typical timed Airstrikes; only those two specifically-scripted ones. It does, however, have timed Ion Cannon strikes.How to make things easier: The three buildings with crates underneath them are the Church, the building directly south-east of it (Sala's House), and the most remote oil derrick in the north-east corner of the village. The Advanced Communications Centre is completely open from the south, so the Ion Cannon can easily be disabled with just two Stealth Tanks. On the other hand, GDI will not rebuild it, and it is much easier to take down the power to disable their base defences if the Advanced Communications Centre remains. Your choice. GDI does not rebuild the small Guard Towers of their outer perimeter. If you take them out, and use some Flame Tanks to temporarily mop up the infantry at their Barracks, you can sneak in a Stealth Tank to find the perfect location to target your nuke. You can use the nuke to take out their Construction Yard and Weapons Factory in one shot. Have a team ready in the centre north to immediately destroy their Barracks too, and you take out all their production capability in one swift strike. Nod Covert Operations: The Tiberium Strain Quick overview: This is just a fun micro mission showcasing the normally multiplayer-only Chem Warriors. Destroy all units and the three Bio-Research Labs, but keep all other buildings intact. Notable scripts: If you destroy any building on the map besides those three labs, you lose immediately. When you kill everyone in the south-west village, a Transport Helicopter will drop off enemy troops to cut you off at the top. When you reach the enemy base, some enemy Light Scouts will enter the map from the east side and join the battle. For each Medium Tank you destroy, you get a new Flame Tank, meaning you can have up to five at the end of the mission. The mission contains a script that is supposed to only allow you to win after destroying all GDI units, but such "Allow Win" scripts don't actually work unless they are targeted at the player's own faction (see my triggers guide for more in-depth explanation on that). This means that technically, if you really don't want to deal with the tank in the village, you can just skip it, as long as you make sure to kill all civilians.Detailed guide: Do not go directly east from your start location; you'll stumble on the enemy's heavy base defences. Go south with your Flame Tanks, across the river, take out the Light Scout, then move on to the south-west, into the village. In the village, you can switch to using Chem Warriors, but be careful since there's a Light Scout guarding the place. Scout with a Flame Tank with the Chem Warriors close by, then once it's secured, spread out the Chem Warriors to take out the villagers. Once the Light Scout is taken care off, further south, there is a Medium Tank surrounded by Minigunners. Try to make the tank focus on your Chem Warriors while taking out the troops with a Flame Tank. Use the Chem Warriors exclusively to take out the tank. Backtrack to the north river, and, staying south of it, go to the east. You'll encounter another Light Scout, so use your Flame Tanks at first, but after that there's a bridge guarded by a Medium Tank, so use the Chem Warriors there. Don't use a full squad of five, otherwise they'll come too close and get crushed. Move along the path with the Flame Tanks, taking out all enemy troops and any civilians you encounter. Once you passed the Communications Centre and the defences just north of it, split off a Chem Warrior to go north-west. There is a lone farmstead there that may have a civilian in it that you could easily miss. If there's no civilian, he died in the nearby tiberium on his own. Go into the base, Flame Tanks first, and take on the hordes of infantry. When the Light Scouts come from the east, you should have some spare Flame Tanks to deal with them. Go into the base with the Flame Tanks alone, making a tour around by going north-east and then west, taking out the enemy troops and the Bio-Research Labs along the way. Stick to the top of the base; that's where the labs are, and that'll keep you out of range of the base defences.How to make things easier: Chem-Warriors are actually anti-armour, and slightly less good against infantry than flame weapons. Keep that in mind. Be careful when encountering Blossom Trees: Chem-Warriors are immune to the effects of moving through tiberium, but Blossom Tree spores will still hurt them. Nod Covert Operations: Cloak and Dagger Quick overview: Find the enemy base, go around the perimeter to find an accessible entrance at the back, and free the MCV. You can distract the two mammoths by attacking the village; civilians will come and ask for help, and the Mammoth Tanks will go to the village to investigate, and will come back a while later. This time can be used to take out two of the Guard Towers at the entrance and rush your MCV through. However, that's not the way I played it. I prefer building inside their base. Tricky, but very satisfying to pull off, and it completely avoids a difficult build and conquer battle. Notable scripts: When you attack any of the civilian buildings, a bunch of civilians will go to the entrance of the GDI base to ask for help, causing the two Mammoth Tanks to check out the village. This may distract them for a while, but will cause them to become aggressive when they return. Enemy production starts when you cross the entrance of the cliff area of the enemy base with a non-cloaked unit. Occasionally, a Transport Helicopter full of enemy Engineers will be reinforced. It drops them off somewhere around the point where you start the mission, from where they will come to attack you. Occasionally, an APC full of Engineers will be reinforced from the top of the GDI base. It will go out of the base through the south entrance, drop off its troops a bit further south, and then they will come to attack you. However, if the APC is stopped before that, it might unload the Engineers inside the base and cause you a lot of problems. Capturing the Tech Centre on the map will give you two free Attack Helicopters. Which is kind of useless, since you don't have access to helipads to reload them unless you capture the GDI base, and if you do build those, they come with their own Attack Helicopters anyway.Detailed guide: Scout around with the Stealth Tank until you find the Tech Centre outpost at the centre of the map. Do not attack it, but make sure you can see the Advanced Power Plant there. Carefully make your way to the enemy base in the north-east, loop around its east wall through the tiberium field, and enter it from the north entrance. Standing just south of the most north-western Advanced Power Plant, you can take out the north-west Guard Tower. Once that's destroyed, move to the north-west corner of the map, and you can find a position to take out the second Guard Tower from there. Destroy all the fences around your MCV, then move the MCV one cell to the north and deploy it. Destroy some of the walls north of the enemy Advanced Power Plants straight north of your Construction Yard. Build three sandbags northwards, and you can place a power plant in the corner, where it won't be shot at. Sell all sandbags except the last one. Start building a Hand of Nod, and when it's finished, sell the power plant, move the infantry out of the way, and place the Hand of Nod on the same spot. Build a Gun Turret, and place it down diagonally south-east of your Construction Yard. From there, you can make it destroy the Advanced Guard Tower in the centre of the base. Optionally, you can build another Gun Turret, and place it down north of the other one. This one will get attacked, but it will speed up the whole process considerably. Lure the enemy vehicles to your turret(s). This can easily by done by taking one of the soldiers that came out of the sold power plant, and ordering him to shoot at one of the enemy Advanced Power Plants just once and then immediately stopping him. This will lure one of the surrounding vehicles. Move the soldier behind the turret(s) and they should be safe while the turret(s) take out the enemy. Once the two Medium Tanks and the Light Scout in the north of the base are gone, sell both turrets. Build a Refinery, but don't place it down yet. Build Engineers and capture the four Advanced Power Plants in the centre and north-west of the base. You might need to sell some to get enough money to build the Engineers. Removing these four will take their Advanced Guard Towers offline. After selling all but the final Advanced Power Plant, you should still have enough money left for one final engineer, to capture the enemy Construction Yard. Use the Stealth Tank to take out the two Guard Towers at the east base entrance. Place down the Refinery. With the east-side Guard Towers gone, you can safely harvest there. Capture the final Advanced Power Plant at the east entrance of the base, to ensure they remain at low power. Destroy the Guard Towers at the base entrance with the Stealth Tank. Build a row of four or more Gun Turrets in the base, facing the base entrance, and use the single-attack trick mentioned before to lure the remaining enemies on the map into it one by one. Do not actually destroy any buildings; this will cause all units on the map to rush you at once, and will cause problems with keeping the enemy power offline later. Once it seems most enemies have been lured in and killed, destroy the Advanced Comm Centre to get rid of the Ion Cannons. As long as you don't capture or destroy any of the remaining buildings, their power should remain offline. Build at least three helipads, and use them to take out the final Advanced Power Plant, at the Tech Centre. Alternatively, you could build a Communications Centre and Airstrip and send more Stealth Tanks to it. The point is to destroy it without ever passing through the cliffs entrance with a non-cloaked unit, because that will start the enemy production. Once the last Advanced Power Plant is gone, capture or destroy the Weapons Factory and Barracks, and wipe out the remainder of the base.How to make things easier: The civilians might accidentally wander close to the Mammoth Tanks, starting up their script to investigate the village. If you want to prevent this from happening while you're still clearing out the centre of the base, you might want to kill all the wandering civilians in advance with the Stealth Tank. Just make sure not to graze any buildings while doing that, or it'll start the whole script anyway.
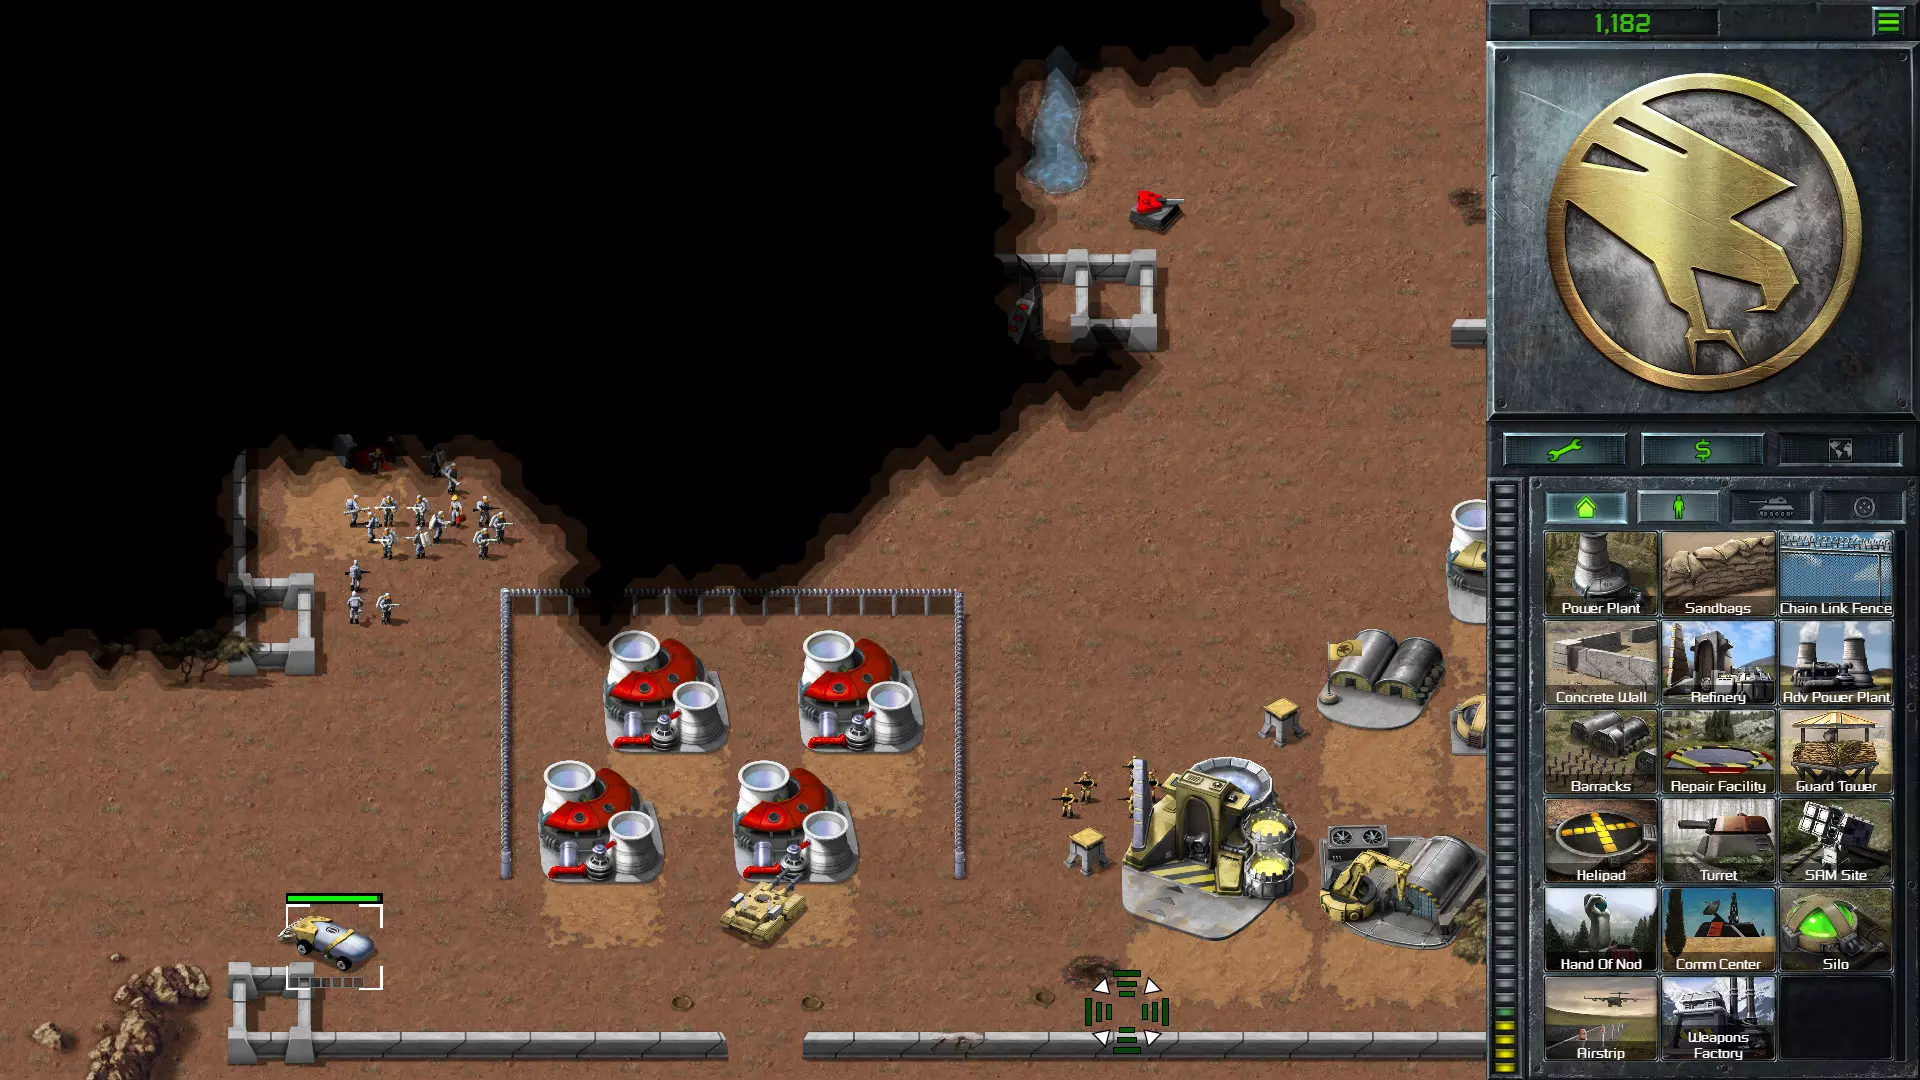
基地北半部已安全。 Nod秘密行动:敌意接管 快速概述:使用给定部队找到一个废弃前哨站。卖掉通讯中心以获得500 credits来建造一名工程师。西南方向是GDI机场,有三架运输直升机。使用火焰坦克和火箭筒摧毁警戒塔并打开外围,然后让工程师夺取一架运输机。会有信号弹指示你建造厂和精炼厂的位置。你起始位置旁边的村庄与敌方基地相连,可将其用作渗透的起点。 详细指南: 将火焰坦克向南移动一点,然后让火箭筒部队移动到火焰坦克原来的位置,这样他们就能摧毁教堂。将火箭筒小队向西南方向移动,让第一辆火箭筒车与其他车辆分开,避免守卫桥梁的中型坦克同时攻击所有火箭筒车。摧毁该坦克,确保所有火箭筒车存活。让火焰坦克保持在附近,以便能立即消灭可能幸存的坦克乘员。 向北移动,侦察小型前哨站。卖掉通讯中心,完全售出后(这对建造速度很重要,因为低电力消耗会减少),开始建造工程师。将火焰坦克、机枪兵和火箭筒小队全部向南移动。 使用火焰坦克和机枪兵摧毁南部的守卫塔,确保守卫塔将火力集中在坦克身上。 工程师建造完成后,卖掉nod之手。用火箭筒在外围炸开一个缺口,占领最南端的运输直升机。这样你就不用去管第二个警戒塔了。 把火焰坦克移回桥上,消灭在那里降落的部队。 用运输机将四名火箭筒手和一名机枪手投放到村庄,然后拾取教堂下方的钱箱。 再让一名机枪手登上直升机,用它去侦察信号弹以北(直升机停放位置的西北方向)的基地。让机枪手留在基地南部,拦截敌方工程师。 在旧的nod之拳前哨站位置,部署一名剩余的机枪手,拦截前来追击你火焰坦克的猛犸坦克。如果敌方没有使用导弹,并且你周围还有一些机枪兵,那么你的部队配合火焰坦克可以在被摧毁前对猛犸坦克造成严重伤害。 在基地建造一座发电厂和一座nod之手,然后在基地东侧建造一座炮塔,以拦截即将到来的火箭发射器和受损的猛犸坦克。如果你能将猛犸坦克的生命值打到红色,一座炮塔就足以应对它。建造一个火焰喷射器来清剿出现的步兵,并在基地南侧边缘留下一些部队,以区域守卫模式防备直升机空投。 建造两个火焰喷射器和三名工程师,将他们放入直升机,然后飞往村庄。 在村庄中,使用机枪兵进行侦察并探明守卫塔的位置。小心部署你的火箭筒以摧毁守卫塔,同时确保自身存活。 之后真正的障碍是火箭发射器。需精细操作几台火焰喷射器,从两侧包抄将其摧毁。你也可以用运输直升机进行牵制。 派遣工程师占领兵营以东三座电厂中的中央和东侧高级电厂,然后再派一名工程师北上夺取敌方建造厂并将其变卖。建造一座炮塔牵制附近敌人,并建造一座nod之手以生产更多工程师,去摧毁其余的电厂。 电力中断后,所有高级守卫塔都会离线,此时你可以安全占领内含矿车的精炼厂。占领基地西北方的 silo 以快速获取资金加成。建造炮塔以清除基地内最后的坦克,占领兵营,然后建造直升机停机坪来扫荡残余敌人。一旦摧毁北部的守卫塔,使用采矿车侦察北部剩余的防御建筑,并派遣攻击直升机将其摧毁。 在摧毁敌方电力设施后,你可以选择立即占领并出售武器工厂,或者先用直升机摧毁工厂北侧的守卫塔,这样就能保留武器工厂并利用它来生产坦克。但请注意:武器工厂被敌方控制的时间越长,他们就越有可能开始用它生产载具。
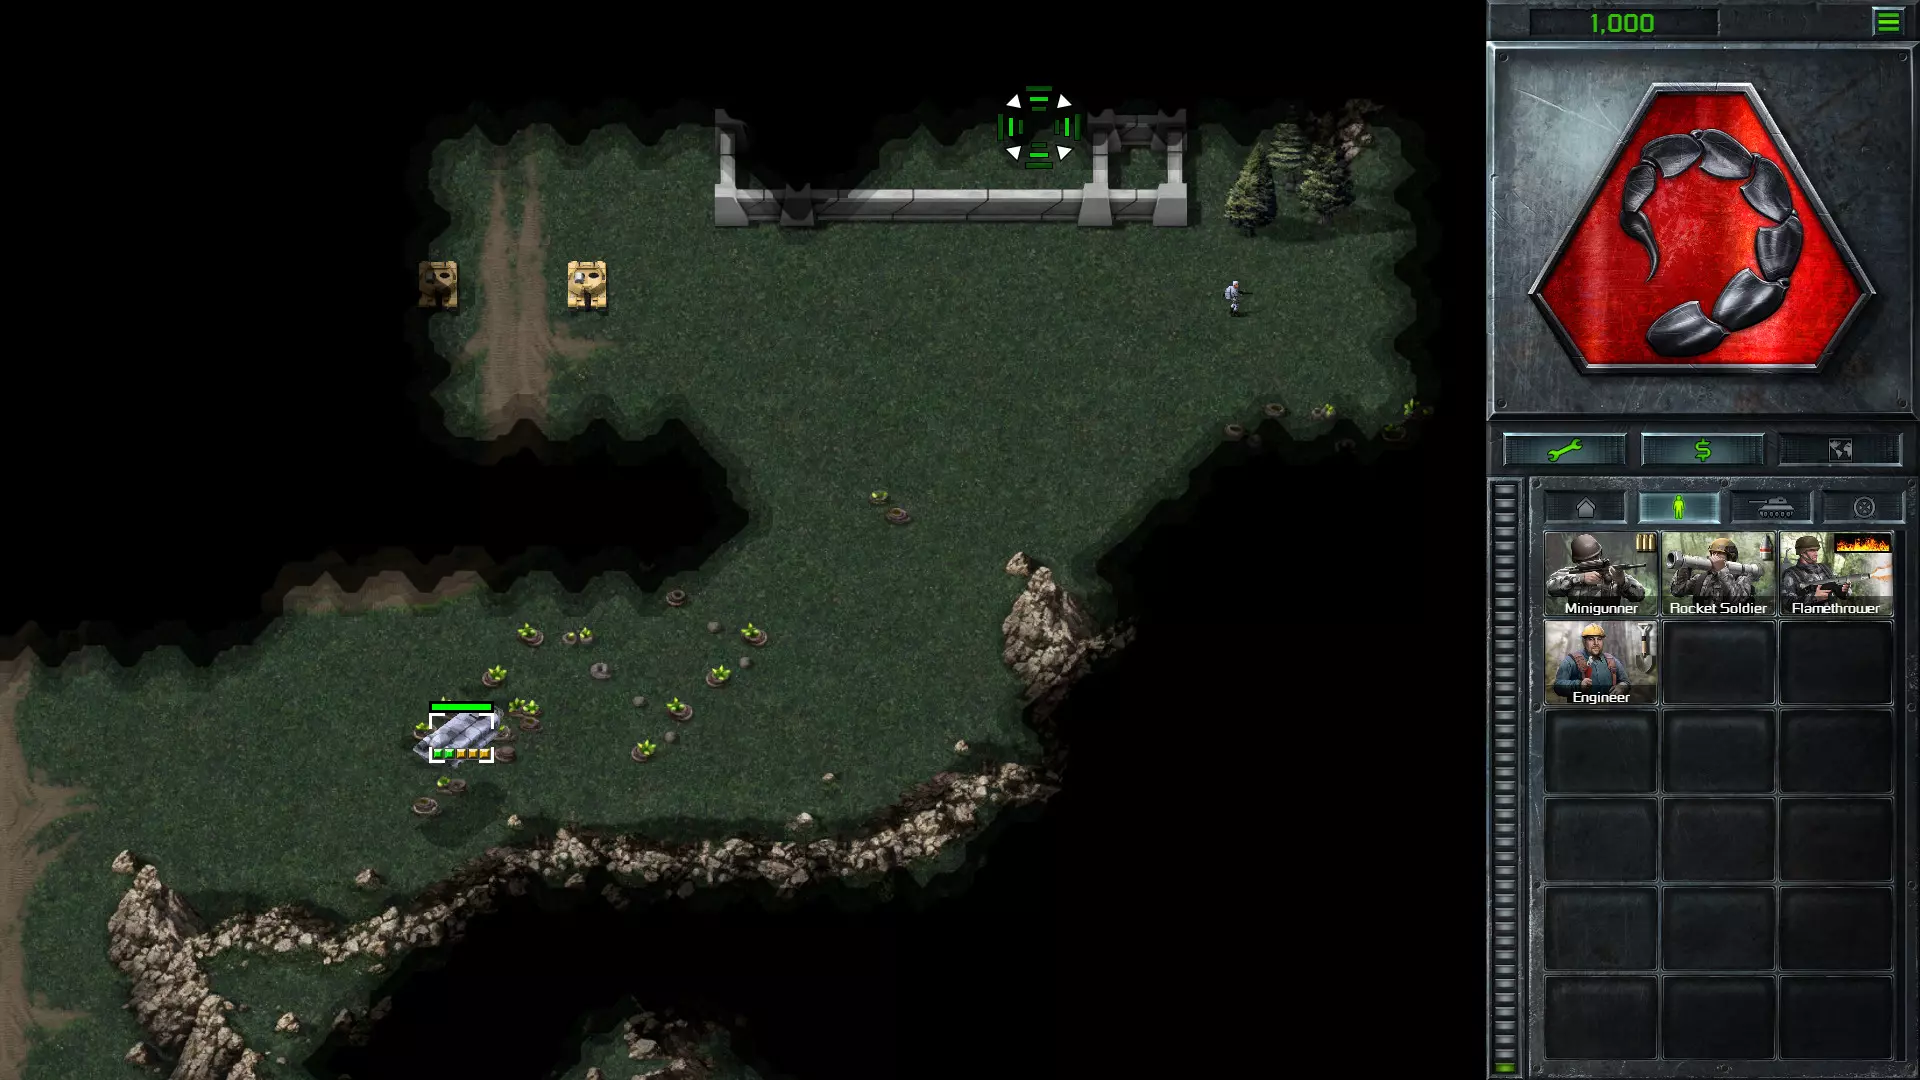
Taking out Guard Towers with Bazookas - the positioning is tricky, but it works. Nod Covert Operations: Under Siege Quick overview: Use the Stealth Tank to go to the village in the south, destroy the Church, get the money crate, and use it to build a Refinery to harvest. Take out a section of the forces on one of the three sides so your harvesters can pass safely to get to the tiberium. Then build defenses, and let the enemies attack you and get killed. This mission can seem very intimidating, but it really isn't hard. In fact, the AI tweaks in the Remaster have made this one even easier, since tanks hit by the Nuke will blindly storm to the Temple, and you can harvest in the north without that making your Harvesters eternal Airstrike magnets. Notable scripts: When all vehicles on one of the three sides are destroyed, all units will rush in to attack you. There are periodic Airstrikes. To give some idea of the interval, the first one will come when your Nuke is about 2/3rd done. There is no way to disable the Airstrikes. The enemy does not build any units to attack you, and even though they have an Advanced Communications Centre, there is no Ion Cannon. None of the enemy's Advanced Power Plants will be rebuilt.Detailed guide: Sell the Silos, and all SAM Sites except the north-east one, and build a Power Plant somewhere in the south around your Hand of Nod. The Artillery will be the first Airstrike target. Move it onto the Repair Bay and sell it; the money you get from it will be more than the repair cost of whatever the A10s decide to bomb instead. Move your Stealth Tank to the village in the south and destroy the Church. Pick up the crate under it to get 2000 credits. Then move it around the map to reveal the three armies around your base, and the tiberium field in the north-east. Sell the Power Plant east of your Construction Yard, and build a Refinery on that spot. Place it from the Repair Bay in the south so there's a cell open between the Construction Yard and the Refinery. Stop the Harvester immediately so it doesn't try to go outside to harvest. Repair your Light Tanks and put them at both sides of the Turret just north of the Construction Yard. Note that if you move anything more north than the Turret, the two Rocket Launchers will come. This is not really a big issue, but it's simpler to take them all out with the Nuke later. Put your three Bazookas behind the Turret, and maybe add the Bike as well. You can keep the Flame Tank nearby too, to intercept infantry, but keep it far enough from your Bazookas. Once the Nuke is ready, aim it at the north force, slightly to the east, so you hit all of them except the Light Scout in the west. The ideal location is between the two east-most tanks. The Nuke will wipe out everything except the three tanks, which will come to attack you, and the Light Scout and some Minigunners to the west, which will remain oblivious. The three tanks will come into your base, but they are focused solely on the Temple. This means you can easily take them out. Order your Harvester to harvest in the tiberium field in the north-east. Sell the Temple, and use the money to build a second Harvester to join it. Note that the Airstrikes may target your Harvesters, so keep an eye on their health, and make sure to repair them if that happens. Now it's time to thin out the east and west armies. Use your Recon Bike to lure in the Rocket Launchers. You can also lure the Light Scouts and Grenadiers by force-firing at a cell next to them from just outside their range. It is also possible to lure the tanks, by force-firing an Artillery on a point close to them, but the Artillery will never survive this, and you also have to constantly keep in mind that it's the prime preferred target for the Airstrikes. Use your Stealth Tank to lure the enemy infantry out of their base, by attacking them once (or force-firing near them) and then re-cloaking when they come for you. They will then proceed to go to your base where you can deal with them. You can also use this trick to get rid of the infantry at the back of the east and west armies, but be careful since the Grenadiers will respond if you uncloak close to them, and could damage or destroy the Stealth Tank. Build up your defences; get at least four Turrets on each side. Build another Flame Tank so you have one on each side. Obelisks are not advised, since the Airstrikes will target them, and they might not survive the rush. Add some of the infantry from sold buildings for good measure. You can also build some more Light Tanks, but be very careful that they do not attack the remaining Light Scout in the north prematurely. Finally, pull back your Harvesters into the base, and destroy the last unit of the north force. This will trigger the remaining forces (which should just be tanks and infantry, now) to rush into the base. Note that any infantry remaining in the enemy base will come at you as well, so it's better to clear those out in advance. Oh, and their Harvester will come as well, so be careful and avoid having it crush dozens of your soldiers. Once the enemy forces are gone, you can mop up the base. It has no defences at the west side, and you can take out all their Advanced Power Plants without getting in range of the Advanced Guard Towers, so it should be fairly simple.
没错,猛犸坦克,那座神殿显然才是你最该担心的。 nod秘密行动:nod敢死队 快速概述:潜入基地后方,摧毁高级通讯中心。 注意事项: 拾取任何一个钱箱,或是摧毁守卫东南入口的任何一个火箭发射器,都会让gdi陷入疯狂,对你的所有单位展开攻击。所以,你懂的。最好别那么做。 详细攻略: 用你的隐形坦克进行侦查,但不要进入基地。侦查东部外围。 将火焰坦克停在东南基地入口和基地东边缘的中间位置。 让你的特种兵移动到基地东边缘。敌方突击队员会冲出来拦截他,但你的火焰坦克会处理掉他们。之后,将其余部队移动到敌方基地东侧区域。 使用隐形坦克在T型路口上方的东墙炸开一个缺口;这是一块任何一侧(甚至对角线方向)都不与建筑物接触的墙体,因此可以确保不会意外惊动AI。 将你的火焰坦克部署在炸开的缺口正前方,然后用突击队员引诱掷弹兵进入火焰坦克的攻击范围。 将火箭筒手部署在炼油厂东侧的厚墙后方,然后让突击队员向猛犸坦克移动。一旦猛犸坦克开始追击,就将其引诱到火箭筒手能够摧毁它的范围内。墙体将在步兵摧毁坦克时为他们提供掩护。使用隐形坦克或火箭筒清除沙袋墙,开辟一条通往目标的清晰路径。将火焰坦克移动到高级警卫塔的射程范围内以吸引其注意力,然后使用突击队员轰炸高级通讯中心。
Picture Perfect Finish - no units lost. GDI Special Ops '97: Mission 1 Quick overview: This is a very straightforward build-up of your forces as you go along. Go to the beach and you get Minigunners and Grenadiers. Take out the Turrets and you get Light Scouts. Take out the Buggies and you get Medium Tanks. Take out the Light Tanks and you get another Medium Tank. Come close to the enemy outpost and take out the Light Tank there and you get Rocket Launchers. Wipe out the outpost to get more Grenadiers. Then, with that entire army, take on the main base at the top. Notable scripts: If you enter the cliff part west of the beach, an enemy troop drop will come. While you can technically avoid this, it's not really a big deal if your Commando is still alive after the Turrets are taken out. When you go north from the centre east outpost, Nod will start producing units, so watch out for that. The mission does not require you to destroy all Nod stuff. Only the buildings inside the base at the end really count. Though this doesn't matter much since everything you destroy before that point helps you in some way. No structures in the Nod bases are scripted to get rebuilt.How to make things easier: At the start, when you only have your Commando and Gunboat, watch out for the Flamethrower hidden behind the tree just beyond the river crossing. Don't try to prevent the Flame Tank from destroying the civilian buildings. Their destruction actually gives you more reinforcements. Don't take out both Bazookas near the Turrets in advance with your Gunboat. If one of them moves towards the village, you'll get more reinforcements. When the road to the east splits to the north and south, specifically go and scout the south part and you will receive a flare and a Rocket Launcher. GDI Special Ops '97: Mission 2 Quick overview: Rescue Moebius before Nod finds him and/or nukes him. He is in the north-west corner of the map. Take out all SAM Sites and you will get a Transport Helicopter to evacuate him. Notable scripts: For some reason, this mission has an alternate win condition, namely to destroy the Nod base structures and all Obelisks. After 300 time units, Nod launches a nuke. That's half an hour, at Moderate speed, so you should have plenty of time to finish the mission.How to make things easier: At the start, there is a group of Bazookas placed to intercept and inflict severe damage to the west team. If you leave the west team alone at the start, you can wipe out those troops using the Rocket Launchers of the east team. In a similar tag-team play, the east team will encounter an Obelisk next. If you move the west team to the west after the Bazookas are taken care of, they will find a set of Advanced Power Plants you can destroy to depower the Obelisk. If you leave the first two Obelisks standing, the AI will have low power as long as you don't destroy any SAM Sites. The first two Advanced Power Plants you encounter, and the two on the east side of the enemy base, will not get rebuilt. GDI Special Ops '97: Mission 3 Quick overview: The intended way to do this is to follow the road to the Nod outpost in the centre west of the map, get the money crate, and use that money to build Engineers and capture the Refinery. But the mission can be finished a lot faster if you destroy the Refinery there, pick up the crate, and then rush to the enemy's main base and take that over instead. In fact, you could rush straight to the enemy base, sell your Construction Yard, and use the Engineer to take over their Construction Yard. This is safer in terms of timing, since the enemy production starts after a set time, but it means the other outpost remains, with both a Refinery and a Hand of Nod, to endlessly harass you with infantry. Also note, the chances of getting an Engineer from selling your Construction Yard are not actually 100%, so you could have some bad luck in RNG there. Notable scripts: Two Nod Transport Helicopters will fly in at mission start and land in the west outpost, so you can capture those. When you destroy the two SAM Sites in the village in the centre of the map, you get a flare showing a safe spot to land troops at the back of the enemy base. If you play the mission as intended, you can use that to land forces and easily take out their power, to disable the Obelisk so you can perform a frontal assault on the base. You need to hurry though, because the landing spot tends to get overgrown by tiberium.Detailed guide: Follow the road to the point where it goes back to the west. Wait until your Mammoth Tank catches up, then go west, but stick to the north edge against the water. When your MCV arrives, move it to the eastern edge of the map, around the same vertical position as the point where the road ends at the Nod outpost. Take a group of three Grenadiers and move them south along the eastern rock ridge, then when the Turret attacks them, move in your tanks as well to take it out. After the first Turret is gone, some infantry will come out to check. Move in the rest of your infantry to help take them out, and swiftly move on to the second Turret. Pick up the money crate, then destroy the Refinery. Attacking it will trigger a rush of some Nod units, including a Light Tank, but you should be able to take them out. You may be tempted to take the time to take out the SAM Site there too, since it keeps distracting your forces from targeting the enemy infantry, but it's better to leave it so you don't lose too much time. Let your forces rejoin with your MCV. Take out any infantry pursuing you. If you see a Flamethrower, try to get it with your Mammoth Tank so it can't wipe out all your Grenadiers. If you have six or more Grenadiers left, leave the three with the least health in the outpost. While your other forces do other stuff, make the squad you left behind take out the Hand of Nod. Spread them out so any surviving enemies can't kill them all with a chain reaction. If they survive, take out the Power Plants as well. At the east side, go south, and destroy the Flame Tank hiding behind the tree. Move all your forces (including the MCV) south, with the Grenadiers at the front. When you arrive at the base, let the infantry soak up the damage, but keep them against the east edge and make them punch through the walls instead of focusing on the Turret. Let your tanks deal with the Turret, but keep them far enough to the east to avoid getting in range of the Obelisk. Don't wait for the tanks to finish off the Turret. Punch through the wall as soon as possible and deploy your MCV on the spot below the SAM Site, but one cell away from the wall (so move the MCV two cells away from it), then place a Power Plant to the south-west of it, as far east as you can. Then place your Barracks south-west of that, as far south as you can. Start building a Guard Tower. Start making Engineers. Capture one of the Silos as soon as possible, then capture the Airstrip and sell it, then capture the remaining Silos. If you're fast enough and the enemy production hasn't started yet, you should be able to get all four full Silos, but once the tiberium level in them goes down, stop capturing them since you'll get nothing from them, and move on to capture the Construction Yard. If you're low on money, you could sell it too. While you are doing that, move your tanks south along the corridor you left open to the east of your Construction Yard. Be careful they don't try to go around, because the Obelisk will pick them off easily. Infantry will probably start harassing you by this point. Build Guard Towers to defend against incoming infantry, but be careful not to put them in range of the Obelisk. Make sure to keep 2000 credits for a Refinery. Move your tanks through the Silos to the point below where the Airstrip was, punch a hole in the chain link fence, move through the fenced area, and punch a hole in the back as well. You might want to take out the whole southern fence as well, to ensure the corridor is wide enough. Don't attack the Power Plants unless you're prepared to take on hordes of Flamethrowers and Bazookas. Build a Refinery where the Airstrip / Construction Yard stood, and order the Harvester west through the opening you made. Beyond it lies a tiberium field. Keep your harvester to the south so the infantry from their Hand of Nod does not attack it. Capture the Advanced Power Plants. Leave the north-east one for the last, since the Obelisk can reach it. The north-west one should probably be sold immediately since the infantry from the Hand of Nod will attack it. Even though the group standing in front of the Hand of Nod may seem impressive, Nod is running on fumes by now. Once the Obelisk is offline, construct a wall of Guard Towers south of the Hand of Nod, onto the Advanced Power Plant you captured there, and lure the infantry into it by attacking them with a tank and retreating. I advise using force-fire on the ground in front of them to limit the amount that get lured in together. When the infantry is all gone, and they don't build more of them, capture the Hand of Nod, sell the Guard Towers, and use the infantry that comes out of the sold structures to destroy the Obelisk and Turrets at the top of the base. Make sure all Power Plants are captured at this point. When Nod loses the last base structure, all units on the map will come to hunt you down. This includes a Stealth Tank, and, unless you destroyed the Refinery while it was unloading, the Harvester from the western outpost. So be careful that they don't crush too much of your infantry. After that, it's just mopping up the remains of the western outpost, and you're done.How to make things easier: If you use force-fire to destroy the Church in the centre village, you'll find a money crate with 2000 credits under it. Though not sure how much that would help with the tactics described here. Also, killing civilian stuff lowers your score, as GDI.
Path cleared for the Harvester. GDI Special Ops '97: S3cr3t M1ss10n Quick overview: This mission is literally a Westwood Studios insider's joke. The enemy does not attack you, and you have, to paraphrase Dr. Evil, Orcas with frickin' laser beams attached to their heads. So yea. No guide here. The enemy has a giant fortress, but does not harvest, does not produce anything, and does not attack you. You have an infinitely large tiberium field, ten Commandos, and can build Orcas that can take out a SAM Site in three shots. Go nuts. Small note: apparently the system used in the Remaster to give the laser weapon to the Orca does not properly work with savegames. So be aware that if you load a savegame of this mission, the Orcas will be reverted to normal. Nod Special Ops '97: Mission 1 Quick overview: Load the Bazookas and Flamethrowers into the APCs and top them off with Minigunners, rush your troops to the village in the south-east corner, and wipe them all out. This one really doesn't need a detailed guide. You can pretty much just rush to the village and win. Even the Mammoth Tank coming at you from the GDI outpost is easily taken care of, even in Hard mode. How to make things easier: At the start, go directly east over the tiberium field, and you avoid two Guard Towers and two Medium Tanks waiting for you. Make sure to rush the APC with Flamethrowers into the village first, and unload it so they take out any civilians before they can flee. Nod Special Ops '97: Mission 2 Quick overview: Rescue the outpost, sell your Construction Yard, use the money to make Engineers, use one Engineer to capture one of the Transport Helicopters, and use the Transport to get the other Engineers to a place where they can capture stuff to allow you to start a new base. The outpost you're supposed to capture is at the flare directly west from the Nod outpost, but the main GDI base in this mission is not finished at the start, and has suspiciously-missing defences on the south-east side, allowing you to infiltrate it if you're willing to take on some Guard Towers and a Mammoth Tank with just infantry. A group of GDI Bazookas is deliberately placed on the cliff to the east overlooking your ruined outpost to prevent you from having an easy route to the enemy base. Of course, they are also a hint from the mission's creator that there is a reason to go to the enemy base ;) Notable scripts: There is a timed Airstrike. Enemy production starts when you move any troops close to the flare. Landing a helicopter does not trigger it until you unload it. Capture any of the buildings at the flare, and the two Medium Tanks guarding GDI's south base entrance will come to your ruined outpost to destroy it. Taking out the Communications Centre ends the Airstrikes. Attack the Harvester and the two Medium Tanks will move to the north-west. Not sure why. The extra time this gives you isn't worth getting a scout squished though.Detailed guide: Move three Flamethrowers to the east edge of the road. Move all four Bazookas one cell west from the end of the road. Now make one Minigunner approach the bridge from the west side, and order him to move on past it (not across). While he distracts the two Grenadiers, move in the three Flamethrowers to take them all out together. The Medium Tank will target one of the Flamethrowers. Move him aside, move another one in front of the tank so he attacks it, and order your Bazookas to attack the tank. If you're lucky, the Flamethrower will immediately kill any survivor coming out of the tank. This is important since it would go to your Construction Yard, which would die in just a few shots. Move the Bazookas to the west, against the trees and as close to the river as possible. A Grenadier and a Minigunner will come over the bridge. Use Flamethrowers to take them out. Take the unused Flamethrower, along with a Minigunner, and send them over the bridge and far to the west to take out the final Grenadier. Move your units across the bridge and reveal the outpost. Sell your Construction Yard. If you don't get an Engineer, build one and don't repair anything, otherwise repair your buildings. Send a Minigunner straight to the west from the end of the bridge until you find the Transport Helicopters. Once you passed the opening in the fence, move straight north to reveal both Guard Towers. If you used a full-health one, you can actually save him if you immediately move him diagonally back to the south-east. Build three Engineers, so you end up with four. Use one to capture the Transport Helicopter. Carefully position your Bazookas to take out the Guard Towers. See the schematic at the start of this guide. Keep some Minigunners nearby so survivors won't murder your Bazookas. Take a group of four Minigunners and move it to the Mammoth Tank. Since you approach it diagonally from the bridge, it won't crush a group of four, and since it's aimed straight at the bridge it won't shoot missiles. Move your four Bazookas behind them for good measure. It will die quickly. Take a Minigunner that still has green health and move him north and then east, sticking to the eastern rock ridge. You will probably encounter the GDI harvester; avoid it and don't attack it. When you come to a cliff that goes north again, go straight north and you'll end up at the walls of the GDI main base. Move your scout farther north-east so it's out of the way of the harvester. Load your three Engineers and two of the Bazookas into the Transport Helicopter, and land them inside the base perimeter. Unload the troops and use the Bazookas to punch a 2-wide hole through the wall. The enemy Harvester will probably start using the hole you made, so make sure your Bazookas don't accidentally attack it if it passes. Move the Engineers north, and use one to capture the Weapons Factory, and the other to capture the Construction Yard. Sell the Weapons Factory, and use the money to start constructing a Refinery. Move the Minigunners from the Weapons Factory to the west, past the Refinery, while an Engineer approaches from the north, and takes over the Communications Centre while the Minigunners distract the Advanced Guard Tower. This will remove the Airstrikes. This is a very tricky manoeuvre; if the AGT targets your Engineer it fails. You could leave off the third Engineer altogether and just deal with the Airstrike, or do this later and distract with your harvester. Sell the Communications Centre to get back the invested 500 credits. This should give you enough money to finish building the Refinery. Place it down at the Construction Yard. Load the Bazookas (and perhaps the scout) into the Transport and drop them off at the outpost, to help defend it later. Let your Harvester harvest in the south-east, and use the money to buy three Engineers. Build two Guard Towers at the outpost to defend against the tanks that will come later. Prebuild another Guard Tower. Load two Minigunners and your three Engineers into the Transport Helicopter and land it at the flare. Wait until the Harvester docks with the Refinery, unload your troops, and capture everything. This is time-sensitive, since their production has now started, and as long as you don't capture it, the Construction Yard there can start building up the rest of the north base. Place the Guard Tower down at the south-east corner of the Refinery; if you're not fast enough in taking everything out, GDI will drop off Engineers there. Order the Minigunners you dropped off at the flare to go to the north, and destroy the Church there. It's friendly-neutral (so use force-fire), but contains a 2000 credits crate. When you capture any of the buildings at the flare, the two Medium Tanks will come to ruin your outpost. They will move quite far in before they stop moving, so keep your Bazookas to the back against the cliffs. Repair the Guard Towers, wait until the tanks arrive at the spot in front of the Hand of Nod and stop moving, then use the Bazookas to destroy them. Build two more Engineers and capture the Advanced Power Plants around the Construction Yard in the north base. With those taken care of, GDI's Advanced Guard Towers are offline. Then capture the final Refinery, and if it's still there, the Communications Centre. Use a Harvester to reveal the Guard Towers at the west and south entrances of the main GDI base, and take them out with carefully positioned Bazookas (with some Minigunners as backup to defend against survivors). Destroy the remaining Advanced Guard Towers with the Bazookas and Minigunners. The final enemy forces are the Bazookas on the cliff to the east overlooking your outpost. Send some Flamethrowers or Minigunners at them and they should die easily.[CHEESE ALERT] At the flare, you can land troops without triggering the production as long as you stay out of the square area that extends three cells to the east and two cells to the north of the Refinery. Using this knowledge, you can retrieve the money crate from the Church much earlier than the moment you do the actual takeover. You can even do this without the Transport, by going to the Church with some Minigunners after taking out the Mammoth Tank. Stick to the cliff and you won't trigger the production.
GDI基地的秘密通道。 GDI特种行动'99:任务1 任务概要:派遣特种兵摧毁附近的萨姆导弹阵地,即可解锁空袭。使用空袭摧毁方尖碑后,你的移动基地车将会抵达。随后建立基地,找到并摧毁生物研究实验室。 本任务一点也不难。敌人不会重建任何建筑,你从一开始就拥有空袭能力,甚至在任务初期只需将空袭瞄准方尖碑,就能发现西北角的敌人发电厂。而且在你摧毁东南角的前哨站后,敌人的电力就会立即不足。当我第一次深入研究N64的ROM并将这个任务移植到PC上时,我对其进行了一些调整:启用基地重建功能,调整了发电厂的设置——让东南前哨站配备普通发电厂,而主基地则使用高级发电厂,这让任务变得更加有趣。然而,在重制版项目中,他们使用的是直接从ROM转换过来的原始文件,没有包含这些调整。事实上,当我参与重制版社区委员会时,完全忘记了这些修改,所以这些调整并未应用到重制版中。 如何让任务变得更简单: 你拥有空袭能力,而你只需要摧毁一个建筑。还需要我多说吗?即使是几次盲目的空袭,最终也能找到目标。[投机取巧提示] 这一点真的需要我特意说明吗?一旦你知道实验室的位置,就可以用你的第一次空袭将其摧毁。它位于地图顶部向下两个单元格处,正好在你摧毁萨姆导弹阵地时所在的岩石山脊东端的正北方。不过,飞机的接近方向可能有点随机,这通常意味着实验室无法被完全摧毁,所以你需要一点运气。 GDI特种行动 '99:任务2 快速概述:建立基地,并派遣一名工程师进入山顶戒备森严的科技中心。(好吧,是的,我猜在这个任务中它有点像监狱。不过,简报中并没有这么称呼它。)如何让任务更简单: 完成这个任务的关键在于电力;东北和西南的前哨站设有高级发电站,这些发电站维持着山上方尖碑的运行。对于这两个前哨站,你可以使用坦克或奥卡战机摧毁其中的萨姆防空导弹阵地(离子炮在这里会很有帮助)、炮塔和单位,然后派遣搭载工程师的装甲运兵车进行占领。 和第一个任务一样,本任务无法重建基地,所以你摧毁的任何东西都会永久消失,包括中央的方尖碑。我怀疑为任天堂64制作这些额外任务的人是否了解基地重建系统的运作方式。nod特种部队99:任务1 简要概述:任务要求你攻击一个平民定居点以分散gdi的注意力,这样你的突击队员就能潜入并获取 crate,但这实际上并不足够,因为基地有先进的守卫塔会将突击队员撕碎。相反,使用提供的火炮摧毁西北部gdi暴露的先进发电站。 值得注意的脚本: 村庄中的建筑物随机附加三种触发器中的一种,当建筑物被摧毁时,分别会使猛犸坦克、中型坦克和轻型侦察兵前往村庄。如果你从北方进入村庄,你周围看到的前三座建筑物(骆驼商人、阿卜杜勒的房子和村庄水井)应该各触发其中一种。详细指南: 使用突击队员清理桥梁周围及对面区域。 使用火焰坦克清理通往西侧的道路,然后前往北侧,途中务必摧毁两辆轻型侦察车。当你向北过桥后,会看到东侧暴露的敌方高级发电站。道路畅通后,将你的炮兵部队移至该处。 带领突击队员和火箭筒兵向北推进,沿途消灭敌方步兵。若让部队沿东侧山脊逐个移动,可忽略第一个警戒塔,因为不会进入其射程范围。所有部队通过后,向东行进会遭遇一辆中型坦克。你的五名火箭筒兵应能轻松将其摧毁。现在径直向北,你会找到一座GDI兵营和科技中心。不要攻击他们,而是将你的部队尽可能向东北方向隐藏,靠近科技中心。使用炮兵单位炸毁高级发电厂,GDI的所有单位都会冲出来。如果有些单位没有出来,就用火焰坦克摧毁村庄里的一些建筑,他们就会出来了。一旦电力中断且所有单位都经过你的特种兵,就让他冲进基地,进入带铁丝网的区域,然后拾取补给箱。
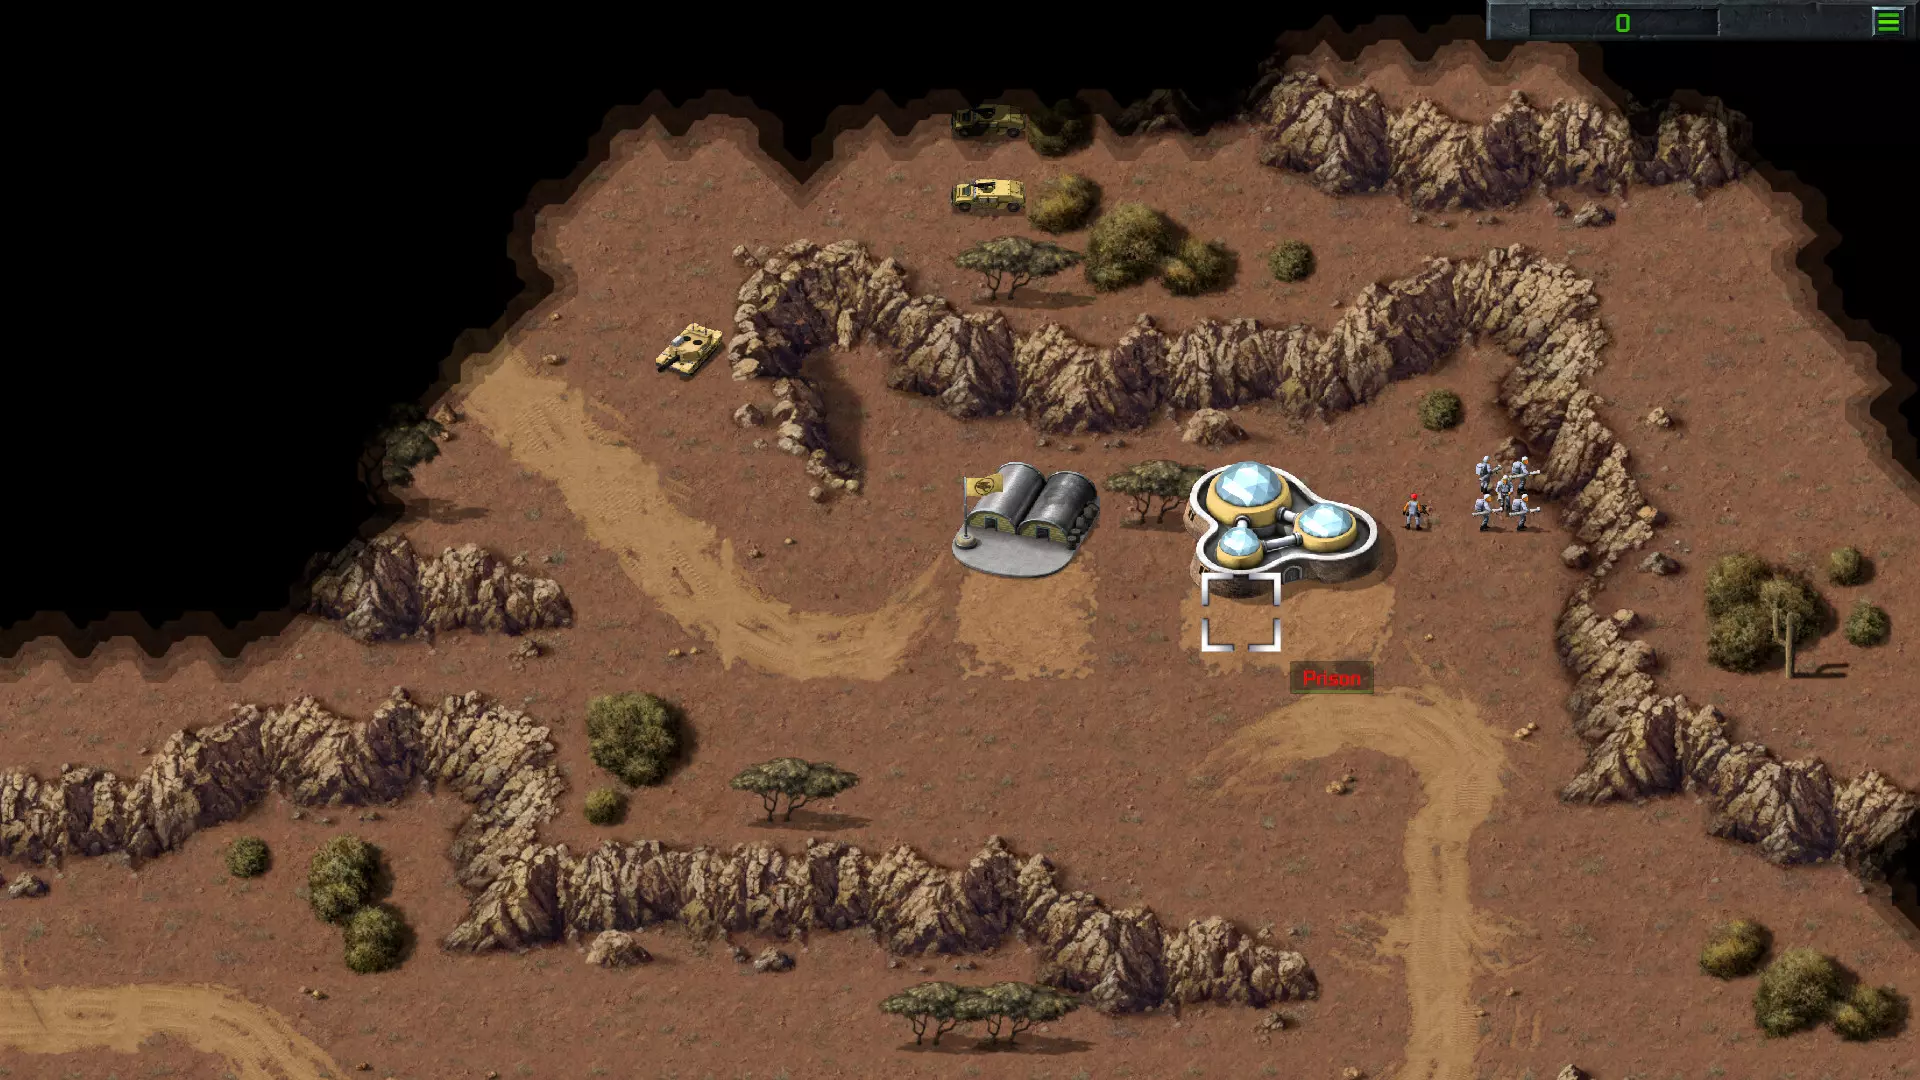
Repeat after me: "Tech Centre. Not Prison". Nod Special Ops '99: Mission 2 Quick overview: Very classic build and conquer mission. Build up your base, scout around, nuke their production facilities, and mop up. How to make things easier: The village in the south-east has a GDI Construction Yard only protected by a single Mammoth Tank. It gives easy access to double tech. Be careful when destroying the village though; they are GDI-owned buildings, meaning that A. they spawn Minigunners and B. attacking and destroying them may trigger a response from the AI to send units there. The enemy does not rebuild anything, so targeting the Construction Yard in their base is useless. You can use your nuke to take out the enemy Barracks and Weapons Factory in one shot, completely crippling their unit production. Funpark: Mission 1 First things first: if you don't know how to get to the secret Funpark missions, the way to unlock them in the Remaster is fairly simple. On the game's main menu, there's a metal plate used as background for the menu buttons. Click on the bolts in the corners of that metal plate, and you'll hear dinosaur roars. Once you clicked on all four of them, the "Select Mission" screen will open, on the newly unlocked "FUNPARK Dinosaur Campaign" category. For the record, the way to access it in the original game is to start the game with the command line parameter ("launch options" in Steam) "funpark". Anyway, on to the actual first mission. Quick overview: Kill all dinosaurs on the map. There are only three of them, and they are generally slow enough that your Bikes should have no issues with them. Notable scripts: The Triceratops will attack you when you approach it. The Tyrannosaurus Rex is supposed to patrol through the village, but very often it just gets stuck.How to make things easier: The Minigunners in this mission are useless fodder. Leave them behind or they'll just get gored, or worse, eaten; the carnivorous dinosaurs heal from eating infantry. Two extra Recon Bikes get reinforced after a while. Don't forget them. After going east and then north, you come to a gap in a rock ridge. South-west of the gap are a bunch of trees that form a perfect barrier to place your Bazookas and Recon Bikes behind, while a single Recon Bike lures in the Triceratops that's just north of that point. The Tyrannosaurus Rex can be lured in a similar manner. Just make a row of Bikes just before the bridge and put your Bazookas safely behind them. Funpark: Mission 2 Quick overview: Load the Commandos in the Transport Helicopter and hop over the river to the west. The Triceratops there barely has any health, so kill it with the Commandos. This will uncover your base in the south-east corner. Use one of the Commandos and the Transport Helicopter to systematically scout around the map and uncover targets for your air force to take out. How to make things easier: Don't build infantry. As mentioned before, they're just food to heal the carnivores. A pair of Attack Helicopters and a pair of Orcas both kill a Velociraptor with exactly all their ammo, but the Orcas kill them much faster (and sometimes have a bit of ammo remaining), and of course also reload much faster. So consider using some of the money you have to buy two Orcas, and using those instead. Any remaining money can be used to build some tanks to guard your outpost, but honestly, you probably won't even need them. (Originally, you could choose to play the missions as GDI or as Nod, and that would determine which type of helicopter was made available to you.) Funpark: Mission 3 Quick overview: This mission is a slog. Make a "corridor of death" in front of a river crossing, with vehicles shielding the infantry from direct contact, and lure dinos through it. Repeat ad nauseam. When the east part is cleared out, do the same for the north. Notable scripts: Each of the four river crossings on the map will trigger a herbivore attack when you cross it, so be prepared for that. They come from the south, just like your own reinforcements. As you take out Velociraptors, you will get reinforcements. One group will come after thinning out the Velociraptors in the east, another after the ones in the north. At some point, a single Velociraptor will specifically come and attack you. But the timing is about as much as your average AI Airstrike, and it happens only one. I never noticed it, to be honest.Detailed guide: At the river crossing in the south-east, make a line of your vehicles at the north and south of the road, leaving a 1-cell road open in between. Put your Bazookas and Grenadiers behind the vehicles/trees to shield them but still have them close enough to attack. Since the Grenadiers are rather inaccurate and do a lot of splash damage, I advise putting them behind the south-east tree, so they will attack first and not damage your vehicles too much. Note that this might eventually destroy the tree. Spread the remaining infantry out over the open area at your side of the river; their only use is to possibly deal some damage against the attacking herbivores. Use one Buggy or Light Scout (they have the same speed so it doesn't matter much, though the Scout has slightly more hit points) to cross the river, and use your mouse cursor to scout where the Velociraptors are hiding. Target the closest one, attack it once, and rush back through your corridor so your Bazookas and Grenadiers can take it out. As a result of crossing the river, a herbivore will come. You can probably also lure it to your Bazookas. Repeat the Velociraptor luring until reinforcements arrive. You will get more Bazookas, some (fairly useless) Chem Warriors, and Recon Bikes. The Recon Bikes are much better at luring Velociraptors since they can actually properly outrun them. They also have a weapon that deals much more damage to the dinosaurs, so add the remaining ones to your corridor force. Repeat the luring strategy until the entire east side is cleared, then relocate your Corridor of Death to the north river crossing, and do the same thing there.[CHEESE ALERT] If you enable the option to always see health bars, finding the Velociraptors is a no-brainer. Which is why I really think that option is cheese; hiding enemies behind trees is a staple of this game. Funpark: Mission 4 Quick overview: Clear the map while constant dinosaur reinforcements bother you. The simplest way to do this is to build two or more Obelisks at the north of your base area as soon as possible, and surround them with walls. They will take out anything. Note that the side you play with is neither GDI nor Nod, but is technically a Multiplayer player; a "blank slate" that can be configured to be either GDI or Nod. In the original Funpark campaign, you started by choosing a side, which would assign GDI or Nod tech to you for the duration of the campaign. Since this mechanism wasn't incorporated into the Remaster, that keeps the player in its original "blank slate" state, giving you access to tech from both sides. However, internally, some things still default to Nod (because it checks if you're GDI, and the answer is "no"), meaning that the helicopters you get on new Helipads are always Attack Helicopters, not Orcas, and the only superweapon you can get is the Nuke. So don't bother building an Advanced Communications Centre; it won't work. Notable scripts: There are specific places on the map that, when you go there, will disable the dinosaur reinforcements. However, do note that Stealth Tanks do not trigger such scripts. To stop the Stegosaurus migrations, visit the tiberium field in the north-east, guarded by two herbivores. To stop the Triceratops migrations, visit the tiberium field in the south-west, guarded by two Tyrannosaurs. To stop the Tyrannosaurus Rex migrations, visit the tiberium field in the north-west, north of the Velociraptor forest, guarded by some Triceratopses. The Velociraptor migrations have no script to stop them.When you visit the tiberium field straight south from your base, you will get a flare showing the island in the north.How to make things easier: Use a Stealth Tank to scout the map. Dinosaurs are not infantry, so they can't detect you. You can clear out larger dinosaurs easily by luring them to your Obelisk defences. For the Velociraptors, I advise using a team of Orcas. Try to clear out the south area of the map as soon as possible, since it gives you a safe place to harvest. Do be careful that your harvesters never try to go through the forest in the west to come back home; it's infested with about 20 Velociraptors. A nuke will clear out a large chunk of the west forest in one hit. You can sell units on a Repair Facility. This means replacing the Attack Helicopters by Orcas will be a less severe financial hit. Note that in the original game you'd normally click on the docked unit to sell it, but in the Remaster, you need to click the building somewhere around the center cell. When a unit is docked, you will see that the Sell cursor will be green, not gold.[CHEESE ALERT] Again, if you enable the option to always see health bars, spotting the Velociraptors becomes ridiculously easy. Funpark: Mission 5 Quick overview: You are now on the dinosaurs' side. Destroy the Nod base. You will get additional units for scouting around, and for destroying enemy structures. Dinosaurs deal massive damage to structures, and you get rewarded for destroying them, so in your initial push it is important to keep destroying structures instead of focusing on the enemy units attacking you. It may seem suicidal, but once their production facilities are down and you have a massive new army at your starting point, it will all have been worth it. Notable scripts: When you go south and then east, just before you reach the enemy Obelisks, you will get a group of Velociraptors. The enemy base has four points of entrance; two cliff gaps, and two river crossings guarded by Obelisks. Around each of those is a trigger that gives you an additional Tyrannosaurus Rex. A lot of the Nod buildings have scripts attached to them that when you destroy it, you get some reinforcements. These buildings include the Tech Centre, the Communications Centre, the Advanced Communications Centre, and some of the north Advanced Power Plants. Get a unit on the crossroads in front of the enemy base, and you'll get a lot of reinforcements. Like, a serious lot. Some triggers spread around the north part of the map will get you some Stegosauruses and Triceratopses. To be honest, they're probably too slow to be useful, even as damage absorbing units.Detailed guide: Go completely south and then east with a few Velociraptors to trigger the Velociraptors reinforcement script. The reinforcement announcement can also be used to warn you that you're getting close to these heavy defences; approaching the base from that side is not advised, so just pull them all back to the north. The main way to their base is the river crossing south-east from your start position. Send the herbivores over first, since the area behind it is full of Stealth Tanks that can do some serious damage to your Velociraptors. After you cross the river, do not go south; you'll end up in range of their Obelisks, in a position from which you can't even rush them. The best place to chew through the enemy defences (om nom nom) is the east edge of the map. You could use some herbivores to distract the artillery units standing there, if you can be bothered to wait half an hour until they make it there, but, honestly, you can just rush them with Velociraptors and a Tyrannosaurus Rex, too. Once you took care of the vehicles and nearby defences, chew through the walls and Power Plants and enter the base, and start taking out the buildings. Focus on taking out as many buildings as possible, starting with the Airstrip and Hands of Nod. You can make your Velociraptors and Tyrannosauruses eat infantry to regain health, but don't waste too much time on the vehicles. Once you've taken out their power, be sure to rush a Velociraptor through all remaining terrain openings towards the base (one in the cliff in the north-west, two over the river in the west), and over the road split in front of the enemy base. Each of these points will get you extra reinforcements. Look back at your starting position, and you'll find a huge new army there that can easily mop up the remains of the Nod base.How to make things easier: As mentioned before, carnivorous dinosaurs heal when eating infantry. Use that to your advantage; it can really help to keep your Velociraptors alive longer.