
《命令与征服™:重制版》


你将找到在《命令与征服》的【趣味公园恐龙战役】困难难度下解锁秘密任务并通关所需的一切内容。如何解锁
游乐园任务01 游乐园任务02 游乐园任务03 游乐园任务04 游乐园任务05 更多命令与征服重制版内容(内容无法识别,已删除)

你将找到在《红色警戒 重制版》主线战役中以困难难度完成所有苏联任务所需的一切。 享受游戏! 苏联战役攻略合集 任务1:浴血教训
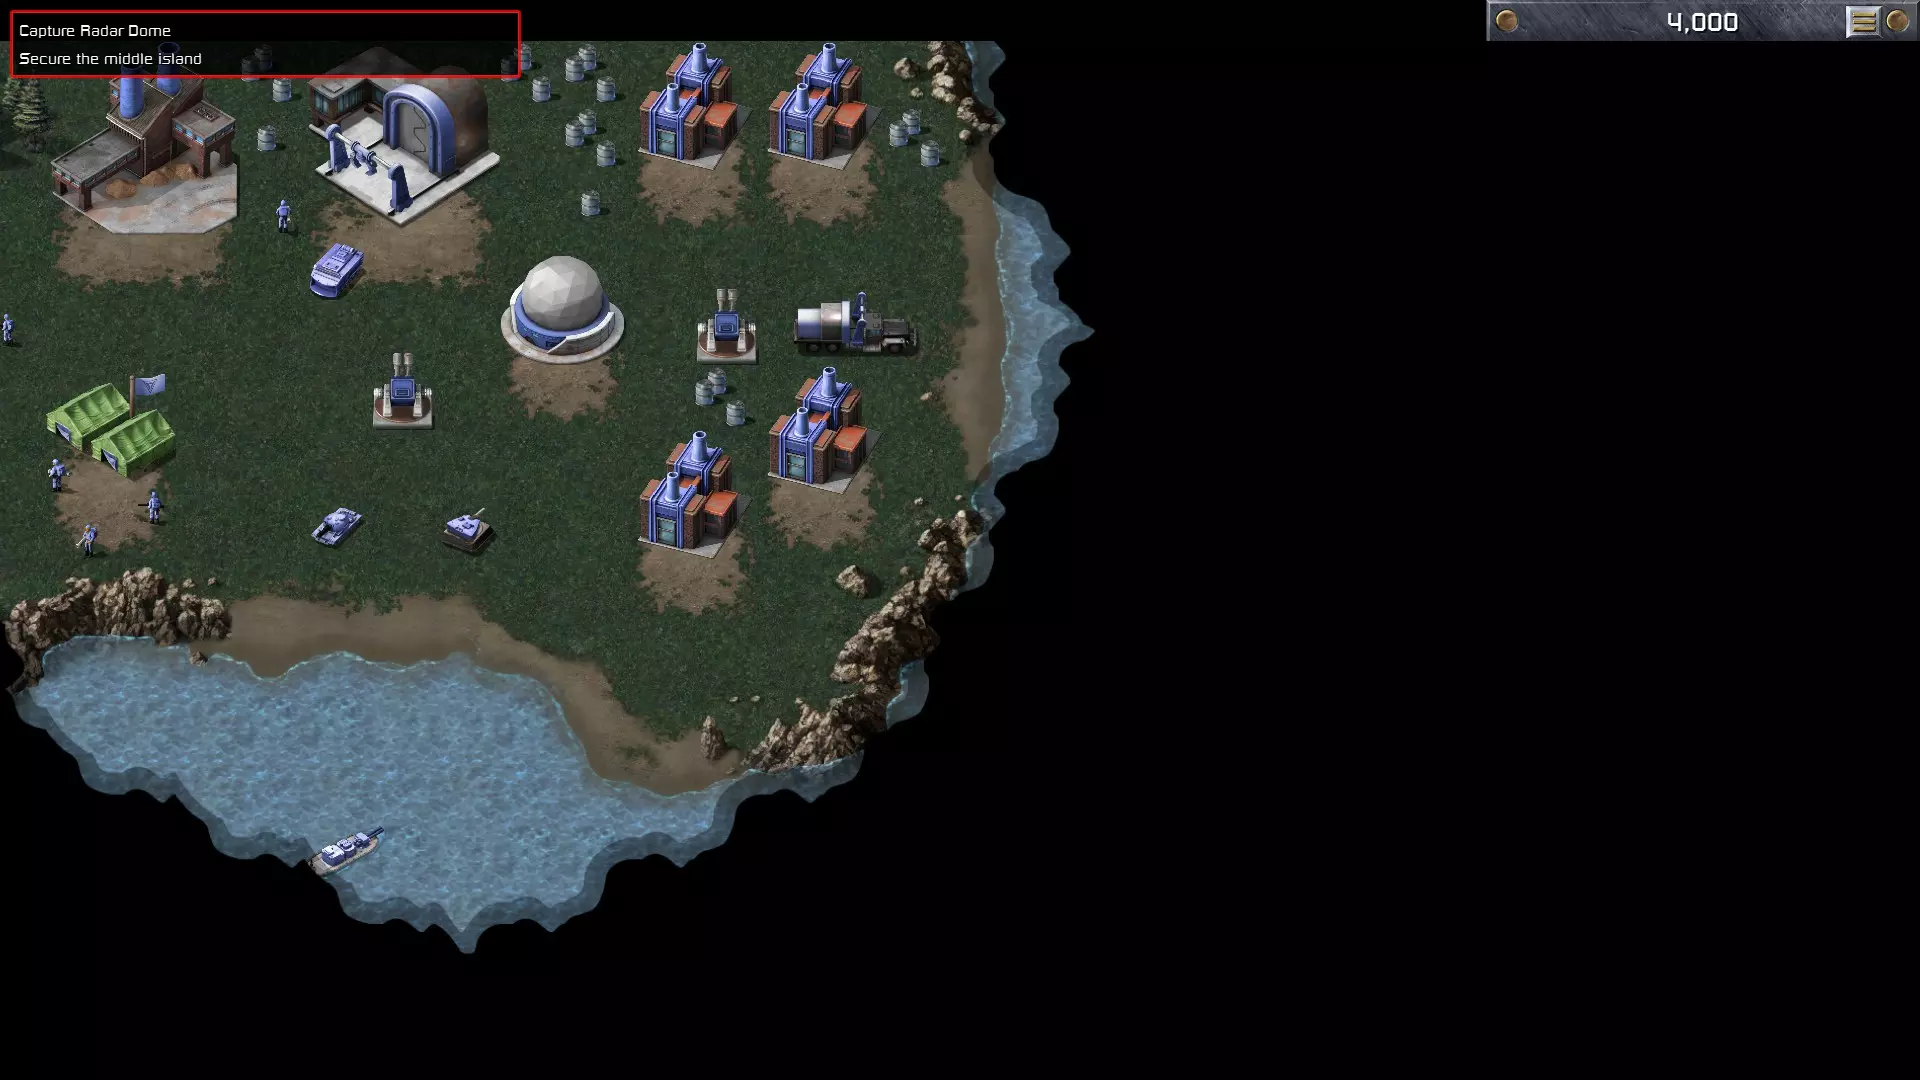
任务2 2A:守卫任务(北部) 2B:守卫任务(南部) 任务3 秘密清理 任务4 4A:深入敌后(北部) 4B:深入敌后(南部) 任务5 远方雷鸣 任务6 6A:格罗兹尼河大桥 6B:维兹乔伊河大桥 任务7 核心问题 任务8 8A:厄尔巴岛(北部) 8B:厄尔巴岛(南部) 任务9 清除隐患 任务10 监督者 任务11 11A:沉没海岸(北部) 11B:沉没海岸(南部) 任务12 占领科技中心 任务13 13A:占领超时空传送仪(北部) 13B:占领超时空传送仪(南部) 任务14 苏联霸权 奖励(英文) 所有过场动画(苏联战役) 奖励(法语) 所有过场动画(苏联战役) 更多命令与征服重制版内容


Here's a list of how many Helicopters are needed to destroy each unit and structures in C&C. Introduction This list shows the minimum amount of Orcas or Apaches needed to destroy their targets. Note that when I mention "Attack Helicopter", I am referring to both, Orca VTOL Assault Craft and the Apache Attack Helicopter. Though, the remastered Tiberian Dawn only dubs the Apache as Attack Helicopter, I will call it Apache in this guide. This guide assumes the target unit is stationary, except the Gunboats. I will also list the amount required if the target is being repaired. For vehicles, it is based on when the unit is parking on a Repair Bay. For structures, it is based on the structure getting repaired as soon as the attack helicopter's first shot lands on it. The amount needed to destroy target being repaired are in brackets. For the Infantry section, I have listed how many infantry of the same type a single fully-loaded Apache can kill in a single attack run by attacking one-by-one, meaning splash damage isn't considered. So, buckle up and grab your aviators, because we're in for a hella-copter ride. Infantry InfantryOrcaApacheHow many an Apache can killMinigunner3-4 (2 if stuck)14.5Grenadier3-4 (2 if stuck)14.5Flamethrower4-5 (3 if stuck)13.5Rocket Soldier2 (1 if stuck)17.5Engineer2 (1 if stuck)17.5Chemical Warrior4-5 (3 if stuck)13.5Commando4-5 (3 if stuck)12Joe2 (1 if stuck)17.5Phil1115 Vehicles VehicleOrcaApacheLight Scout21 (2)Medium Tank35 (6)APC23 (4)Rocket Launcher11 (2)Mammoth Tank47 (8)Nod Buggy21 (2)Recon Bike21 (2)Light Tank2 (2-3)4 (5)Flame Tank24 (5)Stealth Tank1 (2)1 (2)Mobile Artillery11SSM Launcher1 (2)1 (2)Tiberium Harvester5 (6)3 (4)MCV5 (6)3 (4)Mobile HQ11Apache Attack Helicopter21Orca VTOL Assault Craft21Transport Helicopter1 (1-2)1Gunboat6+7+Visceroid21Velociraptor22Tyrannosaurus-Rex59Triceratops58Stegosaurus47 Buildings BuildingsOrcaApacheConstruction Yard6 (7)3 (4)Power Plant2-3 (4)2Barracks6 (7)3 (4)Hand Of Nod6 (7)3 (4)Advanced Power Plant5 (5-6)3Repair Facility6 (7)3 (4)Tiberium Refinery7 (7-8)4Tiberium Silo32Helicopter Pad6 (7)3 (4)Communications Center8 (9)4 (5)Weapons Factory3 (4) 4* (5*) *Modern Balance2 (3) 3* (4*) *Modern BalanceAirstrip612 (>12)Advanced Communications Center8 (9)4 (5)Temple Of Nod15 (16)10 (>10)Hospital3 (4)2Bio Lab5 (5-6)3Research Facility/Prison3 (4)2 Defenses TargetOrcaApacheGuard Tower3 (4)2 (2)Advanced Guard Tower5 (5-6)3 (4)Gun Turret3 (3)5 (7)Obelisk3-4 (4)2 (3)SAM Site4 (4)5 Sandbag Wall11Chain-Link Fence11Concrete Wall1-21-2Barbed Wire11Wooden Fence11Tree5-63 General Tips Targets being repaired usually take at most one extra attack helicopter to be destroyed. Infantry take less damage in prone stance. Usually, they will automatically go prone when under attack but if they are stuck, they will stand still even when under fire. Technicians also have this damage resistance when they are not stuck despite they do not have a prone animation. This is relevant to Orcas as it takes less Orcas to kill infantry that are standing still. As stated above, all these values are based on stationary targets. Moving units take less damage and may require 1 more helicopter to be destroyed. For example, 3 Apaches can barely destroy a Harvester so a moving Harvester might survive 3 Apaches. It is best to wait for the Harvester to start harvesting on a tiberium field before attacking. Gunboats are always on the move. I put a + sign in front of the number needed to destroy them because the number is the minimum amount and you will most likely need more than that as they will constantly evade incoming attacks. It is easier to hit them when they are low health (they become slower) or near the edge of the map doing its 180 degrees turn. SAM Sites take about twice more damage when the battery is exposed. The guide above shows the amount needed to destroy enemy SAM Sites (where the battery will automatically surface to shoot) but for some reason if you need to destroy an ally SAM Site (which remains underground since it won't target friendly air), destroying it takes 5 Orcas (being repaired or not) or 9 Apaches (if not being repaired, retracted SAM Sites being repaired take more than 10 Apache which isn't worth trying). Airstrip being repaired takes more than 12 Apaches shooting at it in order to be destroyed. I didn't put a specific number because the Apaches will usually bug out (no pun intended) when there's too many attacking at the same time, returning back to their helipads. Even if you constantly click the target to keep ordering them to attack, the delay will give enemy more repair time which can give inconsistent results. Same goes for the temple. If a vehicle that requires more than 3 Apaches to be destroyed is being repaired on a Repair Bay, the Repair Bay will be destroyed first if you attack the unit with more than 3 Apaches. Apaches can save ammo if they attack infantry that are grouped together. For example, 1 Apache can kill 2 Commandos max that are spread out but if the commandos are standing on the same cell, it is possible to kill 4 with the same Apache in a single attack run. A single Apache can fire up to 15 machine gun bursts. Hence, it is able to kill 15 Phil Technicians in a single run. When attacking a group of infantry with the Apache, aim for the centre unit first to maximize damage. For civilian buildings, the small ones usually take 2 Apaches or 3 Orcas to destroy them. The 2x2 ones usually take 5 Orcas or 4 Apaches. The Oil Tanker is probably the least armored civilian building. Outroduction Finally, don't take this guide too seriously because there are factors that can give different results: If your first helicopter arrives and attacks early before the others, the opponent will have more repair time. Orca missiles sometimes miss their target. This is probably RNG but it is more common when attacking infantry. Hence, I put 2 numbers on some of the results. Your attack helicopters always move sideways in between their shots. If you have many helicopters attacking the same target, they may move sideways a bit longer before shooting again due to having less room which can give the enemy more repair time. I made this guide simple and basic, there are other more advanced tips that I didn't cover here. I might update this guide in the future for easier reading or if there's an error in my calculations. Please let me know in the comments if you find any errors. This guide is a personal reference to help me remember how many gunships needed to destroy stuffs during a match. I hope you find it helpful as well. If you like the guide, do leave a like or favorite it in case you need to read it during your battles, and if you don't, I thank you for reading this far. I wish you and your pilots good luck on the battlefield.

我尝试给出一些提示,先从GDI的通用提示开始。 这是我的第一次尝试。 GDI通用提示: 基地防御建设: 良好的基地防御至关重要。 从防御稳固的基地出发,能更好地规划进攻。即使第一次进攻失败,也可以在防御良好的基地中规划下一次进攻。玩家主要可依靠的是警戒塔,但它们的射程并不高,且比坦克、火箭零点以及NOD之锤要短。因此,应该在警戒塔后方部署一些坦克。要想有机会对抗炮兵,应该准备一艘奥卡战机。 通过火箭炮塔可以让防御变得简单不少。 应该在离基地稍远的地方部署防御阵地。 可以通过放置一排沙袋,将防御阵地很好地布置在远离基地的位置。如果想收回资金,也可以将这些沙袋卖掉。 泰伯利亚采集: 如果在任务中没有蓝花楹,那么泰伯利亚在被完全采集后就会消失。但至少如果留下一小块泰伯利亚,它就会重新扩散。这样在困难任务中,你可以先专注于防御,让电脑耗尽它的泰伯利亚补给,因为电脑会采集所有泰伯利亚。由于NOD的采集车总会尝试开采其自身资源,因此可以在那里对其发动有效攻击。 步兵: 初期,掷弹兵是最强的单位(无论对士兵还是坦克),而且价格非常低廉。 掷弹兵绝不能与其他单位混编,因为不同单位的射程不同,会误伤友军。 当步兵遭遇火焰喷射器时,应分散部队以减少损失。 泰伯利亚对GDI的所有步兵都有害,只有NOD的化学战士对泰伯利亚免疫。若要穿越大片泰伯利亚区域,应将步兵装入运兵车(BMT)或先收割该区域的泰伯利亚。 电脑会不断试图用重型坦克(单位)碾压士兵。使用小型部队对抗坦克会有更高的成功率,因为你可以及时移动、部署它们,或者尝试救援。 可以放弃使用 Rak Zero,它们速度慢,而且主要只能对付载具。 【沙漠猎手】是一种侦察单位,也是步兵的噩梦: 它的速度使其成为探索黑幕区域的完美侦察兵。 此外,将步兵引诱到泰伯利亚矿区也能让它成为步兵杀手;) 【钢铁风暴】: 绝对推荐用于基地防御。 但在进攻时使用它则必须加以保护。 它的射程比坦克炮塔更远,因此可以在坦克炮塔的射程之外很好地将其摧毁。奥卡战机: NOD方拥有 Rak Zeros、隐形披风、NOD摩托和FLARAK防空阵地作为对抗奥卡战机的防御手段。 摧毁不同目标所需的奥卡战机数量如下: 1架可摧毁NOD之锤 2架可摧毁火箭筒 3架可摧毁炮塔 4架可摧毁坦克、方尖碑和“光明火炬” 6架可摧毁采集车 6架可摧毁FLARAK防空阵地(仅在射程内的单个目标) 奥卡战机不适用于攻击士兵。 战斗坦克: 应注意防范Rak Zeros、炮塔、NOD摩托和方尖碑。 与士兵作战时,发射一发炮弹,士兵会卧倒在地,此时可以直接碾压他们,NOD摩托也可以被碾压。作为基础防御,应始终将其放置在瞭望塔后方,以弥补射程较短的问题。 一旦拥有猛犸象,除士兵外的所有敌方单位以及除方尖碑外的防御设施都不再构成实质威胁。 需要为猛犸象配备士兵作为护卫。猛犸象能够自我修复,因此当拥有多只时,应始终将受损的猛犸象排在队列后方。


《命令与征服:重制版》基础玩法技巧 《命令与征服:重制版》基础技巧与窍门 时隔多年,《命令与征服:重制版》终于发布了!作为一名忠实的《命令与征服》粉丝,我非常喜欢这个系列,也很感激它带我进入了即时战略(RTS)游戏 genre。 以下是一些基础热键和技巧,助你成为更优秀的玩家。通用热键 Esc:暂停菜单 Ctrl +(1-9及0):创建所选单位的编队(感谢@Nyerguds) 1-9及0:选择编队 Tab:镜头切换至最近事件 Space:切换经典与重制版画面 H:镜头切换至建造场 W、E、R、T:选择侧边栏标签页 A:选择屏幕上可见的所有单位 Ctrl + A:选择全地图所有单位 战斗热键 G:所选单位将守卫该区域 S:停止所选单位的行动 X:分散所选单位(用于躲避试图碾压步兵的重型载具) Ctrl + 左键:强制攻击,光标变为攻击图标(用于攻击桥梁或民用建筑) Alt + 左键:强制移动,光标变为移动图标(用于重型载具碾压)步兵单位)Ctrl + Alt +左键:光标变为黄色移动图标,选中的单位将守卫特定地点或单位/建筑。 基础提示 1) 你可以按住左键并拖动方框框选一组单位,而不是逐个点击它们。 2) 有些单位的射程比其他单位更远。例如,某些侦察单位,如越野车/侦察摩托车/悍马/装甲运兵车,拥有比普通步兵更远的视野范围。建议使用它们来清除地图迷雾。 3) 强制攻击(Ctrl +左键)对于防守某些关键位置非常有用,例如桥梁或狭窄山谷。你也可以摧毁桥梁(仅适用于《红色警戒》)来阻断敌人的路线。 4) 当你拥有过多泰伯利亚矿石时,需要建造矿仓来储存多余的泰伯利亚,否则将无法产生任何资金。或者,你可以建造另一个泰伯利亚精炼厂,它会提供额外的采集车并能储存多余的泰伯利亚。 5) 当你的矿仓被泰伯利亚填满且无法获得额外资金时,建造一个造价高且建造速度快的建筑(例如直升机停机坪),一旦开始建造,右键点击取消。你会收回资金,同时释放矿仓空间。 6) 建议使用【警戒】功能,以防止对手引诱你的部队。或者,你可以按下【s】键来阻止单位在敌人撤退时继续追击。 7) 需要视野吗?想在悬崖上获得额外优势但讨厌的树木挡住了视线?使用强制攻击(Ctrl+左键点击)摧毁它们! 8) 有些任务可能很困难,因此保存/加载功能会是你最好的朋友。 以上就是目前的全部内容,这只是一个非常基础的入门指南。我会尽力随着时间推移更新更多内容。 欢迎回来,指挥官! 更新日期:2022年2月3日
视频: 我以前在PSX上用这个技巧在地图上布满基地和很酷的场景 步骤概述:基本上选择苏联,将资金设置为2000,但要确保AI本身不是苏联。由于AI的建造顺序,它们会建造两座发电厂,然后就没钱建造精炼厂了。这样它们就会陷入停滞。 你可以用切断AI所有资金并摧毁其大部分基地等困难方法来禁用AI,但这个方法能确保你获得整张地图上所有的矿石和宝石。 对AI的遭遇战胜利成就: Destroy the Robot Overlords 5胜 Befriend the Robot Overlords 10胜 使用视频中的地图,每次运行应该只需约2分钟,但任何1v1地图都适用。我发现视频里的那张地图是最简单的,因为能快速获取宝石,不到30分钟就能轻松搞定。 建造X单位成就:使用和之前相同的战术,你可以在地图上自由行动。这个方法适用于所有地图,无论你设置多少AI都有效。 相关成就:Tanks A Lot!(500)、To the Front Lines!(1000)和Ship Happens(50)。 你可以尽情建造单位,队列上限是99。按住Shift键点击可以每次增减5个单位的队列数量,非常简单。 高焦虑成就:建造500架飞行器。 奇怪的是,支奴干直升机算作飞行器,而雌鹿直升机和长弓阿帕奇直升机却不算,所以就狂造支奴干吧。当数量达到99左右时,你将无法再生产支奴干或其他空中单位。你可以把它们全部摧毁,然后继续建造,只是一次能建造的数量有限。你也可以制造雅克战机或米格战机,然后让它们降落在维修站进行出售(任何单位只要停在维修站都能出售,即使是满载的装甲运兵车也可以)。成就C4 100 buildings:摧毁任何非敌对建筑(你自己的建筑或中立建筑)不计入此成就。我是通过完成所有“死胡同”变体任务来刷这个的。半挂机模式:建造大量的 silo(仓库)和 refinery(精炼厂),将队列设置为99,然后就可以去做其他事情了。潜艇需要移动,如果坦克无法移动,它们也会像建造米格/雅克战斗机时机场没空位一样阻塞队列。最后说明:大部分成就只要玩战役就能完成,但“High anxiety”需要专门去刷。


允许用户在不打开游戏的情况下播放音频文件。此方法会提取位于《命令与征服™ 重制版合集》文件夹中的Music.MEG文件。 如何从《命令与征服》中提取重制版音乐 1. 下载OSBIGEditor64Bits.zip 2. 将OSBIGEditor64Bits.zip解压到任意文件夹并运行bgeditor.exe 3. 在程序中选择文件-->打开--> 4. 导航至 默认安装目录 - C: Program Files (x86) Steam steamapps common CnCRemastered Data 或 游戏安装文件的自定义位置 5. 选择"MUSIC.MEG" 6. 在左侧选项卡中选择所有扩展名为".WAV"的文件 7. 将高亮文件拖放到桌面 8.提取的音乐将位于桌面名为DATA的文件夹中(具体目录为桌面DATA AUDIO MUSIC)。9. 享受重制版的地狱进行曲吧。
Guide about what happens when you infiltrate certain types of buildings with the Spy. Introduction Spies are Allied infiltration units used to gather intelligence on the enemy. Specialized in espionage, stealth, and infiltration, they cannot attack during gameplay (except on the Lunar Battlefield (Special) map) and are disguised, always appearing as rifle infantry owned by any player that sees the spy (even the spy's allies), except the owner of the spy who always sees him wearing a black suit. Their disguise is their only form of defense. Attack dogs can see/smell through their disguise, enemy vehicles can still runover them (intentionally or not) like other infantry and cautious players can still give orders to attack them. Spies can enter enemy buildings, giving you valuable (or useless) information. This guide will show the effects on infiltrating enemy buildings in general, not mission-specific events. Feel free to comment if you found an error. Infiltration effects Construction Yard Displays the structure currently being built by the enemy if the infiltrated Construction Yard is selected. Barracks Displays the infantry unit currently being trained by the enemy if the infiltrated Barracks is selected. This also includes Attack Dogs. War Factory Displays the ground vehicle currently being built by the enemy if the infiltrated Factory is selected. Naval Yard Displays the naval unit currently being built by the enemy if the infiltrated Naval Yard is selected. Submarine Pen Displays the naval unit currently being built by the enemy if the infiltrated Sub Pen is selected. Gives the Sonar Pulse ability as long as the infiltrated Sub Pen is active. Airfield Displays the aircraft currently being built by the enemy if the infiltrated Airfield is selected. This also includes Helipad units. Gives the Parabombs ability (single use, infiltrating multiple times when the current parabombs is not used will not stack). Displays the ammo bar on the aircraft landing on it if the aircraft is selected. Helicopter Pad Displays the aircraft currently being built by the enemy if the infiltrated Helipad is selected. This also includes Airfield units. Displays the ammo bar on the aircraft landing on it if the aircraft is selected. Power plant/Advanced power plant Displays current enemy power status, in the form of coloured bars if the infiltrated power plant is selected. Green - Power is sufficient Yellow - Low power Red - Very low power, power produced is below power drain by a lot Ore Refinery/Ore Silo Displays the infiltrated enemy's ore storage capacity if any of his refinery or silo is selected. Displays the infiltrated enemy's amount of credits if any of his refinery or silo is selected. You will lose access to these info if the infiltrated refinery/silo is/are lost. Fake Buildings Displays the fake status if the infiltrated fake building is selected. Radar Dome Reveals shroud on what the infiltrated enemy sees as long the infiltrated Radar Dome is not destroyed or captured. Note that the shrouds will only be cleared on moving enemy units or a newly-placed structure after the infiltration. Any structures and stationary units will not be uncovered until they move. Due to a bug, you will still retain this effect if the enemy sells the infiltrated Radar Dome. Other buildings Basically, a spy can infiltrate any building that an engineer can, including service depots, gap generators, forward command posts, research centers, churches and tech centers. Infiltrating these structures with a spy other than the buildings mentioned above will not have any effect other than mission-specific scripts if the mission has one. So, you will only be wasting your spy entering them, unless it's a mission objective or If your enemy discovered your spy and you don't want them to get a kill, you can save the spy by having him enter any building and let him Die another day. ***Also, the intel can't be seen by your allies in the original, so in the remaster, aside from the shroud clearing, I assume the intel is For your eyes only.*** Graphic Notes If you're playing on the default graphics and infiltrated the enemy's silo or refinery, the credit amount will not display if the enemy's money is 0. The enemy credit amount and power condition may always be visible without selecting if the "Resource Capacity" option is set to always show for the default graphics. But sometimes, these amount may not be accurate so you got to select the infiltrated building to "update" the info. The indicator for which structure/unit being produced by the enemy uses the DOS icon for classic graphics. Strangely, the remastered graphics use the unit/structure sprite instead during campaign missions, but they still use the build icons in multiplayer or skirmish. Differences from the original Red Alert In the original C&C Red Alert: Infiltrating enemy Ore Refinery or Ore Silos will display their credits only if the infiltrated building is selected. The remaster made it so any refinery or silo selected displays the info probably because it was sometimes pointless to infiltrate silos in the original. It is hard to read the credits amount on silos as the building is too small and couldn't fit more than 3 digits. Infiltrating Airfield does not give Parabombs (tested in v3.03 SP & MP). Infiltrating Airfield or Helipad does not display the ammo bar of the aircraft landed on it. The "Spy Info" is available (a page that displays the infiltrated enemy's number of infantry, vehicles and structures currently on the field) when their Radar Dome is infiltrated and the player has his own Radar Dome or online GPS. This feature is completely missing in the remaster.
Anyone who has messed with scripting in Tiberian Dawn, and has done some slightly non-standard things, has probably wondered at some point or another why their triggers did not work as expected. Well, I dove into the code so you wouldn't have to. Preface: the Inconsistency of Triggers. Anyone who has messed with mission scripting in Tiberian Dawn before, and who has done some slightly non-standard things like using more Houses than just GDI, Nod, and Neutral, has probably wondered at some point or another why a trigger they put in the mission did not work as expected, or, in some cases, even crashed the game. And, while I dug into triggers before, and in fact have an old document circulating with my name on it[cnc.fandom.com] that claims to know all about these things, I must admit that I'm still very often wrong in my notions on how they work. Especially the role of the "House" on a trigger has been the subject of much debate. So, one day, when I got involved in a conversation on Discord where some people were messing with these triggers, and it devolved from experimentation to guessing, philosophizing and generally getting annoyed at them, my good friend Kilkakon pointed out that we were all being silly, and should just look at the one place that explains everything: the source code. The discoveries that were made that day were baffling, confounding, and occasionally hair-raising. My previous notion that the House was a restriction on who could activate a trigger turned out to only apply to Celltriggers. The configured House is apparently frequently used for both the Event and the Action, often causing insane conflicts and never-working triggers. Two trigger Actions as similar in effect as Production and Autocreate turn out to be handled completely differently depending on what causes them. And the list goes on... Notes: The word "House", in context of C&C scripting, refers to a player side. The name is a leftover of Dune II, where noble families were the involved factions. In TD, they are GoodGuy (GDI), BadGuy (Nod), Neutral (civilians), Special (dinosaurs), and Multi1-Multi6 for multiplayer purposes. All of these can be used in singleplayer missions, though if you try to set anything except GDI or Nod as player faction the game will probably crash when the mission is won. In this article, "Player" refers specifically to the current human player's House. This is important, since trigger handling will sometimes use the linked House, and sometimes use the player's House. The "Loop" status of the triggers is a very ambiguously-named thing. Internally it's called "persistence". This word doesn't refer to the loop-status at all, but instead to when the trigger will be removed from memory:"Volatile", indicated in the stock editor as "None", indicates those will trigger only once, execute their Action, and then disappear from game memory. "Semi-persistent", indicated as "AND", stay alive until all triggered, and then execute their Action once and disappear. "Persistent", indicated as "OR", are true looping triggers, that execute their Action on each triggering and remain active forever (unless specifically destroyed via a "dstry trigger" Action).For some reason, these things are called differently in Red Alert, where it's named "Type", with values "Temporary", "Semi-Constant" and "Constant". They mean exactly the same thing, though. I've been working on an updated version of the map editor included in the C&C Remaster. This contains a trigger check function that scans the more common pitfalls you can encounter with these triggers. You can check it out here: https://github.com/Nyerguds/MobiusMapEditor/ See the README.MD document for install and usage instructions. The downloads are in the "Releases" section.[github.com] In this version, I also migrated the names of the Loop stuff to a completely unambiguous list indicated as "Executes" with values "On first triggering", "When all linked objects are triggered", and "On each triggering". Events, and Where They Come From Each Event can come from three different sources: Cell: will come from a Celltrigger Object: will come from a pre-placed unit or structure on the map that has the trigger linked to it. House: will come from neither, and will be seen as owned by the House in the trigger. Will not work if "House" is set to None, since the function that checks these is the one that processes general House-related functions.Some events can come from multiple of these, depending on how they're configured and what they are linked to. -Event: Player Enters From Cell: a cell is entered by a non-cloaked unit of the trigger's House. From Object: a linked object on the map is captured, regardless of by whom.In practice, for the second case, the "object" in question will always be a structure. Units can technically be captured when docked to a Repair Facility, and this will in fact trigger a "Player Enters" event, but in reality there's no way to make an AI unit do that. Some elaborate scenario could be set up to have you deliver a unit to a repair pad and then make an AI capture it, though that sounds pretty convoluted to me. AI helicopters do go to the Repair Facility to get repaired, and can be captured on their pad, too, but those can't be put on the map in a way a trigger is attached to them. Note that according to the source code, a "Player Enters" trigger with its House set to "None" will automatically substitute that with the player's House. However, there must be some bug involved in this, because in practice, making a "Player Enters" trigger with House "none" will crash the game when starting the mission. So even if the trigger is meant to detect a building being captured, make sure to attach a House to it. -Event: Discovered From Object: a linked object on the map owned by a different House than the Player is discovered by the Player. -Event: Attacked From Object: a linked object on the map is attacked, regardless of by whom. The set 'House' does not affect this. This will only trigger if actual damage is done. From House: any structure of the House set in the trigger is attacked, regardless of by whom. This works without the trigger being attached to anything. However, this event is only ever fired for the player's House.These are actually treated as two different Events: "Object Attacked" and "House Attacked". An Object Attacked trigger should never have a House set, and a House Attacked one should never be linked to any map objects, otherwise, strange behaviour will occur. In fact, since the House version only works for the player, the second event is really "Any player building is attacked". Though, you do need to set the trigger House to the player's House for it to function. The "Attacked" trigger is the only type that works from Terrain objects like trees. As mentioned, though, it does not trigger unless the object actually takes damage, meaning it is useless to put such a trigger on damage-immune objects like the rocks or tree clumps. Note that the default map editor shipped with the Remastered doesn't save triggers on Terrain objects, and will in fact wipe them when re-saving a mission. The updated map editor which I've been working on[github.com] fixes this issue (and many, many others). -Event: Destroyed From Object: a linked object on the map is destroyed, regardless of by whom.A Destroyed trigger should never have a House set, since that will add the trigger to the House's "House triggers" list, and nothing can activate it there. This means such triggers with their repeat status set to "AND" (execute trigger when all linked objects are triggered) will be unable to clear all instances of the trigger, causing it to never fire. This action does not affect Terrain types (like trees), since the code that triggers the event is only implemented on the level of House-owned objects. -Event: Any From Object: any action is performed on a linked object on the map, regardless of by whom.This is a special case, normally only used on "Cap=Win/Des=Lose". If used with any other Action, the Action will trigger from the moment any kind of triggerable event happens to the object. -Event: House Discov. From House: any unit or structure belonging to this House is discovered by the Player. -Event: Units Destr. From House: all units of the specified House are destroyed.This check excludes Gunboats, Transport Helicopters, delivery planes, and airstrike planes. -Event: Bldgs Destr. From House: All structures of the specified House are destroyed. -Event: All Destr. From House: All units and structures of the specified House are destroyed.Again, this check excludes Gunboats, Transport Helicopters, delivery planes, and airstrike planes. -Event: Credits From House: credits of the specified House increased to the specified amount.This one is a bit unintuitive, because it only counts cash money, not harvested tiberium. So this includes starting credits, money from sold buildings or units, from cancelled constructions, and from crates. This is probably a bug, since Dune II contained missions of the "harvest to X credits" type, but Dune II did not have the cash/silo separation. -Event: Time From House: a certain amount of time has passed. The time unit is 1/10th of a minute on Moderate game speed.Code exists to trigger this from map objects, but it is never used, since the House AI function is the only place that checks time. This is a pity, since it would've been an easy way to make timed triggers that can be cancelled by destroying an object. Time triggers can apparently work without a House configured, but since all handling of time triggers is handled in the House AI function, and House triggers are specifically put in a list per House, I have no idea why or how this works. -Event: # Bldgs Dstr. From House: a certain amount of buildings of the specified House are destroyed. Looping is broken for this Event; if the trigger is set to loop, rather than executing after every X destroyed structures, it will constantly detect that the given number was already reached, and will execute the resulting Action at every single game tick. -Event: # Units Dstr. From House: a certain amount of units of the specified House are destroyed. Looping is broken for this Event; if the trigger is set to loop, rather than executing after every X destroyed units, it will constantly detect that the given number was already reached, and will execute the resulting Action at every single game tick. -Event: No Factories From House: the specified House does not own any Weapons Factories, Airstrips, Barracks or Hands of Nod. -Event: Civ. Evac. From House: a non-technician civilian has been evacuated with a Transport Helicopter owned by this House.This trigger event can only be used once in a mission, since the "IsCivEvacuated" status on the House does not reset. -Event: Built It From House: the specified House has constructed a specific building.If set to repeat, this will trigger every time a building of that type is built. Discovering player-owned buildings previously hidden under the shroud counts as "Built it" event. Acquiring a building by capturing it from the enemy, however, does not. This is one rare case where the information saved in the ini file is not completely human-readable; since the data part of the trigger is numeric, the building is specified by its internal ID number. The ID of a building is its index in this list[github.com], starting at 0 for the Weapons Factory. Actions, and What They (Really) Do Now, on to the real beef: the Actions. A lot are origin-independent, while others act very differently depending on the source of the activation. -Action: Win Origin-independent. The Player is flagged to win, meaning they will win as soon as any blockages from "Allow Win" triggers are cleared. -Action: Lose Origin-independent. The Player loses. -Action: Production From Cell: if Player is Goodguy then Badguy begins production; if Player is any other house, then Goodguy begins production. From Object: The House set in the trigger begins Production. From House: The House set in the trigger begins Production.The inconsistency between this and Autocreate actually caused a crash in the original game, since a trigger in Nod mission 13A that tries to enable Production when two Guard Towers are Discovered is lacking its House. Whoever made the mission probably assumed the House would be taken from the linked object, as it works on Autocreate triggers linked to map objects. -Action: Create Team Origin-independent. A Team of the linked Teamtype is created from units available on the map. A common misconception about this Action is that it would directly make the AI produce units. This is not true; the "creation" of a Team does not refer to building the units, but to grouping them together into a team that executes the orders specified in the Teamtype. The "Max Allowed" option on the Teamtype definition is actually what causes the House to hold the necessary units for creating the team in reserve, and produce more of them if needed. -Action: Dstry Teams Origin-independent. All active teams of the linked Teamtype will disband, meaning their units will stop acting as team. This does not destroy the units. It also doesn't prevent the future creation of more teams of this type. -Action: All to Hunt Origin-independent. All non-Player-owned vehicles and infantry on the map are detached from any teams they're in, and have their orders set to "Hunt". This includes disconnecting harvesters from their harvesting routine and making them go on a soldier-crushing spree. It's possible that units that are docked/loaded inside other objects in a way they do not physically exist in the map at the moment the trigger is fired (like units inside an APC or delivery plane, or harvesters docked for unloading) are unaffected by this. -Action: Reinforce. Origin-independent. A Team of the linked Teamtype is reinforced from the map border depending on the Edge setting of the House set in the Teamtype. If you're editing the ini file manually, mind the dot at the end of this trigger Action; it won't work without it. The presence of the dot probably means the name is an abbreviation of "Reinforcements", despite "Reinforce" working perfectly as verb in this context. -Action: DZ at 'Z' Origin-independent. An area with a radius of 4 cells around Waypoint 25 is revealed to the Player. A yellow/green smoke signal is shown at that location, unless the waypoint is placed on a building. The full unabbreviated name of this Action would be "Drop Zone at waypoint 'Z'". Waypoints were indicated by alphabet letters in Westwood's internal editor, which made the one on (0-based) index 25 end up as 'Z'. -Action: Airstrike From Cell: The House set in the Trigger gets permanent Airstrike superweapon ability. If the linked House is the Player, it is made immediately ready to use. From Object: The Player gets permanent Airstrike superweapon ability, immediately ready to use. From House: The Player gets permanent Airstrike superweapon ability. If the House is the player, it's also immediately ready to use. However, if the set House is not the Player, the code to actually add it to the sidebar isn't executed, so it doesn't work at all.Somehow, they managed to make this do three slightly different things. I'm assuming that AI houses getting the Airstrike superweapon ability through cell triggers is a bug, but it works. -Action: Nuclear Missile Origin-independent. Enables a one-time nuclear strike for BadGuy, and immediately charges it. This has no effect if BadGuy does not own a Temple of Nod, since it is required for firing it. The AI will immediately fire this when it is made available to them. The Player will not receive this if they have already fired a nuke before in this mission, but if they have a Nuke that's still charging, this will immediately make it ready to use. -Action: Ion Cannon Origin-independent. Enables a one-time Ion Cannon strike for GoodGuy, and immediately charges it. This should have no effect if GoodGuy does not own an Advanced Communications Center, but the reality is different. The AI ignores this fact, and simply immediately fires it when it is made available to them. For the player, the situation is a bit more problematic; they get an "Ion Cannon Ready" notification, but the Ion Cannon is not added to the sidebar, which permanently breaks the Ion Cannon ability, even if the player does get an Advanced Communications Center later. If the Player already has the Ion Cannon, the "one-time" aspect of this is ignored, and it just acts as an instant recharge. -Action: Dstry Trig 'XXXX' / 'YYYY' / 'ZZZZ' Origin-independent. These three triggers have one simple effect: they destroy the trigger with that name. Only triggers with these three specific names can be destroyed with triggers. The unofficial C&C95 v1.06 patch adds three extra "Dstry Trig" actions to the game, to remove triggers called 'UUUU', 'VVVV' and 'WWWW', but these are not supported by the remaster without additional modding. -Action: Autocreate From Cell: All Houses starts randomly creating attack teams. From Object: The House the object belongs to starts randomly creating attack teams. From House: The House set in the Trigger starts randomly creating attack teams.Teamtypes have an "Autocreate" flag which determines that they can be used for these random attack teams. However, the actual amount of Autocreate teams that the AI considers for construction is limited to 1/3rd of the mission's Build Level, rounded up. On top of that, the specific choice of which of the available teamtypes it selects for construction is, bizarrely, dependent on which units are already on the map; the game will prefer to build certain teams if units of that teamtype already exist. So to have completely predictable behaviour, don't make more Autocreate teams than ((BuildLevel-1)/3)+1. -Action: Cap=Win/Des=Lose From Object: if the object is destroyed, the player loses. If the object is captured, no matter by whom, the player wins.This is normally linked to the "Any" event, since it is the only one that has an Events check inside the Action, so it does the event filtering too to only respond to the two specified ones. If used with a "Player Enters" event, it just act as the Win action without the Lose part. (Note that you must add a House or this will crash; see the "Player Enters" section.) Using "Destroyed" makes you lose when the building is destroyed, but doesn't allow you to capture it without losing, since capturing will eventually send a Destroyed event too. Setting the trigger's Persistence state to Semi-persistent ('And' loop / "when all triggered", in the editor; ini value 1) doesn't work at all, and just makes it do nothing. Note that in the C&C Remastered Collection, any structure that has a trigger with this Action attached to it will automatically become capturable (see "Neat Tricks" below). -Action: Allow Win Origin-independent. The House set in the trigger is only allowed to win after this is triggered. This quirk has some unfortunate side effects, discussed further below. This Action actually does the exact opposite of what its name implies, namely, it prevents you from winning until it's triggered. Each "Allow Win" trigger puts a "blocker" on the House set in the trigger, which relates directly to the "persistence" discussed above; any trigger which is sprung, and is not permanent, is removed from memory, and only at that point will the "blocker" be gone. So you have to be very careful to ensure that all Allow Win triggers can not only be triggered, but in fact triggered in a way they are 'depleted' and thus removed. Because "Allow Win" adds a blocker to winning, it is the only type of trigger that can be "activated" by using a "Dstry Trig" action to remove the trigger. Just like activating the trigger will remove it from memory, so will destroying it, so the effect is the same. Problems, so you can Avoid Them So, as you can see, there are some really messy things in there. And, pretty much all of them are due to both the Event and the Action using the House set in the trigger. Here's some examples: -Problem: Player Enters (cell) -> Airstrike Create a celltrigger setup triggered by an AI that is supposed to give the player the Airstrike, and you see it won't work. Worse; after a while, the AI will start performing periodic airstrikes. Because in the case of celltriggers, the House set in the trigger gets the Airstrike ability. So, yes, this little gem will permanently enable the Airstrike ability on an AI House. Since this is actually the Airstrike superweapon, and not the classic reinforced A-10s used in the Nod campaign, it will use a different targeting logic, which only targets structures. AI Airstrikes are normally done with a looped "Reinforce." trigger sending in a Team of A10s, since that setup can be interrupted by destroying the trigger. Since this is the actual superweapon permanently given to the House, and not just a looped trigger with a one-time superweapon or reinforcement, it is impossible to disable this type of Airstrike with later triggers. -Problem: Attacked -> Autocreate "Attacked" are actually two different triggers; one set on a House, and one set on map objects. If the House is set to anything other than 'None' though, and the trigger is also attached to map objects, possibly of different Houses, things start getting understandably weird. It will get triggered both from the linked objects, and from the House having a structure attacked. Which only works for the Player, on which Autocreate is technically useless. And depending on the Persistence (the "loop" status, in the map editor), one of three things will happen in terms of the Autocreate: Volatile (no loop; 0; when first triggered): One of the linked objects, or a structure of the owning House (if it is the Player), must be attacked. The House of the first triggered object will get its Autocreate enabled. The others won't. Semi-persistent ('And' loop; 1; when all triggered): The linked objects, and a structure of the owning House, must be attacked. The House of the last triggered object will get its Autocreate enabled. The others won't. If the configured House is not the Player, it can never be triggered, and the "and" condition can never be satisfied, meaning the trigger will never fire. Persistent ('Or' loop; 2; on each triggering): Whenever one of the linked objects is attacked, or when a structure of the House in the trigger is attacked (again, only if it is the Player), its owner will get its Autocreate enabled. All Houses can eventually get activated with this setup.So, wait, does that mean that one single trigger might actually affect a different House, purely depending on what the player attacks first? Yes, yes indeed. And the others are just left in the dust, trigger spent, never getting their precious Autocreate. -Problem: All Destr. -> Allow Win You might be tempted to use the Multi-Houses or House Special to add extra enemies for your player to destroy, and only let the player win after they are all destroyed. Sadly, "Allow Win" can never do this: because it stores its "win-blockers" in the House that is linked in the trigger, it has to be linked to the Player House, or it won't function at all. A viable workaround for this is to make a dummy "Allow Win" trigger linked to your House with an event that can never be triggered ("None" is the simplest one), call it XXXX, YYYY or ZZZZ, and then use the corresponding "Dstry Trig" trigger to remove that trigger, and thus the blockage, without the House limitation. This does force you to sacrifice one of your three precious destroyable triggers. There is a somewhat more advanced trigger setup you can also use to get around it. See the "Neat Tricks" section for more on that. -Problem: Discovered -> Dstry Trig 'XXXX' So, you want to make a trigger that deactivates a lose condition on a small squad after you discovered your base? Well, you're going to have to find a different way than "Discovered"; it only triggers when you discover a building of a different House. A valid substitute is the "Built it" event, linked to one of the actual building types you will discover; discovering a building you own counts as building it. Neat tricks There are some interesting things hidden in the game engine, which are not immediately apparent, but which are really handy to use in scripting. This list will be updated as I find more of these. -Trick: Prevent AI selling When the AI fails to repair a damaged building due to lack of funds, it will normally sell that building. However, it will never sell a building that has a trigger attached to it. This means that you can prevent selling of specific structures (like a Construction Yard or Refinery) by attaching a trigger to them, even if the trigger does nothing at all. A trigger can perfectly be created with Event "None", to prevent activation, and then used as dummy to prevent selling. -Trick: Make a building capturable In the original game, the Advanced Communications Center was technically set as Capturable so it could be captured in Nod mission 12. The system blocking you from normally giving that Capture order to an Engineer in all other missions was in the mouse cursor evaluating function; the part of the game that picks the context-sensitive order depending on what you have selected and what you're hovering your cursor over. However, this special code was only active in singleplayer, meaning the building was perfectly capturable in multiplayer. To make things worse, the AI doesn't use that function at all, meaning AI engineers could still perfectly capture it, and you would be unable to capture it back. The way this was fixed in the Remaster is beautiful. Elegant. And quite exploitable. Any building is considered capturable if it has a "Cap=Win/Des=Lose" trigger attached to it, which makes sense, since that makes it a specific capture target. This opens up a huge range of possibilities in using special buildings as capture targets. You can even ignore the actual "Cap=Win/Des=Lose" trigger simply by setting the trigger's Event to "None". Unfortunately, if you do that, there isn't much more you can do with it. You can't attach further triggers to the building, and unfortunately, since "Built it" doesn't trigger on captured buildings, there is ironically no way to check whether the building was captured or destroyed. The only normally uncapturable buildings that give any interesting effect are the superweapon buildings, and those don't work for the opposing House, so outside a "recapture your superweapon" mission, the captured building is bound to be fairly useless, except perhaps as expansion point to build from, or maybe in a mission situation where you need to capture enemy base defenses in order to accomplish a vital objective in the mission. Side note: the C&C95 v1.06 fan-patch has its own system for fixing the problematic capturability issue, namely that you can put a little rules-like section into the mission file that determines a building to be capturable, like this: [BIO] Capturable=true So if you indeed put a Cap=Win/Des=Lose trigger on something normally uncapturable, to ensure compatibility with both the remaster and the fan-patched version of the classic game, you can add that into the ini. The editor I've been upgrading has a section to allow you to add such custom ini stuff. -Trick: Give a player money When you reinforce a C17 plane carrying a unit to a House that owns an Airstrip, the C17 will drop off the unit at the airstrip. That, in itself, is already a pretty cool scripting trick. However, when you try to deliver more than one unit this way, an interesting limitation comes to light: the C17 can only drop off one single unit, and for any others in the team, their cost gets refunded to the player. And if the player does not have an Airstrip at all, the full combined cost of all the sent units gets refunded. This means you can very accurately determine, from the costs of the combined units, how much money you send to a player. There is a dangerous bug in this technique, though. I haven't tested this on the Remaster, but when this kind of trigger setup was applied on the original game, it occasionally caused the C17 to rampage around the map like an Airstrike. Its weapon is set to index "-1" on the weapons list to indicate it is empty, but rather than seeing this as "no weapon", the game actually reads whatever happens to be at that location in front of the real weapons list, and uses a weapon composed of that junk data to attack stuff. When this was originally researched, a workaround for this bug was discovered; apparently, giving an "Unload:0" order to the team would prevent the rampaging. This might be related to the fact the code erroneously sets a timeout on the "Unload" order that's equal to the targeted waypoint, which, for value 0, might make the team abort what it is doing if it doesn't have any specific orders. However, this behaviour is not fully tested, and might not be 100% reliable. In Kilkakon's C&C95 mod, where the money-giving technique is used extensively in missions, we ended up hacking into the exe to ensure all data on the "-1" weapon spot was zeroes, so any potential C17 rampaging would be done with a weapon dealing no damage. Another bug related to this is the "bit mask overflow"; existence of buildings is checked as bit mask in the code, which, in a 32-bit program, has the annoying side effect that one value can only go up to 32 bits. This causes the system to "wrap around" on higher building IDs, causing odd bugs like making the Wheat Field (civilian building "V14", with ID 36) act like the Communications Center (the remainder when dividing 36 by 32 is 4, the ID of the Comm Center), giving the player both the construction options unlocked by the Comm Center, and the radar minimap. Likewise, "V31", the Witch Doctor's Hut in Desert theater, matches the Advanced Comm Center, and thus, in addition to the radar ability, the Witch Doctor appears to be the proud owner of a personal clandestine Ion Cannon uplink. And the large Desert theater Village Well, "V30", would be a nuke silo, were it not that the nuke requires an actual Temple of Nod to be launched from. So, how does this bug relate to the C17 trick? Well, the code to look for an Airstrip actually searches for a valid docking target on the map, so there's no issue there. However, the code to abort the search for such a target only uses the bit mask. This means that if the receiving House owns civilian building "V21", which is "Abdul's House" in Desert theater, the plane will never leave the map, and the money will never be given. The C17 reinforcing and money-giving techniques were originally researched by Lin Kuei Ominae, a Tiberian Sun modding veteran who likes to mess with DOS C&C. Further research was conducted by Kilkakon, as he made extensive use of the money-giving technique in his "Dawn of Tomorrow" mod for C&C95. -Trick: Multiple Actions from single Event / Action after multiple Events An interesting application of the C17 money adding is that it is the correct kind of money that can be checked with the "Credits" checking event. The general setup of this trick is to have an action that triggers a C17 reinforcement containing a single unit, to some multiplayer-House that is 100% unused on the map, and then give that House triggers to check if a certain amount of credits is reached. To completely eliminate any potential for the rampaging C17 bug in this case, you can simply make sure that the "money bag" House is allied to everyone else on the map. This gives some interesting scripting possibilities akin to the "Globals" system in Red Alert's triggers, to trigger multiple actions from one event; you can perfectly create multiple triggers checking for the same amount of credits, and let them each execute a different Action. Likewise, you can make several different triggers each add more money to the same House, to build up to a specific value that will trigger a single Action. Unlike with normal looped triggers set to execute after all linked objects are triggered, this setup can use input from several completely different triggers. And, as mentioned, it can trigger multiple Events too. One of the uses of this trick is to solve the "defeat multiple houses" problem without the need to use up any of the destroyable triggers; instead of an "Allow Win" trigger linked to the destruction of multiple Houses, which, as mentioned, doesn't work, you can make the destruction of each House trigger such a C17 reinforcement containing a single minigunner, to such a money-bag House. And then, you can give that House a trigger to check if 300 credits are reached, so that after three enemy Houses are destroyed, the Win condition is triggered. Note that there is one big limitation to this system: since the money checking is done on an unused extra House, it can't be used to trigger House-specific actions like Production, Airstrike or Autocreate on the Houses that are actually present and used on the map. However, workarounds for such things can be devised, such as reinforcing a unit for that House and making it move over a celltrigger.


Tanks. Legendary vehicles of destruction, especially in the world of Command & Conquer. Check out this data I put together and learn which tank offers the most cost efficient way to annihilate your enemy. Introduction Welcome to my analysis of the four main tanks of Red Alert! It's pretty easy to see which tank is the strongest on the battlefield, but this strength comes at a high price! Now you should ask yourself: Which tank offers the best performance for the money? This is the question I wanted to answer. Why did I only include four units, and tanks only? I originally wanted to list all available units, but I quickly came to the conclusion that there isn't much use in that. Comparing all units is like comparing apples with oranges because there are different kinds of armour (none, light and heavy) and different types of damage (normal, armour piercing, high explosive, tesla). It is very difficult to find a way to include all of these aspects. Those four tanks are most comparable because they all share the same armour and damage type. Also, all of them are likely to be built frequently and can be used as the backbone of your army. Tank Data These are the raw statistics for the Light, Medium, Heavy and Mammoth Tank, taken from the game files and calculated according to the country-specific bonuses (see below). I have included the unit price, the attack strength, weapon cooldown, damage per frame, hitpoints, speed, attack range and sight range. I did not list unit build time because it correlates with the price anyway and I didn't want it to be counted twice. UnitCostAtkCool- down*DPFHPSpeedAtk R.Sight R.Light Tank70025400,63300944Light Tank (G)70027,5400,69300944Light Tank (F)70025360,69300944Light Tank (GB)70025400,63330944Light Tank (Gr)70025400,6330094,44Medium Tank80030500,6040084,755Medium Tank (G)80033500,6640084,755Medium Tank (F)80030450,6740084,755Medium Tank (GB)80030500,6044084,755Medium Tank (Gr)80030500,6040085,235Heavy Tank95060700,8640074,755Heavy Tank (USSR)85560700,8640074,755Heavy Tank (Ukr)95060700,864007,74,755Mammoth Tank170080801,0060044,756Mammoth Tank (USSR)153080801,0060044,756Mammoth Tank (Ukr)170080801,006004,44,756 * in Frames Country-specific Bonuses:Germany+10% AtkFrance-10% CooldownGreat Britain+10% HPGreece+10% Atk R.USSR-10% CostUkraine+10% Speed Scoring As a next step, I have calculated a score value based on all performance parameters (see below for the formula). The score shows the aggregated power of the unit. The efficiency value finally takes the unit price into account. UnitScoreEfficiencyRankLight Tank26,253,755Light Tank (G)26,883,842Light Tank (F)26,943,851Light Tank (GB)26,553,794Light Tank (Gr)26,653,813Medium Tank27,753,4710Medium Tank (G)28,353,547Medium Tank (F)28,423,556Medium Tank (GB)28,153,529Medium Tank (Gr)28,233,538Heavy Tank29,323,0913Heavy Tank (USSR)29,323,4311Heavy Tank (Ukr)30,023,1612Mammoth Tank30,751,8116Mammoth Tank (USSR)30,752,0114Mammoth Tank (Ukr)31,151,8315 Calculation: DPF (Damage per Frame) = Atk/Cooldown Score = (DPF*10)+(HP/100)+Speed+Atk R.+Sight R. Efficiency = (Score/Cost)*100 Rank = most efficient to least efficient Conclusions Now, what can be said about these results? The bigger the tank, the less cost efficient it is. According to this analysis, the French Light Tank offers the best performance for its price. The French bonus has the biggest impact in the effeciency rating overall. This can be explained with a simple example: Compare two French Light Tanks with one Russian Mammoth Tank. For 1400$ you get two fast-moving LTs with the equivalent of 600 hitpoints and an accumulated DPF of 1,38. On the other side, you need to pay 1530$ for one slow-moving tank with the same 600 hitpoints and a DPF of 1,00. Am I saying two French LTs can destroy a Mammoth Tank in a 1 vs 2 battle? Certainly not, because the Mammoth would destroy one of the LTs which would cause a damage falloff on the Allied side. Also, the Mammoth would start regenerating once its below 50% hitpoints. The Greek Medium Tank outranges every other tank with its cannon. The French Light Tank is the fastest shooter. Both the Ukrainian and the Russian Heavy Tank are able to make up for one lacking feature compared to the Medium Tank. Either the price or the movement speed. Interestingly, the Soviet Heavy Tank has exactly the same amount of hitpoints as the Allied Medium Tank. It does pack a bigger punch with its dual cannon, though. Despite the decent hitpoint pool of the Soviet tanks, it is difficult to get them repaired if they are losing the battle. They are usually too slow to get them back to safety once the enemy starts to overwhelm them and Soviet commanders don't have a unit to perform field repairs. This results in a total loss of valuable units. WARNING: These results should be taken with a grain of salt for a number of reasons: The Mammoth Tank, which gets the lowest efficiency rank of all, does have some extras which are special and were not taken into account here: it heals itself up to 50% for free and can attack both infantry and aircraft with powerful rockets. Due to this, one needs to add some extra points for its rating. Both Soviet tanks seem to be less efficient compared to their Allied counterparts. But on the other handside, they focus more power in a single unit. This can be very advantageous in constrained areas. With the relatively weak pathfinding in the game, attacking with a horde of weaker units can be awkward. Masses of units can only play out their strengths in large, open areas where they can tear apart their enemies like a wolf pack. For reasons explained above, I did only analyse four units. However, the two factions consist of many, many more units plus unique defensive buildings. Therefore, winning or losing depends on more than just the cost efficiency of two units. Ultimately, you should always choose the faction which you like most or which fits your playstyle best. Having fun playing is most important! Thanks for reading my guide. Please consider giving it a thumbs up if you liked it. Thank you! PS: If you think my calculation is wrong, feel free to leave me a message in the comments!