换一换
换一换 


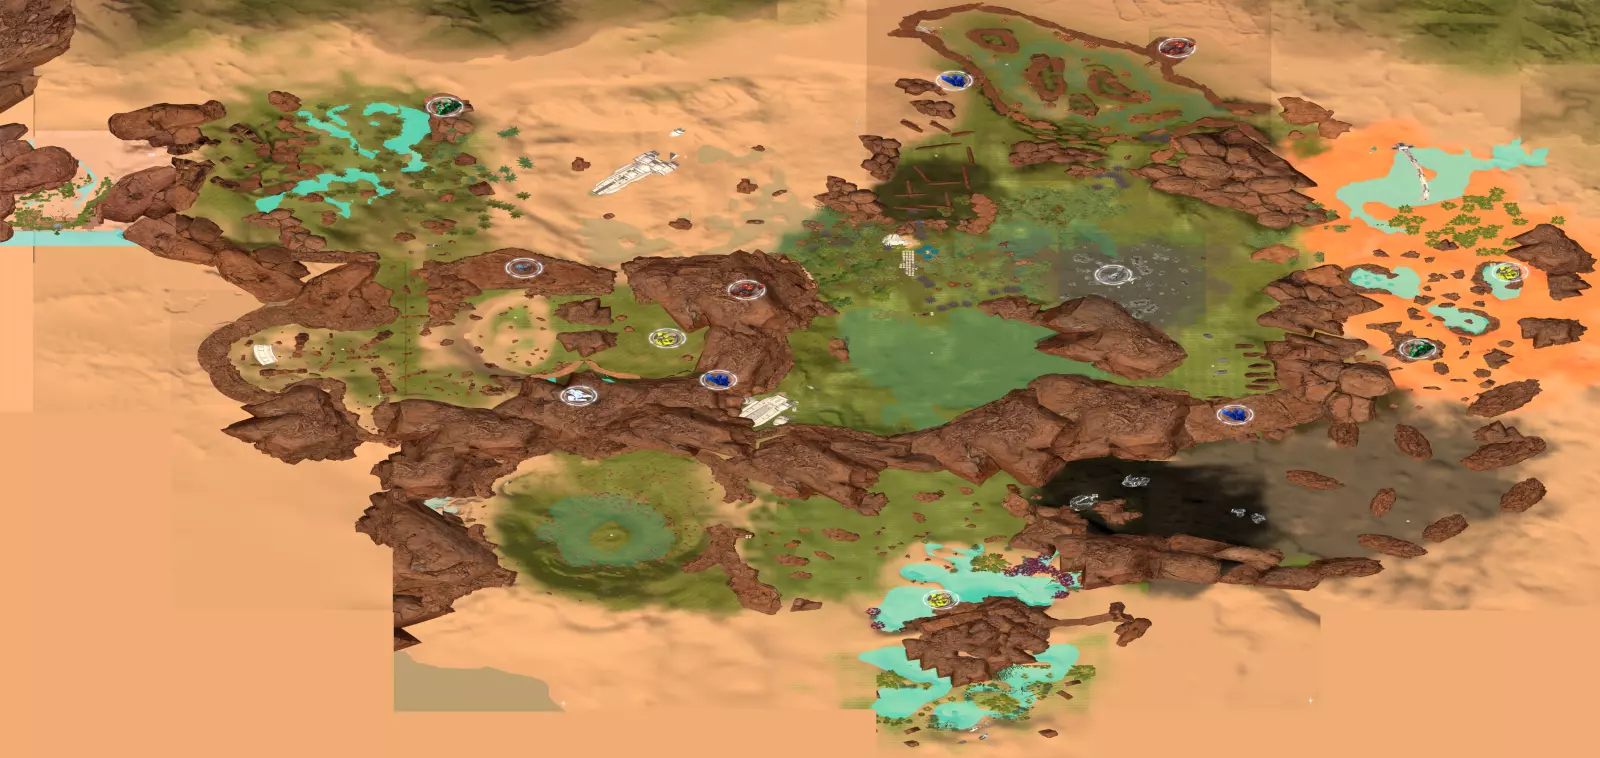
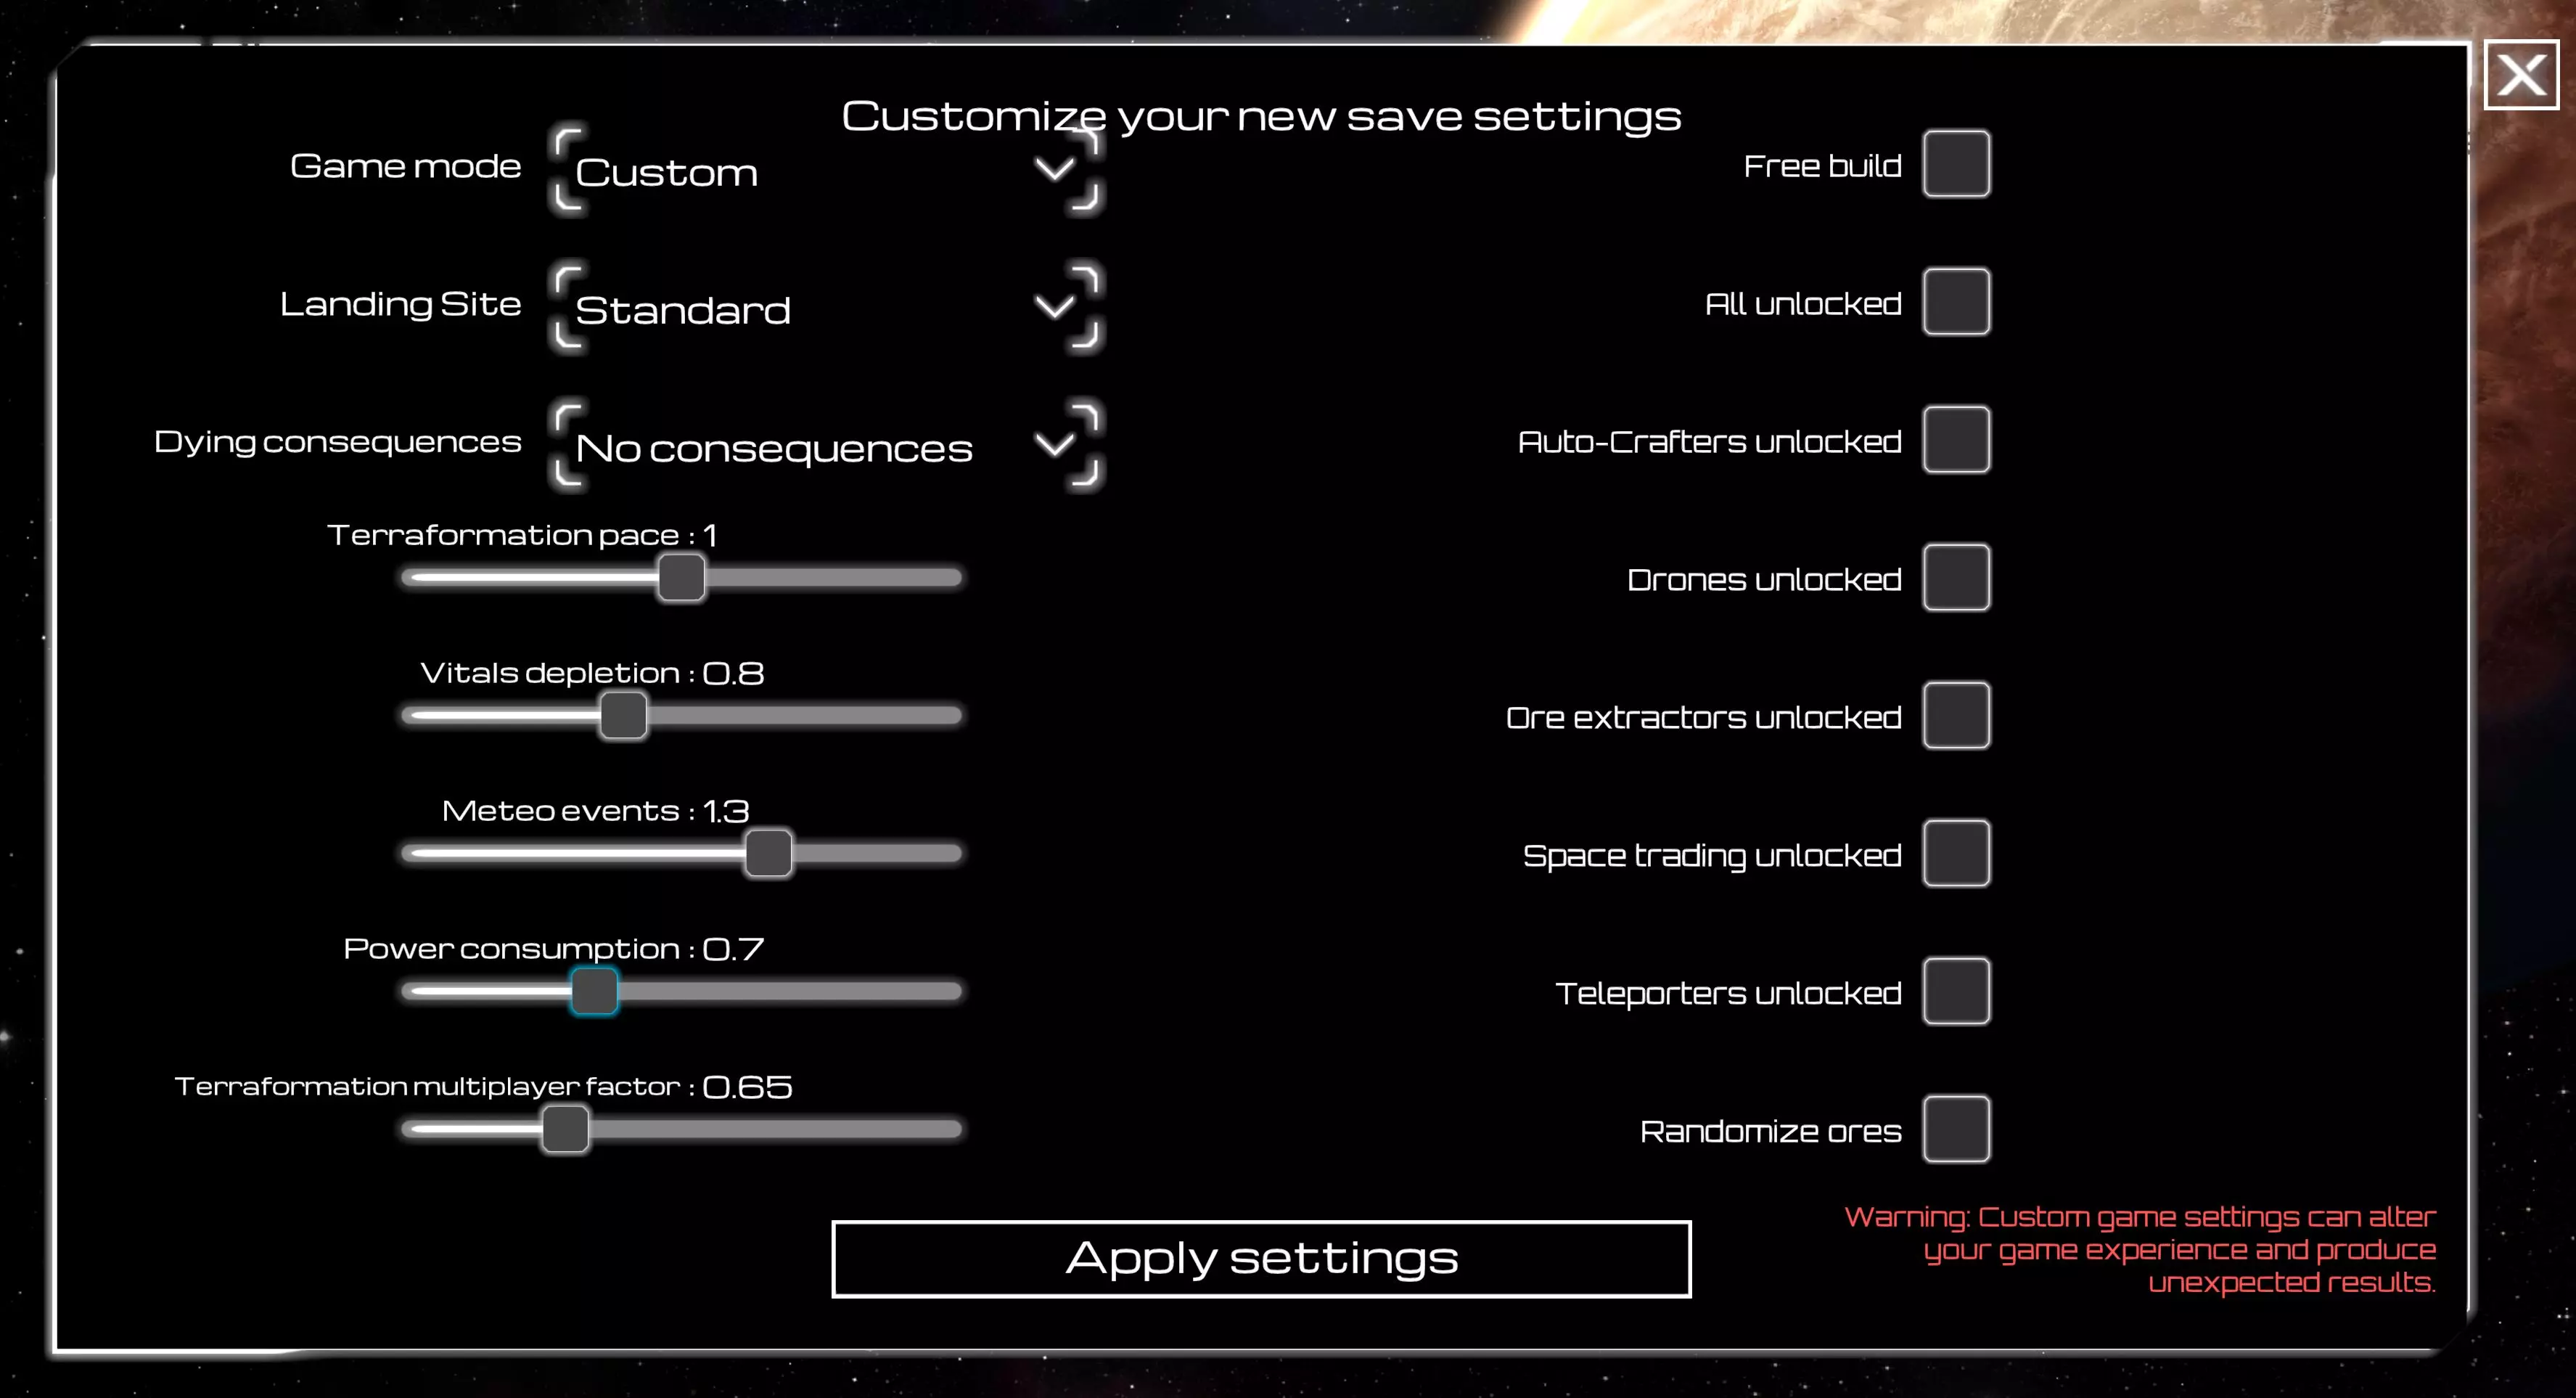
我会为你介绍开始游戏的“最佳”方式,告诉你该做些什么,直到你获得合适的装备,能够自由地按自己的喜好进行游戏,而不必在废土中面临太多死亡危险。 简介 大家好,我是戴夫。本指南只是一个基础的新手流程,足以让你快速高效地入门,并帮助你达到能够独立有效生存和探索的阶段。 本指南适用于1.002版本,更新日期为2024年4月19日。这是游戏的正式发布版本,故事和机制均已完整,但开发者之后可能仍会推出包含新内容的更新。另外,我计划以这款游戏为灵感创作一部小说,不过我会保留足够的“艺术创作自由”,使其成为一部原创作品,而非简单复述游戏剧情。我可能永远无法完成它,即使完成了也可能不会发表,但在重新找到正式工作之前,这听起来是个打发时间的有趣方式。我真的厌倦了失业。 其他资源(地图) 如果你需要一张还不错的星球地图,这里有一张。这张地图不是我制作的,所以如果你喜欢,请向原作者表示感谢,而非我。这张地图标注了各个区域、蓝色和金色宝箱的位置,以及沉船和其他地点。地图尚未完成,但由于本指南仅涵盖游戏最开始的基础知识,所以这张地图对我的需求来说已经“足够好”了。不过之后你会想要一张更好的地图,除非你喜欢自己探索。 零日——迄今为止的故事 你是一名已定罪的罪犯。但你与一家巨型企业达成了协议——如果你能成功改造这个遥远的荒芜星球,你就能获得自由。如果你失败了,你将孤独地死去,没有任何救援或补给的机会。 首先你要选择基本的游戏选项。本指南假设你是第一次玩,所以建议这次选择“轻松”或“标准”游戏模式。轻松模式会减慢食物、氧气和水分的消耗速度,这样你就不会死得那么快,而且如果你死亡,在基地重生时会保留所有物品。标准模式下,属性值会以正常速度下降,但死亡后你的物品会以物品箱形式掉落在尸体旁,随后你将在基地重生。极限模式中,属性值下降速度更快,且死亡后重生前,背包内所有物品都会被删除。硬核模式下,死亡会直接删除存档文件。建议选择【标准起始位置】,该位置位于你游戏进程中所需的所有主要矿产资源的中心地带,而其他起始位置在游戏初期寻找所需矿产时会更困难,但在游戏后期会相对容易一些。你可以为存档命名,也可以在开始前自定义部分选项。创建游戏后,在存档文件列表中选择并加载该游戏。
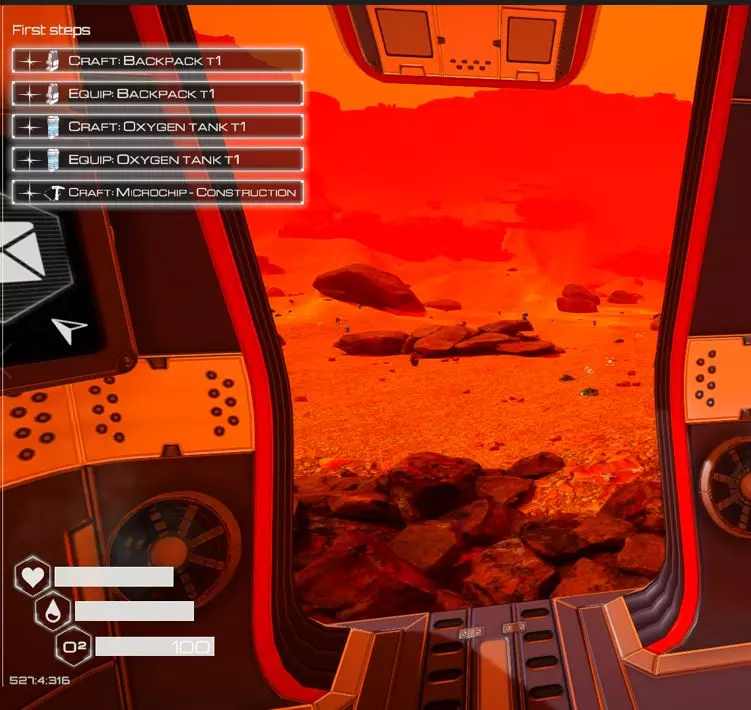
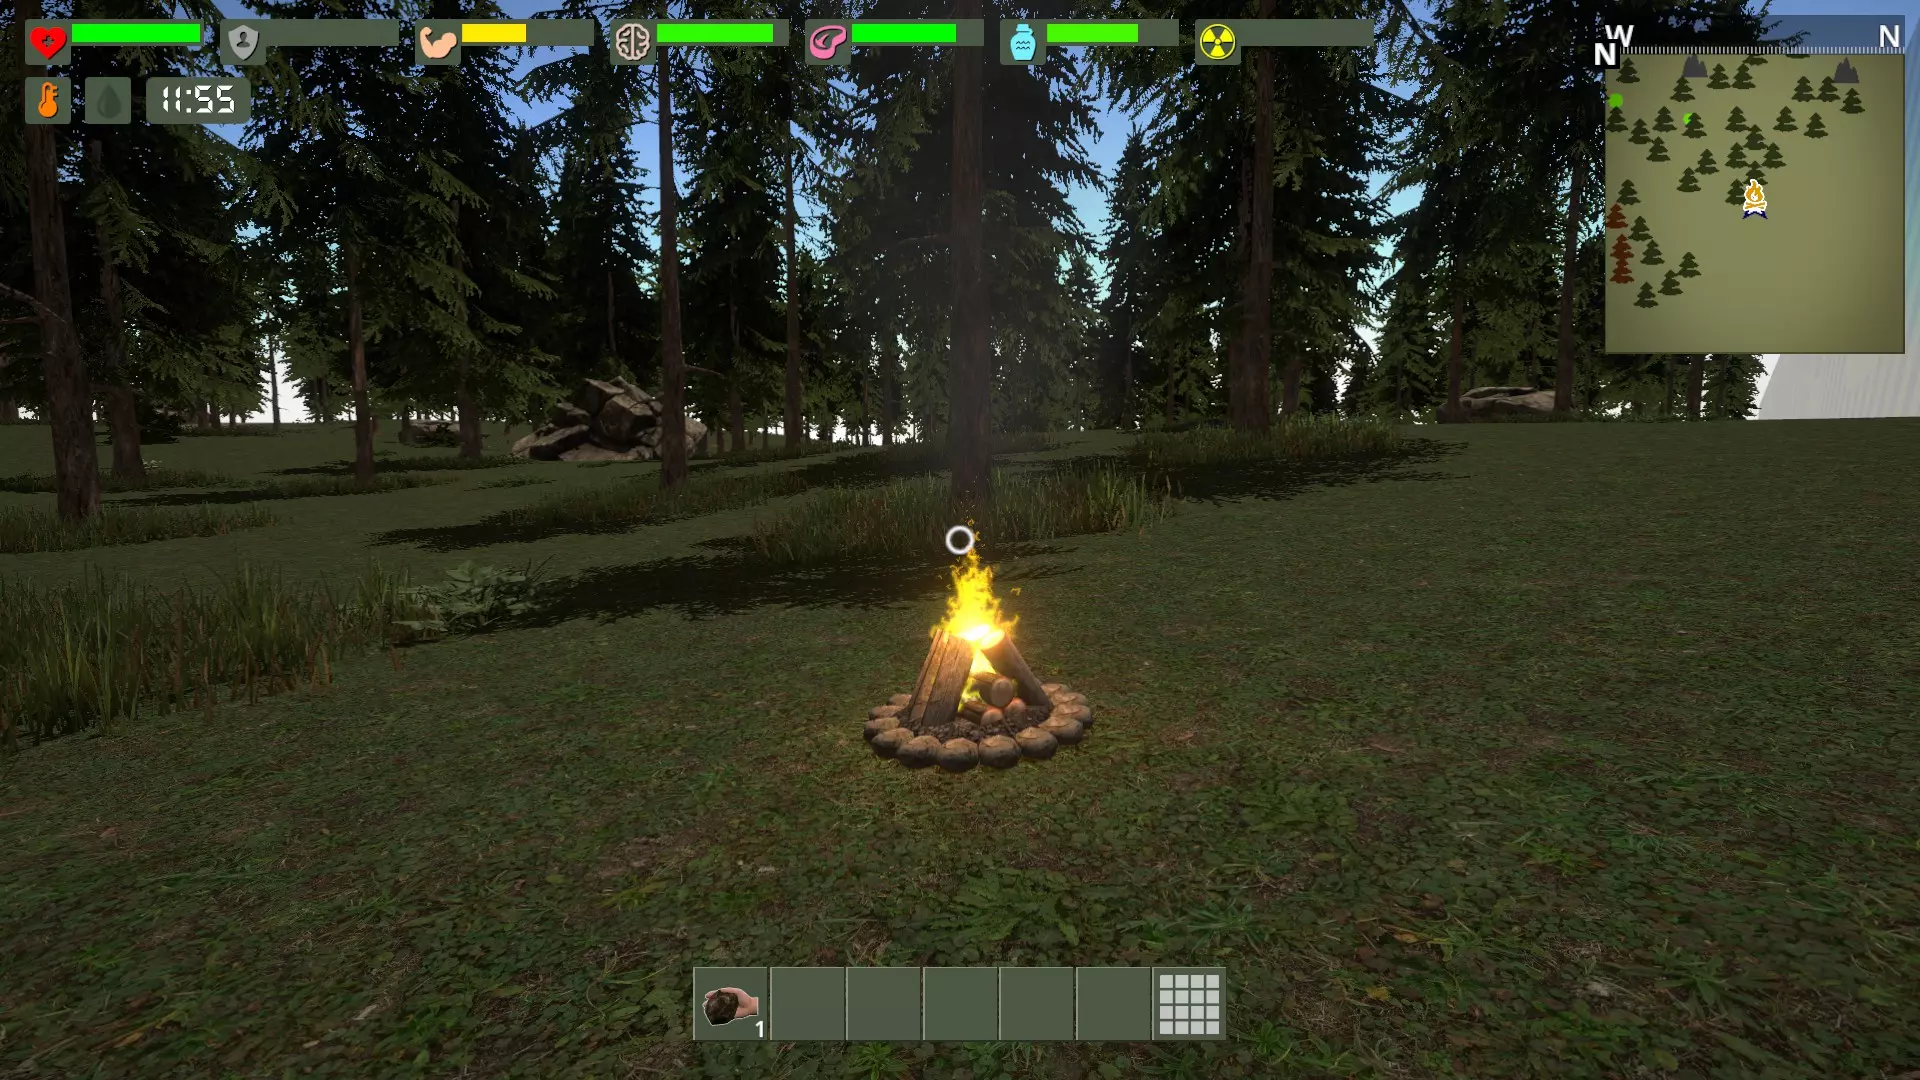
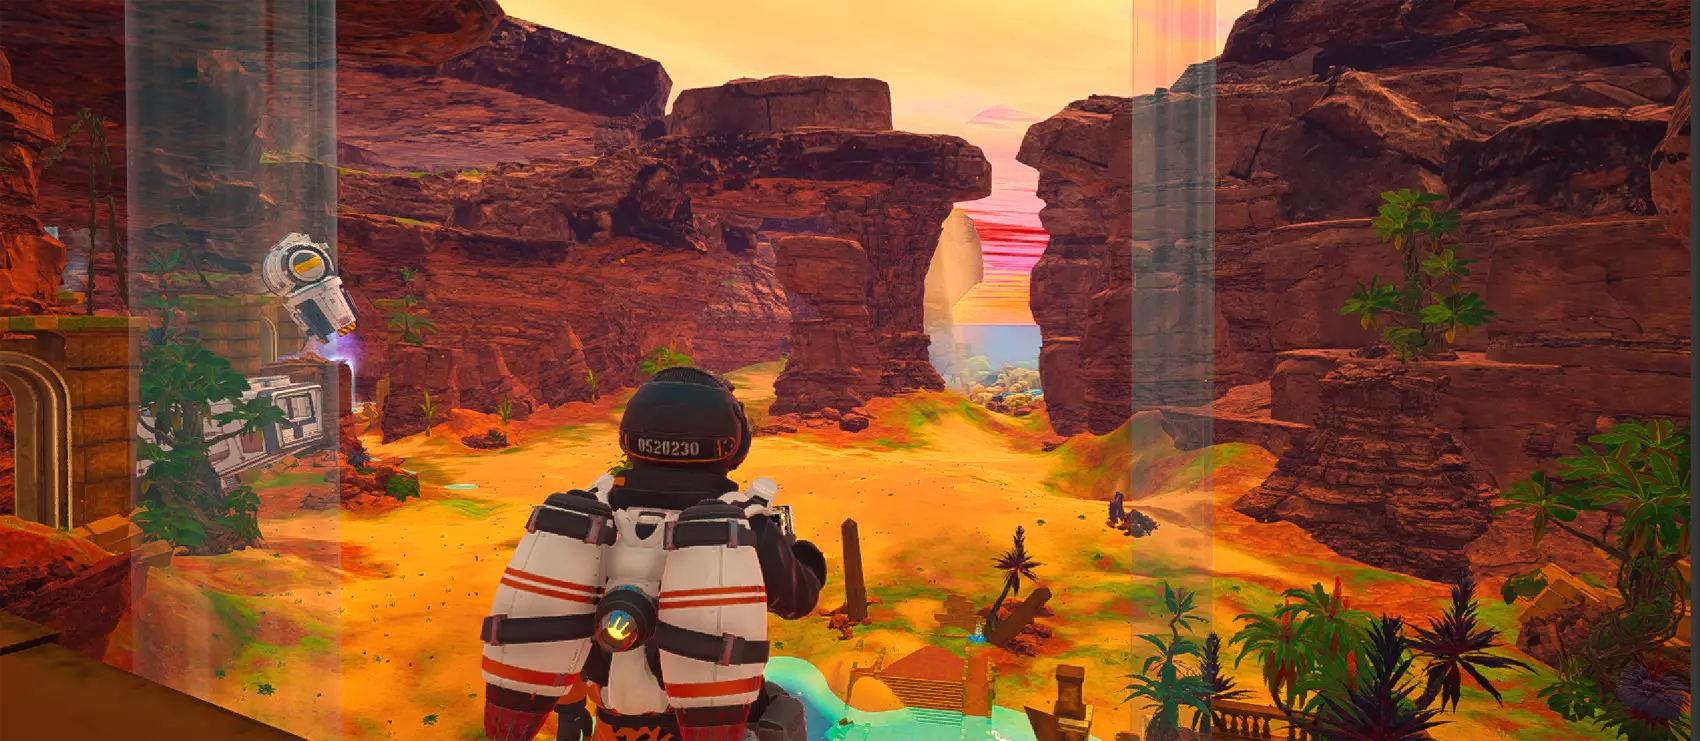
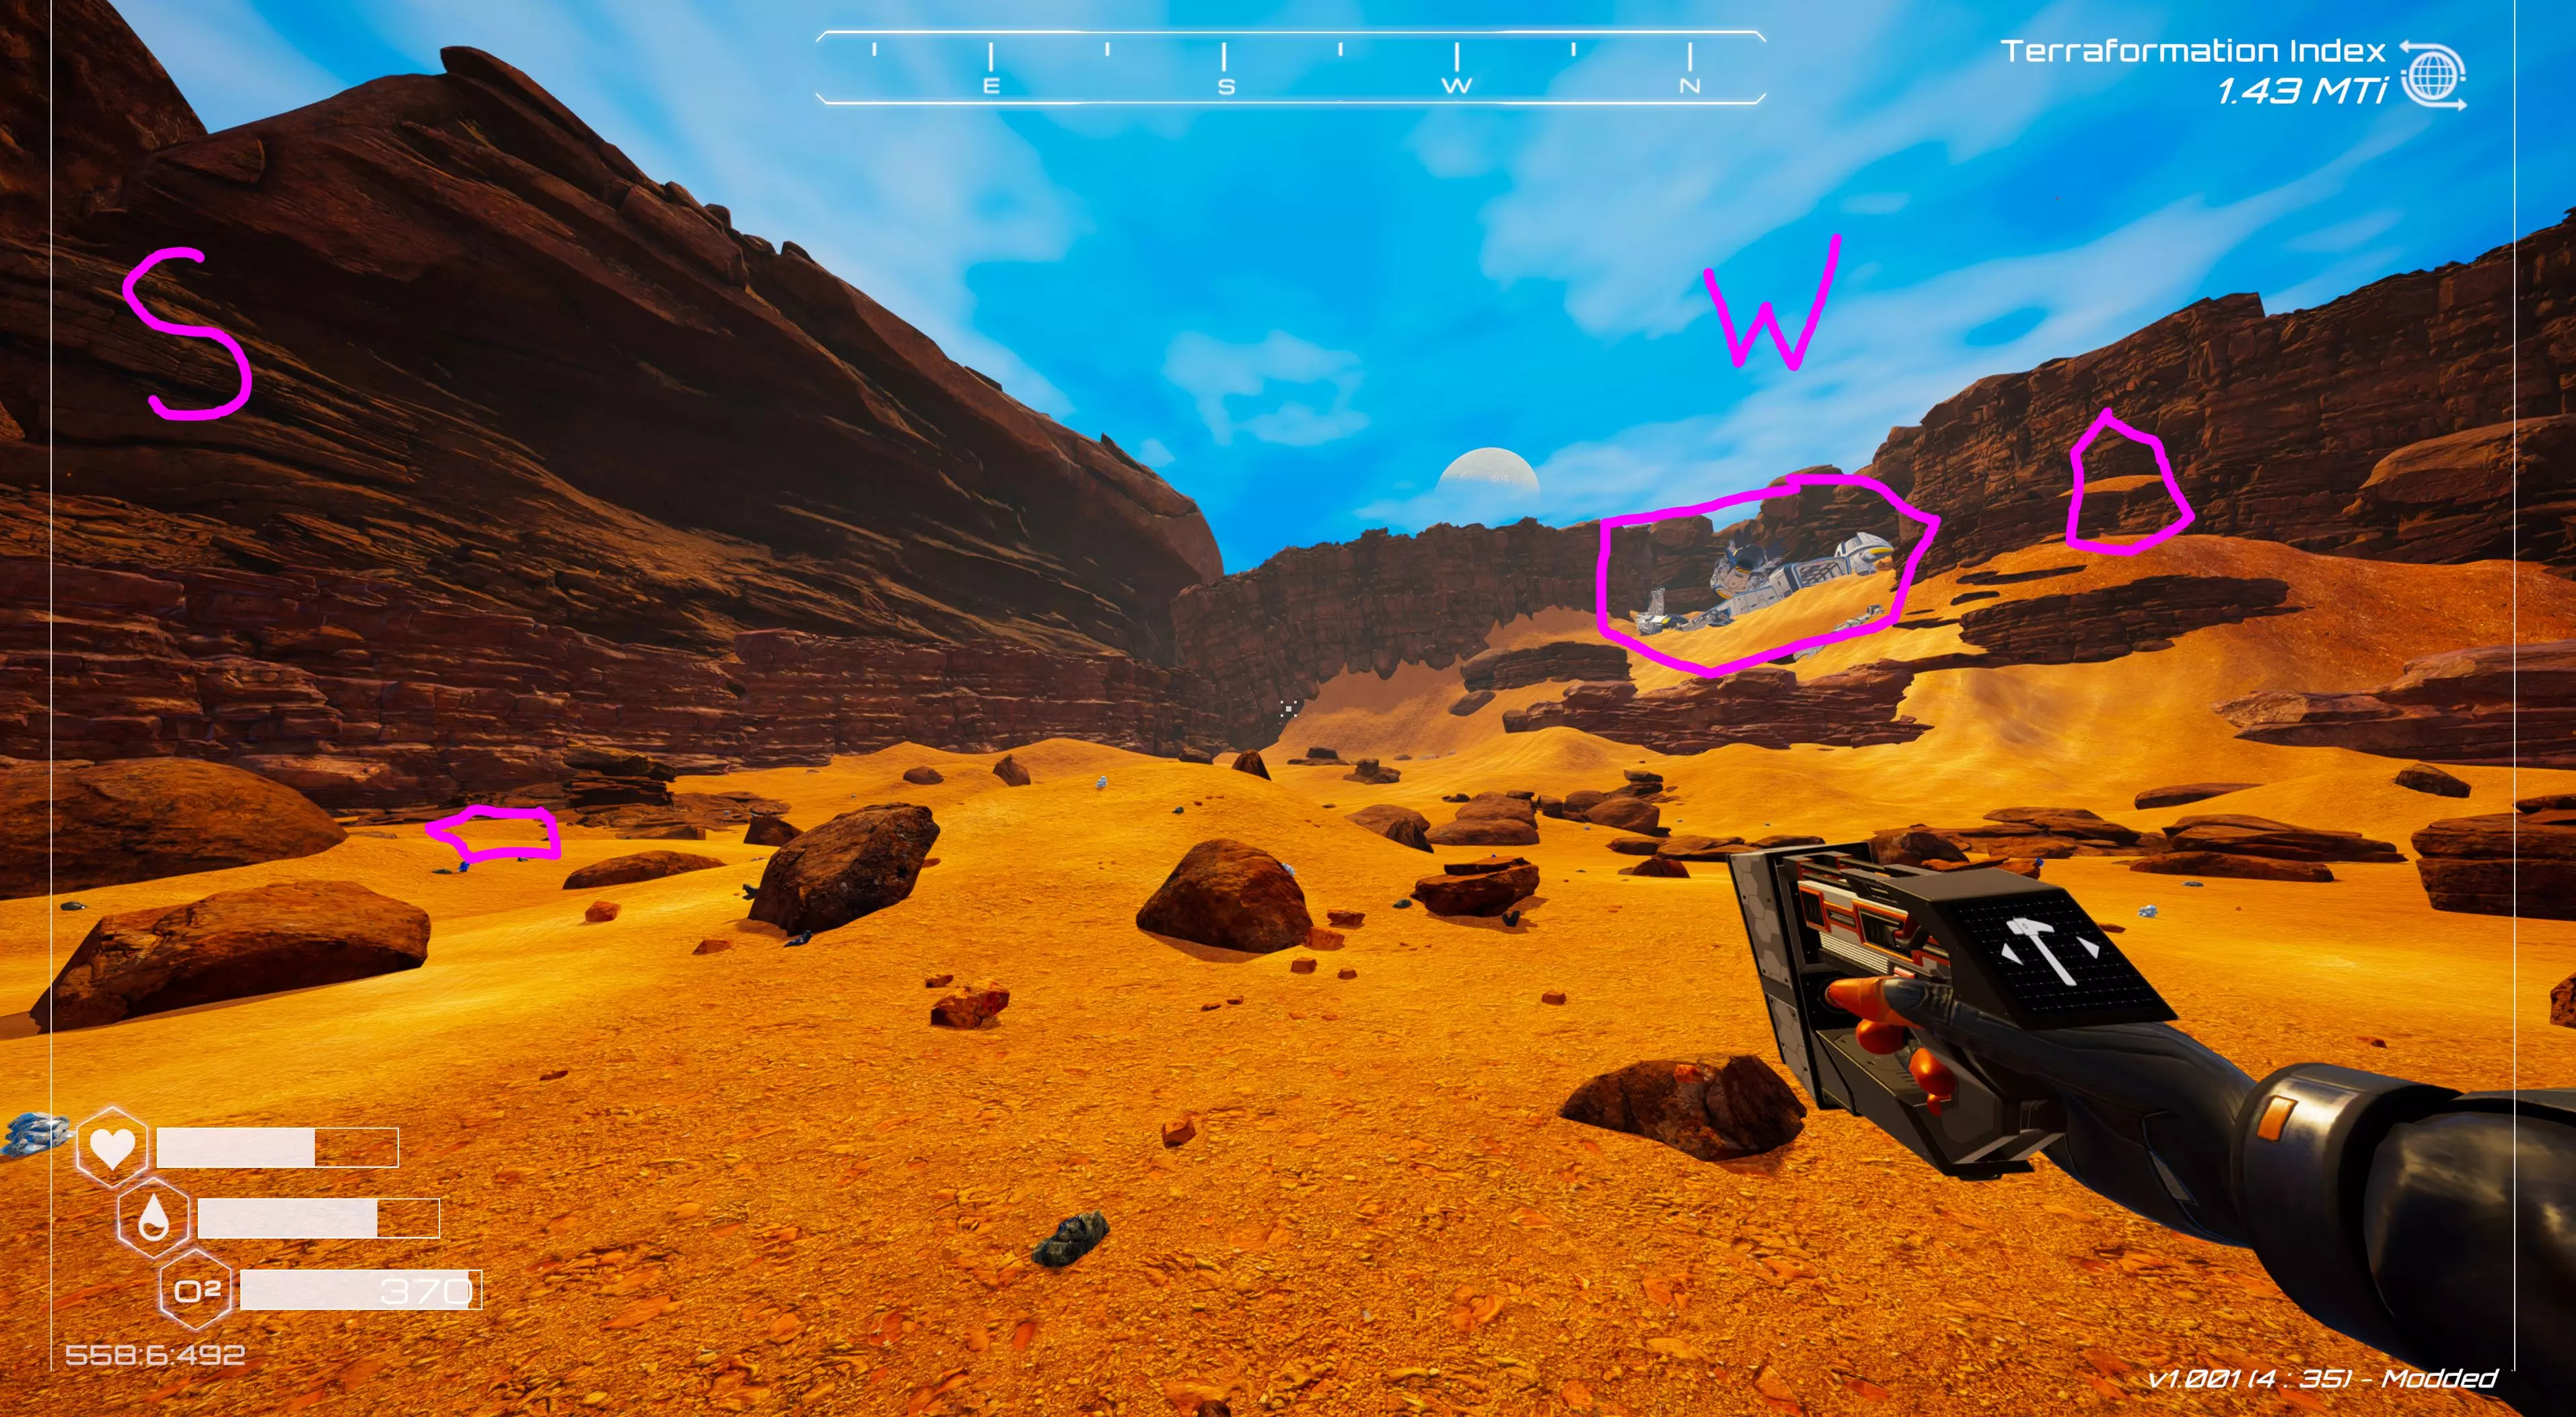
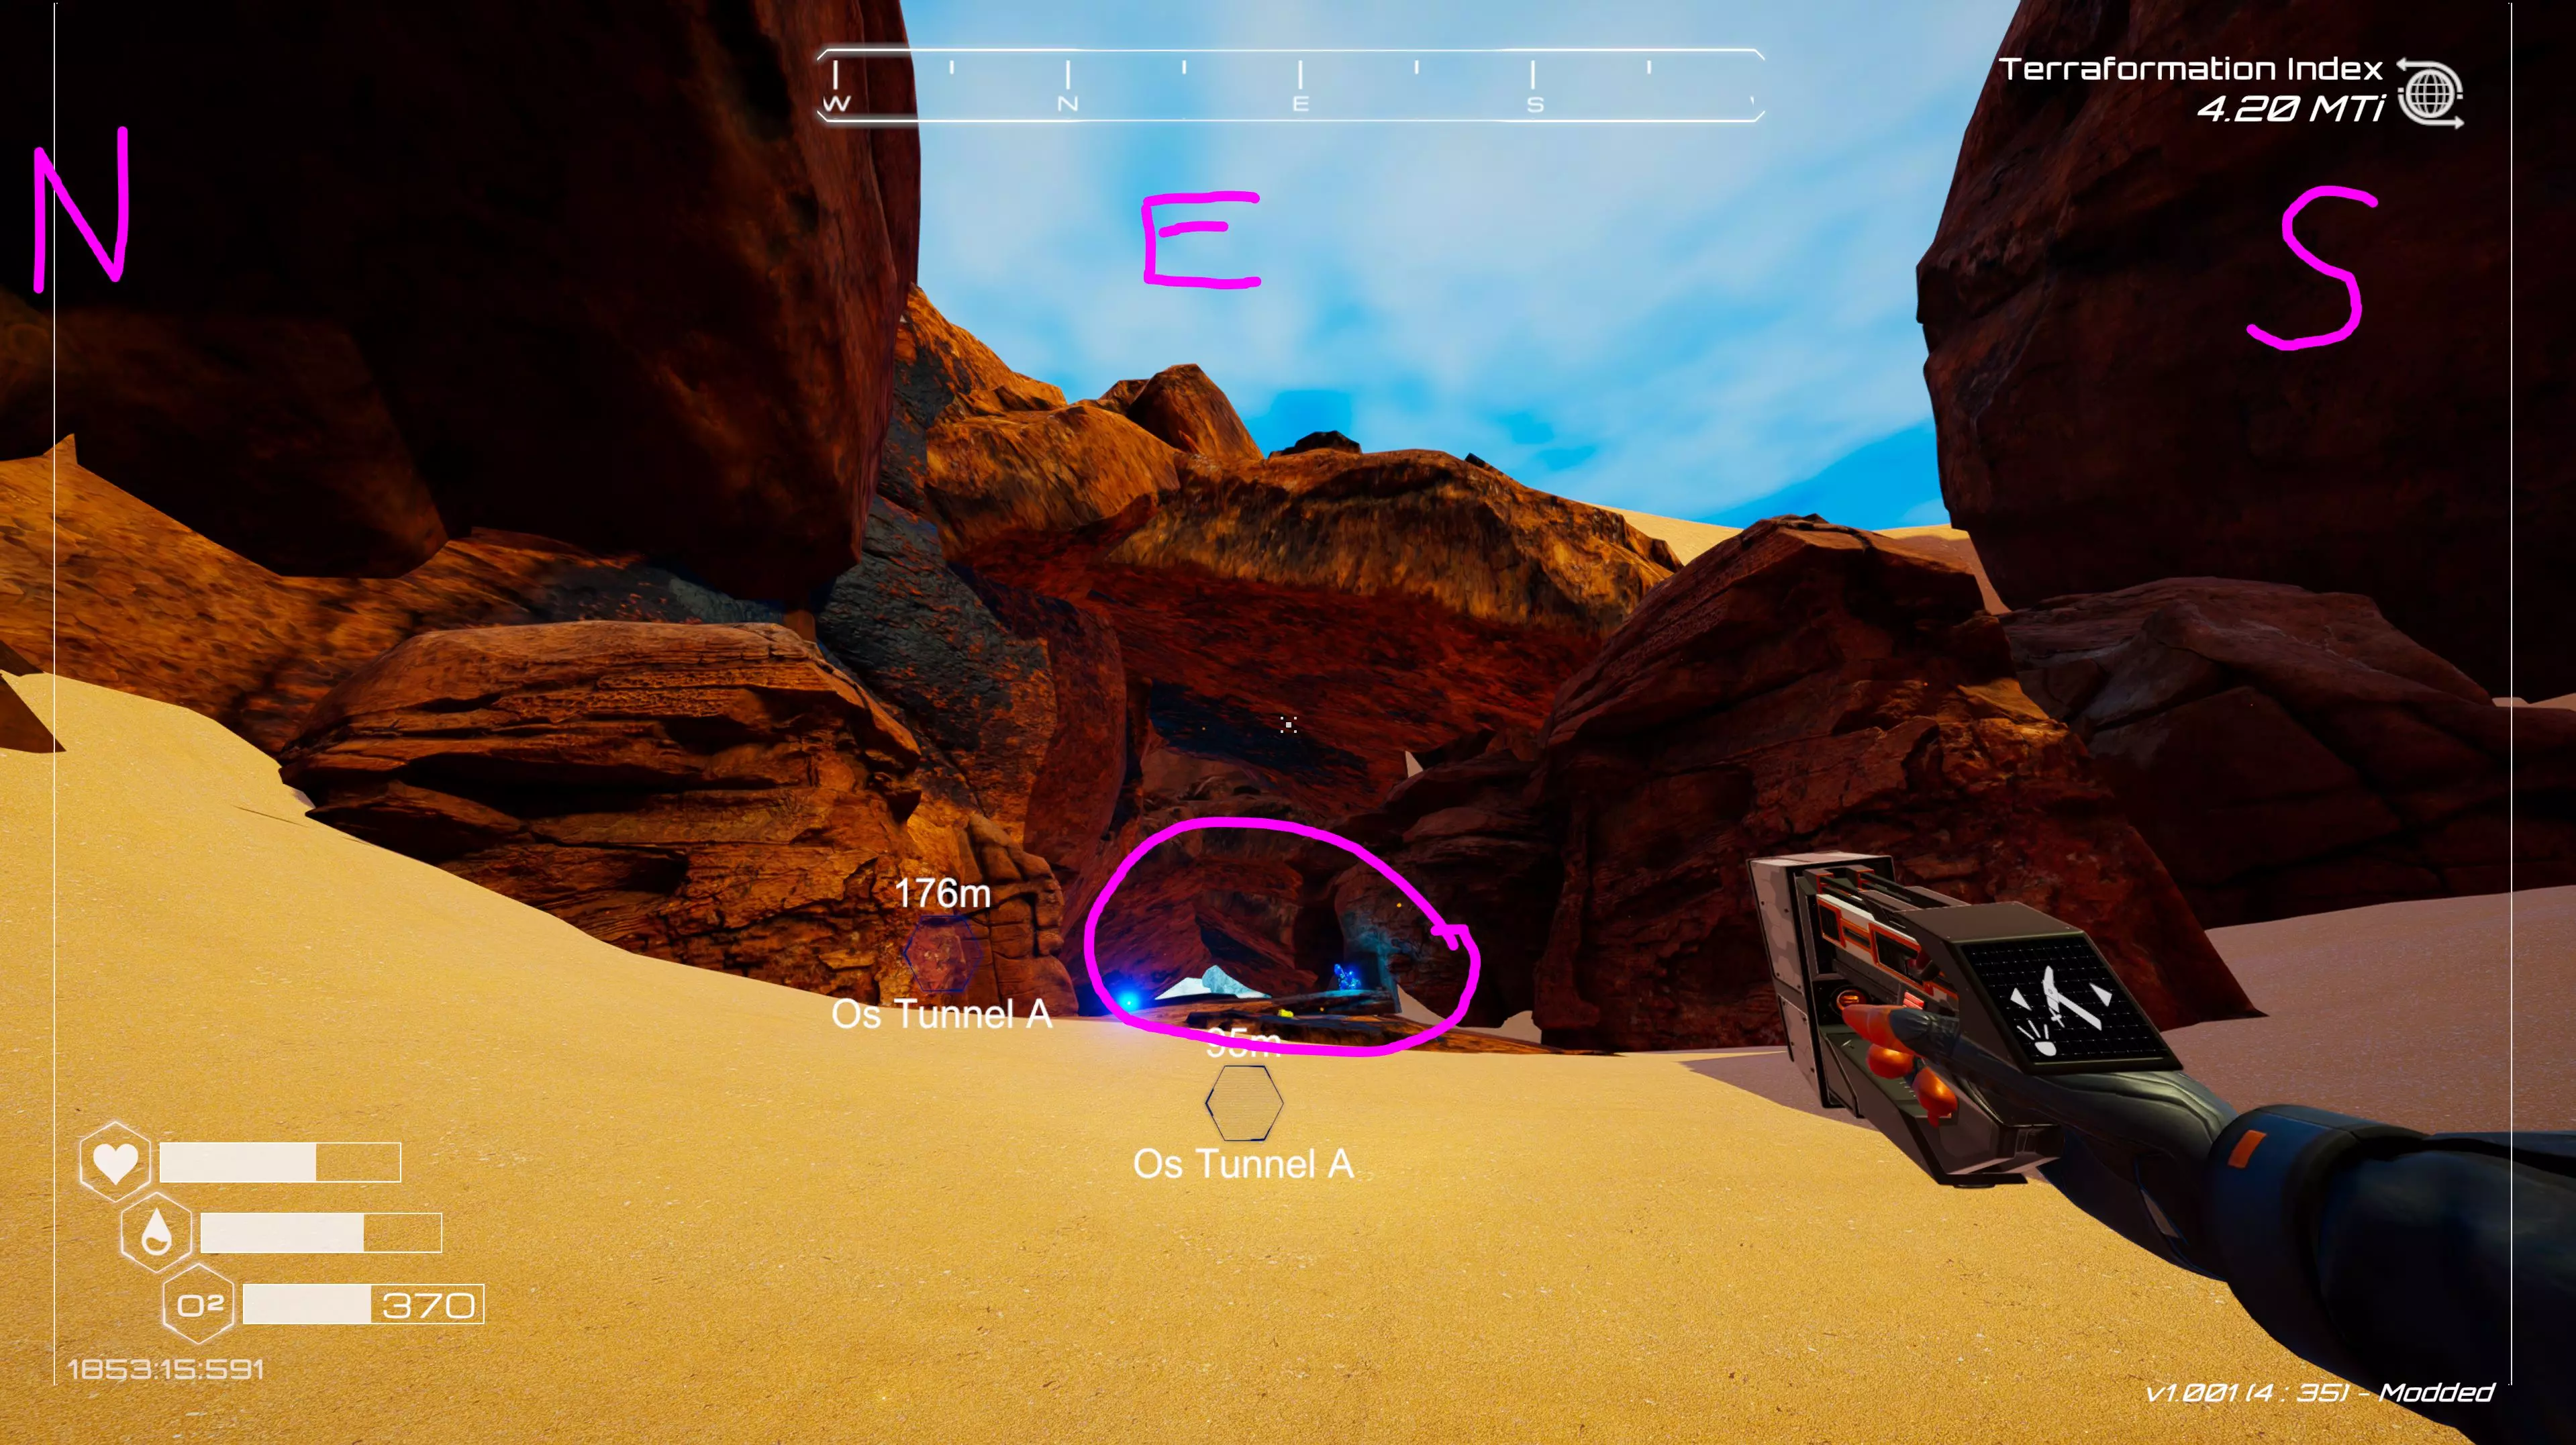
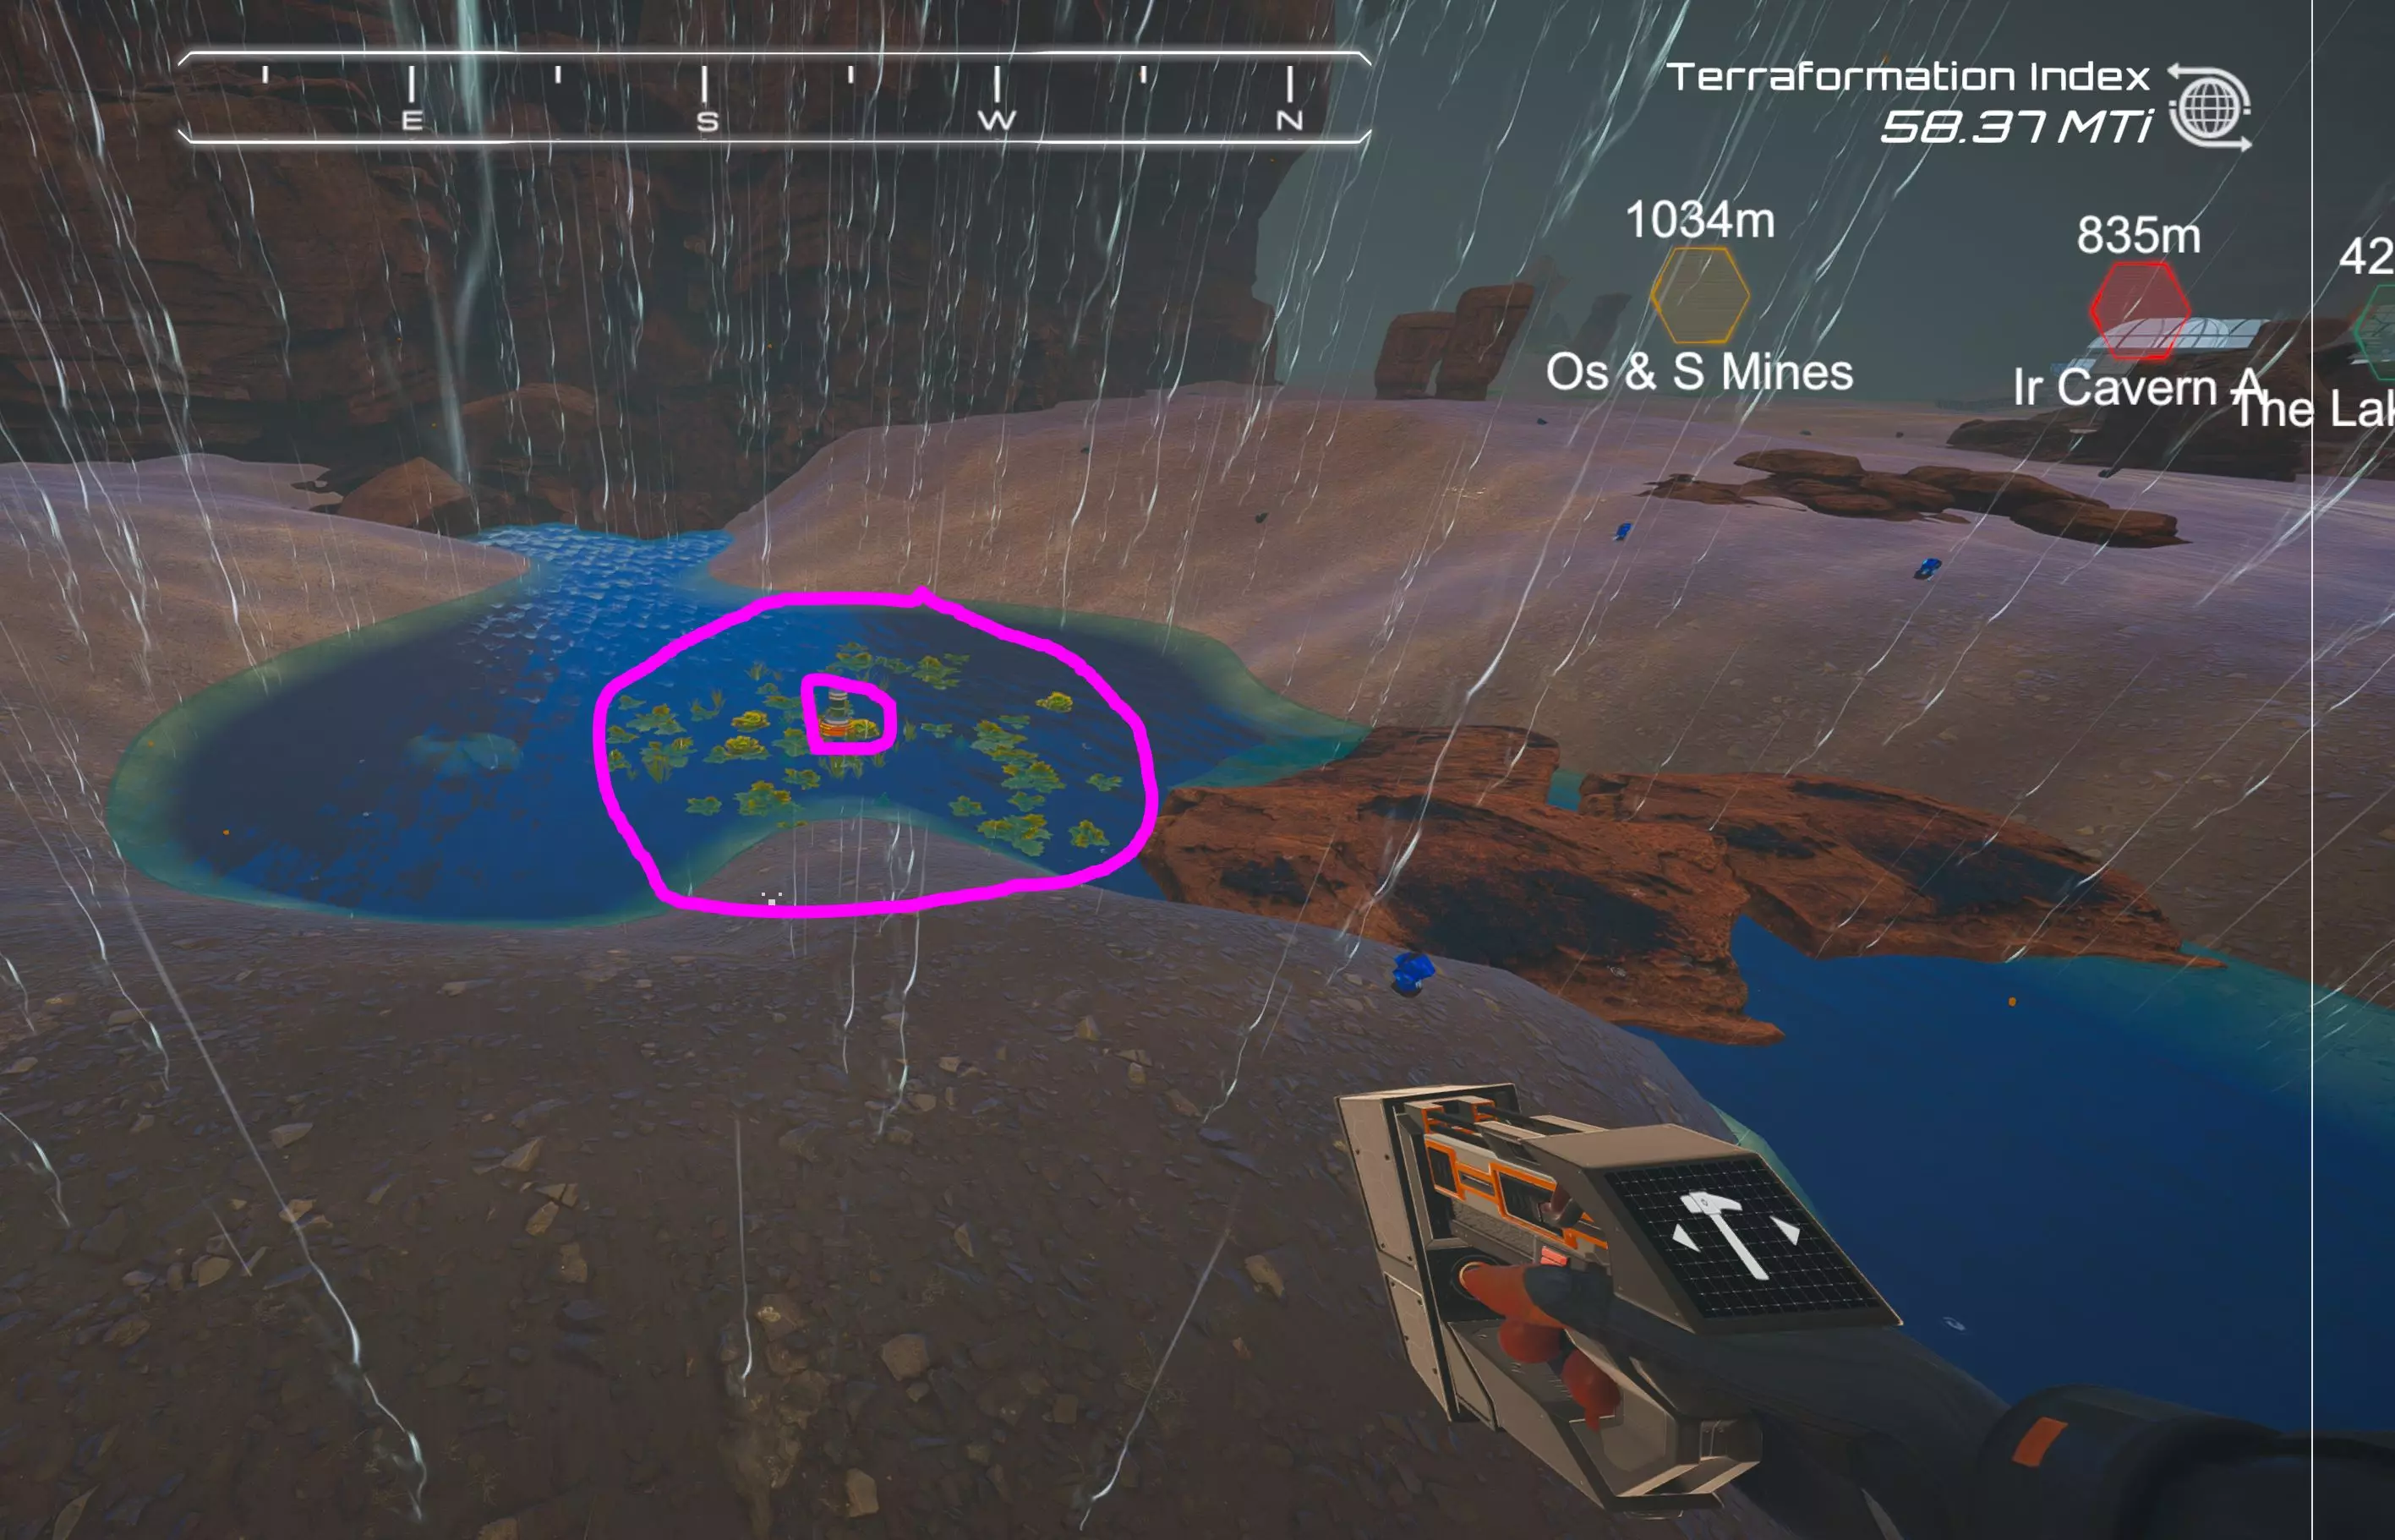
Then your pod will drop to the planet's surface. You land in a dried up old lake bed. You have a basic space suit on, a basic crafting station in your pod, and a tiny box for storing your items. Open the box and see what's inside. Not much. Open up your crafting station and see what blueprints you have. Again, not much. But you'll unlock more blueprints and build new storage in new bases as you get deeper into the game. Now before you step out the door I want to take a few minutes and describe what this game is all about... You have three parameters that you need to watch; if any of them drops to zero then you will die. Your HUNGER (or HEALTH) is the top meter. Refill it by eating space food or vegetables, or later you'll unlock some actual cooking recipes to make real food. It will decay slowly over time. Your THIRST (or WATER) is the middle bar. It drops over time, quite a bit faster than the food bar does. Refill it by drinking bottled water. For now, you can make water by melting ice that you find outside. Later on, you'll unlock a blueprint for a filtered straw that will let you drink from lakes and rivers, too. The bottom bar is for your OXYGEN. It drops pretty quickly over time, but only if you are outdoors. If you are inside a SEALED ROOM that you have built, the room will provide oxygen for you. Or you can consume an O2 Canister to refill the bar if you're far from your base. You can make these using Cobalt. A good rule of thumb is to always carry one piece of food, two oxygen canisters, and two bottles of water with you when you are outside your base. And have some extras stored at your base. This world is EMPTY, nothing lives here. There are no space pirates or alien beasts to worry about. Other than time, there are just two things that can hurt you. If you fall from a high place you take damage. And every so often there will be a meteor storm - these will aim at your current location, and if you get hit by a meteor you take damage. Later on, it will rain and fill up lakes and rivers... you can even swim underwater with no problem because your suit is already air-tight. But you will still need to eat, drink, and breathe... and avoid falling off a cliff or getting smashed by a meteor. Aside from basic survival, you do actually have a job to do here. To that end, there are a few other parameters regarding the planet that you will be working with. The goal is to increase the "terraformation index" or "T.I." number. This number is a mathematical combination of four other parameters. At first you'll only have three to work with: air pressure, temperature, and atmospheric oxygen level. Later you will unlock a fourth one: biomass. As you bring each parameter up to a certain level, you unlock access to new blueprints for tools and equipment. You will also notice the face of the planet changing as your T.I. reaches certain levels. Remember that your job is to raise all of these parameters high enough that the planet becomes suitable for human colonization. At least I assume we're human in this game... could be wrong about that. Ultimately, your corporate overlords want to build a space truck-stop with a gift shop, a diner, and a motel here since it's on a popular interstellar trade route. So basically, you are expected to run around the planet doing some exploration. As you go, pick up minerals and bring them back to your base; then use them to build tools, equipment, and entire buildings that will allow your terraforming efforts to progress more smoothly over time. Later on, you'll get blueprints to build mining machines (ore extractors) that will dig up the ore for you, leaving you free to explore more of the world, decorate your home base, or do whatever else you want to do. You are all alone out there... nobody is watching... LOL. And as you explore, you'll find hidden areas where there may be clues about why this planet is so strange, why your corporate overlords want it done so badly, and basically what the story is around here. Day 0.5 - Welcome to the Suck Now that we have the basics out of the way... click the "email" icon on the terminal next to the pod door. This is how the story is told in this game - via emails and digital notes. Then step outside your little pod. Notice as soon as you go outside your O2 meter starts to drop. Go back inside to refill it before you suffocate and die. Take a quick look at your surroundings. You are in an old lake bed. This will be a problem later because once your T.I. reaches "rain" and "lakes" level, it will fill up with water. ANY ROOM THAT IS UNDERWATER WILL NOT REFILL YOUR OXYGEN, and YOU CANNOT BUILD ANYTHING NEW UNDERWATER. So your little pod will only be your home base for a little while, before long you'll have to move out. Stand with your back to the pod door. straight ahead, up a hill, is a crashed ship. To the right of that is an iceberg that blocks a cave entrance. Later, that cave will be your source for mining Osmium. The other end of the cave leads to a valley full of sulfur, too. But not until you raise the temperature high enough to melt the ice in front of the cave. So just remember it's there for later, don't try to go up there yet. And at this point I want to warn you about those crashed ships. You can enter the ships, search them and haul out quite a lot of loot. BUT NOT YET. You will want to build yourself a flashlight, a bigger backpack, and a lot of O2 canisters before you dive into any crashed ships. This is extra important because most of the ships will have SEEDS and other items just lying on the ground inside; items that you won't find anywhere else very often. Some are in chests or lockers and those are no problem; but some are just sitting out in the open. Those items will VANISH if you wait too long to pick them up... but the timer doesn't start until you get close to the ship. So you want to be able to grab those loose items and bring them home on your first (or maybe second) trip into the ship. Hence the need for a bigger backpack. And the power is out inside the ship, you'll be blind without a flashlight. And it takes a long time to explore down there, so you'll want a bigger oxygen tank, too. Not just more refill canisters - you want bigger tanks. You'll be able to craft some later. That particular ship will also require a special item to restart its nuclear core so that you can release the security lock on a couple of the doors inside. So at the start of the game, only about half of the ship is accessible. At the base of the rocky wall to your left (approximately where I've circled it on the screenshot below) is the first gold chest that you'll find. There's another one on top of the shipwreck. I won't tell you where any more gold chests are, since half the fun of this game is exploring to find things like that on your own.
在那右边,你会注意到一座缓坡小山。山顶是一片平坦的平原。那是建造你第一个【基地】的绝佳位置,因为它位于所有优质矿物资源点的中心,而且地势足够高,当你进入T.I.的雨季阶段时也不会被淹没。所以记住这个位置,我们很快就会前往那里。到达那里后,你可以选择建造一个【临时基地】,之后随时可以在其他地方建造更好的基地。不过这里作为【永久基地】也相当不错。不过这是之后的决定,现在只需知道你很快就要前往那里了。
一直向右转。在小山底部与岩壁相接的地方有一个洞穴……里面有一具尸体。在探索世界各地的沉船和地下 vaults 时,你会在电子邮件、船只日志和日记中发现他(以及其他人)的故事。这个特定的洞穴隐藏在一些与岩壁融为一体的残骸后面。你需要装备分解芯片(Deconstruct Chip),寻找会弹出“分解”图标的位置,然后分解残骸进入洞穴。当你找到更多像日记和电子邮件这样的故事元素时,如果你想按时间顺序梳理这个星球的历史,请注意每篇内容的日期。
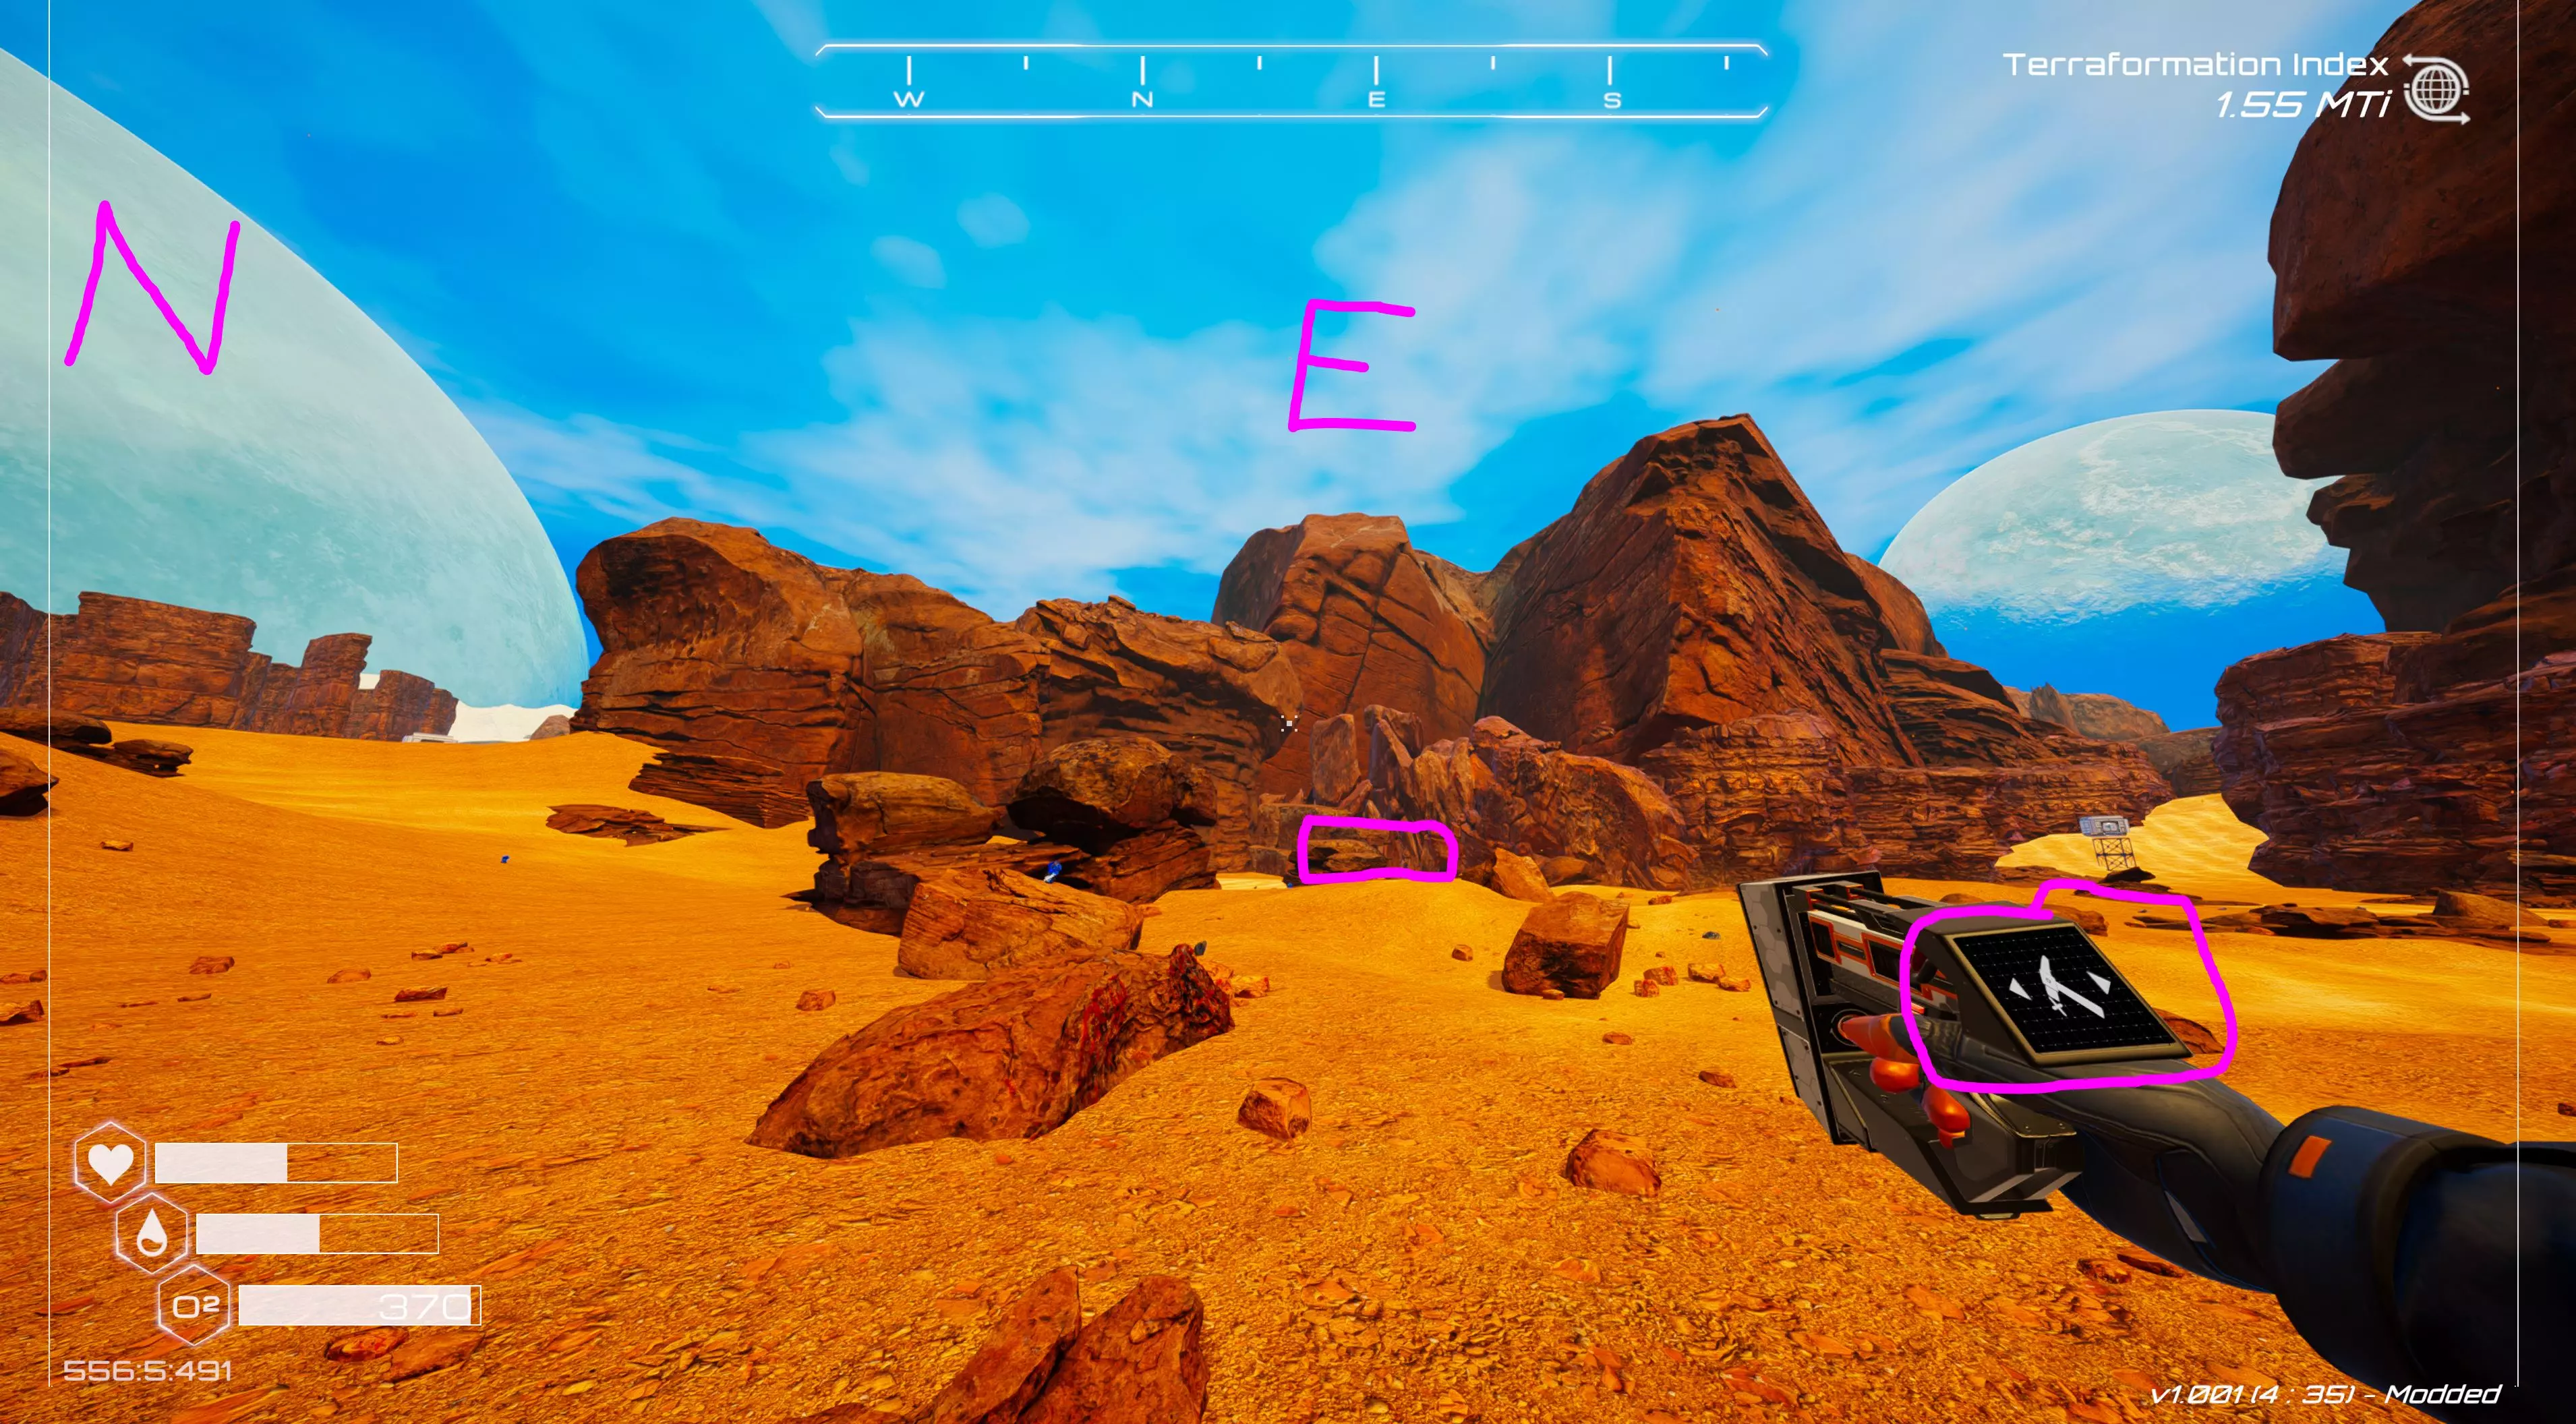
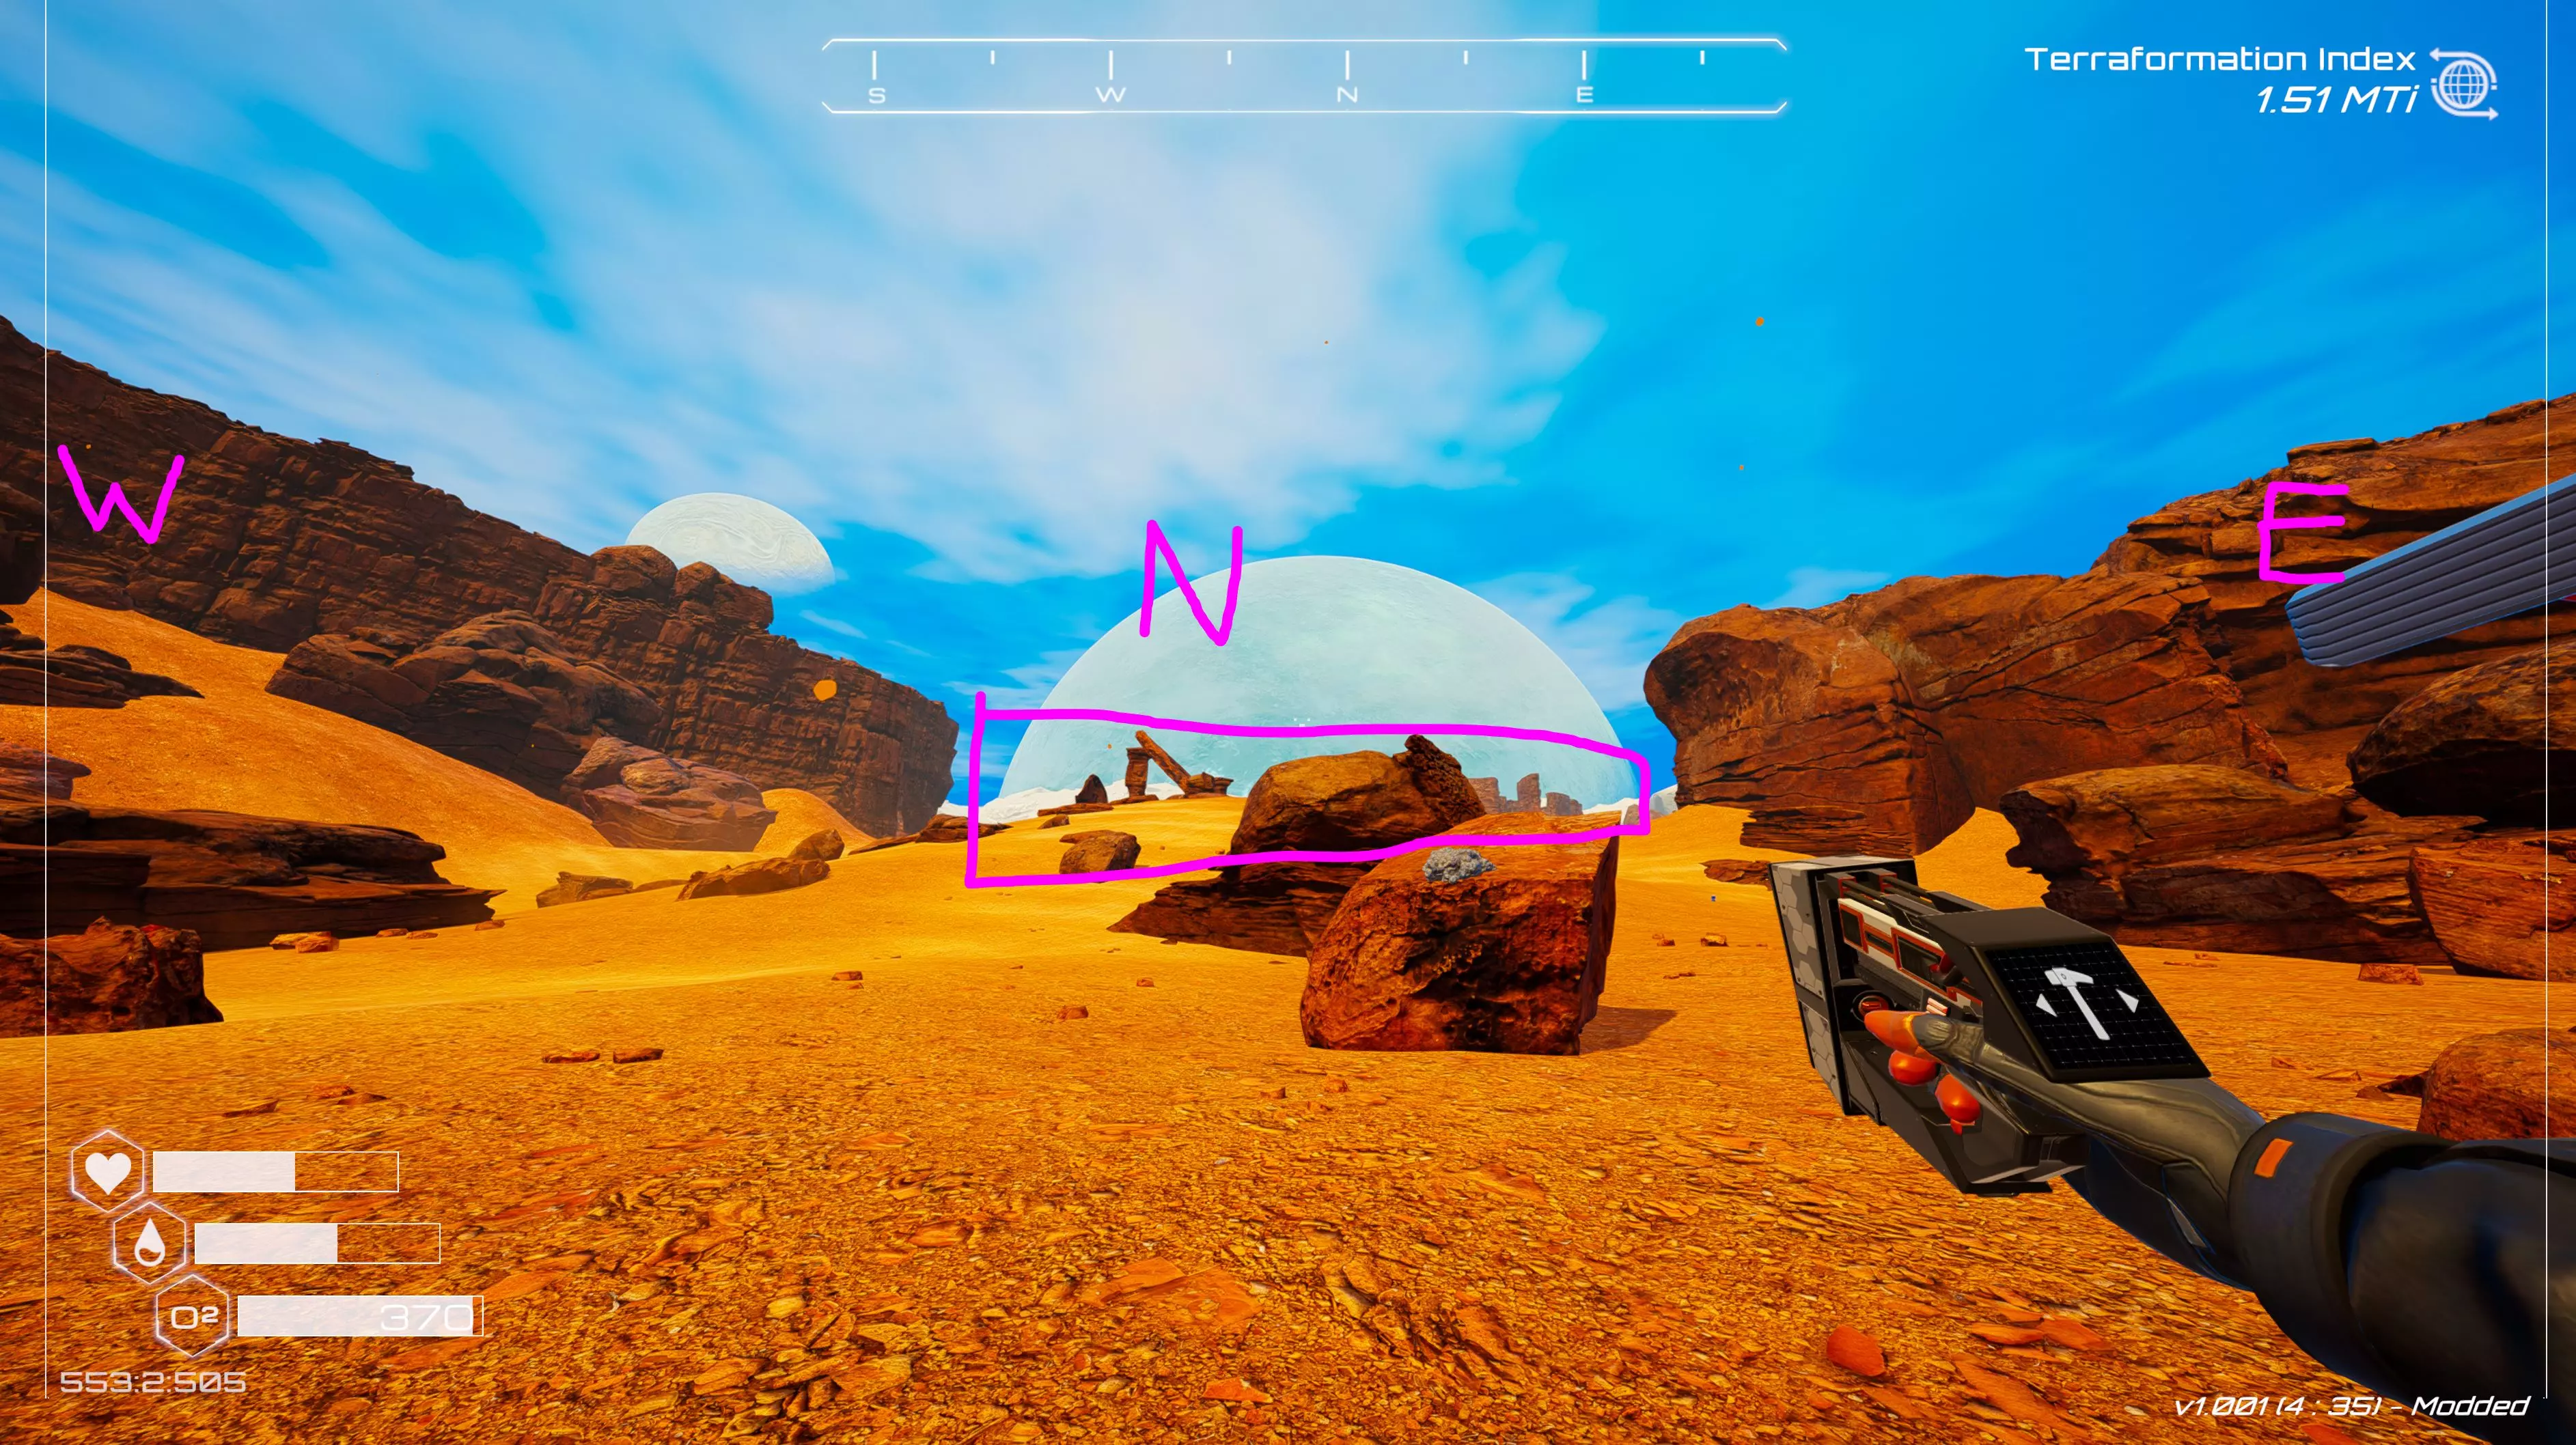
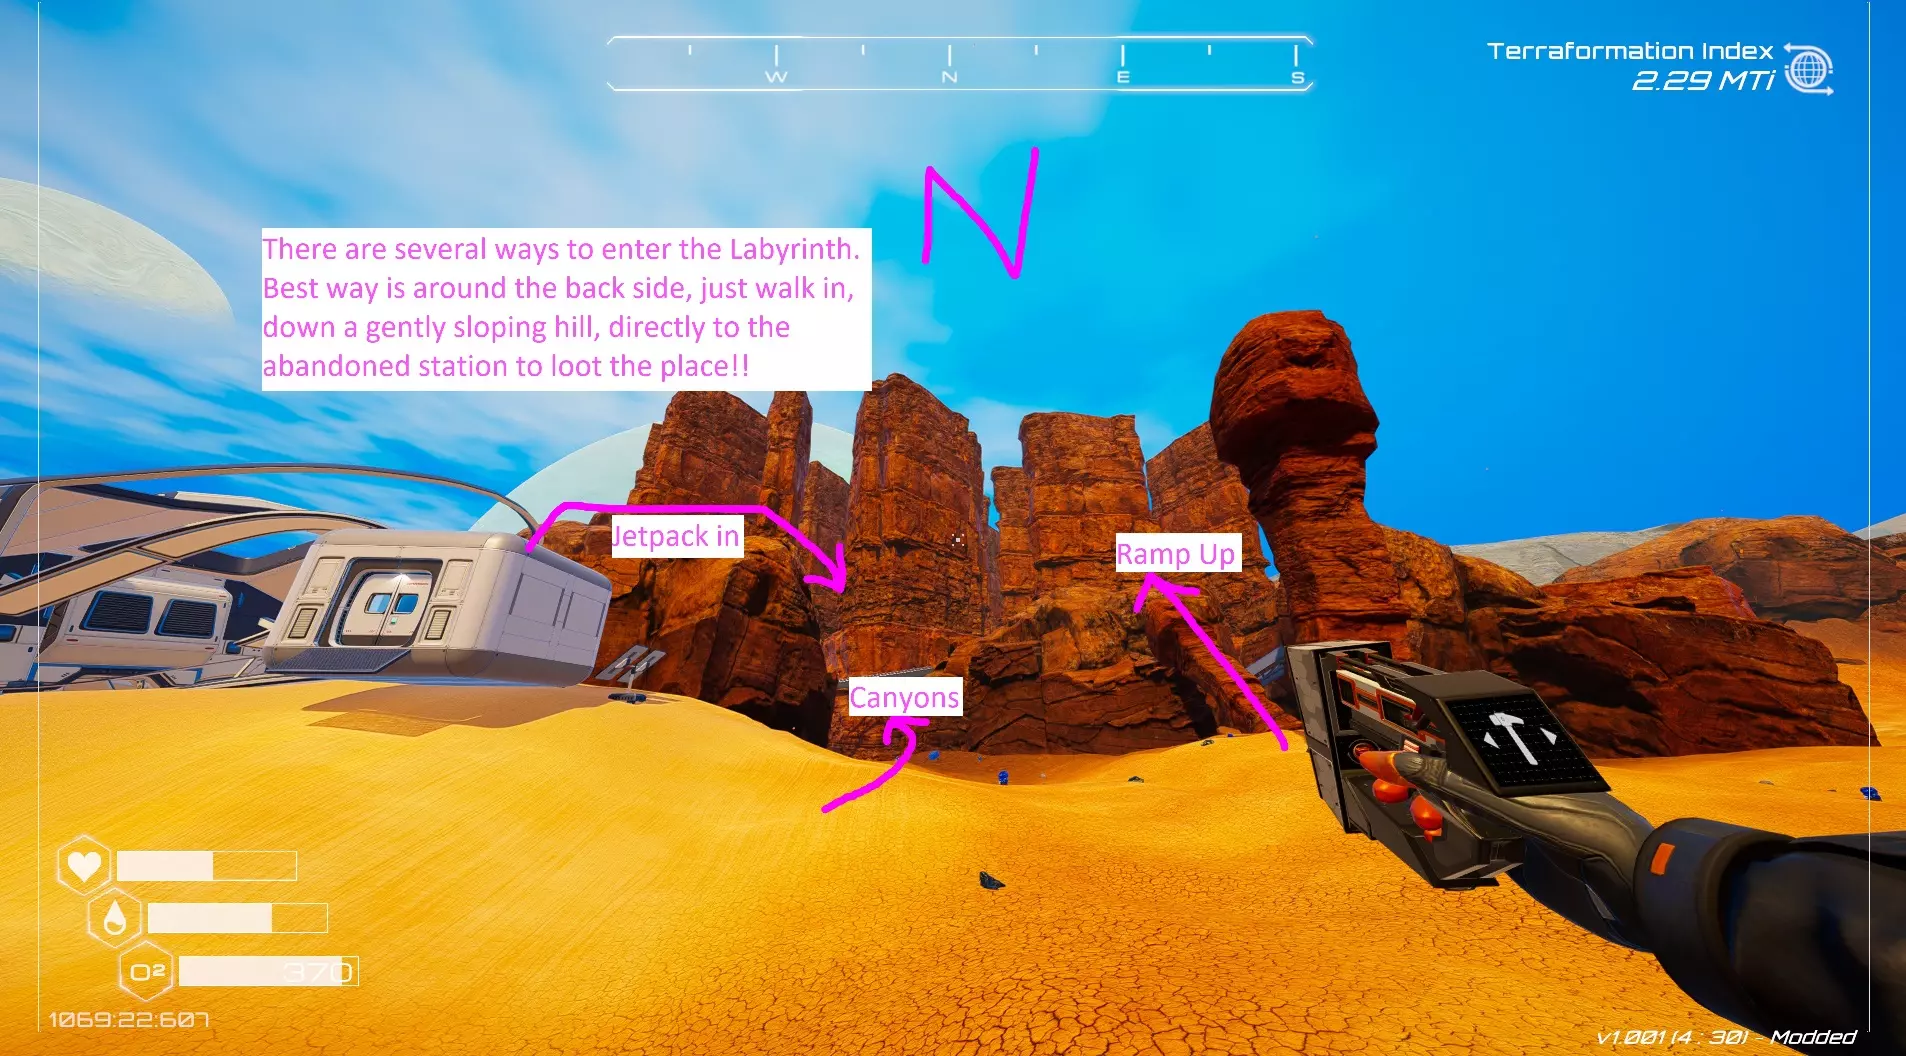
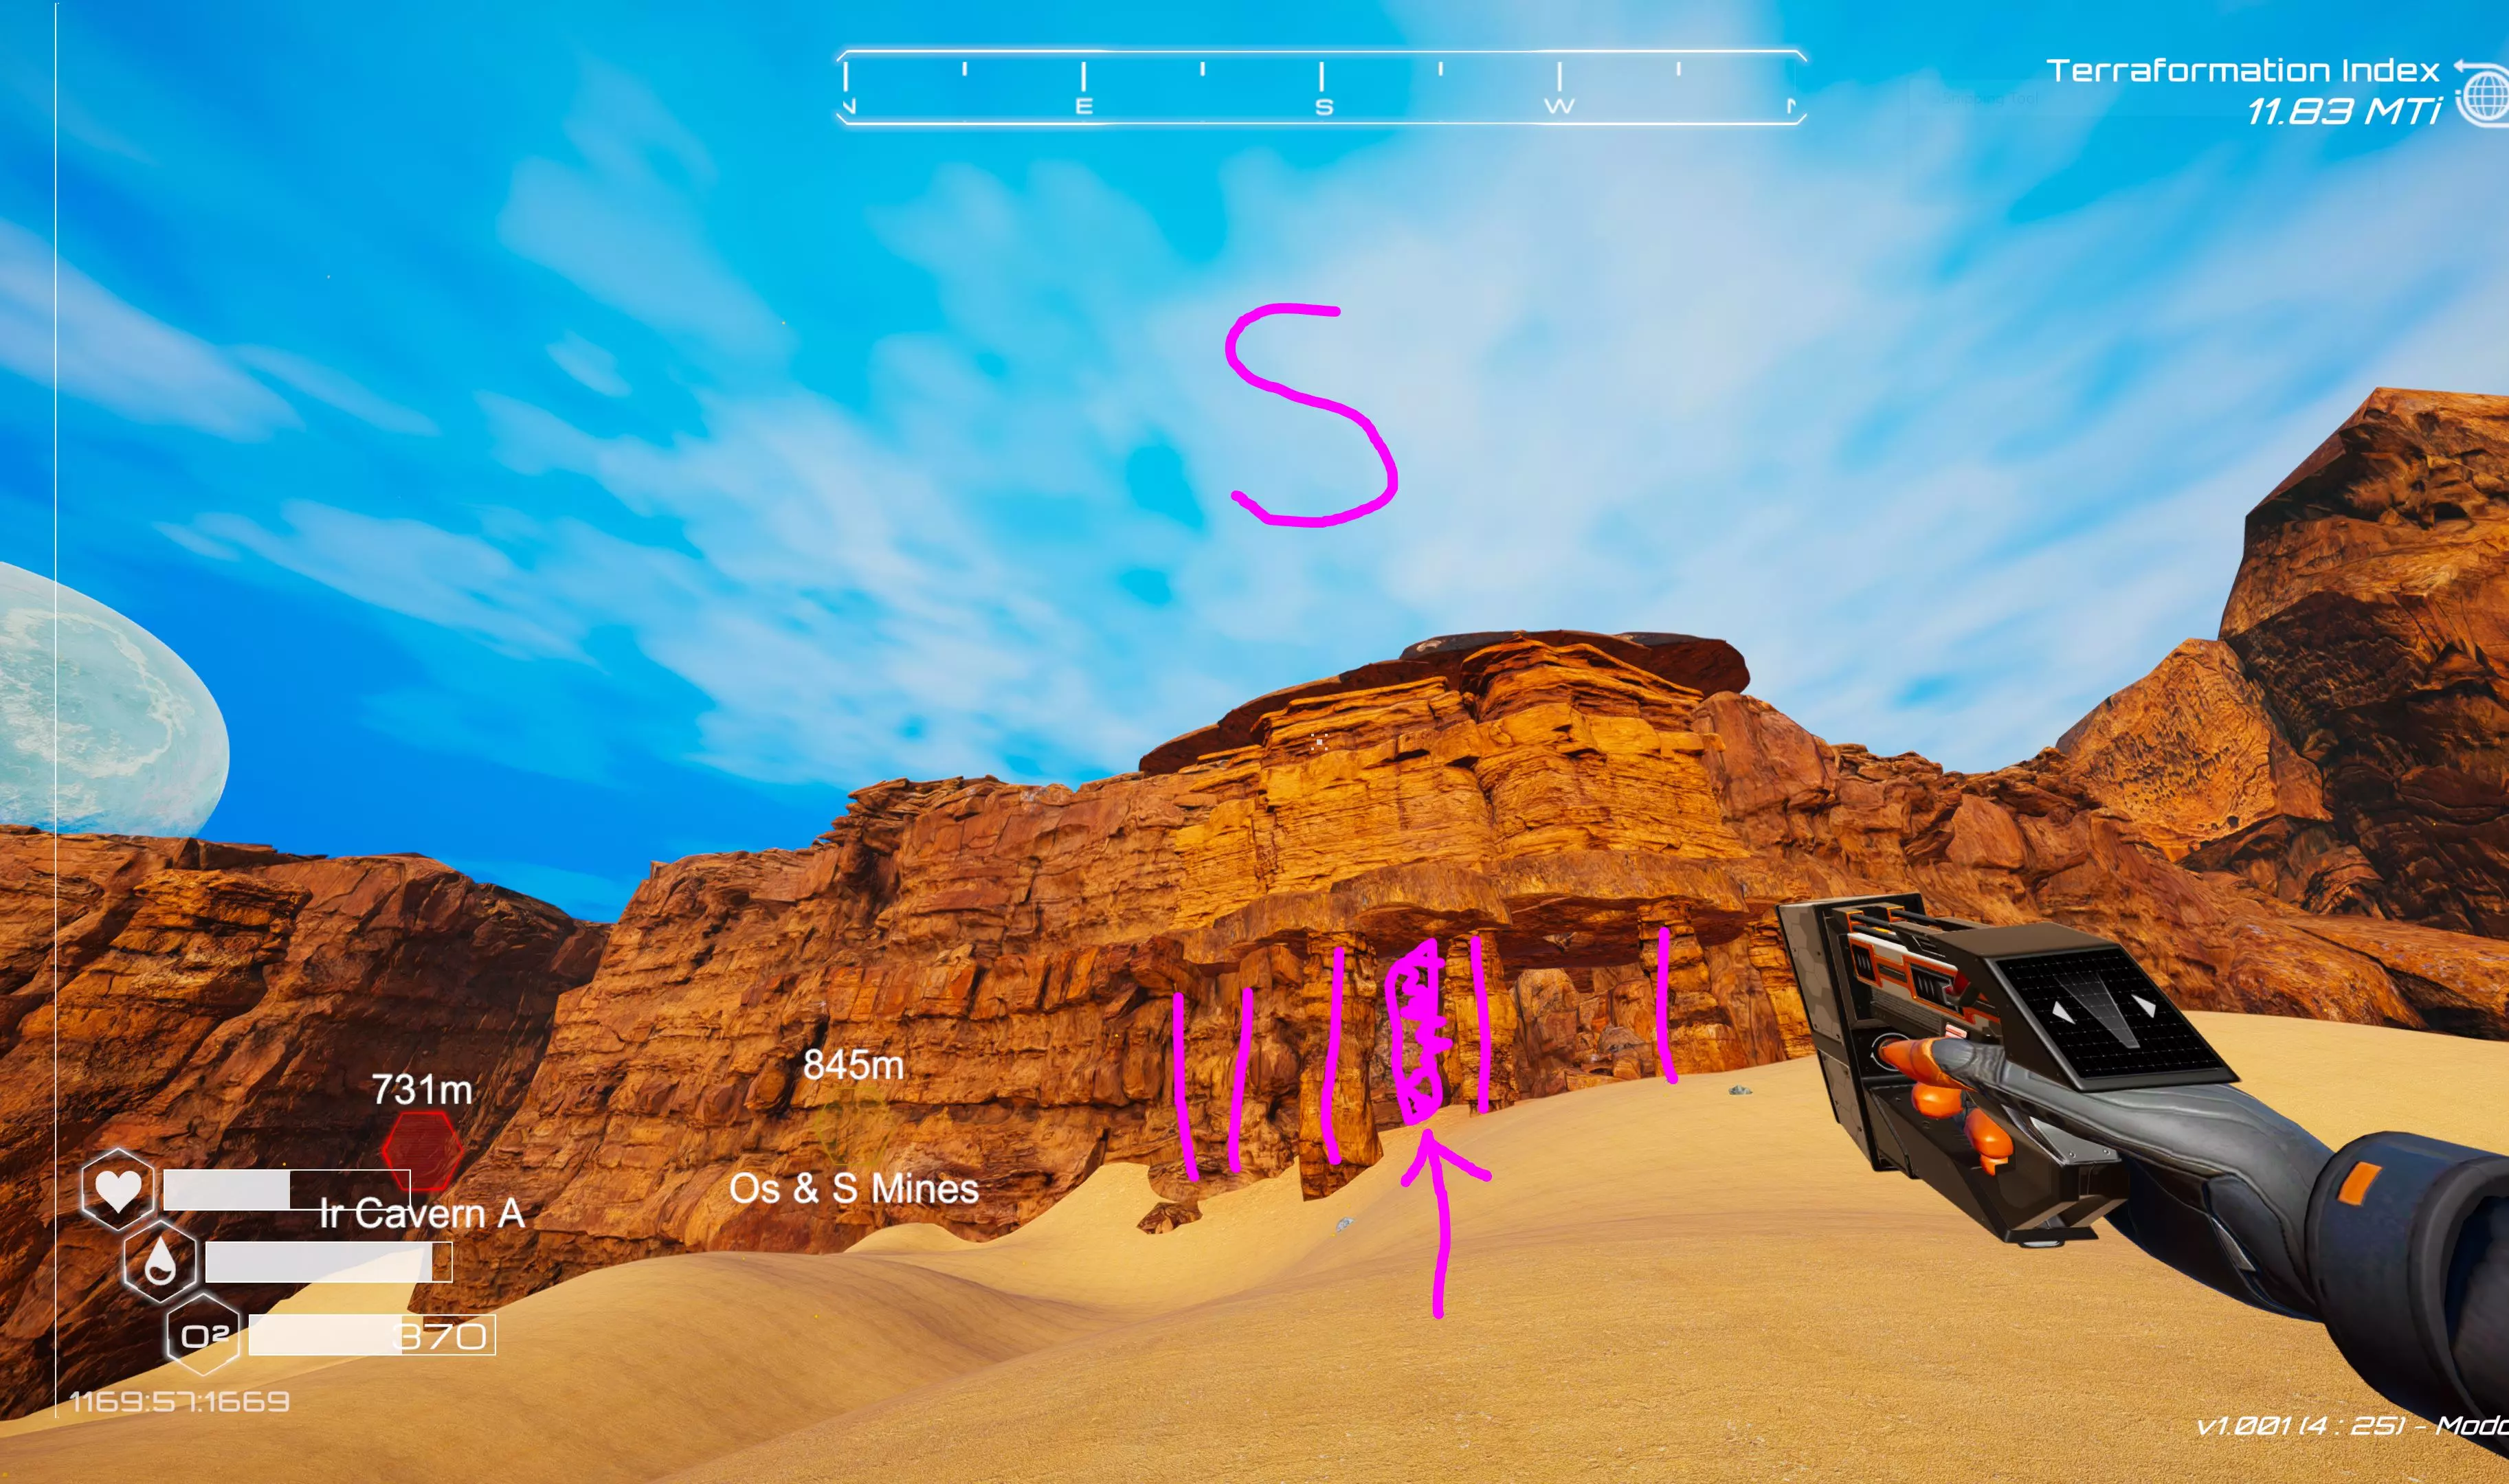
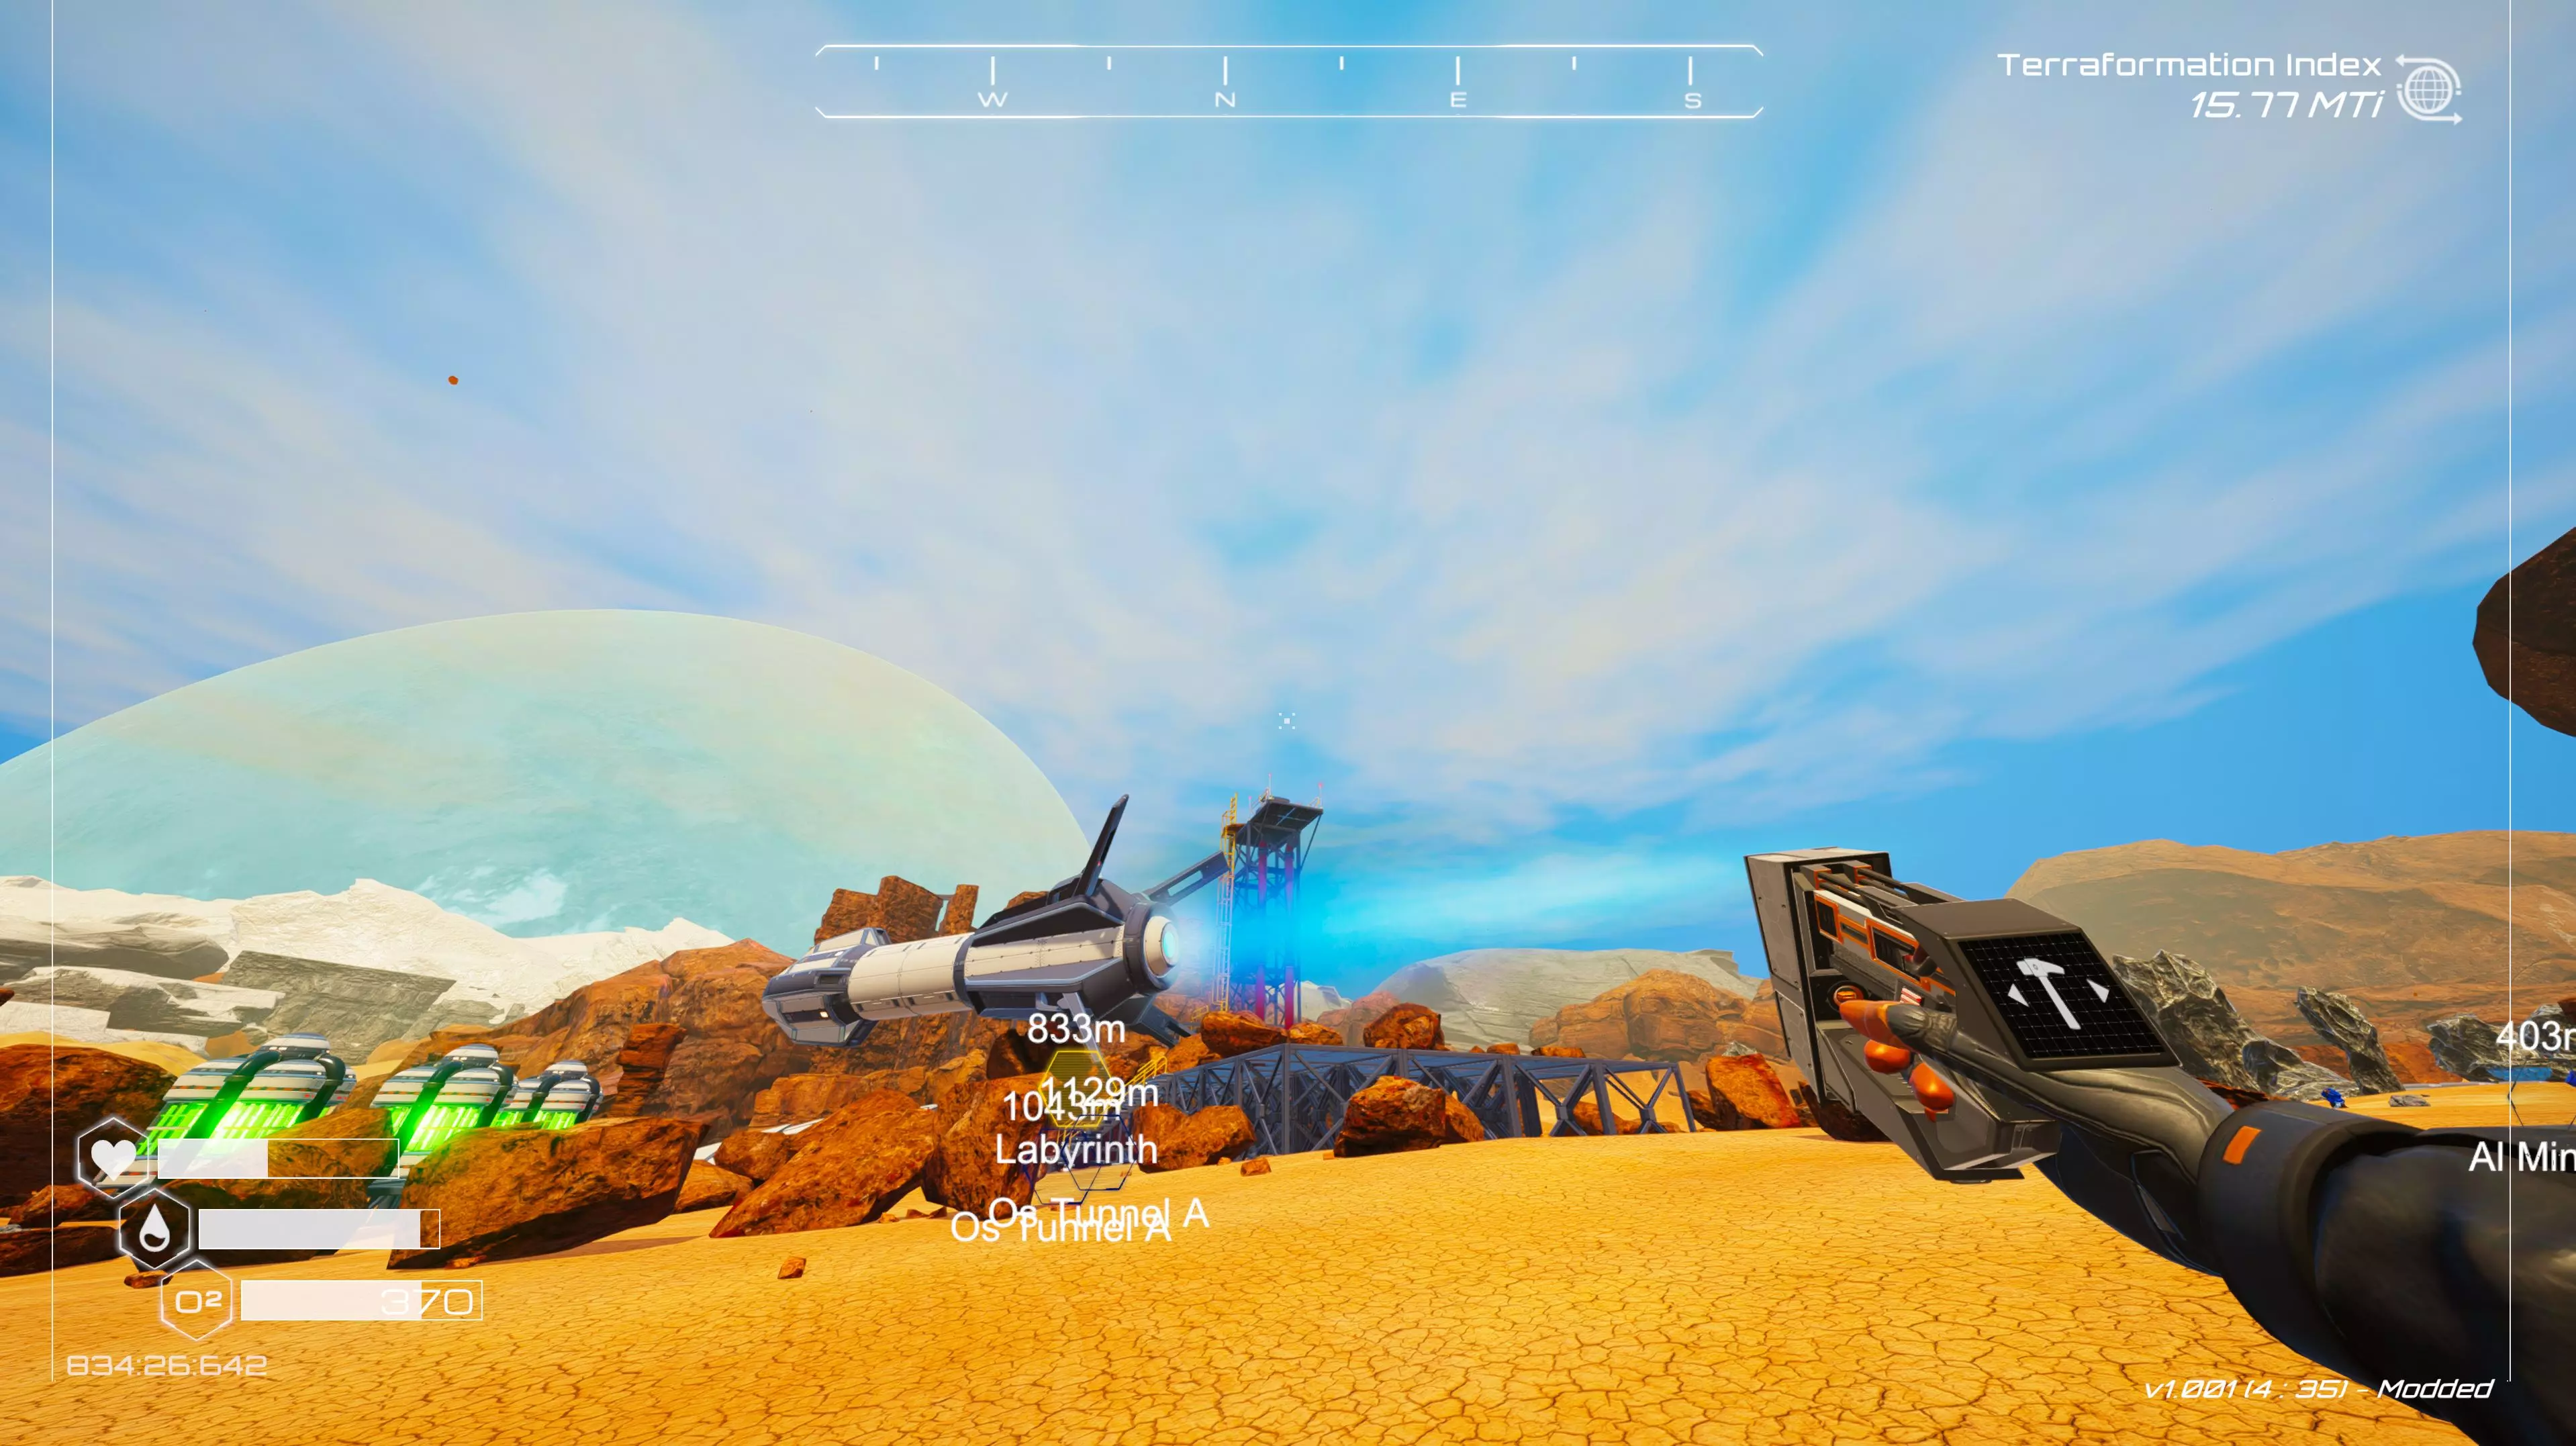
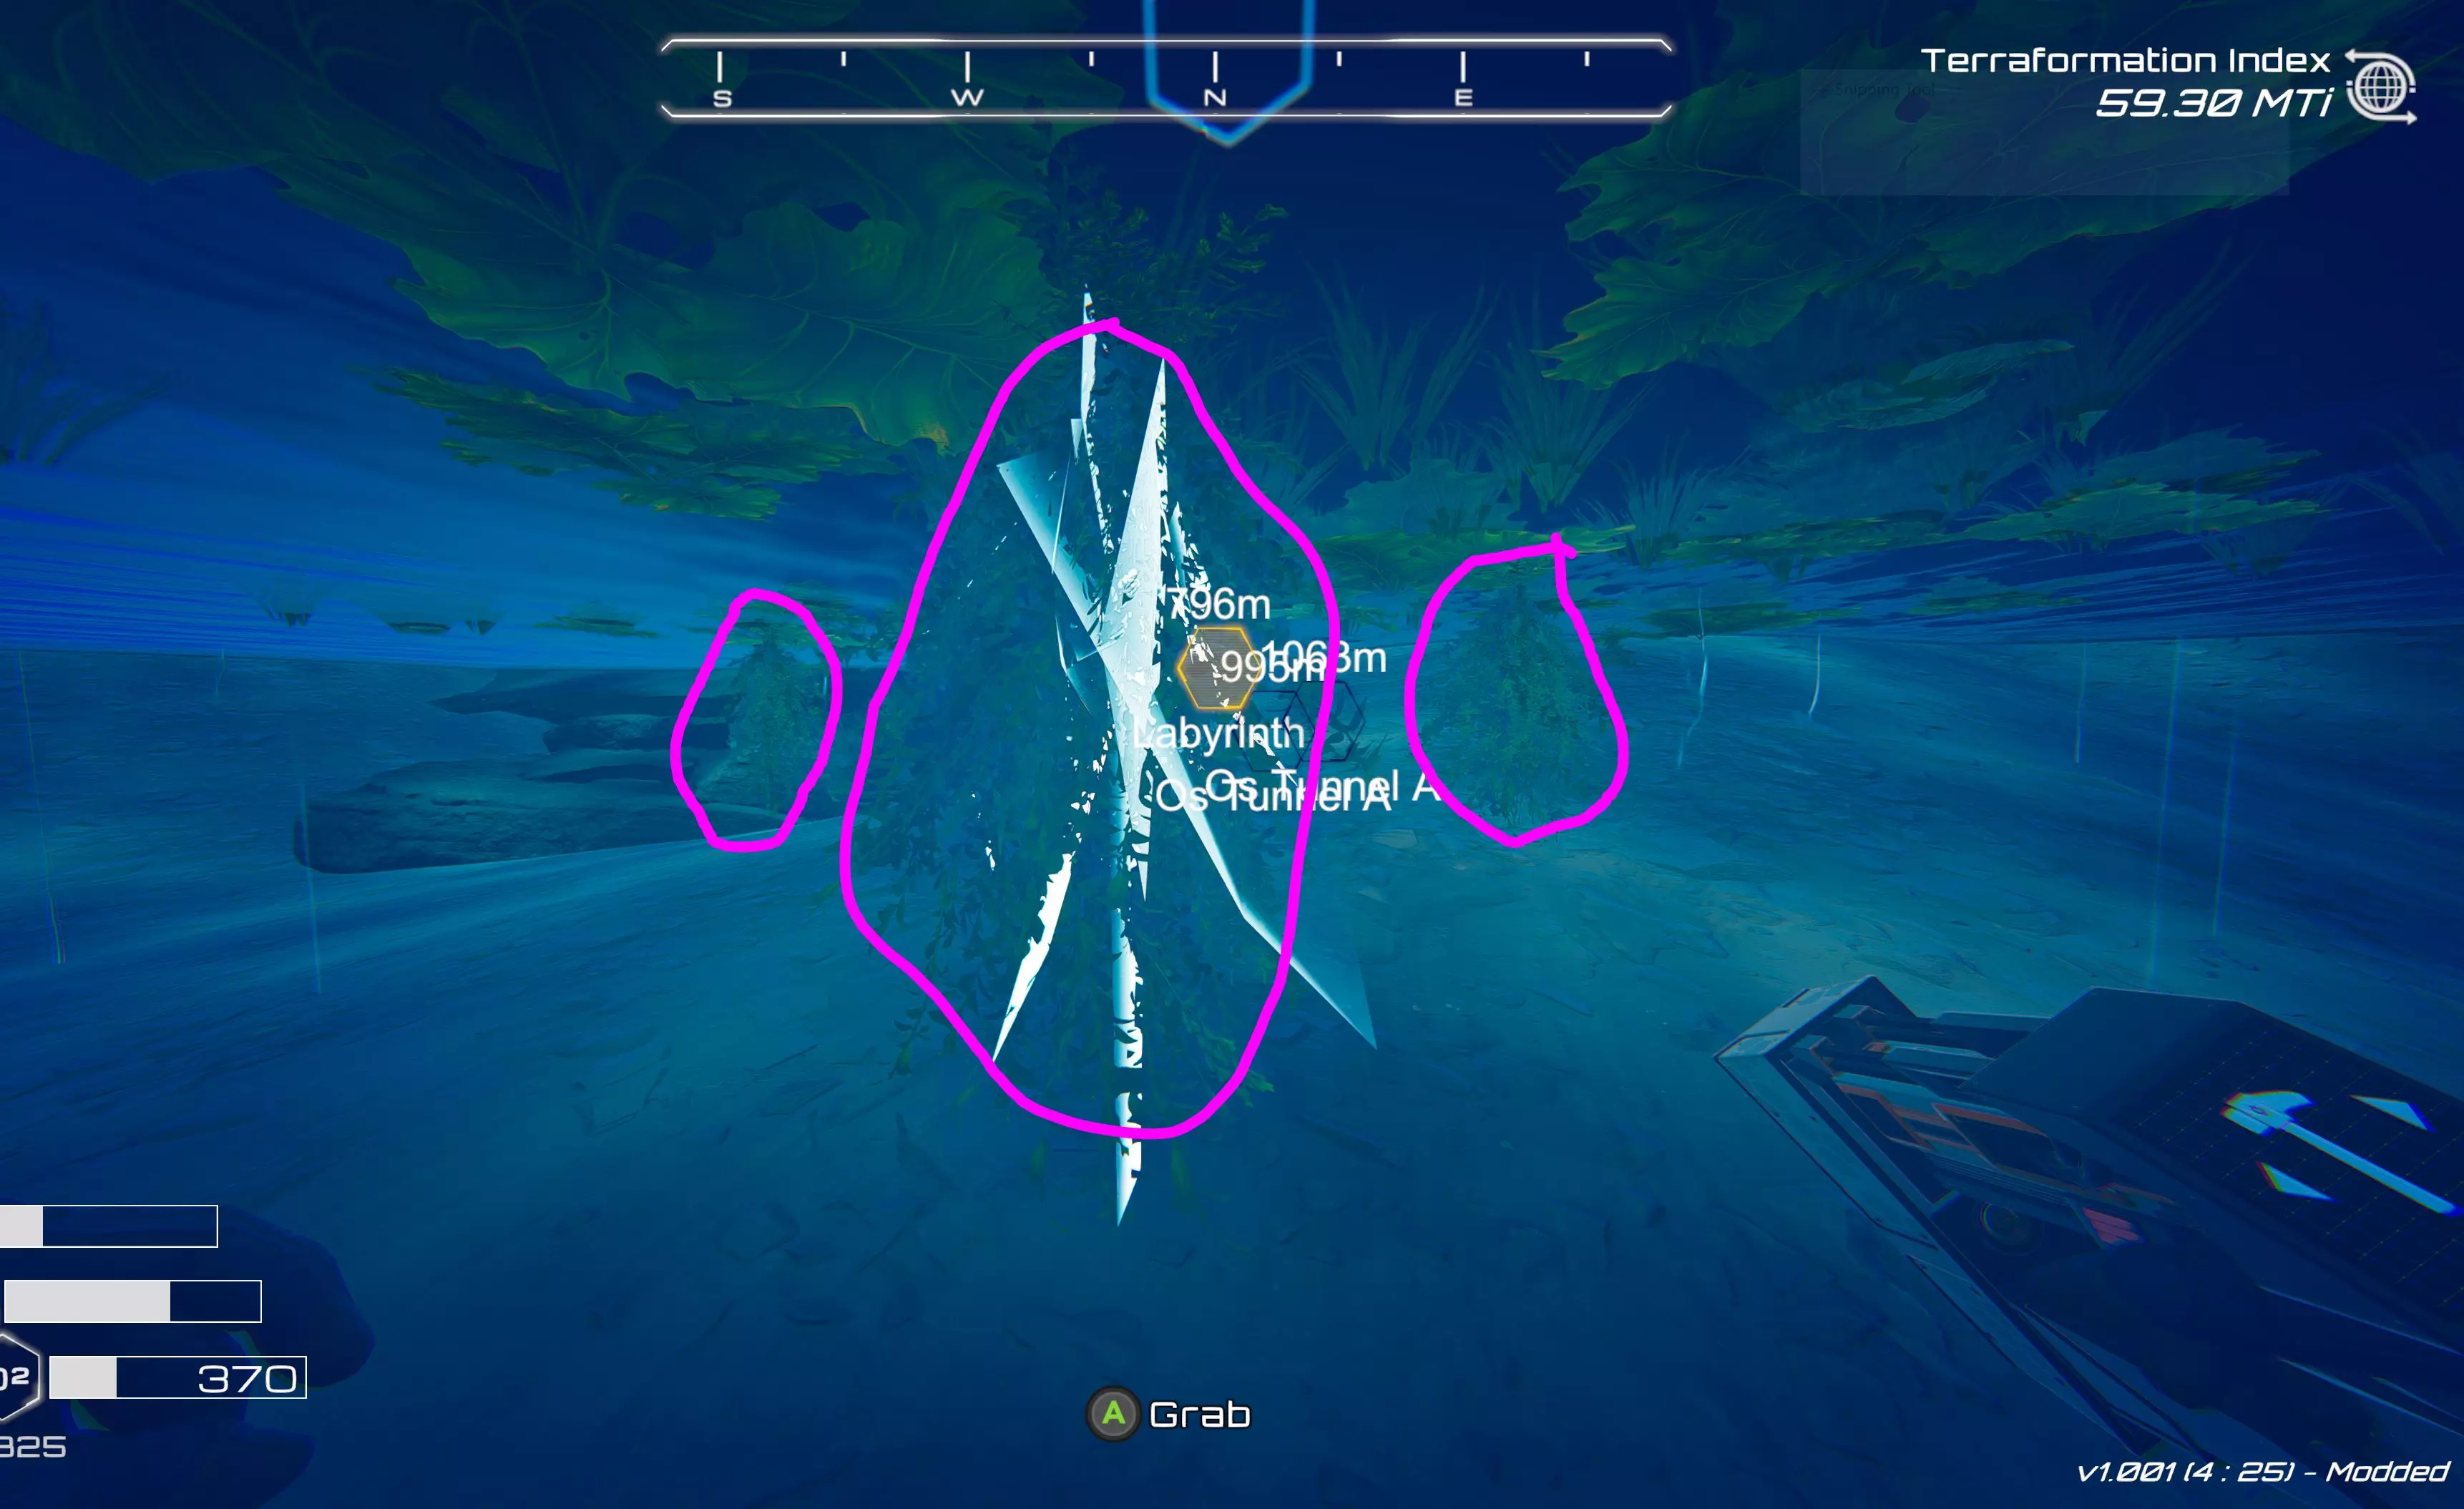
Keep turning right. In the distance there is a pathway leading to a canyon full of tall spiky rocks and some large cargo containers. That's a LONG walk from here though, so we won't be going there until much later. Open the settings menu and check the controls now. You can rebind your controls to either the keyboard or the gamepad, and you can use both at once. The in-game menus and pop-up windows will show you what the buttons do, and they will CHANGE depending on if you're using gamepad or keyboard. For an example, open your backpack menu and look at the bottom right corner. It will tell you which buttons will select an item, which will eat/use an item, etc.. Take note: O2 canisters and water bottles refill the meter COMPLETELY so don't waste them by using them when the meter is still half full. Food restores a set number of HP as listed in the item description, and it seems like your max HP is about 100 or so. Different types of food will restore different amounts of HP. Now you have your bearings, walk on out and start picking up some of the minerals that you find sticking out of the ground. These never vanish, but they also never respawn after you collect them. Only way to get more is to wait for a meteor storm to drop some from outer space, or build an ore extractor to dig for more. But you'll find more than enough of them if you keep going farther and farther from your pod. For the first few days you want to focus on finding enough to get your bigger backpack, bigger O2 tank, some water bottles and O2 capsules, your basic tools, a couple of habitat rooms and a door. You don't need to grab EVERY mineral that you see!! Plan ahead to make things easier for yourself. Once you leave your pod, you'll see minerals all over the ground nearby. Cobalt is a big BLUE crystal. Magnesium is a cluster of BLACK crystals. Iron is a grey/black shiny LUMP. Titanium is a tan lumpy SPHERE (only half of it will be showing above the ground). Silicon is a black LUMP that looks like melted plastic. There are also some blue chests that contain loot. And GOLD chests that contain BETTER loot. Chests can be deconstructed using your tool once they're empty. Blue ones give you one iron. Gold ones give you a super alloy and an aluminum. Chests will have better loot if you leave them there until your T.I. progresses further. But you should grab the ones in this little lake bed NOW because you'll need some seeds and things before long, and chests are the "best" place to find that stuff. In fact, if you turn left out your door until you hit the rock wall, then turn right and follow the wall a bit, you'll find your first GOLD CHEST half-buried in the sand. And on the way there, you'll probably see a BLUE CHEST, too. As you run around out there, you'll notice your oxygen doesn't last long. Feel free to build some temporary "tents" (just a habitat room with a door on one wall) so you can duck inside to refill your oxygen when you need to. But you can't build if it's overlapping the terrain or if there is a piece of ore or something else in the way. Day One - Craft Basic Tools First thing: get that Construction Chip built at your craft station. Requires 2 silicon and 2 magnesium. then the Deconstruction Chip for another silicon and one magnesium. Then the Torch (Flashlight) for one silicon and 2 magnesium. Total required: 4 silicon + 5 magnesium. While you're doing this, you also need 2 ice to make 2 water bottles, and 4 cobalt to make 2 O2 canisters. Once your tools are built, you can equip them from your inventory menu. Next you want to build a bigger O2 tank and a bigger backpack. This will require 3 iron, 2 cobalt, and 1 magnesium for both. This will be the final thing you do while "living" in your drop pod. You need to equip BOTH the backpack and the O2 tank into a "gear" slot and you only have four of those slots. So for now, unequip your Torch Chip since you really won't need it until you go spelunking down in the shipwrecks later in the game. You can even go ahead and store the torch in your blue storage chest for now if it's clogging up your backpack. Next step: open your Build Menu and look at the blueprints you have. These are structures you can build and place them on the planet; you cannot equip or carry them in your backpack. There are a few things you should focus on NOW, before you run out of food and water. Remember the hill I told you about that I said is a good place for your first real base? That's where we want to go now. But if you stay out for too long, go too far from the pod, you will run out of air and water and you will die. It's a bit of a long hike up to the hill. So before you leave the pod you MUST make sure that you're carrying enough minerals with you to build the first room (or two) of your base as soon as you get there, before your oxygen runs out. Also bring some ice and enough materials to build a crafting station - that way you can melt the ice into a water bottle as soon as you get your first indoor room constructed. So you will need these things: Living Compartment + Door: 3 Iron, 2 Titanium, 1 SIlicon Crafting Station T2: 1 Iron + 1 Silicon Two more water bottles: 2 Ice Two more O2 canisters: 4 Cobalt Two storage chests: 2 Iron Total: 6 Iron, 2 Titanium, 2 Silicon, 2 Ice, 4 Cobalt Be sure to build your room on TOP of the hill or propped up on a tower of metal foundations, not on the sloping side of the hill or in the bottom of the lake bed. Then build a door and place it into a wall of your room. If you built your room a bit too high, build stairs attached to the bottom of the door so you can reach it. Notice how there is a little "chain" icon that pops up when the object you're trying to build is snapped in place with the object that's already there. Then go inside and build the crafting station in one corner of the room. It's small... but it's home. We'll be adding onto this as we go. And remember, this is only your FIRST base. You can build it as your permanent home... or you can think of it as a temporary outpost if you find someplace more interesting where you want your house to be later on. But either way, you'll be here for a while so might as well make it fully functional. Open up the new crafting station and you'll notice it has a NEW BLUEPRINT: the Exoskeleton. this will give you more gear slots on your tool-belt. Let's go ahead and build it now, then equip it. Anytime you get a new blueprint from now on, it will appear in THIS crafting station but NOT in the one in your drop pod. From now on, anytime you make a higher tier piece of gear (backpack T2, etc.) you will need to UNEQUIP your current one in order to equip the second one - you can only have one of each type of tool or gear equipped. Also, the higher tier items require the lower tier version as an ingredient. So you will need to spend your T1 backpack in order to build a T2 backpack later. But for now... let's do that new exoskeleton for 1 titanium + 1 silicon + 1 magnesium. You'll also want to build a desk for 2 Iron, since in a little while we'll be building some computer terminals that look better on a desk than on the floor. Feel free to run back outside and get more minerals. Go back to your drop pod and retrieve anything in your storage chest. Then switch to your DECONSTRUCT CHIP (using RB) and remove the chest to gain 1 iron. Carry all that stuff back to your NEW base on the hill and put it in storage there for now. Anything in storage will never rot or decay and it will be safe if you exit the game and come back later. It's just easier to store random things that you find, in case you need them later, instead of dropping everything on the ground when your backpack gets full. While doing all of that stuff, you may have noticed the game was giving you "Low Power" warnings. So far it's fine, we haven't built anything that requires a power source (except the lights in your habitat room - once the sun goes down it'll get DARK in there). But our next project will be to build a small power farm. After that, we'll start building equipment to begin the process of terraforming the planet. But that's a job for tomorrow. Just make sure you have enough O2 canisters (2 cobalt each) and water bottles (1 ice each) to get you through another day or two, and make sure you brought your space food and lirma seeds out of the pod up to your new base. Also, just general advice... when you're exploring and you find a chest, be sure you EMPTY it out even if you have to come back for a second trip. Then deconstruct it. This does two things: gives you some extra minerals to use, and removes the chest so you don't come back to it later thinking it is still full. Just easier for keeping things organized that way. Day Two - Power Network The crafting station is the only thing that will work without an external power source. So before we build anything else, we need POWER. Right now you have two options available to you - wind turbines and solar panels (solar will be unlocked pretty soon). The wind turbines are CHEAP but wow they are terrible at generating power. The solar panels you currently have available are also pretty bad, but better than wind power. You'll unlock more power generators later, so for now we just have to work with what we've got. This game has no power cables, it's all "wireless power" that covers the entire planet. So you can build your power network WHEREVER YOU WANT and it will power ALL your machines no matter how far away they are. For now, because you still have a tiny backpack and a tiny oxygen tank, I recommend you build your first power network pretty close to your little base. And remember - STAY UP HERE ON THE PLAINS, DO NOT BUILD DOWN THE HILL IN THE OLD LAKE BED because it will flood later, and nothing will work if it is underwater. Let's start out simple, with a bunch of wind turbines. Then we'll want to build all three of the basic computer monitors back at base. The big one goes on the wall, the little ones go on the desk. It's also a good idea to build a lamp outside your base, so you can see the door better at night or during a sandstorm, so let's build one of those, too. Wind Turbines, build 8 to get you started - 1 iron each. Basic computer terminals, one of each - 3 iron, 3 silicon, 1 magnesium, 1 cobalt Outside Lamp - 1 Iron, 1 Magnesium If you click on the power screen, at this point you should be drawing a total of roughly 2 power, with somewhere around 8 power leftover. From now on, keep an eye on your power. If you build too many machines the power goes out and ALL of them stop working. So you'll have to build more power generators every so often. This computer terminal lets you keep track of how close to a low-power shutdown you are. The other small terminal is the blueprints monitor. This is where you'll come to unlock more blueprints. As your T.I. stats get higher, you'll hit some unlocks automatically. For others, you'll need to bring data chips here and decode them to get the blueprints - these have nothing to do with your T.I. they're like "hidden secret easter egg" sort of things, but they will make your game a lot easier if you find them all quickly. The big screen that mounts to the wall shows you how far your terraforming has progressed so far. You can see your air temperature, air pressure, and atmospheric oxygen levels on here, as well as your T.I. number. You will build a fleet of machines to increase these, and now that we have some POWER to use, we can start on that process. In your construction menu, read each building's description to see which stats it will raise. Most of them will raise one stat by a lot, then a second stat by a little bit. But the first ones that you have available are very basic, only do one stat each. Heaters raise the temperature as soon as they're built. Drills release gases from underground pockets that will increase the atmospheric pressure as soon as they're built. Oxygen can be raised by using vegetubes, but a vegetube needs to have a flower seed installed. The different kinds of seeds each give a different bonus to oxygen production. Some give an extra 25%. Some give an extra 500%. So read the seeds' item descriptions before you decide which one to use. Go ahead and start building some of those terraforming machines now. Some of them (drills) need to be placed outdoors on level ground. Some need to be placed on a PLATFORM such as indoors, on a roof, or on top of an iron scaffolding block. For now, you'll want as many vegetubes as you can find seeds for them. Your next MAJOR goal is to unlock blueprints for the Food Grower - BEFORE you run out of space food packets. And that blueprint requires 12.00 ppt of Oxygen progression. So get to it! You should have found a Seed Lirma in your drop pod's storage. Flower seeds all look something like this - some kind of plant inside a glass jar. These are the ONLY ones that work in vegetubes. Tree seeds (unlocked MUCH later) won't work, neither will food veggie seeds which come in little foil bags. Also make five of the drills immediately so you can unlock a bigger O2 tank, allowing you to explore farther from home before you need an O2 canister. Vegetube (build one for each flower seed that you find, up to six) - Iron + Ice + Magnesium (1 each) Drills (5 or 6) - Titanium + Iron (1 each) Oxygen Tank T2 - T1 oxygen tank + 1 Silicon + 1 Cobalt + 1 Titanium + 2 Magnesium Backpack T2 - T1 backpack + 1 Iron + 1 Silicon + 1 Titanium We don't have any Iridium yet (unless you got lucky RNG in some chests) so we can't build any heaters... but those are coming soon. Take a moment to check your power use. If you're getting close to the limit, build a few more wind turbines. But I think you should be fine for now if you built 8 of them already. This is also a good time to add a second room onto your base. You could put more doors on it if you really want to, or the glass walls that you'll unlock in about five minutes, but for now I like to stick to the basic version in order to conserve materials until I have access to the ore extractor machines. Notice when you build a SECOND room, there is a "chain" icon if you place it beside, above, or below a room that is already built. This shows that the new room will connect by a hallway to the old room so there will not be a solid wall between them. If you don't see that "chain-link" icon, then your new room will just be a regular square block and you'll have to put a door on it in order to get in and out. Also, if you stack rooms vertically you'll need to build a LADDER in the LOWER room in order to move between them. But you don't have the blueprint for the ladder yet. So for now, just add a basic second room onto one side of your first one. Then you might need to rearrange some furniture to make space to walk through the hallway. Spare Room - 2 iron + 1 titanium Now that we have a T2 backpack and a T2 oxygen tank, we can walk farther from home. Which is good, because you've probably grabbed ALL the iron and silicon that were within T1 walking distance from your new base. Our next target is Iridium, which isn't TOO far away but we're not going to reach it on a single O2 tank even at T2 tank size. So now's a good time to tell you how to build a basic outpost to recover your oxygen and water levels while you travel. You'll need the following: 1 habitat room - 2 iron + 1 titanium 1 door - 1 iron + 1 silicon 1 T1 craft station - 1 iron + 1 silicon When you're running around and you get close to empty on your water and oxygen, build a room with a crafting station inside. Make sure you have enough ice and cobalt to fill your tanks. Then when you leave, you have the option to leave the room there for next time you come this way, or deconstruct it and carry the parts with you as a portable refill station. Anyway... we can't build any heaters without iridium. If you stand on top of the little hill by your new base, looking down at your drop pod... turn right, you'll see a rocky cliff wall. Keep turning right until you see the sand falling down in front of it. That way leads to the iridium cave, but if you're very lucky you might also find a few pieces elsewhere in blue and gold chests; iridium is the RED crystals. Once you unlock the ore extractor, that cave is where you will build them to mine for iridium, but that's for later. For now we need MORE SEEDS to build MORE VEGETUBES, don't worry too much about heaters yet. NEW UPDATE: EXPLOSIVES Apparently one of the new features added in a recent update (which I still have not had time to play through myself) is EXPLOSIVES, and a new type of debris that requires explosives to remove it. Someone said the first place they found the new debris was in front of the Uranium cave. Again, I HAVE NOT played the most recent update content yet, so I have not personally verified this. But someone in the comments here posted a note about how to deal with that debris: "It takes two explosive powder and one circuit board to make a explosive. You drop it like you would any item that you do not want. After left clicking, you have only five seconds to get away or you will be pooped." So it seems you can drop it from your inventory and then it is on a five second fuse - so you should RUN AWAY! Then it goes boom, and you can get past whatever was previously blocking your path. Day 3 - First Shipwreck If you look BEHIND your new base, in the distance you should notice a small crashed ship next to a cliff face. To the left of that is a bigger shipwreck that's farther out in the desert. To the left of that you'll see some rivers of sand falling down from the top of a rocky cliff, marking the iridium cavern. Behind those cliffs near that first little shipwreck is the area known as "the labyrinth" - a series of canyons littered with super alloy nuggets and aluminum and other minerals just lying out in the open... but it can be confusing to find your way in there. And it's difficult to get in there until later when you have bigger oxygen tank and the jetpack. So for now, our next destination will be the shipwreck in front of the labyrinth wall. Why? Because WE NEED MORE FLOWER SEEDS. We need the seeds to install into more vegetubes to make more oxygen, so we can unlock the blueprint for the Food Grower before you run out of space food packets and starve to death. So, here's what we're going to do...

Build as many vegetubes as you have flower seeds. If you build six, that should be enough. You can even build all six first and come back to activate them after you get seeds, but remember all your machines start using power as soon as you build them, even if they're not loaded or not currently doing anything. So watch your power usage. T1 vegetubes have to be built indoors - which is why I had you build that second room a few minutes ago. We only need six of them for now because by the time you will have seven seeds you'll probably unlock the T2 vegetubes which are SO MUCH BETTER than T1, so building extra T1 tubes would be a waste of time and minerals. Our next stop will be that little shipwreck. Before you go, load up on a few things so you can build a small outpost outside the ship's cockpit (on the right side, as viewed from your base) which is where you'll enter the wreck. 1 habitat room + 1 door: 3 Iron, 1 Titanium, 1 Silicon 2 storage chests: 2 iron T1 crafting station: 1 iron, 1 silicon 2 Windmills (to run the lights and the crafting station): 2 iron Outdoor Light (to illuminate the habitat door during sandstorms): 1 iron, 1 magnesium Total minerals needed: 9 iron, 1 titanium, 1 magnesium, 2 silicon Stash an extra oxygen canister, an extra water bottle, and an extra food in the outpost Make sure your torch and deconstruct tools are both equipped on your toolbelt also bring 2 oxygen canisters, 2 bottles of water, and 1 or 2 space food with you before you enter the ship since you'll be in there for a little while. You may need to make two trips to get all those materials from inside the shipwreck to the outpost, and you'll need to make around 3 trips to bring all the loot back to base after. Turn your flashlight on, and try not to get lost in there. Loot is RANDOMIZED inside shipwrecks and in chests, so you never know what you'll find in there. It isn't even generated until you approach the ship. But once you approach, anything that's lying out in the open - on the floor or on top of a desk, not in a chest - will VANISH in less than 20 minutes. So before you get close, be sure you're ready to explore the whole thing. Go on in, with a mostly-empty backpack (except food, water, and oxygen refills). Grab everything that isn't bolted down. Some wrecks have broken steel beams blocking hallways, use your deconstruct tool to remove them (they will give you some iron, too). Big chests have all kinds of loot inside. Tiny chests usually have data chips. Bring those back to the blueprints screen at your base, where you can trade them in for secret blueprints. Those blueprints are awarded randomly, so you might get them in a different order if you start a new game later and try again. Some wrecks (not this one, but the BIG ones) also have a fusion generator inside... these are LATE-GAME things - you need to make a fusion energy crystal, insert it into the generator, and then a few doors will unlock so you can access new areas of the shipwreck later in the game. If your backpack gets full or you start running out of oxygen or water... go back to your outpost and put your loot in the chests there. Then go back into the wreck for another sweep until you have ALL the loot out of it. Remember you can also deconstruct empty chests to gain an iron ore, which can be used to rebuild the chest back at the outpost if you run out of storage space. Once you're done in the ship, start making trips to haul all that loot back to your main base. Start with the seeds, any iridium and aluminum or other "strange" minerals, then prioritize food/O2/water next. Hopefully you found a few more seeds in there. Both flower seeds AND veggie seeds. Load all the flower seeds into vegetubes to get your atmospheric oxygen up until you unlock food grower blueprints. Then build TWO food growers in your base. Open it up and put veggie seeds in both. After a while the seeds will grow, then you click on the VEGGIE PLANT NOT THE MACHINE to harvest your veggies. You can eat ALL the veggies. Beans refill the most health, and are not used in any research later. The squash, eggplant, and mushrooms will all be used in your biolab later in the game. And there will be cooking recipes later, too... I haven't unlocked them yet myself so I don't know which veggies will make the best meals in your kitchen for late-game. You'll be stuck with raw veggies for a pretty long time. So whenever possible, eat your beans and save the other veggies for science later on. We now have ways to refill two of your three survival needs: food by growing veggies, and oxygen by building a habitat room with a door. We still need to worry about water... and you might have noticed it's a pain in the neck hunting for ice to make water all the time. So our next MAJOR target is to unlock the atmospheric water collector blueprint. Build one of those and it generates water slowly over time - no ice required. We also want to unlock the blueprints for the Ore Extractor, which we'll need in order to avoid running out of minerals - they dig into the ground and produce resources over time. On the way to getting those, we'll unlock a bunch of other new things, too. Day 4 - Iridium and Heaters Stand outside the little shipwreck, looking across the open field to your base. To your right is the iridium cave, where you'll find a bunch of iridium sitting on the ground (along with a few pieces of aluminum and super alloy). To your left is a field of grey sands, with sharp metallic rocks sticking high up out of the ground. That is the aluminum field. You'll find a bunch of aluminum sitting on top of the ground over there. From now until the mid-game, pretty much everything you build (in T2 and T3) will require aluminum and/or iridium. Good thing we picked a site for our base where both of those places are so close! By now you've probably experienced your first meteor shower. Big rocks fall from the sky, aimed in your general direction. The ground shakes, the wind howls, the dust kicks up... it's very scary. The rocks break apart on impact, and mixed in with basic useless stone you'll find a few minerals. Pick them up quickly if you want them though, because they will vanish after a few minutes. Try not to get hit by a meteor - it really hurts, you could die from it if you're not careful. To avoid the meteors, go indoors. Either in a habitat room, or in a cave, or into a shipwreck - anything with a roof will protect you. Your buildings will not be damaged by the meteors. But if you're feeling frisky, you can stay outside. This gives you a chance to run around and collect a bunch of free minerals as long as you can avoid getting flattened by a meteor strike. Certain meteors even have a little bit of aluminum in them. Head towards the rock wall where the sand is constantly falling down. Notice how the sand here has a reddish color? It's full of iridium. You need some. You also need all the aluminum you can find. So run around the cave behind the falling sand, explore the whole thing. At the top of the cave is a giant ice block that prevents you from using the tunnel, which leads out to the sulfur fields. It's fine, when your global temperature rises high enough, the ice will melt. I like to setup an outpost near the ice block. Later, this is where you'll be mining for iridium. And using the path behind the ice is the fastest route to collect iridium, sulfur, and osmium. So it's a convenient place to put a little workshop. Anyway... grab ALL the iridium and aluminum off the ground here. Use it to build some T1 heaters. These have to be built indoors, so attach a second room to your iridium outpost building, and fill the whole room with heaters. Remember these are here, we'll come back to dismantle them and reuse the parts later. But for now we need the heat more than the parts. By the time you get your T1 heaters built, you've probably unlocked some better drills and vegetubes. So go tear down the old T1 stuff you built earlier, and replace it with the upgraded versions. Just bear in mind the bigger equipment will need MORE POWER!!!!! So you'll want more silicon to blast out a bunch more T1 solar panels. You can even build some T2 solar panels if you want to, but they require aluminum which is VERY RARE right now. Speaking of aluminum (or aluminium if you're European), from your main base by the old lake bed, if you're looking out over the lake bed turn LEFT. There is an area over there that has grey sand and a bunch of spiky shiny silver rocks sticking out of the ground. That's the aluminum field, if you put an Ore Extractor on the grey sand it will mine for Aluminum. But that comes later. For now, there are a few chests out there that may have more seeds and fabric for you to grab, there is a small crashed shuttle you can explore that has four storage chests in the back end of it (and some equipment that you can come back later to dismantle once you have the T2 Deconstructor Chip), and there will be a bunch of aluminum nuggets sitting around on the ground. Grab all the aluminum you can find!! Sadly it doesn't respawn, so use it wisely. So at this point you should have T2 (maybe even T3) drills x 6. A dozen or so T1 heaters. And T2 (maybe even T3) vegetubes x 6. If you're lucky, you've also found some GOLDEN SEEDS to put into the vegetubes. If you were less lucky, just use whatever seeds you have. (Flower seeds, that is.) Then at your main base you should also have a Crafter, some Storage, and as soon as you have the blueprint for them you need to build FOUR food growers and load them with vegetable seeds; and at least one Atmospheric Water Collector, which will produce water every few minutes. Once you get the blueprint for it unlocked, also build the Advanced Crafting Station. This lets you build Super Alloy nuggets, Iridium Rods, Uranium Rods, Rocket Engines, T4 Backpack & O2 Tank, and the JETPACK!!! And then of course build up your solar and wind power until you have roughly DOUBLE as much power as you need. For personal equipment on your toolbelt, you should have (or be working towards) the following: Backpack T3, O2 Tank T3, Exoskeleton T2, Constructor Chip, Deconstructor Chip, Torch Chip, Compass Chip, Mining Speed T3 Chip, and if you've found enough fabric and unlocked blueprints for them also get the T2 Agility Boots. And you should be working towards getting the T4 backpack and T4 O2 tank next. Once you have the T4 pack and tank, try to build two rocket engines and turn them into a jetpack. Day 5 - Uranium, and Rockets Well, you've got a decent start on improving the oxygen, air pressure, and temperature on this barren rock. By now it's probably started to rain, and you MIGHT even see some of the lakes and rivers starting to fill up. But before long you'll hit a level where your machines just aren't doing enough on their own. You'll need to seed the atmosphere by shooting ROCKETS into orbit, which then release plant spores or cause meteor showers with iridium/uranium meteors. There are even rockets that launch satellites that will map the planet's surface for you. But in order to make rockets, you'll need a lot of iridium and uranium to build rocket engines. So let's go find some uranium now. Bear in mind there is only ONE PLACE to get uranium (other than meteors and chests you'll find in shipwrecks) and it's pretty far from your current main base, and the chunks of uranium on the surface won't respawn so eventually you'll need to build some ore extractors in the uranium cave. Make sure you have enough materials with you to build TWO "tent outposts" on the way there. Each outpost should be at least one habitat room with a door (3 Iron, 2 Titanium, 1 Silicon) and it should have a storage cabinet (3 iron), a T2 crafting station (1 Iron, 1 Silicon), a food grower preferably loaded with BEANS seeds (1 Iron, 1 Water Bottle, 1 Aluminum), and an atmospheric water collector (1 each: Iron, Silicon, Magnesium, Cobalt, Aluminum, Super Alloy) if you can afford to build one. It should also have a lamp (1 iron, 1 magnesium) outside the door. Now that you have that T4 oxygen tank you can spread your outposts out a little farther than you could on day 1. So you'll want some source of food and water at each outpost since the water meter will drop almost as fast as your O2 meter now. If you can't afford to put a water collector at each outpost, it's fine at least store a bunch of ice there to make water if you need it later. Bear in mind that the food grower uses 15 power, and the water collector uses 11. So you might also want to build 27 power at the outpost. That's equivalent to 5 T1 solar panels or 2 T2 solar panels. Once you get to the uranium cave, you'll want to build a more permanent mini-base. It will be similar to the outposts you built along the way, but it should also contain an Advanced Crafter so you can turn the uranium ore into uranium rods, so you can conserve backpack space and bring more uranium home per trip. It also lets you build Super Alloy if you need to, which compresses one each of the Iron, Magnesium, Silicon, Titanium, Aluminum, and Cobalt into a single super alloy nugget. This may not seem like much use to you now, but after you get your ore extractors going they'll pull up a lot of "garbage" minerals along with the uranium. At that point you can start bringing aluminum over here to make some super alloy. But you don't need to do that right now. You should also build a similar mini-base at the aluminum field. And another at the iridium cavern. Once you unlock your ore extractor blueprints you'll need to spend considerable time at each of those locations. It might help you avoid getting hopelessly lost if you build a BEACON at each mini-base that you plan on returning to pretty often. And at your main base. Beacons require 1 Titanium, 1 Silicon, and 1 Aluminum. (Are you starting to see yet how Aluminum will be your limiting resource for the early portion of the game, before you can build ore extractors?) Again, to clarify, we'll be using TWO types of outposts from now on. Tent OutpostA room with a door, a T2 crafter, some storage, maybe an atmospheric water collector, a food grower (beans), a lamp outside the door, and five T1 solar panels. Mini-baseA larger room (or multiple small rooms) with a door, a T2 crafter, some storage, an atmospheric water collector, a food grower (beans) or two, a beacon, an Advanced Crafting Station, a Recycler, a Map Screen & Unlock Screen placed on a table, more storage, even more storage LOL, a lamp outside the door, and MORE POWER - maybe a T1 nuclear reactor, or 11 T1 solar panels, or 4 T2 solar panels. So now you're probably wondering "where exactly is the uranium cave?" Am I right? Let me give you some directions, now that you have the COMPASS chip equipped. From the shuttle wreck in the aluminum field, go EAST. Up a slight hill. There will be a rock wall to your north and another to your south, go between them. When the rock wall to your south (right) ends and you see a giant white ring on your left, turn right. There will be a crashed satellite just around the corner. Feel free to drop down and explore that while you're here. Keep heading south a little farther, and there will be a point where you'll want to drop down off of a dark brown cliff into a sandy alcove. Just a little way ahead, on your left, is a cave in the rock wall that looks like it has a soft green glow when you get close enough. That's your uranium. It is the closest place where you're guaranteed to find uranium. Build your mini-base just outside the cave. Then head in and take whatever isn't bolted to the floor. You can also leave a T1 Uranium Generator here for now.
当你走出洞穴后,向右走一点,在洞穴入口正对面不远处有一条【捷径】,可以通往铝矿区域附近。建议你在铝矿区域那边放置一个信标,这样之后就能轻松找到它了。 另外,如果你想更进一步,可以现在就把这里的小型基地升级一下。接下来的步骤当然是可选的。你现在可能没有足够的材料来完成所有升级,所以可以之后再回来完成…… 不要建造普通的居住空间,而是建一个大一点的。然后显然要装上门。在外面建造一个大气水收集器,再配上一两盏户外灯。在内部建造一个带有地图屏幕的工作台、一个T2制造机、一个高级制造站、一个回收机、一个食物种植器(带豆子种子)和一些储物箱。在解锁T2矿石提取器的蓝图之前,你不会回到这里,但至少现在可以为此做好准备。 当你回到主基地后,前往铱矿洞穴,对你在那里的小型基地进行同样的操作。 一旦你到达超级合金洞穴、可开采锇矿的锇矿洞穴以及硫磺矿区,也要在那里建造同样类型的扩展采矿营地。 记住,高级制造站、回收机、集水器和矿石提取器(你稍后会建造)与你目前建造的大多数其他物品相比,需要大量电力。因此你可能需要升级你的发电系统以确保一切正常运行。 记住,你还有信标。 信标的使用方法:建造信标后,它可以垂直或水平地贴在墙上。信标上有两个按钮。底部那个看起来像圆环的按钮,可以让你更改信标的颜色。这会改变顶部小灯的颜色以及指南针上指示器的颜色。顶部那个看起来像“...”的按钮,可以让你重命名信标。此后,信标的名称和与你的距离将显示在指南针上。它们有助于你找到那些你不想失去踪迹的地方。 既然我们有了一些铀和少量铱,我们可以(也应该)建造一个火箭平台。我喜欢把它放在基地附近以便随时使用,但你也可以把它放在任何你觉得火箭发射台看起来不错的地方。不过要记住,它非常耗电,而且你只需要一个。大约半个T1核反应堆的电力就足以驱动一个火箭平台。 火箭平台 - 3个超级合金 + 3个铁 + 3个钛 T1核反应堆 - 2瓶水 + 3个超级合金 + 1个铀棒 第6天 - 迷宫、超级合金和锇 现在你已经有了喷气背包、足够大的背包和良好的氧气罐,你可能已经准备好进入【迷宫】了。里面有大量的超级合金、铝以及其他一些好东西(比如隐藏的黄金宝箱和一个可以搜刮的废弃站)。更不用说它靠近一些锇矿。如果你回到主基地附近探索过的第一个沉船处,向北看。那面岩壁是迷宫的外部,有好几个入口。不过我建议沿着西侧(左边)绕到后面。沿途你需要搭建几个【前哨帐篷】来补充氧气和水分,不过现在你肯定已经习惯了。另外,记住沙漠里那艘巨大的沉船。我们过一会儿会去那里,但不是现在。
既然你正好路过那艘大沉船,而且你已经知道铱矿洞穴在哪里了,那么你可以站在船上那座长方形桥(就是有根大天线竖起来的那部分)的【南边】——当然,不要离桥太近——然后朝南走向铱矿洞穴,你会在一块巨大的锈色岩石后面发现一个通往地下的秘密舱门入口。你这次出来的时候就应该去那里看看。如果现在不去,那也得尽快去,因为一旦湖泊开始形成,有些地方就很难到达了。到那时地下水会渗进来,那里就会变得又湿又泥泞。所以,我们最好现在就去。之后我们再继续去迷宫。
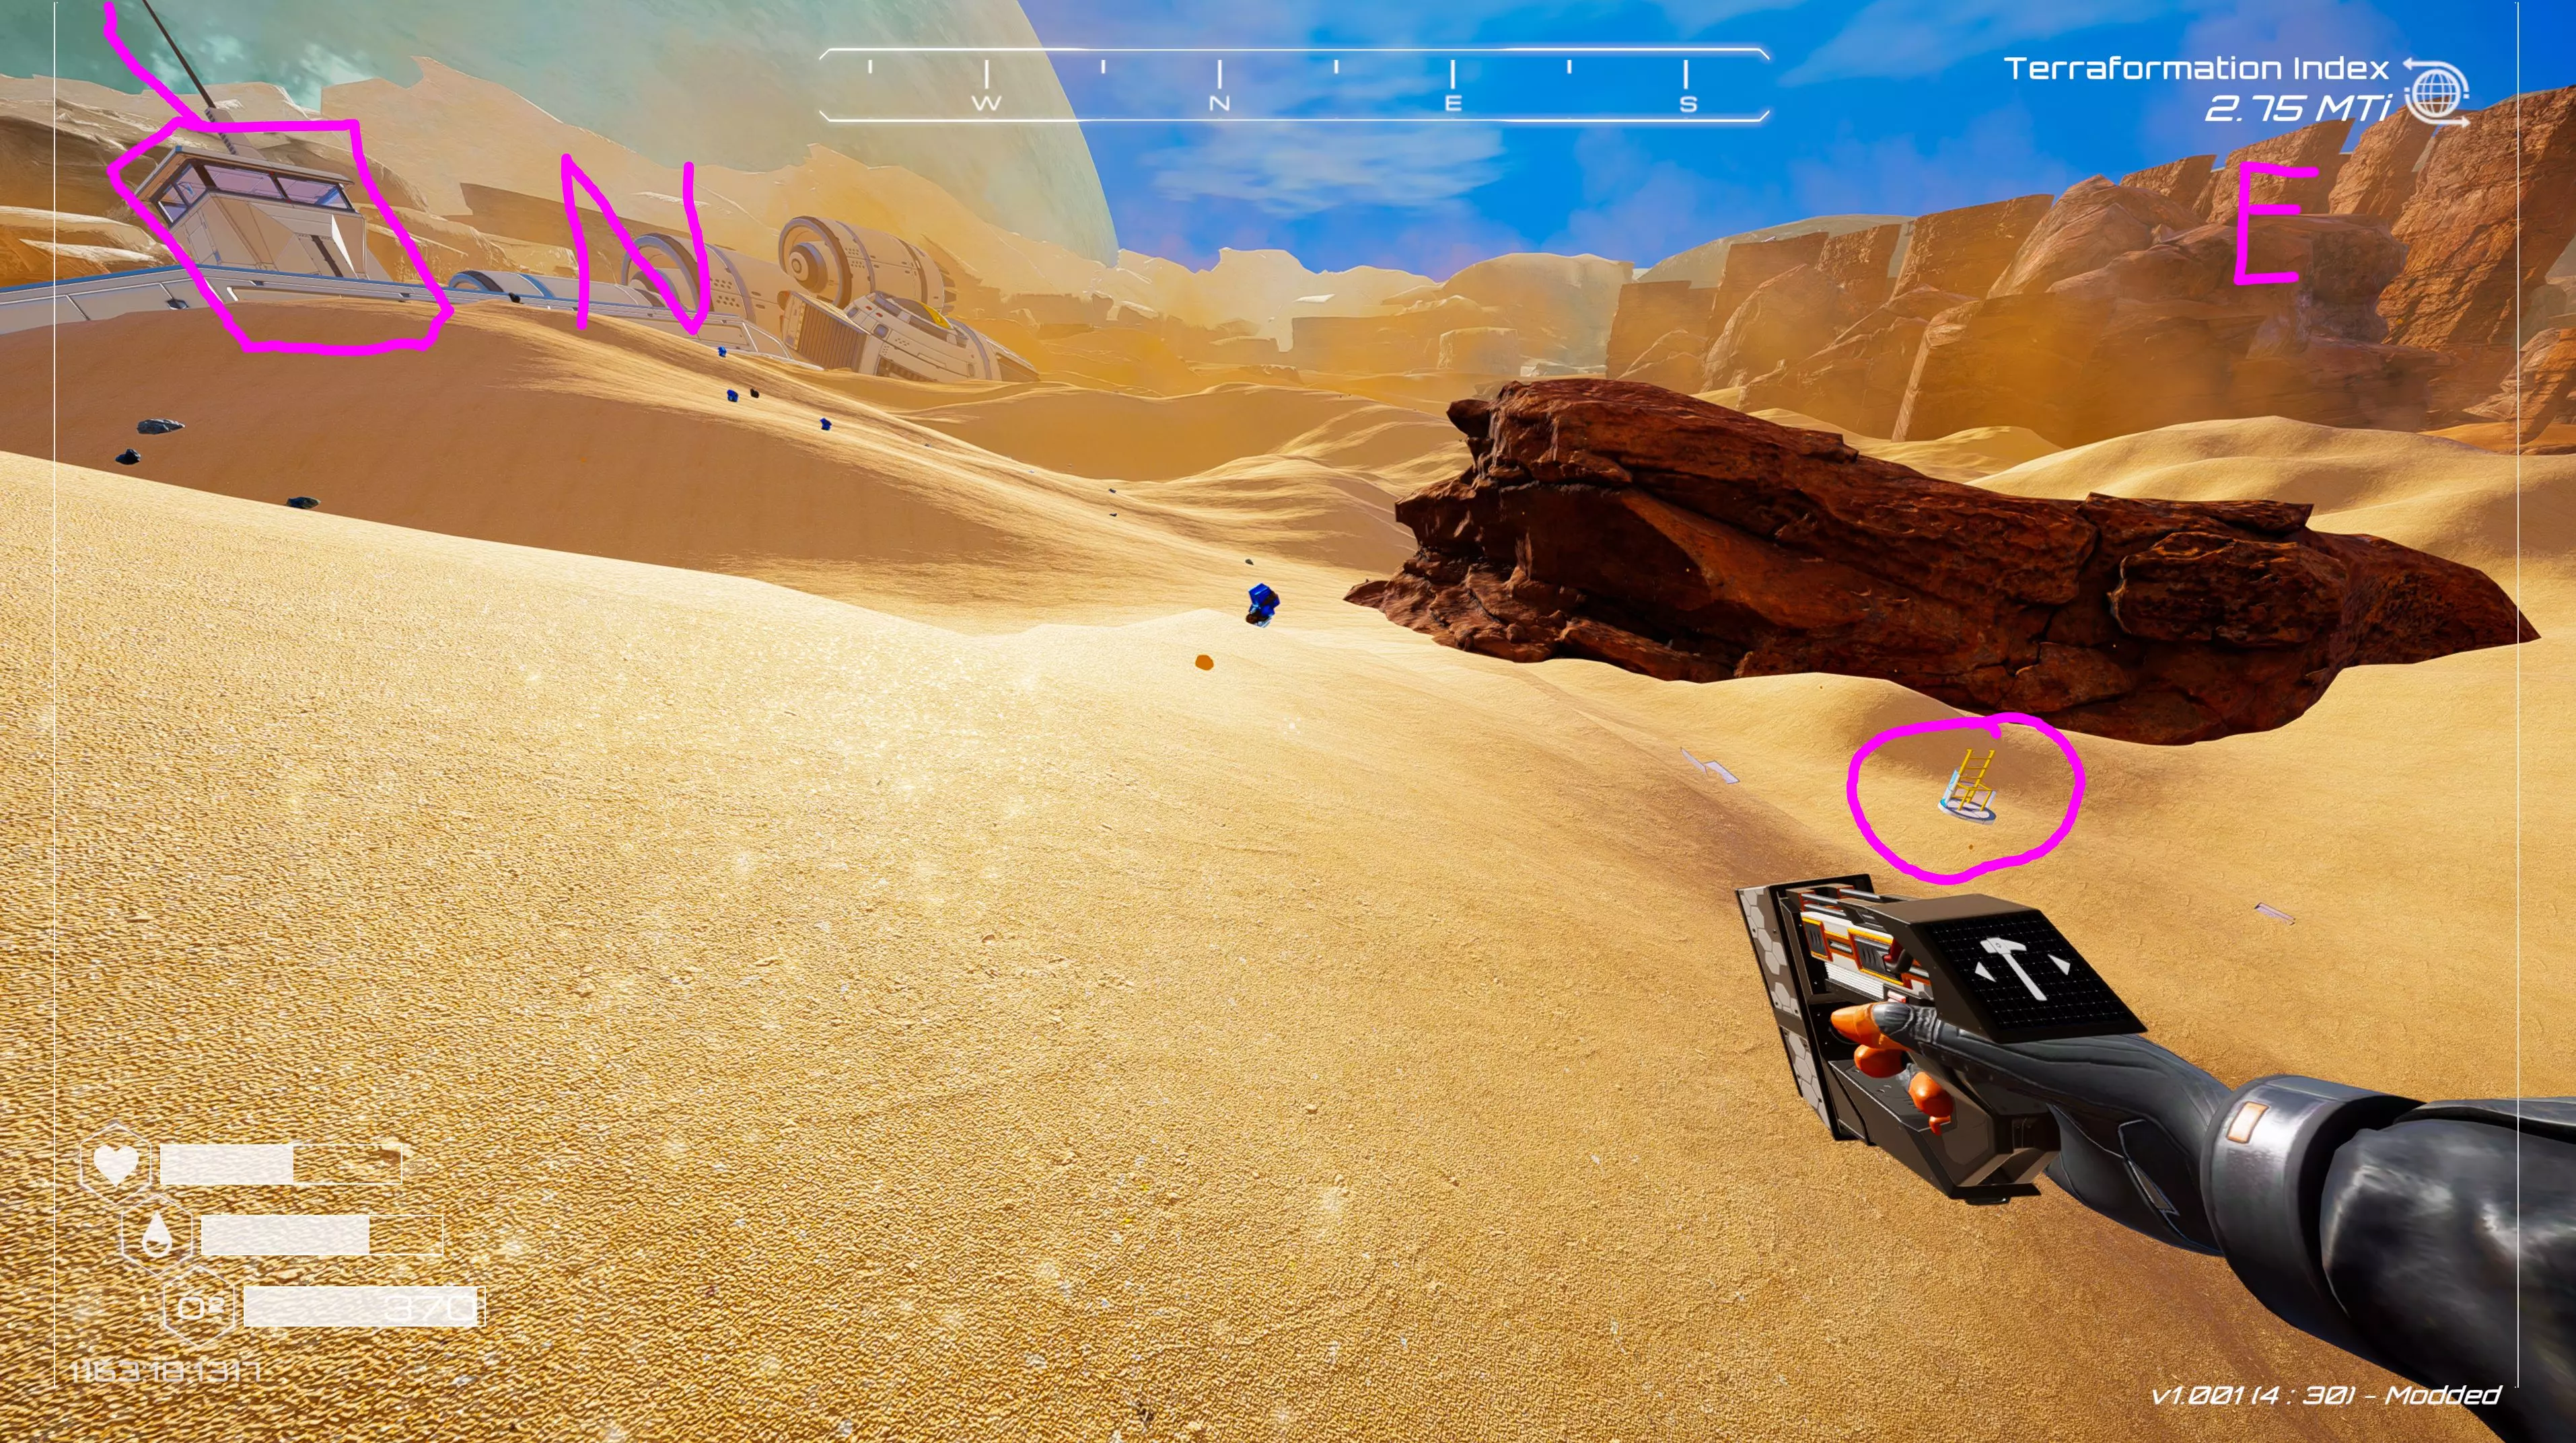
当你继续沿着迷宫的外墙前进时,你在岩石中看到的第一条小巷是个诱饵。那里有一些矿物可以收集,但它不会通向任何重要的地方。在这张截图中,沙漠中的巨大沉船位于我位置的西边,也就是右侧。
你真正想找的迷宫入口是一系列通往地面层的斜坡,以及上方纵横交错的金属和天然石桥。通过这里可以到达黄金宝箱和废弃车站。车站内的部分战利品是类似电脑的【技术残骸】,你需要在获得【T2破坏芯片】后再回来获取。
不过现在,先去迷宫和空间站里好好探索一番吧。但要记住你来这里的目的: 1. 种子 2. 铝 3. 超级合金 4. 铱、铀、硫或锇 5. 可能还需要布料和太空食品包。 目前其他东西都不那么重要,所以如果拿不下所有物品,可以建造一两个储物箱,把东西暂时存放在这里,等下次再来取。 当你探索完迷宫后,从进来的路出去,参考上面的截图。然后向右转(东方),朝着悬崖壁走去。在一个角落里,你会发现一个洞穴入口。如果你还在游戏初期,主洞穴会被冰挡住,但你仍然可以进入其中的一小部分。稍后返回时,冰会融化,但洞穴最终会被淹没。你不能在这里建造任何矿石提取器,但你会发现地上有一堆锇和硫,你可以用你的手持钻探工具直接拾取。而且你现在急需那些锇。所以这里将是你的下一个目的地。确保在洞穴入口外建造一个【帐篷】,并带着一个基本空的背包出发。你现在应该已经拥有T1矿石提取器的蓝图了,而建造它们需要锇。这个洞穴里的锇和硫永远不会重生,所以这是这些资源的一次性来源。请明智地使用它们。
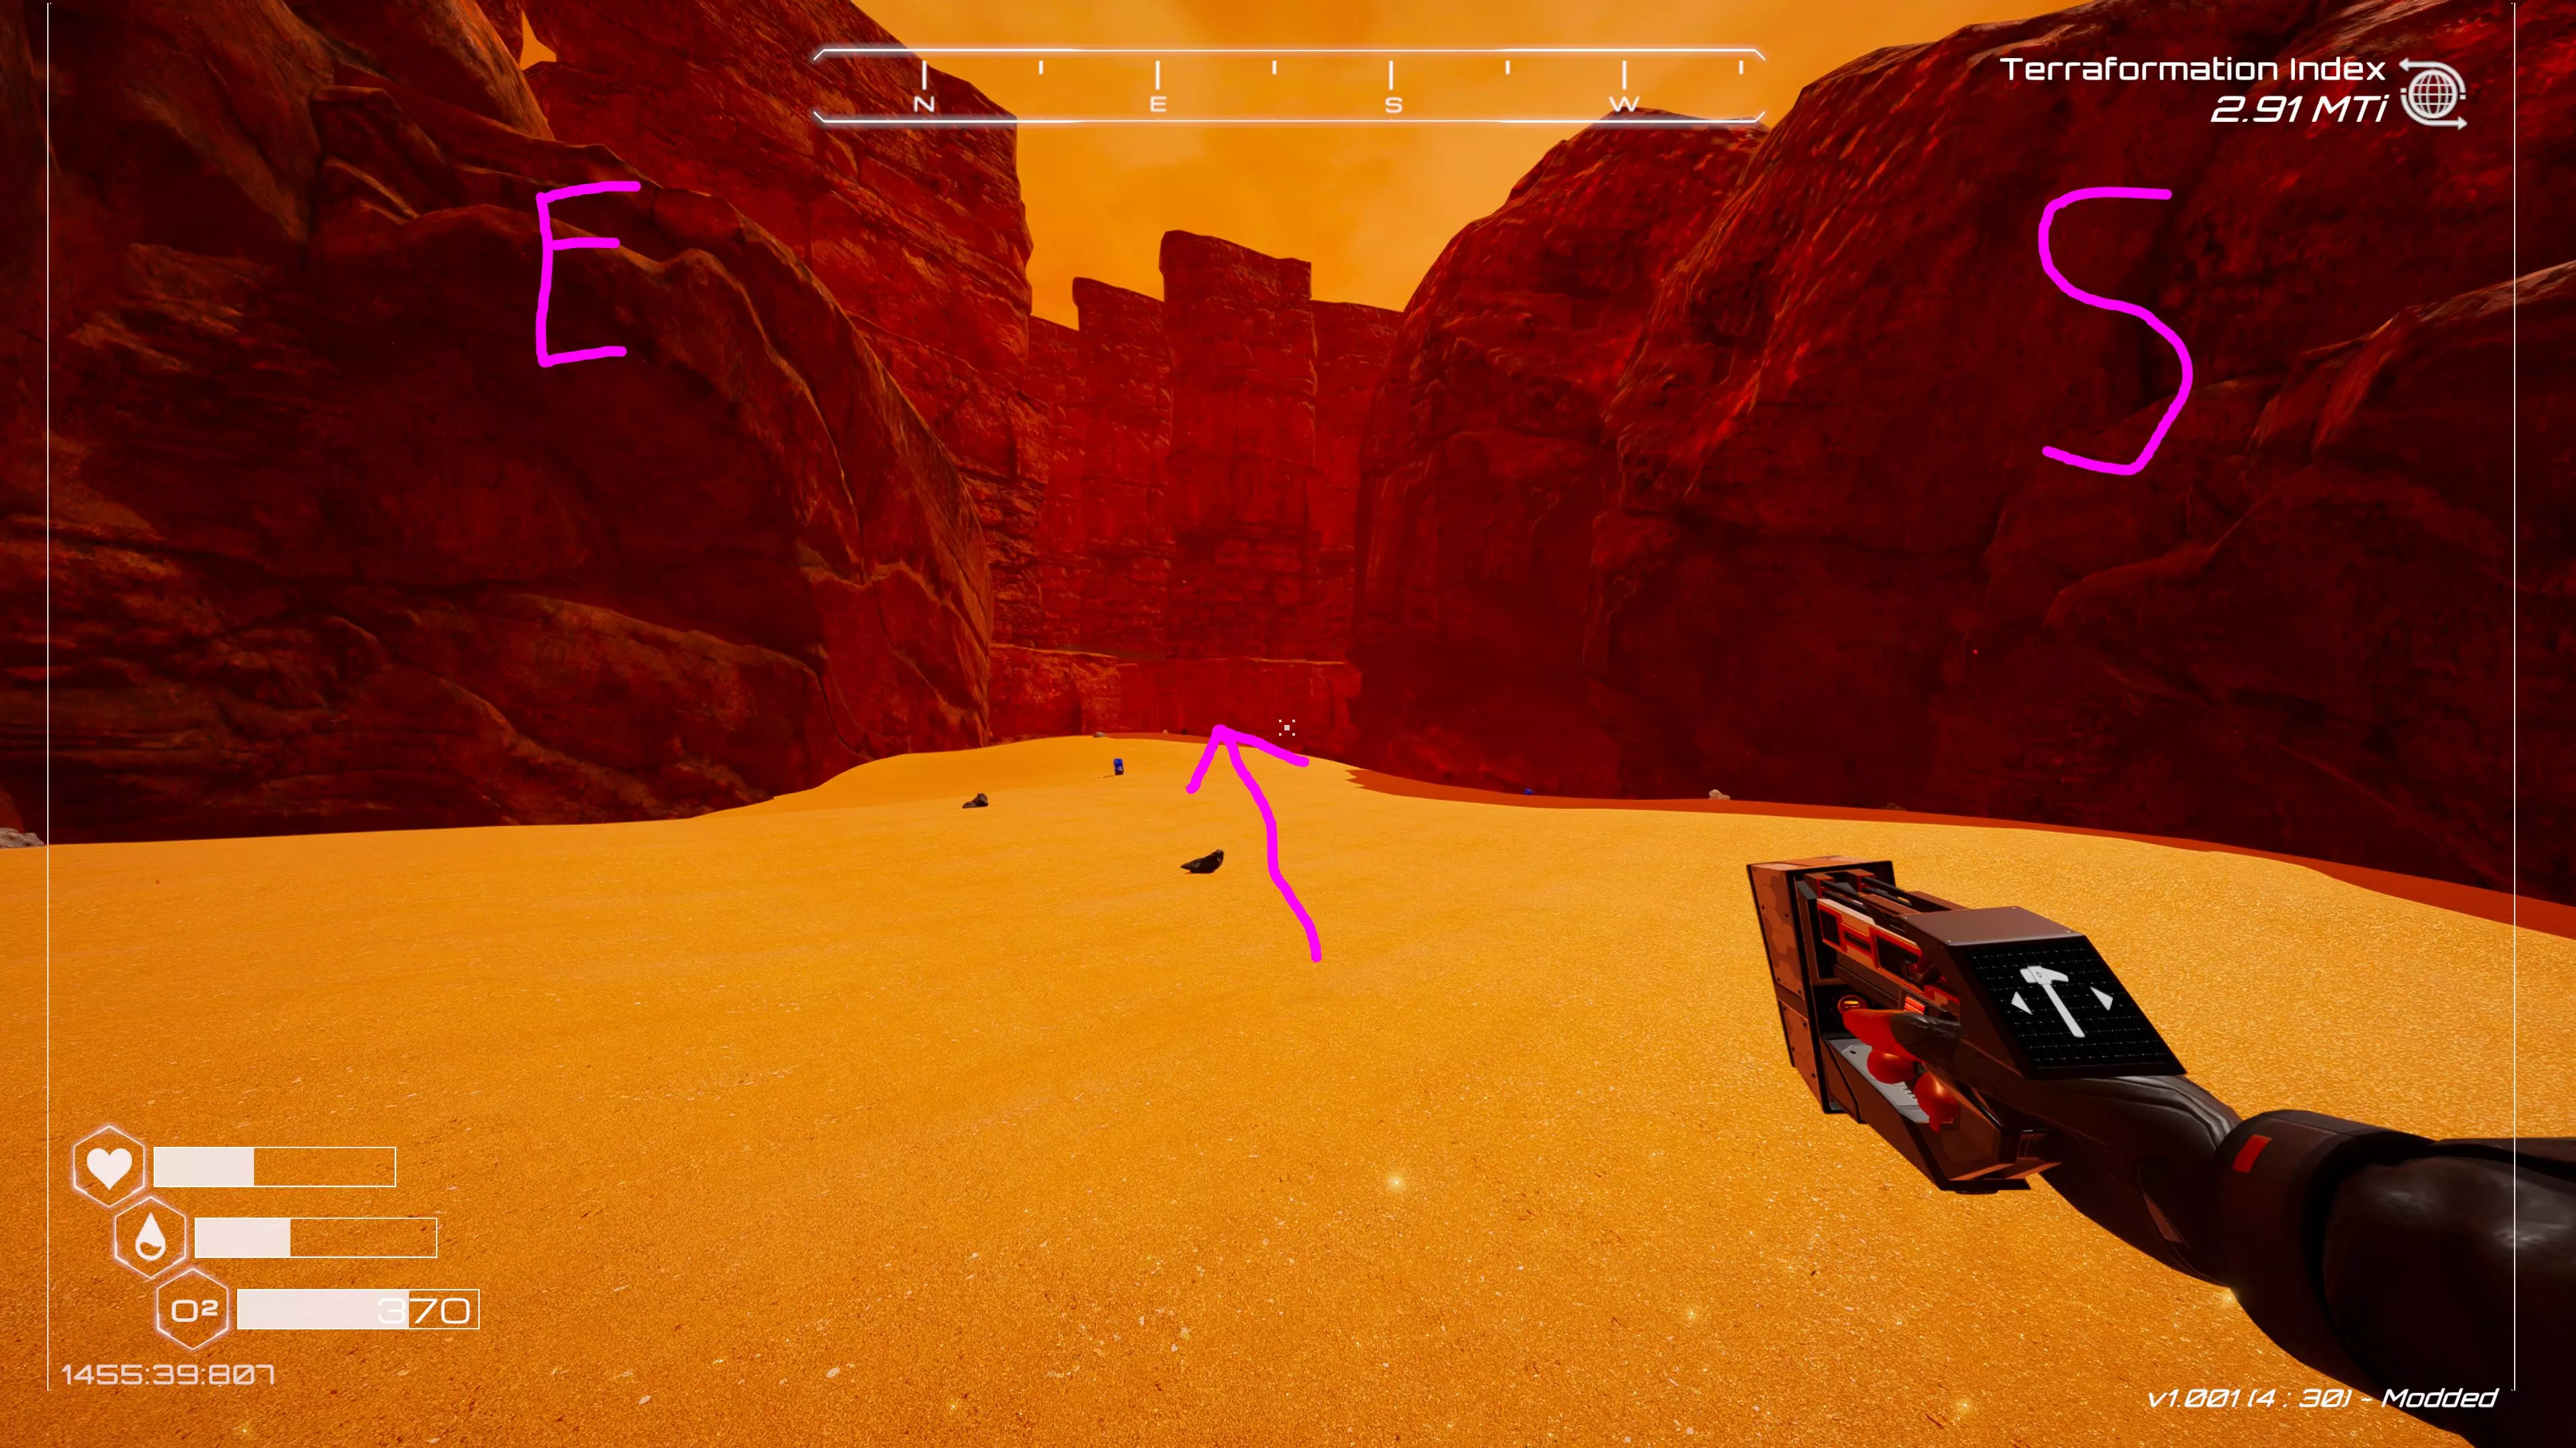
当你从进入洞穴的同一位置离开洞穴后向左转,沿着峡谷壁的这一侧走一会儿(不过要小心别掉进另一边的大峡谷!),你应该会到达一个可以向右登上岩石平台的区域,那里再次是迷宫的边缘,上面有更多的超级合金。然后这条路会通向铝矿区。 现在,根据你到目前为止向大气中释放的热量多少,洞穴可能会被冰川堵塞。别担心,继续建造加热器,冰最终会融化。目前,如果你(小心地)从悬崖另一边的大峡谷往下跳,并在另一边找到洞穴入口,你可以获得更多的锇和硫。那里的冰比这边融化得更快,所以即使这边仍然被封锁,你也能从那边到达大部分锇矿。注意,当你靠近冰面时,传感器会告诉你融化冰面所需的温度。回到基地后,在电脑屏幕上查看当前温度,并将其与所需温度进行比较,这样你就能大致了解需要多长时间来加热这颗星球。
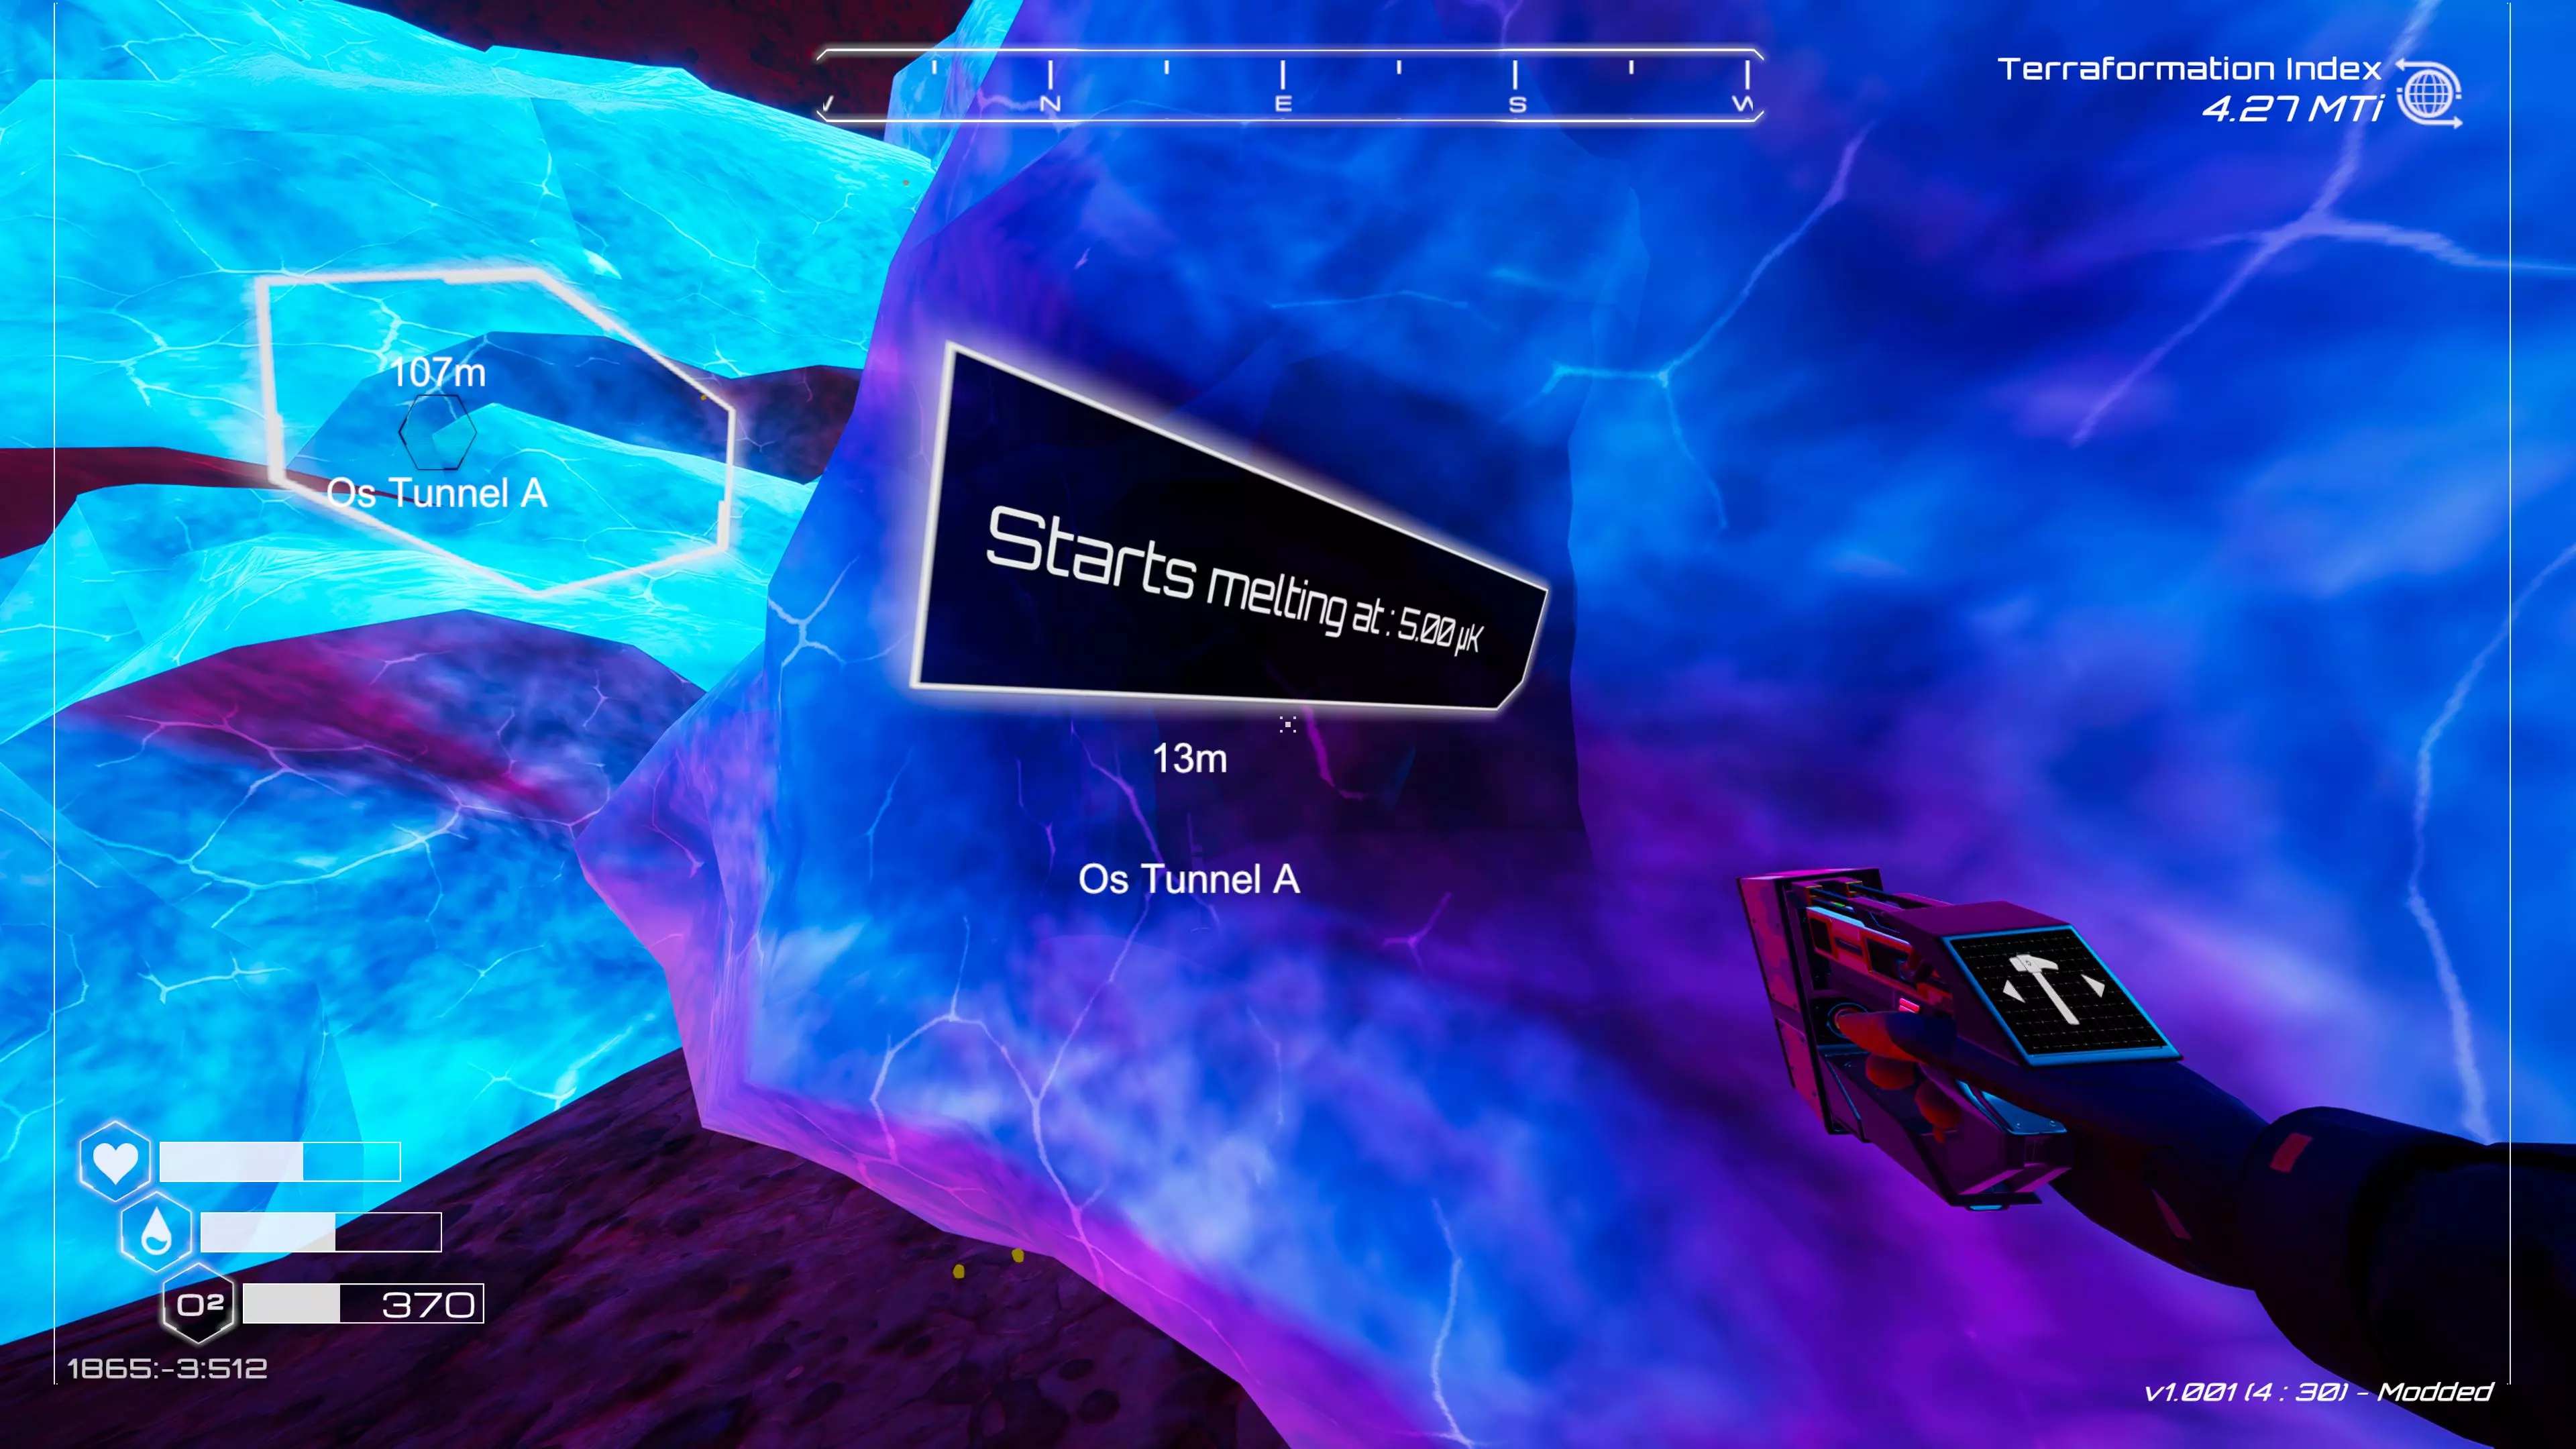
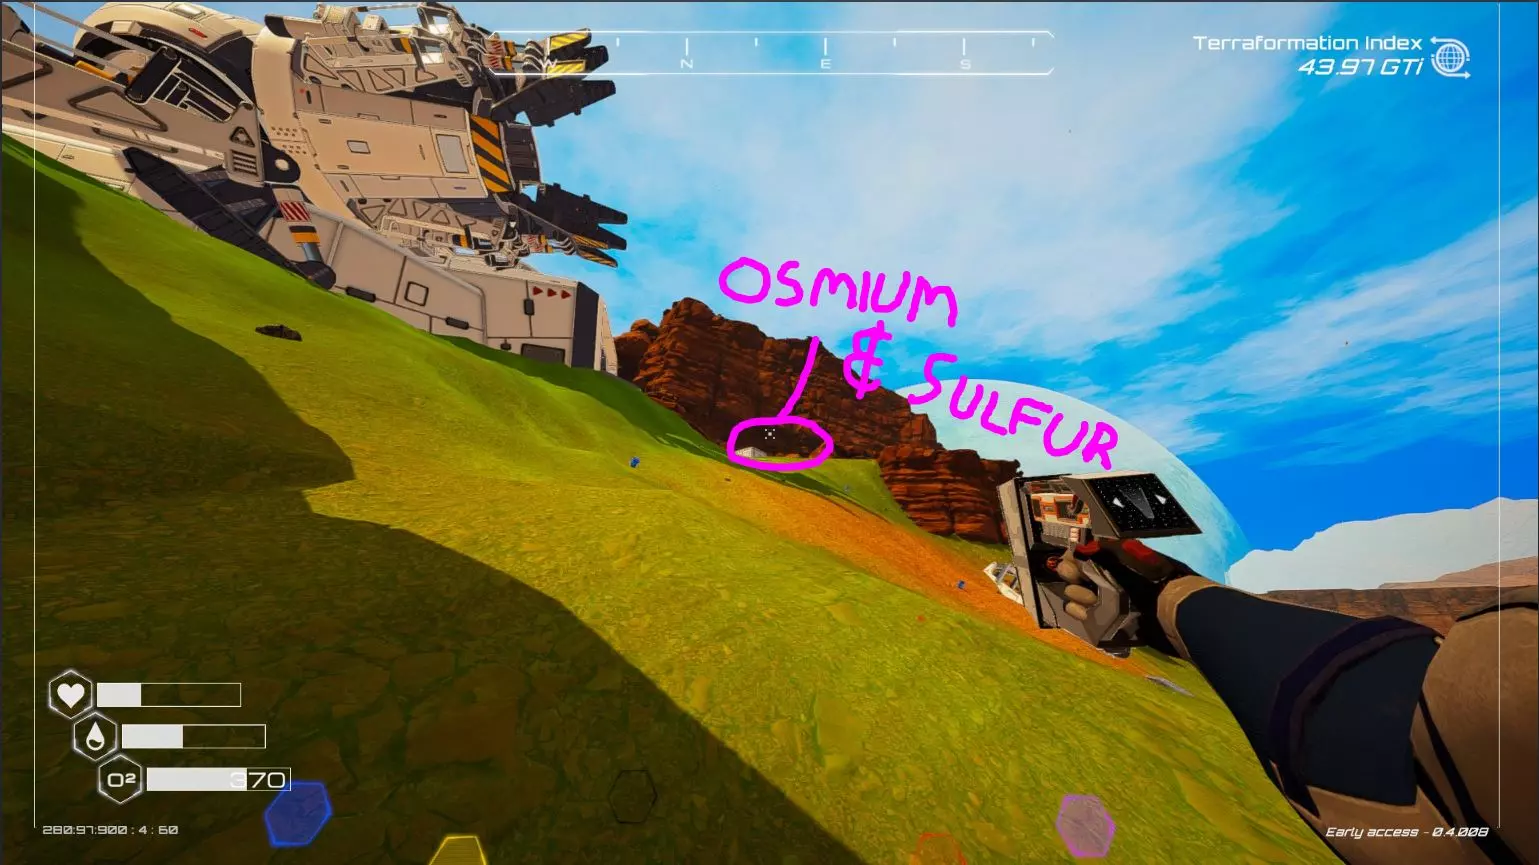
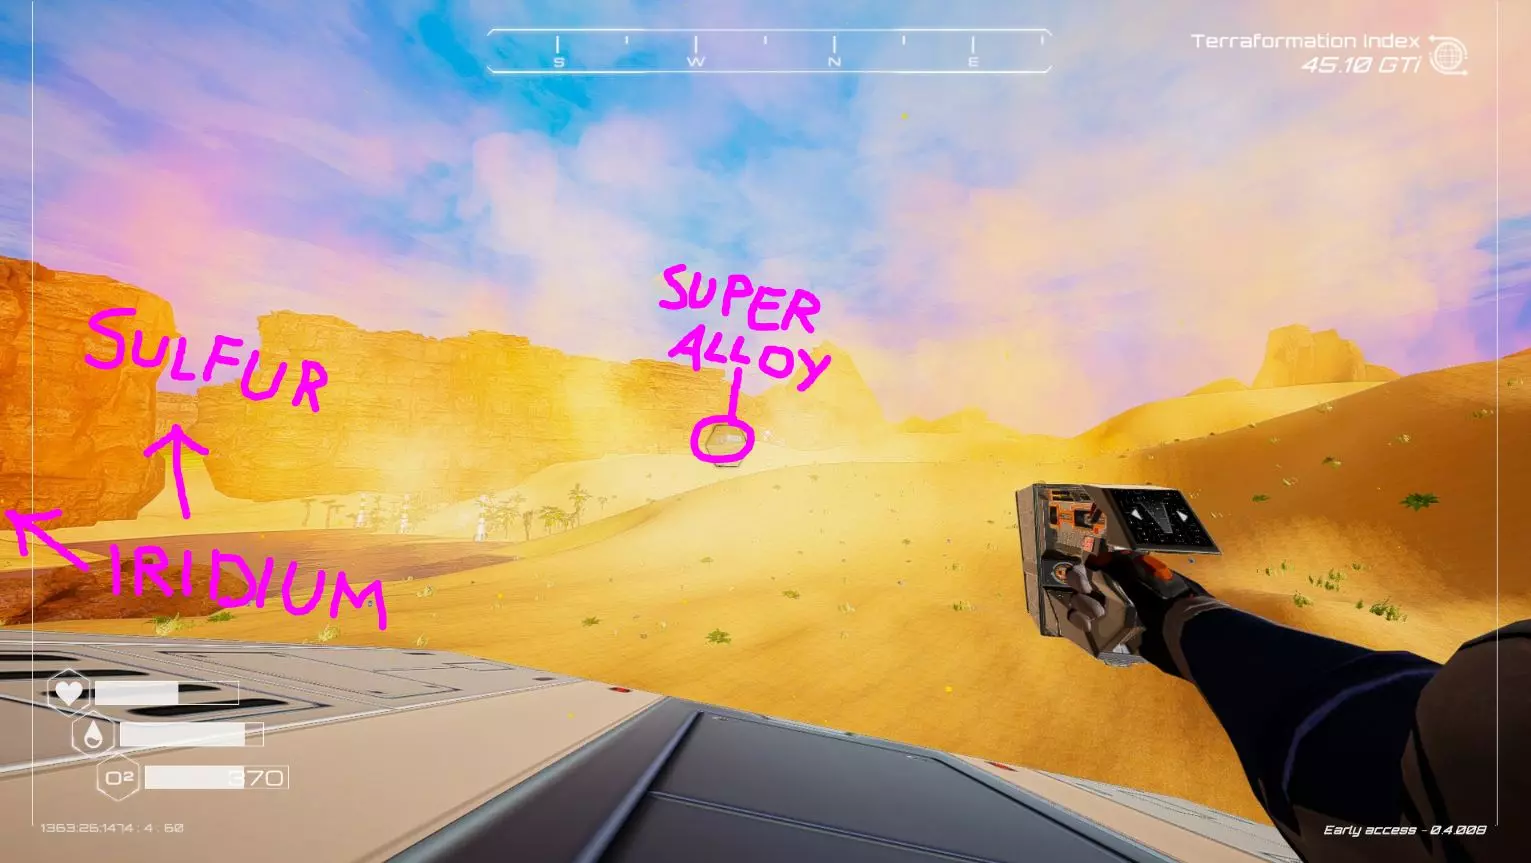
对于不熟悉公制单位的人,以下是各单位的含义: 1单位(米、克或开尔文)=10分单位=100厘单位=1000毫单位=1000000微单位=1000000000纳单位=1000000000000皮单位=1000000000000000飞单位。 那个看起来像“u”和“m”生出来的有趣符号表示“微”。所以如果你的全球温度是5纳开尔文,那么你需要1000倍于此的温度才能融化这些冰。 额外的趣味科学知识:0开尔文被称为“绝对零度”,因为它是我们宇宙中可能的最低温度。在14.15开尔文到20.27开尔文之间,氢会是液体而不是气体。低于14.15开尔文,氢会冻结。已知宇宙中除了氦之外的所有物质在20开尔文以下也都会冻结。氦无法冻结,即使在绝对零度下也是如此,除非将其温度保持在1K以下,同时加压至至少25个大气压。这是不是很不可思议?而在这款游戏中,你可能要将星球加热到毫开尔文(mK)范围,1毫开尔文等于0.001开尔文。好好想想吧。 另外,如果你在大峡谷中站在锇矿隧道前,转过身穿过峡谷。那边还有一个含有铱的洞穴。如果你向北走到峡谷尽头,会有一艘小型坠毁飞船可供探索。不过如果你有其他计划,现在不必非要做这些事。 好了,现在我们来建造一些矿石提取器!T1版本可以放置在“普通沙地”上,它会挖掘出基础矿物(铁、镁、硅、钴和钛)。它可以在灰色沙地上工作,主要会挖掘出铝。或者它可以在红色沙地上工作,主要会挖掘出铱。它无法挖掘出锇、硫、铀或超级合金。这些需要二级矿石提取器才能获取。矿石提取器非常耗电,所以你现在还需要升级电源供应。你现在应该有一些铀了……试着建造几座核发电机。但不要用完所有铀,因为接下来我们需要一些来制造火箭。如果锇用完了,我们可以尝试另一个洞穴,但它也被冰挡住了。那个洞穴在小山顶部,靠近你在旧湖床的登陆舱坠毁地点西边的那艘大型沉船附近。去看看吧,如果冰已经融化了,你就能获取更多锇,这样就能建造更多矿石提取器了。
现在,你需要平衡你的电力、提取器和火箭。在获得T2矿石提取器之前,这将是一个微妙的平衡。所以让我们返回基地,在我让你独立操作之前,我会帮你解决这个问题。 第7天 - T1矿石提取器、锇和超级合金 回到基地后,立即建造一个火箭平台。然后升级你的电力系统,以保证所有机器正常运行。建造完成!如果你爬上平台顶部的梯子,使用那里的电脑建造火箭,然后按下红色按钮即可发射火箭。但现在我们暂时对火箭不感兴趣。我们只需要先把平台建好。 现在前往铱矿洞穴。建造两个T1矿石提取器。 前往铝矿场。建造两个T1矿石提取器。 回到铱矿洞穴,打开矿石提取器上的箱子,拿走里面的所有东西。它有时会产出铱,也会产出其他一些矿物。我的做法是将两个提取器并排建造,让它们连接起来,然后在每个提取器后面搭建网格框架,并在每个网格地基上放置一个储物柜。这样我就可以把没用的矿物暂时存放在那里,等准备好后再回来处理。另外,在附近的房间里建造一个高级 crafting station【高级制作站】;你可以把铝运到这里,用它将所有那些“垃圾矿物”转化为超级合金。矿石提取器的菜单界面如下(此处省略截图)。它的作用就像一个每隔一段时间会生成矿物的箱子。注意:我在游戏中使用了一个模组,它能让所有箱子、背包和矿石提取器中的相同物品堆叠起来。这样能让游戏过程轻松一点,不用为了运八块矿石满星球跑,哈哈。你的屏幕上不会显示物品堆叠效果。
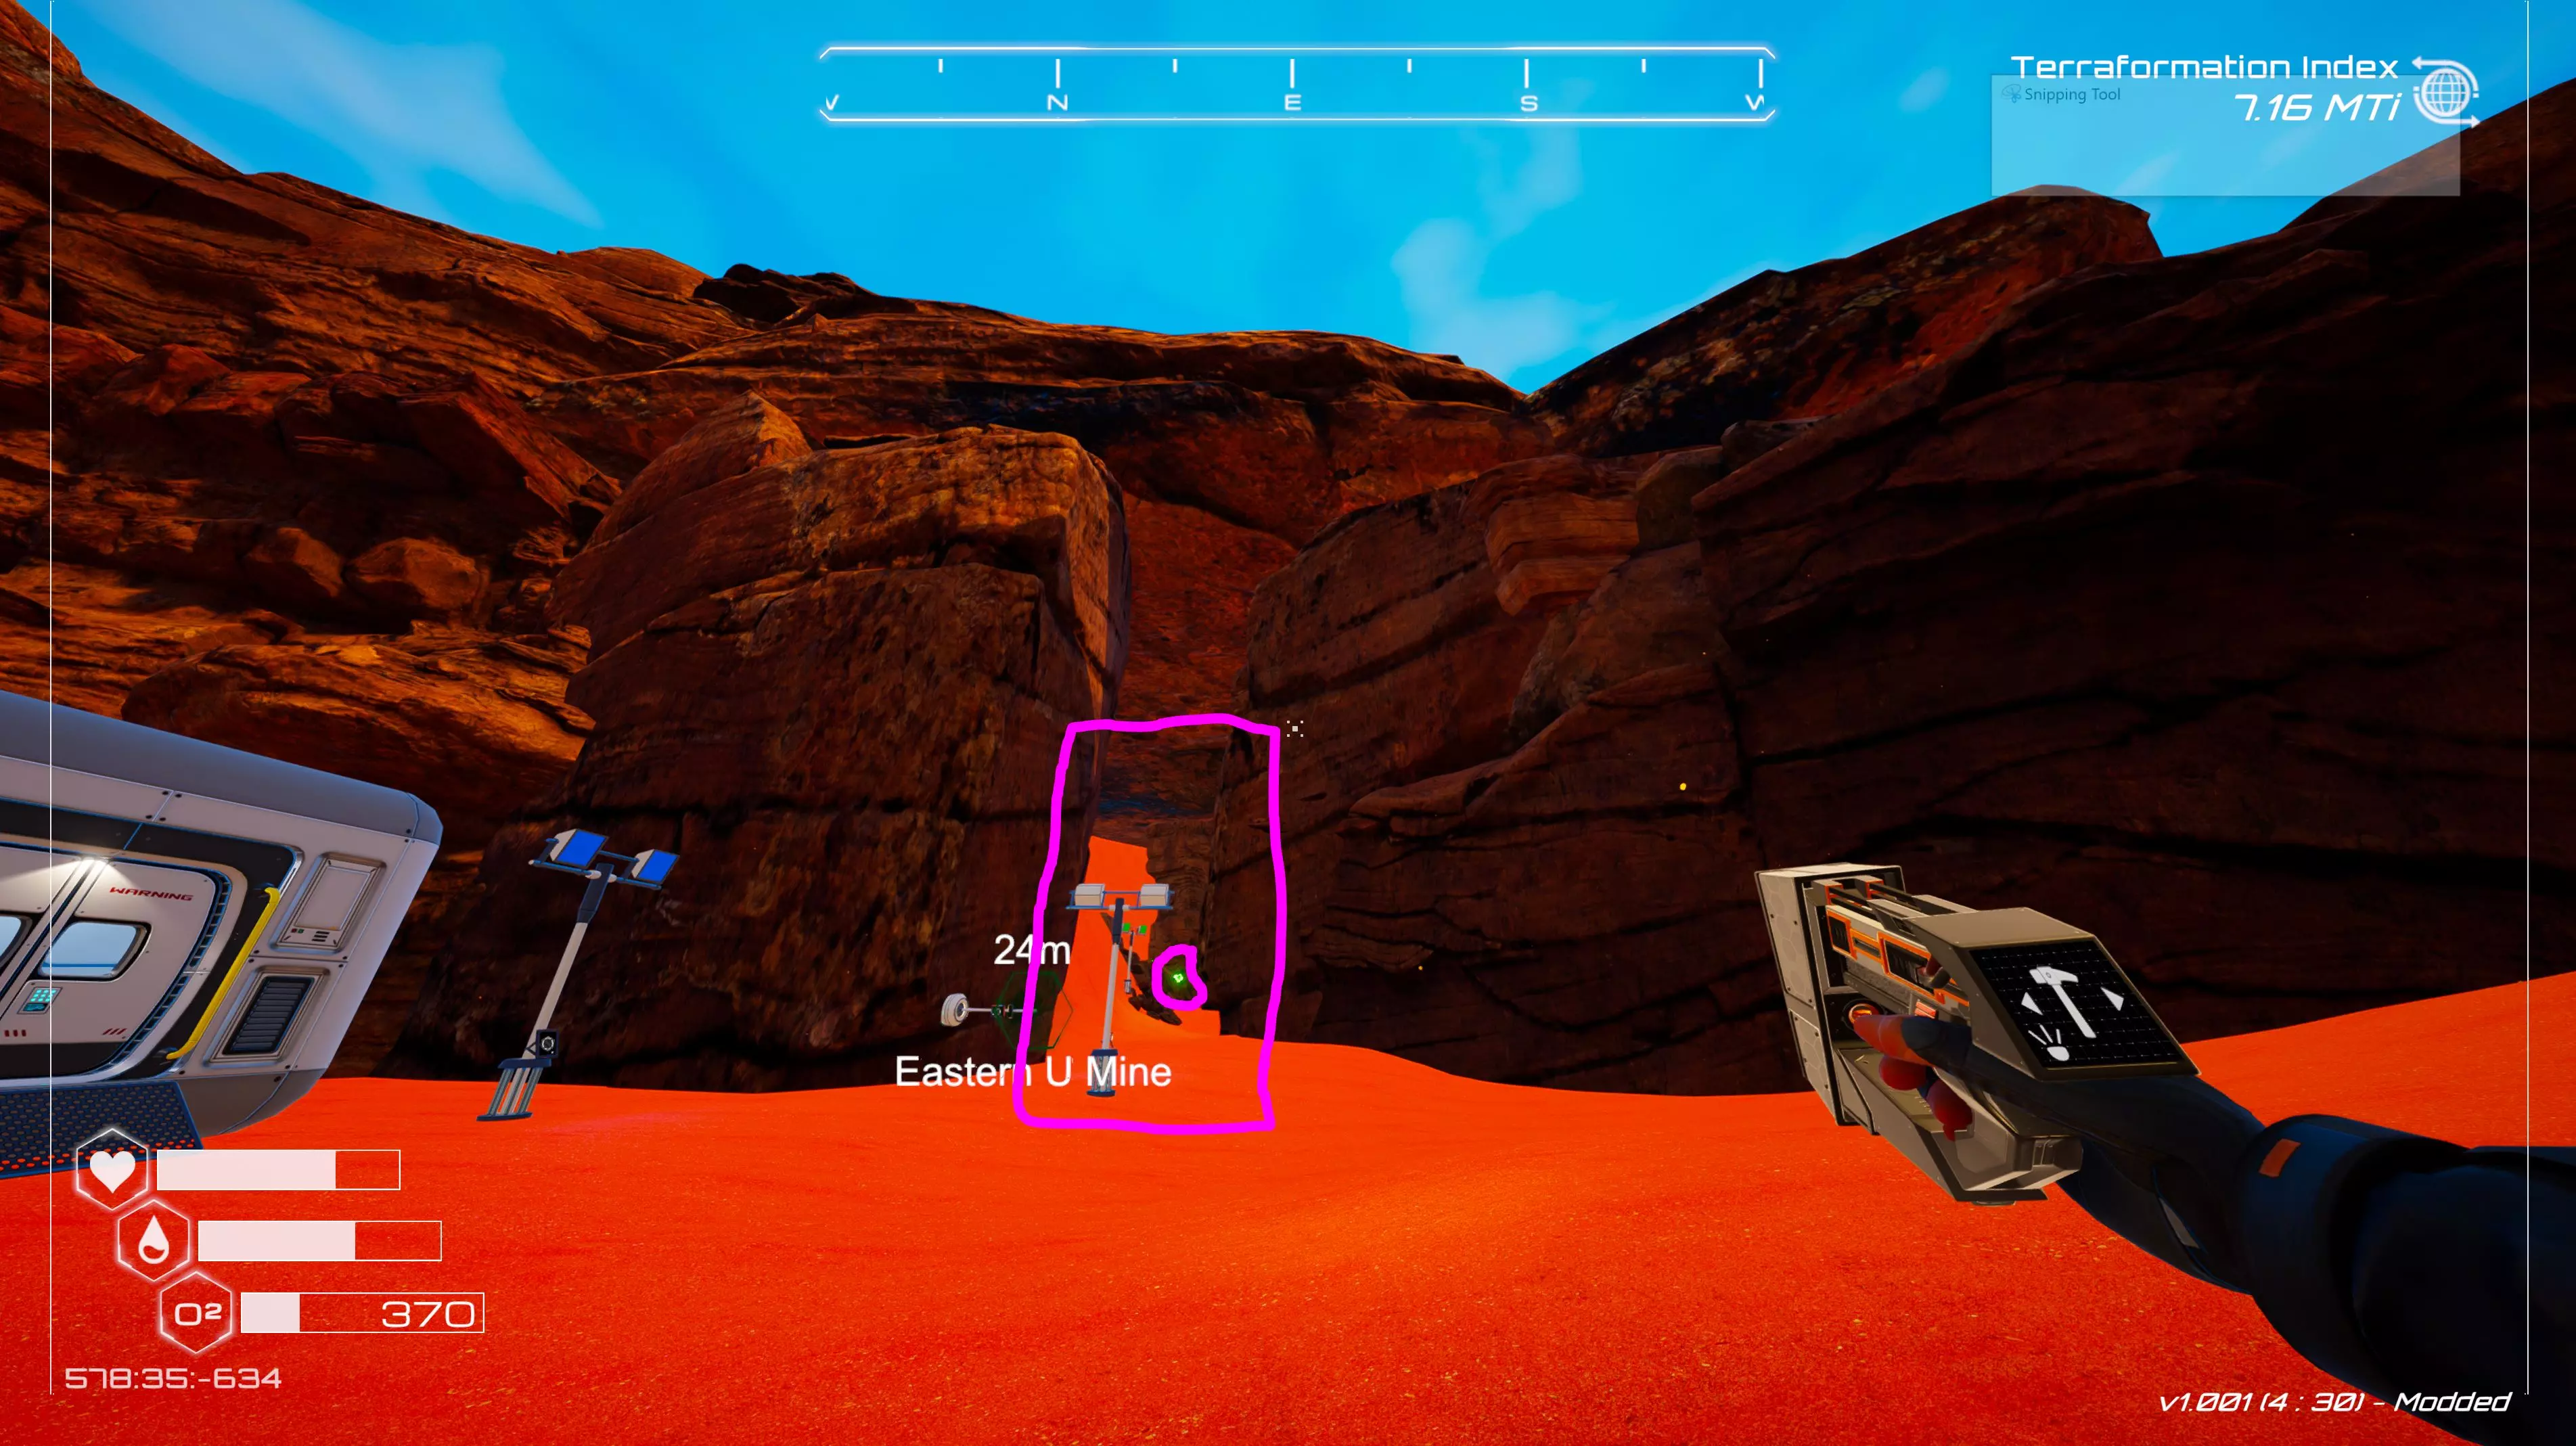
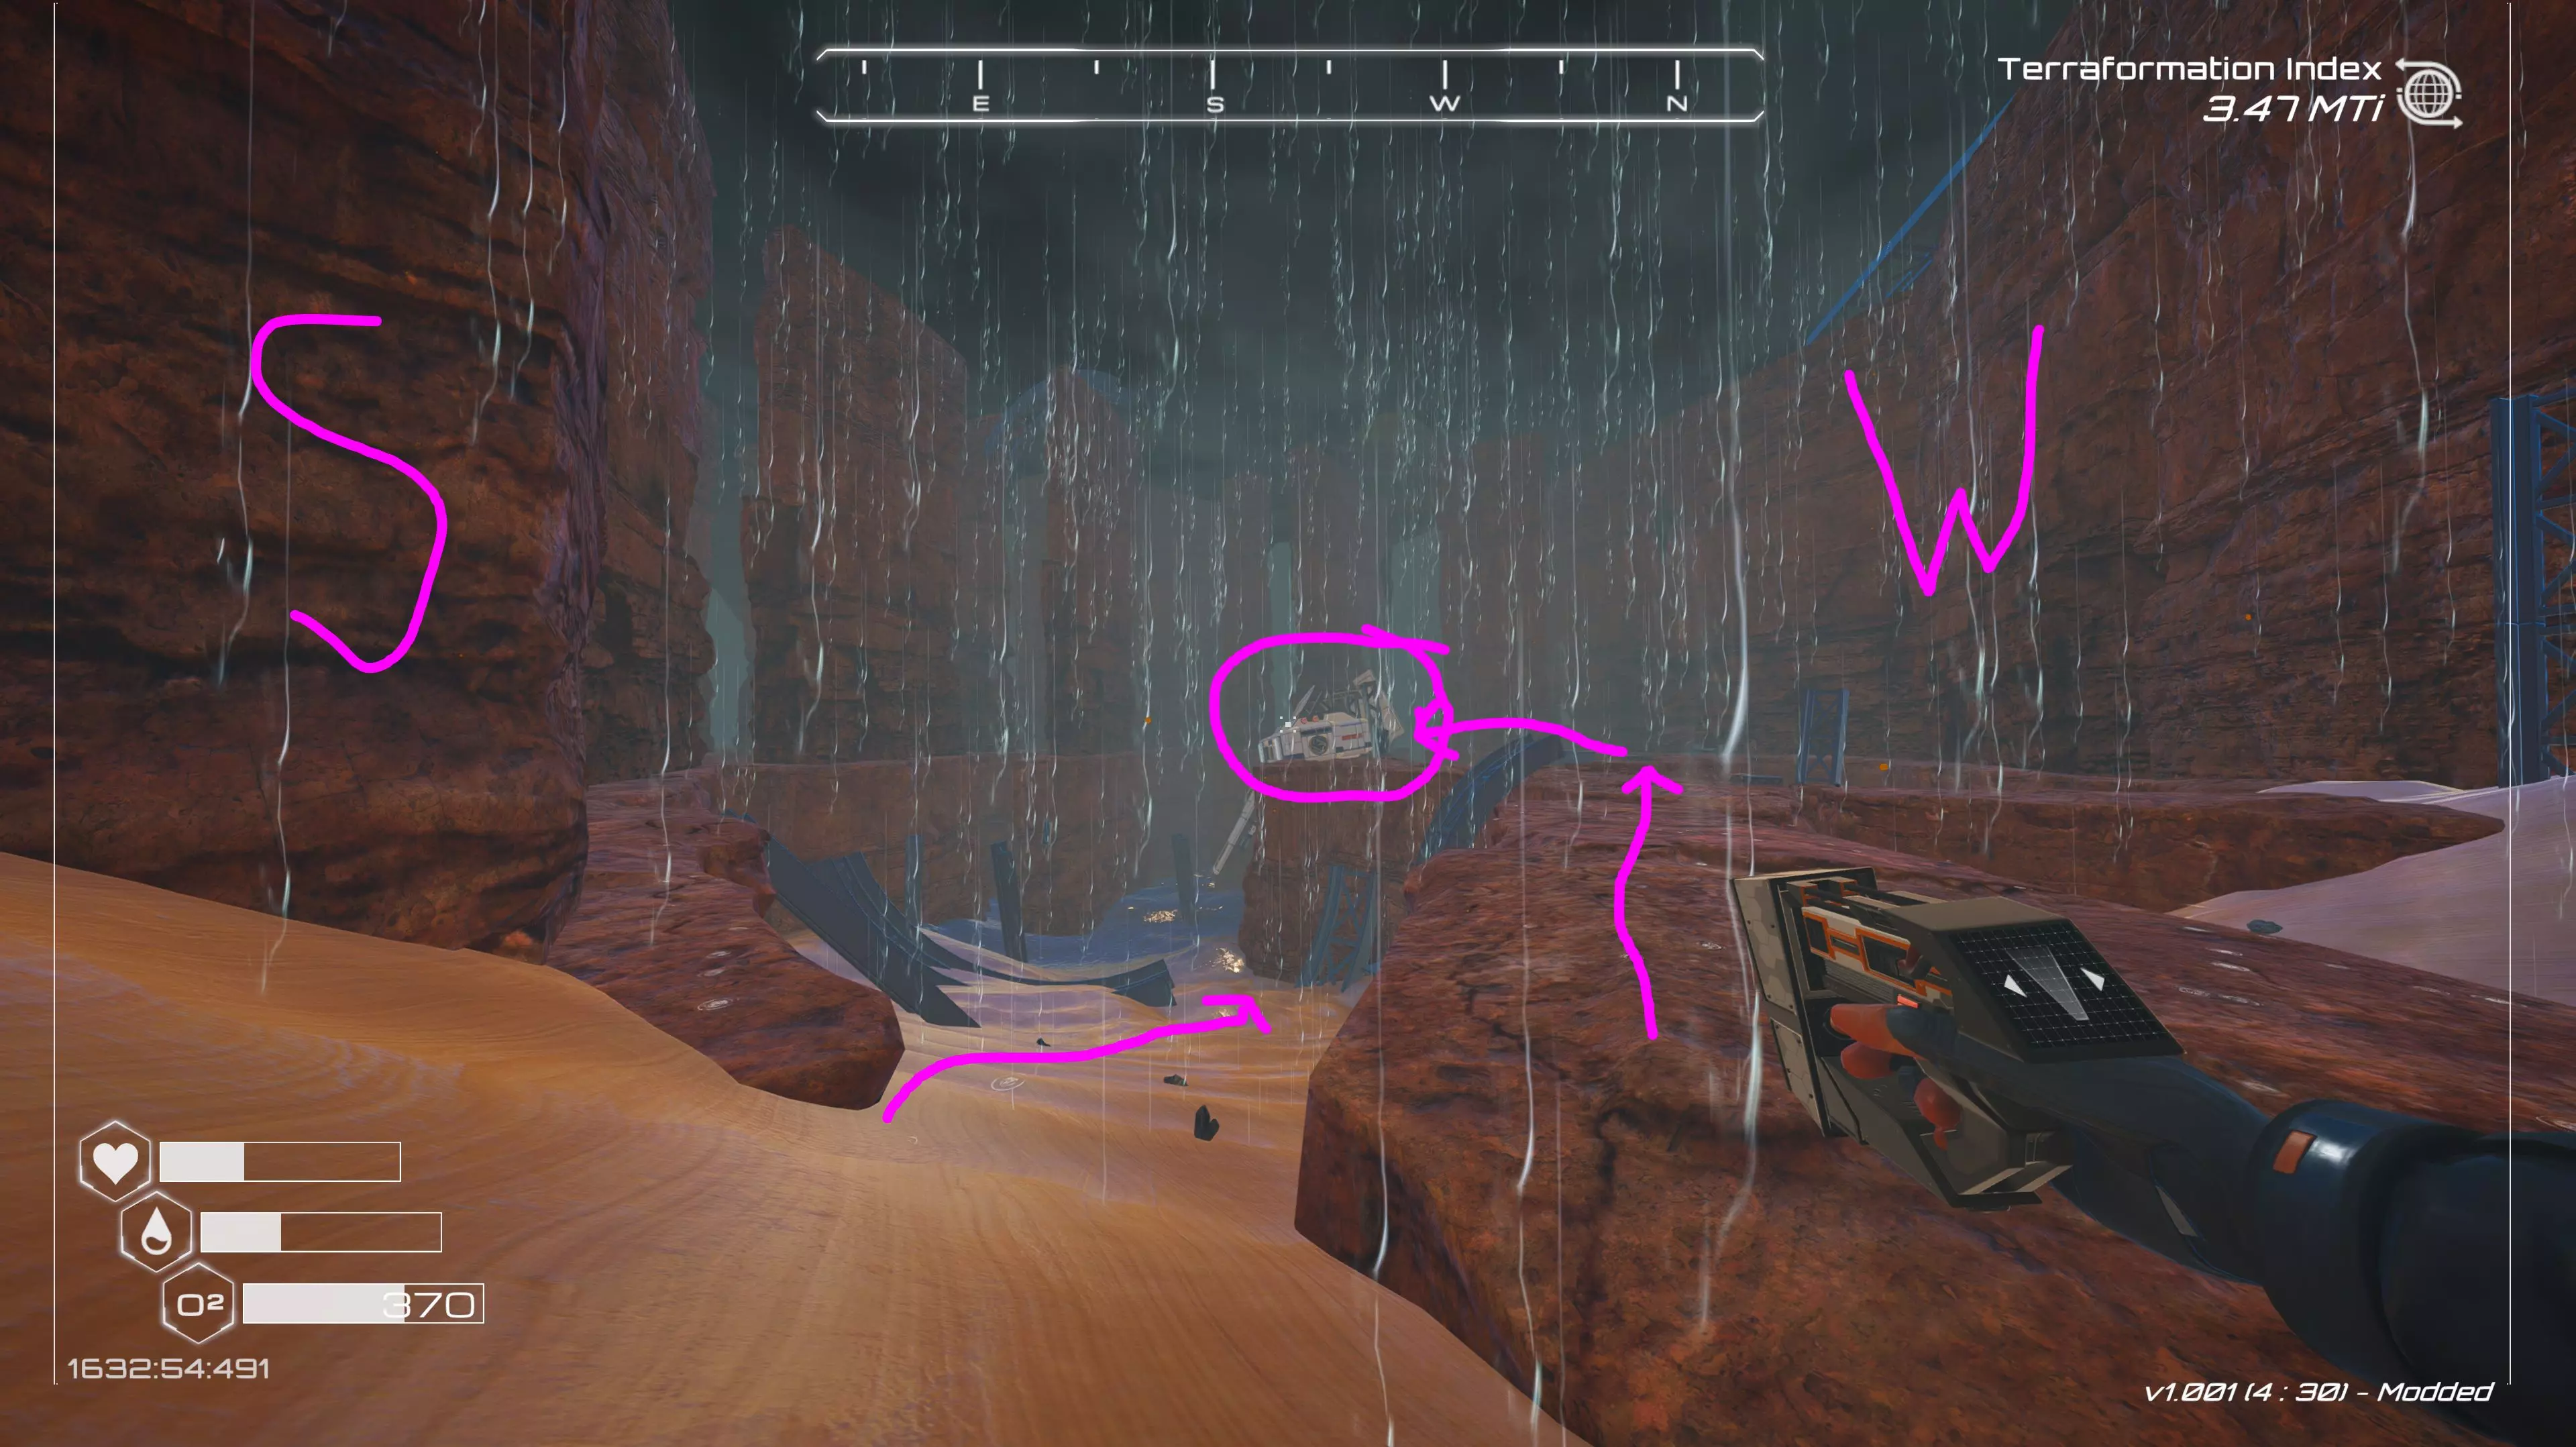
现在前往铱矿洞穴的后方,西南侧。那里应该有一个出口(如果有足够的冰已经融化),通向一个有黄色气体的沙地区域。这就是硫磺场。你的T1提取器无法开采硫磺,你需要T2提取器……但如果你向东南方向穿过这片区域,会在另一边发现另一个小洞穴。那通向一个锇矿洞穴,之后你将使用T2矿石提取器在那里开采锇。现在(如果有足够的冰已经融化),你可以在那里四处走动,从地上收集一些锇。这个洞穴的另一端通向俯瞰你坠机地点湖床的山上的巨大沉船。 回到铱矿洞穴,从北侧出口出去,朝着沙丘中的那艘巨大沉船前进。在出口处左转,沿着岩壁向西走一会儿。最终你会看到洞穴入口前有类似“天然建筑”的石柱。如果转身背对着岩壁,你会正对着那艘大型沉船的正面。当你获得T2矿石提取器蓝图后,可以回到这里开采超级合金!现在,先进去清理一下。把地上所有的超级合金都捡起来。同时,也要记住这里那扇巨大的密封门。
另外,记得在外面建造一个小型采矿营地,就像你在铝、铱和铀矿点所做的那样。如果你继续向西探索,会发现一个失事的卫星,然后是一个漂亮的小河谷。 从大型沉船的船头看过去,这里还有超级合金洞穴的另一个视角,以及通往硫磺田的路径。
在前往火箭之前,我们还要去一个地方。从铝矿场出发,向南走。你会经过一些装满物资的大型集装箱,还会路过通往铀矿的狭窄小径入口。当遇到一堵岩壁挡住去路时,你可以向右转,穿过一些巨大的尖刺岩石回到旧湖床(现在这里可能已经是一个真正的湖了)。但相反,你要找到岩壁上那个充满锇矿的洞穴。之后你可以在这里建造二级矿石提取器。

洞穴的另一边是另一片沙漠区域。如果你彻底探索那里,会发现一群废弃建筑,其中包括一个通往地下避难所的舱门,在那里你能找到更多关于这个星球历史的信息。 一旦你手中有了锇和超级合金,就回到铝矿区域的矿石提取器那里,把提炼好的铝带回家。然后前往铱矿洞穴,从提取器中获取铱,再将其加工成铱棒。 回到基地后,在附近再建造两台T1矿石提取器。这些提取器将开采标准矿物。稳定供应这些矿物是很有必要的。你可以将它们存入仓库,或者加工成超级合金,除非你有特定项目需要用到这些矿物。之后,记得检查一下你的电力供应。确保你正在产生足够的电力来运行目前已建造的所有设施,并且还要有一些额外的电力储备。【注意】——永远不要使用最后两块铀,因为除非发射铀火箭,否则你无法获得更多铀!现在……到了大家期待已久的时刻……我们要发射一些火箭了! 第8天 - 火箭! 在高级制造站建造一些火箭发动机。先造六个。将这些发动机带到火箭发射台,在通往发射台的楼梯旁建造一个网格地基,并在上面放置几个储物柜。暂时将火箭发动机存放在储物柜中。回到你的主存储区,获取以下材料,然后也将它们放入火箭发射台附近的储物柜中。我们打算快速发射最初的几枚火箭,所以现在正在做万全准备。 现在我来解释一下火箭的操作方法。你需要使用发射台顶部的电脑屏幕来建造特定类型的火箭。然后按下控制面板上的红色按钮进行发射。火箭完全升空需要一点时间。在当前火箭真正进入轨道之前,禁止建造另一枚火箭!如果违反,可能会发生奇怪甚至危险的情况。
See? I tried to build a rocket while there was METEOR DEBRIS cluttering the launch pad, and THIS happened. LOL. You will still get the full effect of the rocket as if it flew the right direction, but this is just ridiculous. Since it takes a while for meteor debris to vanish, the best way to handle this situation is dismantle the launch pad, go find another big, clear patch of ground, rebuild it over there, and then you can safely (and correctly) launch another rocket. Here are the different rockets that are probably available to you right now: Name Purpose Ingredients Asteroid Attraction Rocket uranium meteor shower + heat growth rate x10 rocket engine, 3 cobalt, 2 super alloy Magnetic Field Protection Rocket iridium meteor shower + pressure growth rate x10 rocket engine, 3 silica, 2 super alloy T1 GPS Satellite activates the map screens rocket engine, Compass Chip, 2 super alloy T2 GPS Satellite improvements to the map screen rocket engine, 2 compass chip, 3 super alloy Mapping Information Rocket shows points of interest on map screens rocket engine, compass chip, 2 osmium, super alloy rod So what you want to do, with your limited amount of uranium and osmium, is launch these rockets, in this specific order... T1 Map Satellite (now you can build a Map Screen anywhere and use it to view a regional map) T2 Map Satellite (map screen has better resolution and zoom) Asteroid Attraction Rocket Asteroid Attraction Rocket Magnetic Field Protection Rocket Asteroid Attraction Rocket Magnetic Field Protection Rocket Magnetic Field Protection Rocket Remember a rocket engine requires 2 uranium ore to build. So until you can build a T2 Ore Extractor in the Uranium Cave, if you ever start running low on uranium you should save your last 2 uranium for a rocket engine, then build the Asteroid Attraction rocket to get more uranium FROM OUTER SPACE. In fact, I'd say save your last FOUR pieces of uranium because sometimes you just have terrible luck and the uranium meteor might land in a spot where you can't reach it. If you have nothing else you can dismantle to get the uranium parts back, then your game is basically over if you ever totally run out of uranium... you'll have to wait (perhaps WEEKS) until the game randomly sends a uranium meteor shower down. So I always keep a small stash of uranium ore in a cabinet right next to my advanced crafting station, and I NEVER use that uranium for anything except rocket engines, and I ALWAYS replace it immediately after I use it. If you build a rocket that causes a meteor shower, be quick about picking up the results. In about five minutes the broken rocks will vanish. Another 2 minutes and the ore from the asteroid will also vanish. Later, you'll get rockets that spread plant spores and such. After firing one of those, go run around the world and look for plants that bloom to give you special seeds!! But that comes later... not a lot later though. Also, now that you have regular access to iridium and aluminum (and you can make your own super alloy if you need some) you should build MORE MACHINES to terraform the planet. Get some grass spreaders going for more oxygen. Build more T3 drills and T3 heaters for pressure and heat, too. Day 9 - basic biochemistry Before we get into biochemistry and botany, now is a good time for you to go run around the world and find a spot that looks cozy for you to build a permanent home for yourself. That site will be the hub for all of your crafting, rocketry, storage, etc. for the rest of the game. Of course, you are also VERY MUCH allowed to build 100 smaller outpost bases instead of one big central factory/depot location. Whatever you like, do that. But the reason why I suggest you get stabilized somewhere is because we're about to build some pretty big buildings, and then we'll start planting flowers and trees in a little while. And it's kind of a pain in the butt to tear it all down and rebuild it somewhere new later. So I say pick a spot now and then you won't have to move it again... unless you want to. Got a good spot picked out? Got your old base converted into the new one? Or are you leaving the old base intact and just starting fresh elsewhere? Or are you happy with your original spot near the lake? Build some Grass Spreaders. They require a lirma seed for each one (to build it, not in its inventory) but they produce a lot of oxygen and a little bit of biomass. You can group them together on your front lawn, or spread them around all over the world... but it's better to have them close together for now in case you want to deconstruct them later to get those lirma seeds back. Wait for the TI to go up enough that you unlock blueprints for the biolab and the biodome. I like to build 2 biodomes and 1 biolab. Because the biodomes give you a decent amount of oxygen (plus they just look cool). And because I'm a little bit of a madman MWAHAHAHahahahahahHAHAHAA I build a small tower on my base, the top of it being a biolab. Then I attach a biodome on each side so it looks like a great big... Anyway, moving on... Build some more Food Growers. I'd say about 16 total if you have the parts for them all. You want four of each veggie seed growing (beans, squash, mushroom, and eggplant) since we're going to use the produce to make BIOCHEMISTRY items like a mad scientist next. (You might need to add a few more T2 solar panels or another T1 nuclear reactor to keep your power stable after this.) As you can see here, I like to put my veggies in my biolab because it just looks cool. Then I build some storage near the biolab door to store them in.
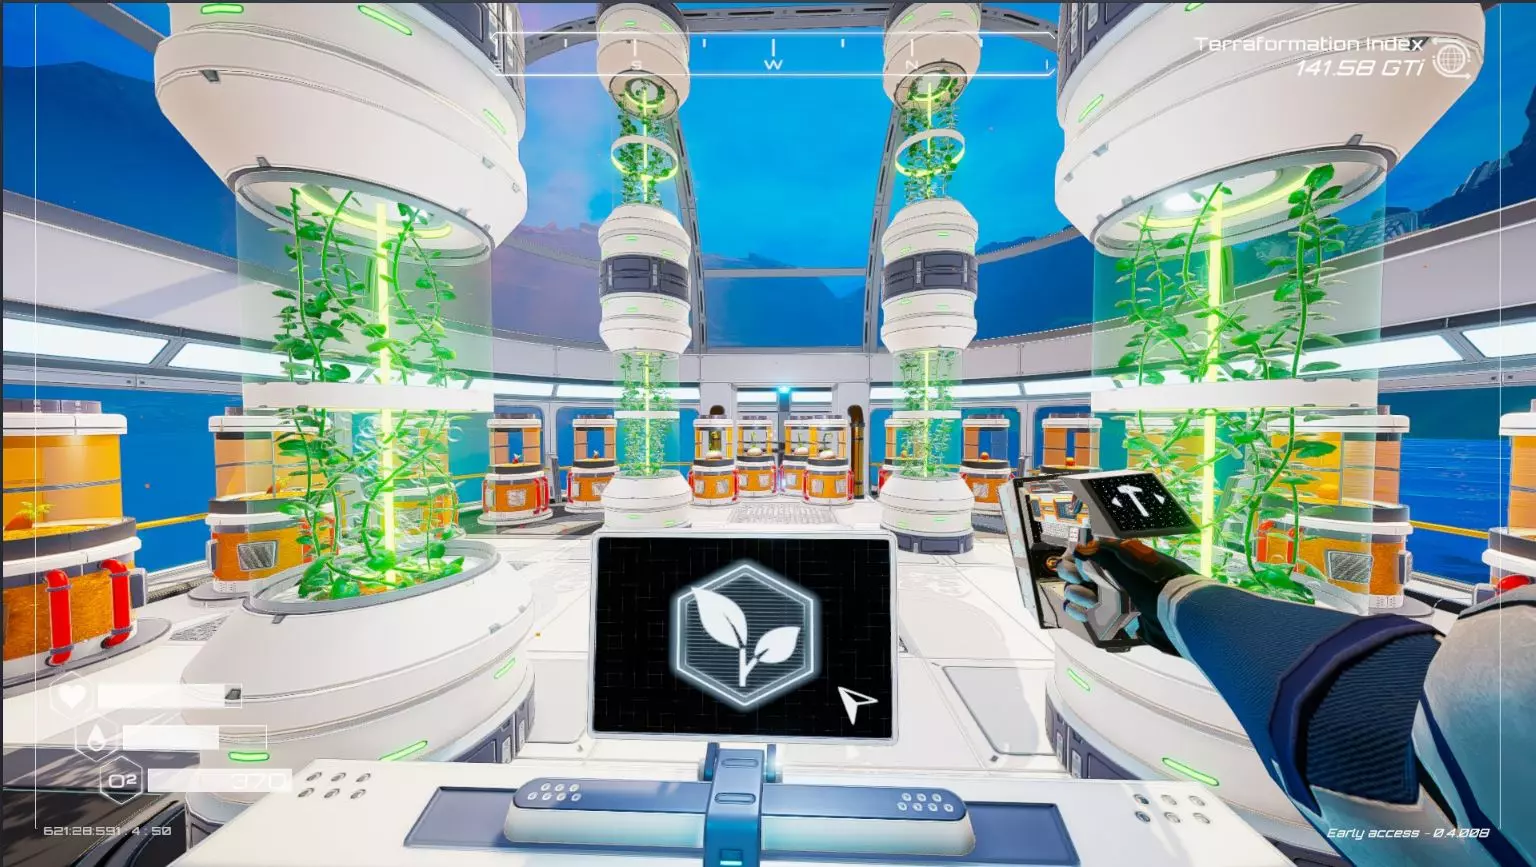
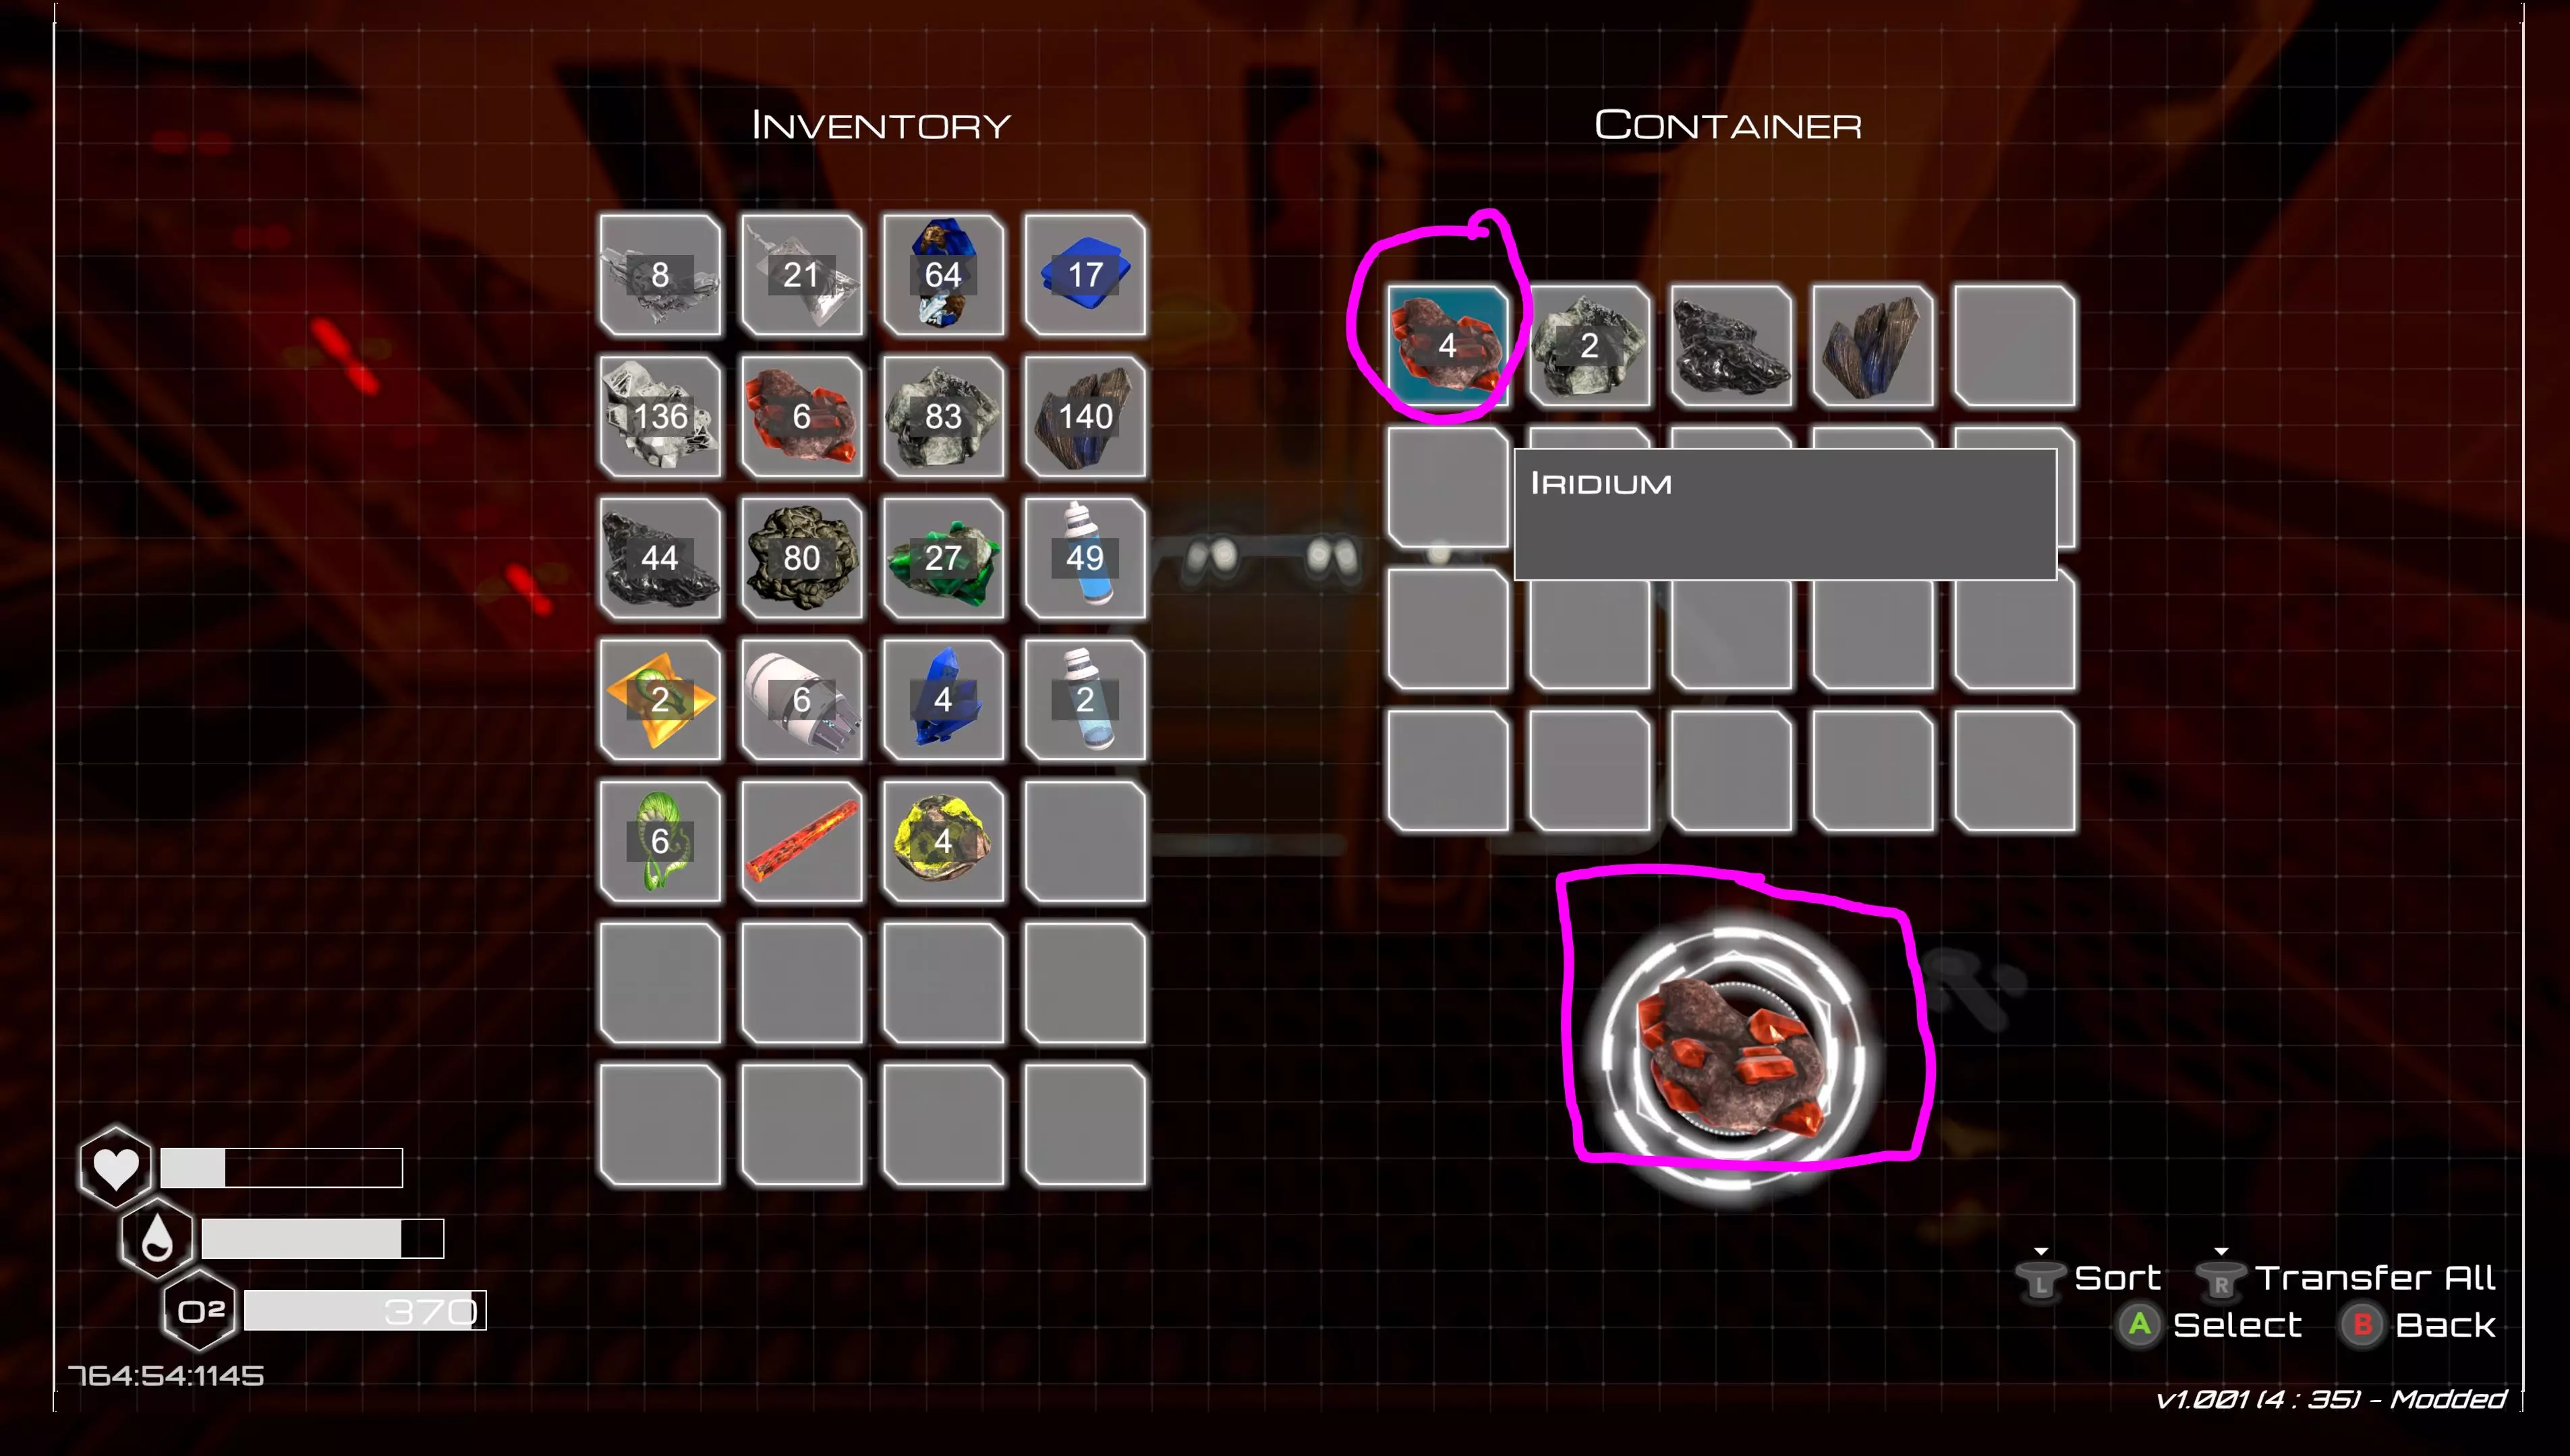
你的下一个目标是制作以下物品,这需要你利用新的生物实验室设施: 生物塑料 - 硅 + 水瓶 + 2个蘑菇 藻类生成器 - 超级合金 + 镁 + 茄子 + 瓶装水 + 生物塑料 细菌样本 - 3个藻类 + 3瓶瓶装水 爆炸粉末 - 2个硫磺 + 铱 肥料 - 3个藻类 + 2个茄子 + 硫磺 T2生物穹顶 - 2个肥料 + 2个细菌样本 + 硫磺 + 超级合金 T2藻类培养器 - 你需要建造大约4个藻类生成器,甚至5个。它们必须放置在开阔水域,比如湖泊或宽阔/深邃的河流中。如果放置得离岸边太近,你将损失大约一半本应生长的藻类,这就失去了建造它们的意义。接下来你需要在水下游泳,收集机器周围水中生长的长长的藻类卷须。制作这一步需要一些生物塑料,希望你有一些蘑菇种子! 爆炸粉末用于T2核反应堆,以及之后的其他一些物品。先制作一些并开始储备起来。 肥料用于T2生物穹顶,以及之后的一些农业相关物品。 细菌样本稍后会用于一些有趣的东西,也用于T2生物穹顶。 T2生物穹顶会生产树皮,之后可用于制作树种。它还能产生大量氧气和相当数量的植物作为生物质。不过它的耗电量非常大。我建议先建造两个。当你攒够大约8份肥料和8份生物塑料后,就可以拆除T1藻类培育器,换成T2版本了。T2藻类培育器能生产更多藻类、氧气和用于制造生物质的植物,但它的耗电量大约是T1版本的两倍。记住,拆除T1藻类培育器时会返还资源,这使得建造T2版本的实际成本看起来更低一些。 我想你很快还会解锁湖水收集器的蓝图。它的功能正如其名:将其放置在湖中,它会过滤湖水,为你制造瓶装饮用水。由于你已经拥有大气水收集器,所以湖水收集器完全是可选的,但它的集水速度似乎更快。或许可以在你的生物化学实验室和蔬菜农场附近建造几个,因为很多相关配方都需要瓶装水。 以下是几张藻类培养器(T1)的截图,供你参考。可种植的藻类只能在水下生长,所以如果有泥土或岩石挡路,它要么无法生长,要么能生长但你无法够到。你必须把它放在可以游到下方进行收获的地方。
Later, you'll unlock flower spreaders that make flowers grow in a small radius (these need flower seeds installed, similar to the vegetubes except the plants are outdoors now). And then you'll get tree spreaders that are similar but they will require TREE seeds that you can collect in shipwrecks or make them yourself using bark and a special DNA machine that you'll unlock later in the game. You'll even get a new rocket that causes special moss and flowers to grow around the world. When you launch one, go explore to find those new flowers - they have SPECIAL SEEDS you can harvest. MUCH later, you'll start to unlock similar technologies for insects (butterflies and bees), fish, frogs, and even mammals! Day 10 - mid-game By now I hope you've realized that my chapter headings "Day X" don't really mean it's been that many days. LOL. I'm sure you've spent more than ten days to get this far. Your next major goals are: work on increasing your BIOMASS using grass and algae work on increasing your PRESSURE and unlock the Ore Extractor T2 (For the next while, until you unlock Pulsar Quartz, your progress will be limited largely by your supply of Osmium, Iridium, and Super Alloy. Meanwhile your electric power grid will be limited by your supply of Uranium. So try to balance these resources in particular.) start mining for Osmium start mining for Uranium start mining for Sulfur, which is mainly used for biology projects add T2 miners on Iridium and Aluminum mining sites start mining for Iron just to make sure you always have a supply available (Just put an Ore Extractor (any tier) on any dirt that is NOT in a special resource zone and it will dig for iron, titanium, silicon, magnesium, and cobalt.) increase your fleet of T4 heaters and drills build several T2 biodomes for more oxygen (and tree bark) MORE FLOWERS MORE ALGAE start growing trees start collecting Zeolite, maybe put a T2 miner in the zerolite cave (if you start from the Sulfur Field, go into the nearby blue cave where your Osmium mine is. Turn right, there is a path over there leading to another cavern - keep going until you find a small pond inside the cave. This is the Zeolite Cave where your Ore Extractor (T2 required) will mine for Zeolite.) switch over to FUSION energy generators MORE ROCKETS MORE TREES MORE T4 HEATERS AND DRILLS Build some Gas Extractors to start getting Methane, for more advanced biology projects EVEN MORE ROCKETS Seriously though, rockets!!! Anyway... we've made it out of the early game!! I've shown you how to survive by making oxygen, water, and food. I've shown you how to gather minerals by hand and turn them into tools and buildings. I've shown you how to build mining machines to collect minerals for you. I've shown you how to build machines to terraform the planet. I've shown you how to manage your power grid. I've shown you how to grow your first little garden. I've shown you the first few locations where you can find some archeology and history of this barren rock. I've even shown you how to launch rockets and check your in-game emails. The rest is up to you. Exploration is half the fun in this game, and now that you know the basics you can experiment and tweak your world in whatever way tickles your fancy. There is still much to discover, so I'll leave you to it. Farewell, Convict GP-8971-L. I'm sure you'll make us all FILTHY STINKING RICH -- ahem, I meant proud. I'm sure you'll make us all proud by converting this barren rock into a lush paradise ripe for colonization. This is your friendly Izitial Prime sector Sentinel Corp account manager, signing off. Day 1000000 - end game. I haven't reached this point in the game yet. I just started playing the game for the first time since early access when they first added insects to the game. So there's a lot of late-game content that I just haven't seen yet, which I can't write about yet. I'm playing through the game again now, in "full release" version 1.0, but this is as far as I intend to go with this guide. I want to leave things for you to discover and explore for yourself, too. But there are different endings you can get, depending on a choice you'll make near the end of the game. Luckily someone else has written a nice guide that will help you figure out how to unlock all three of the different endings for the game. Find that guide by clicking here. If you want to unlock all three endings on a single playthrough, save your game before you reach that critical decision point. Then get one ending. Don't save your game again, just re-load it and pick the other choice this time. Also, keep an eye out for more game updates because later this year they're going to release a MULTIPLAYER feature (co-op style) as well as a feature including MAMMALS added to the ecosystem. Won't that be fun!! Map Coordinates Now that we have some GPS rockets and a map screen, I guess I should tell you how the coordinate system works. You'll see your position at the bottom left of the screen... LAT:HGT:LONG The first number is your latitude. This works the way you'd expect, if you go north the number gets bigger. If you go south, the number gets smaller. The second number is your height. Again, it works as expected. If you go up, it gets bigger. Go down, and it gets smaller. The third number is your longitude. It works the OPPOSITE way from regular maps though. If you go west, it gets bigger. If you go east, it gets smaller. What this means is the "coordinate origin" or "zero point" of the map is in the southeastern corner. I'm not suggesting you should go there... just stating a mathematical fact. In practical terms what this sort of means is you can think of it as if you are in the NORTHWESTERN hemisphere of the planet (similar to if you are standing in the United States on Earth). The equator is south of you, and you can imagine the longitude numbers all have a negative sign on them because you're west of the zero line (i.e. GMT on Earth is zero, so everything east of it is positive and everything west of it is negative; you're west of the GMT line here). Secret Bonus Chapter: Zeolite, and Recycling Once your PLANTS and BIOMASS reach a certain level, you'll start to see vines breaking through the soil all over the place. Look for these. They usually knock some ZEOLITE up from underground. Zeolite is a white crystal, used to make a few tools and the gas extractor that produces methane, as well as the DNA extractor that you need for making TREE SEEDS. And some other stuff.
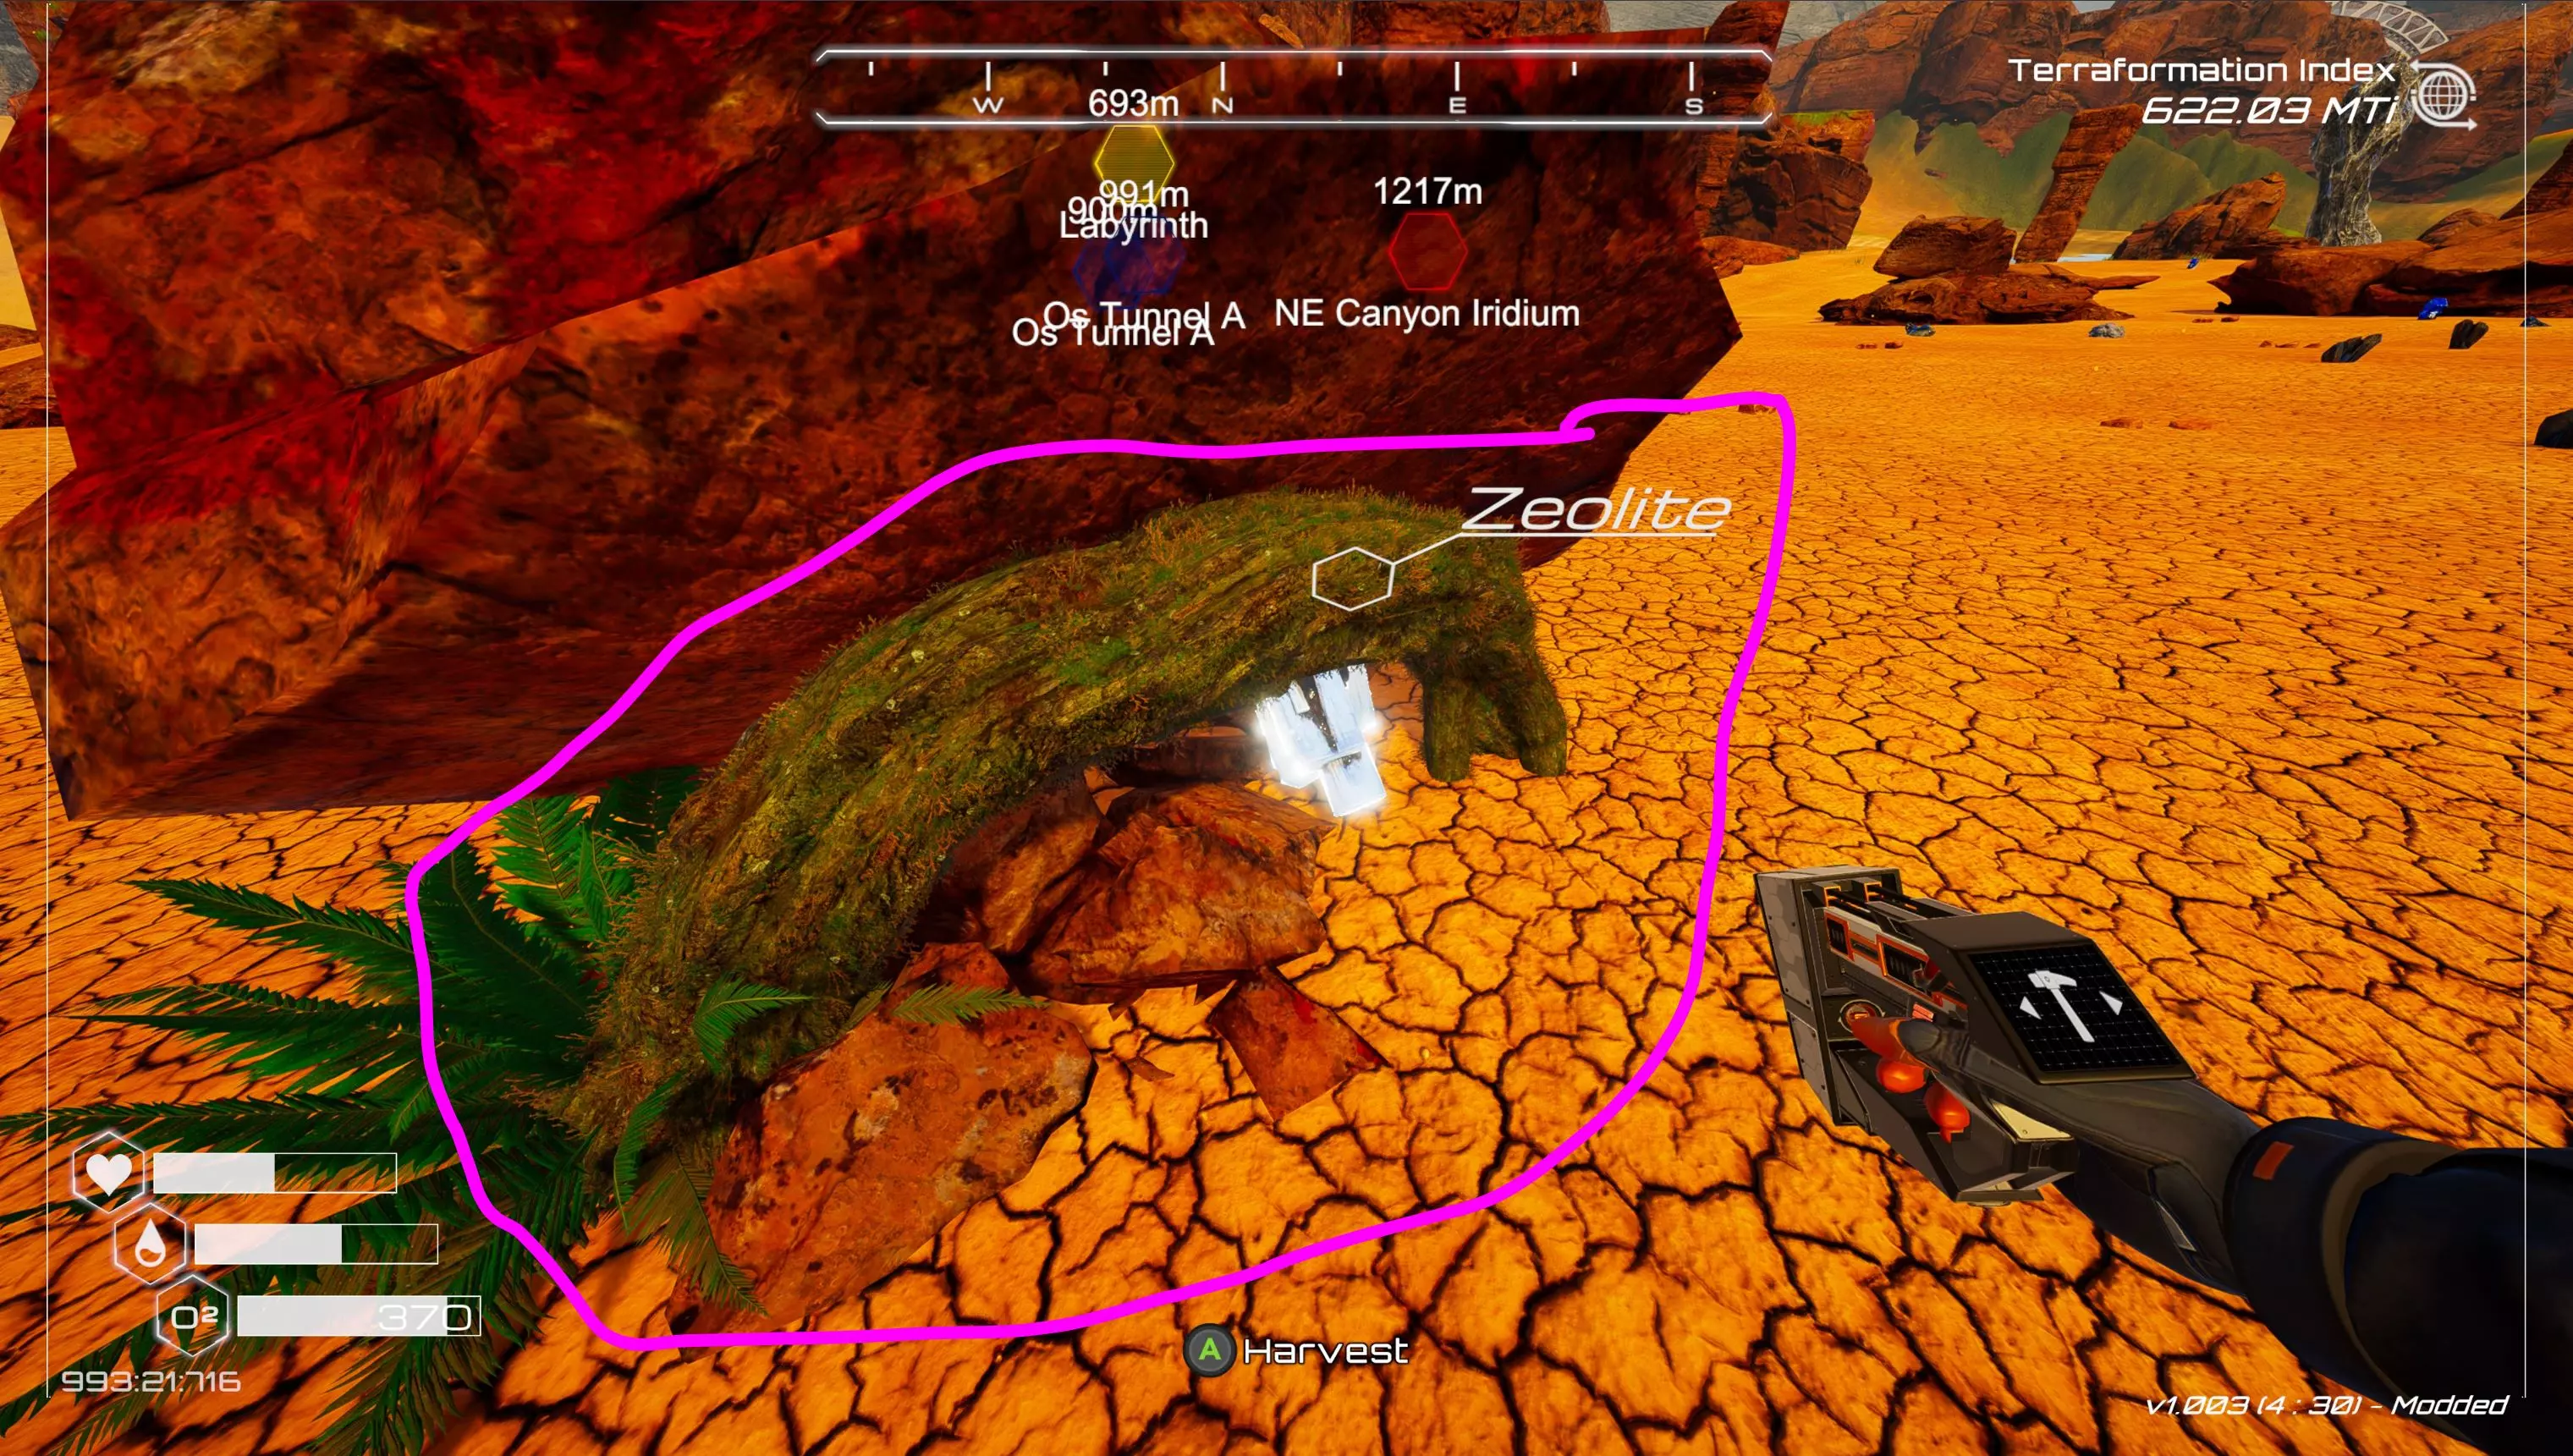
这些沸石根【不会再生】,所以一旦你采集了那块沸石,它就再也不会长出来了。但有一个特定的洞穴(提示:可从硫磺矿区进入,有一条小隧道将其与那里的锇矿洞穴相连),地面上有大量沸石。在那个洞穴里,你可以通过建造一台T2矿石提取机来开采更多(无限供应)的沸石。然后你只需要记得时不时回来清空矿机的存储,就能继续挖掘更多沸石。 记住:拆除建筑可以【全额退还】材料。所以如果你建造了一台T2核发电机,后来发现需要将铀用于其他项目,没问题。只需拆除该建筑,就能拿回铀棒。然后你可以将铀棒放入回收机,将其重新转化为铀矿块。回收机适用于你背包中的任何制造物品:火箭发动机、细菌样本、超级合金、矿物棒,你甚至可以将氧气罐转化回钴。