换一换
换一换 


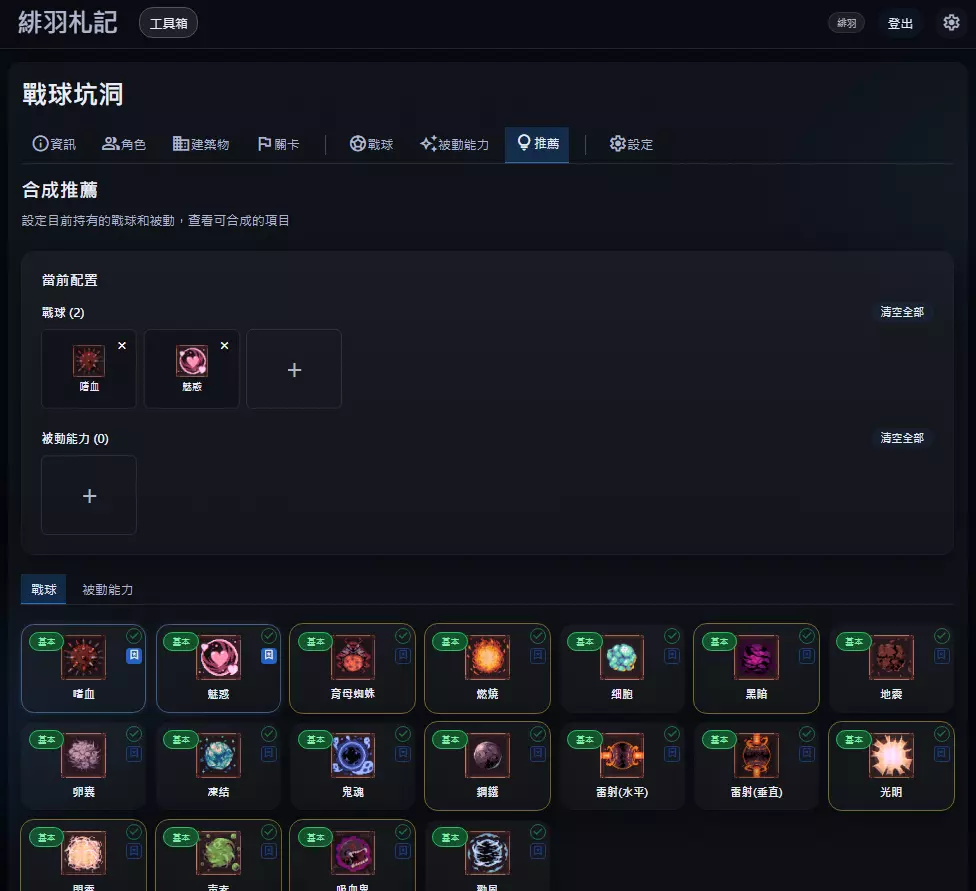
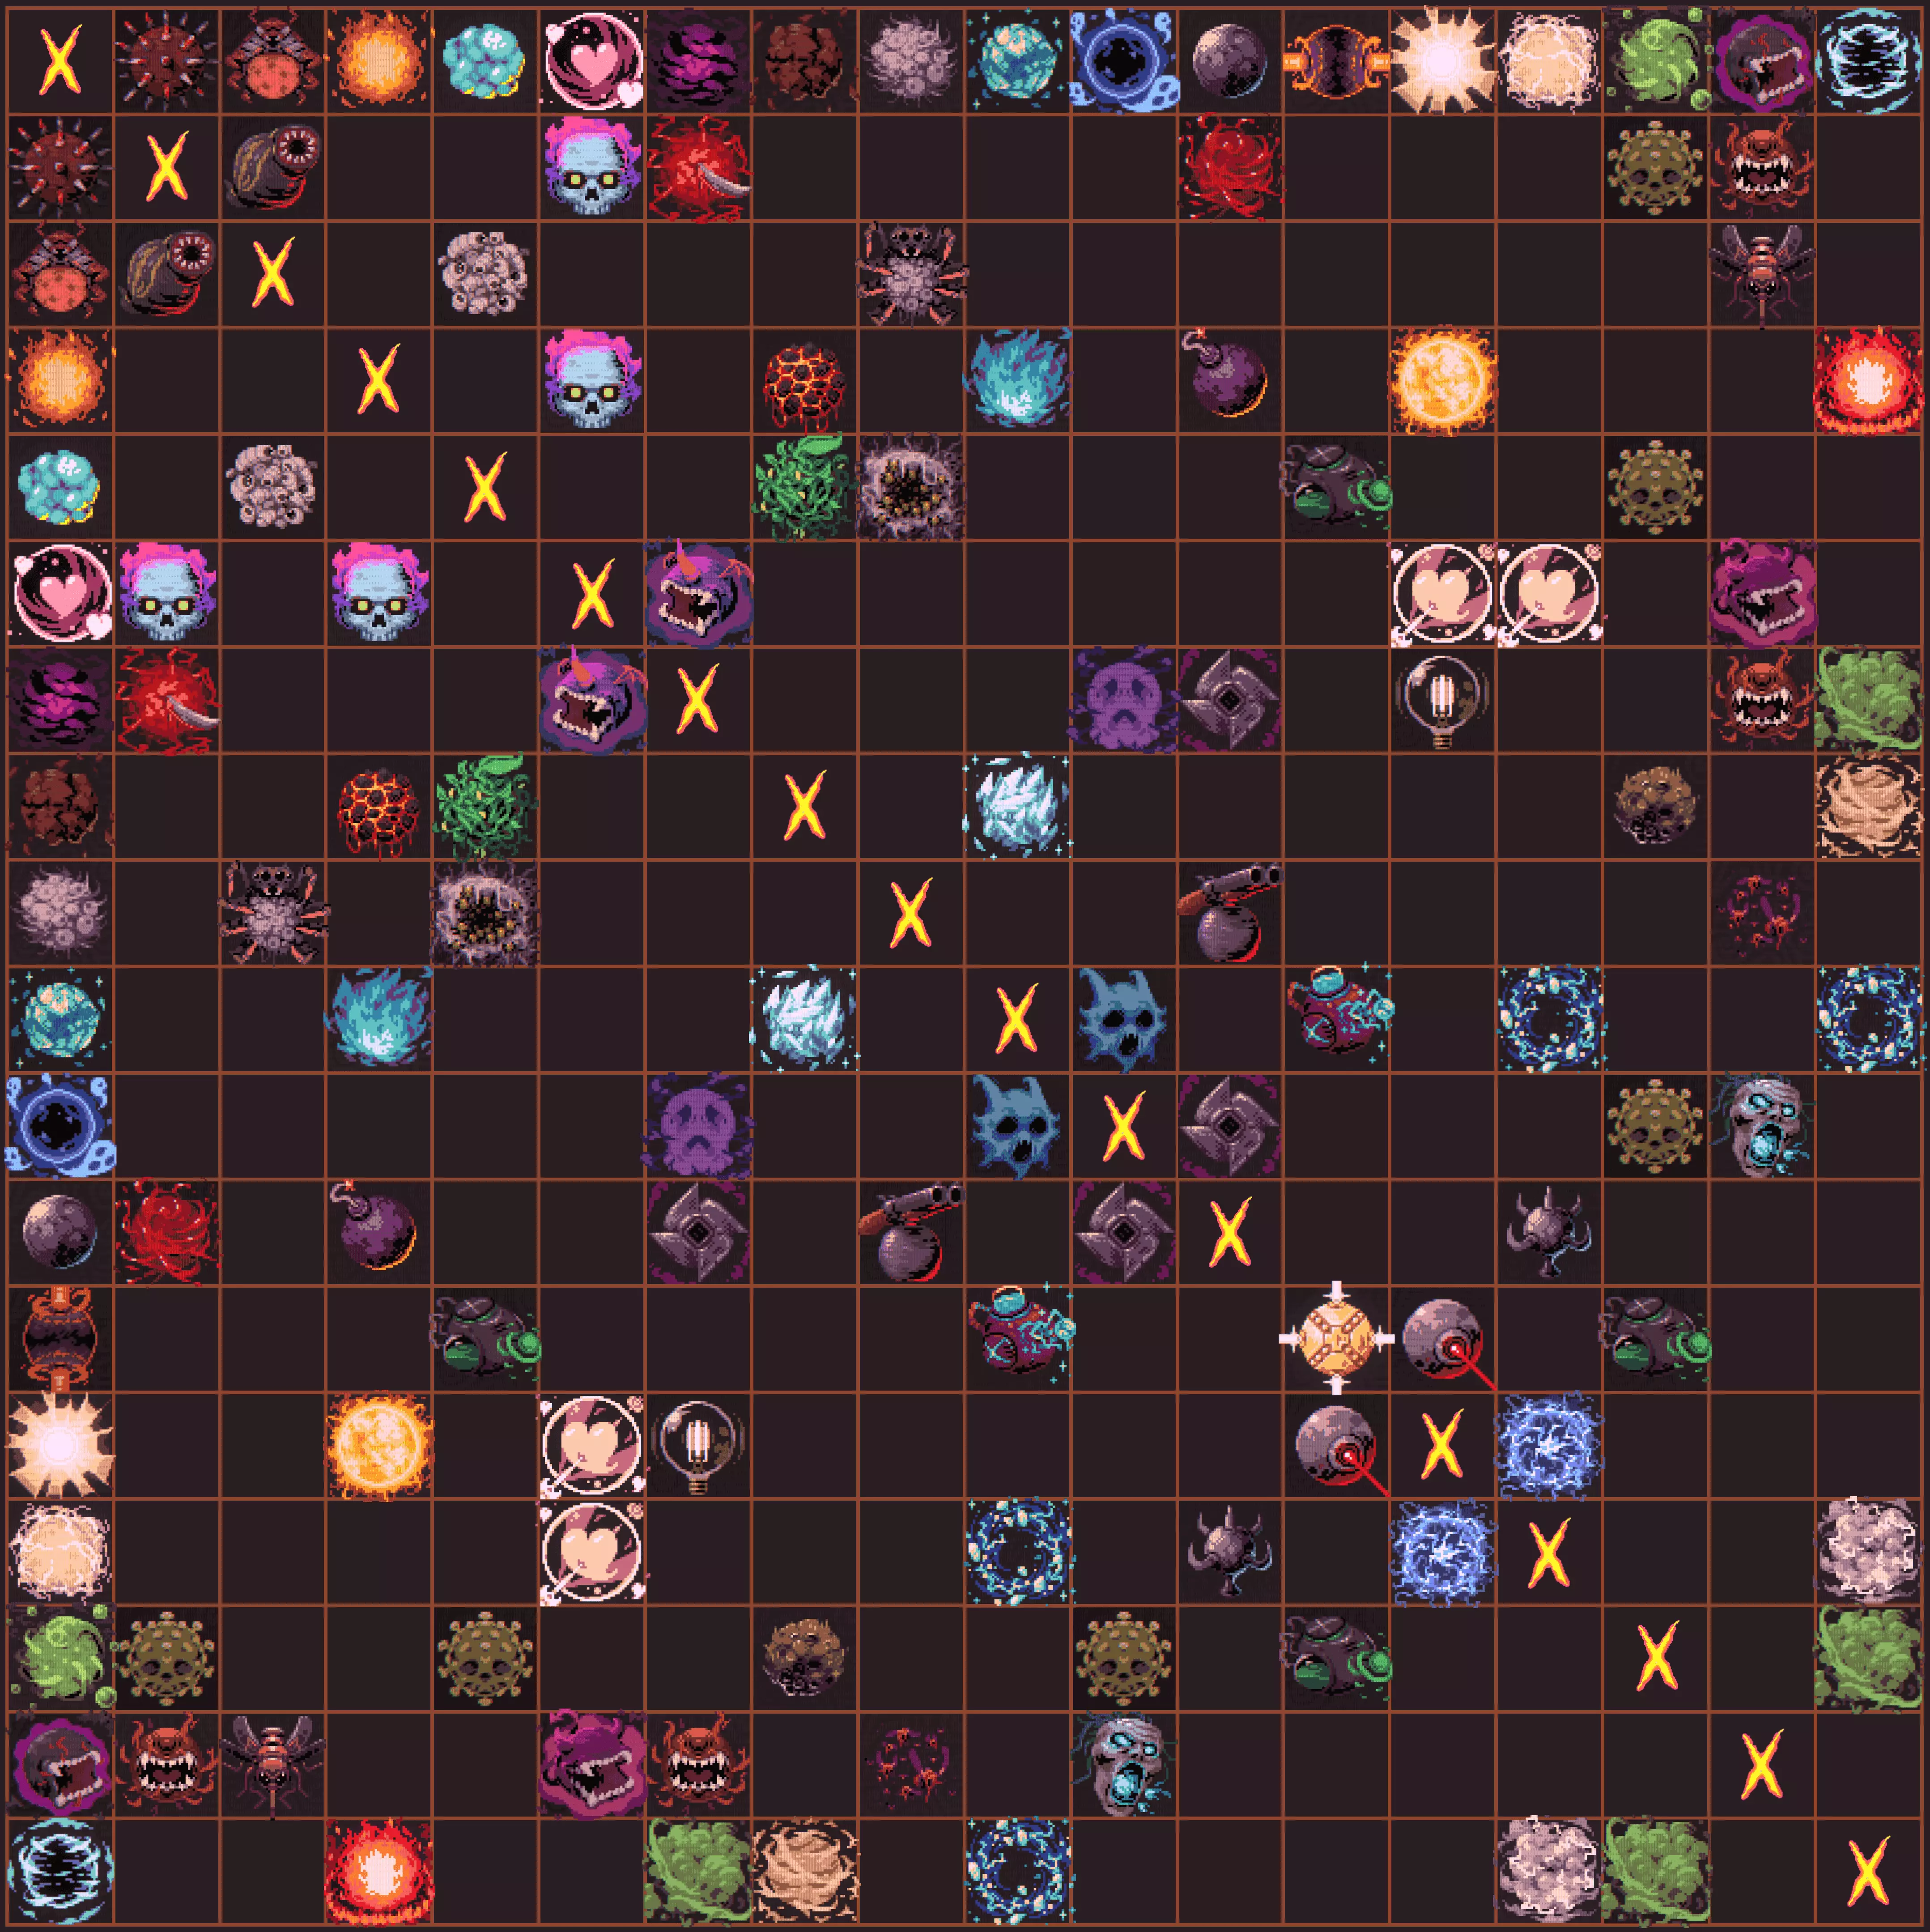
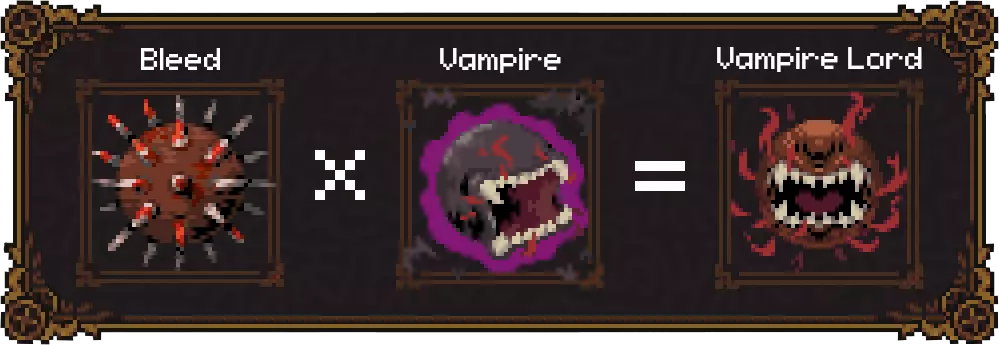
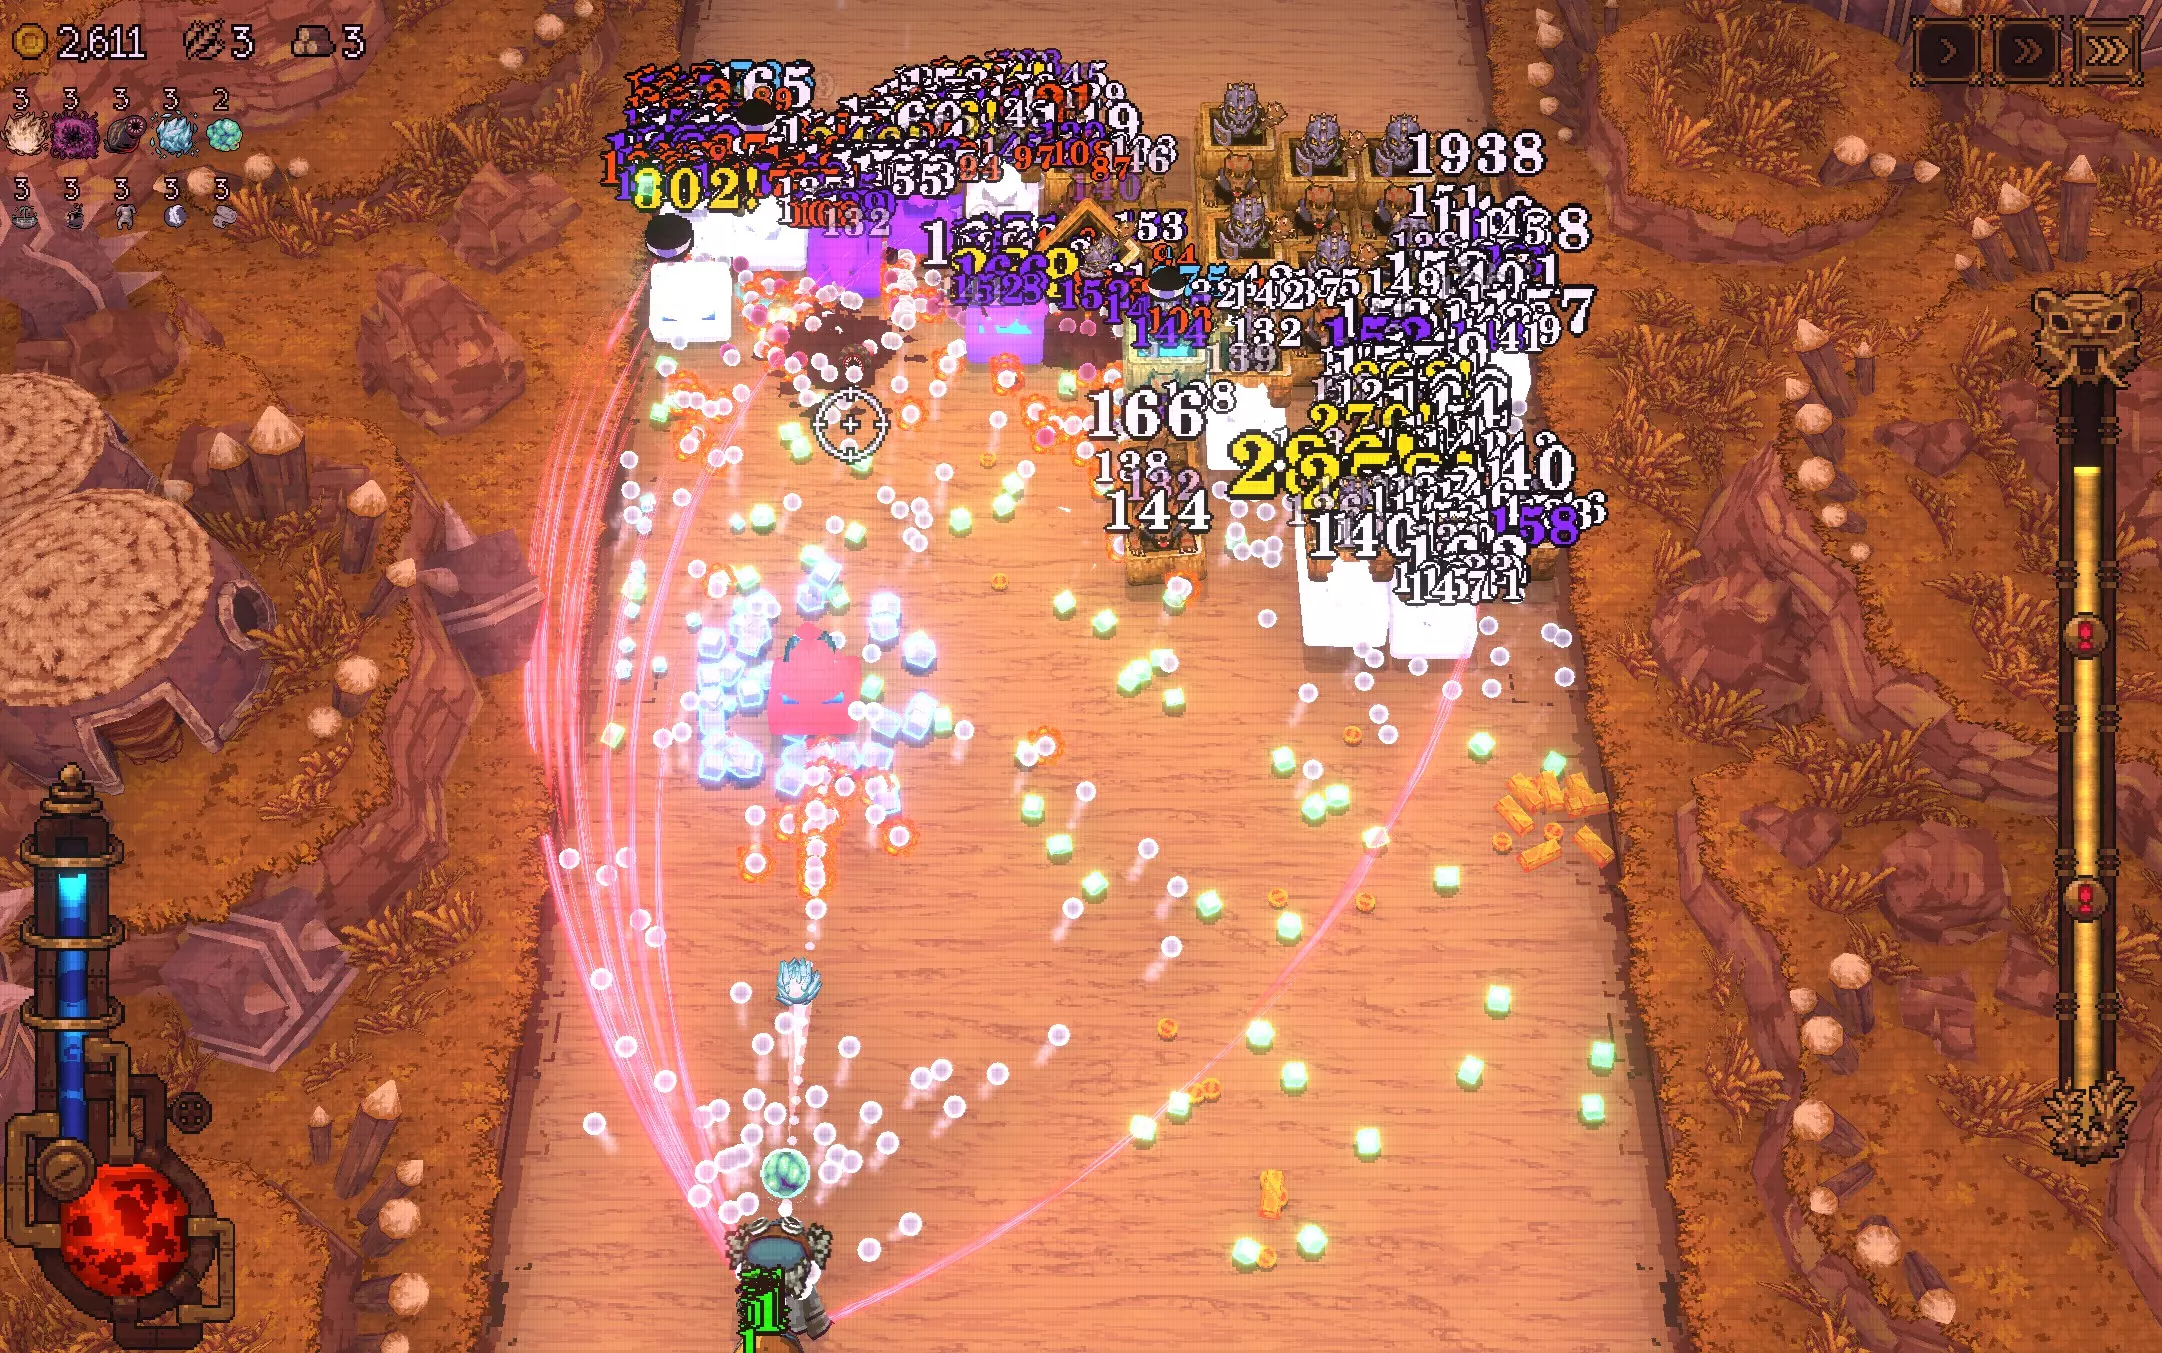
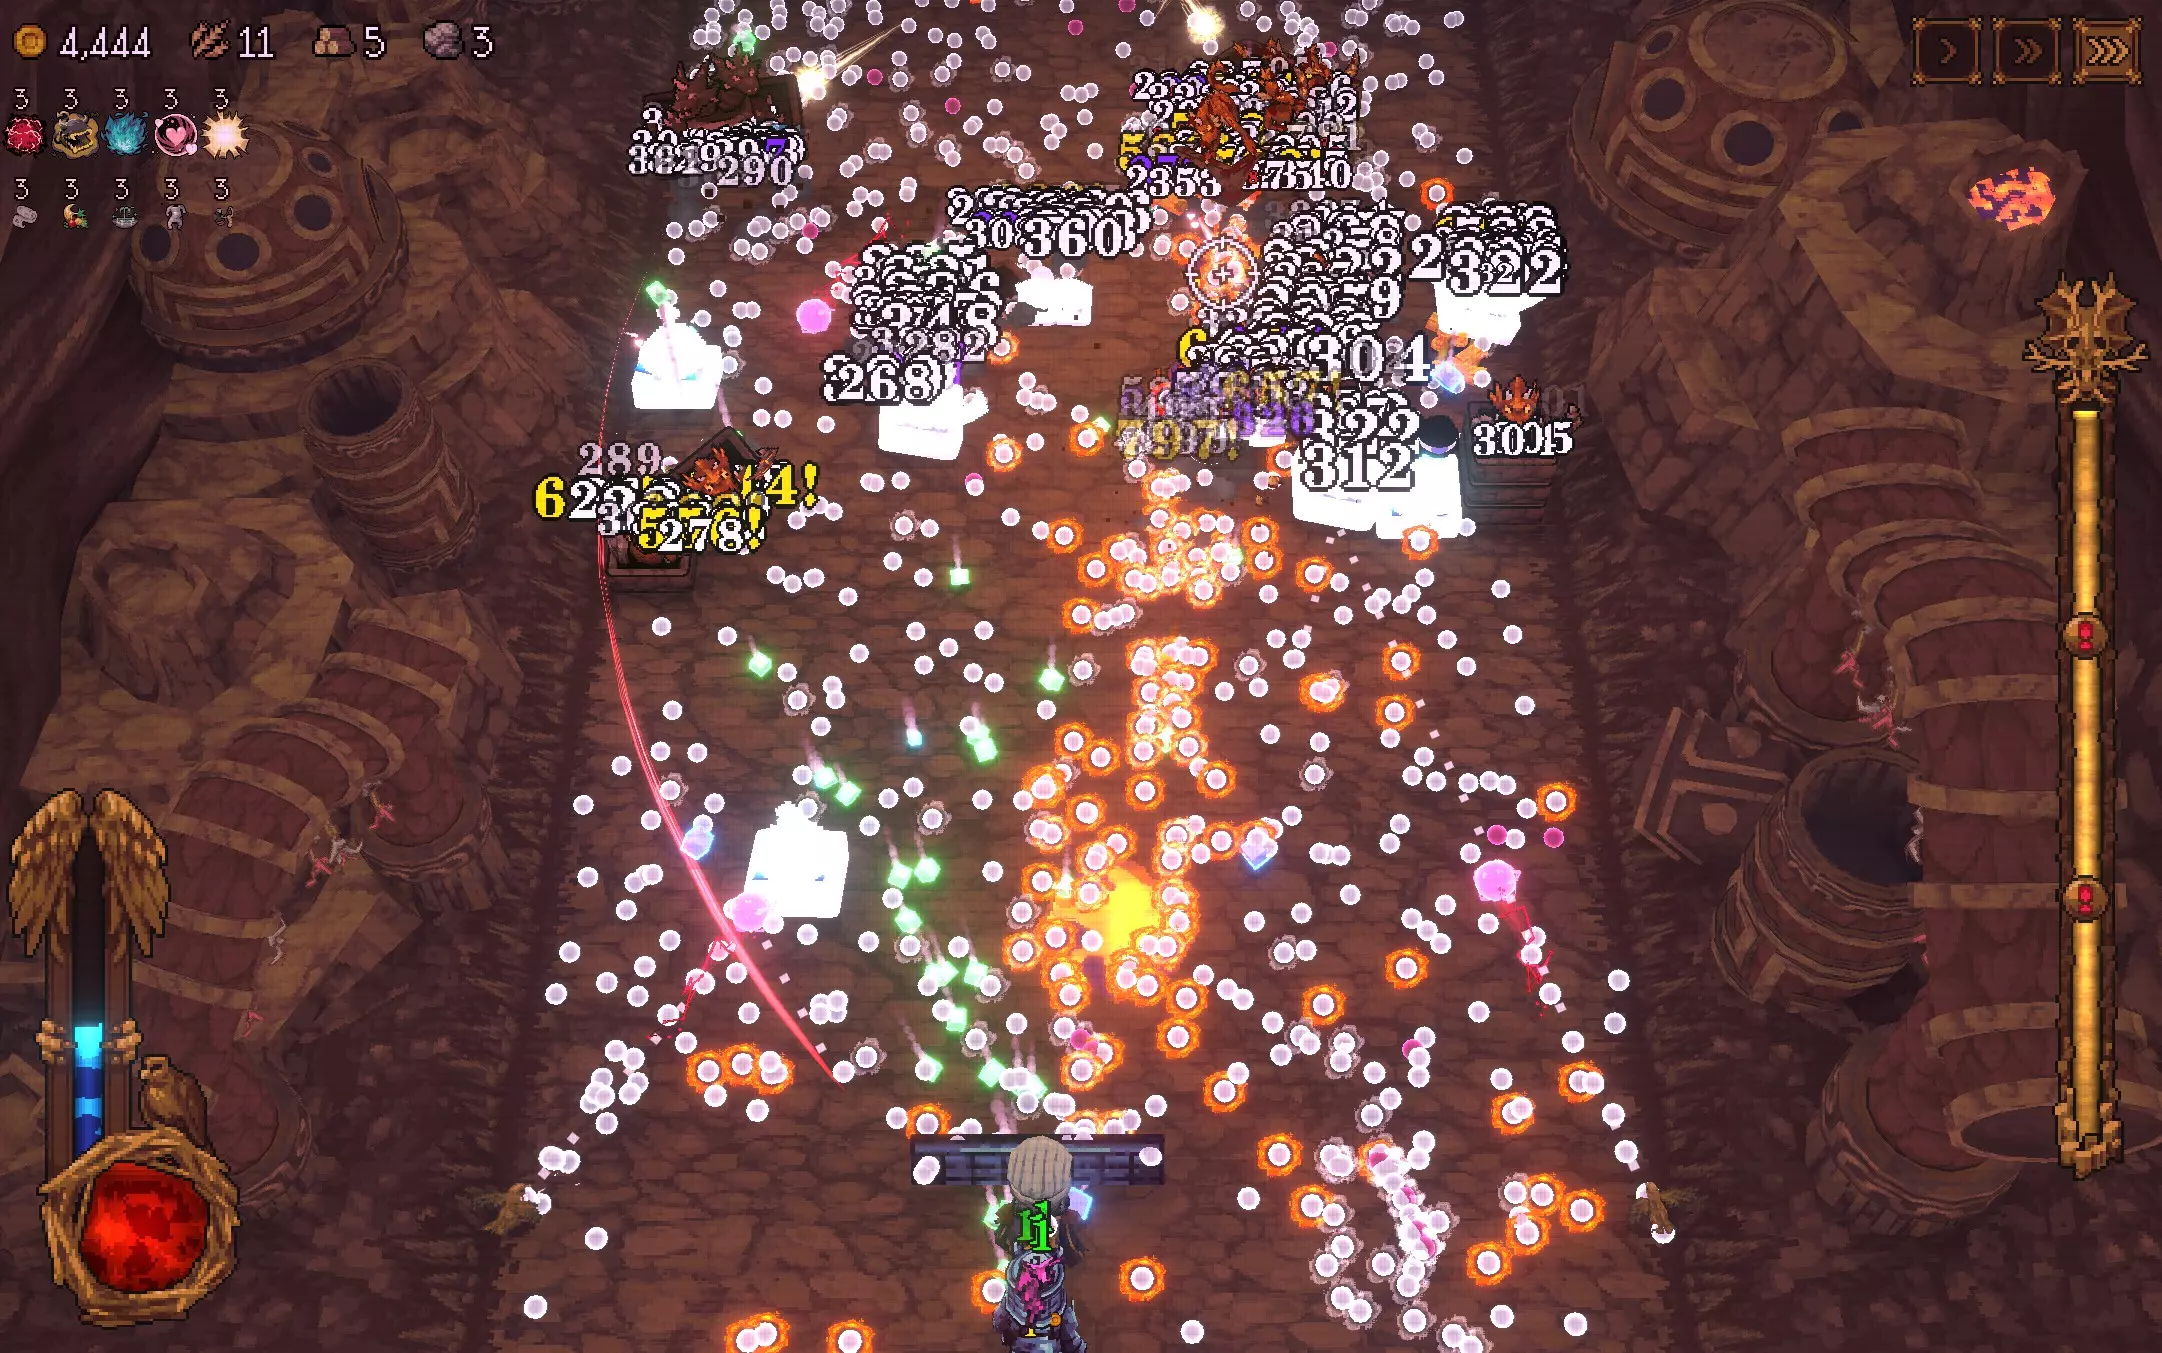
这个构筑是我能构建出的以及在其他构筑中见过的最高DPS构筑。它能生成尽可能多的【宝宝球】,并利用【钢铁连体衣】来指数级提升伤害。几乎任何组合都能使用这个构筑,这是它的另一个巨大优势。 基础与主要组合 如果你想造成大量伤害?那你来对地方了!这个构筑的基础来自两个主要组件:【魅魔球】搭配任意【生成型球】以及【绷带卷】被动。其组合机制是,当【绷带卷】在你每次获得治疗时生成2-3个【宝宝球】,而【魅魔球】会触发持续治疗。将这个组合与增强【宝宝球】伤害的被动搭配,你就能获得一个强大的构筑! 【魅魔球】本身在3级时只有5%的几率魅惑敌人。当它击中被魅惑的敌人时还会治疗1点生命值。单独使用时效果很差,但如果搭配其他许多能触发治疗和魅惑敌人的球,那么每个球基本上都能通过绷带卷持续触发治疗效果。不要被球的伤害数字误导,秘诀在于被动技能和小型球!最右侧是每秒伤害数值,从右数第二位是总伤害。
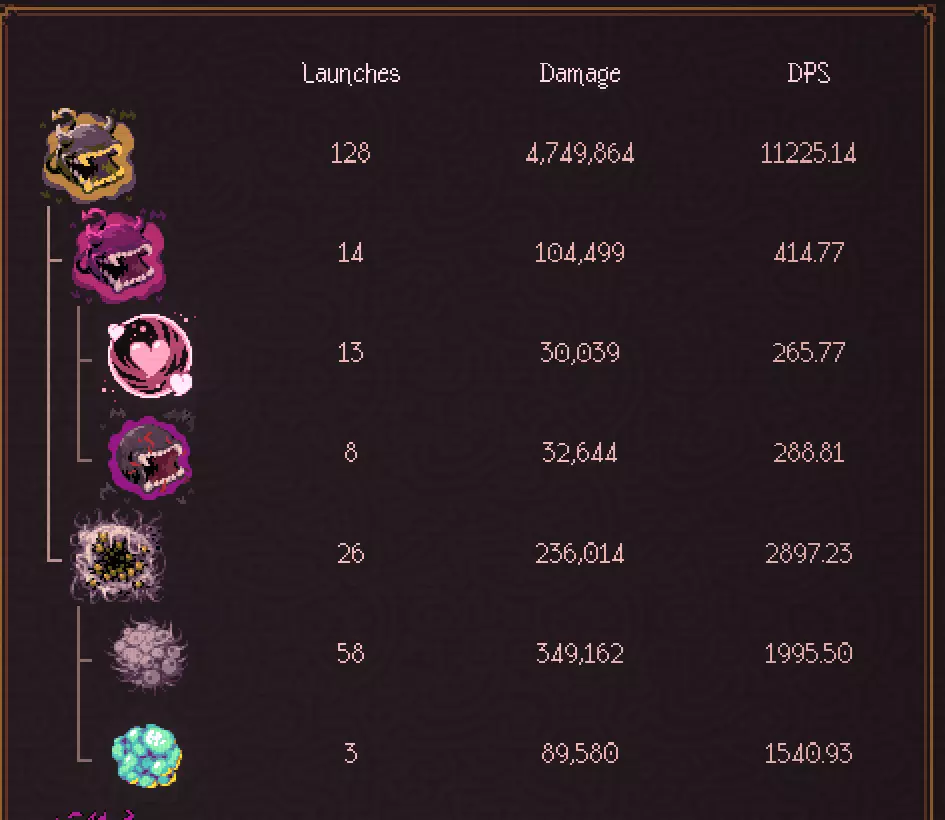
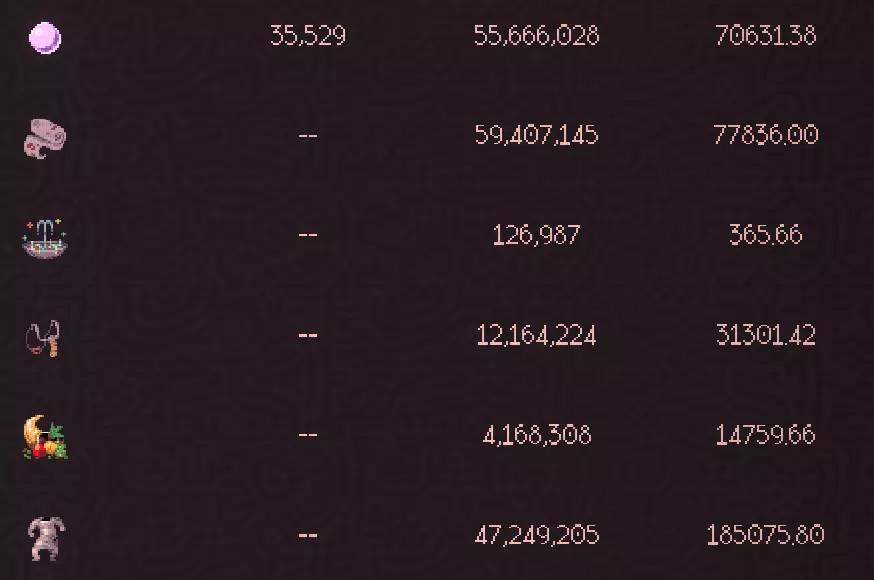
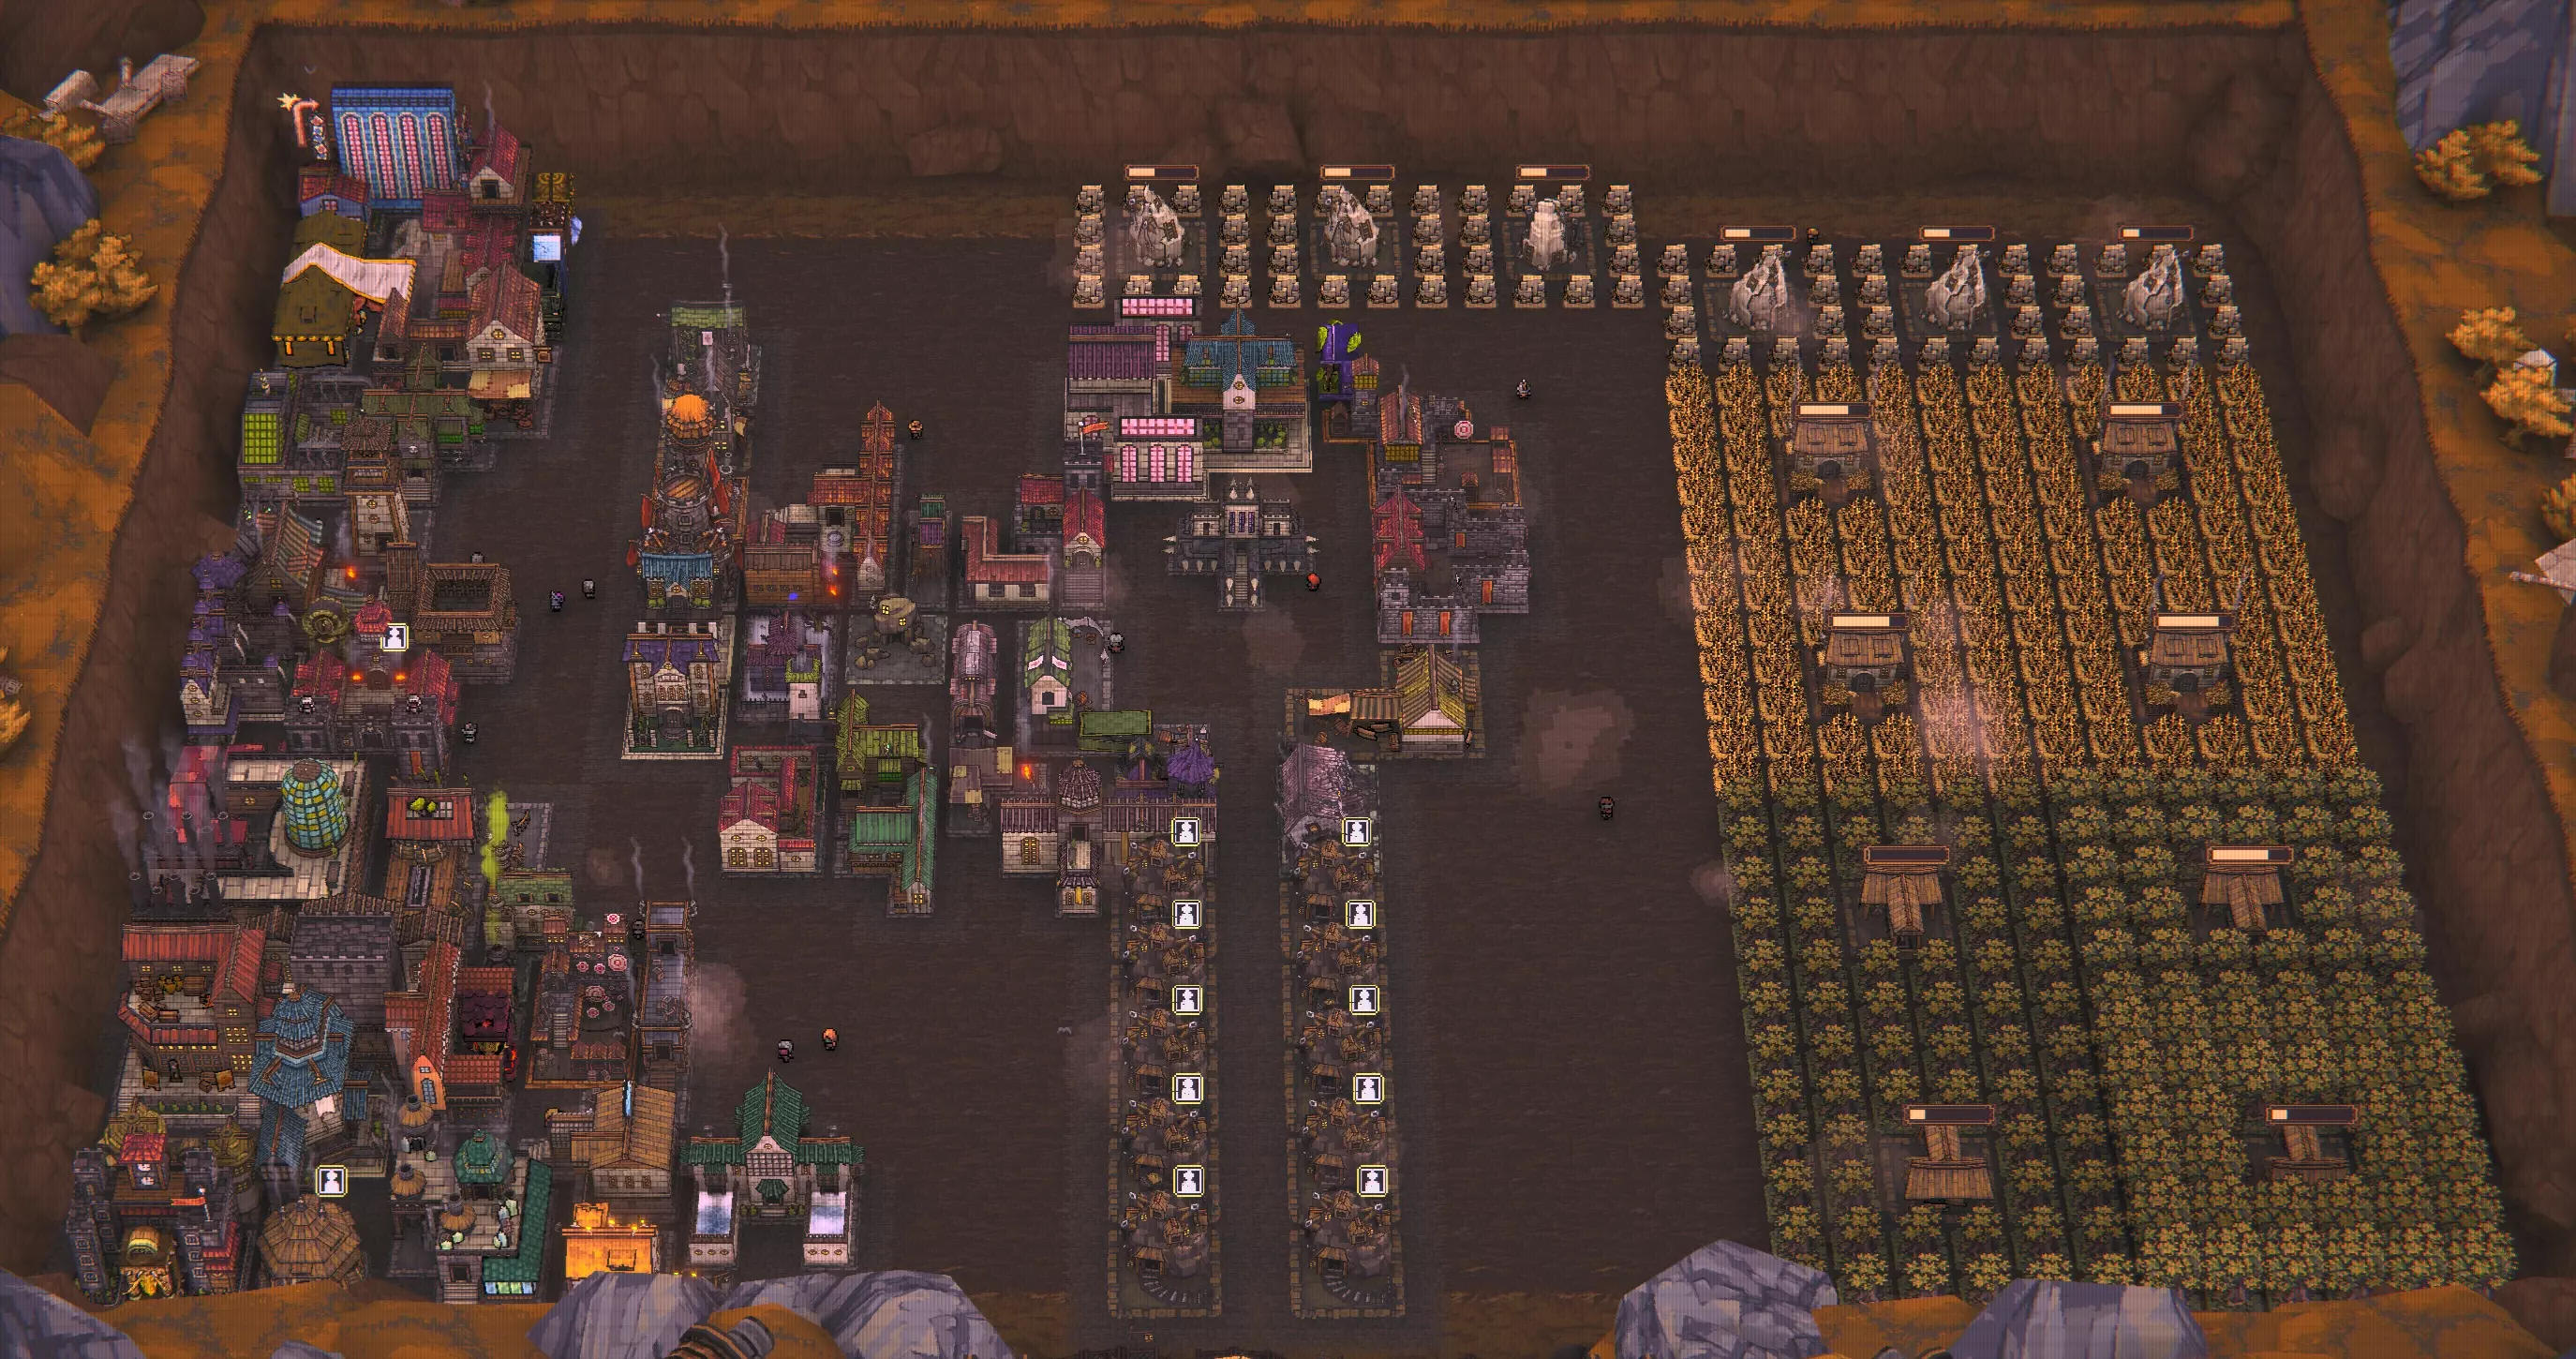
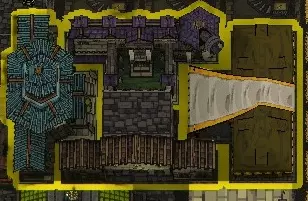
上方图片详细说明了我推荐的构筑核心要素。在构筑中,我选择【丰腴卵囊】而非【蜘蛛女王】或【蛆虫】,因为它能生成更多的小型魅魔球来触发治疗效果。【蜘蛛女王】每次释放需要多次弹跳才能生成同等数量的球体,而【蛆虫】则要求你先击杀敌人,这反而会起到反效果。颇具讽刺意味的是,怪物群越是难以击败,该构筑能造成的伤害就越高! 选择的被动技能自然是【绷带卷】,其次是【铁皮连体衣】、【丰饶角】、【宝石泉】和【弹弓】。 该构筑可搭配的其他球体包括【冻结火焰】、【辐射光束】、【冰川】和【出血】。 上述构筑搭配了【欢宴者】和【挥霍者】,旨在实现双魅魔×丰腴卵囊的组合。适用于约20级的角色。这套构筑几乎适用于所有角色,即使是那些初始没有携带所需起始球的角色也能使用。右侧的伤害数据来自猎鹰者+持盾者的组合,他们初始拥有闪电球和钢铁球。你需要优先获取的核心被动是【绷带卷】,之后几乎就能成型这套组合。接下来我会详细说明其他需要优先选择的被动,以及可以强化该组合的其他球。
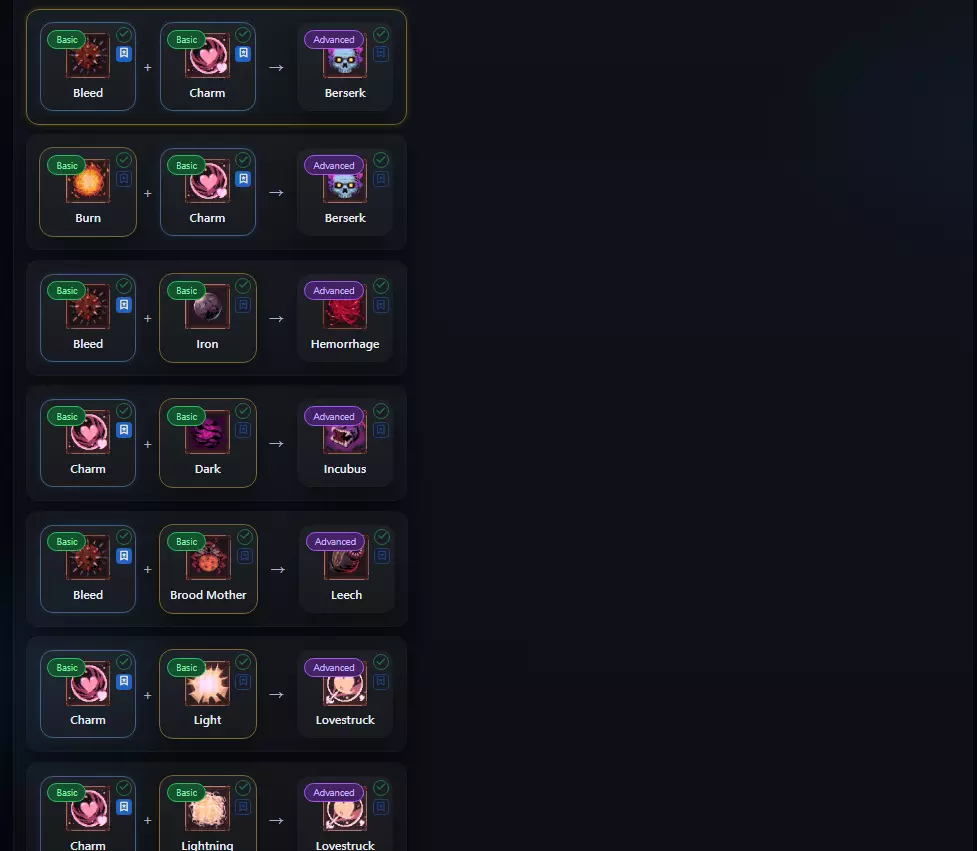
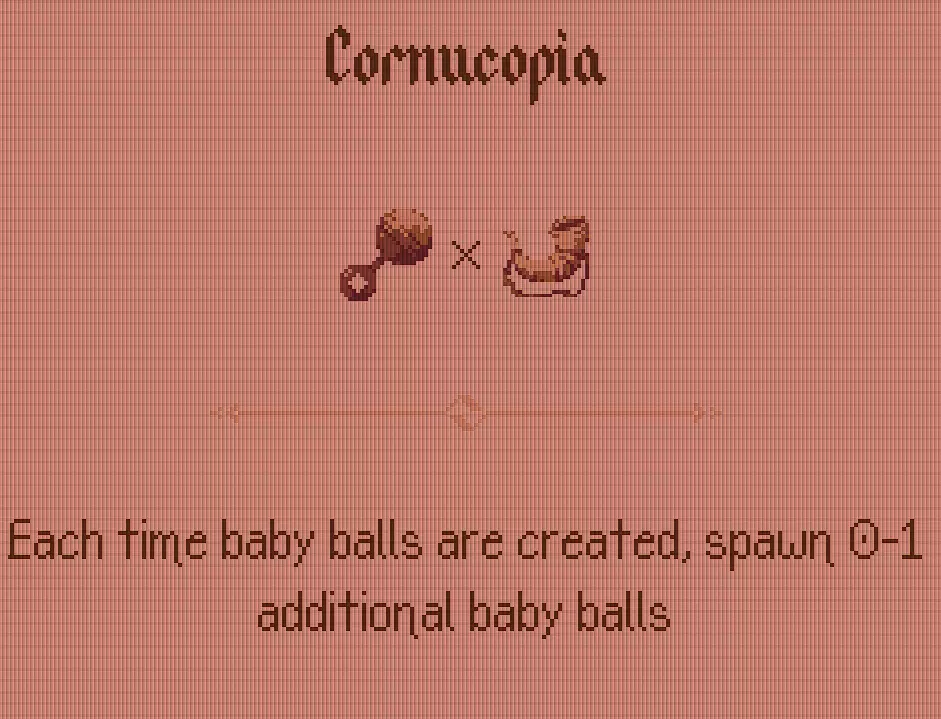
Damage Ramping There are several passives and balls that can augment damage with Baby Balls, which is the primary source you'll be looking for in this comp. I'll first go through passives, and then discuss other balls later. PassivesOTHER THAN BANDAGE ROLL, you'll want to prioritize these passives/combinations, in order: Iron Onesie Gemspring Cornucopia (Baby Rattle + War Horn) Slingshot Midnight Oil Soul Reaver (Goblet + Vampiric Blade) Deadeye's Cross (All 4 Crit Daggers) Honorable Mention: Stone Ally + Traitor's Cloak Iron OnesieThis is the literal best passive you can get after Bandage Roll. New with the Regal Update, it enables you to skyrocket your damage exponentially with the more baby balls you have. As you might've seen in the earlier section, it's possible to get baby balls to do 200-300 damage each with the amount you can summon. I have around 25-30 baby ball base damage, so that's a 10x multiplier possible from this passive. Do not skip it. GemspringThis may be the most unintuitive choice, but it's extremely potent in this combo. You are given a nearly-indestructible unit that you can damage, and proc heals off. In addition, you are rewarded with endless experience! It's a great first-pick passive to let you level up really fast and make the most of your fusions and evolutions, not wasting any on levels. The combo CAN kill these things, so you can get even more out of them than other builds. A nice touch is that these Gemsprings provide a place for you to proc your effects during bosses that have little or no additional summons, such as the Moon during phase 2. This will never feel bad to take, ever. CornucopiaSo you know how we're trying to summon a lot of baby balls? This will summon EVEN MORE! Bandage roll gives you about 2.5 baby balls per heal, and this adds another 1.5 to that (on average). If it only improved bandage roll alone by 1.6x, it would be about as effective as the Deadeye's Cross. But it doesn't stop there! It also summons the baby ball copies of Succubus, adding an additional source for procs on heals. Additionally, the Slingshot (covered next) gets the most benefit from it. This isn't extremely vital to the build, but it is the biggest pick after gemspring. SlingshotThis is a sleeper passive that excels when in combination with Gemspring and Cornucopia. I wouldn't take it unless I have both, but it synergizes extremely well with both of these. This build spawns gems from Gemsprings like nobody's business; each gem summons 0.75 baby balls. Cornucopia at least doubles the spawns for each proc, summoning at least one extra or two extra. It adds up quite quickly and adds to your damage from Iron Onesie. Midnight OilThis is an extremely efficient pick early in a run if you need a quick boost. You'll usually want to build a Frozen Flame ball at some point, so this slots in relatively easily. It adds flat damage to your balls isn't insignificant at all. It's a great early pick that can instantly boost your damage by 2x or 3x, before your baby ball build starts rolling. Not essential, though, and avoid taking it late as your build is more complete. Soul ReaverThis might look like an auto-include, but it simply doesn't put enough work in the build. It only adds heal procs and only once per enemy. The best part is actually the over-heal that lets you face-tank with certain builds like the Carouser. Totally not vital, but it does help a little bit. The Vampiric Blade early on can throw your game, so be aware. Deadeye's CrossI bet you wondered why this shows up so far down, huh? The main thing is that it's too difficult to assemble, too slow to get off the ground, and the payoff is mild, at best. It's *only* a 1.6x multiplier for all of your hard work and doesn't even help with any status damage. If I absolutely need a crit source, I usually just go for the front-facing dagger or the spear for consistent damage. It might be good on an endless run, though I've yet to test it; I would replace the Slingshot first to see the damage potential. Honorable Mention: Allies + Traitor's CloakWell, if you absolutely need another heal engine, this is available. Traitor's Cloak lets you heal your character for 2 when you hit a stone ally. When you have so many baby balls, it can heal for a lot of procs, but it competes for TWO of your passive slots to pull this combo off, unfortunately. I would be more interested if it could proc from Gemspring. BallsThis isn't so much a priority list as much of general considerations for how to build your comp. Realistically, you only need your Succubus + Copy ball to "complete" you build, but there are a lot of good balls to further augment your damage and help with some levels. ...Another One?If there was such a thing as a first-pick ball, it would just be more copies of your Succubus + Copy ball. Even a crappy copy is good, something like Succubus + Clone. You just care about getting more charmed units to proc your heals from them. Nothing else really matters. Frozen FlameRealistically, this is the first-pick to go for. Getting Flame early enables you to pick up Midnight Oil early on to stabilize, and it builds into the Frozen Flame easily. When you do get there, it offers a multiplier on other sources of damage, your main one being almost exclusively from small ball direct damage. It's a potent multiplier for what it's worth, and you can pair it with other evolutions for a 30-second DOT for sustained amp. Bleed BallsBleed is another source of effective damage amp for your build. Any of them will work. Vampire Lord is the only exception to this, counterintuitively; you need 3 hits to heal for the same quantity as 1 of your succu-balls, and the bleed goes away when you do, removing your added damage from the bleed. The other ones are all pretty good; Leech can add up to 48 damage per hit (which is small for optimized builds), Sacrifice can make use of the gazillion balls to proc the curse damage realiably (but also small average per-hit damage), and lastly, but probably the best one, is Hemorrhage. This ball is the standout for the Bleed balls and pairs nicely with Flash or other ball-spam stuff you're already doing. It helps melt bosses while your baby balls melt everything else. Solid augment to the build. Radiation and IceRadiation Beam and/or anything that freezes also offer a source of damage which is multiplicative. These are not too bad to go for, generally, and are easy to work in the build. If you can get Glacier + Radiation Beam, you're pretty solid. None of the other status effects really matter or compare to the DPS you're dishing out with small balls, so you just want to amp that damage as high as it can go. FlashSome of the characters start with Lightning or Light, so Flash is a natural built-in that pairs with any of the above effects. It helps turn awkward characters into over-performers with this comp. If something didn't make it to the passive or ball list, you can probably safely ignore it and write it off. Hero Selection This might be the most tedious section to talk about because...it's pretty pointless with this build. The only characters you can't run this build with are the Radical, Cogitor, and Sisyphus. The Tactician can be a bit challenging, but doable. WarriorPicking Warrior, you want to use the bleed ball to your advantage as an early amp source for baby balls. That's really his only redeeming quality. Pairs well with Shade to get Sacrifice balls, though not the best balls. Itchy FingerThis guy is actually quite good for the comp because you start with the Fireball for a potentially early Frozen Flame and Midnight Oil take. Shooting off balls quickly helps when you get the Rattle, as well. CohabitantsIn addition to the Falconer, this is one of the strongest characters with the build out of the sheer fact that you get twice the balls for twice the procs. You start with Brood Mother which, in my opinion, is a little awkward considering it builds into Leech or Spider Queen, both of which are suboptimal for the build. But you can use Spider Queen on something else like Frozen Flame; it doesn't have to be super important. The RepentantSleeper character for this build, pair with the Physicist for dominating gameplay. The Freeze ball is helpful for building Frozen Flame, and its innate ability to amp damage by 5% per bounce is very helpful as an additional multiplier. I particularly like it with The Physicist because it overrides the back wall and lets balls return to you for a last pass instead of going off-map. Plus, Light from the Physicist builds into Flash, which I've mentioned is strong for amp statuses. EmbeddedPerhaps one of the weaker characters, but you can use his pierce passive to position your Succuballs in enemy clusters for maximum bounce. The poison ball is pretty useless, though. The ShadeThe natural crit is probably the best part as a multiplier. You can instead use passives like the Hatchet for raw damage with him quite easily for early game. Dark can go into Flicker, which functions sort of like Flash but is definitely less effective. The Empty NesterCopies on copies on copies. You get no basic baby balls, but your combo will GO OFF with multiple succu-balls and amp balls. The ghost ball is kinda pointless, though. The JugglerSolid character, can build Flash and position balls exactly where he wants. Nothing bad to say. The FlaggelantOne of the better characters to start with. Egg Sac easily builds into Voluptuous Egg Sac. You can go for the Rubber Headband and make up for lower damage output with extra bounces from the walls, but it's not ideal since the summoned balls don't inherit momentum from the egg sac ball parent. The SpendthriftMainly good because you start with one of the components of the Succubus ball: Vampire. The arc is a little annoying because you don't get to properly aim your special balls where you want them. The ShieldbearerOne of my favorites for this build. Works EXTREMELY well with Gemspring. Iron builds into Hemorrahge for later. Pairs very nicely with Falconer due to leftmost and rightmost Gemspring spawns, where you can bounce them in a straight line with your shield for very fast XP farming. TacticianMeh. PhysicistYou don't need Revenant for him, but it is a plus. The anti-bounce works phenomenally for Gemsprings. Strong character. Can build Flash. The CarouserKinda broken. Starts with half of Succubus in Charm. Insane with Cohabitants or Falconer. Just in general, an absurd character. Will want the Goblet / Soul Reaver more than most, but not essential. Has one of the easiest times farming Gemsprings. Deletes bosses. FalconerSuper broken. Like Cohabitants, if the Cohabitants got a 2x damage multiplier. So yeah.