换一换
换一换 


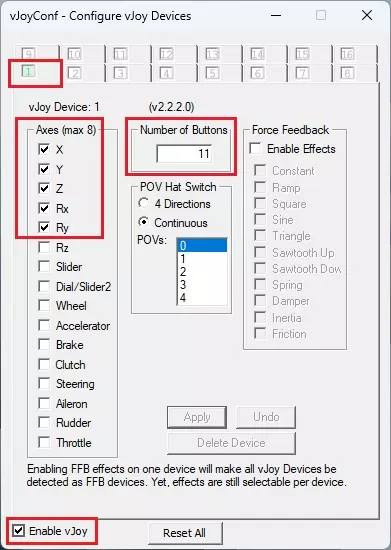
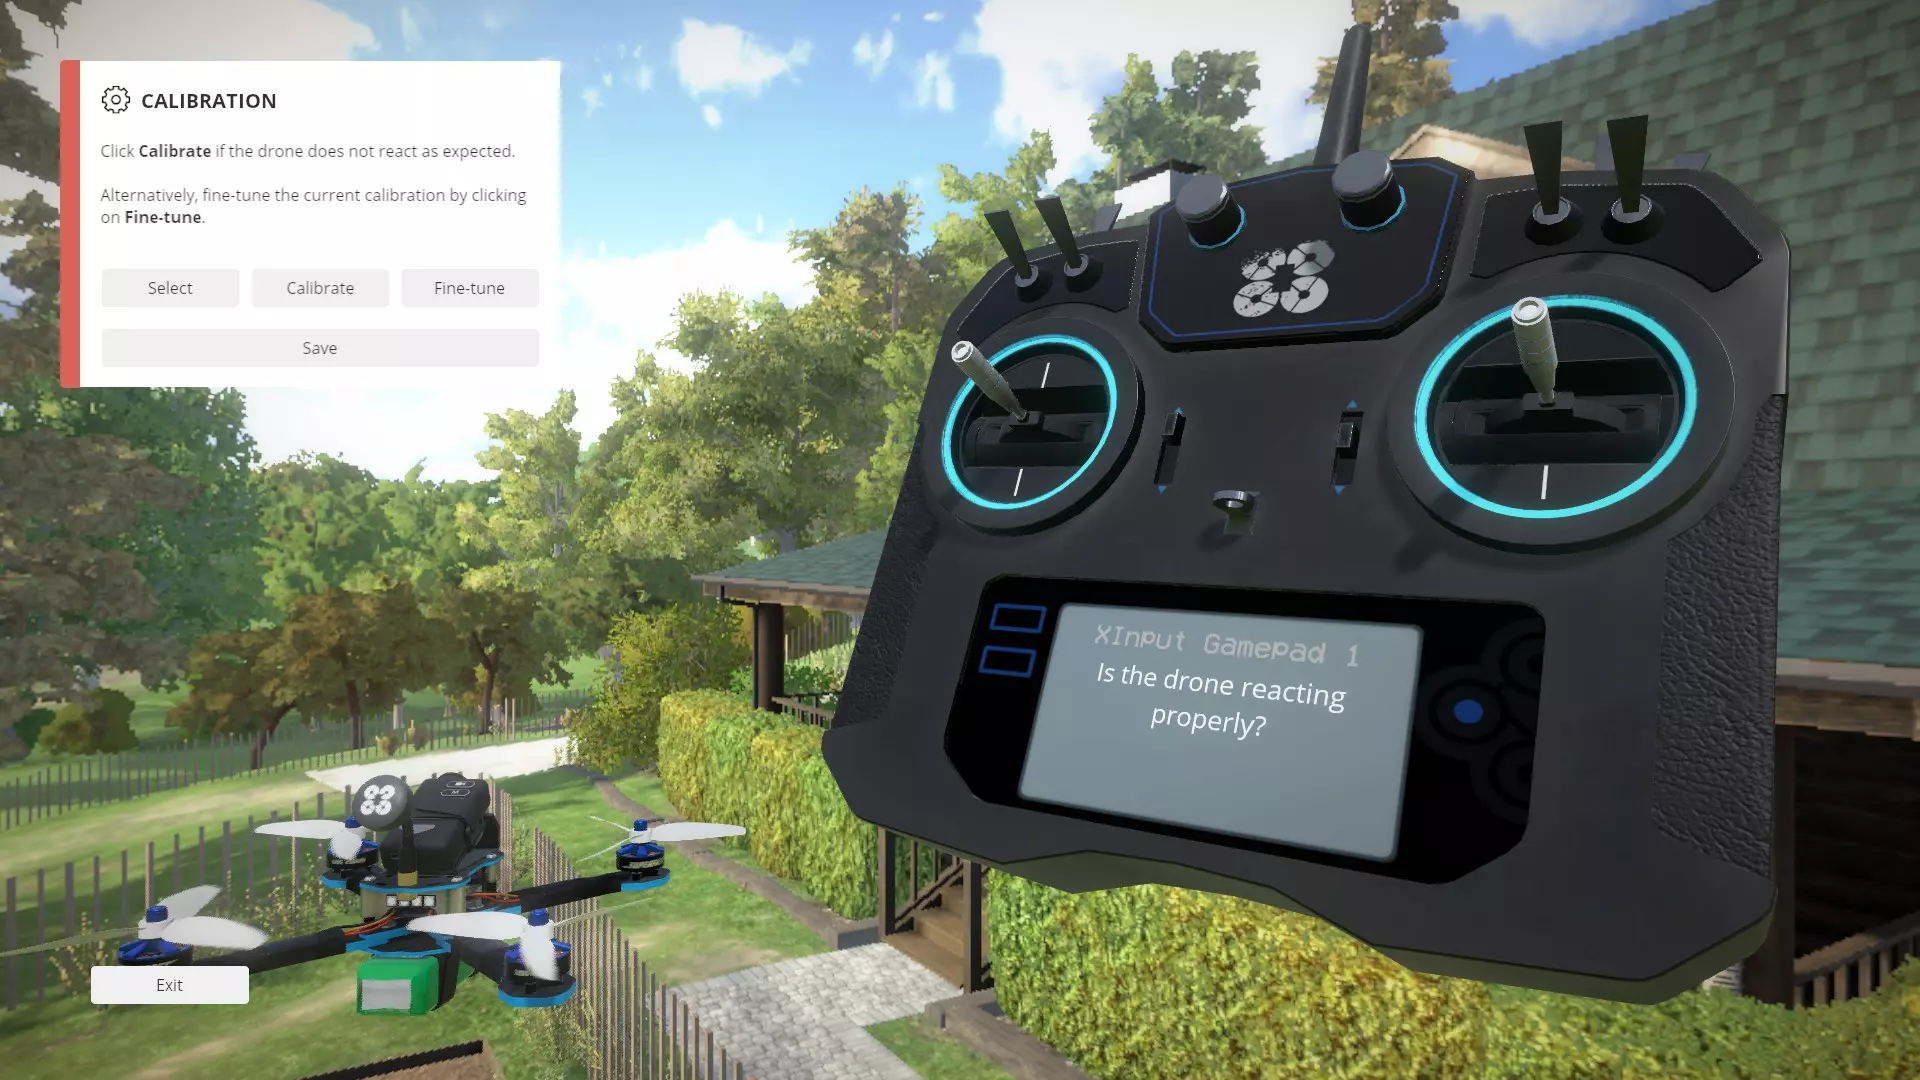
Use your FlySky i6x (or virtually any other RC+receiver) wirelessly with FS-iA6b receiver connected through Arduino to your computer. * Works with any Chinese clone Arduino board that has CH340 chip. How to use your RC controller Wirelessly (with Arduino) How to use your RC controller Wirelessly FlySky i6x with FS-ia6b receiver. Things you will need:Arduino Uno/Nano/Mega (it doesn’t matter, as long as it’s 5V and can be connected to your computer with a USB cable) [1-2$/Euro][Hardware] vJoy software [Free][Software] vJoySerialFeeder [Free][Software] A few jumper cables [Hardware] Your RC Controller and it’s receiver (This guide is using FlySky i6x with FS-ia6b receiver utilizing the i-BUS connection. ) IntroductionIf you are like me you are probably already own a drone and a RC controller. Hopefully your controller is the same as mine. This guide is closely following the implementation that worked for me personally. I in no case vouch for other hardware configurations. The hardware I used was FlySky i6x with FS-ia6b receiver and chinese clone Arduino Nano. Everything worked for me on Windows 7. This method should be working cross-platform and is not limited to a single operating system. If you got this method working under different operating system drop a comment below with information about your setup. In case you also have a chinese clone Arduino with the CH340 programming chip you need to get extra drivers. The drivers from here worked for me: [http://www.wch.cn/download/CH341SER_EXE.html] Before finding this method I was stressing myself with a wired solutions, which did not work for me. First I was confused because the cable that came with the FlySky i6x, despite Windows recognizing the controller, does not work. I tried using S-Video cable with FTDI programmer which did not work either. Then I attempted to use another software library: UnoJoy [https://github.com/AlanChatham/UnoJoy]. Unfortunately (for me) this library utilizes the programming chip on the Genuine Arduino Uno/Mega atmega8u/atmega16u. It programs the said programing chip (bootloader) to report that it is no longer an Arduino but an actual controller. Essentially it converts the original Arduino into the electronics of a physical joystick that you can buy off the shelf. CH340 cannot be utilized in the same manner. All these methods are wired. What finally worked for me is actually better in my opinion because I can actually use my RC controller as it is intended to be used, Wirelessly. The vJoySerialFeeder is primarily made to be used with i-BUS above all else, but it also works with other protocols. Here’s an introduction from their page: 引用自 vJoySerialFeeder:What is it [vJoySerialFeeder]? A program for feeding data from a serial port to a virtual joystick. Currently these virtual joysticks are supported: vJoy (2.x and later, Windows) vXbox (Windows). uinput (Linux).The data coming through the serial port should be structured in a specific way in order for the feeder to recognize it. Currently several protocols are supported: IBUS - used by FlySky radio controllers. SBUS - used by FrSky, Futaba radio controllers. MultiWii Serial Protocol - used by RC Flight Controllers running MultiWii, CleanFlight, BetaFlight, iNav, etc. KISS serial protocol - used by KISS RC Flight Controllers. PPM (converted to IBUS) - see Use case 8. Step by Step:Download and install vJoy Site:[http://vjoystick.sourceforge.net/site/index.php/download-a-install/download] Direct Link: [https://sourceforge.net/projects/vjoystick/files/Beta%202.x/2.1.8.39-270518/vJoySetup.exe/download] (no need to configure anything) Download and unzip vJoySerialFeeder (by Cleric-K) [https://github.com/Cleric-K/vJoySerialFeeder/releases] Download and install Arduino IDE [https://www.arduino.cc/en/Main/Software] Open Arduino IDE. Open EEPROM sample sketch [File->Examples->EEPROM->eeprom_clear] Delete/Remove/CommentOut lines pinMode(13,OUTPUT); and digitalWrite(13, HIGH); Upload edited EEPROM sample sketch to Arduino. You can potentially flash your Arduino multiple times to ensure it is completely blank and will not interfere with the transmission from the receiver. Connect your Receiver to the Arduino in the following configuration: Receiver -> Arduino i-BUS -> TX pin +5V -> +5V G to GND For identifying the pins on your Receiver please refer to your manual. Open vJoySerialFeeder.exe Top right corner select the COM port your Arduino is on. Top right corner click on Connect. Add 4 four axis (or more) and configure your Throttle, Yaw, Row, and Pitch. vJoySerialFeeder should dynamically show you axis movements you do on your RC controller. vJoySerialFeeder must be open and running in order for this to work. DO NOT EXIT vJoySerialFeeder Open Liftoff Go to Options -> Controllers Liftoff should report it found a vJoy - Virtual Joystick Controller (or something of this sort) Go to Calibration and calibrate your axis You are now ready to Fly. [Optional] Go and express your gratitude to Drone Mesh and Cleric-K Drone Mesh also designed this awesome piece of hardware: DroneMesh VUSB All in One Dongle Wireless Simulator for Frsky Flysky Spectrum Futaba Transmitter [https://banggood.app.link/LNTzIXBKhT] The USB dongle is paired with the vjoy software in order to be compatible out of the box with all sbus and ibus receivers at the same time drop latency to a minimum. Which also has an inbuilt inverter for SBUS. Disclaimer.I do not own any of this work. This article is just a compilation of information for convenience. All credit goes to the original creators. This written form guide closely following the video posted by Drone Mesh on YouTube. For video format of this guide you can follow the original video: https://www.youtube.com/watch?v=TRnu2_TI9Vk
参考:如何将富斯遥控器连接到任何电脑模拟器//无线无需线缆 vJoySerialFeeder(由Cleric-K开发) vJoy 本指南撰写时的软件版本:vJoy软件测试版v2.1.8.39-270518 vJoySerialFeeder - v1.3.1 Arduino IDE - 1.8.8