换一换
换一换 


这是一份详尽的100%成就指南,包含从0到100%的逐步流程。如果你正在寻找特定的成就或收集品,可以使用Ctrl+F并在搜索栏中输入相关内容以获取更直接的帮助。 我会为我的所有指南提供支持和调试帮助。如果你有任何问题、遇到困难或发现指南中的错误,请随时留言,我会尽快回复你。祝你游戏愉快! 简介:
Achievement Breakdown: (15) Story Related: (4) Collectibles: (2) Slay: (1) Miscellaneous: (2) Advanced Maps: (3) Portal Challenges: (3) Portal will require two full playthroughs of the Main Campaign. The first playthrough we will be finding all 33 Security Cameras as well as just completing the story. The second playthrough unlocks a new collectible for us to find, Radios, & we will need to find all 26 of them & bring them to their proper destinations for the Transmission Received Achievement. I will explain more about this in Sequence 4. After we complete all Achievements pertaining to the Main Campaign, we will then have to complete all 6 Advanced Maps. These can be a little difficult, but after playing through the main story twice we should be pretty proficient at Portals mechanics. They are simply more difficult version of Test Chambers found within the Main Campaign. Lastly, we need to earn Gold Medals on all 6 Portal Challenges. This is the part that may stop a lot of people from earning 100%. Video guides are basically the only way to complete these Medals; they are very difficult. Fortunately, I found some great guides by Carrot Helper who helped me crack those last three Achievements regarding the Portal Challenges, hopefully they will help you too. *Guide contains major spoilers. Sequence 1: Be GLaD 1. Test Chambers: 00-13 2. Security Cameras Detached: 16/33 3. Achievements: 2/15 ----------------------------------------------------------------------------------------------------- Relaxation Vault:When the game begins, we will wake up in the Relaxation Vault. There are two Cameras in this room, however since we do not have the Portal Gun they do not count towards the Achievement. While in the Relaxation Vault, we can see a Radio on top of the nightstand. These are what we will be looking for during our second playthrough hidden throughout the Chambers for the Transmission Received Achievement… Test Chamber 00:When we enter this Chamber a Weighted Cube will fall from the nearby Vital Apparatus Vent. There is a Camera in this room but once again, since we do not have the Portal Gun, it does not count towards the Achievement. Test Chamber 01:There is a Camera at the start of this Chamber; no Portal Gun, no Camera. Test Chamber 02:Head down & collect the Portal Gun. Now we are able to create Blue Portals & our struggles begin. Security Camera #1: With the Portal Gun in hand, fire a Blue Portal & step through it to be up at the Chambers end. From where we stand, look across the Chamber to see a Camera up above a glass observation window. Shoot a Blue Portal at it to sever the Camera from the wall. 32 more to go… You can track your Achievement Progress in the Achievements tab of the Pause Menu. I recommend doing so in case you miss a Camera. Security Camera #2: Now from the Orange Portal, look left over to where we first entered the Chamber & fire a Blue Portal over the half wall. Step through the Orange Portal & we can see a Camera on the far wall at the bottom of the stairs. Fire the Blue Portal to sever it from the wall. Security Camera #3: Now follow the stairs up to the start of the Chamber where the Chamber Hazard Board is. Turn around from the board & we can find the Camera just above the doorway; fire that Blue Portal at it to sever the Camera from the wall, you get the idea… Test Chamber 03: Security Camera #4: As soon as we enter Chamber 03, we can see this Camera to the left of the Hazard Board. Security Camera #5: From the Hazard Board, turn right & we can spot the next Camera across the way to the upper right of the Orange Portal. Security Camera #6: Pass through the Orange Portal now & once again turn to your right to see the Camera against the wall to the right of the Chamber exit. Test Chamber 04: Security Camera #7: When we enter Chamber 04 we can see this Camera immediately in front of us just before the Pressure Plate. Security Camera #8: The next Camera can be found across the way just to the right of the Chamber exit doors. Test Chamber 05: Security Camera #9: As soon as we enter Chamber 05 we can find this Camera above the doorway to the right of the Hazard Board. Make sure you wait for the Orange Portal to open to sever the Camera from the wall. Security Camera #10: Enter into the main room & immediately look up to your left to see another Camera up on the wall. Make sure you have severed Cameras #9 & #10 before heading through the exit doorway as we will not be able to go back for them when the door closes behind us. Security Camera #11: After placing both Weighted Cubes on the Pressure Plates, enter through the exit doorway & we will become trapped. When the Orange Portal appears on the ceiling, fire a Blue Portal to land on the trap rooms ceiling. We can find this Camera on the wall opposite where the elevator is located. We should receive an Achievement Update that we have severed 11/33 Cameras. Now complete Chambers 06-09 as there are no severable Cameras in these Chambers. Test Chamber 10: Security Camera #12: As soon as we enter Chamber 10, we can see this Camera on the opposite wall from the Hazard Board. This is in the very first room of the Chamber, be sure to sever the Camera before progressing onwards. Test Chamber 11: Security Camera #13: When we step off the elevator into Chamber 11, walk up the stairs to the Hazard Board & turn around to look back down the stairs; the Camera will be in the wall just above them.

成就#1 - Lab Rat:获取完全充能的光圈科技手持传送门设备。 剧情相关。在第11测试室中,我们还将把传送门枪升级为可发射蓝色和橙色两种传送门。在测试室中央拿起第二把传送门枪即可解锁该成就。 第12测试室中没有可收集的摄像头,继续前往第13测试室。 第13测试室: 安全摄像头#14:进入第13测试室后,沿着小走廊进入有危险提示板和压力板的房间。转身,查看小走廊上方的墙壁即可找到摄像头。 安全摄像头#15:将加权立方体放在压力板上后,我们就能进入测试室的第二个房间。当我们进入内部后,转身回头看向我们走过的门口,会看到其右侧有一个摄像头。 安全摄像头16:在第二个房间的压力板上放置两个配重立方体,以解锁通往电梯的门。当我们穿过门口后,看向左侧墙壁,就能看到这个摄像头。

成就#2 - Terminal Velocity:坠落30,000英尺。 既然我们现在可以同时控制蓝色和橙色传送门,那么随时都能解锁这个成就。找一个可以在天花板和正下方地面各射一个传送门的地方(比如第13号试验 chamber 的第二个房间)。现在从下方的传送门掉下去,你就会从天花板的传送门出来,再穿过地板的传送门,如此不停地循环坠落,大约持续5分30秒。这比你想象的要久得多;当你让雪儿开始不间断坠落时,你可以去拿点零食、喝点饮料,然后5分钟后回来,应该就能解锁成就了。 显然,房间的天花板越高,你就会感觉自己坠落得越远。对于像我一样使用公制单位的人来说,30000英尺等于9144米,这可是一段相当长的坠落距离! 第14号测试室中没有可收集的摄像头。 序列2:让他们吃蛋糕 1. 测试室:15-19 2. 已拆除安全摄像头:33/33 3. 成就:6/15 测试室15: 安全摄像头#17:走出电梯进入15号测试室。走过危险提示板,在进入第一个房间前,向右上方的小拱门望去,即可找到上方的摄像头。 安全摄像头#18:进入第一个房间,我们可以看到正对面的下一个摄像头。向它所在的方向发射自己,确保走回去将其从墙上拆除。安全摄像头19:现在进入二号房间,我们可以看到电梯左侧墙上、靠近房间出口电梯的上方有下一个摄像头。 安全摄像头20:乘坐电梯上楼并进入三号房间。进入大房间后,立即向左看,会看到上方有一个壁龛,里面有楼梯通向那里。走上楼梯,我们可以在左侧墙上找到一个摄像头。 安全摄像头21:解开三号房间的谜题后,开始沿着有移动平台和有毒水的走廊前进。穿过走廊进入四号房间,摄像头就在走廊进入该房间出口的正上方。测试关卡16: 安全摄像头22:进入实弹测试关卡16的第一个房间,我们可以直接看到这个摄像头就在前方。 安全摄像头23:经过第一个摄像头后,避开挡路的炮塔,我们可以在下一个房间前方的墙上看到另一个摄像头在上方。

成就#3 - Friendly Fire:用一个炮塔击倒另一个炮塔。 此成就现在即可解锁,或在任何有炮塔的关卡中解锁。只需在任意【激活的】炮塔上方创建一个传送门,并在另一个炮塔下方创建另一个不同的传送门,使其将另一个炮塔撞倒。倒下的炮塔不必处于【激活状态】也可计入成就。 安全摄像头#24:从第二个炮塔沿着走廊继续前进,左侧凹室中有另一个炮塔,天花板上画有红色X。看向这个凹室,就能看到墙上的摄像头。 安全摄像头#25:在关卡接近尾声时,我们会进入一个有压力板和三个炮塔的房间。摄像头可以在出口门正对面的炮塔上方角落里找到。 安全摄像头26:按下压力板并进入下一个房间,我们会看到面前有一个格栅,后面有一个炮塔。穿过格栅传送到炮塔所在的位置,我们可以在墙上正上方找到一个摄像头。注意下一个格栅后面还有另一个炮塔。 测试 chamber 17:当我们进入chamber 17时,墙上会有多个无法创建传送门的摄像头。这些摄像头不计入成就,只有两个摄像头计入。 安全摄像头27:使用同伴方块爬上壁架,然后沿着两条有能量球发射下来的走廊向下走。在第二条走廊的尽头,我们会进入一个小房间,房间的墙壁可以生成传送门;走下第一段楼梯后,摄像机将位于我们右上方。 安全摄像头#28:走下第二段楼梯并进入下一个房间;我们可以在前方低处墙壁上,一个通往能量球发射器的门道上方,立即看到下一个摄像头。

成就#4 - Fratricide:不择手段以求生存。 与剧情相关。在测试 chamber 的尽头……我们必须杀死自己最好也是唯一的伙伴才能继续前进。不……没有其他办法。我们肯定会为此下机器人地狱的…… 测试关卡18:本关卡中有摄像头,其中大部分无法拆卸,只有两个可以。 安全摄像头#29:沿着关卡向上走,直到到达顶部的压力板。进入侧室并按下定时按钮,进入下一个满是炮塔且令人痛苦的房间。我们一进入这个房间,就能在穿过的玻璃窗右侧的墙上找到摄像头。 安全摄像头#30:拿起加权立方体并将其放在压力板上,以继续通过关卡。穿过我们打开的门进入下一个充满毒水的房间;从我们跳入房间的位置向右看,就能看到摄像头。 如果你还未解锁Terminal Velocity成就,这个房间是解锁该成就的好地方。 测试 chamber 19: 安全摄像头#31:首次进入该 chamber 时,走过危险告示板进入第一个房间,我们可以在右侧墙上立即找到摄像头。 安全摄像头#32:在第一个房间通过能量球谜题启动移动平台。穿过毒水两次传送,你会进入一个带有定时按钮的小壁龛,该按钮用于为移动平台打开一扇门。在这个壁龛中,看向定时按钮的上方就能看到摄像头。安全摄像头#33:通过需要使用定时按钮打开的门,踏上移动平台,我们就能看到前方墙壁上绿色能量球旁边的最后一个摄像头。

成就#5 - Camera Shy:从墙上拆除全部33个安全摄像头。 如果你一直按照本指南操作,拆除第33个安全摄像头后将解锁此成就。 如果你遗漏了某个摄像头,在新游戏中无法返回寻找遗漏的那个。不幸的是,重置游戏会重置摄像头计数,你将不得不重新寻找全部33个。请认真保存游戏,并在离开房间前通过暂停菜单的成就选项卡检查你的成就进度。

成就#6 - Party Goer:做出正确的派对护送提交位置决定。 剧情相关。在我们通过燃料罐旁的破损管道向上发射,快速逃离被投入焚化炉的命运后,此成就将解锁。 场景3:蛋糕是个谎言?! 1. 光圈科技 2. 成就:8/15

成就#7 - Long Jump:跳跃300英尺。 这个成就在游戏接近尾声时最容易解锁,此时我们已经潜入了光圈科技的内部设施。最终,当我们穿过维修区域时,会到达一个类似下水道的大型蓄水池,那里空间开阔。当我们从浑浊的水中爬上第一层平台时,警报会触发,并且会有许多炮塔向我们发起攻击。在我们解决掉这些炮塔后,就可以在这个巨大的房间里尝试解锁成就了。 这个成就与“Terminal Velocity”成就非常相似,只是这次我们需要的是水平距离而非垂直距离。要做到这一点,在这个大房间里,会有两面倾斜的液压墙,我们需要借助它们来跳出房间。逐步前进,以便能在最高的倾斜墙上放置一个传送门。从传送门中跳出,然后在较低的倾斜墙上放置另一个传送门,在这两个传送门之间循环。要对准位置并恰到好处地控制速度可能有点棘手,但幸运的是,我们只需要循环2-3次。 不管什么原因,如果你在空中直视地面,雪儿会跳得更远。 当你认为已经完成足够次数的循环跳跃后,落在坚实的地面上,成就就应该会解锁。

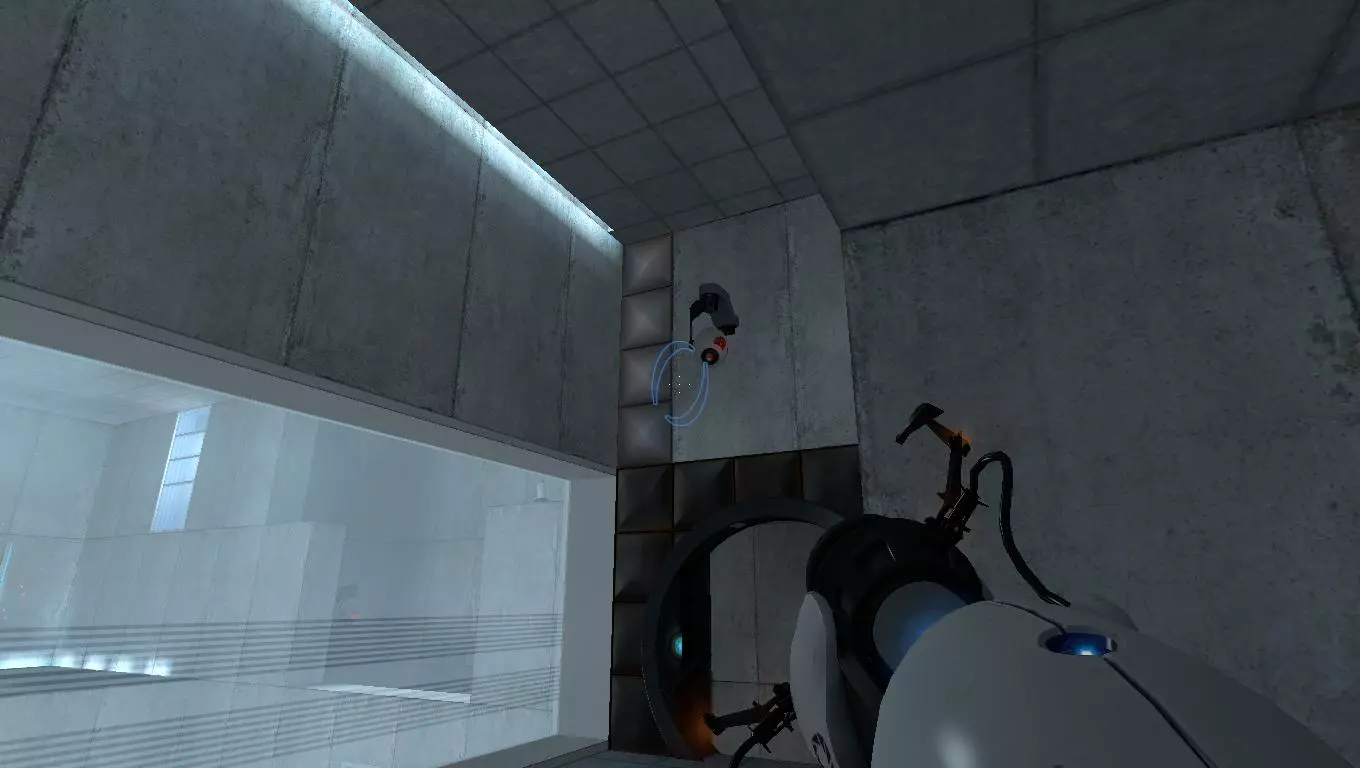
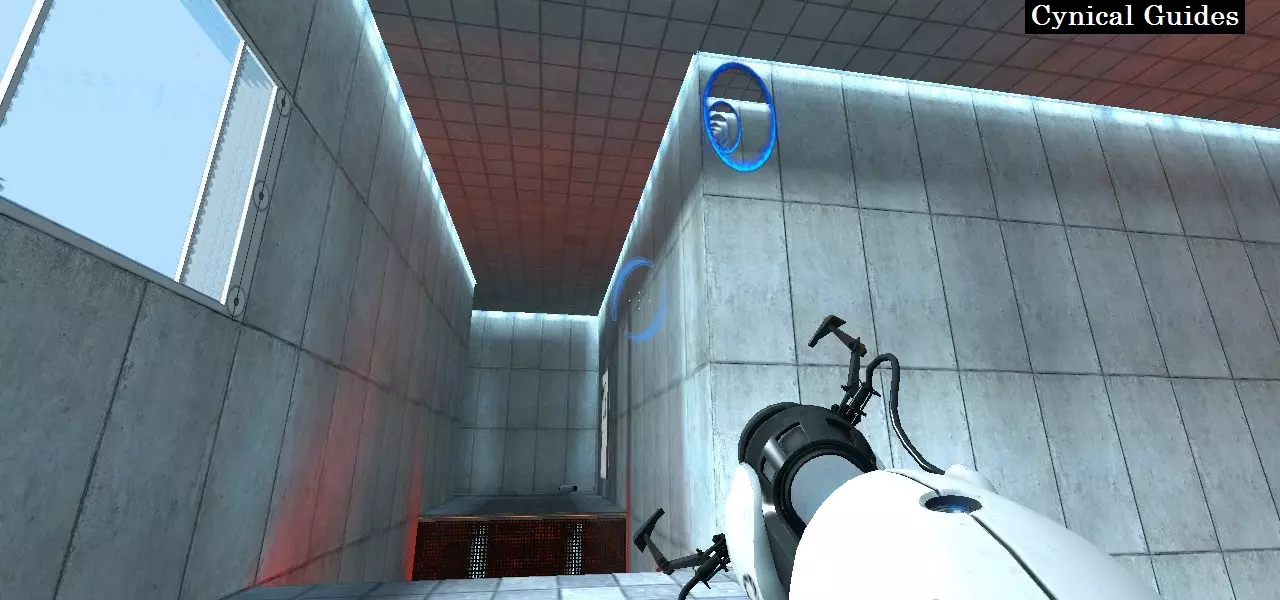
成就#8 - Heartbreaker:完成《传送门》。 剧情相关。击败GLaDOS后解锁此成就。将四个“光圈科技未知功能物品”扔进焚化炉以阻止她。 最终过场动画后不久将播放 credits。现在我们已完成游戏一次,将能在主线战役中寻找隐藏的收音机以获取“Transmission Received”成就。 完成度53%! 序列4:你还在吗? 1. 测试 chamber:00-09 2. 收集到的无线电信号:10/26 3.成就:8/15 在我们的第二次游玩中,我们需要找到新解锁的【收音机】,并将它们带到其关联【密室】中的特定位置。此外,如果你在之前的游玩中错过了任何成就,请务必在本次游玩中解锁它们。 在带着收音机离开密室前,确保在暂停菜单中查看你的成就进度,以确认它已被记录。同时要经常存档,以防收音机丢失或损坏;当密室难度提升时,这种情况很可能发生,所以要小心!如果我的描述不够详尽,你仍然难以找到收音机或其信号,可以查看由3D动画师Max Lebled制作的优质视频指南。 【放松宝库】 收音机1:当我们开始第二次游戏时,可以看到第一个收音机放在牢房里的小床头柜上。这是我们在第一次游戏中就能找到的少数收音机之一,但当时我们无法对其进行任何操作。拿起收音机,你会注意到其屏幕底部中央有一个小红点。穿过传送门离开牢房,前往下一个房间的压力板。手持收音机走到压力板上,红点会变为绿色,同时会收到关于“Transmission Received”成就的进度通知。一旦指示灯变为绿色,收音机就会被激活,之后可以移动或摧毁它,不会影响成就获取。还剩25个…… 测试室1: 收音机#2:乘坐电梯下到测试室1后,走过危险提示板,但不要掉进第一个房间!保存游戏,慢慢走到边缘,向右看摄像头,就能发现收音机放在摄像头顶部。慢慢挪到墙边,从摄像头上拿起收音机。 拿到收音机后,掉进房间,用配重 cube 完成谜题。门解锁后,再次拿起收音机并穿过传送门;我们可以在通往电梯的出口门前收集信号。 测试室2: 收音机3:进入测试室2后,看向大型玻璃窗,我们能看到收音机在右侧外部未完工的墙顶上。走下楼梯并拿起传送枪。穿过橙色传送门来到二楼,我们可以看到收音机在对面左侧的墙上。在收音机上方的天花板上放置一个传送门,然后跳下去抓住它。 我们可以在拿起传送枪的房间中央接收到这个收音机的信号。测试室3: 收音机#4:一路穿过测试室,到达出口门附近的电梯处。查看出口门右侧墙上的摄像头,收音机就在摄像头顶部。用传送门切断摄像头即可收集收音机。 这个收音机的信号有点棘手,因为它是在空中接收到的。从橙色传送门位置转身面向测试室起点的危险告示板方向。在我们右侧墙壁的左上角放置传送门。然后拿起收音机,将其穿过传送门即可捕捉信号。 这有点难以描述,所以建议参考传送门放置位置的截图;将收音机穿过该传送门即可捕捉信号。
Test Chamber 4: Radio #5: Make your way over to the Vital Apparatus Vent & you will see that the Radio falls out of the vent along with the Weighted Cube. We can find this Radio’s Signal in front of the elevator we just came down from the previous Chamber. Test Chamber 5: Radio #6: Enter Chamber 5 & place the two Weighted Cubes on the Pressure Plates to open the doors; we can see the Radio just beyond the doors but do not pass through them! The doors will close behind us if we walk through them, use a Portal to get the Radio over to us. We can catch this Radio’s Signal down in the small pit where one of the two Weighted Cubes was located behind the Pressure Plates. Test Chamber 6: Radio #7: When we enter Chamber 6 we will see a a machine firing an Energy Ball into an inactive Orange Portal. The Radio is located above the tile where the machine is launching the Ball. First, to make things safe, guide the Energy Ball into the Inactive Generator. Then make a Portal as close to the Radio is possible; the best way is to reach through the Portal & just pull the Radio through, but you can mess around with falling through the Portal & trying to quickly snatch it if you want. With the Radio in hand, walk up to the Lift we activated & we will catch the Signal directly in front of it. Test Chamber 7: Radio #8: Enter Chamber 7 & walk down the stairs into the room. At the bottom of the stairs make your way around the side of them & crouch underneath to walk to the very back of the stairs where we can find the Radio tucked away. Activate the Platform & step through the Portal holding the Radio on top of it. We can catch the Signal just in front of the exit elevator. Test Chamber 8: Radio #9: Save your game; possible Radio destruction! Enter the Chamber & there will be an Energy Ball firing off our left with an inactive Platform to our right. Look underneath the inactive Platform & we can see the Radio tucked there. Make a Portal on the wall to its right so we can reach through & grab it. Place the Energy Ball into its Generator to make things safer. With the Radio, take it back over to the Chamber Hazard Board to catch the Signal. Test Chamber 9: Radio #10: Save your game; possible Radio destruction! When we enter the Chamber there will be a Disintegration Field off our right where a Pressure Plate is located behind it. Look above the Field & we can see the Radio stuck in the small space we need to fire a Portal through. The best way to get the Radio down is to place a Portal above the Radio, then with a Weighted Cube in hand, fall through your Portal & knock the Radio down over to the other side. Really be sure to Save as it is highly possible you might bounce the Radio through the Disintegration Field. With the Radio, walk through the doors we open with the Pressure Plate to find the Signal. Sequence 5: This Isn't Brave... 1. Test Chamber: 10-17 2. Radio Signals Collected: 19/26 3. Achievements: 8/15 ----------------------------------------------------------------------------------------------------- Test Chamber 10: Radio #11: In this Chamber, complete the first two long jump puzzles & enter into the third room. In this room we will need to make two separate long jumps to get across. Before we do any, walk to the edge of this first floor & there will be be a white square with a single black dot in its top left corner. From this square, look up to your left to see an identical square on the wall; we can see the Radio up to the right of this wall square on an extended wall tile. Place a Portal on the left most white wall behind us & launch ourselves directly at the Radio to grab it. With the Radio, we can catch the Signal at the very bottom of the room in front of the stairs. Test Chamber 11: Radio #12: Save your game; possible Radio destruction! Collect the Orange Portal Gun & look straight ahead above us to see the Radio just in front of the doors we need to open with the Timed Button. Shoot a Portal just to the left of the door & make a different Portal so we can reach through carefully & grab the Radio. Take the Radio back over to where we collected the Orange Portal Gun to catch the Signal. Test Chamber 12: Radio #13: Enter the Chamber & long jump your way up to the highest level where the Weighted Cube is located. Now walk over to the ledge & very carefully drop off the ledge onto the top hydraulic wall below. Slowly walk backwards along the hydraulic press in the center to find the Radio against the back wall up here. Take the Radio over to where the Pressure Plate is located. From the Plate, head to the back wall underneath the angled hydraulic wall & take the Radio over to a bright light square to catch the Signal. Test Chamber 13: Radio #14: This is a very specific Radio so pay attention. When we use the Weighted Cube to open the doors into room two do not remove it from the Pressure Plate! Enter room two now & guide the Energy Ball into its Generator to active the Platform. Drop onto the moving Platform & look along the right wall to see the Radio resting on an extended tile; grab it as we move by it. To catch the Signal, make a Portal back into room one since the door is still open & take the Radio over to the Pressure Plate here. This is impossible to do if we remove the Weighted Cube here & move all our Portals into room two. Test Chamber 14: Radio #15: Enter the large first room of the Chamber & head right towards the locked door we need to open with the Pressure Plate. Up to the right of this door we can see the Radio tucked on top of an extended wall tile. To reach it, we need to place a Portal on the floor below it, then head left into the room to place a Portal on the bottom of the pits floor. Leap off into the pit through your Portal & we will be launched upwards into the air. Orient yourself & grab the Radio in mid air. Save your game; possible Radio destruction! Grab the Weighted Cube & place it on the Pressure Plate to unlock the door. Take the Radio through the doors & hop across the dropping Platforms to the center Platform to catch the Signal. Test Chamber 15: Radio #16: Enter the first room of the Chamber & there will be a large Disintegration Field in front of us. Turn around & look up to see a hydraulic wall extended a short ways out above where we entered from; the Radio is on top of the hydraulic system behind the wall. Shoot a Portal beside the hydraulic system & carefully reach through your Portal to grab the Radio. We can catch this Radio’s Signal just in front of the elevator at the Chamber entrance. Radio #17: This is a very tricky Radio to get. Pass through the Chamber, over the stretch of toxic water into the final room where we need to press two Times Buttons to open doors so we can guide an Energy Ball into its Generator. Guess where the Radio is? Behind those two doors; we need to be fast. Quickly press the two buttons to open the doors, then place a Portal on the floor below the column with those doors & a second Portal on the floor below you. Leap off the second floor through your Portal to launch yourself into the air vertically & through the doors to grab the Radio. This will probably take you more than a few tries… After GLaDOS releases us from trapping ourselves, take the Radio up the Lift we just activated to catch the Signal at its top. Test Chamber 16: Radio #18: Make your way through the Chamber until you pass the first three Turrets. Past the third Turret we will round the corner & see “Help” written in red to our left near two Weighted Cubes holding open a hydraulic wall. Remember this location. Carry on past the next two Turrets into the large room with another two Turrets in it. From this room we can enter a small storage room with a malfunctioning Vital Apparatus Vent with a bunch of Weighted Cubes below it. The Radio will be on top of a Weighted Cube. Oddly enough, this Radio will show up in our first playthrough as well… Remember where “Help” was written on the floor? Pick up the Radio & bring it back over to where it is. Walk past & crawl under the hydraulic wall into the secret room where we can find the Signal in front of the vandalized wall. Test Chamber 17: Radio #19: Enter into the room where we need to raise three Platforms to proceed. Lift up the third Platform & we can find the Radio underneath it. Take the Radio with us to the end of the Chamber & we can catch the Signal right in front of the Aperture Science Emergency Intelligence Incinerator. Sequence 6: ...It's Murder 1. Test Chamber: 18-19 2. Radio Signals Collected: 26/26 3. Achievements: 9/15 ----------------------------------------------------------------------------------------------------- Test Chamber 18: Radio #20: When we enter the Chamber, Portal across the first pool of toxic water. On the other side of the water, there will be a small hole in the wall to our left. Crawl under it into a secret room & we can find the Radio behind the second set of stairs leading up. Save your game; possible Radio destruction! This is a very difficult Signal to catch as we need to toss the Radio through a Portal so it can get launched up into the air. Leave the secret room & carefully make your way up to the the second floor of the room with the white square that has two black dots on it. Place a Portal to the right of the black dot square then place another Portal on the ceiling directly above your bottom Portal. Take the Radio now & drop it through the Portal; it will catch the Signal halfway through the air as it falls. Radio #21: At the top of the room, use the Timed Button to enter the side room full of Turrets & toxic water. After dispatching the Turrets, walk over to the column with the Timed Door & Generator we need to guide the Energy Ball into to activate the moving Platform. Place a Portal on the floor beside it & one down on the floor way below the level we stand on. Drop off the level down into your Portal & we will be launched on top of the column where the Radio will be. Save your game; possible Radio destruction! Now take the Radio over the moving Platform with you & we can catch the Signal just behind the other Timed Button we use to activate the angled hydraulic wall. Radio #22: Use the Weighted Cube to open up the way to the next room with the different ledges we need to launch up to over toxic water. We can find this Radio at the very bottom of the deep pit off our left when we first enter this room. For now though, leave the Radio down here where it is. Save your game; possible Radio destruction! The Signal for this Radio is at the very top of this room where the exit elevator is. Normally, this would be an abysmal challenge getting it up here however there is a cheap workaround. Without the Radio, just make your way up to the top floor & Save your game just in case. Now place a Portal on the floor up here & leap off the top floor all the way down to where we first entered this room. Shoot a different Portal down where the Radio is & drop down to it to pull it through the Portal back to the top floor. Test Chamber 19: Radio #23: Complete Chamber 19 & rescue yourself from almost being incinerated by GLaDOS. Before launching yourself up into the maintenance area above, walk to the railings over near the fire instead. Along the right wall down in the incinerator will be the Radio in the center. Place a Portal just above it & carefully reach through the Portal & pull the Radio out. Save your game; possible Radio destruction! Leave the Radio where we pulled it through into the safe place & launch ourselves up into the maintenance area. Turn around & place a Portal under the Radio & bring it up here with us. Bring the Radio along with us through the maintenance area, up the stairs & past the large ventilation fans. When we enter the room with the toxic water, leave the Radio on the walkway across from us where the locked door is. Use Portals to get over to the walkway in the center & enter the office area. Head inside & unlock the door; take the Radio over to desk in front of the large window overlooking the room we were in to catch the Signal. Aperture: Radio #24: Head through the Weighted Cube… tube, & escape out of the Test Chamber back into the Aperture inner workings. Carry on until GLaDOS tells us we are going the wrong way & we enter the room with the five large hydraulic presses. Before entering the room, look off your right & there will be a small room with some stairs going up. Head under the stairs & there will be a chain link fence we can shoot a Portal through. Got over to the other side of the fence & crawl through the open vent off our right to find the Radio in a secret room. Take the Radio with us into the next room where we will see two hydraulic presses off our right, with more further up in the room. The Signal will be on the floor directly above where we entered this room. Portal up to the second floor with two more presses on it & either jump across with the Radio or Portal it up to you. The Signal will be along the chain link fence on the back wall here. Radio #25: Navigate over the Weighted Cube tubes over the toxic water & fight off the three Turrets that appear in the trap room. Escape out of the room & we will enter a small workshop area with a broken Turret who cannot shoot. Maybe he is out of bullets? Whatever the reason, we can find the Radio on the table behind it. With the Radio in tow, head up & into the next room after dropping down on a Turret. When we enter this room we can see “Over Here” written on the wall directly across from us. Walk over to it & there will be an open vent leading to a secret room to its right. We can catch the Signal just in front of the vent. Radio #26: We can find the last Radio in the large cistern with the Turret ambush near the end of the game. Deal with all of the Turrets & drop down into the sewer water at the bottom of the cistern. The Radio will be in an alcove down here on the opposite end from where we enter this room. Place the Radio in the center of the cistern main floor & launch yourself out of it to the very top floor. Portal the Radio up with you & dispatch the two Turrets that are lowered down to us. Once again, place the Radio on the floor & launch yourself up to the next floor where two green power generators are. Portal the Radio up to us & we can catch the final Signal in front of the first generator.

成就#9 - Transmission Received:如果你一直按照指南操作,在将最后一台收音机带到最后一个信号点后,该成就将会解锁。 解锁此成就后,我们在主线战役中就没有其他任务了。你可以选择退出游戏,或者为了体验更高的完成度而再次通关战役。 当前完成度:60% 第七章节:高级地图 1. 高级地图:6/6 2. 成就:12/15 高级地图是我们在主线战役中已完成的测试关卡的 harder 版本。在通关游戏两次后,这些高级地图应该不会给你带来太多困扰。如果确实如此,这里有一份由Extremely Impossible制作的优质指南,应该能帮你解决问题。

成就#10 - Cupcake:完成两张传送门高级地图。完成6张高级地图中的任意2张即可解锁该成就。

成就 #11 – Fruitcake:完成四张传送门高级地图。完成6张高级地图中的任意4张即可解锁该成就。

Achievement #12 – Vanilla Crazy Cake: Beat all six Portal Advanced Maps. Complete all 6 of the Portal Advanced Maps to unlock the Achievement. 80% Complete Sequence 7: Challenges - Least Portals 1. Least Portals: 6/6 2. Least Time: 0/6 3. Least Steps: 0/6 4. Achievements: 12/15 ----------------------------------------------------------------------------------------------------- Least Portals:Out of the three different Challenges, the Least Portal Challenges are definitely the “easiest” though there are a few infuriating moments in some Chambers. Note that you can actually abuse Quick Saves/Quick Loads. If you are happy with your progress or are about to attempt a clutch move, Save your game & reload if it does not go well. This really speeds up how long this takes as you are not replaying the entire Chamber all over again. For all of these Challenges, I shamelessly followed Carrot Helper's video guides to a Tee, with a few exceptions. These are very well done & I really could not have even begun to grapple these without their help. https://www.youtube.com/watch?v=EAdlK9rUHOk Test Chamber 13:Starts at 0:00 Gold Medal – 4 Portals For Test Chamber 13, we need to make a Weighted Cube toss to save our Portals which can be very tricky. Note that jumping will not increase your throw distance; walk to the edge of the platform & toss the Cube with speed using your movement (mouse or stick). This is an important skill to master as we will be using it for the Least Steps Challenge. Test Chamber 14:Starts at 0:36 Gold Medal – 2 Portals Nothing special of note for this Challenge, it is actually really simple. Test Chamber 15:Starts at 1:14 Gold Medal – 14 Portals Test Chamber 15 is not too bad as well, be sure to Save often at each section. The hardest part is when we must cross the toxic water. When peaking out of the Portal, be sure to take a step back inside it after we fire a new Portal or we will be bounced out. This is an important skill to master as we will be using it in the other two Challenges… Test Chamber 16:Start at 2:40 Gold Medal – 2 Portals Test Chamber 16 is not terribly hard either apart from having to block bullets with Weighted Cubes… Take your time & Save often. Test Chamber 17:Starts at 4:14 Gold Medal – 2 Portals For Test Chamber 17, Carrot Helper's strategy is actually insanely difficult to pull off. Instead, we will be using the help of a different video guide done by FinSompi & taking advantage of manipulating energy orbs with the Companion Cube instead of wasting Portals to do so. It does take some finagling as you need to angle the Companion Cube properly to deflect it into the generator's, but it is still a much easier strategy. https://youtu.be/u485mRZO_VI Test Chamber 18:Starts at 6:13 Gold Medal – 13 Portals Test Chamber 18 is a little cheeky with how we hold onto our Portals, but the video will go over that. Compared to Chamber 17 it really is not too bad. The hardest part is just getting that computer part all the way up to the doors without wasting Portals. Basically just follow the video exactly. With that, we are 6/18 Gold Medals in. Sequence 8: Challenges - Least Time 1. Least Time: 6/6 2. Least Steps: 0/6 3. Achievements: 12/15 ----------------------------------------------------------------------------------------------------- Once again, this is a great walkthrough guide by Carrot Helper. https://www.youtube.com/watch?v=e2s7-Pn4uGQ Test Chamber 13:Starts at 0:00 Gold Medal – 0:19s This is very similar to its Portal Challenge except this time we have to be very fast. After quickly reaching the first Pressure Plate with the Weighted Cube, make a Quick Save & just keep reloading every time you miss until you stick the throw. At least we don’t have to worry about conserving Portals… Test Chamber 14:Starts at 0:31 Gold Medal – 0:10s Test Chamber 14 is a little tricky trying to pull off that final shot to launch ourselves up onto the Platform. Once again, just make a Quick Save before you begin & just keep reloading until your shot goes through. It is really easy to get disoriented, just be patient. Test Chamber 15:Starts at 0:56 Gold Medal – 0:54s Similar to its Least Portals Challenge you just have to complete this Chamber as fast as possible, using Portals where possible to speed yourself up. Once again, we will be doing the toxic water skip except for we have to be really quick about it. Make a Quick Save at the beginning of the water with good time & try to weave through as fast as possible. Test Chamber 16:Starts at 1:55 Gold Medal – 0:52s Test Chamber 16 is where things really start getting interesting. To avoid wasting 20s listening to GLaDOS speak to us, we can glitch inside the first room ahead of time. By firing a Portal on the ceiling above the door then trying to shoot a Portal through the thin slit of wall in between your Portal & the doors wall. Alternate your Portals between Blue & Orange & when your ceiling Portal opens up (& it is not because it is stuck to the wall above the door by accident) remove your ceiling Portal & step through to the other side of the door. Be sure you remove the right Portal & not the one on the other side of the door! Test Chamber 17:Starts at 2:56 Gold Medal – 1:27s We will be using a similar Portaling exploit we used in the previous Chamber for Test Chamber 17, but we have a lot more time to play around with making it less clutch. If you are still stuck on the Least Portals Challenge for this Test Chamber, definitely use this Portaling strategy to help you out. It works! Test Chamber 18:Start at 4:10 Gold Medal – 1:13s Test Chamber 18 has a similar exploit as we used for the Least Portals Challenge however this time, we will be snagging a Camera instead. I actually found getting the Camera stuck in the door much easier than the computer part. 12/18 Gold Medals. Sequence 9: Challenges - Least Steps 1. Least Steps: 6/6 2. Achievements: 15/15 ----------------------------------------------------------------------------------------------------- A Step counts as any… step or jump taken. A step counts if you enter through a Portal & fall onto the ground from a wall or the ceiling. A step does not count if you place a Portal on the floor ahead of you, then a Portal underneath you, taking the Portal away at the last second to bring yourself forward. This will be our primary method of travel for us to save our steps. Of course, we will need the help of trusty Carrot Helper. https://www.youtube.com/watch?v=CFP60NZ8At4 Test Chamber 13:Starts at 0:00 Gold Medal – 10 Steps We basically have to follow the video verbatim; we really have no room to mess around. This Chamber is actually one of the hardest out of the six. Test Chamber 14:Starts at 1:01 Gold Medal – 10 Steps Once again, there is not much to say about this Challenge other than just to follow along with the video as it is also… pretty challenging. Test Chamber 15:Starts at 1:30 Gold Medal – 55 Steps This is actually one of the simpler Least Steps Challenges; we have quite a bit of room for error (compared to the other Challenges that basically take all the required steps). I managed to complete this with 5 steps to spare Test Chamber 16: Starts at 3:00 Gold Medal – 40 Steps Once again, we have a bit of wiggle room for this Challenge. Be sure to not get hit by Turrets if possible as you will take steps when shot. I completed this Challenge with 5 steps to spare, as well. Test Chamber 17:Starts at 6:00 Gold Medal – 150 Steps This is a pretty clutch Challenge, depending on if you can take advantage of the crouch hopping or not may give you an easier time though. I did not, & barely managed getting exactly 150 steps. Fortunately, we will be using the Portaling exploit so that saves us a lot of time… or steps that is. The hardest part is getting to the Portaling spot in a decent amount of steps. Test Chamber 18:Starts at 7:48 Gold Medal – 85 Steps Amazingly, this is actually the easiest of the six Least Steps Challenges in my opinion. The hardest part will be finagling that Camera into place like we did for the Least Time Challenge. Just be mindful with your Saves & you should be just fine.

成就#13 – Basic Science:在所有18个传送门挑战中获得铜牌。 此成就将在我们在所有6个最少传送门、6个最少时间和6个最少步数挑战中获得铜牌后解锁。 对于普通传送门玩家来说,这是相当容易达成的。

成就#14 - Rocket Science:在所有18个传送门挑战中获得银牌。 此成就将在我们在所有6个最少传送门、6个最少时间和6个最少步数挑战中均获得银牌后解锁。 如果你能获得所有银牌,你或许有能力刷新自己的记录去冲击金牌!

成就#15 - Aperture Science:在所有18个传送门挑战中获得金牌。 此成就需要在全部6个最少传送门、6个最少时间和6个最少步数挑战中均获得金牌后解锁。 该成就将是你达成100%完成度的决定性因素,也是大多数玩家的长期障碍……我花了整整四个小时才从0枚奖牌提升到18枚金牌。 结论: 如果不是因为Aperture Science成就,我可以说这是一个容易达成的100%完成度。但严格来说并非如此;其他成就都还好……难点在于必须成为完美主义者才能获得那些金牌。《传送门》的100%完成度我花了大约12小时,这其实还不算太糟;尤其是考虑到其中三分之一的时间都耗在了挑战地图上,死得跟玩《黑暗之魂》似的。
100%完成!