换一换
换一换 


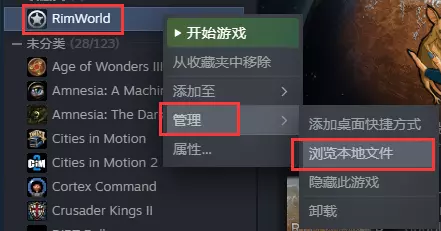
机械族故障。机械师进阶。机械师剧本指南与技巧。首领/指挥官(恶魔、机械女王、天启使者)策略与技巧。机械族基础设施技巧。污染应对技巧。 简介
本指南内容: 我将介绍每一种机械族单位(按等级排序,因为科技进度是主要限制因素),包括它们的单独使用方法、协同作战方式以及机械族科技的发展途径。还会提供针对每种机械族单位、指挥官和基础设施的进阶技巧,以及一些特定场景的提示。随着我持续游玩,未来几天会进一步完善本指南。 获取机械连接装置: 如果没有使用机械师剧本,在游戏进行一到两年左右,会触发一个任务,让你有机会去盗取一名已故机械师的坟墓。这是一场难度较低的综合袭击,敌人数量很少甚至没有。一个持枪的人应该就足够了。 或者,地图上会生成一个外骨骼机甲残骸,其中包含可立即获得机械连接装置的方法。 该任务大约每1.5-2年生成一次,且不限于一个任务,所以只要你愿意等待,就能获得尽可能多的机械师。 总体思路: 获取你能负担得起的任何机械师装备和基础设施,并且在获得更多装备时注意带宽的使用方式。 带宽(BW): 这是机械师最重要的属性。带宽越高,意味着可以操控的机械越多,就这么简单。带宽可以通过装备、植入体和基础设施来提升。它仅受资源限制,没有硬性上限。 控制组: 每个控制组可以管理多个机械,并且可以设置为工作、护卫、充电和休眠模式。对于不需要参与战斗的机械单位,可将其设为休眠状态;而劳工机械单位则应让它们工作。你可以为每个分组设置充能阈值。通常,一个劳工机械单位分组和一个战斗机械单位分组就足够了,但更多的控制组有助于在机械师控制下选择特定的机械单位组,例如在征召时。当屏幕上存在多个同类型机械单位时,双击可能会出现问题(例如,两个机械师拥有相同的机械单位,或存在敌方机械单位)。拥有3个以上控制组几乎完全是为了提升游戏体验。 机械师进阶/逐步指南 本节将介绍机械师在每个等级的高效使用方法,以及如何利用这些方法提升到下一个等级。开始: 建造一个小型孕育舱(如果你拥有足够的组件、资源和生产能力来快速启动,例如一个成熟的殖民地,也可以建造两个)、一个子核心编码器和一个小型机械充能器(大约每3-4个劳工型机械需要1个)。这些设备不需要太多电力。如果可以的话,在机械加工台制作头戴设备。 孕育机械: 在子核心编码器中添加制造简单子核心的订单,并在孕育舱中添加你想要生产的机械的订单。只有你的机械师可以执行这些任务,并且必须具备【锻造】技能(在工作标签中)。你需要订单中列出的材料,以及足够的机械带宽。 此阶段避免建造带宽节点,它们成本过高,不值得投入。

T1装备: 尽快获取空线耳机,额外的机械单位会比机械师的头部吸引更多火力。 T1推荐机械单位/带宽使用/战斗用途: 如果想让殖民者从某项工作中解放出来,可使用建造机器人和农业帮手,并尝试获取搬运机器人以节省殖民者时间。目前可将剩余带宽用于军事机器人以增强殖民地防御,或者若愿意为射程和/或建造能力牺牲 dps,可使用更多建造机器人。这些机械单位射程均较短,因此要注意分散敌人的攻击目标,避免群体伤害,并让它们靠近敌人。 T1战斗技巧: 集结尽可能多的军事机器人,将部队分散部署,这能降低群体伤害的概率。瞄准同一目标时最好使用4个或更多机器人,理想射程为5-7格。机甲种类不多,所以策略选择有限。 一旦你组建起完整的部队,就召唤一台【Diabolus】。消灭第一台【Diabolus】不需要太多火力,更多细节可参考 Boss 攻略。只需先消灭伴随的机甲,你就不会有问题。这会给你一个信号芯片来解锁 T2,令人惊讶的是,研究 T2 不需要微电子元件。
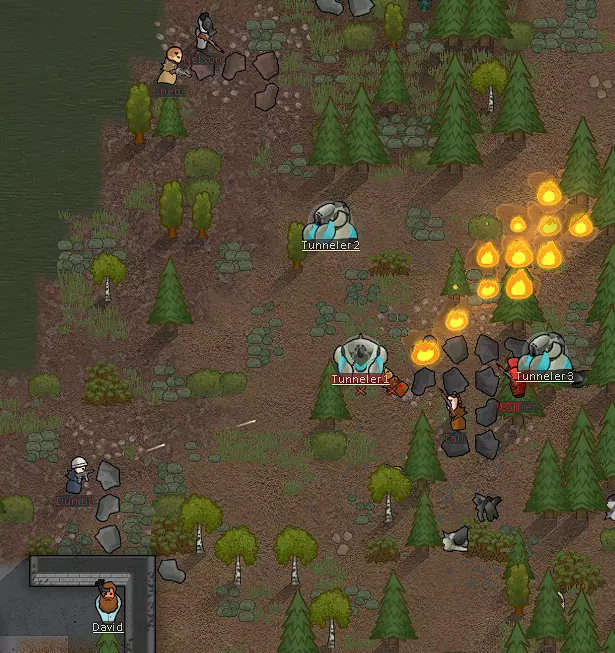
T2 start: Build the large mech gestator (one or several if you are well endowed), and the large mech recharger (Again 1 for every 3-4 medium and above labor mechs). From this point on you will need plasteel, as much as you can get your grubby hands on. T2 gear: Get the array headset (not the Mechcommander helmet, since it takes a signal chip without giving extra BW). If you can handle the extra Pikemen in the 2nd Diabolus fight, take the fight to Craft the bandwidth pack. It takes utility slot and gives a whopping 9 BW. T2 recommended mechs / BW use: Labor mechs: whatever roles you need filled to free up colonists for more critical tasks. A lifter and a cleansweeper will go a long ways. Get a Tunneler or two so you can tank further fights with less losses. Pikemen will be the best ranged combatants for T2, but Scythers will take and do more dps. I recommend the latter. Militors are still viable since they have a high bandwidth to damage ratio. A scorcher is going to be outclassed by other options, but may be worth it if you are struggling with raids. T2 Combat Tips: With a couple more mech types to play with, your best bet at T2 is to get as many scythers as you can. A Tunneler can soak up a couple of enemies fire, so it is best to use one for getting enemy snipers engaged. Pikemen are pretty weak dps-wise, so if you need ranged damage, stick with militors. Scythers will synchronise better with Militors since you are already going to be close up. T2 Implants: Both implants require a signal chip to produce, so they are low priority until you get the bandwidth pack. The mech gestator implant will greatly help, since you won't have to wait as long to get your fancier mechs, and you will be able to resurrect mechs faster. The control sublink implant gives more control groups, and increases work speed of mechs, which can help depending on the role of the mechanitor. T2 production: Getting materials to fund your mech army is critical for development, but this is just focusing on what mechs can do for your colony. Since you now have the tunneler, start sectioning off large amounts of space to be strip mined, however you see fit. Two cells in between tunnels is ideal. If you can get one, a long range scanner can be useful, so you can reliably find plasteel. Although it may seem surprising, a single tunneler can carry almost if not all of the plasteel from one site (about 120kg per site, and 135kg capacity). Bring a gun to take out the minor threats you may face, and any mechs you deem necessary. Steel should be sourced from your colony, either through drilling or strip mining. Components can still be bought, but try to get a fabrication bench so you are self-sustaining. You can also scan for components, and get a good supply, if you accept the risks of caravanning. Since you will want high subcores for T3 mechs, start finding... candidates. Money production is up to you, but I will say agrihands can sustain a lot of farms. T3 start: At this point, you need to have a reliable source of components, plasteel, steel, and power, since the big guys take up a lot of resources. Since you will have those resources, start making more mech rechargers so you can keep mechs at high energy levels, and they can be repaired more during battle. This is also the time to start building band nodes, since there is no worthwhile gear for more bandwidth. Start grabbing as many expendable prisoners as you can, since high subcores are needed for most of the mechs. T3 recommended mechs/ BW use: Labor mechs: if you have gotten a second mechlink at this point, have one mechanitor handle labor mechs and another combat mechs. It will be easier to dedicate your resources to one good mechanitor, and let the other take the ones that don't need much upkeep. If you haven't, don't spend more BW on labor mechs than necessary to keep the colony growing. A fabricor is worthwhile, since it is reliably making you money. A paramedic is situational, and generally not worhtwhile. For combat, get as many Diaboluses you can, since they have an incredibly high ROI in all aspects. A Gunner or two will also be great. Start phasing Militors and Pikemen out for Lancers, since they are more versatile and still relatively cheap for this stage. Scythers are still useful since they can handle melee, and tunnelers are still helpful because they act as bait, since other heavy mechs can adopt tank roles while being noticeably faster than tunnelers. T3 combat tips: Now is when overwhelming power starts being more important than strategy. Spend as many resources as you can getting more mechs, since they are far more reliable than colonists in combat. Just deal with enemy scythers and you are looking fine. A diabolus or two firing at a group of scythers trying to kill your sacrificial tank(usually a tunneler) can make this trivial. T3 implants: T3 introduces the remote repair and remote shield implants. Both has strengths, but the best part is they give something for your mechanitor to do instead of twiddling their thumbs behind a wall. Remote repair is 100% effective, so you can keep a mech topped up on health. Remote shield is something I need to play with, so more on that later. T3 to come as I play through my game :) Boss/Commander guide/tips: Diabolus All bosses: They have emp resistance, but emps will still work on them, and especially on their accompanying mechs. They get exponentially stronger with each fight (not linearly), so be more prepared every time. A good general strategy: Focus on taking enemies down one at a time, starting with weaker ones. Letting things shoot at your forces while sinking bullets into a tank is the strategy enemies want you to use. They also want you to die. You will want to take out threats prioritizing potential damage over hitpoints. If it is a tank with low damage, then it is low priority, if it is a lighter mech at ideal range, it is a high priority. Expert tips: Tip #1:Create a save game before summoning each boss to go back to and try again. Experience is king, and will give you a better sense of what mechs to bring regardless of my advice. Tip #2: If you create a save game after the boss is summoned, but before it drops, it will spawn in the same spot, so you can set up beforehand. Tip #3: All the bosses have a mounted turret. It is weak, but relentless. Try to engage it on a tank so it doesn't take out your tiny bots. Tip #4: Finally a game where the boss under your control isn't any weaker! Tip#5: All bosses have a very weak melee attack, so engage them with melee to prevent their main attacks. Tip #6: After 8 summons, the boss cycles it's summon pattern from the 3rd summon, so it will not scale past the difficulty of any of the listed summon groups. This means you can eventually overpower them for more chips. This is unlike raids that can get infinitely powerful. Tip#7: Protect the goods. Unless you want to lose out on your rewards from killing the bosses(chips), you should make sure not to accidentally destroy the chips after the boss. Or you could dev them back in after they randomly disappear.
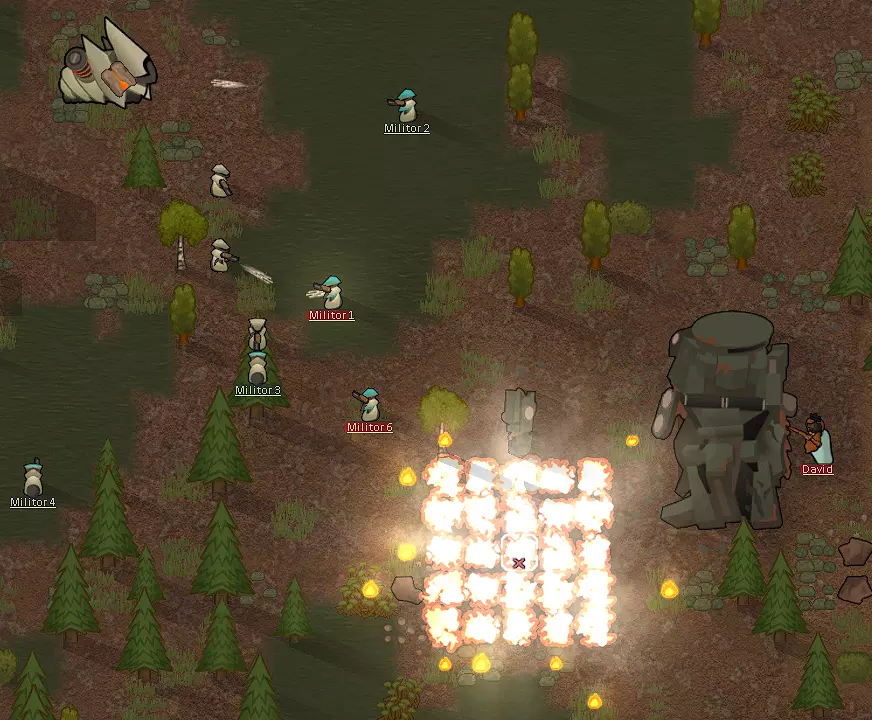
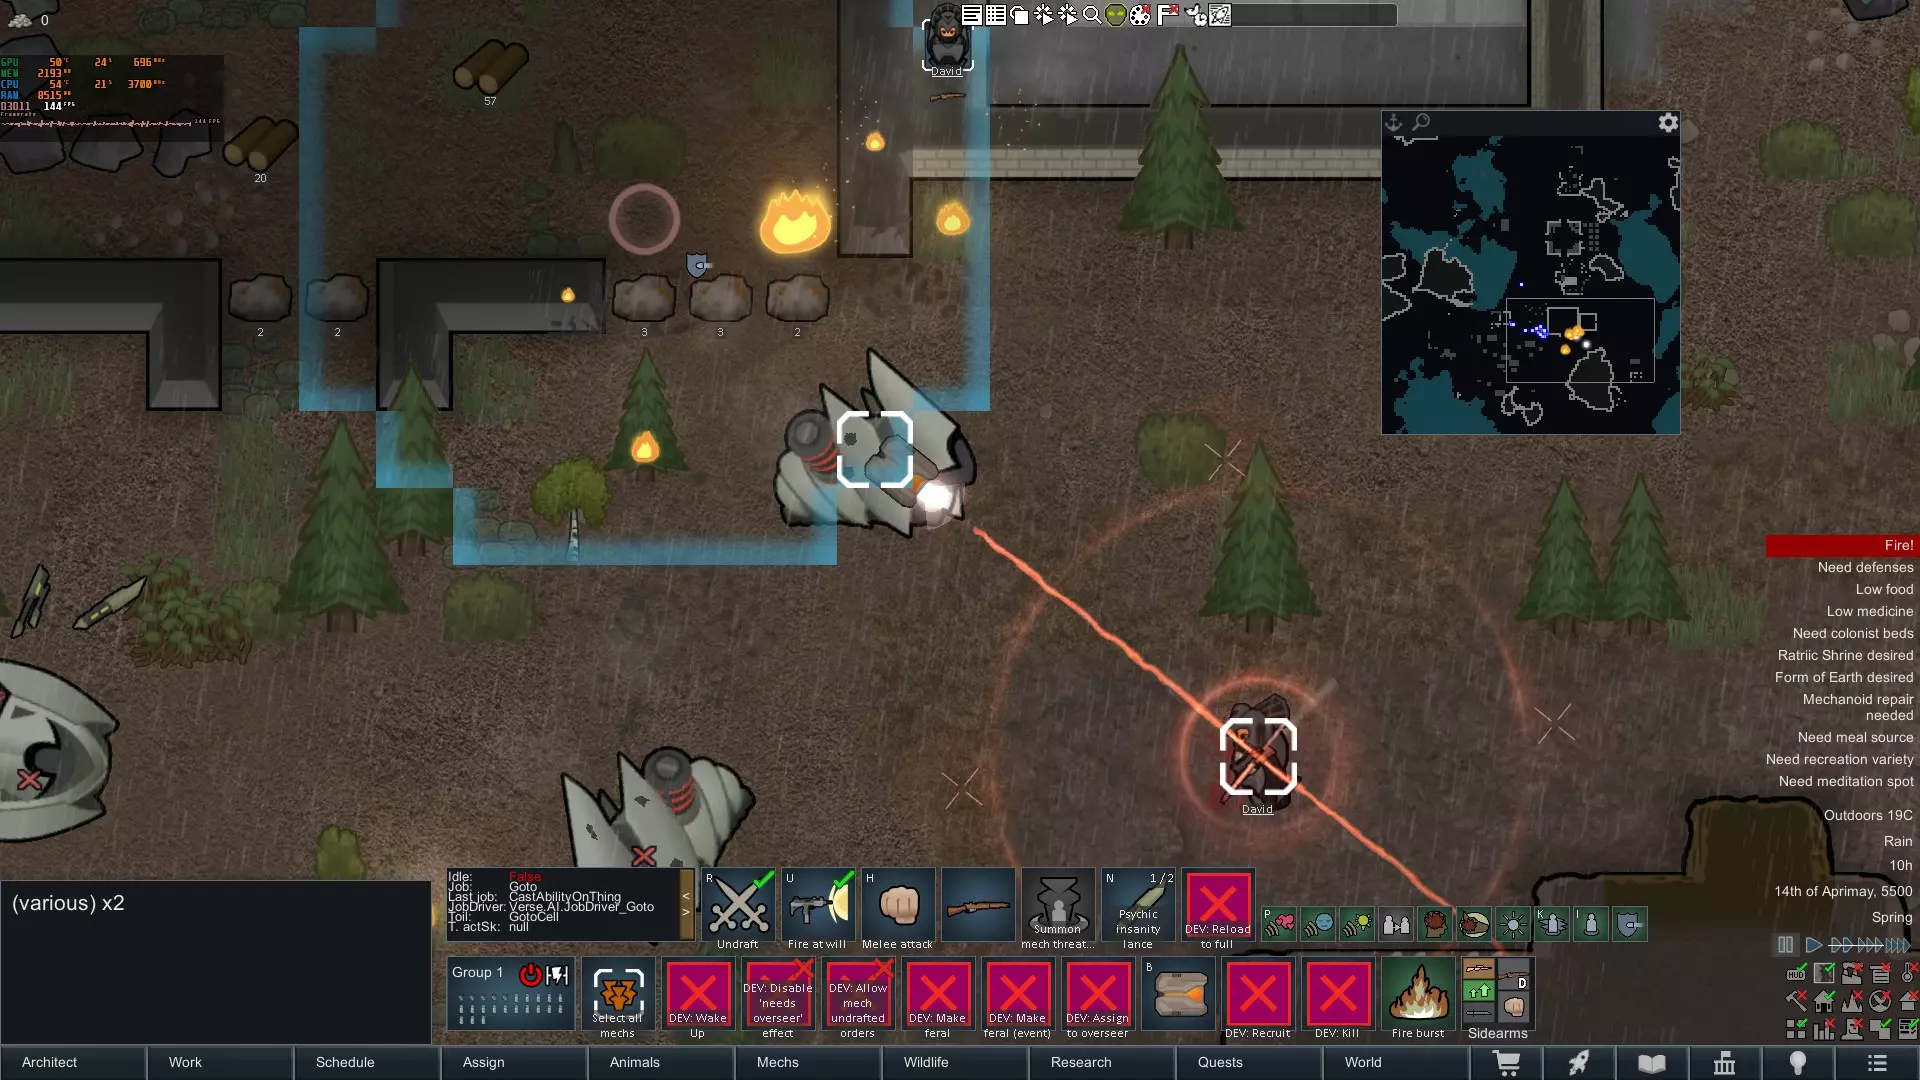
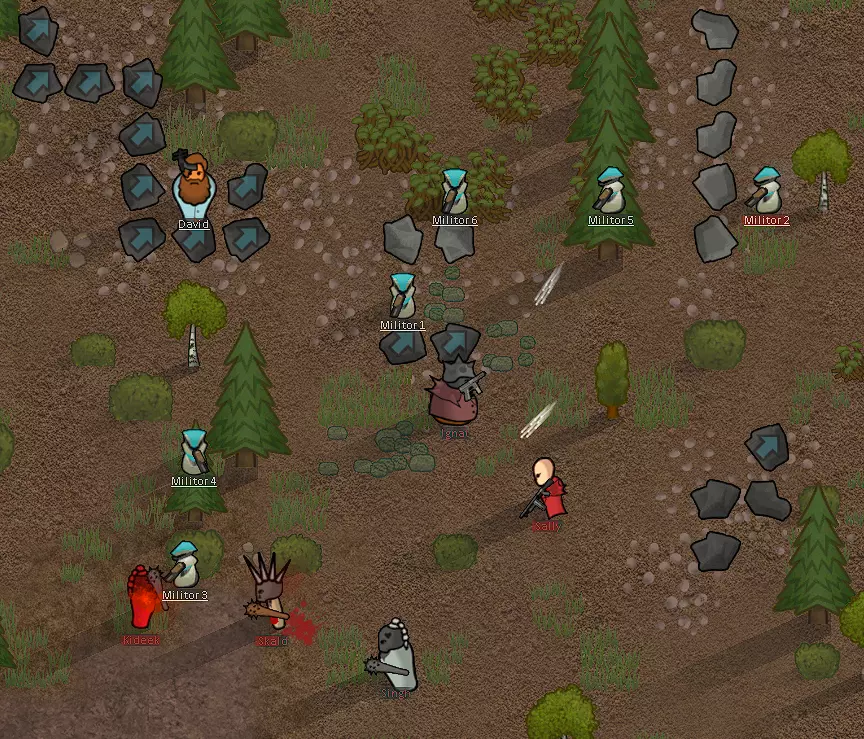
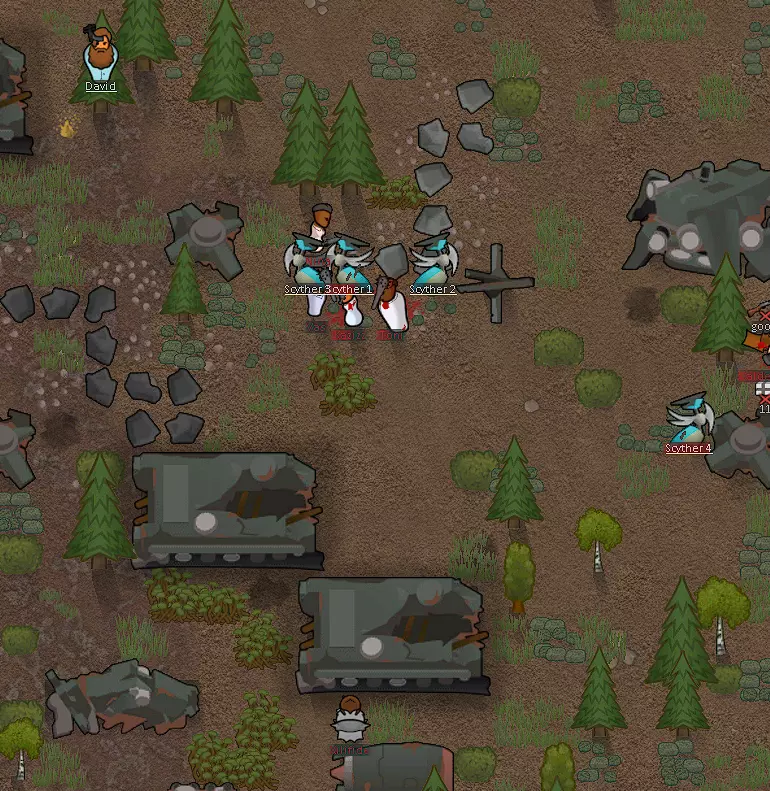
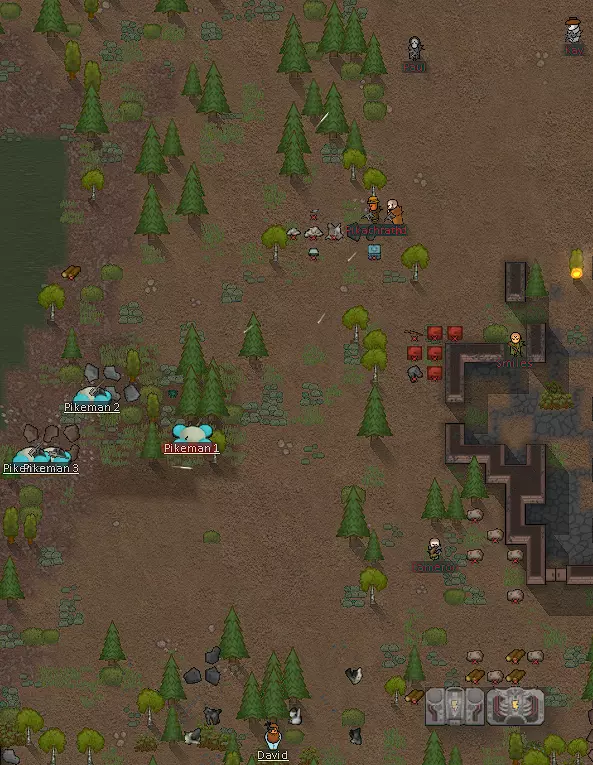
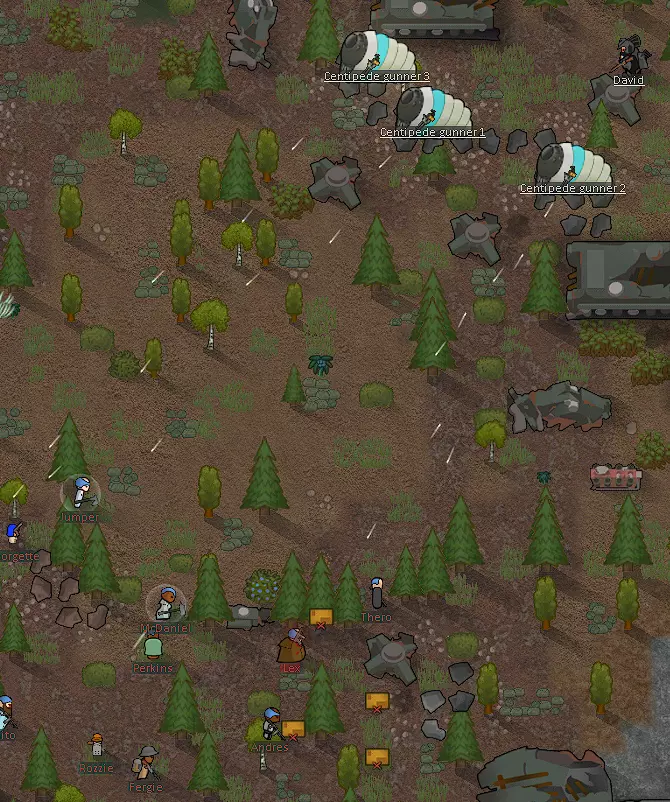
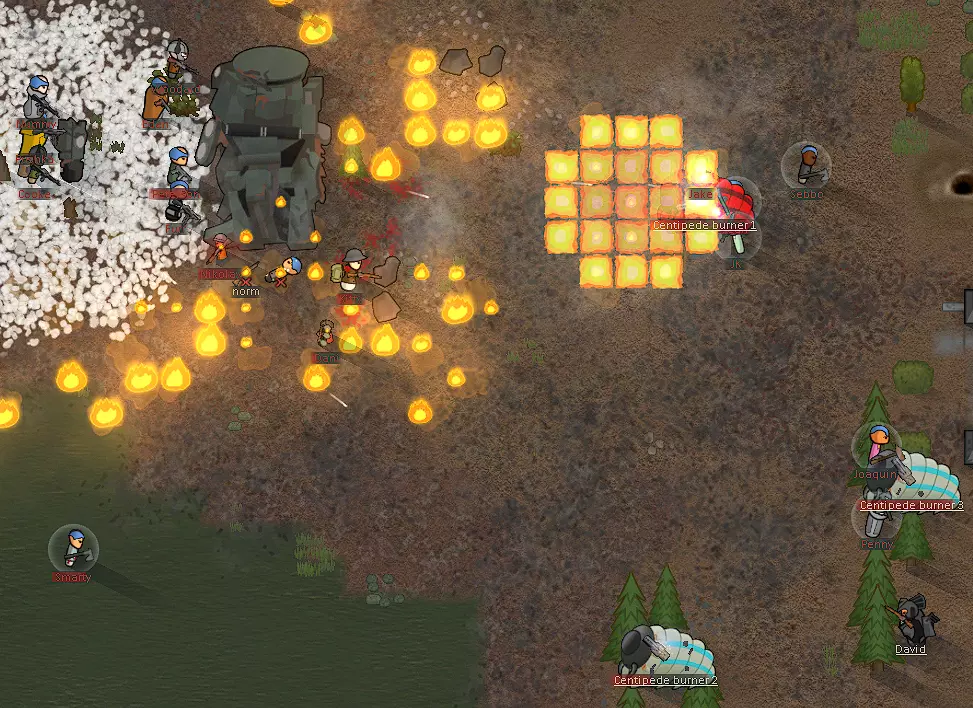
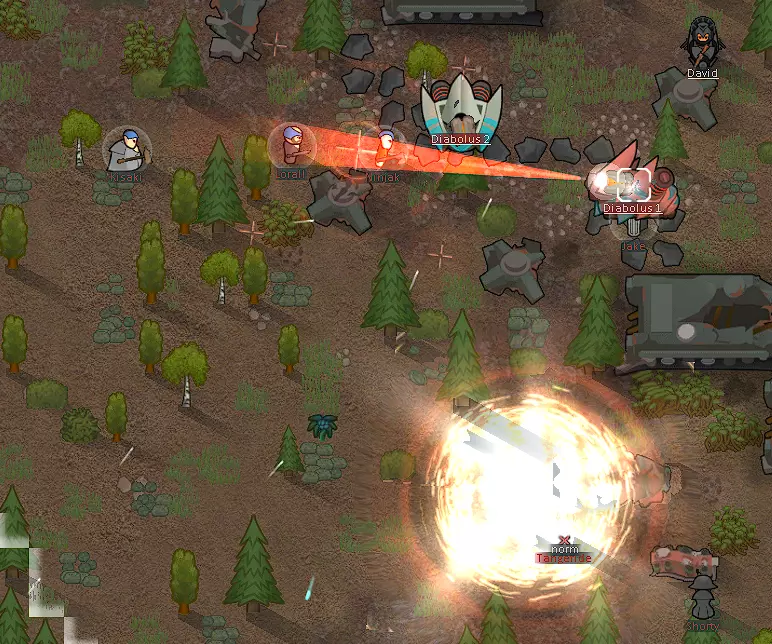
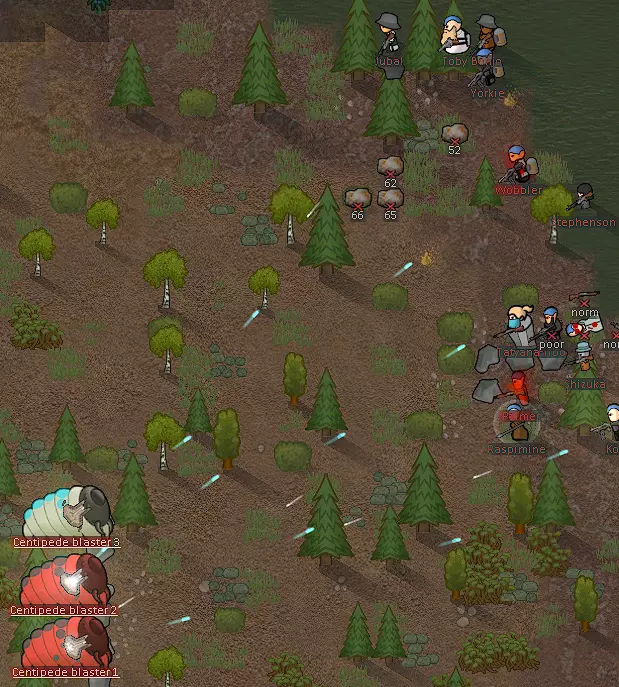
Diabolus: A slow tank with a big gun. Siegebreaker, if you will. Strong against organic targets, relatively weak against mechs (still a big gun though). Very slow at 2.4 c/s (although faster than tunnelers and centipedes). High armor at 75% sharp. Hellshere cannon: Does vaporize damage(similar to explosion, but different somehow). Follows normal damage rules, tries to inflict 2-4 instances of the explosion, guranteeing that at least 2 body parts are destroyed every shot. Cannot hit internal organs (only does damage to torso). Can also miss the torso. It is a BURN, therefore affected by HEAT ARMOR STAT. Guess who has good heat armor. Thats right. Mechanoids. In fact they ALL have 200% heat armor, guaranteeing that all hits from a cannon are halved in damage or ignored entirely. Seems to do about 130 damage per hit on centipedes, enough to destroy heads and 2nd, 5th, and 6th body ring. Close Combat Incineration Discharge: avoid engaging melee or within 10 tiles with flammable combatants. Mechs are not flammable, but will need to be micromanaged to shoot instead of extinguishing fire. Mounted turret: best to keep this focused on a tank so it doesn't down your dps mechs. Not the end of the world if you can't. What comes at each spawn level 1: 1x Diabolus, 3x militor 2: 1x Diabolus, 4x militor, 2x pikeman 3: 1x Diabolus with heavy shield unit, 7x militor, 2x pikeman, 1x tesseron 4: 2x Diabolus with heavy shield unit, 10x militor, 3x legionary, 1x centurion 5: 2x Diabolus with heavy shield unit, 10x militor, 5x scyther, 3x centipede gunner 6: 2x Diabolus with heavy shield unit, 15x militor, 8x pikeman, 4x centipede gunner , 1x centurion 7: 2x Diabolus with heavy shield unit, 15x militor, 10x lancer, 5x centipede gunner 8: 3x Diabolus with heavy shield unit, 15x militor, 10x tesseron, 6x centipede gunner , 1x centurion Alpha Strike tactic: If you can, get an EMP to help start the fight, an EMP from a mortar will be huge in allowing you to position your mechs to take out enemy mechs. Use a Scyther or Militor to engage Diabolus in melee combat, to give time for a tank to move in, preferably a tunneler. Use the entire rest of your forces to fire on a couple of the enemy mechs. It is preferable to take them out one by one, rather than splitting fire between many (idea is to reduce their dps as soon as possible). Do not fire at the boss until all other mechs are down. A tunneler will do 2 things that are very useful: prevent any main attacks through melee engagement, and easily soak up all the mounted turret shots. Melee Strategy: After defeating the first Diabolus, Scythers and Tunnelers are excellent options for keeping the boss occupied with melee attacks. Human attackers set fire easily, but there are ways to prevent that with genes and armors if you are willing to. Baiting hellsphere attacks: It may be tricky and require practice, but what you need to do is manipulate enemy pathing to get enemy mechs where diabolus is locked on for some sweet extra damage. Scythers are especially easy to use this against, but make sure they don't leave before getting blasted. Militors can also work to bait the attacks. Example of good baiting shown. Note my mech placement sacrifices tunneler to kill enemy scythers, but other than that my mechs are out of hit zones.
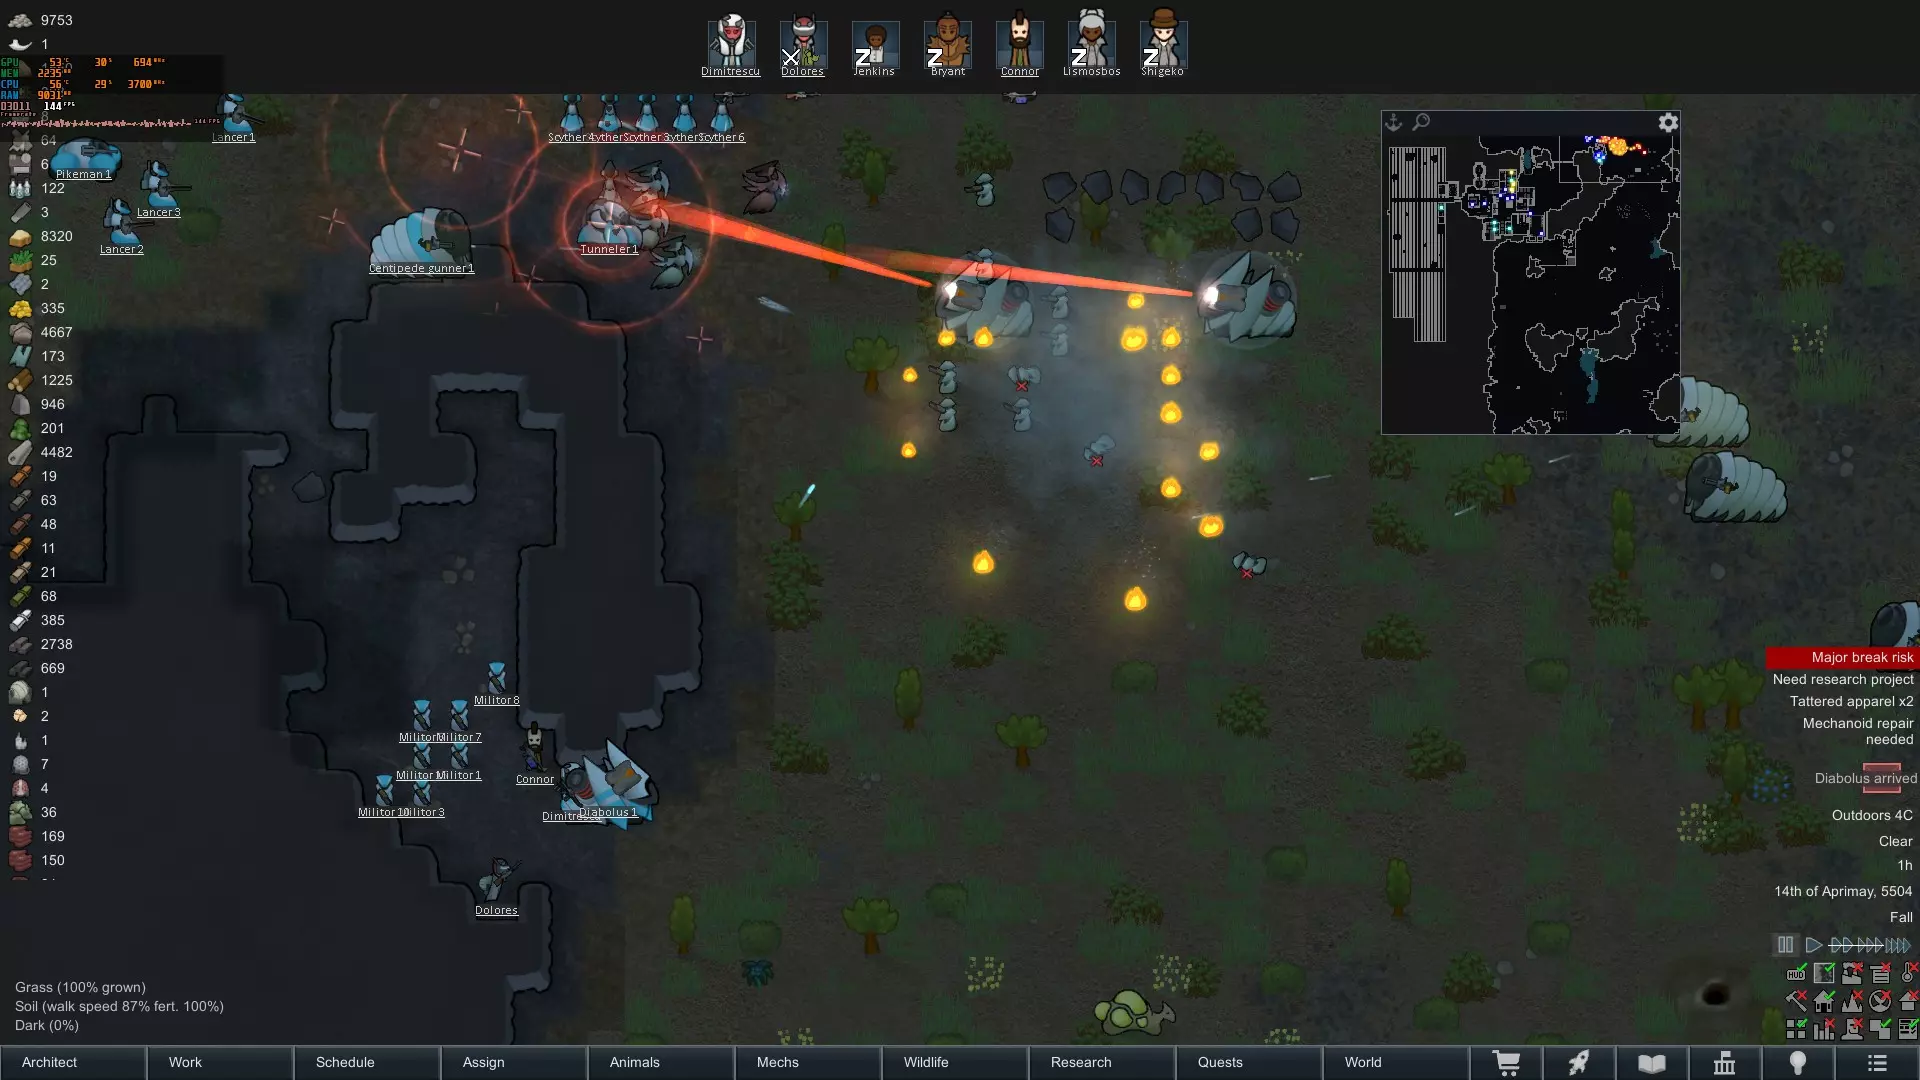
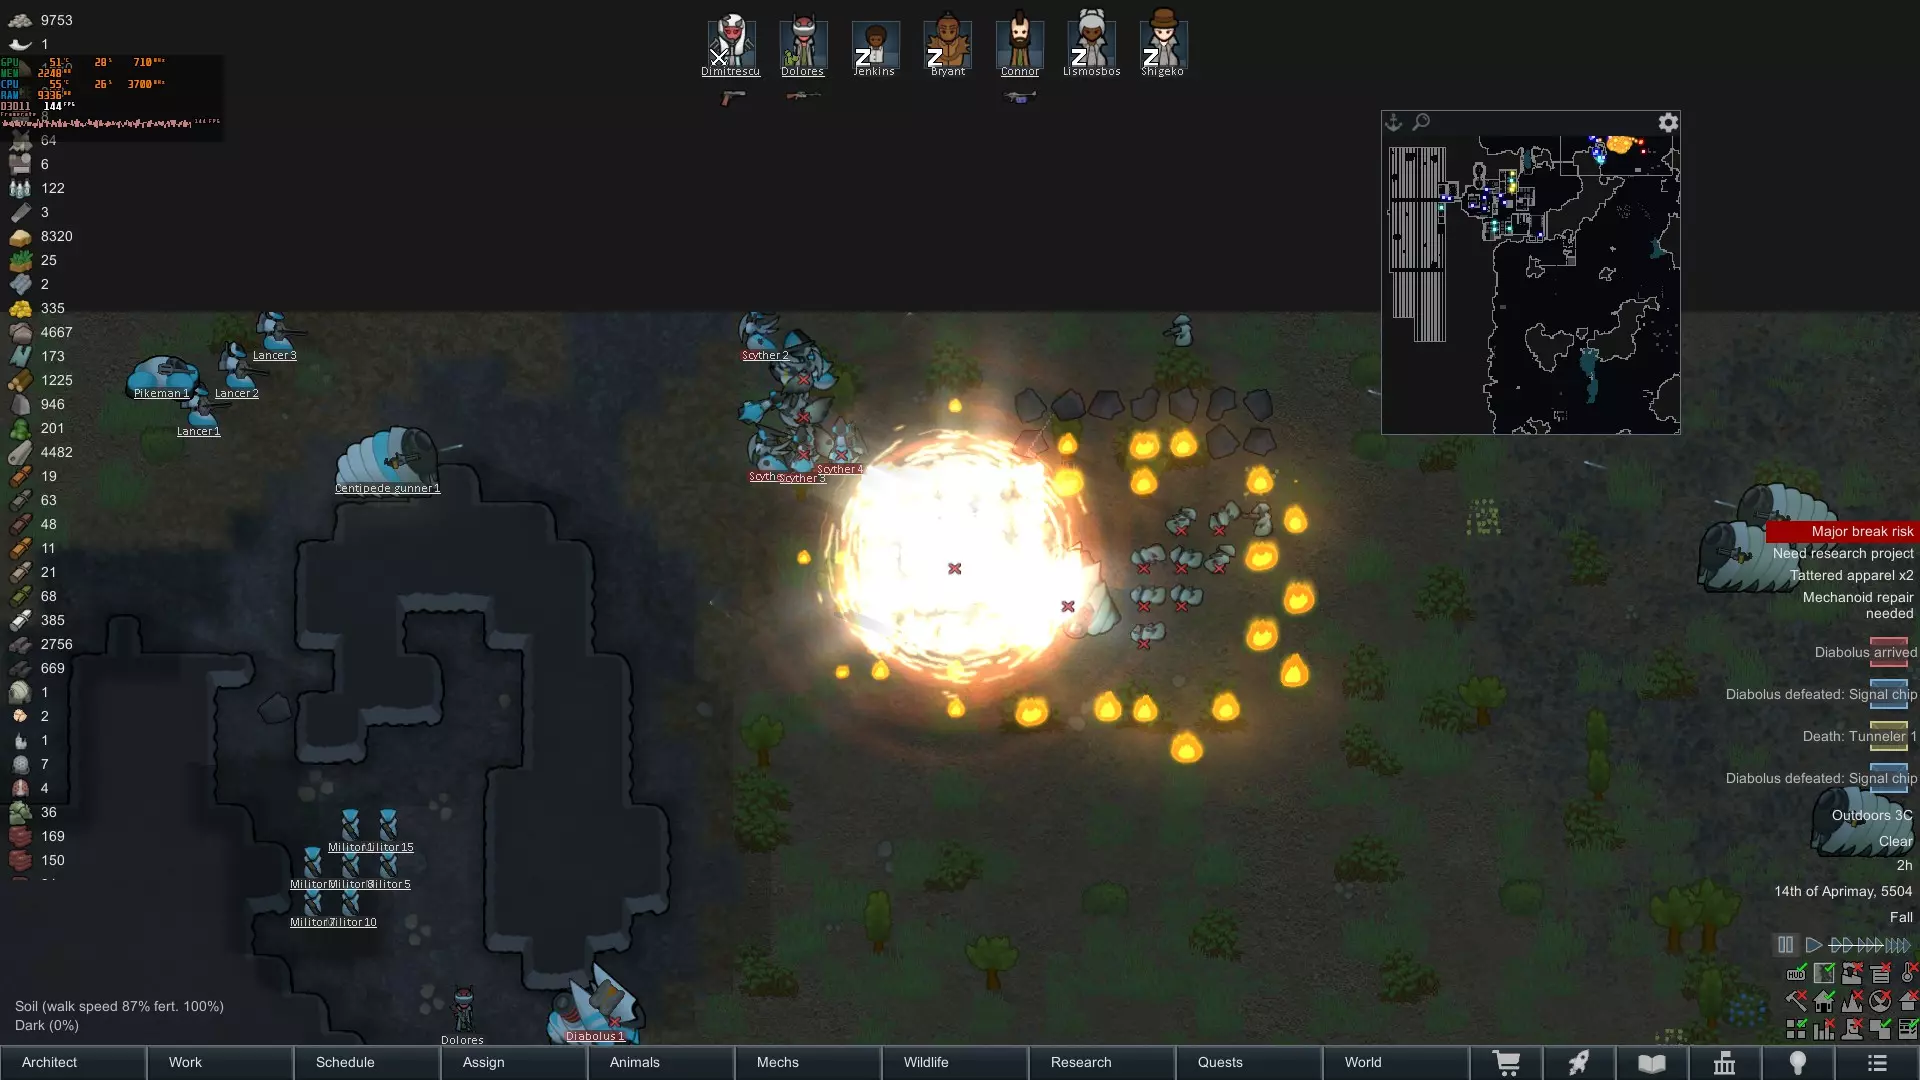
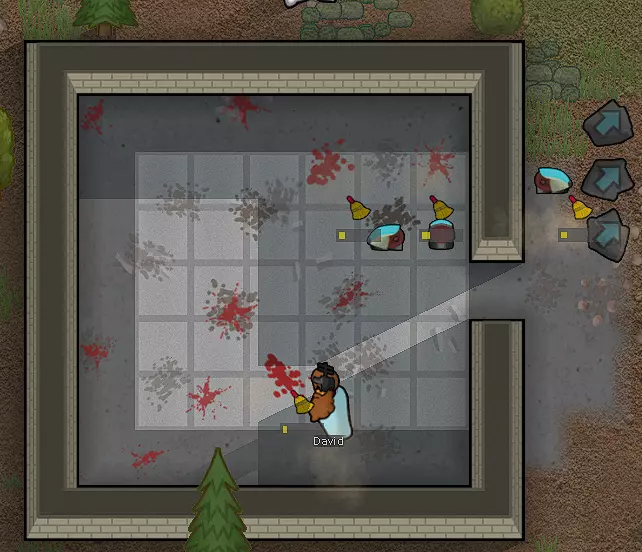
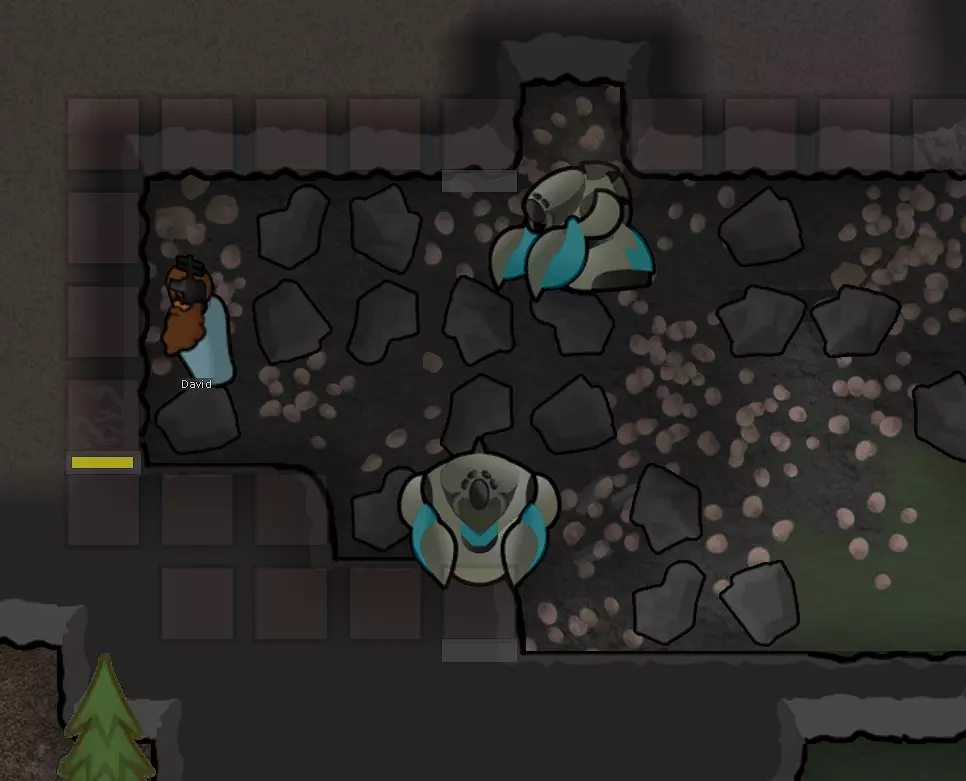
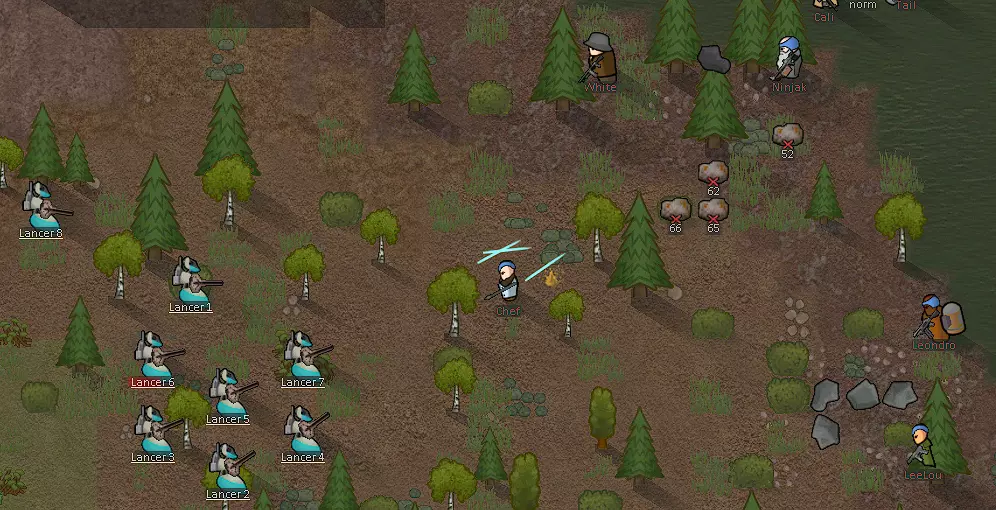
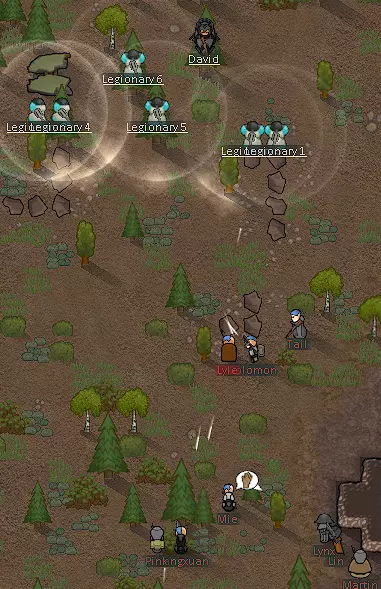
与迪亚波罗斯(Diabolus)进行前三次战斗后的应对方法: 由于该 Boss 的强度呈指数级增长,获取信号芯片会变得越来越困难。因此,你需要相应地增强自己的部队实力。当面对两个迪亚波罗斯时,你需要同时应对两次主要攻击。我的建议是,尝试让 Boss 与镰刀机(Scythers)交战,并使用长枪机(Lancers)、 pikemen 或 militors 进行支援。将你的机甲部署在远离你希望复活的尸体的位置。战斗中可能会出现大量护盾,因此电磁脉冲(EMPs)会很有帮助。好消息是,由于有两个 Boss,你可以获得 2 个芯片。 防御迪亚波罗斯的方法: 最好避免正面防御,因为他可以摧毁你所有的防御工事。不过,如果操作得当,你可以利用静态防御来消灭他的随从。如果他有敏捷的同伴,在他处于后方时阻止他,然后用近战攻击牵制他,同时你去对付其他机甲敌人。如果他的同伴行动迟缓,让一名高机动性的 pawn(比如拥有跳跃能力)吸引他的地狱球仇恨一整个周期,同时其他人移动,然后根据需要重复此操作。 灵能施法: 跳跃护盾可用于让恶魔领主的地狱球对其自身造成友军伤害。把握好时机,一个跳跃护盾就能让他对自己射击两次。将跳跃护盾的边缘直接与他的发射方向平行,并且让他处于护盾的外侧边缘(你希望他处于爆炸中心以造成最大伤害)。跳跃护盾的完美放置和时机示例(注意恶魔领主身上的开火指示器)。
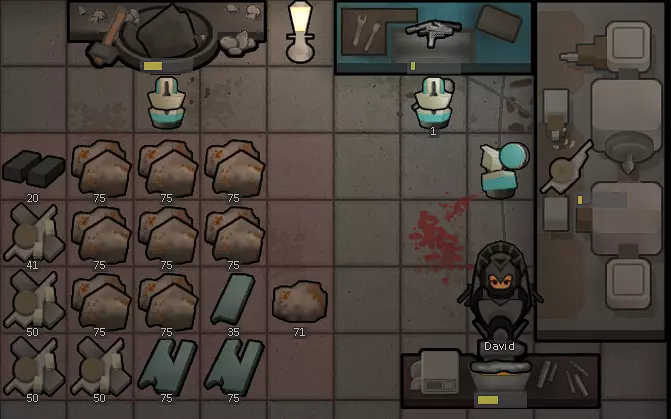
Wallraise应该能产生类似效果(需要测试)。 两张迪亚波罗斯的死亡截图很酷。我自己的迪亚波罗斯幸运地触发了两次秒杀。
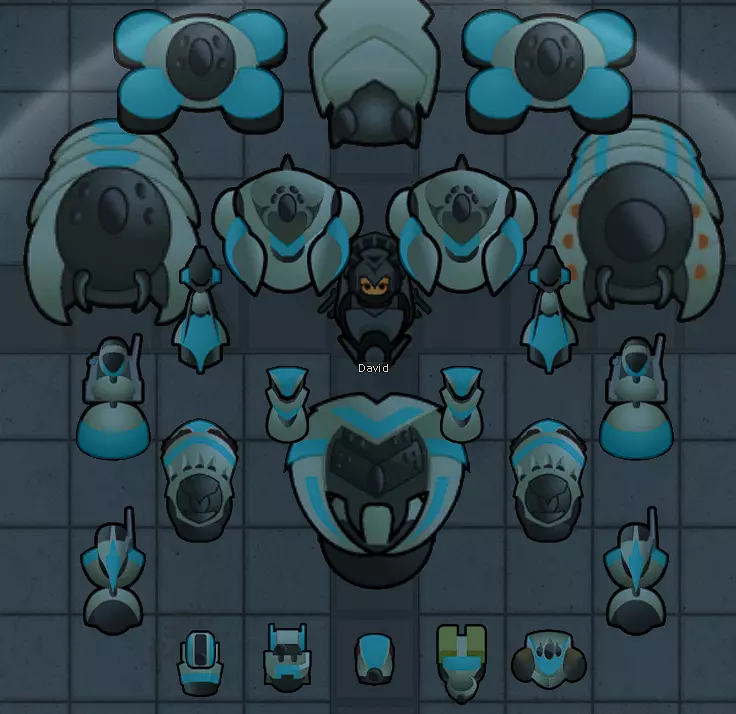
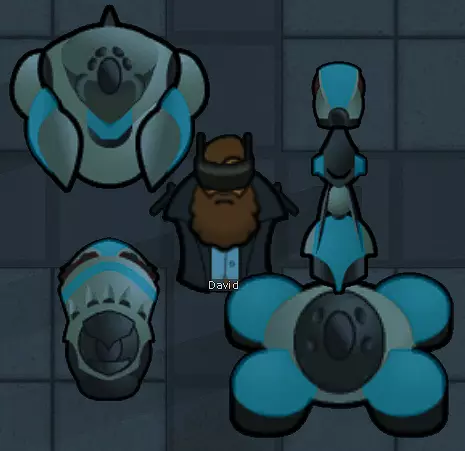
War queen, apocriton(to come) War Queen: More to come War urchins: this is the queen's main attack. She summons war urchins in sets of three. They have fast firing attacks that deal 12 damage, outclassing the dps of some T1 mechs. She spawns these every 15 seconds while in combat. The queen can spawn up to 24 urchins in combat. Mounted Turret: Good to be wary of, but not a major hassle. For levels see wiki page:https://rimworldwiki.com/wiki/War_queen Melee strategy: Engage the queen with melee so she can't spawn more war urchins. Try to have only 1 engager with a backup. Use the rest of your forces to take out other enemies. Defensive strategy: If you are into static defenses (aka a killbox), the war queen will eventually attack and go through that. However do note that killboxes are designed for killing one thing at a time, so be aware. Apocriton: to come Other tactics/strategies are welcome, leave them in the comments and I will put them here. Mechanitor Scenario Tips This section regards The Lone Mechanitor scenario. General strategy: keep your mechanitor alive(wow big surprise). Hide behind a mech army, and get labor mechs to do the easy tasks. It is 100% up to you how to deal with the recluse trait. It is only a mood buff in small colonies, and will not significantly debuff mood even with a large colony(max -8 moodlet), so it's more of an early game pity than a reason to keep a colony small. Story may be more important than mood though. For a Geneline, you are free to choose whichever you like. Whatever will benefit production is good. Whatever will make them break more often and work less is bad. The opposite is funny and challenging. For skills, you will want a pawn with good Mining above all, since you will need the resources at all game stages. Good Crafting is next, since you will want to be able to craft the new gear, and components later on. Also it is the base skill for mechanitor work like repairing. Decent intellectual is beneficial, but a second pawn can do a better job later on. Medical is helpful, but keeping your mechanitor hidden behind a mech army, so hopefully they don't take damage at all, not to say it won't get you an extra prisoner when it counts. Social is helpful for recruiting faster and trading better, but as long as it's not blocked, you will be ok. Combat skills can help supplement a mech army, but mechs will easily overcome a bad shooting skill. Avoid melee since it guarantees your mechanitor to take damage. Plants is usually helpful on solo colonist scenarios, but mechs can do that, so don't bother. Construction the same goes, you don't need a pawn with construction. Animals is pretty much useless since you already have dispensable combatants and aren't going to caravan with only 1 colonist. Cooking isn't worthwhile, but if you have the other boxes checked it doesn't hurt. A Nutrient dispenser is OP for solo colonist. Artistic is up to you, but generally not worth it for solo colonist. Dumb labor disabled is workable, since mechs can handle all of that, but not being able to flick switches is annoying. Starting the world: You start with a Constructoid and a Lifter. Get the infrastructure to recharge and gestate an Agrihand as soon as possible. A second Agrihand will help a lot for making you money in the short term(more wood to sell in chemfuel or other good forms). With 55 components, you gotta make them count. For power, a wood-gen is ok to start with, but if you are ok with the extra pollution, a toxic generator is more powerful and scaleable, very good for this scenario. Turbines might seem good, but you will have to sink components into batteries if you want to go that route. Chemfuel gens are good once you have the tech and lifters to cut wood. Even though you have the research, avoid batteries, since you need those components elsewhere. Next you will want a research bench, you can build an advanced one, but you may find the 10 components it takes are better spent elsewhere, go with a simple one, unless you intend to rush for fabrication. A second gestator helps but isn't necessary if you can afford to wait. Get a subcore encoder to build more than 5 small mechs. Once you have 1 Constructoid, 1 Lifter, and 1-2 agrihands, the best way to spend your remaining 5-6 BW is on Militors or Constructoids, since they've got guns. Once you have all BW slots full, you are strong enough to take on the 1st Diabolus. Strategy is in the boss section, but notes for this scenario are to let your mechs take aggro, since you can't afford letting your mechanitor get shot. Keep your mechanitor hidden behind cover, but close enough to freely control mechs in a large area around the Diabolous. Focus on the militors first, and spread your units out to reduce micromanagement to avoid the hellsphere. Once you get the chip, study it, and save it for a Bandwidth pack later on. Research Standard Mechtech only if you have the means to produce the higher tier techs: Plasteel and steel/components, otherwise research means to get those instead. Standard Mechtech era: Get an array headset and start gestating a tunneler (you will need the new buildings), it is the best use of the 3 new BW without a doubt. Then get a Bandwidth pack as soon as possible, following the same strategy to take out a second Diabolous. This will give you 9 more BW to play with, meaning about 4 standard mechs. It is nice to get a cleansweeper to keep your colonist(s) happier, but is not necessary. Scythers are your best bet for this stage, so get 2-4 scythers and fill out on militors. This is because most mechs are weak to melee. Focus on these production items: Plasteel, Steel, Components. Cash is king, so drugs or other high-profit items are excellent. A fabrication bench is indispensable from here on out, get one ASAP. Deep drilling and Ground Penetrating Scanner are your best bet, as one lucky scan can get you several hundred to a thousand plasteel. Steel can be mined by a tunneler for now given you haven't mined out the map. You should find a way to deal with pollution (or not) at this stage, since your piles of trash are growing large. You may also spend on band nodes so do so at your own pace when resources allow. Long range mineral scanner: It's usable but needs extra prep compared to deep drilling. Since you have to leave the map to mine what is scanned, make sure there is defenses in place that your mechanitor doesn't need to control and move. You can keep dormant sleep mechs in key positions, but you won't be able to move them after drafting, so they are essentially turrets. Turrets are also good. Bring your tunneler and whatever mechs you don't need to defend the base. Only scan for plasteel, components, and gold, since other things are too heavy to be worthwhile. About 250-300 kg capacity is enough for the biggest plasteel deposits. More to come as I continue playing :) Overall Tips- for mechanoids and mechanitors Recharging: Let your combat mechs recharge idly (preferable safe and close to where you want to wake them for combat). 1 recharger for every 3-4 labor mechs is sufficient. Active time:8/10 days active at worst If you want the deets read on: They drain energy at 2% day while wandering, and 10% a day while working, so an average of about 6-8% depending on where they are working(is one task close to the next basically). They all recharge at 50% / day at a station. Thus you will get at worst 2 days of recharging every 10 days, which is very good. You might get better mileage with say a lifter that spends half it's time going back and only using 2%. Resurrection: Resurrection always takes 1 gestation cycle regardless of size. Resurrection costs are as follows: Light:25 steel, Medium:50 steel, Heavy: 100 steel, Ultraheavy: 150 steel. As you can tell, it is rather cheap to resurrect mechs, so don't worry too much if one or two dies. However if significant numbers are dying in a battle, you may have trouble resurrecting them all before you need them again, so build more gestators if needed. Subcores/Mech costs: Subcores cost the following: Simple:2 components, 50 steel. Standard: 4 components 100 steel scanning sickness on pawn, High:4 components 100 steel 1 human life. Some mechanoids cost only steel, some need plasteel as well, and some need more components. Boss mechs require Repairing mechs: The repair function can heal any mech that isn't entirely dead to full health, and takes no material resources, but drains the energy of the mech (doesn't consume energy, therefore you can repair a mech with 0% energy). The speed at which your mechanitor repairs is dictated by Crafting skill, and can reach 280% with 20 crafting. Further bonuses can be gained through expensive implants, which compounds with crafting, resulting in a max repair speed of a whopping 840%. For an idea of how fast that is, you can repair 140 hp in about 32 seconds. So with high repair speed repairing mechs in battle becomes a valuable advantage, while without it you are pretty much forced to wait until the fight is over. Remote repairing has 100% speed scaling, with only capital cost downsides of the war queen drop. Mech Work: Gestating and repairing mechs is tied to the smithing work priority, so make sure you set that high. Mech gear(headsets and armor): All of them wear out fairly quickly. Make sure you have a spare so you don't have roaming mechs. This can be annoying since it can put a timeline on how long there is before you fight a boss. Consider a way to repair the gear with mods if you want to avoid that. Solar flares: Will temporarily stop mechs from charging, and dectivates band nodes, stopping some mechs from being connected. The flare will pass before it becomes a problem, so just wait it out. Mechanitor death: Install the mechlink in your next best pawn in crafting. Relink to mechs that are unconnected, but still under your control(will show up with red name in mech tab), they must also be walking (otherwise you must repair them with your new mechanitor first). Caravanning with mechs: Yes you can. Capacities are about what you’d expect (based on body size), with the notable bonus for the tunneler. It gets 128 kg, making it an efficient caravanner. Make sure mechs are satisfactorily charged, and you aren’t gone for more than several days (otherwise they might enter dormant mid trip). Nomad mechanitor? Since you can caravan with mechs, it might be feasible given you carry enough steel to setup at a new location. Might make for a fun playthrough. Mech Infrastructure Tips Band nodes: They cost 300 steel, 3 components, and 300 W, for just 1 BW. They take up 2*2 tiles, and can't be placed directly adjacent to each other. Great for mid to late game when you can afford them. You could just shove them into room (they don't detract beauty), then you get the spacious room benefits without wasting it on empty tiles. Bedrooms, dining rooms, rec rooms, and the like. Putting it in pathways is also pretty fun, but will require paths at least 3 tiles wide to walk around the nodes. Dedicated node rooms is probably the least efficient way to go, but it will keep your investment more protected. Rechargers and gestators tip: You can overlap interaction spots of rechargers, which will be more space efficient. More to come as I continue my playthrough. Pollution tips Exporting Pollution: Use transport pods to send it to a spot far away from other communities and it won't damage relations. This will cost 60 steel, 1 component, and an amount of chemfuel for every 25 bags. Not the cheapest but if you've got the steel then it is good. Caravans can also dump it, but toxic bags are chunky and weigh a lot, so you must plan accordingly. Storing Pollution: Toxic wastebags can stack max 5 per tile (they don't fit on shelves), so they can quickly fill your freezers. Deal with other ways ASAP. Embracing Pollution: Gas masks will take their headgear space. Everything else you've seen from posts. Plant death/ alternatives, insectoids, enemy wasters, etc. Mech Breakdowns-what to expect Each mech breakdown will be indexed as: Picture(once I put them in) Mechanoid type(size,BandWidth): Intro, labor use(with advanced tips), combat stats(class, speed(Cells/Second), dps(damage, cooldown), range(tiles), accuracy note(where you should put it relative to the enemy)), and combat use(with advanced tips). Tier 1 Mechs- Breakdown Covers the combat potential and labor potential of each mech. These mechs are available before defeating Diabolus.
搬运者(S,1BW): 功能相当直观。激活状态下,它会不停地将物品从A点搬运到B点(不像那些不情不愿的殖民者)。非常适合搬运尸体或远处的物品(比如地图另一边的那堆钢材)。游戏初期建议配备1个,后续可根据需求增加。能轻松应对大多数搬运需求。除了比拳头攻击稍弱的伤害外,几乎没有战斗能力。
农业帮手(S,1BS): 能够完成殖民者所有与植物相关的工作。可以播种和收割大面积的农田,并且遵循标准优先级设定,因此在完成农活后,你可以随时安排它进行一些伐木工作。只需一个农业帮手就足以种植多片农田。它具备功能性近战攻击,虽然威力不大,但比起重型搬运机器人(Lifter)要好。
建筑机器人(S,1BS): 可以完成任何你需要的建造工作。相当于一名技能等级10但缺失一只半手臂的 pawn(建造速度25%),**但它不会建造失败,建造高级建筑时不会浪费资源(可建造基础游戏中的所有物品)**。尽管速度较慢,但能满足殖民地大部分非大量建造的需求。近战能力和战斗水平与搬运机器人类似。
清洁机器人(S型,1带宽):今天就领养一台清洁机器人,告别日常污秽。适合清理你的公主殖民者不愿处理的东西。不适合战斗,与搬运机器人情况类似。
米利托(S,1BS): 作为一级机甲中最“懒”的存在,它无法执行任何殖民地任务,配备的霰弹枪威力也较弱,非常适合充当炮灰。这是一种近战步兵单位。其霰弹枪的射程仅为可怜的12.9格,造成10点伤害,射击间隔为2.9秒。不过它的速度还算不错,为3.8格/秒。如果操控得当,少量的米利托就能给敌人带来不小的麻烦。如果找不到掩护,就在战斗中把它们分散部署。让它们围绕敌人进行环形蜂拥攻击,以充分发挥霰弹枪的优势。只需确保它们在射程内开火即可。米利托最好成群使用,因为单把霰弹枪难以成事。 所有一级机甲: 所有一级机甲的体型大小均为0.7(仅承受殖民者所受伤害的70%),且抗性极低(20%穿刺抗性)。它们无法承受太多攻击,但易于维修且复活的材料成本低廉。它们的孕育时间略少于2天。不要害怕在战斗中使用你的工作机械,因为它们的近战能力比被动承受攻击要好。 查看机械师指南以了解如何在战斗中协同使用它们。 二级机械-详细说明 扫描来自Diabolus的信号芯片后,即可获得二级机械。 它们的孕育成本更高,并且需要塑钢和标准子核心。

烈焰喷射兵(M,双足机甲): 收养一名烈焰喷射兵,将你的敌人变成移动篝火。非常适合让易燃敌人远离你的前线单位。对击杀机甲效果不佳。攻击距离接近7格以内的接触范围,但凭借4.5格/秒的移动速度可以快速拉近距离。最好用它们来扰乱敌人,最好是成群使用。只有在对抗大量人类或动物时才好用,否则将双足机甲用于能击杀机甲的单位。
隧道工(大型,3带宽): 今天就收养一台隧道工,让你的敌人化为血肉模糊的尸堆,让石头变成成堆的矿石。在劳动力方面,它们唯一能做的就是采矿(不过比殖民者快)。在有大量岩石可开采的地图上表现出色,在缺乏大量岩石的地图上则效果很差。无法进行钻井作业,因此只有在游戏后期配合远程扫描仪时才有用。拥有不错的 caravan 负重能力,但价格昂贵。 在战斗方面,它是最优秀的 T2 机械单位之一,因为它配备了一个拥有可观生命值的护盾(250点生命值加上护盾再生)。非常适合吸引敌人火力,但不擅长消灭敌人。此外,它的速度非常慢,仅为1.9格/秒,除了在合理的静态掩体附近,使用它的理由并不多。它拥有高达80%的护甲 rating,超过了其他任何机械单位。 通常的坦克战术对它都适用。让一个机甲吸引火力来开启战斗是个不错的策略,但它只能承受有限的子弹。试着让一个机甲处于地面掩护后方的敌人射程内,以此吸引火力,为其他机甲争取走位时间。威力强大但速度缓慢的钝器近战攻击适合牵制近战敌人,不过用来高效击杀它们效果不佳。这种机甲对敌方狙击手尤其有用,比如 pikemen 和 legionaries,因为它们不太可能打破其护盾,这样你基本上就可以无视这些狙击手,去处理其他问题。如果你需要牵制敌方 scythers,防止它们割开殖民者的喉咙,那么这种机甲是最佳选择,因为其高额护甲有相当大的几率减免伤害。当然,前提是你没有在 scythers 靠近之前就将它们消灭。
镰刀机甲(雄性,2BW): 今天就收养一台镰刀机甲,让你的敌人变成生鱼片吧。你了解这些家伙,你也曾败在它们手下。其速度为4.7格/秒,比其他机甲和人类都要快。每2秒可造成20点伤害的劈砍或刺击,拥有30%的穿甲率,命中率约为60%。非常适合切割血肉,对大多数机甲也有不错的效果。能快速与敌人进入近战。由于你只能指挥靠近机械师的目标,因此可能难以瞄准远处的优先目标。尤其在群体作战时表现出色。由于大多数敌方机甲的近战能力较弱,镰刀机甲在对付它们时会非常有效。不过,由于BW的限制,很难让它们进行集群作战。而且因为它们通常离敌人更近,容易吸引大量敌方火力。
pikeman(男性,2BW): 今天就招募一名 pikeman,给你的敌人来个出其不意。伤害较低,但在敌人有机会反击前,非常适合从远处对其进行消耗。狙击型机甲。44.9 格射程(堪比狙击步枪),15 点伤害,30% 穿甲率(比 T1 机甲攻击略好),每 4.6 秒攻击一次。远程精度极高,有几个这样的单位,你可以轻松在敌人发现你之前就将其消灭。由于 2.1 c/s 的速度,它们无法轻易重新部署。总体而言,在视野开阔的开放地图上是不错的选择。逐渐削弱敌人的实力。不过一旦敌人靠近,主要就得靠其他殖民地战斗单位了。我的建议是招募几个,用于在首轮攻击中消灭容易对付的目标。防御表现出色,进攻时起辅助作用。二级机甲总体情况: 大多数二级机甲拥有40%的锐器伤害抗性,虽然聊胜于无,但面对装备精良的敌人时作用不大。它们的孵化时间比一级机甲更长,大多数需要大型充能器,且复活成本也略高。 三级机甲:详细解析
Fabricor: 可靠劳动力的优质来源,可利用你的原始资源获利。尤其适用于药品和组件的生产,其中组件的需求量会很大。它们能够制造高级组件。工作速度为50%。由于在同一地点工作,因此从增益道具中获益最大。需要高级子核心。

医护机器人: 由于重要医疗任务具有时间敏感性,医护机器人较慢的工作速度在紧急情况下是不利的。它非常适合处理火灾,并且随时可以进行护理,而医疗殖民者可能会疲劳或被其他事情占用。如果你拥有一个小型殖民地,需要备用医疗人员,那么值得拥有一个医护机器人,但在大型殖民地中,与真正的医生相比,它们的表现并不理想。它还可以减轻常规护理任务和喂养囚犯的负担。它的人工智能很有趣,但不要期望它在救援时完全按照你的意愿行动。
枪骑兵: 招募一名枪骑兵,将你最卑鄙的敌人断肢。作为常规步兵单位,枪骑兵拥有所有机甲中伤害最高的枪械,30点伤害、45点穿甲值,冷却时间4.4秒,射程29.9格,还算不错。他们的移动速度为4.7格/秒,能快速调整位置。如果你的目标是消灭单个敌人,枪骑兵性价比最高,且比民兵提供更多的定位选择。除了在绝对需要额外射程的情况下,枪骑兵在几乎所有方面都优于长枪兵。冲锋 lance 的特性意味着将枪骑兵部署在5-30格范围内的任何位置,效果都差不多,所以只需让他们处于能在掩体中使用枪械的范围内即可。由于他们是常规步兵,其使用场景也应类似。它们是可消耗单位,在战斗中损失的频率远低于你的 militors 或 scythers。不过,它们确实依赖坦克和重型单位吸引大部分敌人火力,因此避免让它们在没有保护的情况下贸然冲锋。与大多数重型和超重型机甲配合效果良好。
蜈蚣枪手: 今天就招募一名枪手,让你承受数不清的子弹。重型枪手坦克职业,配备转轮机枪,拥有看似无尽的生命值。每发子弹造成10点伤害,每2秒爆发25发子弹,爆发间隔4.8秒,标准射程30.9格。移动速度为1.9格/秒,这家伙跑不快。由于在所有射程下枪械精度都很低,最好让它向群体开火,但单体伤害仍然超过许多其他选择,因为有大量子弹射向目标区域。你可以随意放置蜈蚣枪手,但要让它们待在前线近战单位后方。或者你也可以将它们当作坦克来使用,并采取相应的玩法。自然地,它们之前的“头目”地位仍然适用,既可以成为强大的盟友,也可能是危险的敌人。一个实用技巧是让远程维修单位持续为一只蜈蚣机甲补充状态,使其能够承受大量敌人伤害。拥有“传送”能力的灵能者可以弥补蜈蚣机甲的一大缺点,将其传送到理想位置。蜈蚣机甲的主要弱点是近战,因此如果有敌方镰刀机甲,优先消灭它们以保护你的蜈蚣机甲。 协同配合:蜈蚣机甲的设计初衷是群体控制,当敌人聚集时,它既能承受大量伤害,也能造成巨额群体伤害。为了补充这一点,可以搭配高单体伤害的机甲,比如 lance 机甲,来逐个消灭落单的敌人。它们对近战的弱点可以通过友方镰刀机甲来弥补,或者在其他敌人之前先消灭敌方镰刀机甲。这个问题很容易用更强的火力来解决。
烈焰蜈蚣: 蜈蚣的火焰特化版本,装备了臭名昭著的地狱加农炮,能够大面积散播火焰,甚至可以瓦解最密集的阵型。移动速度为1.9格/秒,因此它会较晚加入战斗,但这并不意味着它在对付敌人时没有巨大作用。与其他造成火焰伤害的方式一样,除非你难以对抗血肉单位,否则最好不要使用烈焰蜈蚣。它还可以通过制造火焰迫使敌人绕行来控制其行进路线,因此在机甲战斗中至少能发挥一定作用。 三阶 恶魔
恶魔: 死亡使者,是你可使用的首个指挥官机甲。它需要两个信号芯片。它拥有你对抗过的那个 Boss 的所有能力,只是没有护盾发生器。对攻击静止的人类部队效果显著。不太擅长击杀机械单位(参见 Boss 指南)。不过即便对抗机甲,它也完全物有所值。它能在爆炸前击中掩体。由于存在最小和最大射程,其部署位置非常有限。在战斗中,因其庞大的生命值,你可以将它用作子弹吸引器(肉盾)。 坦克破坏者。800 点汽化伤害(关于其机制的具体数值参见 Boss 指南),预热时间 7.5 秒(就是发光的阶段),冷却时间 6 秒。每秒伤害 2.4,比掘进者快,但不会最先出现。射程为中短程(5.9-18.9 格)。对所有有机敌人效果极佳,几乎能确保击杀或击倒。由于具有致残潜力,对中型和轻型机甲效果良好。对重型机械单位相对较弱,因为无法一击摧毁肢体,击杀一只蜈蚣机甲可能需要1-5发炮弹。命中部位非常看运气。 使用时机和场合:用于消灭敌人集群,因为它是游戏中最可靠的范围伤害手段。 防御时:通过提供掩体来引导敌人的行动路线。敌人会躲在掩体后面,为地狱 sphere(原词)的生效争取时间。 进攻时:等待敌人静止不动,然后开始开炮。如果敌人躲在掩体后面,他们往往不会因即将到来的危险而逃跑。使用恶魔机甲消灭敌方坦克效果也不错,因为它仍有很高概率造成大量伤害。 在围攻战(对抗机甲集群等静止敌人)中:如果有机会,让它在掩体后方处于理想位置。瞄准重要掩体周围。让它承受伤害,它是最抗打的指挥官。在消灭掉大量敌人后,让它专注攻击炮塔等静态防御设施。 协同效果:搭配任何射速快的单位。由于地狱 sphere 加农炮承担了主要输出,你需要能完成收尾工作的单位,也就是高 DPS 输出量的单位。民兵、枪骑兵、蜈蚣机甲(炮手型或爆破型)以及任何爆发型单位都可以。高爆发次数的武器(如转轮机枪)与低爆发次数的武器(如冲锋枪)效果大致相当,但代价是目标获取速度的通用性下降。更多的恶魔单位,通过两次射击来提高触发关键阿尔法打击的几率。这确实是一个可靠的方法,尽管成本不低。 杀戮区优化:将敌人引入一个规整的5*5区域,让恶魔单位能在其中肆虐,这至少是至关重要的。你需要为此定制一个杀戮区,但这是值得的。只需用带护盾的近战单位堵住入口,一切就准备就绪。 友方恶魔单位小贴士: 作为指挥官,我觉得有必要专门提供一些关于友方恶魔单位的使用技巧。 技巧1:你可以对自己的恶魔单位使用眩晕技能,以延迟其地狱球体加农炮的发射,使其保持在即将开火的状态。这样做是为了预先充能其攻击,以应对即将有敌人进入的区域。技巧2:恶魔是所有机甲中速度最快的坦克,比蜈蚣快0.5格/秒,比掘进机快1格/秒。因此,在速度至关重要的进攻行动中,你可以更早地进行部署。 技巧3:在撰写本文时,恶魔的地狱球会摧毁指挥官芯片,所以用它来击杀 Boss 实际上是个坏主意。如果你确实带了一个恶魔去对抗 Boss,让它转而攻击其他机甲。这在很大程度上无法避免,所以不必费心尝试。 技巧4:如果你有勇气让多个恶魔加入你的队伍,在战斗中让它们攻击不同的位置,但蜈蚣除外。蜈蚣值得两个地狱球。 四级机甲:解析
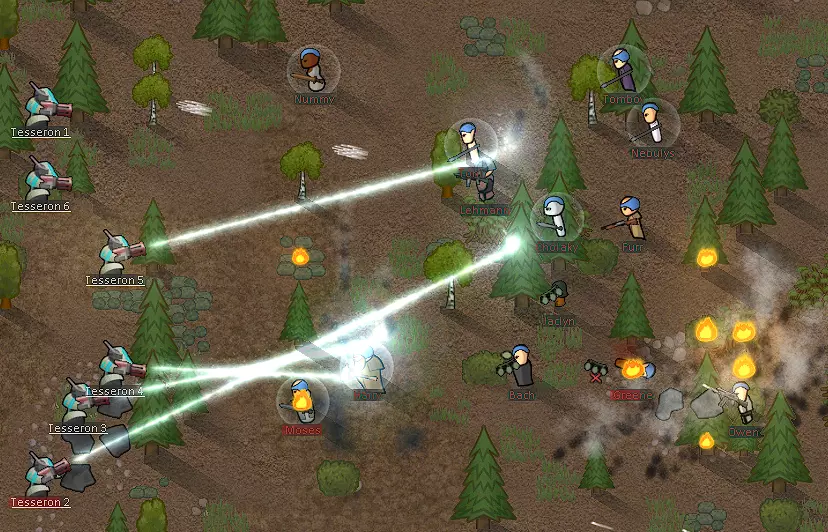
泰瑟隆(中等体型,3BW): 今日选用泰瑟隆,可将敌人化为灰烬。它是光束格林炮的持有者,这种独特武器采用高能量密度激光。作为特种部队单位,其速度与人类相当,为4.7格/秒。每次扫射造成10点伤害,扫射间隔2.7秒。拥有独特的发射机制,即便经过测试我也未能完全理解。攻击范围为中距离,3.9格至24.9格。由于成本高昂,泰瑟隆通常是一个较弱的选择。在机甲对战中表现不佳,即便面对有机敌人,也比不上其他机甲。此外,即便算上范围伤害,其每秒伤害也低得可怜。总体而言,泰瑟隆是个糟糕的选择,资源最好用在更实用的机甲上。 它唯一的优势是其中距离攻击的冷却时间。它的射程比【烈焰喷射器】远,冷却时间也比【燃烧器】快得多。它们在某些情况下可能有用,但目前我还说不出具体是哪些情况。 造成4次光束伤害(而非预期的5次),分别对以目标为中心的随机预设路径上的4个随机单元格各造成一次伤害。破坏路径会激活4行:目标下方3行、目标下方1行、目标所在行以及目标上方2行。不在目标所在行的每行可以击中目标所在列及其前方的单元格。在目标所在行,目标最有可能被击中,其次是其后方的单元格,很少会击中其前方的单元格。
蜈蚣爆破者(重型,4带宽): 装备超高科技大容量武器的蜈蚣。重型炮手坦克单位。移动速度极慢,为1.9格/秒,但拥有出色的生命值和武器配置。重型充能爆破炮与转轮机枪类似,但以武器冷却时间为代价换取了更高的子弹伤害。每发子弹15点伤害,每次爆发24发子弹,爆发间隔8.65秒。中等射程,为27格。战斗定位与蜈蚣枪手几乎相同。 蜈蚣爆破者与蜈蚣枪手: 两者拥有相似的武器、相同的成本和机械平台,因此需要讨论哪一个更优。简而言之:蜈蚣爆破者的综合表现略胜一筹。迷你机枪由于冷却时间较短,所以每秒伤害略高一些,但爆破枪50%的伤害加成和7%的额外护甲穿透几乎完全弥补了这一差距。如果你需要更稳定的每秒伤害(差距非常小),可以选择枪手职业。考虑到大多数敌人都有护甲,爆破枪在对抗装甲目标时的每秒伤害表现会更好。
军团士兵(中型,2 BW): 今日招募一名军团士兵,即可远程攻击敌人。作为战斗狙击支援单位,其装甲较轻,配备200生命值的护盾,但护盾恢复时间较长。作为最快的远程机甲,移动速度为4.3格/秒,使其能够超越许多敌人,更重要的是,可以与盟友保持近距离。每次攻击造成15点伤害,拥有30%的穿甲率,攻击间隔4.6秒。狙击类单位射程为44.9格。如果战场上有几个即将被消灭的敌人在游荡,这是一个绝佳选择。由于拥有防御护盾,它能与任何类型的远程盟友很好地配合。由于护盾充能时间较长,它更像是早期战斗中的伤害缓解手段。 协同效果:与廉价的枪骑兵搭配效果良好。由于军团士兵的独特能力,他们非常适合用于侧翼包抄敌人,最好能有几名枪骑兵或其他中距离单位协同作战。当敌人主力集中攻击你的主力部队时,你可以调动军团士兵及其支援小队对多个目标造成严重伤害,且无需考虑掩护问题。侧翼小队的作战思路是尽量避免承受敌方火力,以便让护盾有机会再生。通常最好将军团士兵部署在附近,但要处于任何流弹的射程之外。 你也可以利用护盾保护后方部队,拦截那些穿透前线的流弹。将机械师置于军团士兵的护盾范围内,是保障其安全的好方法。
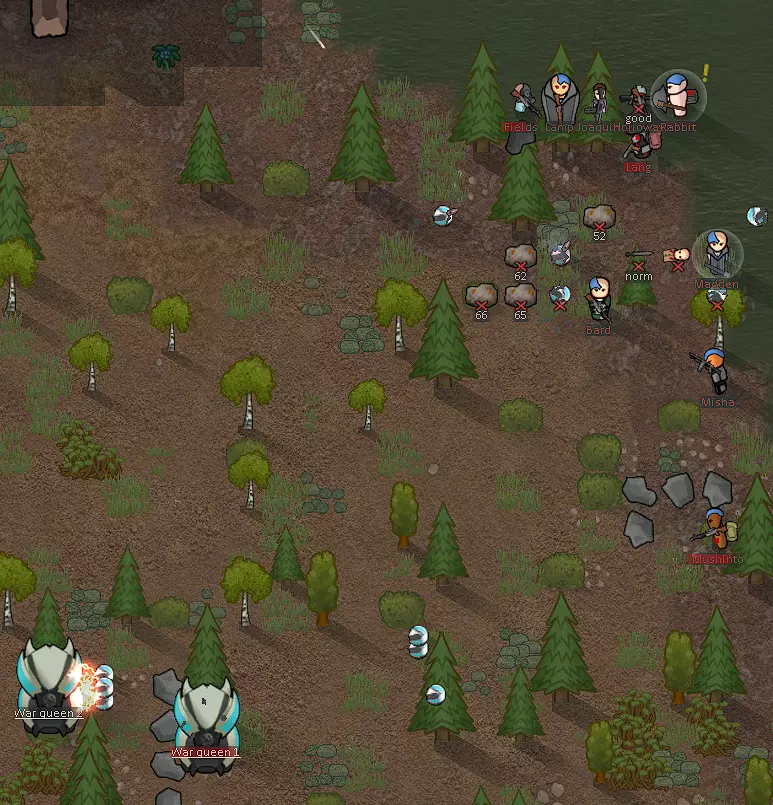
War Queen(Ultraheavy, 5BW): Adopt a War Queen today, and turn any battlefield into home. Mobile swarmer platform. Heavily armored, and very slow at 1.6 c/s. Armed with a light bulb turret, and the ability to gestate three war urchins (more below) every 15 seconds. The use case is very different compared to all other mechs, since the War Queen herself is not very useful in battle, rather relying on the war urchins to supply fire support. You can place her in the front to tank enemy fire. Overall an excellent choice. Having the ability to create dispensable allies on command is incredibly valuable in combat. In stationary combat (such as kill boxes), war urchins are still useful, but can clog up entrances if used excessively. Therefore the War Queen performs best in open-field combat, where there is plenty of places for her urchins to run to. Synergies: Works well with tanks, which will soak up enemy fire, allowing war urchins to deal damage uncontested. Can also synergize well with more war queens, to overwhelm enemies. War Urchins: The cannon fodder swarmers of the War Queen. Very powerful, dealing 12 damage every 2.1 seconds at a range of 6.9 tiles. Moves fairly quickly at 4.2 c/s. Lightly armored but surprisingly beefy, with a 1.3 health scale(head hp of 33 compared to humans at 25). Upon spawning, they cannot be drafted and will follow a policy of attacking the nearest enemy. Allied War Queen Tips: Tip#1: You can use war urchins to draw enemies from preparations early (whilst they stage themselves). Tip#2: War urchins are a cheap way to occupy enemy Diabolus in open-field combat. Tip#3: War urchins can be kill-focused for a constant supply of focus. Tip#4: You can resupply War Queens with steel on the field, even while drafted. Centurion(Ultraheavy, 5BW): Adopt a Centurion today, and let your enemies know that their guns are as useful as their fists. Mobile defense support platform. Heavily armored and very slow at 1.6 c/s. Armed with a light bulb turret. The shield has 300 hp and regenerates at a negligible rate. Upon breaking, takes 30 seconds to fully restore and redeploy. The shield only intercepts enemy fire, so you don’t need an allied pawn to be within the bounds of the shield to shoot out. Due to the slow regeneration rate, it is a temporary mitigation device, rather than a dependable shield. While the cost is high, being able to avoid casualties in a battle is worthwhile. Due to being a support mech, all mechs will synergize well. If using multiple, it is better to have the shields layered, so one centurion is behind the other and covers the same allies. This allows shields to recover before pawns take damage. To give perspective on the effectiveness of the shield, a single centipede blaster volley is enough to destroy it. Psycasts: the best weapon is control Psycasters have a special advantage when it comes to enemy mechs: control. You can make up for your mechs weaknesses, and exaggerate enemy weakness. The most useful ones I will list in order from most useful to least useful. Note that they are only for combat. Skip: The best ability(objectively speaking). Put mechs where you want them. There are a lot of slow mechs. Getting them in position without the risks of them moving there is a huge advantage. For your mechs: instantly move slow mechs into cover where they can use their guns. For enemy mechs: Put enemy tanks into deadly groups of melee attackers. If an enemy has some favorable position, take them out of it. Also good when kiting for keeping an enemy away. You can also just teleport them far away to deal with them later. Another fun trick is to place an enemy mech where an enemy diabolus is shooting. Stun: Stop an enemy mech in its tracks. Can be used to delay an enemy attack (although not prevent it entirely). Useful against bosses and centipedes if you need a little extra time before they attack to get situated. Burden: Make your slow enemies slower. Good for that little extra advantage when kiting. Invisibility: If will cause enemies to draw aggro elsewhere, and when the cloak drops, they won't be firing at the mech that was cloaked anymore. You can also cloak a critical mech in a fight to prevent further locks. Good for giving advantage to key allies. Berserk: Stop an enemy from firing at you, get them to fire at their friends instead. Works both ways. Best used on an enemy tank to start the fight. Can also be useful mid fight to turn the tide. Make sure your pawns are further away than enemy pawns so that it actually helps you. Berserk Pulse: Berserk but better. Same use. Skipshield: Can be useful, but since you can't fire out of one, it's pretty situational. Good for melee, or putting an enemy in a time-out cage. Can be particularly useful against Diabolus, since when his blast hits the wall, it explodes. See boss guide for more. Wallraise: Multiple uses. It is instant cover, allowing pawns to move into position, or placing cover in a critical spot. You can also use it to block enemy pathing, as well as cut off firing angles. Mass Chaos Skip: If you like chaos, cause it. Otherwise best left alone. Chunk skip: Extra cover when engaging on attack. Smokepop: Extra cover when engaging on attack. Works two ways though. Beckon: The poor man's skip. Much more specific use cases to bring an enemy closer. Can be used to interrupt enemy patterns, stopping them from shooting temporarily. Useful for getting an enemy away from a favorable spot. Waterskip: Put out fires for more pathing options. Many enemy mechs have fire attacks, so being able to put out a fire on one of your pawns can be helpful to say the least. Thanks For Reading I hope that you found something helpful in this guide, and I thank you for taking the time to read it, especially as I am in the process of getting it to a finished guide. Suggestions are also welcome and encouraged: anything that can be added is helpful, I will credit you below here. Awards, I like awards, they give me that nice dopamine. MMMMM dope. I Love Dope. Consider leaving one if this guide helped you in any way. Ratings help a lot with telling other people how good a guide is, so if you find the guide helpful, leave a good rating. If it was a waste of time and didn't give you anything of value, leave a bad one. Credits: When I add things that other people came up with, I will put them and their contribution(s) here. TheBlindOne: Psychic shock lances on bosses. Abureaucrat : Diabolus hellsphere baiting Production guide You will need a lot of resources to fuel your craving for more mechs. Plasteel, components, and steel are very tight in all game stages. If you know efficient ways to get these materials, you can skip this section. I will cover how to get these materials using mechanoids specifically, so methods that only real colonists can do are not included. I make the assumption that you are capable of research, and crafting, since those are both required skills for a mechanitor. Advanced components: These can strictly be bought, so focus on making money to buy them rather than crafting them yourself. Once sufficient in other minerals, you can craft them yourself. Caravans to mining sites from a long-range mineral scanner: You can leave your colony behind, and take your sole colonist on a caravan to get plasteel. It is a bit finicky, but with proper preparations, it is possible. You can also use mechs to carry things in a caravan. Defense prep: Obviously, a concern with this is leaving your colony unprotected. You will need some luck and a walled in colony center so you know where to put defenses, ideally with one or maybe two entrance points for raiders. Then leave large amounts of turrets and mechanoids to cover those entrances. If and when a raid comes, just take your combat mechs(leave them on dormant sleep so they stay in position) and draft them. They won't be able to move, but they will shoot much like turrets (aka you can't choose what they shoot at). That should cover you for the several days needed to mine out a scanned deposit. Alternatively, having a way to quickly get your mechanitor back is helpful, but be careful not to abandon mechs you can't afford to replace. For the actual caravan to the mining site: take as many tunnelers as you have. Charge any mechs to 100% before leaving as a precaution. If you can afford the steel cost to drop pod there, then that is highly preferable (make your time-resource cost decision). Plasteel and components: These generally don't weigh that much, and a full site of resources can be carried by a single tunneler. Steel:build a drop pod launcher and send the steel back in pods. Bring all your tunnelers, a constructoid, and an agrihand. It will make it possible to send back all the steel without all the caravan mass. However it costs steel (which is obviously mined on site), components (which can be obtained other ways), and chemfuel, which can also be manufactured on-site. You may have to do the math on how many components to bring with you, but 10-15 should be enough, 6 for pod launcher, refiner, and wood gen, and the rest to send back pods. If you want to pod your caravan back, then do the math. Deep drilling: Since tunnelers cannot mine (at the time of my writing this), deep drilling is exclusive to humans. It is still a great way to get all minerals, since you don't have to leave the map. Mining on map: The easiest way to get minerals, but it runs out quickly. Just have a tunneler strip mine everything that it can. Components: Since Fabricors can craft components, as well as your mechanitor, it is highly recommended to have fabrication benches (wow big surprise). Boosting a Fabricor in a workshop is great since you can get up to 75% work speed. You will need steel for this, but that is easier than components.