换一换
换一换 


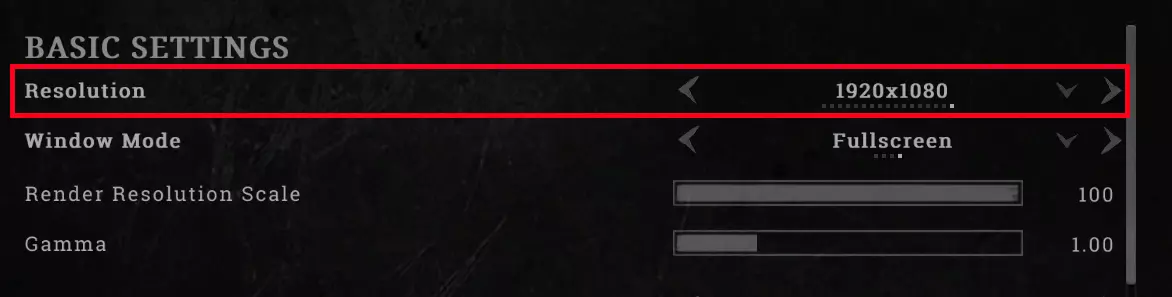
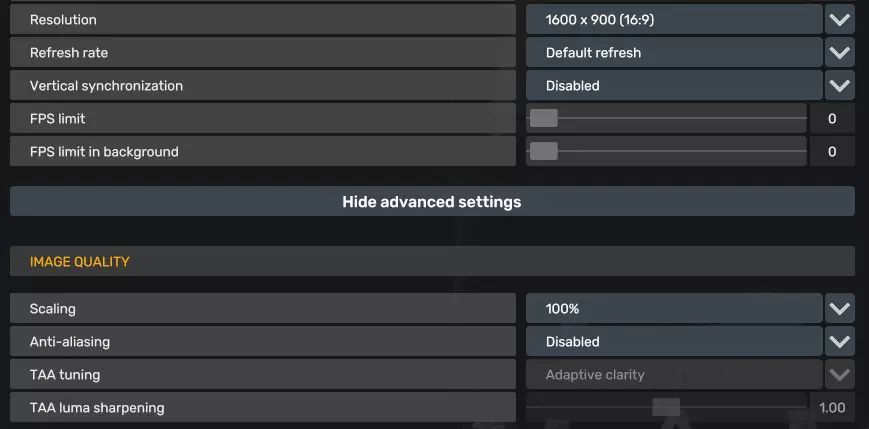
在过去一年里,我尝试了各种设置来寻找视觉质量和帧率之间的最佳平衡。然而,要实现100%稳定的帧率是不现实的。主要问题在于物体数量的增加,由于多线程支持不佳,这可能会导致CPU瓶颈。这些是我个人的画质与性能设置,并在不同场景进行了测试。你可以进行调整,但启用某一设置通常需要禁用另一项。 基于此,我们来看看具体配置。目标是在画质和减少帧率下降之间找到可接受的折中方案,同时为原生PCVR设备目标帧率90 FPS,为Meta Quest设备目标帧率72 FPS。系统与VR信息 我使用的是NVIDIA RTX 4090搭配Ryzen 5700X。不过性能问题并非仅与硬件相关,使用旧款硬件甚至能获得相近乃至更优的性能表现。【美国卡车模拟】和【欧洲卡车模拟2】的主要问题在于游戏引擎以及DirectX绘制对象数量的增加,由于多线程支持不佳,这会导致CPU出现瓶颈。该问题在通常单核性能较弱的Ryzen CPU上更为明显。 虽然未来DirectX12可能会带来一些改善,但仍需要对游戏引擎进行更深入的改动。结果如何,我们拭目以待。 VR方面,我使用PSVR2配合Steam OpenXR,以及HP Reverb G2配合Windows Mixed Reality,并借助OpenXR和OpenXR Toolkit。Windows Mixed Reality 相比 Steam OpenXR 表现出更好的性能。本指南专为原生 PCVR 设备设计,目标是 90 FPS/Hz。这些设置中的大部分也适用于 Meta Quest 设备。为获得最佳体验,请将头显刷新率设为 72Hz。 通常情况下,应避免使用动作平滑或重投影,因为它们对解决 FPS 下降没有帮助,还可能导致画面扭曲效果。确保正确设置渲染分辨率。在 SteamVR 中,将渲染分辨率设为自定义并进行相应调整。例如,PSVR2 应配置为 68%。 目前,搭配 SteamVR 和 SteamVR OpenXR 使用的 PSVR2,其性能明显不如搭配 OpenXR Windows Runtime 运行的 HP Reverb G2。请注意,创建通用的VR性能和画质配置文件颇具挑战性,因为性能会因位置(例如城市)和VR视角的不同而有显著差异。 配置 游戏内图形设置:
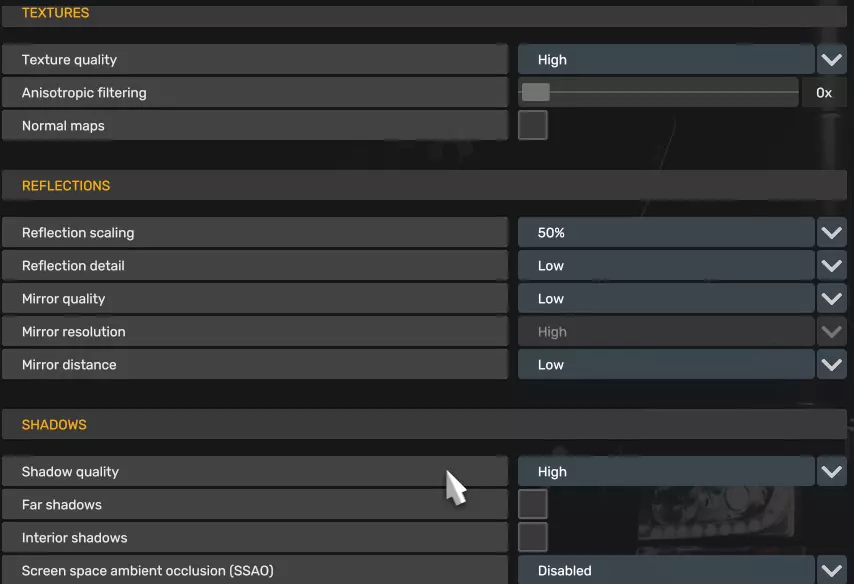
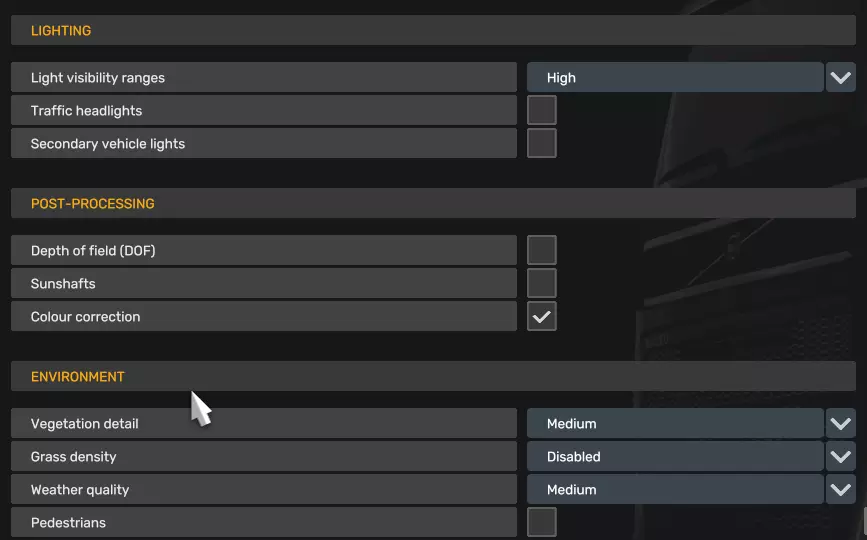
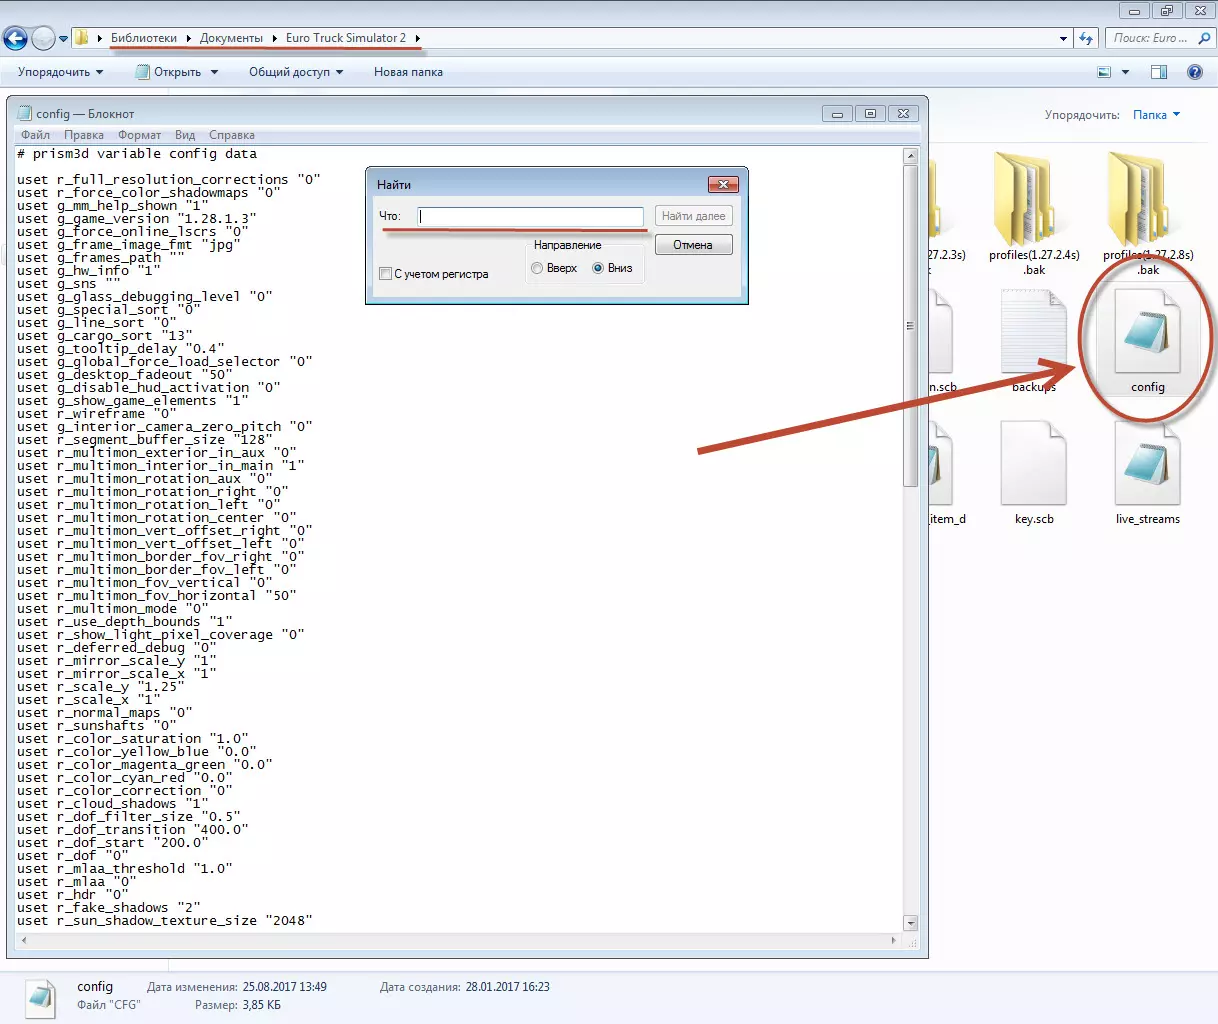
Resolution needs to be as low as possible or should be disabled though mirror mode! in config.ini - uset r_manual_stereo_mirror_mode "0" Optional (1): Consider increasing the graphical fidelity of mirrors by raising the mirror settings to "Medium." This change result in enhanced mirror visual quality but lead to more FPS drops, depending on the area and traffic conditions. Increase value with care! Optional (2): Lowering vegetation detail from Medium to Low will improve overall FPS performance, as fewer objects are rendered as the simplified trees (appearing almost in 2D) reduce CPU load. CONFIG.INI: Location: Documents Euro Truck Simulator 2 config.cfg uset o_openxr_threaded_submit "0" <- Disabled as threaded submission can cause stability issues. For Meta quest devices use uset o_oculus_threaded_submit "0" uset t_ignore_hmd_timing "1" <-- works great with turbo mode in OpenXR uset g_traffic ="0.5" <-- this will reduce the amount of traffic uset t_averaging_window_duration "0" uset t_averaging_window_length "0" uset r_buffer_page_size "50" <-- May reduce texture pop-ins and improve the smoothness of texture loading. Uses more VRAM. r_sun_shadow_texture_size "512" <-- decreases the texture size. Still looks oke. Optional to greatly increase pixel densityn(less jittery): uset r_manual_stereo_buffer_scale "1.4" <-- read below The default value is 1.0, but I find that 1.4 strikes a good balance between performance and quality. However, this can vary based on your GPU. I recommend adjusting it gradually, starting with 1.1 and increasing .1 from there. STEAM COMMAND-LINE: -openxr -nointro <-- for OpenXR devices -oculus -nointro <-- for Meta quest devices Or when using traffic mods (see Mods section): -openxr -nointro -mm_pool_size 16384 -mm_max_resource_size 50 -mm_max_tmp_buffers_size 1000 <-- for OpenXR devices -oculus -nointro -mm_pool_size 16384 -mm_max_resource_size 50 -mm_max_tmp_buffers_size 1000 <-- for Meta quest devices Please note that the recommended mm_pool size should be set to half of your available RAM. in my case, 16GB for a system with 32GB of RAM. These settings can help boost performance and reduce noticeable stuttering when using traffic mods. If you're not using any traffic mods, there's no need to enable it. VIDEOCARD Settings: NVIDIA 3D Settings: Anisotropic Filtering: 16X Texture Filtering - Anistropic Sample Option: On Texture Filtering - Quality to Quality Texture Filtering - Negative LOD Bias to Clamp Texture Filtering - Anisotropic Sample Optimalization to Enabled Virtual Reality prerendered frames: 2 <-- Can improve performance and frame rates but may increase latency. Test with both values (1 and 2) and see what works best for your setup. Disable FXAA Enable Antialiasing Gamma Correction RADION Software: Anisotropic Filtering: Set to 16X (Go to Graphics > Texture Filtering Quality, and set Anisotropic Filtering to 16X) Texture Filtering Quality: Set to High Set Wait for Vertical Refresh to Always Off FXAA: Disable (Go to Anti-Aliasing > Anti-Aliasing Method, and set it to Multisampling or None to disable FXAA) OpenXR Toolkit: This software provides a collection of useful features to customize and improve existing OpenXR applications, including render upscaling and sharpening, foveated rendering, image post-processing and other game-enhancing tweaks. However, as of 2024, support for OpenXR Toolkit is discontinued but still works. Enable upscaling using CAS on 80% Turbo mode: On (It appears to work correctly only with OpenXR Windows Runtime, not via SteamVR/Steam OpenXR) Optional Configurations Draw distance - Optional, but not recommended The draw distance in the horizon such as mountains are hard-coded into the game engine and cannot be changed. You can improve the Level of Detail (LOD) for traffic and parked vehicles by increasing the corresponding value in your configuration file. However, I haven’t tested the impact on performance, so proceed with caution and only adjust after extended testing without these settings enabled. uset g_lod_factor_parked "2.0" <-- parked cars uset g_lod_factor_traffic "2.0" <-- AI traffic (adjust between 1.1 and 3.0 as 1.0 is the default value) The following settings will adjust the Level of Detail (LOD) for trees, grass (note: grass is disabled in this guide!) and falling leaves. Increasing these values will put more load on the GPU and may lower frame rates. Do not use these settings if you are using ProMods. First lod class is for trees, the second lod class for grass (detail vegetation). Requires adjustment in game_data.sii I can create mods if people are interested, the includes below values. Let me know in the comments. Low Systems leaves_lod_start: (140.0, 110.0, 50.0) leaves_lod_end: (200.0, 160.0, 100.0) Default systems leaves_lod_start: (240.0, 410.0, 50.0) leaves_lod_end: (300.0, 460.0, 100.0) High system leaves_lod_start: (510.0, 610.0, 50.0) leaves_lod_end: (570.0, 660.0, 100.0) Ultra systems leaves_lod_start: (610.0, 710.0, 50.0) leaves_lod_end: (670.0, 760.0, 100.0) Mods in Use Warning: Avoid using ProMods or any other external map mods. These mods often introduce a large number of additional objects, resulting in significant FPS drops, sometimes as much as 30% or more. For the best performance and experience, it's recommended to stick with the vanilla version of the game. If you still choose to use ProMods, be aware of the huge impact on your FPS, depending on the area you are. https://steamcommunity.com/sharedfiles/filedetails/?id=3270559825 https://steamcommunity.com/sharedfiles/filedetails/?id=2942906812 https://steamcommunity.com/sharedfiles/filedetails/?id=1236032431 https://steamcommunity.com/sharedfiles/filedetails/?id=2877653830 https://steamcommunity.com/sharedfiles/filedetails/?id=774384307 Final Note Before you can determine if these settings work for you, you need to drive for at least an hour in various locations. You still experience FPS drops near and in cities, but they should occur less frequently (hopefully). In general, if you experience FPS drops in the range of 2-10 frames, you can adjust your settings to mitigate the issue. However, drops exceeding 20 FPS, such as those often seen in city areas, are typically not recoverable, even with all settings on low and scaling reduced to 25%. If you’re still having trouble reaching your desired FPS outside of cities and are using older hardware, try capping the FPS at half your headset's refresh rate. For example, 45 FPS for a 90Hz headset or 60 FPS for a 120Hz headset. I’ve tested this approach, and while it’s not the best experience, it’s better than dealing with constant stuttering. If you have a direct drive wheel, be sure to check out my other guide for tips on optimizing your experience. https://steamcommunity.com/sharedfiles/filedetails/?id=3365016077 American Truck Simulator Guide. https://steamcommunity.com/sharedfiles/filedetails/?id=3365890143