换一换
换一换 


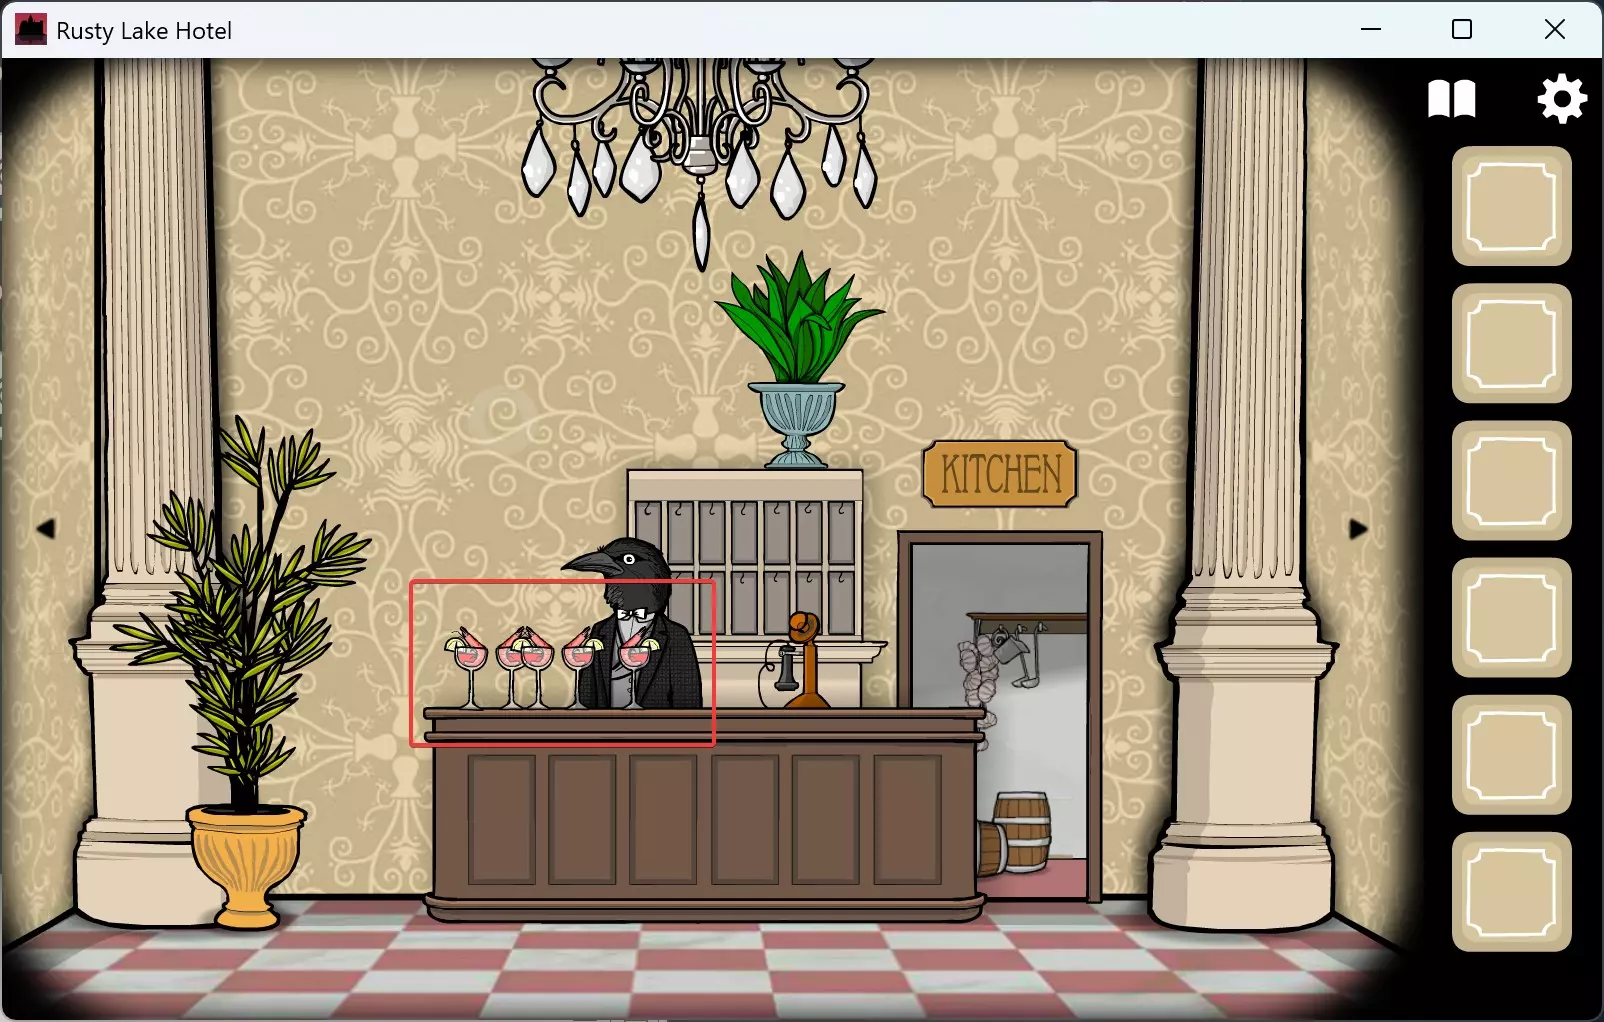
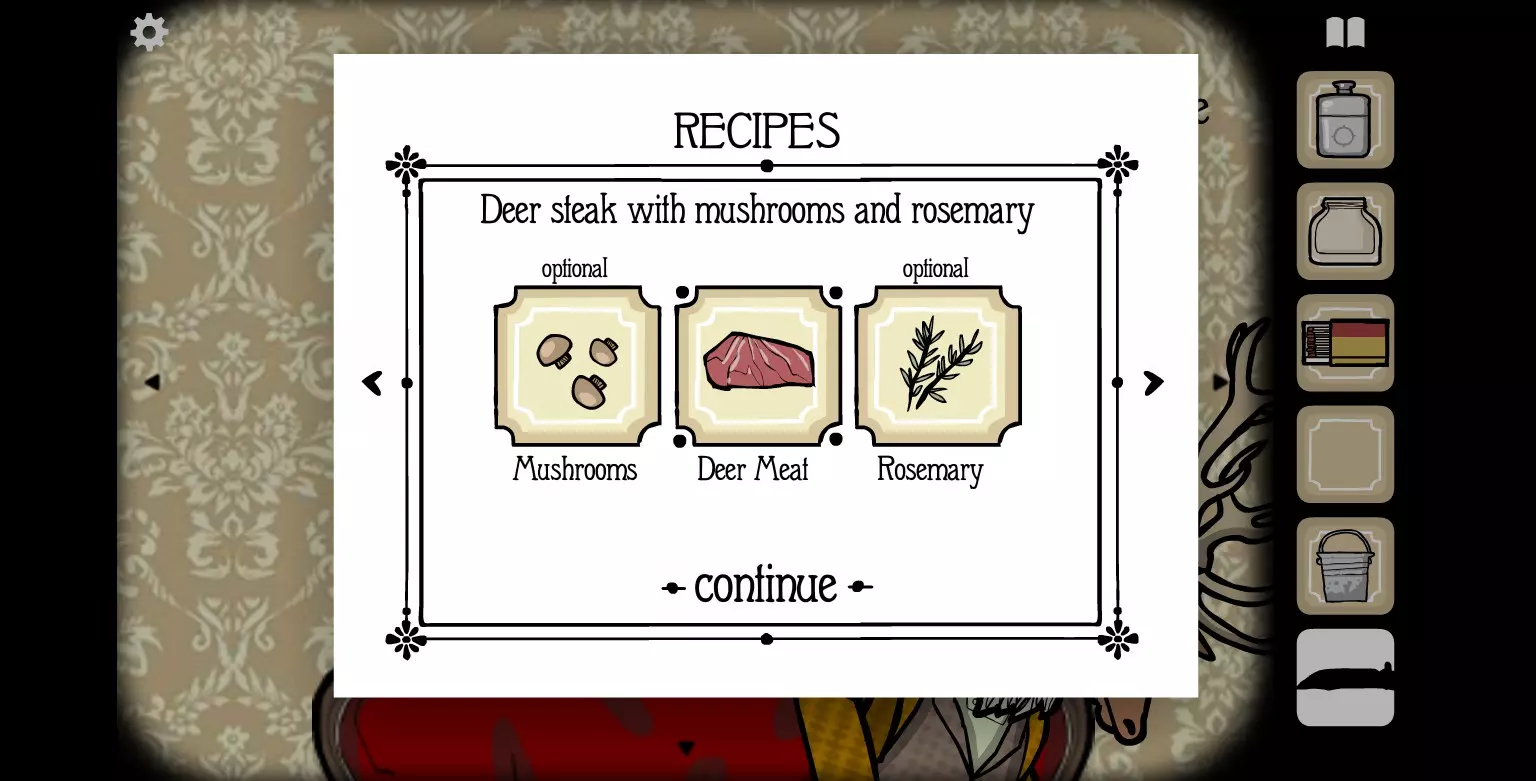
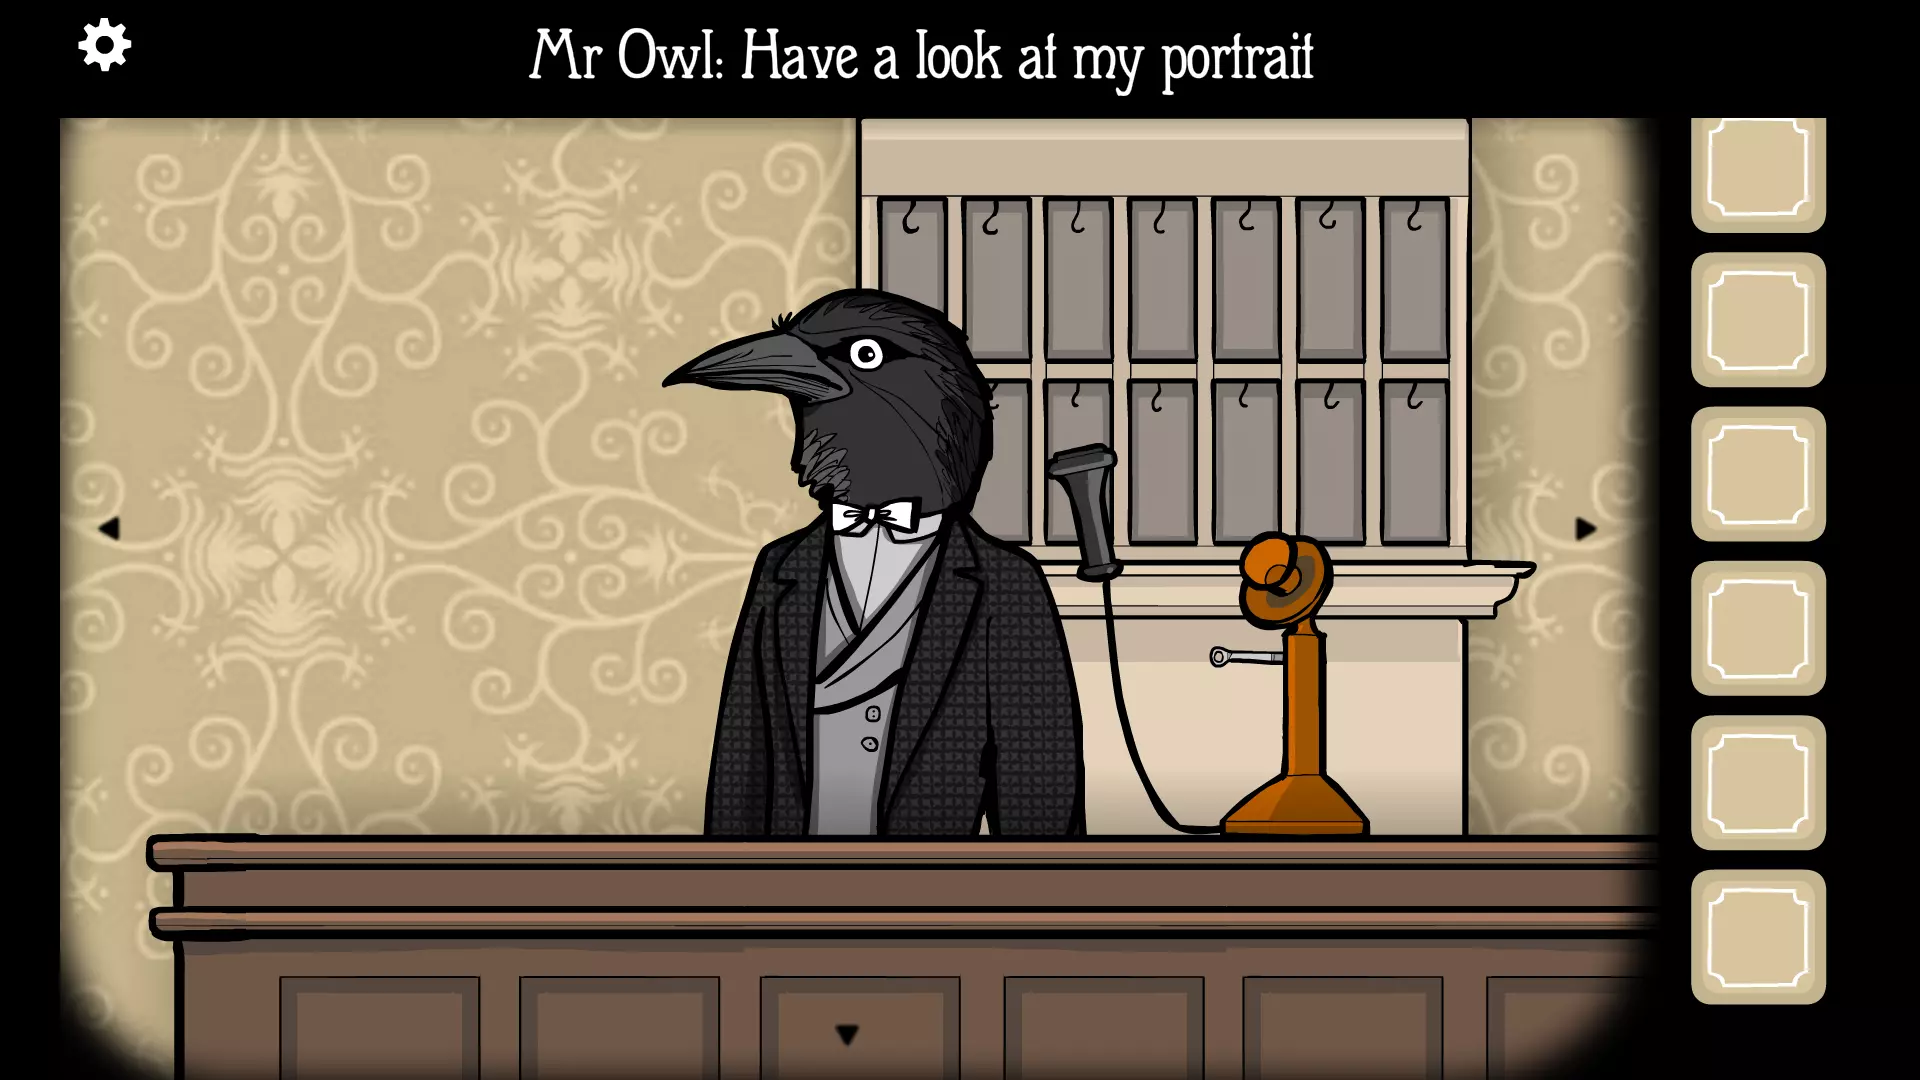
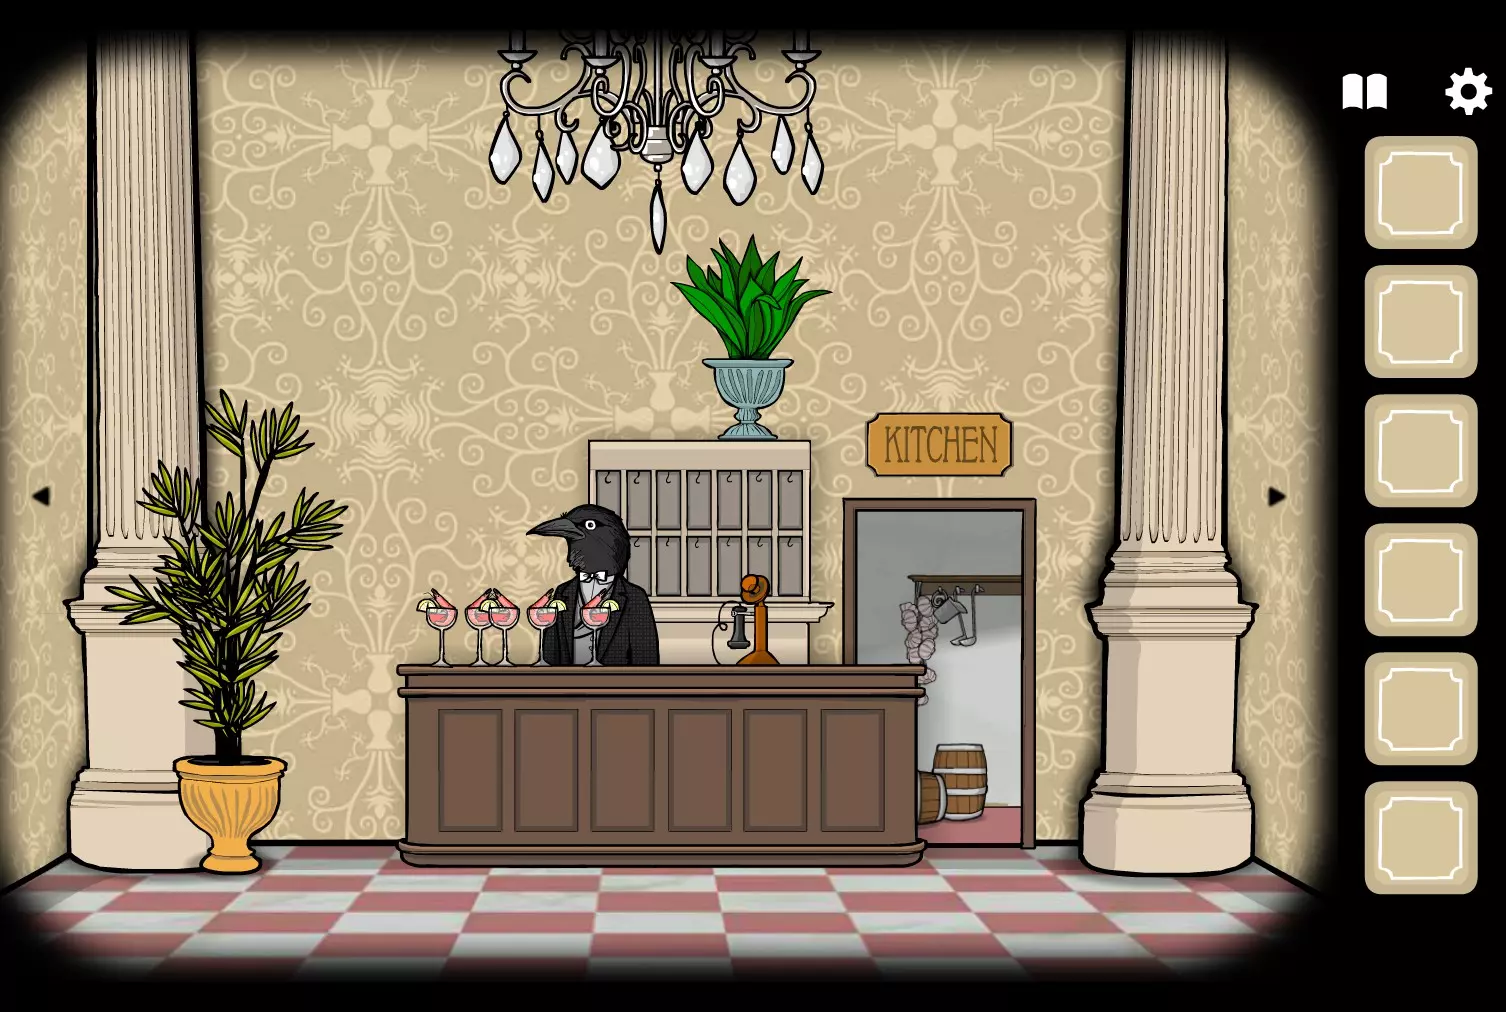
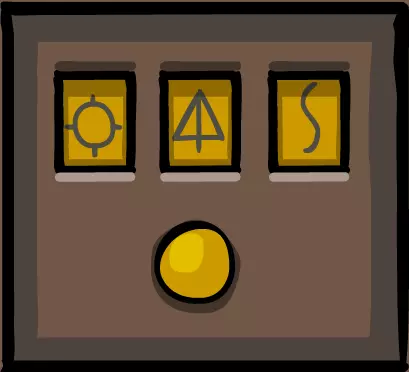
A guide to completing every level and unlocking every achievement in Rusty Lake Hotel. OVERVIEW !!! SPOILER WARNING !!! (obviously ._.)Greetings! This is a guide to completing all five levels and unlocking all 23 achievements. I'm getting better at writing these, but I'm still fairly new to this. Sorry if it sucks. I am writing guides for every game in the Rusty Lake franchise by following the recommended playing order. If you came from my Cube Escape Collection guide, links will be provided to the previous and next games when necessary. If you're just here for Rusty Lake Hotel, feel free to ignore these. A video walkthrough is planned in the future. Stay tuned! With that out of the way, let's stay a few nights at the Rusty Lake Hotel. I've heard the dinners are to die for. ROOM 1 - MR. DEER PREVIOUS GAME: CUBE ESCAPE: THE MILLThe LobbyGrab the five shrimp cocktails from the reception desk and serve one to each guest. Once night falls, pick up the phone. Finish the call and take the mushrooms from Mr. Owl's portrait. Achievement Get: Mushrooms Use the elevator and enter Room 1.Room 1Items: Take note of the stamp on Mr. Deer's research plan. Grab the key from behind the left end table and the canteen of vodka behind Mr. Deer. Turn around towards the door and grab the bucket on the table. Check the drawers for some matches and take the glass jar from the grinder. Puzzles: Find the values of each weight using the scale and put the code (3531) into the box by the windows to get a knife. Cut Mr. Deer's antlers and collect the blood in the glass jar, then fill the glass with blood and vodka. Interact with the antlers on the mounted deer skull until tabasco comes out of the nose and collect some in the empty canteen. Grab the rosemary on the left antler. Achievement Get: Rosemary Open the left window, tie the bucket to the rope, lower it and raise it back up to get some water. Unlock the cabinet and pour water into the containers. Move water between the three containers (10-5, 6-10, 5-6, 10-5, 5-6, 6-10, 5-6, 10-5, 5-6, 6-10) and take the eight deciliters of water. Open the right window, refocus until the butterfly is on the windowsill and attempt to stab it. Achievement Get: Albert's Way Refocus until it's on the sill again and catch it with the glass jar. Place the butterfly in the frame and interact with them in the right order using the code above the science equipment (from left to right, 213322) to get a seed. Plant the seed in the dirt cup, water it with the bucket, light the candle and cover the cup to get poisonous seeds. Replace the glass jar on the grinder and grind the seeds into poisonous powder. Put the eight deciliters of water and the poisonous powder in the lab setup, then light the candle to make poison. Put the tabasco and the poison in the glass and give the glass to Mr. Deer. Interact to make him drink it, then refocus to kill him. Take the meat. Achievement Get: Deer Meat ROOM 4 - MR. RABBIT The LobbyGrab the room key from behind Mr. Crow and insert it into the correct lock in the box below Mr. Owl's portrait (the orange stamp). Talk to Mr. Toad to prepare today's dinner. Talk to Mr. Crow and check his pocket to find a carrot. Achievement Get: Carrot Head up to Room 4.Room 4Items: Grab the ace of clubs hidden in the light above the bed and the knife in the drawers. Turn right towards Mr. Rabbit. Grab the hat on top of the chained box and the triangle stone behind the table with the glass box. Grab the two of hearts behind the sketch of a hand. Interact with Mr. Rabbit to get the five of clubs. Turn around and grab the four of diamonds behind the sword diagram. Refocus on the wall with the window until a figure appears (he takes a few seconds to show up). Achievement Get: Watch Closely! Puzzles: Use the knife on the sketch of Mr. Owl. Achievement Get: White Beans Play the cup game by Mr. Rabbit to get an eye (there's no set answer, it's randomized). Give Mr. Rabbit his hat and line up the flowers according to the painting to the left of the chained box (purple, red, white, orange), then move Mr. Rabbit's head a few times to get a key. Flick the lever on the box below Mr. Owl's sketch and stab the hand before it closes the box. Take the ring from it. Drop the ring in the glass box to receive a key. Place the four cards with the other two on the sketch and arrange them based on the symbols. The A5 sketch has two clues, the hand sketch has one, the Mr. Owl sketch has one and the Magic Show flyer has two. Make sure you look at the Magic Show flyer to see the stamp. Place the cards in order (from left to right and top to bottom, two, four, five, ace, eight, king) and move the five of clubs to get a key. Unlock the chains and open the box, place the triangle stone in its slot, close and reopen the door, place the eye in the skull, then close and reopen the door twice to find three swords. Place the swords in the correct spots based on the sword diagram (from top to bottom, 145) to kill Mr. Rabbit and take the meat. Achievement Get: Rabbit Leg ROOM 5 - MRS. PIGEON The LobbyPut the room key in the correct lock (the grey stamp) and prepare tonight's dinner. Turn around and watch a shooting star outside the window. Look around the room and interact with Mr. Bat twice facing the windows, reception, the dining room and the elevator. Refocus on the elevator wall and interact with Mr. Bat to get some potatoes. Achievement Get: Potatoes Head up to Room 5.Room 5Items: Turn left towards the radio and grab the key behind the projector. Grab the pieces of paper behind the radio and the brain diagram, taking note of the stamp as you do. Puzzles: Unlock the cabinet to get some corn. Give the corn to Mrs. Pigeon and take the new key from the plate after she's finished eating. Change the radio station in the correct sequence using the sketch next to the magnet contraption (starting from the leftmost station, RRRLRLLL) and grab another key. Take the wheel out of the projector and replace the two pieces of paper in the correct positions, then replace the wheel and pull the switch. Look at the table. Let the bug escape three times. Achievement Get: Can't catch me! Win the game by trapping the bug. Do not let the bug reach the edge of the board or you will lose. This puzzle may take a few tries, as the bug is very smart. Once trapped, grab the stag beetle and place it in the magnet contraption. Using the two diagrams next to the projector, input the correct code into the metal box (8613). Pull the lever several times and grab the blackberries that will eventually show up in the bird's mouth. Achievement Get: Blackberries Use the two keys to free the bird, then have him pull the lever by the magnet contraption. Push the button near Mrs. Pigeon's bath to kill her and take the meat. Achievement Get: Pigeon Wing ROOM 3 - MS. PHEASANT The LobbyGo over to where Mrs. Pigeon used to sit and grab the glass of white wine. Achievement Get: White Wine Put the room key in the correct lock (the red stamp) and prepare tonight's dinner. Head up to Room 3.Room 3Items: Turn right towards the clock and grab the photo liquid by the puppet stage. Interact with the small leaf at the top right corner of the clock. Achievement Get: Thyme Look at the flyer on the desk and take note of the stamp. Grab the dry glass plate from the desk drawers. Turn right towards the camera and grab the key on top of the empty frame. Turn right to face the window and check the drawers for a brush, a magnifying glass and some matches. Puzzles: Unlock the right cabinet and take the hat. Open the window, wait for a hand to show up and slam the window down to make the hand bleed and retreat. Achievement Get: Need a hand? Collect some of the blood with the brush. Give Ms. Pheasant the hat, then pull down the screen behind her and paint the "Lady in Blue" backdrop according to the paintings below the clock. Put the photo liquid and the dry glass plate inside the tray on the desk. Take the wet glass plate, put it inside the camera and take a photo. Take the photo and put it in a frame. Input the code on the photo into the box by the window to receive a crow mask. Puzzle Solution:
提示:你可以使用相框照片上的放大镜来更清晰地查看线索。 将面具交给雉鸡女士,并绘制“乌鸦先生”背景幕布,然后更换玻璃 plate 并拍照。将照片放入另一个相框中,输入显示的时间(3:30)以获得一个小擀面杖。与木偶舞台互动,直到一男一女出现。把擀面杖交给女性,让她击打男性,直到出现一把小斧头。把小斧头交给男性,让他击打女性几次,然后从她脖子上取下小火把。把火把给她,点燃火把并点燃男性。从他的残骸中拿起钥匙,打开左侧柜子获得猫头鹰面具。将猫头鹰面具交给雉鸡女士,并绘制“猫头鹰先生”背景幕布,然后更换玻璃 plate 并拍照。将照片放入相框,然后按从左到右、从上到下的顺序,将图案【5432343213】输入音乐盒。播放旋律以获取钥匙,打开抽屉顶部的盒子。拿起手枪交给雉鸡女士,更换玻璃板并拍照。拿走肉。 获得成就:Pheasant Breast 房间2 - 野猪先生 大厅 前往雉鸡女士曾经站立的位置,拿起那杯红酒。 获得成就:Red Wine 将房间钥匙插入正确的锁(棕色印章处),准备今晚的晚餐。前往2号房间。 房间2 物品:拿走野猪先生头顶上方的蜡烛。向右转,从马桶里拿起野猪粪便。检查抽屉,获取一些火柴和生菜。向右转朝门的方向,拿起柜子顶部的卫生纸。右转朝向窗户,摘下玫瑰花瓣以获取一些鸦片。留意给野猪先生的信上的印章。 谜题:根据抽屉上方画作上的图案,解开柜子谜题并拿到鸦片烟管。将烟管交给野猪先生,把鸦片放入其中并点燃。随着房间内烟雾渐浓,留意四周直到看到一片森林。每次看到乌鸦时点击它,然后将注意力集中在乌鸦先生的剪影上。从他那里拿到刀,并与他互动以返回2号房间。 成就获取:You know what to do! 解开猴子谜题的方法是按正确顺序点击猴子。每只猴子会敲响钹一、二或三次,代表你需要点击的下一只猴子。解开谜题(1232133123)后,从绿色猴子体内取出钥匙。用钥匙打开上锁的柜子,并用蜡烛照亮内部。解开第二个柜子谜题,拿到锤子。在砧板上用面包、生菜和野猪粪便制作三明治,喂给野猪先生,等它去 bathroom 时给它卫生纸。重复此过程(会有更多野猪粪便和卫生纸),等它结束后与马桶互动获取一些西红柿。 获得成就:Tomatoes 重复上述过程,但不要给野猪先生卫生纸。用锤子卸下战斧。将绳子完全放下,与斧头互动将其系在绳子上。升起斧头,给野猪先生卫生纸,然后用刀割断绳子。拿走肉。获得成就:Boar Ribs 房间6 - 猫头鹰先生 大厅 将房间钥匙插入正确的锁(黑色印记)并打开盒子,获得一盒锈湖雪茄。钥匙的顺序应为(35412)。 获得成就:Secret Rusty Lake Specialty 准备今晚的晚餐。前往6号房间。 房间6 转身并与蝙蝠先生互动。 获得成就:Just Hanging 与猫头鹰先生交谈。当他让你看时,查看房间周围容器中的五个立方体。再次开始与他交谈,当提示时查看白色立方体。点击森林中漂浮的所有八个立方体,然后将注意力集中在远处的电梯上。 获得成就:The Elevator 完成游戏后,点击【你的星星】按钮以获取一个秘密代码。这将在后续游戏中使用,所以现在不用担心。《逃离方块:锈色旅馆》已完成! 下一款游戏:《逃离方块:生日》 建议/反馈 我相信目前已经涵盖了所有内容。不过,如果有任何遗漏,或者你对本指南有改进建议,请在评论中告诉我。欢迎并强烈鼓励任何批评/帮助,即使是拼写/语法错误这样的小问题。