换一换
换一换 


造物 portalcraft(Artifact Portalcraft)是一种能够通过卡牌自然生成到手中的廉价材料,来构筑自己传说级终局王牌随从的套牌类型。 这意味着你并不需要获取(那么多)贵得离谱的传说卡牌,就能组出一套强力的制胜卡组,这让造物成为了整个游戏中最适合免费玩家(f2p)的套牌类型。 本指南将教你如何像一个劣质宇宙的贫民窟冠军一样玩这个“贫穷”套牌。 简介 以下是玩造物套牌的要点: 1. 打出卡组中的卡牌来拖延战局,并生成造物素材到你的手牌中。 2. 以不同方式组合手牌中的造物素材,生成各种能力和用途各异的造物工具。 3.打出能够将你手牌中的神器工具复制到场上的卡牌,这样你就能在使用这些复制体的同时,将原版保留在手中,以便在游戏后期合成神器王牌首领【杰作神器Ω】。 强烈建议在第8回合使用【拉尔米亚】,它最多可召唤3种不同神器工具的复制体,瞬间形成一支军队。 4. 如果仅依靠神器工具和牌组中的卡牌还无法赢得对战,就在第10回合将手牌中的神器工具合成为【杰作神器Ω】。 【杰作神器Ω】拥有10点攻击力、突进、守护和毁灭效果。它还无法被指定为目标,召唤时对所有敌方随从造成5点伤害,并为你恢复5点生命值。具体如何使用它,就需要你自己决定了。你会因为赢得游戏而哭泣(或者因为你没能用10攻的王牌怪兽击倒对手,然后对手在下一回合用1费带【毁灭】效果的蝙蝠炸掉了你的Ω)。 神器介绍 这里我们会解释每张神器卡的效果,了解这些卡牌的作用可能会提高你的胜率。你最好能记住并能随时回忆起每张卡牌的效果。 炮灰神器(0级)
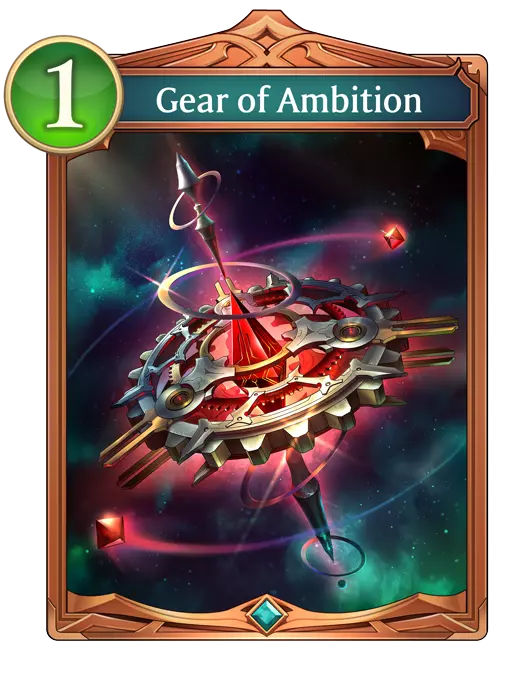

这些卡牌是初始神器,当你使用牌组中的部分卡牌时,它们会被加入你的手牌。红色的名为【野心】,蓝色的名为【回忆】。 它们是消耗1点费用的护符型卡牌,没有任何能力,实际上也无法在场上使用。它们拥有“神器”卡牌特性。 当与至少1张其他神器卡牌组合时,这些素材卡牌可以转化为我所说的“一阶”神器,此时神器开始变得有用,并且可以实际使用。 融合神器卡牌的方式与《影之诗》原作中的卡牌融合非常相似。将鼠标悬停在卡牌上,然后点击弹出的信息面板上的融合按钮即可。请注意,你只能将这些0阶卡牌相互融合,因为它们的融合素材要求是“具有神器特性且为护符类型”的卡牌;而它们本身是游戏中唯一同时满足这两个条件的卡牌。其他所有神器卡牌均为“随从”类型。 其他所有神器卡牌对融合素材没有护符类型的限制,因此一旦你超越0阶,就可以自由地将任意神器卡牌与其他神器卡牌进行融合。 一阶神器
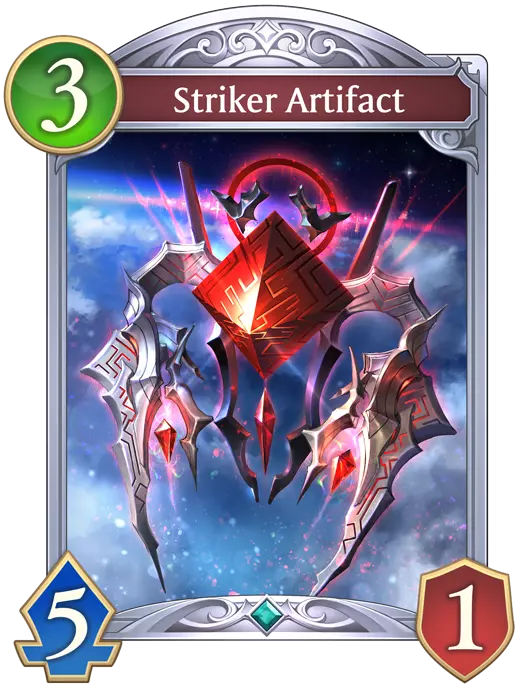
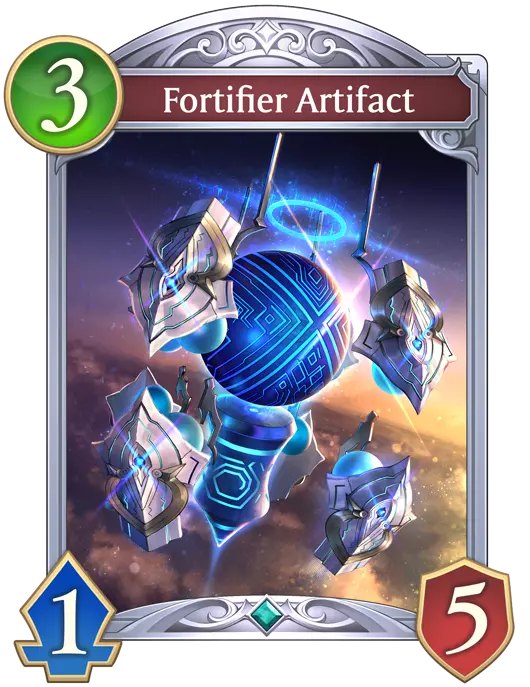
这是神器开始发挥作用并能在场上实际使用的阶段,但通常情况下,如果可能的话,你要避免立即打出它们,而是将其留在手中以合成更高阶的神器(不用担心,有卡牌可以将它们复制到场上,这样你无需打出就能利用它们)。 一阶神器是3费的随从类型卡牌,具有神器特性。 前锋神器由一个“野心”与任意其他神器融合而成。 前锋是3费随从,拥有5点攻击力和突袭,对于这样一张卡牌来说价值极高。 只需记住:野心对应红色→攻击→前锋。 强化者神器由一个“回忆”与任意其他神器融合而成。 强化者是3费随从,拥有5点防御力和守护。由于有很多卡牌可以无视随从的防御力将其消灭,所以它的价值不算太高,但能获得廉价的守护效果还是不错的。 只需记住:追忆是蓝色→防御→强化者 这些一阶神器非常实用,值得保留,它们分别可以在你需要一个低费3点费用、5点攻击力且具有突袭能力的打手,或是一个高价值的肉盾时派上用场。游戏经济系统的设计使得在一场对战中,你通常会获得足够多的额外【神器】资源,至少可以再制作1-2个【神器】并将其部署到战场上。因此,虽然你通常应该在手中囤积【神器】以合成【终极神器】,但如果你确实需要,并且手中实在没有其他可使用的牌时,也不必犹豫,直接打出这些【一阶神器】。 【二阶神器】
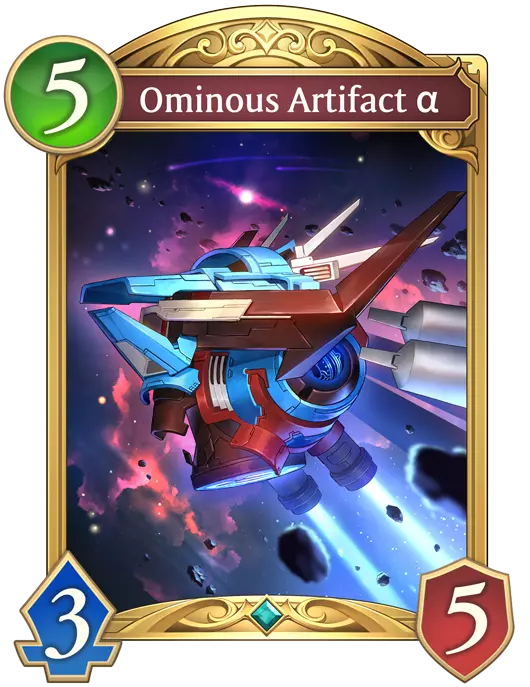

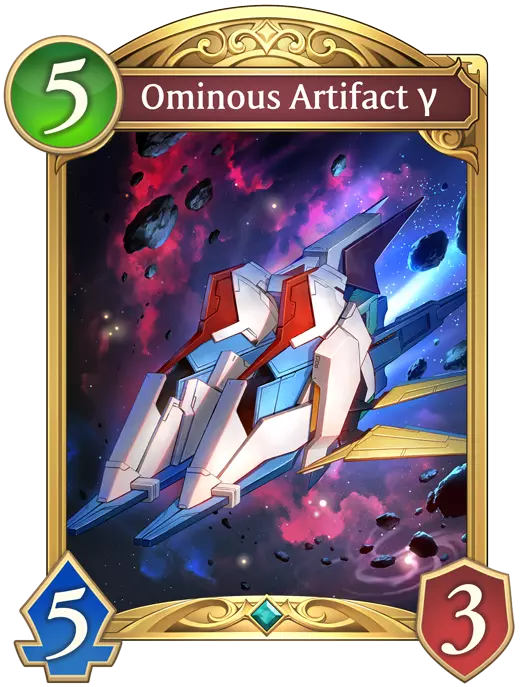
神器开始变得更加精致,并拥有不同的能力。 将1阶神器与总费用达到特定数值的不同卡牌材料融合,可将其转化为相应的2阶神器。 2阶神器是费用为5、具有神器卡牌特性的随从类型卡牌。无论使用的1阶基础神器是攻击型还是防御型,其合成配方都相同。 【不祥神器α(阿尔法)】是一张5费随从牌,当它在场上时,在你的每个回合结束时为你的领袖恢复3点生命值。 阿尔法是通过将1阶神器与一张或多张总费用等于1的材料融合而创造的。 由于你只能使用神器作为其他神器的融合材料,制作阿尔法最具成本效益的材料是任意一种单独的0阶消耗型神器。不祥神器β(测试版)是一张5费的随从牌,当它在场上时,在你的每个回合结束阶段对敌方首领造成3点伤害。 β通过将1阶神器与一个或多个总费用为2的材料融合来制作。 制作β最具成本效益的材料是任意组合的两个0阶消耗型神器(没有单张费用为2的神器卡牌)。需要注意的是,【Beta】的合成材料在所有2阶神器中占用的手牌空间最大,因为适合合成它的材料只有两张0阶素材卡;游戏中确实没有其他任何神器卡牌组合能达到2费,因此值得优先考虑合成这件神器,因为在对战后期手牌数量会受到限制,这使得这件神器相比其他神器更难合成。 【Ominous Artifact γ(Gamma)】是一张5费的随从小怪,当它在场上时,在你的每个回合结束阶段,会对所有敌方随从小怪造成3点伤害。 【Gamma】通过将1阶神器与一张或多张总费用为3或更高的材料融合来合成。制作伽马(Gamma)最具性价比的材料是任何1阶神器,它可以通过将两个0阶 fodder 材料简单组合即时制作出来。不要浪费3个 fodder,因为2个组合在一起效果同样好。 通常,你需要努力在手中各持有一张2阶神器卡牌,以便在游戏后期能够制作终极神器。 在考虑优先制作哪种2阶神器时,要根据当前对战中每种神器独特能力的紧急程度来决定。在决定制作顺序时,考虑你是否需要治疗、领袖伤害或群体清场能力。 终极神器
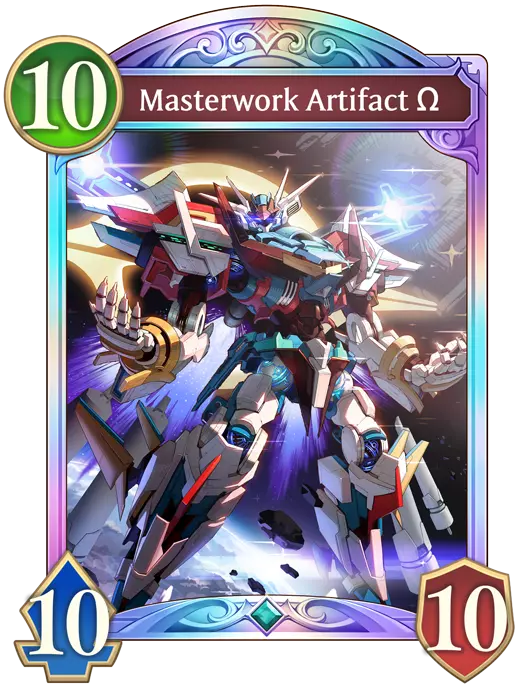
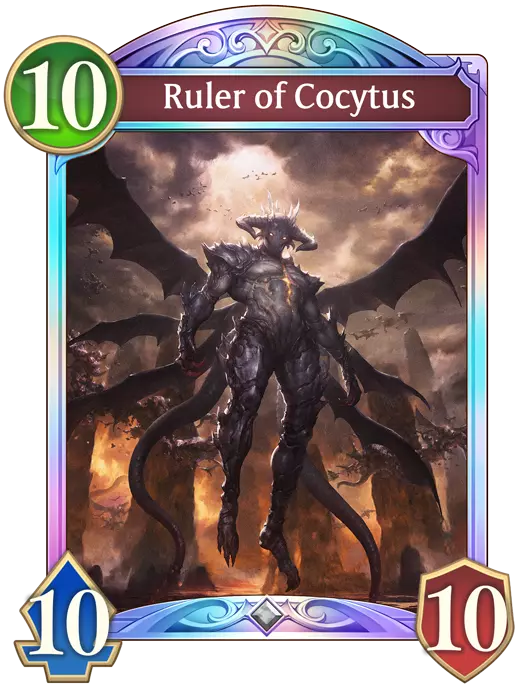
这就是你在整个游戏中一直努力的目标。 杰作神器Ω(欧米茄)是一张10费的随从类型卡牌,具有神器特性。 欧米茄拥有10点攻击力和防御力,以及风暴、毁灭、守护和光环(无法被敌方技能选为目标)。欧米茄在召唤时还会对场上所有敌方随从造成5点伤害,并为你恢复5点生命值。 欧米茄是通过将阿尔法与贝塔和伽马作为素材融合而成的。 请注意,只有阿尔法可以作为融合基底。贝塔和伽马的信息面板上没有融合按钮。你不必一次性将所有素材融合到阿尔法中,你可以选择逐个融合(例如,当你需要腾出手牌空间时),但要注意每回合只能对一张卡牌进行一次融合。另外需要注意的是,可能会将不合适的材料融合到阿尔法中,例如重复的贝塔和伽马卡牌。这样做会导致这些卡牌被消耗且不会获得任何回报。 从零开始合成欧米茄的总成本是11张0阶素材卡牌。在判断自己距离能够合成欧米茄还有多远时,记住这一点可能会很有用。 如果欧米茄都不能为你赢得游戏,那么就没有什么能做到了。 话虽如此,欧米茄并非无敌卡牌。它容易受到灾厄效果的影响,也会被非指向性破坏效果影响,例如神圣雷霆,该效果不会指定目标,而是会随机破坏攻击力最高的卡牌。此外,欧米茄也可能会被普通的随从攻击击败,不过作为回报,它会对任何未超进化的单位施加灾厄效果。和《影之诗》一贯的风格一样,最好尽快结束对战,如果你已经到了可以召唤欧米茄的阶段,就是现在了。这套卡组
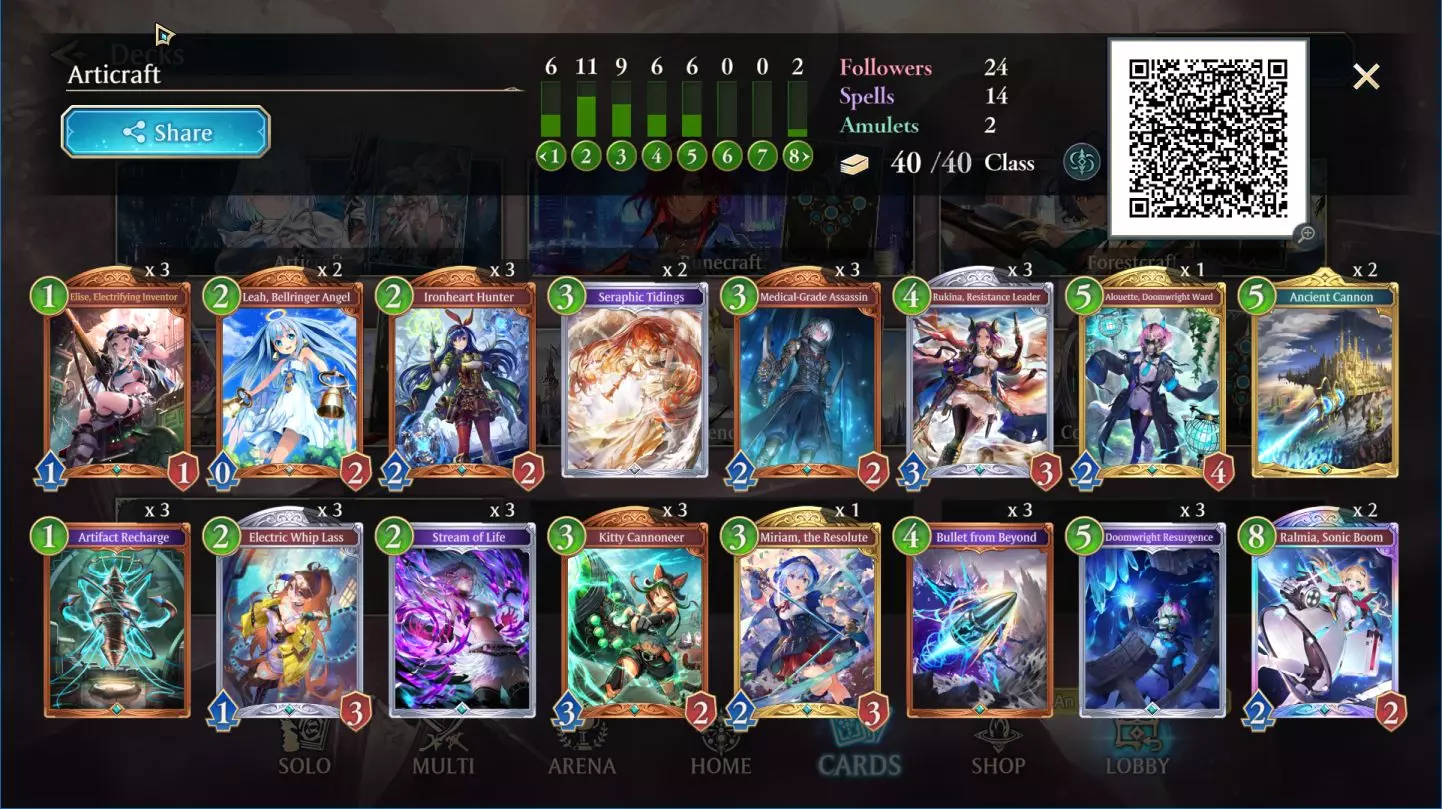
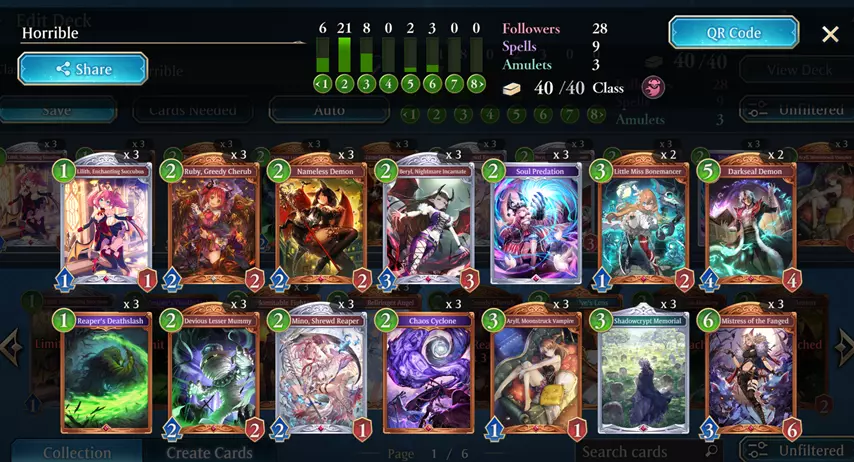
这是我廉价又简单的免费游玩《Artifact》套牌。注意到它只有2张传说卡牌了吗? 我看到那些爱抱怨的新手评论和留言说你需要10到12张传说卡牌才能赢;拜托,我这套只有2张传说卡牌的平民套牌已经在竞技场里反复大杀四方了。 说明:这套牌完全没有优化;它是一套平民套牌,由我能抽到的仅有的卡牌组成,也就是我能使用的全部卡牌,但它已经能在PVP中稳定获胜,而且真的不需要额外的传说卡牌就能做到。 各卡牌作用及原因 伊莉斯 - 能站场,提供前期压制,死亡时生成一个神器。生成神器卡牌的第二/第三划算的方式。神器充能是生成神器最划算的方式。花费1点魔力获得2个神器,无需多言。 莉亚死亡时会抽一张牌,并且拥有守护效果,能在你启动神器体系时减轻伤害。也可以考虑进化她来获得额外的抽牌机会。她是超越者职业为数不多的抽牌手段之一,而且,谁能抗拒那可爱的叮咚声呢?

Electric Whip Lass - puts an Artifact in ur hand on fanfare. While not the most cost effective way to generate artifacts, she is a good value card overall, being only 2 cost for 4 power (1 attack + 3 defense). (pretty much any card that can generate an artifact is going to be mandatory in this deck; there aren't so many of them that we can pick and choose which ones we want or not. That being said, if we did want to start dumping some cards in this deck to slot in others, Whip Lass is a strong contender to get cut) Ironheart Hunter -puts an Artifact in ur hand on fanfare. Decent 3 damage nuke on evolve. Stream of Life - puts an Artifact in ur hand and is a cheap 3 damage nuke. Seraphic Tidings - Leah and Seraphic Tidings are pretty much the only draw-power cardz that Portalcrap currently has access to, and thus are mandatory in any Buttholedraft deck where you don't want to run out of cards in ur hand. Consider replacing this card with Eudie for a more expensive bling-bling deck. Kitty Cannoneer - puts an Artifact in ur hand on fanfare and has 3 attack with Rush. For when you urgently need to hit something but don't have any evolution points. Medical Grade Assassin - What do you want? I ran out of Artifact archetype cards to put into the deck. Seriously though, this bronze-rarity card gives you a 1 cost 3/3 puppet with rush, and then buffs that puppet with bane on summon. Just think of it as a bargain-basement 4 total-cost insta-bane deployment system, and then Assassin kinda just sticks around after the bane is used up, being a 2/2 presence on the field. Miriam the Resolute - gives you 4 Artifacts for 3 cost (and 1 evolution point). Second most efficient way of generating Artifacts if you use an evolution point, 3rd most efficient if you don't. If i had more copies of her I would def' slot them into this deck, fo-sho. Rukina - puts 2 Artifacts in your hand on summon, and when evolved, summons a 5 attack with Rush beatstick (Striker Artifact). Since the Striker artifact is summoned to the field, it can't be used as fusion material in your hand, but hey, a friendly 5 damage beatstick with Rush is always welcome. 10 total rush attack damage for only 5 cost + 1 evolution point, very much worth. Bullet from Beyond - Nukes any targetable enemy, and puts 2 artifacts in your hand. Save this puppy for the big chonky enemies (unless you really, reaaally need the addtional fodder Artifact materials). Alouette - One of the few cards that will clone an Artifact from your hand onto the field. Try to think about which artifact might be most useful in the moment, and then play Alouette and evolve her to get that Artifact for free. Artifact cloned must be 5 cost or less. Tier 0 fodder artifacts cannot be cloned. Note that the Artifact you choose to be cloned doesn't necessarily have to be a 5 cost Tier 2 Artifact. Sometimes, a 3 cost Tier 1 artifact can be the best option. Don't be afraid to consider all the options, except for the 1 cost Tier 0 fodder Artifacts, they can't be cloned/summoned. Doomwright Resurgence - One of the few cards that will clone Artifacts from your hand onto the field. Clones 2 separate Artifacts, of at most 5 cost each (except Tier 0 fodder Artifacts), temporarily onto the field. Note that the only valid Artifacts that can be cloned by this card are any Tier 1 or Tier 2 Artifacts (Tier 0 are not playable, and Omega cost 10 and thus is too expensive for this card). Also note that you must have least two separate valid Artifact cards to be able to play this card at all. If you have only 1 valid Artifact card in your hand, the card will be unplayable until you fuse enough Artifacts such that you have at least 2 valid ones in your hand. Also, you can't pick the same Artifact card twice to clone. You must choose two separate cards. They can be the same kind of Artifact, they just have to be 2 individual cards. Artifacts cloned onto the field by this card will disappear after the opponents turn; this is indicated by the cracking and shattering around the edges on their card image on the field, so make use of them while you have them. A couple of 3 cost Tier 1 Striker Artifacts are serious contenders for this card, as they have Rush and can attack as soon as summoned without having to waste an evolution point on a temporary card. Make sure to consider all your options. Ancient Cannon - Permanent Amulet that does 2 non-targeting damage to a random enemy follower every time you fuse cards, plus gives you a fodder Artifact on summon. Since you're going to be doing a lot of fusing with this archetype, you can get a lot of good mileage out of this card played early. 5 cost is pretty expensive, so if there are any enemies on the field, make sure you have cards handy to fuse, as it will likely be the only big card you can play that turn. Avoid playing more than 1 of these, as having too many permanent fixtures on your field will block Ralmia's 3 summons later on. Actually, including only 1 Cannon in your deck is fine if you got something better, like an extra Alouette or Miriam. The only reason I have 2x Cannon in my deck is because that's what I pulled. If you do swap out Cannon, try to swap it with a different Artifact fodder generating card, as having too few in your deck will stall your Fusion. Ralmia - The only Legendary card in this deck. She makes an instant army by cloning up to 3 different Artifacts of 5 cost or less (except for Tier 0 fodder) upon summon. Additionally, when you super-evolve her, she gives +1/+1 to all Artifacts on the field, buffing your new Artifact army. Note that unlike Doomwright Resurgence, you don't actually need to have 3 separate Artifact cards to be able to play her, though if you don't have 3 different ones, her fanfare ability will be somewhat wasted as only the ones you are able to choose will be cloned. Her biggest downside is that she has only 2/2 damage/defense, making her rather a rather weak hitter. Still though, instantly summoning 3 different 5 cost Artifact cards is a value of 15 play points in a single turn, and can be game winning in of itself, and she can be played on turn 8 for 8 play points, two whole turns before you are able to summon an Omega, which costs 10 play points. Teh Mulligans and Teh Playing A Match The best card to keep and mulligan for at the start is Ancient Cannon. Sure, it cost 5 play points, but by the time you get to the point where can play it, you hand should be bursting with Tier 0 Artifact fodder ready to start fusing, and it'd be a waste if you didn't already have an Ancient Cannon to take advantage of all that fusing by then. Other good cards to keep on mulligan are all the cards that cost 2, or less, as they can be played early and often. Avoid drawing extra cards too much early on. Clogging your hand with excess non-fodder playables will cockblock the cards that add 2x fodder at a time to your hand, causing that fodder to be wasted before you can even start fusing to clear up the space. Save most of the draw-power cards for when you already have a good amount of fodder that can be fused for space, or after you've spent some Artifacts and need to replenish a now empty hand (ie, after you fuse and throw down Omega). Try to aim for being able to craft at least 1 each of the Alpha, Beta, and Gamma Artifact cards by the time Ralmia is ready to rock on turn 8. For further guidance on how to play the deck, see the Teh Introduction to this guide. Teh Tipz and Trucks It's best to hang onto the lowest tier of Artifact cards that you can manage for as long as possible (ie. until you need to make space in your hand for additional cards). Having the lower tier of Artifact cards readily available in your hand gives you the option to fuse them into higher tiers at any time, allowing you to choose which tools you want to fuse in order to suit the situation. Artifact's flexibility is probably it's biggest strength. Remember: there is no way to "un-fuse" artifacts. Also, certain cards have effects that trigger when you fuse. So just having the ability to fuse a bunch of times in hand can be useful in of itself. --- Congatulation! You are Artifact Expert!