换一换
换一换 


Do you feel your skill is not up to par with the size of your weapon? Are the cute hunters laughing at your performance? Then hunt in gloom no longer as this is the greatest Greatsword guide for utilizing your moveset to it's full efficiency. Here you'll discover advice about techniques that can be used in practice and not simply a pile of numbers on paper. All techniques, no cookie cutter damage builds. Featuring GIFs! Introduction to Principles of Greatsword Welcome to the most practical and fundamentally in depth Greatsword guide on this sector of the interwebs. Here in this guide I'll be discussing about the Greatsword's moveset and the techniques for all the moves; including advice I can give you on them. Whether you're already an experienced Greatsword user or someone who is interested in trying it out, I have both the utmost appreciation and respect for your dedication to learning of the art of the Greatsword. If you come out of reading this guide with at least one or two new techniques learnt, then I'll be all fuzzy with joy by the end of this. For the ease of reading this guide, I'll be splitting the moveset into categories based on the purposes of the moves. We'll be discussing each move in the same fashion of the example format below: Slashy Slash (The name of the move) Up, Up, Down, Down, Left, Right, Left, Right, B, A (The input of how to perform the move) (Here will be the description of what the move is and how we can use it. I'll be mentioning any techniques I'm aware of for this move and give advice or recommendations on how you can integrate it in your life as a Greatsword user.) The inputs will be in Xbox buttons as I play with an Eckbok controller myself and can't figure out a universal way for displaying controls to everyone without clogging up the inputs. For those using Dualshock or Keyboard & Mouse, please bear with me and check here for button translations. In order from Xbox to Dualshock to default KBM bindings: Normal Attack: Y / Triangle / Mouse1 Special Attack: B / Circle / Mouse2 Roll: A / X / Spacebar Special Action: LT / L2 / C or Mouse3 Guard: RT / R2 / Mouse4 Movement: Left stick / Left stick / WASD There's no frame data or statistics of the like here because compared to a fighting game, those are not mandatory to success in Monster Hunter. This is a guide created for more practical knowledge and not a guide meant to carry spreadsheets. In addition, there's no builds to be featured here, but I'll be talking about skills of intrigue in Section 4. With all that settled, let's begin without further ado. Section 1.1: Greatsword Starter Pack "This Greatsword of mine glows with an awesome power! It's burning grip tells me to defeat you!" Alright, let's get this party started. We'll talk about the bare essentials and foundation of the Greatsword moveset in this section. If you've played a good amount of Greatsword then this shall be familiar to you already, but it should be worthwhile to read as a refresher and for connecting back to with future sections. Overhead Slash/Charged Slash Y Any direction + Y with weapon sheathed (Overhead Slash) Hold Y (Charged Slash) Any direction + Hold Y (Charged Slash from sheathe) When in doubt, Overhead Slash. The Overhead Slash is your basic attack and the Greatsword's equivalent to an "All of the above" answer in a multiple choice exam. You can charge it up to three tiers of increased damage and aim your Greatsword during charging to land a hit on a monster or a specific spot on a monster. While charging you're able to cancel your slash by pressing B to perform a Tackle, an interesting move with purposes we'll discuss later. Poking with the Overhead Slash and resheathing immediately after to reposition until you find a good opening to do combos is a habit you're going to be doing often in your life as a Greatsword user. Remember, it's not retreating; you're just advancing in a different direction and playing cleverly. Nailing the charge timing is another habit you'll be doing a lot because releasing the button precisely when your hunter and Greatsword are flashing a bright red will grant you more damage. Successfully doing this will cause your Greatsword to make a vibrant red effect and sound. Mistiming and doing a premature or overcharged slash will cause your damage to be the same as the previous tier of charging (EX: Overcharging the third tier will just be the same as if you perfectly charged the second tier). If you're new to Greatsword, you'll have to figure out the timing by looking at your hunter. Eventually you'll know when to release the button from sound and feeling after a few fights. After playing for a long time, you could even do it from just muscle memory and intuition alone. (Using this move from sheathe is called Overhead Slash and using it while your Greatsword is drawn is called Charged Slash by the game, but I'll refer to both as Overhead Slash because they're basically the same.) Strong Charged Slash Y (Overhead Slash) > Any direction + Y Y (Overhead Slash) > Any direction + Y (Strong Charged Slash) > B (Strong Wide Slash) Another slash that continues your main combo after the Overhead Slash and has the same mechanics of charging and tackling. The Strong Charged Slash should be used after hitting the monster with your Overhead Slash when it’s still within range and not in the process of moving or attacking to warrant a resheathe. The damage of an uncharged Overhead Slash into Strong Charged Slash is nearly equal to a triple charged Overhead Slash without taking affinity into account. With this knowledge, it’s better to do the two-piece meal if you believe the monster might relocate quickly and hit confirm the uncharged Overhead rather then whiffing the triple charged Overhead altogether. This attack can be uniquely linked into Strong Wide Slash if you want to squeeze in some extra damage, but I don't recommend it because there are more appetizing alternatives to perform. Most especially appetizing being the extremely exciting move to be discussed below. Side Note: Apparently some people like to pull the stick back to perform and aim charged slashes. This works, however it seems strange to me because I personally believe pushing the stick forward is easier to aim your slash. Again, either method is fine and this is just food for thought for you to see which method you may prefer when practicing.
必须保持领先才能击中头部。 真蓄力斩 Y( overhead 斩击)>任意方向+Y(强力蓄力斩)>任意方向+Y 真蓄力斩。有很多类似的斩击,但这一个是我的。 真蓄力斩是我最好的朋友。它是我的生命。我必须掌握它,就像我必须掌握自己的生命一样。 我仍然觉得像BFS(Big Family-friendly Slash)或RYNO(Rip Ya a New One)这样的名字会很酷,但TCS(真蓄力斩)确实适合作为你招式集中的明星招式。它作为你招式集核心的地位由一个主要原因巩固:那些橙色数字带来的狂喜。真蓄力斩的伤害相当于我发现丈夫把我自制的千层面倒进垃圾桶后,我内心受到的伤害。这意味着你应该尽可能多地使用这个招式,以在狩猎中造成最理想的伤害。不过,由于真蓄力斩是一个漫长的两段式招式,需要前置攻击,因此并非总能安全地使出这一招。 不假思索地随意使用真蓄力斩,会让你像游戏中大多数女性 armor(盔甲)的腹部一样毫无保护。你有很多方法可以让真蓄力斩的释放变得安全,但为了简单起见,现在我只展示最常规的起手方式。
橙色数字高到可能会弄脏几条平角裤或浸湿几条内裤。 冲撞 在蓄力上述任何斩击时按B键。 A(翻滚)>Y(冲撞) B(横扫斩)>B(冲撞) 如果你认为《怪物猎人:世界》中最强、最耐用的武器是大剑,那你就错了。真正最强的武器是你的肩膀和纯粹的意志力。 在蓄力上述任何斩击时,你可以通过按B键来展现 dominance,直接用肩膀冲撞穿过怪物的攻击。原因是冲撞具有超级 armor 属性,意味着被击中时不会退缩或被击倒,但你仍会受到一定的伤害减免。这一点至关重要,因为当怪物咆哮或在冲锋过程中试图攻击你时,这个动作就相当于你的反转UNO牌。 Tackle的生效窗口在翻滚后持续约一秒钟。因此,你不必在撞击的瞬间精确翻滚,稍微提前一点翻滚仍能通过超级盔甲抵御攻击。请记住,在面对多段攻击时,这就像一把双刃剑——你不会因一次攻击就被击倒在地,而是会承受所有攻击,导致生命值瞬间蒸发(例如:爆鳞龙的爆炸伤害递增)。 Tackle的另一个重要特性是能够跳过蓄力斩,直接衔接真蓄力斩。若想了解如何利用冲撞取消来缩短使出真蓄力斩所需的时间,请务必查看后续的3.1章节。对于崇尚勇猛风格的大剑玩家而言,掌握冲撞技巧无疑是一项宝贵的能力。 额外提示:为大剑装备生命强化是个不错的选择,这得益于斩击的高额单发伤害。冲撞同样会受到生命强化的影响,因此,完全蓄力的冲撞带来的生命回复,再加上其本身的伤害减免效果,能提供出色的伤害缓解能力。
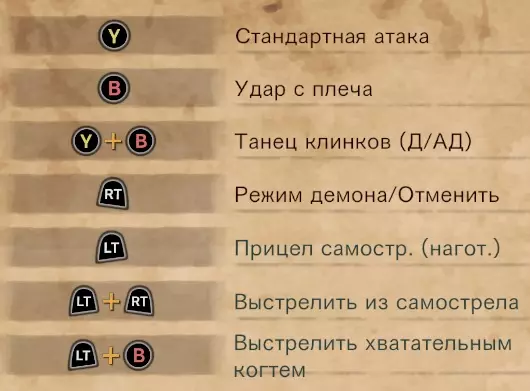
哦?你在靠近我吗?你非但没有逃跑,反而径直向我走来? 一些自用的懒人缩写 为了节省篇幅,避免输入内容过于杂乱,我们将对后续部分中使用的关键术语进行缩写。 GS - 大剑 OS - overhead slash( overhead slash) SCS - 强力充能斩 TCS - 真充能斩 1.2节:侧方小队斩击 “大剑的构造如同牛排馆般厚重,但操作起来却像小酒馆一样灵活!” Y键专门用于施展你招式集中的常规动作,而B键则绑定了更多实用型斩击。这些招式更多用于特定的战斗场景,而非以造成伤害为主要目的。在精通一种武器时,充分利用你技能组中的每一个部分都是值得的。横斩 B Y(快速切换)>B Y+B(上挑斩)>B,反之亦然 就像你朋友那据称住在国外的配偶一样,横斩并不存在。横斩在大剑的日常玩法中完全不会用到,可以说是列表中最没用的招式,毕竟为什么不用快速切换呢?你可以选择用快速切换或接下来的上挑斩来形成循环连招,但在允许你这么做的开场阶段,真蓄力斩是好得多的选择。横斩和上挑斩都不安全,所以把它们组合起来会让你陷入危险境地,其频率堪比睾酮素遇上糟糕决定。我能想到的这个招式的唯一用途,就是利用其较大的横向攻击范围而非纵向范围,来逼退小型怪物。这些小型怪物包括在瘴气之谷探险时不断让你麻痹的讨厌的眩鸟,以及远古鹿首精的贾拉随从。 上挑斩 Y + B Y(拔刀状态)> Y + B Y(拔刀状态)> 任意方向 + Y(踏步斩)> Y + B 好的,发挥你的想象力。你正在进行一个历战麒麟的救援任务,只剩下一次猫车机会,而你的弓箭队友被一道 stray 闪电击中,瞬间陷入麻痹状态。与眩晕不同,普通攻击无法将猎人从麻痹状态中打醒,但你还是尝试使用各种招式来救他们。最终你使出一记升龙斩,在另一道闪电劈中地面上的弓手之前,将其挑至空中。你救下了弓手,但自己却因即将到来的闪电攻击而猫车,导致任务失败。虽然狩猎没有成功,但至少你最终赢得了那位弓手的心。 升龙斩是一种具有类似锤子二级蓄力攻击或斩斧Y+B动作特性的招式,这意味着范围内的友方单位会被击飞至空中。这一技能实用性很强,你可以像上述例子那样拯救陷入睡眠或麻痹状态的队友,甚至创造出那些值得剪辑成集锦的团队骑乘时刻。当然,你也懂的,还能在狩猎结束后的60秒内整蛊队友。强烈不建议将上挑斩用于进攻,因为它慢得令人难受。你可能会觉得这招对付那些烦人的飞行翼龙和巨龙会很有用,但它的起手和收招动作都异常漫长,极不安全。你甚至可以跑回营地换一把长柄武器(呃),用它把翼龙从天上打下来的速度,都比大剑用上挑斩进行对空攻击要快。 补充说明:上挑斩的判定框有个奇怪但有趣的特性。向前挥砍后,它会向后挥动,并击中你七点方向的任何怪物。这并非完全180度向后,更像是朝你下方屁股的左斜方向。这算不上什么革命性的发现,但对于经验丰富的狩猎笛玩家来说,这是一个熟悉且可能有价值的技巧。
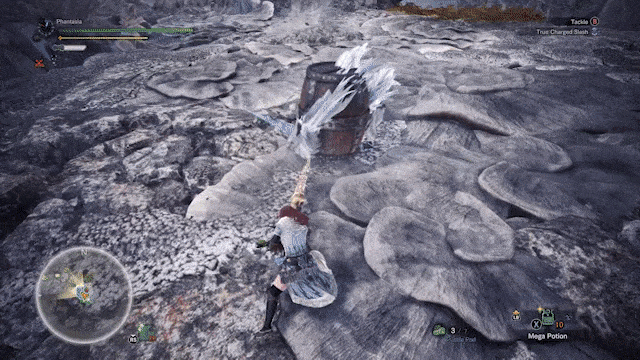
光谱酱展示了空中体术的价值。谢谢你,光谱酱,非常酷。 跳跃横斩(JWS) 使用冲撞后,按下B键即可施展跳跃横斩。 B(横斩)>B(冲撞)>B 说到招式的安全性,我们来聊聊跳跃横斩。施展冲撞后,你可以直接接真蓄力斩,但要是当时这么做太危险怎么办?你当然可以翻滚躲开,但那样岂不是错失了输出机会?这时跳跃横斩就派上用场了。这是一个非常快速的单段攻击,猎人会向前挥砍并对路径上的任何目标造成有力一击。它不消耗耐力,伤害也相当可观,但先别激动,还有更棒的。还记得取消蓄力斩时蓄力会延续到冲撞吗?现在蓄力甚至可以从冲撞进一步延续到跳劈。虽然这不是完全蓄力的真蓄力斩级别的伤害,但相当于未蓄力的真蓄力斩伤害。考虑到跳劈更安全,且使用后能让你立即进入新的位置,这一点非常不错。
在你的屈辱中消失,然后去零售店买个新的吧! 1.3节:防御性进攻 “不是我被困在这里和这个怪物在一起,而是这个怪物被困在这里和我在一起。” GS在进攻端是一股不可阻挡的力量,但在需要防守时也能成为坚不可摧的壁垒。与冲撞和跳跃宽斩类似,GS还有其他多用途招式可用于进攻或防守。 侧击 在任何蓄力斩或强蓄力斩后不倾斜方向按Y 跳跃宽斩后按Y 冲撞后按RT+Y 由于伤害较低,且大多数人会直接进行下一次蓄力斩,侧击几乎成了一个被遗忘的招式,但它仍然有着重要的用途。侧击的操作方法是:在普通蓄力斩或强蓄力斩后,不倾斜摇杆按Y即可使出。这比持续挥砍更快,这很实用,因为当怪物躲开你的攻击时,你无需翻滚就能更快地恢复。 使用侧击的另一个好处是耐力管理。冲撞会消耗大量耐力,之后立即翻滚会导致耐力大量流失。侧击能让你的耐力有时间恢复,使你有机会再次翻滚或奔跑而不会耗尽耐力。格挡 右摇杆 右摇杆 + 左摇杆 + 任意方向倾斜右摇杆(改变方向) 你已经了解了 tackle(冲撞)惊人的防御能力,但当你没有足够时间准备冲撞,或者在角落里被怪物连续击晕、处于极其不利的位置时,该怎么办呢?答案就是格挡。按住右摇杆,你可以像使用长枪一样举起大剑来抵挡怪物的攻击。 需要注意的是,格挡会消耗耐力并造成少量生命值损伤,因此在耐力不足时格挡是不可取的,而且某些多段攻击的怪物招式甚至可能致命。格挡攻击还会影响大剑的锋利度。根据你的锋利度数值,怪物的一次强力攻击就可能直接打掉一整条锋利度槽,因此请谨慎使用此招式。你主要应将格挡保留用于以下情况:无法及时使用冲撞回避,或是在倒地起身时正处于怪物的攻击范围内(例如:雌火龙的直线冲撞攻击)。 另一方面,格挡咆哮和震动不会消耗锋利度,因为这些本身不会对你造成伤害(除了轰龙和黑轰龙的咆哮)。同样,这是在你没时间准备冲撞回避,或是怪物咆哮/震动的前兆难以辨识时的备用选项。某些怪物如尸套龙、恐暴龙以及灭尽龙/歼世灭尽龙拥有无法通过普通翻滚回避的长时咆哮。如果你的装备上没有装备【回避性能】技能,或者没有准备好【回避衣装】来增加翻滚的无敌帧时间,那么格挡会很方便。 额外提示:当你在短时间内被怪物多次击倒时,就会进入眩晕状态。如果你已经被击倒两三次,并且知道自己即将眩晕,那就格挡并重新调整位置以喘口气。
干得不错, donkey kong。你前投后的择现在已经是过期香蕉了。 踢击 RT + Y RT(格挡)> Y 来猜个谜:什么东西被玩家认为是游戏里多余的部分,还总被开玩笑说没用?如果你猜的是导虫,那答错了,正确答案是踢击,但这么说好像也没完全错。 大家都开玩笑说踢击是个没用的梗技能,但说实话,尽管它是大剑招式里伤害最低的,却有其实用性。它是你最快的招式,因为不需要先做其他动作(好吧,严格来说要先格挡,但你懂我意思),而且起手和收招都比任何斩击都快。这能让你快速将被击晕的队友打醒,且无需通过不安全的挥砍动作使自己陷入危险。不过这还不是全部,因为关键在于: 踢击可以衔接其他招式,让你能够快速使出连招: RT(格挡)> Y(踢击)> Y(冲撞) 注意到冲撞了吗?从这里你可以进行如下操作: RT(格挡)> Y(踢击)> Y(冲撞)> 取消蓄力横斩冲撞 > 任意方向 + Y(蓄力斩) RT(格挡)> Y(踢击)> Y(冲撞)> B(跳跃武器技能) 使用RT(格挡)> Y(踢击)> Y(冲撞)这一招式,你可以在站立状态下直接冲撞穿过怪物的咆哮,而无需准备蓄力斩,也不必指望怪物在你蓄力斩的过程中咆哮。踢击后的衔接冲撞可作为取消的输出技能,因此你可以接任何你想用的招式。
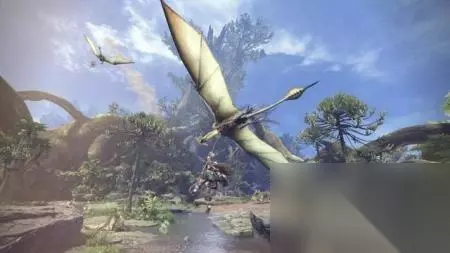
使用大剑的人并非勇敢,只是无法感受到恐惧。 1.4节:空中技巧 “是鸟!是飞机!是一只背上骑着大剑猎人的雄火龙!” 遗憾的是,这里没有空中狂欢、登龙斩和跳跃取消。尽管大剑在空中的动作模组比较常规,但它确实有一些空中攻击技巧,这意味着我们需要对这些空中技巧进行分析。 空中蓄力斩 空中按Y键释放。 如何进入空中? - 从悬崖跳下 - 朝着可反弹的墙壁奔跑 - 装备滑翔衣装时下落 - 滑行时跳跃 - 被队友击飞 - 跑进热喷泉 哦,如果你在冰原之前有过大剑使用经验,那么你肯定知道空中蓄力斩的重要性。这本质上是一个空中释放的操作系统,因此你也可以快速蓄力增加这一斩击的伤害。不过这个招式的亮点在于,你可以通过蓄力斩击来改变自身方向并在空中获得 momentum(动量)。考虑到这一点,你可以通过跳下平台并蓄力斩击反复上下回到平台来滥用这一攻击,就像 cowgirl(女牛仔)一样。这是一个非常破坏平衡的技巧,在《怪物猎人:世界》本体中拥有独特的玩法,直到《怪物猎人世界:冰原》中将其伤害削弱到合理水平。 你仍然可以使用这种平台策略,但由于其当前的伤害状态,最好将其用于快速轻松的骑乘。此外,空中杂技技巧还是留给操虫棍比较好。
直面挑战,全力以赴!挺起胸膛,做到最好! 蓄力上挑斩+下刺突 滑行时按Y键(蓄力上挑斩)> 空中按Y键(下刺突) 下刺突后可接Y键或B键释放强力横斩 沿斜坡滑行时可施展蓄力上挑斩,与普通上挑斩类似,会将路径上的友方单位挑飞。滑行时可蓄力以造成更高伤害。蓄力上挑斩后可在空中接下刺突,这是一种独特的多段骑乘攻击。由于下劈突刺的多段攻击特性,你必须非常精准才能完全命中这一招,因为其判定范围就像一个拥有两把震动牙刷的修女一样不可靠。 下劈突刺后,你可以衔接地面的强力横斩,然后像往常一样继续使用SCS或横斩。值得注意的是,蓄力上挑斩的蓄力可以转移到下劈突刺和强力横斩中。 虽然这个过程看起来很精彩,但我个人更喜欢在滑步时跳跃并使用空中蓄力斩,因为这样更快更简单。 第二部分:冰原趣事 “你裤子里藏的是大剑吗?还是说你只是很高兴能痛扁灭尽龙?”《怪物猎人:世界 冰原》为每种武器都新增了招式,而大剑无疑获得了一些实用的新技能。这些技能与冰原的大剑新玩法完美融合。 抓钩武器攻击: 当抓钩挂载在怪物身上时按Y键发动。 有谁和我一样觉得用大剑刺穿怪物,再用体重将其猛砸向地面的动作既硬核又残酷,同时还非常酷?抓钩武器攻击用于软化怪物部位以造成更多伤害,由于大剑是重型武器,只需一次攻击就能完成软化。不过,大剑的抓钩武器攻击与其他武器相比速度较慢,因此你很可能需要等到怪物流口水(虚弱状态)时,或者牺牲一次真蓄力斩的机会来进行软化。这样做更为可取,因为你的队友会感谢你造成的额外伤害,而且当你即将到来的真蓄力斩造成超过一千点伤害时,你也会感到高兴。 多位读者发私信要求详细说明某个爪钩机制。虽然我觉得这并非大剑独有的特定战术,但为了内容完整,我还是决定补充进来。 额外提示:首次对流口水的怪物使用爪钩时,怪物流口水的持续时间会重置。这在社区中被称为【clagger】,即“爪钩 stagger”的缩写。clagger 能让你即使较晚用爪钩骑乘怪物,也能确保完成大剑漫长的爪钩攻击。如果正在攻击的部位已经软化,你可以通过按下跳跃/翻滚键下落,并使出几次强力的蓄力斩来利用这个时机。这并非仅适用于大剑的技巧,其他武器也可以使用,这意味着如果队友触发了怪物的失衡硬直,你就可以准备并轻松打出帅气的真蓄力斩。
它们狂怒、残暴、毫无怜悯。但你,你会比它们更甚。撕裂,直到一切结束。 真蓄力斩(强化) 施展真蓄力斩时,若第一击命中,后续攻击将造成额外伤害。 你可能会觉得卡普空会给这个改良招式起个像“真蓄力斩(超级涡轮重制版)”之类的花哨名字,但我觉得“真蓄力斩(强化)”这个标题也还行。这算不上新招式,更像是个新机制:真蓄力斩(强化)能让真蓄力斩的第二击在第一击命中后造成更高伤害。这使得现在命中真蓄力斩的两击都很重要,不像本体游戏里第一击几乎无关紧要。成功触发时,会有剧烈的特效和音效,并伴有明显的伤害加成。额外获得的伤害提升让真蓄力斩(TCS)的橙色伤害数字达到了新高度,现在最终一击甚至能突破2000+。这简直可以说是相当可观了。 这个新添加的特性看起来完全是正面的,尤其是当你完全蓄力真蓄力斩时。不过,《怪物猎人:世界 冰原》(Iceborne)削弱了未蓄力和单段蓄力真蓄力斩的伤害(很可能是因为接下来的招式),这表明真蓄力斩(威力型)(TCS (Power))是为了弥补这部分伤害损失而设计的。 投射器爆发 在储备有投射器弹药的情况下,使用特定斩击攻击后按下LT键。 示例:Y键(拔刀斩)> LT键(投射器爆发)> 任意方向+Y键(真蓄力斩) 这才是重头戏啊。你是否曾遇到过怪物在地上扭动,头部差点躲过你的真蓄力斩(TCS),或者遇到过尸套龙(Vaal Hazak)的头把你引向错误方向的情况?投射器爆发就是解决所有这些问题的便捷方法。使用投射器爆发可以让你直接衔接真蓄力斩,并且能在发起攻击前调整自己的方向。 没错,投射器爆发是另一种衔接真蓄力斩的方式,既快速又安全。只要你储备了投射器弹药,就可以从多种斩击动作衔接这个招式,无论你以何种动作起手,都能衔接真蓄力斩。这让你在机会出现时拥有两种选择。当你需要承受攻击,或者没有弹药和投射器爆发时,使用回避。如果你需要改变方向或希望节省耐力,使用投射器爆发。 说到缺乏弹药,如果你找不到石头来进行投射器爆发,你总是可以开始扔你的粪便。真的,你完全可以使用 dung pods(粪便玉)作为投射器弹药的替代品,对一个区域的怪物使用投射器爆发。我们的进化祖先很聪明,知道自己在做什么。 额外提示:对非免疫的怪物使用具有击退效果的弹药(例如:穿刺弹、水晶爆发弹、荆棘弹等),可以创造一个小小的机会来进行攻击,或者在连招过程中避免被击中。

Hehe, and that one was left-handed! Section 3.1: Straight Up Stylin' "Three words. 16 letters. Say it, and I'm yours." "True Charged Slash." The GS playstyle revolves around getting to the TCS and there are plenty of methods and strategies to doing so. These are probably not all the combinations you can employ, but should be most of the ones you can make use of. *Any combination designated with an asterisk involves Slinger Burst, an Iceborne exclusive move that requires slinger ammo to utilize. Bread and Butter Combo Y (OS) > Any direction + Y (SCS) > Any direction + Y (TCS) Replace any of the former two attacks to get quicker combinations like: Cancelled OS Tackle > Any direction + Y (SCS) > Any direction + Y (TCS) Y (OS) > Cancelled SCS Tackle > Any direction + Y (TCS) Cancelled OS Tackle > Cancelled SCS Tackle > Any direction + Y (TCS) Ideally if the monster is knocked down or disabled temporarily, you'll want to reposition to a favourable weakpoint. Then from here, you should use a double tackle cancel to shortcut into TCS the fastest before the monster recovers. If you're already in a good position like the head or tail, then using any of the other combinations to incorporate more slashes and charges for more damage is optimal. Maybe even using all three fully charged slashes if you're feeling lucky. In reality, charging is a key factor you'll have to fine-tune yourself for the scenario at hand. An example is deciding between going for the fully charged TCS at the end or simply doing all three uncharged slashes for comparable damage with the insurance of the first two hits landing. Figuring how to accomplish optimal damage with your BnB combo is made easy by asking yourself mid procedure the good ol’ five Ws + how. Who: Who in the team is wounding the monster for more damage or have I wounded the monster before going for full damage? (assuming it isn’t tenderized already) What: What moves can I string together to land the TCS in time while doing the most damage? Do I need to swap some slashes for tackles in this situation? When: When is a good time to start setting up the TCS? Is the monster knocked down, under status aliment or trapped? Or maybe it's just being a plain doofus? Where: Where is the monster in correlation to me? Do I need to close the gap and what part of the monster should I go for? Am I feeling like ravishing the top or bottom today? How: How much charging should I apply for each slash to maximize damage? Why: Why am I here? Why am I brutalizing this animal? Why am I wielding this big stick? This seems like a lot of things to take in and contemplate in the heat of the moment, but whether your brain processing speed is an i3 or i7; you'll have to invest many hours and hunts with a variety of monsters and situations to discover the best solving combinations. Only then shall you be postulating the possibilities on those bad mama jammas with the greatest of ease. Slinger Burst Route A Y (OS) > LT (Slinger Burst) > Any direction + Y (TCS)* Considering this starts off with OS, it's the most used path to Slinger Burst and you'll be using this combo very often in Iceborne. It's close to, if not faster then the double tackle combo in terms of TCS setup speed. Hipfiring from Slinger Burst is also much more quick then aiming and firing your slinger normally. I mentioned in the Slinger Burst section that you're able to use flinching ammo to your advantage, but did you know you could also utilize the slinger's distraction properties? With the normal slinger, you'd use this to shoot a stone into the center of the special capture arena to trick the monster into the rock trap or perhaps to lure it near a wall for a wall bang. Slinger Burst distracts monsters as well, except to your location instead of where you're aiming. Thus if you're skilled enough, it's feasible to start a hunt by luring the monster with Slinger Burst and then slam it with the chained TCS once it gets near. Rolling Start A (Roll) > Y (Tackle) > Cancelled SCS Tackle > Any direction + Y (TCS) A (Roll) > Y (Tackle) > RT+Y (Side Blow) > LT (Slinger Burst) > Any direction + Y (TCS)* A (Roll) > B (Wide Slash) > LT (Slinger Burst) > Any direction + Y (TCS)* Starting off with a roll is a great way to close the distance when you need to get into range first. You can perform TCS off a roll to save some precious time when the monster is knocked down from a distance or as a counterattack after an evasion. I'd suggest using the Side Blow or Slinger Burst method for counterattacks due to the hefty stamina cost of the roll + double tackle. Side Slash Shortcuts B (Wide Slash) > B (Tackle) > Cancelled SCS Tackle > Any direction + Y (TCS) B (Wide Slash) > LT (Slinger Burst) > Any direction + Y (TCS)* Y + B (Rising Slash) > LT (Slinger Burst) > Any direction + Y (TCS)* Y (OS) > Cancelled SCS Tackle > B (JWS) > LT (Slinger Burst) > Any direction + Y (TCS)* I guess if you wanted to use the utility slashes, this is the best method to make purpose from them offensively. OS isn't the only slash with access to Slinger Burst as the move can be done right after Wide Slash and Rising Slash. Most notably and worthwhile though, is being able to do a Slinger Burst immediately after JWS and utilize both the redirection and mobility together, which creates an amazing unison on par with some gin and tonic after a day on the grind for sweet sweet monies. Kicking It Off RT+Y (Kick) > Y (Tackle) > Cancelled SCS Tackle > Any direction + Y (TCS) RT+Y (Kick) > Y (Tackle) > B (JWS) > LT (Slinger Burst) > Any direction + Y (TCS)* RT+Y (Kick) > Y (Tackle) > RT+Y (Side-Blow) > LT (Slinger Burst) > Any direction + Y (TCS)* Transitioning a kick into a tackle lets you take advantage of a monster's roar to sneak in a TCS. It's wonderful if you're at risk of overshooting the monster's head and need to setup TCS without moving too much. Relating back to the Rolling Start, you could use this for an additional method of counterattacking with TCS. The kick being faster and more neutral in movement than the roll. Aerial Acrobatics Y while in the air (Midair Charged Slash) > LT (Slinger Burst) > Any direction + Y (TCS)* Y when sliding (Charged Rising Slash) > Y while in the air (Plunging Thrust) > Y or B (Strong Wide Slash) > Cancelled SCS Tackle > Any direction + Y (TCS) Y when sliding (Charged Rising Slash) > Y while in the air (Plunging Thrust) > Y or B (Strong Wide Slash) > B (Wide Slash) > LT (Slinger Burst) > Any direction + Y (TCS)* Getting to TCS from a slide is a complicated and questionably useful process, but it's there if you need it. Using Slinger Burst after a Midair Charged Slash is superb, as having the high ground makes it quicker and safer then OS in some situations. Side Note: Why is there no super neato GIFs here for demonstration of these shortcut combinations? The answer is I'd display it for sure if I could, but it's very difficult to balance GIF size+quality while having a duration showcasing the full combo string. Section 3.2: Rude Awakening "Set 'em up and I'll knock 'em down!" You've been in a hunt long enough that the monster is aching all around beat up to a pulp and it just wants to go home and sleep or perhaps one of your teammates have induced it to nap via some wily wily methods. In either scenario there's a technique all GS users should know and learn about and that's the sleepbomb wakeup. If you've played for a while then you're probably aware of the usual routine of placing bombs near sleeping monsters, but did you know the first hit that wakes up a monster deals double damage? From that, we can conclude the intelligent course of action to take would be to use your strongest attack to wake up the monster. GS's strongest attack without a doubt is the mighty TCS, but how do we land it on a sleeping monster when it requires you to do some prequisite attacks? That's exactly where this five step wikiHow comes in handy. How to perform a sleepbomb wakeup: Step 1: Hug the head of the sleeping monster. First before anything, you want to get nice and snug with sleeping beauty's head. You'll want to be in a position where none of the other parts of the monster are going to interfere and get hit untimely before your TCS lands on the monster's head. It's important to place yourself in a spot not covered by bombs, so your TCS doesn't detonate any of them before it lands on the monster's head as the explosion will knock you back and wake up the monster early. Step 2. Block to line yourself up. Now that you've found a good spot for huggie wuggies, you'll want to straighten yourself and line up in the direction you'll be swinging towards the monster. This is simple as all you need to do is Block (RT) and angle yourself in the direction you want. Make sure you have enough space directly behind you for at least one roll. Step 3. Roll backwards once. With all calibrations calculated and calculations calibrated, it's now time to begin setting up the TCS. Start things off by rolling backwards once straight in the angle you have setup. Exactly only one roll is needed as that is generally the correct range to be around in most situations for you to land the TCS. Step 4. Turn yourself around and adjust. After the roll you should be facing away from the monster's head and will now need to turn around to face the monster. This should be enough distance from the monster for you to safely land the final hit on TCS on it's head on flat elevation without obstacles. If you're on a slope you'll have adjust yourself slightly away from the monster and if the monster is elevated on a bump then you'll have to adjust slightly towards it. You're mostly alone with your own judgement with this part, but I believe in you. Just remember it's better to whiff and retry then to overshoot and land the first hit of TCS. Anyways, we'll now start talking about the next ste- wait the palico there raising your hand in the back row, what's your question? "mewmewmew... so what if the meowster uses evade extender nya?" Ah... that's a good question, always gotta have that one smarty in the class. If you're using Evade Extender then your roll will have covered more distance then normal. There's really no surefire way to do a sleepbomb wakeup with Evade Extender, so you'll have to eyeball it and practice the needed adjustment on your own. You'll have to move slightly away from the monster and increase with increments depending on what level of extender you have. It's annoying for sure, but consider it extracurricular work. Step 5. Unleash the TCS. It's time. Start off swinging by doing the OS with no charging or tackling then continue with the SCS with again no charging or tackling. Now you can charge your TCS to maximum and completely destroy the monster's head. If you've done everything correctly, then congratulations. You have successfully vandalized the head of something that really just wanted to take a nap in peace.
Honey, I've got your favourite breakfast cereal! Trinitrotoluene! Extra Advice A lot of GS players have trouble with performing a perfect sleepbomb and myself included can't do it on 100% of hunts due to the many varieties of monsters and terrain. You can come close to 100% consistency with practice of course, but you won't have many opportunities to practice in multiplayer. I suggest heading to the training area and using the steps above to land final hits on the pole. Inventory is infinite in the training area, so place as many bombs to your heart's content to understand how you should be angling yourself. For more real, but still clandestine testing you should try soloing a lower rank monster quest as you'll be capable of sending the monster into the sleeping phase very quickly. Very useful for figuring out the variables of monsters as their heads and lairs won't always be similar to the training pole. Eventually your opportunity to shine will come in an actual hunt and you'll have to strut your stuff with confidence. Just with an impatient HR999 Longsword, a Wyvern Fire happy Gunlance and a fellow eager Greatsword in the background watching you. No pressure... teehee~ Section 4: Skills For Your Frills "The right decoration in the wrong armor can make all the difference in the hunt..." In terms of builds, GS has the ease of creation of a lock in a sock with all the lethality included. I assume you most likely already know the standard armor skills like Attack Boost, Health Boost, Critical Eye, Weakness Exploit, and etc. from tinkering around in the item box or from reading build guides. While it's natural to squeeze out as much damage as possible in your build, it's important to remember that corpses do zero DPS. Thus the skills I'll be talking about here will be utility/survival skills applicable particularly to GS and slotted in more for comfort and your personal preference. I'll list these recommended skills in order of usefulness: Focus (Charger): Reduces charge timesIf you've felt like you could of landed that TCS if you were just slightly faster then Focus is a must-have. It's on equal terms with your essential damage skills because landing your attacks in the first place is important to your DPS. I highly approve of getting this skill maxed out to level 3 since the speed increase to your charged slashes is a more then noticeable benefit. However, if you're having trouble squeezing it in your build, then at least level 2 would be enough for a satisfying increase. Flinch-free (Brace): Prevents knockbacksFlinch-free stops certain monster movements and attacks from tripping you, but more importantly it stops your teammates from tripping you with their attacks. A mandatory skill in multiplayer for most weapons, except doubly so for GS because you'll need to land your TCS uninterrupted with all these Longswords, Dual Blades and Insect Glaives frolicking around. If you're playing solo, then this skill is not required. Mind's Eye (Mind's Eye/Ballistics): Prevents attacks from being deflected.GS is woefully one of the few melee weapons that doesn't have a built-in move with Mind's Eye. Mind's Eye is a boon against armored monsters such as Barroth, Radobaan/Uragaan, Lavasioth, or monsters with temporary armor like Kirin/Rajang. It doesn't remove the damage reduction when hitting armored parts, but stops your GS from bouncing off and leaving you open for an attack. Airborne (Flight): Increases the damage caused by jumping attacks.A nice bonus skill pre-Iceborne due to bundling as a freebie with Drachen and the absurdity of vanilla Aerial GS. It's fair to hypothesize Airborne wouldn't be worthwhile after the nerf to Aerial GS in Iceborne, however Iceborne has granted a buff of +10% to +30% aerial damage to Airborne. The increased bonus regains most of Aerial GS's lost damage, if not reverses it. All for the small cost of a level 2 decoration slot which is a great value for some occasional ledge hopping or quick mounts. You'll most likely be tight on level 2 slots and be unable to fit Airborne due to fitting Focus, Critical Boost and Weakness Exploit all together. It'd be smart to slap it on a Glider Mantle (easy mounts galore) or any other hoodie and then wear it when fighting in a ledge or slope area. Guard Up (Shield): Allows you to guard against ordinarily unblockable attacksDid you know the block of the GS counts as a shield? This means it's affected by the Guard and Guard Up skills, with the former being mediocre and the latter being very handy for some monsters. The Guard Up skill allows you to block certain unblockable attacks like... Teostra's Supernova Deviljho's Pin Vaal Hazak's Fart Beam Xeno/Safi'Jiiva's Laser Beam Velkhana's Ice Beam Really any laser beam type attack and many more attacks you can find out for yourself. GS is not quite mobile enough to get out of range of these attacks all the time and Guard Up can block these attacks quickly, letting you resume your offence. Then again, you could simply tackle through most of these attacks if you're up to the challenge. Partbreaker (Destroyer): Makes it easier to break or sever parts of monstersGS users will most likely be lurking around the head or tail and generating lots of damage for part breaks. Partbreaker assists in the process and is superb for when you're trying to sever the tail for the purpose of making the fight easier and receiving another carve. Not mandatory in standard quests, except I'd vouch for slotting Partbreaker in at any level for the Guiding Lands or Siege Quests like Kulve Taroth and Safi'Jiiva. Slinger Capacity (Stonethrower): Increases the loading capacity for the slinger ammo obtained in the field.Not a crazy skill to have in the base game, but it's a great contender in Iceborne for that last empty level 1 slot you may have in your build. Slinger Capacity increases the amount of ammo you pick up and that means more chances to use Slinger Burst! This makes it less of a nuisance to Flinch Shot a monster into the wall because instead of losing all your ammo after, you'll still have some rocks to do some fast TCSs on the knocked down monster. Level 1 increases the ammo you pick up on the ground only (EX: Stone, Redpit and Crystals) However if you desire more of the exotic ammo dropped by monsters (EX: Bomb, Thorn and Piercing Pods), you can add more levels to increase the amount you obtain from monsters. Handicraft (Handicraft) (Revolver Ocelot): Extends the weapon sharpness gaugeDecent skill, but not always needed thanks to GS's low sharpness consumption. You just need enough Handicraft to pass white or purple sharpness (assuming you don't have it on your weapon) and/or run Master's Touch to play through a phase or even an entire quest comfortably. For defensive purposes, it might be useful to add more if you want to have more sharpness in reserve for blocking. Now that we have the more descriptive and complex skills out of the way, I'll speedrun through the other skills that are of interest. Recovery Up (Medicine): Increases the amount restored when restoring Health.Health augments on GS give great regen and Recovery Up 3 turns it into amazing regen. Possible to even just keep recklessly attacking and never chug potions at Level 3. Evade Extender (Jumping): Increases evade distance.Extender is optional for GS, but very nice to have against wide reaching attacks like Teostra's tail sweep. Level 2 is the sweetspot in my personal experiences with Hunting Horn and Switchaxe. Speed Eating (Gobbler): Increases item consumption speed.People be sleeping on Speed Eating. Being able to chug faster or instantaneously with a weapon that sheaths often? Succulent. One of my wishes is that Capcom will add Speed Eating Secret for one frame consumptions. Critical Draw (Draw): Increases affinity when performing draw attacks.A holy relic from an older era, but this ain't the skill 4U to have on GS in World. Crit Draw has some value with OS hit and run playstyles, however it's not really worth it due to most of our damage coming from TCS. (Frostcraft is a can of worms to talk about, but I have to mention that even serious FC builds don't use Crit Draw and focus on squeezing TCS with a full bar.) Earplugs (Earplugs): Grants protection from large monsters' roars.I don't appreciate the "git gud" and roll through it argument against Earplugs, but for GS I can only recommend it to new players struggling to find openings for TCS. Experienced players can simply tackle or block roars and avoid the hefty investment needed of Earplugs. Quick Sheath (Sheath): Increases sheath speed.It's true we sheath a lot and can make lots of use of this skill, but the benefit is very minor. It's not something you want to slot in and is best kept as a nice bonus skill from an armor piece. Section 5: Insightful Perspective As an additional bonus supplement to the guide, here's a self-created video with subtitles showcasing my thought process and what I'm pondering during a standard Fatalis hunt. While the main focus is to help hunters viewing my Fatalis guide, it's a little tailored to Greatsword and you should be capable of using the video for an insightful perspective. I hope it'll be of valuable assistance in your future Greatsword hunts and grant you some new insights to think about.
指南结束 最后,我们来到了本指南的结尾。以上就是我能教给你的所有关于大剑的知识,正如我在指南开头所说。希望你至少学到了一两个关于大剑的新技巧,这会让我心里感到一丝温暖。 如果你读完本指南后仍对自己的表现不满意,或者觉得这一切有些难以承受,我建议你采用模块化的方法来练习这些技巧。我所说的模块化训练,是指每次专注练习一到两个招式,力求完全掌握,而不是尝试一次性运用所有技巧。刚开始使用【大剑】时,你的玩法可能会比较基础,但当你开始逐个掌握这些技巧后,一切都会融会贯通,最终达到类似【究极本能】的境界。 有了这些实用建议,你不妨去狩猎一些怪物,在不断提升自己的过程中获得满足感,同时获取更丰厚的怪物素材。在结束本指南之前,我要特别感谢一下自己,但最重要的还是要感谢另一个人。你问是谁? 当然是你啦!
你的生命将在30分钟后终结。(画师:Boo Rad13y)