
Ara Fell: Enhanced Edition


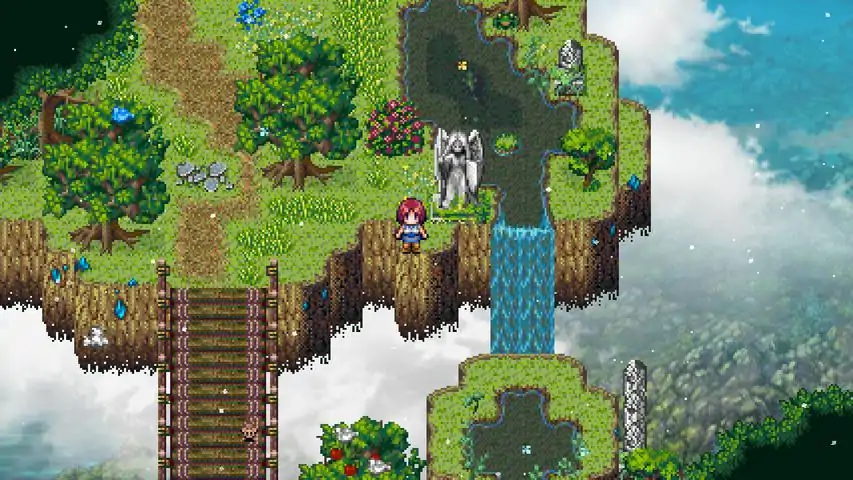

UPDATED AS OF JANUARY 3, 2022 FOR THE ENHANCED VERSION - Hi all! Thank you for your patience as I updated this guide! I was able to find the time to fully replay the game and I noticed several changes since the last time I played, so this guide accurately reflects my experience with the game as of the most recent update, including changes to upgrading gear, which items were found where, and more specific directions to find your way around the game. I have also added a cumulative quest guide at the end of this, for those of you looking for specific help! This guide will help players make their way through the beautiful world of Ara Fell. The guide comes complete with recommendations and directions, along with specific combat information that will definitely be of use. If you are looking for something specific, I have items and quests named here, so feel free to use Control (CTRL) + F on your keyboard to search for key words, which may help you find your spot faster! This walkthrough was written as I made my way through the game. I hope everyone loves the game as much as I did! The ending almost made me cry! Leave a comment if you have any questions! Tips and Helpful Information Welcome to Ara Fell! If you chose to add the Story Mode Ability in the beginning of the game launch, do not fret! It does not mean you can't choose to fight monsters the regular way. Story Mode becomes an end-all attack that deals 9999 damage to each opponent, meaning you only do one attack and can progress through the game more quickly without worrying about spending money on items for recovery or for gear for your characters. At the same time, you are gaining the same experience and rewards from combat that you would through regular combat. It is by no means mandatory, but is helpful at times, especially for grinding, which can be tedious. To check your quests, open the menu and check your items. Quests are under items and you can interact with them for further details. Use Enter to Dive in water to collect materials from different fish. Use Space to jump up or down cliffs of 1 space higher or lower. Sparkles indicate that either a crafting material or quest item is available if you interact with it using Space or Enter. Use the Shift key to crouch to enter small rooms. Use the feature Utility: Crafting whenever you have spare materials. Speak to everyone to unlock new craftable items. Sparkles at the edge of a body of water allow you to enter the water and swim. You can emerge from the water by interacting with any other land nearby. If you are not playing using Story Mode, fight every enemy you come across. Exiting a room and reentering causes enemies to respawn, giving you more chances to fight and gain experience. Interact with every character you can for commentary and bonuses you would not discover otherwise. Some items, like apples you'll find in homes, permanently boost specific stats of a chosen character. Look carefully for these. Once you've interacted with a large crystal, you can use it to move to other areas with large crystals you've interacted with before. It's a teleportation device. Certain areas you enter will have a large purple orb nearby. Interacting with these tells you the recommended Party level and party number for the area. It is important that you understand how easily you can die in this game if you are unprepared. It is recommended to use Lita’s Scout skill on every new mob you come across because it permanently identifies their HP as a mob type, which would enable you to more strategically plan your battle moves. When I play, and I recognize a turning point in the plot, or an action I would take that would cause the plot to move forward that could prevent me from exploring, I actively avoid that action and purposefully explore, so very often in this walkthrough, you may ask “Why didn’t she go do this right here?” It’s because I’m exploring or completing side quests. You do not need to play the same way I do, and do not need to do the side quests if you choose not to, but please skip forward in the walkthrough until you see me complete the step you are expecting me to if that is the case. Otherwise, enjoy your exploring! Prologue Watch prologue – Adrian explains that you are looking for a ring. In the cave, Adrian tells you that his boss, who sent him on this quest, told him there is a second door to access the deeper areas of the cave. Locate the second door in the cave and use the Space bar to interact with it. The door opens, and Adrian leads you into the entryway. Walk down the stairs and head to the right of the statue and upright column, interact with the area of the wall that appears slightly off-patterned, in the center. Walk up the stairs and to the broken bridge. You can now jump over small gaps and broken stairs using Space or Enter. Walk to the edge of the broken bridge and jump. Adrian follows you, but is injured in the process. A Green Question Mark appears above his head, indicating that he has a Quest for you. Speak to Adrian. He requests that you make him a Mending Potion, which consists of Fish Oil, an Angelflower, and Stardust. If you use Escape to view the Menu, you can now visit the Quests section, where you will find the quest Make a Potion. Crawl using Shift into the small cave on the left of Adrian. Save at this point, as a battle is coming up! Interact with the sparkles by the edge of the round cliff, pick up Key, Normal. You are entered into a battle against x3 Leaf Bugs. I fought against three (3) leaf cutters and found that alternating between Attack and Charged Shot as I replenished my MP was more effective than relying on Attack alone. From this fight gain x1 Stardust. I also leveled up as a result of this fight and received x10 Allocations to boost my base stats. As Lita is an archer class, I prioritized my Agility. I placed four (4) Allocations into Agility, and two (2) into all other stats. I walked down the stairs directly below me from where I exited the post-battle screen and into the next room. I entered the small building closest to me and there was nothing inside. I exited the building and walked around to the other building in this chamber. There is a woman with blond hair and a short cut scene. Exit the small building, walk to the right back to the stairs, and continue to backtrack to Adrian. From Adrian, walk towards the stairs, and walk into the water to jump in. You can use Space over the circles that appear in the water to Dive. While you are in the water, swim over the Fish and use Enter to dive at the fish. Head back down to Adrian and speak with him. Then, using the Menu, go to Crafting. For now, you only have one recipe, Potion, Mending, so select that and make the potion for Adrian. Adrian is now healed and has joined your party and can participate in battles. Head back to the water upward and swim all the way north. Interact with the door and enter the next room. You also get around x20 Coins per battle with these mobs, and having more money is definitely better than having less in this game! Here, I found Small Bugs and Small Ants, with 74 and 53 HP, respectively. The door right ahead with sparkles in front of it is protected by magical shields. You will need to disable them in order to move forward. Up the right staircase, I found a red lever, which I interacted with, and which disabled the magical shields. However, this triggers a Mutant to spawn with 181 HP. It is important to use Adrian’s Taunt here because of the difference in HP between he and Lita. After using Taunt, I switched between Lita’s First Aid, Charged Shot, and Attack to keep Adrian afloat while chiseling away at the Mutant’s HP, and Adrian’s Power Attack, which took out chunks of the Mutant’s HP. After defeating the Mutant, head down the stairs to the doorway north you were previously unable to enter, and go through. There is another doorway here, go through it. Make sure to save here if you haven’t! Interact with the statue. Lita falls down a hole! Walk up the stairway above you. Jump up the stairs. Interact with the Skeleton. Lift the red lever. Walk down the stairs and cross the bridge. Walk into the next room and continue to walk through the cave until you find the Spirit. Continue walking through the cave. At the fork in the road, I continued to the right and upward. I found a chest at the end with x50 Coins inside. I then went back to the fork in the road and went left. Continue through the cave and enter the door. Interact with the pedestal. Take the ring. Taking the ring opens a new doorway to your left. Enter it. Head up the stone stairs, head right, and continue down the stairs to the floor below. You find yourself back in the area of the cave where you initially fell down. You are saved by Lita’s father, Edward, and meet Reamor, who will later sell you weapons and armor. You are then transported to Aloria. Chapter One, Section I When you awaken, interact with the chest to find x25 Coins. You can read the books on the shelves for some Ara Fell lore/backstory. Head downstairs, go speak with your mom. Your mom tells you that your dad is at the Seremai Plains to set up for the archery contest. She tells you to apologize for your dad’s rudeness, and that he is at the temple, on the northeast side of town. Head down to leave your house. Speak with Talani, the white haired merchant outside your house. You will run into her almost everywhere but she will have different items depending on where you find her. Here, she told me to look for the giant crystals in special areas, and did not give any context. I decided to purchase Basic Potion Making from her here. Go down the bridge below and right to interact with Elle, who had a quest. She tells you that Old Man Ricker has been worse than usual lately, and asks that you pass along a note to him. Receive quest: Note for Ricker. Speak with the young girl playing by the water to receive x1 Dust, Life. Above the kids, enter the cave, the Great Bazaar. Up the stairs on the left, interact with the first merchant on your right, purchase a Snowbear for an upcoming quest. Interact with the giant crystal in the upper left corner to unlock the Aloria teleport. Exit the bazarr, head north to where Elle gave you the Note for Ricker quest, and head east. Enter the cave directly above where you got off the bridge. Speak with Janice, who tells you she needs a stuffed Snowbear for her baby, receive the quest: Snowbear!. If you did not already purchase the Snowbear, head back to the bazaar and purchase one. If you already purchased one, give her the Snowbear and receive +500 Experience. Exit the cave and walk to the base of the apple tree with the girl on top of it. She asks you to catch the apples she is picking as a favor and will reward you for it. This is not a regular quest, but is a bit shorter and more fun in my opinion! You have to move to the areas where the arrows appear, all in a radius around the tree, and click Space when you step on the arrow to collect the apples. Once you have collected all ten (10), she will reward you. I received 1x Relic, Magic Apple, and +500 Experience. Enter the water below the apple tree and swim to the left side of the angel statue. Walk down the ladder and interact with the chest to find 1x Treasure, Opal. Enter the cave before the bridge to find the Adventurer’s Guild. You can speak with the Guild Master to learn of four (4) bounties available to receive rewards and experience. The bounties are as follows: 1)Bunny Girl Bandit: “The so-called ‘Bunny Girl Bandit’ has been committing petty crimes in Aloria. We believe she’s near here. She’s been stealing little things. Some coins here, some fruit there. Nothing serious. Still, it has to stop. 100 coins for this bounty.” 2)Armire Gang: “The Armire Gang has been committing serious crimes along the Starway. Our rangers haven’t been able to locate their leader, Armire himself. We believe he’s somewhere in the Starway. Be careful if you find him. He’s dangerous. Bring him in dead or alive. It’s a 500 coin reward for his head.” 3)Vampire Stalker: “A vampire is living somewhere north of the Hunting Range, attacking travelers and turning them. This, needless to say, must be stopped. Be cautious if you come across this vampire. He or she is very dangerous.” 4)The Star Witch: “The Star Witch is hiding somewhere far to the north, last I heard. Perhaps near Silvara. Be cautious should you attempt to engage her. She is extremely dangerous and extremely powerful. This is the biggest bounty we’ve ever offered. It’s 5000 coins if you can defeat her.” Leave the Rangers Guild and cross the bridge. Enter the next cave. Read Adrian’s Journal, just for funsies. Continue across the bridge, walk into the meadow to your right to encounter a dwarf. Briefly speak with him, receive the quest Hill Dwarf? You cannot complete this quest quite yet, so continue on. Head down the bridge to your south. Speak with Cara to receive the quest Upgrades! Enter the cave behind Cara, speak with Arger. Make note that he does not want you there. He also will not let you interact with the chest at the back of his room. Exit the room and head north, and when you are about to reach the temple, cross the bridge to your left. Enter the cave, make note of the crack in the wall to the right of the staircase. Exit the cave and head left. You will find a man with a blue question mark above his head. This is Old Man Ricker. Speak with him and give him the note to make progress on Note for Ricker. Enter the cave behind him. Speak with Shelly on the right, who asks if you can grab her a Bag of Flour from the bazaar. She gives you x20 Coins to purchase the flour. Receive quest: Flour Girl. Head all the way left and south across the bridge. Speak with Elle and complete Note for Ricker, receive +20 Coins. Head south and enter the Great Bazaar on your left. Walk all the way to the top area and speak with the baker, who can be identified by the loaves of bread he is surrounded by. Purchase one bag of Flour. Exit the Great Bazaar, head all the way north, head east across the bridge, enter the first cave. Speak with Shelly, complete the quest Flour Girl, receive +100 Experience. From Shelly, head all the way across the bridges to the right. When you are about to enter the Temple, your mother stops you and tells you that your cat Percy was seemingly spirited away as he ran off to the southeastern part of town. She also asks you to go find him. Receive quest Percy, Idiot. Enter the temple and speak with Adrian. Adrian joins the party. Chapter One, Section II Head all the way south from the temple. Enter the cave. Watch the short cutscene. Open the chest on the left, receive Bombs. Open the chest on the right, receive x2 Hide, Common and x2, Thread, Flax. Interact with the crack in the wall on the right of the chest. Crawl through the hole in the wall. Save the game. Here, I found Poison Snakes with 47 Hp, Snakes with 47 HP, Shield Bugs with 34 HP, and Small Bats with 51 HP. Lita’s First Aid will come in handy here! At the bottom of the second ladder, on the left, find a chest containing 1x Ingot, Bronze. You need to get around Arger, so jump into the water and swim south. Pull the blue lever. Nothing seems to happen… From where you are. Cross the bride and head south. Enter the cave. This is a great place to grind and that is definitely recommended at this point in the game. I would recommend reaching at least level 7 or 8 before proceeding. After grinding to your satisfaction, exit the cave and head up the stairs on your right. The chest has x50 Coins. Pull the lever. Cross the bridge to your right, go up the stairs, and crawl into the small cave. Walk across the cave to find a chest containing a Lantern. Exit the cave. At the bottom of the ladder, to the right, is a crack in the wall. Interact with it and use the bomb. In the bottom right of the small cave that opens, find 1x Essence, Earth. The buttons need to be pushed in a certain order. Note: there is no rule specifying that all buttons need to be pushed. In my run-through, I only needed to press the button on the far right, then the button in the middle, to pass . Exit the cave, and crawl through the cave to your left. Pull the lever. Purchase a few Life Potions from our favorite traveling merchant before proceeding. Save the game. Watch (or don’t) the cutscene. Interact with Percy (white cat). Then interact with Adrian. Enter a battle against Mister Arger, who has 727 HP and can summon possessed animals to fight on his side, stealing their energy to add to his own. I used Lita’s Elven Focus and Adrian’s Mark to add some buffs here, and Adrian’s Taunt because Arger’s abilities dealt some serious damage. When Mister Arger starts summoning animals, I started using Adrian’s Whirlwind. After defeating Mister Arger, you receive a Magic Flute. You also receive x100 Coins and 1x Stone, Archer, as a reward. You also receive the quest Strange Contact. From outside the temple, head south towards Mister Arger’s house, then west across the bridges. Speak to the hooded figure in Adrian’s doorway and complete the quest Strange Contact. Receive the quest Archery Contest. Before proceeding with the main story, let’s wrap up some side quests and exploration! Head back west to the Great Bazaar, but do not go inside. Instead, head left. Enter the first house you come across and speak with Farmer Jean, who has asked you to help with the harvest by gathering lettuce, tomatoes, turnips and radishes. Receive the quest Big Salad. You can find the Radishes in the farm plot just south of Farmer Jean’s house. If you follow the path left, but stay around the top of the map, you’ll find some Lettuce and Tomatoes. Continue to follow the path all around the farm until you find the water areas. You will come across one particular water area with a large crystal in it next to a break between this section of land and the next. Enter the water, because we’re going bounty hunting! Swim south until you enter a new screen, then climb out of the water, head down the stairs, and enter into the ruins. Here, you will find Bunny Girl! I chose the rudest response option for funsies. Enter into a battle against Bunny Girl! She has 240 HP but not the most impressive defense and even her special abilities are kind of weak given your current level, so you can just have fun with this one. Exit the cave, swim north, and rejoin humanity. From the bridge you’ll find yourself at after exiting the water, head up the stairs right above you and grab a Turnip. Then head slightly right and jump down a small set of stairs to find a chest containing 1x Treasure, Opal. Head back north to speak with Farmer Jean, complete the quest Big Salad, receive x70 Coins and +100 Experience. From the farm, head east, then northeast through Aloria to the Rangers Guild in the center of town. Turn in the bounty for Bunny Girl Bandit, receive x100 Coins. Head to the northwest corner of Aloria and continue north past Lita’s house to the Starway. Head north. At the fork in the road, head east. In this area, you will find Moon Cats with an average HP of 97, Rock Worms with an average HP of 48, and Fox Wolves with an average HP of 117. The Moon Cats have an ability to buff their attacks, so make sure you have Life Potions! You can craft those as needed, provided you are gathering materials to make them. Continue east. There are two women facing one another by a cave, speak with the woman on the right, receive the quest Old Statue. Enter the cave behind the women, walk all the way left to the next screen, and interact with the statue of the old man sitting here to complete Old Statue. The statue is preventing you from proceeding forward, so head back a screen. The guard standing by the stairs informs you that you will need to speak with Lady Maranda at Castle Atana to be able to pass him. Exit the cave. Head east to the next screen. Continue east across several bridges and a body of water, interact with the signpost to receive the quest Stone Beast. From the signpost, head south, and enter the screen below. Interact with the statue to receive the quest 2nd Stone Curse? Head back up to the signpost and continue north. Continue northwest and then west entirely. Pass a canoe, find two caves side by side against a northern wall. Enter the caves, either one since they lead to the same place, and interact with the giant crystal to activate the Springs Teleport. This is Hanna’s shop, and she is an apothecary who can sell you advanced potion recipes, a ton of different crafting materials, and various potions and elixirs as needed. She DOES have a limited stock, however, so make sure you’re crafting independently as often as you can. Head west and enter the next screen. In the cave you can see on this screen, there is a door that will not budge. Make note of this door. Head south from this cave, walk across the water, and find 1x Essence, Earth. Head back north, then west. You will find two (2) caves to the north. Enter the northern most cave to find a chest containing x100 Coins. Exit the cave and enter the cave slightly to the left. At the top right of this cave, find a chest with x50 Coins. In the bottom right corner of this map, find 1x Essence, Earth. Head all the way West, then south down the bridge, and keep heading down until you see two (2) small caves on the right of the map. Jump into the water and swim into the water cave. Find a chest with x50 Coins. Exit the cave, but do not enter the top cave yet. This is where you will encounter the Armire Gang for one of your bounties, but their health is on average 10x higher than yours at this point. If you are using Story Mode, by all means go for it, but for the average player, make note of the location and come back to it later. Head west to enter the Orchards. Chapter One, Section III Head west across the bridge and then south from this point, as far south as you can, and find a chest containing +500 Coins. There are some bodies of waters with circles within them that can give you small amounts of coins, so be on the lookout. Return to the bridge above and head west. Continue west, then head as north as you can while remaining on the map, to get to the northwestern corner of the map. Enter the cave here. Interact with the giant crystal to activate the Orchards Teleport. Speak with Business Man to receive an Ancient Necklace, also receive the quest The Necklace. Speak with Mister Carver, who asks you to head east to the central islands, take the bridge north, locate a tower, and locate a magic crystal that increases fertility. Receive quest The Tower. Head south from here, cross east using the bridge, head north at the first available chance, then continue north to the next screen. When you to the tower, speak with the guard blocking the front door. Keep heading forward in the tower, the pathway is pretty linear. Reach a room with two (2) sparkles on the floor and a chest. Interact with the sparkle on the left, receive x1 Essence, Water, and the sparkle on the right yields the same. The chest will yield a Mimic with over 1000 HP, which is much too high for your current level. Make note of the location of this chest and return here later to finish the quest The Tower. Head back to the Springs and continue east. Continue northeast until you find yourself back at the canoe in the Springs. Head north along the path identified by the signpost. Climb the ladder on the building and head north. Continue north, across the bridge without taking the ladder, and enter the cave. Interact with the strange thing in the room and receive the quest What’s This? Exit the cave, head south, and climb up the ladder. Head west. Enter the cave right after the bridge and interact with the giant crystal to activate the Castle Atana Teleport. This is a library so there are a lot of lore/background books here to read! Head east along the bridge. There is a merchant here selling materials and Expert Potion Making, if you have the Coins for it. Head east, then south along the side of the castle. You cannot enter the castle at this time. Head south to the next screen, entering the Seremai Plains. Head east, then north and stay north until you find two caves. Enter the left cave. Talani is here selling potions, materials, and recipes, if you are interested. On the far-right side of the cave is a door that will not budge. Walk north past Talani, enter the first cave on your left. Speak with the ghost next to the statue in the back to proceed with the quest The Necklace. You see a door open elsewhere in this cave system. Exit this cave and head north until you reach the cliff. Interact with the sparkling pearl on the ground to receive x1 Stone, Magic. The door that opened previously is just south of your current location. If you are not using Story Mode, you will not be able to proceed with this quest at this time, as the monsters ahead are much too strong for your current level, and that is taking into consideration grinding. Make note of this location and return here at a later time. If you are using Story Mode, go ham. Exit the cave and head south until you reach a bridge. Cross the bridge and stay near the top of the screen as you move east, following pathways more towards the north. You will encounter two slopes heading east or west over a cave. Head to the east and stay north on this route. When you get to the far right and slightly south, you will find a large body of water. Enter it and swim to the east to find x1 Essence, Earth. Back-track to the two slopes and this time head west and enter the cave. Interact with the giant ctystal to activate the Seremai Plains Teleport. Interact with the man next to the roped-off area to continue on the main storyline. Watch the cutscene, it’s a long one but some important things take place here. Exit the Seremai Plains by heading north and west. Re-enter the Castle Atana area. Head all the way north and then all the way west to enter the next screen. Head west in the Quarry area, enter the cave directly below you. In the chest, you find x200 Coins. Head west around the rock formation, between the two larger mountainy formations, and enter the water in the southeast. Swim southeast from here and follow the path toward the cave, south. Find a chest containing x1Elixir, Luck. Enter the cave, find a chest with x1000 Coins. Exit the cave, head north, enter the previous screen. Swim up and west. Climb the ladder on the right and enter the cave. Make note of the statue blocking your way to the chest. Exit the cave, head down the ladder to the ground level, and enter the cave on the left. Find a chest containing x1 Ingot, Bronze. Exit the cave and follow the tracks to the southwest, enter the first cave. On the far left side of this cave, find a giant crystal. Interacting with it activates the Stone Quarry Teleport. Note that in the upper left corner, there is currently a passageway that was flooded and is not accessible at this time. Exit the caves through either entrance, and make your way west and north. You will find Talani here, if you need materials or potions. Head north, then cross the bridge east. When you get to the center row, head south, crawl under the bridge, and find a chest containing x3 Hide, Common. Head north, then make your way to the northeast corner of the map. Enter the Hunting Range. Chapter One, Section IV Note that the monsters here are tougher than the last ones although they look the same. However, they do give a bit more EXP, so this is a great area to level in! Head to the northeastern portion of the map. Lita looks around for her father but he is not there. Enter the cave. Use a bomb in the back right portion of the cave, crawl to enter. Continue northeast through the cave, find 1x Stone, Warrior. In the fair northwestern corner of the map is a chest containing x1 Enchant: Invulnerability I. Note that, slightly south of this chest and to the east is a cave, inside of which is a door that cannot be opened at this time. Heading east, but more south than the previous location, Lita again looks for her dad. Adrian leaves the party to help you look for your dad. Be mindful of the short party if you are not using Story Mode, or maybe just use Story Mode until you are reunited with Adrian, but it’s your choice! Walk southeast on this plateau, enter the water, swim down, and find x1 Essence, Earth. Follow the path to the north. Find a chest containing x2 Potion, Revival. Swim back south, then follow the stone path to the left. Continue all the way left until you find a giant crystal. Interact with it to activate the Talani’s Shop Teleport. This is also where you will find Talani’s shop, the stationary kind. Leaving the shop and returning east, there is a bridge being guarded by stone trolls who will not let you pass unless you have a full party. Make note of this and come back. Head all the way south from the main area, then east, back to where you first entered the Hunting Range. From there, follow the path that leads most north, across the bridge, up the path continuing north, do not go up the stairs but stay right. Continue east across the bridge and head north at the end of the east path. There is a cave entrance here. To the right, is a chest containing x75 Coins. Above the cave, encounter the Spirit, who tells you her name is Asari, one of the guardians of the six (6) elven Artifacts of Power (just a reminder that Lita’s ring is one of these artifacts!). She tells you to take Dian’s Ring to the Arei Ruins in Blood Forest to unlock the power to break the curse. Finish the cutscene, enter the cave below. There is a secret door in this cave. It is in the left wall, in the center. Find a chest in the secret room containing x1 Relic, Tablet. Leave the Hunting Range by going directly southwest from where you are. Head southeast through the Quarry, enter the Starway, continue south across the bridge at the far end. Watch the cutscene. Spoiler! Adrian is a statue now! As are all others on this map! Time to head home! Turns out you turned all of Aloria into statues! Aren’t you glad you completed your side quests earlier? Meet Doren, who knows all about Dian’s Ring and asks you to accompany him to his home in the Quarry. Remember that mine shaft in the Quarry that was previously flooded? Meet Doren there. Crawl under the beams to enter. There is a chest on the left containing x1 Enchant: Impenetrability I. Enter the doorway at the top of this room. Chapter Two, Section I Watch the cutscene. Before going to sleep, you can speak with those in the other room and gather a bit more information for understanding the story of this game. When you are ready, head upstairs and interact with the bed to go to sleep. This completes the quest The Stone Curse. After the cutscene, head downstairs. Watch the next cutscene. Doren tells Seri Kesu that the ring will allow Lita to travel quickly using the Fairy Circles. Speak with Seri Kasu to move onward in the game. Head left and speak with Seri Kasu. Enter the Fairy Circle. She tells you to head south to land, enter the Blood Forest, and head towards the Arei Ruins from within. You turn into a fairy light! Fly west until you locate a bluish-white fairy circle near the ladders heading north. Hit Space to land here. Take a step down to watch a short cutscene, then head up the ladder. Watch the cutscene, know that Seri Kasu is coming to join your party. Lita then finds herself in the Quarry with directions leading west. Head west until you spot Talani, then head just south and just west of her to enter the Blood Forest. Up the northern path is a gate that blocks your path. There is another blocked gate further west, north along the next path available. However, in the cave next to this gate, there is a giant crystal. Interact with it to activate the Blood Forest Teleport. To the far west, and having head north, there are two (2) gates that are locked here. In the cave here, there is a chest containing 1x Power Crystal: Red. From here, I headed south to enter the Orchards to use the fairy circles. There is one directly south, and a chest to the east right next to a fairy circle. This chest contained x3 Elixir, Power II. Head back to the second gate from where you first entered the Blood Forest. Behind the frozen guard is a blue lever. Pull it to open the gates to Blood Forest. The monsters here are a little too tough for you at your current level (I was level 11 when I entered this area) while you have only one (1) battler in your party, so I would recommend avoiding combat here until someone joins your party. If you have Story Mode on, then no worries! In this area, find Spiders with 104 HP, Shadow Moles with 53 HP, Banshee Hawks with 78 HP. In the second most northeastern corner, find a statue staring at a chest containing x1 Relic, Quill. Following the most northeastern path leads back to the Hunting Range, but I found this to be an excellent area to grind because there are only two (2) mob parties with only two (2) mobs each, so they aren’t TOO tough, but still be careful if you are below level 15. To the west, above an area with two (2) gates, there is a pond that leads into a small cave. Inside this cave is a chest containing x1 Enchantment: Shocking and x1 Essence, Earth. Heading northwest from here, you find yourself in a clearing with one fairy ring. If you enter it and fly directly north and slightly east, you will find a section of land with a fairy ring on it if you look closely, and this land is not connected to a path. Land here and collect x1 Essence, Light. Enter the fairy circle and fly almost all the way south, then slightly west to land at the top of two sets of stairs, before a bridge. Seri Kesu joins your party at this point. She is a mage specializing in elemental area of effect (AOE) magic and can inflict ailments on the selected targets. At this point, I chose to move forward with upgrading my equipment. Go to the Menu, then to Crafting, and move right to select either Lita or Seri Kesu, and use the materials you’ve so painstakingly gathered to upgrade their gear to your discretion. I was able to upgrade all items once at this point, as some materials have not been available to you yet. When you encounter your first mob with Seri Kesu in your party, you will unlock the charged ability Ultimate with each turn that passes in combat. At this point, with Seri Kesu in my party, I was able to battle regularly and without difficulty. Seri Kesu can apply all of her Skills to the entire party if you use the Left and Right arrow keys to shuffle between attack options until the arrows point at all available targets. Even doing this, I found her attacks to be very strong for this area, so I’d say go for it at this point! Make sure you’re crafting those Life Potions, though! Continue east to the next screen. Watch the cutscene. You have to make your way north to the probably sealed door and avoid the vampires ahead. To the north, to the left of the stairs, find a chest containing x1 Treasure, Opal. To the path to the left, find a tombstone stating “Lord Azariel I: This stone commemorates the day his body was given to the abyss. May the winds carry him to the sun.” The door leading north from the main path does not move, so you need to find another way. Head down the stairs and continue south to find a building. There is a hidden door on this wall, right in the center. Enter it and watch the short cutscene. Find Zombies here with an average HP of 170 and Eyeballs with an average HP of 113. You can interact with the purple torches to receive x1 Torch each, but you will enter into combat when you do. Head north, east, then south towards the pit of blood. Watch the short cutscene then descend into the pit and collect the shiny object, receiving x1 Enchant: Siphoning I, very vampire reminiscent. Exit the blood pit and walk south. To the far west is a door protected by a magical barrier. There are also several doors here that require keys to be opened. There is also a door that requires x1 Gold Key to enter it. To the southeast, find a chest containing x1 Potion, Revival. Below the door with the gold lock, there are three staircases you can head down. Take the left staircase. Of course, Talani is here. Speak with her if you need to make any purchases at this time. From Talani, head west. You can enter the water and swim west to find a purple torch. Head northwest and crawl under the spiderwebs. Find a chest containing x1 Potion, Revival. By this point, you should have found x4 Torches in total. Interact with the torch stands to insert the torches. Once all four (4) have been inserted, an object falls from the crevice behind it. Interact with it to receive x1 Key, Normal. Chapter Two, Section II In the far left room, there is a note on the wall stating: The farthest left is left alone The one beside will then be pressed Then copy this, the path is known Until at last, thy soul at rest To solve this riddle, press the second (2nd) and fourth (4th) buttons, do not touch the first (1st) or third (3rd). Receive x1 Key, Normal. In the second (2nd) to far left room, there are three (3) torch stands with angels on them. To solve this puzzle, move the torches onto the angels imprinted on the floor. Make use of the space between the wall and the angels to move Lita and the torches around effectively. Receive x1 Key, Normal. The paper on the floor now states: “If it is willed, what has been made will be undone. Know this; the dark fires will emerge in the angel symbol.” In the far right room, there are four (4) pentagrams on the floor. The notebook on the table states: The color of Blood Fore the color of Suns The color of Sky Then the color of Plums. The Tutorial pop-up states: “You can toggle Colorblind mod in the Settings section of the Menu, which will alter this puzzle." Go to the Menu, then to Settings. On the first window, go down to Colorblind Mode and select it. Exit the Menu and note that the pentagrams now have three (3) box columns next to them. To solve this puzzle, stand on each pentagram and interact with it until the boxes are numbered from left to right as: x1, x2, x3, and x4, or until the pentagrams are the following colors in order from left to right: red, yellow, blue, purple. Receive x1 Key, Normal. In the second (2nd) to right most door, find a staircase descending downward. Follow the stairs down. There is a blue lever. Be ready, because once you pull it, a timer will start and you will enter the obstacle course! I thought this was such a fun addition to the game. Basically, you just need to keep moving, don’t slow down. Jump over the gaps in the pathway, crawl under the spiderwebs, and make your way to the golden eye symbol at the end of the course. When you reach it, stand on top of it and interact with it to receive x1 Key, Normal. Pulling the lever caused the magical barrier on the middle door to be released, so you can enter it now. Inside is a chest containing x1 Key, Gold. Head back to the door with the golden lock and open it. Save the game! Enter into combat. The Vampire has 1024 HP, so you’ll want to whittle down his health while also picking off his underlings. I was lucky enough to have Seri’s Elemental Burst available during this battle, which easily removed the underlings and took out a chunk of the Vampire’s HP. Once you have defeated the Vampire, the door behind him is locked, so you need to find another way. To the left are two columns with flowers on top. Interact with the wall between them to open a secret door. Inside is a chest containing x1 Relic, Pendant. Head back to the area with the blood pit and head up the stairs, either side. There is a chest in the upper left corner containing x1 Enchant: Luck. The notebook states: “The brazier will burn in the light.” The brazier is located in the left corner of the room. Move it into the light. Moving the torch illuminates the other light sources in the building and unlocks the door that was behind the Vampire you previously fought. Head to that door and go through it. Walk to the pathway leading north and watch the cutscene. Now that you know where the vampires are, you know what area to avoid! Head east, and before crossing the bridge, head north. There is a chest containing x300 Coins. There is also a staircase heading up here, enter it to find x1 Key, Normal. Cross the bridge to the east and walk north to find a hidden doorway where the ground is discolored. Enter it to find x1 Stone, Magic. Head down and east and go up the stairs to enter the next room. Save the game! Walk northwest to cross the bridge. Enter into a battle. The Vampire has 1195 HP. I found Seri’s Lightning ability to be extra effective here when applied to all enemies, to wipe out the basic mobs. Seri’s Lightning was also very effective on the Vampire once the mobs were wiped out. I also made use of her OP Elemental Burst move to help greatly reduce the Vampire’s HP. Continue west after defeating the team, enter the next screen. Here is a chest containing x1 Key, Normal. There is also a golden eye Teleport here, to bring you back to the entrance. Continue up the stairs to the left. In the center of the wall ahead is a hidden door. Interact with it to reveal it, then go through. In the upper right corner, find x1 Essence, Water. By this point, you should have collected both keys, so take the Teleport back, head slightly east, and use the keys to open both doorways to the Vampire hidden in the fortress. Save the game! This Vampire has 1308 HP. I used Lita’s Elven Focus and Holy Charged Shot here a lot, along with Seri’s Lightening both on the group as a whole and directly on the Vampire. I did rely on the revival potions and Life potions here, so make sure you’re using them as needed! Also use Seri’s ultimate ability when available! After combat, watch the cutscene. You need to find a place to play the flute you previously received after defeating Mister Arger. Exit this building entirely, watch the cutscene. Head west to the tombstone and interact with it. Watch the cutscene. The door to the main building is now open. Talani has now appeared here, too! Shop as needed. At this point, I upgraded by gear a bit more and assigned Enchantments to both Lita and Seri, for extra beefiness. I would recommend being at least level 15 before proceeding. You can go back and grind if needed. Save the game! Proceed through the door. Watch the cutscene. Enter combat against Lord Nash, who has 2645 HP and who wields a poison-coated blade that can deal high damage. He also wields serrated blades that cause bleeding, can use spells, and can summon mobs to fight for him and drain your energy. Seri’s Elemental Burst does a huge amount of damage here, and you carry over saved energy from previous battles, so I saved up that energy before entering into this battle to start off strong. Switching between Lita’s Holy Charged Shot, Rapid Fire, and using her Elven Focus, and Seri’s Lightning, Elemental Burst, and using several Life Potions and Revival Potions enabled me to defeat Lord Nash. Watch the cutscene, then head west, see another short cutscene. Walk north, interact with the statue. Watch the cutscene. Asari tells you that you can use Dian’s Ring to break the stone curse by touching it to others. Interact with Seri to unfreeze her. Lita is given Arlen’s Bracelet, another Elven Artifact of Power, and is told that all of the Artifacts are needed to break the curse on the Elves. Asari then tells you that you need to gather the Soul Stones from the Temple Orlian, then meet her in the Holy Land. Watch the cutscene. Awaken in the Blood Forest. Seri tells you to head south towards the Orchards. Chapter Two, Section III At this point, I wanted to work on some side quests, so I went back to the Starway and entered the top cave to duke it out with Captain Armire. At this point, my team was at level 17, and using Seri’s Elemental Burst, I was able to make short work of his henchmen. It was a close call for me and used several of my Life Potions, but making full use of my skills, I was able to defeat him. If this battle is too tough, wait to return here until you are level 20. Head upstairs to find three (3) chests. The chest on the left contains x1 Enchant: Power I. The middle chest contains x1 Stone, Warrior. The chest on the right contains x1 Treasure, Emerald. There is also a fairy ring here. Use it, then fly east until you find land, then south and slightly west to find another fairy ring outside of a cave. Enter the cave. Inside the cave and find two (2) chests. The chest on the left contains x1 Relic, Scale. The chest on the right contains x1 Ancient Elven Bow. Go back to the fairy ring and fly back to the cave area. Head south, where you reunite with Adrian, who has been unfrozen and joins your party. Head south to return to Aloria. Watch the cutscene. Simmeon tells you that to access the Holy Land, you need to make your way through the Cave of Life. Adrian, Doren, and Seri join your party. First, let’s wrap up some side quests. Upgrade Adrian and Doren’s gear. From Lita’s house, head all the way east and all the way south. Speak with Cara, as by this point you have upgraded your equipment at least once. Complete the quest Upgrades! and receive x2 Dust, Agility and x1 Enchant: Quickness I. Then, find the fairy circle in the southwest corner of the map. Use it, and fly towards the southeast corner, then slightly north. Speak with Bimly the dwarf, then follow him east, then north and enter the cave. Make your way through the cave, then when you can move, use the ladder below you to enter the water. You will encounter Water Walkers with 349 HP, Cave Spiders with 209 HP. The mobs here give a lot of EXP for our lower-level friends Adrian and Doren, so it is highly recommended to grind here while you can. Just a note, when I started on this quest, I was about level 17 across the board on my team, and in the big battle up ahead, I died repeatedly, so I kept entering and exiting this area to grind with these mobs, and then I continued onward once I had reached an average level of 25. Also, these mobs drop different types of Dust that can be used to upgrade your current gear! Rather than spending thousands of gold on those materials, you can grind here to gather them and upgrade as you go! Doren’s ability Holy Blast was very effective here, but it costs around half his mana per use, so I wasn’t able to use it too often in battle. In the southwest corner, find a chest containing x3 Flask, Volatile. Continuing northwest, find a fairy circle. Use it, and fly to the far right, south side, land. You can get here without the fairy circle, but it does make travel faster! In the northeast section of the cave, find x1 Essence, Light. Make your way up to Bimly and interact with him. Watch the cutscene. You need to stand on and interact with each of the symbols that appear. The closest is in the northeast corner of the cave, and the other two (2) are right next to the previously mentioned fairy circles. Locate each and interact with them. Return to where Bimly was. Watch the short cutscene. SAVE THE GAME. Note, when you go to interact with the tablet, you will enter into combat against five (5) NPC’s and it IS intense, so make sure you have plenty of Life Potions and are at least level 25. Interact with the tablet and enter into combat against Bimly and his crew. Bimly has 720 HP, The Mercenary Bruiser has 1224 HP, the Mercenary Ranger has 662 HP, the Mercenary Swordsman has 685 HP, and the Mercenary Medic has 488 HP. Bimly has these grenades he throws that lower the target’s total damage dealt while still dealing damage, and I found that he targeted Adrian without me using Taunt. I focused on the healer first because his healing abilities were incredibly strong and he was able to keep his entire party alive while mine was slowly picked off. Once he was eliminated, I targeted the Swordsman because he has an Area of Effect ability that does some serious damage. Make sure you are using Adrian’s Taunt where you can! After defeating Bimly’s crew, watch the cutscene. You now get to choose a new class selection for Lita! Either Valkyrie or Ranger, with their stats as follows: Bonuses: 1)Increased support ability 2)More area of effect Ranger: Masters of hunting and scouting, rangers specialize in identifying the weaknesses of their opponents and striking where most effective. Bonuses: 1)+5% Critical Hit Rate 2)+25% Critical Hit Power 3)+20 SpeedSince I primarily rely upon Adrian and Seri for damage during battle, I chose to proceed with Valkyrie to make Lita more of a support character in the party. After this, you complete the quest Hill Dwarf? Head back to Aloria. Head to the Bazaar. At this point, I purchased a ton of crafting materials to prepare for upgrades. Head to the far right of the cave and interact with the stone statue. He leaves the room. Head to the Rangers Guild and speak to Toran, turn in Bounty II: The Armire Gang, receive x500 Coins. Head north to the Starway. Watch the cutscene. Doren advises to grind and level up and collect money before heading to Castle Atana, so let’s go complete some side quests now that you’re about level 25! Head slightly north, then west to the Orchards. Head south, then west across the bridge, and north. Continue north until you reach the Tower. Save the game! Climb all the way up and interact with the chest to engage in combat with the Mimic. Use Doren’s Holy Blast, Lita’s Charged Shot and Rapid Shot when the potions appear by the chest to wipe those out, Seri’s Lightning, and Adrian’s Power Attack. Defeat the Mimic and receive x2000 Coins, x5000 EXP, x3 Dust, Poison, and 1 Power Crystal: Green. Continue right to a small passage heading outside, to the southeast of the room. Interact with the chest to receive x1 Fertility Crystal. Exit the Tower, head south, then continue west, then head north to the cave in the northwest corner. Speak to Mister Carver. Receive +3500 EXP and x1500 Coins. Complete the quest The Tower. Use the giant crystal to Teleport to the Seremai Plains. Chapter Two, Section IV Head to the far northeast corner of the map and enter the left cave. Continue north until you can enter the building. Here, you will find Goblins with 625 HP, Goblin Axeman with 739 HP, Goblin Mages with 568 HP, and Goblin Spearman with 681 HP. Use AOE attacks wherever possible and make sure to use Adrian’s Taunt here. In the northeast corner of the cave, there is a puzzle. To solve the puzzle, move the torch stand to the lighted window on the left of this immediate space. The torch will light. In the northwest corner of the cave, there is another torch stand. To solve this puzzle, push the torch stand down the stairs into the beam of light focused on the ground. The torch will light. Head to the southwest corner of the cave. In the wall to the right of the gap, there is a crack in the center that is a bit hard to see. Interact with the middle of the wall and use the bomb. Crawl into the cave, follow it around, and exit on the other side. There is another torch stand here. To solve this puzzle, [spoiled] move the torch stand under the beam of light pointed directly at the floor.[/spoiled] Head back to the center pathway leading north. he door that was previously there is now gone and you can proceed north. Interact with the little flame on the other side of the cave to enter combat against the Spirit. The Spirit has 11367 HP and can practically one-shot your whole party. This Spirit has a tremendous OP ability hind of like your party, and what I found to be simply the most effective battle strategy was to use Adrian’s Reflect on the Spirit, so while it decimated my party’s HP with the attack, the same applied to itself and Adrian was spared, allowing him to attack the Spirit on his next turn and defeat it. Win the battle, gain +50000 EXP, x1200 Coins, and x3 Dust, Aether. When you go to head back, select the option Return to Entrance to head back to the entrance to the building, not to the whole cave system. Head slightly south and enter the cave. Speak to the spirit to complete the quest The Necklace. The spirit leaves behind the necklace, pick it up to receive x1 Relic, Necklace. Head back to the giant crystal in the cave in the Seremai Plains, to the far south above the area where you completed the archery contest, and Teleport to the Springs. Head all the way east from where you are, then south, and head down south to the next screen. Interact with the statue. The statue does not unfreeze, but you move it off of a fairy circle. Use the fairy circle, and fly to the southwest corner of the map. Find x1 Essence, Water. Fly to the northeast corner and land there. You will find Poison Plants with 208 HP, Alpha Wolves with 296 HP, and Star Cats with 197 HP here. Slightly to the west you find a chest containing x1 Potion, Refresh II. In the southeast corner of the map, there is an indent on the wall. Head south into the indent to enter a cave. Adrian picks up a necklace he believes may have belonged to his mother. Receive the quest Adrian’s Parents, receive x1 Nostalgic Amulet. Enter the next screen on the other side of this cave. Here, you will also find Stone Skunks with 278 HP. Head all the way southwest. Save the game and enter the cave. Watch the cutscene, where Doren tells you that a creature called a Firadir has the ability to turn its prey to stone. Adrian gets to choose a new class as follows: Paladin: Bearers of truth, bringers of light and justice. Paladins are the pinnacle of mitigation, borrowing from the aether to block spells and support their allies. Bonuses: 1)Can block spells 2)Increased utility Berserker: Anger, rage, fury. These are the fuel of berserkers. Berserkers charge into battle with dual axes, foregoing defense in lieu of a strong offense. Bonuses: 1)Replaces MP with Rage 2)Rage increases damage 3)Can no longer use a shield Because I have so heavily relied upon Adrian’s tank abilities, high defense and protection skills, I proceeded with Paladin. Enter into combat against the Firadar who has 4752 HP. I used Adrian’s Taunt, Doren’s Holy Blast, Lita’s Charged Shot and Sunlight abilities, and Seri’s Lightning to deal maximum damage. I also used Adrian’s Reflect when the Firadar started charging for a big attack. After defeating the Firadar, receive x222 Coins, +19620 EXP, and x3 Hide, Heavy. Complete the quest Adrian’s Parents. Head all the way back to the area of the Springs where you first entered this cave and head all the way northeast to the fairy circle. Use it, then fly south. Land on the fairy circle to find x1 Essence, Light. From here, fly west and then north to the first statue you came across and land on the fairy circle. Head all the way back through the Springs to the canoe, then head north to Castle Atana. Head all the way west to enter the Quarry, then head west and then south down the middle path. Enter the cave on the right up the ladder and interact with the stone statue. Unfreeze the elf and gain +5000 EXP. Interact with the chest to receive x1 Enchant: Deadly Strikes I. Head back to Castle Atana, and when you get to the bridge heading to the castle, head north without taking the ladder up. Enter the cave at the top of the map. Watch the cutscene. Seri tells you to make a trip to the Castle Atana library to the west within the city, in a cave. Exit the cave, head south, climb the ladder, head west, enter the first cave. Watch the cutscene. You need to find more of the power crystals used to power Seri’s crystal ball. The quest has been updated to Crystal Ball. You need to find three (3) more gems to reactivate the crystal ball. At this point in the game, I had collected the Power Crystal: Red, the Power Crystal: Green, and was only missing the Power Crystal: Blue. You will collect the third throughout your adventures, so just hang on! Exit the cave and head east towards the castle. Walk up to the entrance on the left side between two (2) guards and watch the cutscene. You have to fight against two (2) Enchanted Guards to pass through, both of which have 1866 HP. The combat is fairly easy, I didn’t need to heal even once, so just give it your best shot. Enter the castle. Enter the first blue curtain on the left. In this room, walk on the water and find a chest in the far back containing +300 Coins. Take the steps found on either the far left or far right of the screen. Take the left stairs up. Enter the door on the left. There is a secret door on the left of the room in the middle of the wall. Interact with it and enter the room. Interact with the chest to receive x500 Coins. Also find x1 Stone, Magic. Head back two (2) rooms and back through the doors leading south on either side of you. Head back to the main hallway, then head north through the central path. Speak with the guard and watch the cutscene. Save the game. I was level 28 when I first attempted the next battle. If you are not yet at this level, I would highly suggest returning to areas like the Spring or the Blood Forest, or even Bimly’s cave, to grind some more and gather or purchase materials to upgrade your gear. When you’re ready, return here and proceed. You can watch the cutscene or skip it. You will enter into combat against three (3) Enchanted Guards with auras that make them stronger, all of them have 1119 HP. I was able to use Adrian’s ultimate ability here to Taunt all targets, then beat the others using standard skills after that. After beating the guards, watch the cutscene. Chapter Three, Section I Wake up in the dungeons of Castle Atana. Interact with the door to your cell. Watch the cutscene. There is a hidden door in the cell in the wall, second spot from the left. Interact with it and go through the door. You find a fairy circle here, but you need to get your friends out before proceeding. Head back into the cave, speak with Adrian, then head back to the fairy circle. Fly straight north to find x1 Essence, Water and x1 Essence, Light. From where you are, fly straight east and land. Head south and enter the building. Continue to the next room and watch the cutscene. In this room, in the left corner is a chest containing your confiscated equipment. You will also find the Atana Dungeon Key. Exit the room and head south to reenter the dungeons. Unlock Doren’s cell so he can rejoin your party. In the cell in the northwest corner, find x1 Enchant: Immortality III. In the east there is a staircase that leads down, follow it. Enter the water, swim all the way east, climb up the rocks, head west. There is a chest in the divot of the wall to your north containing x300 Coins. Head down the stairs and continue west to find a chest containing Doren’s confiscated gear. Head north through the cave. Save the game! Enter into combat against two (2) Vampires with 1306 HP each. Remember that you don’t have Seri in your party at this time, so you may need to be more calculating with your attacks. I found that it wasn’t too difficult to beat these mobs without her without having to go through incredible leaps and bounds to do so. Defeat them and gain +5000 EXP. Head to the next room, crawl under the wooden doorway, head east. Enter the next screen. Both doors here are protected by a magical barrier. Continue to the next screen. To your right, find x1 Essence, Light. Head west and north, interact with the tombstone. Watch the cutscene. You see a door in the Atana Dungeons open. Head back into the doorway below, then north. Head back several screens, watch the short cutscene. Continue north to find a chest containing Seri’s confiscated gear. Watch the cutscene. Enter into combat against two (2) Enchanted Guards with 1119 HP each. Defeat them and watch the cutscene. Exit the cave and head northwest to go towards the doors guarded by magical barriers. Walk up to one of the doors and watch the cutscene. Enter the right door. Find Green/Red/Blue Slimes with 326 HP, Kobold Fighters with 559 HP, Kobold Custodians with 373 HP, and Kobold Assassins with 419 HP. In the north, find two (2) chests, the one on the left containing x2 Dust, Vampire, and the one on the right containing x1 Ingot, Bronze. Use the teleport on the ground to warp back to the entrance to this room. Exit, and enter the door on your left. Head north. Head up the stairs in front of you and continue north through the doorway. There is a bookcase here, interacting with it yields you x1 Vampire Prophecy. Receive quest Prophecy. Continue north and interact with the painting to receive x1 Painting: Godlike. Interact with the bookshelf to your left to receive x1 Vampire Prophecy. Head east. Note that if you head north up the large set of stairs, you will continue with the plot, so head east. The same applies to the area south of the door with the golden lock. Head all the way northeast and enter the room. Find two (2) paintings, x1 Painting: 4 Lights, and x1 Painting: Candles. If you continue north and through this area, you will eventually find yourself at a hole in the ground. Jump down into a room containing x1 Painting: Night. Jump down and move south to the next room. On the bookshelf, find x1 Vampire Prophecy. Exit the room to the south. Just to your east is another doorway. Enter it to find a chest containing x1 Key, Normal. Interact with both bookshelves on either side of you to receive x1 Vampire Prophecy each. Leave this room and head west of the big door to find a door with a lock on it. Use the key and enter the room. Take the stairs to your left, find x1 Stone, Warrior, and a blue button. Interact with the button to push it down. Head back up and then down the stairs to your right. There is a blue button here as well. Push it down. The pathway north now opens. However, there is a door here guarded by a magical barrier that Seri cannot break, so you will have to return here. In the northwest corner, find x1 Essence, Fire. Head southeast to the door with the golden lock. Then head west and up the big flight of stairs. Save. Enter into combat against the Mutant, who has 2613 HP. After defeating the Mutant, pick up x1 Key, Normal from the ground. Head north then east. You will come across an area with two black windows in the wall, two (2) torches close together on the left and two (2) further apart on the right. There is a secret door in the middle of the wall. Interact with it to enter the room. The chest on the left contains x1 Enchant: Quickness II, and the chest on the right contains x500 Coins. Interact with the back wall to open another secret door. In this balcony area, find a chest containing x1 Enchant: Ethereality. Head back to the main cave, then continue northeast until you can continue north. Then find a door with a lock on it. Use the key to unlock it. Interact with the bookshelf to receive x1 Vampire Prophecy. Head north and crawl under the spider webs, find two (2) paintings, the one on the left being x1 Painting: Prophecy, and the one on the right being x1 Painting: Refraction. Head east and crawl under the spears that descend from the ceiling. Save the game before entering the room at the end of the hall. Before proceeding, I was an average level of 30, so I would make sure you are at least this level. Enter into combat against the Wyvern, which has 8287 HP. I utilized Adrian’s Taunt and Power Attack, Lita’s Charged Shot, Seri’s Ice, and Fire to keep dealing damage and Doren’s Holy Blast. Defeat the Wyvern to receive x1500 Coins, +50000 EXP, x2 Hide, Heavy and x3 Dust, Poison. Also receive Inaria’s Pendant. Above you, unlock the chest to receive x1 Key, Gold. Exit this area and head all the way back to the door with the Golden Lock. Enter into combat against another Mutant, which also has 2613 HP. Defeat it and pick up x1 Key, Normal from the ground. From here, head all the way northeast to the previously unlocked door, then west to the locked door. Enter this room. Find two (2) paintings, the one on the left being x1 Painting: Withered, and the one on the right being x1 Painting: Artifacts. Head all the way back to the door with the Golden Lock and go through it. Read the tombstone. The prophecy is: “It began as a quest for immortality; a spell to make us gods. But the magic failed. We became vampires instead. We went to war with the elves. We won. But in their death, they turned themselves to stone and sealed away the sunstone. We have withered since then. But there is a way to break our curse. There is a way to make us whole. In time, I realized the answer. The sunstone was sealed with the Artifacts of Power. They are enchanted with sunlight and we cannot touch them. We must find a human thrall. We will gather the artifacts. The way to the sunstone will be opened. We will gain its power once more. We will become what we were meant to be.” To solve this puzzle, you must interact with the three triangles ahead and insert the paintings in the following order from left to right: Godlike, Withered and Artifacts. Once you have arrange the paintings correctly, the magical barrier blocking the other door is disabled. Head all the way to the west side of the map to find the door and watch the cutscene. Watch the cutscene. Head up the stairs and watch the cutscene. Head north to fight two (2) Vampires with 933 HP each. Defeat them and continue forward. Save before exiting the cave. Chapter Three, Section II Take the fairy circle southeast and find yourself in the Seremai Plains. Head west back to Castle Atana. Talani is here and this may be the last time you can stop to purchase new items for a while, so buy while you can! Upgrade your gear if you have not done so in a while. Head north and enter the castle. Watch the cutscene. Proceed ahead. Enter into combat against Zi’am, who has 8616 HP. Using Lita’s Sunlight Fury was very effective here if you saved up for it! The same applies to Doren’s Song of the Elves. Also making use of Adrian’s Taunt and Seri’s Fire helped wonders! Defeat Zi’am and receive x1200 Coins and +60000 EXP, as well as x3 Dust, Vampire and x1 Potion, Aether. Watch the cutscene. Head north. In the next room are two chests, the left of which contains x1 Treasure, Diamond, and the right one contains x1 Treasure, Emerald. Continue south. Save before continuing. Watch the cutscene and enter into combat. Miranda has 9631 HP, and the spirits each have 1076 HP. The spirits are elemental, green being earth, yellow being lightning, red being fire, and blue being ice, so use Seri’s abilities accordingly here. Use Doren’s Alter Time, Adrian’s Last Stand, Seri’s Elemental Burst, and Lita’s Cleanse as often as you can. I also relied a lot on Doren’s ultimate ability, but I did try to spread his heals over the team for maximum efficiency. When Maranda changes form, her HP stays the same but her abilities change and become dark. I also used several Poison flasks, Seri’s ultimate ability, and had Doren healing the whole party almost constantly. Defeat Maranda and receive +70000 EXP, x2500 Coins, x4 Dust, Magic, and x1 Dust, Abyssal. Head into the doors below you and speak with the guards blocking the door. Save and enter the room. Watch the cutscene. Chapter Four, Section I After the cutscenes end, go to the throne room where you previously fought Maranda. First, speak with the queen. Receive the quest The Cure. Speak with the king, receive x5000 Coins. Exit Castle Atana, head south to enter the springs, and make your way west towards Hannah’s cave. Enter it and speak with her. She tells you that you need x10 Ilaria Wasp Wings to complete it, and tells you their nest is to the south of the Springs. Head south while staying west and enter the south most central portion of the map that leads to the next screen. The Ilaria Wasps each have HP of 568 but their attacks are strong. Defeating each mob once gave me enough of the wings, but I stayed here for a bit to grind, using the cave in the south of the map to reset the surface area and exiting the cave causes respawns within the cave, so this was a great area to gain EXP. I did some grinding here until my team was level 37, which also gained me a TON of gold. Leave this area and head to the upper right corner of the Springs, move to the next map, find a fairy circle. Use it, and fly towards Castle Atana, on the right side. Land here and find a chest containing x1 Power Crystal: Blue, x1 Essence, Water, and x1 Essence, Light. Head back to the Springs, then head west to go speak with Hannah, receive the antidote and head back to Castle Atana. From Castle Atana, head north and continue north at the bridge. Enter the cave and interact with the crystal ball. Watch the cutscene. You now get to choose a new class for Seri as follows: Battle Mage: Learn the dance of the elements, the harmonious flow of magical and physical. Let your battle staff be an extension of your magical prowess. Bonuses: 1)Attack damage increased 2)Attacks trigger special effects Elementalist: Embrace the power of the elements greedily. Take all they have to offer and unlock the true potential of your spells. Bonuses: 1)+10 MP regen 2)Increased elemental power I chose to move forward with Elementalist because those situations in which you are battling those that can also use elemental magic, this could be more effective against them. Complete the quest Crystal Ball. Return to Castle Atana, enter the throne room, and speak with the queen. Receive +5000 EXP. Exit the castle and head left to exit the city. Exit the Quarry to the southwest. Enter the Starway. From where you are, head south towards the entrance to Aloria, and then start going right across the bridge with the couple standing there. Head north to find a small cave accessible through the water and enter it. Find a chest containing x200 Coins. Head all the way east and enter the gateway. In the Cave of Life, you will encounter mobs you have previously. All the way to the northwestern side, there is a doorway blocked by a magical barrier. You will also find here Lava Lizards with 816 HP and Fire Sprites with 583 HP. Head east. The second pathway south you can take leads you to an outdoor area with a cave. Enter the cave, make your way to the next screen. To the far east is x1 Stone, Magic. Save before entering the cave. Enter into combat against the Wurm, which has 11965 HP. It is especially weak to Seri’s Lightning, so use that! When it dives, it summons Fledgling Lizards with 466 HP each, and they deal some decent damage. Defeat it and gain +100000 EXP, x3000 Coins, x6 Hide, Rare, and x6 Dust, Fire. Interact with the red button to lower the ladder outside the cave. Exit the cave and enter the one up the ladder. In the cave, find a chest containing x2 Ore, Iron, and x1 Key, Normal. Head west and down the stairs, jump down the cliff. Head west and then north up the stairs, open the locked door and go through. Speak with the Strange Man and watch the cutscene. Receive the quest Summoning. Head back down the stairs, to the right, and interact with the sparkle at the top of the other stairs. Head down the stairs to your left. Enter the door on the right. On the table, find x1 Gem: Red. Exit the room. Enter the room on the left to find a chest containing x1 Enchant: Invulnerability II. Head south, enter either door, find a chest containing x1 Key, Normal. Exit this area, head all the way back up the stairs. Head all the way west from here and enter a cave to find x1 Gem: Blue. Head all the way east, head slightly north, and enter the first door you come across. Find x1 Gem: Pink. Step on the blue symbol at the top of the room between the columns to make a bridge fall in the other room. Exit the room, head south, then west, and north at the first pathway. Head up the bridge. The pathway left is currently blocked by a magical barrier, so head right. Enter the locked room and speak with the old man. Since you have collected all three (3) gems, he unlocks the magical barrier. Head towards the left path now, enter the cave. Pick up the sparkle from the floor and watch the cutscene. Continue all the way through the following caves until you reach Talani again, then head towards the stairs and save the game. My team average was level 38 at this point, so go back and grind if you are not at that point yet. Head up the left set of stairs. Speak with the Strange Man. Watch the cutscene. Enter into combat against Ririmsu, which has six (6) heads with 4905 HP each and will attack one after the other as a block. You’re going to want to go all out, use items if you need to, just go ham. During this fight, I only used Doren to heal the team and provide buffs, as well as revive as needed. Seri’s Ice does particularly well here. Also, while the imps that are summoned are annoying, they do minimal damage to your team and distract the monster from attacking you, so try not to engage them in combat to prolong your team’s health. The attacks Ririmsu uses against them are significantly stronger than the attacks it will use against you if you let them remain. Also, use Adrian’s Whirlwind as it slowly diminishes the HP of all the heads at once so you can focus on one at a time with your non-AOE attacks, and when you get to the next head, there’s significantly less HP remaining. Defeating Ririmsu unlocks the magical barrier by the entrance to the cave, in the northwest. Use the teleport in the room, head west and north, and enter the new cave. Head north and west first, find x1 Stone, Bard. Continue south, find a chest containing x1 Enchant: Scorching. Head back north, then head all the way east then south, continue to the next screen. Make your way through the cave and down the stairs. Enter the next screen to Dian’s Gully. Watch the cutscene. In Dian’s Gully, you will encounter Wraiths with 942 HP, Ice Hawks with 785 HP, Snow Bear Cubs with 471 HP. Follow the path from the first screen until you reach the next screen, it is pretty easy to follow! On the next screen, head south and speak with the man. He asks you to go down the well and search for treasure. Receive the quest Down the Well. Interact with the well to descend. The mobs down here are the same as up above. Head directly west to find x1 Essence, Fire. Head directly south, find a chest containing x1 Ingot, Gold. Enter the cave to the north and follow it all the way down to find x1 Stone, Bard. Exit the cave and take the southeast pathway. Follow it until you reach an open area and enter the cave above you. Save the game! Interact with the chest. Enter into combat against the Dire Mimic, which has 8224 HP and summons up to four (4) enchanted items that lower all of your stats, each with 1 HP. For this battle (and this may be my strategy moving forward), I used Adrian’s Taunt and Reflect which added a huge amount of damage back to the mimic, and Lita’s Charged Shot did very well here. Defeat the Dire Mimic and receive x4000 Coins, +150000 EXP, x16 Dust, Magic, x5 Dust, Poison, and x1 Enchant: Corruption II. Also receive x1 Treasure, Ring. Chapter Four, Section II Exit the cave and head all the way northeast to exit the well. Return and speak with the man, there are three options to choose to complete the quest: 1) Honesty, give him the item… 2) Lie, and keep it… 3) Lie, but maybe return it… If you choose option 1, He tells you he is going to take the ring to Temple Orlian to research it and thanks you before leaving, also gives you x1000 Coins and x1 Enchant: Freezing. If you choose option 2, he thanks you for trying, pays you x250 Coins, and leaves. Choosing option 3 ends the conversation without choosing a definitive answer. Complete the quest Down the Well. From the well, continue east, then go as far south as you can until you reach the next screen. Watch the cutscene. Feel free to explore! On the far right side of the map, find a giant crystal. Interact with it to activate the Orlian Teleport. The Temple Orlian is in the central northmost portion of this map, head there. Enter the cave and continue until you reach the next map. Watch the cutscene. Enter the temple. Speak with the old man. Receive the quest Elven Garden. Head to the main hallway, then turn right and down the stairs. Note that there are chests here that are locked. Speak with the nun at the bottom of the room to receive the quest Ghost Bustin’. Head down the stairs below the nun. Here, you will encounter more Wraiths with 1031 HP and Phantoms with 946 HP. You need to defeat every ghost mob down here to receive all x10 Ectoplasm. Once you have collected all of the Ectoplasm, head back upstairs and speak with the nun. Receive x1000 Coins, x1 Enchant: Enlightenment, and complete the quest Ghost Bustin’. Head back upstairs and through the pews in the middle of the building, watch the cutscene. Marise gives you the two keys needed to unlock the chests in the cavern below the temple. Head back down the stairs and interact with the chests on the northeast side. The left chest contains x1 Enchant: Impenetrability II, x2 Dust, Spirit, and x1 Ingot, Gold. The chest on the right contains x2 Stone, Exotic. Now, leave Orlian Temple entirely, and head south through the cave system back to Orlian proper, then head west and enter the Inn, which is the cave on the right. Save the game and speak with the innkeeper. Choosing option 1 proceeds with the plot. Watch the cutscene. Exit the Inn. Watch the cutscene. Rush to Temple Orlian. Enter and watch the cutscene. Head through the doorways on either side of you, then up the stairs. Enter the door on the far right. Save the game. Walk towards the Vampire on the stairs. Watch the cutscene, enter into combat against Azatel, who has over 6000 HP, and two Vampires, both of which have 2407 HP. Defeat them, then head up the stairs. Watch the cutscene. Leave the room and continue south, heading down two flights of stairs, and move as though to leave the temple. Watch the cutscene. Exit the temple, head south to reenter Orlian, then head all the way east and continue south past the Teleport crystal, and walk past a cave all the way right to enter Dian’s gully on the other side of Orlian. Head south and jump down the cliff to enter the cave. Make your way to the northwest corner and interact with the wall. Use a bomb and enter the cave. Speak with the old man, receive x1 Enchant: Immortality IV. Exit the cave, and head back to the gully. Head north. Head east and crawl into the small cave. Make your way north then east to enter the next cave section. Continue through the cave, jump down the cliff and exit the cave. Head south first and jump down the cliff. Head right along the top of the water to find x1 Stone, Magic. Head northeast up the bridge and continue north then wet to find a chest containing x1 Enchant: Power II. Head back east and south and reenter the water. Swim all the way west to the other bridge and land. Had all the way south from here to find a chest down three (3) sets of stairs, containing x1 Ingot, Gold. Head north from here, then all the way east and south, jump down some stairs and cross the river to find x1 Stone, Archer. Head west and north until you see the bridges leading west, then head west until you can head north. Continue north at the bridge and jump up the short wall to your left. From here, head northeast and jump from the land to the island and to the land where the stairs are. Follow the stairs and head east to find x1 Essence, Fire. Head all the way west and go back into the cave. Follow the cave back until you’re back in the gully. Head just to your right and north. Continue north. Just keep going north until you walk up a large staircase. Watch the cutscene. You are now in the Holy Land. Walk down the bridge and watch the short cutscene. Note the fairy circle in the upper left corner of this map. Here, you will encounter Earth Sprites with 1356 HP, Water Sprites with 1175 HP, Sun Sprites with 993 HP, Sprites with 452 HP, and Fire Sprites with 1084 HP. Head south and cross the bridge. There is another fairy circle to your left. Use the fairy circle to fly all the way north to find the last fairy circle, land here, and interact with the chest to receive x1 Ingot, Platinum. Return south to the other fairy circle. Head south and all the way east from there to find x1 Stone, Archer. Head back to enter the water and swim towards the stairs leading up to the archway and enter the cave. Walk all the way north and interact with the middle area of the wall to reveal a secret door. Go through it. There are some great crafting materials here! Find x1 Essence, Wind. Exit this area and return to the Holy Land. Then, swim to the land on the left, follow the path south, and enter the map below you. Head west to find a giant crystal, which activates the Holy Land Teleport. I used this at this time to Teleport back to Orlian. Head to the temple and speak with the old man right inside the entryway. Receive x5000 Coins and x1 Enchant: Anticipation. Complete the quest Elven Gardens. Exit the temple, make your way southeast to the Teleport crystal, and Teleport back to the Holy Land. There is a magical barrier above Talani that you cannot pass through at this time. Head west and continue to the stairs to your left, south, the walk to the stairs. Watch the cutscene. You need to head to the city of Angels to acquire the next Artifact of Power so the fairies will unlock the magical barrier. Head all the way south and cross the water to find a chest containing x1 Relic, Doll. Head back up to the Teleport Crystal, then east to the island with bridges pointing in three directions. Head south. Head east across the land until you cross a small bridge, head down the stairs, find x1 Stone, Warrior. Continue east past the signpost (it may be hard to see because it is in the shade). Head all the way south from where you are, follow the stone path until you reach an area with a short stone wall and an apple tree, there is x1 Essence, Wind above the stone wall. To the left of the stairs on your right, on the middle layer of the cliff area, is x1 Stone, Bard. From here, head west and then north to find a chest (my apologies but I pressed the wrong button here and did not catch the name of the Enchant I found here, but I do know it was an Enchant). Head back around, and then north until you reach water. Enter the water, swim north and return to where you entered this map. There is an arch to the north. Save before you walk there, then do so and interact with the item lying on the ground between the two (2) columns. Watch the cutscene. Take the cave to your right first. In the northwest corner, find x1 Essence, Fire. Take the other staircase up. Walk north to find a x1 Essence of Fire, and a chest containing x1 Ingot, Platinum. Head all the way back to the cave you started in. Head north and take the other cave. Chapter Four, Section III Head all the way south through the water, and, and save your game. Before proceeding, note that I was level 49 when I entered here. If you are not yet at least this level, head back and do some grinding. Enter the cave. Watch the cutscene. Enter into combat against the giant octopus. The main body has 11199 HP, and each arm has 2426 HP. I targeted the tendrils before the main body but after doing that the body was pretty easy to take down! Once defeated, receive x1200 Coins, +250000 EXP, x2 Dust, Endurance, x3 Hide, Exotic, and x2 Dust, Sun. Exit the cave and go back one screen to the cave you were originally in. Cross the new bridge. Continue through the cave and exit. Head all the way south until you reach a crossroad. The path to the right has a cave blocked by a magical barrier, so save the game and head left. Enter into combat against three (3) Cockatrices, each with 3849 HP. Defeat the Cockatrices, unlocking the magical barrier to the east. Head east and enter the cave. Walk through and exit the cave. Save the game. Head up the stairs. Watch the cutscene, enter into combat against the Sky Guardian, which has 28874 HP. I relied heavily on Revival and Life Potion II throughout this battle and was able to make it through by alternating who was attacking and who was using items or buffs to strengthen my position. Defeat the Sky Guardian and receive x5000 Coins, +300000 EXP, x2 Hide, Exotic, x2 Dust, Sun, x2 Dust, Spirit, and x2 Dust, Immortality. Watch the cutscene. Head west to exit this area. Then, head northwest to the teleport crystal and continue west to First Steps. Then, speak with the fairy by the stairs. Head east to Talani and save the game. Head north at the crystal. Watch the cutscene. Head west. Follow the dwarves! Find yourself back in Dian’s Gully. Head down the ladder and watch the cutscene. Head all the way down the map. Watch the cutscene. Chapter Five, Section I Continue west and south, then west again to return to Orlian. Use the Teleport crystal to teleport to Talani’s Shop, which is the closest point to Silvara. There is a fairy circle here. Use it, and fly towards the northeast while staying closer to the center. There are two (2) fairy circles on adjacent islands. The one on the left has x2 Dust, Blessed, and the one on the right has a chest containing x1500 Coins. There is also a fairy circle by a cave in the most northwest corner of the map. Inside, I found x1 Flora, Eris Herb, x1 Dust, Blessed, and a chest containing x1 Relic, Ruby Strand. Head east from Talani’s shop, save before heading north along the bridge. Enter into combat against four (4) Trolls, each with 1544 HP. After defeating the Trolls, and crossing the bridge, you will encounter Crystal Crabs with 1698 HP and Bush Bears with 1313 HP (Yellow), 1244 HP (Multicolored), 1471 (red), and 1357 HP (Green Solid). Follow the path until you reach small set of stairs, jump up the cliff, enter a small cave. Crawl to enter it. Find x1 Stone, Archer. Follow the path north. Continue following the path. When you reach the fork in the road with the signpost, head west. There is a chest up the second ladder to your left containing x800 Coins. Enter the cave on the far left to speak with Tarim Vizur, who if you recall, was the person you competed against in the final round of the archery competition. He asks to buy the Elven Bow you previously picked up from you. I chose to tell it and gained x1000 Coins and +25000 Experience. Completed the quest Elven Bow. Exit the map back to the Starway. Head northeast until you reach a signpost and then head west. Enter Silvara. Silvara is abundant with crafting materials so look carefully! Head west and enter the water, swim across to the left to find a fairy circle hidden by the trees. Use it and fly north towards the caves. To the north is a tavern and materials shop selling all of the materials you may be looking for to fully upgrade your team’s gear. If you can afford to do so, upgrade as much as you can. At this point, I was able to fully upgrade each team member’s gear. Up the left door, in the Inn, find a chest containing x1000 Coins. Follow the path north to find x1 Essence, Wind. Head all the way east to enter the temple building. Interact with the giant crystal to activate the Silvara Teleport. Speak with Reamor. Follow Reamor. The first lever is in the northwest corner of the cave. The second lever is to the east, up a flight of stairs. The third lever is in the southeast corner of the cave, in a room you need to crawl into. Interact with all three (3) and head back to the center of the room. Interact with the red button by the window and watch the cutscene. Follow the tracks north. Pass through the cave. Pass through the meadow to the next cave. Follow the cave. Climb up the ladder. Cross the bridge. Find x1 Essence, Wind. Interact with the chest and watch the cutscene. Take the Teleport back to Silvara. We’re heading to the farmlands, east of Silvara. But first, let’s complete the Bounty Quest Vampire Stalker. Leave Silvara and start heading east. Enter the cave you come across. Following the left pathway, head northeast. Interact with the empty mine cart next to the full one and a guard below moves from a doorway. Head east then south from where you are and enter the doorway on your left. Continue through the cave and enter the next room. Save the game. Walk toward the Vampire, watch the cutscene. Engage in combat against the Vampire Stalker, who has 5291 HP, and her army of spiders, each of which have 2893 HP. The vampire should actually be very easy to beat here, the issue is her spiders. They bite you only dealing minimal damage, but restoring 9999 HP each time, so you need to beat the witch first, then work on defeating one spider each turn before they can take their turn. Defeat the Starwitch and receive x2000 Coins, +251285 EXP, x3 Dust, Vampire, x3 Dust, Immortality, x4 Hide, Rare, and x1 Enchant: Siphoning II. Exit Silvara to the east, continue east, then head northeast. Enter the first cave you come across, find a chest containing x2500 Coins. Head east. Cross the bridge. Continue to the southeast corner. Find x1 Essence, Wind. Make your way to the northeast corner of the map and move to the next screen. We’re going to battle the Starwitch! I am level 52 at this point so if you are not at that level, head back and grind some more. Continue right. Save the game. There is a secret door in the middle of the statues, interact with the wall to open it. Interact with the red button in the left room, and the blue button in the right room, to disable the magical barrier on the door in the middle room, then proceed through the middle. Enter into combat against the Starwitch, who has 14279 HP, and the Golem she summons which has 34999 HP. The Starwitch can manipulate time, so she can control your turns basically. Make use of the time you have and note that she can also siphon your mana so use your items where needed! You don’t need to defeat the Golem to win the battle, just survive its attacks, so use Doren’s defensive and healing spells to keep your party in fighting shape, have Adrian Taunt the enemies where possible, and just go all out with Lita and Seri. After defeating the Starwitch, receive x3000 Coins, +419999 EXP, x3 Dust, Immortality, x2 Dust, Aether, x2 Dust, Spirit, and x1 Enchant: Refreshment II. Return to Silvara and use the Teleport crystal to teleport to Aloria. Head slightly north then east and enter the Rangers Guild. Speak to Toran and turn in both the Vampire Stalker and Starwitch Bounties. For the Vampire Stalker, receive x2500 Coins. For the Starwitch, receive x5000 Coins. Also, because you completed all of the Bounties, receive x1 Relic: Protector, x2000 Coins, and +15000 Experience. Return to the Aloria Teleport and Teleport back to Silvara. Exit Silvara to the east and reenter the northeast forest area, and continue all the way west. When you can, head north and continue north until you can enter a cave. In the back of the cave, find a chest containing x2500 Coins. Head all the way to the east side of the map, towards the Elven Ruins. There is a signpost outside the entrance. Go to the next screen. Watch the cutscene. Head up all the stairs. Enter the cave. Watch the cutscene. Interact with the giant crystal to activate the Eldrinor Teleport. You’ve been to this place before, so it should look somewhat familiar! Interact with the secret door in the wall on the right side of the cave and go through it. Continue all the way to the back of the cave like before and go through the door. Speak with the dwarf and follow her up the stairs to your left. Watch the cutscene. Open the secret door in the back of the wall. Keep following the path through this room to the next, go down the stairs on your left. Watch the cutscene. Reamor tells you there are keys hidden in the west and east wings of the castle behind him to unlock the way forward. Here, you will encounter Abyssal Banshees with 1373 HP, Abyssal Warthogs with 1662 HP, Abyssal Beasts with 1997 HP, and Abyssal Horrors with 1497 HP. This is a great area to grind and the last area to do so in, so make the most of it by entering and exiting buildings to cause respawns if needed and get your level up. Talani is where Baramon walked through the floral archways. Head to the building on the far right. Between the two (2) cabinets by the entrance is an elf. Interact with it to unfreeze it. At the northmost area of the room by the balcony is another elf. Interact with it to unfreeze it. In the upper right corner of the room is another elf. Interact with it to unfreeze it. Unfreezing these elves unlocks the magical barrier guarding the center of the room. Head down either set of stairs in the center area of this room. Chapter Five, Section II In the new room, head all the way west, find an elf directed towards a balcony. Interact with it to unfreeze it. Then, head south, then all the way east, and slightly north to find another elf. Interact with it to unfreeze it. Keep going north until there is a small square room on the right. Enter it and find a statue in front of a pile of rubble. Interact with it to unfreeze it. Note that a magical barrier in this building has been unlocked. Head west and find a chest containing x1 Key, Normal. Head back to the stairs and go back up. Head to the doorway in the northwest corner of the castle from where you are. When you walk in, there is a frozen elf right in front of the barricaded door above the water. Interact with it to unfreeze it. There is a locked door on the left of the room, unlock it and go through. Head south down the wooden area and keep going until you find Talani. There is an elf here. Interact with it to unfreeze it. Head all the way back north and turn right at the wooden bridge. Take the first staircase up to find x1 Stone, Bard. Head back down and continue right to the next screen. There is an elf to the right of the chair. Interact with it to unfreeze it. Exit the room and head all the way left this time. There is an elf right in font of you when you enter. Interact with it to unfreeze it. Head back to the wooden bridge. Save the game. I was level 53 on average at this point so if you are not yet there, head back and grind. Head down to where Talani is, south. Watch the cutscene. Enter into combat against a Gold Drake with 7944 HP, an Ice Drake with 7944 HP, and a Venom Drake with 7944 HP. Make sure you are using Taunt here, Doren’s Alter Time, and you should be able to manage. I didn’t need to use a single revive spell or item here. Once you defeat them, receive x15000 Coins, +377999 EXP, x6 Hide, Exotic, x3 Dust, Poison, x3 Dust, Spark, x3 Dust, Ice, and x1 Key, Gold. Take the teleport that appears back to the entrance of the building. Head toward the floral arches in the center of the building. There are four (4) switches here, two (2) on either side of the torch, that need to be pulled. Their order is, from left to right: Up, Down, Down, Down. This causes two staircases to open on either side of the switches. Take either one. In the right of the immediate room is an elf in front of an armoire of sorts. Interact with it to unfreeze it. On the left side of the same room is another elf standing to the right of a broken barrel. Interact with it to unfreeze it. The chest in the middle of the room is now accessible. Open the chest to receive x1 Key, Normal. Exit the building entirely and head to the building on the far right of the map. Head down the stairs in the middle, then all the way south. Unlock the door. Save the game before continuing through. Walk down the stairs and watch the cutscene. Enter into combat against the Abyssal Abomination which has 21186 HP. It can also summon Summoning Flames with 926 HP. You don’t have to defeat its summons to beat the battle, just focus on defeating it and keeping the other mobs taunted on Adrian to balance out the damage. Receive x147 Coins, +367499 EXP, and x5 Dust, Abyssal. Continue south and west to find x1 Essence, Wind. Head north and enter the cave. Continue north through the cave. On the other side, find a fairy circle. The fairy circle you are aiming for to proceed is directly north, so go there. Head all the way south to find a chest containing x1 Key, Gold. Use the teleport to travel back to the entrance of the building. I did some grinding using the three (3) mobs right outside the right most building and right inside the same building until I had reached level 60 across the board. Interact with the door in the center of the area with the gold lock and go through, watch the cutscene. Take the left set of stairs, follow the other stairs down and make your way down the south way. Enter into combat against some basic scrubs. Wipe them out, then watch the cutscene. Head south. In the northeastern corner of the cave is an elf. Interact with it to unfreeze it. In the southeast corner is another elf. Interact with it to unfreeze it. Head west and up the stairs to find another elf. Interact with it to unfreeze it. This unlocks the magical barrier below you. Save the game! Go through the new cave. Enter into combat against Lord Nash, who has 26716 HP. Lita’s Sunlight Fury does very well here. Also Adrian’s taunt and Reflect, and Lita’s Holy Charged Shot, since at this level the crit rate and damage is pretty great. I didn’t have too much difficulty with this battle at this level and with the gear build. Defeat Lord Nash and receive x800 Coins, +524999 EXP, x3 Dust, Vampire, and x3 Dust, Immortality. A set of stairs has opened in the other room. Head all the wa north and after climbing up the stairs, head down those immediately to the left. Enter the water and swim to the small cave to your immediate right. Enter it. Follow the cave through to the snow. Follow the path east and then south. Find an elf blocking the bridge south. Interact with it to unfreeze it. It turns out this elf is Dian! Enjoy the backstory. He tells you to meet him in the grand hall in the castle. Follow him into the Teleport. You are now on the other side of the magical barrier that Baramon set on the floral archways. Walk towards the castle and enter the door on the left. Watch the cutscene. If you haven’t already, upgrade your gear to the highest you can get it. Save the game. Head forward. Watch the cutscene. Enter into combat against Baramon, who has 54366 HP. Lita’s Sunlight Fury does great here if you are able to use it. Use status effect abilities where you can, Adrian’s taunt, Doren’s healing abilities and defensive abilities, and go ham with Seri. He does summon Summoning Spirits with 926 HP. After dealing about 8000 damage, Baramon transforms into a new form that deals more damage. After dealing about 23000 damage, Baramon transforms again. Just try to keep his mobs from morphing into their stronger forms by defeating them faster. Make sure you are boosting your stats with either skills or abilities regularly to prevent total death! I had Baramon down to 1 HP with 2 summons remaining and he issued a hit that dealt 999 damage to each member of my party, wiping them out. Watch the cutscene. The end! I hope you enjoyed the game and the ending as much as I did! Side Quests, Section I This is a list of every quest you'll receive during gameplay that you would find in your Items list! (At least, every quest I came across myself. Let me know in the comments if you find any that I missed!) Make a Potion: “Using the Craft Menu, I’ll combine my Fish Oil, Angelflower and Stardust to create a Mending Potion for Adrian.” In the opening area ruins: 1)After picking up Key, Normal, and encountering first battle, gain x1 Stardust from victory. 2)In the room with the Spirit, find x1 Angelflower. In another, it was found within some sparkles, but both times it was found in this room. 3)In the body of water above Adrian, swim over the fish, use [Enter] to dive, gather the Oil, Fish. Snowbear!: “I’ve been asked to find a stuffed snowbar and to bring it back to Janice in Aloria. 1)Enter the Great Bazaar in Aloria. 2)Up the stairs on the left, interact with the first merchant on your right. 3)Purchase Snowbear. 4)Return to Janice. Upgrades!: “Cara, the local busybody, insists I should upgrade some of my equipment (through the Crafting Menu), then come back to her. She’s offering to reward me, so I guess I better do it…” 1) Go to the Menu. 2) Go to Crafting. 3) Move over any member of your party. 4) Upgrade any item for any party member. 5) Return to Cara. Bunny Girl Bandit: “The so-called ‘Bunny Girl Bandit’ has been committing petty crimes in Aloria. We believe she’s near here. She’s been stealing little things. Some coins here, some fruit there. Nothing serious. Still, it has to stop. 100 coins for this bounty.” 1) Head back west to the Great Bazaar, but do not go inside. Instead, head left. 2) Continue to follow the path all around the farm until you find the water areas. You will come across one particular water area with a large crystal in it next to a break between this section of land and the next. 3) Swim south until you enter a new screen, then climb out of the water, head down the stairs, and enter into the ruins. 4) Defeat the Bunny Girl in battle. 5) Return to the Rangers Guild in Aloria. Armire Gang: “The Armire Gang has been committing serious crimes along the Starway. Our rangers haven’t been able to locate their leader, Armire himself. We believe he’s somewhere in the Starway. Be careful if you find him. He’s dangerous. Bring him in dead or alive. It’s a 500 coin reward for his head.” 1) Enter the Springs from Aloria. 2) Head north until you see two (2) caves on the right near some water. Enter the top cave. 3) Speak to the pirate in blue and ask him for a fight. Armire drinks alcohol to replenish his HP. 4) Defeat Armire and his gang in combat. 5) Return to the Rangers Guild in Aloria. Vampire Stalker: “A vampire is living somewhere north of the Hunting Range, attacking travelers and turning them. This, needless to say, must be stopped. Be cautious if you come across this vampire. He or she is very dangerous.” 1) From Silvara, leave the town and head east. 2) Enter the first cave you come across. 3) Make your way all the way through the cave to the far back. 4) Fight and defeat the Vampire. 5) Return to the Rangers Guild in Aloria. The Star Witch: “The Star Witch is hiding somewhere far to the north, last I heard. Perhaps near Silvara. Be cautious should you attempt to engage her. She is extremely dangerous and extremely powerful. This is the biggest bounty we’ve ever offered. It’s 5000 coins if you can defeat her.” 1) From Silvara, head east, then continue all the way northeast. 2) In the new map, make your way all the way northeast. 3) Move to the next map. 4) Enter the cave. 5) Make your way through the cave to a balcony. 6) Battle the Starwitch. 7) Return to the Rangers Guild. Hill Dwarf?: “There’s a strange dwarf up on that hill! I wonder what he’s doing there…” 1) Use the fairy ring in the southwest corner of Aloria, fly to the far east corner and use the fairy circle. 2)Speak with Bimly the dwarf. 3)Follow Bimly east and enter the cave. 4)Swim north to find Bimly on a stretch of land and speak with him. 5)Interact with the symbols that appear, one in the west of the cave by the fairy ring, one in the southeast by the other fairy ring (you can use the fairy rings to quickly move from one symbol to the other), and the third in the northeast corner. 6)Go back to where Bimly was, save the game. 7)Interact with the tablet and enter combat. 8)After defeating Bimly, choose a new class for Lita. ” 1)Go to the Great Bazaar in Aloria. 2)Walk all the way to the top area and speak with the baker, who can be identified by the loaves of bread he is surrounded by. 3)Purchase one bag of Flour. 4)Exit the Great Bazaar, head all the way north, then east across the bridge, and enter the first cave. 5)Speak with Shelly, give her the Flour, complete quest and receive +100 Experience. Big Salad: “Well, this is a fine way to spend my morning, isn’t it? Oh well. I’ll find some lettuce, tomatoes, radishes and turnips, then return to Farmer Jean.” 1)Exit Farmer Jean’s house, walk directly south into the farm plot, walk along the water to just above the second to bottom row of vegetables, then interact with the sparkles in the plants to receive Radishes. 2)From Farmer Jean’s house, follow the path northwest until you walk upon some Lettuce and Tomatoes. 3)All the way below and kind of to the left of the Radishes, find the Turnips in a patch. 4)Return to Farmer Jean. Old Statue: “Somebody standing outside the Cave of Life told me they found a statue of an old man in a side passage near the entrance blocking the way further inside.” 1)Enter the Cave of life. 2)Walk north, then left at the fork in the road. 3)Enter the next screen. 4)Interact with the statue, complete the quest. The Necklace: “I was given a strange necklace by a rude man that didn’t want it anymore. He said he found it in the Seremai plains.” 1)Enter the Seremai Plains. 2)Head east, then north and stay north until you find two caves. Enter the left cave. 3)Head north past Talani until you reach a cave. 4)Speak with the ghost at the back, who asks you to go kill the demon that cursed the necklace. You see a door open elsewhere. 5)Head north along the left-hand side of the map until you find a small building with a now open door. Enter it. 6)Complete the three (3) torch stand puzzles found in the west, northeast, and north areas of the cave by moving the torch stands into the nearest bright source of light, causing the door in the north to open. 7)Head through the cave exit in the north and interact with the spirit to enter combat. 8)Using Adrian’s Taunt when the spirit is about to use its charged attack will defeat the Spirit regardless of your level. 9)Head back to the spirit boy in the cave system and speak to him. 10)Pick up the necklace from the ground. The Tower: “The owner of the Apple Orchards said there was rumored to be a strange fertility crystal in the tower north of the orchard. Is it for the orchards or his wife? We’ll never know! I’ll find it and bring it back.” 1)Head to the Orchards. 2)Head towards the middle column of the map and all the way north. 3)Enter the tower. 4)Make your way to the top. 5)Defeat the Mimic. 6)Collect the Fertility Seed from the chest outside from this floor, to the bottom right. 7)Return to Mister Carver. Side Quests, Section II What’s This?/Crystal Ball: “I found a weird crystal ball! It looks magical. If I ever make a magical friend, like a sorcerer, I should bring them to see it!” 1)From the Blood Forest Teleport. To the far west, and having head north, there are two (2) gates that are locked here. In the cave here, there is a chest containing 1x Power Crystal: Red. 2)Head to the Orchards. Head south, then west across the bridge, and north. Continue north until you reach the Tower. Defeat the Mimic and receive x2000 Coins, x5000 EXP, x3 Dust, Poison, and 1 Power Crystal: Green. 3)Head to the upper right corner of the Springs, move to the next map, find a fairy circle. Use it, and fly towards Castle Atana, on the right side. Land here and find a chest containing x1 Power Crystal: Blue. 4)Return to the cave to the north of Castle Atana. 5)Interact with the crystal ball. 2nd Stone Curse/Stone Beast/Adrian’s Parents: “I found a strange statue, southeast of the Springs, but I can’t break its curse. If I make friends with anyone knowledgeable, maybe they could tell me more about it…” / “A sign warned of a dangerous beast in the Southeast Springs area. Should I investigate?” / “Adrian found an amulet that looks like his mother’s in a cave… Could his parents have fallen in the area southeast of the Springs?” 1)Enter the next screen on the other side of the cave in which you received this quest (in the Springs). 2)Head all the way southwest. 3)Save the game and enter the cave. 4)Watch the cutscene, where Doren tells you that a creature called a Firadir has the ability to turn its prey to stone. 5)Enter into combat against the Firadar who has 4752 HP. I used Adrian’s [Taunt], Doren’s [Holy Blast], Lita’s [Charged Shot] and [Sunlight] abilities, and Seri’s [Lightning] to deal maximum damage. I also used Adrian’s [Reflect] when the Firadar started charging for a big attack. 6)After defeating the Firadar, receive x222 Coins, +19620 EXP, and x3 Hide, Heavy. The Cure: “Queen Nahira has tasked me with getting a cure for the king. I should ravel to the Springs and speak with the alchemist Hannah about this.” 1)Teleport to the Springs. 2)In the room, speak with Hannah. 3)Head to the east side of the springs, head a bit south, then west. Continue south. 4)Enter the next screen. 5)Battle every bug mob you find until you receive ten (10) wings. 6)Head back to Hannah. Down the Well: “A strange man in Dian’s Gully said there was a treasure hidden in an old well. Maybe I’ll check it out…” 1)Interact with the well to descend. 2)Take the southeast pathway. Follow it until you reach an open area and enter the cave above you. Save the game! 3)Interact with the chest. 4)Enter into combat against the Dire Mimic, which has 8224 HP and summons up to four (4) enchanted items that lower all of your stats, each with 1 HP. Defeat the Dire Mimic. 5)Exit the cave and head all the way northeast to exit the well. 6)Return and speak with the man, there are three options to choose to complete the quest: 1) Honesty, give him the item… 2) Lie, and keep it… and 3) Lie, but maybe return it… If you choose option 1, He tells you he is going to take the ring to Temple Orlian to research it and thanks you before leaving, also gives you x1000 Coins and x1 Enchant: Freezing. If you choose option 2, he thanks you for trying, pays you x250 Coins, and leaves. Elven Garden: “An old man told me there was a beautiful place in the Holy Land where the elves once kept a garden. He’s too old and too blind to see it for himself, so he asked me to find it and describe it to him.” 1)Walk down the bridge and watch the short cutscene. 2)Head south and cross the bridge. 3)Enter the water and swim towards the stairs leading up to the archway and enter the cave. 4)Walk all the way north and interact with the middle area of the wall to reveal a secret door. Go through it. 5)Exit this area and return to the Holy Land. 6)Then, swim to the land on the left, follow the path south, and enter the map below you. 7)Head west to find a giant crystal, which activates the Holy Land Teleport. I used this at this time to Teleport back to Orlian. 8)Head to the temple and speak with the old man right inside the entryway. Receive x5000 Coins and x1 Enchant: Anticipation. Ghost Bustin’: “The basement of Temple Orlian has been infested by ghosts! I should chase off as many as I can, and return to the nun with their… spectral leavings as proof.” 1)In Temple Orlian, head down the stairs below the nun. 2)Here, you will encounter more Wraiths with 1031 HP and Phantoms with 946 HP. You need to defeat every ghost mob down here to receive all x10 Ectoplasm. 3)Once you have collected all of the Ectoplasm, head back upstairs and speak with the nun. Receive x1000 Coins, x1 Enchant: Enlightenment

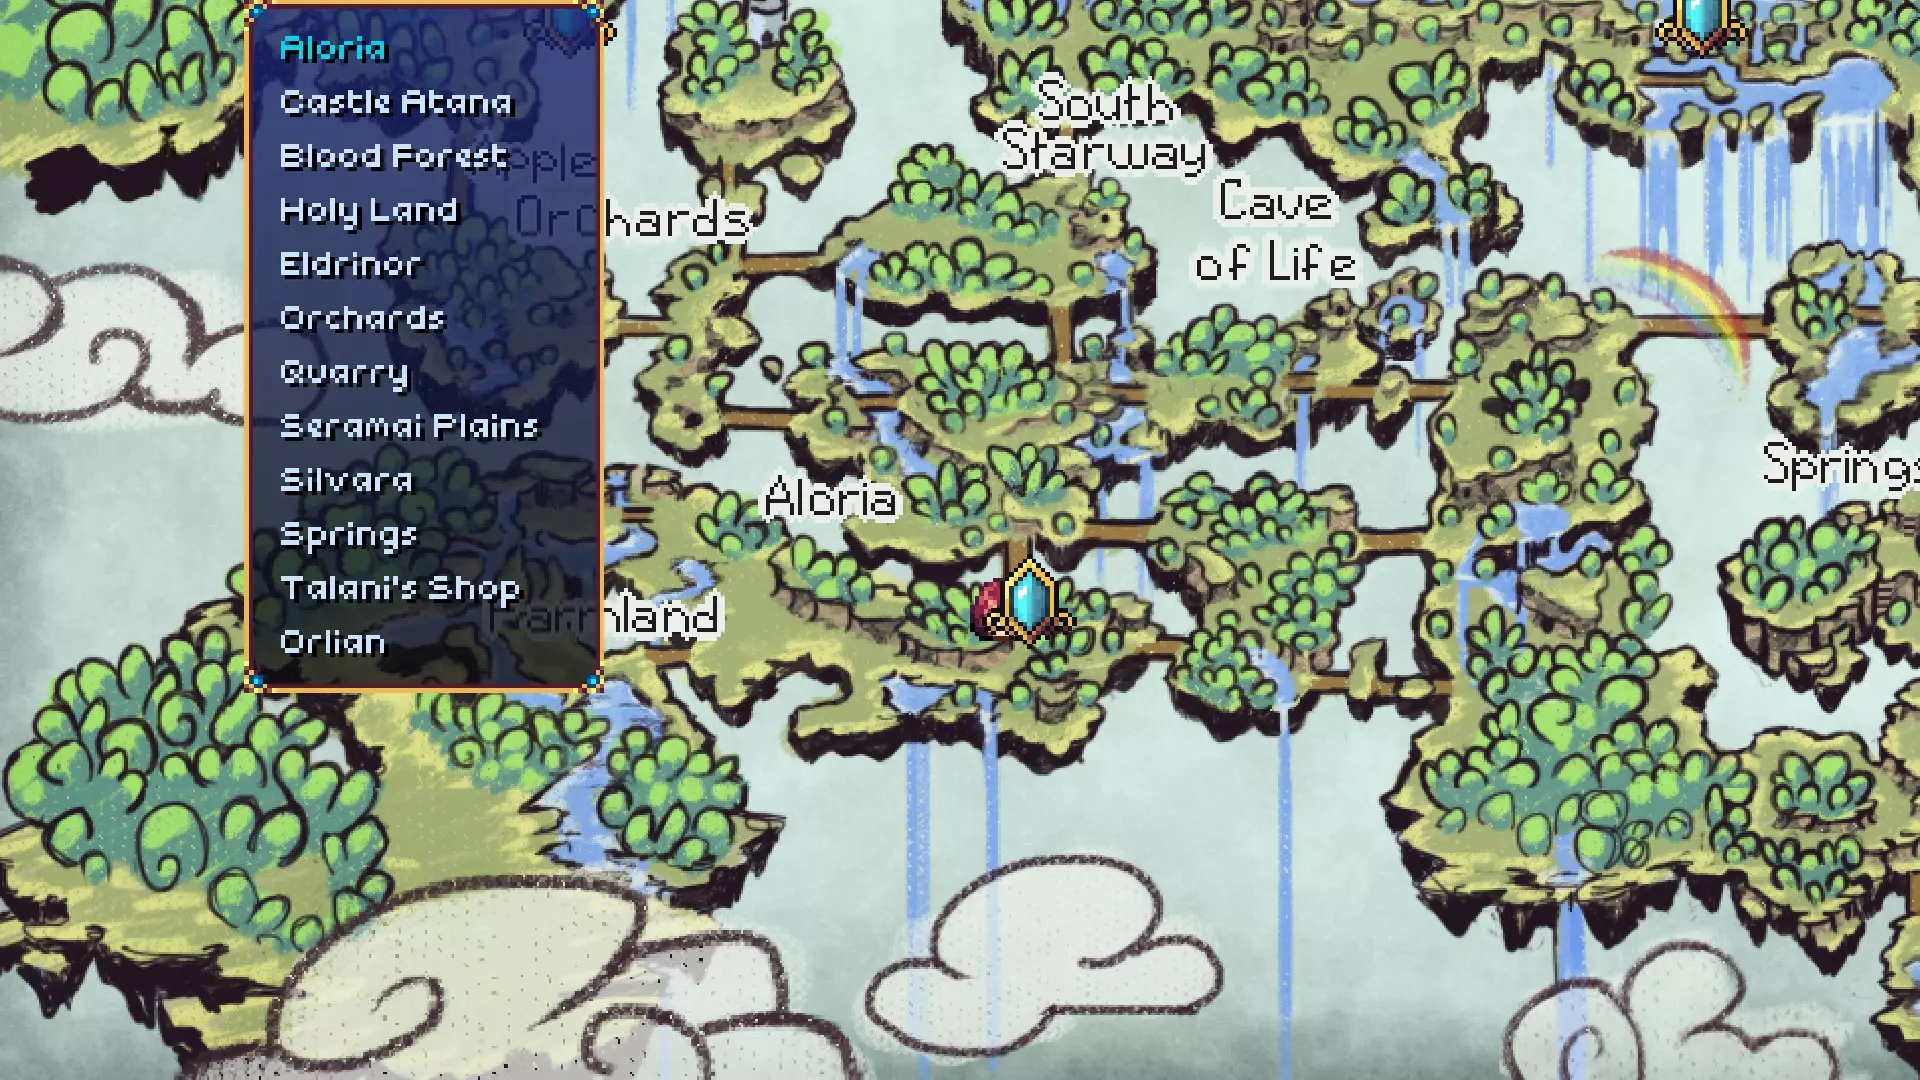

《阿拉菲尔:增强版》专家难度角色养成指南 简介 《阿拉菲尔:增强版》并非一款特别具有挑战性的游戏,即便是在专家难度下亦是如此。不过,我热衷于钻研如何在该难度下优化角色养成,而且目前似乎并没有针对增强版的角色养成指南,所以在此分享我是如何在专家难度下全程不使用药水通关的经验。 这款游戏的平衡性良好,节奏也较为舒缓,因此你不必严格遵循某一固定指南来通关,适当的刷级就能弥补任何不够优化的角色养成。但本指南旨在帮助你减少刷级的需求。 请注意,本文可能包含轻微剧透,尤其是对于尚未解锁所有角色的玩家而言。我玩过该游戏的增强版,所以这可能对同样在玩这个版本的玩家有所帮助。 本指南内容稍显杂乱,因此可以使用右侧的目录来查看你感兴趣的内容并跳转到相应部分。 属性分配 首先,确保你的“基本需求”得到满足: 1. 确保你的角色拥有足够的速度来超越该区域的怪物。这通常也能保证他们能超越 Boss。 2. 确保你的角色拥有足够的生命值,至少能承受 Boss 的 1 到 2 次攻击。你会逐渐找到感觉;如果你能轻松击杀该区域的敌人,这可能意味着你应该分配一些点数到防御上(不需要太多;即使在游戏末期,你的角色生命值也不应超过 220 - 270)。1. 只要刷够等级通过一个区域,就能前往下一个区域。 2. 每种物品的最大堆叠数量为99个。在达到上限前卖掉一些。 3. 始终尽量保持足够的敏捷以快过对手。 4. 不用担心花钱。 5. 旅行商人的 inventory 会在每个新区域刷新,但她的价格是平时的两倍。 6. 不要懒得去调查水波纹。我曾经在果园的水波纹里捡到过一块银锭(不过大部分是硬币)。 第一章 1. 专注于火力,而非防御(是的,包括艾德里安)。在游戏后期之前,你的装备应该足以满足生命值需求。 2. 莉塔必须专注于速射。她的蓄力射击是最强技能,但消耗太高难以持续使用。 3阿德里安在游戏初期不需要投入防御属性。他的旋风技能是强大的范围攻击能力,丽塔此时还没有这个技能,这能加快刷级速度。 4. 尝试解锁塔拉妮的商店和她的传送门(她在星道的家中有一个永久商店,以正常价格出售物品)。她的商店非常有用,因为她会持续出售你当前阶段无法获得的材料,让你能更早升级装备,保持良好的装备状态。 第二章 1. 塔拉妮的商店仍然营业,所以如果需要购买材料,你可以传送到那里。 2. 你将在没有阿德里安的情况下行动,因此你的角色可能需要更多生命值来弥补这一点。分配一些点数到防御上。 3.尝试获取莉塔的羽绒背心II以获得更好的防护。你需要从塔兰尼的商店(星道以西)购买材料,尤其是棉花。厚兽皮很容易刷取。 4. 塞莉的装备提供的防御力不高,所以给她增加一些防御力。 5. 对付 bosses 时要稳妥行事;确保有足够的 MP 用于急救,不要频繁使用速射。 第二章(全队集结) 1. 虽然没有明确说明,但你需要四处完成莉塔和她同伴们的任务,以解锁他们的第二职业。顺序不太重要。 2. 莉塔的第二职业能带来最大的 DPS 提升,因为它解锁了莉塔的范围攻击潜力。使用塞莉的元素爆发和范围技能来清剿敌人队伍。 3.赛莉的第二职业对探索的依赖性最高,可能也是(就战斗而言)最容易获得的。建议使用攻略来完成。 4. 艾德里安的第二职业可能是最实用的,能让他的旋风技能为队友恢复魔力值。 5. 多伦的第二职业防御性最强,不仅能通过时间扭曲提升防御力,还能增加闪避几率。 6. 我建议先完成莉塔的任务,然后是赛莉的,接着是艾德里安的,最后是多伦的,但这其实不是什么大问题。 7. 我完成这些任务的顺序是莉塔、赛莉、多伦、艾德里安。 8. 解锁三阶附魔,并给你的一个角色装备贪婪附魔来赚钱。一旦你的所有队员都获得了第二职业,就可以开始在塞拉迈平原与哥布林战斗了(就是那个红色敌人的任务,古代项链任务),并让塔兰妮治疗任何伤势。你的队伍中会有一到两名队员不断被哥布林长矛手击杀(最好让莉塔保持队伍中最低的生命值),但这比刷其他敌人更快,而且你还能获得一些用于制作三阶装备的稀有皮革。实际上,你可以利用艾德里安的反射技能击败该区域的 boss,从而提前解锁项链遗物。这并非必需,但拥有它会很不错。 10. 准备就绪后前往城堡(等级达到 24 - 25 级比较合适)。在击败玛兰达的深渊形态后,你基本已经掌握了游戏的玩法,并且已经解锁了扫荡剩余区域所需的全部内容。 技能升级顺序 1. 就能越快击杀普通怪物来升级 2. 就能越快提升实力和装备在 boss 战中,你越快集火 boss 越好。 按以下顺序升级他们的技能: 莉塔: 速射 精灵专注 侦查 蓄力射击 急救 艾德里安: 旋风 标记 嘲讽 强力攻击 反射 塞莉: 火焰 寒冰 引导 闪电 大地 多伦: 时间扭曲(可叠加) 神圣冲击 治疗(若为神秘学者,则改为复活) 复活 再生 职业与技能强化选择: 游戏平衡性良好,许多选择可根据个人偏好决定。以下是我觉得使用起来比较顺手的职业和强化组合。 你可以在此处查看每个职业的技能列表。技能强化等级分为【重要】、【良好】、【次要】和【无用】,以便你了解各角色应优先强化哪些技能。 莉塔:游侠 理由: 1. 从技能强化角度看,女武神技能略占优势。 2. 但游侠职业拥有+5%暴击率和+25%暴击伤害,这相当于约41点属性点,仅此一点就使游侠优于女武神。 3. 游侠还能获得+20速度,因此莉塔几乎能快过游戏中所有敌人。 她的技能强化优先级如下: 充能射击:弹跳——弹片攻击其他敌人, potency+10 重要 这解决了莉塔缺乏范围攻击的问题。 速射:动脉射击 良好 在我看来这是个人偏好,因为两个选项都非常好。如果你等级不足,禁用射击更好;总体而言,动脉射击更优。 精灵专注:神圣之力 - 增加10%所有伤害 良好 莉塔不需要更多速度,而更多伤害总是好的。 日光之怒:致盲箭 - 使目标眩晕1回合 良好 眩晕敌人意味着你的整个队伍获得一个自由回合来集火 boss,比增加威力更有用。作为开场技能也不错。 侦察:弱点暴露 - 降低敌人5%防御力 微不足道 两个选项的收益有点相似,但降低防御对持续伤害也有好处。急救:治愈精通 - 为目标恢复少量生命值,持续2回合。 无用 莉塔的游侠职业对其急救技能提升不大,所以我决定让她仅提供一些生命恢复效果。作为游侠,我几乎从不使用她的急救技能。 阿德里安:圣骑士 理由 1. 他的职业选择取决于个人偏好,但让阿德里安成为狂战士需要从根本上改变队伍配置和他的玩法。就我个人而言,我更倾向于让阿德里安担任辅助,莉塔担任输出。 2. 让阿德里安成为狂战士会削弱他支援队伍和保护自己的能力。这一选择最好在较低难度下使用。 3.记得也要提升角色的装备。大约在第二章之前,你不需要分配点数到防御上。 3. 不建议为了魔法值而将点数投入智慧;如果莉塔需要魔法值,只需用精灵之力/侦察/基础攻击来缓冲。如果阿德瑞安的伤害属性培养得当,他的旋风技能(在解锁圣骑士职业后)通常能为队伍恢复足够的魔法值。我个人更倾向于将艾德里安培养成圣骑士,这能让他变得更肉,并且成为一个强大的魔力值充电宝,在游戏中期非常实用。 技能强化顺序如下: 旋风:清新光环 - 为队友恢复魔力值。 重要 他为队友提供魔力值的能力极其有用。他造成的伤害越高,恢复的魔力值就越多,这非常棒。他能解决你所有的魔力值担忧。 嘲讽:直觉 - 2回合内格挡率提升50%。 重要 这会让他变得更抗揍。我们希望提高格挡率来应对多次攻击。 背水一战:以太涌动 - 每回合终极技能充能增加10%。 良好 艾德里安举着盾牌时能承受大多数攻击,所以无敌效果并非必需。在我看来,提高终极技能充能更好。马克:生命汲取 - 对目标造成的伤害会为攻击者恢复所造成伤害的10%作为生命值。 优点:在游戏中后期,10%的伤害输出可以转化为每回合100-200点生命值的治疗,这非常强力,能让多伦除了治疗外还能做其他事情。 强力攻击:生命虹吸 - 恢复所造成伤害的25%作为生命值。 优点:在游戏后期,这对艾德里安来说几乎是一次完全治疗。 反射:无升级 你可以通过升级它来获取成就,但反射敌人的攻击有时比其他效果更有价值,而且我们也不需要其他增益。例如在诅咒之灵 boss(远古项链)战中,你可以将他的诅咒反射回去,将其生命值降至1点。 塞丽:元素使 理由:1. 我认为塞丽的职业选择取决于个人偏好。两者各有千秋。 2. 元素使更适合作为终极辅助(完全升级的聚能技能可以在1回合内充能多兰的终极技能)。她的魔力回复在游戏早中期表现也非常出色。 3. 元素使在对付多个目标时表现稍好。 4. 战斗法师在对付单个目标时优势明显。 5. 不过,战斗法师的操作也更复杂。元素使只需每回合交替使用火焰/闪电和冰系技能,而战斗法师则需要先施加减益效果,再用基础攻击引爆。 6. 在第一次通关后,我已经习惯了随时能使用终极技能,这就是我让塞丽成为元素使的原因。按以下顺序强化她的技能: 冰系:冰之调和 - 将被命中敌人的伤害减免提升至20%。 重要 首回合立即降低所有敌人20%伤害效果非常好。 能量引导:以太汲取 - 每5点魔法值可使终极技能充能增加1%。 重要 这使塞莉成为【精灵之歌】的优秀终极技能充能工具。中期,她还能通过为莉塔的【日炎之怒】充能来造成更多伤害。 火系:火焰调和 - 将献祭效果的 potency提升至每回合10点。 良好 雷系:闪电调和 - 将目标身上的增幅打击次数提升至3次。 良好 提升团队伤害。元素爆发:元素超载 - 对所有敌人施加所有元素状态效果。 无关紧要 即使使用爆发技能,她也能成为强大的减益施加者。 大地:大地调和 - 每个目标的速度将降低2回合。 无关紧要 大地属性对元素使来说不是很有用。你应该始终投资速度,以确保比敌人更快行动。 多伦:牧师 理由: 1. 多伦的职业选择取决于个人偏好。两种职业都是可行的。我选择牧师是因为我想更快通关游戏。 2. 牧师在前期更有优势,因为能立即获得15点治疗效果加成,这意味着从一开始就能为队伍提供全额治疗(在后期这并不重要,因为你的力量值会足够高,即使没有治疗效果加成也能进行全额治疗)。你的范围神圣冲击还会造成 daze 效果,这在你尚未妥善培养角色敏捷属性时很有用。 3. 牧师也能更快通关游戏,因为你无需等到敌人回合就能触发神圣冲击伤害,而且该伤害可以暴击(持续伤害效果无法暴击)。因此牧师能造成更高的个人伤害,让你更快消灭怪物。 4. 不过,神秘学者的时间扭曲技能更为强大,因为其 buff/debuff 效果可以叠加。在 boss 战中,他们是更出色的辅助,因为闪避不如伤害增减益效果有用。这就是多兰的职业选择取决于个人偏好的原因。理论上,神秘学者可能更优,但实际上,我更喜欢牧师。按以下顺序强化他的技能: 牧师: 神圣冲击:震荡冲击 - 对所有敌人造成+20威力的伤害(升级后+30)并使其眩晕。 重要提示:范围攻击总是很有用,多兰拥有游戏中伤害最高的范围攻击技能;塞里的伤害会分摊给多个敌人,莉塔的游侠蓄力射击无法对每个敌人造成相同伤害,阿德里安的旋风斩伤害也没那么高。 治疗:治疗涌动 - 治疗威力提升15。 重要提示:确保多兰每次都能将所有人的生命值恢复至满,在游戏前期和中期非常有用。到了后期作用不大,因为会经常出现过量治疗,但5%的伤害加成反正也没什么用。 时间扭曲:时间气泡 - 提升盟友10%的闪避率。重要提示 如果你的角色敏捷属性培养得当,就不需要速度增益。即便培养不足,三阶【预知】附魔也会让这类速度增益变得毫无用处。 精灵之歌:智慧之歌 - allies获得10%力量和防御力加成。 推荐 为队友施加增益效果比5%的终极技能充能(多次施放时,5%的终极充能恢复效果不会叠加)更有用。 再生:活力焕发 - 同时恢复生命值和魔法值。 无用 恢复魔法值比恢复双倍生命值更重要。不过我不常使用再生技能。 复活:治愈精通 - 复活队友时移除所有受伤状态效果。 无用 如果你有时间施放复活术,不如去做其他事情,比如施加增益或进行攻击。我宁愿让他的复活技能移除受伤状态效果,但说实话我从来不需要用他的复活能力。 如果将他培养成秘术师: 神圣冲击:释放深渊之力。不再造成初始伤害。使所有敌人在2回合内每回合受到15强度(升级后为20)的伤害。 重要 范围攻击总是好用的。 时间扭曲:衰老 - 同时使所有敌人的防御力降低15%。 重要 能让你的队伍更快击杀敌人。对召唤生物的效果不如暴击 buff,但召唤生物通常生命值都较低。 治疗:汲取 - 利用随机敌人的力量来增强法术,使其伤害在2回合内降低5%。 良好 减益效果比伤害更重要,因为伤害本身并不高。精灵之歌:虹吸之歌 - 降低所有敌人10%的伤害。队伍每影响一个敌人,获得5%力量加成,持续2回合。 良好 相当于牧师的智慧之歌,对敌人施加减益和为盟友提供增益效果都很出色。 再生:深渊恩赐 - 每回合额外增加5%力量。 一般 在较高难度下不建议降低防御,但如果效果不够好,不妨使用时间扭曲。很难说哪个更好。 复活:噬魂者 - 多兰获得10%力量加成,持续至战斗结束。 无用 说实话,你应该不需要频繁使用复活,所以升级这个技能优先级较低。 通用策略 前期: 莉塔 1. 如果没有多兰,保留莉塔的魔法值用于急救。 2.当你有多余点数可分配到伤害相关属性时,你需要优化剩余属性点以提升伤害: 优化伤害的方法简单但需要细致操作:大部分伤害都可能产生暴击(持续伤害效果除外),我们可以发现,实际有效伤害等于未暴击时的力量值加上暴击时的力量值,由此得出公式: 力量值×(1 - 暴击率) + 力量值×暴击率×暴击伤害 力量值指的是你在升级页面看到的力量属性。暴击率指的是产生暴击的概率(暴击率 < 1),暴击伤害指的是你在升级页面看到的伤害倍数。 根据这个公式,我们该如何选择分配点数到力量、敏捷、智慧属性以最大化伤害呢? 1.使用侦察/精灵之力作为缓冲回合来恢复你的魔法值(例如:第一回合使用速射/蓄力射击,第二回合使用精灵之力/侦察来恢复魔法值)。 中后期: 清小怪: 1. 莉塔 蓄力射击 2. 多伦 神圣冲击 3. 塞莉 火焰(全体) 4. 艾德里安 旋风 通常,所有敌人会在发动攻击前被消灭。 boss 战: 1. 尽量在终极技能完全充能的状态下开始 boss 战。 2. 根据敌人数量,你可能需要以塞莉的元素爆发(消灭所有敌人)或艾德里安的背水一战(触发+10 终极技能充能)开场。你也可以用莉塔的日光之怒开场,获得一个额外回合,然后用塞莉的引导恢复终极技能充能。 3. 塞莉应在冰系与雷/火系之间交替使用。若面对多个敌人则使用火焰技能,若仅面对首领则使用雷电技能。 4. 莉塔应先释放精灵之力,进行侦查,然后持续使用速射。若战斗开始时敌人较多,她应使用蓄力射击来清理敌人。 5. 艾德里安应根据情况行动。保持对首领的嘲讽,若可能则标记首领(以便所有人通过攻击首领来自我治疗),若队伍需要魔力值则使用旋风技能,或在你认为首领将要释放致命技能时使用反射技能。我们先获取当前的属性值,然后分别计算将1点属性点分配到力量/敏捷/智慧后能获得的有效战力。这能让我们根据当前属性值,确定这3个属性中哪个是分配该属性点的最佳选择。 2. 接着,我们将这1点属性点分配到能带来最佳伤害提升的属性上。 3. 重复步骤1和步骤2,直到没有剩余属性点可分配为止。 这个过程可能会比较繁琐,所以我用脚本将其自动化了。 通常在至少前20级左右,你会将这些属性点分配到力量上,直到达到某个阈值,此时分配属性点到敏捷/智慧能带来更显著的伤害提升。别忘了装备和附魔会改变你的属性,所以未来你可能需要重新分配点数。此外,莉塔的精灵之力(未升级技能前)能为她增加20点力量。这一点可以在战斗中通过状态选项查看。如果你想将部分力量点数转移到敏捷/智慧上,以提升她的闪避率/魔法值,计算时也可以把这20点力量考虑进去。设置你想要分配的点数 例如:如果你决定在防御上投入4点,那么你还有6点可以分配 可分配点数 = 10 5. 按下运行按钮执行代码,查看应如何分配点数 代码 增量 = [1, 0.003, 0.附魔列表可在此处找到。1. 我建议尽快给所有角色装备致命一击I和致命一击II。暴击率能显著提升你的伤害,而且它们也是对应等级中最值得使用的附魔。 2. 在游戏中期,给1到2个角色装备贪婪附魔来积累财富,以便购买材料和药水。 3. 中期对于艾德里安来说,坚不可摧II可能很有用,因为此时他的装备无法提供足够的格挡率。如果你的敏捷还不足以快过敌人,预判附魔在中期也相当不错。 4. 对于游戏后期的附魔,所有角色的目标应该是致命一击I、致命一击II、无敌II/知识II以及神圣祝福。如果你想让艾德里安达到100%格挡率,或许可以将他的三阶强化换成【无懈可击II】。 我选择【神圣祝福】是因为它相当于60点属性点。【致命一击III】只相当于50点,所以客观上更差。【力量II】在 offensive power 方面略胜一筹,但我喜欢【神圣祝福】提供的额外加成(例如速度、闪避、魔法值)。 术士多兰的范围神圣冲击波无法暴击,所以你可能需要换种方式培养他,专注于属性加点,忽略暴击流的培养方式。 各章节简要提示(至第二章结束) 通用提示与技巧 1. 不要过度刷级;本游戏的经验值增长很快,下一个区域的敌人通常会比前一个区域提供多得多的经验值。

升级与战斗处理指南及终局装备 升级 莉塔·勒科塔:将她培养为物理输出。 升级点数优先投入攻击,敏捷点数加到200点。 这种加点能让她在敌人攻击一次的时间内攻击两次,每次攻击造成数百点伤害。 艾德里安·阿曼尼:将他培养为坦克。 升级点数平均投入防御和智力,因为智力能提供魔法抗性,并增强游戏中最重要的技能之一【反射】。 如果他的魔法值不足,可以投入一些点数到魔法。我的艾德里安魔法值22时没有遇到任何魔法问题。 可以投入少量升级点数到敏捷,让他先于敌人行动,通常3到4点升级点数就足够了。不过这一点之后就无关紧要了,因为你会获得一个能让他先手行动的物品。 多兰·因迪尔让他担任你的治疗者。 首先专注提升智力,当你感觉魔力不足时,将2次升级点数投入魔力。 他的魔力上限应控制在50左右。 每将2次升级点数投入魔力,魔力回复速度就会增加1。例如,魔力为10时,回复速度是2;18时是3;26时是4;34时是5;42时是6;50时是7,以此类推。 我建议投入4到5次升级点数到敏捷上,这样除了莉塔外,他能比所有人先行动,因为他的【精灵之歌】和【魔力强化】 buff能大幅提升你的 dps。举个例子,我曾见过塞丽在获得 buff 后造成1000点伤害。 塞丽·凯苏让她担任你的魔法输出。首先专注于提升智力,当你感觉魔力不足时,将两次升级点数投入魔力。她的魔力上限应为600。她只有在防御时才会恢复魔力,不过当魔力达到600时,每次防御大约能恢复100魔力。最终你会获得能减半她魔力消耗的物品,装备其中一件并拥有600魔力后,就能施放两次“全体元素爆发”,快速消灭大多数杂兵。敏捷对她而言并非必需,但投入少量升级点数能让她在敌人行动前施法。最终效果:莉塔负责物理输出。艾德里安对敌人施加减益效果并使用“反射”,他造成少量魔法伤害,物理伤害为零,但几乎能承受所有攻击。多伦为队伍施加增益效果并进行治疗。他造成的伤害为零,就是这样。 塞莉(Seri)会使用强力的范围法术,并提供魔法伤害。装备 名称 武器 副手 armor 头部 饰品 莉塔·勒科塔 阿洛里亚之弓(任务奖励) 塔林的护腕(任务奖励) 光明之声(制作) 头带(4)(商店) 力量圣物(剧情) 阿德里安·阿曼尼 心弦(制作) 盾牌(4)(商店) 神圣铠甲(剧情) 重型头盔(4)(商店) 项链(5)(探索) 多伦·英迪尔 雷击(制作) 神圣鲁特琴(商店) 光明之声(制作) 神圣头盔(剧情) 月剑吊坠(任务奖励) 塞里·凯苏 卡拉希尔(制作) 女神像(探索) 光明之声(制作) 法师兜帽(4)(商店) 神圣手镯(探索) 战斗 队伍配置 行 队员 1 阿德里安 2 莉塔、多伦和塞里 杂兵战 几乎所有杂兵战都遵循以下模式: 莉塔自动攻击一个敌人。 阿德里安施放“反射”。 多伦等待需要治疗时再行动。赛莉施放【元素爆发·全体】。 莉塔自动攻击其中一个活体生物。 艾德里安进行防御。 多伦继续等待,直到有人需要治疗或通过防御来恢复法力。 赛莉施放【元素爆发·全体】。 战斗胜利。 进一步建议:莉塔的自动攻击应集中在高生命值或高智力的怪物身上,因为这些怪物通常能承受两轮【元素爆发·全体】的攻击。 多伦的治疗和莉塔的治疗使得【梦境之杯】道具失去作用,因为他们都能复活。因此,要优先保证多伦的生存。 【反射】技能强力:当敌人释放任何范围法术时,艾德里安的【反射】技能效果就会显现:它会将法术反射回整个敌方队伍!所以,【反射】对任何以艾德里安或其队伍为目标的法术都有效。通常从圣地开始,小怪和 Boss 都喜欢施放范围法术,并且在【反射】状态生效时可能会杀死自己。 2 级【反射】的持续时间是 1 级的两倍,为 20 回合,消耗的魔力却是 1 级的一半,因此相当容易施放。 Boss 战斗可采用以下策略: 艾德里安施放【反射】,然后施放【标记】,接着施放【强力打击】,之后进行防御。 莉塔施放【精灵专注】,然后自动攻击直到可以再次施放【精灵专注】。当【精灵专注】施放三次后,就专注于自动攻击。除非面对吸血鬼,此时使用阳光技能。(并非必须使用阳光技能才能杀死吸血鬼。吸血鬼在生命值减半时会进入【虚弱】状态,任何阳光技能都能处决处于【虚弱】状态的吸血鬼。)多兰施放【精灵之歌】,之后优先进行治疗,或者对塞丽施放【魔法强化】以恢复她的法力。 塞丽在有杂兵时施放【元素爆裂·全体】,否则施放【元素爆裂·单体】直至法力耗尽。之后进行防御,直到能再次施放【元素爆裂·单体】。 特殊注意事项:多阶段 boss 战 最终,你将面对多阶段 boss 战。无论出于何种原因,所有增益效果都会在每个新阶段重置,因此务必尽快重新施放【反射】。目前尚不清楚这是 bug、预期机制还是可修复的问题。 特殊注意事项:首个吸血鬼长老 boss 战 在此战斗中,你将只有莉塔和塞丽两个低等级角色。除了道具外,你没有任何治疗手段,且塞丽在战斗的大部分时间里都会被击倒。那么,按以下步骤操作: 第一回合,让莉塔使用攻击药水,让塞莉施放【元素爆发一】。 第二回合,让莉塔施放【精灵专注】,如果塞莉受到伤害则让她治疗莉塔。 一旦魔法束缚宝珠开始攻击塞莉,优先消灭触须,因为吸血鬼长老会在一段时间后施放【全恢复】法术,将自身恢复至满血并生成大量触须。 【全恢复】法术施放后,优先消灭吸血鬼长老。他不会再次施放【全恢复】法术。 最终,宝珠会因为塞莉死亡而停止生成触须攻击她,此时你可以使用【梦境之杯】复活她,让她开始治疗队伍。但一段时间后,宝珠会再次开始攻击她。最终,你会将 Boss 削弱到阳光能杀死他的程度。这样做就能赢得游戏中最困难的战斗。 我的队伍状态 姓名 等级 生命值 魔法值 攻击力 防御力 智力 敏捷 莉塔·勒科塔 42 999 18600 120 105 240 阿德里安·奥马尼 40 999 22140 365 250 170 多伦·英迪尔 40 999 50 195 105 370 170 塞里·凯苏 40 999 600 165 55 570 180 我会做出的改变 去掉给莉塔加的两级魔力。我那么做是想看看她的终极技能效果,结果发现毫无用处。 把状态提升道具留到队伍齐整或者有最能从中受益的队员时再用。比如,我最后给阿德里安用了几个智力强化道具,其实本可以用在塞里身上。

- 全成就指南。 - 主线任务、支线任务、悬赏任务及职业任务攻略。 - 地点详情,详尽列表。 免责声明 本指南仅适用于游戏的增强版。 本指南完全基于我自己细致、系统的游戏流程;在制作过程中,我未参考任何其他指南或网站。本指南的任何部分均不得复制或转载至其他指南或网站。快捷链接和引用则不受此限。 这是我制作的第一份指南,希望它能帮助其他人像我一样享受这款优秀的游戏。 我欢迎对指南的修正,请提出修正意见,我会解决任何问题。我对攻略的建议持开放态度,但不确定还想投入多少精力,毕竟已经花费了大量时间和努力。 我整理和撰写的攻略基本做到了100%无剧情剧透;我会说明去哪里、做什么,但不会透露会发生什么。 游戏中的NPC会用基本方向来指引你前往何处,所以我在攻略中也采用了同样的方法。例如,北方是屏幕的顶部中央,东北方是屏幕的右上角,东方是屏幕的右侧中央,以此类推。 通用提示、技巧和建议 成就猎人必须在专家难度下进行游戏,但我甚至想说,每个人都应该尝试一下,即使是在首次游玩时。Might of the Abyss(单次攻击对单个目标造成超过5000点伤害。)我直到最终Boss战才获得这个成就,而且这场战斗似乎就是专门为达成这个成就而设计的,有点像“通关游戏”的成就。 Support Expert(让一名队友身上同时存在8个增益效果。)相同增益效果的多层叠加会计入8个总数中。如果你将莉塔的精灵专注技能专精选择选项1,在有多次范围攻击的长时间Boss战中,她可以获得多达5层以上的伤害提升叠加,然后让多伦施加一些治疗者增益(他的技能也可以专精以提供多个增益效果)。 Lore Seeker(完成所有支线任务。)详见下方支线任务部分的攻略,我涵盖了所有支线任务。 End Game(至少有一名角色达到50级。在我的游戏过程中,我在刚开始进入最终区域时就达成了这个成就,只需通过主线剧情中的适度刷级就能轻松获得。我通关时所有角色都是53级。 Master Tactician(在专家难度下赢得所有战斗。)以专家难度开始并完成游戏。我全程只玩专家难度,发现它并不那么难;只需要少量额外刷级来保持实力与敌人相当。我遇到的真正难度峰值只有一处,那就是进入生命洞穴的主要区域时需要大量刷级,除此之外,在地图中移动时击败遇到的每个敌人基本就足够了。成就(技能相关) Skillful(升级并强化所有技能):需要使用职业石(弓箭手、战士、法师、吟游诗人)升级每个角色的技能,然后使用异域石进行强化。职业石可在各地图探索获得(游戏中可免费获取足够数量完成此成就),游戏后期也可偶尔在塔兰尼商店购买。异域石可从红色水晶资源点采集、通过职业任务获取,或在多处商店购买,数量充足。以下是所有职业石的位置记录: 弓箭手职业石(有一个多余) 珀西的奖励,主线任务“愚蠢的人”(不可错过)。 射箭比赛的奖励,主线任务(不可错过)。在生命洞穴(主线任务期间可进入的主要区域)内的地面上发现。 在迪安峡谷(东)与圣地(北)之间的洞穴通道内的地面上发现。 在圣地(北)的地面上发现。 在北星道塔拉尼商店东北方向的洞穴内地面上发现。 战士之石: 阿洛里亚,阿杰先生的地下室,“秘密”洞穴(箭头指向墙壁)。早期主线任务区域。 南星道,完成支线任务“赏金任务II”后,在宝藏室中打开中央宝箱。 主线任务第三章开始时,在阿塔纳城堡地牢的深渊区域,左屏障门后方的地面上发现。 狩猎场,东南角,进入洞穴后对北墙的裂缝使用炸弹,爬过去后在地面上发现。在圣地(南部)的地面上发现。魔法石(两个额外) 在生命洞穴(主线任务期间进入的主要区域)的地面上发现,位于东南部洞穴的东侧。 阿塔纳城堡,楼上区域,西北门,搜索西北墙上门形部分进入秘密区域,在地面上发现。 阿塔纳城堡,从牢房逃脱后的地牢,返回牢房并登上东北楼梯,用炸弹炸开东北方向的裂缝墙,再次用炸弹炸开北方的裂缝墙,在地面上发现。 塞雷迈平原,东北部的洛妮长笛洞穴,在地面上发现。 血森林,阿雷遗迹,穿过金色锁门,穿过大门入口,最东侧,然后向北到墙上门的左侧,激活前方地面颜色较浅的墙壁,在地面上发现。在迪安峡谷(东部)的地面上发现。 在迪安峡谷(东部)与圣地(北部)之间的洞穴通道内地面上发现。【吟游诗人之石】(额外一块) 阿洛里亚,大集市,在主线任务第二章中途解除雕像的石化诅咒后,下楼在地面上发现。 在生命洞穴(主线任务期间进入的主要区域)的地面上发现,穿过已解除的屏障,向北穿过两个洞穴,然后向北过桥并上两段楼梯,再向西走。 阿塔纳城堡,从牢房逃脱后的地牢,返回牢房并登上东北楼梯,用炸弹炸开东北方向的裂缝墙壁,在地面上发现。【遗物】成就 古物收藏家(收集所有遗物) 游戏中可通过多种方式获得遗物,按区域列出如下: 阿洛里亚 魔法苹果:在中部偏南区域,与苹果树上的女孩对话。接住全部10个苹果即可获得该遗物作为奖励。 面包:在大集市内,向面包师(商人)花费100金币购买。 蛋糕:在大集市内,向面包师(商人)花费5000金币购买。 高脚杯:在大集市内,向店主(商人)花费6000金币购买。 迪安峡谷(西):从生命洞穴出口向南走,接取支线任务【下井】,下井后进入西北方的洞穴,在地面上获得。 天使城(圣地东南部):在地面上获得。 埃尔德里诺(第五章最终故事区域):在地面上获得。魅力护符:从阿杰尔的房子获得炸弹(任务物品)后,在旅馆内对裂缝墙壁使用,打开里面的宝箱。 守护者勋章:完成所有悬赏任务(悬赏一、悬赏二、悬赏三、悬赏四——详见下方攻略)。南星道 箭头徽章:地图东北角,三个洞口左侧的洞穴。向东游泳,然后向南游泳,打开宝箱。 鳞片护符:使用阿米雷洞穴入口旁的精灵之环,飞往东南方的精灵之环。进入洞穴,下楼梯后打开左侧宝箱。泉水区域 号角饰品:地图西南出口(经过25级黄蜂)向南进入洞穴,激活指向箭头旁的墙壁,打开左侧宝箱。塞雷迈平原 项链:完成支线任务“项链”的奖励(详见下方攻略)。狩猎场 指南针:地图北/中心边缘,入水游至秘密区域,绕陆地游动,然后向东,打开宝箱。 石板:地图东北角,进入废墟入口,激活花朵资源旁的西北墙壁,穿过后打开宝箱。 血森林 羽毛笔:森林南部区域,地图中北部,上坡并沿草地小径向北至秘密区域,打开宝箱。 阿雷遗迹 吊坠:进入第一道门,沿东墙在入口稍北处,向东北经过塔拉尼,穿过任意三道门中的一道,稍向西并激活两根柱子之间的墙壁,进入后打开宝箱。阿塔纳城堡 卷轴:需将主线剧情推进至第三章,在地下城内,通过东北方向的楼梯下至深渊区域,用指向箭头激活北墙,打开左侧宝箱。 奥利安村 法典:在杂货店花费7000金币购买。 圣地 玩偶:前往圣地南区,向西到达初阶区域,然后一直向南走,打开宝箱。 北星道 红宝石项链:使用塔兰尼商店旁的精灵环,径直向北飞行,在精灵环处着陆,进入洞穴,打开宝箱。 希尔瓦拉 爪牙:在杂货店花费10000金币购买。 成就( enchantments) The Joy of Enchanting(收集所有附魔配方。这是我尝试过的唯一难度,实际上一点也不难。我只进行了少量刷级,很少需要使用或制作药水;这不是一款难游戏。 角色定制非常少,只有升级时的几个属性点选项。四个角色是简单直接的标准RPG职业:坦克、物理输出、魔法输出和治疗者。以下是我个人对属性的看法: 力量:这是你应该投入所有额外点数的首选属性。它能提升物理伤害、魔法伤害和治疗效果——对每个角色都很重要。如果满足以下三个条件,就总是选择力量。附魔配方可通过游戏中的多种方式获得,按区域列出如下: 阿洛里亚 永生I:莉塔的家,打开宝箱(楼下)。 知识I:在大集市从老加恩(商人)处以200金币购买。(我很确定在南星道或采石场地图的某个宝箱中可以免费获得,但我已经购买了)(如果购买了,该宝箱会改为200金币,因此从哪里获得没有区别) 无敌I:在大集市从铁匠雷维(商人)处以200金币购买。(或在狩猎场地图免费找到) 坚不可摧I:在大集市从铁匠雷维(商人)处以200金币购买。致命一击I:可在大集市从铁匠雷维(商人)处以200金币购买(或在游戏后期的采石场地图中免费获得)。 迅捷I:完成支线任务【升级!】的奖励。 腐蚀I:主线任务中,进入阿杰先生的地下室,激活指向箭头旁的墙壁,打开宝箱即可获得。 贪婪:第二章中期,在大集市解除雕像的石化诅咒后下楼,打开宝箱获得。位置在南星道。 力量I:击败阿米雷(悬赏任务II)后,在阿米雷洞穴的宝藏室左侧宝箱中获得。位置在狩猎场。 无敌I:地图西北角的宝箱中获得(若未在阿洛里亚大集市购买)。血之森林 震撼:森林南段,从苹果园出口向北游入水洞,打开宝箱。 阿雷遗迹 致命一击II:进入第一道门,沿东墙在入口稍北处,向东北经过塔拉妮,穿过三道门中的任意一道,向西打开宝箱。 虹吸I:进入第一道门,沿东墙在入口稍北处,向东北经过塔拉妮,穿过三道门中的任意一道,向东北方向走,爬下梯子进入血池,激活骷髅。 幸运:进入第一道门,沿东墙在入口稍北处,向东北经过塔拉妮,穿过三道门中的任意一道,向东北方向走,爬上任意楼梯,打开宝箱。采石场 致命打击I:南星光道出口的东北方向,爬上右侧的梯子,进入雕像洞穴,在第二章中途解除雕像的石咒并打开宝箱(如果尚未在阿洛里亚大集市购买)。 刀枪不入I:在第二章结束时,打开藏身处的宝箱(如果尚未在阿洛里亚大集市购买)。 生命洞穴(失落之地) 知识II:跟随多伦的职业任务,进入神殿内部,向西走,然后向北穿过水道,打开宝箱。 阿塔纳城堡 不朽II:城堡西侧的守卫洞穴,打开宝箱。 不朽III:跟随主线任务至第三章,在阿塔纳城堡地牢中,前往西北方向的牢房并打开宝箱。【活力I】:跟随主线任务推进至第三章,在阿塔纳城堡地牢中,登上东北方的楼梯并打开宝箱。 【迅捷II】:跟随主线任务推进至第三章,在阿塔纳城堡地牢的深渊区域,穿过第二道屏障门后,前往东北角,打开暗门(颜色较深的墙壁)并开启左侧宝箱。 【空灵】:跟随主线任务推进至第三章,在阿塔纳城堡地牢的深渊区域,穿过第二道屏障门后,前往东北角,打开暗门(颜色较深的墙壁),再打开第二道暗门(颜色较深的墙壁)并开启宝箱。生命洞穴(主区域) 无敌II:跟随主线任务至第四章,在生命洞穴中,向北走,向东,上右侧楼梯,向西至南侧楼梯,西北门,打开宝箱。 灼热:跟随主线任务至第四章,在生命洞穴中,穿过西北方已解除的屏障,向北穿过两个洞穴,然后向北过桥和两段楼梯,接着在地面向西走。 迪安峡谷(西部) 腐蚀II:完成【井下探险】(支线任务)的 boss 奖励。 冰冻:完成【井下探险】(支线任务)的奖励,但你必须选择诚实结局! 奥利安村 坚不可摧II:奥利安神庙,打开地下室左侧宝箱(钥匙通过主线任务获得)。 启迪:完成【捉鬼行动】(支线任务)的奖励。期待:完成【精灵花园】(支线任务)的奖励。地点:【戴安峡谷(东部)】 不朽IV:离开【奥里安村】,立即向南走,进入洞穴,用炸弹炸开西北方向的裂缝,与老人对话获取奖励。 力量II:离开【奥里安村】,向东北方向走并爬过小型洞穴,穿过下一个洞穴,然后向东南方向涉水/向西北方向过桥,找到宝箱。地点:【圣地】 致命一击III:进入【圣地】,向南走,然后向东前往【天使城】,到西南角最深处打开宝箱。地点:【北星之路】 虹吸II:在到达【希尔瓦拉】之前,进入洞穴,完成【悬赏III】(支线任务)后击败 Boss 获得奖励。 恢复II:【农田区域】东北角,完成【悬赏IV】(支线任务)后击败 Boss 获得奖励。埃尔德林诺 深渊污染:跟随主线任务直至第五章末尾,前往埃尔德林诺,在西北角的树木后方打开宝箱。 主线流程攻略 主线剧情分为多个章节,一系列任务将为你指引方向。不含剧透! 序章 游戏开始于一个教学地下城。流程较为线性,将教授你探索区域、与物品互动以及战斗的基础知识。同时也会为后续剧情埋下伏笔。 前往东侧,激活岩壁以开启秘密门进入。 可选内容:存在资源模式(水晶矿石)——会触发关于采集的教学对话。 继续前进,将学习跳过小缺口和破损楼梯的教学,并接取相关教学任务。制作药水(教程) 收集物品: 油、鱼:跳上破损的楼梯,向北走,在水中游泳,直接在游动的鱼上方互动。 魔法、星尘:爬过西边的洞口,互动地面上的钥匙,进行教程战斗获取战利品并获得【普通钥匙(任务物品)】。 植物、天使花:继续经过魔法、星尘区域,进入下一个区域后会触发过场动画,随后收集花朵。 制作(教程) 返回艾德里安处与其对话,使用“制作”菜单制作“治疗药水”,然后再次与其对话完成教程。跳上破损的楼梯,向北走,在水中游泳,向北游,互动锁着的门(【普通钥匙(任务物品)】会自动使用)。中央大门有魔法护盾屏障,需要通过东北方向的楼梯上的开关来关闭。 注意:如果游玩专家难度,建议将莉塔(Lita)练到至少3级以获得急救技能。或许两个角色都再升一级能提高生存能力,但我在4级/3级时勉强打赢了那场战斗。激活开关会触发教程战斗。击败 Boss 后,魔法护盾屏障会自动关闭。 小知识:西北方向的楼梯上方有一面可以激活的墙,但没有任何作用。 穿过已解除屏障的门,激活神龛以继续剧情。防御:不要低估这个属性;我早期以为坦克能搞定就没太在意,但到后面你会遇到一些 boss,它们的范围攻击能秒杀防御(生命值)不够的角色。我发现防御比随机闪避概率要有效得多。我的经验法则是:坦克的防御值保持为力量值的两倍(例如 200 防御对应 100 力量),其他角色则相反(例如 100 防御对应 200 力量)。 敏捷:我会把敏捷加到刚好能让我方先行动的程度。每当进入新区域,敌人行动顺序超过我方时,就再加几点。我一开始试着给物理输出角色堆很多敏捷,但效果并不好。(无法回头 - 过场动画) 向南有一座桥,桥上有另一道魔法护盾屏障,因此需向北走上楼梯,再跳上另一组楼梯,激活骷髅进行对话,然后启动开关以驱散魔法护盾。 穿过桥并沿着路径前进,触发剧情过场动画。 宝箱(右上角):50金币 跳过桥梁。 资源:(1)矿石、水晶 进入门内,激活桌上的戒指以继续剧情。 穿过秘密门。 资源:(1)矿石、水晶 爬进洞穴触发过场动画。(开始第一章) 第一章 下楼,与房子西北角的莉塔母亲对话。 离开房子,向东走过两座桥,会触发过场动画并获得第一个主线任务。珀西,蠢货 触发条件:靠近神殿时自动触发。 进入东北部的神殿,与艾德里安对话。 离开神殿,一路向东南方向走到角落里的阿杰尔家。 打开西南角的宝箱获取【炸弹(任务物品)】,激活东北角墙上的裂缝,然后爬进去。 继续穿过下一个区域,然后进入下方的洞穴。 阿杰尔先生站在中央附近,你必须避开他的视线,基本上要沿着地图的外围移动。 北墙上有一扇锁着的门,需要用3个杠杆打开: 地图西南部的空地上,激活杠杆。 地图南部中央,激活杠杆。跳过东边的断桥,爬上梯子,爬进洞口,打开宝箱获取【灯笼】(任务物品)。 爬下梯子,用炸弹炸开墙上的裂缝,爬进去解谜: 需要按正确顺序按下3个红色按钮(中间和右边)。可以多次按下或取消,直到找到正确组合。 激活出现的拉杆。注意:如果游玩专家难度,建议将两个角色至少练到7级。 进入北边的门。(无法返回 - boss战) 激活白猫【珀西】。 激活【艾德里安】。任务日志中的该任务将自动完成,并开始新任务【奇怪的联系】。 【奇怪的联系】 来源:完成任务【珀西,小笨蛋】后自动触发。 前往【阿杰先生家】西边的【艾德里安家】。与身着长袍、红眼的身影(问号标记)对话。任务转换:此任务将在任务日志中自动完成,并开启“Archery Contest”任务。 “Archery Contest” 任务来源:完成“Strange Contact”后自动触发。 从艾洛莉亚的西北角离开,通过南星道向北(采石场)或向东(温泉)前往阿塔纳城堡,然后向东南方向前往塞雷迈平原。 在塞雷迈平原向东南行进,与竞赛组织者(问号标记)互动。(无法返回 - 过场动画) 奖励:200金币;【石质箭矢(Treasure/Skill Upgrade)】 任务转换:此任务将从任务日志中消失,并变为“The Hunt is on!”任务。 “The Hunt is on!” 任务来源:完成“Archery Contest”后自动触发。离开塞雷迈平原(西北出口),向西穿过阿塔纳城堡地图,向西北穿过采石场地图,然后从西北出口前往狩猎场地图。(或者如果之前已解锁,可从塞雷迈平原的水晶传送到采石场的水晶) 进入狩猎场地图后会触发一段对话。 地图上有三个区域需要进入以触发过场动画,进入顺序无关紧要,故事进展相同(注意:在第二个过场动画之后,建议避免任何战斗): 东南区域——从采石场出口出发,向东走过原木桥,向东南下楼梯,向东过桥,然后上下楼梯。北部区域 - 从采石场出口出发,向右走一点,向北穿过原木桥,沿着左侧小路向北走上小台阶,再向北过桥,然后沿着东北方向的小路前进。 东北区域 - 从采石场出口出发,向右走一点,向北穿过原木桥,沿着右侧小路向北,向东过桥后一直向东北方向走。 注意:此任务会从任务日志中消失,并变为【精灵之魂】和【神器】(目前处于搁置状态)。 【精灵之魂】 触发方式:完成【狩猎开始!】后自动触发。 返回采石场地图的西南出口。 警告:请先完成所有你想进行的探索/刷怪,因为接下来一段时间剧情会变得相当线性且受限。你之后可以回来,所以不会错过任何东西,但需要等一小段时间。注意:传送水晶已禁用。向南然后向东前往南侧出口,进入南星道。 一路向南,在通往阿洛里亚的出口前的桥上会触发一段过场动画。 继续向南进入阿洛里亚,会触发另一段过场动画。注意:此任务将从任务日志中消失,并变为【石之诅咒】。 【石之诅咒】 来源:完成【一个精灵鬼魂】后自动接取。 从北侧出口进入南星道,一路向北前往采石场北侧出口。(或者,如果之前已解锁,可从大集市的阿洛里亚水晶传送到采石场水晶) 进入西北侧的洞穴入口,一路向北,然后向西前往坍塌的洞口,触发过场动画。 从倾斜的横梁下爬过去,向北步行/游泳,然后进入门内。(无法回头 - 过场动画)(开始第二章) 与任意事物互动后,激活楼上的床以观看更多过场动画。 继续观看各种过场动画并按照指示操作。 完成仙女环教程(向西飞行并激活蓝色仙女环)。注意:此任务完成后,将切换到之前获得的任务【神器】。 第二章(第一部分) 【神器】 来源:完成【狩猎开始!】后自动触发。 注意:此任务将保留在日志中,直到完成【精灵之魂】和【石之诅咒】。 另一段过场动画后,你将在采石场地图的中北部区域重新获得控制权。 小知识:你可以直接回到采石场洞穴中过场动画发生的位置,获取两段简短对话。其实不太值得,但如果你喜欢和NPC对话的话可以去试试。 向西前往血森林出口。 注意:仅莉塔一人在此处战斗会非常艰难。即使刷级,在敌人数量占优且自身防御较低的情况下也不会有太大帮助。最好小心地绕过游荡的敌人,避免任何战斗,直到抵达阿雷遗迹。 血森林深处有三条有门的路径,你需要前往中间那条并拉动蓝色开关。之后所有三道门都会打开,路径也会相连。 前往西北角最深处,走那条路进入下一张血森林地图。 向东北方向前往仙女环,向北飞至另一个仙女环。(提示:飞行时你可以安全地侦察整个地图) 向北走一小段路,会触发一段过场动画。继续向东北方向前进,沿着小路进入废墟。 注意:如果没有坦克角色,这里的战斗仍然会比较困难,但还是可以应对的。等你再升一到两级后,战斗就会变得相当轻松。 向北走过纪念碑,然后前往东墙,可以看到一个门的轮廓,激活它。暴击和闪避的随机性太强,完全不可靠,所以我很快就默认加力量/防御了。如果把力量/防御堆得很高,暴击和闪避的触发会变得相当规律,但在达到那个阶段之前,你在整个游戏过程中都得忍受频繁的未命中,每次未命中都让人咬牙切齿。 智慧:我会把智慧加到刚好能让我每回合都使用技能/法术,而不用退而求其次使用普通攻击的程度。资源,比如矿石、线、粉尘、植物和鱼,采集时会随机获得1个或2个。我记录了自己的游戏过程,概率似乎是50%对50%。有一个遗物可以将这个数量提升到有机会获得3个。 水中的战利品通常会随机给予一定数量的金币。你偶尔会找到一块锭,还有一种遗物可以提升战利品品质,我猜这应该是指能获得更多金币,或许还能得到更多锭。 仙环会在主线故事第二章开始时解锁,在此之前它们没有任何作用。 我建议与所有NPC对话,他们会提供一些关于主角和阿拉菲尔世界的背景故事,能提升故事的体验感,但并非必须。在一些主线剧情节点之后,他们的对话会发生相应变化以反映剧情进展。 在任务攻略或地点详情中,我列出的任何标有星号(*)的物品都意味着它们用于成就解锁。 你需要购买多个等级的药水配方才能学习药水制作,大多数商人处都有这些配方出售。商人头顶会显示硬币图标,治疗师头顶会显示【C】图标(可移除伤势并重置属性),任务发布者头顶会显示【!】图标,任务目标头顶会显示【?】图标。 成就(通用) Herbalist(采集100个资源点。)可采集的资源点会有闪光标识,包括墙壁/岩石中的矿石、花草/植物以及地面上的尘堆等。游戏中可能有数千个资源点,你需要这些物品来升级装备以推进游戏,这很简单。 Team Zissou(潜水捕鱼或打捞30次。)水域中有时会有游动的鱼或扩大的圆圈(水下 loot),这类目标可能有数百个,这很简单。Vampire Slayer(在战斗中击败一名吸血鬼。)这会在主线故事第二章的中途自动发生。 Savior of Aloria(打破石头诅咒。)这会在主线故事第二章接近尾声时自动发生。 Specialist(为每个角色解锁一个专精职业。)完成四个职业任务(见下方攻略),这些任务会在主线故事第二章接近尾声时解锁。 Disabler(在单个敌人身上同时施加8个减益效果。)同一减益效果的多叠加层数会计入8个总数中。一个简单的获取方法是让艾德里安使用嘲讽/标记,让塞里·凯苏使用她的特殊技能元素爆发,该技能在完成职业任务后可升级为选项2:元素超载,能一次性叠加所有元素减益效果。Armed to the Teeth(将所有物品升级至4级):你需要收集或购买大量资源才能达成此成就,但无论如何,为了让你的属性与敌人强度保持一致,这几乎是必要的。我在最终章节的早期就达成了。 Brimming With Magic(填满所有16个附魔槽):你需要找到附魔配方(见下方“附魔的乐趣”成就),将四个饰品全部升级至IV级,然后为每个角色填满I、II、III、IV槽位。 Unlock ALL the Teleports!(解锁所有传送水晶):随着剧情推进,这些水晶会逐渐解锁,只需激活一次即可解锁: 阿洛里亚:地图西南部的大集市内。 斯普林斯:地图西北部的汉娜草药与药剂店内。采石场:地图中南部,距离南侧出口最近的洞穴内,稍微偏西北方向。 阿塔纳城堡:中心区域,城堡西侧,图书馆内。 塞雷迈平原:中心区域,入口东南方向,洞穴内。 血森林:东南角的洞穴内。 苹果园:西北角,洞穴内。 奥利安村:东北角,露天区域。 圣地:南部区域,西侧,塔兰妮旁边的露天区域。 塔兰妮的商店:从狩猎场进入北星道后,直接向西走并进入她的商店。 希尔瓦拉:神庙内的东北角。 埃尔德里诺:遗迹入口内侧。 【成就:Bounty Hunter】(完成所有悬赏任务。)击败由阿洛里亚游侠公会的托兰发布的四个悬赏目标(详见下方悬赏任务攻略)。
火盆谜题 你需要找到四根火把,并用它们点燃西北房间里的四个火盆。本区域有两根,下一个区域有两根。最简单的方法是先去下一个区域: 从入口出发,向东走,然后向北经过塔兰尼。打开三扇门中的任意一扇(通往同一个地方)。 向东走,然后向南;火把在东边的床和桌子之间。会自动触发战斗。 现在向北走到两段楼梯之间,然后向东进入房间,在那里找到火把。会自动触发战斗。 通过三扇门返回第一个区域,向南走,然后向西经过塔兰尼。向北转,然后爬下梯子进入水中。向西南方向游泳,爬上岸,激活骷髅上方的火把。战斗将自动触发。 跳回水中,游向梯子并爬上去。向西然后向北走,从蜘蛛网下爬进有火盆的房间。拿起火盆旁边的火炬。战斗将自动触发。点燃所有四个火盆,一把普通钥匙【任务物品】会掉落在火盆正北方。捡起钥匙,再次穿过那三扇门继续前进。 回到并穿过那三扇门,这次向西走进走廊。这个房间里有五扇锁着的门,中间那扇门上有一个盾牌屏障。
房间谜题 每个房间都有一个谜题,解开后可获得另一把钥匙。你需要用手中的钥匙打开第一个房间,解开谜题,然后前往下一个房间并重复此过程。解开每个房间的谜题后,门上方的灯会亮起,以此标示你已完成的房间。完成最后一个房间后,中央大门的护盾屏障也会解除。解谜的顺序无关紧要,但本指南将从左侧开始,按顺序向右进行。 第一个门(最左侧):这里有四个红色按钮,类似阿杰先生洞穴中的开关谜题,墙上还有一张纸条提供解谜提示。从左到右,四个按钮的操作依次为:不按/按下/不按/按下。拿起出现的【普通钥匙(任务物品)】,回到隔壁房间。 第二个门(从左数第二个)。这个谜题没有提示,但有三个可移动的火盆和地面上三个带有奇怪凹坑形状的天使符号。目标是将每个火盆移到天使符号上方。火盆每次只能朝一个方向移动,操作方法是:激活火盆,朝该方向推/拉,释放火盆,移动到下一个侧面/方向,再次激活火盆,依此类推。墙上的笔记可以让你随时重置谜题并重新开始。我发现最简单的顺序是这样(但并非唯一方法): 将中间的火盆向东推一格,然后向南拉四格,绕到东侧,再向西推到左侧的天使符号上。前往北边的桌子,激活金钥匙以获取【阿塔纳地牢钥匙】(任务物品)。 向西走,激活宝箱。 穿过西南边的门,沿着南边的小路向下走,触发另一段过场动画。 向西走,激活多伦的牢房,进行对话。 向东走,然后下楼梯。爬下梯子进入水中,一直向东游,爬上梯子,跳过缺口,向西北方向走,然后向南下楼梯,向西走并激活宝箱,进行对话。 向北穿过桥并上楼梯,然后向北走,触发对话和非 boss 战斗。 继续向北上楼梯到下一个区域,向北跳越过缺口,从倾斜的横梁下爬过去,向东走,然后向南下楼梯。向东南方向前进,经过带有魔法屏障的门,从东南出口离开。 向西走,爬上梯子,然后向北走激活纪念碑以触发过场动画。 趣闻:即使没有物品栏(包括任务物品),你也能使用该物品。一路返回至桥梁之间的宝箱处,继续向东走触发过场动画。继续向北走会触发另一段过场动画和战斗。 一路返回至带有魔法屏障的门处,激活任意一扇门即可解除两个屏障。 穿过左侧的门触发过场动画,然后继续向北走,经过塔兰妮,穿过下一扇门。将右侧火盆向西拉一格,绕到北侧后向南推三格,再绕到东侧向西推两格(推过中央天使像)。 将左侧火盆向东拉两格,绕到西侧后再向东推一格。绕到北侧向南推三格,接着绕到西侧向东推一格,使其落在右侧天使像上。 将中间火盆向东拉一格,使其落在中央天使像上。 火盆会点亮并出现一把钥匙。拾取【普通钥匙(任务物品)】,返回下一扇门——4号门(从右数第二个)。同样,这个谜题没有提示。走下楼梯,注意蓝色开关和红色雕像。这是一场限时障碍赛。赛道上有两组需要跳跃的间隙和两组需要匍匐通过的蜘蛛网(全程匍匐通过速度太慢,你需要采用匍匐/奔跑/匍匐/奔跑的方式才能在规定时间内完成)。激活蓝色开关后,会有三秒倒计时,红色雕像会出现在你和开关之间,同时开始计时。现在向西走,跳过每一个间隙。向北走,匍匐通过每个蜘蛛网,然后在网间奔跑。向东走,跳过每一个间隙。向南走,匍匐通过两个蜘蛛网,然后在网间奔跑。向东南方向经过楼梯和火盆,站到印记上即可完成比赛。你会被传送回起点,并触发一段简短对话,同时钥匙会出现。拿起【普通钥匙(任务物品)】,然后前往下一扇门。 第五扇门(最右侧):地面上有四个魔法符号,墙上有一张纸条,提供了谜题的提示。每个魔法符号都需要被激活来改变颜色,它们可以循环变换所有颜色。从左到右,圆圈的颜色需要依次为:红色、黄色、蓝色、紫色。拿起出现的【普通钥匙(任务物品)】,然后返回下一扇门。 第三扇门(中间的门):护盾屏障现已消失,门可以被解锁。打开宝箱以获得【金色钥匙(任务物品)】。 第二章(第二部分) 暂时先经过金色锁着的门。从这三扇门出发,向东北方向走,从任意一段楼梯爬上去。阅读书籍,激活火盆,然后将其拉/推到光亮处(火盆一次只能朝一个方向移动,若要改变方向,需先释放再重新激活)。金色锁门后的门障将会解除。 返回三道门前,用金钥匙打开北侧的门。(无法返回—— boss 战) 专家难度提示:我几乎没有进行任何刷级,只打了强制战斗和少数几只随机遇到的怪物,等级 13/12 级就轻松通过了战斗。进入大门后尝试向北走,会触发一段过场动画。 向东走(向北会被阻挡),经过锁着的门,继续向东,然后走第一条向北的路,接着下楼向西。激活骷髅可获得【普通钥匙】(任务物品)。回到前一个房间,向南走,然后向东穿过桥梁。向西北方向走,激活墙壁上东北方向的门。 向北走,再向西走,触发过场动画(无法返回点 - boss战)。战斗与之前非常相似,难度大致相同。 向西走,然后向南穿过开口。 打开宝箱获得钥匙,普通(任务物品)。 激活传送符文,返回到之前有过场动画且东侧有锁着的门的位置。 向东走并解锁门。穿过门后解锁下一扇门(无法返回点 - boss战)。战斗与之前类似,难度稍高。 过场动画结束后,返回艾瑞遗迹主地图(向西走,向南穿过开口,向南穿过三扇门,向南走,在塔兰尼处向西走,然后向南穿过出口)。向北走,然后第一个向西的路口前往新区域。 激活纪念碑触发过场动画。 向东返回之前的区域,然后向北进入新开启的门。【无法返回 - Boss 战】 专家难度提示:这是一场艰难的战斗,建议两个角色都达到14级。需要把握好元素爆发的释放时机,并且几乎每回合都要使用升级后的急救技能。战斗结束后,从西南方向的开口继续前进,向北走,激活神社触发一段较长的过场动画。 继续向南,从西南出口前往苹果园,观看另一段过场动画。 向南走,然后向东,再向东北方向走到南星道出口。 向东南方向前往阿洛里亚,观看另一段过场动画。 继续向南前往阿洛里亚,观看更多过场动画。(注:部分NPC的对话有所调整,如果你感兴趣的话可以留意一下) 从西北出口离开阿洛里亚,前往南星道触发另一段过场动画。 注:游戏会以一种比较明显的方式建议你在继续之前完成所有任务、提升等级和进行装备升级。我强烈建议完成每个角色的职业任务系列以提升他们的技能,以及所有可用的支线任务。主线故事的下一部分中,你将面对等级21左右的敌人,因此无论如何你都需要将等级提升到相近水平。我完成了所有任务并进行了一些轻度刷级,最终在结束时达到了25级。 准备就绪后,前往阿塔纳城堡,与门口的两名守卫对峙,触发过场动画和一场非 boss 战斗。进入城堡,在那对贵族的东边一点,然后走上中央楼梯,与守卫对话触发过场动画。 准备好后返回并再次与守卫对话,触发另一段过场动画和战斗。(开始第三章)注意:此任务将暂停,直到完成接下来的两个任务。 第三章 深渊之源:在开始第三章时,会在“神器”任务中途自动触发。 激活牢房大门进行对话。 前往北墙,激活有裂缝的区域,穿过开口触发过场动画。 返回牢房并激活艾德里安。 激活妖精之环,飞往东边的妖精之环。 跳下楼梯,向南走到建筑处,从东门进入进行对话。 走下西边的楼梯触发过场动画。
预言/画作谜题 这是一个结构复杂且相互连通的区域,以下是我找到的完成各步骤的最简单方法: 从入口直接走上第一段楼梯,穿过门后再上楼梯,激活书架以获取【吸血鬼预言】(任务物品)。 向北走上楼梯,进入任意一扇门。激活书架以获取【吸血鬼预言】(任务物品),并激活画作以获取【画作:神圣】(任务物品)。 返回入口:一路向南。从入口向东北方向走,然后向北走上三段楼梯,会触发一场战斗(此为【无法回头点】)。激活掉落的钥匙以获取【普通钥匙】(任务物品)。从最近的楼梯下去,向东走,然后向南,接着再向东,在有金色锁的门前下楼后向南转,会触发一场战斗(此为【无法回头点】)。激活掉落的钥匙可获得【普通钥匙】(任务物品)。 回到楼上,向东走,然后一路向北穿过门。激活两幅画,可获得【四盏灯画作】(任务物品)和【蜡烛画作】(任务物品)。 穿过门,一路向西北走,然后跳下楼梯。激活画作可获得【夜晚画作】(任务物品)。 跳下南边的楼梯,向南走到下一个房间,激活书架可获得【吸血鬼预言】(任务物品)。 向南走出房间,然后向东北走到下一扇门,穿过两个房间。向东北方向前往北部出口,然后一直向北进入圣地。向南前往西南或东南出口,接着向西前往初阶区域,再向南走到楼梯处触发过场动画。注意:此任务将暂停,直至完成“收集任务”! “收集任务”!来源:第四章“神器”任务进行到中途时自动触发。向东返回圣地南部,然后向东南前往天使城。向东北方向走,激活拱门下方地面上的手环。(无法返回 - 任务区域)沿着向北的路径走,然后向东穿过出口,向南穿过水域,再登上楼梯。(无法回头点 - boss battle) 向南离开房间,然后向北前往下一个区域,向北穿过新建的桥梁,接着进入下一个区域。 向南过桥,然后向西过桥。(无法回头点 - boss battle) 按照指示向东穿过已解除的屏障开口,穿过洞穴,向北走上楼梯。(无法回头点 - boss battle) 返回至仙子处完成任务。注意:此任务完成后,你将切换回【神器】任务。 第五章 【神器】(续)通过东北出口返回,向东走一小段,然后向北经过传送水晶,进入伊托拉丛林。(无法回头点 - 过场动画) 完成所有过场动画后,向南走以观看另一段过场动画。(开始第五章) 前往狩猎场!返回奥利安村,使用传送石前往采石场或血森林,然后向北前往狩猎场,再一路向西北到达希尔瓦拉出口。(注1:如果之前解锁了塔兰尼商店,也可以传送到那里,直接到达目的地。)(注2:如果你喜欢徒步或忘记激活传送石,也可以全程步行。) 向西走,尝试过桥,会触发一场非 boss 战斗。 沿着北星之路向北前进,穿过几个线性区域,然后在道路分岔的路标处向西走,一直前往希尔瓦拉。 在希尔瓦拉按西/北/东的路线绕行,进入东北角的神庙。和矮人对话并进入秘密门,继续前进到下一个房间,你会得到关于谜题的提示。打开宝箱获取钥匙、普通(任务物品),并调查两个书架获取吸血鬼预言(任务物品)×2。 向南返回房间外,然后走上门旁的楼梯一路向北,解锁门并激活两幅画作,获得画作:枯萎(任务物品)和画作:神器(任务物品)。 离开房间,一路向东并解锁门。调查书架获取吸血鬼预言(任务物品)。从蛛网下方爬过,上北侧楼梯并激活两幅画作,获得画作:预言(任务物品)和画作:折射(任务物品)。 爬下楼梯,然后向东南方向走,从长矛陷阱下方爬过,再向北穿过门。同意进入以触发 boss 战和过场动画。打开宝箱获取钥匙、金币(任务物品)。离开房间,向西北返回经过长矛陷阱,向南走出房间,然后向南/西/南/西回到金色锁着的门。打开门进入谜语谜题! 激活纪念碑,再次激活以阅读预言。纪念碑指向预言的段落。第一段是【画作:神圣】,第三段是【画作:枯萎】,第五段是【画作:神器】。将它们从左到右放置在支架上,魔法屏障门就会打开。 离开房间,向东走,然后向北,从任意楼梯上去,向北到十字路口,转向西,经过之前打开的门,解锁下一扇门并通过。 走西南的楼梯,按下浅蓝色按钮,然后回到楼梯上。沿东南方向的楼梯下去,按下浅蓝色按钮,然后回到楼梯上方。 向北走触发过场动画,之后穿过已解除的魔法屏障门。过场动画结束后,向西北方向上楼梯,再次触发过场动画,接着向北走上楼梯进入战斗。 继续向北穿过入口。(无法返回 - 过场动画)任务转换:此任务将完成,同时切换到新获取的任务【拯救国王】。 【预言】 来源:在【深渊】区域中,激活任意发光书架时中途触发。 注:通过在【深渊】区域中推进剧情,并收集上述全部六份【吸血鬼预言】(任务物品),此任务将自动完成。 【拯救国王】 来源:在【深渊】区域接近尾声时自动触发。激活妖精之环,向东南方的妖精之环飞行一小段距离。 跳下楼梯,返回阿塔纳城堡地图。注意:传送水晶已失效。 继续向北触发过场动画,然后从南门进入城堡,再次触发过场动画,之后继续向北。【无法回头 - boss战】 穿过所有房间。【无法回头 - boss战】 从任意楼梯下去,穿过任意门,与守卫对话,然后穿过那扇门。【无法回头 - 过场动画】(开始第四章)任务转换:此任务将完成,你将切换回【神器】任务。 第四章 【神器】(续)过场动画结束后,返回王座室并与国王对话。前往南星道地图东南侧的生命洞穴,沿着现已开放的北侧路径前进。 穿过第一座桥向东走,接着继续向东走过下一座桥,然后向南穿过出口。 向东北方向前进,游过水域,进入洞穴进行 boss 战。 专家难度提示:我为这场战斗进行了大量刷级,达到 31 级后就比较容易应对了。按下红色按钮,离开熔岩洞穴,爬上梯子进入下一个洞穴。 向北穿过洞穴,打开宝箱获得【钥匙,普通(任务物品)】,然后从西南方向离开。 跳下去,向西转,然后立即向北,解锁左侧的门并与戴面具的人交谈。注意:此任务将暂停,直到完成【召唤仪式】。召唤之源:在第四章开始后不久,于“神器”任务进行到一定阶段时自动触发。 返回东边,走左侧楼梯下去,然后从右侧楼梯上来,接着激活闪光的岩石进入洞穴。 径直向北走,进入门内,捡起地上的【宝石:红色】(任务物品),然后踩在符号上。 离开房间,向南返回,稍微向西走,再通过楼梯向南。进入西北边的门,从桌上获取【宝石:绿色】(任务物品)。 离开房间,向北走上楼梯,然后一直向西走到洞穴。捡起地上的【宝石:蓝色】(任务物品)。 离开房间,稍微向东走,然后跳上北边的楼梯,穿过木桥。向北走打开门,与老人对话。回到西侧,穿过已开启的屏障门,从西北出口离开,激活闪光球体。 向北离开并沿着路径前进。跳下楼梯后向西北返回,与戴面具的男人展开一场 boss 战。(此为无法回头点) 专家难度提示:我为了这个任务特意刷级到 34 级,但战斗仍然很艰难。我不得不重新加载存档好多次,最终成功的那次战斗中,我在所有人生命值都很低且无法治疗时使用了多兰的特殊技能,然后在第一个头颅被击败后立即使用了塞里·凯苏的特殊技能,这消灭了另外 3 个头颅,之后集中火力消灭了最后 2 个。这场战斗确实非常紧张刺激。 注意:完成此任务后,你将切换回【神器】任务线。神器(续) 使用传送符文(如果你想挑战一下,也可以步行),向西返回,然后向北穿过已解除的屏障门。 穿过接下来三个线性洞穴,进入迪安峡谷。 继续向南穿过迪安峡谷(线性路径),进入奥利安村。 向东走过旅馆,然后向北前往神庙。 进入神庙后径直向北走,与女祭司对话,她会给你【奥利安钥匙2】(任务物品)。(这些钥匙可用于楼下的宝箱获取战利品) 返回奥利安村的旅馆,与旅馆老板(带有问号标记)对话。(此为无法返回点——会触发过场动画/ boss战/过场动画) 返回奥利安村,从标有“圣地”的东侧出口离开。
拉杆谜题 注意:初始对话提到3个拉杆和1个按钮,但之后与其对话时却说有4个拉杆。实际上只有3个拉杆和1个按钮。 拉杆位置:西北角(跳上台阶,爬上梯子)、东北角(跳上台阶)、东南角(爬过洞口)。 按下按钮,然后沿着轨道向北走,接着穿过接下来的四个线性区域,爬上梯子并从顶部穿过桥梁。打开宝箱触发过场动画。 使用传送符号,离开希尔瓦拉,在十字路口向东走,穿过农田继续向东,然后向北穿过废墟入口。 这是游戏最开始序章中的同一地图,所以只需再次穿过它,直到通过之前锁着的门。与矮人(问号标记)对话,然后前往秘密门。(序章中曾出现过神秘/预示性的信息!) 继续穿过接下来的两个线性区域以观看过场动画。 向北走,观看另一段过场动画,并获取下一个谜题的相关提示。
金钥匙谜题与雕像 向西走并进入门内。 激活门正北方向闪烁的石头。 前往中央的楼梯井,按从左到右的顺序拉动红色拉杆:上、下、下、上。 从任意一扇门向北走,激活西侧和东侧的雕像,然后打开中央的宝箱获取【普通钥匙(任务物品)】。 通过门向南返回,然后下楼,接着向西走并打开门锁。 进入房间后从任意楼梯下楼,然后从西侧出口出去,激活雕像。 向东返回,经过四个楼梯,从东侧出口出去,激活雕像。 向西返回,然后从南侧出口下去,穿过下一个区域,激活雕像。 向北返回。(无法回头 - Boss 战) 获得金色钥匙(任务物品)后,使用传送符文返回第一个区域。向东走并进入门内。 激活入口处、东北角和北中心的雕像。 走任意一个楼梯下去,激活西边、东边的雕像(在下方房间内)以及东南角的雕像。 前往北中心,打开宝箱获得普通钥匙(任务物品)。 打开南门,向南穿过下一个区域。(无法回头 - Boss 战:进入楼梯旁的洞穴,向北穿过下一个区域。) 使用精灵之环飞往东北角。 一路向南走,打开宝箱获得金色钥匙(任务物品),然后使用传送符文返回第一个区域。回到中心区域,解锁塔兰妮正南方的金色锁门,触发过场动画。 穿过任意一扇门,下楼后向南走,会遭遇一场非 boss 战斗并触发过场动画。 继续向南,然后激活东北角、东南角和西南角的雕像。 进入已解除屏障的门。(无法返回点 - boss 战斗) 离开房间,走下新出现的楼梯进入水中,然后爬过东侧的洞口。 穿过接下来的两个线性区域,激活挡住去路的雕像以触发过场动画。 使用传送符号,向北穿过唯一可用的门,触发过场动画。 穿过北门。(无法返回点 - 最终 boss 战斗) 恭喜!记得查看主菜单新增的【尾声】——它为故事带来了一个感人的结局。 “英雄不过是在困境中不放弃的普通人。”——艾德里安 支线任务(阿洛里亚) 面粉女孩 接取地点:雪莉,位于阿洛里亚中北部,在洗衣男孩旁边的房子内。 同意接受任务后,雪莉会给予20金币。 前往阿洛里亚西南角,进入大集市,向北走到面包师处,花费4金币购买一袋面粉。 返回雪莉处领取奖励。 奖励:100经验值;16金币 雪熊! 接取地点:贾妮丝,位于阿洛里亚中南部,在苹果树旁边的房子内。 前往阿洛里亚西南角,进入大集市,向北走到桌上摆放着填充熊的店主处,购买一个填充雪熊。回到贾妮丝处领取奖励。奖励:100经验值 里克的任务笔记 任务来源:艾尔,阿洛里亚西南部,带有屋顶睡人房屋的旁边。 前往阿洛里亚中北部的里克老人处,他在洗衣男孩的旁边。 回到艾尔处领取奖励。奖励:20金币 大份沙拉 任务来源:农夫吉恩,从阿洛里亚西南部出口前往农田区域,进入西北边的房屋。 收集以下农作物(通过闪光点识别,与资源节点类似): 农夫的萝卜(地图入口南边) 农夫的芜菁(农夫吉恩房屋西边) 农夫的生菜(地图西北角) 农夫的番茄(地图西北角) 回到农夫吉恩处领取奖励。奖励:100经验值;70金币 升级! 任务来源:卡拉,阿洛里亚东南角,阿杰先生房屋的旁边。开始任务后,升级任意一件 armor(盔甲)。返回卡拉处领取奖励。奖励:【附魔:迅捷 I】;【粉尘】,【敏捷 2】 支线任务(剩余) 【高塔】 来源:【苹果园地图】,【卡佛先生洞穴】(位于西北角),【卡佛先生】。 离开洞穴,朝着【南星道】的出口返回,但改走北边的桥。与士兵对话获得进入许可,然后进入【废弃高塔】。 注意:第四层有一个宝箱,但那是个【陷阱】。里面有一个15级的 boss,但在某个【职业任务】中需要与之战斗。 通过四层,到达塔顶,打开宝箱获取【生育水晶】(任务物品)。返回卡佛先生处领取奖励。奖励:3500经验值;1500金币 项链 获取途径:苹果园地图,卡佛先生洞穴的西北角,商人。 与商人对话并同意他的请求,即可获得【古代项链】(任务物品),同时该任务会被记录到任务日志中。 前往塞雷迈平原的东北角,进入洛尼的长笛洞穴。 沿着北侧路径走,选择第一个向西的入口。 向北走,与雕像旁的半透明男孩对话。 离开房间,继续沿着北侧路径前进,穿过现已打开的门。 注意:虽然在游戏初期就能接到这个任务,但 Boss 等级为25级,因此最好等到有能力应对时再挑战。这里的敌人等级均为25级,实力非常强大。即便我在25级时来到这里,也曾被他们团灭。最好是闪避它们,避免战斗。
火盆谜题 这个房间有三个谜题需要完成才能打开下一扇门。顺序无关紧要,我只是按最方便的顺序列出。所有三个谜题都需要将火盆推/拉到阳光照射的位置。任何时候你都可以点燃火焰来重置该谜题。 谜题1: 一路向西,用炸弹炸开北面的裂缝墙壁。 爬过洞口,绕过弯道,然后穿过另一个洞口。 一路向北,激活火盆并拉动它。背对着岩石将其一路向南拉,然后松开。到西侧,激活火盆,向西拉一格,松开。到南侧,激活火盆,向南拉一格,松开。到西侧,激活火盆,向东推一格。谜题将完成。谜题2:返回入口,然后向北走,登上第一段楼梯,接着向东北方向走到水边,从破损的楼梯跳下去,然后一直向北走。激活火盆,将其向南拉两格后松开。走到北侧,激活火盆,向南推两格后松开。走到东侧,激活火盆,向西推两格。谜题将完成。谜题3:回到水边西侧,登上西北方向的楼梯,然后向西北方向登上下一段楼梯。激活火盆,向南拉一格后松开。走到东侧,激活火盆,背靠岩石向西拉三格后松开。走到东侧,激活火盆,向西推一格。走到北侧,激活火盆,一直向南推。来源:前往阿洛里亚东南角,两座桥的东侧,靠近悬崖上的矮人。 注意:此任务可随时接取,但需在主线故事第二章进行到一定阶段后才能继续。 解锁精灵环后,前往阿洛里亚西南角,一直走到南端,激活那里的精灵环。 一路向东飞行,在矮人旁边的精灵环处降落。 与矮人对话后向东走。 向北走并进入洞穴入口,沿着直线路径向南走,然后从南边的楼梯下到下一个房间触发过场动画。 顺着梯子下到水中,向北游泳,爬上那块斜入水中的方形地面,与矮人对话触发过场动画。前往三个符号位置并激活它们:游向东边的符号,游向南边的符号,然后通过仙女环前往西北边的符号。 游回石碑处,将触发一场 Boss 战和过场动画,完成该任务。奖励:莉塔职业选择 阿德里安的职业任务:石兽 来源:泉水地图,前往东南角,经过桥梁后激活标识。 注意:此任务链可随时开始,但会暂停,直到主线故事第二章进行到中途。 向南通过东南角的路径出口前往尼禄山谷。 激活雕像。注意:此任务将在任务日志中自动完成,并开启任务“第二个石咒”。 第二个石咒 来源:完成“石兽”任务后自动触发。注意:此任务将暂停,直到主线故事第二章进行到中途才能继续。 返回雕像处,激活雕像后会触发一段过场动画。注意:此任务将自动完成,无需进一步操作,继续任务链的方法如下: 从新解锁的妖精环出发,向东飞行至东北角,降落在该妖精环处。 向南跳下楼梯,向西走并在第一个向南的路口转弯,向南走后转向东过桥,然后在洞穴入口处向南转,接着一路向南从东南出口离开。 在洞穴中向南走,触发过场动画以开启【艾德里安的父母】任务。 【艾德里安的父母】 触发方式:进入尼禄谷地图东南角的洞穴,即可触发过场动画。 在洞穴中继续向南走,跳下各个缺口。离开洞穴后一路向东,然后一路向南走下楼梯并穿过桥梁,接着向西游泳进入洞穴入口。 进入洞穴后向北走,会触发一段过场动画,随后是一场 boss 战,完成后即可结束任务。奖励:阿德里安职业选择 塞里·凯苏的职业任务:这是什么?? 触发位置:阿塔纳城堡地图,中心区域北侧,垂直桥梁向上走到水平桥梁下方,在男人旁边的洞穴里,激活奇怪的水晶球。 注意:此任务可随时接取,但会暂停直至主线故事第二章中段。 激活水晶球后,任务启动但没有进一步指引,会暂停直至主线故事推进到足够进度。 返回洞穴后会触发一段过场动画。注意:此任务将从任务日志中消失,并被【水晶球】任务取代。 【水晶球】 任务来源:完成【这是什么??】任务后自动触发 前往南部的十字桥,爬上梯子,然后稍微向西前往图书馆观看过场动画。 现在你必须找到三块力量水晶: 【力量水晶:红色】(任务物品)位于血森林西南角的士兵洞穴内,打开宝箱即可获得。 【力量水晶:绿色】(任务物品)需要在苹果园接取支线任务【塔楼】。完成该任务可让你进入苹果园东北出口处的废弃塔楼。登上塔楼,在第四层打开宝箱。击败 Boss 后即可获得该水晶作为奖励。【力量水晶:蓝色(任务物品)】位于阿塔纳城堡后方的秘密区域。前往泉水地图的东北路径,该路径通向阿塔纳城堡地图东南角的一小块独立区域,那里有一个妖精之环。向东北飞行,在妖精之环着陆,打开宝箱。返回水晶球并激活它,触发另一段过场动画并完成任务。奖励:塞里·凯苏职业选择;*石头,异域2(宝藏/技能升级) 多伦的职业任务:古老雕像 接取来源:前往南星道,向东走到生命洞穴入口,与右侧的女性对话。 进入生命洞穴后径直向北走,然后穿过西侧的通道,激活楼梯上的雕像。注意:此任务会无提示地完成,详情见【失落之地】。失落之地 注:此任务需在主线故事第二章进行到一定阶段后才会解锁。 任务来源:返回楼梯上的雕像处,解除石头诅咒。 老人离开后,向东进入洞口,穿过每一个线性洞穴,进入沙漠地带。 向西走,然后向南穿过桥梁进入建筑。 向南走触发过场动画,之后向南穿过洞口,再向南走离开建筑。 从这里开始有一条长长的环形路线:向东北方向走到底,然后向南,再向西,会发现一个洞穴入口。 进入洞穴入口触发过场动画。【无法回头 - Boss 战】 战斗结束后离开洞穴,返回寺庙,此时门上的魔法屏障已解除(注:无需一路绕回,可进入西侧建筑并激活屋顶的开关,以开启桥梁捷径)。 进入门内,向北走,打开宝箱。 现在离开并绕回地图东南角,那里有一栋带有红色锁门的建筑。 开门进入,向东南走下楼梯,触发过场动画并完成任务。奖励:多兰职业选择 位置详情 不确定是否有人会觉得这些信息有用,但我有相关数据,所以还是一并附上。阿洛里亚(城市)(为清晰起见分为6个区域,上3个区域和下3个区域) 阿洛里亚西北区: 出口:西北小径(南星道)、东桥(阿洛里亚北区)、南桥(阿洛里亚西南区) 地点:莉塔的家 NPC:塔兰妮(商人)(C)(临时,在进入阿格洞穴前停留于此)、珍妮、杰西卡 莉塔的家NPC:埃里卡、彭茨、珀西 书架(楼上):《精灵传说》、《阿拉菲尔历史》 宝箱(楼上):25枚金币 宝箱(楼下):【不朽附魔 I】 阿洛里亚北区: 出口:西桥(阿洛里亚西北区)、东桥(阿洛里亚东北区)、南道(阿洛里亚南区) 地点:雪莉的家、旅馆 NPC:马克、里克尔老人、杰基、迪恩、加里、塞德里克、艾米、多伦 雪莉的家NPC:雪莉(支线任务:面粉女孩)、戴维斯、格伦 书架:人类历史,滇资源传说:(1)矿石、水晶宝箱:30金币 酒馆NPC:艾琳(商人)、瑞德(C)、史蒂芬、托里克、音乐家、塔比莎、特丽、神秘权贵(3名)(临时) 趣闻:即使神秘权贵离开后,史蒂芬仍会提及他们。谜题即将完成。向北走,通过楼梯出口。 向西北方向走并激活蓝色火焰,将触发一场 boss 战。(注意:尽管会给你选择,但你必须战斗) 提示:若想轻松获胜,让艾德里安使用嘲讽和反射技能。当 boss 使用诅咒(或类似的蓄力特殊技能)时,它会将自身生命值降至 1,此时一击即可将其击杀。通过捷径离开该区域后,你可以选择直接跳出谜题房间。 返回灵童处,观看另一段过场动画。 向前走并激活项链。奖励:【遗物,项链】 星猫尾巴获取方法!来源:狩猎场地图,就在采石场出口的东北方向,与猎人(推车旁的女人和矮人)交谈。 注意:此任务要到第二章接近尾声时才会解锁。秘密:破损的墙壁(从阿杰尔的房子获得【炸弹(任务物品)】后使用) 资源:(2)魔法,星尘;(1)矿石,水晶 宝箱:遗物,魅力 阿洛里亚东北部: 出口:西桥(阿洛里亚北部),南楼梯(阿洛里亚东南部) 地点:神庙 资源:(1)魔法,星尘 神庙 NPC:阿德里安(临时,主线任务),丹森教授,科琳娜,奥拉亚夫人(算命),巴托洛,西缅,蒂拉,阿杰尔(在主线任务后期出现) 书架:《阿拉菲尔历史》,《精灵传说》 阿洛里亚东南部: 出口:北楼梯(阿洛里亚东北部),西桥(阿洛里亚南部),东路径(仙女圈,职业任务:丘陵矮人?) 地点:阿杰尔的房子,阿德里安的房子 NPC:布雷斯,切尔西,矮人(职业任务:丘陵矮人?)卡拉(支线任务:升级!) 资源:(2个)石油、鱼;(1个)线、亚麻 精灵圈(位于有矮人的悬崖顶部,无法从主区域进入) 艾德里安的家 琐事:(仅限莉塔,在从神殿接回艾德里安之前,或村庄被冻结时)激活日志可获得关于艾德里安的一些见解(又名窥探你的朋友)。如果艾德里安和你在一起,他会阻止你。 阿杰的家 宝箱(床左下方):炸弹(任务物品) 宝箱(东北方):兽皮(普通2);线、亚麻(2个) 使用炸弹炸开右上角墙壁的裂缝,然后爬过洞口。阿尔杰洞穴 地点:洞穴1、洞穴2、洞穴3、【秘密】洞穴 NPC:阿尔杰(临时)(必须躲避);塔兰妮(商人)(C) 资源:(3)矿石、水晶;(1)油、鱼;(4)线、亚麻 宝箱(入口):锭、青铜 宝箱(地图中南部):50金币 洞穴1(中南部入口) 关于敌人重生的教程。资源:(1)矿石,水晶 洞穴2(跳过断桥,爬上梯子,爬进洞口) 宝箱:灯笼(任务物品) 洞穴3(跳过断桥,用炸弹炸开裂缝,爬进右侧洞口,然后向左) 资源:(1)矿石,水晶;(1)精华,大地 【秘密】洞穴(中心区域,激活箭头标志左侧的墙壁) 资源:(1)【战士之石】(宝藏/技能升级) 左侧宝箱:【腐蚀附魔 I】 右侧宝箱:50金币 阿洛里亚南部: 出口:西桥(阿洛里亚西南部),东桥(阿洛里亚东南部),北道(阿洛里亚北部) 地点:贾妮丝的家,苹果树,游侠公会 NPC:波林,迪恩,艾丽(小游戏) 资源:(1)油,鱼 宝箱(地图南端,下梯子):宝藏,蛋白石 贾妮丝的家 NPC:贾妮丝(支线任务:雪熊!)书架:阿拉菲尔地质学、吸血鬼 注:楼上没有东西。苹果树 与艾丽对话会开始一个小游戏。你必须接住苹果——这需要移动到红色箭头标记处并激活该位置。时间不多,所以你需要快速移动并激活。如果错过任何苹果,将没有奖励;如果接住全部10个苹果,你将获得500经验值和【遗物:魔法苹果】。可以多次尝试直到接住所有苹果。游侠公会NPC:阿拉妮、矮人、托兰(悬赏任务) 悬赏(支线任务):兔女郎 bandit(悬赏一)、阿米雷 gang(悬赏二)、吸血鬼 stalker(悬赏三)、星辰女巫(悬赏四) 资源:(1)植物,天使花 阿洛里亚西南部: 出口:西南小路(农田)、北桥(阿洛里亚西北部)、东桥(阿洛里亚南部) 地点:塔莉娅的家、大集市、克里斯汀的家 NPC:瑞恩、屋顶上的男人、卡弗、卡西、艾尔(支线任务:给里克的便条)、凯文、雅各布、塔拉(给予粉尘、生命)、埃里克 资源:(2)植物,天使花;(1)矿石,水晶;(1)魔法,星尘 精灵之环(最南端) 塔莉娅的家 NPC:塔莉娅、杰克 书架:《阿拉菲尔历史》、《精灵传说》 资源:(1)植物,天使花 大集市 NPC:安德、商人梅莉(商人)黛米、老加恩(商人)、矮人(男性)、老妇人(商人)、迈克尔、店主(商人)、店铺老板、矮人(女性)、莱利、面包师(商人)、阿克、桑迪、铁匠雷维(商人)、迪米特里、雕像(秘密) 书架:奥利安神庙、低地 宝箱:永远无法打开,只是个玩笑。传送水晶(阿洛里亚) 商人:老加恩(右下角) 配方:【附魔:知识 I】(200金币) 商人:店主(有熊的上方区域) 遗物:【遗物,高脚杯】(6000金币) 任务物品:雪熊(45金币) 商人:面包师(有面包的上方区域) 遗物:【遗物,面包】(100金币);【遗物,蛋糕】(5000金币) 任务物品:面粉(4金币) 商人:铁匠雷维(穿过入口直达最顶部) 配方:【附魔:无敌 I】(200金币);【附魔:穿透 I】(200金币);【附魔:致命一击 I】(200金币) 秘密:(在第二章中途解除雕像的石化诅咒后下楼) 资源:(1)【石头,吟游诗人】(宝藏/技能升级) 宝箱:【附魔:贪婪】 克里斯汀的家 NPC:安妮特、哈罗德、克里斯汀 书架:阿洛里亚,太阳石 宝箱:15金币 阿洛里亚(郊外)农田(阿洛里亚): 出口:东南小径(阿洛里亚西南)、向南游泳(隐藏遗迹) 地点:让农夫的家、儿童之家 NPC:女农夫、男人、男农夫 (2)油、鱼;(2)矿石、水晶;(1)水 loot;(2)线、亚麻;(1)魔法、星尘 宝箱(地图底部,跳下楼梯):宝藏、蛋白石 让农夫的家 NPC:让农夫(支线任务:大沙拉) 儿童之家 NPC:男孩(蓝发)、男孩(棕发) 隐藏遗迹(阿洛里亚): 出口:向北游泳(农田) 地点:兔女郎强盗藏身处 资源:(1)魔法、星尘 兔女郎强盗藏身处(进入遗迹入口) NPC:兔女郎(悬赏/任务目标) 矮人洞穴(莉塔的职业任务区域): 出口:西南小径(阿洛里亚)东南部区域(洞穴前) 资源:(3)线团、棉花 洞穴内 资源:(3)灰尘、附魔材料;(4)油、阿里鱼;(2)*石头、异域材料(用于宝藏/技能升级);(3)矿石、水晶;(1)油、鱼;(1)精华、光 宝箱(西南角):瓶子、不稳定的3 精灵圈(东南角) 精灵圈(朝西北角方向) 南星道 出口:西南路径(阿洛里亚)、西路径(苹果园)、西北路径(采石场)、东北路径(泉水)、东南路径(泉水) 地点:西水洞、阿米雷洞穴、东北左洞、东北中洞、东北右洞、南水洞、生命洞穴 NPC:男人和女人、女人、女人(职业任务:古老雕像) (2)油、鱼;(2)矿石、水晶;(3)线团、亚麻;(1)魔法、星尘;(1)精华、大地精灵击败星猫,收集10个星猫尾巴(任务物品)。返回猎人处领取奖励。奖励:2500经验值;4000金币。 趣闻:敌人名为“星猫”,而任务名称和任务物品名为“星猫”。 任务接取地点:阿塔纳城堡王座室,与娜希拉女王对话。 注意:此任务需在第四章开始后才会解锁。 前往泉水地图的汉娜草药与药剂店(提示:使用传送水晶可直达),与汉娜对话。 前往泉水地图的西南角,通过出口,击败伊拉利亚黄蜂,收集10个黄蜂翅膀(宝物)。 注意:即使在28级,我也被这些黄蜂打得很惨。你可能需要在推进一段剧情后再回来尝试。圆圈(在阿米雷洞穴入口处) 仙女圈(水边洞穴南侧,无法从主区域进入) 资源:(2)尘埃 附魔宝箱(左侧):遗物 鳞片宝箱(右侧):远古精灵弓(支线任务物品) 西部水洞(从阿洛里亚小径出发,向北过桥,跳入水中,游进洞口) 宝箱:50金币 阿米雷洞穴(从阿洛里亚小径出发,向北过桥,爬上斜坡至洞口) NPC:男人、阿米雷(悬赏/任务目标)(可获得任务物品:阿米雷签名) 资源:(1)矿石、水晶 北侧房间被男人阻挡,直至击败阿米雷。资源:(1)尘埃,附魔 宝箱(左侧):*附魔:力量 I 宝箱(中间):*石头,战士(宝藏/技能升级) 宝箱(右侧):宝藏,绿宝石 东北左洞穴(最东北部,3个洞口的左侧) 资源:(8)矿石,水晶;(1)精华,大地;(2)线,亚麻 宝箱(东北角):50金币 宝箱(向东游泳,然后向南):*遗物,箭头 东北中洞穴(最东北部,3个洞口的中间) 资源:(1)矿石,水晶 宝箱:100金币 东北右洞穴(最东北部,3个洞口的右侧) 门:从失落之地解锁(职业任务:失落之地的一部分) 南部水洞(从阿洛里亚路径,向东过桥,在下一座桥处跳入水中,游进洞口) 资源:(1)油,阿里鱼 宝箱:200金币(可能包含*附魔:知识 I)生命洞穴(及失落之地) 出口:南路径(南星道)、西路径(雕像室)、北路径(迪安峡谷东部) 地点:雕像室、失落之地、东南洞穴、召唤洞穴 NPC:卫兵(2名)、塔兰妮(商人)(C) 资源:(7)植物、黎明花;(3)矿石、水晶;(1)【石头】、弓箭手(宝藏/技能升级);(3)矿石、铁;(1)【石头】、吟游诗人(宝藏/技能升级)(通过已解除的屏障,向北穿过两个洞穴,然后向北过桥和两段楼梯,接着向西走地面) 宝箱(通过已解除的屏障,向北穿过两个洞穴,然后向北过桥和两段楼梯,接着向西再向南):【附魔:灼热】 雕像室(从南星道入口向西) 出口:东路径(生命洞穴)、南开口(失落之地) NPC:雕像(职业任务目标 - 第二个石咒)资源:(1)尘埃,附魔 通往失落之地的第一个房间(在第二章中途打破雕像上的石头诅咒并下楼) 资源:(1)尘埃,附魔 通往失落之地的第二个房间 通往下方失落之地的出口: 东南洞穴(东南角出口) 资源:(6)丝线,丝绸;(1)矿石,水晶;(2)矿石,铁;(1)【魔法石】(宝藏/技能升级)(进入洞穴,穿过,东侧);(1)【异域石】(宝藏/技能升级) 召唤洞穴(中心区域,穿过障碍石后上右侧楼梯的洞穴) 资源:(2)丝线,丝绸;(5)矿石,铁;(2)【异域石】(宝藏/技能升级);(1)矿石,水晶 宝石:粉色(任务物品)(向北穿过第一道门) 宝箱(南楼梯,西北门):【附魔:无敌II】 宝石:红色(任务物品)(南侧楼梯,东北门) 宝箱(南侧楼梯,南侧门):钥匙,普通(任务物品) 宝石:蓝色(任务物品) (西南洞穴) 失落之地(多伦职业任务区域): 出口:东北通道(生命洞穴),南侧通道(神殿) 地点:神殿,南失落之地 资源:(1)粉尘,附魔 神殿 出口:北侧通道(失落之地),南侧通道(南失落之地) 宝箱(向西,然后向北穿过水道):【附魔:知识II】 注:此处大部分区域,包括最西侧、东侧、北侧房间以及屋顶,均无重要物品。南失落之地 出口:北侧入口(神殿) 地点:洞穴、西南建筑、东南建筑 NPC:塔兰妮(商人)(C) 资源:(3)植物、云玫瑰;(3)线、棉花;(2)【异域石块】(宝藏/技能升级) 宝箱(魔法屏障门后的房间内):【远古钥匙】(任务物品) 洞穴(地图西南角附近) 资源:(1)【异域石块】(宝藏/技能升级) 西南建筑(地图西南角) 资源:(1)光元素精华 开关:激活连接地图西北和西南区域的桥梁 东南建筑(地图东南角) 出口:西南入口(南失落之地)、沿所有楼梯向上(南星道) 泉水(及尼罗谷) 出口:西侧路径(南星道)、西南路径(黄蜂!高等级!)),东南路径(尼罗山谷),东北路径(仙女环),北方路径(阿塔纳城堡),西北路径(南星道) 地点:汉娜的草药与药剂店,东北湖(从汉娜的店上方爬梯子,向北游泳),西北湖(东北湖西侧),东北路径 NPC:男子,告示牌(职业任务:石兽) 资源:(4)植物,天使花;(4)油,鱼;(1)线,亚麻;(2)矿石,水晶 有黄蜂!(西南路径,大地图中的独立小区域) 资源:(1)石油、鱼类;(2)植物、黎明花;(2)线、丝绸;(2)植物、太阳果 秘密:(洞穴内激活指向箭头旁的墙壁) 资源:(1)植物、太阳果 左侧宝箱:*遗物、号角 右侧宝箱:500金币 尼洛山谷(东南路径,大地图中的独立小区域) 出口:北路径(泉水处) NPC:雕像(职业任务:石兽、第二个石咒) 资源:(1)线、棉花 汉娜的草药与药剂店(西北角) NPC:汉娜(商人)、工人×2、孩子 宝箱:植物、云玫瑰×2;石油、阿里鱼×2 *传送水晶(泉水处) 东北湖(严格来说是“阿塔纳城堡”地图的南部,但属于泉水区域) 资源:(2)魔法、星尘;(1)植物、天使花;(2)石油、鱼类 西北湖泊(严格来说是“采石场”地图的东南部,但属于泉水区域) 资源:(1)植物:天使花;(1)精华:大地;(1)水之 loot;(1)矿石:水晶;(1)油料:鱼 东北路径(严格来说是“阿塔纳城堡”地图的一小部分,但属于泉水区域) 资源:(1)植物:天使花 精灵圈(配对的精灵圈见阿塔纳城堡) 尼禄山谷(艾德里安的职业任务区域): 出口:西北路径(泉水区域)、东南路径(东南洞穴) 地点:东洞穴、东南洞穴、雪地 资源:(4)植物:云玫瑰;(3)线:棉花;(1)*石头:异域(宝藏/技能升级);(3)油料:阿里鱼 宝箱(东北精灵圈西侧):药水:活力恢复 II×2 精灵圈(出口处西北角) 精灵圈(东北角) 精灵圈(东侧,中部区域资源:(2)植物,云玫瑰;(1)精华,光精灵圈 西南角资源:(1)线,棉花;(1)精华,水 东部洞穴(地图中东部,通往东南出口的路径上)资源:(1)粉尘,附魔粉尘 东南部洞穴(尼洛谷地图的东南出口)资源:(1)粉尘,附魔粉尘;(1)【石头,异域石头】(宝藏/技能升级) 雪地(东南部洞穴的南部出口)资源:(1)【石头,异域石头】(宝藏/技能升级) 采石场出口:南部路径(南星道)、西部路径(血森林)、西北部路径(狩猎场)、东北部路径(阿塔纳城堡)、东南部路径(秘密区域) 地点:采石场洞穴、雕像洞穴、宝箱洞穴、矿主洞穴、秘密区域 NPC:男性(4名)、塔兰尼(商人) (C)资源:(2)矿石,水晶矿;(3)水 loot;(1)油回到汉娜处获取【解毒剂】(任务物品),然后返回女王处领取奖励。奖励:20000经验值;5000金币 井下探险 任务接取:生命洞穴出口南侧的黛安峡谷,与井边的男子对话。 注意:此任务需在第四章中段后才可接取。 一路向东南走,然后向西到达楼梯出口。 打开宝箱触发 boss 战。 提示:如果不攻击支援道具,只攻击主 boss(不使用范围攻击),这场战斗会很简单。清除 debuff 并持续攻击 boss 即可。返回男子处根据选择领取奖励。鱼类;(3)魔法,星尘;(6)植物,天使花 宝箱(从木板下爬过去可进入):隐匿,普通 3 采石场洞穴(地图中南部,南星道出口处,两个入口) 位置:矿工宿舍,多伦的藏身处 NPC:矿工,男人(4名),矮人 资源:(8)矿石,水晶 【传送水晶(采石场)】 矿工宿舍(传送水晶处的西/中央入口) NPC:男人(2名),女人,男孩 多伦的藏身处(西北角,在主线任务期间解锁) 资源:(2)水 战利品;(2)油,鱼 宝箱:【附魔:坚不可摧 I】 多伦家书架:吸血鬼,奥利安神庙 雕像洞穴(南星道出口东北方向,从右侧梯子上去) NPC:雕像(打破石头诅咒可获得5000经验值) 宝箱(被雕像挡住):【附魔:致命一击 I】 宝箱洞穴(正北方向)南星道出口(下层)宝箱:锭 铜矿主洞穴(地图东北角,下层) NPC:矿主、秘书 书架:阿拉菲尔地质学 宝箱:200金币(可能包含【知识附魔 I】?)【秘密区域】(隐藏在地图东南部的出口,必须游泳前往,寻找被树木覆盖的石头小径) 位置: - 空屋洞穴宝箱: elixir(原词)、 luck(原词) - 空屋洞穴宝箱:1000金币 阿塔纳城堡 出口: - 南部路径(泉水区域) - 西部路径(采石场) - 东南部路径(塞雷迈平原) 位置: - 守卫岗哨、兵营、水晶球洞穴、图书馆、守卫洞穴、城堡 NPC: - 士兵(3名)、工人(2名)、男性(2名)、屋顶士兵(无法到达)、男性矮人、女性矮人、男孩、商人(商人)、守卫(2名) 资源: - (5)植物、天使花;(1)魔法、星尘;(1)植物、云玫瑰;(2)线、棉花;(1)粉尘、附魔 仙女环(城堡东侧后方,无法从主区域进入——详见泉水区域的配对仙女环) 资源: - (1)精华、光;(1)精华、水 宝箱: - 力量水晶:蓝色(职业任务:水晶球) 守卫哨所(南道路出口旁) NPC:卫兵 兵营(守卫哨所北侧) 无内容 水晶球洞穴(兵营北侧,东西向桥梁下方/穿过桥梁) 书架:《阿拉菲尔地质学》《精灵传说》 神秘水晶球(职业任务:这是什么??)【图书馆】(城堡西侧,过桥后) NPC:图书管理员萨拉、图书管理员(C)、女性(2名)、男孩(3名)、男性(2名)、女孩 书架:《阿拉菲尔史》《精灵传说》《人类史》《迪安传说》《太阳石》《阿洛里亚》《阿拉菲尔地质学》《吸血鬼》 资源:(1)矿石、水晶 *传送水晶(阿塔纳城堡) 【守卫洞穴】(城堡西侧) NPC:守卫(2名) 宝箱:*附魔:不朽II 【城堡】(主线剧情中解锁) 地点:西兵营、餐厅与厨房、东兵营、楼上、地牢、王座室 NPC:贵族(3名)、守卫(3名) 资源:(1)粉尘、附魔宝箱(从入口向北,涉水至北部中央):300金币 西兵营(从入口穿过任意北侧门帘,再穿过任意北侧门,然后)(通过西北门)NPC:卫兵(2名) 餐厅与厨房(从入口进入,穿过任意北侧门帘,通过任意北侧门,再穿过北侧中央双开门)NPC:主厨、厨师(2名)、厨师(无法交互) 东兵营(从入口进入,穿过任意北侧门帘,通过任意北侧门,再穿过西北门)NPC:男性(2名)、士兵 楼上(从入口进入,穿过任意北侧门帘,通过任意北侧门,再通过任意楼梯上楼)地点:国王卧室、储藏室、儿童房、城堡屋顶 书架:太阳石、阿洛里亚 国王卧室(楼上区域,北侧中央门)书架:阿拉菲尔地质学、吸血鬼 储藏室(楼上区域,西北门)秘密(激活西北墙上门形区域):资源:(1)*石头、魔法(宝藏/技能升级)宝箱:500金币 儿童房(楼上区域,东北门)NPC:肯尼斯王子、萨拉公主 城堡屋顶(楼上区域,任意南门)NPC:卫兵(2名)、屋顶上无法互动的卫兵 门:从内部锁定,可从王座室离开 地牢(从入口进入,穿过任意北侧窗帘,再穿过任意北侧门,然后走任意楼梯下楼) 注:仅在第三章开始时可进入出口:阿塔纳城堡(西南方向的一对楼梯)、守卫营房(牢房内的秘密开口或东北门)、废弃牢房(东北楼梯向上)、深渊(东北楼梯向下) 资源:(1)矿石、水晶;(1)粉尘 附魔宝箱(西北牢房):*附魔:不朽 III 守卫营房(通过牢房内的秘密门) 妖精环(位于监狱牢房出口,地图西南角) 妖精环(监狱正北方) 资源:(1)精华、水;(1)精华、光 妖精环(地图中心东侧) 资源:(1)油、阿里鱼;(3)线、棉花 守卫营房(东南角) 书架:奥利安神庙、低地 宝箱:任务目标 废弃牢房(东北楼梯向上) 资源:(2)粉尘 附魔宝箱:*附魔:恢复 I 秘密1(在东北方向的裂缝处使用炸弹)墙壁):(1)【石头】,【吟游诗人】(宝藏/技能升级) 秘密2(对北部裂缝墙壁使用炸弹):(1)【石头】,【魔法】(宝藏/技能升级) 深渊(向东北楼梯下行) 资源:(2)【石油】,【阿里鱼】;(2)【矿石】,【水晶】;(3)【粉尘】 【附魔宝箱】(水上东北路径):300【金币】 【宝箱】(木桥之间):任务目标 【不那么秘密的秘密】(激活指向箭头旁的墙壁) 资源:(1)【矿石】,【水晶】 【宝箱】(左侧):【遗物】,【卷轴】 【宝箱】(右侧):【锭】,【银】 纪念遗迹 资源:(1)【精华】,【光】;(1)【植物】,【黎明花】 右侧屏障门 资源:(2)【石头】,【异域】(宝藏/技能升级) 【宝箱】(右上):【锭】,【青铜】 【宝箱】(左上):【粉尘】,【吸血鬼】×2 【宝箱】(穿过开口):【宝藏】,【钻石】 传送:尽头的符号会将你传送到一个新的传送点接近开始部分奖励(击败首领):【附魔:腐蚀 II】 奖励(选择诚实):1000金币;【附魔:冻结】 奖励(选择撒谎并保留):250金币;宝藏,戒指(可出售获得5000金币) 精灵花园 接取地点:奥利安神庙,与神庙内的老人对话。 注意:此任务需在第四章中段后才可接取。 继续主线任务,返回奥利安村,从东侧出口前往迪安峡谷东部,再从东北出口、北侧出口进入圣地后,向南走,游过水域,进入废墟。 向北走过桥梁,激活中央的雕刻墙壁,进入即可找到精灵花园。 返回老人处领取奖励。 奖励:5000金币;【附魔:预判】 幽灵驱逐 接取地点:奥利安神庙,与地下室祭坛处的修女对话。左屏障门 资源:(2)*石头,异域(宝藏/技能升级);(6)矿石,铁;(1)矿石,水晶;(3)线,丝绸;(1)*石头,战士(宝藏/技能升级);(1)精华,火焰 秘密1(向东北方向,激活颜色较深的墙壁部分) 宝箱(左):*附魔:迅捷II 宝箱(右):500金币 秘密2(激活北端颜色较深的墙壁部分) 宝箱:*附魔:空灵 王座室 宝箱(左,王座后方储藏室):宝藏,钻石 宝箱(右,王座后方储藏室):宝藏,翡翠 塞雷迈平原 出口:西北路径(阿塔纳城堡) 地点:洛妮的长笛洞穴,传送洞穴 NPC:比赛组织者(临时,主线任务目标) 资源:(7)水 loot;(3)植物,天使花;(3)矿石,水晶;(2)线,亚麻;(4)油鱼类;(1)精华,大地;(2)魔法,星尘 精灵圈(地图中西部区域,无法从主地图进入,楼梯过高) 精灵圈(地图西北角 - 在主线剧情中解锁) 趣闻:存档文件中此处名为【Seramai Plains】,水晶传送列表中显示为【Seramai Plains】,NPC们称其为【Serami Plains】,但实际地图和区域入口的标识为【Seremai Plains】。 洛妮的长笛洞穴(地图东北角,两个入口) NPC:塔兰妮(商人)(C) 资源:(1)矿石,水晶;(1)植物,云玫瑰;(1)*石头,魔法(宝藏/技能升级) 趣闻:水池中有一处无法获取的水上 loot,可能仅为装饰效果。灵童房间(北路径,第一个西向入口) NPC:灵体(支线任务目标:项链) 资源:(2)植物,云玫瑰 谜题房间(高等级–25级!!!) 资源:(2)矿石,铁;(4)植物,黎明花;(1)植物,云玫瑰;(2)矿石,水晶 传送洞穴(地图中央,箭术场上方) 资源:(1)矿石,水晶 【传送水晶(塞雷迈平原)】 狩猎场 出口:西南路径(采石场),西路径(血森林),西北路径/水路(北星道),北路径/水路(秘密区域) 地点:传送印记洞穴,秘密区域,资源洞穴,遗迹洞穴 NPC(第二章期间出现):猎人(支线任务:星猫尾巴!)矮人资源:(4)线、亚麻;(2)水之 loot;(3)油、鱼;(5)矿石、水晶;(5)植物、天使花;(1)大地精华 宝箱(极西北角):【附魔:无敌 I】 宝箱(极东北角,遗迹洞穴旁):75 金币 妖精环(西北角,上层区域) 妖精环(南部中心区域) 妖精环(地图东侧靠近中心处,无法从主地图进入) 资源:(2)精华、水 传送印记洞穴(西北方靠近北星道出口处) 锁着的门 - 仅能从内部打开 传送印记(配对方法见下方秘密区域) 秘密区域(北部路径 - 陆地区域及北部水域 - 游泳区域) 资源:(2)植物、天使花;(1)矿石、水晶;(3)油、鱼 宝箱(陆地区域):药水、复活 2 宝箱(绕陆地游泳,然后向东):【遗迹,指南针】传送印记(配对方法见上方的传送印记洞穴) 资源洞穴(地图东南角) 资源:(1)矿石,铁;(2)矿石,水晶 秘密:激活水晶资源旁北墙上的裂缝,然后爬过去。 资源:(1)魔法,星尘;(2)矿石,水晶;(1)【石头,战士】(宝藏/技能升级) 遗迹洞穴(地图东北角) 资源:(1)植物,天使花 秘密:激活花朵资源旁西北墙上的机关,然后走过去。资源:(1)植物,天使花 宝箱:*遗物,血森林石板(及阿雷遗迹) 血森林(南部):出口:西南路径(苹果园)、东部路径(采石场)、北部路径(秘密区域)、东北路径(血森林东北部)、西北路径(血森林西北部) 地点:西士兵洞穴、东士兵洞穴、水洞、秘密区域 NPC:卫兵(4名) 资源:(4)植物,天使花;(3)线,亚麻;(3)矿石,水晶;(2)油,阿里鱼;(1)魔法,星尘 西士兵洞穴(南出口正北) NPC:士兵(C) 宝箱:力量水晶:红色(职业任务:水晶球) 东士兵洞穴(西南路径与东部路径中途) NPC:士兵 *传送水晶(血森林) 水洞(西士兵洞穴正北,跳入水中并游入洞穴) 资源:(1)油类,阿里鱼;(1)矿石,水晶;(1)精华,大地宝箱:【附魔:电击】秘密区域(地图中北部,上坡,沿草地小径向北)NPC:雕像资源:(1)魔法,星尘宝箱:【遗物,羽毛笔】血森林(东北部):出口:南部小径(血森林南部),东部小径(狩猎场)NPC:守卫资源:(1)线,亚麻血森林(西北部):出口:西南部小径(血森林南部),东北部小径(阿雷遗迹)资源:(2)线,亚麻;(1)植物,天使花精灵圈(南部小径出口东北侧)精灵圈(与另一个精灵圈隔 gap 相望)阿雷遗迹(血森林):出口:南部小径(血森林西北部),西部小径(西部遗迹)地点:西部遗迹,一号门房间,二号门房间NPC:塔拉尼(商人)(C)资源:(3)弗洛拉,云蔷薇;(2)弗洛拉,天使花 宝箱(纪念碑之间向北中途位置):宝藏,蛋白石 西部废墟(地图北端附近的西侧路径) 资源:(2)弗洛拉,天使花;(1)弗洛拉,云蔷薇 第一个门房间(东侧墙壁纪念碑以北)或(从第二个门房间穿过中央走廊的任意三扇门) NPC:塔拉妮(商人)(C) 资源:(1)油,阿里鱼 宝箱(入口西北方向):药水,复活 第二个门房间(东侧墙壁向北两层)或(从第一个门房间穿过塔拉妮以北东北区域的任意三扇门) 宝箱(三扇门西侧):【附魔:致命一击II】 宝箱(三扇门南侧):药水,复活 秘密(三扇门东北方向,爬下梯子进入血池) 骷髅:【附魔:虹吸】秘密(三个门的西侧,激活两根柱子之间的墙壁) 宝箱:【遗物】、【吊坠】 第三个房间(第二个门的房间,三个门的东北方向,从任意楼梯上去) 宝箱:【附魔:幸运】 书籍:【任务目标】 第四个房间(第二个门的房间,三个门的北侧,穿过金色锁着的门,再穿过巨大的门洞) 资源:(3)【尘埃】、【附魔材料】 宝箱(东侧,然后东北方向):300【金币】 秘密(最东侧,然后向北走到墙壁上门的左侧,激活前方地面颜色较浅的墙壁) 资源:(1)【石头】、【魔法】(【宝藏/技能升级】) 主线任务后(之前被封锁的西北区域) 资源:(2)【线】、【棉花】;(1)【精华】、【水】 第五个房间(第四个房间,向东走,然后向北,再下楼梯向西) 资源:(1)【线】、【棉花】 骷髅:【钥匙】普通(任务物品) 第6房间(第4房间,向远东走,然后进入东北方向墙上的门) 无物品(剧情过场/战斗) 第7房间(第6房间,穿过另一端的开口) 宝箱:钥匙,普通(任务物品) 资源:(1)附魔粉尘;(1)棉线 传送符印:返回第4房间西角注意:此任务需在第四章中途才能接取。 从修女处直接向南走,下楼梯进入下一个区域。消灭走廊和每个房间里所有游荡的幽灵。 返回修女处领取奖励。奖励:1000金币;【附魔:启迪】 小知识:完成任务后,修女头上的任务目标问号标记仍会保留。 精灵弓 获取途径:北星道,第三个区域,西出口,与洞穴中的塔林·维祖尔对话。 注意1:此任务需在开始第五章后才能接取。 注意2:从第二章开始后的任何时间都可以获得该弓,若已拥有则可立即完成任务。 返回南星道,靠近通往阿洛里亚的出口处,使用阿米雷洞穴旁的妖精圆环。第八房间(第七房间,走上西侧楼梯)秘密(向北走并激活墙壁中央颜色不同的部分)资源:(2个)线、棉花;(1个)精华、水 第九房间(阿雷遗迹地图,通过主线任务开启的门一路向北)无(剧情过场/战斗) 苹果园 出口:东侧路径(南星道)、东北侧路径(废弃塔楼)、西北侧路径(血森林) 地点:守卫洞穴、卡弗先生的洞穴 NPC:男性(5人)、女性(3人)、守卫、男孩、女孩、树上无法互动的人(5人) 资源:(3个)植物、天使花;(3个)水之 loot;(1个)油、鱼;(1个)线、亚麻;(1个)矿石、水晶;(1个)植物、云玫瑰 宝箱(从南星道入口出发,向西过桥,然后向南走到尽头):500金币 仙女环(东北角有宝箱,无法从主区域进入) 15级拟态怪会发动攻击。若等级较低,建议跳过稍后再来。奖励:2000金币;5000经验值;粉尘,3级毒药;绿色能量水晶(职业任务:水晶球) 宝箱(屋顶):生育水晶(支线任务:高塔) 迪安峡谷(西) 出口:西北洞穴(生命洞穴),东南路径(奥利安村) 地点:水井 NPC:男子(支线任务:下井) 资源:(3)线团、丝绸;(2)矿石、水晶;(1)*石头、异域(宝藏/技能升级);(1)植物、黎明花;(2)油、以太鱼 水井(生命洞穴出口向南) 资源:(9)矿石、铁;(1)精华、火焰;(2)矿石、水晶 宝藏(西北洞穴):(1)*石头、吟游诗人(技能升级) 宝箱(入口西南方):金锭 宝箱(南楼梯出口): boss战(支线任务:下井) 奥利安村与神庙(为清晰起见分为4个区域) 奥利安村西北:出口:西北路径(迪安峡谷西)、东桥(经过旅店,奥利安村东北)、南桥(过河,奥利安村西南) 地点:北屋、旅店、中屋、南屋 NPC:男性(2名)、女性、男孩 资源:(1)植物、黎明花 北屋(西北出口旁) NPC:女性、老人 旅店 NPC:女性(中间)、修女、男性(4名)、女仆 中屋(中心区域) 无内容 南屋(南桥过河处) NPC:男性 书架:《阿拉菲尔史》、奥利安神庙 奥利安村东北 出口:西桥(通往旅店,奥利安村西北)、北桥(奥利安神庙)、东路径(迪安峡谷东/圣地)、南路径(经过杂货店,奥利安村东南) 地点:铁匠铺、杂货店【传送水晶(奥利安村)】 铁匠铺(东北角) NPC:铁匠(商人),男性 杂货店(圣地小径右侧) NPC:店主(商人),男性,女性 资源:(1)线,丝绸 书架:精灵传说 商人:店主 遗物:*遗物,法典(7000金币) 奥利安村西南部: 出口:北桥(过河,奥利安村西北部),东双桥(奥利安村东南部) 地点:房屋(北),房屋(南) 房屋(北)(北桥右侧) NPC:女性 书架:人类史,奥利安神庙 房屋(南)(北桥右侧) 书架:阿拉菲尔地质学 奥利安村东南部: 出口:北道(经杂货店/圣地至奥利安村东北部),西双桥(奥利安村西南部) 地点:房屋(北),房屋(中),房屋(南) NPC:女孩(2名),男孩(3名),男性(2名),女性 资源:(2)植物晨花;(1)矿石,水晶;宝箱(地下室,左侧):*附魔:坚不可摧II;灵魂粉尘x2;金锭 宝箱(地下室,右侧):*异域石头x2(宝藏/技能升级) 卧室资源:(3)太阳果植物;(1)黎明花植物;(1)丝绸线 书架:太阳石、精灵传说、阿拉菲尔历史、人类历史、迪安传说、阿洛利亚 迪安峡谷(东部) 出口:西向路径(奥利安村)、北向路径(圣地) 地点:南部洞穴、北部洞穴 资源:(2)丝绸线;(2)黎明花植物;(1)*魔法石头(宝藏/技能升级) 南部洞穴(从奥利安村出口直接向南) 资源:(1)水晶矿石 秘密(用炸弹炸开西北方向的裂缝墙壁) NPC:老人【洞穴(N)】(从奥利安村出口向东北) 资源: (2)植物:太阳果 (7)矿石:铁 (1)矿石:水晶 (3)植物:黎明花 (2)油类:以太鱼 (1)【石头:魔法】(用于宝藏/技能升级) (5)丝线:丝绸 (3)【石头:异域】(用于宝藏/技能升级) (1)魔法:仙尘 (1)【石头:弓箭手】(用于宝藏/技能升级) (1)精华:火 宝箱(东北角):【附魔:力量 II】 宝箱(南部):锭:金 【圣地】 圣地(北部): 出口:西北楼梯向下(黛安的峡谷东部)、西南路径(圣地南部)、东南路径(圣地南部) 地点:废墟 资源: (4)水之 loot (1)粉尘:祝福 (4)油类:女神鱼 (2)魔法:仙尘 (3)矿石:铁 (1)【石头:弓箭手】(用于宝藏/技能升级) (1)矿石:水晶 (1)油类:以太鱼;(1)丝线,丝绸 精灵圈(西北角,无法从主区域进入) 宝箱:锭,铂金 精灵圈(西中心) 废墟(从迪安峡谷东出口向南,游过水域) 资源:(1)矿石,水晶 秘密(激活入口正北过桥后的中心雕刻墙) 资源:(1)植物,厄里斯草药;(2)魔法,仙尘;(1)油,女神鱼;(1)【石头,异域(宝藏/技能升级)】;(1)精华,风 圣地(南部): 出口:西北路径(圣地北部),东北路径(圣地北部),西部路径(x2)(第一步),东南路径(天使城) 地点:伊托拉树林(西北屏障路径,任务区域),洞穴 NPC:塔拉尼(商人)(C) 资源:(3)丝线,丝绸;(2)魔法,仙尘;(1)油,女神鱼;(1)【石头,异域(宝藏/技能】升级材料:(1)矿石,铁;(1)【战士之石】(宝物/技能升级)【传送水晶】(圣地)洞穴(中南部)资源:(1)祝福粉尘 第一步(圣地):出口:东北路径(圣地南部),东南路径(圣地南部)地点:洞穴资源:(1)魔法,仙尘;(2)水中战利品;(1)女神鱼油;(2)矿石,铁;(1)风之精华;(1)祝福粉尘宝箱(最南端):【遗物,玩偶】洞穴(中央,双入口)资源:(1)水晶矿石;(1)植物,厄里斯药草 天使城(圣地):出口:西路径(圣地南部)地点:任务区域资源:(2)丝线,丝绸;(3)女神鱼油;(2)水中战利品;(2)魔法,仙尘;(1)【吟游诗人之石】(宝物/技能升级);(1)风之精华;(4)【异域之石】(宝物/技能升级);(1)植物,厄里斯药草飞往东南部的仙女之环,进入洞穴并打开右侧的宝箱。返回塔林·维祖尔处,选择出售弓箭以获取奖励。奖励:25000经验值;1000金币 悬赏任务 悬赏任务一 来源:阿洛里亚,游侠公会,托兰。从阿洛里亚的西南角离开,向西穿过农田,然后向南游泳至一个隐藏区域。进入遗迹并与兔女郎对话,选择战斗。注/ trivia:我通关整个游戏后才完成这个任务,并没有所谓的能加入她的服装,这只是游戏在捉弄你。返回托兰领取奖励。奖励:100金币 悬赏任务二 来源:阿洛里亚,游侠公会,托兰。从阿洛里亚的西北出口离开,向北走一小段路后进入洞穴。宝箱(西南方向):【附魔:致命打击III】任务区域(主线任务:收集任务!)(注意:这是仅在任务期间可进入的临时区域——所以趁能收集时赶紧获取战利品!)资源:(4)线、丝绸;(9)矿石、铁;(2)精华、火焰;(4)矿石、水晶;(1)油、以太鱼;(2)水 可掠夺NPC:塔兰妮(商人)(C) 宝箱(起始处上楼,向北,再向北):锭、铂金 北星道 出口:东南路径/水域(狩猎场)、西北路径(希尔瓦拉)、东北路径(农田) 地点:塔兰妮的商店、洞穴(南)、塔林·维祖尔的家、洞穴(北) 资源:(3)水;(2)植物、天使花;(3)魔法、仙尘;(4)线、丝绸;(8)粉尘、祝福;(3)油、女神鱼;(1)油、鱼;(1)油、以太鱼 【传送水晶】(塔兰妮的商店) 【精灵之环】(塔兰妮的商店旁) 【精灵之环】(西北远角,无法从主区域进入) 资源:(1)粉尘、祝福;(1)植物、厄里斯药草 宝箱:【遗物】、红宝石项链 【精灵之环】(东北远角)角落,两个精灵之环左侧,无法从主区域进入)资源:(2)尘埃,祝福精灵之环(极东北角,两个精灵之环右侧,无法从主区域进入)资源:(1)线团,丝绸宝箱:1500金币塔兰尼的商店(第一区域,西南角)NPC:塔兰尼(商人),塔兰尼(C)趣闻:游戏开发者完全是在开玩笑,说她能同时出现在所有地点。洞穴(南)(第一个区域,东北角) 资源:(1)神圣粉尘;(1)【射手之石】(用于宝藏/技能升级);(1)艾瑞丝药草 塔林·维祖尔的家(第三个区域,西侧出口) NPC:塔林·维祖尔(支线任务:精灵之弓)、女人、女孩 资源:(3)丝绸线;(1)女神鱼油;(4)神圣粉尘;(1)魔法仙尘;(2)铁矿石 书架:关于吸血鬼的书籍 宝箱:800金币 洞穴(北)(第四个区域,西北方向通往希尔瓦拉) NPC:矮人 资源:(5)神圣粉尘;(3)铁矿石;(1)水晶矿石;(2)女神鱼油 秘密(激活左侧矿车,然后爬进之前由矮人看守的通道) 资源:(1)神圣粉尘 战斗/奖励(支线任务:赏金 III):【虹吸附魔 II】 希尔瓦拉 出口:东南路径(北星道) 地点:南方房屋、福拉尔酒馆、北方房屋、神庙NPC:矮人(女性)×2,矮人(男性)×2 资源:(8)线、丝绸;(3)魔法、仙尘;(2)尘埃、祝福;(1)矿石、水晶;(1)油、女神鱼;(2)水之 loot 仙女环(西南角水边,部分被树木遮挡) 仙女环(西北角,无法从主区域进入) 资源:(2)魔法、仙尘;(1)线、丝绸;(1)尘埃、祝福;(1)精华、风 房屋(S)(西南角) NPC:矮人(女性)、矮人(男性) 资源:(5)尘埃、祝福;(3)矿石、铁;(1)矿石、水晶;(2)油、女神鱼 书架:《迪安传说》 福拉酒馆(西中心,两个入口) 地点:旅馆、厨房、杂货店、铁匠铺 NPC:旅馆老板(C)、男性×3、女性 资源:(1)魔法、仙尘;(2)尘埃、祝福;(2)矿石、铁 书架:太阳石旅馆 NPC:女性(C) 宝箱:1000金币 厨房 NPC:矮人 杂货店 NPC:商人(商人) 资源:(2)尘埃、祝福 书架:艾罗利亚 商人:遗物:*遗物、利爪(10000金币) 铁匠铺 NPC:铁匠(商人)、矮人(商人) 资源:(2)尘埃、祝福 房屋(N)(西北角,弗洛拉酒馆与旅馆上方) NPC:矮人(男性) 资源:(3)尘埃、祝福 书架:人类史、太阳石 神殿(东北角) NPC:矮人(男性)、雷亚莫(临时,主线任务) *传送水晶(希尔瓦拉) 秘密:(主线任务,之后可进入) 资源:(2)尘埃、祝福;(3)矿石、铁;(2)矿石、水晶;(3)魔法、仙尘;(2)植物、艾瑞丝药草;(1)精华、风 农田/北星道(及艾尔德里诺) 出口:西南路径(北星道)、东北路径(女巫巢穴)地点:南屋、北屋、女巫巢穴、艾尔德里诺 NPC:矮人(女性)×3、矮人(男性)×3 资源:(6)线、丝绸;(3)魔法、仙尘;(8)尘埃、祝福;(3)水之战利品;(2)矿石、水晶;(4)油、女神鱼;(1)精华、风 南屋(西北角,靠近北星道出口) NPC:矮人 书架:《人类史》《精灵传说》 宝箱:2500金币 北屋(西北角) 宝箱:2500金币 女巫巢穴(东北出口) 资源:(3)线、丝绸;(1)尘埃、祝福 战斗/奖励(支线任务:悬赏IV):【附魔:活力II】 艾尔德里诺(东出口,然后向北) NPC:塔兰妮(商人)(C)( Boss战之前的几个区域) 资源:(8)尘埃、祝福;(1)【石头、吟游诗人】(宝藏/技能升级);(2)精华、风;(2)植物、艾瑞丝药草;(1)油,女神鱼;(1)魔法,仙尘;(4)矿石,水晶;(7)矿石,铁;(1)线,丝绸【传送水晶(艾尔德林诺)】宝箱(树后西北角):【附魔:深渊污染】与戴着眼罩的大胡子男人对话并选择战斗。 注/ trivia:你可以向他索要签名并获得【阿米雷的签名】(任务物品),但我通关了整个游戏后发现这个物品没有任何用途,只是游戏在跟你开玩笑。返回托兰领取奖励。奖励:500金币 悬赏任务三 来源:阿洛里亚,游侠公会,托兰。 注:此任务将暂停,直到第五章开始。 在北星道,就在通往西尔瓦拉的西北出口前,进入洞穴。 向北走,启动左侧的矿车,然后爬进之前由矮人看守的通道。 穿过线性隧道到达尽头的房间,击败吸血鬼。 返回托兰领取奖励。奖励(首领):【附魔:虹吸 II】 奖励:2500金币 悬赏 IV 来源:阿洛里亚、游侠公会、托兰 注:此任务将暂停至第五章中段 前往【农田(北星道)】,向东北方向走到尽头并通过出口。 继续穿过下一个区域,然后激活城堡两座雕像之间的墙壁。 按下西侧的红色按钮和东侧的蓝色按钮以解除屏障,随后穿过门。(无法返回 - 首领战) 返回托兰领取奖励。 奖励(首领):【附魔:恢复 II】 奖励:5000金币 (完成所有悬赏后)奖励:15000经验值;2000金币;【遗物:守护者】 职业任务 莉塔的职业任务:丘陵矮人?
