


为实用人士打造的实用造船指南
1. **还在为飞船布局绞尽脑汁?厌倦了在多人游戏中被打得毫无还手之力?来获取一些实用的飞船建造技巧,重新夺回优势吧!** 2. **本指南仍在制作中,因此并非所有章节都已完成。请定期回来查看新内容!** 3. **简介** ①《太空工程师》为玩家提供了近乎无限的可能性,但这也带来了一个非常重要的问题:你打算如何利用这种潜力? ②你可以建造一艘自己最喜欢的电影或电子游戏中的飞船复制品,也可以在小行星上建造一座“城市”…… ③或者,如果你和我一样,可能更关心建造一艘更具可信度的飞船,也就是具备实际应用和更写实设计的飞船。不过,这并非易事;实际上,在很多方面,这比单纯建造一艘宏伟的飞船还要困难。你不仅要像艺术家或建筑师一样思考,还得尝试像工程师那样思考。如果我把引擎放在这里,它们会不会太容易受损?我是否设置了冗余控制系统,还是说驾驶舱一旦被击中,飞船就会报废?我的气闸是否破坏了飞船的线条,我是必须移动它,还是要接受飞船变得难看的事实? 飞船越大、越复杂,设计难度就越大。小型飞船的设计通常不算太难,但大型航母或殖民舰会面临各种在结构完整性、美观性、容量和实用性之间的冲突。你的房间越大,飞船的结构就会越脆弱。你的飞船内部支撑越多,可利用的空间就越少。框架越重,就越难保持良好的外形。建造一艘实用的飞船,需要在各个层面的众多设计要素之间进行仔细的平衡。
本指南旨在通过提供设计问题示例及可能的解决方案,帮助你维持这种平衡。这些方案可根据需要单独应用,也可整体实施以从零开始建造新船。但归根结底,你应始终确保自己的舰船能满足个人目标与期望。 ### 1. 总体布局 #### ① 角色定位 首先,你设计舰船的目的究竟是什么?其任务目标是什么?将在何种环境中运行? - 你是否在设计一艘货运飞船,配备精简船员与大量模块化货柜,且可由货运拖船进行货柜的加装或移除? - 抑或是设计一艘商业袭击舰,侧重于航程与载货量,并配备足以威慑平民的火力?1. **工厂舰需要易于访问的集中式传送带系统,并在最小空间内配备尽可能多的精炼厂和装配机——你的工厂舰具备这些吗?** 如果没有配备能妥善容纳小型采矿船的机库,那么采矿支援舰又有什么用呢? 2. **不要仅仅通过在运输舰上堆砌一堆炮塔就决定建造战列舰——要认真思考你的舰船具体要执行什么任务,以及如何以最佳方式设计它来实现这些目标。** 考虑它将在何处以及如何执行这些任务。 3. **例如,如果你的货船要长途穿越未知星系,可能就需要一些防御炮塔;又或者你设计的战斗机预计也要在行星表面运行,那么就需要机翼。**事实上,最后这个例子就是一个很好的证明:机翼不仅为航天飞机式的双用途战斗机提供了合理性,还提供了更多安装武器的空间。想想现实中的例子——许多攻击直升机都有短翼来携带更多武器。
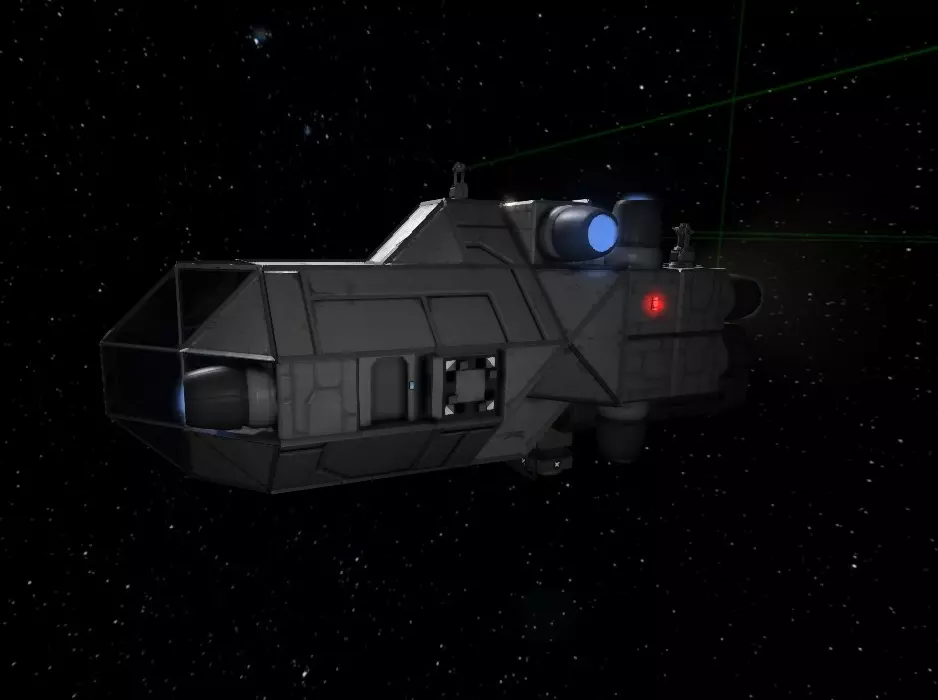
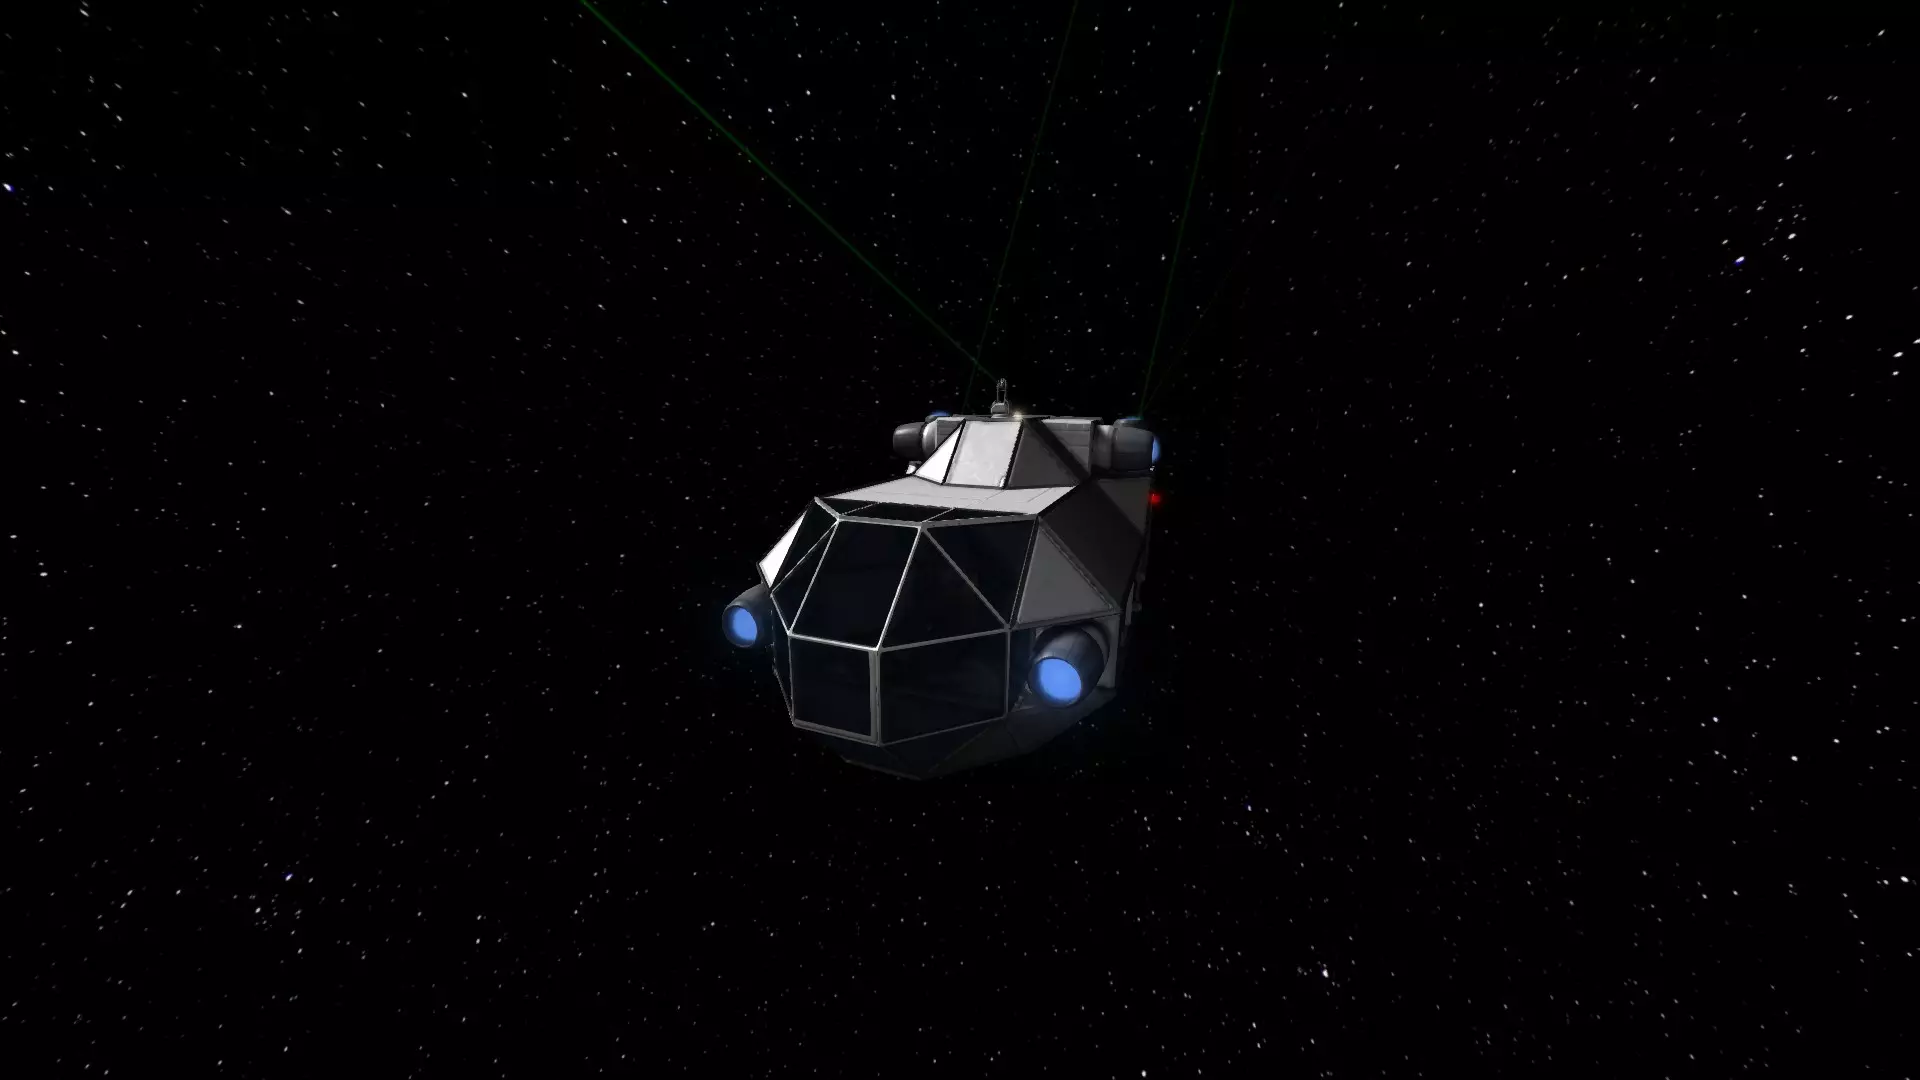
“暴徒”级III型工程车是围绕其功能而非反过来设计飞船的完美范例。该工程车没有浪费任何空间,在同尺寸飞船中拥有出色的容量,甚至能挤入最狭窄的作业现场。(GCV Mk.III 由 PartyAlarm 设计并建造) 生产注意事项 1. 你计划建造多少艘此类飞船?一次性建造的飞船可以精心打造,但多用途飞船和小型战舰需要保持足够简单,以便进行大批量生产。 2. 正如安托万·德·圣-埃克苏佩里曾经说过的,完美设计的真正标志不是没有什么可以添加,而是没有什么可以删减。 3. **在不影响飞船功能的前提下,尽可能简化生产流程,并尽量保持其布局的逻辑性。**如果其他人可能需要协助建造,或者他们将亲自建造飞船,这一点尤为重要。
GCV Mk.III的设计极为简洁,有玩家在目睹其建造过程后不到一小时,便在未获原设计者任何协助的情况下建立起完整的生产线——很快,众多玩家也加入进来,建造这些小型舰船,即便面对最残破的残骸,也能将其修复。 生存能力 没人愿意损失数小时、数天乃至数周的心血。在你沉迷于设计宽敞的散步甲板、挑高大厅或长达数英里的走廊之前,请先停下来思考这些设计对你的舰船及其船员意味着什么。 hull breach(船体破损)是否会导致整艘舰船爆炸性减压?一枚精准命中的导弹或一块不幸的小行星,是否可能切断你与引擎的连接,或是将舰船拦腰截断?如果你损失了飞船的一部分,是否会因为所有陀螺仪都在那里而无助地漂流?冗余设计只是第一步,精心设计则是另一步。 以下是一些对注重实用性而非华丽外观的玩家的基本规则: 1. **对飞船进行分区**。确保舱壁足够坚固。 2. **将关键区域设置在飞船中央,和/或分散布置**——不要集中成一大块,那样很容易被击毁。 3. **为每种可能发生的情况制定行动方案,为每个系统准备备份,为每一种潜在灾难准备应对措施**。 4. **确保你已仔细规划好照明**——没人愿意在黑暗中发生碰撞,或是从长长的通道竖井坠落身亡。同时也要考虑到舰船受损后的维修便利性——你能否轻松接触到所有主要系统进行维修?是否有一些部件可以拆下来用于修补其他地方的破损?这类问题以及你的应对方式,可能就是勉强抵达安全港口与永远漂流在外的区别。 多功能性 你的舰船是否具备多种功能,还是需要使用不同工具来完成任务?可以考虑将新的合并方块用作工具连接点。这能让舰船无缝切换任务,而无需在每次出现新情况时都进行大规模、高成本(且很可能耗时)的改装。
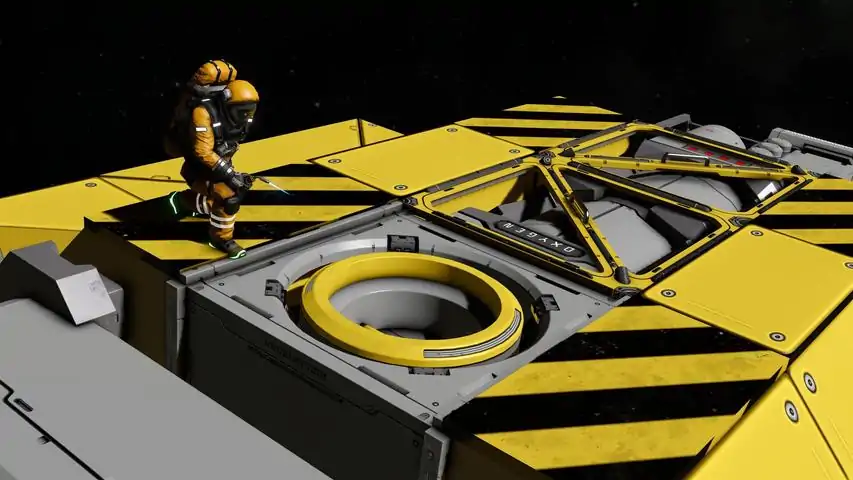
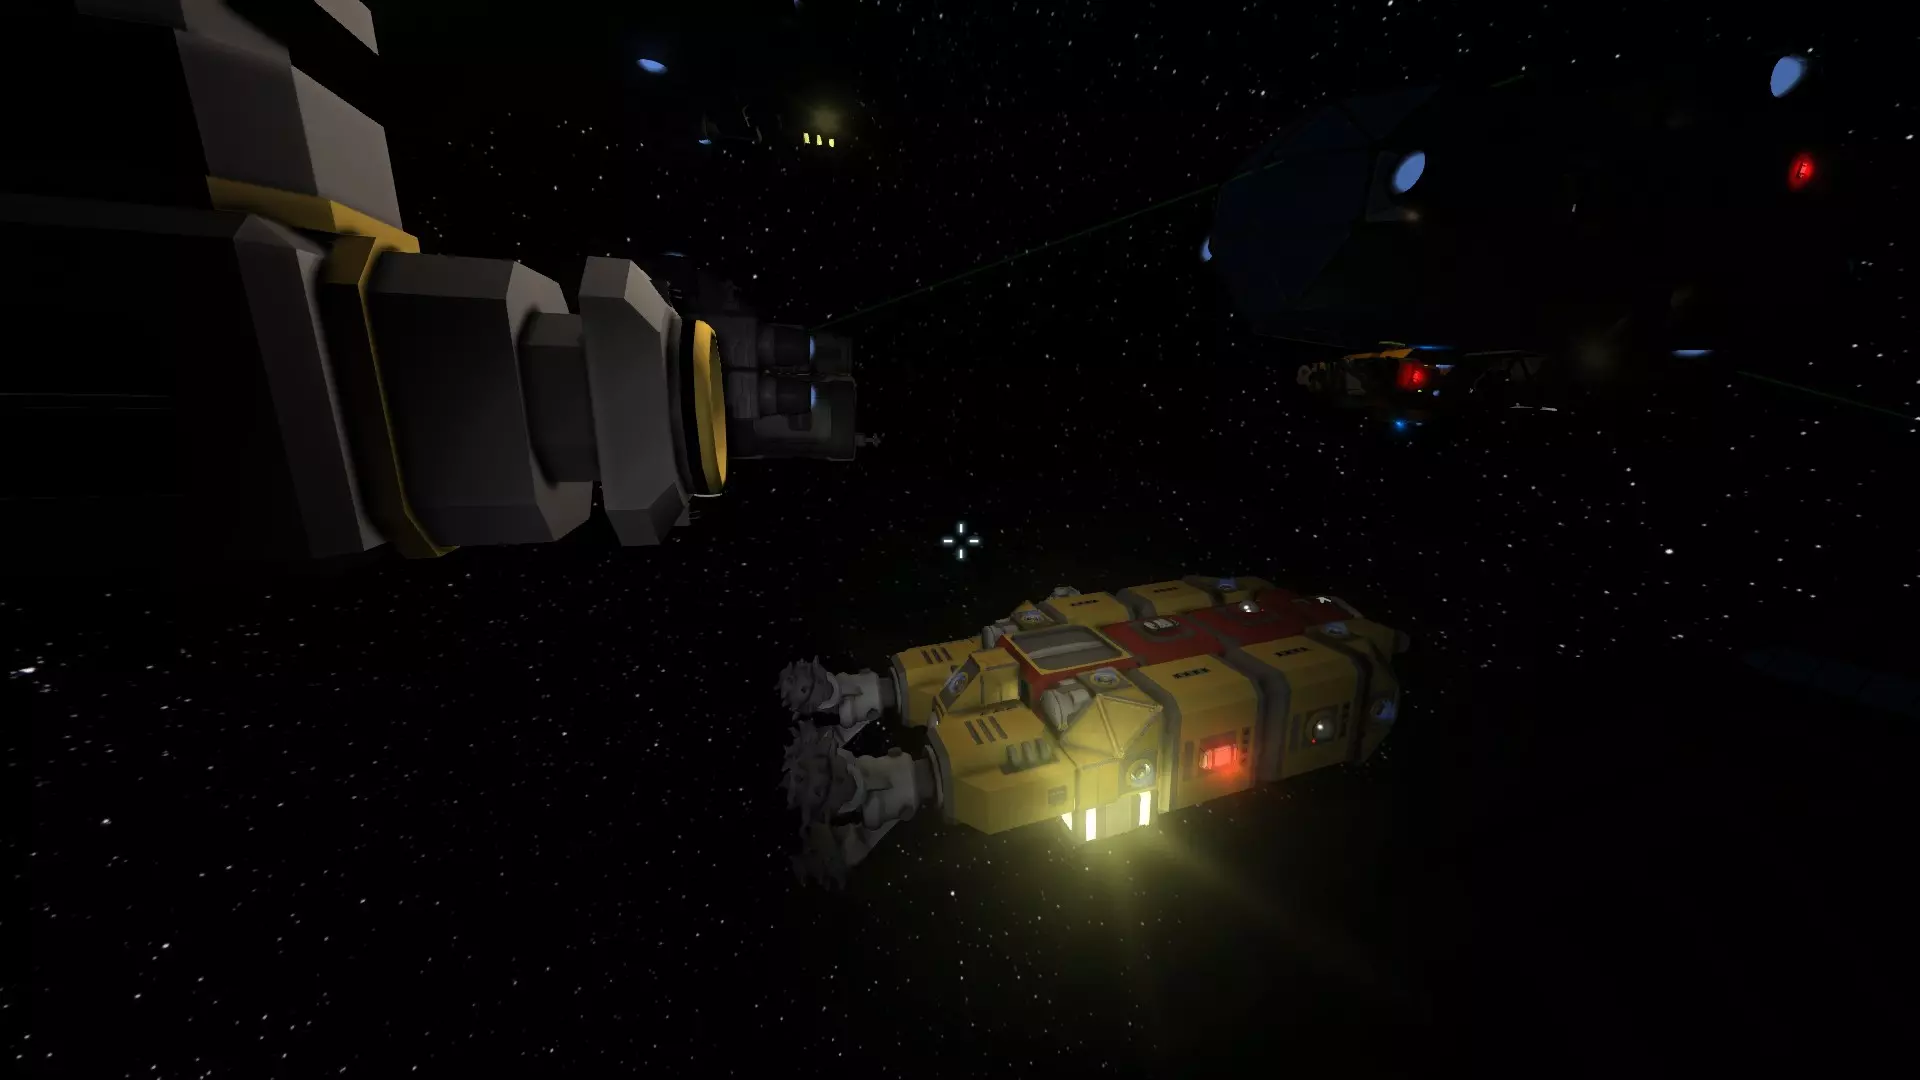
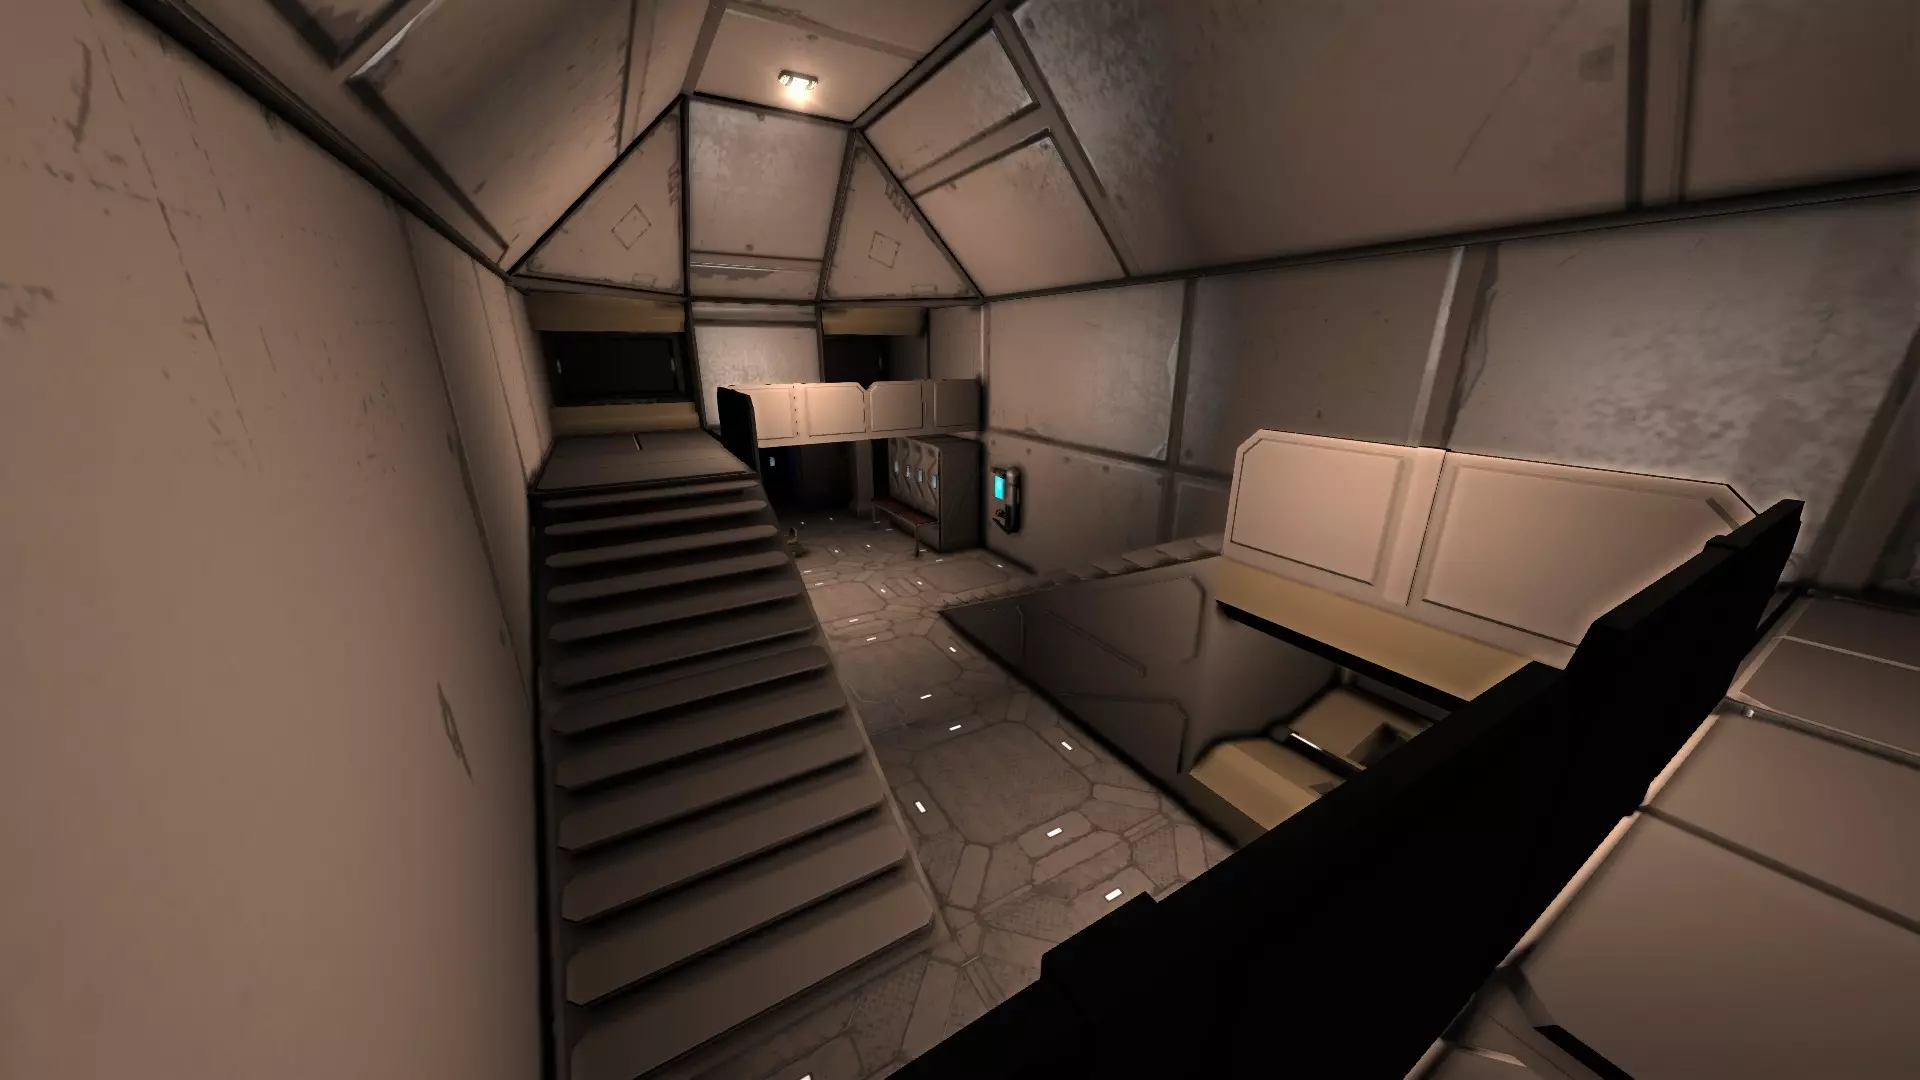
在对标准救生艇进行重新设计时,我在飞行员座椅正后方和气闸旁各添加了一个朝下的合并方块,目的是利用它们将飞船停靠到空间站或在其上安装工具装备。
在驾驶舱下方简单加装合并方块后,标准的一次性救生艇就变成了值得保留的飞船。我设计了一个大型研磨机附件,需要时可以固定上去,不用时就能拆卸下来。 机动性 根据飞船的用途,它可能不需要具备高速或高敏捷性。对于像之前展示的GCV这类工程船,出色的操控响应和均匀的推力分布比速度更为重要。而对于拦截机和突破封锁的飞船来说,速度和敏捷性则意味着一切。至于货船,它们只需要足够的动力来直线行驶——转向功能可有可无。 在建造飞船时,务必充分考虑到这些需求。动力不足的战斗机注定会失败;如果在缠斗中因反应堆过载而失去动力,这很可能就是你的最后一战。另一方面,货船或工业舰上多余的陀螺仪只是在浪费空间,这些空间本可以更好地用于增加货物存储或机械设备。 记住,对最重要的系统进行冗余设计是个好主意——给战斗机配备比实际“需要”更多的陀螺仪并非坏事,为工业舰配备备用反应堆也是如此。 舒适度 舒适与局促之间只有一线之隔,但注重实际的造船者最应避免的就是浪费空间。走廊应提供足够两人或最多三人通行的空间,或许再加上一些管道空间——仅此而已。利用闲置空间添加座椅、办公桌、货物模块或备用系统。确保人员能够看清行进方向,并考虑采用某种颜色编码系统,帮助船员在较大型船只中导航而不会迷路。 规划船员区域时,可参考同等吨位和功能的海船配置:拖船可能不需要床铺,小型穿梭艇或许只需一两个床位,但巡洋舰肯定需要宿舍、食堂和娱乐空间。
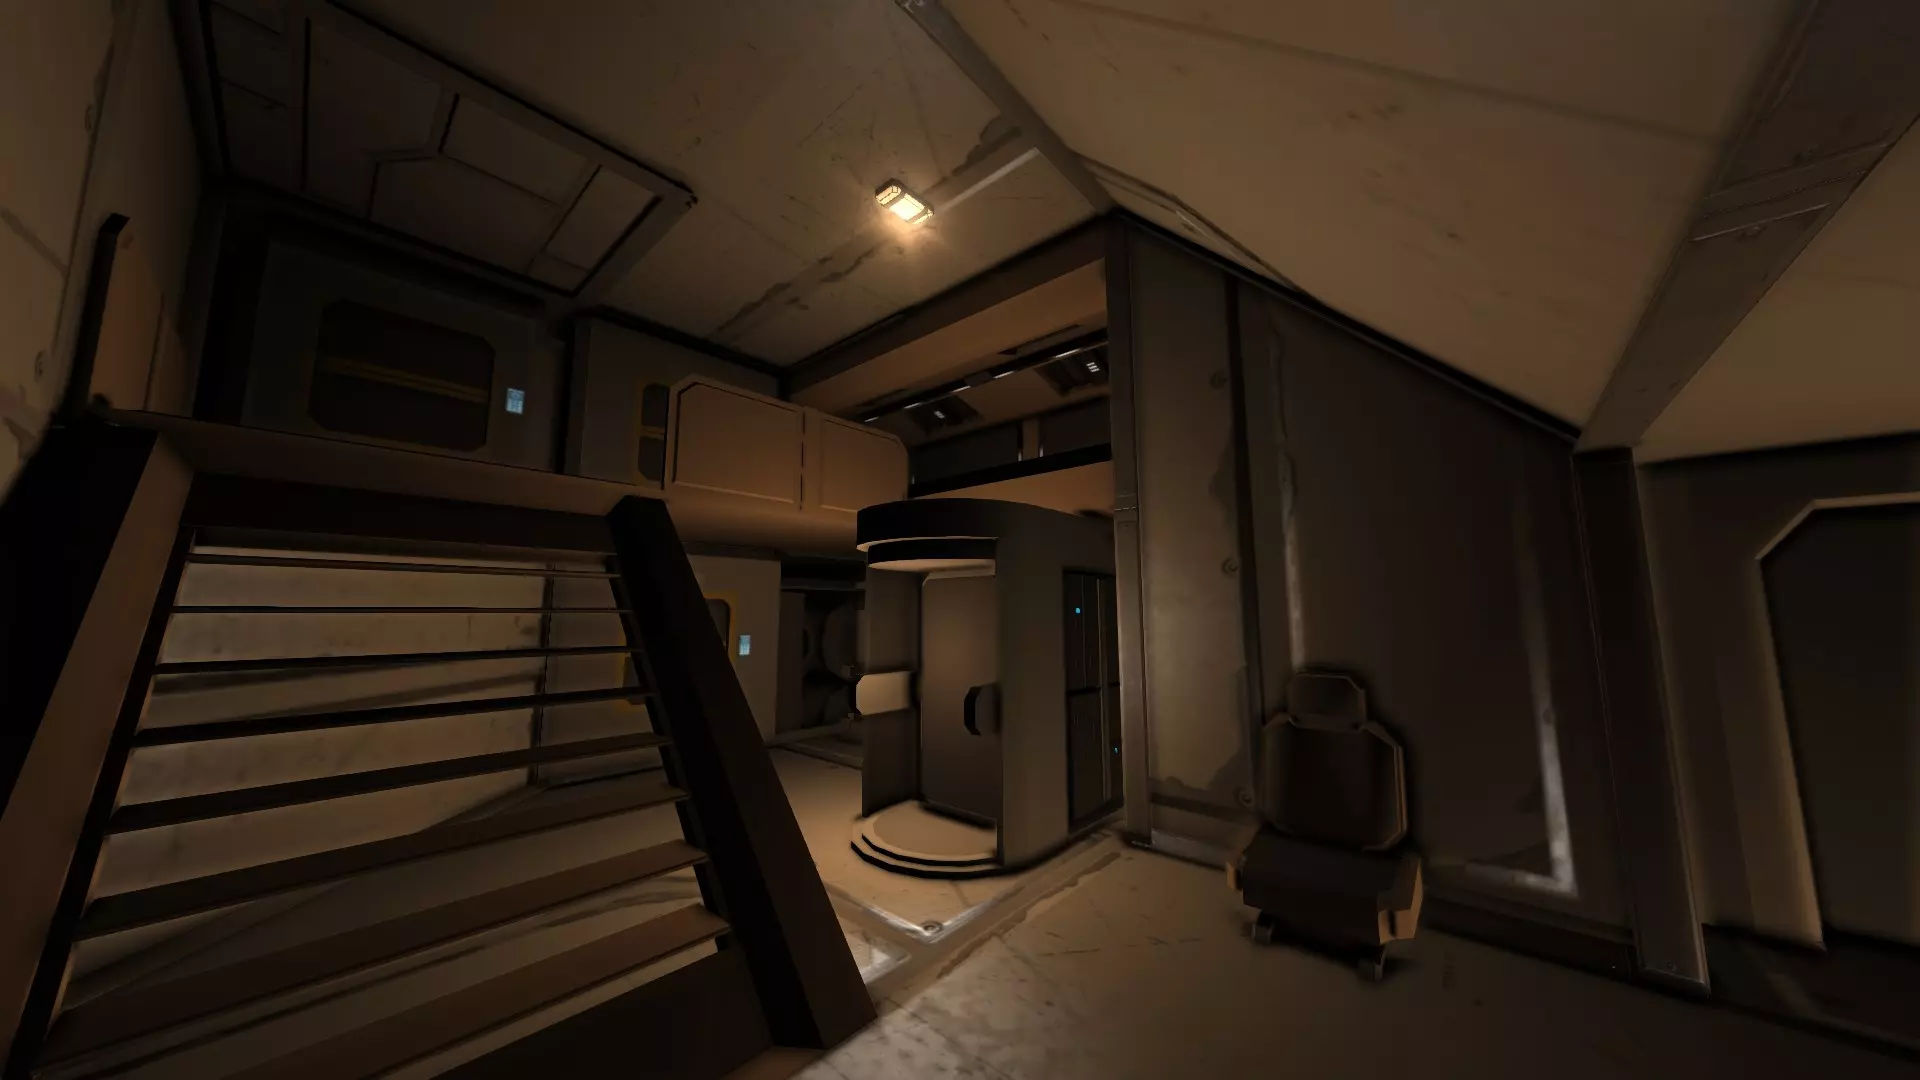
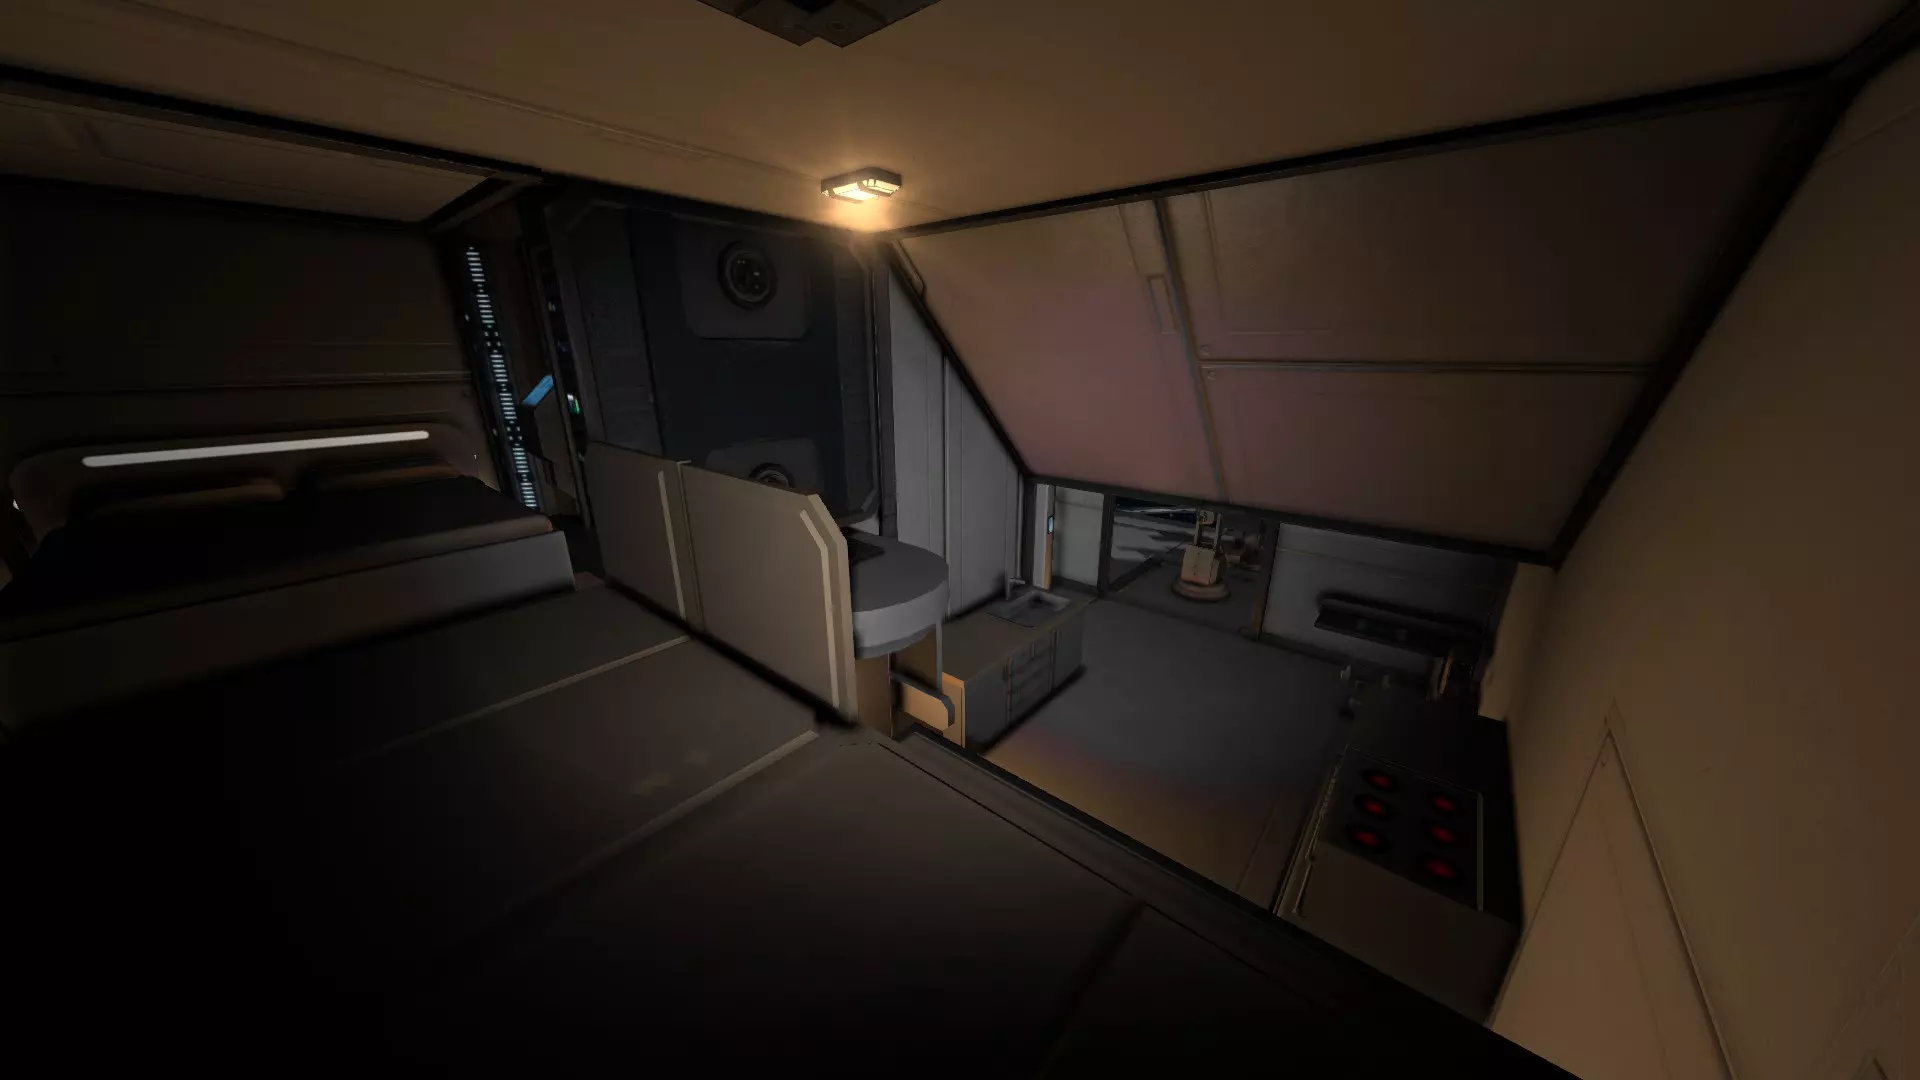
充分利用你拥有的空间——即便是看似狭小拥挤的空间,也总能找到利用的方式。在我的例子中,这艘改装救生艇的内部在加装了一张双人加长铺位、独立驾驶舱乃至内部气闸后,感觉依然舒适而非拥挤。 请记住,民用船只和军用船只的内部设计会有所不同,船只尺寸也是一个影响因素: - **较大的民用船只应给人更开阔、更豪华的感觉**; - **军用船只无论尺寸大小,往往都显得拥挤且令人感到幽闭**; - **小型商船和穿梭艇则应给人舒适的感觉,而非拥挤或宽敞**。尺寸与复杂度:分辨率问题 由于游戏基于模块化的特性,大型舰船必然能实现更高的“分辨率”:它们能容纳比小型舰船多得多的细节系统和形状。但这也需要付出代价,如果你过于纠结细节,舰船尺寸可能会失控。 开始设计时,最好规划好特定尺寸或特定细节水平——你无法合理地兼顾两者。在两者之间做出选择,有助于避免在追求实际上对设计没有贡献的事物时陷入过度投入的倾向。我自己也经常纠结这个问题,并且发现我最好的飞船往往是那些我对其尺寸有明确规划的。 如果你想设计一艘穿梭机,甚至可能是护卫舰或驱逐舰,那么规划完善的暖通空调系统、电气导管和管道是没有必要的。《太空工程师》已经省去了一些更复杂的细节需求,它允许任何方块——无论大小、类型或完成状态——都能在一个网格内传输电力。尽管这可能减少了损管方面的潜在深度(比如不得不应对主要电缆线路被切断的后果),但确实简化了造船流程,也能实现更紧凑的设计。如果我们必须在所有地方都铺设线缆和管道,不难想象,即便是最简单的太空游艇也会失控般地不断扩大,最终变得像一艘大型航母那么大。 尽管现在通过模组工坊可以获取许多为舰船增添真实感的部件——包括电缆导管、通风管道和管道段——但在添加这些部件之前,你始终应该确保它们确实能为舰船设计带来显著提升,同时要注意它们对舰船可用内部空间、整体尺寸和质量的影响。或许你可以只铺设一块格栅板,而非一整套暖通空调系统,或者只在需要暴露的地方展示线路?这通常是我设计小型飞船的方式,这样能让它们更容易设计和建造,最终成品也更具美感。 有人驾驶还是无人驾驶? 随着游戏中功能性远程控制的最新加入,无论你的建造经验如何,现在都能打造出可操控且实用的无人驾驶船只。以前,远程控制飞船需要手动调整每个推进器或陀螺仪的参数,而且很难甚至无法看到操作结果;传感器模块让操作稍微简单了一些,自动跟随无人机和基础制导导弹也因此成为可能。现在,通过组合远程控制单元、摄像头和快速功能工具栏,我们都可以着手建造无人机舰船和制导武器,并且能更精确地控制它们。不过,有时你可能并不想完全依赖无人机。
有时,无人机可能会陷入难以远程解决的困境,需要进行救援。比如我的采矿无人机“小锤”(Malyutka)就曾卡在自己挖掘的隧道里,无法转向,也无法前进或后退,我不得不亲自飞过去手动清理出空间,让它得以移动。 战斗舰船 有时候,你就是需要人类的反应速度和态势感知能力。我设计的大多数军事化舰船都保留了载人功能,因为简单的摄像头系统提供的感知能力远远不够。《太空工程师》似乎没有模拟任何与距离相关的控制延迟,但万一未来加入了这一设定,那将是战斗无人机的又一个重大劣势——它们离指挥中心越远,响应速度就会越慢。在战斗中,瞬间的决策和快速的操控反应至关重要——这也是尽管无人机技术发展迅猛且已成为现代战争的常见元素,但现实世界中仍在使用有人驾驶战斗机的部分原因。 不过,这并不意味着无人机完全不适合《太空工程师》中的军事任务——如果你不想冒险离开基地,它们可以成为相当实用的哨兵,还能在危险区域进行低风险侦察。如果无人机被击落或捕获,你无需担心会因此损失一名工程师。将无人机用作侦察机的另一大优势在于,与载人战斗机相比,其体积需求小得多。大多数驾驶舱的尺寸约为3x3x3或4x3x3方块,而无人机仅需单个方块的远程控制单元,再加上任意数量的摄像头即可。更小的体积意味着更高的灵活性和更小的被击中概率,同时也为燃料或弹药腾出了更多空间。 采矿/工业船只、多功能船只 这或许是最具发展潜力的领域。采矿船省去驾驶舱后节省的空间使其效率大幅提升,能够搭载更多矿石和钻头。同样,工程船和工业船只也可以缩小尺寸以提高效率和实用性,并从安全位置进行控制。此前危险的环境现在可以安全作业,无需担心受伤或死亡风险,受损船只的维修或更换成本也降低了。但要记住——你无法转头查看身后。合理设置摄像头位置,确保视野盲区尽可能少。尽量将摄像头安装在连接器或工具等物体附近,这样可以更轻松地对准它们。
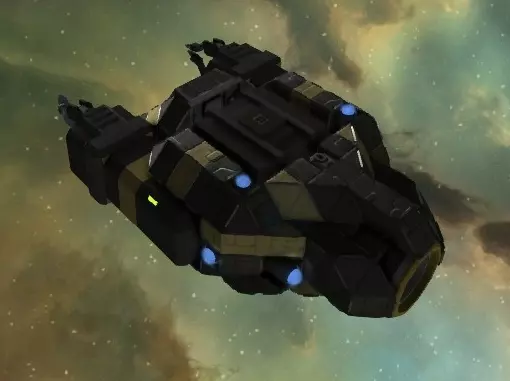
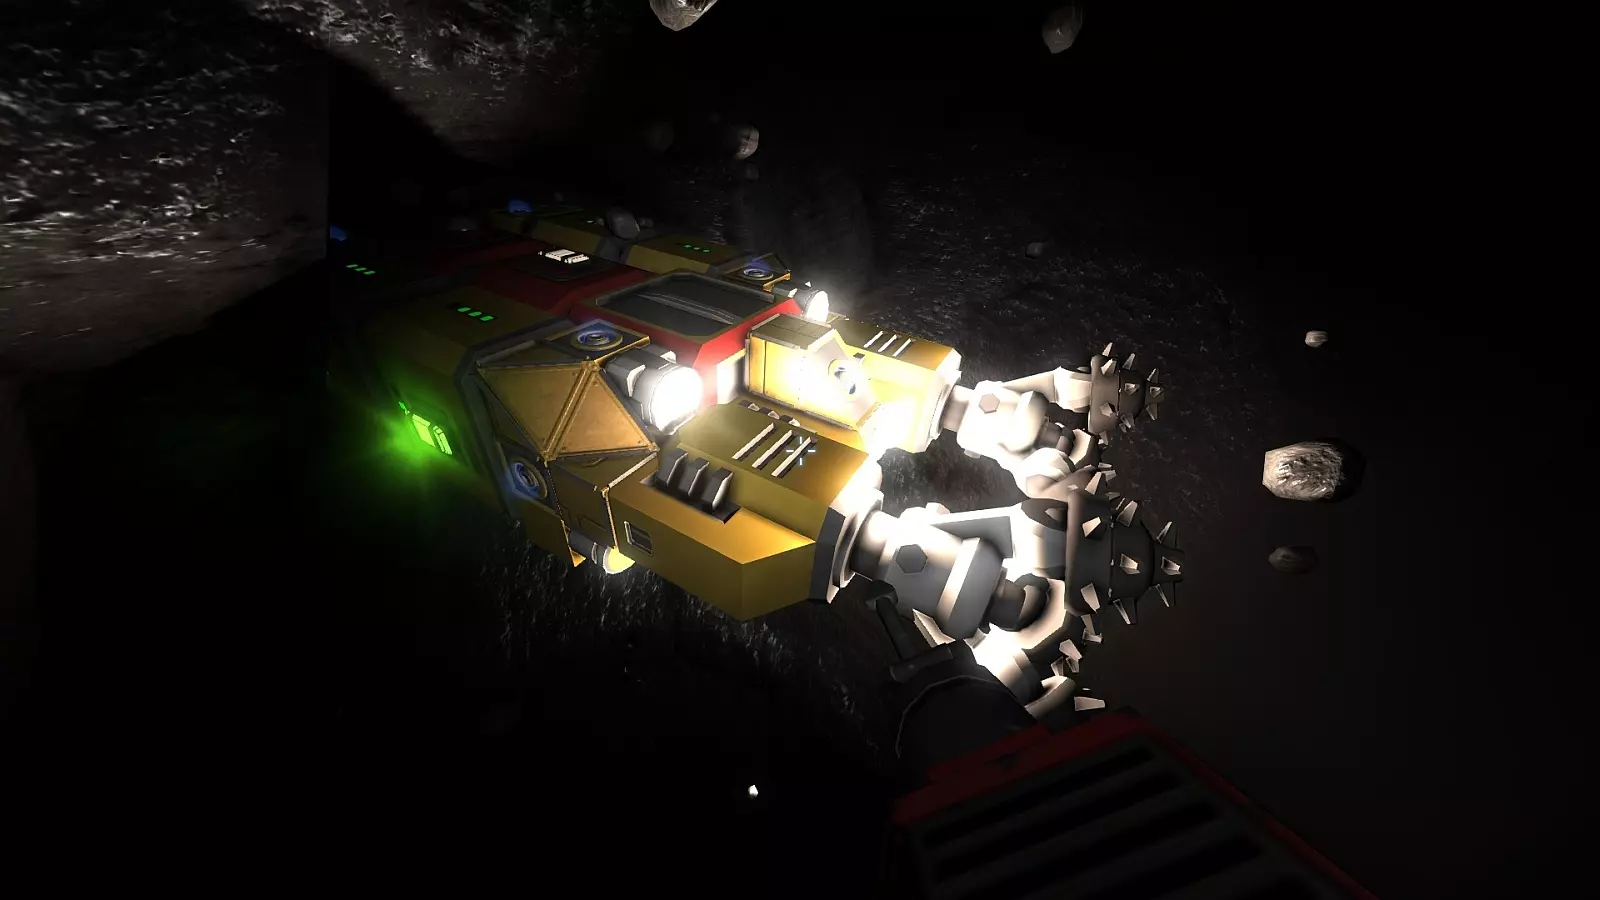
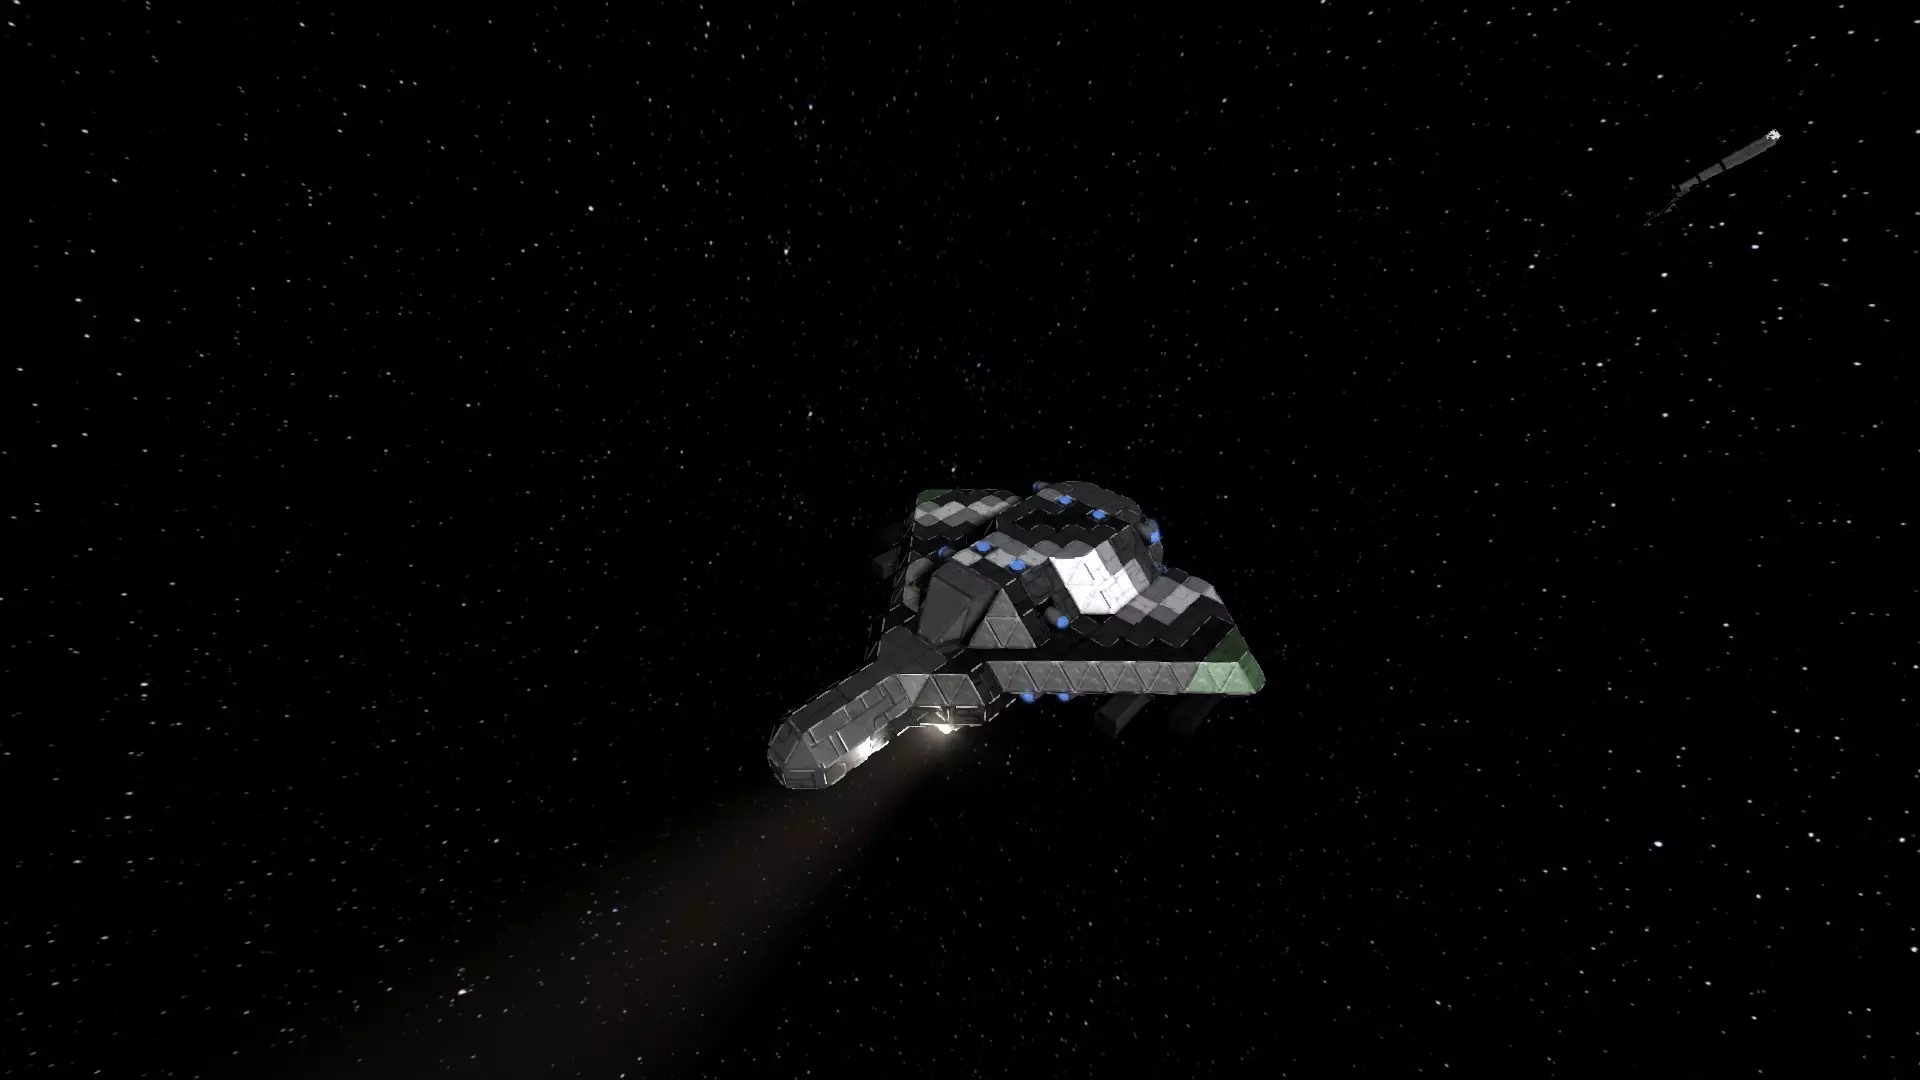
无人机舰船,例如这款采矿无人机,由于无需驾驶舱,其体型可以建造得更小、更轻。我之前的采矿船是有人驾驶的,体积大约是它的两倍。 大型舰船 尽管完全可以远程操控更大的舰船,但任何比标准救生艇大得多的舰船都应该配备船员。这是因为大型复杂舰船的维护需求要高得多,同时也是出于空间效率的考虑——任何不需要船员的舰船都不应该那么大,而任何那么大的舰船都至少应该能够容纳两到三人的小型 crew(船员)。船员还能起到威慑海盗的作用,即使武器系统离线,他们也能保卫舰船。框架、舱壁与船体结构 框架与船体结构 框架的使用很大程度上取决于你计划建造的船只尺寸和类型。对于小型商船,通常直接将船体建造为外壳,然后根据需要添加舱壁更为简便。可以将这种方式理解为类似昆虫的构造:船体作为外骨骼,为船只提供结构完整性。 **请注意,船只的尺寸、舱室大小以及舱壁的数量和尺寸将决定其确切的抗损伤能力。采用“外骨骼”设计但舱室较大、舱壁装甲窄薄的船只,在解体前无法承受太多损伤。**我们来看一个例子——这是我那艘“纳杰日达”级科学巡洋舰的剖面图,拍摄于我开始布置内部装潢之前的一段时间。
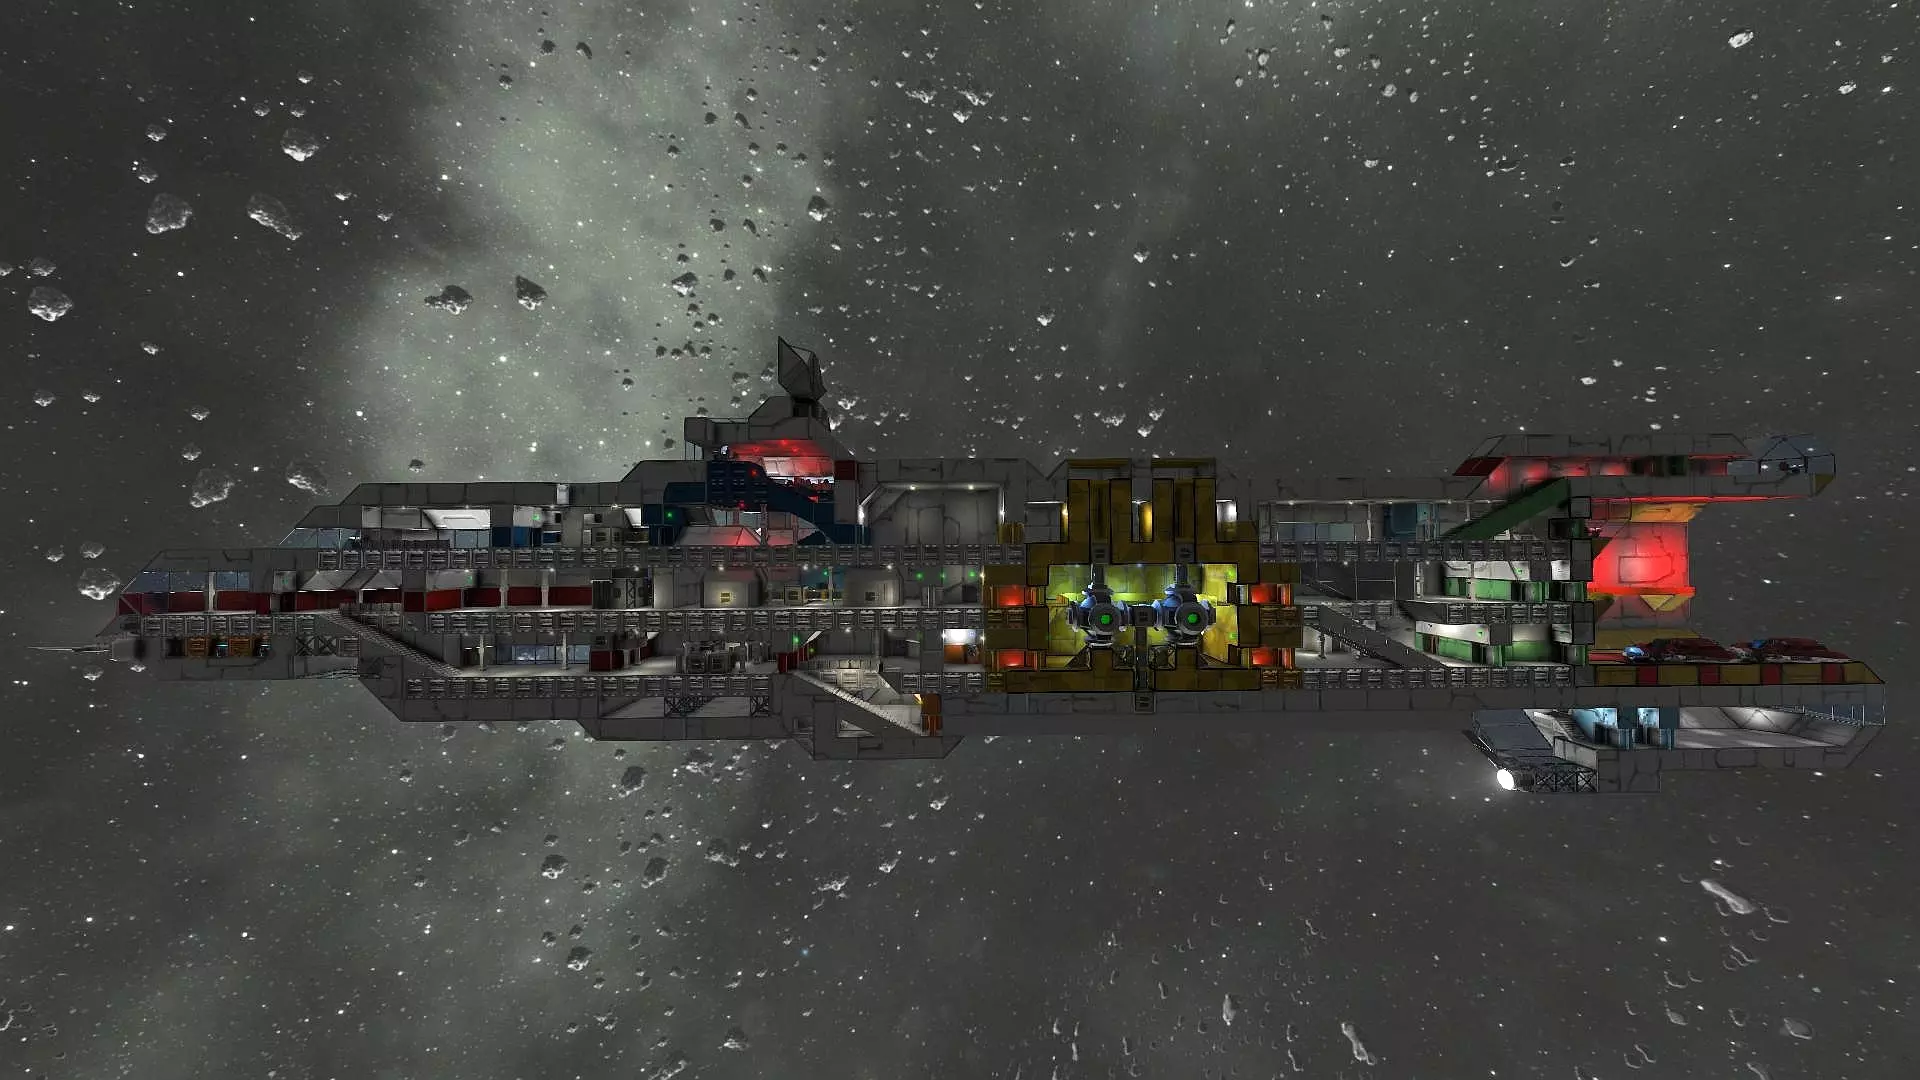
如你所见,这艘船的外部仅由单层轻型装甲块构成。内部地板采用的是内甲板,而内部舱壁同样全部为轻型装甲——并且各甲板间的装甲并不统一。实际上,整艘船中唯一的重型装甲板,就是反应堆舱的防护罩以及机库 bay 的地板和舱壁墙。内部舱室大小不一,既有小房间也有大舱室。只要船体未受损,这一切都还算正常,但一旦受到撞击,问题就会立刻显现。 我将这艘船复制到了一个创意服务器中,那里有另一位玩家拥有一门非常巨大的旋转重力炮。我们决定进行测试,于是我将指挥甲板周围的装甲板涂成亮橙色,并从两公里外瞄准。以下是结果,我认为它们足以说明一切。
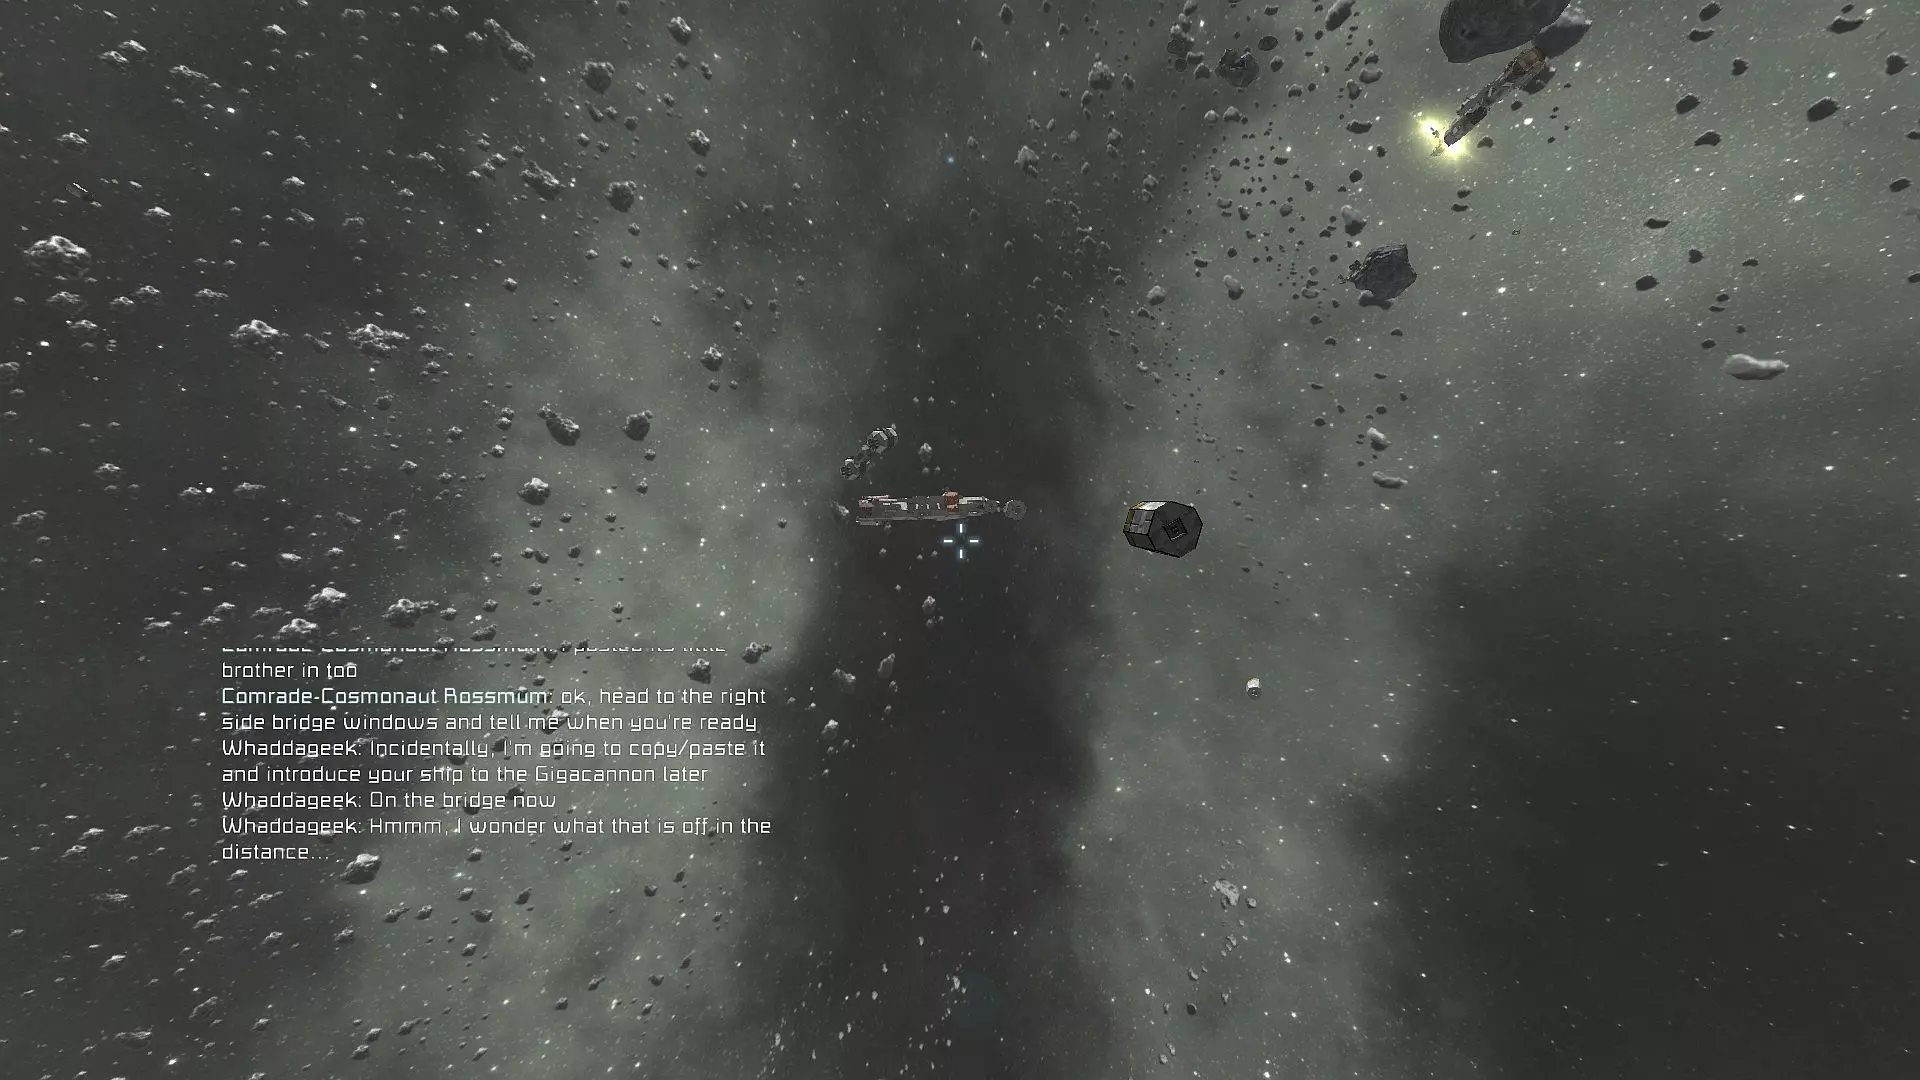
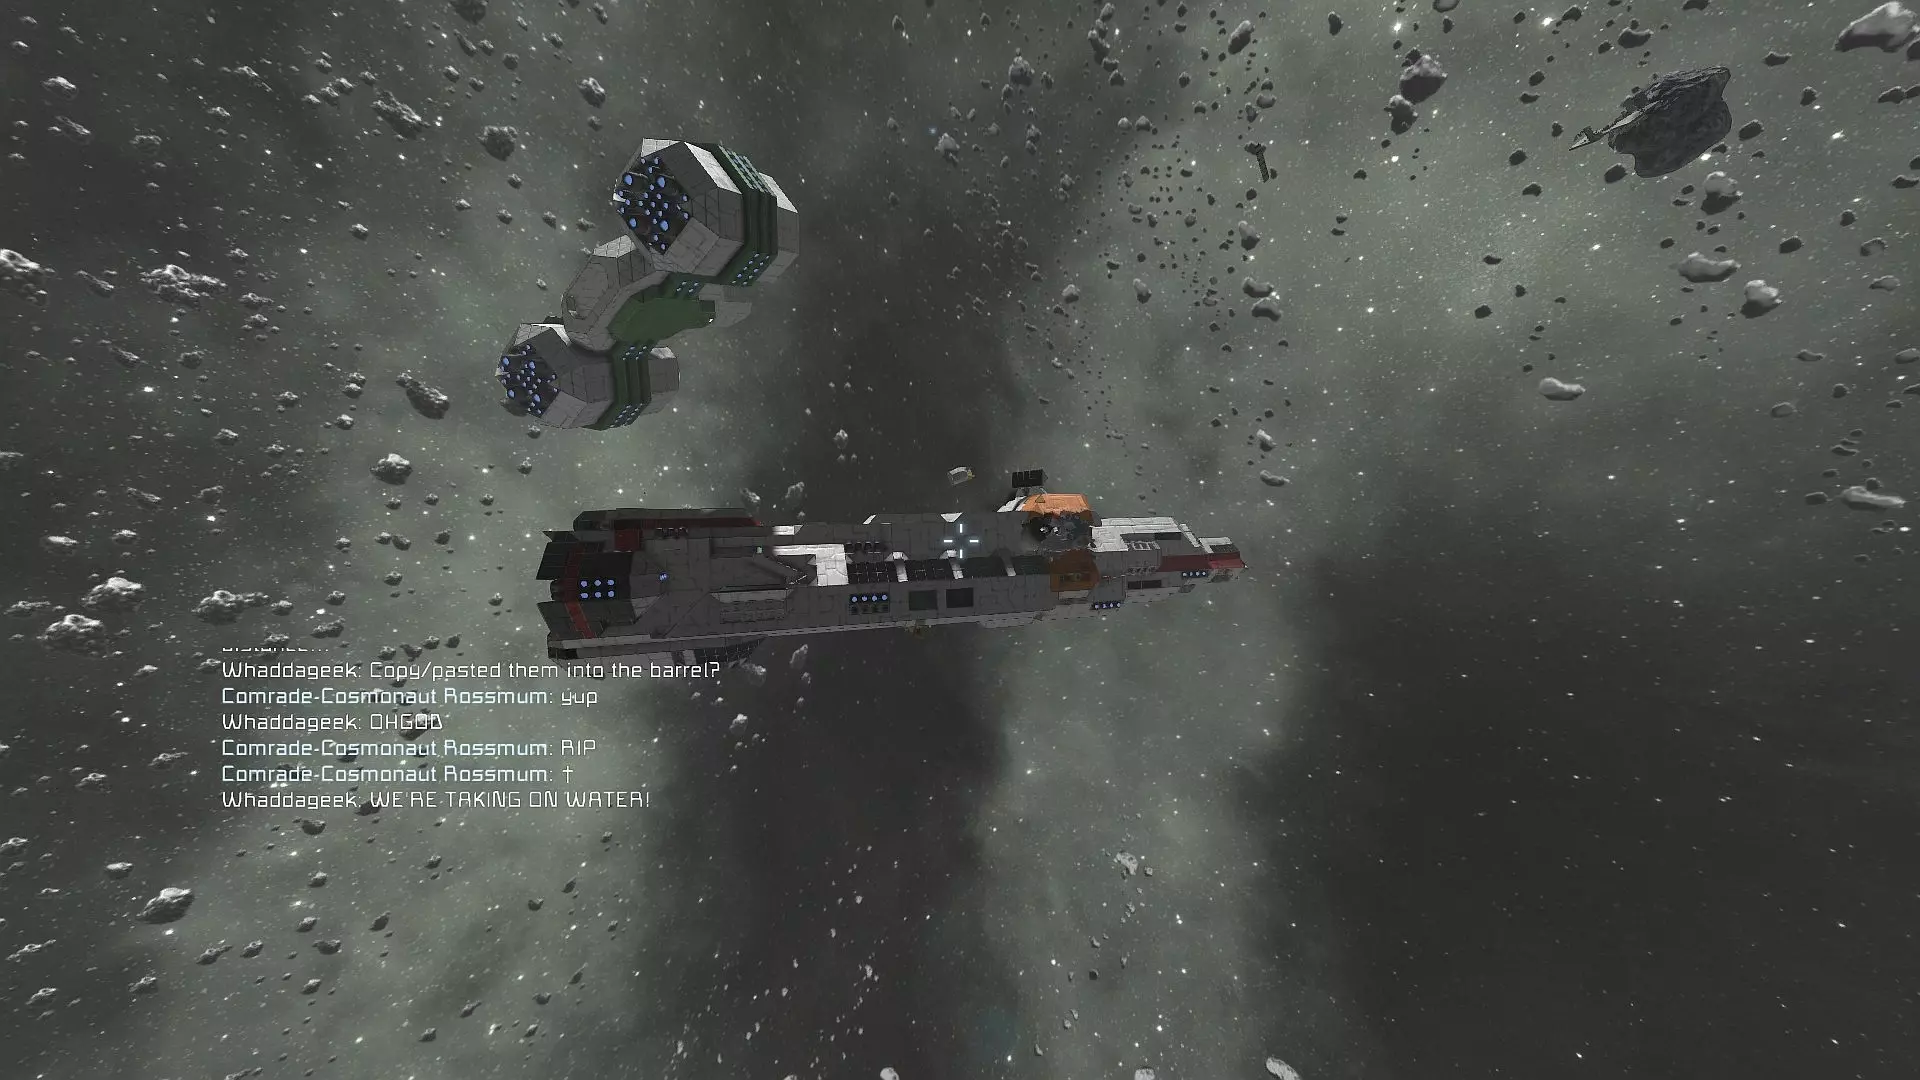
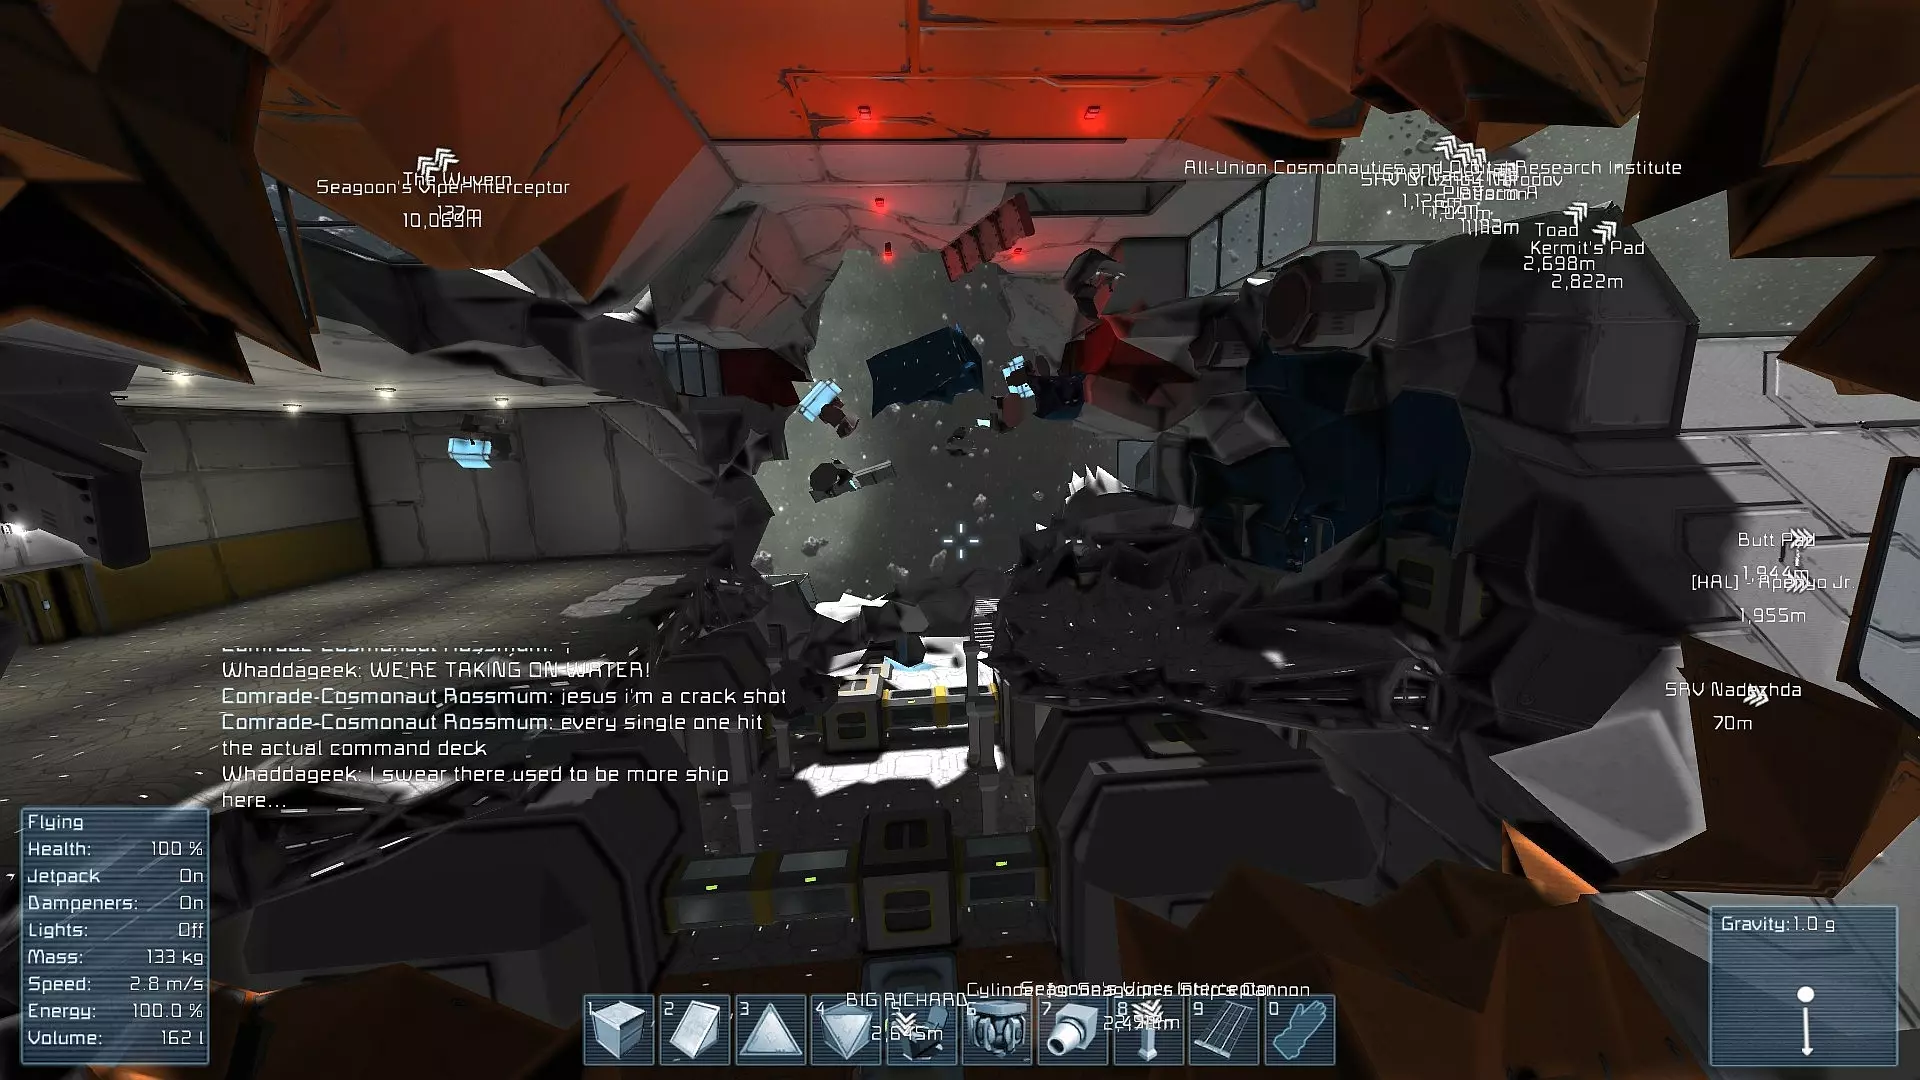
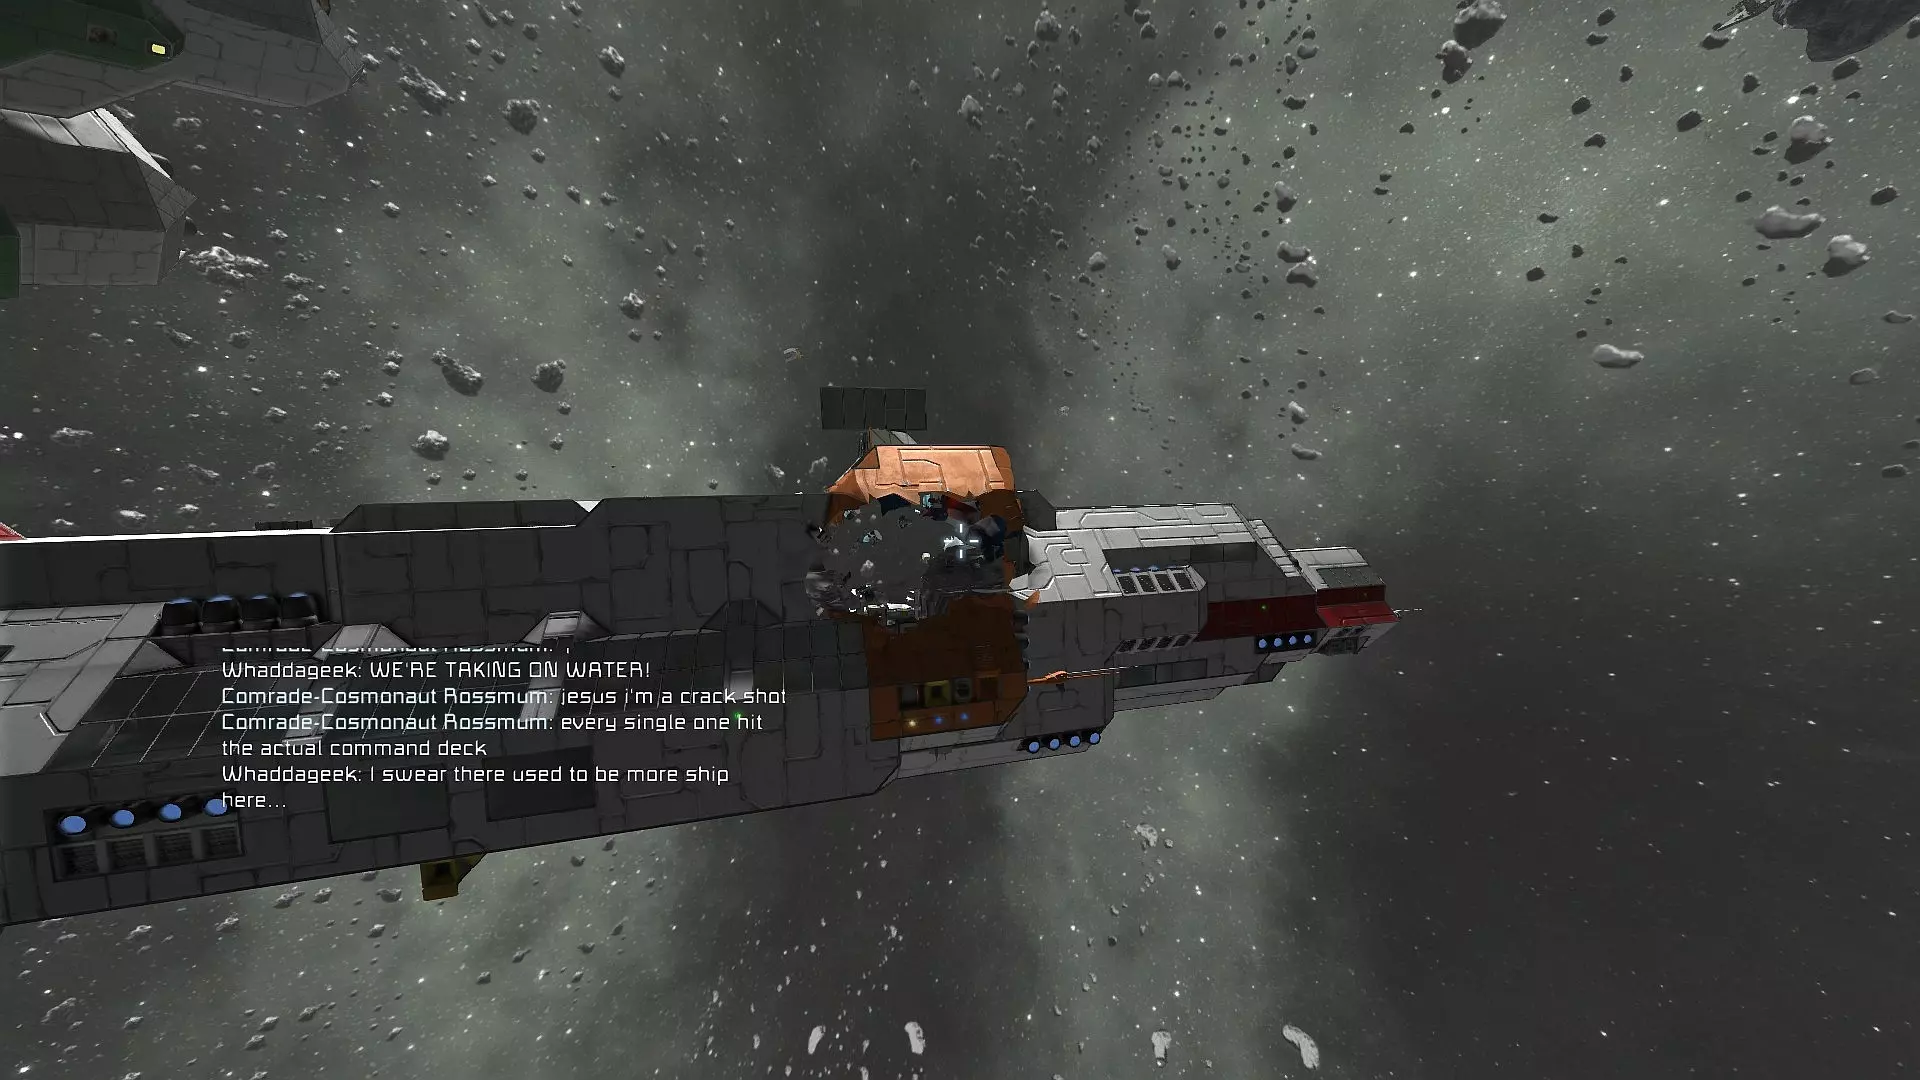
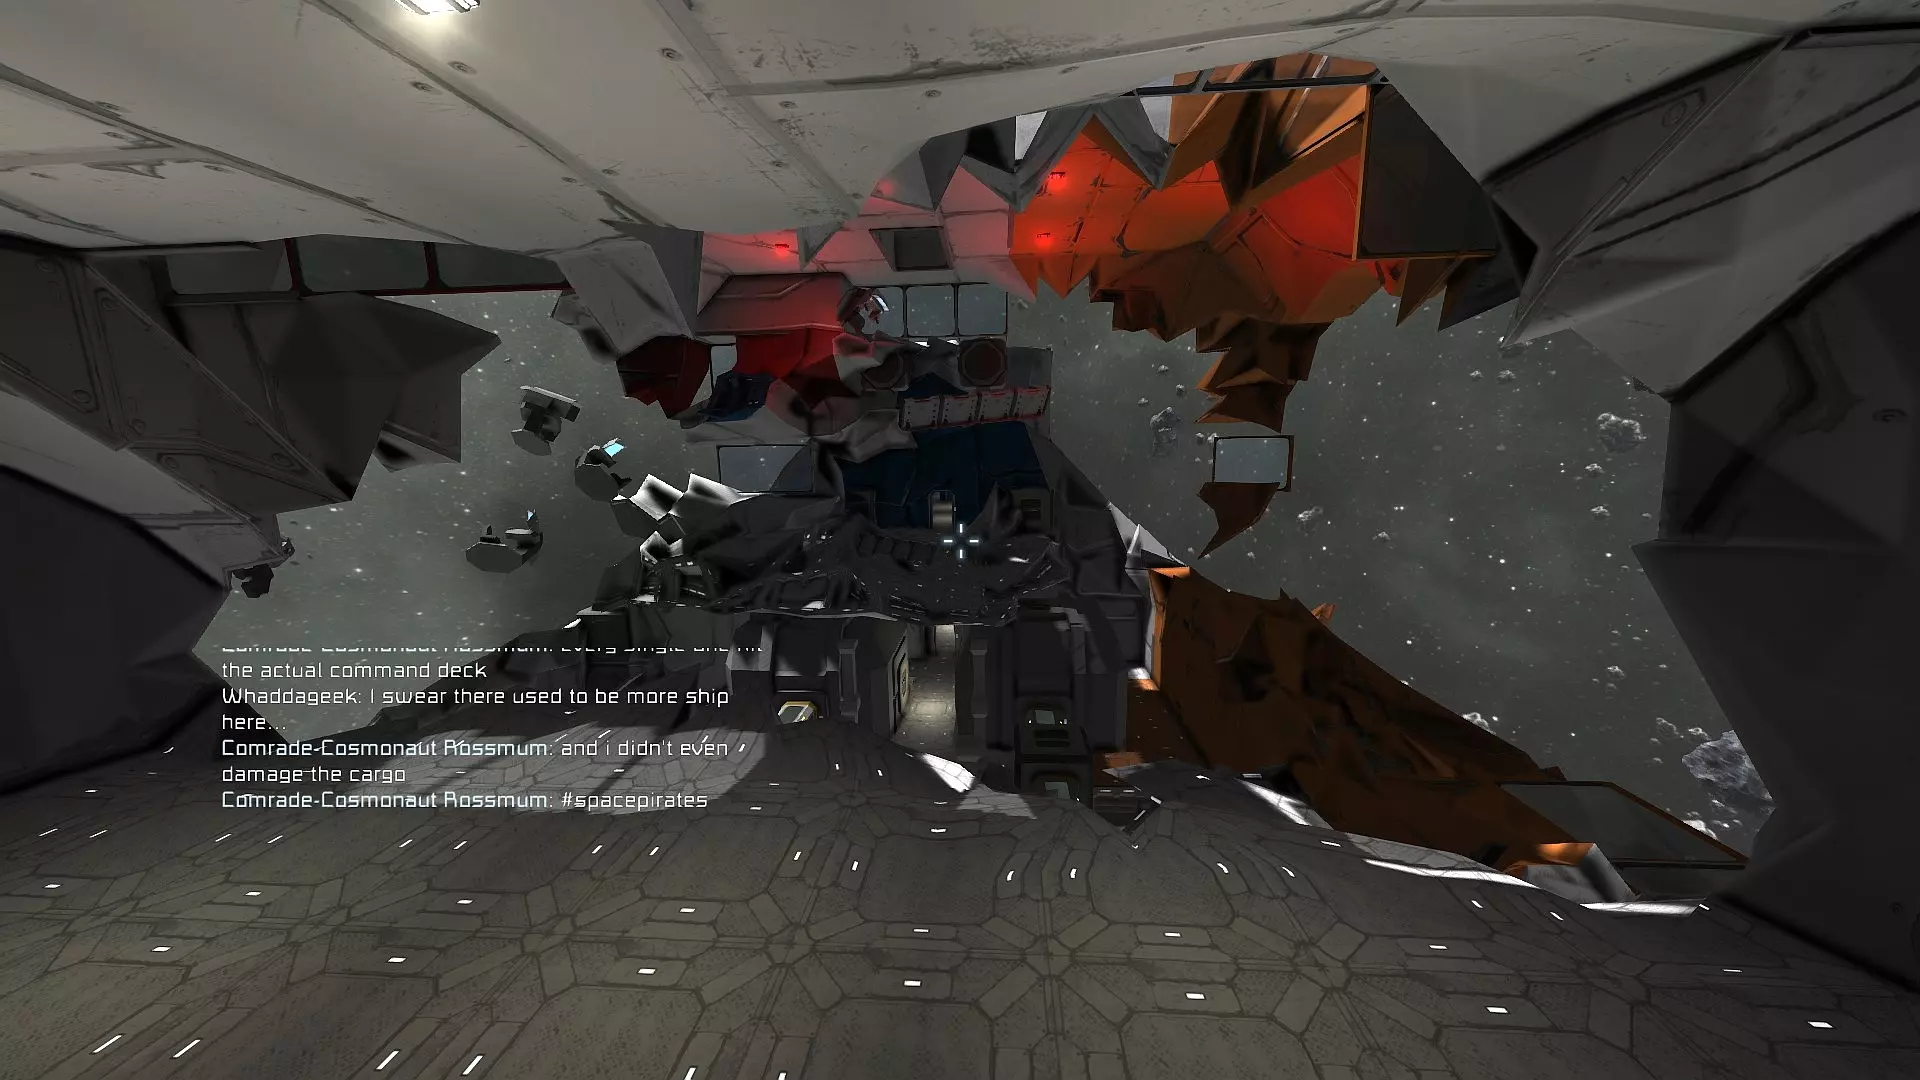
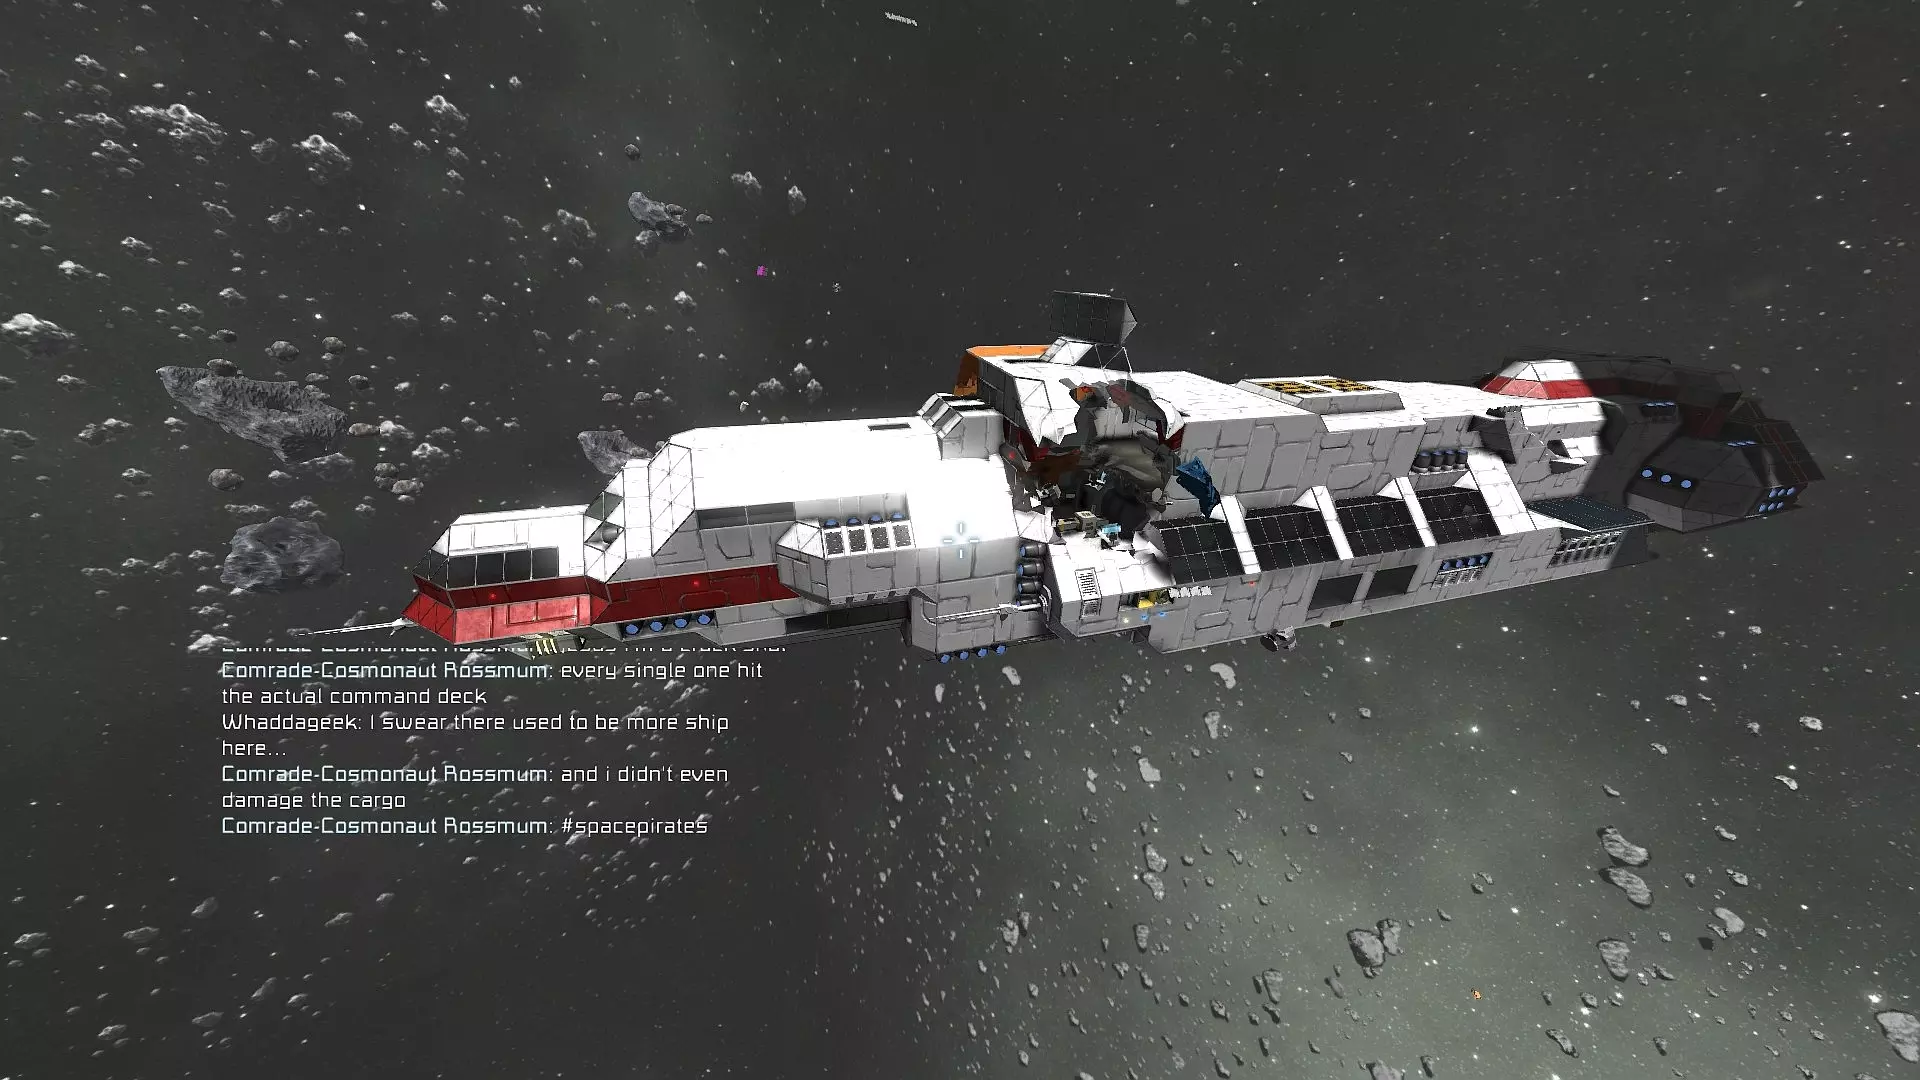
Six projectiles fired from a range of two kilometres not only penetrated the hull, but completely obliterated the command deck and the bulkheads on either side of it. They also tore out the floor below (albeit without damaging the actual cargo system, a feat of space pirate marksmanship I was quite proud of). In a combat scenario, this ship is dead in space. Nadezhda does have a backup control station in the nose, but the damage to the ship was so severe that its handling worsened significantly and the loose debris would only have worsened the damage. A second barrage of shells severed the ship in two. Obviously, this won't do for combat vessels or larger ships (Nadezhda is a little over 200 metres long, and weighs about 7,000 tons, and is at the upper limit of what I would consider a safe size for an 'exo' design). For these vessels, building an embedded heavy armour frame which the rest of the ship is formed around is often a safe plan. There are many different takes on this design theory, ranging from a simple 'spine' that runs the length of the ship and which all of the most critical systems are hung off of through to a fully-fledged network of framing not unlike what you would see on real ships or aircraft. Each method comes with its own pros and cons. In the 'spine' example, it provides some additional structural integrity to the ship, but it still doesn't prevent whole chunks of the ship being blown off. A true framework provides some protection from damage and also holds the ship together no matter how badly perforated the actual compartments themselves are, but it is bulky and time-consuming to build. A more balanced approach which I have been considering recently is a more organic approach inspired by nature. It combines the lightweight nature of the spine with the more thorough protection of the framework, by building what is essentially a skeleton for the ship. A spine runs along its length, with all vital components held safely within a ribcage. Less important areas are simply suspended off the spine, as it doesn't matter so much if they are blown away. Engines are connected to the spine via limb-like extrusions. At the end of the day, which method you use should be influenced by the size and role of your ship. There's no point fully framing a shuttle, but it might be worth it on a supercarrier or a colony ship. Compartmentalisation As well as providing a boost to the ship's structural integrity, compartmentalisation helps to ensure damage control is easier for the ship's crew. Compartmentalisation is absolutely vital in order to ensure proper pressurisation and prevent a catastrophic depressurisation of the entire ship in the event of a hull breach. In addition, the ability to isolate each compartment can help combat fires, boarding, gas or radiation leaks, or all manner of other nasty problems. As a general rule, I try and keep one room per compartment, but you can just as comfortably squeeze multiple rooms into a single compartment to save on space and reduce overall complexity. Each bulkhead should completely seal the compartments off from each other and should be at least one block thick. Two or three block layers may provide even stronger bulkheads, with integral airlocks - these are useful in high-risk areas like reactor rooms or in areas that will often be depressurised, like hangar bays. However, they do significantly impact on your ship's available interior space and its mass and size, so often it is best to use them sparingly. I would argue that they aren't really viable on a ship less than 300 metres in length, except in the aforementioned areas. Bulkheads can be built of any kind of block that completely seals a cube space, but I would recommend armour plates. Light armour is acceptable for smaller ships or less important areas, but heavy armour bulkheads are a good idea around vital systems or where necessitated by the ship's structure. Remember that in the Nadezhda example, the bulkheads were only partial - and remember an infamous historical example of this as well, RMS Titanic. Full bulkheads are preferable (and if I was to build Nadezhda again from scratch, I would have used them). Armour plating: types & layouts Armour distribution and type Although just building your entire ship out of heavy armour might sound like a good plan at first, the impacts on handling will probably not be worth it in the end. As such, it is often better to save heavy armour for vital systems and predicted areas of attack. For instance, encasing your reactor chamber and your command deck in heavy armour is a good idea, while your leisure areas and less important passageways can probably get away with only having light armour shielding. Remember that spaced layers of light armour (including double hulls or pressure hulls, think of a submarine's design) can often provide adequate protection all on their own, while being much lighter and easier to build. This will be covered in more detail shortly. If you do decide to use heavy armour on your design, it may be worth placing it to deflect attack rather than to form the actual structure of an area. For example, you may build an angled plate of heavy armour that protects a part of your ship from attacks launched from above and in front, because that is the direction you most expect fire to come from. Only using plates where you expect inbound attacks saves a lot on weight and can also provide more interior volume for you to put systems inside. These heavy armour "inserts" can be coupled with spacing techniques to further improve survivability. Advanced armour theory In addition to simply deciding between light or heavy armour blocks, their thickness, and where to place them, you can also adopt more advanced techniques such as adding spaced armour or sloped armour. These are seen in the real world, with both becoming popular for tank design during the Second World War. However, they have been in use much longer than this; the concept of sloping armour dates back to the days of earthen forts. Let's take a look at how these can be applied in Space Engineers, and what makes them work in the real world. Sloped armour The benefit behind adding a slope to an armour plate is twofold. First of all, the angle makes an incoming projectile more likely to simply bounce off of the plate. Although a well-designed projectile normalises to a certain degree (that is to say, it "bites in" and strikes at a less extreme angle), it is still very difficult to get a good angle of attack against the armour. In the real world, shells striking sloped plates often shatter or deform in addition to simply ricocheting off of the plate. The second advantage is that by sloping the plate, there is more armour for a shell to travel through than a plate that is perpendicular to the incoming projectile but otherwise exactly the same thickness and hardness. Think about the length of a square's diagonals compared to its sides - the diagonal is considerably longer. The steeper the angle, the more thickness the armour presents to an incoming projectile. For a plate sloped back steeply, the effective distance needed for a shell to penetrate may be double or more the actual thickness of the armour plate itself. This approach does have some shortcomings, however, many of which became apparent during early experiments with sloped armour on tanks. Sloping the armour decreases the useful interior volume, leaving narrow corners that are useless for crew or equipment storage and which can be difficult to get at for maintenance purposes. Another disadvantage comes if the incoming projectile strikes the armour face from a perpendicular (known as normal) angle. This situation could present itself if something fires downwards at an angle at a sloped plate below it - for instance, firing diagonally downwards at a 45-degree plate will totally negate its slope. Because of the way blocks work in Space Engineers, you will need two sloped half-blocks back-to-back to simulate real sloped armour plates. Just like in real life, projectiles (generally missiles) in the game have been observed to both normalise to and bounce off of armour plates, depending on the angle of impact with respect to the armour face. This means sloped armour can be an effective way of protecting your ship, although it will limit your useful interior space. Spaced armour Like sloped armour, spaced armour has featured prominently in tank design, as well as limited application in military aircraft (usually to protect engines, ammunition, and aircrew). Spaced armour is exactly what its name suggests: two or more pieces of armour plate, separated by empty airspace. In an atmospheric environment, the air between the plates serves to add friction and slow the incoming projectile. In space, this is not an option, but two pieces of separated armour may have a better chance at stopping an incoming projectile than a single double-thickness layer. My own trials have certainly proven very effective. Usually, a single block gap will be enough, and you'll seldom need more than two layers of armour. Spaced light armour is very effective and good value for mass - it can prevent hull breaches by two or three consecutive missile hits to the same area. Conveyor systems With interior space at a premium, there is considerable incentive to place your conveyor systems outside the hull rather than inside - but this also comes at a cost, with exposed systems being vulnerable to damage or piracy. Worse yet, a damaged tube may result in parts being vomited out into space or the system backing up and disrupting production. With this in mind, you will need to weigh up the importance of your conveyors and the cargo they will be moving. Multiple, isolated systems are recommended. I typically keep ammo, fuel, and cargo on three separate circuits. This makes management of ammunition and fuel much easier as you don't have to worry about accidentally trading away your own reserves to other vessels or stations, and if one system goes down, the others will still continue functioning. In addition, I like to keep secure storage for things like crew tools or weapons separate completely, in isolated cargo containers. In the majority of cases, I would recommend double-hull construction for any ship where you plan to have complex conveyor networks. This gives you all the space between the pressure hull (where your actual crew compartments and important systems are) and the outer hull (which protects your ship) to run your conveyors through, while the outer hull shields them from damage and keeps pirates away. For particularly at-risk vessels, it may be wise to build actual armoured covers to cap off your exterior access points when not in use. This prevents someone sneaking up to your ship and latching onto a connector. When using redundant or isolated systems, try to avoid running them all through one narrow conduit, as this largely defeats the purpose of having multiple systems in the first place. Spread them out so that a hit to one will not also destroy the others. Interior conveyors can be used where space allows. When running a conveyor through a bulkhead or compartment wall (anywhere that would be pressurised or provides structural strength, essentially), use an actual conveyor block to fill the entire cube space. This maintains pressurisation while still allowing the conveyor through. Conveyors can be run along ceilings or under floors (grates, catwalks, or glass panels can be used to provide a safe and even walking surface over conveyor conduits), as well as alongside walls.
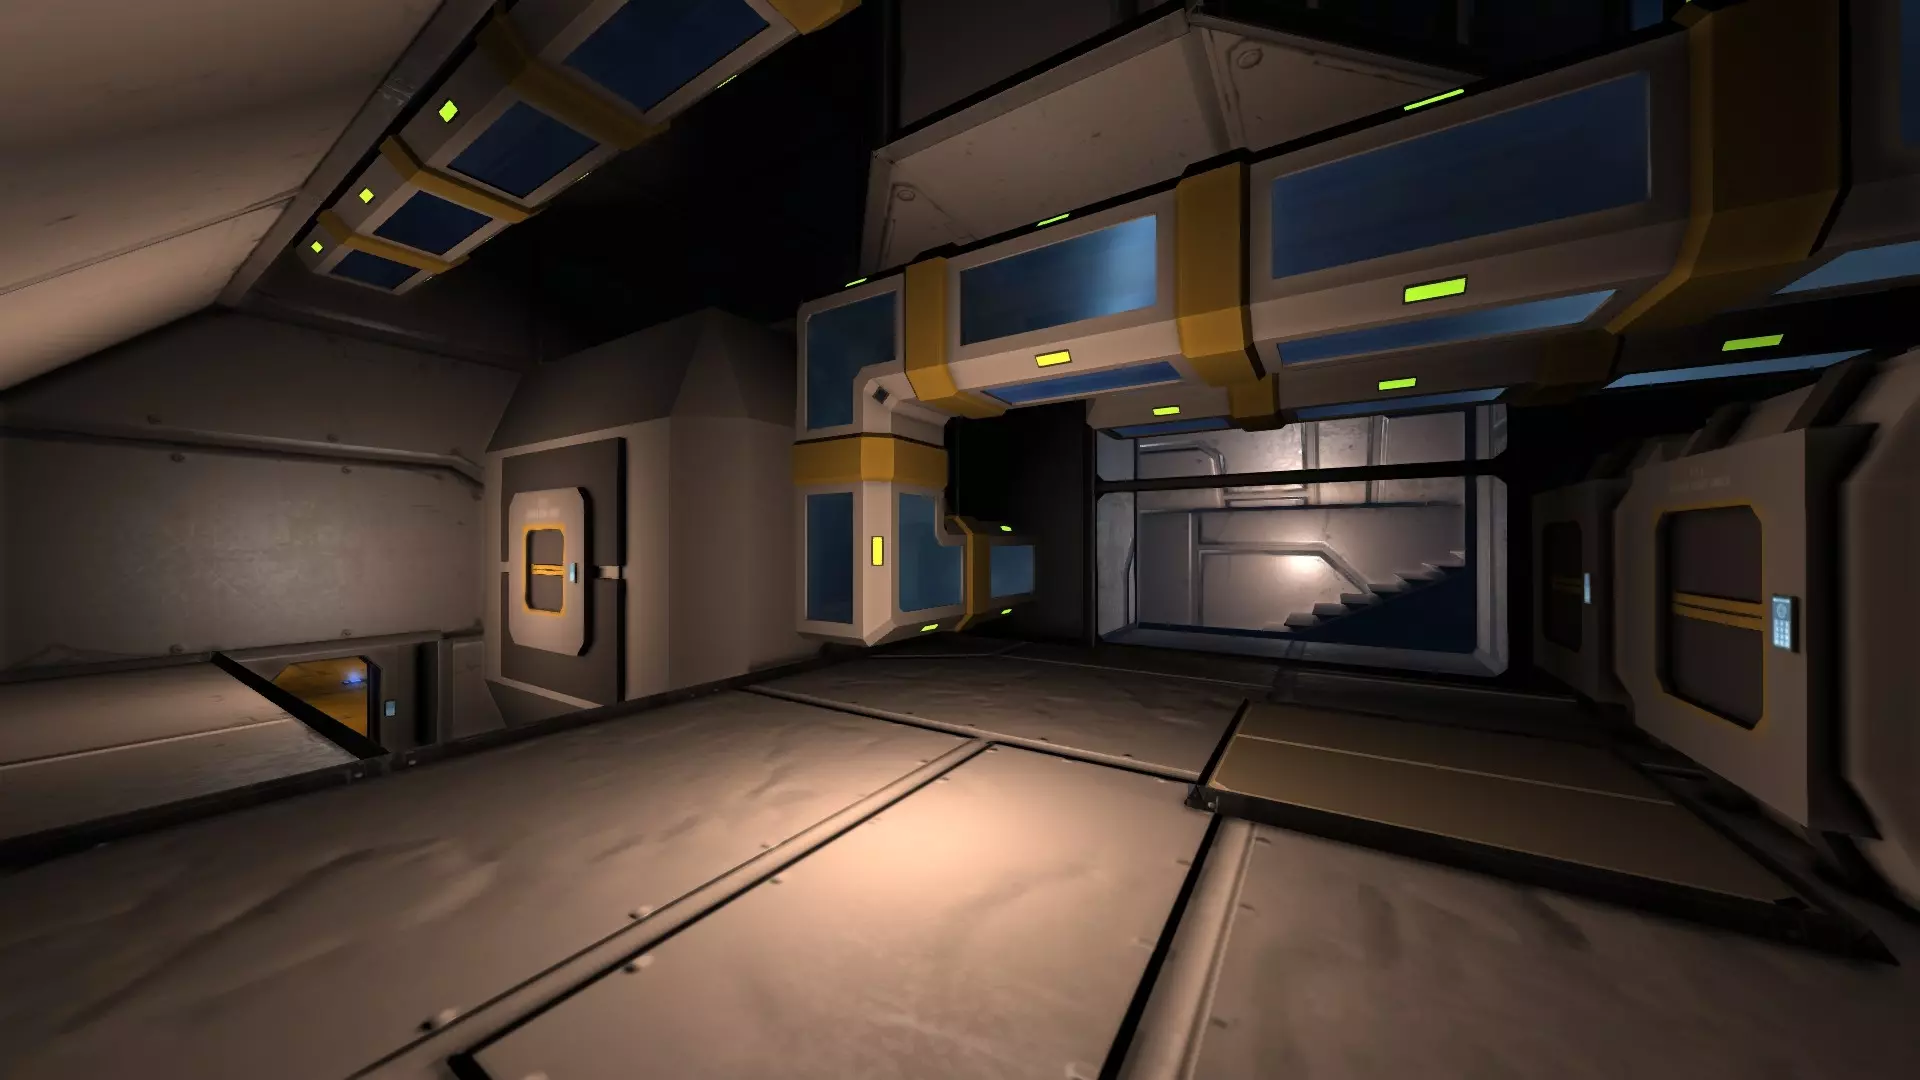
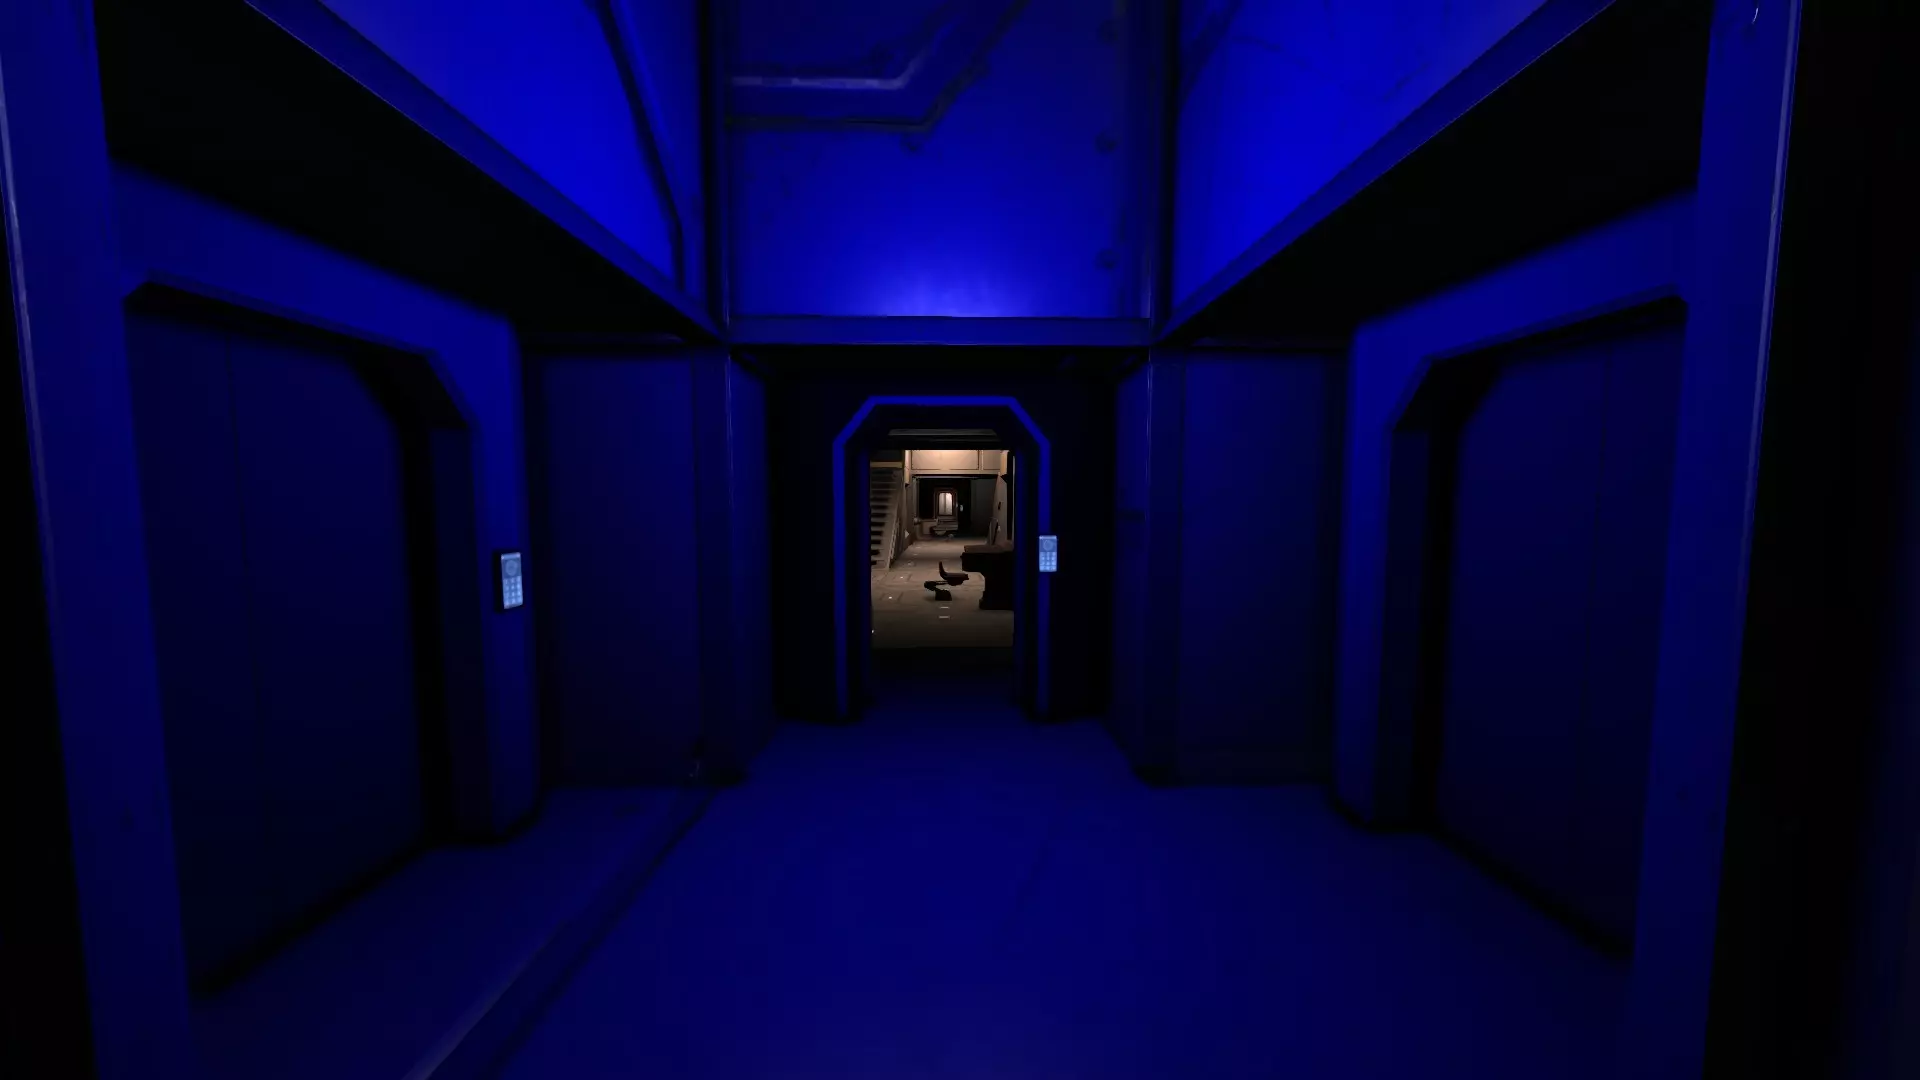
有时输送机必须放置在飞船舱室内,但它们不必碍事。可以沿着墙壁、地板或天花板布置,以避免挤占船员的活动空间。 驾驶舱与指挥中心 指挥控制中心:选择玻璃还是装甲? 这是军用舰船和民用舰船往往存在巨大差异的一个方面。在许多民用船只中,尤其是货船和豪华邮轮,更倾向于配备视野良好的宽敞舰桥。然而,军用舰船则需要将受保护的神经中枢安置在船体装甲深处,以确保其整个指挥人员不会被一发精准的炮弹“狙杀”(如早期民用船只“纳杰日达”的截图所示)。尽管在安全区域内,飞行通道仍是避免碰撞并提供良好视野的不错方案,但飞船的大部分控制装置和指挥人员应安置在靠近飞船质心位置的装甲堡垒内(但最好不要直接位于反应堆舱上方)。
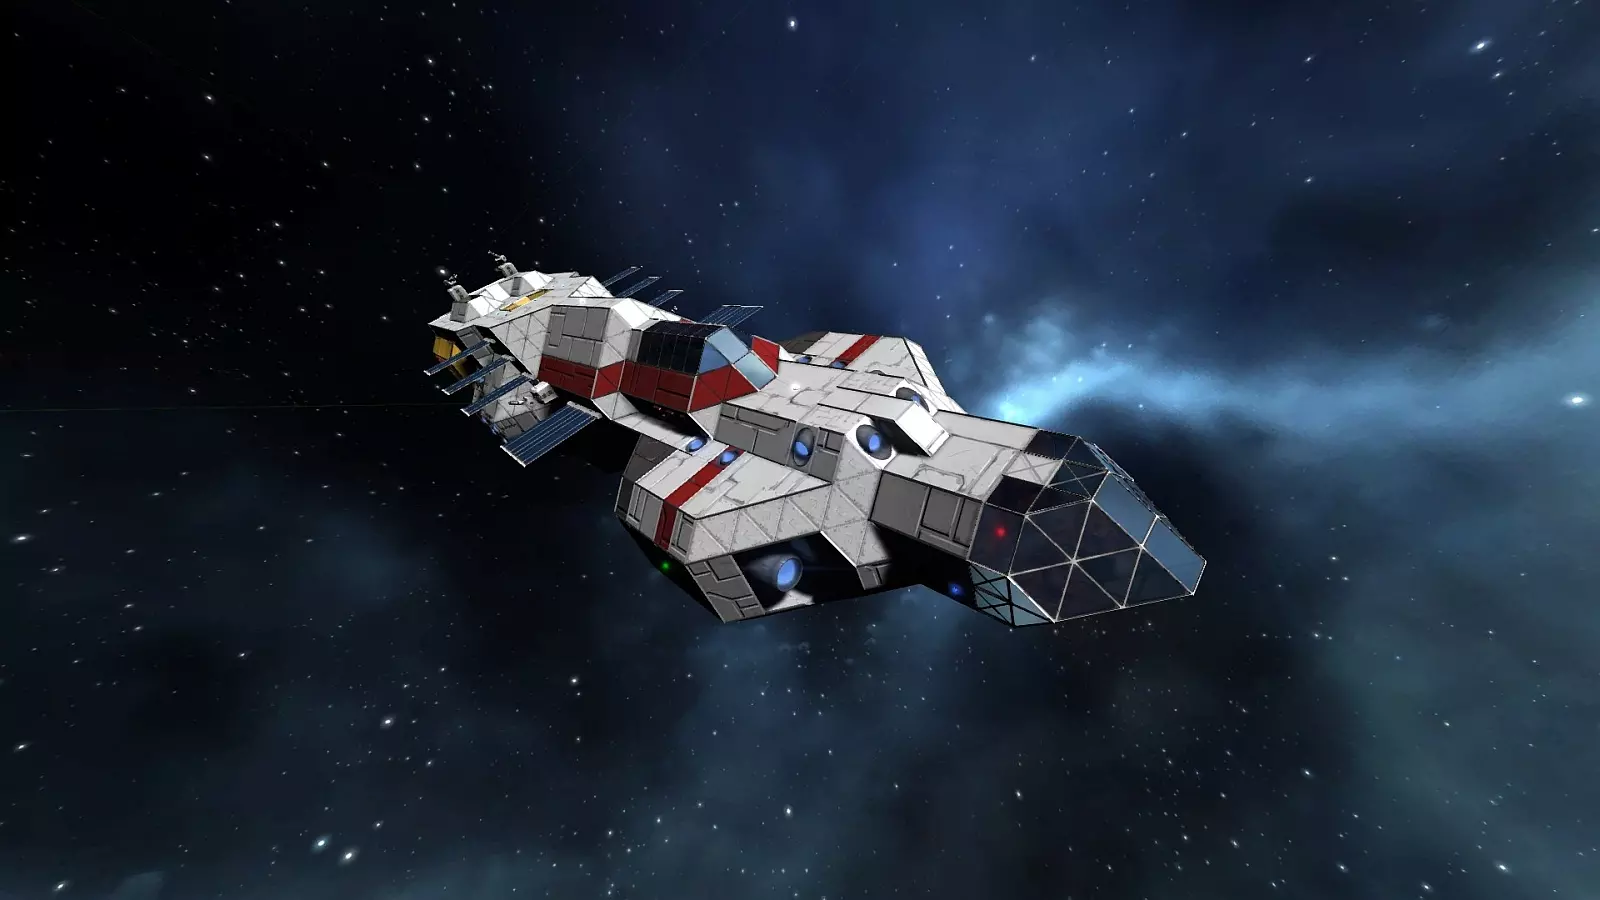
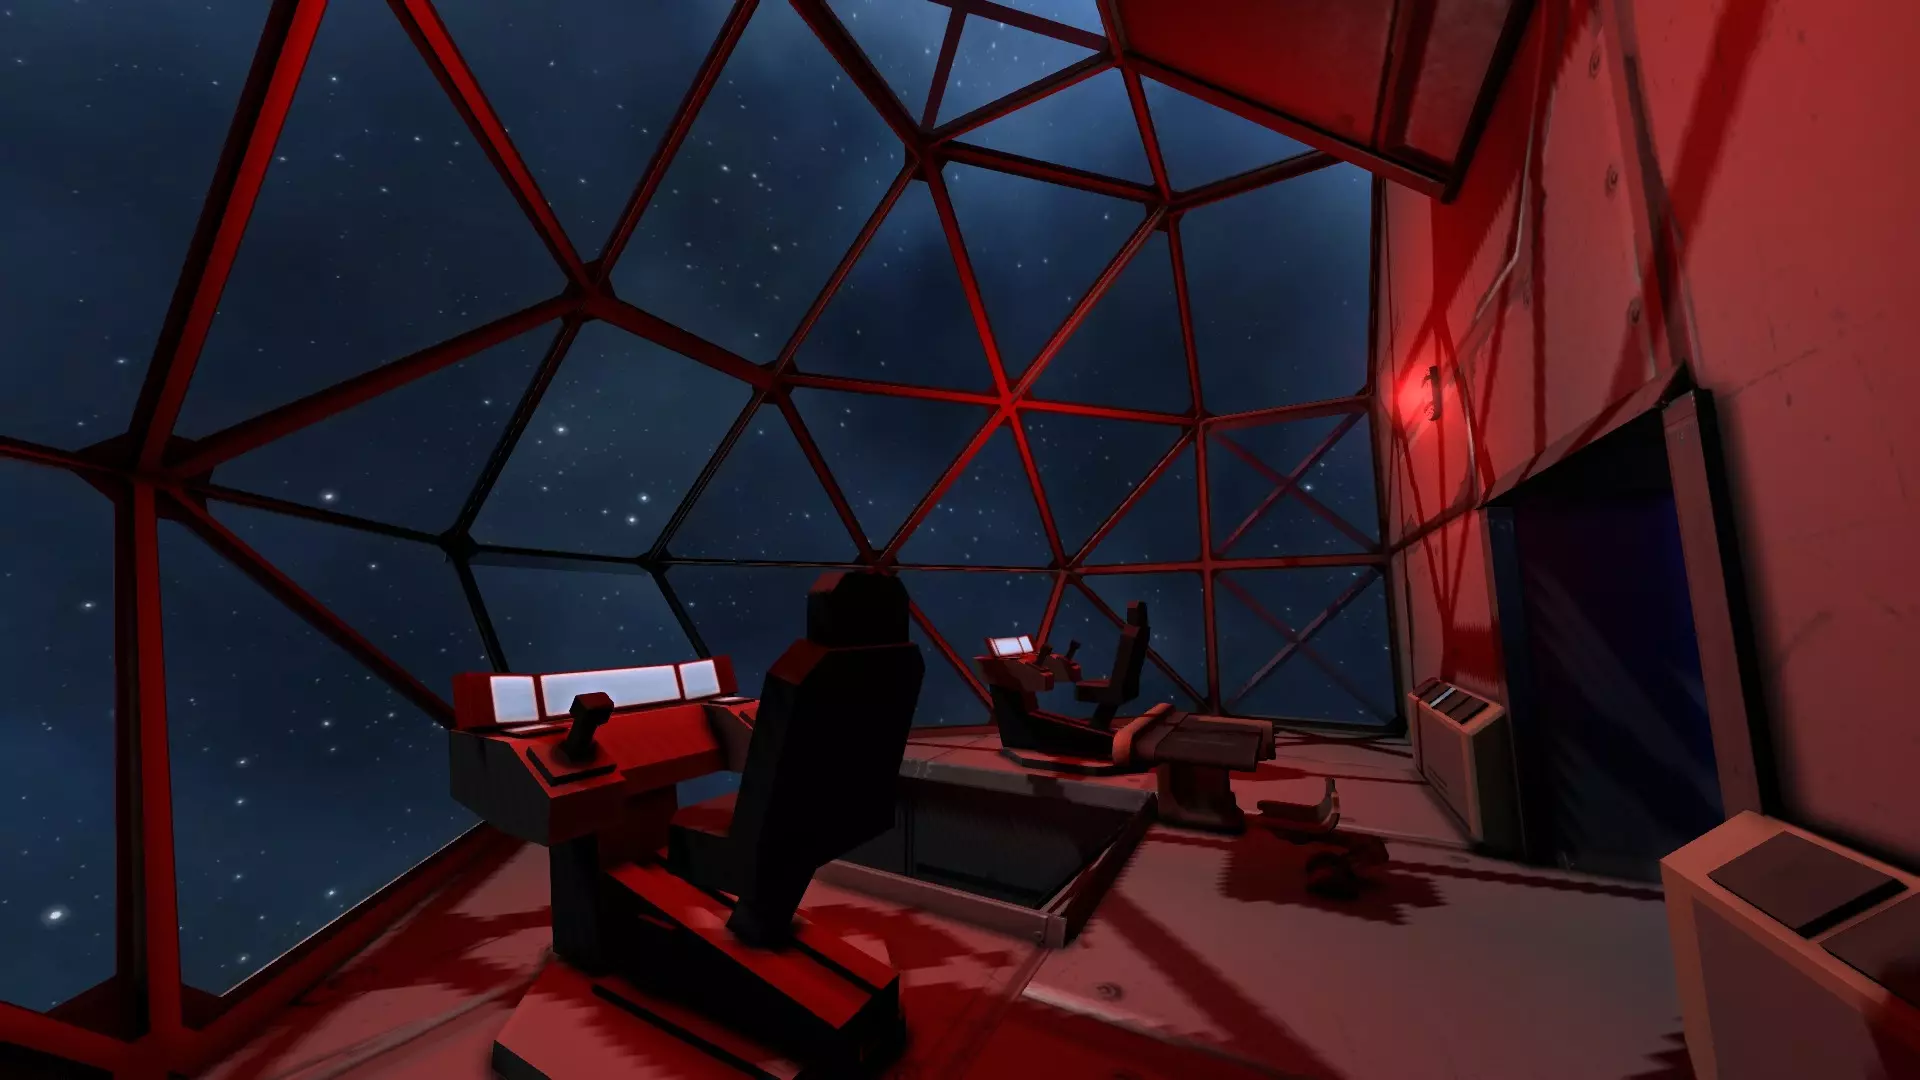
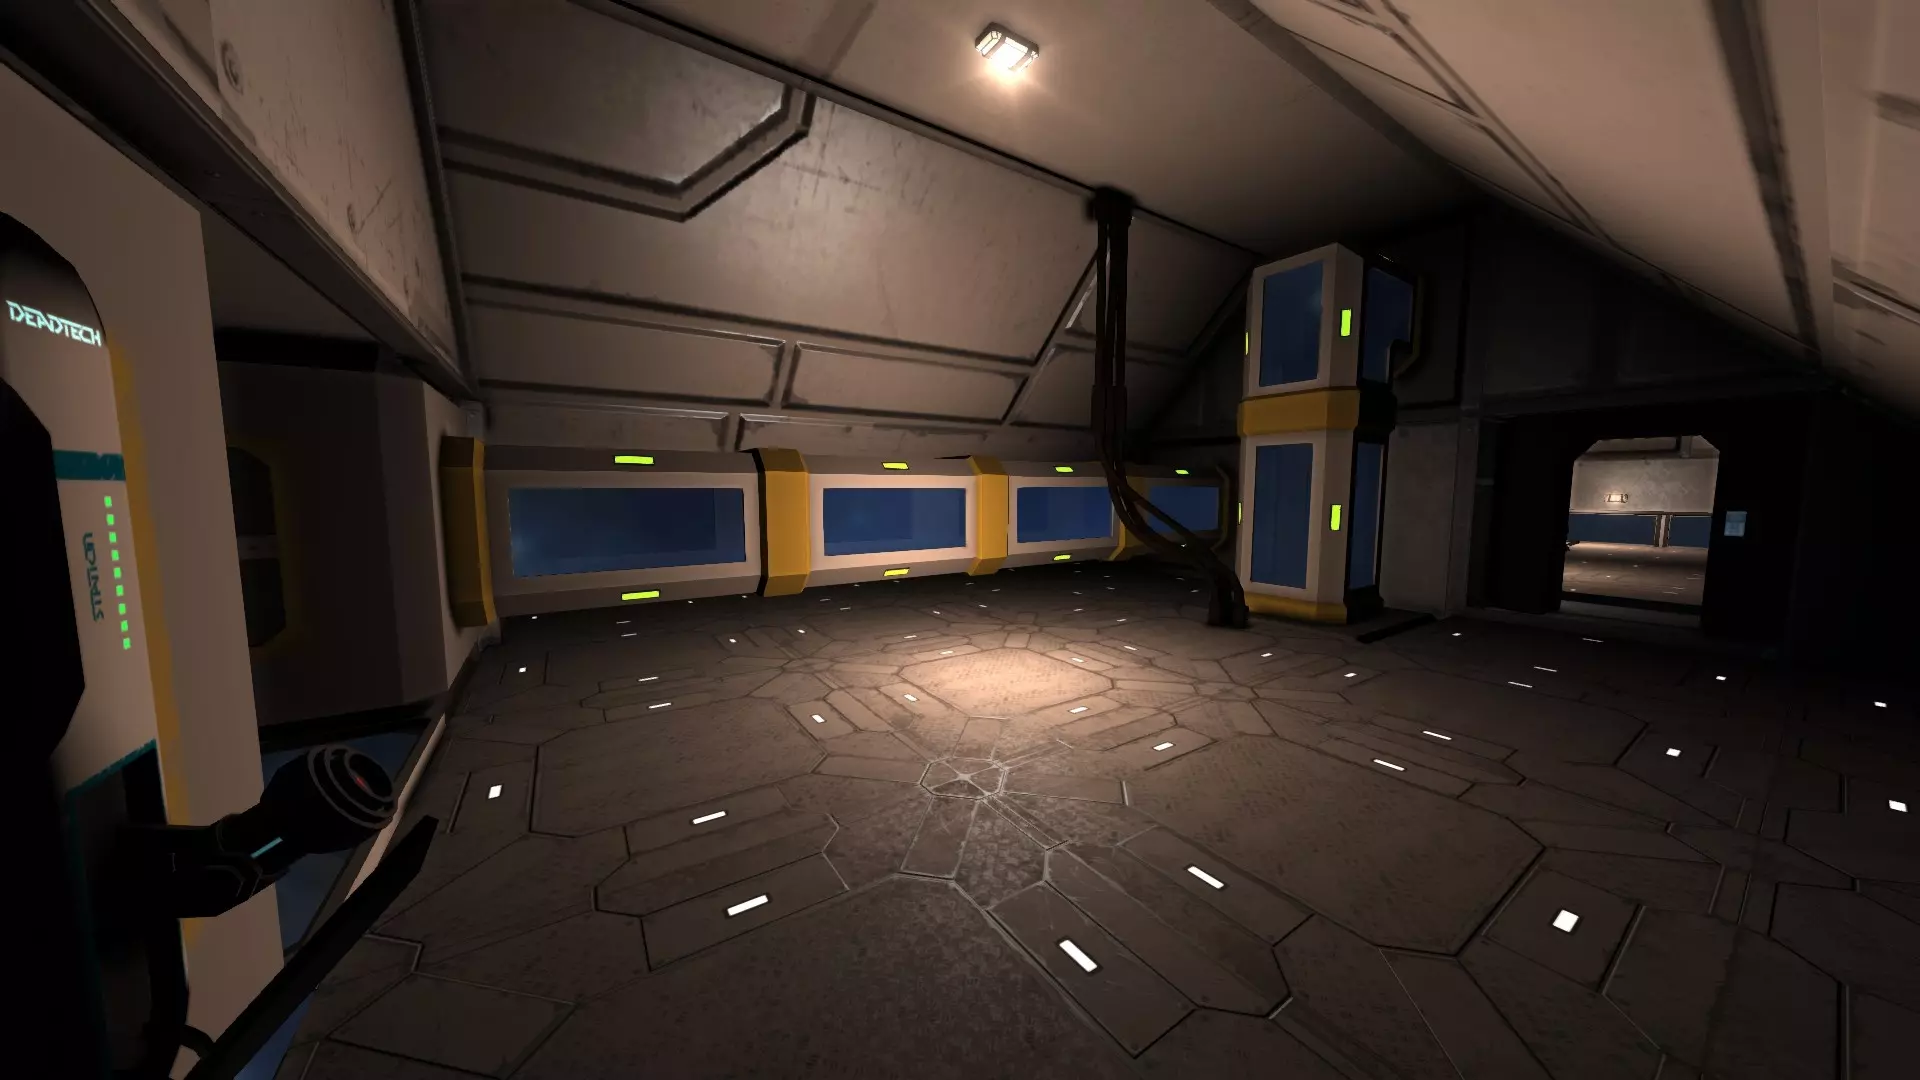
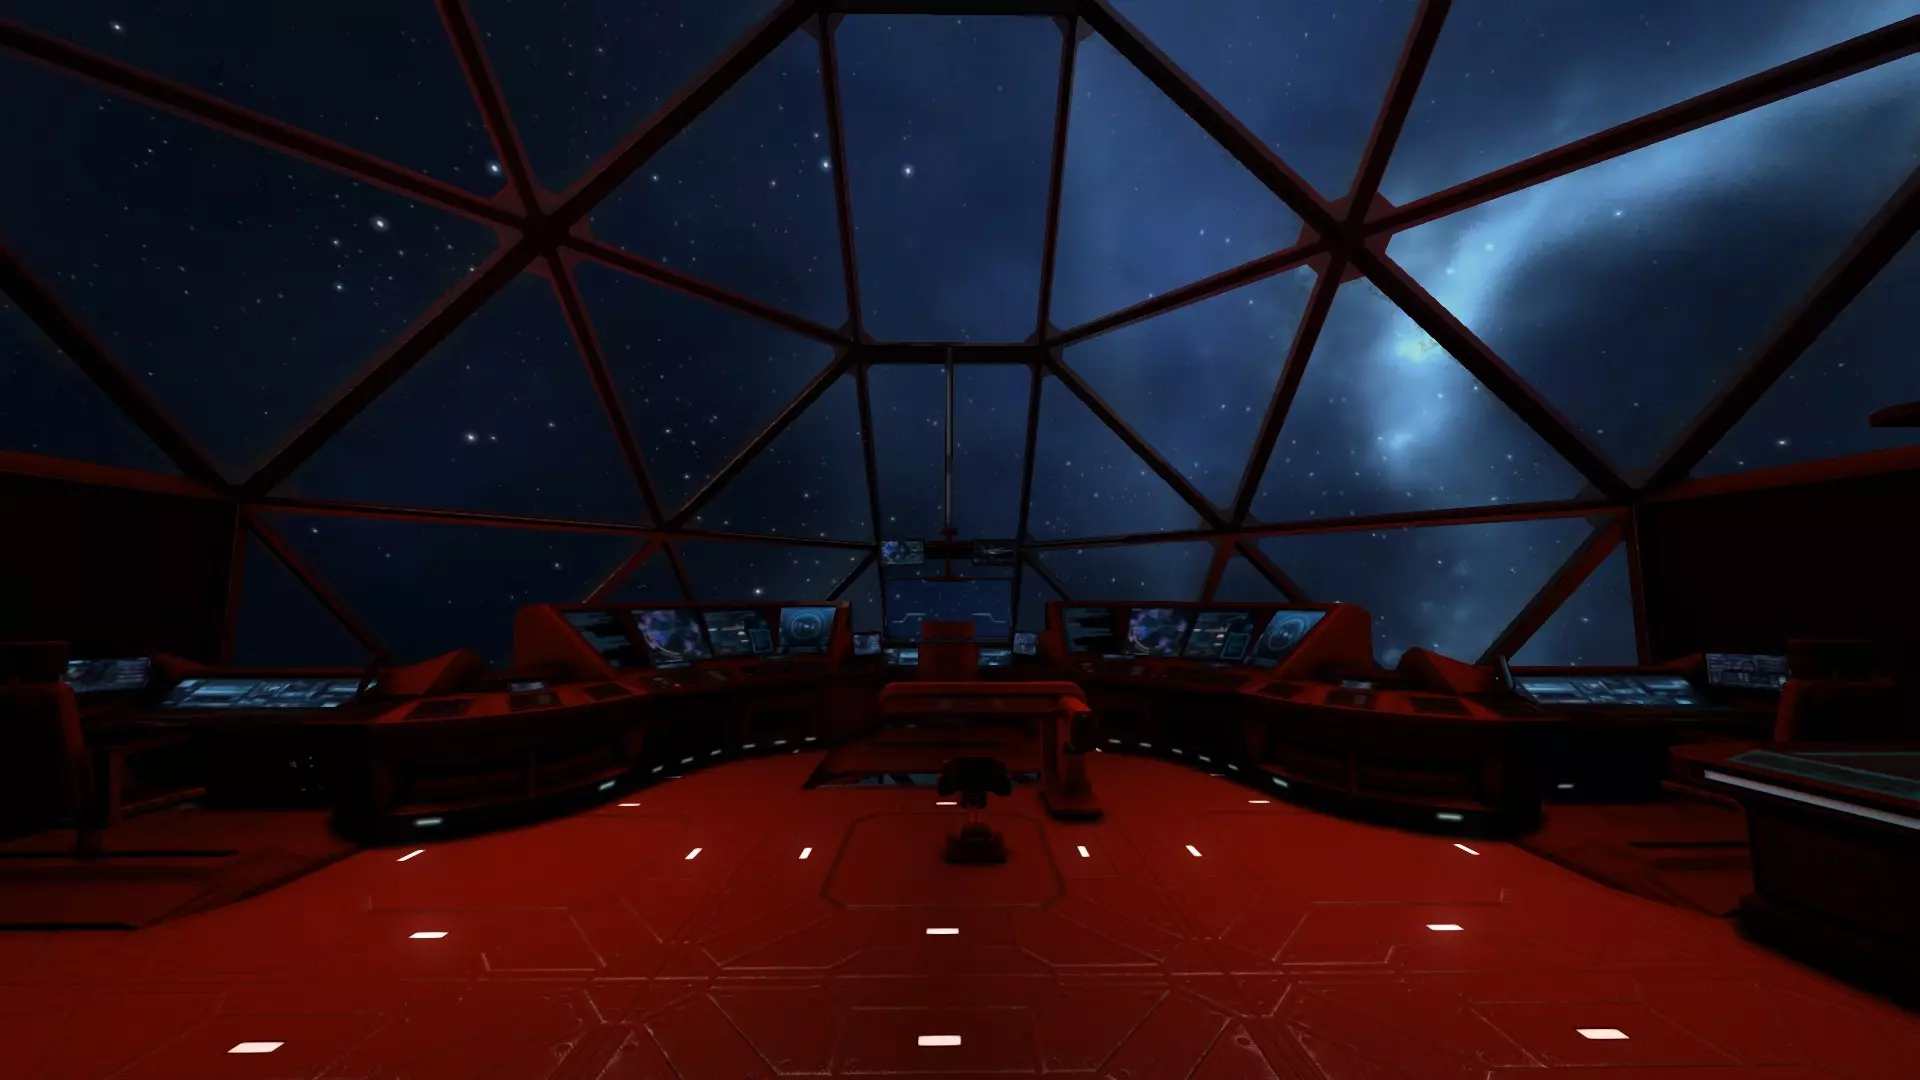
非战斗用途且无需考虑遭遇海盗的飞船,通常可以采用玻璃飞行甲板。这种设计能提供更开阔的星空视野和更好的态势感知能力,但代价是结构完整性有所降低。不过,这类甲板仍可能难以抵御流星或太空碎片的撞击。 战斗舰的控制中心之所以采用居中布置,其原理与反应堆的布置思路一致:若将控制中心置于舰船的边缘位置,能够为其提供缓冲保护的结构就会减少,控制中心也更容易被完全炸离舰船。除非出于某种角色扮演的需求,否则完全没有必要在舰船设计中留下易受攻击的弱点,所以千万不要这么做!
在战斗舰上安装基础飞行通道未必是个坏主意,尽管它会成为一个明显的集火弱点。战斗时应让机组人员远离该区域;若条件允许,应在飞行通道与舰体其他部分之间加装装甲插板和气闸;同时,将其与其他船舱保持一定间距也是个不错的方案。
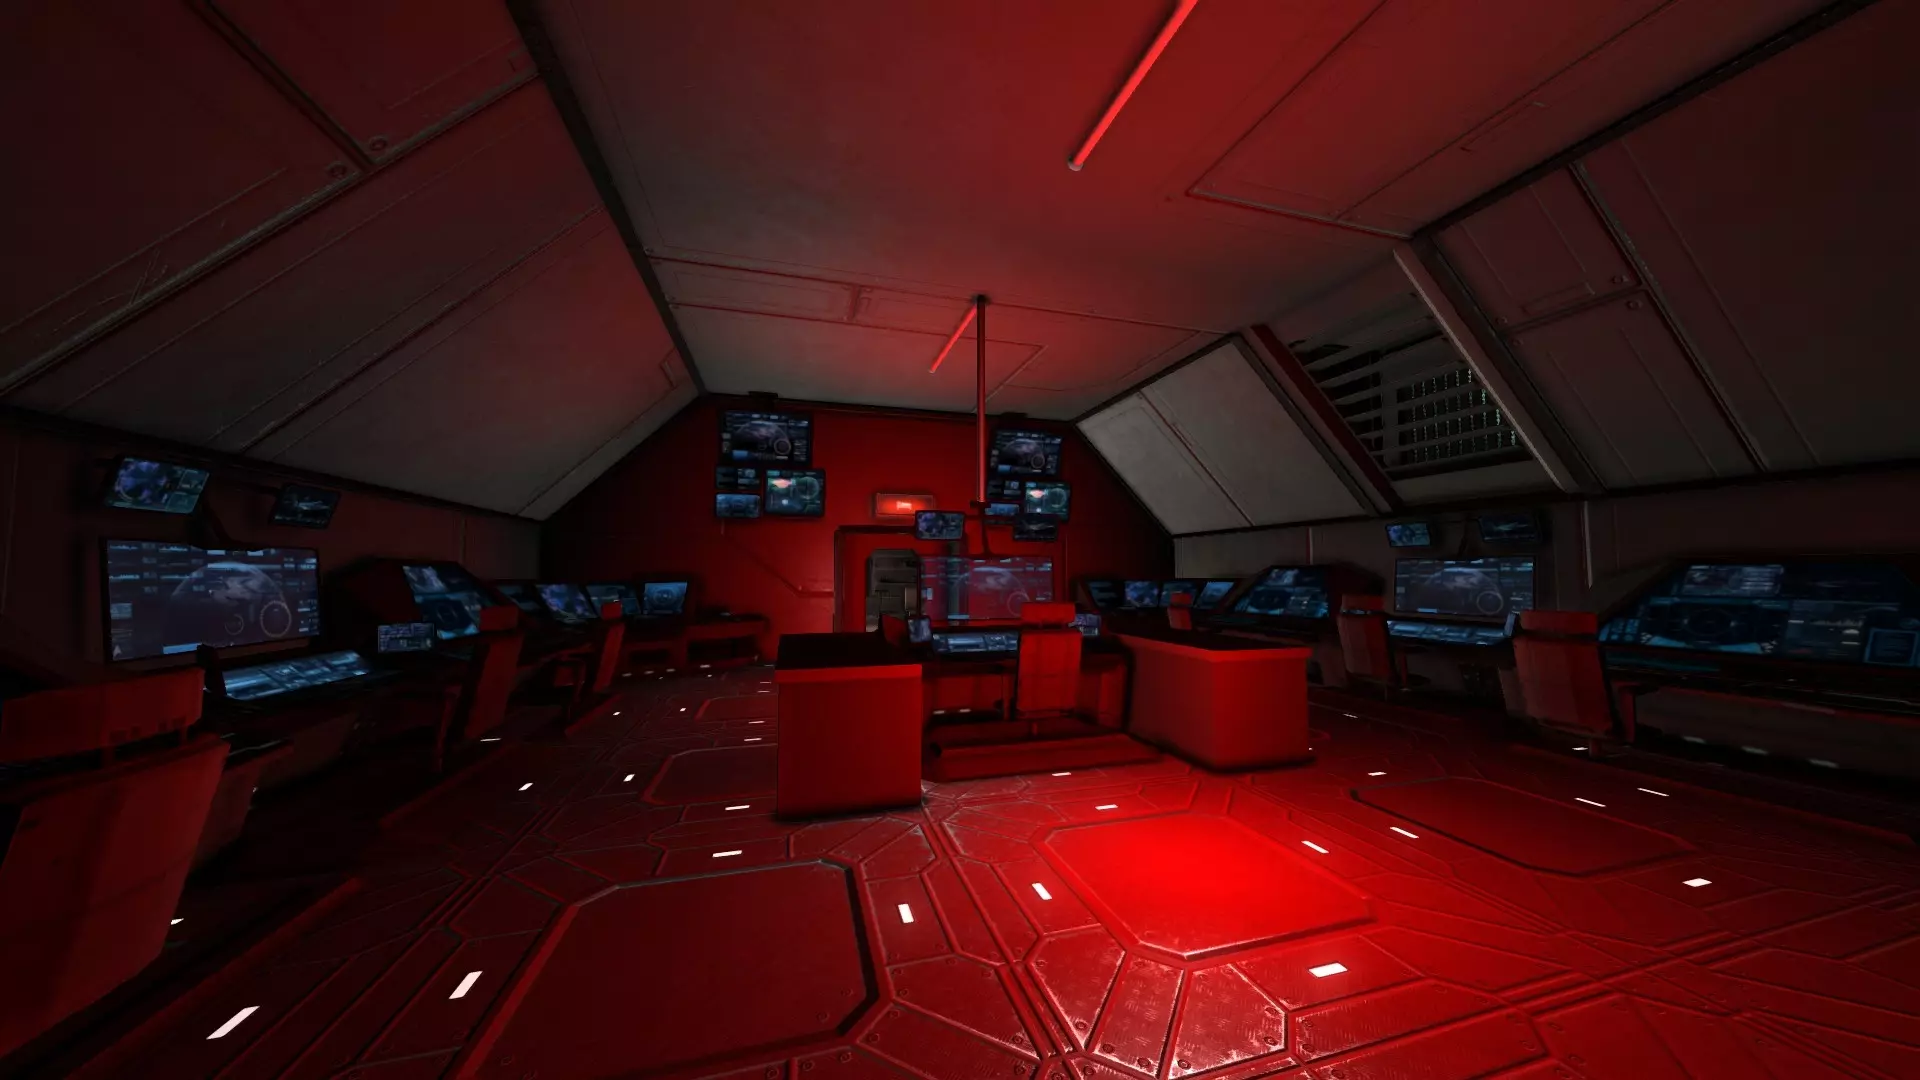
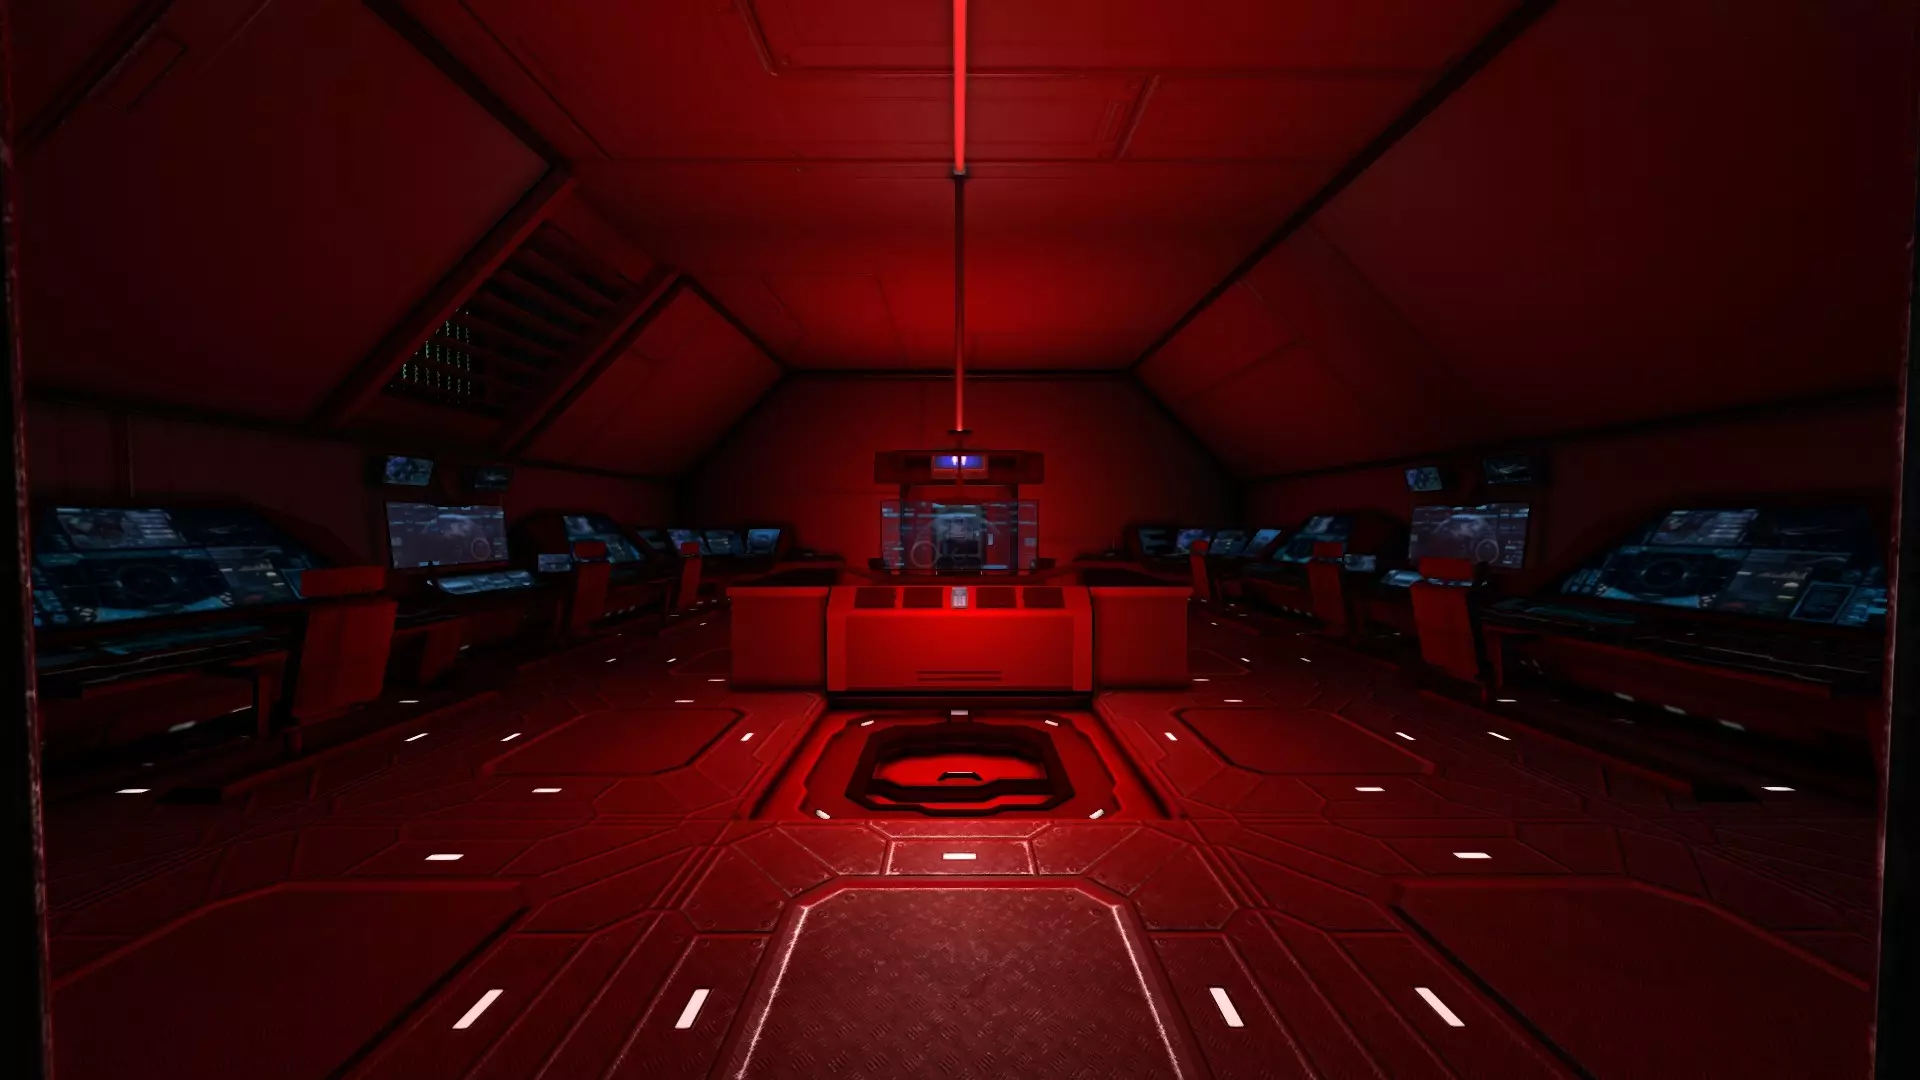
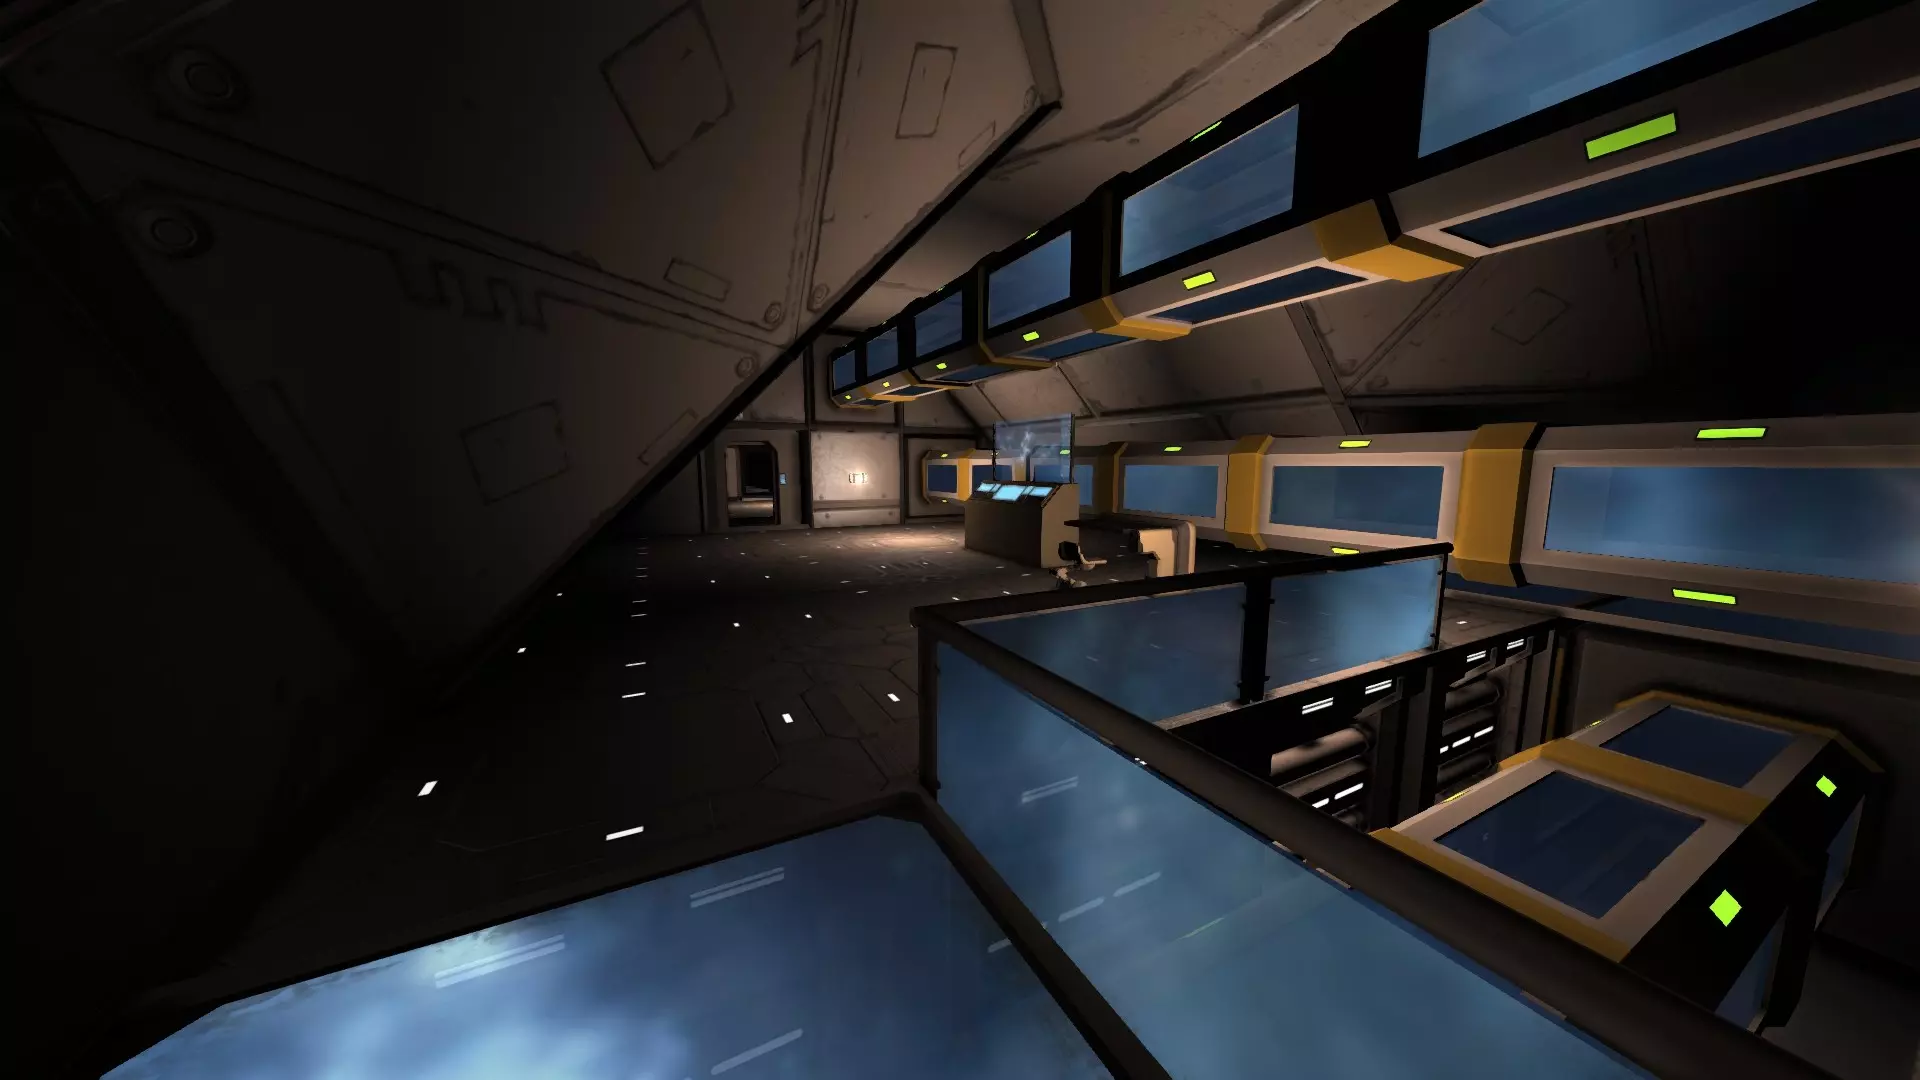
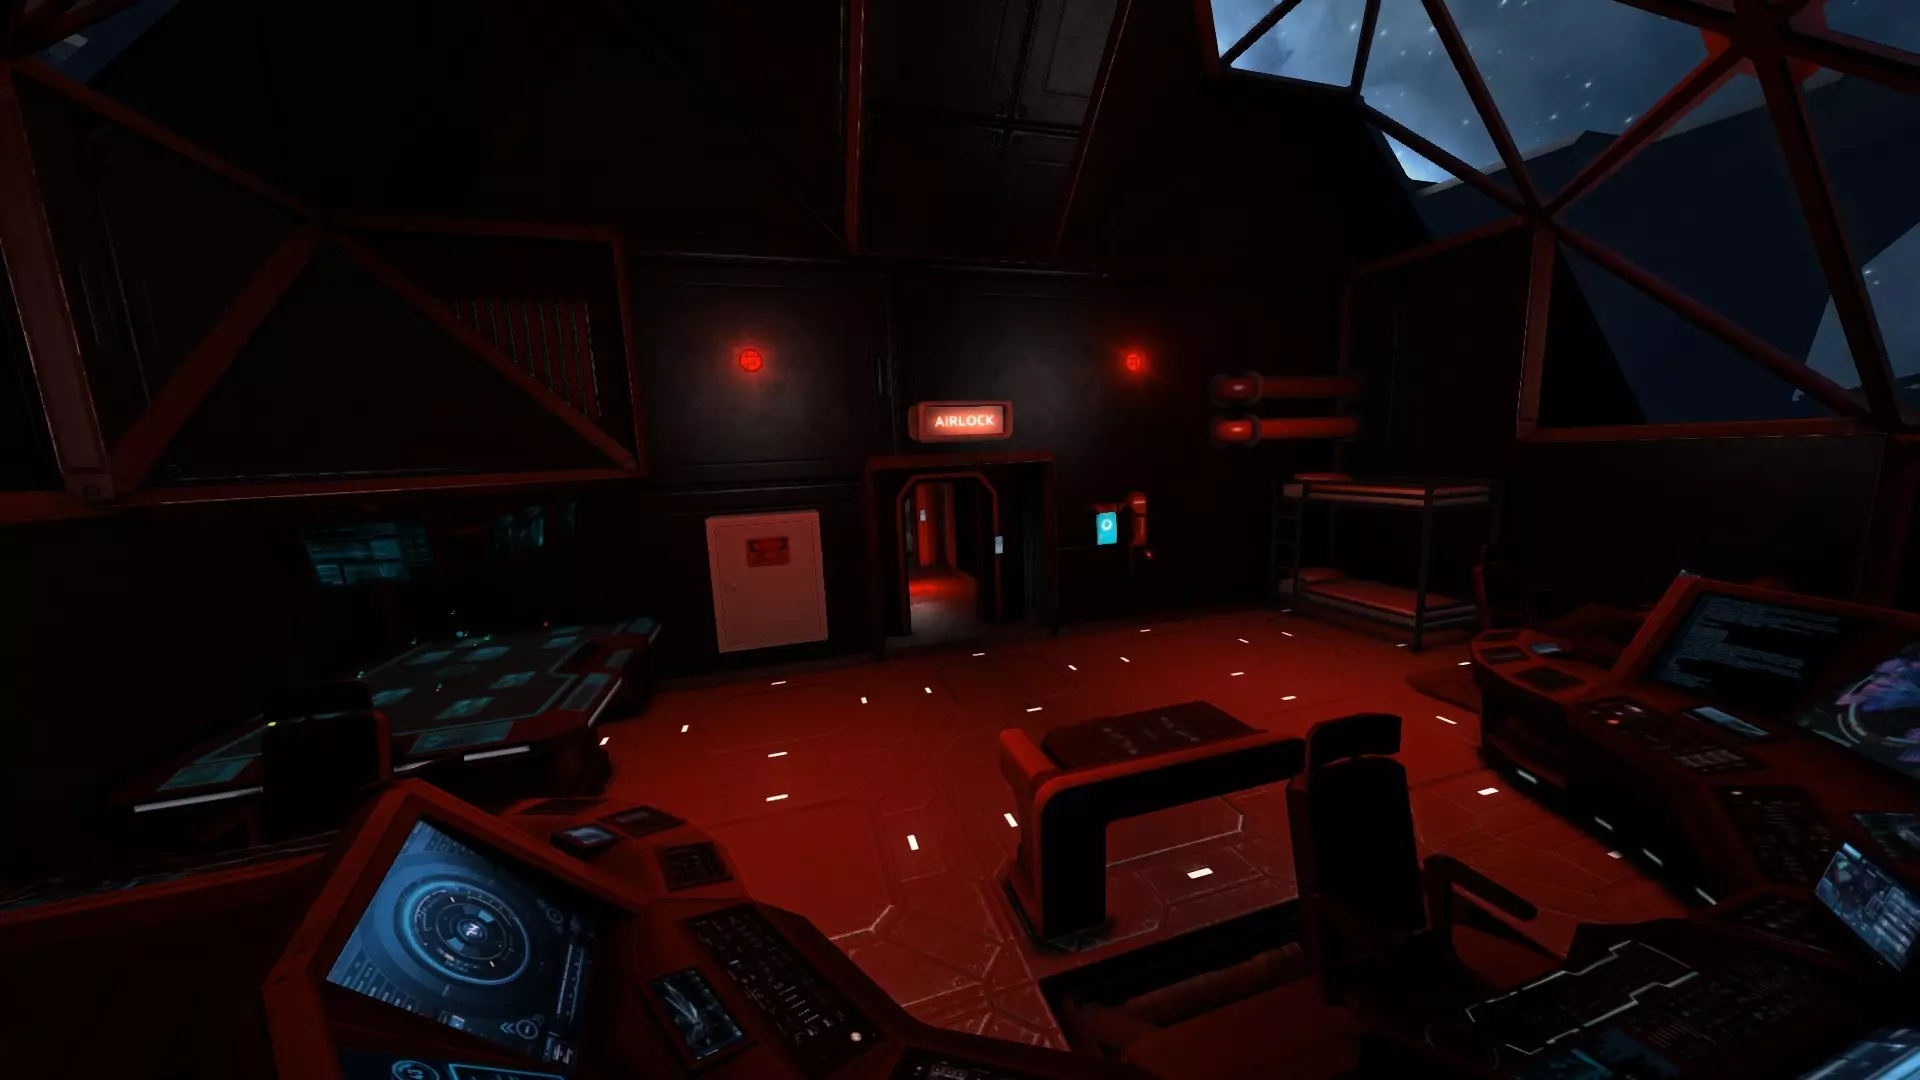
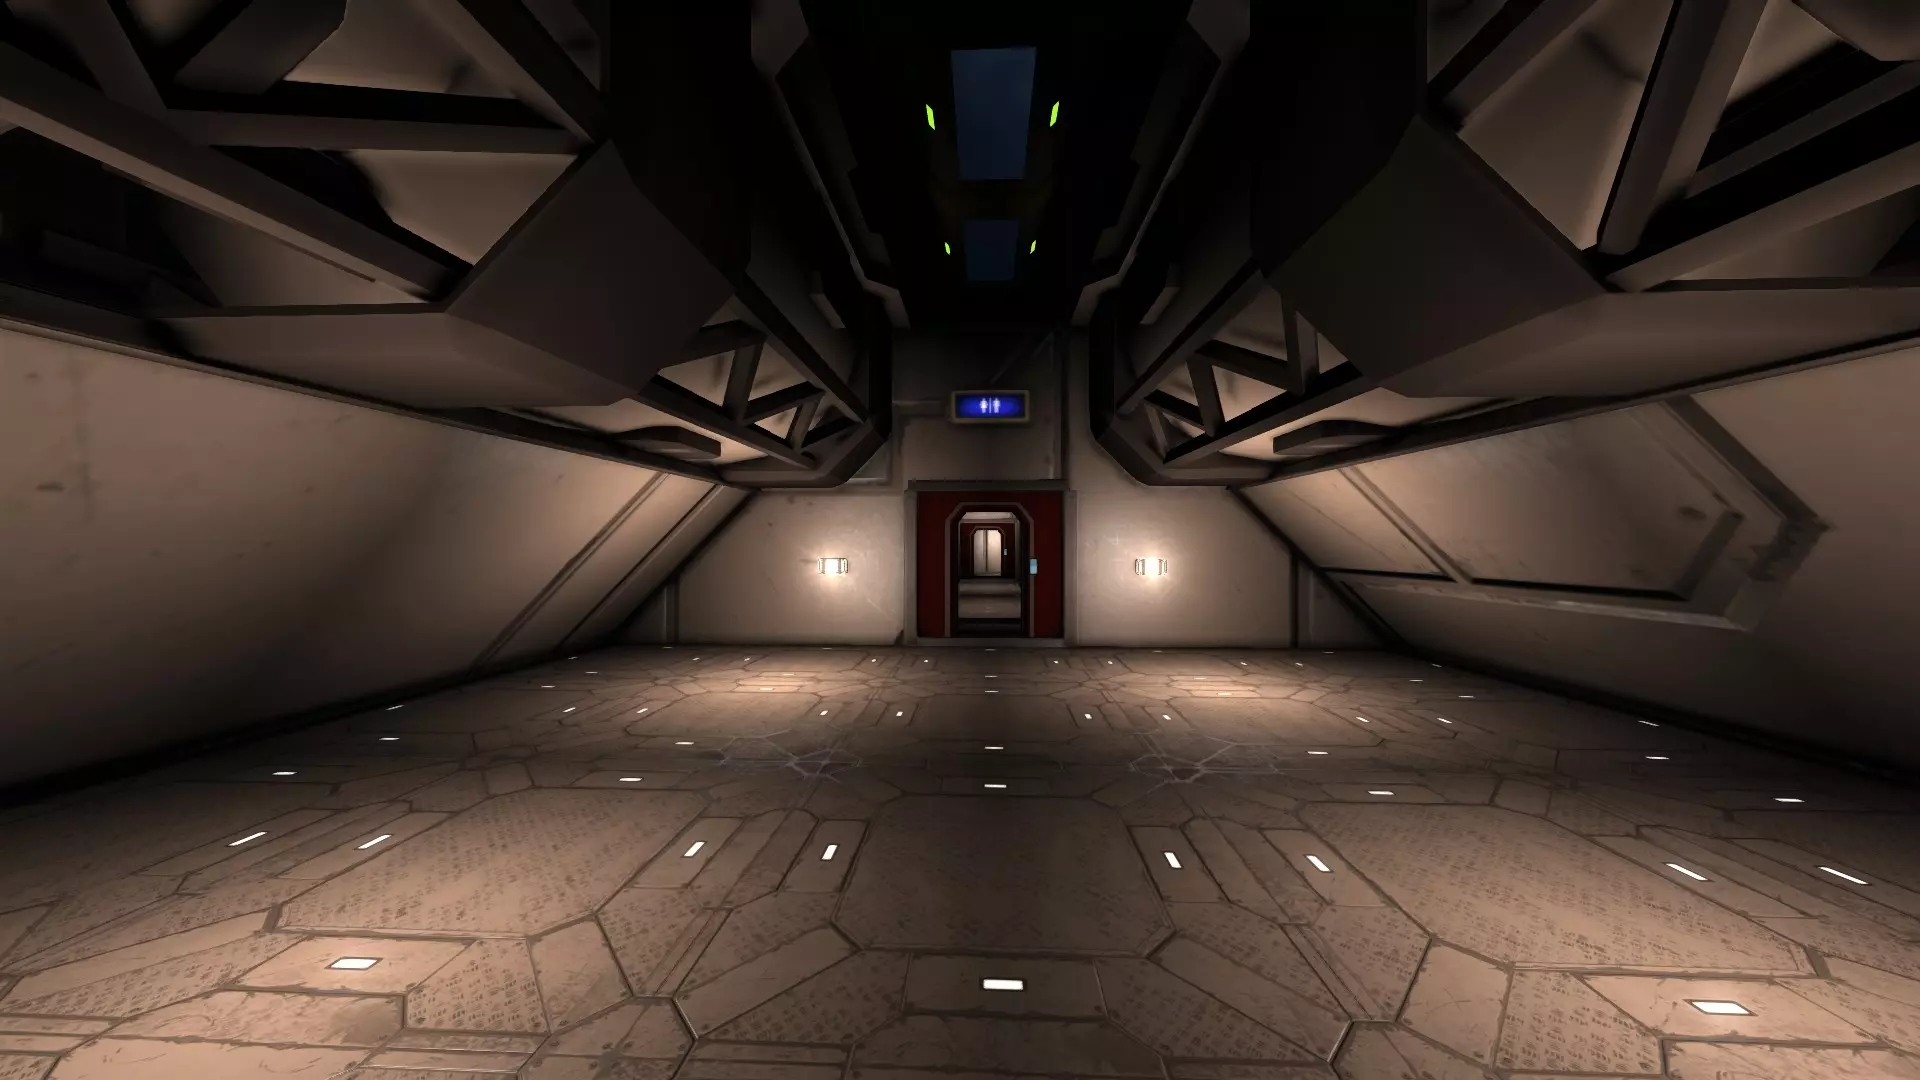
From the same vessel as the above flight bridge, we can now see a separate command centre. This centre is windowless, and is buried deep within the centre of the ship. This is where the crew operate from during combat, with the aid of a CCTV system that allows them to maintain situational awareness. Reactors, gyroscopes & thrusters: other critical flight systems Ship powerplant Your powerplant should be built with the ship's purpose in mind. Ships with lower energy demands may be able to survive on solar power alone, with only backup reactor systems and batteries; warships will generally need several reactors in order to deliver a high power overhead for combat manoeuvres. No matter which power system you decide on, backup systems are a good idea - any moderately sized ship should have at least 30 minutes of battery power in case of systems failure. When building fighters weighing less than 40-50 tons, one large reactor will often be more than enough to deliver your power needs without forcing your ship to be problematically large. Small reactors can also be used, but the more thrust your ship demands, the more you will need to use until the tradeoff between volume and power is no longer viable. There are other guides regarding the optimum reactor setups on the Workshop, and I'm terrible at mathematics, so I'm not going to include one here. Really all that needs saying is that when your cluster of small reactors and associated piping takes up an area approaching the size of a large reactor, just go with the large reactor instead. You'll get more power out of it anyway. While solar and battery power are well-suited to civilian needs, military craft should rely primarily on nuclear energy. Reactors should be well-sited, roughly in the middle of the ship and encased in some kind of heavily-armoured chamber (this is true of all ship types, but especially combat vessels). Exposed reactors, or reactor rooms near the outer parts of the ship, are asking to be destroyed. Small backup reactors and/or battery banks should be placed throughout the ship in case the main powerplant is taken offline, and should provide enough power to run critical control and life support systems for 30 minutes or more. Gyroscopes Like the ship's powerplant, the gyro requirements will vary based on your design's size and role. Small construction ships typically only need a single gyro, as do smaller vessels built on large ship blocks (such as the default lifeboat, or a shuttle). Fighters can often fit redundant gyro systems; my fighters are generally quite small but feature between four and ten gyroscopes with the power settings adjusted accordingly. Don't be afraid to set the power lower than 100% in order to keep your ship controllable, especially if it's a relatively small and light design. Too much gyro power will result in rapid, jerky movement that is difficult to control, makes aiming near impossible, and can cause oversteer that is very hard to counter. On larger ships, it is often necessary to build a great many gyroscopes to provide any useful level of handling. A ship with too few gyros will display little or no roll response unless it is already in motion, a good way of gauging your gyro power needs. As the default gyroscope often needs to be plastered on every available surface to keep large (over 10,000 ton) ships controllable, it may be worth considering some modded parts. Advanced gyroscope mods are available on Workshop at time of writing, providing much more power for a single-cube sized part (the actual model itself is slightly larger than the standard model, with a bracket that allows connection on both ends of its vertical axis rather than just one attachment point). Larger gyroscopes with scaled power outputs are also available. Should you decide to stick with the stock part, you will need to be resourceful in finding places to house your gyro banks. Due to their critical nature and the sheer number you will need, it is imperative to avoid putting them all in one location. Spreading gyro banks throughout the ship can prevent total loss of manoeuvrability due to battle or collision damage. Some ideas for placement include service bays within the actual hull of the ship, spaces between decks, or spaces between hull layers (particularly on double-hulled designs or between armour plates). Thrusters Although as of October 2014 the game does not yet require realistic thruster placement, I like to pair off thrusters to provide a feasible means of manoeuvring in the absence of things like RCS blocks. This also has the bonus effect of built-in redundancy. When placing thrusters, they don't have to be perfectly balanced - they just have to be spaced enough apart and far enough from the centre of mass to be worthwhile. Putting a pair of thrusters bracketing the centre of mass by only one or two blocks isn't going to do be very helpful - remember your basic machines. It's more efficient to put your effort further from your fulcrum rather than closer to it. The size and number of thrusters you will need generally comes down to the size of your vessel and what you want it to do. For straight-line speed, a lot of large thrusters will see you through. For example, when building my fighters, I often put a pair of large thrusters in the back for speed and then add paired or quadded thrusters to every other axis to provide agility. Obviously, the more thrust is available on the other axes, the better turning response will be at high speed. One important note here is that the amount of power a thruster can output is tied to what is controlling it. Player control inputs allow for roughly 66% of thruster power to be used, but the ship's inertial dampeners will use 100% of the thruster's available output. This means that in order to make a tight corner or loop in a dogfight, you should periodically release the controls in order to allow the inertial dampening system to fire and help you "bite in" to the turn. Trying to turn under manual control alone will cause you to skid out along your original velocity vector and simply rotate around your centre of mass. Remember, this is space, not atmosphere - angle of attack has very little meaning here. Thrusters are typically a weakpoint in a ship's armour, and their destruction can have dire consequences. Some larger ship designs alleviate this by simply building the thrusters wholly inside the ship, but although this works ingame, it's always felt a little cheap to me. Other counters could include recessing them into armour plates, or building spaced armour baffles around them. This ensures that only a directly aimed, accurate shot has any chance of hitting the thruster. Vents can also be used (with appropriate standoff to avoid heat damage). Life support and utility systems Atmospherics, ventilation, and air scrubbers Oxygen and pressurisation are here! You can now build basic life support systems into your ship with unmodded parts. It's also possible that we'll see further life support in the future; modders have already added rudimentary food and water processing systems. So, how do you go about incorporating the pressurisation system into a ship? First of all, any access to space should be via an airlock of some sort, to avoid decompression every time somebody opens a door to go on EVA. This is simple enough (in fact, it's probably the easiest thing in this entire guide to do). Don't forget to place a pressuriser in your airlock - you may need to make it a little larger than usual in order to fit, as I've found that the smallest possible airlocks are too small to pressurise consistently. All compartments should be sealed. Even if a block is in place, if its collision model does not fully "seal" the interior from space I like to add another block in front of it or behind it which does, just to be sure. This does seem to be a factor ingame, as merge blocks (which have miniscule gaps around the edges where they're bevelled slightly) seem to prevent compartments from pressurising properly. One of the easiest examples of areas which may need additional attention is conveyor systems. In order to seal these, I simply use an actual conveyor cube as the sealing block while running the pipe in one side of it and out the other. This can get more complicated in smaller ships or with particular blocks, so just play around and see what works. If you can't completely seal a compartment, don't sweat it just yet - you can redesign the compartment to be intentionally unpressurised, or find another way around the problem. Ventilation is not something that is easy to do for smaller vessels, on account of the resolution problem I talked about early in the guide. In these cases, it's easier to just handwave the whole thing - maybe throw an oxygen scrubber in here and there and leave internal doors open to ensure airflow. This could all fall apart if compartments need to be locked down, but beggars can't be choosers. If you're genuinely worried, you may need to compromise by upsizing your design to accomodate a more complex life support system, or build from small blocks to allow more detail in the same amount of space. Larger vessels allow room for conveyor piping or duct parts, which in turn allows for full HVAC (Heating, Ventilation, Air Conditioning) systems. In turn, this allows for the construction of a service system somewhere in the ship, allowing for the control and maintenance of these systems and including components like air scrubbers and oxygen tanks. This should be somewhere safe, due to its critical life support function. These more complex systems can allow for better resistance to damage, but remember that redundancy is still very important. You don't want your entire HVAC system to be knocked out by a single broken pipe. As well as the air scrubbers themselves, you can place additional oxygen storage tanks wherever they'll fit, conforming to your ship's design, perhaps fitting them between hull layers or compartments. Water and waste management Running water, while extremely useful, is a comparative luxury and so does not carry the same importance as HVAC systems. However, large ships with fixed crews will likely find themselves needing some basic crew facilities at the very least. Due to the nature of space travel, water may need to be recycled in order to allow longer endurance and less waste of a precious resource. Again, a systems room with water purifiers and filter systems would prove useful on larger ship types. Food and nutrition Some ships may benefit from food processing facilities, including hydroponic farms. Large farms are most useful on very large ships, while smaller vessels may need only one or two small hydroponic planters to provide some of the crew's food. Traditional kitchen facilities are also useful, ranging from a small crew break room through to a large industrial kitchen. When considering the scale of your food processing facilities, bear in mind the size of your crew, the size of your ship, and the expected duration between port visits. Medicine and surgery Similarly, medical facilities should be scaled based on the size of ship and crew, as well as the expected mission. Warships will need much more capacious and well-equipped hospitals than a light civil vessel, for reasons that should be obvious. It's always better to have something and not need it than the reverse, but at the same time, having a hospital with every machine under the sun and beds for 50 in a small industrial vessel or transport with a crew less than 500 is lunacy. Due to their nature, medical bays are one of those things you'll want to keep safe, towards the centre of your ship - putting it moderately close to your command centre is decidedly not a bad idea. Very large ships may even benefit from multiple medical bays, spread throughout the ship. As well as providing the ever-important feature of redundancy, this also ensures that the time required to get treatment is kept to a minimum no matter where on the ship disaster happens to strike. Cargo containers, factories, connectors & modular utility mounting clamps Cargo containers - fuel & ammunition Due to the important nature of these containers, it is a good idea to have redundancy. Spreading multiple containers throughout different areas of the ship can provide a large capacity for both critical supplies, while ensuring that you do not lose everything to one well-placed shot. Mixing container size can be a good idea, too - instead of having to set aside large spaces for large cargo containers, you can have a few large containers and a lot of small containers scattered throughout the ship as conformal fuel/ammunition tanks. Keeping at least some of these containers shielded by heavy armour or buried deep within the ship is a sound idea, as it guarantees you will always have at least some fuel and ammo even if your other containers are destroyed in combat or a collision. Cargo containers - high value High value cargo containers that are likely to be targets of piracy should be kept within the ship's inner hull, and may even need to be piped up to a separate network. Using a manually-controlled connector "switch" to hook the high-value containers into the main cargo circuit may be possible for larger ships, and can prevent the accidental loss or deliberate theft of precious cargo through the normal system. Cargo containers - low value These can be scattered throughout the ship in any available space, or stored between double hulls if space is at a premium inside. Due to their low-value nature, these containers can be permanently connected to external access ports (such as connectors or collectors). Crew storage Crew storage can be either hooked up to the main conveyor system (as a form of "mailing chute") or isolated throughout the ship (for personal items, weapons, tools, and the like). Some external cargo containers providing tools and small arms ammunition may prove useful for crew members partaking in EVA, but remember that cargo containers are not armour - be sparing with these external containers, or place them behind armoured baffles. Factory systems For purpose-built factory ships, it may be useful to isolate some containers in the same manner as the high-value containers described above. This can prevent the ship's factory machinery from pulling excessive resources from cargo storage or filling the cargo containers with components in a disorganised fashion. However, this option is unnecessary on smaller ships or ships which do not have large processing facilities, and may also be made redundant by automatic sorting systems. Connectors & collectors As a general rule, connectors should be in easy-to-access places on the outside of the ship, or inside hangars on the ship. Collectors are best used in pits, either with a single collector set at the bottom of a slope-sided hopper chamber or a bank of collectors set into a flat surface. For obvious reasons, an active gravity field should cover the area of the collector, to avoid loss of resources into space. Access points connected to systems of high importance such as fuel, ammunition, or valuable cargo storage should be concealed or covered over by articulated armour hatches, allowing access only when needed. Another possibility is to leave these systems uncovered, but provide adequate defensive firepower and camera systems around them. Merge blocks & their uses for utility attachments One of the more practical uses for merge blocks is the creation of modular sections or tool rigs for ships. Placing merge blocks at sensible locations around the ship can allow for the building of rigs for grinding or welding, or even mining. Merge blocks can also provide anchor points for modular sections, meaning you can build a ship that is little more than a command and control centre, reactor, and engines and then hang sections from this frame that incorporate cargo systems or additional living space. Just remember that when a merge block deactivates through damage or destruction, it may cause the merged module to break away - use more than one block for anchoring large modules. Weaponry - offensive, defensive, deterrent measures Offensive weapons - large ships Large ships provide an excellent basis for diverse weaponry. In addition to actual weapon blocks (such as turrets, fixed gun emplacements, missile and torpedo launchers, and so on), many players have devised weapons of their own for capital ship combat. Most commonly, this takes the form of a gravity cannon - similar to a railgun, but using gravitational fields rather than magnetic fields in order to accelerate a projectile. Because this weapon is limited only by the available construction and power resources of its designer, gravity cannons are often built to immense sizes, launching projectiles that weigh many thousands or even tens of thousands of kilograms. More sophisticated designs often include some form of automatic loading mechanism. However, gravity cannons have some disadvantages. Due to their relative size and complexity, they are often ineffective on smaller ships, causing the design of the vessel to blow out in size and mass until it is no longer economically sound. Depending on their size and power, they can also disturb or be disturbed by the gravity field of the ship itself, necessitating one or the other to be switched off when not in use. This vulnerability to interfering gravity fields also renders these weapons almost totally ineffective when fired at ships which employ a form of gravity shielding, and can cause well-aimed rounds to dip away from a target as they enter its gravitational influence. This can be countered in turn by increasing the complexity of the projectile so that its artificial mass is deactivated at a safe "arming distance", but this in turn requires more time and resources to be sunk into single-use ammunition. Another form of gravity weapon is the gravity torpedo. Due to the potential for immense acceleration and motive force provided by gravitational fields, these are less like traditional naval torpedoes and more like extremely high velocity kinetic weapons, spearing through a ship and ripping it apart as the ship's own gravitational field acts on the torpedo's artificial mass. Again, however, these are sensitive to gravitational fields and can be easily thrown off-target. They also need to be very large and heavy to achieve worthwhile damage output, making them less useful in combat and perhaps better suited for a coup-de-grace on an already crippled capital ship. Moving away from gravity weapons, more conventional solutions are available than ever thanks to the efforts of modders and new features added by KSH. As well as pre-made turret blocks, often with inbuilt AI control as per the stock turrets, players can build their own heavy armament turrets using fixed weapon mountings and rotor and conveyor systems. These turrets are generally quite bulky compared to their modded counterparts, but can provide heavy firepower in a well-protected package, having much better potential survivability than single-block parts. Thanks to programmable blocks, we can also build centralised fire control systems, like those of a World War II warship. Instead of controlling each turret individually, you can build an (unarmed) fire director tower on a portion of the ship that has good visibility in as wide a field as possible - thanks to the three-dimensional nature of space combat you may need one on both the top and bottom surfaces of your ship - and then use this director to control azimuth and elevation inputs of all weapons at once. This was previously only possible through bulky and easily-damaged mechanical linkages. In either case, the centralisation of fire control and superior survivability of manually-built turrets makes them an excellent choice for long-range offensive weaponry. More traditional torpedoes and guided missiles are also a potential course of weapons development, allowing for precise, long-range delivery of enormous explosive payloads. [to be continued] Offensive weapons - small ships Defensive weapons - large ships Defensive weapons - small ships Deterrent measures - large ships Deterrent measures - small ships Camouflage, concealment & deception measures: part I The best way of avoiding attack is to avoid detection altogether or, failing that, to make engagement so difficult and frustrating for your enemy that he abandons his pursuit in favour of an easier, more obliging target. There are several ways of doing this. We'll look at four main methods. Camouflage paint Sounds simple enough, right? We're in space, just paint the whole ship black! ...Actually, that would not be the best of ideas. The purpose of camouflage is to trick an observer into not seeing something by breaking up the outlines, colours, reflections and textures that allow us to identify objects. Painting something the same colour as the environment is a start, I guess, but we can do better than that! Right off the bat, the first problem with one-colour "camouflage" is that you aren't doing anything to break up the distinguishing visual features of an object, you're just making it slightly harder to see against the background. The ship will still reflect sunlight in a distinctive shape, it will still have a clear silhouette against backlighting or different coloured objects, and it will still have a distinctly metallic texture. If you look at modern military camouflage, there are often two to six colours involved and many different patterns and shapes, too. Camouflage schemes are extremely diverse and vary in effectiveness, but the general idea is the same: to break up the outline and colour, and possibly texture, of an object. Looking at real-world examples can help you devise a scheme, but simply trying to replicate a pattern as you see it on the internet isn't foolproof. Test your camouflage, and play around until you feel you have an effective pattern. Grab some friends to help you test it - ask them to try and find the camouflaged ship without telling them where exactly it is, only the general area to look. There are many tricks you can emply to enhance the effectiveness of your camouflage paint, and many of these were inspired by nature. Countershading can be seen on birds and sharks - a dark colour on top and a light colour on the bottom can make something appear two-dimensional, making it difficult to see against certain backgrounds. Historical human examples include the countershading used on some WWII German aircraft and British tank crews' attempts to make Sherman Fireflies appear to be regular Shermans from a distance. Similarly, use of contrast can help break a silhouette. Light areas with dark shapes running through them can make it difficult to perceive a straight edge, or can be used to make a corner disappear. You can also use this to force somebody to notice a certain part of your ship but not another - hiding weapons, doors, or other likely targets in plain sight.


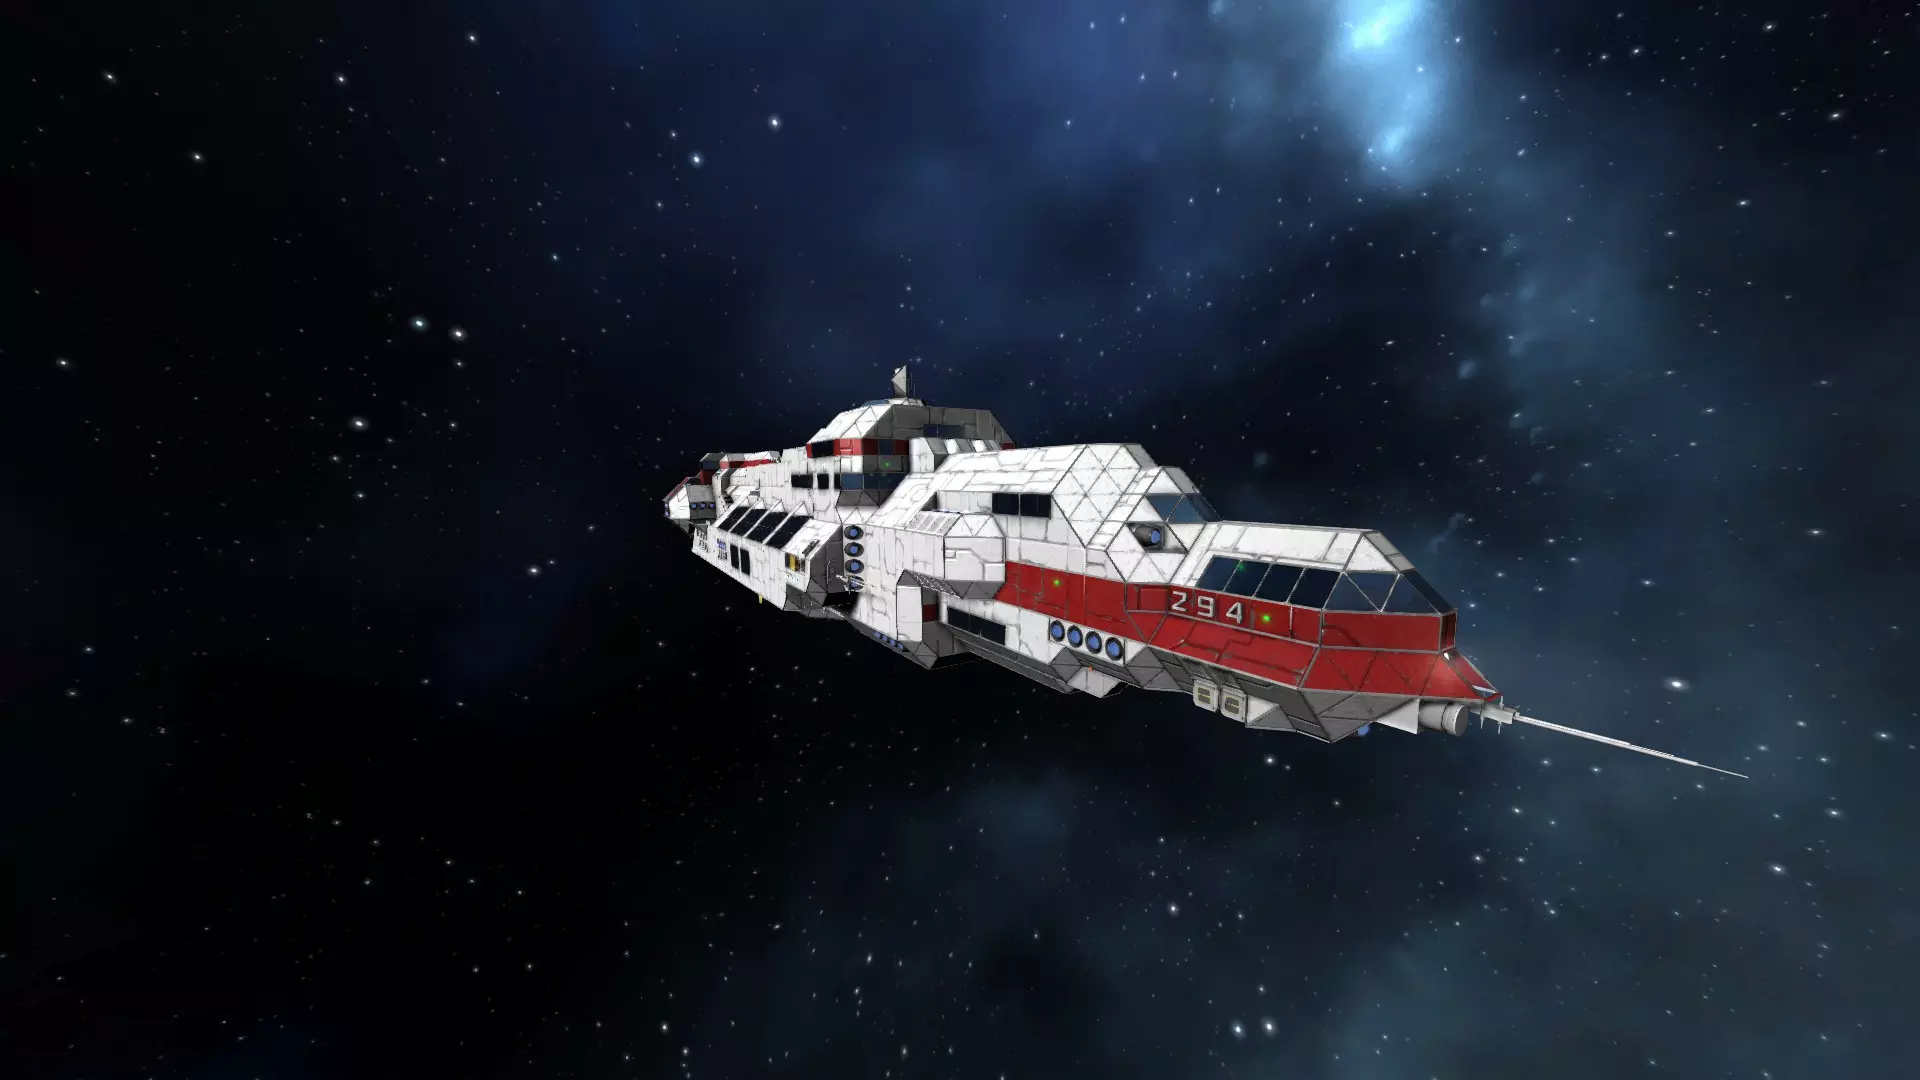
这款战斗机采用白、浅灰、中灰、黑四色迷彩图案,近距离时可能会被发现,但在远距离则完全消失,看起来就像一团星星,或是一块扭曲的太空碎片。 记住,迷彩并非总是为了不被看见——有时恰恰相反!“炫目迷彩”在第一次世界大战期间的军舰和商船中颇为流行(部分案例甚至延续到了二战)。这种迷彩运用大胆、对比鲜明的色彩和奇特的抽象形状,使得舰船容易被发现,却难以被识别。实际上,它甚至会让观察者难以判断舰船的行进方向以及相对自身的航线。这在躲避登船或重力抛射物时尤其有用。 伪装、隐蔽与欺骗手段:第二部分 隐蔽 有时候,花哨的涂装并不足以隐藏你的飞船。或许你正被海盗追击,或者误入了一个涂装效果不再理想的区域。没关系!只要附近有恒星和/或小行星或残骸,你就还有办法。 空战中最古老的技巧之一就是躲在太阳里(并从太阳方向发起攻击)。这意味着将你的飞船直接置于敌人和太阳之间——敌人看不到你,因为直视太阳是个非常糟糕的主意,而且往往会对人类视网膜造成不良影响。就算他真疯到要尝试,阳光也太过刺眼,光线会在你周围“溢出”,模糊你的轮廓——想想早期HDR技术刚出现时的效果,你走到户外,屏幕上的光晕严重到让你根本看不清画面。现在的情况和那差不多,只是规模更大。不过要记住,你离敌人越近、你的飞船体积越大,这种效果就越差。大型飞船或离观察者很近的飞船会挡住阳光,而不是被阳光掩盖。


利用附近的恒星进行隐蔽可能非常有效,但这在很大程度上取决于你的飞船大小以及与观测点的距离。与大多数伪装形式一样,你离敌人越远,隐蔽效果就越好。 阴影可以通过多种方式用于隐藏。完全处于阴影中就是一种方法,其效果取决于阴影的类型。 投射阴影(例如,躲在小行星的远端或漂浮的废船后面)在紧急情况下很有用,但其效果取决于投射阴影物体的大小、光线的角度和亮度,以及你自身的位置。注意,光线可能会照亮你的飞船边缘或小行星边缘,形成明显的轮廓,即便飞船本身无法被直接看到,这个轮廓也可能被察觉。

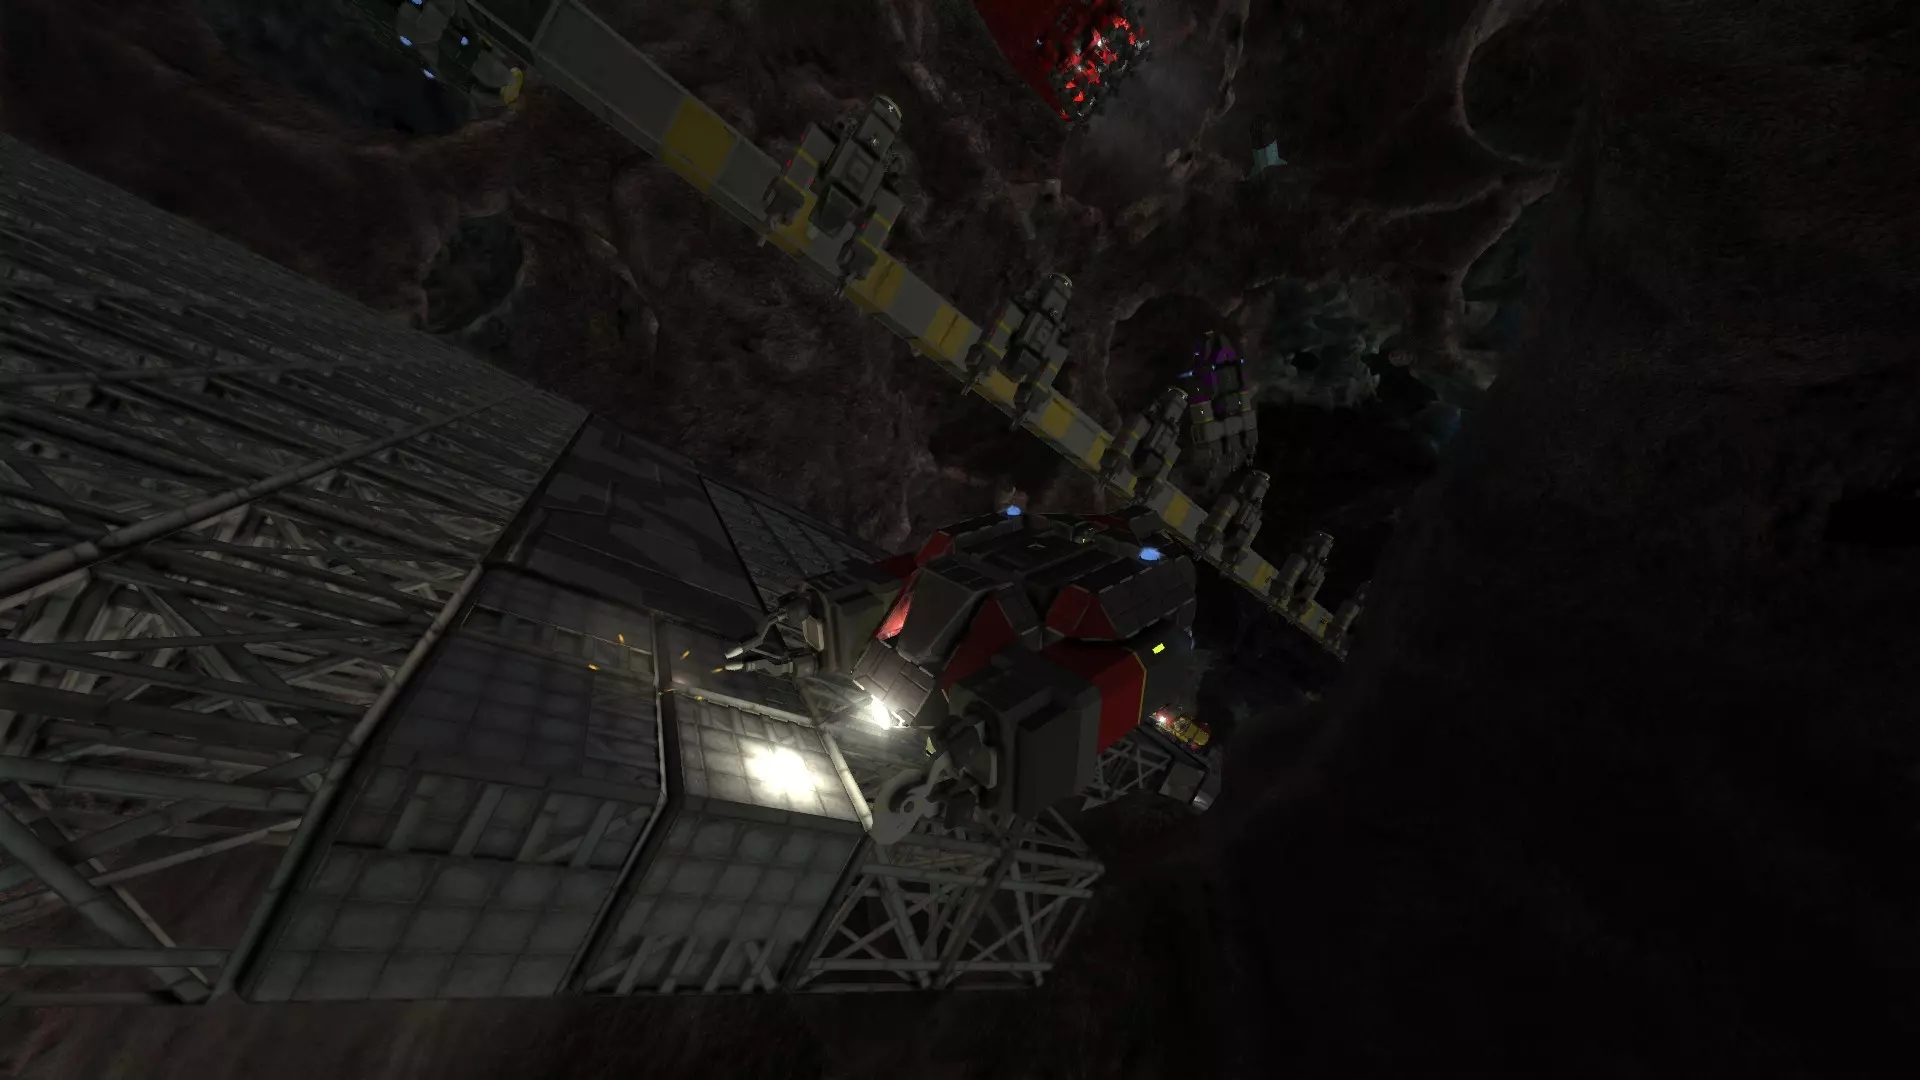
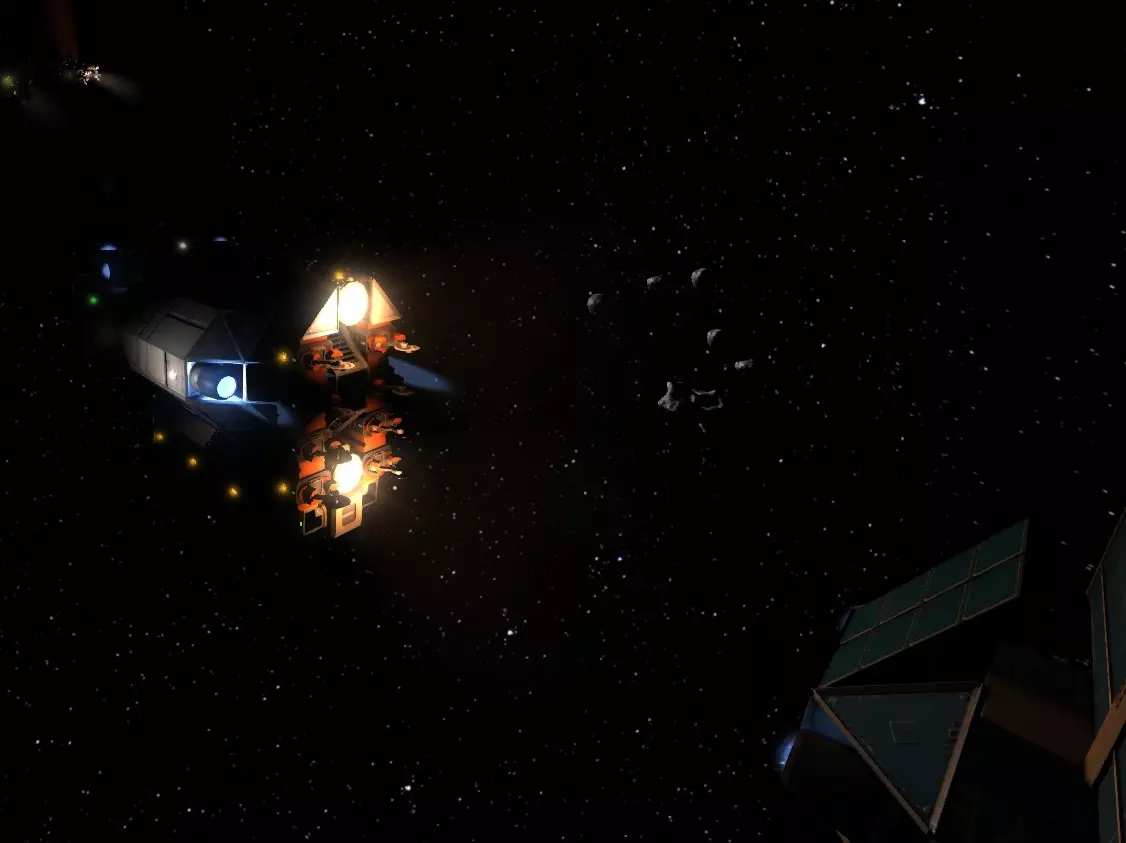
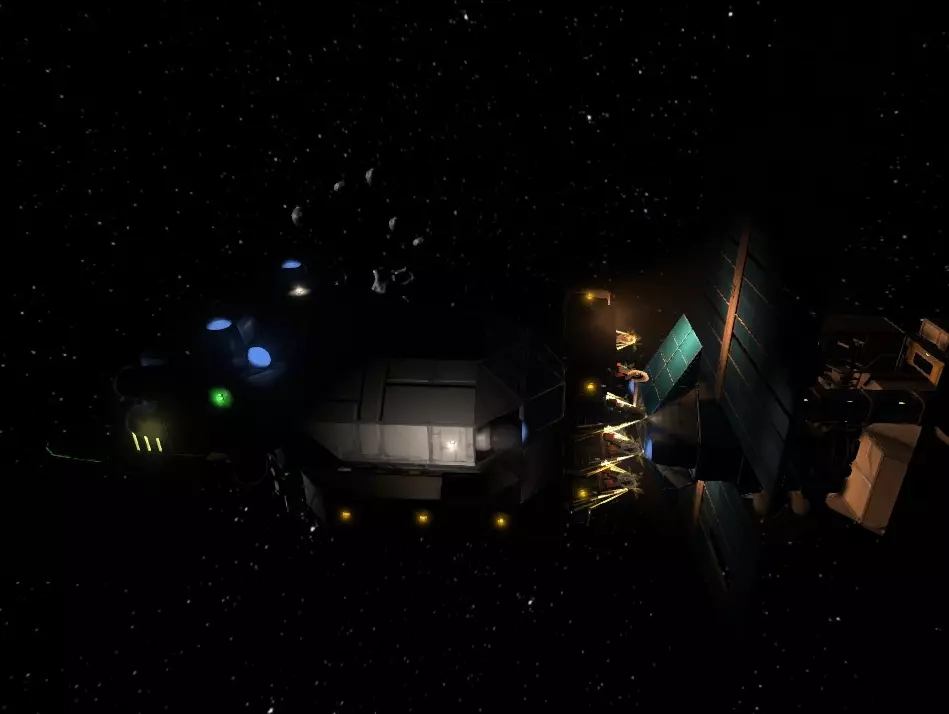
投射阴影示例:我的小行星基地之所以能被清晰看见,是因为周围飞船的航行灯和引擎。而飞船本身几乎漆黑一片。 **封闭阴影(隐藏在物体内部,例如废弃飞船或洞穴中)是更好的隐蔽方式,因为你能完全屏蔽外来光线。只要有选择,就应优先选择封闭阴影。** 除了单独利用光线或阴影外,你还可以将两者结合使用。通过只让飞船的特定部位暴露在光线下,有助于破坏其轮廓,或营造出飞船体积更小、未装备武器的假象。例如,你可能想在武器上投射阴影,以掩盖自己并非无助的民用货船这一事实;或者,你可以尝试用阴影将飞船“分割”成两半,使其看起来比实际更小。你也可以隐藏在深色阴影与强光的交界处来迷惑他人——这种强烈的对比度几乎让人什么都看不见。 重要提示:注意你飞船的光信号。从窗户、通风口或敞开的门透出的内部灯光可能会暴露你的位置。推进器在相当远的距离外就容易被发现,即使看不到飞船本身,它们也能让人轻易判断出飞船的大小和形状。输送机、合并方块和连接器上都装有灯光,即使飞船完全断电也无法关闭,所有带键盘的方块亦是如此。信标显然是个明显的暴露源。虽然门键盘和连接器校准灯在几百米外可能不易被察觉,但较大的光源则不然。如果你需要隐藏,应尽可能关闭产生光源的系统。对于专门建造的隐形舰船,可以考虑遮蔽所有发光方块(例如,在推进器喷口上安装通风口,或在门周围建造金属板环)。

灯火管制对于在阴影中隐蔽至关重要。 重要提示:由于《太空工程师》当前的阴影渲染方式,即使在最高设置和深色天空盒下,远处物体的向阳面仍会显得明亮。因此,躲在阴影中对附近的追击者最为有效。 物理伪装:欺骗与拟态 那么,你想全力以赴吗?很好。现在让我们来看看物理伪装——即在飞船上实际放置物品(而非涂料)以破坏其外形或将其伪装成其他物体的做法(这种做法被称为拟态,在动植物界都很普遍)。虽然你可以使用涂料来改变飞船的轮廓和纹理,但在飞船外部以能反光或投射阴影的方式粘贴一些随机杂物,效果会更好。不过,这需要付出其他代价——它会使你的飞船变得沉重且反应迟缓,可能会限制武器的射界,还会妨碍停靠。你甚至还会面临一个非常真实且极其尴尬的风险,那就是分不清自己飞船的首尾。 而拟态则能让你保留更多功能。本质上,你需要将另一艘飞船的外观当作“面具”来使用——例如,让你的贸易袭击舰看起来像一艘采矿平台,或者让你的贵重物品运输舰看起来像一艘护卫舰或驱逐舰。你能在多大程度上做到这一点取决于你自己——从简单地在飞船周围建造一个空心外壳,到实际将你选择的伪装特征融入飞船本身。只需记住,这种伪装的效果会随着距离的缩短而迅速减弱。与威胁保持一定距离,以免你的伪装被识破。 规划物理伪装和欺骗时,最后一个需要考虑的要点是使用可伸缩盖板隐藏飞船的各个部件。这可以通过使用转子和一些板材来形成盖板或屏障,以隐藏武器、对接端口,甚至是可用于快速逃离的额外冲刺推进器。发挥你的创造力吧!生活区 - 舒适设施与空间高效利用 人体工程学 随意摆放物品是不可取的。要考虑船员取用物品的便捷性。不要将办公桌放在走廊中央,而应靠墙或放在角落。需要频繁操作的系统应放置在显眼且易于访问的位置。不太重要的系统可以移到次要位置,例如侧室、 crawlspaces(检修空间)或墙体内部。同时要考虑飞船的移动——除非有栏杆,否则应避免设置较大的落差或楼梯,以防突然转向导致人员或物品从边缘滑落。支撑梁或支柱应尽可能以不显眼的方式放置——尽管其用途通常意味着它们必须放置在舱室中央附近,但也要想办法让它们兼具功能性。可以考虑在较大的支撑梁上添加控制台,或者将走廊向外凸出,以确保其周围有行走空间。 区域照明应根据其用途来设置——工作区或娱乐区需明亮,睡眠区则应较暗。战斗岗位应使用彩色灯光而非白光照明(现实中最常用红色,但也可见蓝色或绿色),以避免亮度差异过大造成不适。记住光的作用原理——如果要用红色灯光照亮房间,那么蓝色的物体看起来会呈黑色。按钮面板可用作电灯开关,操作便捷。
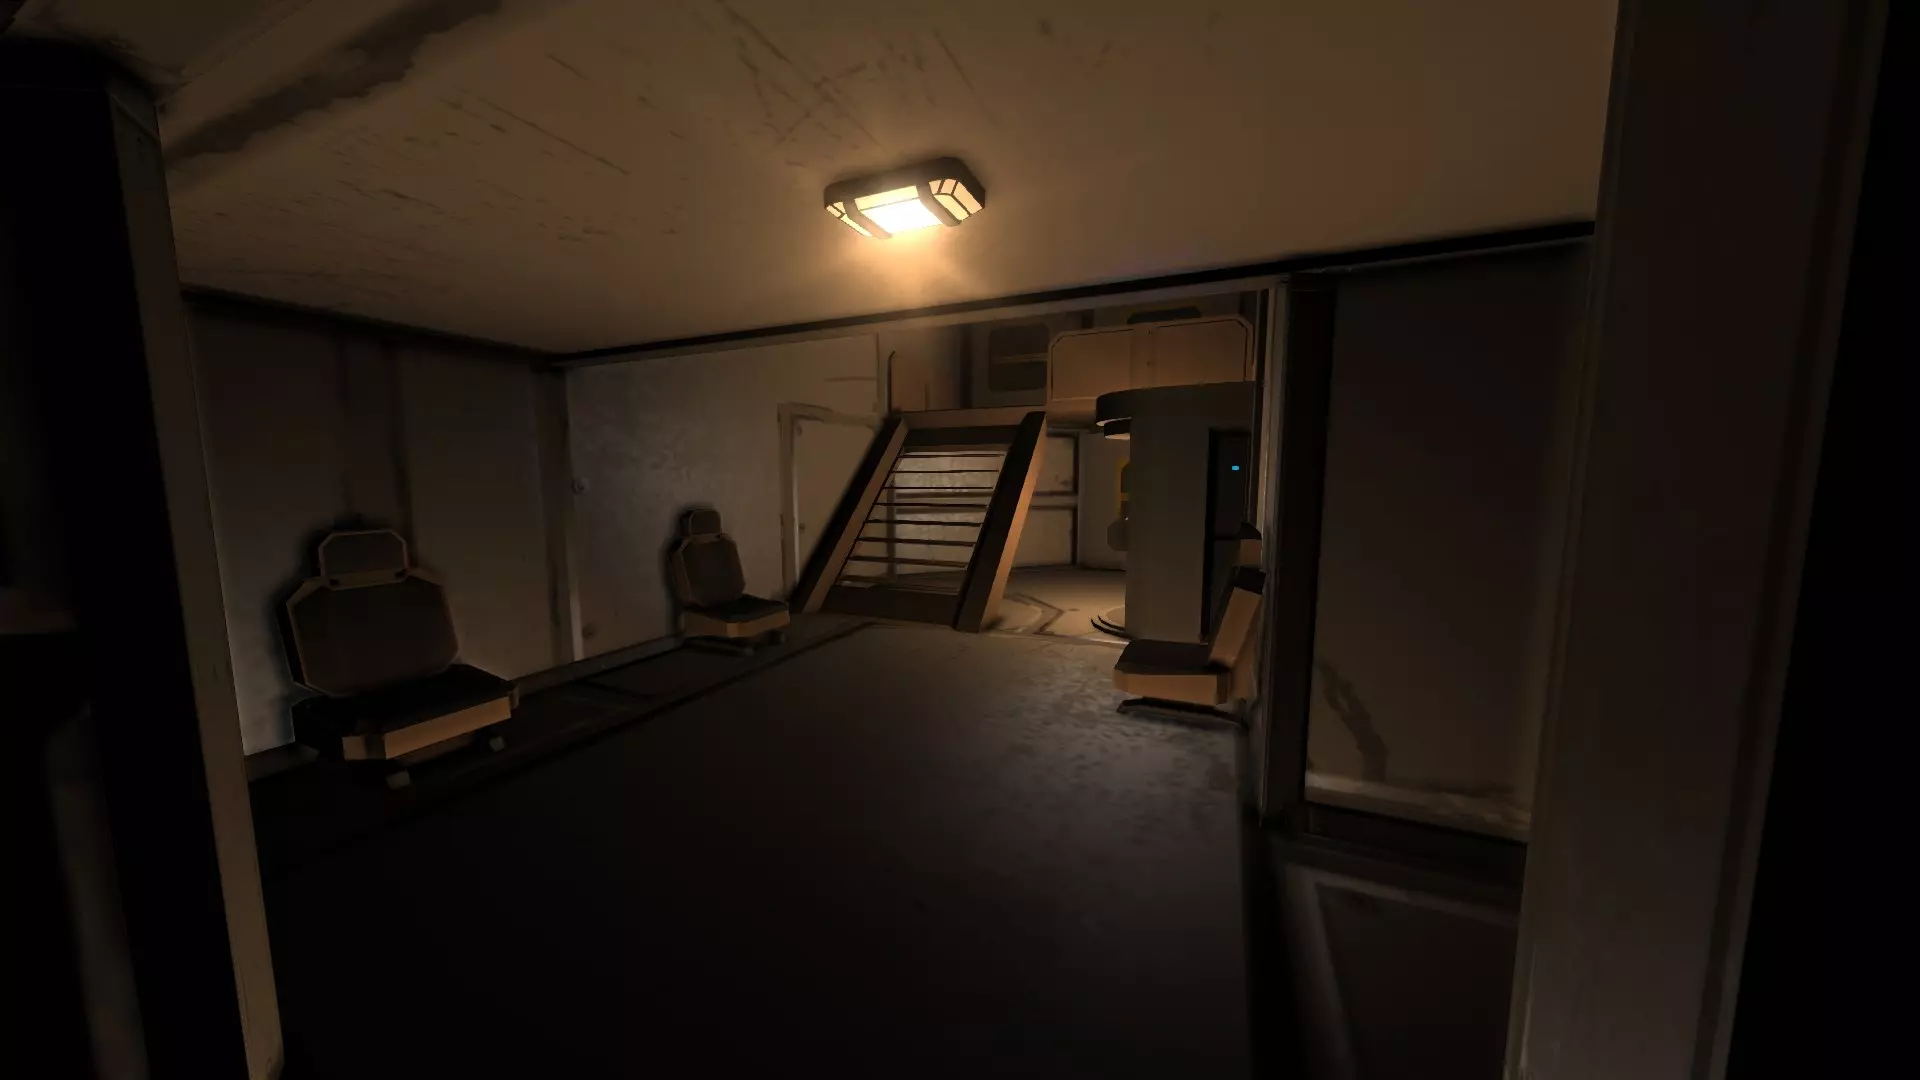
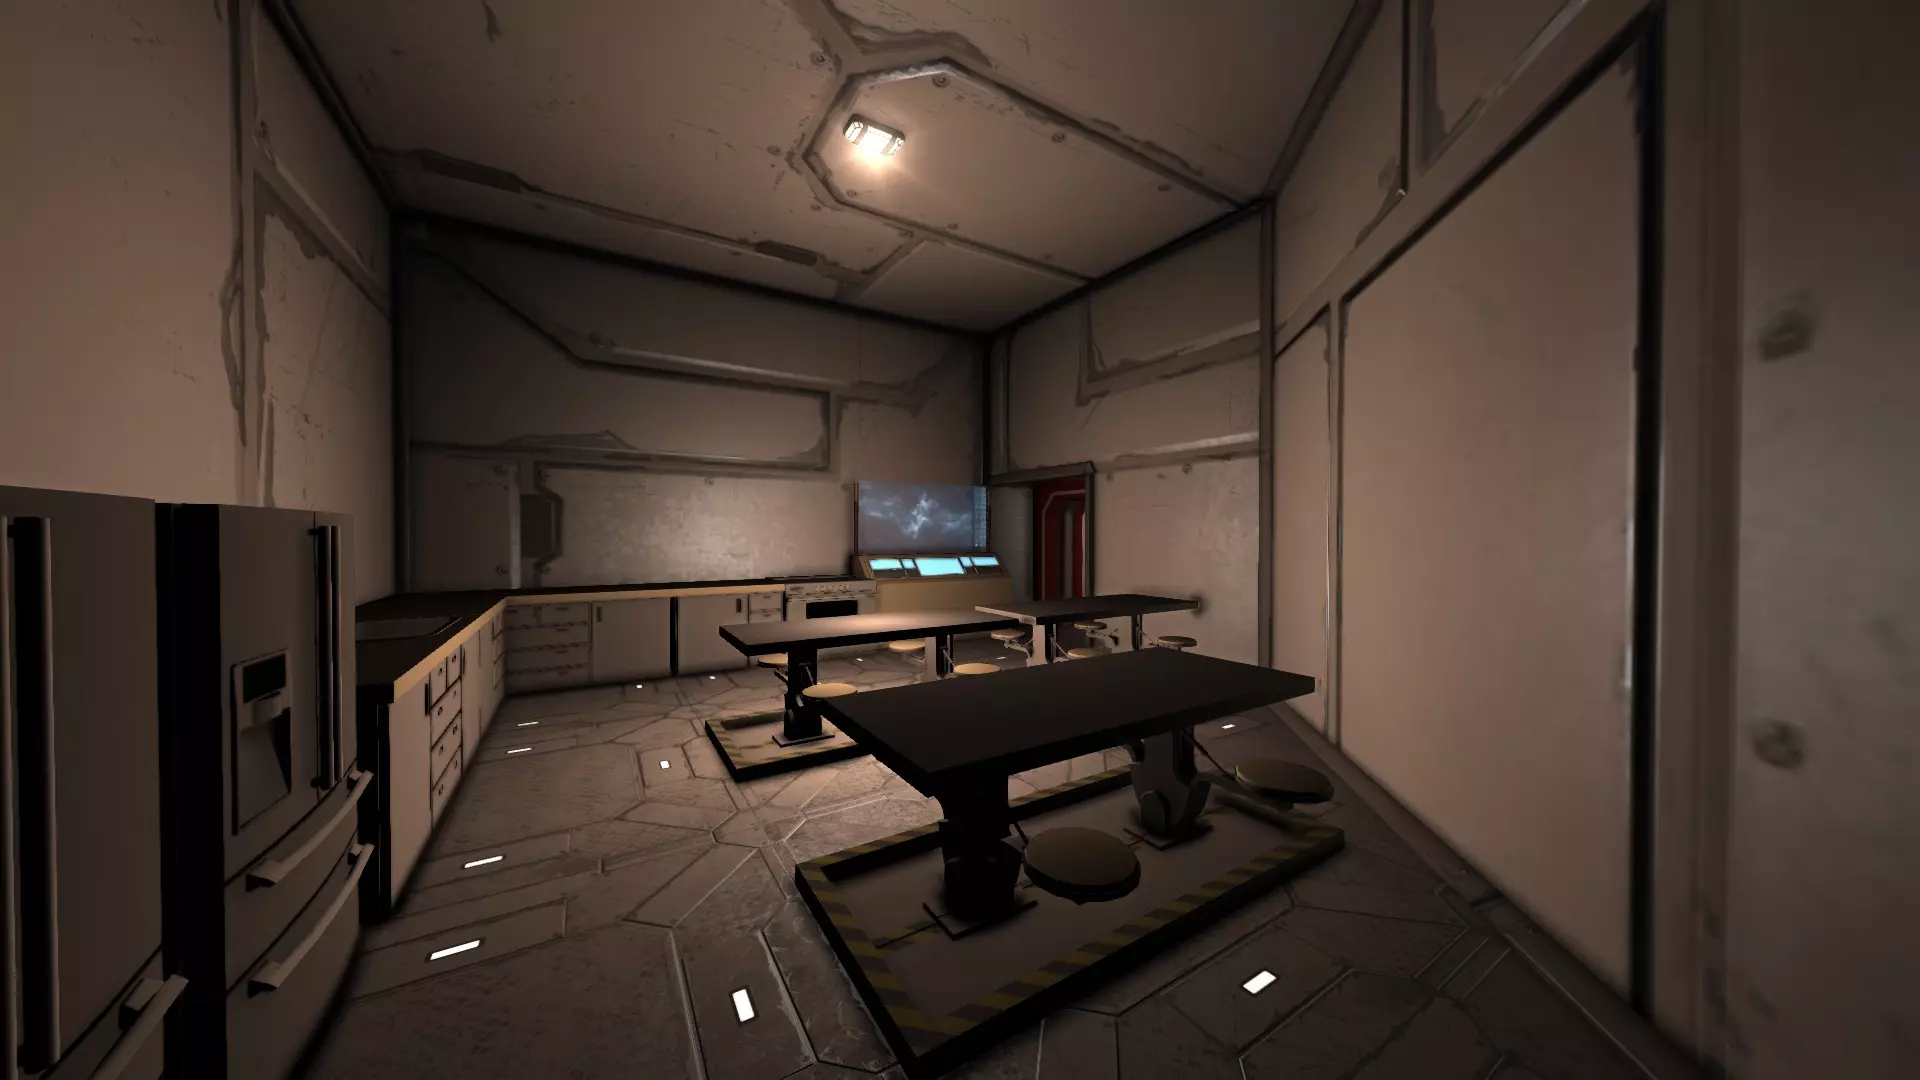
使用彩色灯光照亮气闸舱,不仅能提醒船员不要一次性打开所有舱门,还能帮助他们从漆黑的太空环境过渡到光线明亮的飞船内部。 空间注意事项 - 尽管你需要为船员考虑,但过多的闲置空间肯定是不可取的。试着让闲置空间发挥作用——比如添加办公桌、显示器,或者娱乐设施。 - 尽量避免过长的走道,舱室大小应刚好满足其预期功能,并留有少量富余空间。 - 注意避免杂乱。虽然为了在空间和功能之间取得良好平衡,你可能需要将许多物体放置得较为紧凑,但要确保留有足够的活动空间。
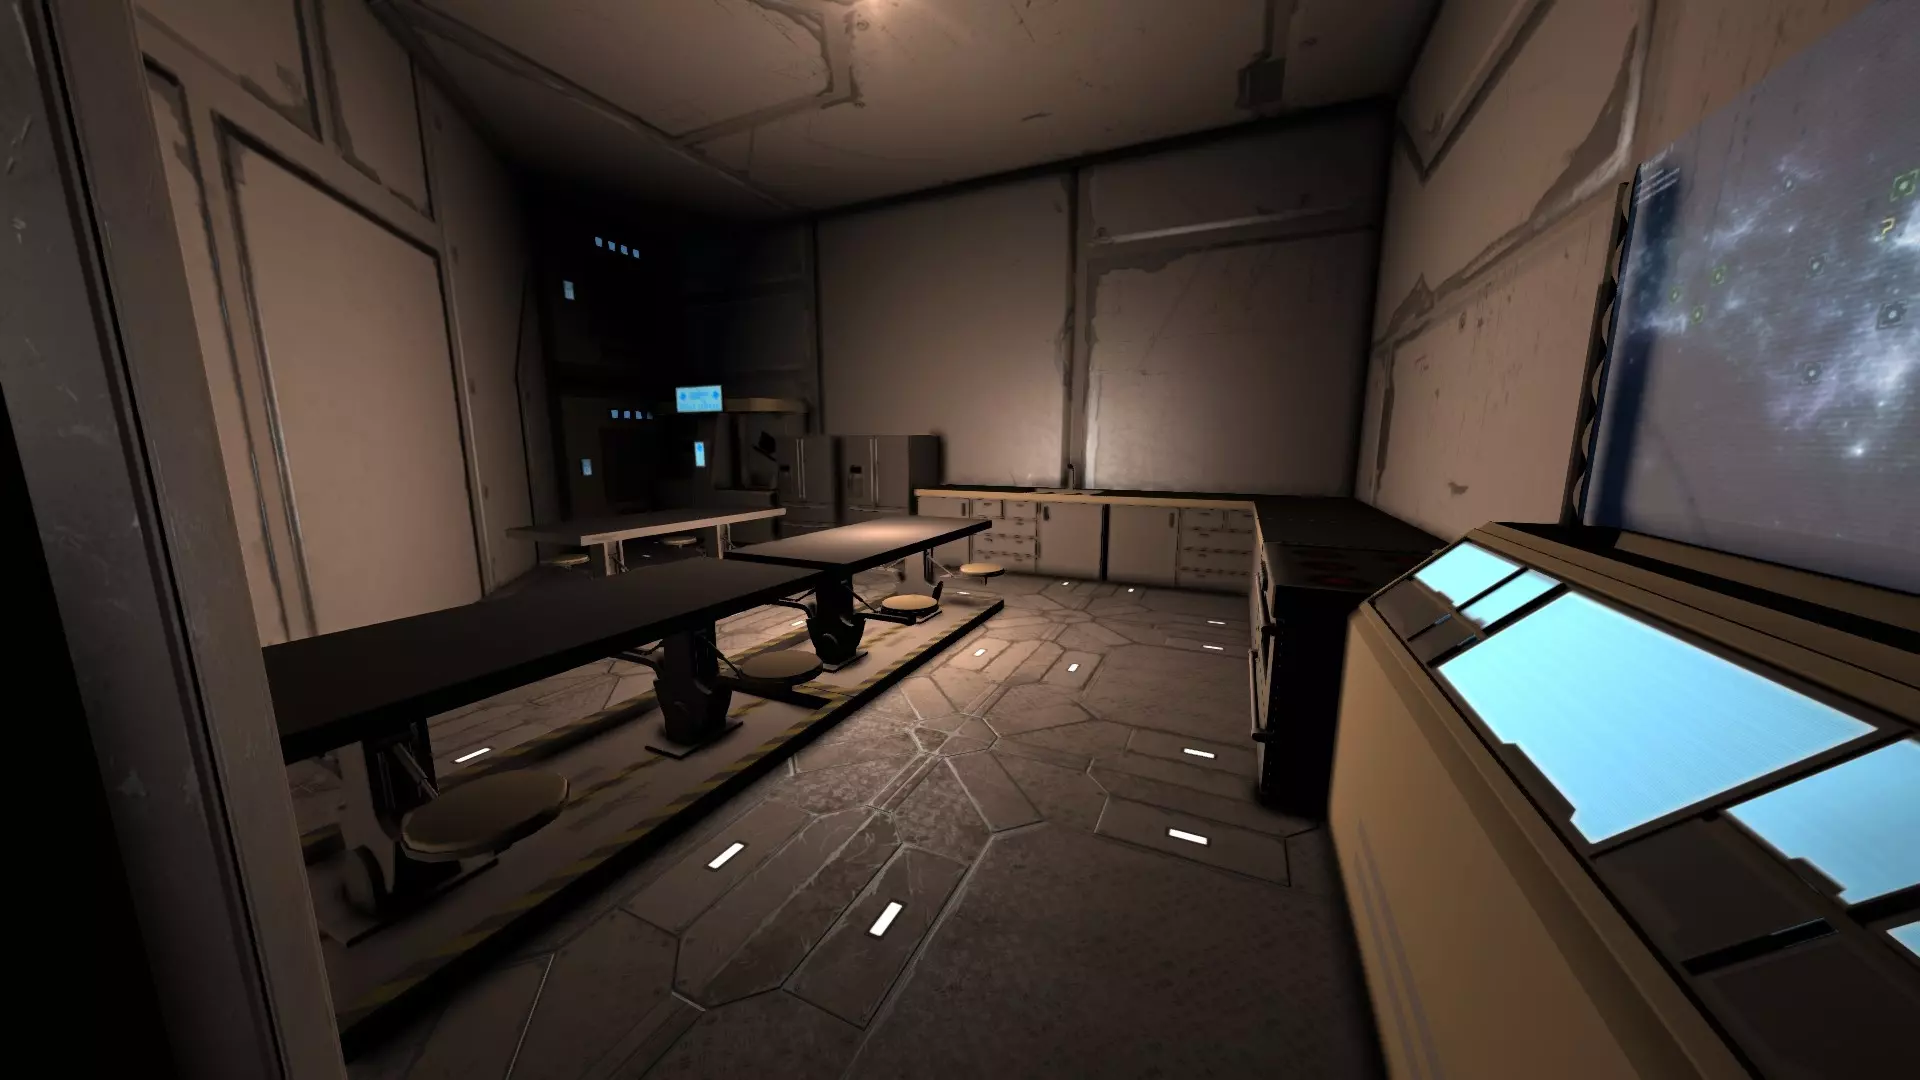
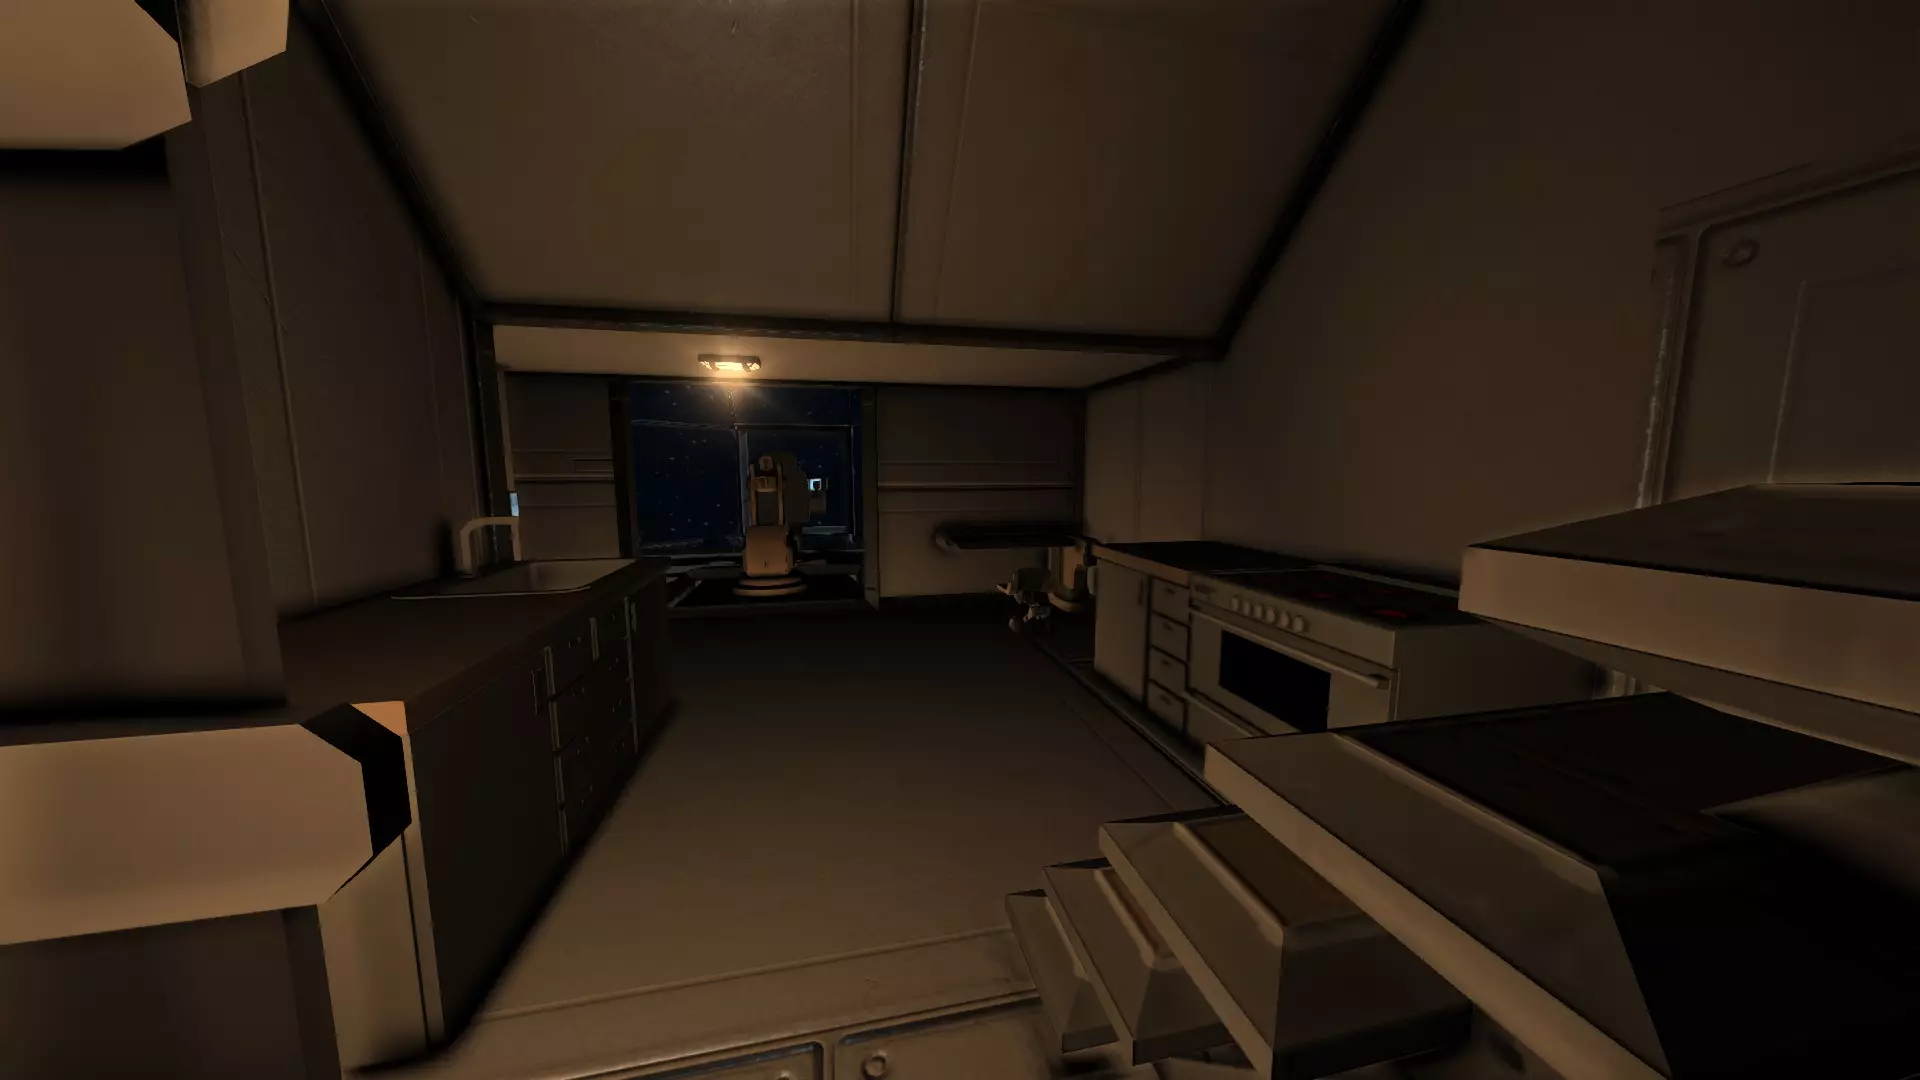
这艘舰船的食堂允许自由通行,同时占用的舰船内部空间最小。 由于从碰撞模型改为边界框方块编辑,在狭小空间内建造可能会很困难,而且现在必须在放置物体前完成涂装,因为无法再绕着物体进行涂装。我希望Keen能实现一个在两种建造模式间切换的选项,但在此之前,这是你需要注意并解决的问题。
这两个房间大小几乎相同——船员宿舍隔间的天花板略高一些。 让你的飞船更具(或更缺乏)家的感觉 改变飞船内部氛围最简单的方法之一,就是在精致与实用之间找到平衡。如果你不确定我指的是什么,可以想象一下邮轮与驱逐舰的内部、军用直升机与民用直升机的内部,或者老式可靠的路虎与豪华SUV的内部对比。 军用、警用或纯工业用途的飞船往往会暴露机械或框架,几乎不会费力去隐藏这些杂乱的内部结构。任何内部配件本质上都将是简朴的,会被尽可能塞在最合适的位置,同时避免妨碍通行(这一点与我之前提到的人体工程学方面有部分重叠)。 相比之下,太空客轮、穿梭机或更豪华的商用飞船预计会将机械装置完全隐藏起来,设备间则通过隐蔽的维修通道进入。这类飞船优先考虑舒适性、安全感和奢华感,而非实用性,因此物品的摆放会更注重美观和人体工程学,而非尽量节省空间或材料。 尽管上述两种极端情况都是完全可以接受的,但也可以尝试在两者之间寻找折衷方案。或许你的飞船为军官配备了奢华的生活区,而为普通船员准备了简陋的铺位。或许你的飞船会遵循实用至上的设计原则。我最喜欢的工程学杰作之一便是“喷火”战斗机(Supermarine Spitfire);它拥有优美的外形,且这一外形不仅没有对其性能造成负面影响,实际上正是其卓越性能的成因。这个世界充满了各种妥协!你的飞船又为何能成为例外呢?

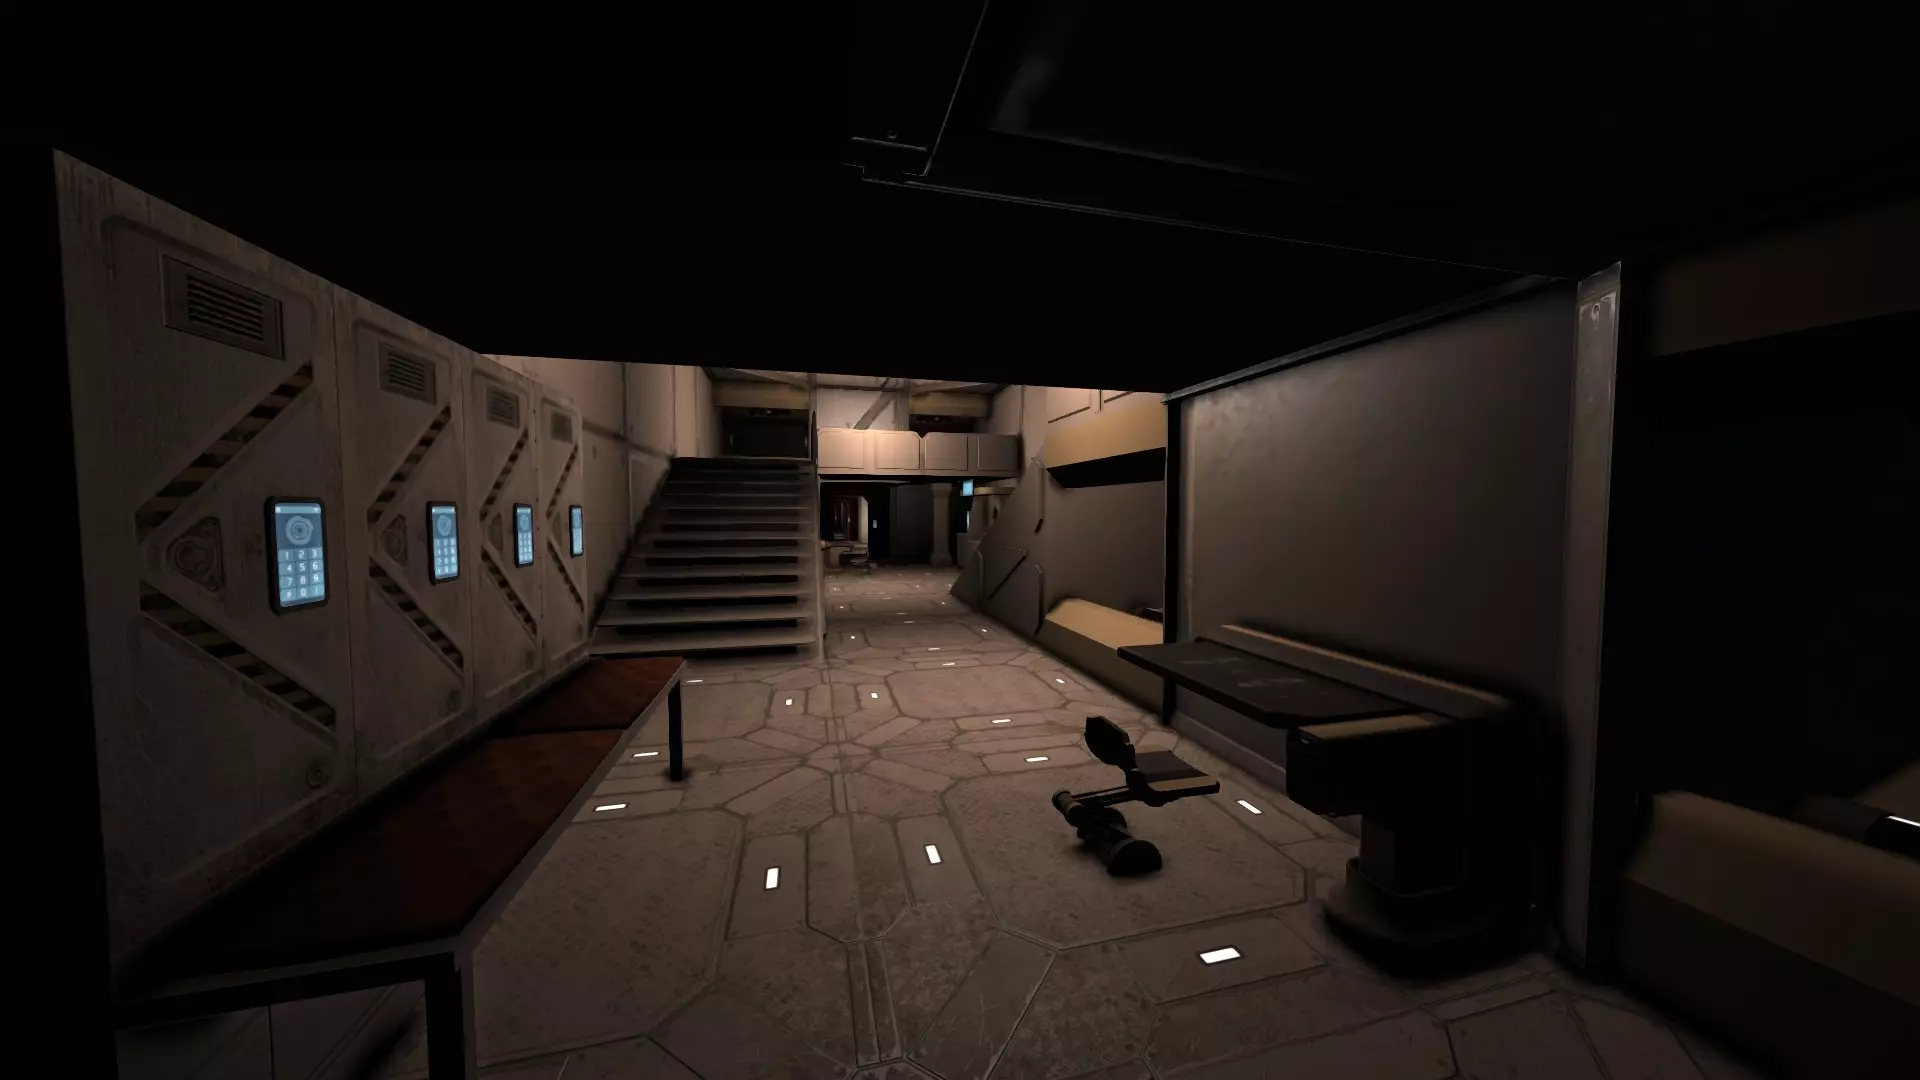
设计折中的一个例子:SN-4-N1救生艇旨在小巧实用,但其内部舒适、线条简洁,仍能给人一种奢华感。 创意工坊精选舰船 科学考察船“纳杰日达” 科学考察船“德鲁日巴·纳罗多夫” 救援游艇SN-4-N1和SN-4-N2
2026-02-13 11:30:31 发布在  Space Engineers

说点好听的...
收藏
0
0