


新手、刷级与单刷指南(4367补丁)
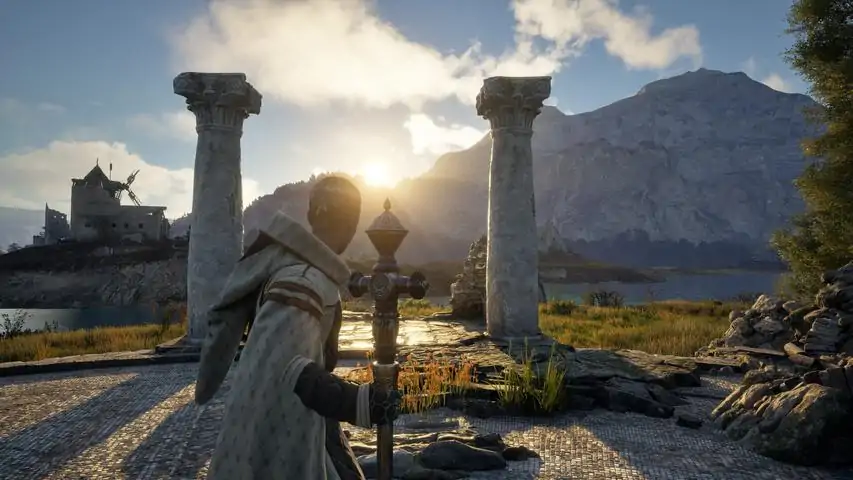
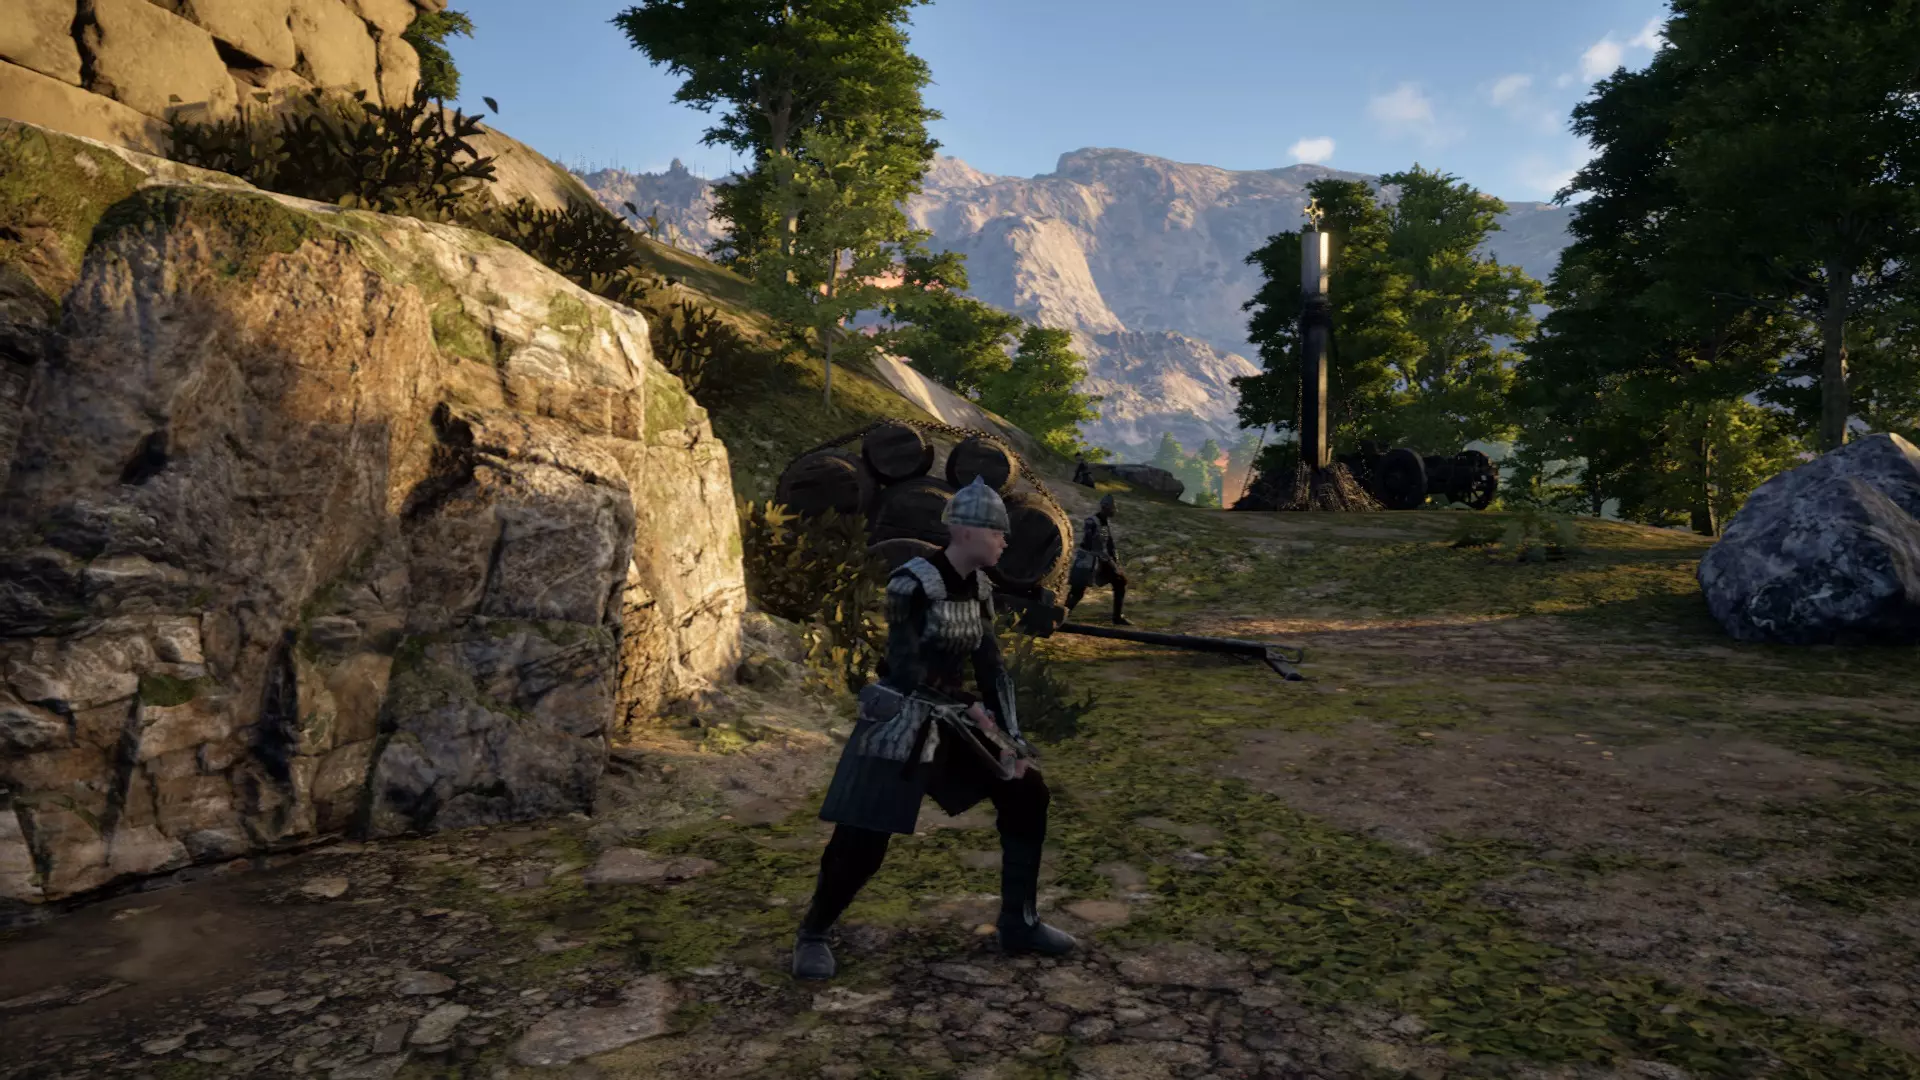
新手玩家与单人玩家指南:刷级方法及《Pax Dei》Discord常见问题解答合集 免责声明 我会根据Discord上出现的问题不断补充本指南。这份指南是我花了一个小时匆匆写就,用于帮助Discord上的某位玩家。因此,若有任何疏漏之处,请告知我以便修正。更新过程可能相对缓慢,若未能及时更新,敬请谅解。 在此期间,如需更多信息,请访问:https://paxdei.gaming.tools 如需交互式地图,请访问:https://paxdei.th.gl/ 新手指南第一章:欢迎来到《Pax Dei》! 您已购买抢先体验版并进入游戏。不幸的是,除了花一个小时打造你那非常性感的角色形象外,我敢肯定你对这款游戏的玩法一无所知!不过别担心!我会尽我所能一步步帮你。 让我们从最基础的开始。看到这块仿佛直接从斯坦利·库布里克电影里搬出来的宏伟巨石了吗?
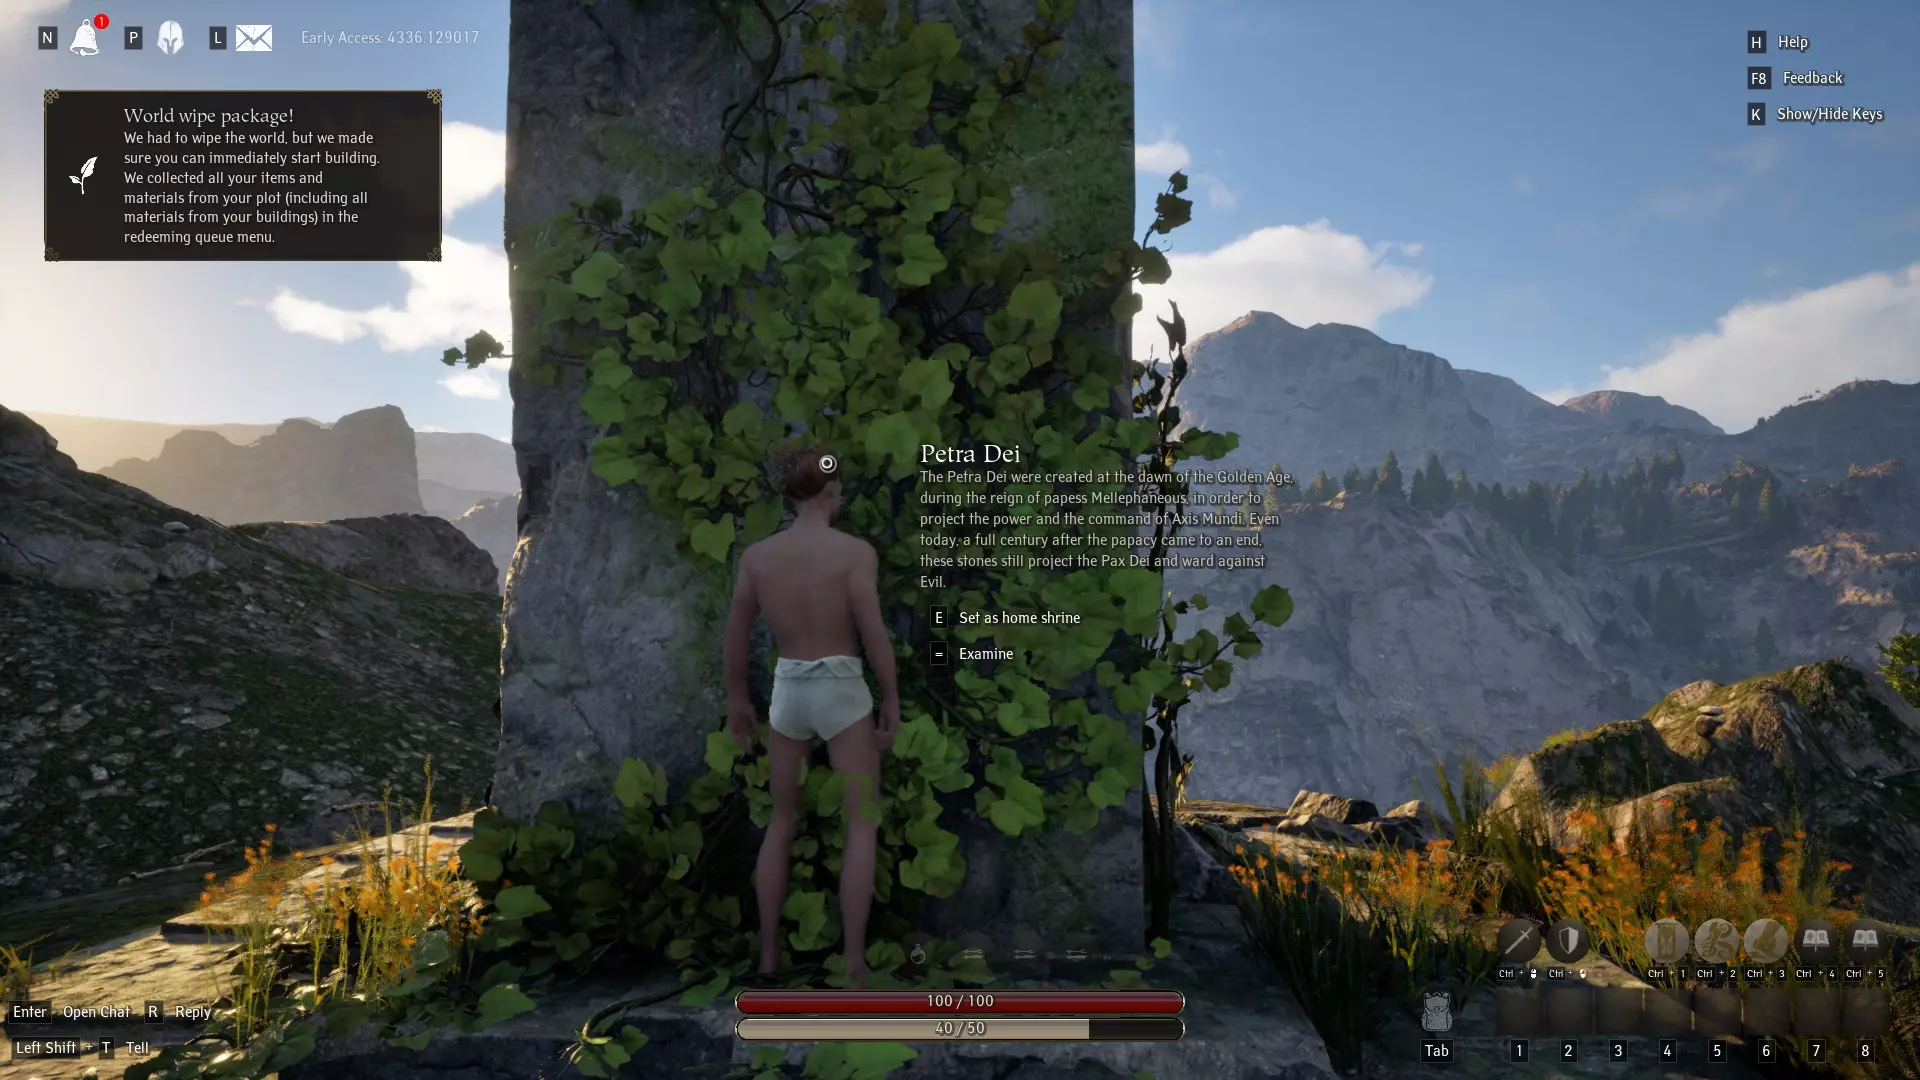
那被称为佩特拉· Dei。 这是你的出生点。当你死亡并重生时,你会回到这里。这里也是你可以传送返回的地方。 你是否也看到地面上散落着许多东西,比如石头和树枝?
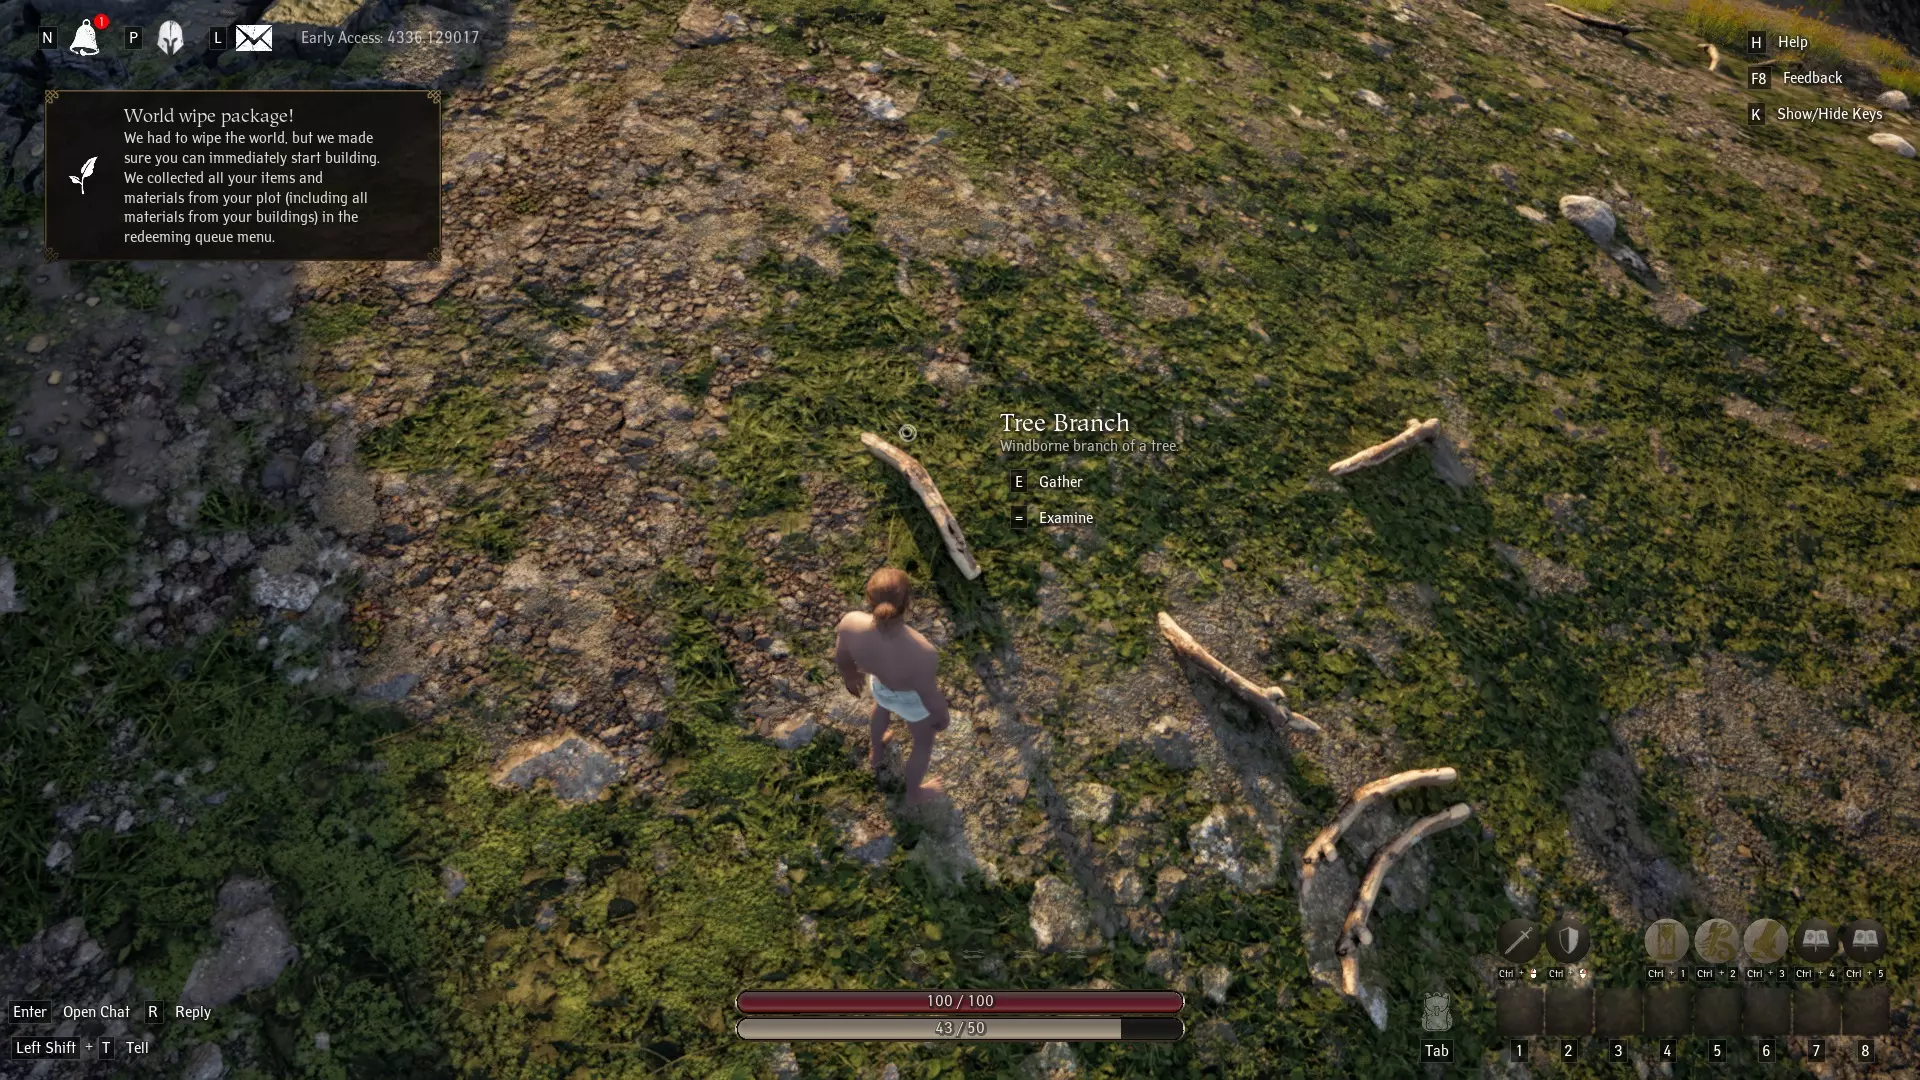
这些非常重要!现在就把它们捡起来!尽可能多地收集,因为随着时间推移,你最终会需要所有这些东西。 现在按下键盘上的“TAB”键。在弹出的界面中,点击中央栏的第三个标签页“制作”。
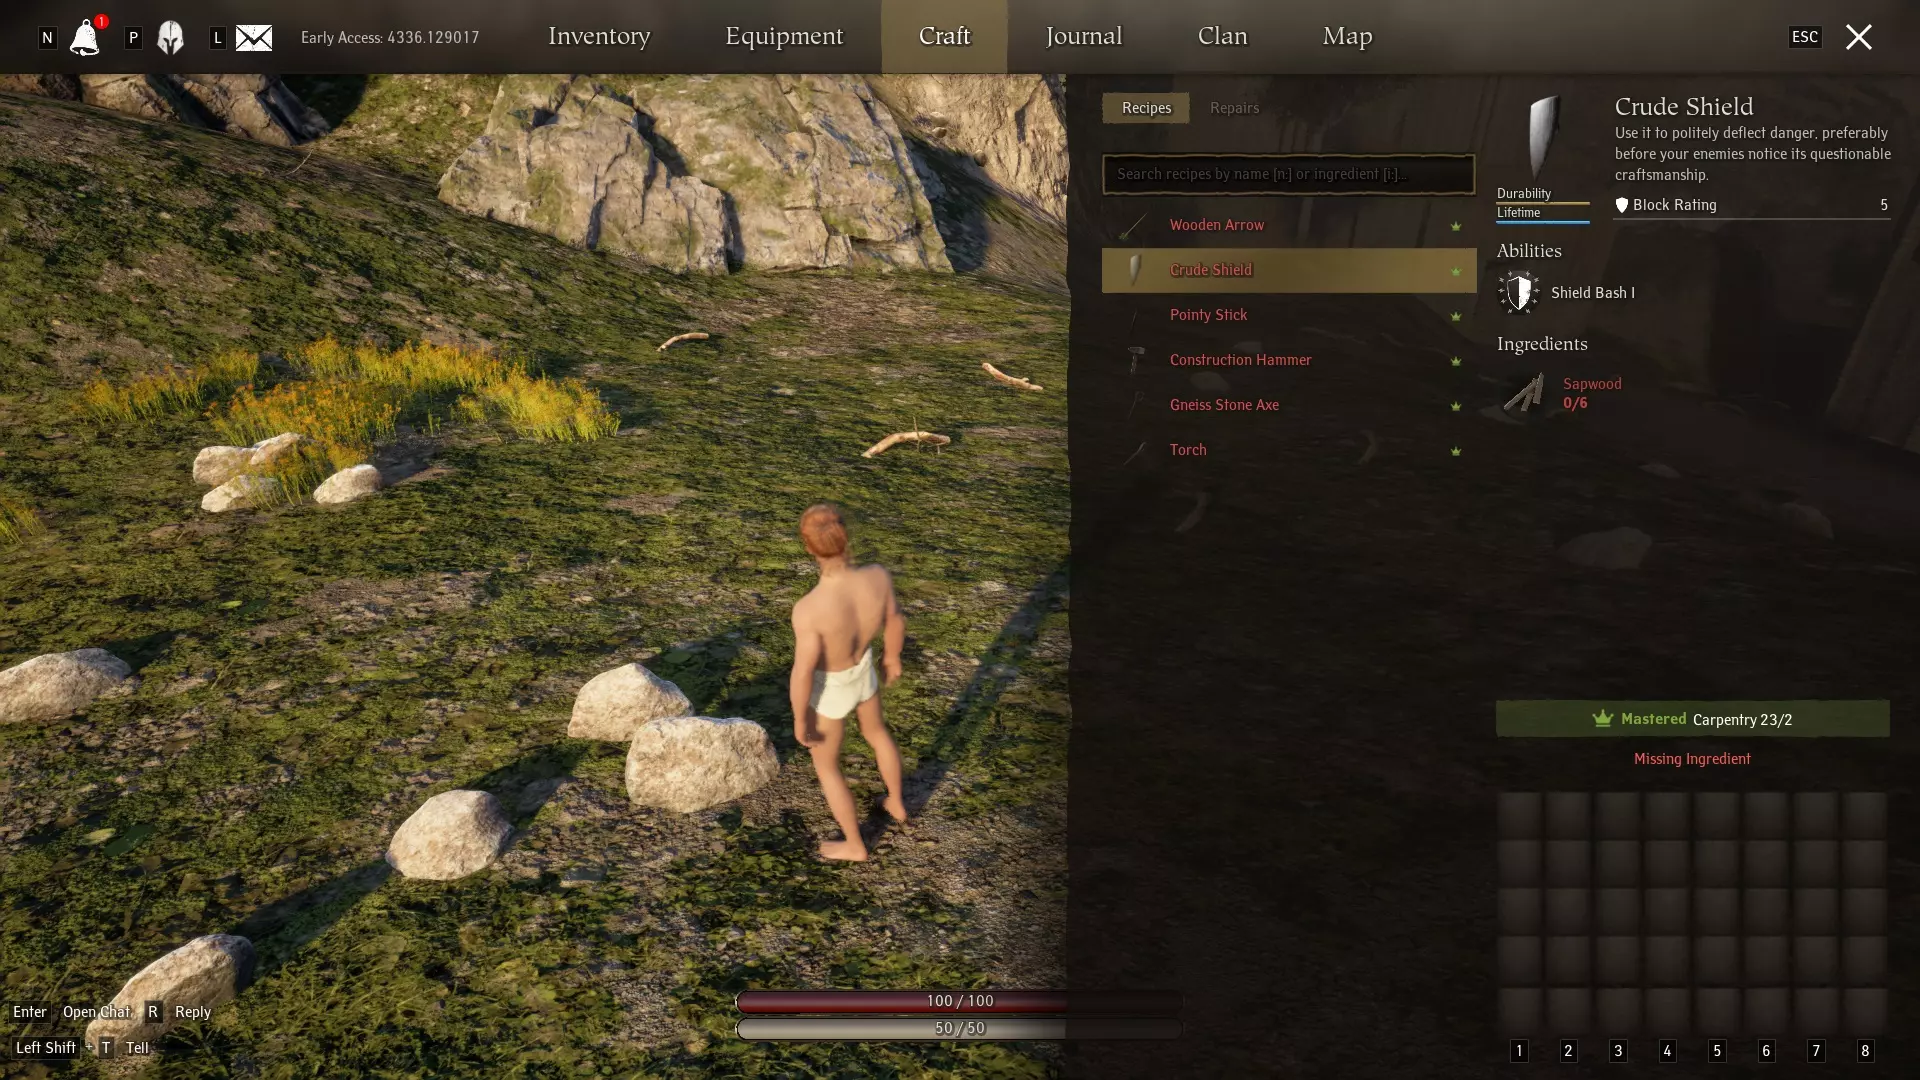
创建以下物品: 建造锤 片麻岩石斧 尖木棍 简易盾牌 新手指南第二章:寻找你的永久家园 现在你已经配备了最基础的装备。你需要找到一个可以称之为自己的区域。这在《和平之神》中非常重要——这款游戏不仅主要围绕创建自己的基地展开,而且将你的地块用作存储、制作等活动的行动基地也很关键。 那么事不宜迟。选中你的锤子。然后在锤子被选中的状态下,右键点击鼠标以打开“地块”界面。
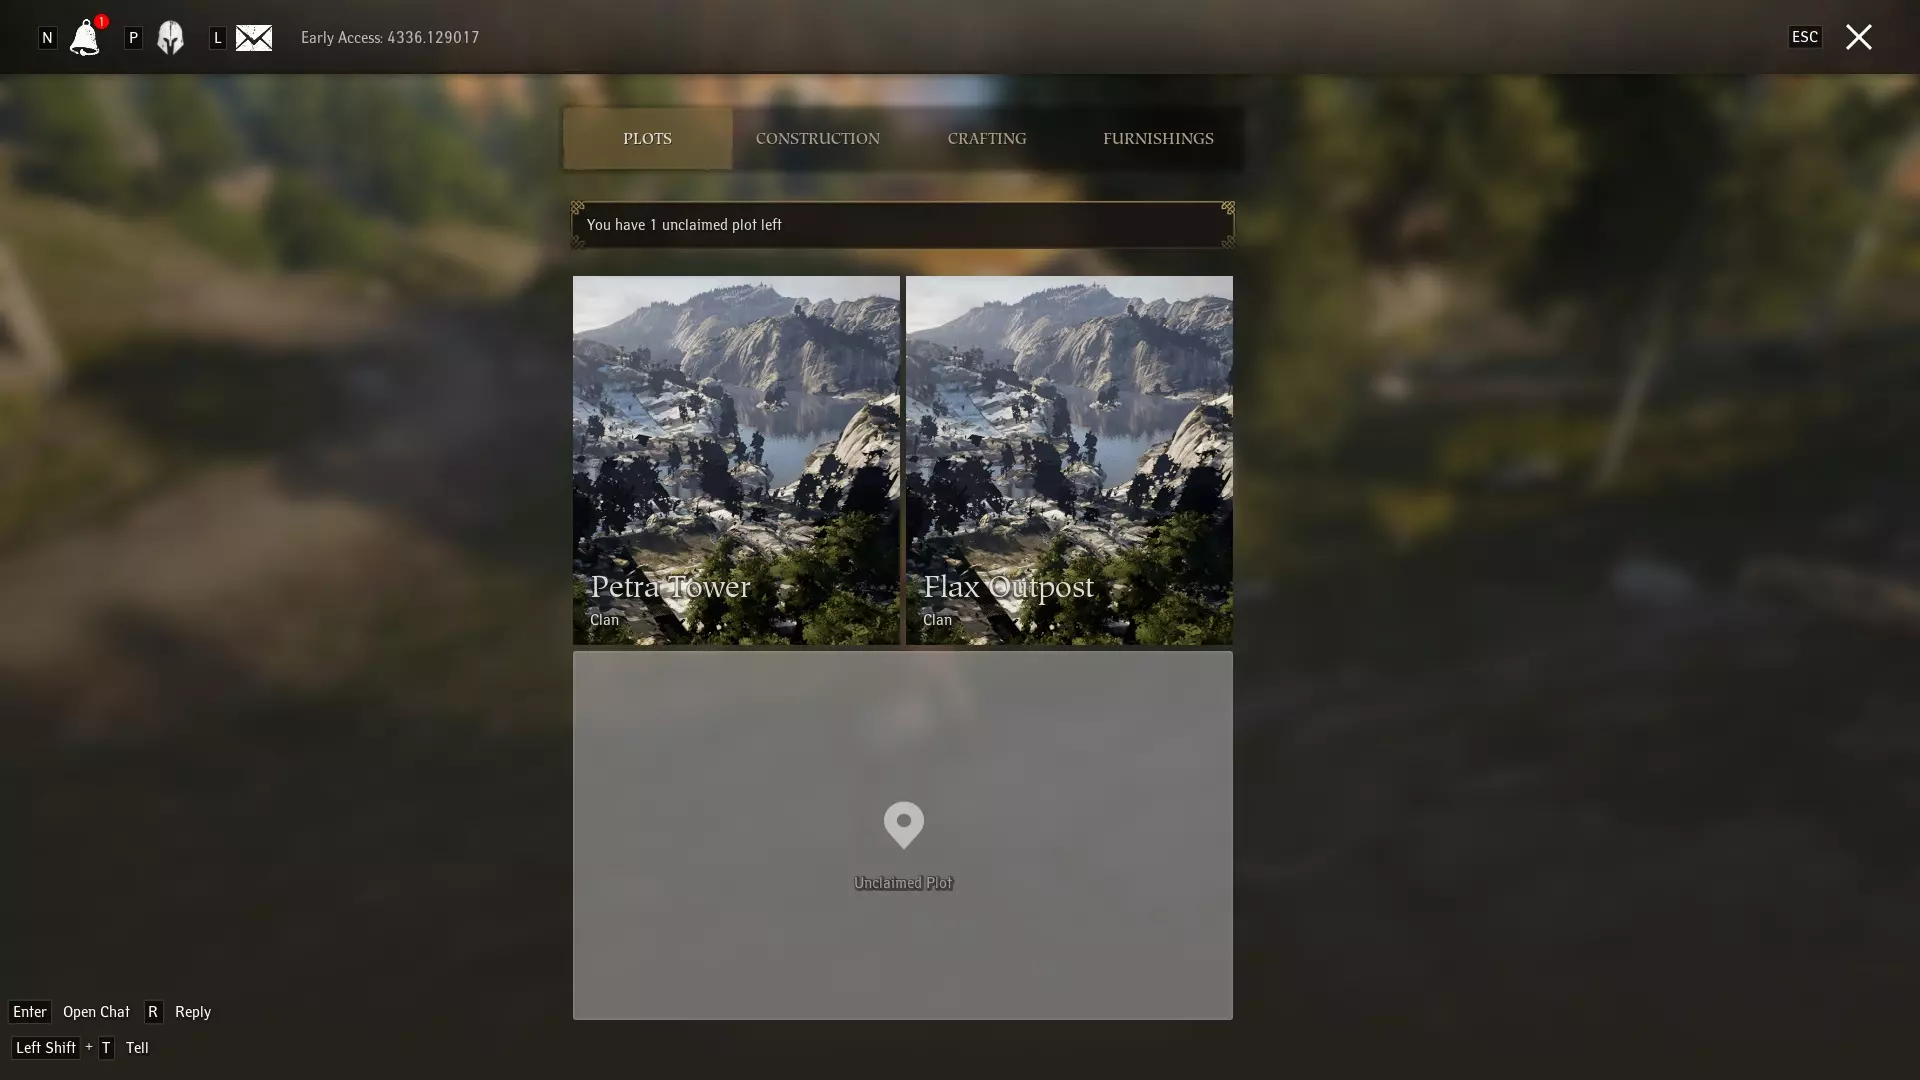
在地块界面选择“未认领地块”,然后四处寻找,直到找到高亮显示为蓝色的位置。橙色表示无法放置,通常是因为靠近他人的地块、附近有道路,有时他人的物品也会阻碍你放置地块。
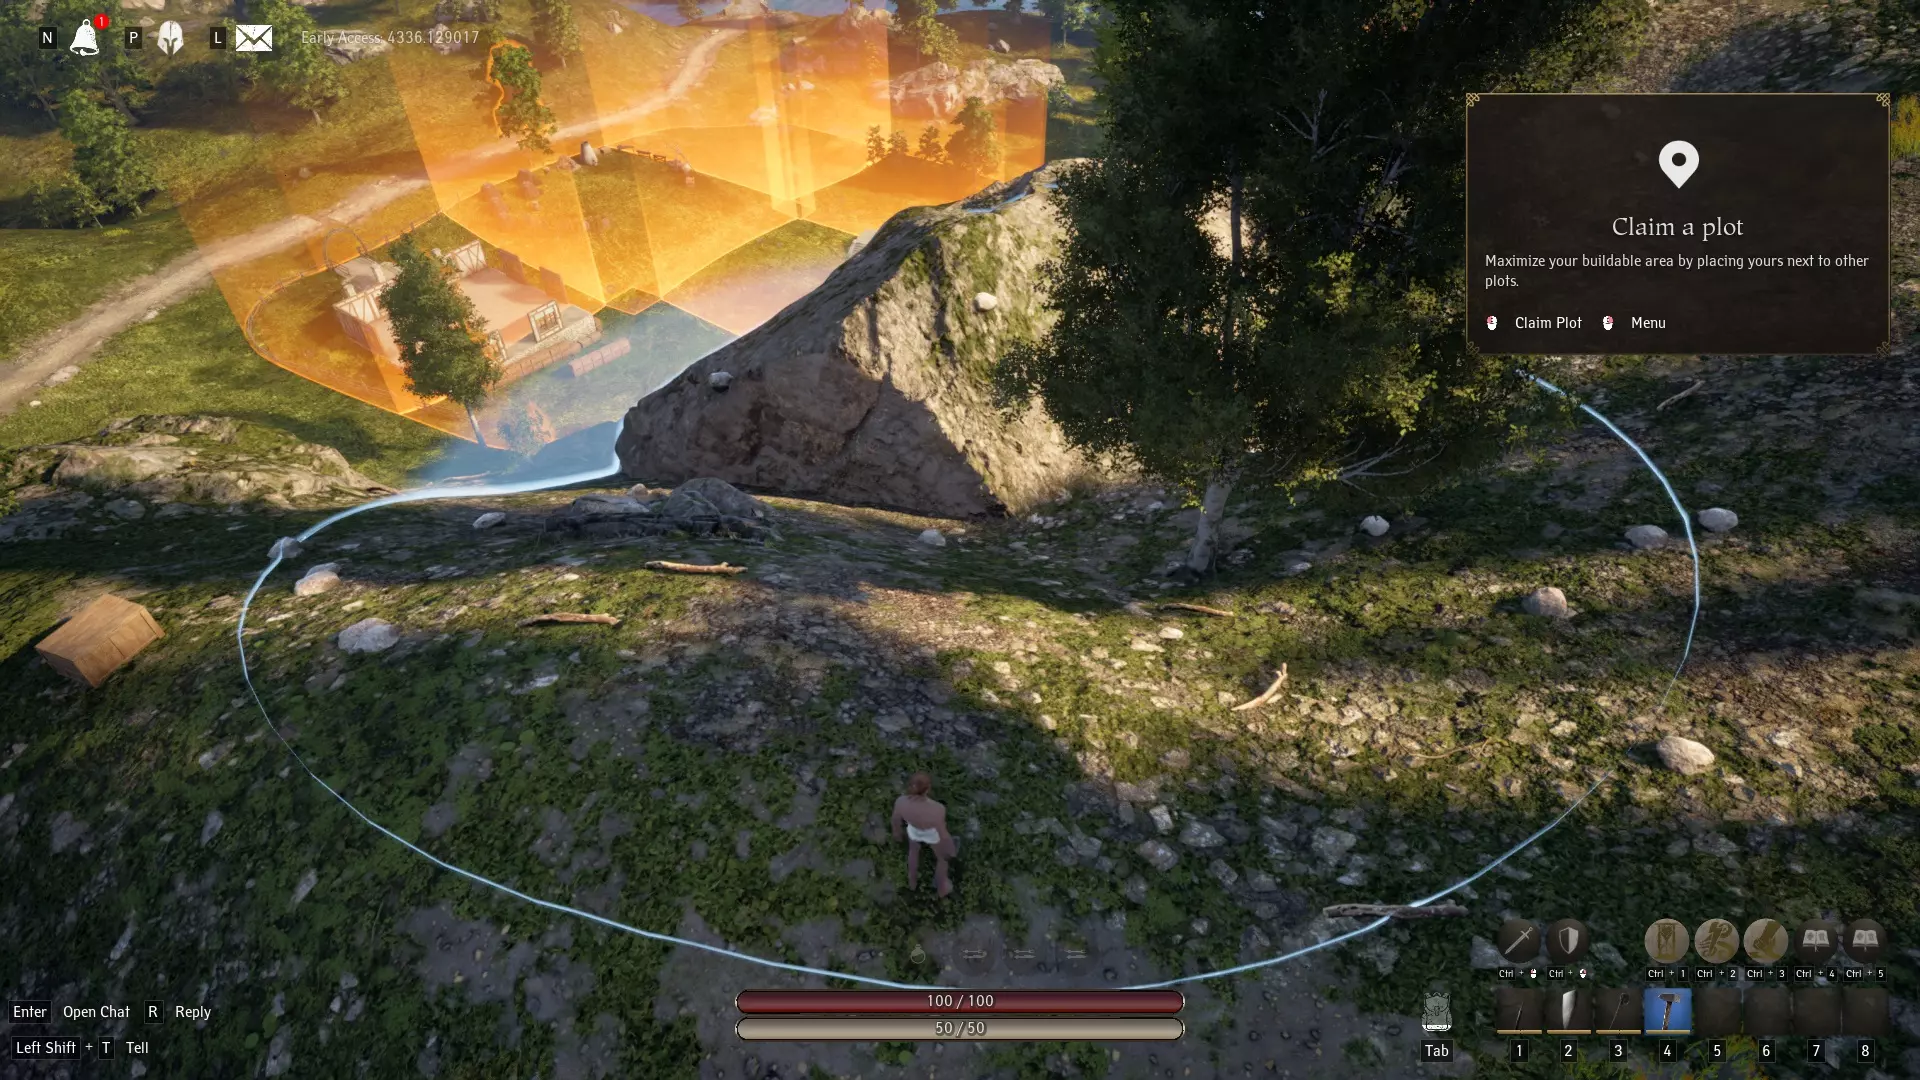
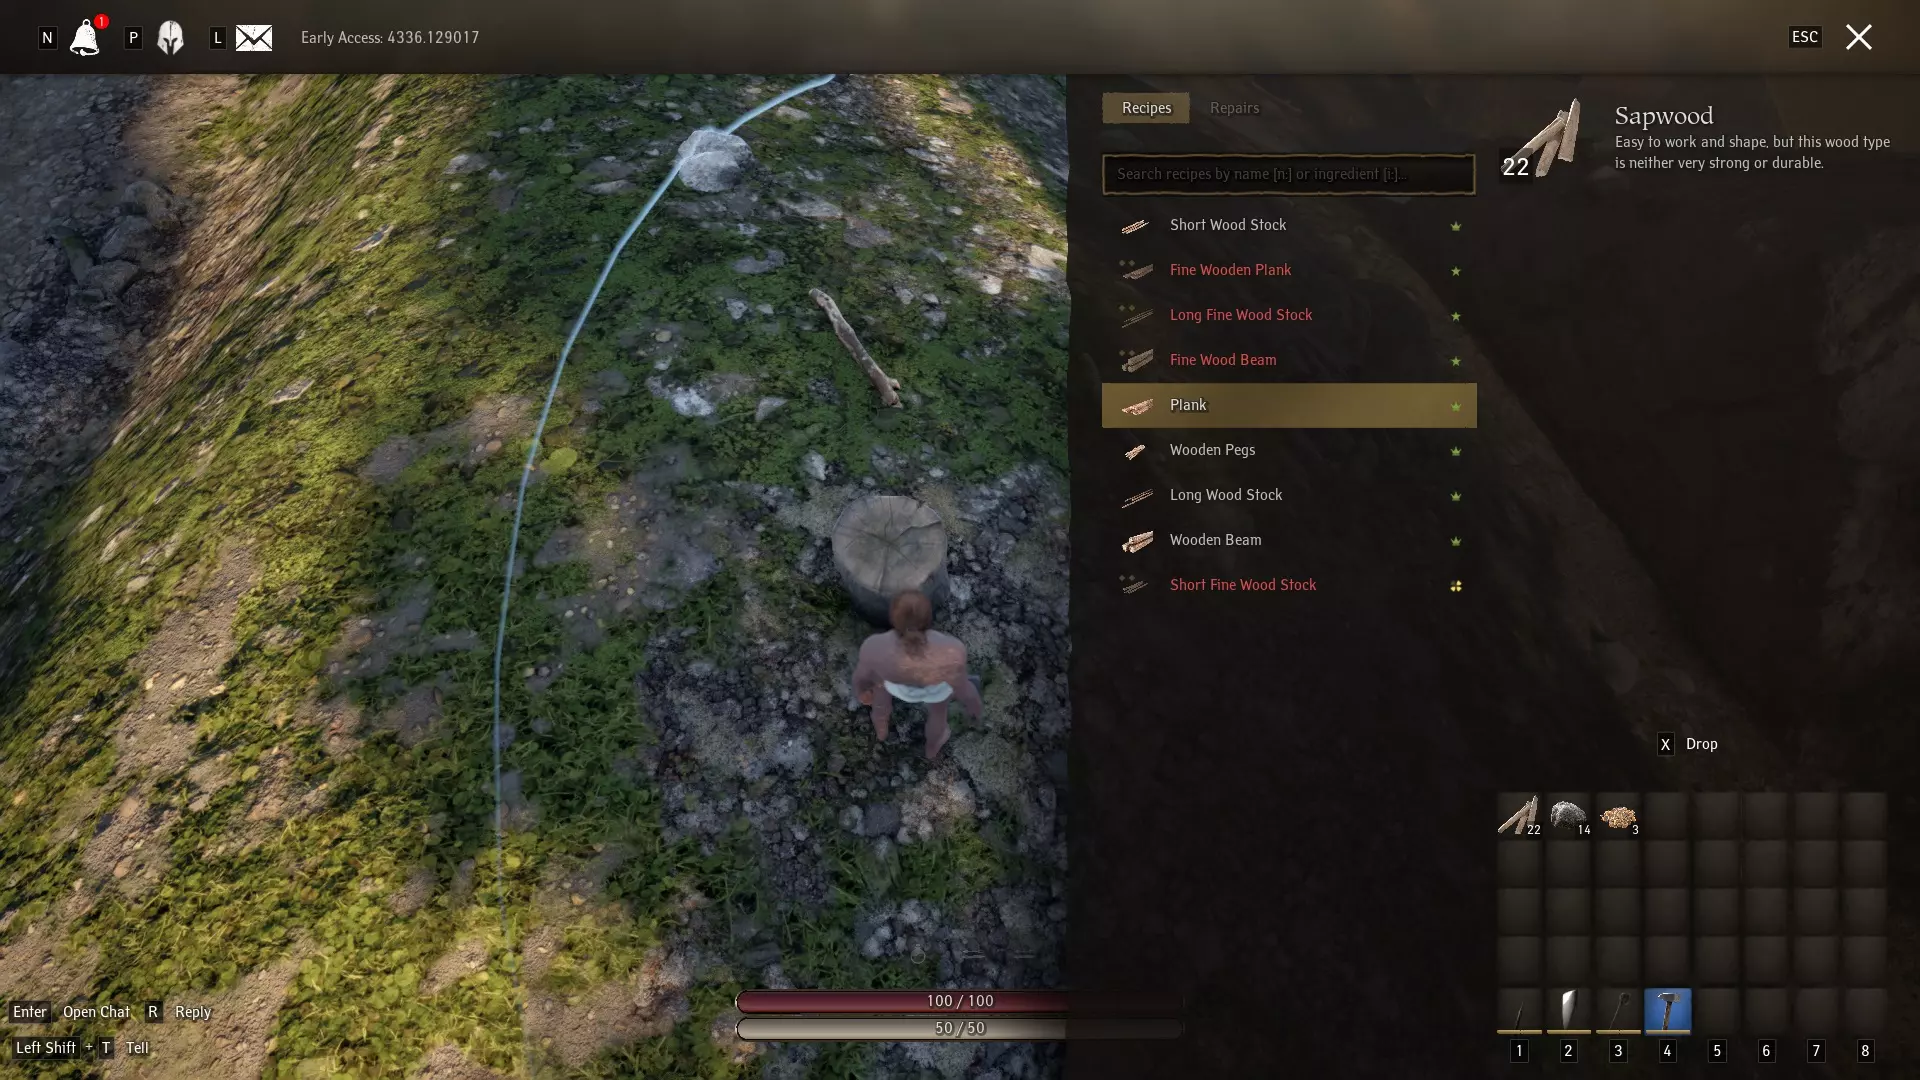
一旦你放置好自己的地块,就可以在上面建造东西了!让我们先建造基础的“木材劈柴块”,这不仅是制作重要建筑材料的必要设施,也是你日后提升木工技能的途径。
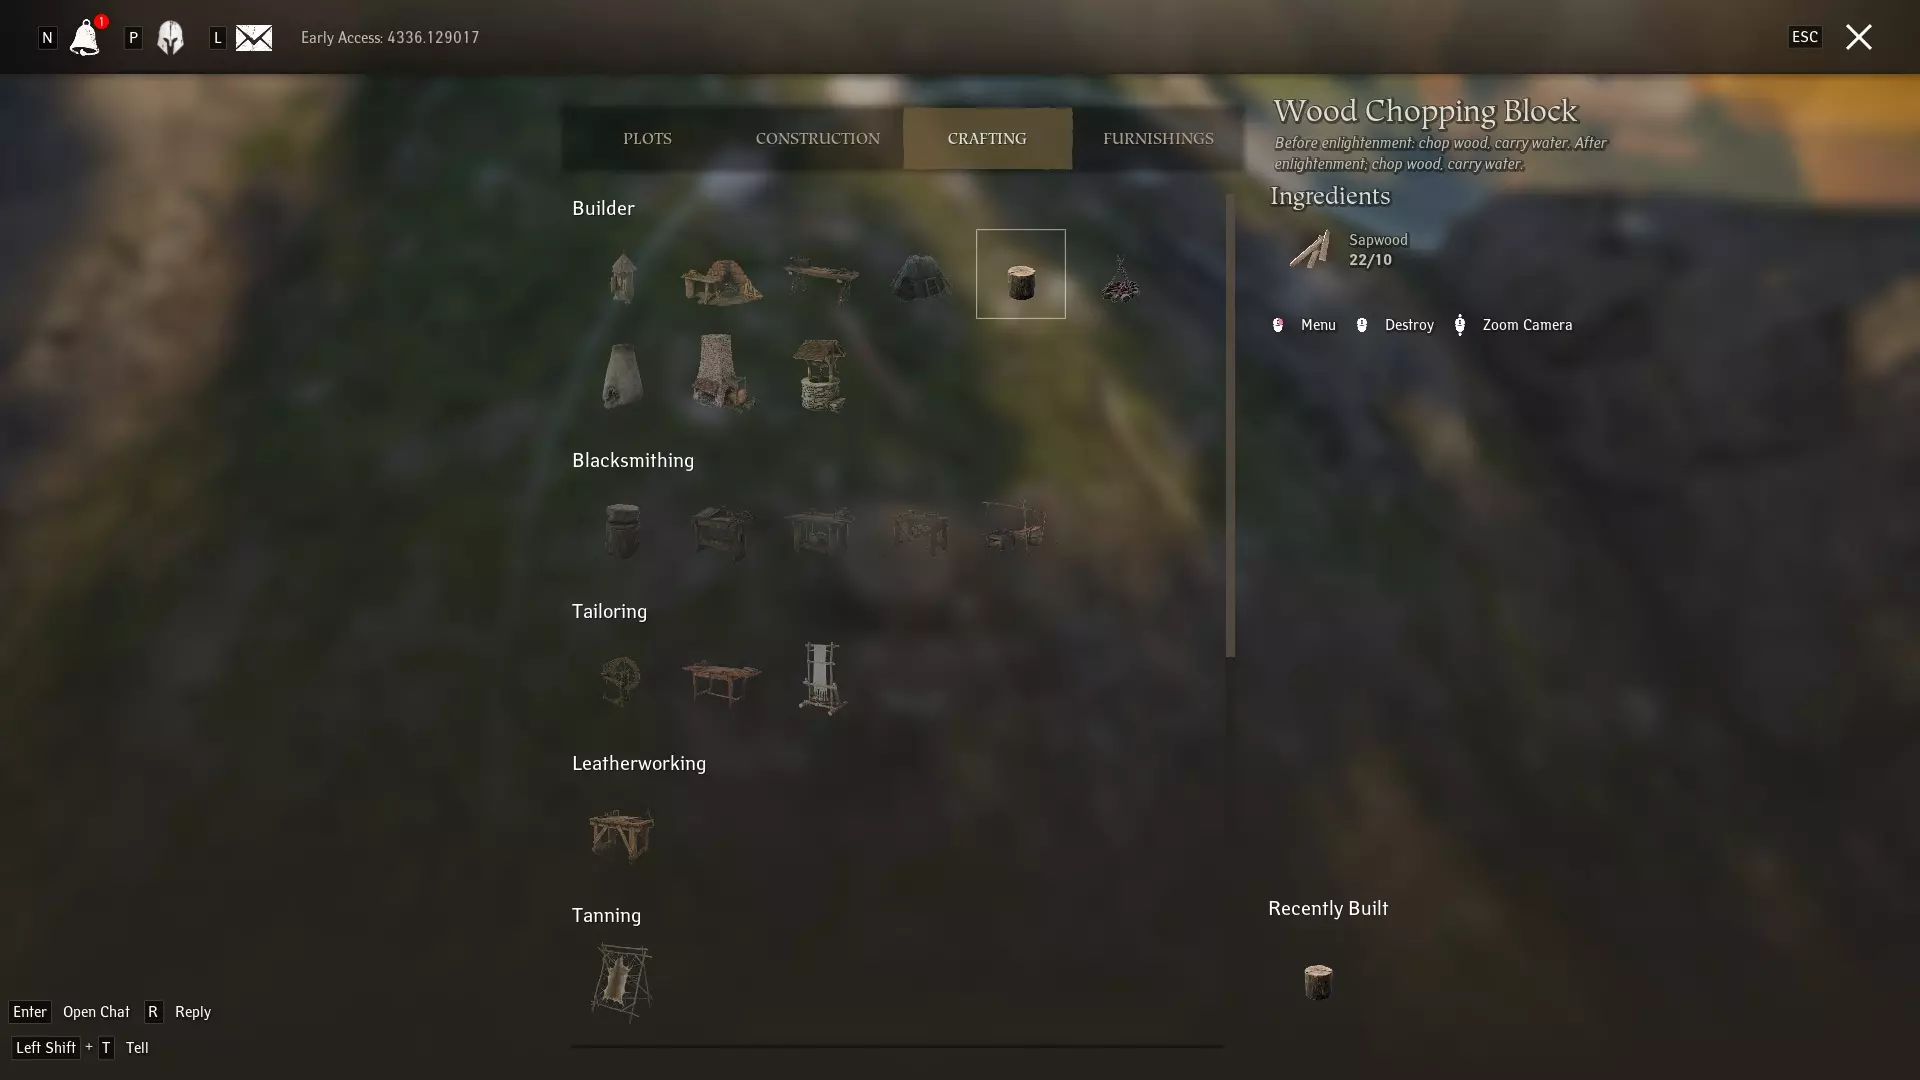
《Pax Dei》中的制作系统完全取决于你的技能。例如,制作木板的要求是“4级木工技能”——如果你刚开始时木工技能为1级,这可能会非常困难,并且会导致大量失败。不过别担心!你最终会提升技能,届时制作所需物品将变得非常容易!在《Pax Dei》中,坚持不懈是成功的关键。
一旦你搭建好砧板,接下来就需要一个基础木工工作台了。
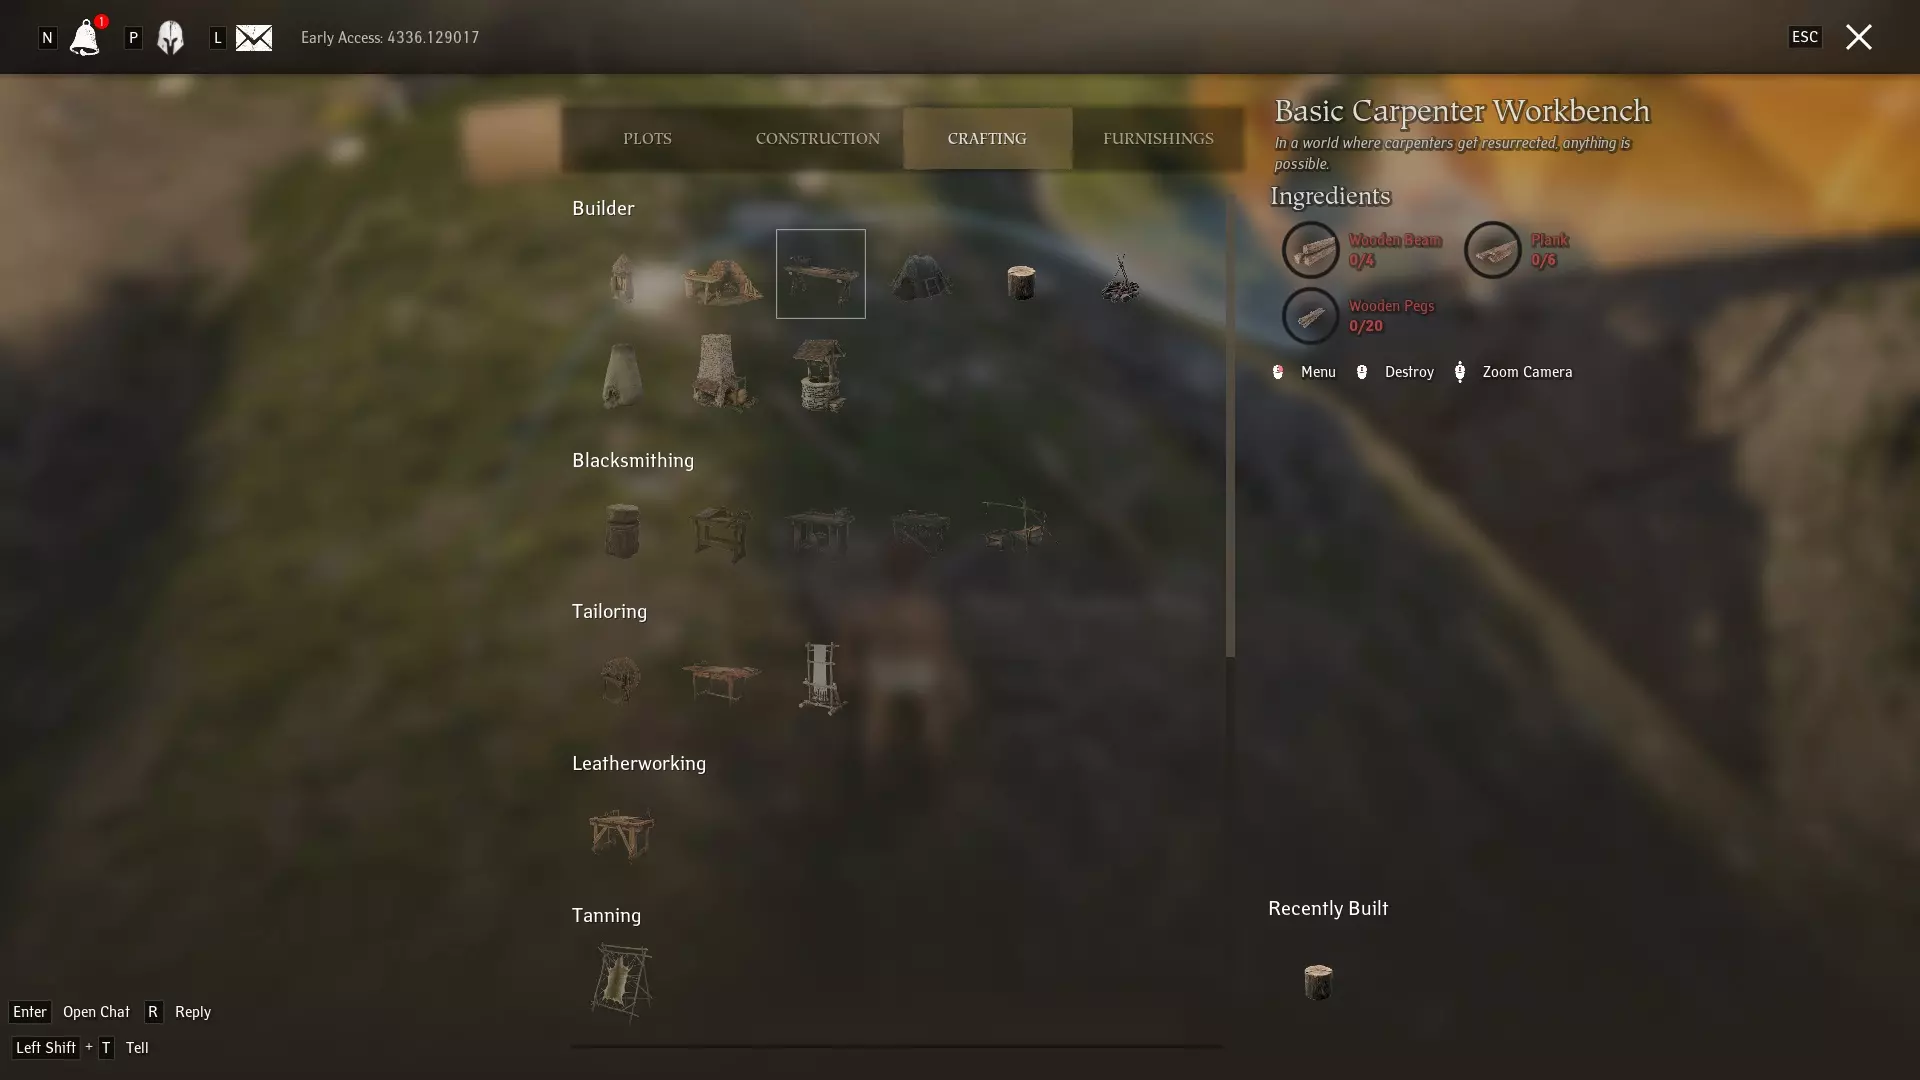
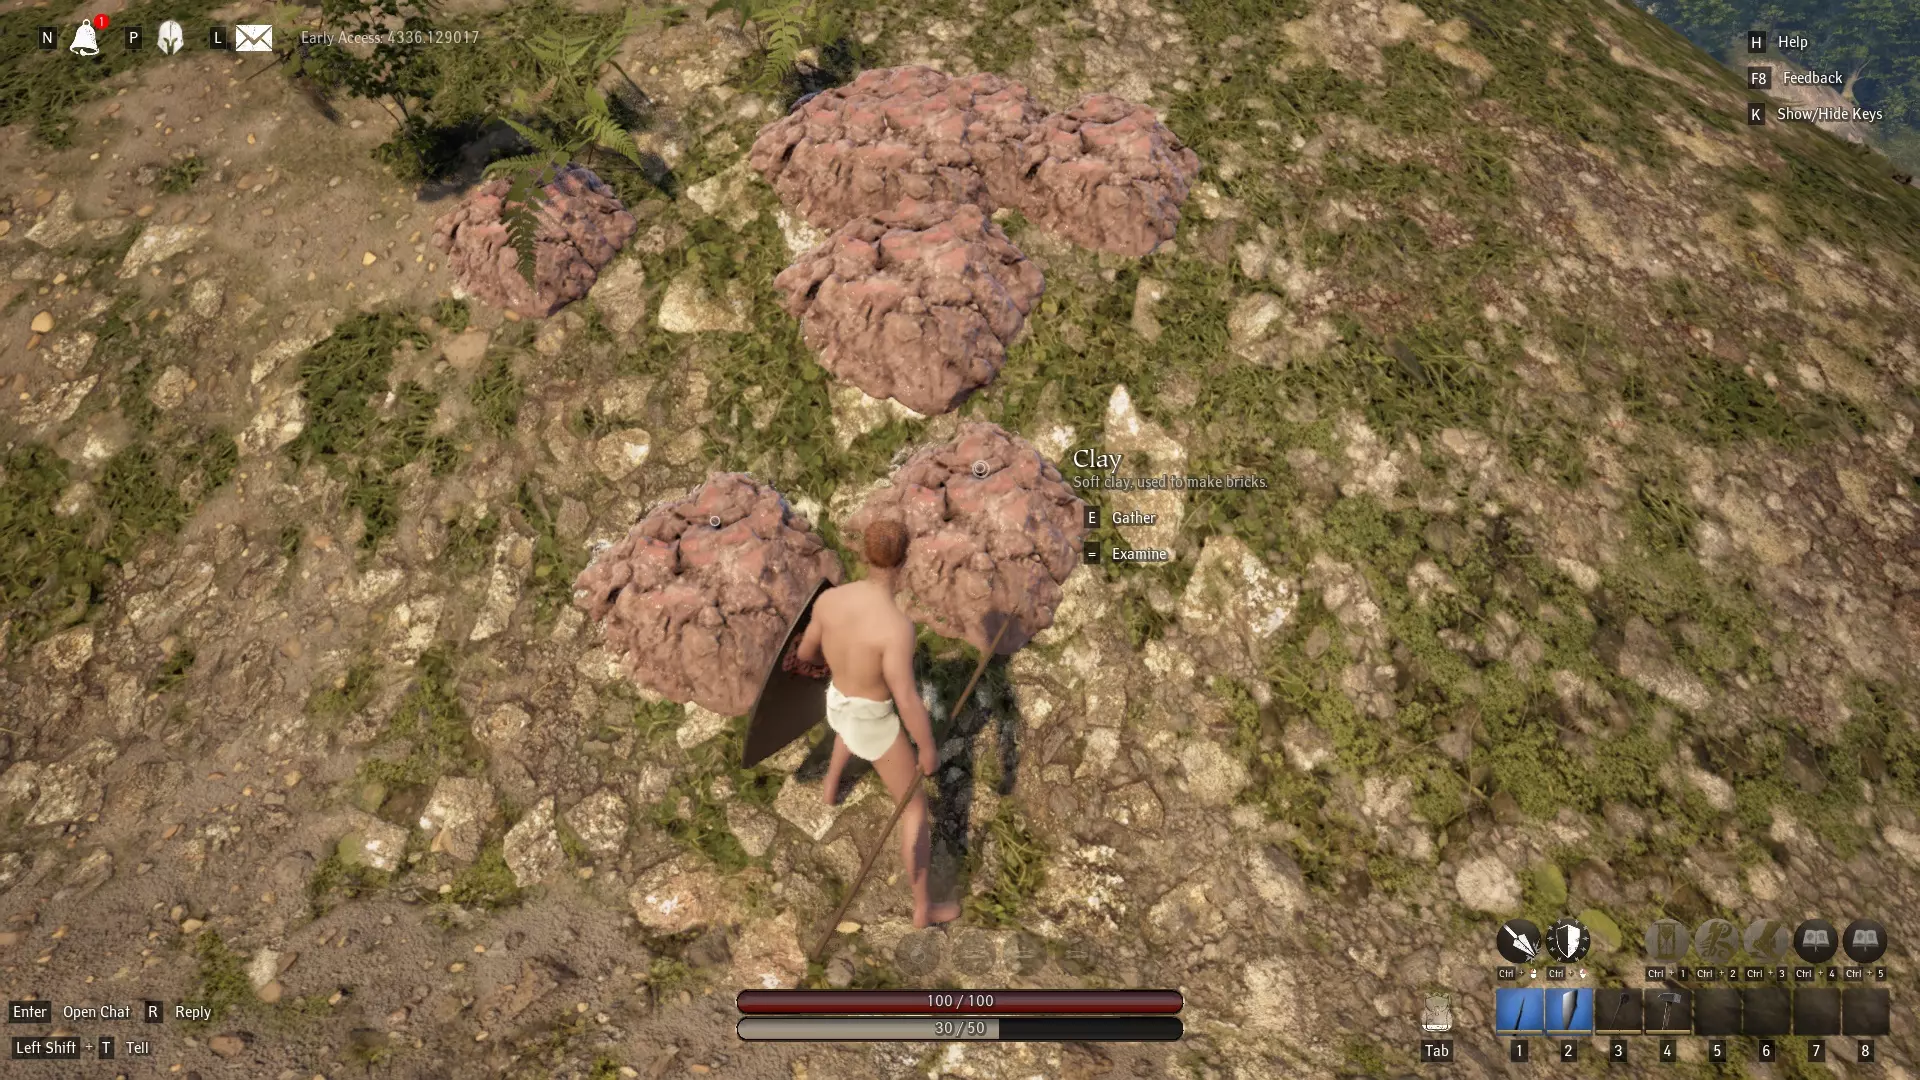
4根木梁 6块木板 20个木栓 你可以使用你的劈柴块来制作这些材料。 信不信由你,这就是开始建造你的基地所需的全部材料!需要注意的是,你目前还不能完全获取所有建筑物品,这需要更高的木工等级。不过,你完全可以用基础的石地基和木屋墙壁来应付初期需求。 花点时间发挥创意,建造一个你认为不错的初始基地吧。你随时可以拆除并重建,所以不必为细节烦恼。 要为你的家建造地基,你需要黏土和片麻岩(石头)——黏土可以在水边找到大片聚集的区域。
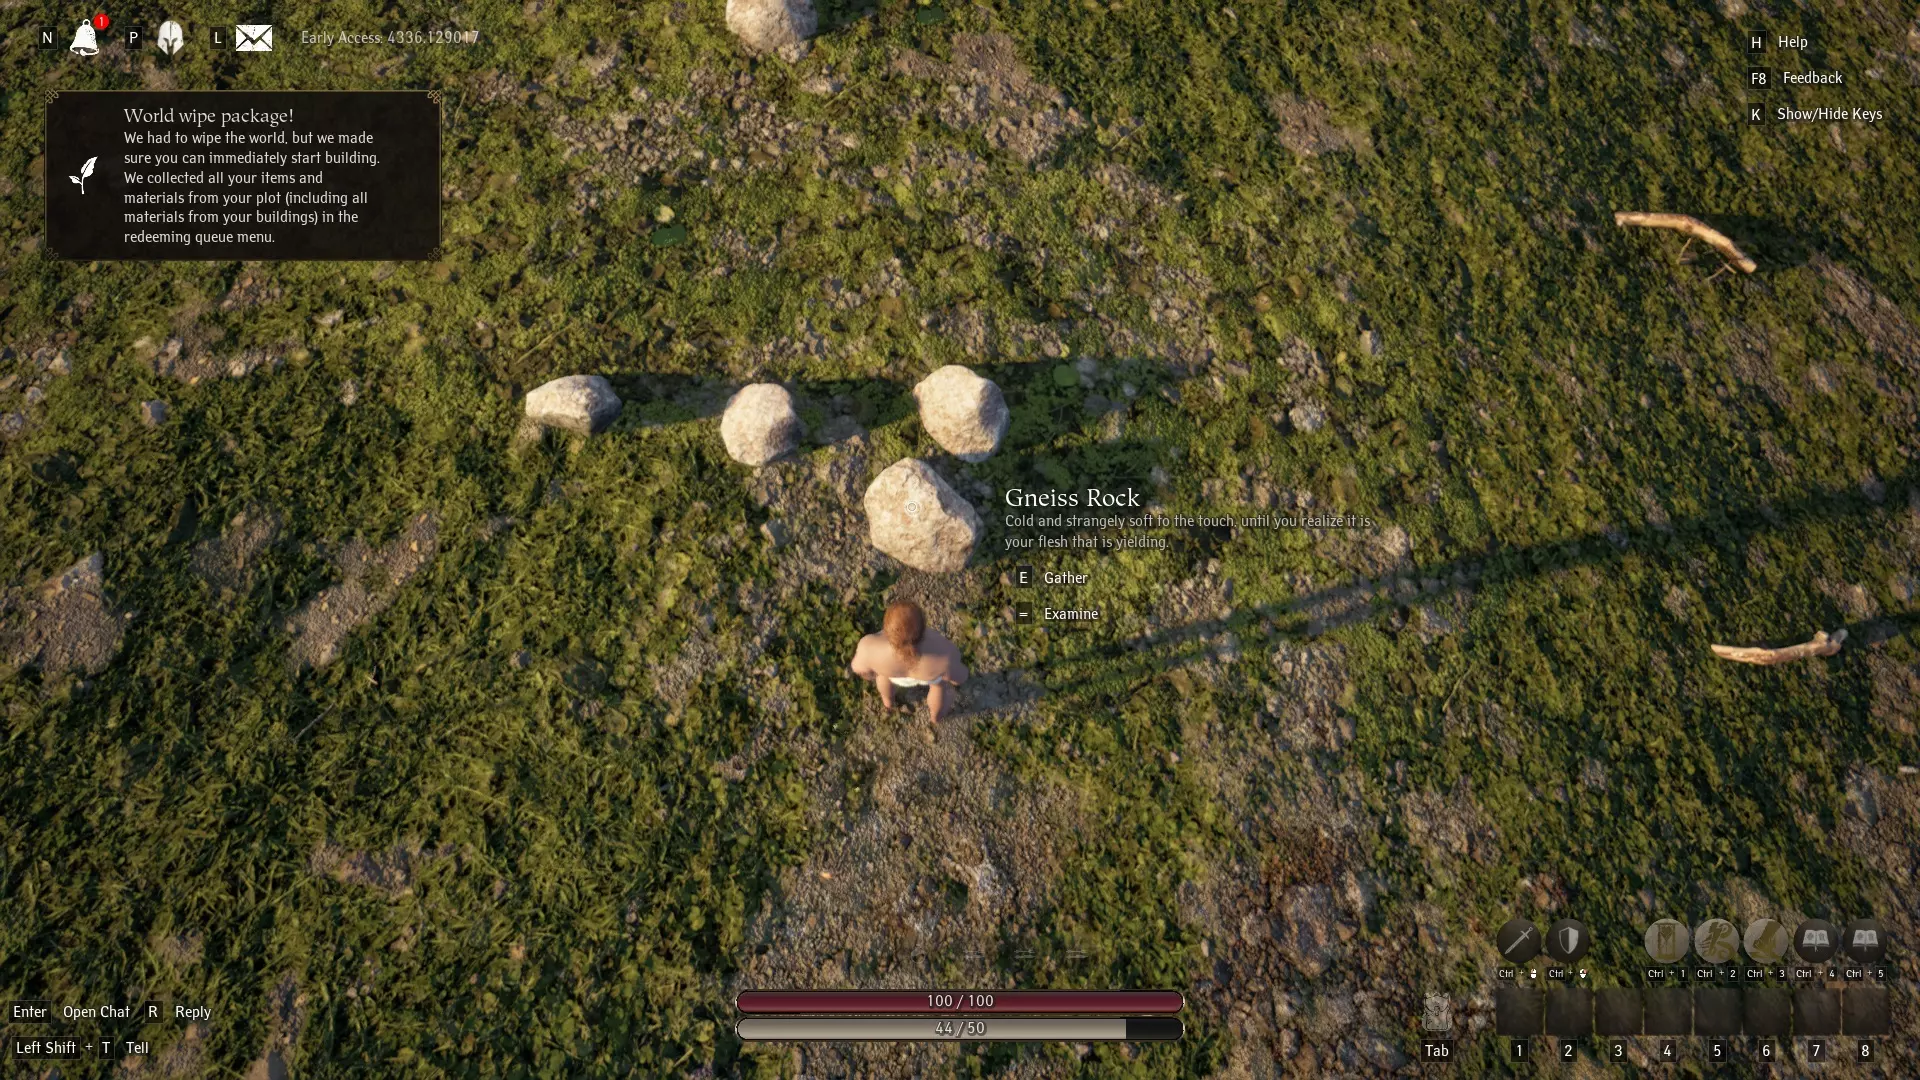
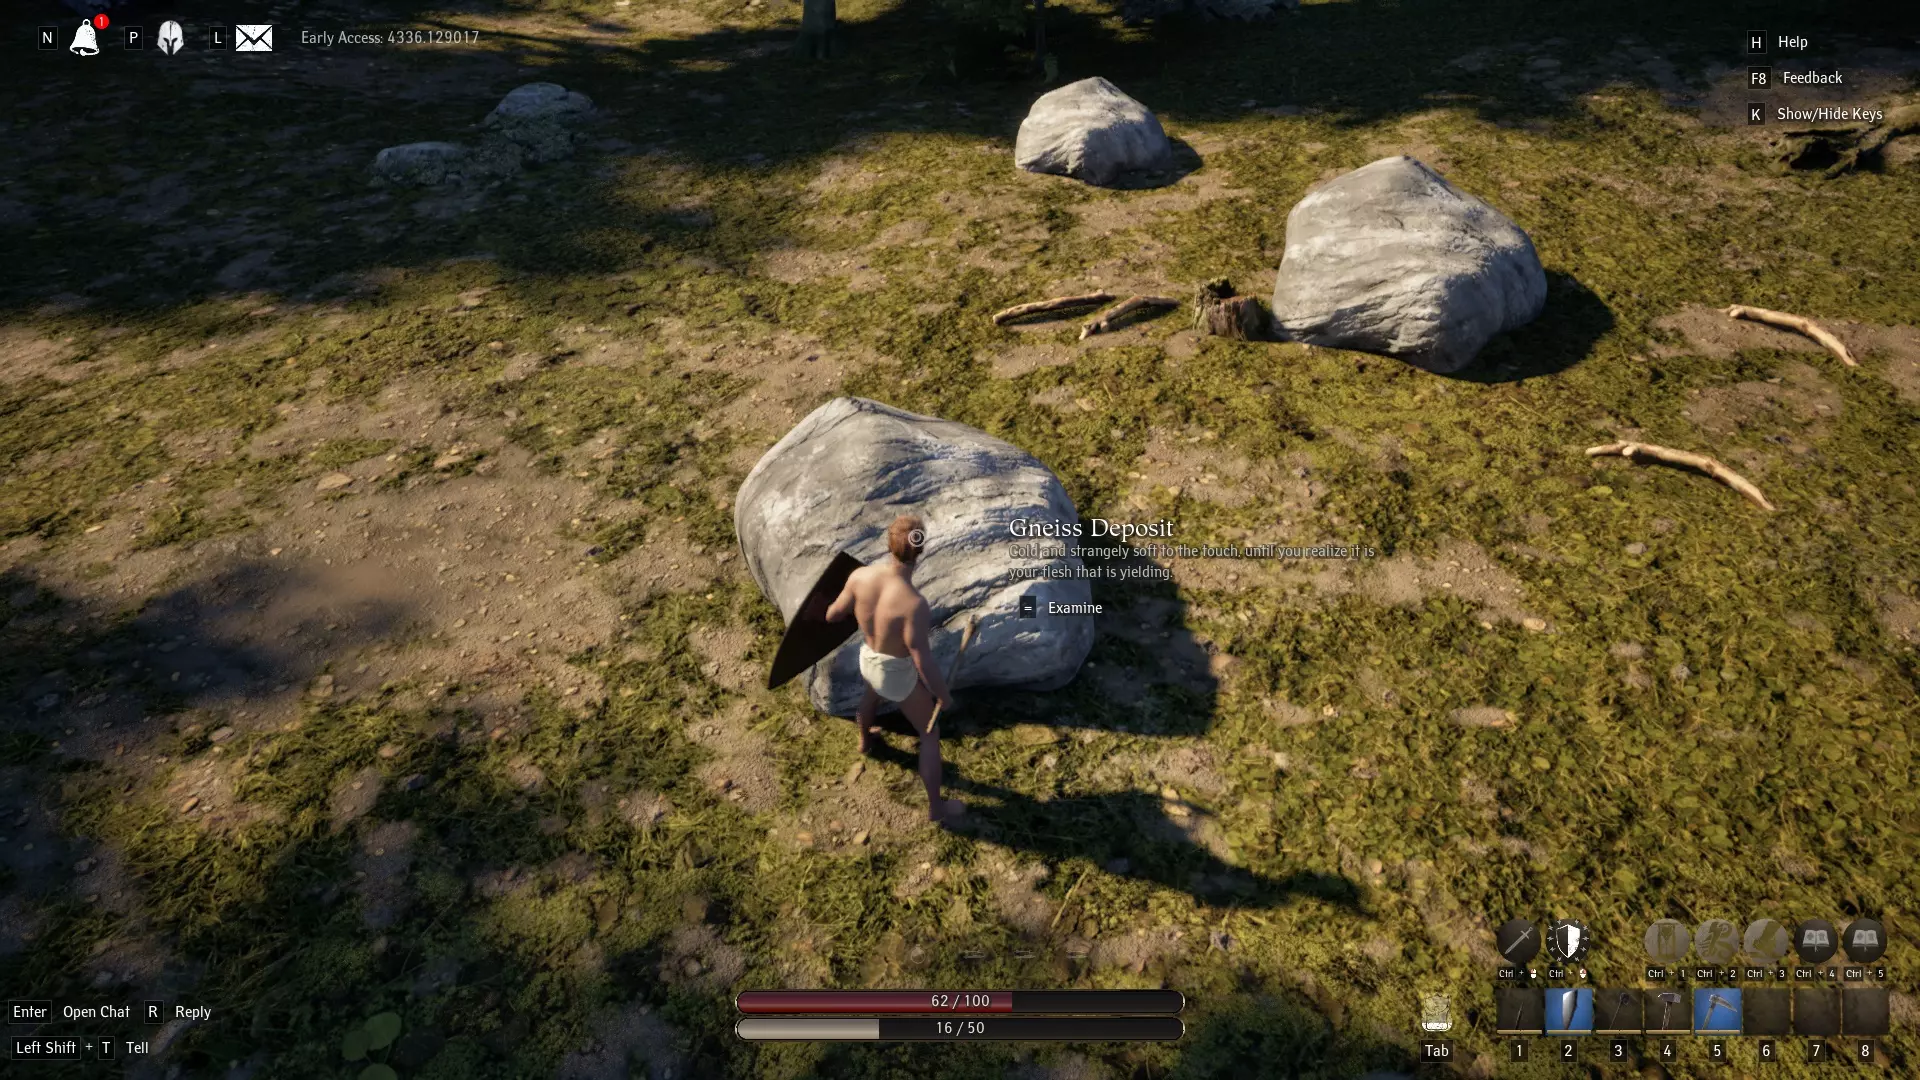
片麻岩可使用石镐在矿石节点开采,或在地面上直接拾取。
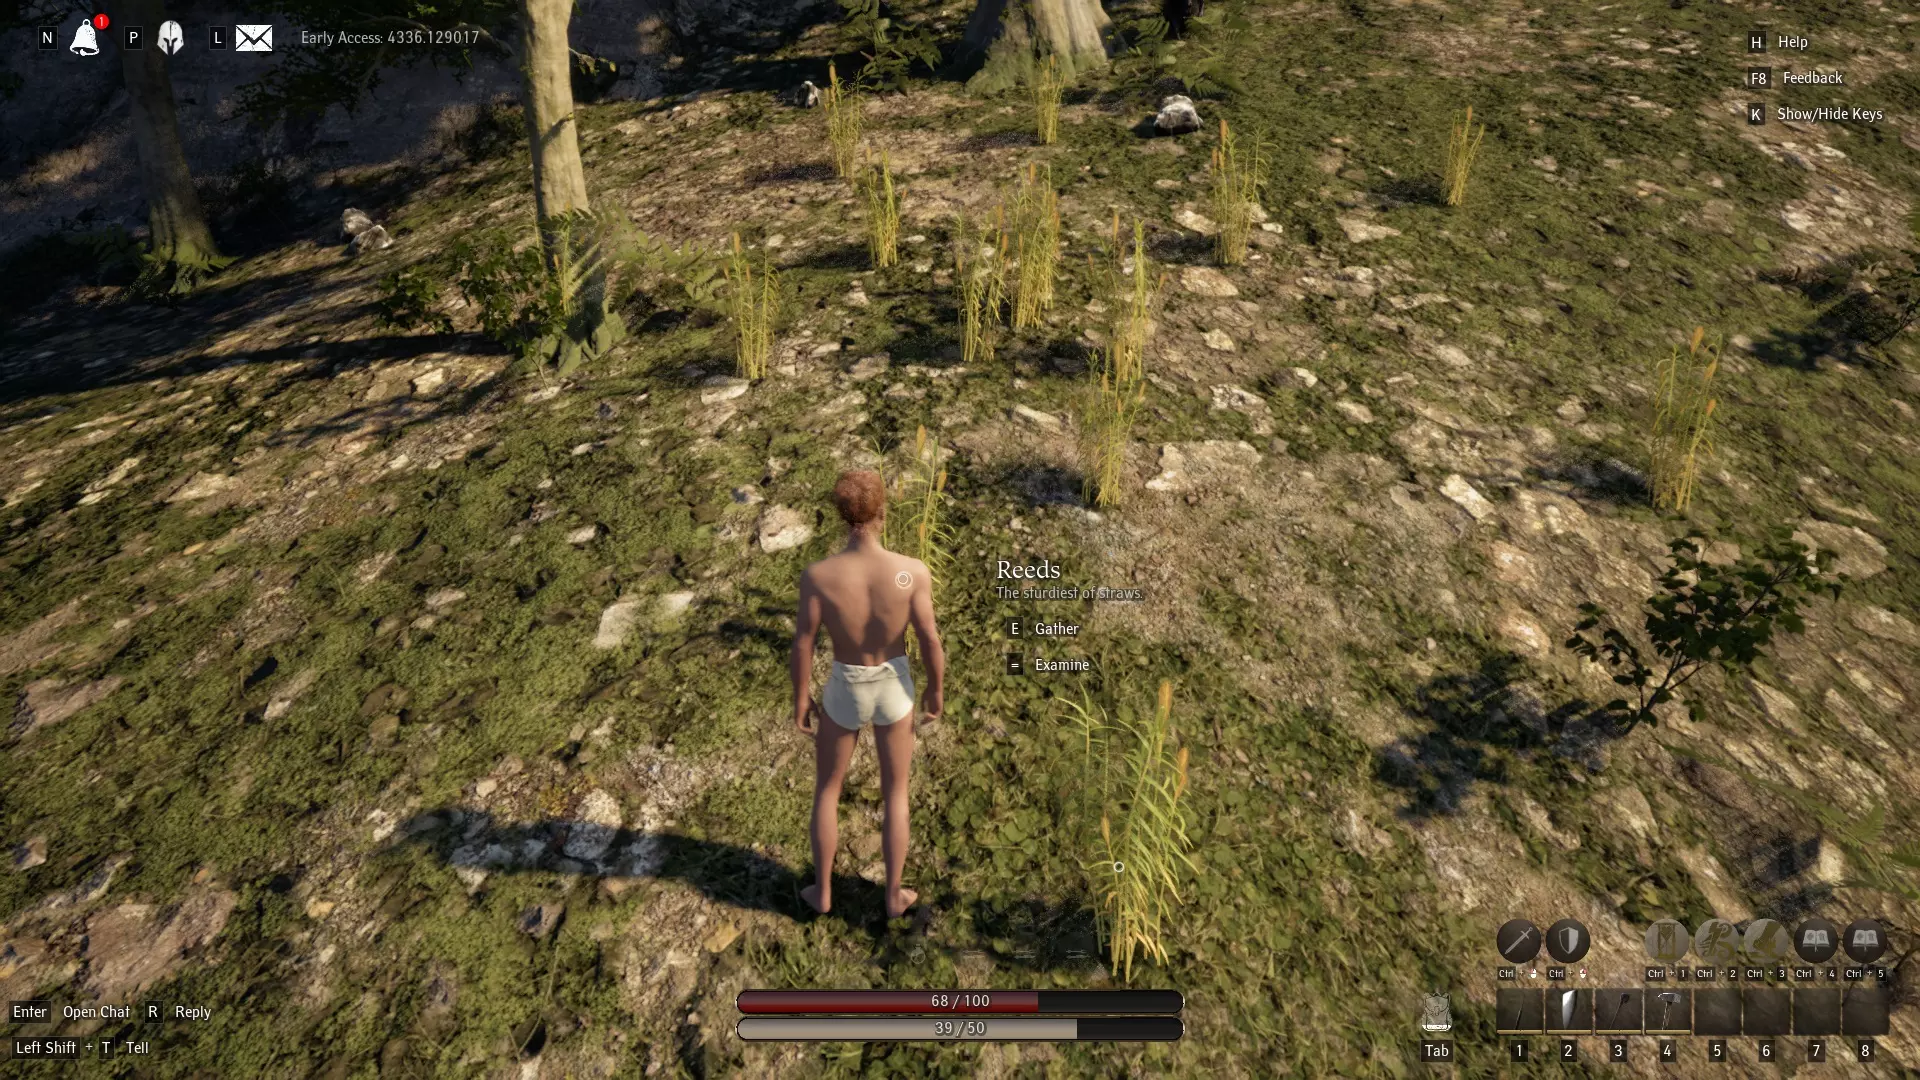
建造小屋可能需要芦苇,芦苇也可以在岸边找到——通常就在水边。
你可以使用片麻岩斧砍伐树木轻松获得边材,也可以继续在佩特拉 Dei 附近拾取树枝(请注意!在佩特拉 Dei 区域外,你不会找到那么多甚至根本找不到树枝或片麻岩矿石!)
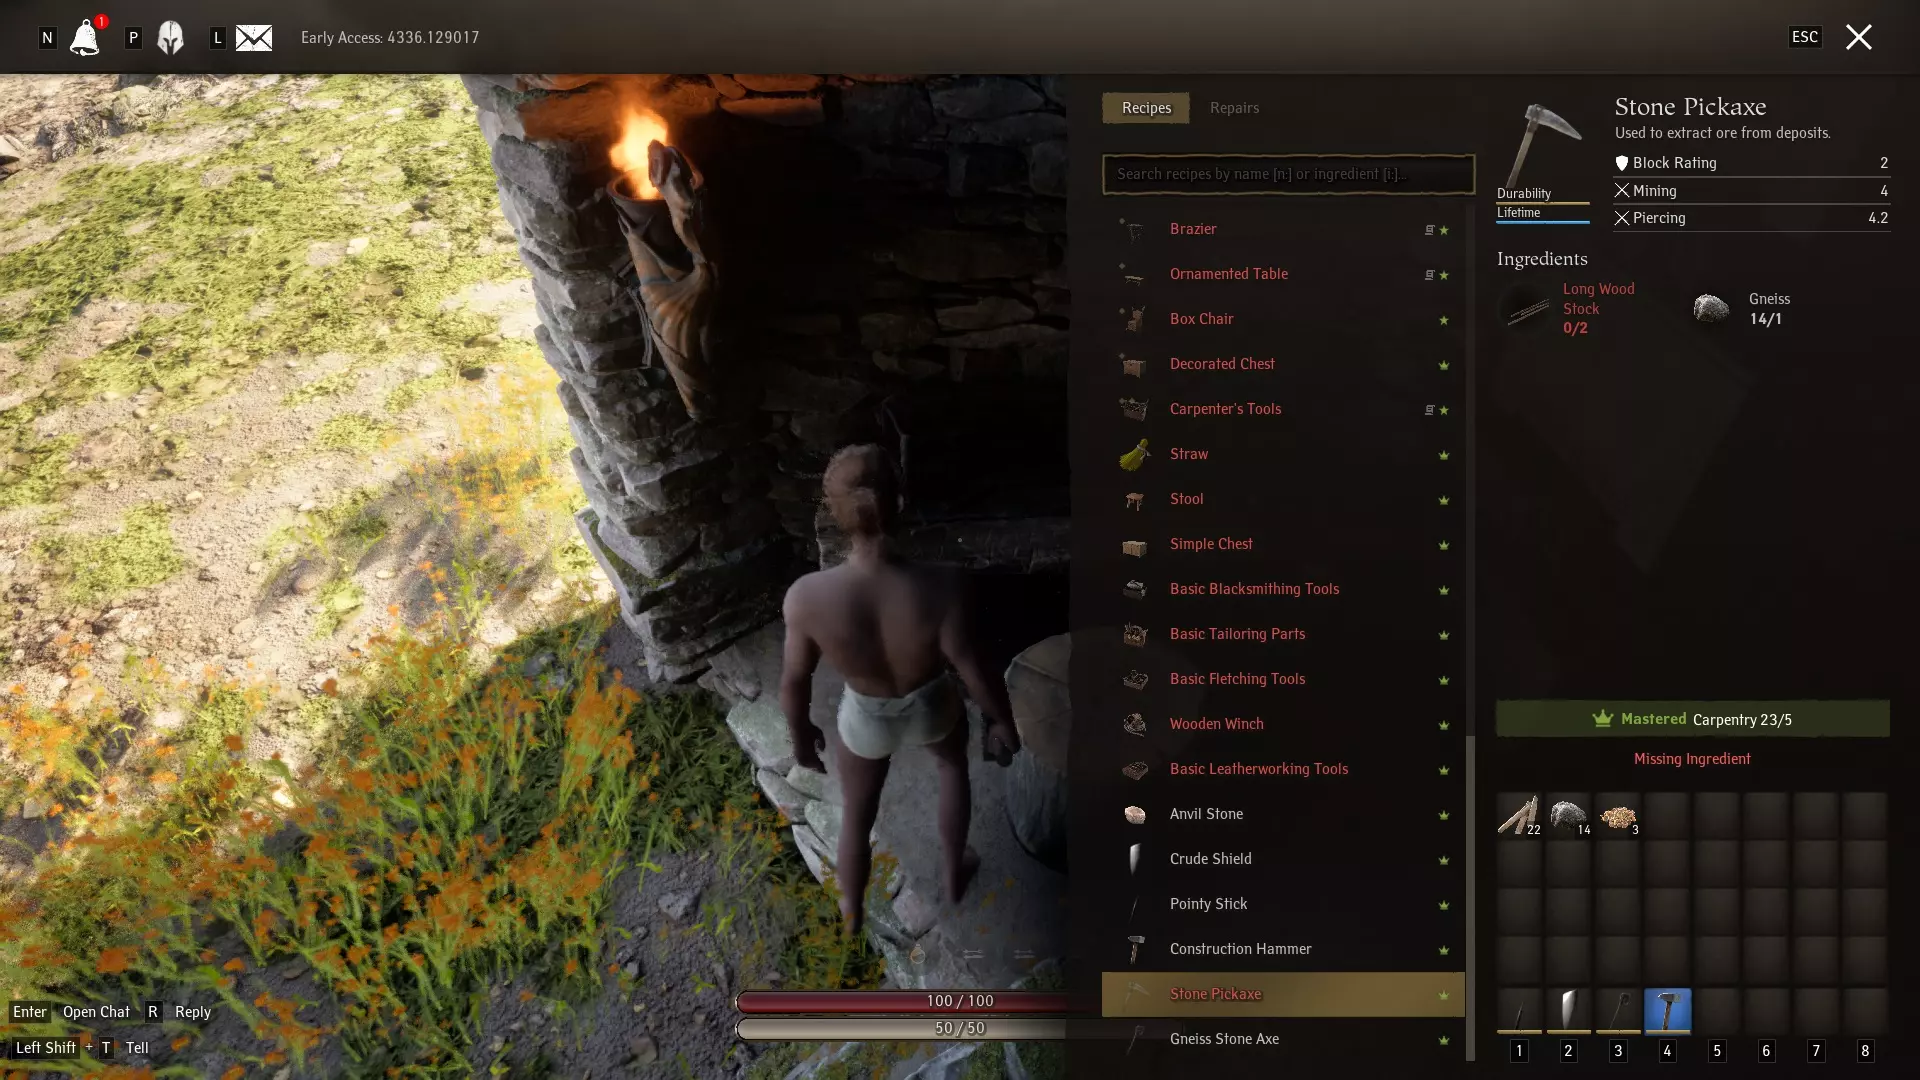
如果你已经建造了木工台,那么你可以花些时间制作一把石镐,它能让你开采片麻岩、铜和锡。使用石镐采矿会获得片麻岩和沙子,这两种都是有用的材料。
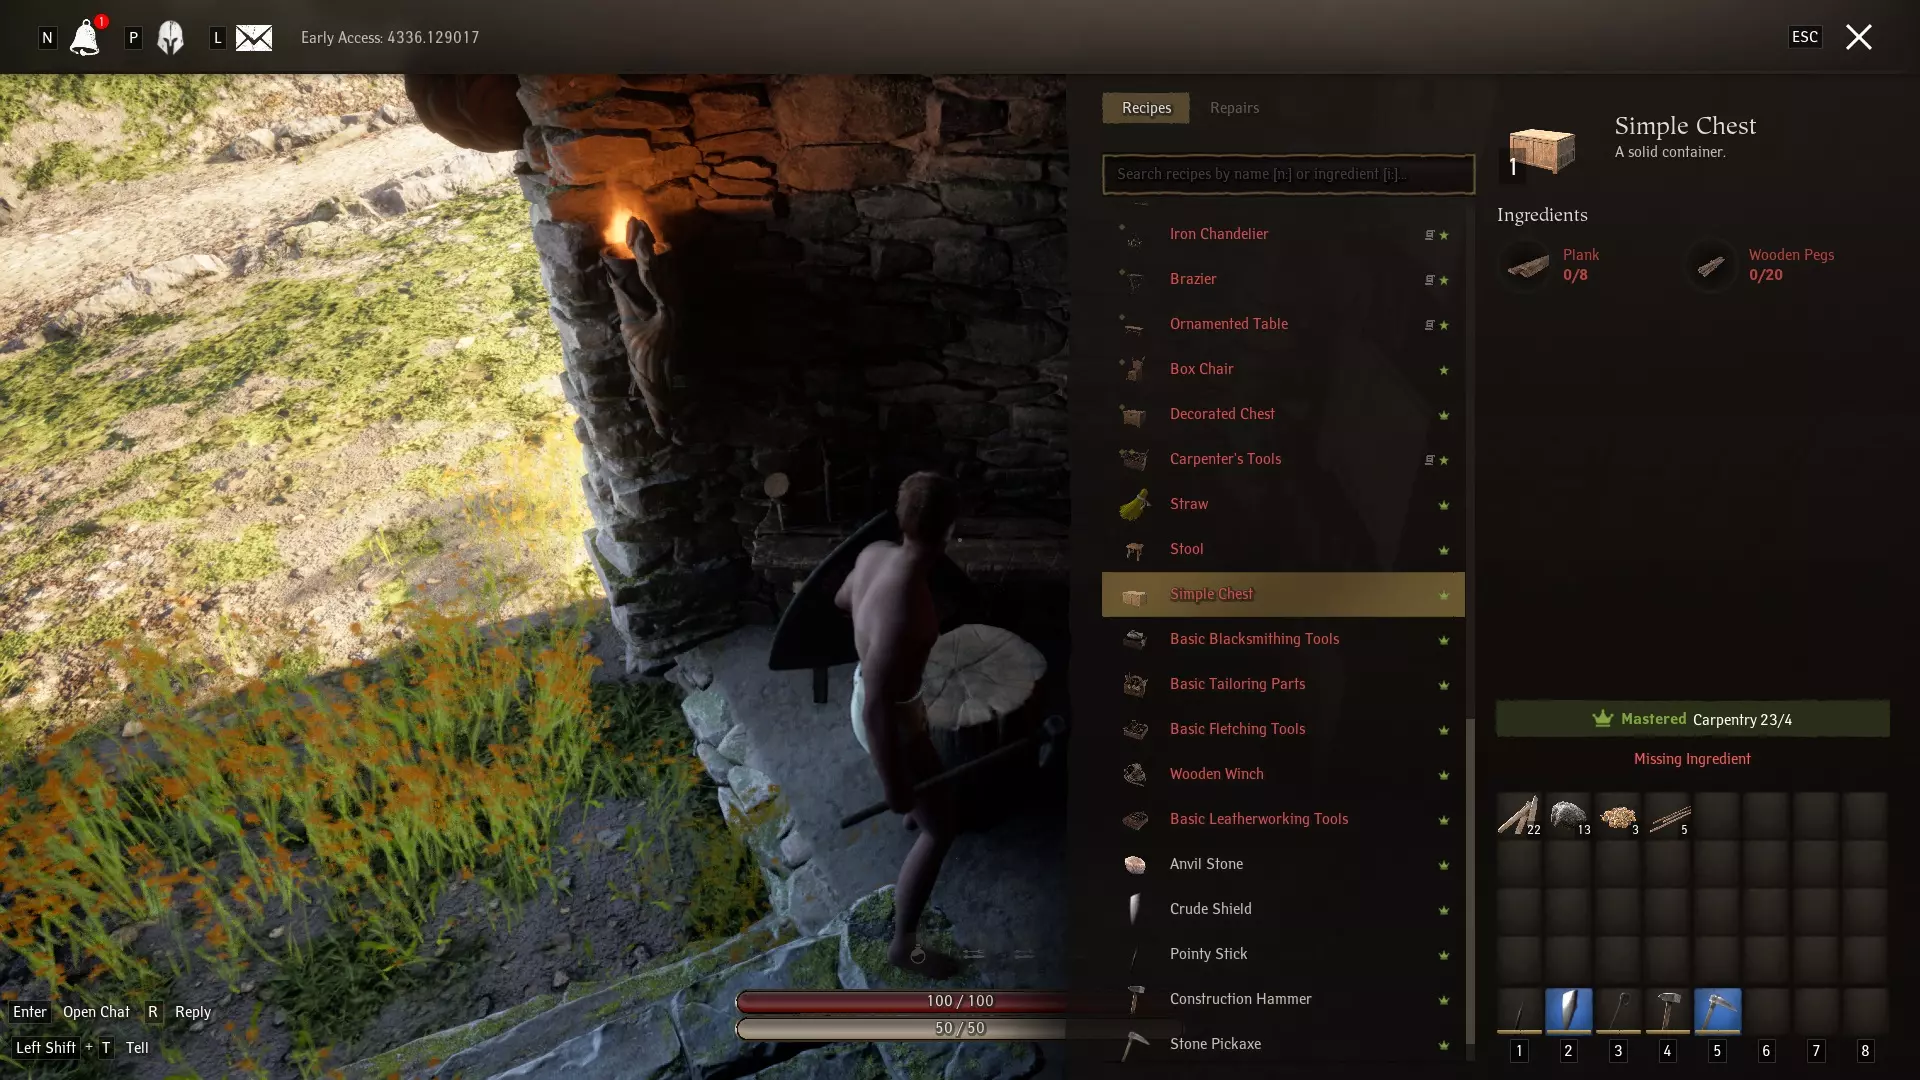
你还可以使用木工台制作另一个重要物品——“简易箱子”。这是一个重要的物件,你可以用建造锤将其放置,用来存放你各种各样的物品。
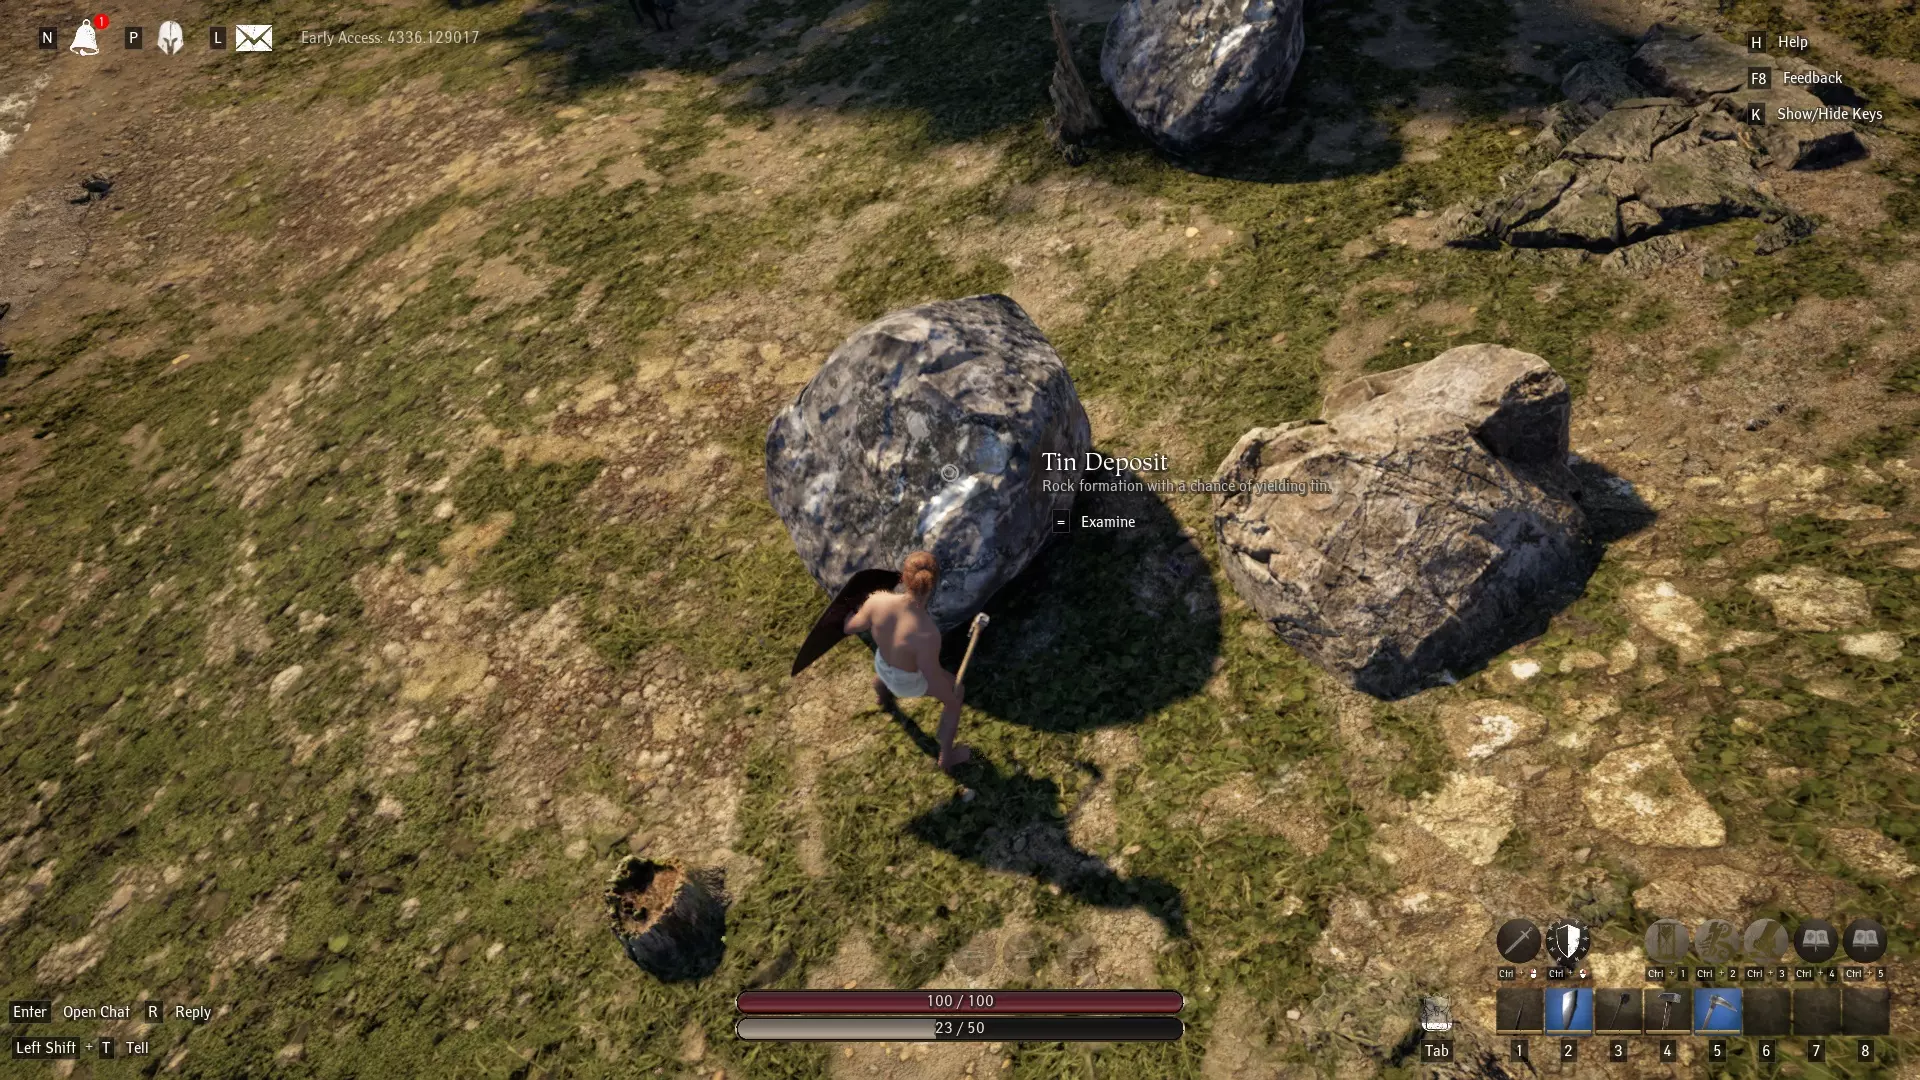
无论如何,这应该能为你提供搭建一个基础基地所需的一切。在下一章中,我们将开始讨论《和平之神》(Pax Dei)中单人玩家的稳定进阶路线。所有内容都是相互关联的,因此你需要大量刷取技能,才能制作下一级别的装备和工作台。 《和平之神》新手指南第三章:准备好进入新的阶段了吗? 当你拥有一个让自己满意且安心的初始基地后,《和平之神》的核心玩法——刷技能——就开始了。按下J键,你可以打开日志,查看游戏中的所有技能。游戏中共有16种制作技能和10种战斗技能。在《和平之神》中,要充分体验游戏内容,你可能需要用到16种制作技能中的近12种,只有约4种是纯可选的。所以如果你真的打算 solo 游玩,预计要投入大量精力。 我的建议是——如果你不愿意在《和平之神》中花费大量时间肝游戏,那就加入《和平之神》的 Discord 社群,在你选择的服务器上找一个氏族加入。这样你可能会快乐得多,也能更快速、更轻松地体验游戏流程。 至于其他像我一样疯狂、想 solo 通关的玩家?做好准备吧。 接下来,我会尽力为你提供一份从创建初始基地一直到制作二级工作台的指南。这是一个漫长而艰巨的过程,需要大量的刷怪刷材料,所以不要三心二意地投入其中。 单人攻略第一章:青铜生产 在搭建好基地并放置好储物箱以及任何你觉得美观的设施后,接下来的首要任务就是建造其他工作台。作为单人玩家,你在这个过程中不会得到任何帮助,这意味着所有资源都需要你自己收集,所有物品都需要你自己制作。 这意味着你需要熔炉、木炭窑和工作台! 要开始这段旅程,你的目标应该是制作一个基础铁匠工作台,它需要: 1. 基础铁匠工具 2. 4根木梁 3. 6块木板 4. 20个木钉 而制作基础铁匠工具则需要: 1. 2块青铜板 2. 2根青铜条 3. 4个青铜钉这意味着你需要生产青铜才能继续推进!青铜的制作流程是:先将锡矿石和铜矿石熔炼为锡锭与铜锭,然后再用这些锭来制作青铜锭。正如上一章所述,你需要找到铜矿床和锡矿床,并且需要使用石镐来开采它们,以收集锡矿石和铜矿石。 不过,你还需要建造生产这些矿石的设施!也就是基础木炭窑和基础熔炉。
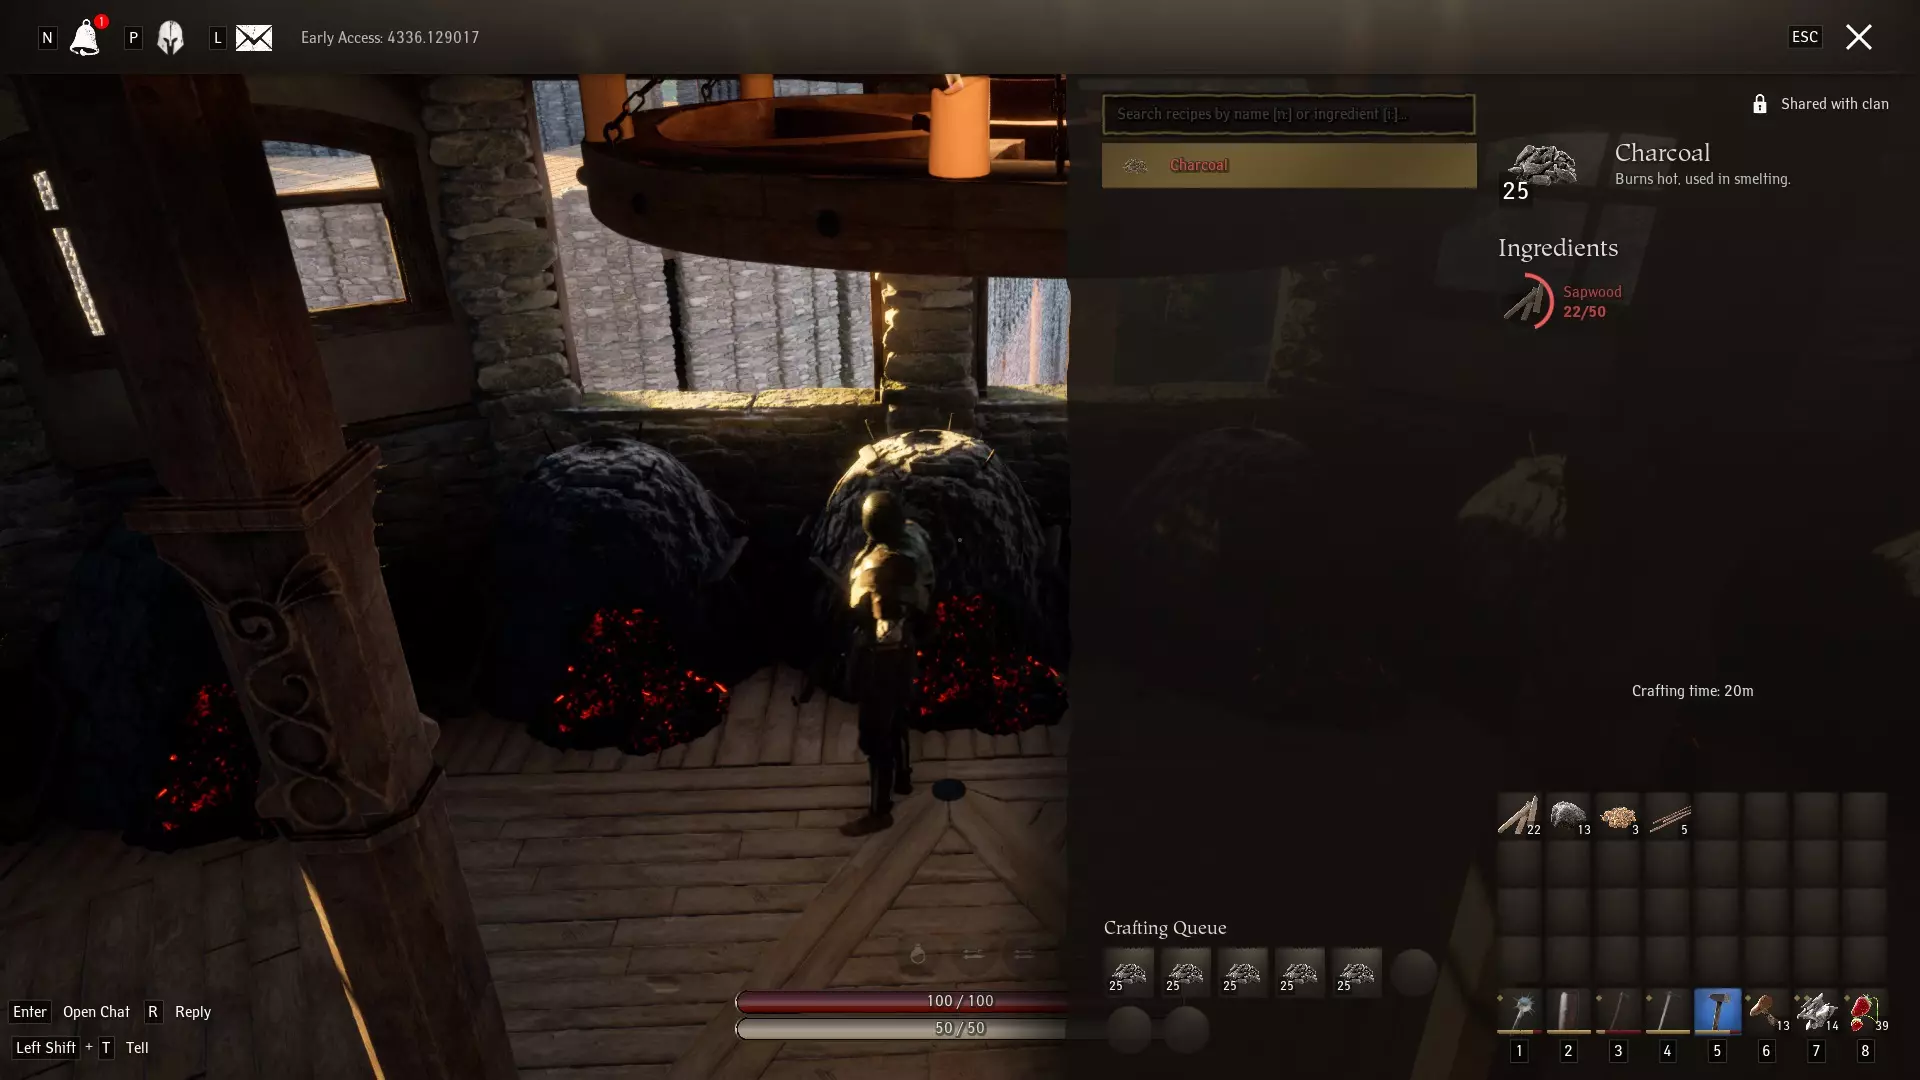

收集60个黏土、8个片麻岩和12个短木坯来制作基础熔炉,以及25个黏土和10个边材来制作基础木炭窑。当你的地块上同时拥有这两者后,就可以开始制作木炭了。 通过砍伐树木可以获得边材,边材可放入木炭窑中。50个边材能制作25个木炭,其中30个木炭是制作铜锭和锡锭所必需的,之后制作青铜锭则需要100个木炭。因此,我的建议是,一旦搭建好木炭窑,就尽早大量制作木炭!如果你足够勤劳且能高效砍树,甚至可以建造额外的木炭窑来更快地生产木炭! 现在,当你的木炭和锭正在制作时……接下来你需要从基础木工工作台制作一个“铁砧石”。之后,你就可以在建造菜单中用5块片麻岩和10块边材制作“石制铁砧”了。
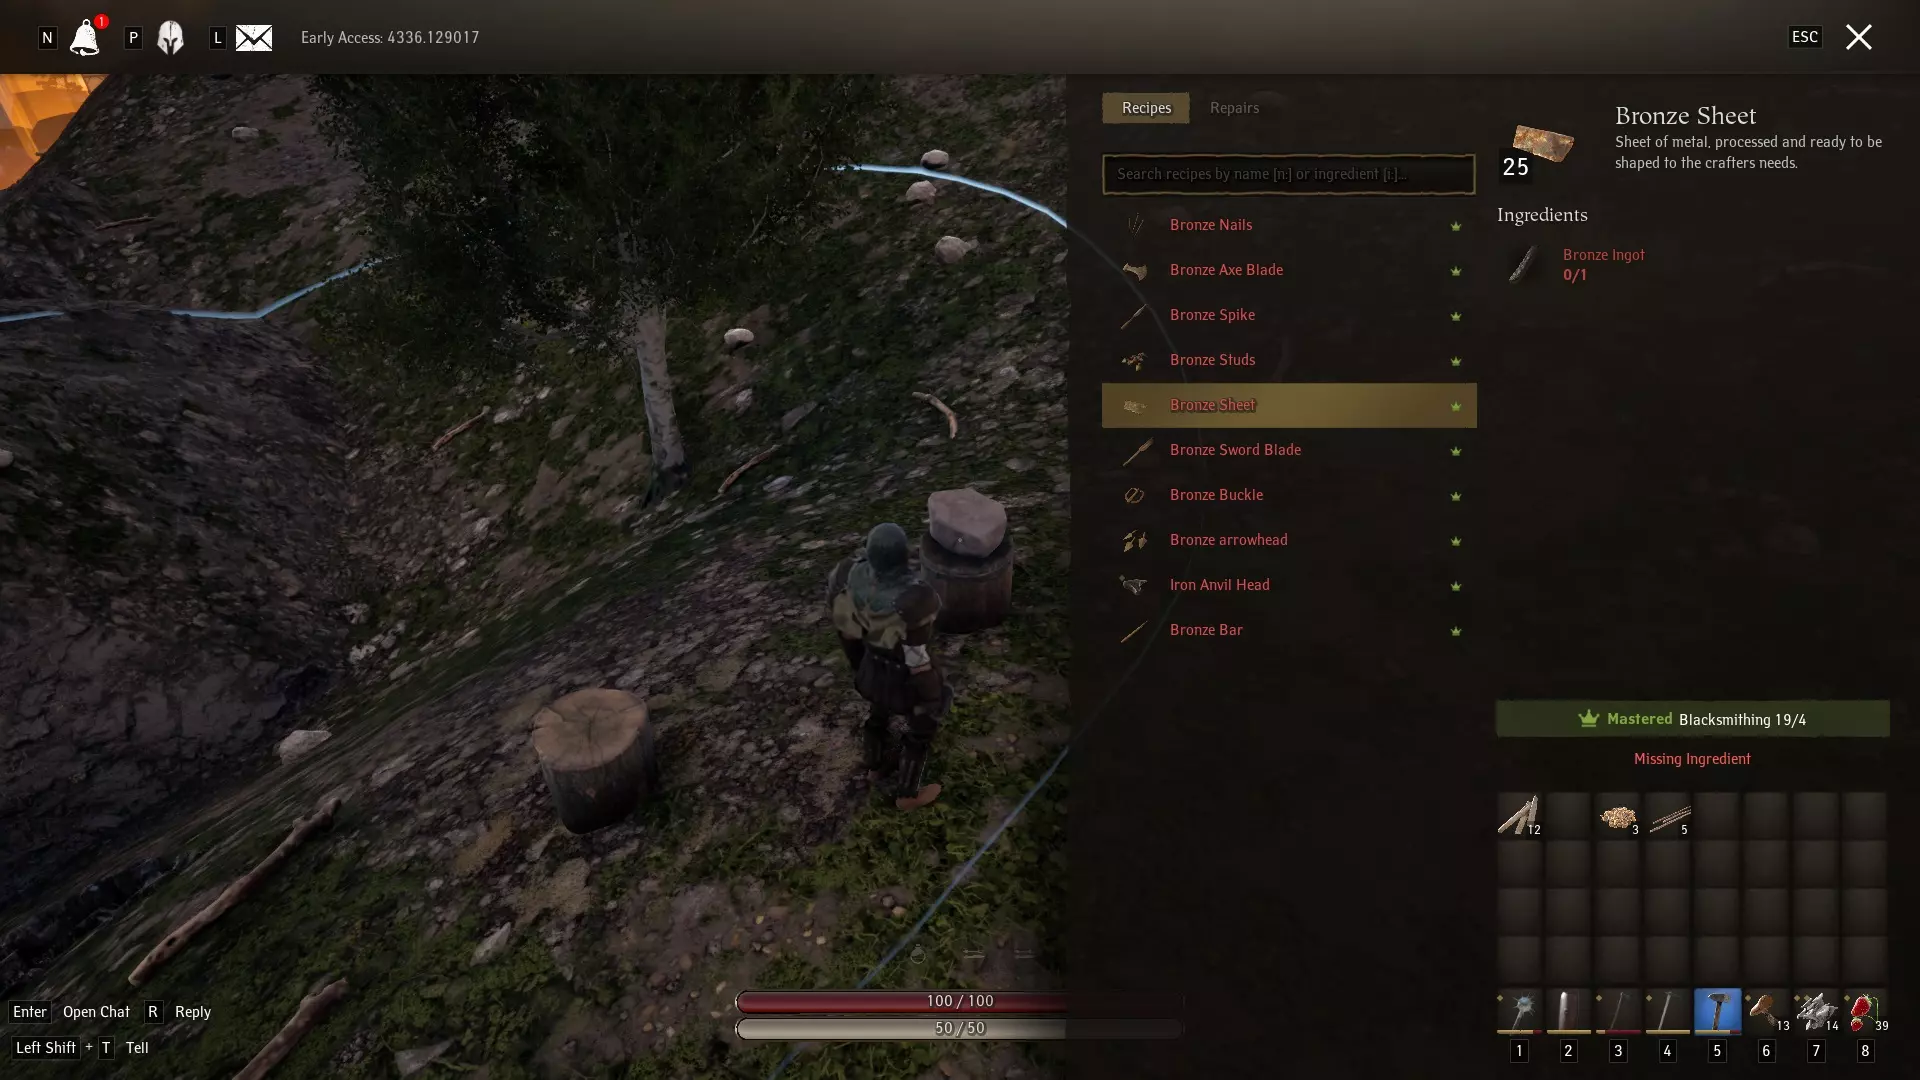
使用这座石砧,在你制作出青铜锭后,就可以继续制作青铜棒,然后用青铜棒打造青铜钉子。别忘了还要制作一叠青铜板,以完成你的基础铁匠工作台。
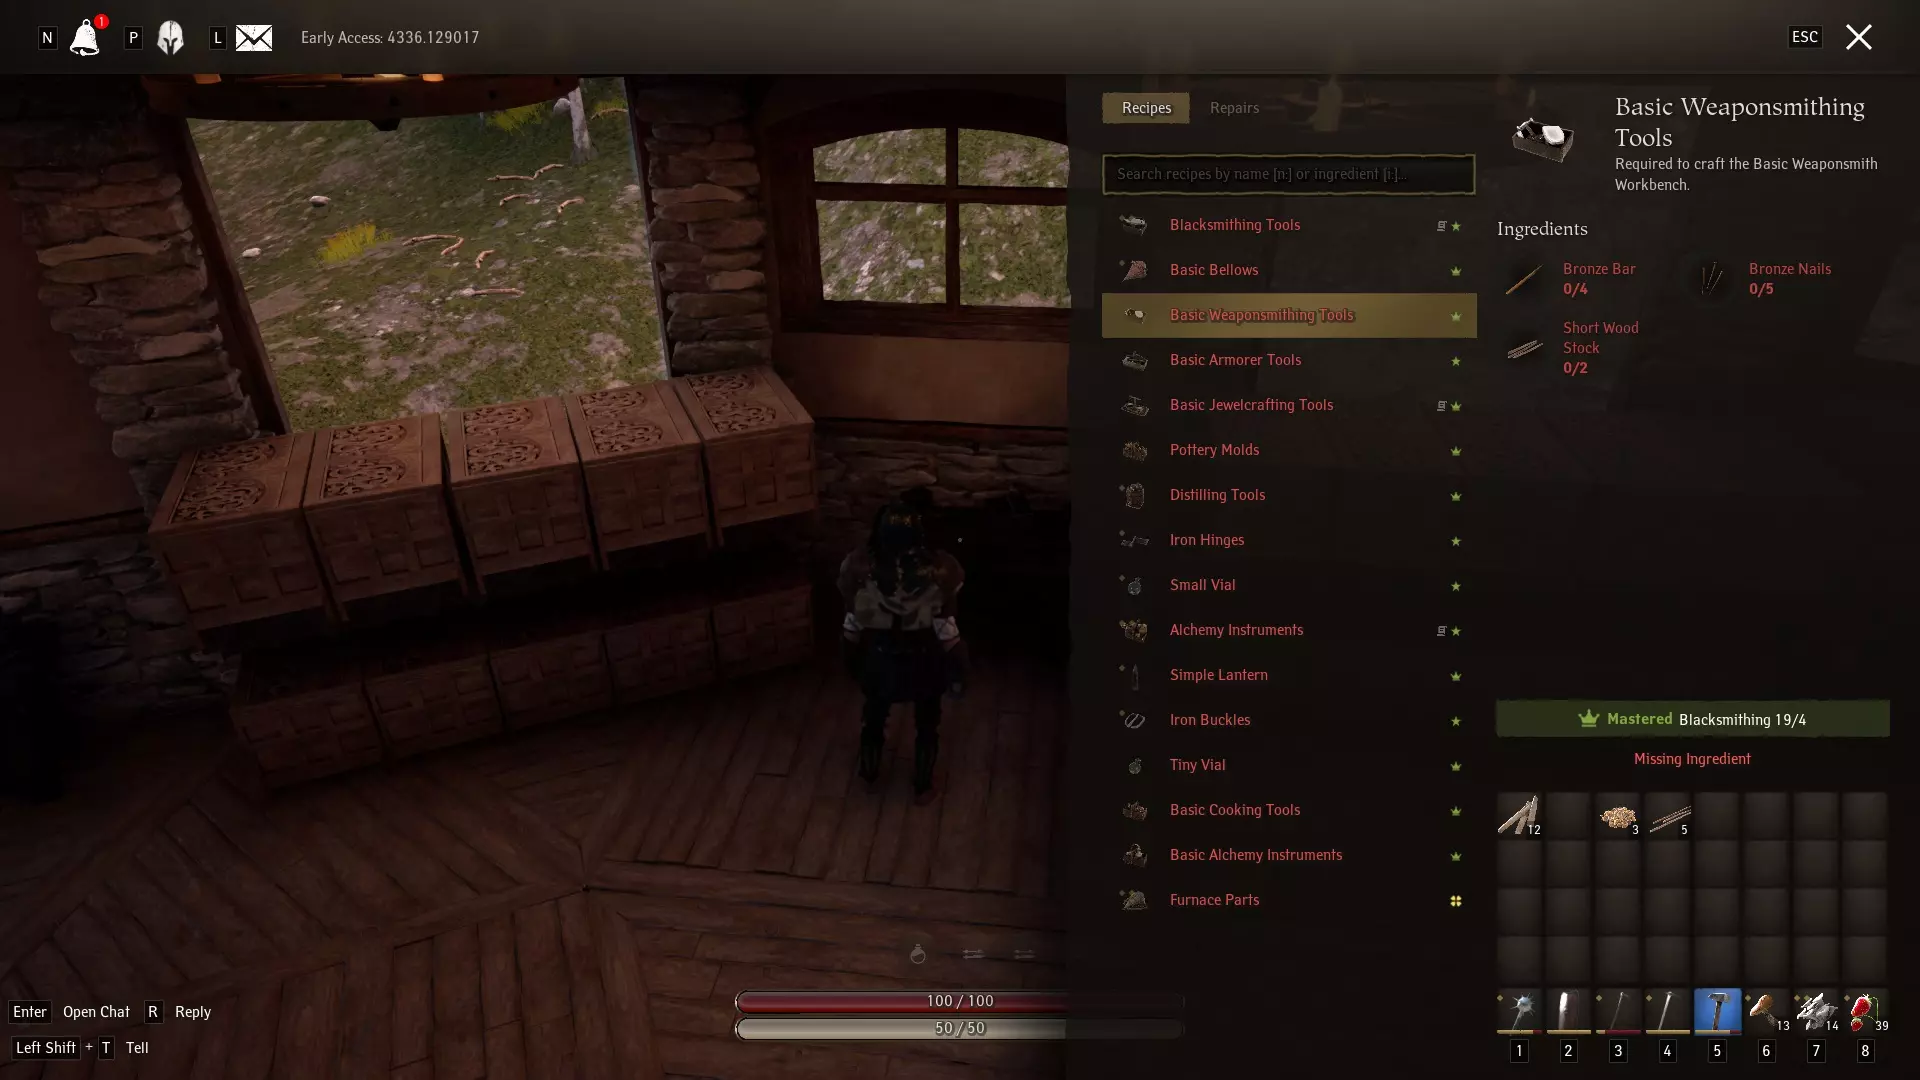
接下来,恭喜你!你已经制作出基础铁匠工作台,这将为你解锁更多制作场所和物品! 单人指南第二章:无处不在的工作台 你已经搭建好了铁匠工作台,但这还没完。作为一名单人玩家,若想真正发展壮大,你还需要大量的工作台。为什么呢?因为大多数技能都需要与其他技能相互配合才能制作物品。有时,你需要较高的皮革制作技能才能在铁匠工作台上制作工具。同样,你也常常需要较高的铁匠技能来为皮革制品制作带扣。 所以,我的建议是——搭建好你的工作台,为单人模式下各个技能的精彩打磨世界做好准备。(没错,即便是烹饪、熟食加工和炼金术对 solo 玩家也很有用) 你需要制作以下物品: - **基础皮革加工工具**(1 个碎骨、10 个边材、5 个燧石) - **简易鞣制架**(6 个长木坯、2 个短木坯、8 个芦苇) - **简易皮革加工台**(1 个基础皮革加工工具、4 个木梁、6 个木板、20 个木钉) - **基础武器锻造工具**(4 个青铜锭、5 个青铜钉、2 个短木坯) - **基础武器锻造工作台**(1 个基础武器锻造工具、4 个木梁、6 个木板、20 个木钉) 当你搭建好所有这些工作台后,花些时间将皮革鞣制成生皮,然后使用皮革加工台制作粗皮绳。(总共至少制作15个,以备后续所需) ============================================= 接下来你需要建造的物品包括: - **纺车**(10个短木坯料、1个木板、6个木栓) - **基础裁缝部件**(1个骨碎片、5个亚麻纤维、10个边材) 你还需要从附近的灌木丛或丘陵生物群系收集一些亚麻,然后用纺车将其制作成粗亚麻线。这将让你能够为后续制作以下物品: - **简易裁缝桌**(1个基础裁缝部件、4个木梁、6个木板、20个木栓、5根粗亚麻线) - **简易织布机**(12个木板、40个木栓、8个短木坯料、40根粗亚麻线、12根粗皮革线)你还可以选择制作以下物品(建议制作,但非必需): - **基础制箭工具**(20块燧石、20块边材、10根芦苇) - **基础制箭台**(1个基础制箭工具、4根木梁、6块木板、20个木栓) - **基础烹饪工具**(1块青铜板、2根短木柄、2块燧石) - **基础烹饪工作台**(1个基础烹饪工具、60块片麻岩、50块木炭、25块黏土) - **基础烹饪炉**(1个基础烹饪工具、20块片麻岩、50块木炭、25块黏土、2块铜锭) - **基础炼金仪器**(5块铜锭、2根青铜棒、5块粗玻璃) - **基础炼金台**(1个基础炼金仪器、4根木梁、6块木板、20个木栓、5块粗玻璃) - **基础试剂蒸馏器**(4块木板、12根青铜钉、10块粗玻璃、100个青铜饰钉)一旦你完成了所有必要的工作台,就该打造基础熔炉了!首先在锻造工作台上制作基础风箱(需要长木坯、3根粗皮绳、4张生皮、10块边材、20枚青铜钉、1个铁砧头)。 然后在建造菜单的“基础熔炉”选项中放置它(需要1个基础风箱、2根木梁、4块木板、2块黏土、10块木炭、3块片麻岩、20个木栓)。 这将为你开启许多在石砧上无法实现的新选项,尤其是你将能够打造铁质装备。 不过现在我们先把这个放一放。铁制品的生产固然重要,但对于 solo 玩家来说,还有一个同样有用的事情值得你暂时分心去做。花点时间查看你的武器锻造工作台,看看能否打造出一把既快速又简单的像样武器……不过就算不行也不用担心,一根尖头木棍和一面简陋的盾牌也能帮你应对接下来的章节。 单人攻略第三章:装备自身 作为单人玩家,你将面临大量战斗。你不仅要面对可能多达数千头的野猪,而且由于无法将中小型的二阶兽皮缝合在一起,实际上你还得去猎杀熊来获取二阶大型动物皮。这意味着在游戏初期,你能为自己做的最重要的事情就是获取一些非常好的装备。 幸运的是,游戏中的“主机”为我们新增了营地,这些营地被称为审判者营地。
作为新手玩家,你应优先关注佩特拉 Dei 附近或你家乡任意重生圣坛周边的 4 级审判官营地。在这款游戏中,如果你远离重生点,死亡后会很麻烦,尤其是现阶段你的主要武器还只是尖刺木棍和粗糙盾牌。
你的目标是找到这些营地中的4级审判官,将他们孤立并消灭。记住,按住Ctrl键+左键点击,可以使用你的尖矛发动“刺击”特殊攻击,造成额外伤害。更重要的是,记得按住Ctrl键+右键点击,使用你的“粗糙盾牌”发动“盾牌猛击”特殊攻击。盾牌猛击会击晕敌人,让你有机会在他们反击前造成更多伤害。 审判官实际上会掉落很多对早期玩家非常有用的战利品。有时你会获得已熔炼好的铁锭,有时会得到极其珍贵的铁矿石。不过,你的目标是收集“破损的吊坠”、“磨损的吊坠”、“小型大地护身符”、“小型水之护身符”和“小型空气护身符”。 收集这些护身符将为你解锁以下装备的制作配方:
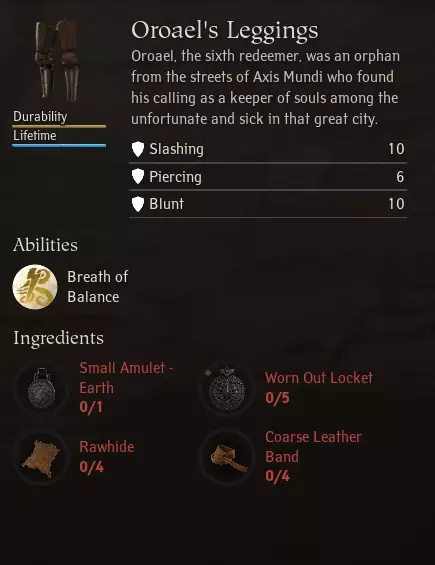
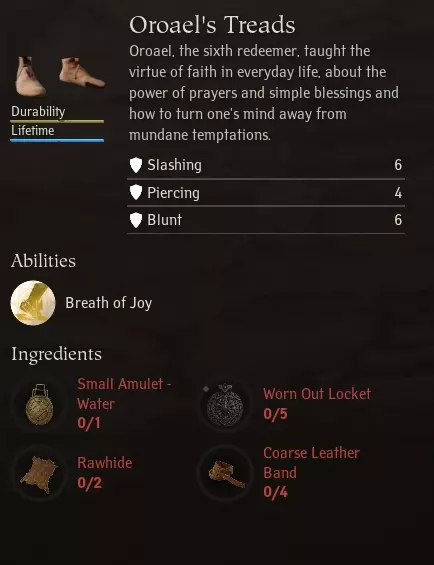
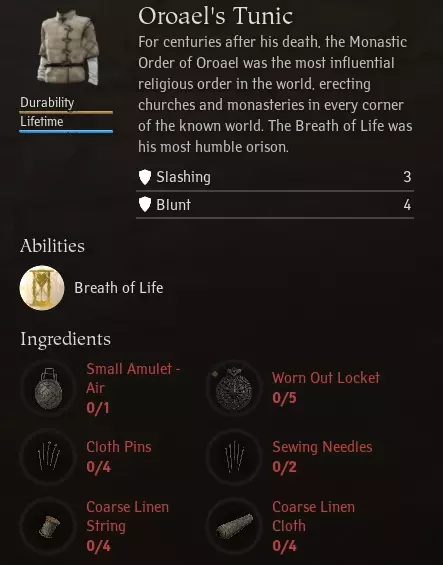
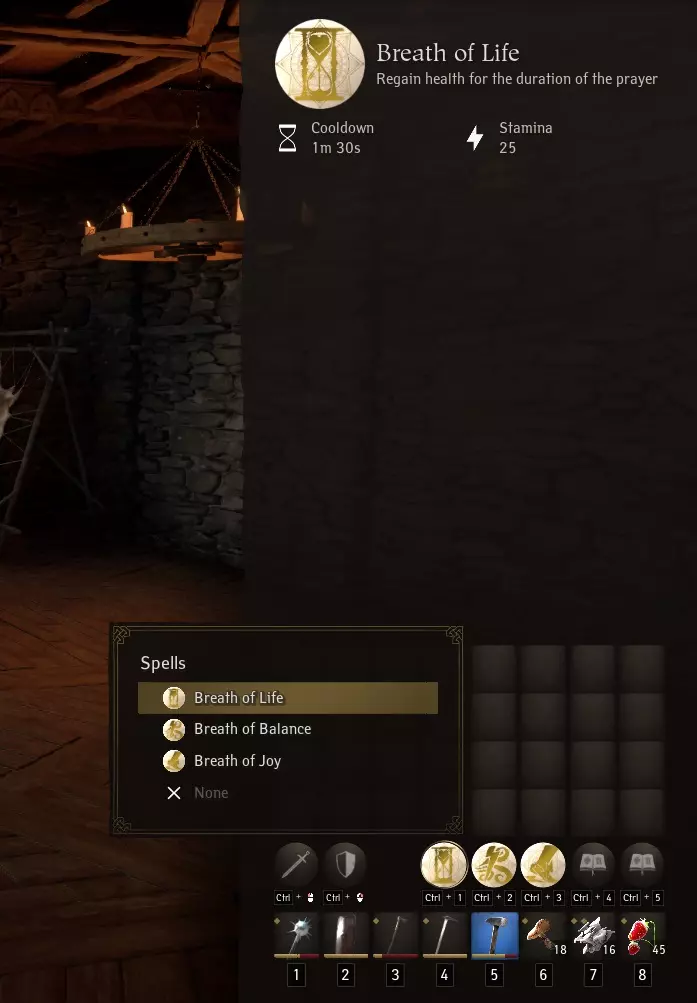
这些盔甲带有非常特殊的魔法,你可以按“I”键打开背包,然后选中屏幕右下角的5个圆圈之一,将其添加到任务栏。 生命之息:5秒内每秒恢复17点生命值。 平衡之息:施法3秒后恢复50点耐力。 喜悦之息:7秒的 sprint (疾跑)增益效果,提升移动速度,且跑步时不消耗耐力。(这是目前游戏中最棒的法术。) 选择出现的法术将其添加到任务栏后,你可以使用“Ctrl + 1至5”来施放这些法术。
单人攻略第四章:铁矿生产 在这些章节中,希望你一直在提升自己的技能。仅使用青铜就应该能让你的武器锻造技能达到10级,铁匠技能达到8级。你可能也花了一些时间研究新的工作台,并得出结论:更好的武器和盔甲是个好主意。我倾向于同意这一点——在这些章节之间多花些时间,根据自己的技能水平打造最好的装备。 如果你一直在提升武器锻造技能(你也应该这么做),你可能已经接触过“青铜镐”。这个小宝贝不仅是将武器锻造技能提升到10级的最佳工具,也是必不可少的物品。这把小巧的镐子能引领你独自踏上成长之路。打造出它后,你就可以开采那些烦人的“粗铁矿石”了——你或许已经注意到,它们就散布在锡矿和铜矿节点旁的悬崖边。
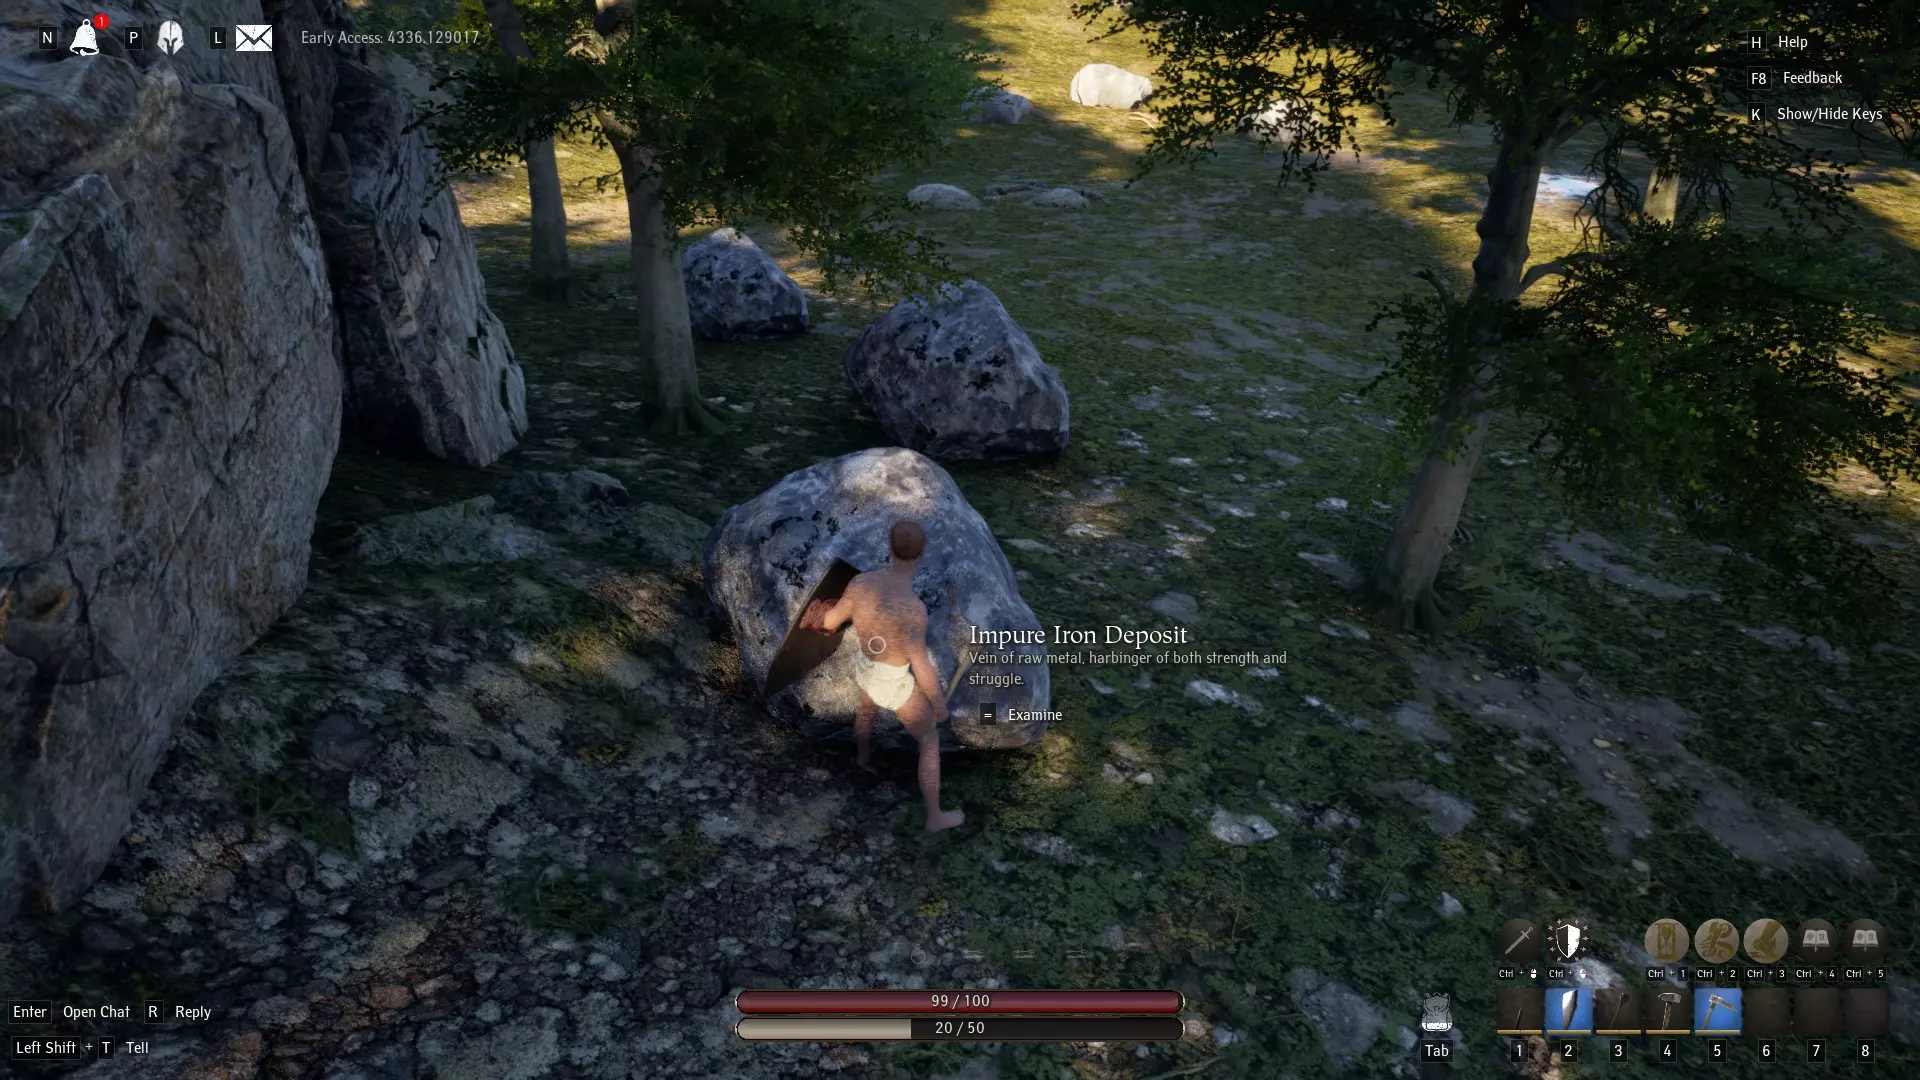
手持青铜镐,尽情开采这些不纯铁矿脉吧。当你觉得收集得差不多了,就将其熔炼成铁锭。在此期间,你可能会发现需要更多的木炭。这是因为,与青铜不同,你需要大量铁锭才能努力提升等级,以解锁二级工作台。我的建议是通过增加熔炉和窑炉的数量来提高生产效率。我个人使用了大约3个熔炉和10个窑炉。其他人可以根据自己愿意投入多少时间采集边材和不纯铁矿石来维持窑炉与熔炉运转,选择更多或更少的数量。
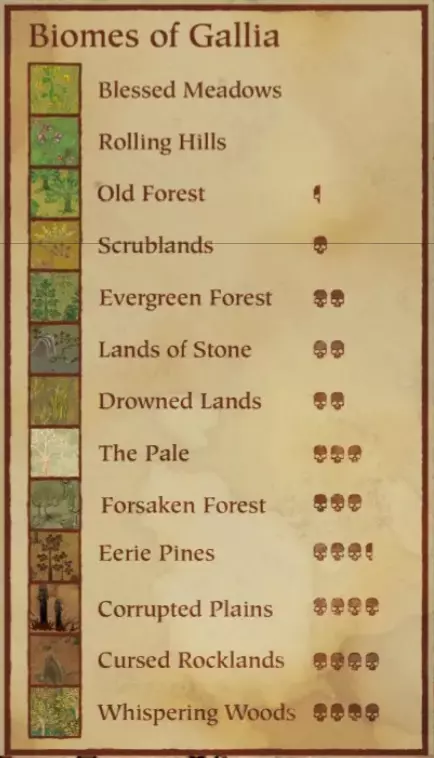
Regardless of how much effort you're willing to put into it. Your goal remains the same right now. Garnering Tier 2 Workbenches. Right now you have only the basic forms of the workbenches, otherwise known as the Tier 1's. This is limited in that you can not create everything in the game on them, you can only create maybe 1/3rd of what's possible on Basic Workbenches. However, the requirements to making the most important Tier 2 workbench (The one that makes the others), the Carpentry Workbench are: Carpenters Tools (1 Wrought Iron Nail, 1 Boiled Generic Leather) Carpenter Workbench (1 Carpenter's Tools, 4 Fine Wood Beam, 6 Fine Wood Plank, 20 Wooden Pegs) This means, to create a Carpenter's Workbench, you will need at the very minimum: 19 Blacksmithing to make Wrought Iron Bars/Nails/Knife Head. 16 Leatherworking to make Generic Boiled Leather. 15 Carpentry to actually place the Tier 2 Carpenter Workbench. Another important skill milestone you're likely going to want will include: 15 Tailoring to make Coarse Linen String for the Tier 2 Forge Now that you've got your Iron Production started, it's time for you to grind. Solo Guide Chapter 5: WIP --I'll write it up when I get a chance.-- Grind Guide - Alchemy (15 Alchemy is used to actually place your Tier 2 Alchemy Table.) Alchemy is going to be a HEAVILY subjective grind. Honestly, it will depend more on what you have the easiest access to, when it comes to grinding. I'm going to give up on a linear form of progression. Skill 1 -> 2: Weak Health Tonic I (Fly Agaric) then Skill 2 -> 4: Weak Healing Potion I (Datura Fruit) Skill 1 -> 4: Weak Healing Potion I (Datura Fruit) Skill 3 -> 7: Aegis Potion I (Soapwort) Skill 4 -> 8: Weak Potion of Vitality I (Meadosweet) Skill 4 -> 8: Weak Tonic of Vitality I (Fly Agaric) Skill 5 -> 10: Weak Healing Tonic II (Fly Agaric) Skill 5 -> 10: Weak Healing Potion II (Datura Fruit) Skill 6 -> 11: Aegis Potion II (Soapwort) Skill 7 -> 12: Weak Tonic of Vitality II (Fly Agaric) Skill 10 -> 12: Weak Potion of Vitality II (Datura Leaf) (10 Alchemy for Datura Leaf Extract) Skill 8 -> 13: Aegis Potion III (Alfalfa) Skill 9 -> 13: Fire Resistance I (Sow Thistle) (9 Alchemy for Sow Thistle Extract) Skill 10 -> 15: Weak Health Tonic III (Lavender) Skill 10 -> 15: Weak Healing Potion III (Tansy) Skill 11 -> 16: Aegis Potion IV (Castor) Skill 12 -> 16: Poison Resistance I (Amanita Regalis) (12 Alchemy for Amanita Regalis Extract) Skill 12 -> 17: Weak Potion of Vitality III (Datura Leaf) Skill 12 -> 17: Weak Tonic of Vitality III (Amanita Regalis) Skill 14 -> 19: Cold Resistance I (Crane Flower) Skill 14 -> 19: Aegis Potion V (Castor) Skill 14 -> 20: Minor Healing Potion I (Crown Beard) Skill 18 -> 20: Minor Health Tonic I (Death Cap) (18 Alchemy for Death Cap Extract) Skill 15 -> 21: Minor Potion of Vitality I (High Mallow) Skill 15 -> 21: Minor Tonic of Vitality I (Golden Poppy) Skill 16 -> 22: Steady Mind I (Golden Poppy) Skill 19 -> 23: Aegis Potion VI (Starwort) (19 Alchemy for Starwort Extract) Skill 19 -> 25: Fire Resistance II (Pasque Flower) Skill 19 -> 25: Minor Health Tonic II (Death Cap) Skill 19 -> 25: Minor Healing Potion II (Crown Beard) Skill 20 -> 26: Aegis Potion VII (Starwort) Skill 22 -> 26: Minor Tonic of Vitality II (Red Poppy) (22 Alchemy for Red Poppy Extract) Skill 23 -> 26: Minor Potion of Vitality II (Wolfsbane Leaf) (23 Alchemy for Wolfsbane Extract) Skill 22 -> 28: Poison Resistance II (Red Poppy) Skill 23 -> 29: Aegis Potion VIII (Starwort) Skill 23 -> 30: Minor Healing Potion III (Fool's Webcap) Skill 27 -> 30: Minor Health Tonic III (Skullcap) (27 Alchemy for Skullcap Extract) Skill 25 -> 32: Cold Resistance II (Deadly Nightshade) Skill 25 -> 32: Aegis Potion IX (Bladder Campion) Skill 26 -> 33: Minor Potion of Vitality III (Wolfsbane Leaf) Skill 26 -> 33: Minor Tonic of Vitality III (Bladder Campion) Skill 28 -> 35: Steady Mind II (Batflower) Skill 28 -> 35: Aegis Potion X (Bladder Campion) Skill 29 -> 36: Health Tonic I (Skullcap) Skill 29 -> 36: Healing Potion I (Skullcap) Skill 31 -> 38: Fire Resistance III (Batflower) Skill 33 -> 39: Potion of Vitality I (Loios' Tears) (33 Alchemy for Loios' Tears Extract) Skill 33 -> 39: Tonic of Vitality I (Loios' Tears) (33 Alchemy for Loios' Tears Extract) Skill 36 -> 38: Potion of the Aegis (Elegant Stinkhorn) (36 Alchemy for Elegant Stinkhorn Extract) Skill 36 -> 40: Poison Resistance III (Elegant Stinkhorn) (36 Alchemy for E. Stinkhorn Extract) 40 is the new max as of patch 4367 Grind Guide - Armorsmithing (15 Armor Smithing is used to actually place your Tier 2 Armor SmithWorkbench.) Skill 1 -> 4: Wooden Buckler Skill 4 -> 8: Primitive Chainmail Coif I Skill 8 -> 10: Primitive Chainmail Shoes I Skill 10 -> 15: Primitive Chainmail Gloves II Skill 15 -> 16 or 19: Inferior Chainmail Coif II Skill 16 or 19 -> 22: Butted Chainmail Gloves I Skill 22 -> 24: Butted Chainmail Coif III Skill 24 -> 29: Butted Chainmail Gloves V Skill 29 -> 36: Riveted Chainmail Gives I Skill 36 -> 38: Riveted Chainmail Shoes II Skill 38 -> 40: Riveted Chainmail Coif IV 40 is the new max as of patch 4367 Grind Guide - Baking I've never done baking, so you'll have to be patient. I'll grind it up in game first before I write out a guide for this one. Sorry for the inconvenience. Grind Guide - Blacksmithing (19 Blacksmithing is used to make Wrought Iron Bars/Nails for Tier 2 Workbenches.) Skill 1 -> 3: Bronze Bars Skill 3 -> 4: Bronze Sheets and/or Nails Skill 4 -> 5: Bronze Studs Skill 5 -> 8: Bronze Buckles Skill 8 -> 11: Iron Bar Skill 11 -> 12: Iron Nails Skill 12 -> 13: Iron Studs Skill 13 -> 14: Iron Knife Blade Skill 14 -> 17: Iron Crossbar Skill 17 -> 18: Large Iron Crossguard Skill 18 -> 19: Large Iron Sword Blade AND/OR Skill 18 -> 19: Jewelcrafting Tools (Requires a Tier 2 Blacksmithing Workbench) AND/OR Skill 14 -> 19: Leatherworking Tools (Requires a Tier 2 Blacksmithing Workbench) AND/OR Skill 15 -> 19: Furnace Parts (Requires Boiled Generic Leather) Skill 19 -> 20: Wrought Iron Bar Skill 20 -> 21: Wrought Iron Nails or Wrought Iron Spike (For Weaponsmithing) (Tier 2+) Skill 21 -> 23: Wrought Iron Studs (Leatherworking) or Wrought Iron Spike (Weaponsmithing) Skill 23 -> 25: Wrought Iron Spike Skill 25 -> 28: Wrought Iron Arrowhead AND/OR Skill 28 -> 29: Baking Tools (Fine Linen Cloth) AND/OR Skill 28 -> 30: Basic Distilling Tools (The distilling tools are reversed/bugged) AND/OR Skill 28 -> 35: Large Wrought Iron Crossguard AND/OR Skill 30 -> 37: Steel Bar Skill 37 -> 38: Steel Nails or Steel Studs Skill 38 -> 39: Steel Spike Skill 39 -> 40: Steel Crossbar or Steel Arrowhead (The Large Iron Sword Blades HURT at 10 iron bars each. Solos do not have access to Tier 2 Blacksmith Workbenches, so they can not make Leatherworking Tools for cheaper. People in clans however, can instead use Leatherworking Tools to Wrought Iron. Furnace Parts will require a lot of generic boiled leather, which likely is only possible again, if you have friends or neighbours with tier 2 workbenches for you to use.) 40 is the new max as of patch 4367 Grind Guide - Carpentry (15 Carpentry is used to make the Tier 2 Carpentry Workbench.) Skill 1 -> 2: Wooden Pegs Skill 2 -> 3: Long Wood Stock Skill 3 -> 6: Wooden Beams Skill 6 -> 7: Tiny Stool Skill 7 -> 9: Wicker Window Flower Pot (Requires no Iron) AND/OR Skill 5 -> 10: Sand (Gneiss into Sand) AND/OR Skill 7 -> 12: Decorated Chest (Requires Iron Hinges) AND/OR Skill 9 -> 12: Ornamental Table (Requires no Iron) Skill 12 -> 17: Fine Wood Beam Skill 17 -> 19: Fine Wooden Plank AND/OR Skill 14 -> 20: Sand (Limestone into Sand) Skill 19 -> 23: Long Fine Wood Stock Skill 23 -> 27: Short Fine Wood Stock Skill 27 -> 40: Stone Planter with Frieze and/or Ivy. 40 is the new max as of patch 4367 Grind Guide - Charcuterie (15 Carpentry is used to place your Tier 2 Charcuterie Workbench, so your Charcterie skill doesn't matter here.) Skill 1 -> 2: Meat Chunks (Rabbit Carcasses) Skill 2 -> 3: Meat Strips Skill 3 -> 5: Poorly Parted Deer Skill 5 -> 7: Parted Deer Skill 7 -> 9: Poorly Parted Boar Skill 9 -> 14: Parted Boar Skill 14 -> 16: Well Parted Deer (Tier 2+) Skill 16 -> 22: Well Parted Boar Skill 22 -> 25: Butchered Deer Skill 25 -> 27: Butchered Boar Skill 27 -> 30: Skillfully Butchered Deer Skill 30 -> 31: Skillfully Butchered Boar Skill 31 -> 35: Premium Butchered Deer Skill 35 -> 36: Premium Butchered Boar Skill 36 -> 39: Premium Butchered Wolf Skill 39 -> 40: There is nothing. Enjoy grinding on Trivial stuff. 40 is the new max as of patch 4367 Grind Guide - Cooking (15 Cooking is used to place your Tier 2 Cooking Workbench.) Skill 1 -> 4: Barley Water or Tallow or Lard Skill 4 -> 8: Amber Barley Water Skill 8 -> 9: Golden Barley Water Skill 9 -> 14: Blueberry Syrup Skill 14 -> 18: Raspberry Syrup Skill 18 -> 23: Strawberry Syrup Skill 23 -> 28: Red Currant Syrup Skill 28 -> 33: Raisins Skill 33 -> 34: Blackberry Syrup Skill 34 -> 38: Elderberry Syrup Skill 38 -> 40: There is nothing. Enjoy grinding on Trivial items. 40 is the new max as of patch 4367 Grind Guide - Fletching (15 Fletching is used to actually place your Tier 2 Fletching Workbench.) Skill 1 -> 2: Wooden Arrow Skill 2 -> 5: Flinthead Arrow Skill 5 -> 7: Bronze Tipped Arrow Skill 7 -> 9: Iron Tipped Arrow Skill 9 -> 14: Wrought Iron Tipped Arrow Skill 14 -> 15: Rough Bow Stave (It starts to suck from this point on.) Skill 15 -> 18: Sturdy Longbow Skill 18 -> 19: Curved Longbow Skill 19 -> 23: Bow Stave Skill 23 -> 24: Silver Tipped Arrow Skill 24 -> 31: Steelhead Arrow Skill 31 -> 36: War Bow Skill 36 -> 40: There is nothing. Enjoy grinding on trivial items. 40 is the new max as of patch 4367 Grind Guide - Jewelry Making I've never done Jewelry Making, so you'll have to be patient. I'll grind it up in game first before I write out a guide for this one. Sorry for the inconvenience. Skill 1 -> 2: Simple Bronze Band Skill 2 -> 4: Blizzard Stone Amulet Skill 4 -> 8: Small Topaz Amulet Skill 8 -> 9: Onyx Headband (Or grind on Trivial, Small Topaz Amulet to save Onyx) Skill 9 -> 14: Slender Bronze Earring AND/OR Skill 11 -> 16: Small Silver Bracelet (Wrought Iron) AND/OR Skill 12 -> 17: Onyx Bronze Ring (Bronze) AND/OR Skill 13 -> 18: Shiny Silver Bracelet (Wrought Iron) 40 is the new max as of patch 4367 Grind Guide - Leatherworking (16 Leatherworking is used to make Generic Boiled Leather for Tier 2 Workbenches.) Skill 1 -> 2: Coarse Leather Band Skill 2 -> 3: Coarse Leather String Skill 3 -> 6: Suede Leather Shoes or Bonded Leather Hat Skill 6 -> 7: Suede Leather Gloves Skill 7 -> 11: Rough Leather Bands AND Rough Leather String (You need more Bands than String) Skill 11 -> 16: Split Leather Gloves Skill 16 -> 20: Animal Hide AND Large Animal Hide AND/OR Skill 18 -> 22: Leather Bands AND Leather String (You need more Bands than string.) Skill 22 -> 23: Decent Leather Gloves Skill 23 -> 26 or 28: Split Leather Hat Skill 26 or 28 -> 31: Corrected Leather Blacksmith Gloves AND/OR Skill 26 or 31 -> 33: Fine Leather Bands and Fine Leather String (More Bands than string.) Skill 33 -> 35: Fair Leather Hat Skill 35 -> 39: Splendid Corrected Leather Blacksmith Gloves Skill 39 -> 40: You're on your own here. Everything here requires sigils or leashes. 40 is the new max as of patch 4367 Grind Guide - Tailoring (15 Tailoring is used to make Coarse Cloth String for Tier 2 Workbenches.) Skill 1 -> 2: Coarse Linen String or Swing Needles Skill 2 -> 3: Cloth Pins Skill 3 -> 5: Plain Cloth Pants Skill 5 -> 10: Rough Linen String Skill 10 -> 11: Rough Cloth Tippet Skill 11 -> 13: Rather Simple Cloth Tippet Skill 13 -> 14: Unremarkable Undergarment Skill 14 -> 20: Linen String Skill 20 -> 21: Coarse Cotton Cord (Trust me, this is better than anything involving cloth pins) Skill 20 -> 23: Rough Wool Yarn (Trust me, this is better than anything involving cloth pins) Skill 23 -> 30: Fine Linen String Skill 30 -> 31: Rough Cotton Cord (Trust me, this is better than anything involving cloth pins) Skill 31 -> 33: Wool Yarn (Trust me, this is better than anything involving cloth pins) Skill 33 -> 40: Cotton Cord (Trust me, this is better than anything involving cloth pins) Cloth Pins become obscenely expensive after around level 15 for items, and it becomes much faster to simply farm Level 15+ boars for wool, or to make a trip to a Drowned Lands for cotton, than it does to actually make anything like a tippet above level 15. 40 is the new max as of patch 4367 Grind Guide - Weaponsmithing (15 Weaponsmithing is used to actually place your Tier 2 Weaponsmithing Workbench.) Skill 1 -> 2: Bronze Pike Skill 2 -> 10: Bronze Pickaxe Skill 10 -> 15: Simple Heavy Spear Skill 15 -> 16: Wooden Spear (Tier 2+) Skill 16 -> 22: Novice Spear Skill 22 -> 24: Wrought Iron Pickaxe or Novice Handspear Skill 24 -> 29: Sleek Spear Skill 29 -> 32: Wrought Iron Pickaxe II Skill 32 -> 37: Balanced Spear or Fine Spear Skill 37 -> 40: Steel Pickaxe 40 is the new max as of patch 4367 Grind Guide - Winemaking and Brewing (15 Cooking is used to actually place your Tier 2 Cooking Workbench, so Winemaking skill doesn't matter here.) Winemaking, like Alchemy can be very subjective and entirely based on what you have closest to you. It's not as bad as Alchemy, but do expect a lot of And/Or's. This will also not be a linear progression table. Skill 1 -> 2: Shire Gold (Blueberry/Honey) Skill 1 -> 4: Strawberry Mead (Strawberry/Honey) Skill 1 -> 5: Plain Ale (Barley Grain -> Malt/Yeast -> Weak Ale Base) Disclaimer: If you live nearby Barley, making Ale's are probably the easiest to grind. Skill 4 -> 8: Small Cider (Raspberry/Honey) Skill 6 -> 11: Autumn Heat (Blackberry/Honey) Skill 7 -> 12: Farmhouse Cider (Blueberry Syrup) Skill 9 -> 14: Harvest Gold Ale (Honey/Barley Grain -> Weak Ale Base) Skill 11 -> 16: Meadow Song Ale (Barley Grain -> Cloudy Ale Base) Disclaimer: If you live nearby Barley, making Ale's are probably the easiest to grind. Skill 14 -> 19: Blueberry Mead (Blueberry/Honey/Barley Grain -> Weak Mead Base) Skill 15 -> 21: Weak Mead (Honey/Barley Grain -> Weak Mead Base) Skill 18 -> 24: Raspberry Mead (Raspberry/Honey/Barley Grain -> Cloudy Mead Base) Skill 19 -> 25: Summer Heat (Red Apple/Honey/Raspberry Syrup) Skill 21 -> 27: Duskfire Ale (Rosemary/Barley Grain -> Cloudy Ale Base) Skill 22 -> 28: Strawberry Mead (Honey/Strawberry/Barley Grain -> Cloudy Mead Base) Skill 23 -> 28: Small Beer (Hops/Barley Grain -> Weak Beer Base) Disclaimer: Weak Beer Base requires level 23 Winemaking Skill 23 -> 30: Piquette (White Grapes -> Weak White Wine Base) Skill 24 -> 31: Dry White (White Grapes -> Weak White Wine Base) Skill 26 -> 33: Kerys Cider (Red Apple/Honey/Red Currant Syrup) Skill 26 -> 33: Sweet Mead (Honey/Hops/Barley Grain -> Strong Mead Base) Skill 28 -> 35: Harvest Glow Ale (Yeast + Hops/Barley Grain -> Strong Ale Base) Skill 30 -> 37: Summer Brew (Hops/Barley Grain -> Cloudy Beer Base) Skill 30 -> 37: Lora des Papes (White Grapes -> Cloudy White Wine Base) Skill 32 -> 39: Red Currant Mead (Honey/Red Currant/Hops/Barley Grain -> Strong Mead Base) Skill 32 -> 39: Gallian Red (White Grapes -> Cloudy White Wine Base) Disclaimer: Yes, Gallian Red uses White Grapes... don't ask me why. Skill 32 -> 40: Mulled Redwine (Red Grapes -> Weak Red Wine Base) Skill 33 -> 40: Bold Winter Stout (Honey/Hops/Barley Grain -> Cloudy Beer Base) 40 is the new max as of patch 4367 FAQ #1 - Where to find Heartwood. Oaks Trees in Old Forest give heartwood. Oaks are the dark barked ones, while beech are the light barked ones. This requires an Iron+ Hatchet. Twisted Oaks in Forsaken Forest give Heartwood at I think 35+ Woodcutting. This requires a Wrought Iron+ Hatchet Juniper Trees in Lands of Stone/The Pale give heartwood at any level woodcutting. This requires an Iron+ Hatchet Fir Trees in Evergreen Forest give random amounts (0 to maybe 10) of heartwood at any level woodcutting. This requires a Bronze+ Hatchet Hawthorne Trees that look like the small sized juniper trees in the Scrublands give 4 heartwood at any level woodcutting also. This requires a Bronze+ Hatchet. Pine Trees in the Eerie Pines give random amounts (Around 20) of heartwood at any level woodcutting. This requires an Iron+ hatchet. Beech Trees in the Rolling Hills give random amounts (Around 10) of heartwood at any level woodcutting. This requires a Bronze+ Hatchet. Birch Trees (Large) in the Old Forest give random amounts (Around 8) of heartwood at any level woodcutting. This requires a Bronze+ Hatchet. Birch Trees (Medium) in the Old Forest give random amounts (Around 5) of heartwood at any level woodcutting. This requires a Stone+ Hatchet. FAQ #2 - Where can I find ____ ? Honestly, you should take some time to learn how to use https://paxdei.th.gl/ It's also a good idea to learn how to differentiate the biomes on the map based on the key here:
按分类学字母顺序排列(未在此列出的可能已被移除): 可采集/植物类: 苜蓿 - 苍白之地 鹅膏菌 - 常绿森林(仅限荒野) 大麦 - 石之大地、灌木丛 蝙蝠花 - 被遗弃森林(仅限荒野) 海湾牛肝菌 - 被遗弃森林 黑喇叭菌 - 被遗弃森林 黑莓 - 石之大地 膀胱麦瓶草 - 苍白之地 蓝莓 - 古老森林 蓖麻 - 淹没之地 鸡油菌 - 常绿森林 云莓 - 苍白之地 棉花 - 淹没之地 鹤望兰 - 淹没之地 冠须花 - 淹没之地 蒲公英 - 起伏丘陵 小皮伞菌 - 诡异松林 曼陀罗 - 灌木丛 致命颠茄 - 淹没之地 毒鹅膏 - 被遗弃森林 神圣蘑菇 - 古老森林 接骨木莓 - 苍白之地 金针菇 - 被遗弃森林 茴香 - 苍白之地亚麻 - 丘陵地带、灌木地 毒蝇伞 - 废弃森林、古老森林 愚人网盖菇 - 常绿森林 大蒜 - 古老森林 金罂粟 - 苍原 青苹果 - 废弃森林 锦葵 - 苍原 啤酒花 - 废弃森林 薰衣草 - 淹没之地 柠檬草 - 石之大地 洛伊奥斯之泪 - 诡异松林 绣线菊 - 淹没之地、丘陵地带 羊肚菌 - 低语森林(仅限荒野) 芥末 - 灌木地 燕麦 - 石之大地 平菇 - 常绿森林 欧芹 - 淹没之地 白头翁花 - 石之大地 牛肝菌 - 古老森林 长春花 - 丘陵地带 雨百合 - 丘陵地带 覆盆子 - 常绿森林 红苹果 - 废弃森林 红卷心菜 - 石之大地 红醋栗 - 废弃森林 红葡萄 - 诡异松林(仅限荒野) 红洋葱 - 废弃森林 红罂粟- **可采集植物/矿物** **黏土** - 所有生物群系(靠近水源的海岸线附近) **铜** - 所有生物群系(悬崖边、山脉及岩石构造附近) **燧石** - 所有生物群系(靠近水源的海岸线附近) **片麻岩矿床** - 所有生物群系(悬崖边、山脉及岩石构造附近) - **植物** **石芦苇之地** - 所有生物群系(靠近水源的海岸线附近) **玫瑰丛** - 淹没之地 **迷迭香** - 苍白之地 **黑麦** - 石之地、苍白之地 **鼠尾草** - 起伏丘陵 **黄芩** - 被遗忘森林 **肥皂草** - 灌木丛 **苦苣菜** - 石之地 **繁缕** - 被遗忘森林 **草莓** - 常绿森林 **甜李子** - 诡异松林 **艾菊** - 石之地 **百里香** - 石之地 **小麦** - 苍白之地 **白葡萄** - 诡异松林、常绿森林 **狼毒** - 常绿森林(仅限荒野) **黄洋葱** - 常绿森林、古老森林花岗岩矿床 - 遗忘森林、苍白之地、石之大地(仅荒野区域)(分布于悬崖边、山脉及岩石构造处) 不纯铁矿床 - 所有生物群系(分布于悬崖边、山脉及岩石构造处) 铁矿床 - 石之大地 石灰矿床 - 苍白之地(分布于悬崖边、山脉及岩石构造处) 纯铁矿床 - 腐化平原(仅荒野区域) 锡矿床 - 所有生物群系(分布于悬崖边、山脉及岩石构造处) 可能从游戏中移除的可采集资源: 高山桧 白芷 猫草 细香葱 氯 雏菊 醋栗 山楂 大麻 铃兰 梨 菠萝莓 车前草 浮石 甘蔗 豆瓣菜
2026-02-13 19:00:25 发布在  Pax Dei


说点好听的...
收藏
0
0