


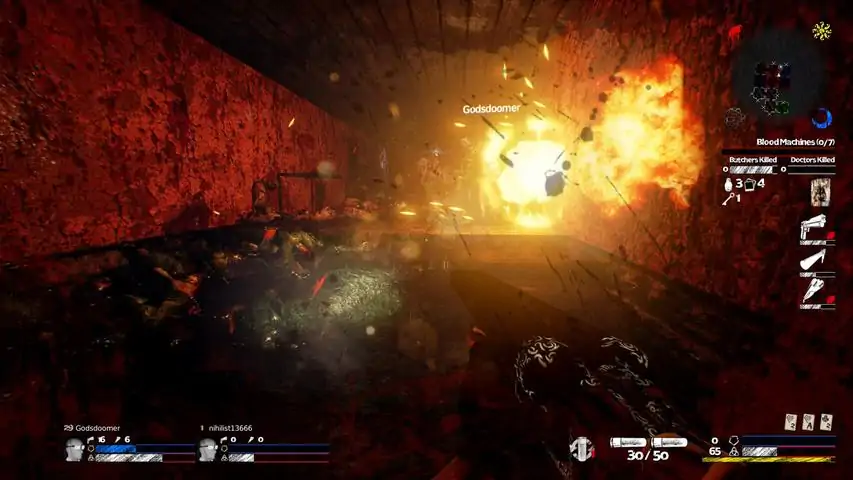

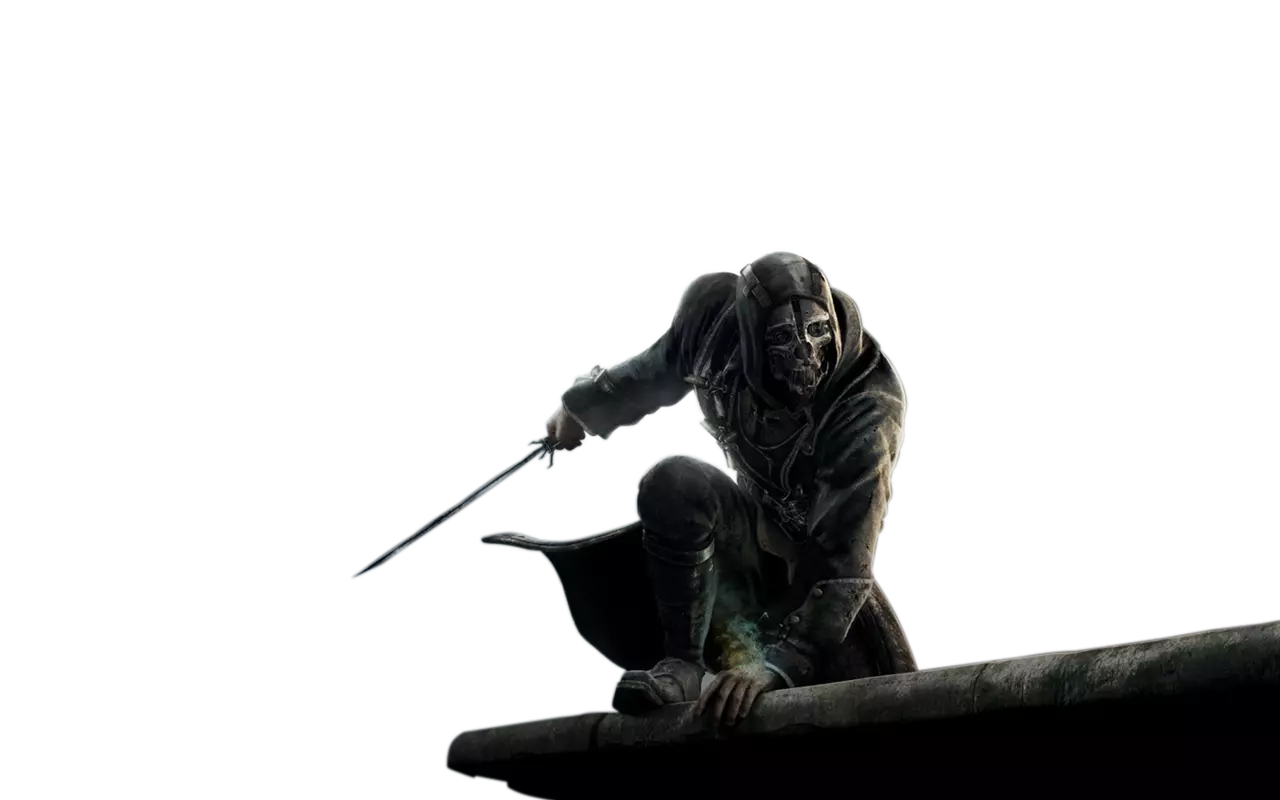
从慈悲到超凡 - 《UNLOVED》进阶指南
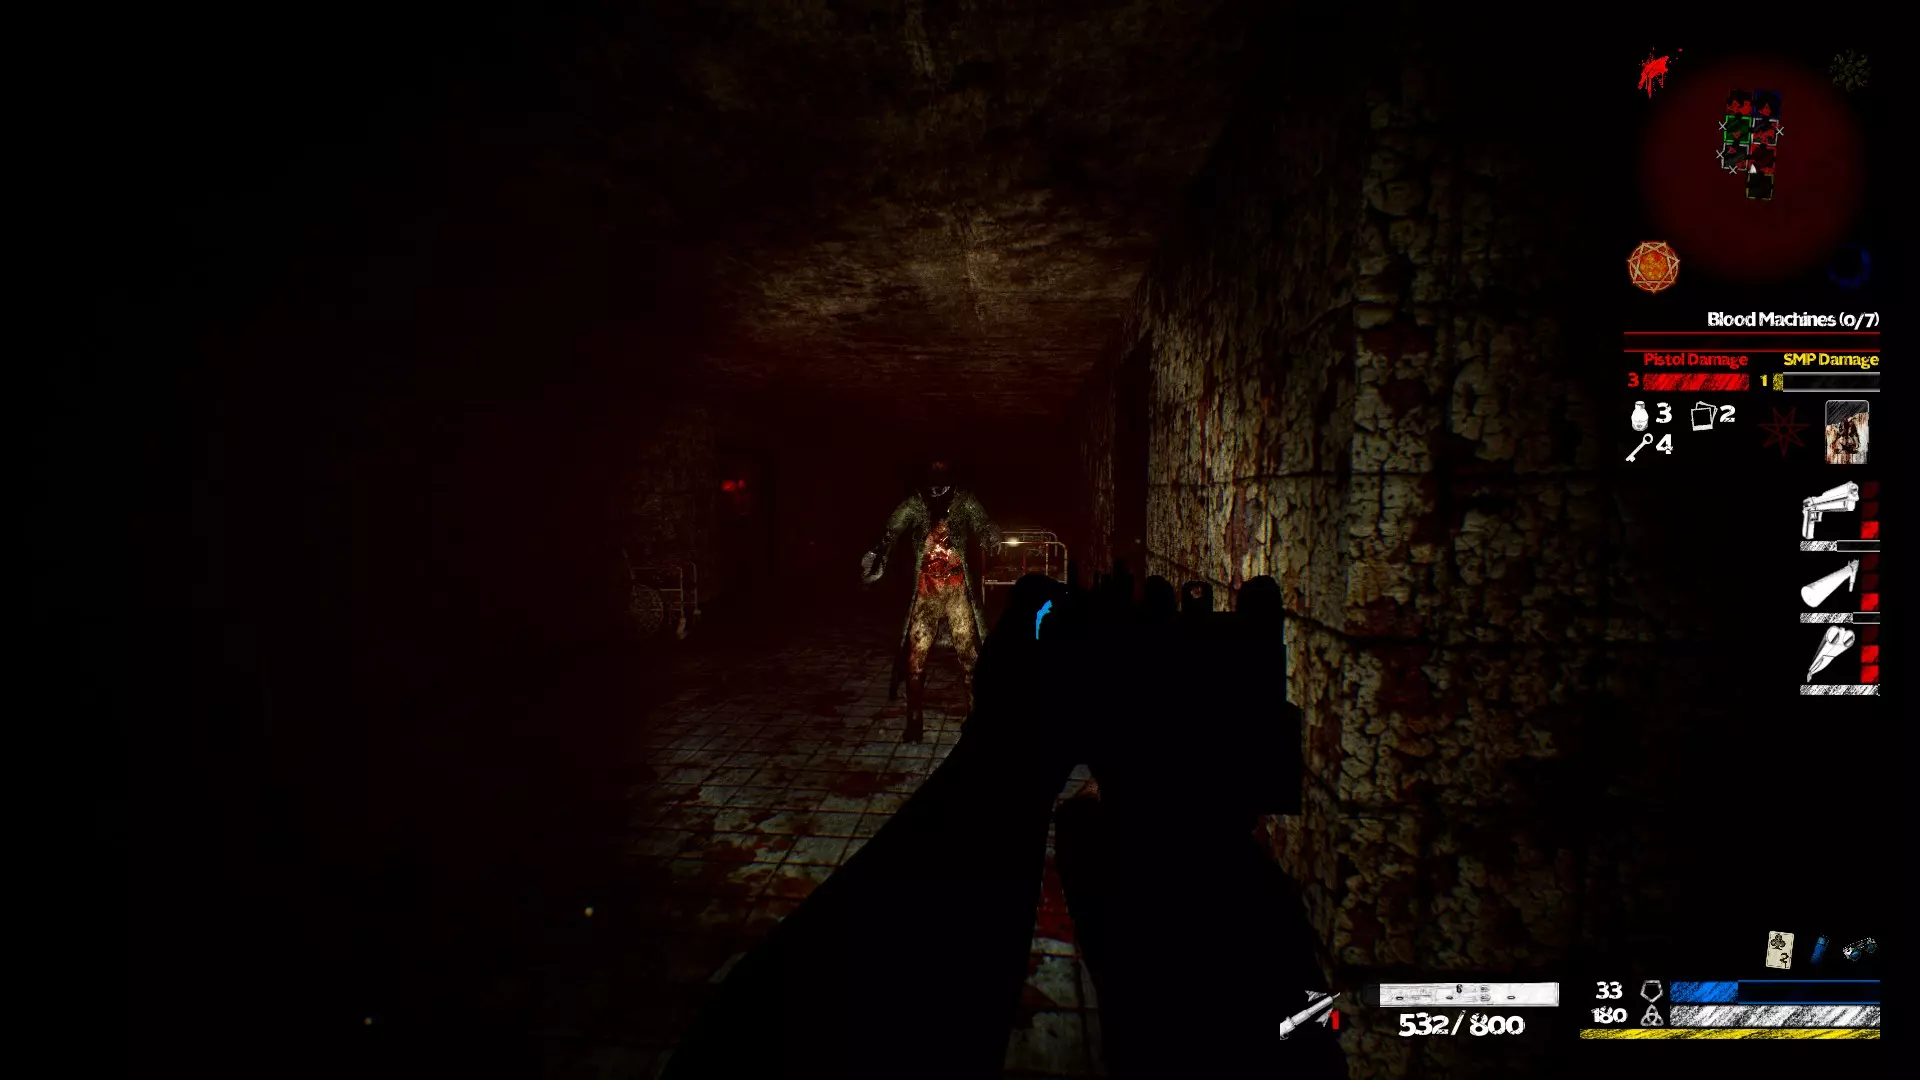
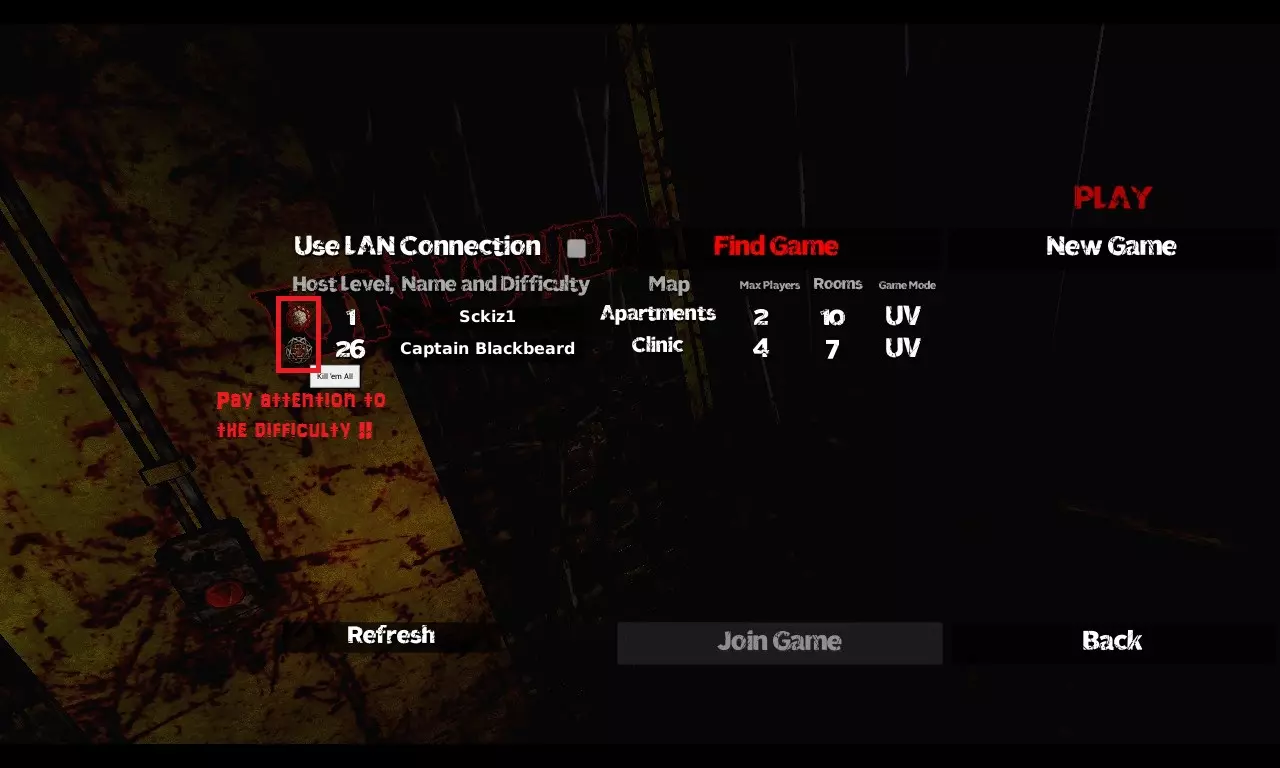
《UNLOVED》是一款令人惊叹且深度惊人的射击游戏,但游戏本身提供的信息却很少。本指南将解释游戏的核心机制,并提供有助于游戏进程的实用技巧。 简介 某个老傻瓜的一些回忆……《UNLOVED》是一款难度极高的游戏,其设计理念既不会手把手指导玩家,也不会提供任何降低陡峭难度曲线的内容。事实上,随着你的推进,游戏难度会变得异常之高——敌人数量会更多,它们还会获得某些能力、“腐烂”的敌人变体、更高的伤害以及更大的生成量,从而获得对抗你的优势。 这款游戏就像是一个痛苦模拟器。别搞错了,它就是故意设计得不公平。《UNLOVED》甚至会误导、迷惑最理智、最善于分析的人。不过……别担心!大鲨鱼科夫斯基与波特曼,以及社区中众多热心人士,决定伸出橄榄枝,在看似毫无希望的处境中,为亲爱的玩家们带来一丝希望。凭借一些古老的知识与技巧,你会发现这款游戏远比表面看上去更有深度。只要拥有力量与耐心,你或许就能走到“最长之路”的尽头。 本指南采用分步结构: 1) 新手入门基础——HUD界面、游戏目标、怪物、物品、武器 2) 饰品菜单、热度、武器模组及图腾 3) 前期进度——1级、2级、戒指* 4) 中期进度——3级、恶魔宝箱、红宝石 5) 终局内容——4级、深渊[待办事项] 6) 一些你可能不知道的高级技巧 同时,我也要感谢Blue(《UNLOVED》的开发者),他为我们提供了许多此处及维基上展示的信息,给予了大力支持,并且制作了这款真正出色的游戏,让我们投入了数百小时的游戏时间。 话不多说,让我们开始吧! 游戏玩法 [重要] 免责声明:尽管你可以自由选择任何设置,但强烈建议你遵循以下设置,以获得最佳的初次体验。这将帮助你更好地学习、暂停游戏并避免干扰。多人模式是《UNLOVED》不可或缺的一部分,我们完全鼓励大家一起游玩、协作。随着你掌握基本的游戏玩法信息,你会了解到拥有队友的诸多好处,以及团队合作在混乱游戏中的强大作用。 如果你是首次进行在线游戏,建议你创建主机而非作为客户端加入,以确保你不会遇到延迟、“同步错误(desyncs)”或断开连接的问题。 -------------------------------------------------------------------------------------------------------------------------- 开始你的第一场游戏 进入“游玩”选项,然后点击“新游戏”。进行以下配置: - 最大玩家数:仅自己 - 难度:仁慈微光(Sliver of Mercy) - 地点:任意(公寓是不错的选择) - 区域大小:小型或中型 - 游戏模式:极致暴力(Ultra-Violence,默认游玩方式) - 挑战:无挑战 最后,点击“开始游戏”。现在你已进入你的第一场游戏。这将是你无数旅程的开端。 接下来,我们将为你介绍游戏的HUD(平视显示器),并解释各个元素的大致含义。 **HUD** 下图展示了HUD的各个组成元素。
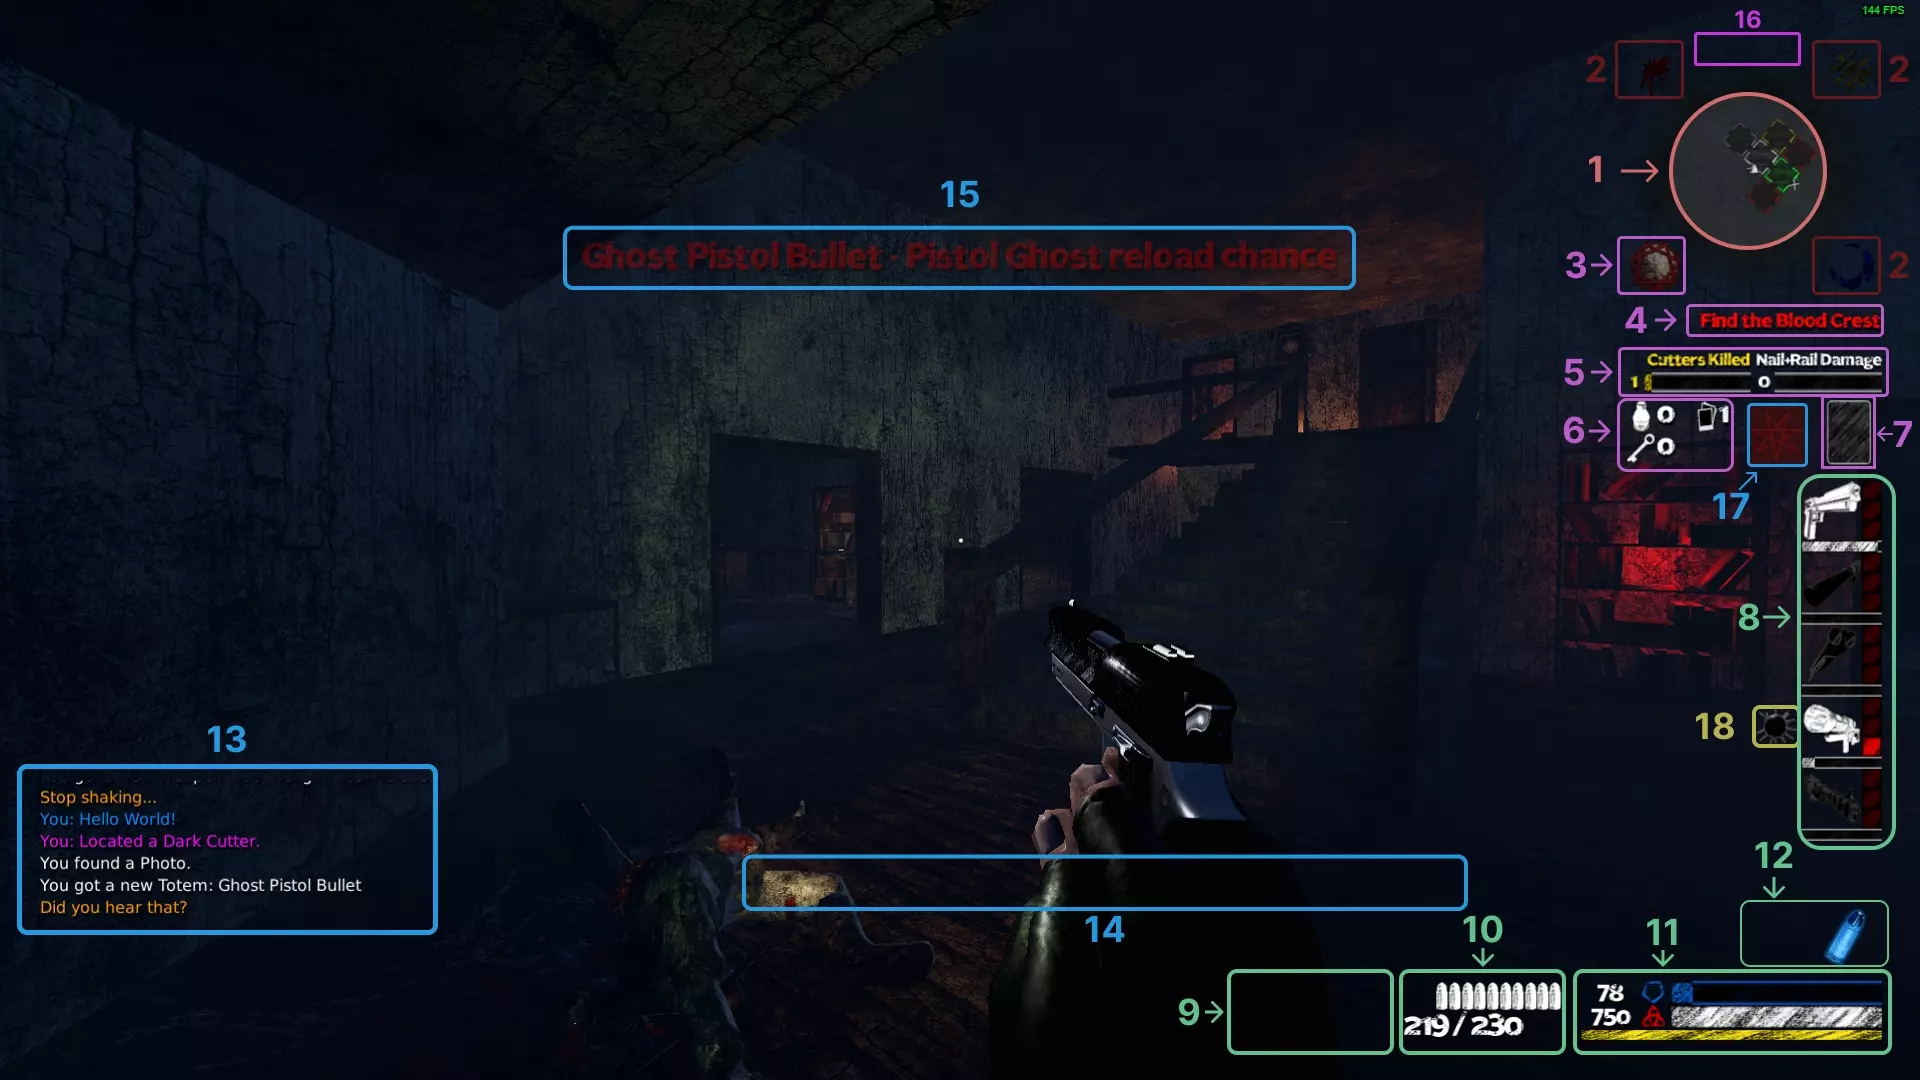
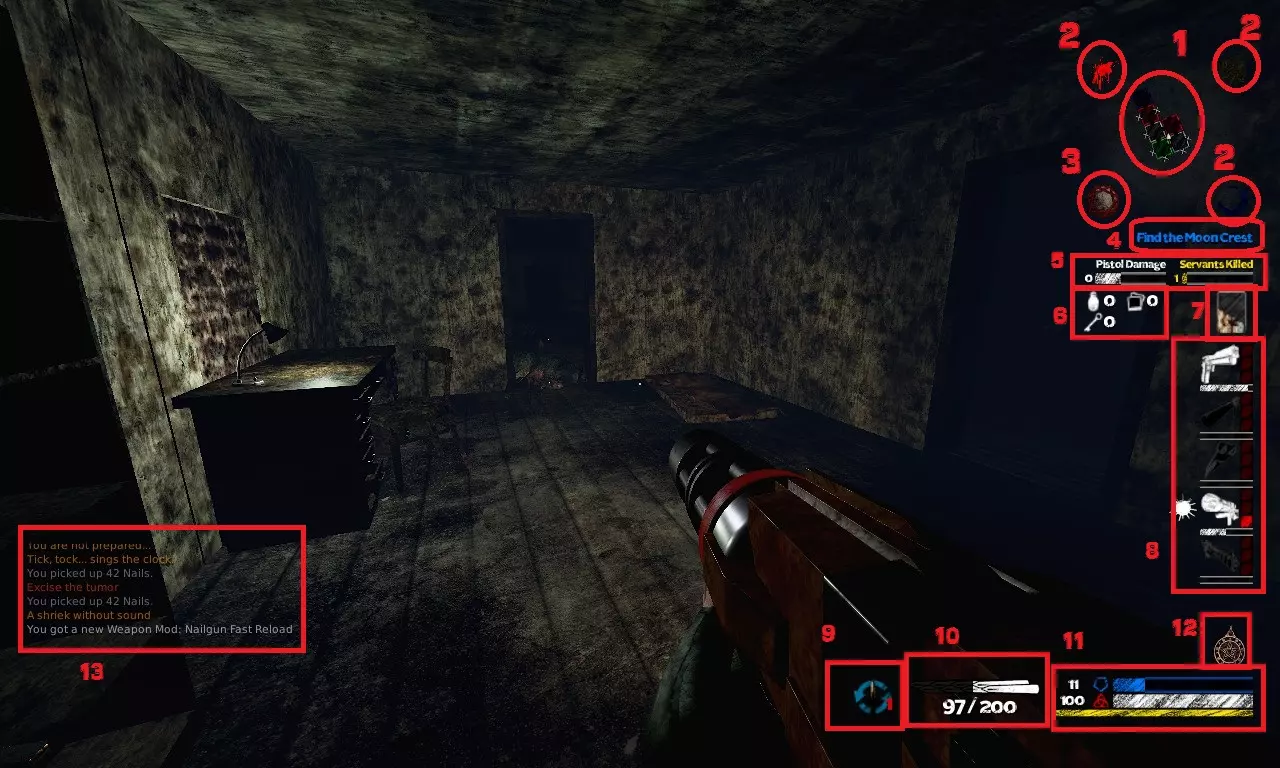
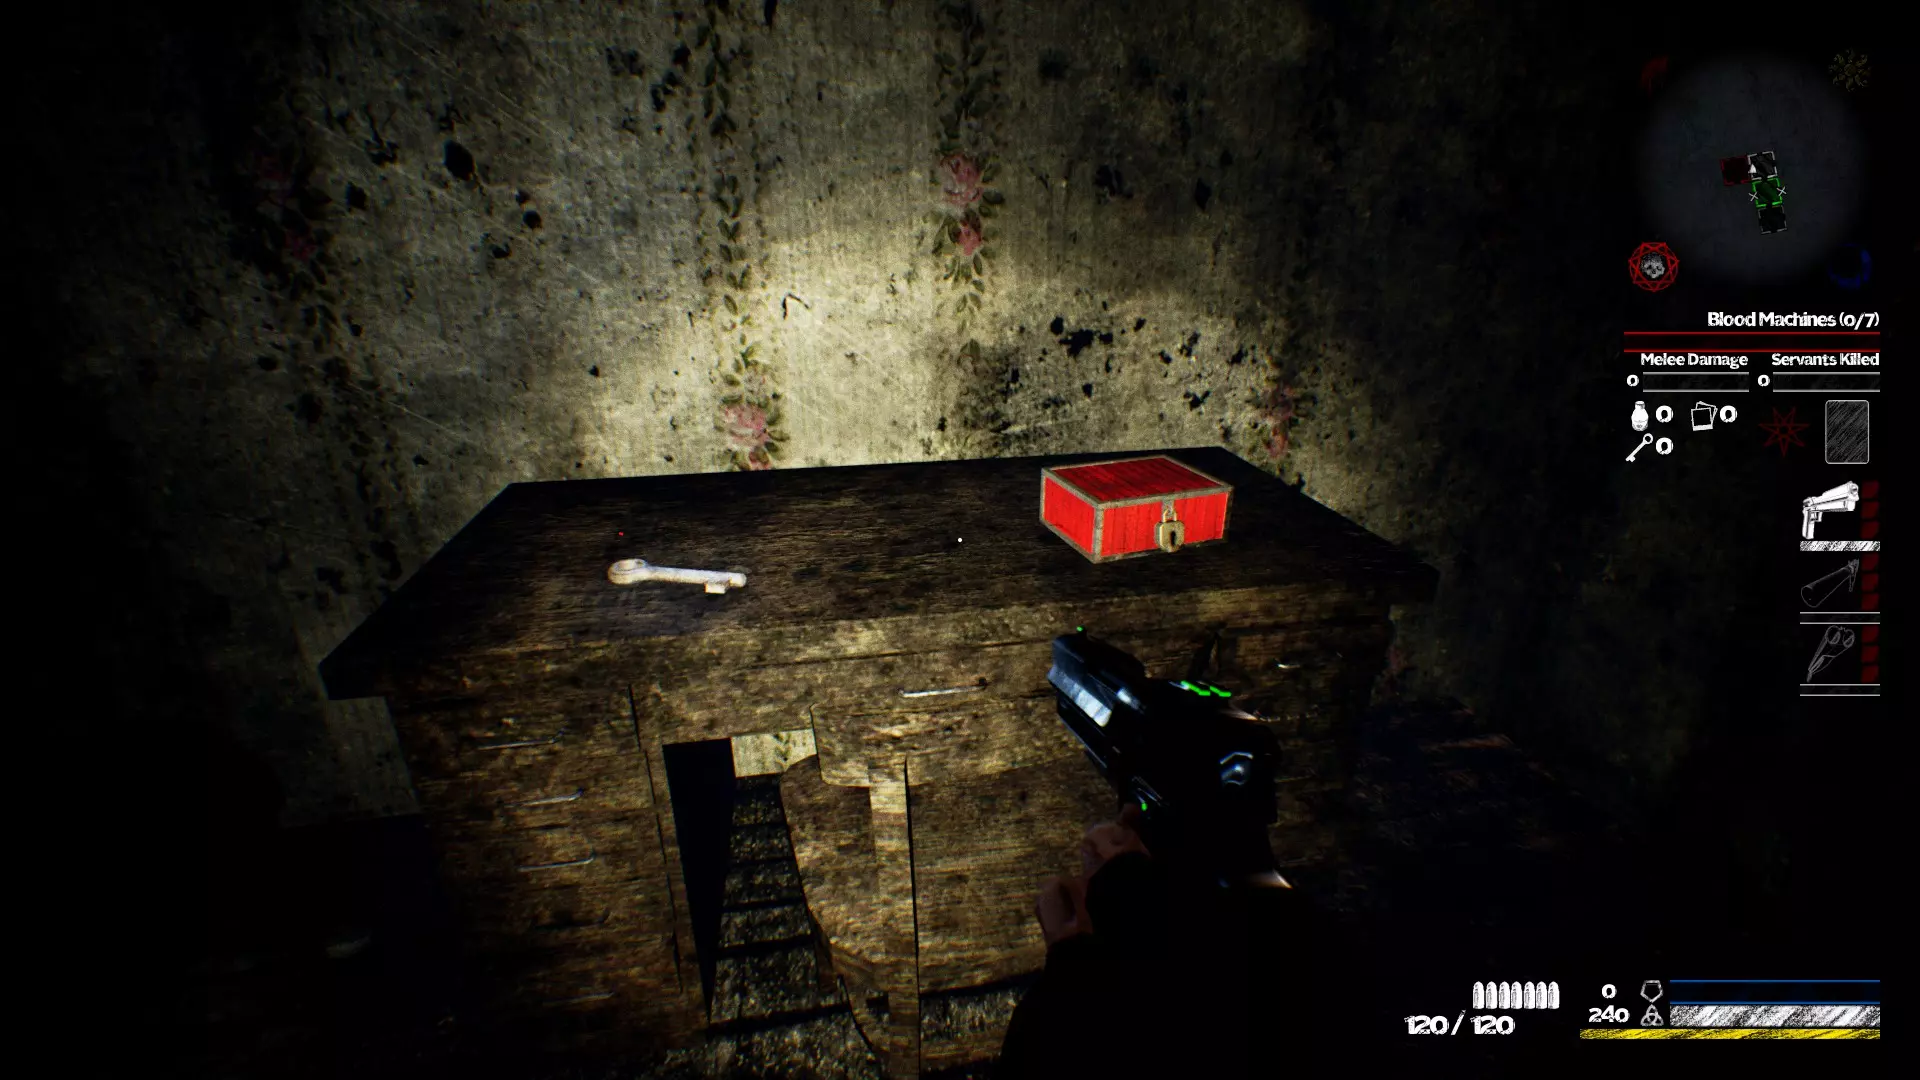
1 - This is the map. By default, it is oriented to the direction you're facing, but it can be changed in the Options to be static. It shows the rooms, as well as the positions of the other Players. Crosses indicate an impassable door. 2 - Each slot corresponds to a red/blue/yellow key. You need to collect them to enter the rooms of the corresponding color. 3 - The current Difficulty 4 - This is your current objective. In UNLOVED, the objectives are as following.. I) Find the Blood Crest (in white rooms) II) Find Moon Crest (in red rooms) III) Find Sun Crest (in blue rooms) IV) Activate the blood machines (in yellow rooms) V) Elevator or "Green" tile. You start here.5 - These are your Side Objectives. If you progress them enough, you will get a bonus amount of Karma. They re-roll every time you start a new game. 6 - This is the amount of Collectibles you have found; Ink Bottles, Photos and Silver Keys. 7 - How many Card Pieces you have collected. Find all three of them (one in white, one in red, one in blue) you get an extra trinket at the end of the level. On Beast difficulty and above, it may give you an extra Demon Chest instead. 8 - Your weapons, with a bar indicating how much ammo is left, and red squares indicating how many Mods are attached to them. 9 - The detail of the Mods for the current weapon 10 - Ammo for the current weapon 11 - Armor, Health, and Stamina. Health is your most important stat - if it reaches zero you die. Armor protects you from almost all instances of damage. Stamina is a resource to run faster and to use Melee, it regenerates over time. 12 - The Totems you have found. 13 - The chatbox. It's used for : Messages from you and other Players White messages, display useful information such as how much ammo you just picked Yellow warnings, indicate an increased chance of getting a bigger horde on next interaction/pick-up. Red warnings, indicates a spawn has triggered from an interaction/pick-up. Purple messages, printed from you or other Players who are 'marking' objects or enemies. And Death messages, indicating what killed who. Gameplay Loop The Gameplay Loop of UNLOVED The main goal and win condition is rather simple: activate the 7 Blood Machines located in the Yellow Rooms and escape through the Elevator in the Green tile, the very same you started in. The game finishes and you win rewards if you manage to get out after using the Elevator Button. When you start the game, you need to acquire the Crests to pass through the respective Crest-locked Doors.. The first Crest is the Blood Crest, then Moon and finally the Sun Crest, located respectively in White/Red/Blue rooms. This is always the same each time. You cannot find a Moon Crest in White Rooms. The Area Size decides how many rooms there are. A Crest will be in one of them, so you must look carefully! Perhaps you simply missed a Wooden Door in a previous room you searched. If you play Large, you will have *two* Yellow Rooms to look for the Blood Machines. By using the minimap, you can 'rule out' if you've missed a tile. You cannot go through 'black' or 'chained up' doors, and if these are on any of the sides of a tile then looking at it will mark it with an 'X' on the minimap. Not that complicated, yes? Well.. Each Crest makes the game considerably harder, ramping the Heat up, UNLOVEDs mysterious and in-depth spawn mechanic, (see 'Heat' section for more info) where enemies will aggressively seek you out or roam the level. They have only one goal: putting you down for good. The enemies only spawn from your pickups and any doors you open, meaning you've far more control of the game than you might think.. As you traverse and explore rooms, you may find items to help you survive such as Totems and Weapon Mods. Extra supplies like ammunition, health, Armor and other Weapons. You can also find Collectibles such as Silver Keys, Photos and Ink. Silver Keys are used to open a box of Totem and later, Demon Chests. Once you have siphoned your Health 7 times to the Blood Machines, the game will immediately unlock the Elevator Button and the text 'GET BACK TO THE ELEVATOR' will flash on the screen. The Players must now escape through the same way they came. To win and end the game, you must reach the Elevator Button and press & hold it for 5 seconds. If you are playing online, then *all* Players must be close enough to the Elevator to be allowed to leave. If you die, you can be Revived by another Player if the lobby is allowing for more than 1 player. Leaving has consequences. Death is often not the end in multiplayer. If you fall, the Resurrection Orb is spawned on the location you died at. Another Player can revive you by interacting with it for 5 seconds. If you happen die next to the Elevator or inside of it, and your friends manage to end the game, you will still be rewarded in full. Leaving the game, solo or online, forfeits most rewards. Ink Bottles, Photos, Karma earned, Q and Trinkets earned through Card Piece completion is instantly awarded - whereas any Rubies, Trinkets, Demon Chests or Abyss Chests are gone forever. -------------------------------------------------------------------------------------------------------------------------------- Did you win? Good, lets talk about those Trinkets you've earned. This is a very important core of the game and progression.. Progression, Upgrading Trinkets, Equipment Slots After your first win(s), you'll have Trinkets you can equip to become stronger. You will also have Karma, an essential currency that is used to upgrade Trinkets and unlock Memories. Trinkets are the bread and butter towards reliably winning higher difficulties in UNLOVED and they are your main power components. In 'Trinkets' you will see a screen where you can equip any and all Trinkets you currently have. Any Trinket you have earned is visible in the respective "lane." (See below image for two trinkets in the Gloves slot, which is locked and costs -75 Karma to use) If you for example earned an Evidence trinket, it will be in the Evidence slots' lane. The Evidence slot is always unlocked, but the other slots require Karma to unlock. You only need to do this once per slot. The cost for each Equipment Slot scales in Karma cost. Choose wisely. Further below, we will explain how to Upgrade and Break Trinkets, but before that we want you to pay attention to this screen first, as it has one important feature to consider..

“随机饰品按钮” 让我来告诉你为什么你需要关注这个功能。它的花费为-77碎片,或者当你拥有特定数量的碎片时,花费为你碎片总数的7%。碎片只能通过分解饰品和墨水瓶获得。在游戏初期,这当然是一大笔碎片,但这个功能对你的好处怎么强调都不为过。以下是你能从中获得的东西以及为什么你应该关注它: - 它可以提供1级或2级的饰品,且已完全升级。重复的饰品可以返还不错的资源。 - 更重要的是…… - 有7%的几率获得随机戒指,能在游戏早期解锁大量强大的能力。 好了,回到基础操作…… 选择饰品 选择你拥有饰品的槽位,解锁该槽位,然后选择饰品并按下“装备”键。现在该物品已放入相应的装备栏,并且在接下来的游戏中会一直陪伴你。点击饰品可以查看它们提供的属性。 装备栏类型与饰品 共有10个装备栏,每个都对你的生存几率至关重要。下面我将列出每个装备栏并简要说明它们的作用。资深玩家应该对其中大部分术语都很熟悉,但“实用性”是我选择使用的一个宽泛词汇,指的是换弹速度、最大弹药量、弹药拾取加成、交互速度/范围以及其他不太明显的属性,例如“幽灵换弹”。 “续航”指的是弹药、生命值和护甲的节省,也涉及“热量”管理,这是 kukri 流派能够擅长的方面。证据:初始武器,决定武器伤害、实用性或高续航近战能力 小雕像:核心优势,决定生命值/护甲防护/移动速度/武器伤害,部分实用性 手套:实用性,决定道具拾取、交互和武器相关属性 箱子:弹药,决定最大弹药量、幽灵换弹、护甲防护、移动速度 (武器)自定义:提供加成和玩法差异(例如:马格南套件 vs 战术套件) 戒指:选择的核心;几乎能决定所有属性,甚至是独特属性! 现在让我们看看另一个同样重要的页面…… 升级与分解饰品,“饰品管理器”
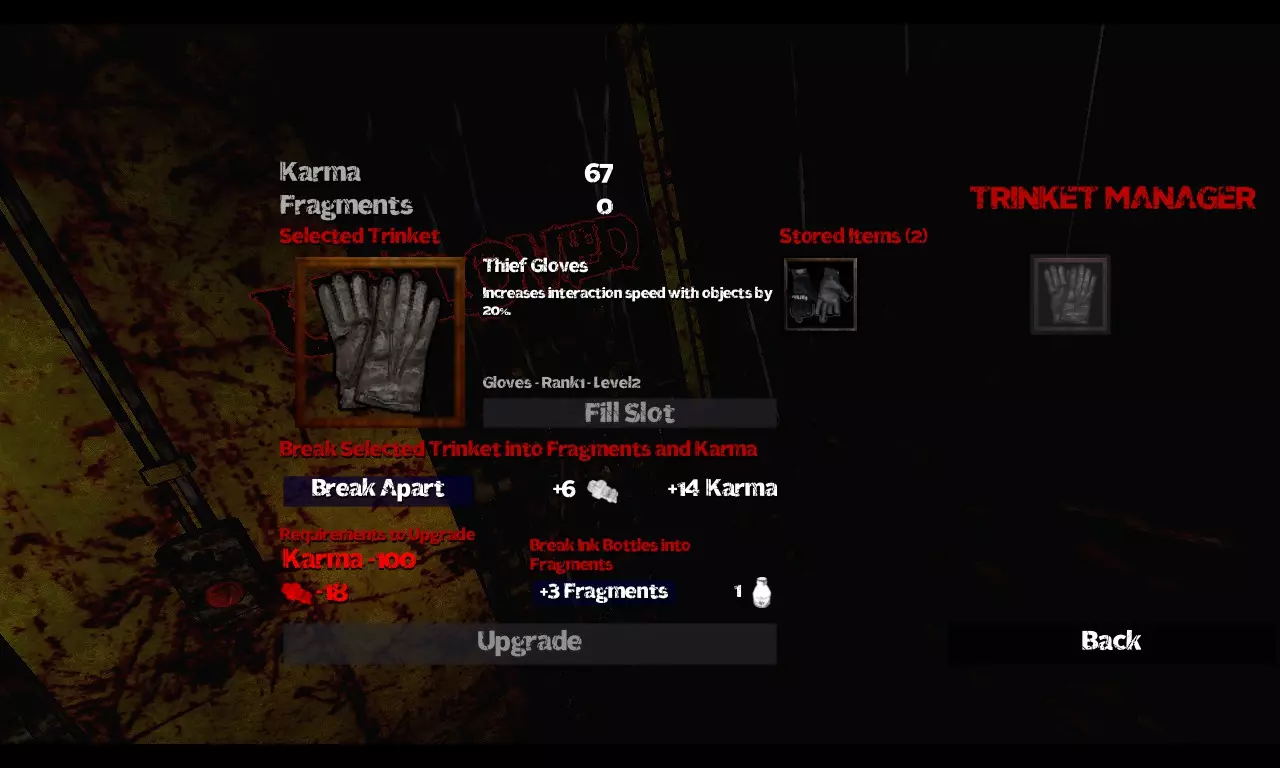
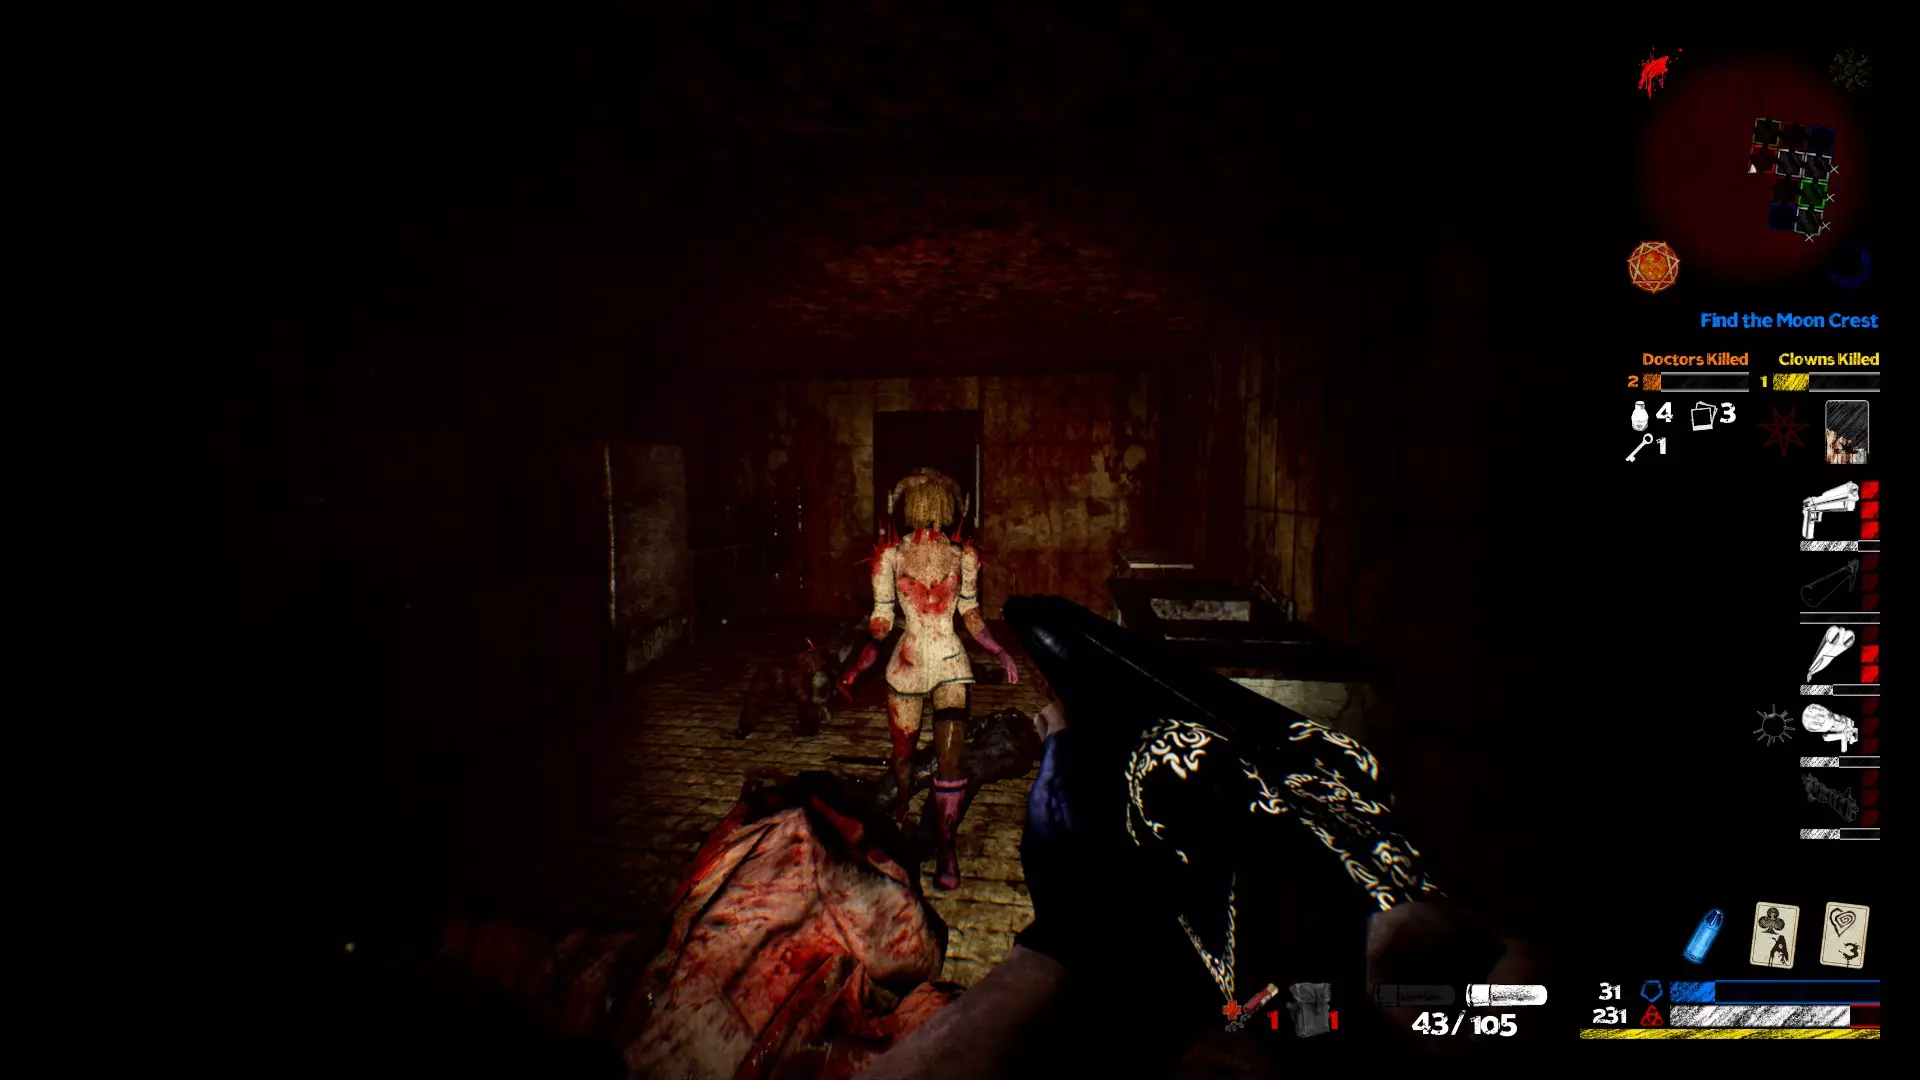
Your Inventory holds all UNEQUIPPED Trinkets and Demon/Abyss Chests that you own. If the Trinket does not appear here, you have to go back and 'Unequip' it. To Upgrade or Break a Trinket, select it on the right, then click on "Fill Slot". You should now see two options: either Upgrade or Break Apart. Pressing Upgrade will consume Karma and Fragments to upgrade to the next Level. Here, upgrading would cost me 100 Karma and 18 Fragments. Pressing Break Apart will destroy the trinket, but provide you with Karma and Fragments in return. The values are based on the Rank and Level. Once you've Upgraded and feel happy, go back to Trinkets and select your new shiny Trinket. You will notice that the border of these change depending on Rank and Level. Just remember that you must equip them to have effect. You can never upgrade a Trinket to another Rank, you must find them through winning or special conditions.. Need more Karma or Fragments?For Fragments.. The Ink Bottles can be traded for +3 Fragments each. Extra Trinkets you don't need can also be broken for Karma and Fragments. For Karma, you can use Photos to gain Karma in the Unlockables menu. Ink Bottles can also roll Color Schemes in 'Character' menu which can be sold for +5 Karma. For more information on Karma during gameplay and wins, check out the part further down. Karma Rewards How it is gainedWinning games award Karma based on a number of conditions related to which Game Mode, Area Size and Difficulty you play. Breaking Trinkets and unlocking Memories with Photos in the Unlockables menu are two other ways of gaining Karma. Interestingly, a large source of Karma tends to come from Trinkets awarded at higher difficulties rather than the Side and Area Size-based completion rewards. This is because higher difficulties have a higher chance to award Rank 2 Trinkets, which may be up to Level 3 already. Here are a bit more details to better understand how Karma works and is awarded.. Side Objectives and their Karma factorEach Side Objective grants an instant Karma reward when it reaches one level. The formula is K_obj = olvl * 5 * (difficulty + 1) where olvl is the combined levels of your Side Objectives. olvl ranges from 0 (no progress) to 6 (max progress on both objectives). Finally, difficulty is a number starting at 0, and increasing by 1 for each difficulty (No Hope is 1, Kill 'em' All is 2, etc..) Example: A win on No Hope, Ultra-Violence, and 4 combined objective levels, grants 4 * 5 * 2 * 1.5 = 60 Karma from the secondary objectives. If you did not win, you would have had only 40 Karma. And if you had played on Arcade Style, you would have had only 30. Area Size-based Karma factorIf you win, an additional Karma amount is applied based on the number of sizes your level had: K_size = rooms * 7 * (difficulty + 1) ; where rooms is the total number of rooms (including green room) of the map. Game Modes & Challenges This guide is primarily written for the standard Game Mode; Ultra-Violence (UV) However.. there are other ways to play the game, each with its pros and cons, to spice up gameplay and even offer a different advantage or offer new ways to use trinkets. It is highly recommended to try them all, especially if you're feeling stuck! Arcade Style (AS)Pros: Instant interactions on *everything*, go speed greed! Item spawns are more frequent Maximum Stamina is increased Base enemy Health values reduced by -25% Allows for some strategies and fastest wins unlike any other Game Mode Cons: You earn half as much Karma compared to Ultra-Violence The base chance to find Demon Chests is reduced by -50% (does not affect Demon Card chance) Enemy spawns occur more often from pickups/interactions, leading to an onslaught of forces.. Ruby drop rates are decreased by -25% On Abyss difficulty, the number of required enemies to spawn an Abyss Wanderer is raised to ~49 Arcade Style is a popular choice, not just for a different experience but also for efficiently gaining trinkets, Rubies and even Demon Chests as you are unhindered by any stoppers with interaction speeds/buffers.. provided you do not linger for too long.. Classic Horror (CH)Pros: Monster counts are severely reduced and it takes more pickups to start spawns Karma rewards doubled Ruby drop rate is increased by 50% On Abyss difficulty, the number of required enemies to spawn an Abyss Wanderer is decreased to ~16, meaning less enemy juggling... Cons: Enemy Damage raised by 250% used to be 300%.. Items spawn much less frequently. Survival horror fans, rejoice! You move much slower (~-20% Movement Speed) Area size increased; enforcing double Yellow Rooms (ex. UV 'Small' size is 7, CH is 11) On Abyss difficulty, the lowered threshold also makes it easy to get Abyss Wanderers into the game, which can mean less setup time to prepare.. Classic Horror makes UNLOVED go far more into a 'survival horror' experience, reducing ammo and items in exchange for less enemies that deal more than twice the damage. Among some veterans, it is deemed to be part of the hardest challenge possible in the game. If you seek maximum bragging rights, try to play this on Abyss difficulty and put on 'The Rotten Challenge'. Go ahead, I dare you. Challenges"As if this game wasn't challenging enough.." UNLOVED offers Challenges that can change core parts of the gameplay. Generally speaking, playing any Challenge is deemed harder than playing without them, but there are exceptions. Trinkets can dictate what Challenges are harder or easier. Challenges allow a currency called Rubies to spawn. These always have chance to drop when you kill an enemy of any kind. Rotten and higher tiers of enemies such as Witches have a higher chance to drop Rubies. All Challenges have their own Maximum Ruby count allowance, modified by a Daily Ruby Modifier (ranging -25% up to +200%) and lastly by difficulty level. Higher difficulty means more Rubies can be acquired per game. Difficulty level also controls how many Rubies you get per pickup. For example: - Playing on Sliver of Mercy and choosing 'Pistol Only' allows for 5 Rubies, where each Ruby gives 1 Ruby. - Playing on Kill 'em All on the same Challenge allows for 10 Rubies, where each Ruby gives 3 Rubies. You can increase or decrease Ruby spawn chances such as.. filling Blood Machines (+0%-+70%) Playing Classic Horror (+50%) Playing Arcade Style (-25%) Playing Challenges that only spawn higher tier enemies such as Faceless, Doctors or Clowns Below are a few Challenges we felt worth discussing. Quad Damage is quadrupling the damage enemies do to you, but also the damage you do to them. This implies that, assuming you don't take a single hit, you can tackle a higher difficulty than you were able to. Damage isn't much of a problem anymore - all enemies die in 1 hit, except the fatter ones that are likely to die in 2 shotgun hits. One con of Quad Damage is that it requires to specialize your loadout in a completely different way. You will spend Karma on equipment that might have been switched to other equipments in regular mode. Typically, you are likely to emphasize survivability a lot more over damage - so if you take your Quad oriented build in regular mode, you might find yourself not dealing enough damage. However if you would like to specialize in Quad challenges, you should look at maximizing Reload Speed (for decreasing reaction time), Armor Protection (gives you more damage reduction), Armor and Health pickup bonuses (easier time refilling the armor/health bars), Life Leech (to replenish health easier). You should also have a bit of damage bonuses of course - but the damage bonus provided by your weapon specific trinket should be enough, so that you can use your Figurine and/or Gloves for survivability. Heavy Weapon challengeThis is another well known challenge. The pros: With almost infinite ammo of Railgun and Nailgun, you are sure to have enough firepower to deal with whatever the game spawns at you The cons: Railgun and Nailgun ammo is expensive (in terms of heat), so the game will spawn big stuff at you To make proper use of that challenge, you should have good Nailgun/Railgun trinkets The probability for DC is halved Despite the cons, even with a regular loadout, that challenge actually tends to make it easier to win a difficulty. In fact, before the DC probability got halved, people were playing this non-stop. It can help you reach difficulties you would not be able to win otherwise. 'Heat' - how to control pace and difficulty I've already mentionned that Heat is created by picking up items. Let's detail it a bit more. You can think of Heat like an air baloon. It gets inflated whenever you pick items - but the Unloved game master don't deflate it straight away. Instead, they keep their fingers on the extremity - or regulate the deflation. The more you will step up in difficulty, the more unpredictable the deflations will be. Meaning the UNLOVED game master will love to retain the air so they can spawn stronger waves.. If you see a Red message appearing in the Chat, it means there's just been a major deflation, and you will face a big wave in the coming seconds. The amount of generated heat depends on: The type of item. A full box of ammo costs more than a few shells. Blood machines give a high heat (hence the big wave you have at the end). The color of the room. An item in yellow room costs more than one in blue room. Yellow > Blue > Red > White = Green. A single door in a Blue room actually costs a lot, that's why you have the impression that the game throws more and more monsters at you as you advance through the game. Items that are on the ground (dropped by monsters) cost less heat, afaik regardless of the room color. So how do you minimize the amount of generated heat? Don't take ammo for weapons you don't have. If you take for example all the Railgun ammos, but there is no Railgun in the map, you will have picked them for nothing. Don't take twice the same weapon. For example, if you already have a Pistol, don't take another Pistol. It will only add you few pistol ammo for the heat cost of a Pistol. Such maneuver should only be in desperation, when you've got nothing else to take. Prioritize taking the items on the ground dropped by enemies - they add less heat than the other items. Avoid taking e.g. a full box of ammo when you miss only a few shells. That's a waste of heat. There's also all the extras to take into account.. Photos, Ink Bottles, Card Pieces, they give you more rewards. Totems and Weapon Mods can help you in your run if you're feeling unlucky. But if you're already on the verge of dying.. Is it really worth to take more, only to get yourself killed? There are two major points to consider in UNLOVED: Should you explore another room? Say you already have Blue key, and there's still one Red room to explore. Should you do it? What would you gain from it? More health perhaps? Or Railgun? Or wouldn't it add too much heat in an already barely sustainable condition? Also, it would create new places for enemies to spawn in. Should you really pick that 4th weapon? Or do you have enough with 3? Taking an Ink Bottle when you're at 10 health.. 3 more fragments, but perhaps at the cost of your game? Heat is something unpredictable. You never know when the game is going to spawn the wave. Maybe taking the extra item won't do anything bad. Maybe it will unleash a deadly second wave after you barely defeated the first. There is no optimal strategy there. But when you die, it's good to take a step back, and try to understand why you died, so that you can adjust your game later on. Generally, if a wave brought you down to 20 health, there's very little chance that you'll survive the next, so you'd better take survivability tactics. If you feel confident in your health, armor and ammo you can continue exploring - but if you are barely alive, you should be very careful on what you pick, which door you open, where you go.. Particularly if you are the last member alive of your crew! Weapon Mods and Totems Weapon Mods and Totems in general make your game significantly easier. But they do generate heat - so should you take them or not? Here is a few things you should consider in order to determine whether you take them or not. Weapon ModsA weapon Mod will attach to a random weapon that you already have. Say you have a Shotgun, a Nailgun and a Railgun - then a weapon mod that you take will be attached randomly to your shotgun, nailgun or railgun (exclusive). A weapon mod can add significant bonus to the weapon it's attached - it can be bring more ammo (ammo pouch), increase reload speed, increase damage, magazine size.. It can help you defeat monsters you have trouble with. The downside is the heat that comes with it. When it's in White/Red it's quite subtle, but when it's in Blue/Yellow you start to feel it more. I'm redirecting you to the Heat section to know whether you should take it or not - but my general feelings about this is that it tends to make your games easier, despite the extra heat, because in the long term you can face bigger monsters with ease. Especially in multiplayer. However, if you're running very low on ammo/health and feel like you can't take another wave, you might want to delay the time where you pick the Mod. Also, maybe there is little to no reason for you to take the mod, if you feel like you have enough firepower already. When taking mods you should also consider that since it applies to a random weapon, the less weapons you have, the more control you have on where the mod will go. If you go through the game with just 3 weapons, these weapons will be more buffed than if you had the full 6 weapons. TotemsSame remarks as weapon mods regarding the heat - except that totems are much more powerful, especially since a recent UNLOVED update. You can read here the list of totems: http://steamcommunity.com/sharedfiles/filedetails/?id=785296295 2023 UPDATE: the guide linked above has been taken down unfortunately. Hopefully what we wrote below still makes sense. This list is (at the moment) not in phase with the UNLOVED update ; now totems that increase damage/max health/max armor scale with difficulty. Let's suppose you get Marine Armor + Iron Helmet. This boosts your armor protection by 50%, meaning you will have 75% armor protection (instead of 25%)! While wearing armor, you will take 4 times less hit than usual. That's perhaps the best combo you can ever find in totems, but there's also some very nice effects in there. Some other great effects: Demon weapon_name: boosts the damage of the weapon by a lot. This can really turn the situation in your favor. Ace of spades: boosts damage of all weapons - great to have Gemini laser: basically doubles the amount of railgun ammo you have, since one railgun ammo is used for 2 lasers! Amulet of Chaos: helps a lot to provoke infighting between enemies = more breathing room for you! Angel: converts a random enemy to fight by your side.. If you get it on a Rotten Clown, well you couldn't dream of anything better! My personal stance on them is that they're definitely useful - and really shine in multiplayer. But as for weapon mods, don't take them if you're already in a bad-almost-dying situation. By the way, it should be noted that in multiplayer, each player gets a potentially different totem. How to deal with specific monsters I'll be detailing here what are all the possible monsters, and how to deal with them. All the images are from UNLOVED wikia[unloved.wikia.com] Salem Servant
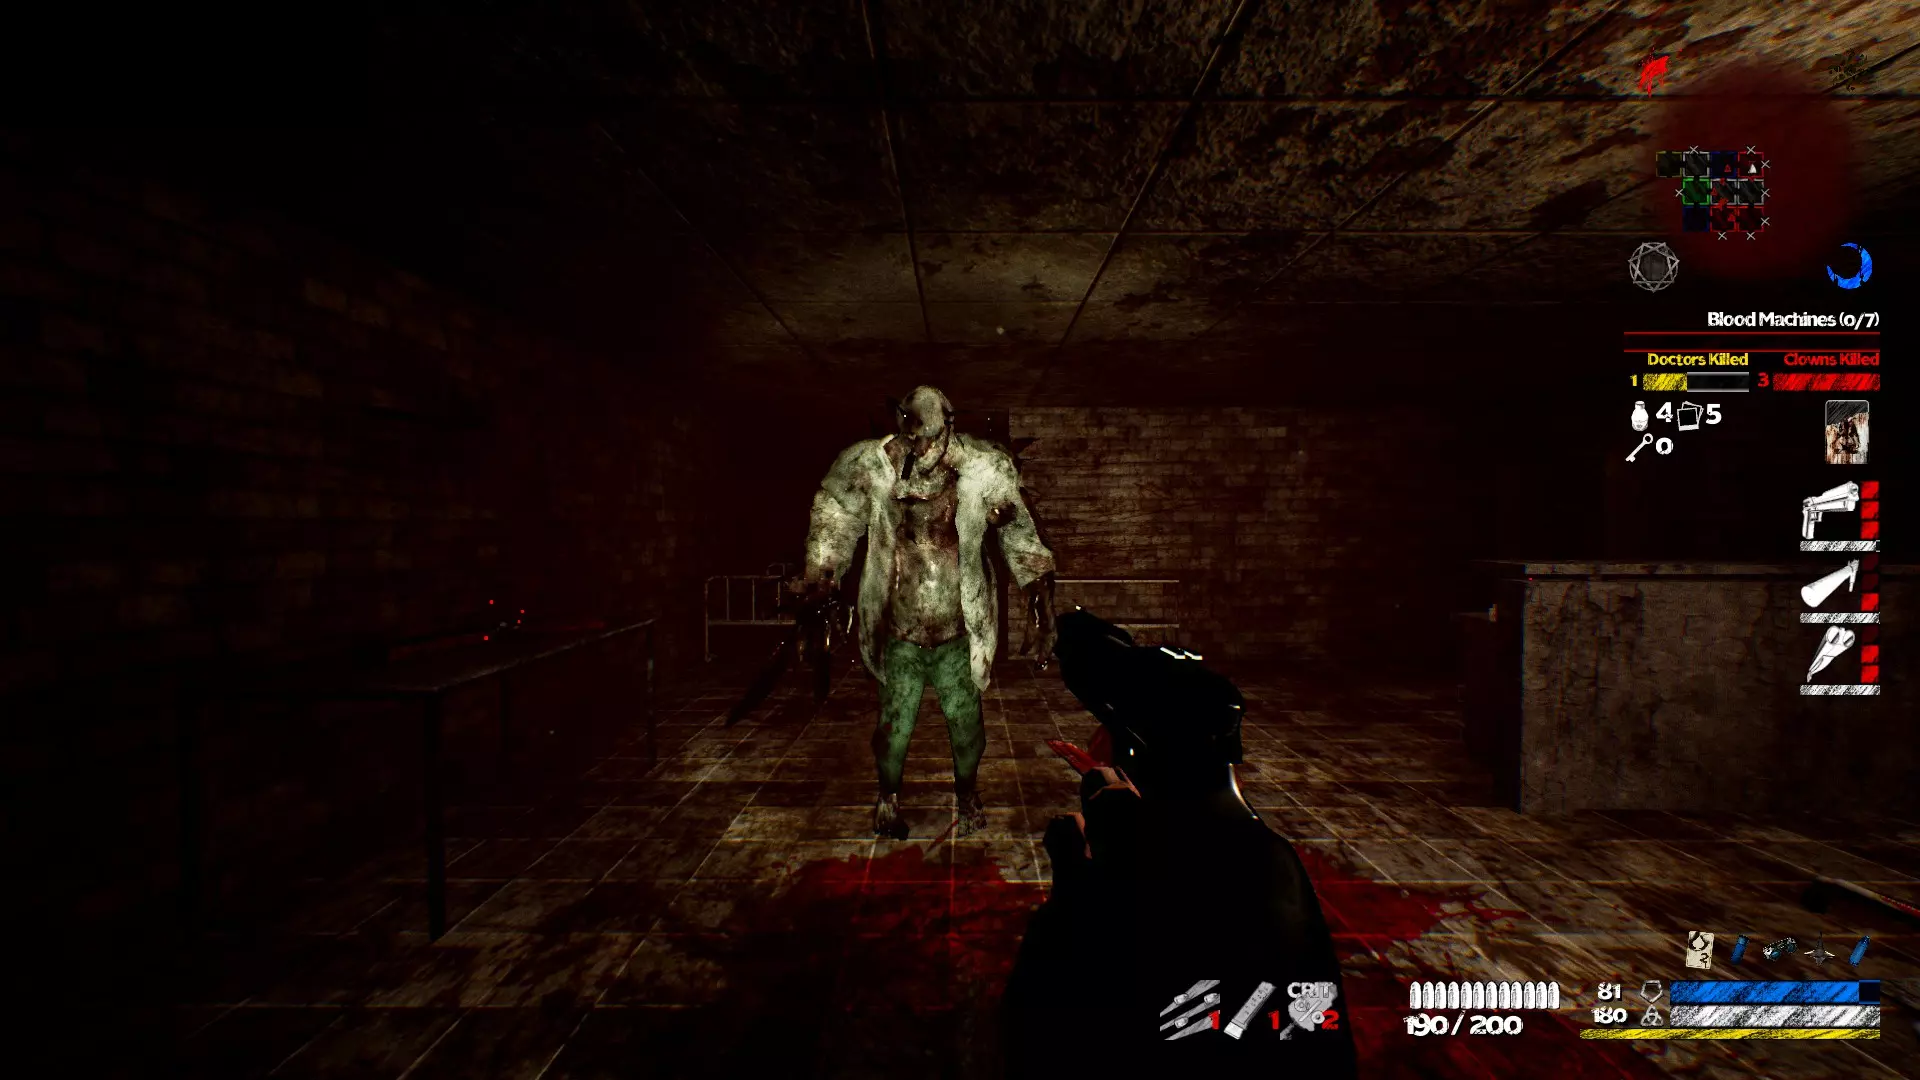
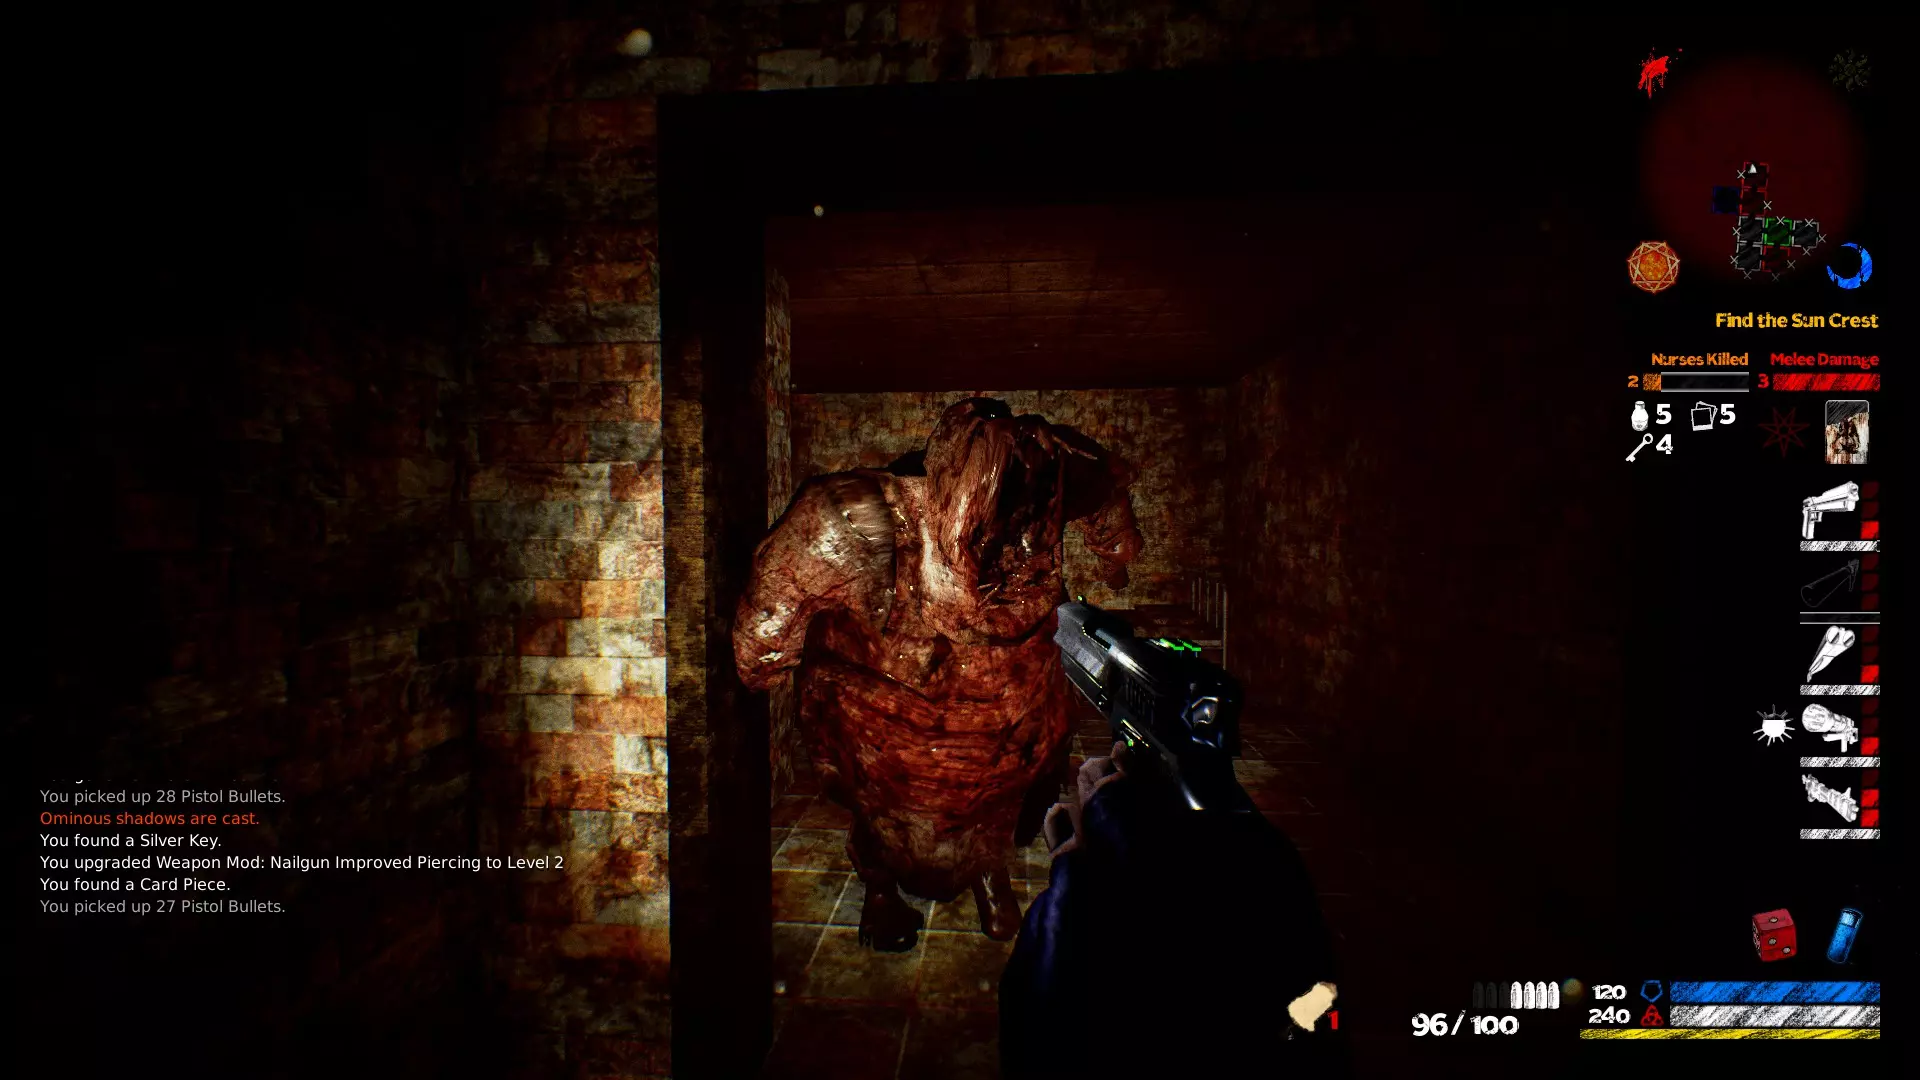
游戏中最弱的敌人。你应该在它对你开枪前解决掉它;尤其是在游戏初期,它们往往数量众多,会一点一点消耗你的护甲/生命值。不过它们非常脆弱,通常一击就能解决。当你生命值较低且正忙着与其他怪物战斗时,它们会变得特别危险。保持警惕! 护士
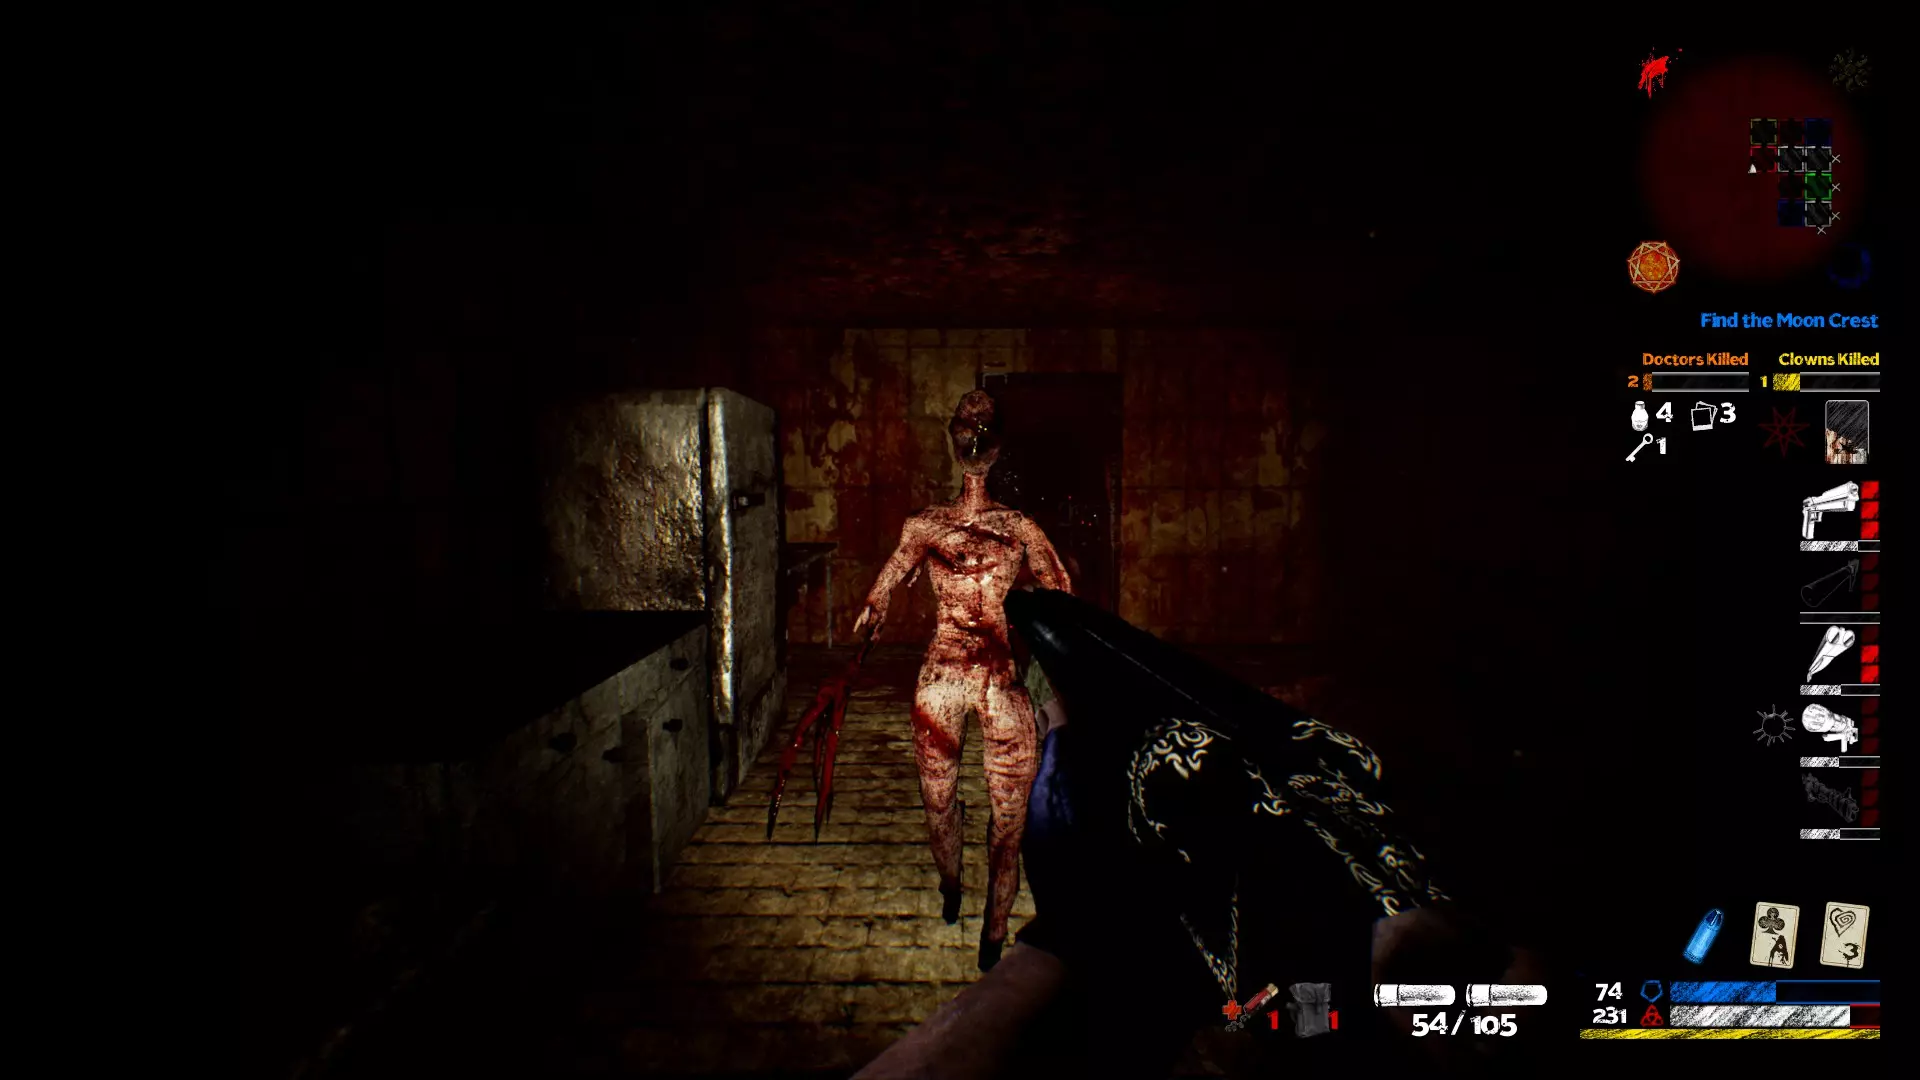
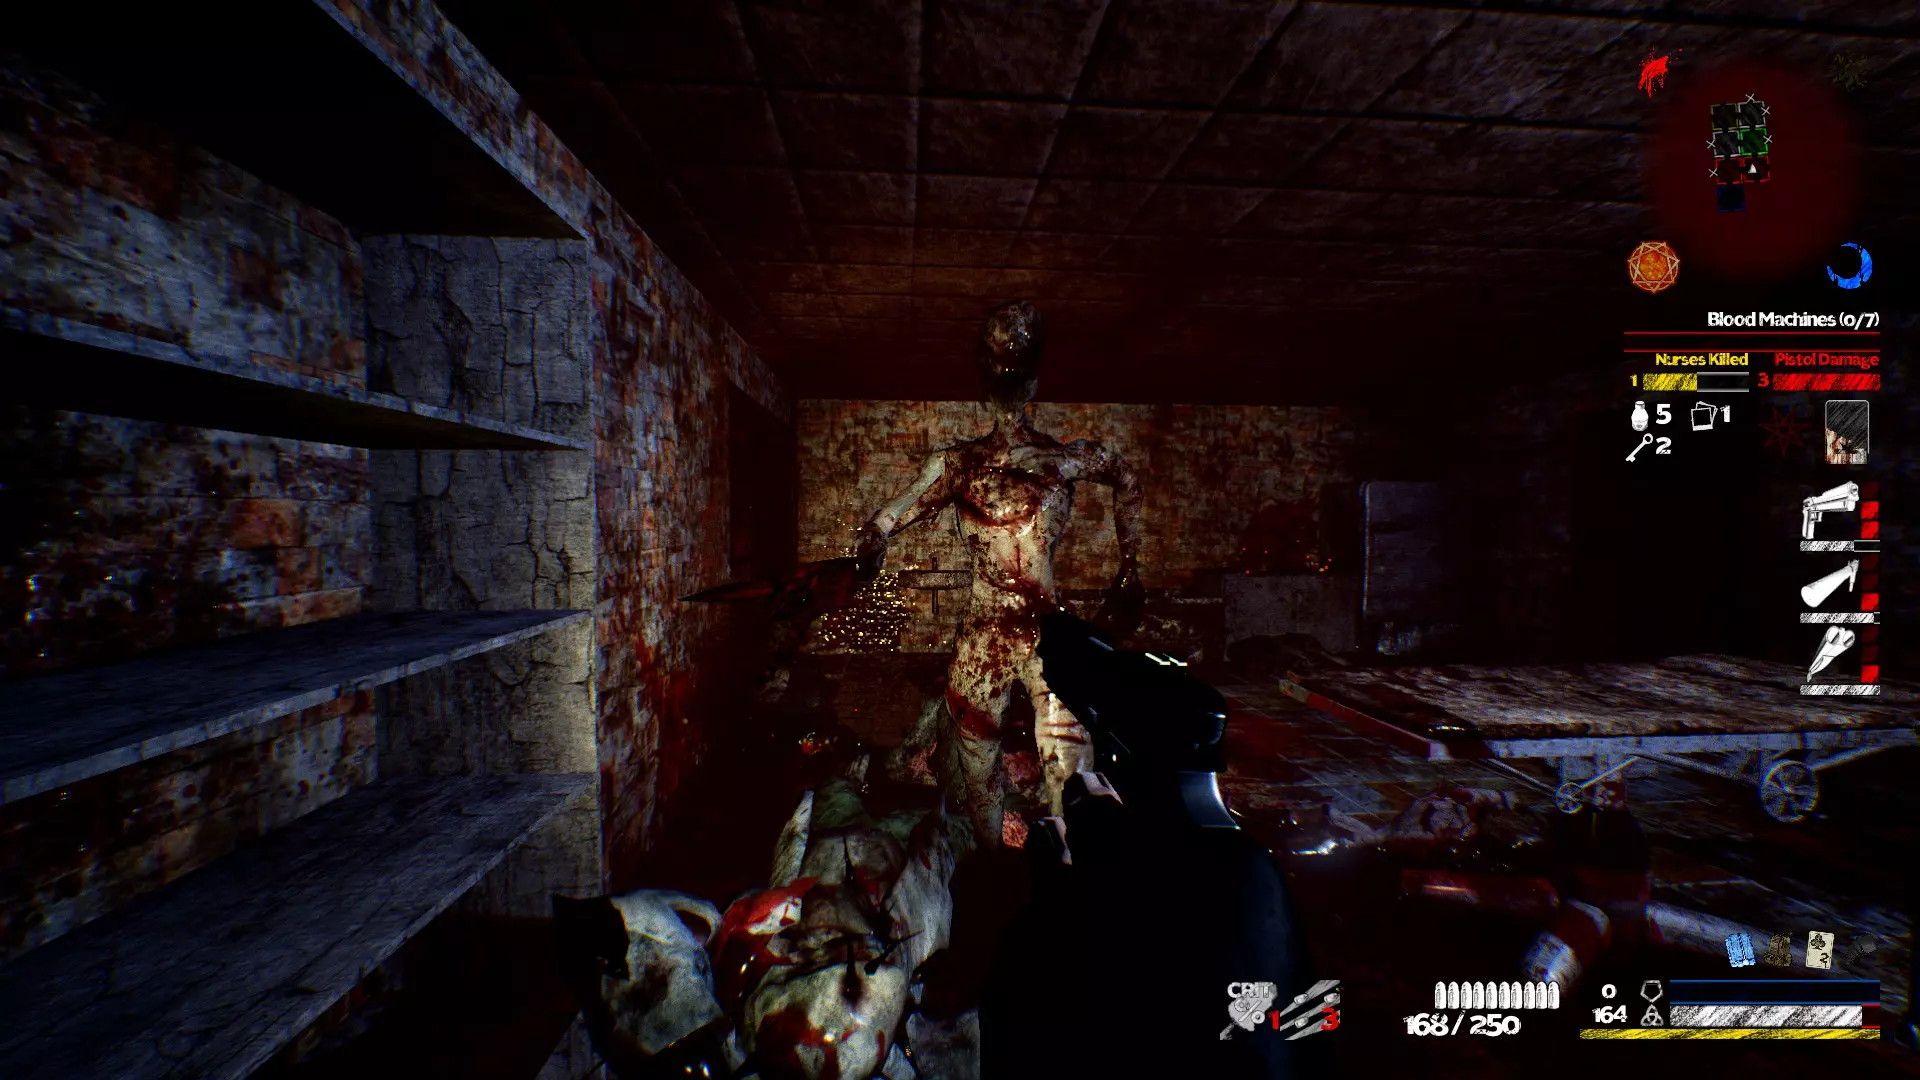
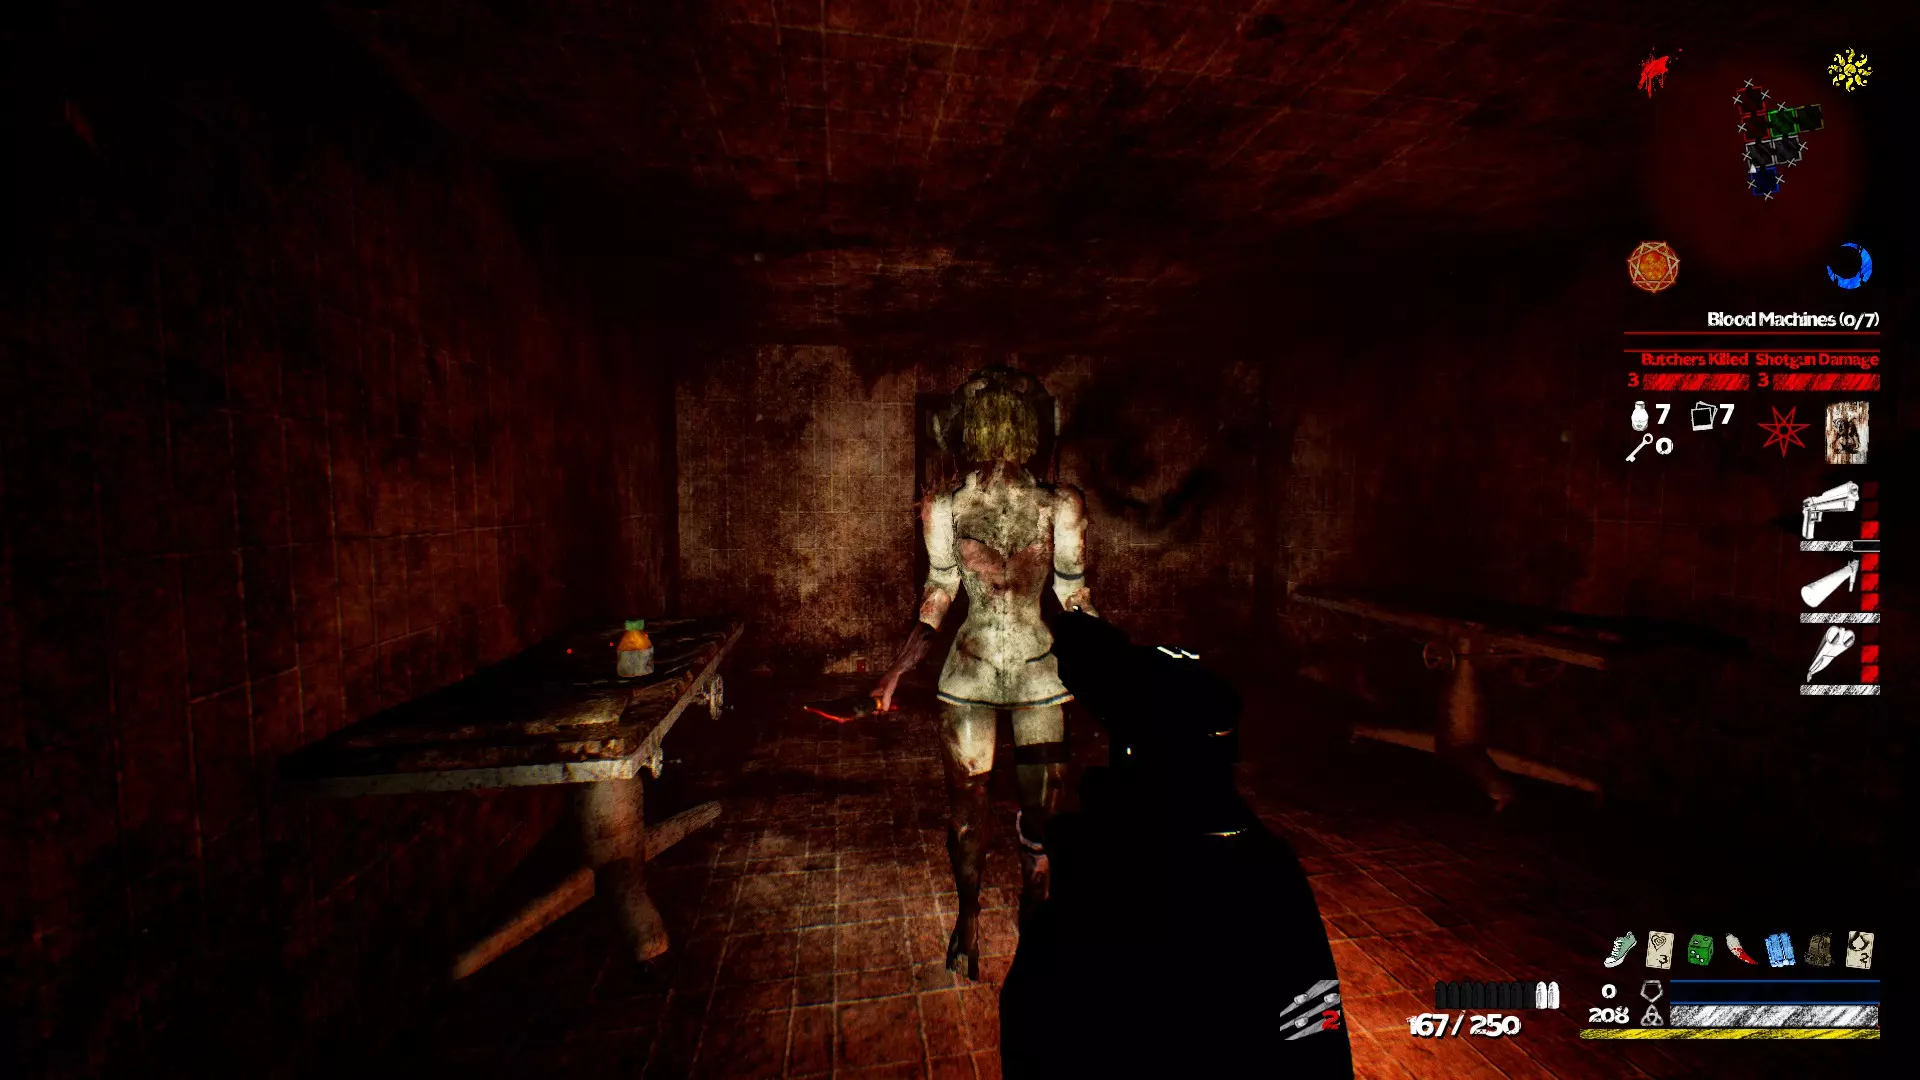
护士看似虚弱,实则喜欢从背后偷袭。如果不小心,你可能会在这个过程中损失大量护甲/生命值。所以,每当听到护士的声音时,最好检查一下身后。 血腥护士是经过强化的护士,她还能向你发射红色火球。当只有一个火球怪物时,躲避这两个红色火球(其实一般的火球都一样)还算容易,但如果有多个火球怪物,情况就会变得复杂。看到火球怪物时,一个不错的经验法则是:要么尽快将其消灭,要么找掩护。 切割者
切割者的行为有点像护士,但我觉得它比护士“没那么凶残”。它会发射火球,并且喜欢把你逼到角落,在刺击你的同时阻止你移动。 暗切割者(黑暗版本)拥有紫色的追踪火球。为了躲避它,你需要让火球撞到墙上。在这款游戏中,你永远无法逃脱任何追踪型投射物。 一个不错的策略是紧贴墙壁,这样一旦火球从你身边经过,它就不会折返,而是会撞到墙上。 屠夫
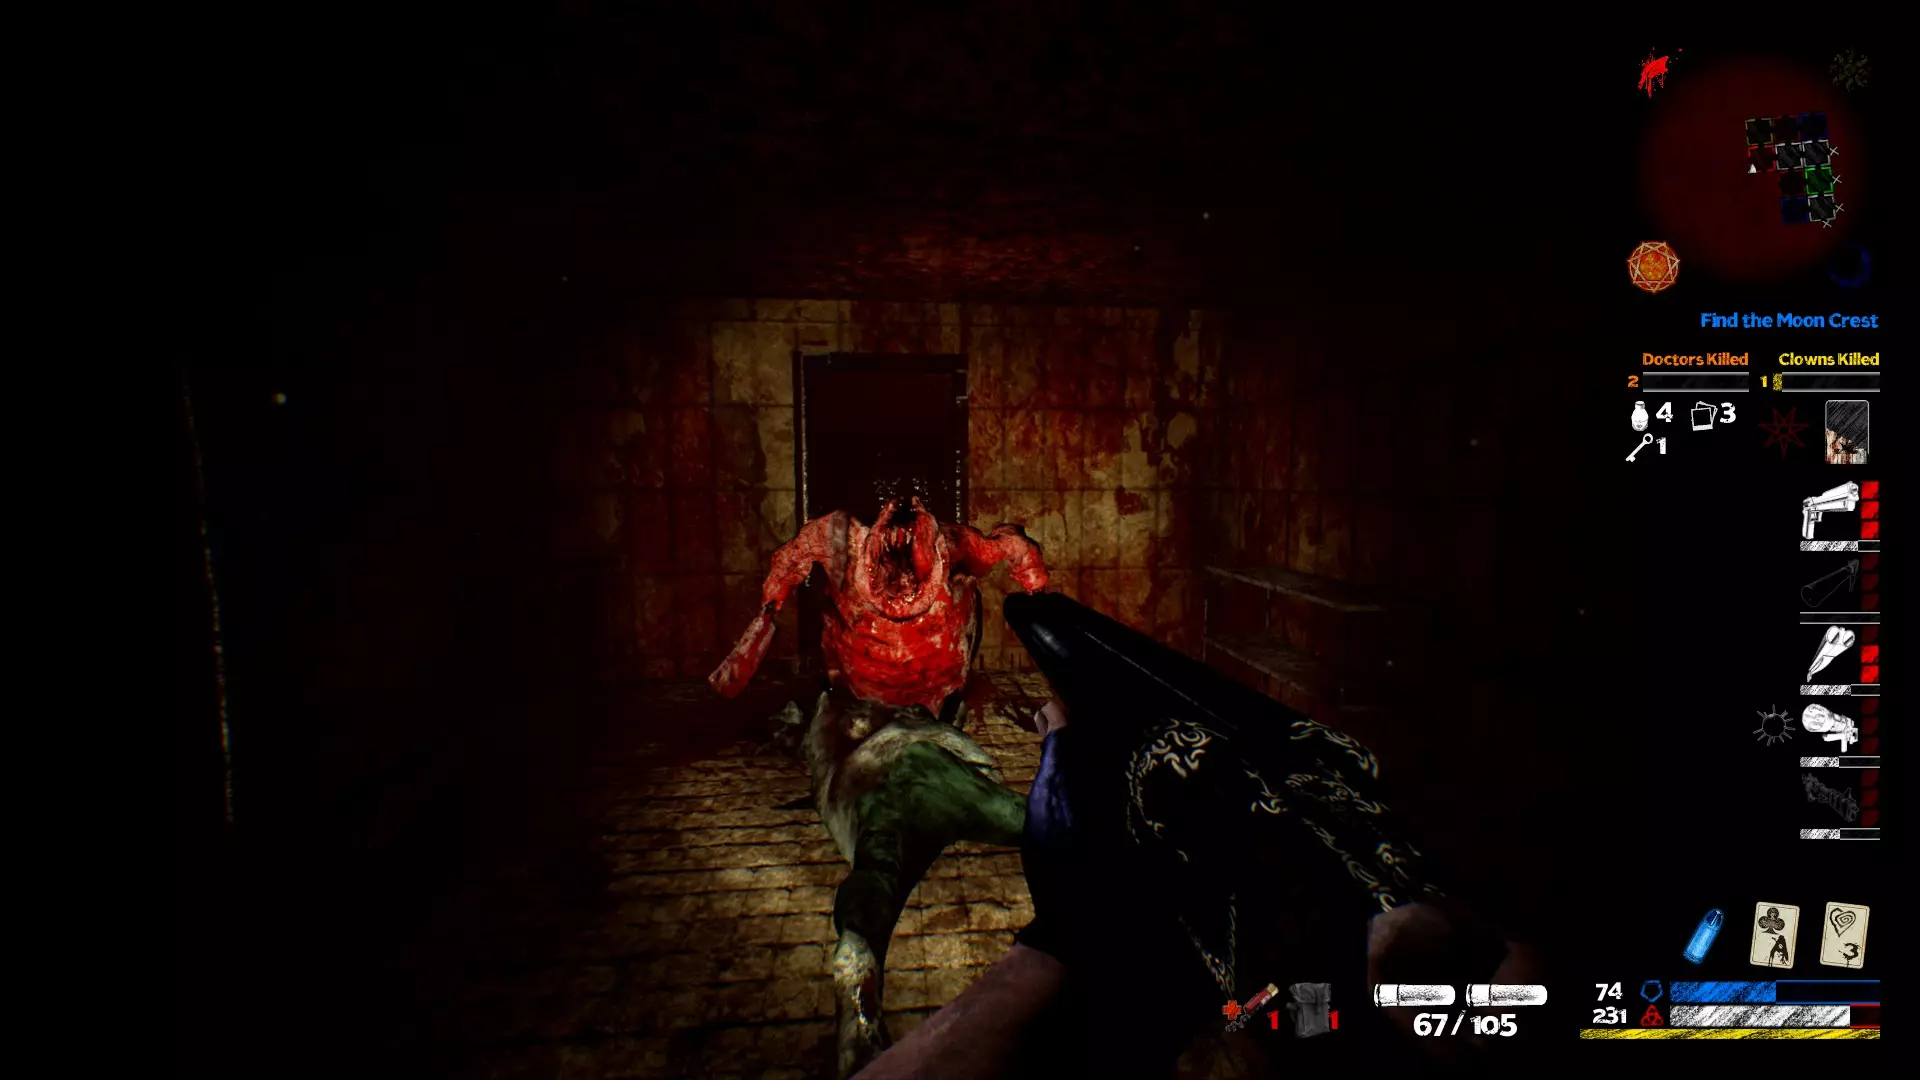
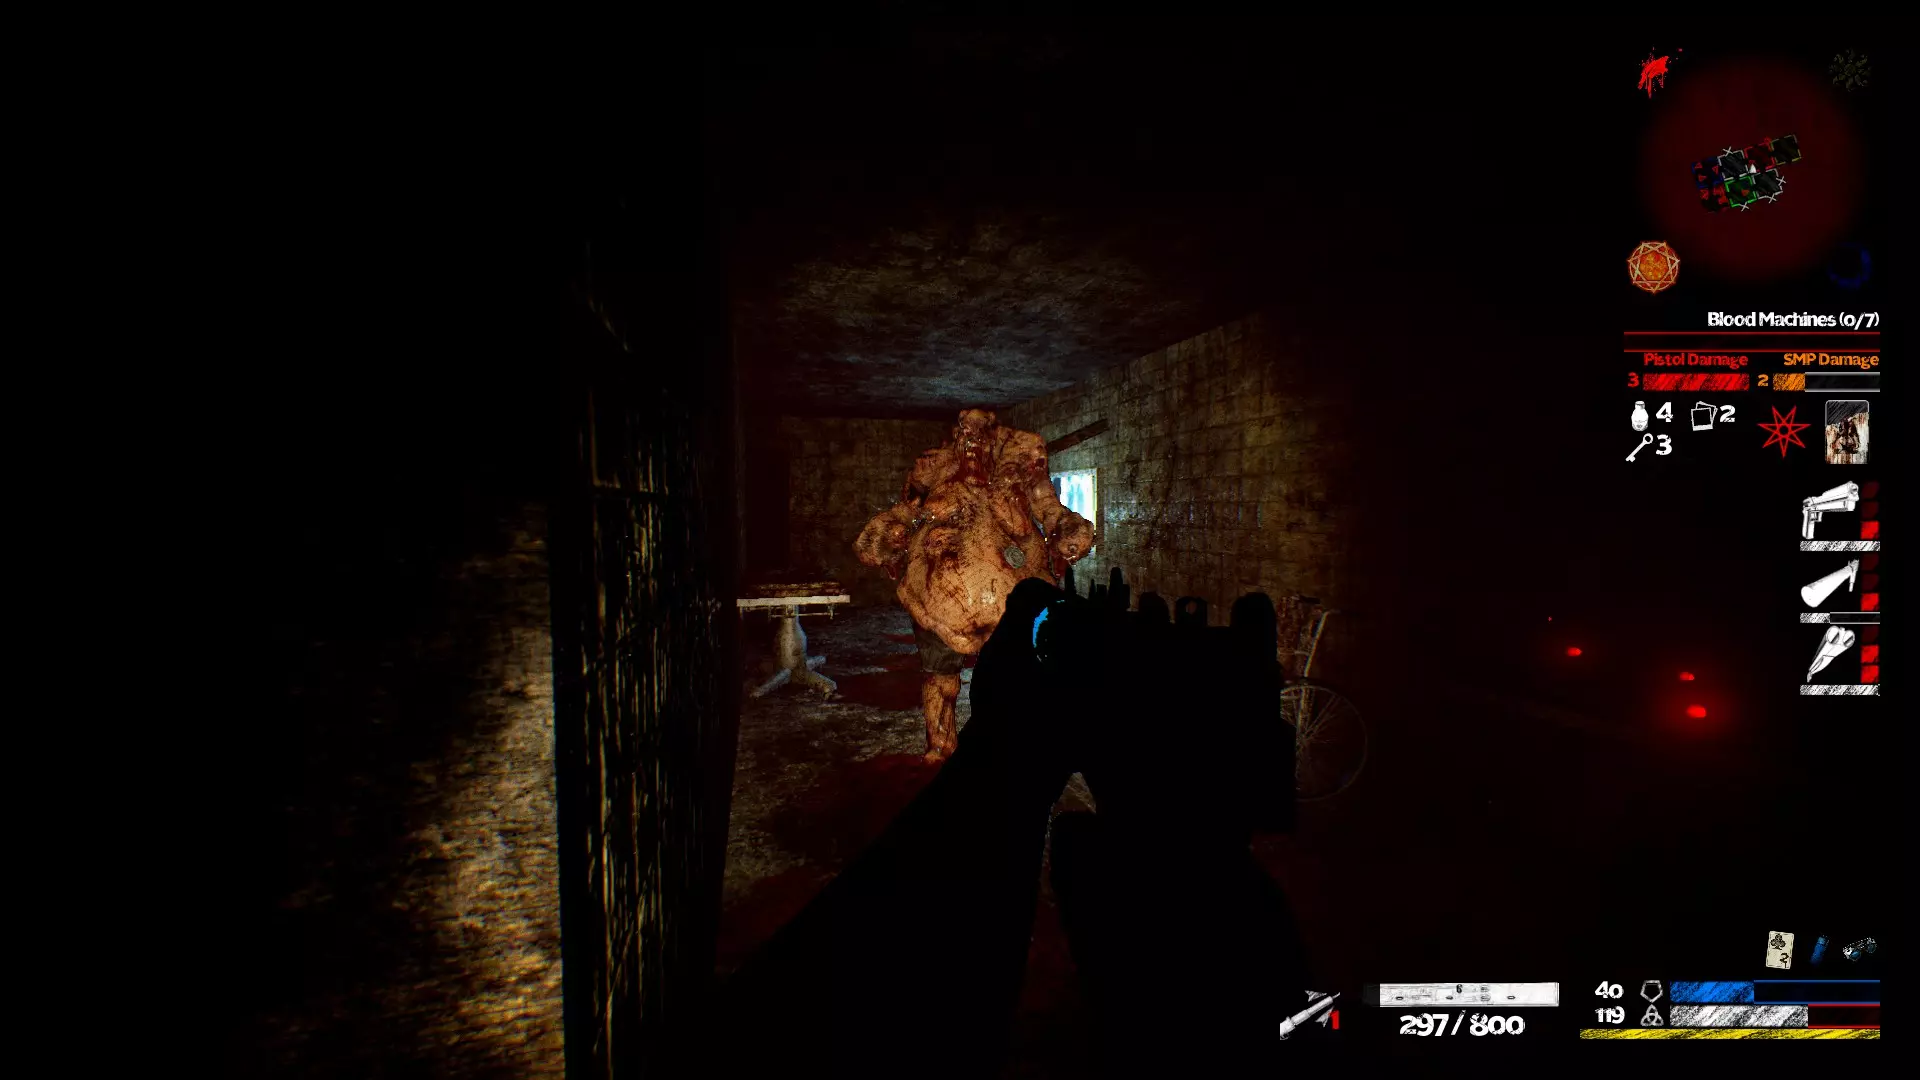
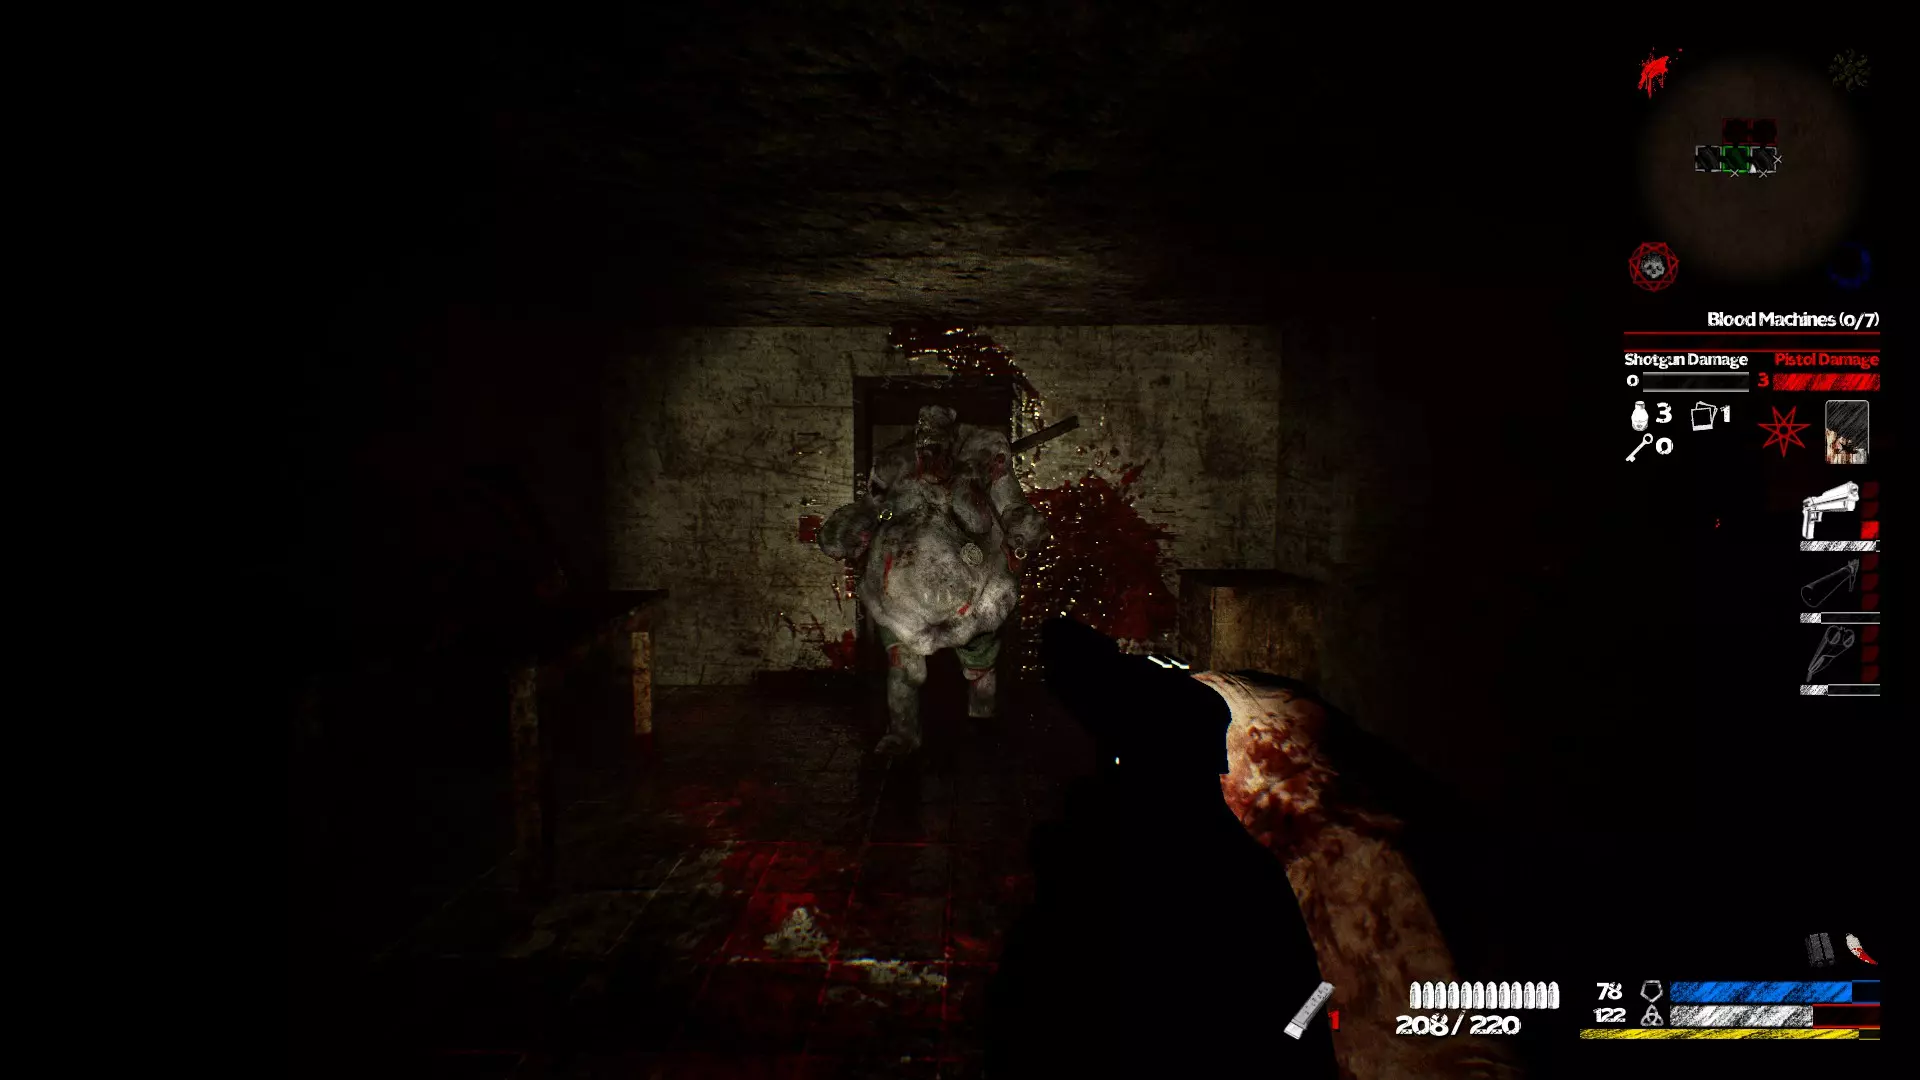
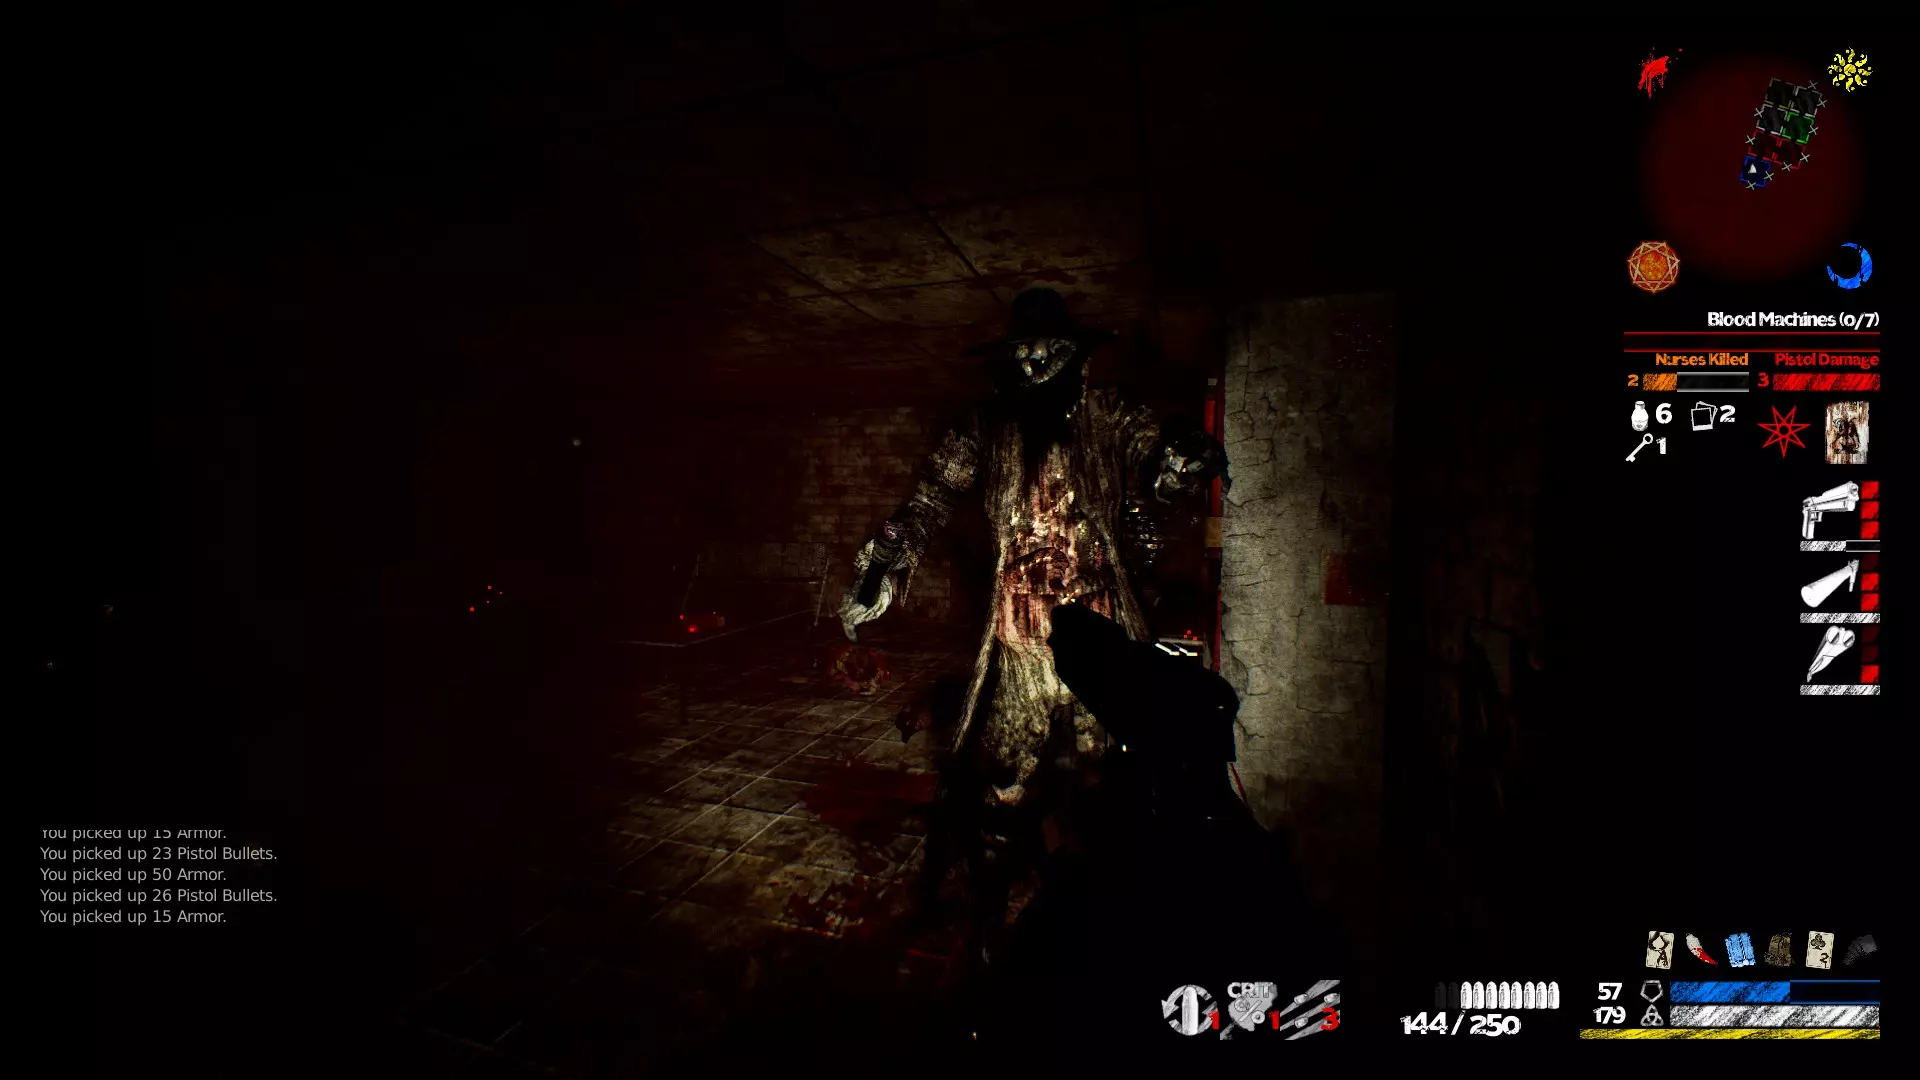
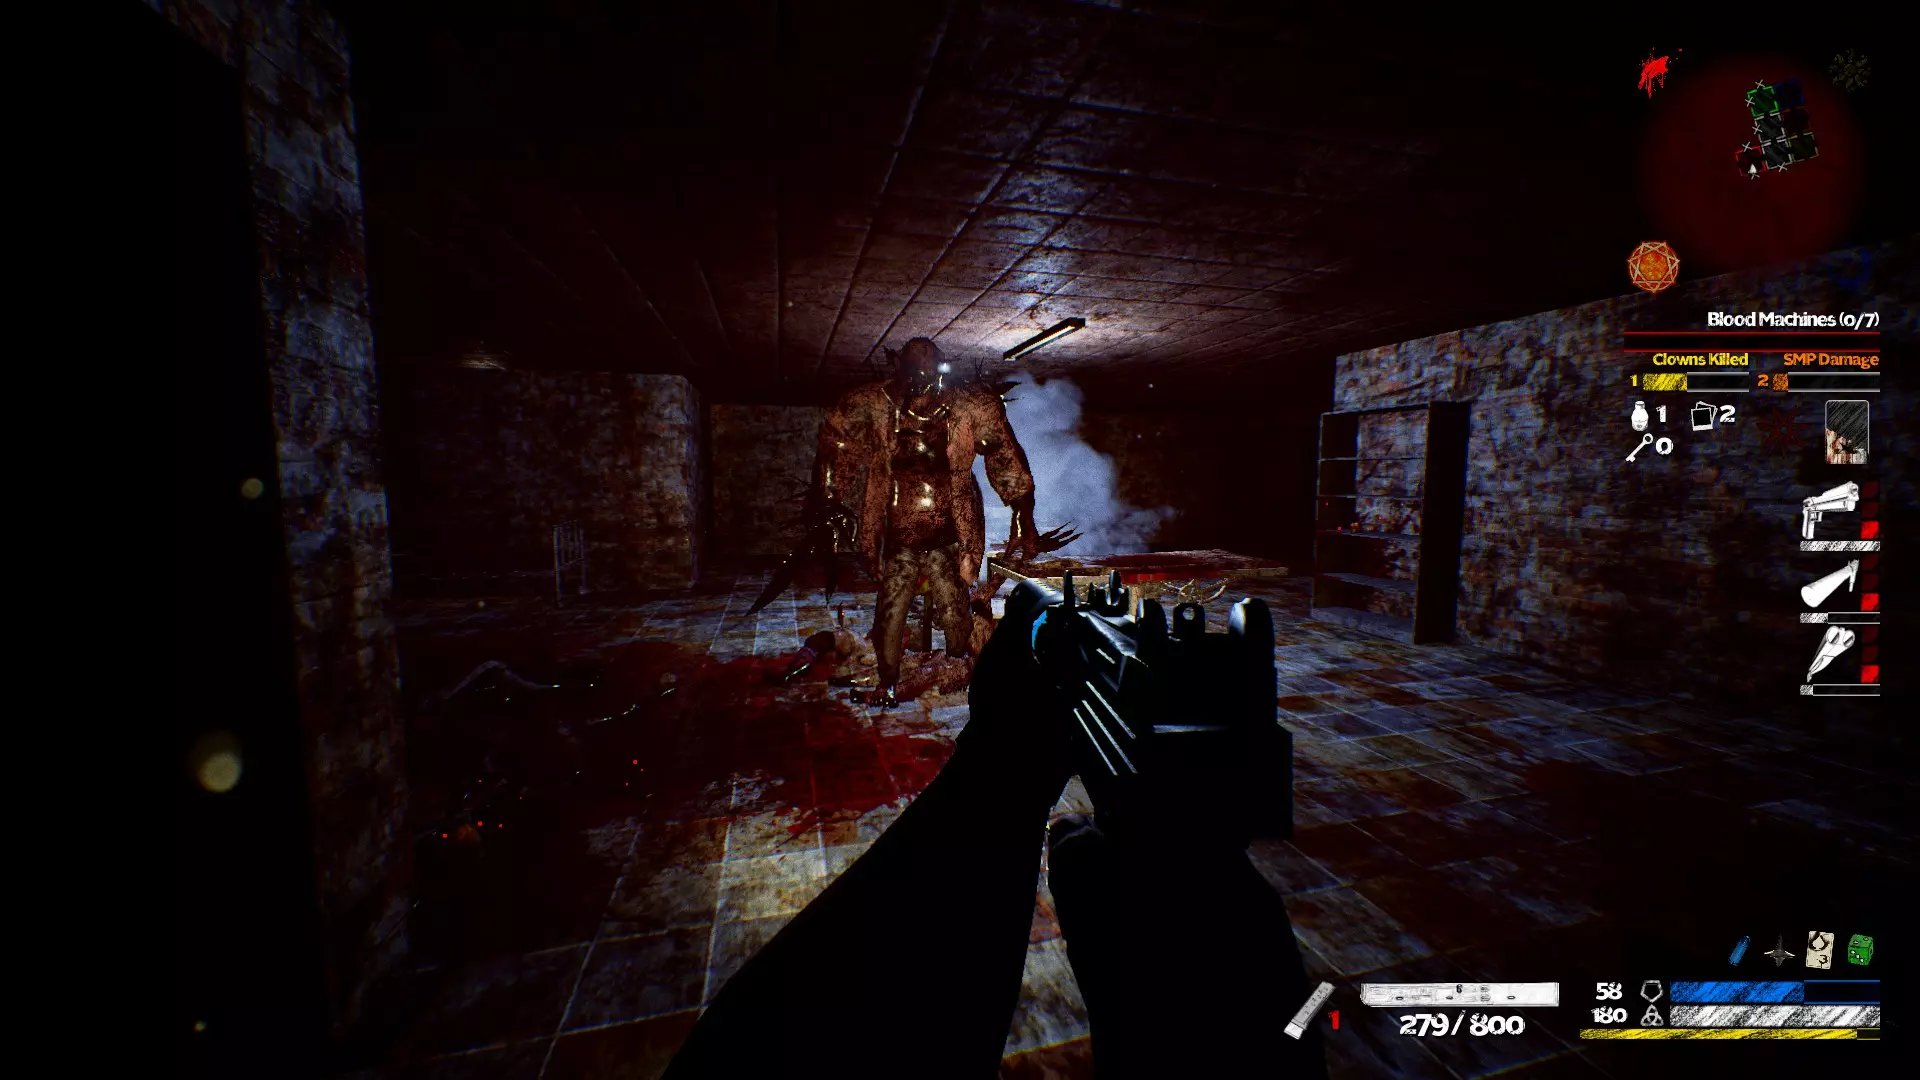
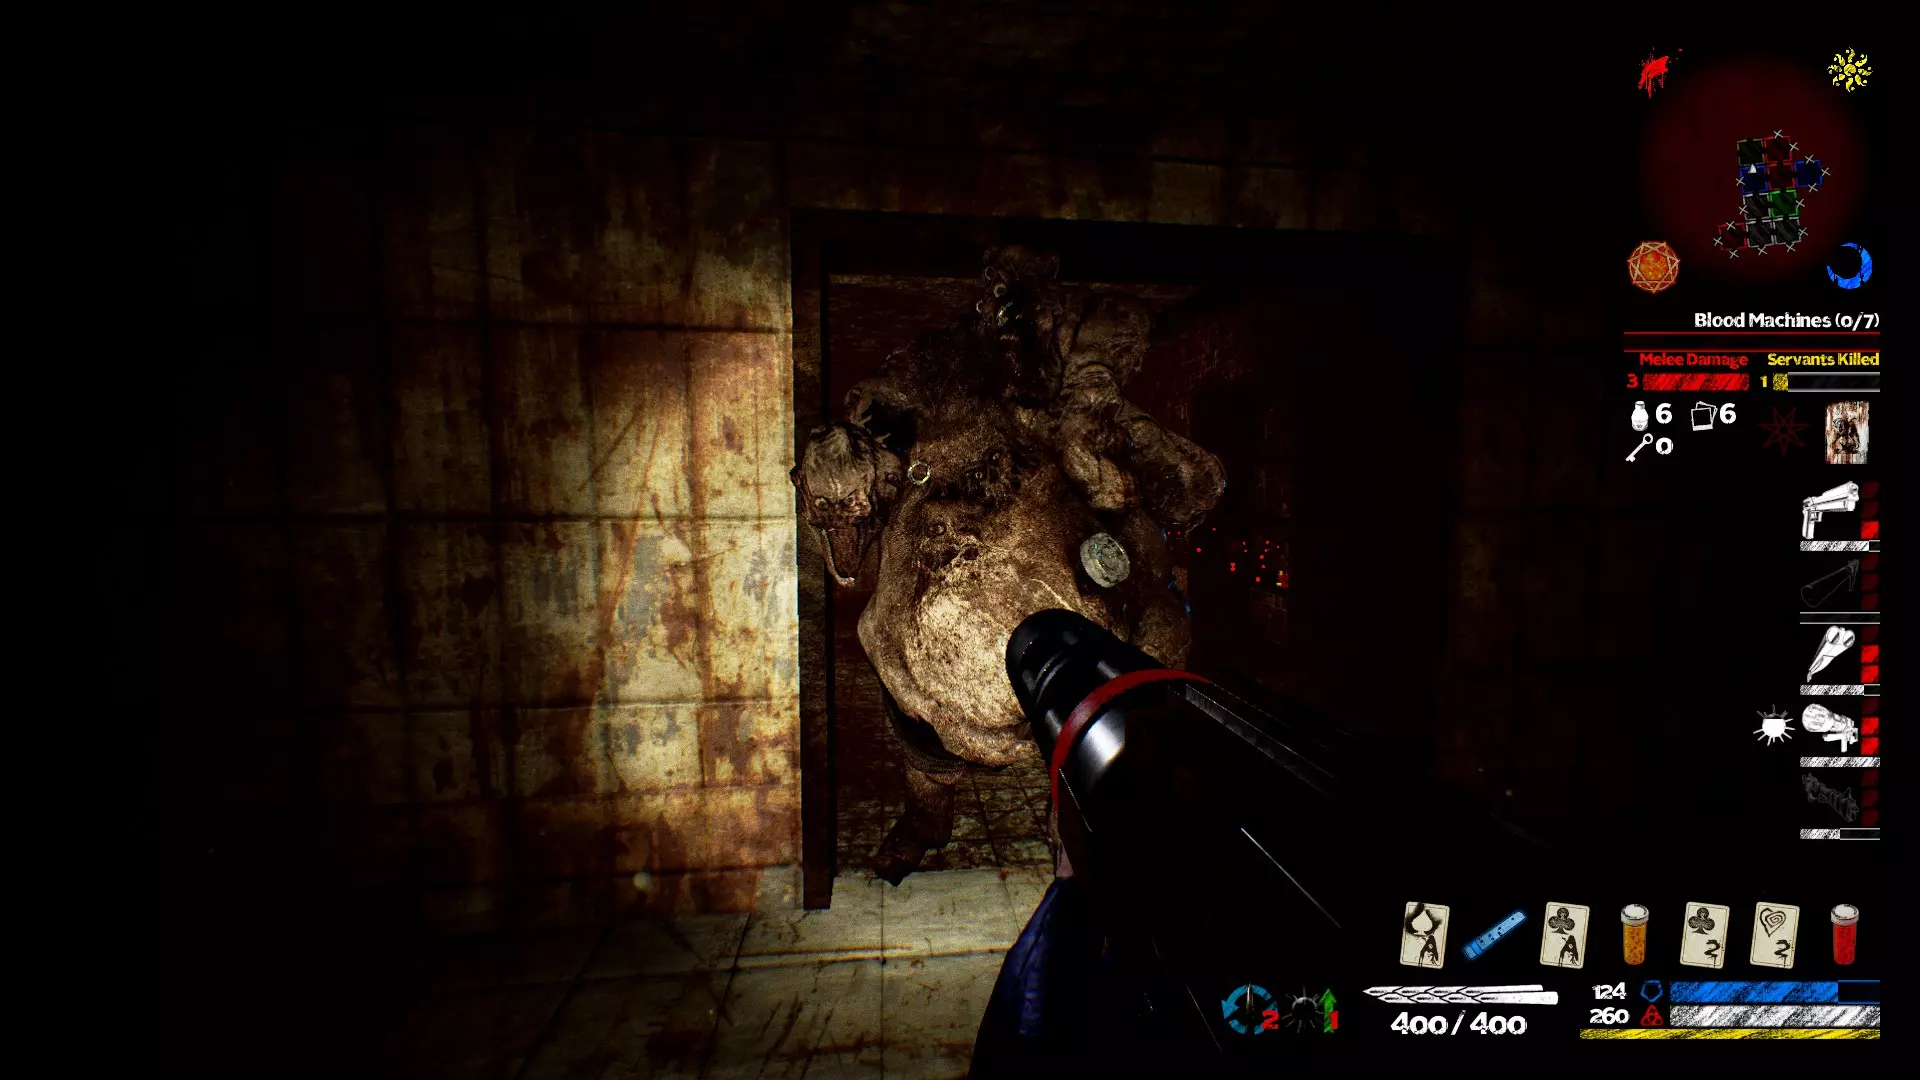
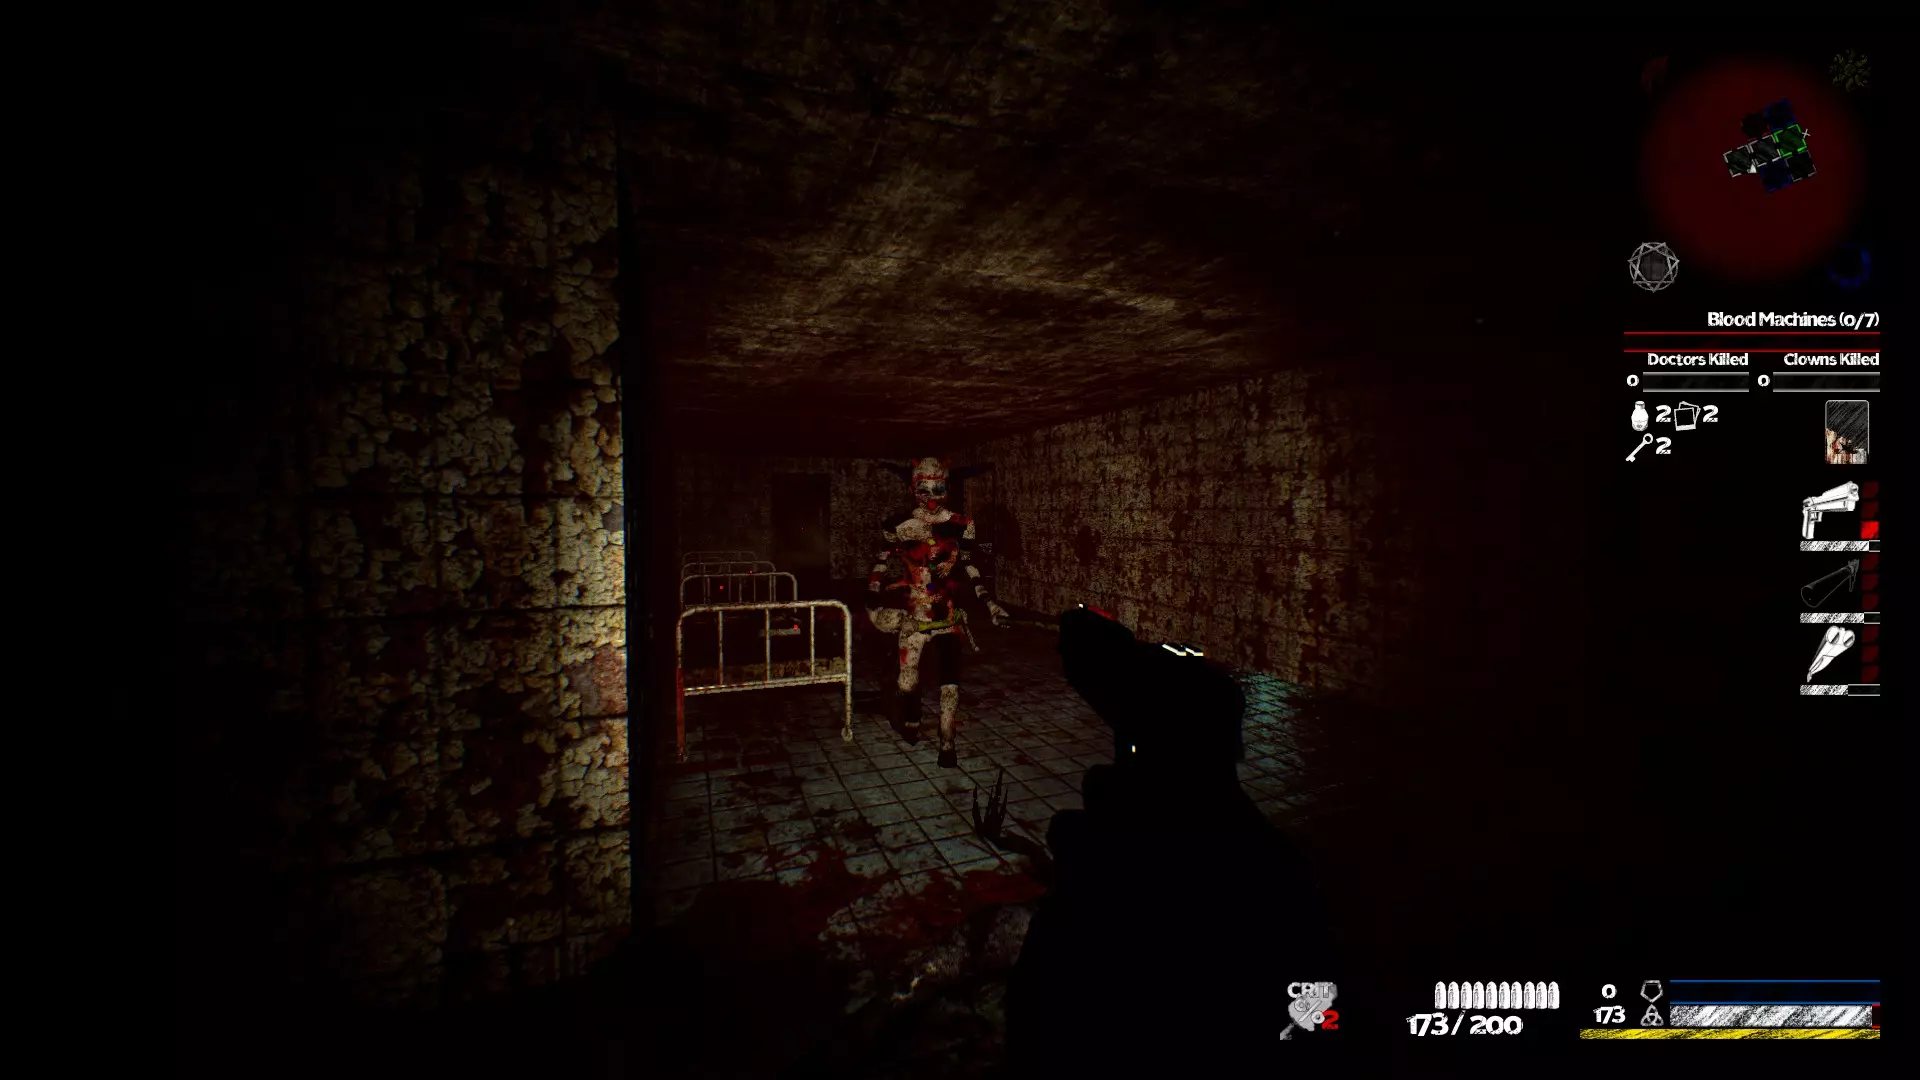
屠夫是危险程度较低的敌人之一,其行动模式非常容易预测。不过,它是你会遇到的第一个“血袋”,击杀它需要比普通敌人更多的攻击次数,所以要注意别让它堵住你的去路。 血腥屠夫还会发射火球。 小丑 由于某些原因我无法上传图片。但它确实存在,而且很容易辨认。 (图片链接:https://vignette.wikia.nocookie.net/unloved/images/b/b3/20160326234400_1.jpg/revision/latest?cb=20160327072020) 在一段时间内,这家伙会是你最棘手的敌人。想象一下护士的凶残,拥有比屠夫更高的生命值,比黑暗切割者更致命的跟踪导弹,再加上毁灭性的近战能力?没错,这就是小丑。 小丑应被视为一个相对危险的威胁。你需要尽快将其击败,以免它降低你的生命值。 他的投射物可以通过贴墙来躲避——但他的速度相当快,因此并非在所有情况下都能轻松做到。“恰恰”舞步在这里会有所帮助:首先,向他移动以触发他的近战攻击,然后立即后退,这样你就不会被近战动画击中。你也可以在他发射导弹前用霰弹枪将其击晕,或者使用SMP来实现更持久的眩晕。如果你是手枪使用者,情况会稍微复杂一些——你需要集中火力快速将他击败,并专注于躲避他的导弹。 博士
这个敌人有点像“移动墙壁”。它会迫使你不断转移位置,而且要打掉它需要承受大量攻击,这点很烦人。不过它的近战伤害不算特别高(和其他一些坦克型敌人相比——当然还是比切割者之类的近战伤害要高),而且它的火球也很容易躲避。 无面者
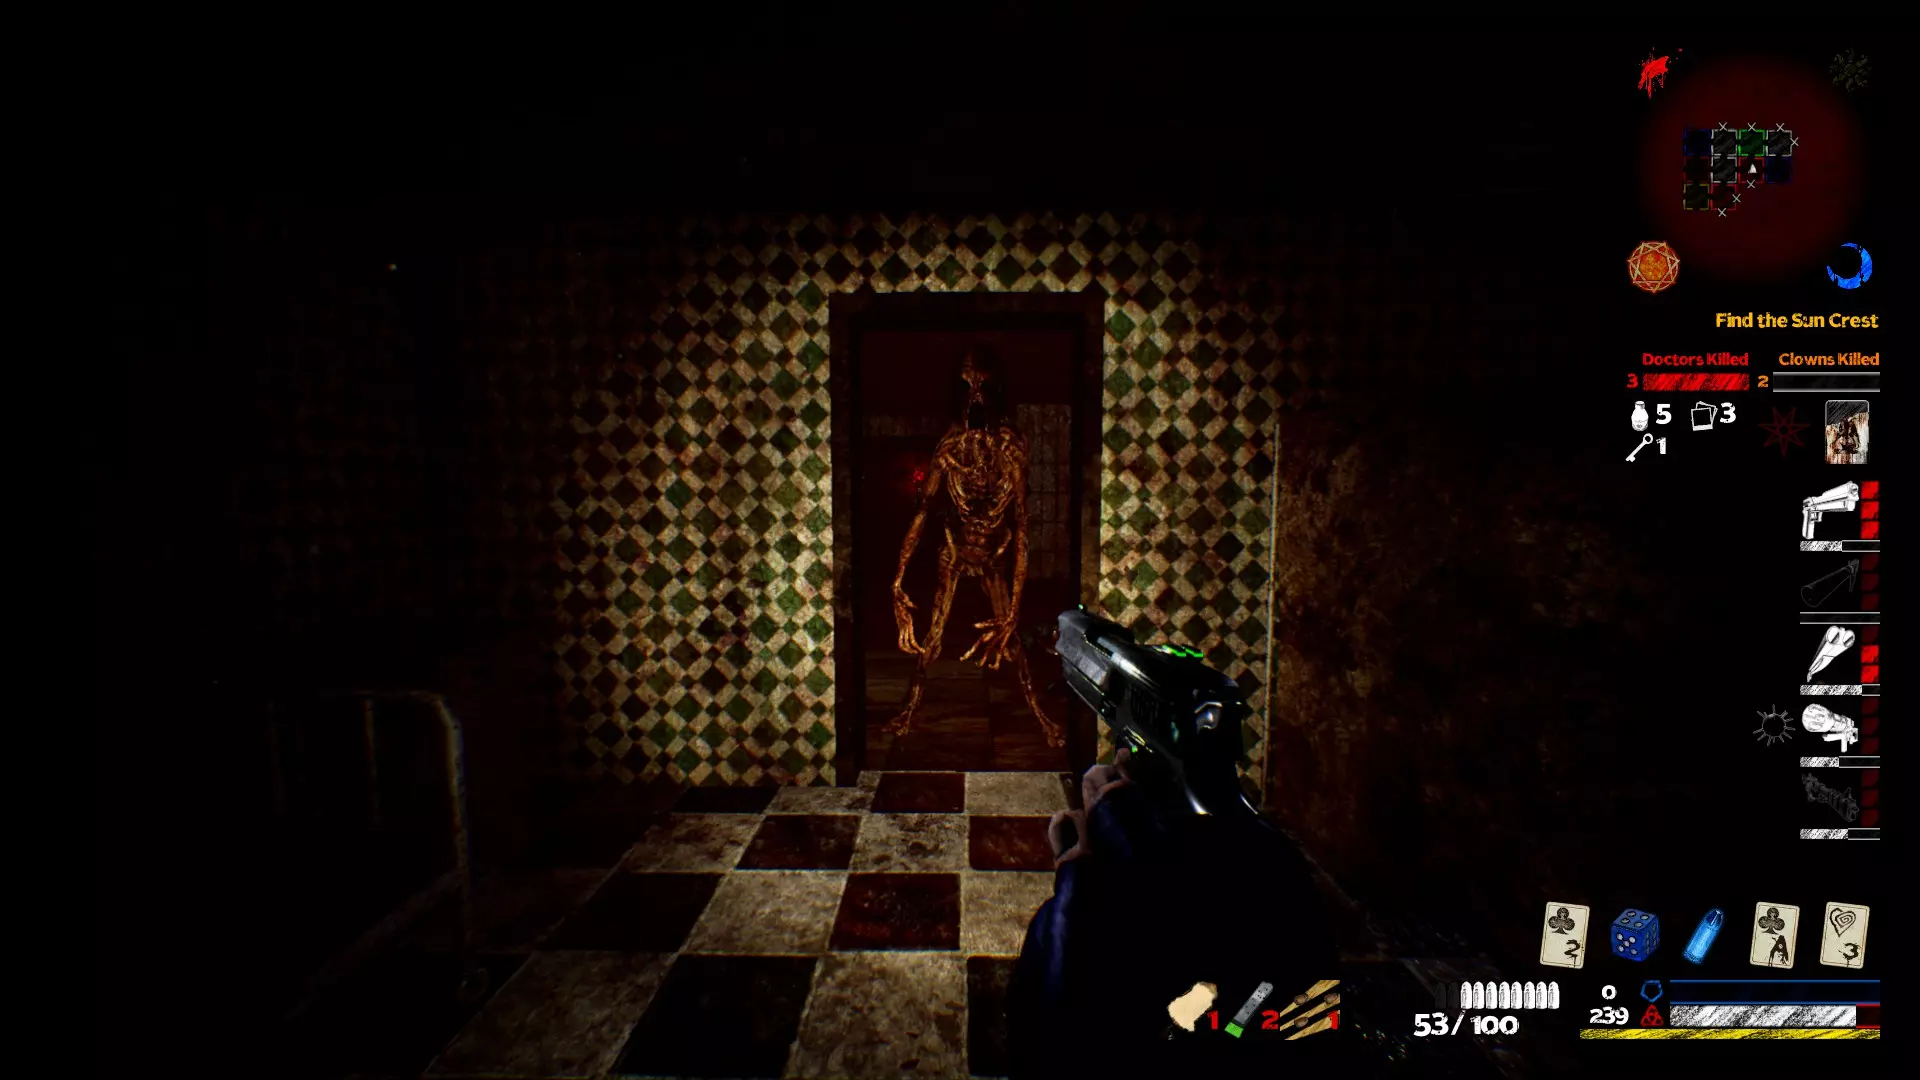
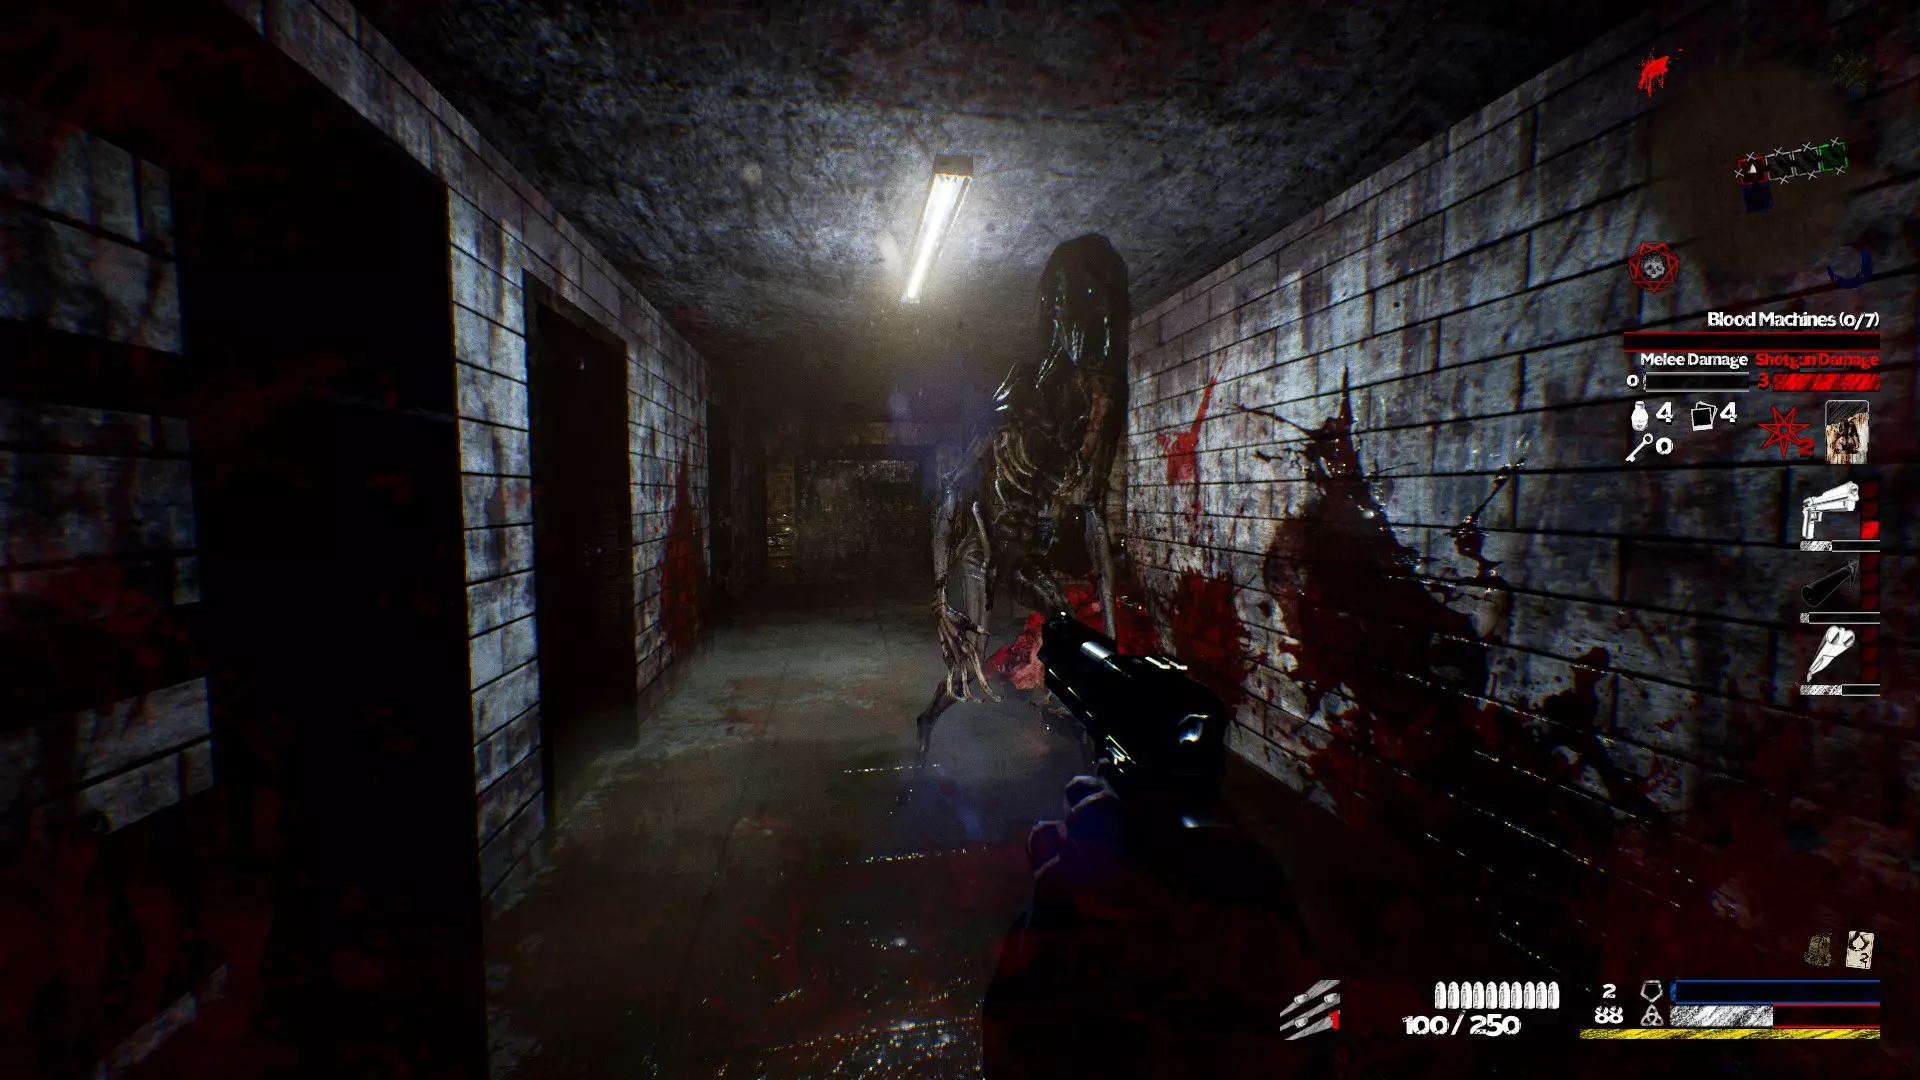
这是最危险的敌人之一。他有点像一个移动炮台——只要他不开火,你就可以在他周围移动,但当他开始发射火球时,你最好找掩护! 他会连续发射3轮火球,每轮2个,极难躲避。你必须使用东方Project粉丝所说的“擦弹(streaming)”技巧来躲避——小幅移动避开第一个火球,同时确保不会撞上第二个,还要避免被逼入角落。不过,如果在他开始发射火球时你能找到掩护,那会安全得多。 他的火球造成大量伤害,因此这个威胁不容小觑,实际上它起到了区域封锁(Area Denial)的作用,阻止你逃脱。 溺水无面者
就像无面者,但这个不会发射火球。相反,他是个巨大的血袋,移动速度相当快(比医生还快),而且他的拳头伤害极高!!! 他是那种会迫使你转移阵地的怪物之一,因为在他和其他怪物把你干掉之前,你根本无法将他击败。你应该在可能的情况下尽快将他消灭,以免陷入腹背受敌的境地。 女巫
Remember when I told you the Clown would be your worst enemy? Well, forget it. That is your worst enemy. A Witch inflict 100 damage bypassing any armor. Yes, as a lvl 1 character, that's pure death. It goes without saying that you should consider them as the worst possible threat you can encounter in UNLOVED, and should take it down ASAP. How it works: it casts a spell by staring at you. While staring at you, your screen gradually fades to black. If you're still in its line of sight when it's done casting, you take 100 damage. If not, its cast fails and it will usually run around to stare at you again. It is fast at running, which makes it all the more scary. If it stares at you, don't ask yourself any question, just run until you're out of its sight. If you're currently defending a room, a good tactic is to stand in the doorway (all the while shooting at it) to prevent it from entering your room - then when it starts casting, get out of the doorway. If it isn't dead, repeat the process. If he enters your room, you have to get out. If you can't get out, your last chance of survival is to burst him down as quickly as possible.. Rings Rings belong to the special Equipment Slot.. Ring There are 24 Rings in total, all obtainable through two means; Random Trinket Button in Trinkets menu (7%) or Demon Chests (10%) Rings always start at level 1 and do not affect your Level and max out at level 200. Rings require Rubies and Karma to upgrade. Rings typically come with three positive stats where many of the 'categories' of Rings, eg. 'Demon', 'Light', 'Unholy' and 'King', comes with three variants. Typically, two of the three variants will lean strongly for 2 of the stats and one is 'neutral', giving a balance of all 3 stats. An exception to this is Ring of Sacrifice, which has one positive and one negative stat. To further make an example, let's look at the King category. The 'Plated King Ring' favors higher Maximum Armor and Armor Pickups (max +315%), but less Pistol Damage (max +105%). The neutral 'King Ring' will give +210% to all three stats for a balanced approach. Finally, the 'Merciless King Ring' favors Pistol Damage (max +420%) but has far less Max. Armor and Pickups (max +105%) The importance of having a Ring is extreme, becoming enormously helpful at early game and a necessity at late-game stages. The sooner a Player acquires a Ring, the better. Albeit all Rings in UNLOVED are viable, you should pick your Ring wisely. I encourage you to read the page on Rings on the UNLOVED Wikia[unloved.wikia.com] to get yourself an idea of what Ring you should invest in. The cost of upgrading a Ring is arithmetic - lvl 2 costs 20 Karma and 1 Ruby, lvl 3 costs 40 Karma and 2 Rubies, and so on. A full table of cost is available on the above webpage. To upgrade a Ruby from lvl 1 to lvl N, you need N * (N+1) / 2 rubies. The cost therefore grows quickly - so it's much more efficient to upgrade a Ruby from lvl 1 to 50, than it is to upgrade from lvl 150 to 200. Leveling Rings and opening Demon Chests at the same time is very expensive, as you will be limited by Karma. It is recommended to get all max leveled Rank 3 trinkets before upgrading your Ring to lvl 200. The first 50-75 levels for a Ring is far more achievable and gives very strong benefits regardless of which Ring you pick. How to avoid being overrun, and what to do when you are In all your UNLOVED playtime, you will live at some point a situation where you're surrounded by all sides.. Monsters everywhere, you don't know what to dodge anymore, you take hits from everywhere, and then you do THE final mistake that make you die, with nowhere else to run.. The most typical overrun case encountered by newbies is when they are in the middle of two monsters lane. Any monster who spawns will seek out the shortest route to you. Say monsters spawn in A and C, and you are in B, in a room map like this: A - B - C The monsters in A will go to B. Those in C will go to B. You will be surrounded by both sides, which means you won't be able to backpedal and kite them effectively, so that will lead you to your only remaining choice: be a Chuck Norris, dodge everything and kill them all until they're all dead. Spoiler: that doesn't work ;) If such a situation arises, you need to crawl your way back to some defendable room. Typically, a room with only one entrypoint, so you can reduce their flow and manage them more effectively. If you can't find any straight away, that's where the situation becomes complicated - you will have to go in reverse of the monster flow. The goal here isn't to kill them all, but to kill enough of them so you can actually move in-between them. Then you eventually find some defendable position. You usually get hurt while doing this, so it's not a recommendable situation.. So how to avoid these situations? During the game: make sure you don't open any unnecessary doors. You want to have a "snake" pattern so that 1) monsters take a lot of time to reach you, and 2) you only get one flow of monsters, and can defend properly. Right before the wave hits (so when you read the Red message): brace for impact. If you're in a big vast empty room, retreat to corridors where you'll be able to actually defend yourself. Watch out your ammo!! There is nothing worst than being empty-ammo in the middle of a wave, since it forces you to relocate, losing health in the process. Oh by the way, did I mention sprint-running? That's like bunny hopping - you press Shift to sprint, then you immediately press jump and release Shift. Your character will keep its inertia, allowing you to travel at running speed without (or barely) consuming your Stamina bar. Very effective! Crouch jumping can also be used to get on top of otherwise unreachable places, or just get away entirely through a window. This gif is courtesy of zenon
多人游戏生存技巧 在单人模式中,你可以自主控制热度,按自己的节奏进行游戏。而在多人模式下,其他玩家也会积累热度。 加入生存难度较高的游戏是可以的。但如果你难以生存,务必尽量紧跟队友。当你意识到自己即将死亡或被包围时,要赶紧跑向队友。如果实在跑不过去,就在一个易守的小房间里倒下,这样队友就能前往你的位置营救你。 **切勿在跳跃或蹲伏时死亡!**复活你的难度大了很多,因为其他人无法“把头伸”进复活领域,必须向上或向下瞄准,这极其不舒服。 多人游戏中很多团灭都是因为玩家分散。团结在一起才能生存! 既然说到这里,一场配合良好的多人游戏可以包含以下可能的策略: **全员分散**——新手最常见的方式。每个玩家各自为战,探索并攻击遇到的怪物。当周围几乎没有怪物,或者每个玩家都能很好地独自应对时,这种方式是可行的。 **全员防御**——与全员分散相反。玩家不惜一切代价团结在一起,共同清剿怪物。在遭遇大型一波敌人时,你的配置应如下所示,这是提升生存几率的最佳方式: **探索者 + 清怪者**——一人负责探索,另一人则清理探索者附近的怪物。在大规模敌人波次来袭前或无怪期间,这是非常出色的配置。探索者可以专注于探索,而清怪者则负责保障其后方安全。 无论如何,最好保持在彼此的近距离范围内(比如最多相距1-2个房间)——除非你对自己的操作有十足把握。这样一来,当队友需要帮助时,你就能迅速前往支援,而不必在穿越地图时面对大量敌人的阻拦。 至于被敌人包围的情况,你有以下几种应对选择: **坚守阵地**——留在原地并防御当前房间。如果你有充足的弹药,这种方法会很有效。一旦怪物开始涌入房间,你必须立即改变策略。 **集体冲锋B点**——你们所有人一起朝着另一个可防御的位置奔跑,沿途消灭怪物。如果你正在防守的房间被怪物淹没,这通常是最佳策略。当你们填满所有血液机器后,直接冲向绿房间也是一个有效的策略。 **全员分散**——这有点像应急策略,但有时你们必须分散开来,以分散怪物的攻击目标,这样其中一人就能趁机恢复。大多数情况下会出现这种情况,因为在多人游戏《UNLOVED》中,混乱很容易瞬间爆发。 如果有玩家死亡,就不应该继续探索了。不管是什么杀死了他,下一个就是你——而且如果你是唯一的幸存者,一旦你死亡,游戏就会结束。复活死去的队友应该是首要任务。 例外情况:如果你已经填满了血液机器,并且所有死去的队友都在绿房间。你可以尝试直接冲向电梯来结束游戏。 如何有效复活? 有一种有效复活队友的技巧。使用这种技巧,在等待5秒的过程中,你还可以向怪物射击,这会让任务变得容易得多。要让这个技巧生效,你需要将你的头部完全伸入蓝色复活球体中。使用蹲伏指令,这样你的视角就能处于合适的高度;当头部在球体内部时,你将能够激活球体,同时面向任何方向进行射击!专业提示:濒死时尽量不要跳跃。没有什么比在跳跃过程中死亡的人更难复活了,因为你必须向上瞄准。 小心腐坏者! 在刷二级等级时,你应该会开始遇到腐坏怪物。 这些怪物是你当前面对的怪物的更强版本。它们非常致命,是你“下一阶段”的“最可怕敌人”。 腐坏仆从
依旧很脆弱。但他能用手枪轻松放倒你! 与仆人偶尔对你射出虚弱子弹不同,这家伙会用手枪连续射出3发致命子弹,对你造成大量伤害。在他放倒你之前先解决他! 腐烂切割者 & 护士
与其他腐坏者相比,它们的危险性不算高——行动模式可预测,火球也容易躲避。不过,它们的生命值比普通切割者/护士更高,需要更多攻击才能击败,因此切勿掉以轻心。 腐坏屠夫
腐烂屠夫是一个行动模式可预测但十分危险的敌人。击败它需要承受大量攻击——但最棘手的是它的追踪导弹。它会发射4-5枚追踪导弹组成的齐射,这些导弹会缓慢地向你袭来。由于导弹速度较慢,贴墙躲避是行不通的,这意味着你必须在自己和导弹之间立起一面墙(或其他任何障碍物)。 腐烂医生
这家伙比博士危险得多。他拥有更高的生命值,并且会发射3个火球而非1个(有点像无面者)。他的近战攻击也相当疯狂。 只要保持风筝战术直到他死亡即可。如果他落单,威胁不算太大——但当周围有其他敌人时,他就会变得比较棘手。要避免被他的火球击中,因为那真的很疼。 腐烂的无面者
这就是个加强版的无面者。它和无面者基本一样,只是生命值高得多,而且火球造成的伤害也更高。务必小心。 与普通版本相比,它还会发射3波火球而非2波:先是3个火球,接着是2个火球,最后又是3个火球。 论危险程度,它就像腐烂医生,但火球更多。所以战术相同——风筝它,保持冷静。它发射火球的频率也比腐烂医生更高。 腐烂小丑

你会被那个敌人杀死。 他是《UNLOVED》中最危险的两个敌人之一。他速度极快,拥有更具毁灭性的近战攻击,且攻击速度非常高(别想和他周旋),并且他发射的不是一枚,而是两枚毁灭性且快得离谱的追踪导弹。像往常一样贴墙躲避……但面对那样的速度,这只能帮你撑到一定程度。哦,他的生命值也很高。 当你拥有强力饰品时,可以快速将他击败。但在R2或低等级R3难度下,情况就完全不同了。 当他出现时,你必须在他消灭你们所有人之前集中火力对付他。轨道炮对他非常有效——你应该始终随身携带几发轨道炮弹药,以防他出现。通常2-3发轨道炮就能解决他。 我通常这样快速击杀他: 轨道炮射击,然后先用霰弹枪全力射击,接着使用手枪或冲锋枪进行连射。 如果这样还没击倒他,就重新装填轨道炮并再次向他射击。 当你面对他时,如果只有主武器,保持冷静。实际上,完全可以做到无伤击败他——但你必须不犯任何错误,并且随时准备躲避他的跟踪导弹。 需要注意的是,冲锋枪和霰弹枪(手枪不确定)可以使敌人进入僵直状态;腐烂小丑也不例外,两发霰弹枪射击就能让他僵直。诀窍是等到他即将发射导弹时,将其僵直以重置他的施法。使用冲锋枪可以对他进行连射并尝试将其麻痹。在多人游戏中,这非常有用,因为当你让他僵直时,其他人可以趁机将他击倒。在单人模式中,你可以利用僵直时间寻找合适的掩体。 在“非尘世”难度的游戏中,你至少要准备面对一个腐烂小丑。在“野兽”模式下,它更为稀有,主要会因过热而生成。 腐烂女巫
我觉得这家伙是最危险的敌人。稍有失误,你就会直接死亡。 他的行动模式和女巫一样,但生命值高得多(所以任何爆发伤害对他都无效),而且他能一击秒杀你(造成无限生命值伤害)。 与腐烂小丑相比,他的危险之处在于你无法预料死亡何时降临。你以为自己很安全,能轻松应对他,但一旦失误,他就会进入房间,把你逼入绝境,游戏也就结束了。 在危急情况下,所有能让你避开他视线的投机取巧战术都是好方法,包括躲在桌子后面(蹲下)。 击败他的策略和对付女巫相同——站在门口射击,然后撤退,如此反复直到将其消灭。=== 里程碑一 - 1级5级饰品 === 饰品分为四个等级: - **1级饰品**:最常见,升级成本最低。你应该从它们开始入手。 - **2级饰品**:较为稀有,升级成本较高。完成第一步后再考虑它们。 - **3级饰品**:仅可通过恶魔宝箱获取,升级成本远高于2级饰品。更多细节将在后续说明。 - **4级饰品**:最新加入的等级,仅在深渊难度中出现。这属于非常后期的内容,此处暂不涉及。 现在你已经完成了第一场游戏,可以开始继续刷取饰品了!你需要进行更多游戏,直到获得一整套1级5级饰品,并逐一将它们升级。一些注意事项: 游戏并不在意你在一局游戏中花费了多少时间——无论如何你都能获得奖励(饰品和业力)。通常来说,加入他人的游戏比独自游玩要好得多。此外,4人组队时游戏完成速度会快很多,所以不要犹豫,加入他人并组队吧! 阅读《如何在多人游戏中不成为累赘》指南,其中包含非常有用的建议。特别是,尽量遵循房主选择物品的方式。如果房主要求你不要拿任何武器模组/图腾,那就不要拿。 根据需要解锁槽位。关于槽位解锁和饰品升级的顺序,我建议: 首先,解锁雕像槽位。它能提供显著的加成。接下来,你应该开始升级你最喜欢的武器槽位。在这款游戏中,最大化伤害输出非常重要。 之后的选择就完全取决于你了。这取决于你的偏好以及你当前拥有的饰品。我发现,1级初始武器饰品的升级并不是那么重要,因为它们不会增加伤害——只需装备与你最喜欢的初始武器相对应的那个就足够了。 你可能会开始获得2级饰品:如果你找到了一个非常好的2级饰品,即使你还没有大量5级的1级饰品,也可以放心地开始升级它。你会发现2级饰品提供的加成要强大得多,但升级成本也高得多。 别忘了收集卡牌碎片。这确实值得你花时间——如果你玩小型地图,它会给你3个饰品而不是2个!记住,每种房间颜色各有一个。 保持冷静,鲁莽只会让你送命。只有当你对游戏足够有信心时再加快节奏。 关于难度,选择“一线生机”或“毫无希望”都行。“毫无希望”难度即使1级也肯定能通关,而且奖励更丰厚,但“一线生机”更简单。根据你的舒适程度选择难度吧! 地图大小方面:我个人觉得小型地图效率更高——你能快速完成,获得卡片碎片=3个饰品,而且如果你能完成两个次要目标,还能得到不少业力。大型地图奖励的业力和饰品更多,但玩了30分钟后死亡可能会让人很沮丧。大型地图也比小型地图难赢得多:你距离安全屋(Green room)更远,需要激活两个黄色房间(Yellow rooms)而非一个,而且随着时间推移,你遇到的尸潮规模往往也更大。 加入游戏时还有最后一件重要的事:
注意你加入的难度!例如,如果你加入“非尘世”难度的游戏,会发生两件事: - 你会因为没有足够的饰品而不断死亡。 - 你造成的伤害不足,需要花费大量时间拾取越来越多的弹药——这实际上会因为额外生成的怪物而让其他玩家的游戏体验变得更加困难。 一个不错的经验法则是:如果你能 solo(单人通关)第 N 难度(例如“毫无希望”难度),那么你可以加入最高 N+1 难度(这里即“赶尽杀绝”难度)。如果你要加入更高难度,请询问房主是否可以拾取弹药、生命值或护甲,或者他是否希望你保持低调。如果你始终待在绿房间里,就完全不会妨碍游戏进程,因为当其他玩家冲向终点时,你的身体会在那里(即使玩家死亡,只要他们的身体在绿房间内,游戏也能完成)。不过,无所事事地被“带飞”可能不会让你觉得特别有趣。 === 里程碑 II - 2级5级物品 === 一旦你集齐了完整的1级物品套装,就可以开始挑战更高水平的对局了! 尝试更高难度吧。难度越高,你获得2级物品的几率就越大(而且在更高难度下你还能获得更多业力)。 选择“合适的难度”完全取决于你的游戏水平以及你的饰品进阶程度。一旦你拥有几个2级角色,就可以开始追逐恶魔宝箱了。 这可能是游戏中最无聊的部分(截至2017年9月),因为游戏开始变得困难,而你还没有足够的实力去猎杀恶魔宝箱。但不要放弃,也不要犹豫,可以在UNLOVED的Discord(指南底部有链接)上寻求他人的帮助。 === 里程碑III - 猎杀恶魔宝箱! ===
(credits to Unloved wikia for the image) This is a Demon Chest. Just like a Totem, it requires a silver key to open. However, instead of giving you a bonus, it gives you a random Rank 3 trinket.. provided you manage to get out of here alive! Demon Chests only spawn on Time to Die, Beast, Unearthly and Abyss difficulties. Time to Die has maximum 1 demon chest, while Beast, Unearthly and Abyss got 2 maximum. Depending on your luck, you might not find any demon chest - it's all random. More precisely, it depends on the size of the area. The bigger it is, the more chance you have to find one (or two). Each DC has an individual spawn chance of 25%/50%/75%/100% if you play on respectively Small/Medium/Large/Huge. It also depends on some specific modes - Heavy Weapon reduces the individual DC spawn chance by 33%, and Arcade mode reduces it by 50%. https://docs.google.com/spreadsheets/d/14m3xKKLlppuwIV_veyXuFng1OTcHE7LytLmMxvOy1rg/edit#gid=0 They spawn a massive amount of heat when opened. So you should be very careful with them. I detail in the next section the various strat that exists when it comes down to opening them. When you have a Demon Chest, you can either : Break it, which awards you with a non negligible 1764 Karma and 324 Fragments ! Or open it. You spend 999 Karma, and get a Rank 3 trinket with a level between 1 and 7. A Rank 2 lvl 5 trinket is much better than most of the Rank 3 of level inferior of 3. If you're lucky enough to get a Rank 3 lvl 7 trinket, it's by far worthier than any Rank 2. However, this will happen maybe 1 time out of 10. On the other hand, breaking a single DC allows you to gain roughly 2 levels on any Rank 2. Whether you wanna break or try your luck is up to you. Personally, I preferred going the "steady" way and get a full set of Rank 2 lvl 5 trinkets by breaking Demon Chests. I then became more powerful and was able to farm them better. Sometimes a Demon Chest will contain a Ring - more details about it in a further section. It should be noted that on Beast, Unearthly and Abyss mode, picking all card pieces grant you 20% chance to get an additional DC! Opening Demon Chests There is a good question that arises when you encounter a Demon Chest. When should you open it? It all depends on your situation, and on the location of your Demon Chest.. Case 1 - the Demon Chest is close to the exit. Or it's between Yellow and Green room, meaning you can take it on your way back while you're making a run for the exit. In that case, avoid yourself the extra heat and open it after the blood machines. You won't even feel the extra heat, since you won't give the monsters enough time to spawn. Case 2 - the Demon Chest is far away on an isolated room. That's a debatable situation.. Tactic 1 - Open it straight away. The good - once you make it out of yellow, you can just go to green and leave. The bad - you will be facing a non negligible amount of heat, making your run harder, especially if you are unprepared to handle it. (to give an idea, I once saw in Beast mode 3 rotten clowns spawn after a Demon Chest got opened) Tactic 2 - leave it for the end. The good - the objectives will be more manageable. The bad - if you're getting overrun after having filled the Blood Machines, if you want to acquire that Demon Chest, you have to go open it while being overrun. It also depends on the number of Demon Chests in the map! If there's only 1 DC, you can open it at the end. But if there are now 2 DCs.. Are you sure you would be able to open them one after the other, without having to face the extra wave? In multiplayer, it should be noted that when you open a DC, only those that are present when you open it will receive the trinket. Some people prefer to leave the DCs at the end so that if you join them you get a free DC ;) I do that myself most of the time ; but there's sometimes situations where I feel like it could cost me the game to not open it straight away. Either way, the decision is up to you. Balance the risks, and make up your mind! If you are not the host, ask whether it's ok or not to open it. The host is the one in charge - and you can actually throw up the game without knowing it by opening a DC too soon. Ruby farming You can farm rubies only by doing one of the available challenges. Based on which day it is, some challenges provide more or less rubies - from 50% up to 200%. When you take a ruby, the actual amount of rubies you get is multiplied by the "difficulty" modifier: 1 for Sliver of Mercy, 2 for No Hope, 3 for Kill'em'all, etc.. Rubies are spawned by monsters randomly when they die. Unlike a normal game where you want to minimize heat to spawn as least monsters as possible, if you want to reach the Max amount of rubies, you will have to get some Heat at some point so monsters can spawn and you can take their rubies. Usually the best setting to do that is on AS mode - because interaction time is 0, so you have a lot easier time picking Rubies and resurrecting others. But then it makes it less prone to DC farming because of the reduced chance you have in AS games (DC games are better done on UV). I've noticed several possible strategies in my games. Rambo mode. Pick every Mods/Totems, let them spawn and kill'em, picking their rubies in the process! It's a good tactic if you're very confident in your ability to complete your run; and you feel badass while doing it ;p Safe mode. Don't pick any Mod/Totem, complete the blood machines with minimal heat as you would do in UV. Let the Rubies stay where they are. Then, go for a Ruby run (grab them as fast as you can), and head for Green room. Survive for as long as you can, and get out when it starts to become impossible to survive. In any case, Ruby games need you to be aware at all time of your chance of survivability, and possibly moderate your rate of picking Rubies. So you've barely gotten out of last wave alive.. Do you really want to pick more rubies? Using the "safe" strat, it's possible to solo most of the challenges on Unearthly and get a significant portion of the max amount of Rubies. Even if you're not a godtier player it's doable (given you have a good enough Trinket set of course ;) if you can barely beat Unearthly, don't even think of Ruby farming it!) If you don't feel confident in playing an Unearthly challenge, but still need Rubies, you can still play lower difficulties. They will give you less rubies though, and also less Karma. If you play in Multiplayer, you have a lot more manoeuverability - especially in AS with the instant revive. A good rule of thumb is that as long as one player has full health+armor it's fine to go on farming. But whenever both of you have low health, you should consider ending your run before you get a wipe. ~~~ A couple of more tricks ~~~ WeaponsPistol/SMG/Shotgun: the basic weapon of the game. You have to find the one that suits you the best, each one of them is able to take out small monsters as well as big monsters. With experience, you should find by yourself which weapon should be used in what situation. Nailgun: It works really good against trash mobs (one nail = 1 kill), and it's the best weapon to deal with crowded rooms. Without any upgrade, the base Nailgun can penetrate up to 4 enemies before running out of energy. Against fat mobs, in my opinion you will only waste precious ammunition on them - but if you can align 2 or more fat mobs it may be worth the nail. Railgun: Ideally, you want to keep it for fat mobs. It deals a huge amount of damage very fast. The secondary fire is of great use when you're surrounded or in panic. Just shoot a few burst and you should gain some breathing space. Having a Railgun can significantly increase your chances to win! Marking monstersYou can "highlight" monsters and items, allowing you to show them to your mates, but also to keep track of them !
在这个例子中,我被一个小丑追赶。它是一种危险的生物,所以我对它进行了高亮显示,以便更好地掌握它的位置。 (注:不知怎么搞砸了截图——小丑周围本该有红色光环的。我会尽快修复这个问题。) 高亮显示的默认热键不太方便操作。我个人将其重新映射到了Q键。你也可以用它向其他玩家标记弹药、生命值、护甲或恶魔宝箱的位置。 随机小技巧:加入其他游戏时使用近战攻击要小心。在处理近战武器时,延迟问题非常严重——你无法多次挥舞,而且在延迟较高的游戏中,刀刃的命中反馈会有延迟。如果你是 kukri(廓尔喀刀)专家,加入他人游戏时可以考虑切换到其他饰品。除非你清楚自己在做什么 ;)\n\n**冲刺跳跃**能让你在消耗最少耐力的情况下快速移动!只需按住Shift,然后跳跃并松开。由于跳跃会保留惯性,冲刺跳跃能让你达到与单纯冲刺相同的速度,但不会消耗耐力。这甚至为游戏增添了几分动感 :)\n不过要注意,在低矮的天花板下或上楼梯时,这个技巧无法使用。\n\n如果你在冲向电梯时拿到了**轨道炮**,通关就会变得很简单!只需同时按下电梯按钮和副武器开火键。子弹会反弹到电梯轿厢上,并击中任何攻击你的敌人。\n\n~~~ 延伸阅读 ~~~\n《UNLOVED》维基,包含有用信息:http://unloved.wikia.com/wiki/UNLOVED_Wikia 如何在多人游戏中避免成为团队负担:http://steamcommunity.com/sharedfiles/filedetails/?id=774688024 带图片的怪物图鉴!http://steamcommunity.com/sharedfiles/filedetails/?id=693172191 图腾效果列表:http://steamcommunity.com/sharedfiles/filedetails/?id=785296295 《UNLOVED》中的躲藏地点:https://steamcommunity.com/sharedfiles/filedetails/?id=1370508629 这里有一个非常友好的《UNLOVED》Discord社区:https://discord.gg/Xk6hYyd === 以上就是全部内容! === 感谢阅读本指南,祝您在《UNLOVED》的冒险中好运! Bonus:我的单人超凡难度通关视频 https://www.youtube.com/watch?v=_0zMnOv_De4
2026-02-14 04:00:08 发布在  UNLOVED

说点好听的...
收藏
0
0