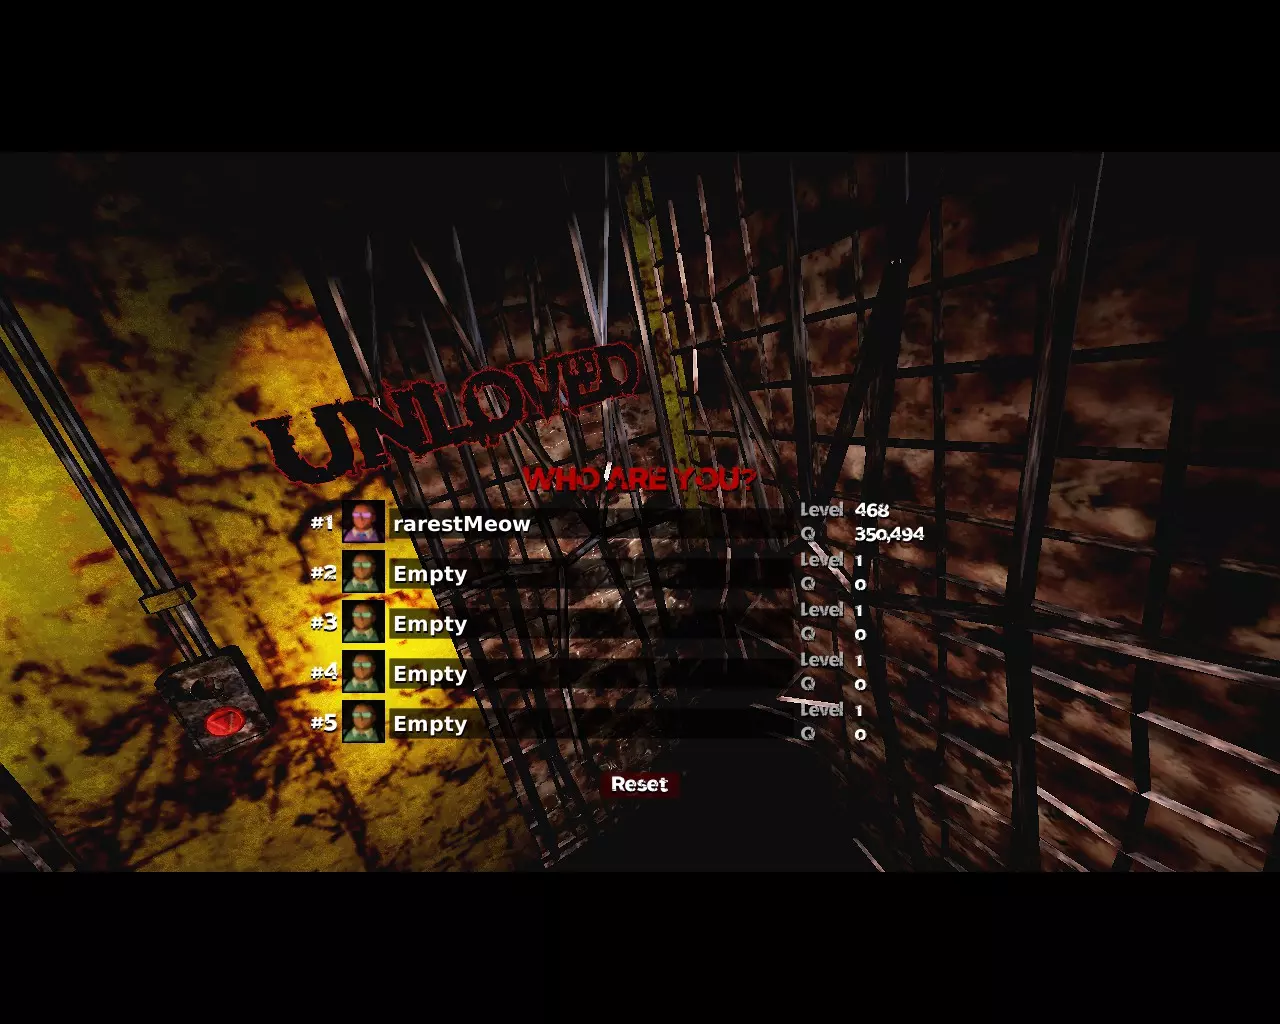
UNLOVED


我有一台分辨率为2560 x 1080像素的超宽屏显示器。 如何在游戏中设置自定义分辨率? 通用 英语 1. 运行游戏,配置设置后退出。 2. 下载一个十六进制编辑器。 3. 打开文件C: Users <您的用户名> AppData Local Unloved Saved SaveGames Settings.sav(请制作备份副本) 4. 在十六进制编辑器中,以“替换模式”更改文件中的分辨率(不改变文件大小)。 5. 保存更改,享受新分辨率下的游戏。 俄语 1. 运行游戏,进行必要的设置后退出。 2. 下载任意十六进制编辑器。 3. 在编辑器中打开此文件C: Users <您的用户名> AppData Local Unloved Saved SaveGames Settings。sav(制作备份副本) 4. 在十六进制编辑器的替换模式下,将分辨率数值替换为您的数值。重要的是,确保没有偏移且文件大小保持与原来完全一致。务必制作备份副本以防万一。保存文件。 5. 启动游戏并享受。

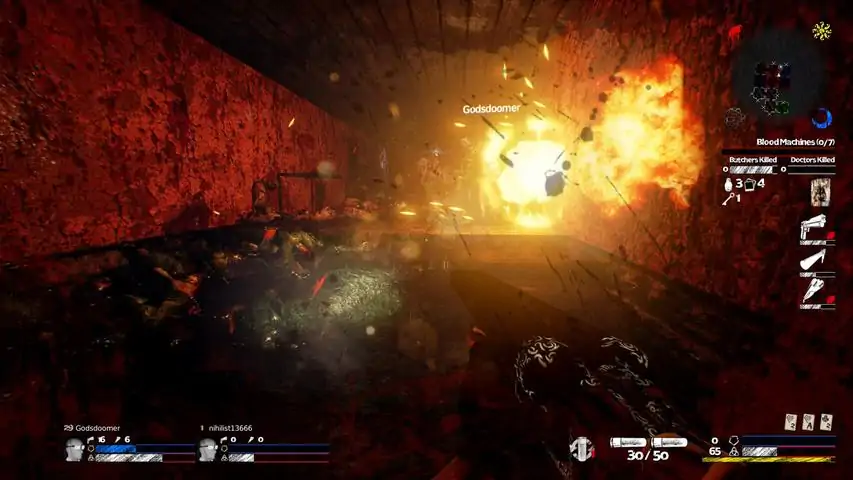
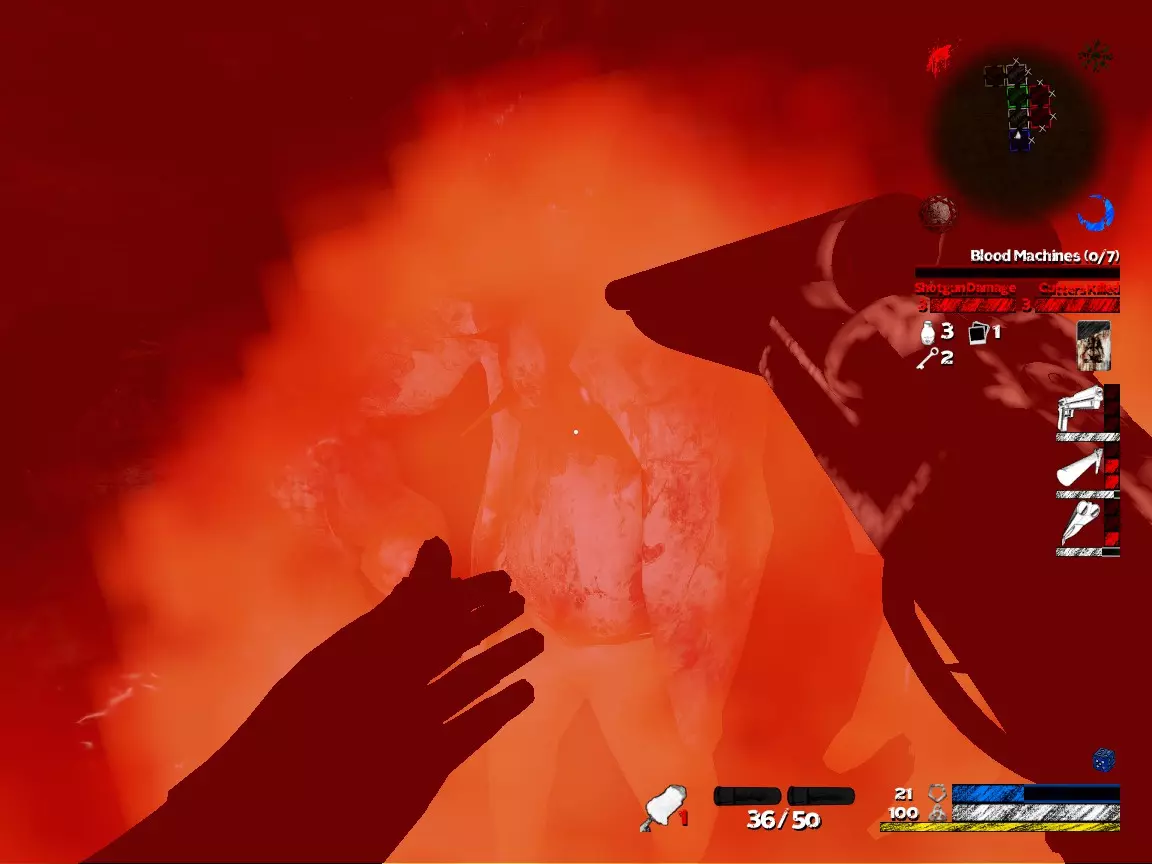
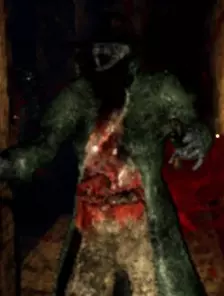
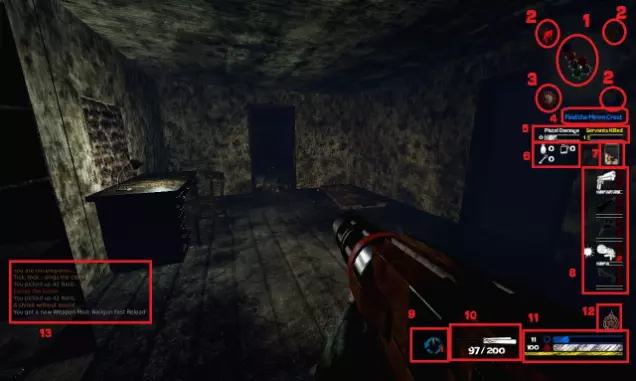
Disclaimer: This guide is outdated since many updates back. I (Frollospyre/Moki) highly recommend checking out Pottermans' guide here instead. As it is very easy for new players to bring great harm to a team due to unexplained mechanics, I've create a basic guide that should cover the basics of playing in a multiplayer game. A basic guide to multiplayer games, touching upon topics like: - Spawn mechanic called Heat, and how to minimize Heat - Weapons, specialization and the why - Some basic gameplay tips. Spawn Mechanic: Heat The first thing you need to know is the spawn mechanic, called Heat. (Not an official name for it, but a community label by some EA-testers that has been passed on since August 2015 and around.) It is a HUGE misconception from players that the enemies in UNLOVED do not stop spawning, and seems endless. This is false. Infact, it is more or less controlled by the player's interactions and amount of interactions on a map. Every item you pick up, every "e" action you do such as opening door generates "Heat". As Heat increase, monsters are spawned in greater and greater numbers, and these may come in a randomized order with Clowns, Butchers, Faceless and Salems for instance. Sometimes, you may suddenly just encounter a small squad of Clowns! These are spawned on black pentagrams on the floor you sometimes find, and they will not spawn from it when you are close to them (At least on lower difficulty). Do note that if you generate no heat, no new monsters will spawn either, so spawns are not infinite. To predict what kind of monsters and their quantity is currently not possible, and it is understood that to do so would be an extremely complex task. However, as a player, it could be a good idea to ask yourself if you really want to pick up those 2 last Weapon Mods on the map when you've just struggled against a horde after opening the Yellow Room which reveals the next risky task: filling the Blood Machines. Do not feel alarmed in that you shouldn't pick up stuff you may need such as filling your Armor, as having extra protection can save your life dramatically - and a Weapon Mod can change the dance of death in your favor as well. There is a certain amount of RNG in the game, but consensus of veterans and the current input of the developer implies that it is in favorable odds as long as you are prepared for what that difficulity level offers. UNLOVED is by no means an easy game, and you will learn that sooner or later. Items and actions generate different amount of heat, and there's no complete list of order from lowest to highest yet. You can however, expect an item to generate greater heat the higher value it has, such as a Demon Chest. Totem box, Sun > Moon > Blood crest, Blood Machines and mostly notably the Weapon Mods are good examples on items that generate a considerable amount of heat. But that's not to say that Ammo / HP / Armor don't generate noticeable amounts as well. A big stack will generate more heat then a small stack, a weapon will generate more then its ammo. Wheter Railgun Ammo or Nailgun Ammo generates more heat than the "standard weaponry" such as Pistol, Super Shotgun and SMP, is unknown. It should be noted that Blood Machines are special and has a chance (precentage unknown) of adding Heat. Make sure to fill a few, scout for enemies, and take the rest when you feel it's safe. As a new player, the first instinct is to pick up everything and top off every type of ammo. This generates more Heat than usual, can make you pick up excess ammo/health/armor and eventually might make you and your team die due to the amount of enemies that come from it as consequence. Instead, pick up ammo only for guns you currently have, though you can bend that rule once you're a veteran doing Kill 'em All and above, applying to rail or nail ammo. Don't pick up ammo / hp / armor when it is close to full causing wastage from spillovers. Don't grab all five guns and top up on every ammo, which generates a lot of unnecessary heat and significantly decrease your teammate's combat ability. Another obvious rule is to not grab duplicate guns, guns generate more heat then ammo and it locks out teammate from increasing their combat potential, bad deal all around. You should specialize in 1 main gun + 1 backup gun, with the option of a 3rd gun being the greater guns (Nail gun or rail gun). I'll explain why below, but make sure you don't pick up a 4th and 5th gun at all. Weapons, specialization and the why There are five weapons: 3 basic + 2 greater weapons. Every weapon has their place and is well balanced, even though I call nail gun and rail gun greater weapons they're not exactly better. This is because of that your gear might have trinkets to boost the damage tables for the Super Shotgun, but none for the Nailgun which makes it become less effective. Think of your damage versus the enemy health, and the amount of time it takes to kill that enemy. You might want to kill a Clown on Kill 'em All with the SMP with about less than 1 ½ whole magazine (40 + 20 rounds without buffs or trinkets) to feel "effective" enough, for example. You should specialize in a primary main weapon and a backup weapon, these should be picked from the basic weapons pool. A 3rd weapon from the greater weapons pool is optional in Mercy and No Hope, but likely needed in Beast Mode. You should specialize because of the trinket system, which allows you to add massive damage modifier along with other buffs to a basic weapon of your choice. A fully specialized player with Rank 2 trinkets can do ~300% damage with the chosen weapon, not including reload / critical / ghost ammo / ammo % buff bonuses, all together, 1 bullet specialized = 5 bullet Un-specialized. This becomes even crazier when rank 3 trinket comes into play. A very smart thing is to communicate with your team and ask them what weapon they specialize with in the start of a game if you're really biting the dust, and want to raise your overall team efficiency. This helps distribute goods and weapons to the better man and woman out there. Basically, you can generate about 5 times less heat picking up ammo of your spec assuming maxed rank 2 trinket specialization. Imagine 3 players, each of which specialize in Pistol, SMG and Shotgun, they'll have plenty of starting ammo + ammo on map as they're not competing with each other for the same goods, and they will each do massive damage and generate far less heat due to the diligent distribution of resources. Finally the total damage in ammo availability on the map increases drastically. If you play at higher difficulty and everyone uses 100% unmodified damage I guarantee you'll run out of ammo before monsters on anything that isn't No Hope. Why a backup? Well, because even when fully specializing a chosen weapon, you can still get around ~200% damage mod for a 2nd basic weapon without sacrificing your primary, and you can switch to your secondary to keep up a wall of damage against a horde of demons charging at you, or simply kill an important enemy such as the Witch in less amount of time. Eg. There are the big three rank 2 trinkets: Scythe, Gundude and Gungirl, which gives you +100% dmg to main and +50% to another basic weapon. With 2 weapon types, you drastically reduce the chance of running dry when mowing down hordes and reduce the chance of ammo shortage by terrible luck. Pistol - Amazing jack of all trades. Sweet unique critical bonus, extreme abundance of ammo. Actually a very strong weapon either as primary or backup. The Rank 2 weapon mod adds a lot of bonuses like reload, critical, stability, damage all rolled in one, and even changes the model! SMP - Suitable all range, falling off a bit for long range, can stun-lock certain enemies like the clown. Tapping alt fire allows you to maintain decent accuracy while dishing out stunning burst of DPS. Just like for old Doomers with a Chaingun, the tap fire is very favorable and helps you reduce Accuracy loss to save for moments of desperation, as well as save ammo of course. Super Shotgun/SSG - Mostly short - medium range. Can suffer from lag severly in fire speed/reload speed. Reload bonus is also very important for this weapon due to the heavy gaps of reloading, leaving you vulnerable to stress, anxiety and health damages without ability to retaliate properly against swarms. The Rank 2 add-on might be mandatory before you can specialize in SSG. Amazingly fun, amazing at burst damage. Nailgun - use it like a piercing SMP: and make sure to line enemies up! Best to load up grenade and save it for hairy moments like Witch & Co. and the like you don't want to keep around. The grenade can damage you, but when you need it near you don't hesitate to drop it near yourself, as the self-damage is not as dramatic as you may think, but enough to make you avoid thinking it's Quake III Arena.. Railgun - Mainly used with Alt-Fire for a piercing bouncing heavy buckshot. Effective in tight space, corridors and most notably: Witch and Rotten enemy variants. Not as good in large spaces. Main fire is a single piercing shot with roughly the equal base damage of 4 Super Shotgun shots (or 6 Shells). Trinkets for this gun is VERY favorable. You can for example have the Gearworks V2 upgrade to increase your damage massively, cutting reload speed AND giving you a chance of not consuming ammo on reload! Impressive! Gameplay tips - Card Pieces. You can find one piece on each color in a map, regardless of what mapsize you use. One in white, another in blue, and red areas. This is great to memorize if you don't wanna spend 60 minutes looking for that one wooden door with a card piece inside! - You've noticed the Demons swooping around the place, yes? Certain enemies are able to use something called Demon Speed. This is probably the most trivalizing thing in the entire game, as it can absolutely knock you over and it's very hard to predict whenever an enemy will attack or retaliate with a Demon Speed towards you. ALWAYS keep this in your head! Work up your reflexes, and be prepared for anything coming up your face or back. Oh, and Demon Speed - due to them going sanic mode - can actually make them get stuck in furniture that is very close to the floor. How anti-climatic! - If there is a player that starts without a weapon due to he/she preferring the Melee starting build, then do not pick up Weapon Mods until that Player has at least one gun in their arsenal. All Weapon Mods that are taken will not give anything to the player otherwise. This is more important than you think. - Rank 2 trinket can drop in the lowest difficulty. (It is unknown wheter it REPLACES a Rank 1 or ADDS it along on the endgame results.) Make sure to find the Card Pieces for an extra trinket drop! The chance isn't exactly high but it's there. Bigger map-size gives you more trinkets on finish. You get NO trinkets if you exit the game/host disconnects (either after dying or when alive.) - You see that minimap on the corner of the screen? Use it, seriously. When you are looking on a new player either by having them join your game or you join theirs, you will "mark" them on the map which makes you able to find them anywhere. By looking at Rusted Doors, your minimap will make a small "x" which indicates that it is inpassable. This helps you figure out where that last room might be, and can help you find Card Pieces too if you memorize. The minimap should be understood early. - Do not leave a game just because you happened to die and want to rejoin it for a cheap self-revive. This will reset ALL of your items in that round, and you might even recieve a massive penalty of Karma/Trinket loss. The latter part is being researched.. - It cost less to upgrade Rank 1 trinket to max level then Rank 2 trinket once, don't be afraid to level up rank 1 trinket as stopgap. You need all the power you can get, and so does your teammates. - Your starting goal should be to find one of the main rank 2 trinkets: Scythe / Gundude / Gungirl II, followed by the rank 2 pistol / SMG / Shotgun weapon add-on and evidence file. - Each monster make a unique sound both from PATROLLING and DETECTING a Player. You can tell its proximity with a little practice (it does travel through walls). The Nurse are most notable for the Detection sound when it sees someone. Learning this is IMPORTANT as you'll be able to both detect and IDENTIFY an enemy immediately, as well as work up your reflexes to prevent a backstab during your precious item-looting.. Monster sound is your enemy proximity radar! Use it! - Don't open every door you see, not even because of heat but to limit avenue of monster approach. Learn the fixed map tile types, many areas are accessible via 2 doors, 1 of which may already be open. Keeping the right door unopened often makes the difference between the area becoming a kill zone or a suicide spot. Bottleneck 'em! - Blood crest spawns in White area, Moon crest spawns in Red area, Gold crest spawns in Blue area, Blood machines spawn in gold areas. Also an area cannot have more then 1 piece of card, so if you found 1 piece from an area you won't find another one there. - Small & Medium map has 1 gold room, large and huge map has 2 gold room. Small map completion gives 1 trinket, +1 trinket per increase in map size, another +1 trinket if the Card Pieces are found. I recommend either Medium or huge map, and for huge map considering not going out of your way to search every single nook for the Card Pieces. Gameplay time is considerably increased as well. Expect 30-90 minute games dependent on your pacing on Large mapsize. - Periodically clean up monster spawns by defending a kill zone, you don't want them to build up to ungodly hordes. On higher difficulties you may spend large amount of time doing population control in kill zones, consider getting a partner or two, so 1 can explore while the rest do pest control in kill zones closest to explorer. Some of it can time consuming but it is good investment. - Big open space with multiple entries is a bad place to fight. Don't hesitate to relocate to a better spot to battle the monsters. Certain map tiles are just not good places to fight hordes in, use the ♥♥♥♥♥♥♥ sprint and get to a kill zone. - Set up kill zones if you can where monster can only approach from 1 direction with a bit of space (but not too much), easier in some map type and certain map tiles (some tiles just don't have good kill zones). Remembering where these spots are helps a lot. Leaving ammo and health at kill zones is also a good idea while grabbing more stuff from suicide spots. - Coordinated firepower in a good kill zone is a wonderful thing. - Gun mods you pick up are limited to the weapons you have in your possession! Players who join after you pick up a mod will not receive the bonuses. They also generate large amount of heat (while increasing your heat efficiency usually). Do with this information what you will, there are pros and cons to picking it up when you have only your main weapon or when you have all three weapons. Disclaimer


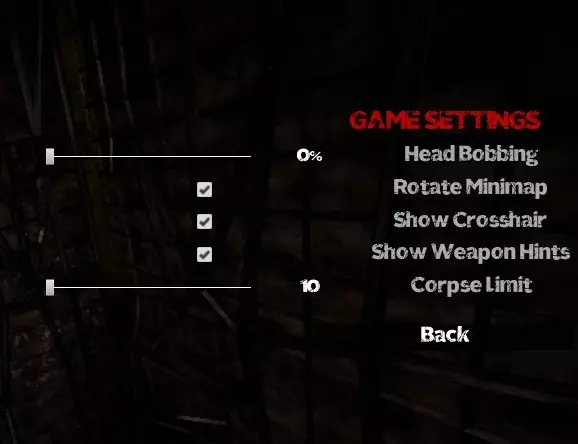
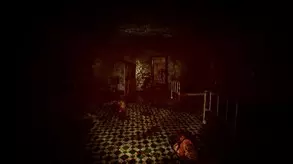
《UNLOVED》是一款带有roguelike元素的合作恐怖第一人称射击游戏,基于热门《毁灭战士2》模组制作。你将在随机生成的关卡中战斗,面对各种怪异怪物、恶魔环境和致命陷阱——支持单人游玩或最多4名玩家在线合作。 本指南面向希望了解基础知识、延长生存时间并享受这款游戏残酷魅力的新玩家。 主要特色 - 快节奏枪战与紧张恐怖氛围 - 四种独特职业:各有专属技能与优势 - 随机生成关卡,带来无限重玩价值 - 最多4人在线合作 - 可解锁特质与升级,自定义你的角色构建 - 每次游玩都藏有关键物品、谜题和秘密 职业概述 每个职业都有不同定位。根据你的游玩风格做出明智选择。 突击:全力输出伤害。擅长使用步枪和霰弹枪。 生存者:能够承受伤害。适用于 solo 游玩或担任坦克角色。 幻影:身手敏捷且擅长潜行,在机动性方面表现出色。 样本:拥有奇特能力。高风险,高回报。 基础控制(默认) WASD — 移动 Mouse1 — 射击 Mouse2 — 瞄准/缩放 F — 互动 Shift — sprint Ctrl — 蹲下 Q/E — 切换武器 Tab — 物品栏/地图 1-4 — 快速栏武器 游戏玩法提示 1. 探索即生存 务必检查每个房间——钥匙、秘密和升级道具往往隐藏其中。 部分门需要多把钥匙,这些钥匙通常来自不同的路径。 2. 先开枪,后惊慌 敌人可能会迅速蜂拥而至。不要犹豫开枪——弹药虽宝贵,但死亡更可怕。 3.使用你的特性 特性是被动强化(例如:更快的换弹速度、生命再生)。 根据你的游玩风格选择特性。在后期关卡中,特性比武器更重要。 4. 与他人一起游玩(如果可以的话) 合作模式会让游戏变得更简单,也更有趣。 角色之间可以互补——在更高难度下,良好的团队配置是关键。 5. 有时关闭手电筒 黑暗可能是你的朋友。有些敌人会探测光线,躲在阴影中会有所帮助。 设置建议 视野(FOV):如果感到幽闭恐惧,可以调大。 动态模糊:如果眼睛感到不适,建议关闭。 难度:从“简单”开始——这款游戏后期会变得非常困难。 可解锁内容 随着游玩进度,你将解锁更多特性、外观和难度等级。你还可以解锁备用武器和房间修饰符,让每一局游戏体验更加独特。 已知问题/提示 性能下降?将阴影质量设为低。游戏运行会更流畅。 支持手柄操作,但键盘+鼠标能提供更高的精准度。 没有突然惊吓,但氛围和音效十分紧张——建议佩戴耳机! 最终评价 《UNLOVED》是老派射击游戏、恐怖主题和类rogue随机性爱好者的隐藏佳作。它难度较高、氛围诡异,当你“上手”后会获得极大的满足感。


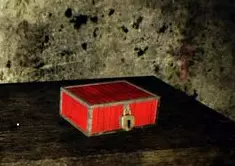
開発者がこの点についてどう考えているのか判明したので、筆を執る次第です。Demon Chestで詰まってる人は読んで下さい。 開発の見解とプレイヤーの見解 Demon Chest / Abyss Chestはリセマラ可能ですはい。方法は後述しますが、要はセーブファイルをバックアップする事によるリセットです。これをどう考えるかは個人で割れると思うので、参考になる見解を置きます。 開発者本人であるBlue氏の見解公式の開発ビデオでも確認できるようですが、リセマラについて開発者であるBlue氏は: Blue氏は、リセマラが存在しているのを認識している。 Blue氏は、リセマラをしているプレイヤーが居るのを認識している。 Blue氏は、リセマラを出来なくするようにパッチを当てる事が出来る。 Blue氏は、リセマラを出来なくするようにパッチを当てる予定がない。 Blue氏が、パッチを当てる予定がないのは、単純にリセマラについて何も思っていないから。ちなみにBlue氏は、Abyssは恐ろしくタンク型の構成(しかもLv468)で4回ほどテストランしただけでゴーサインを出したらしいです。Abyssが異常にきついのは、調整不足による仕様と考えて差し支えないでしょう。 Ake-tits個人の見解ここに宣言します。私Ake-titsはDemon Chestを数十個~100個ほど普通に開けた後に、マトモな装備を揃える為にリセマラしました。Abyss Chestはリセマラしかしていません。この事について、フレンド解除するなりブロックするなり通報するなりして頂くのは各個人の勝手だと思いますが、早まる前に以下の文章に目を通して頂ければ幸いです。 個人的には、こう考えています。 ゲーム全般:リバースエンジニアリングによる内部データの洗い出しは、場合によっては必要悪。開発者はユーザーがそんなことをしなくても済むように、プレイに必要な数字(武器の攻撃力や能力の発動率、ドロップ率等)は開示すべき。 シングルプレイヤーオンリー:チートしようが何しようが勝手。 PvPゲーム:チートは厳罰に処されるべき。クライアントサイドのMODは程度による。 CooPゲームの場合:ハック(外部ツールで直接データをいじる)はダメだと思う。細かくは以下。 蓄積する進行がないゲーム(Serious Samとか):その場にいる全員の了解があればお好きにどうぞ MMO:後生だからやめて ゲーム内EXPを稼がないと遊べるコンテンツが縛られる(Killing Floorとか):ちょっとズルっぽいファーミングマップとか使うのはいいんじゃない このゲーム:余りにもファーミングが長い。概算したところ、Rank4アイテム一つMAXにするのに、プロ級プレイヤーでもプレイ時間で6時間、Ringは50時間程度かかる。自分くらいの腕のプレイヤーだと、この5倍くらいかかる。装備アイテムのスロットは9か所あり、とっかえひっかえ遊ぶなら更に増える。Ring以外のRank3アイテムも、Abyssに到達できるようにするだけで少なく見積もっても100時間程度はかかり、戦力になりたいならその数倍に膨れ上がる。この数字は個人の装備が十分に整っている事前提の数字。リセマラしてガチャ運を廃したところでAbyssの周回やルビー集めが無くなる訳では無い。箱あけが楽しめるうちは個人の勝手だけど、楽しめなくなってきたら是非ともリセマラをして、Abyssに参加してほしい。入手難易度がべらぼうなAbyss Chestはリセマラ前提だと思っている。 他プレイヤーの見解Lv468の他プレイヤー数人に確認したのですが、彼らもリセマラを容認している・実際にした人が多いようです。当然ですが全員に確認はしていない(3名程度)なので悪しからず。この中には、ゲームリリース当初からの古参も含まれています。 御託はいいからさっさとリセマラの方法を教えろ ハイ。ではやり方です。 リセット・バックアップのたびにゲームを終了する必要はありません。 1.ゲームを起動します。 2.プロファイル選択画面にします。 3.Alt+Tabでゲームから脱出したら、C: ユーザー username AppData Local Unloved にある、Savedフォルダーを丸ごとその場にコピーします。 4.コピーしたフォルダーの中身をコピーし、本家フォルダーを開いておき、すぐに貼り付けできるようにします。 5.Demon Chestを開けます。 6.結果が良くない場合は、プロファイル選択画面に戻り、データを貼り付け、また開きなおします(箱の中身は開くたびに変化します)。 7.良い結果が出たら、プロファイル選択画面に戻ってから、3~4を行ってバックアップ元とします。 8.手持ちのチェストが無くなったらおしまい。カルマが不足している場合は、Demon Chestを破壊しても良いです(後のAbyss Chestの開封の為に、最低でも66枚のAbyss Coinをこの方法で取得する必要があります。Abyssに行くようになったら基本的にDemon Chestは破壊するものです。Abyss Chestも基本的には破壊するものです。)