换一换
换一换 


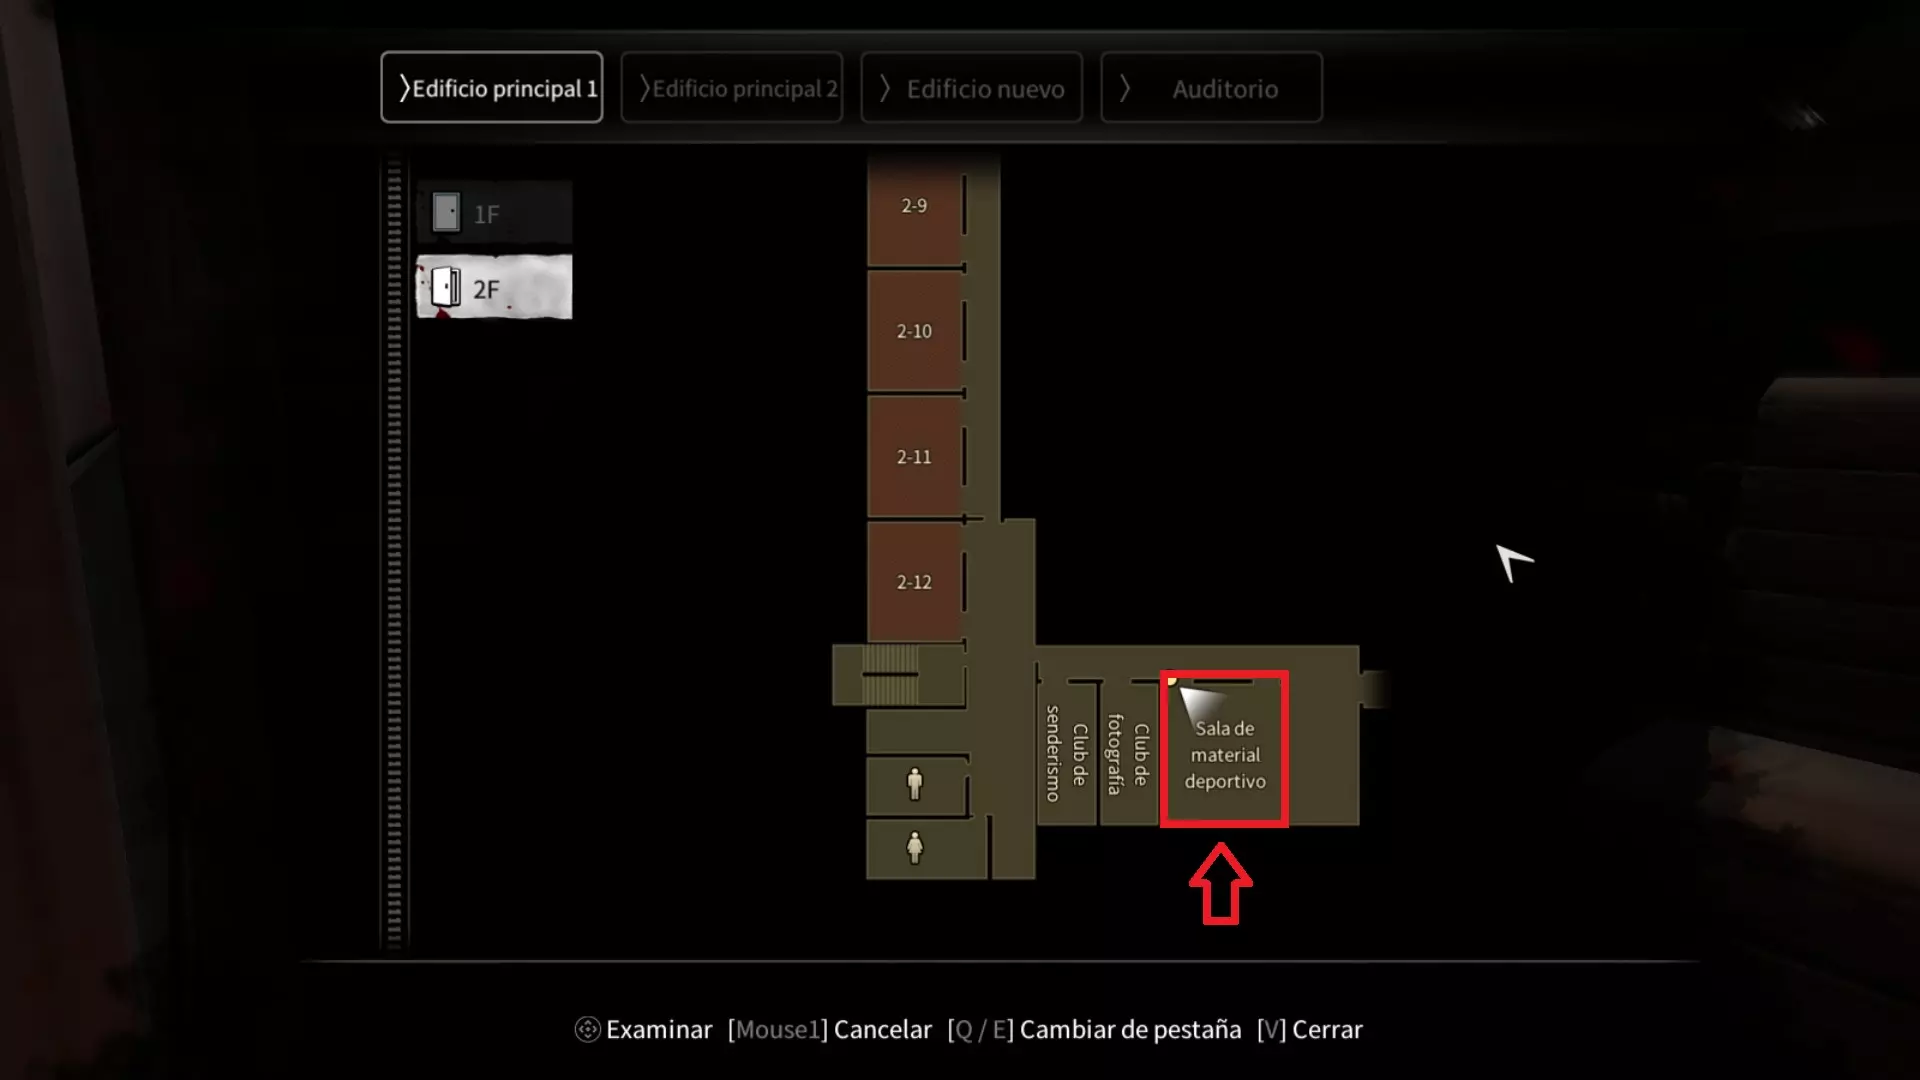
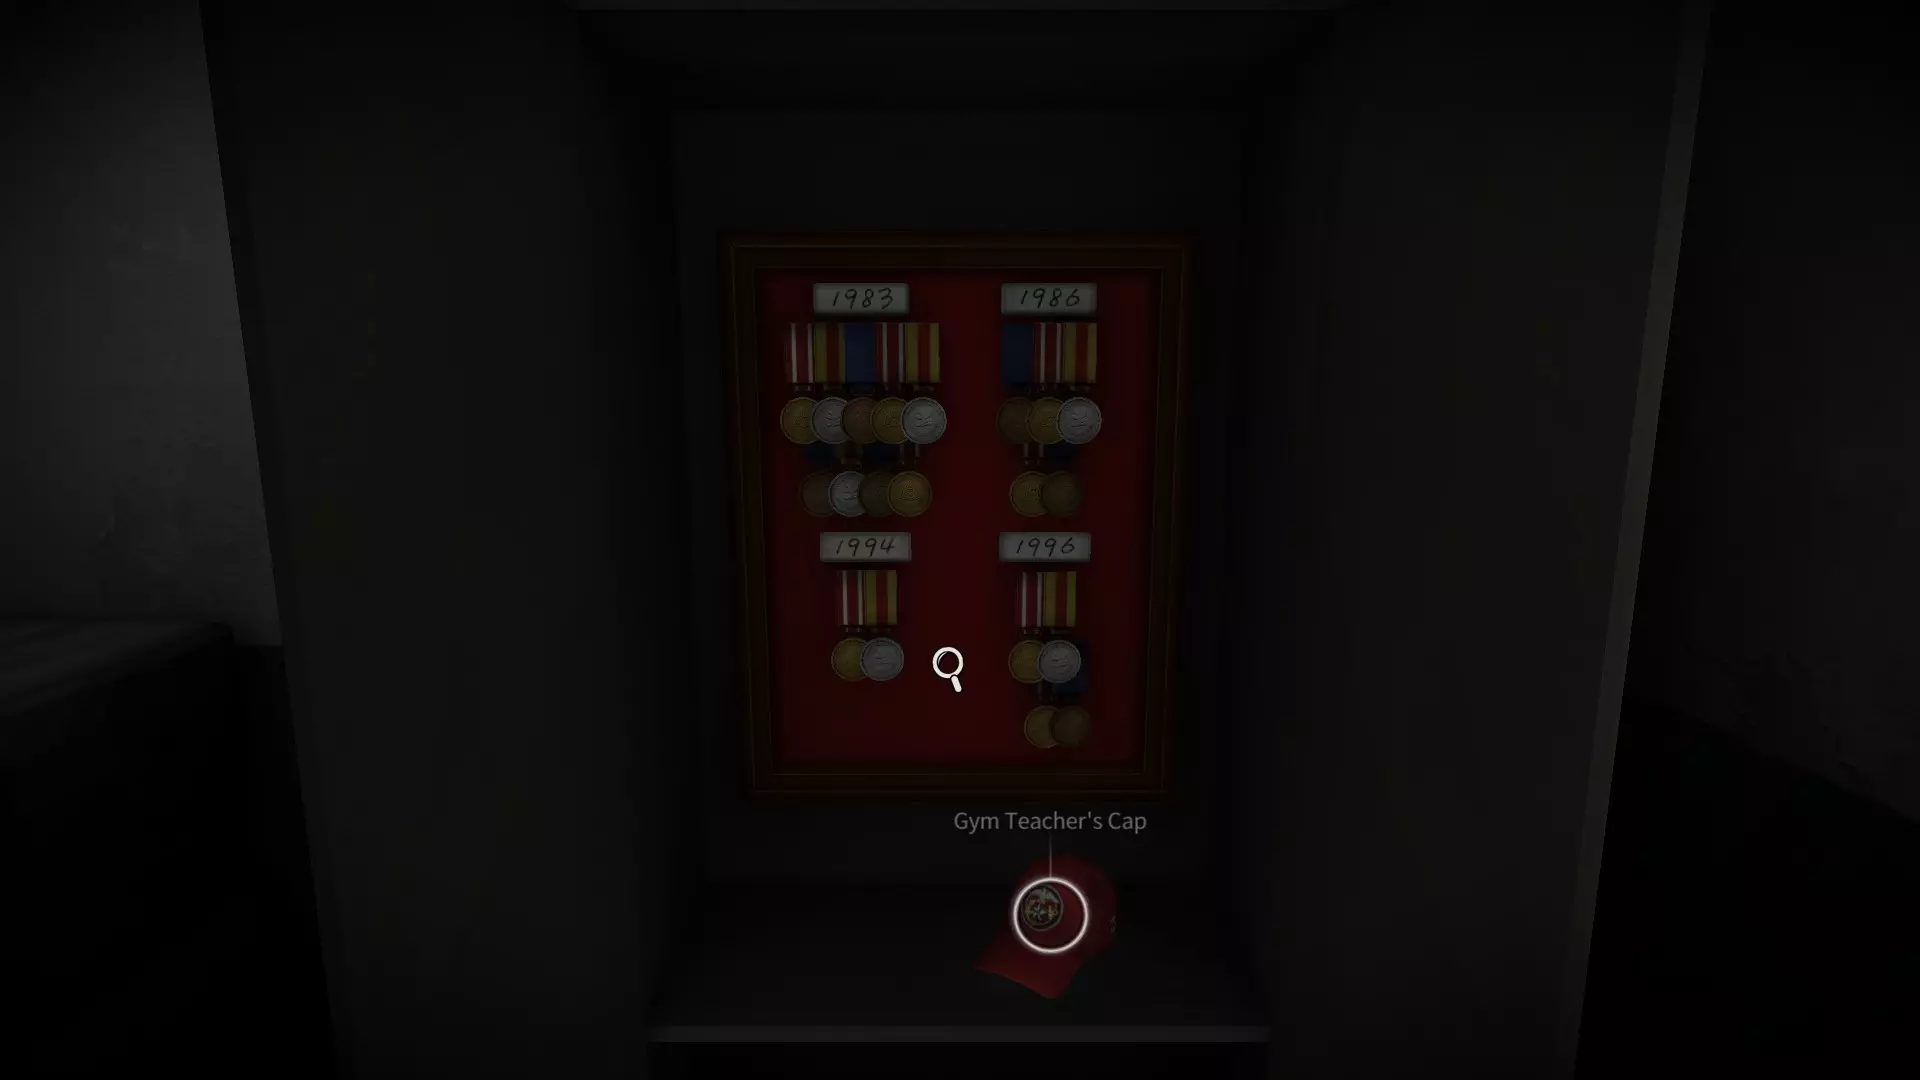
快速通关攻略,仅涵盖必要操作和物品。 主楼1 游戏开始后,向左走并进入2-6号房间。打开灯,从支架上拿起学校杂志。 离开房间,打开镜头聚焦的双扇门。 你将首次遇到成雅和智贤。选择与你想要达成的结局相符的对话选项。 与她们交谈后,跟随成雅前往洗手间,她会让你拿几样东西。这两样东西都可以在你初次遇到那两个女孩的走廊尽头找到。 返回洗手间并进入通风口。在里面左转,关闭两个阀门。从最初有蒸汽的地方离开通风口,然后跑向火警右侧的箱子并打开它。 将第一个箱子转动两次,另外两个箱子各转动一次。 拿起掉出来的钥匙和金属代币。 打开2-6右侧的门,会播放一段过场动画。与智贤对话。 拿起身后桌子上的打火机,离开房间,将代币插入右侧墙上的插槽。 爬上楼梯,沿着走廊前往2-8房间。你会发现门是锁着的,所以需要继续沿着走廊走。在锁着的双开门附近拿起一张纸条,上面写着工具箱里有密码。 回到之前找到梯子的地方,查看地板上的箱子,找到一个工具腰带。 检查腰带,查看螺丝刀的顶部以找到密码。回到一楼主办公室,用那个密码打开后面的锁箱。拿走里面的钥匙。 上楼到我们找到详细说明腰带位置的纸条的地方,打开那里的门。穿过门后会触发与第一个鬼魂的过场动画。 现在回到2-8房间与素英会合。过场动画结束后,我们将开始第一场限时Boss战! 捡起地上的钥匙,然后沿着走廊前往登山社活动室。里面有一瓶驱虫剂。 到隔壁几个门的体育馆储藏室,进门时阅读桌上的纸条。这会告诉我们接下来谜题所需的年份顺序。 打开房间后右侧的储物柜,会看到一组奖牌。目标是将奖牌数量与年份顺序对应起来。因此在我下面的示例中,结果将是5924。

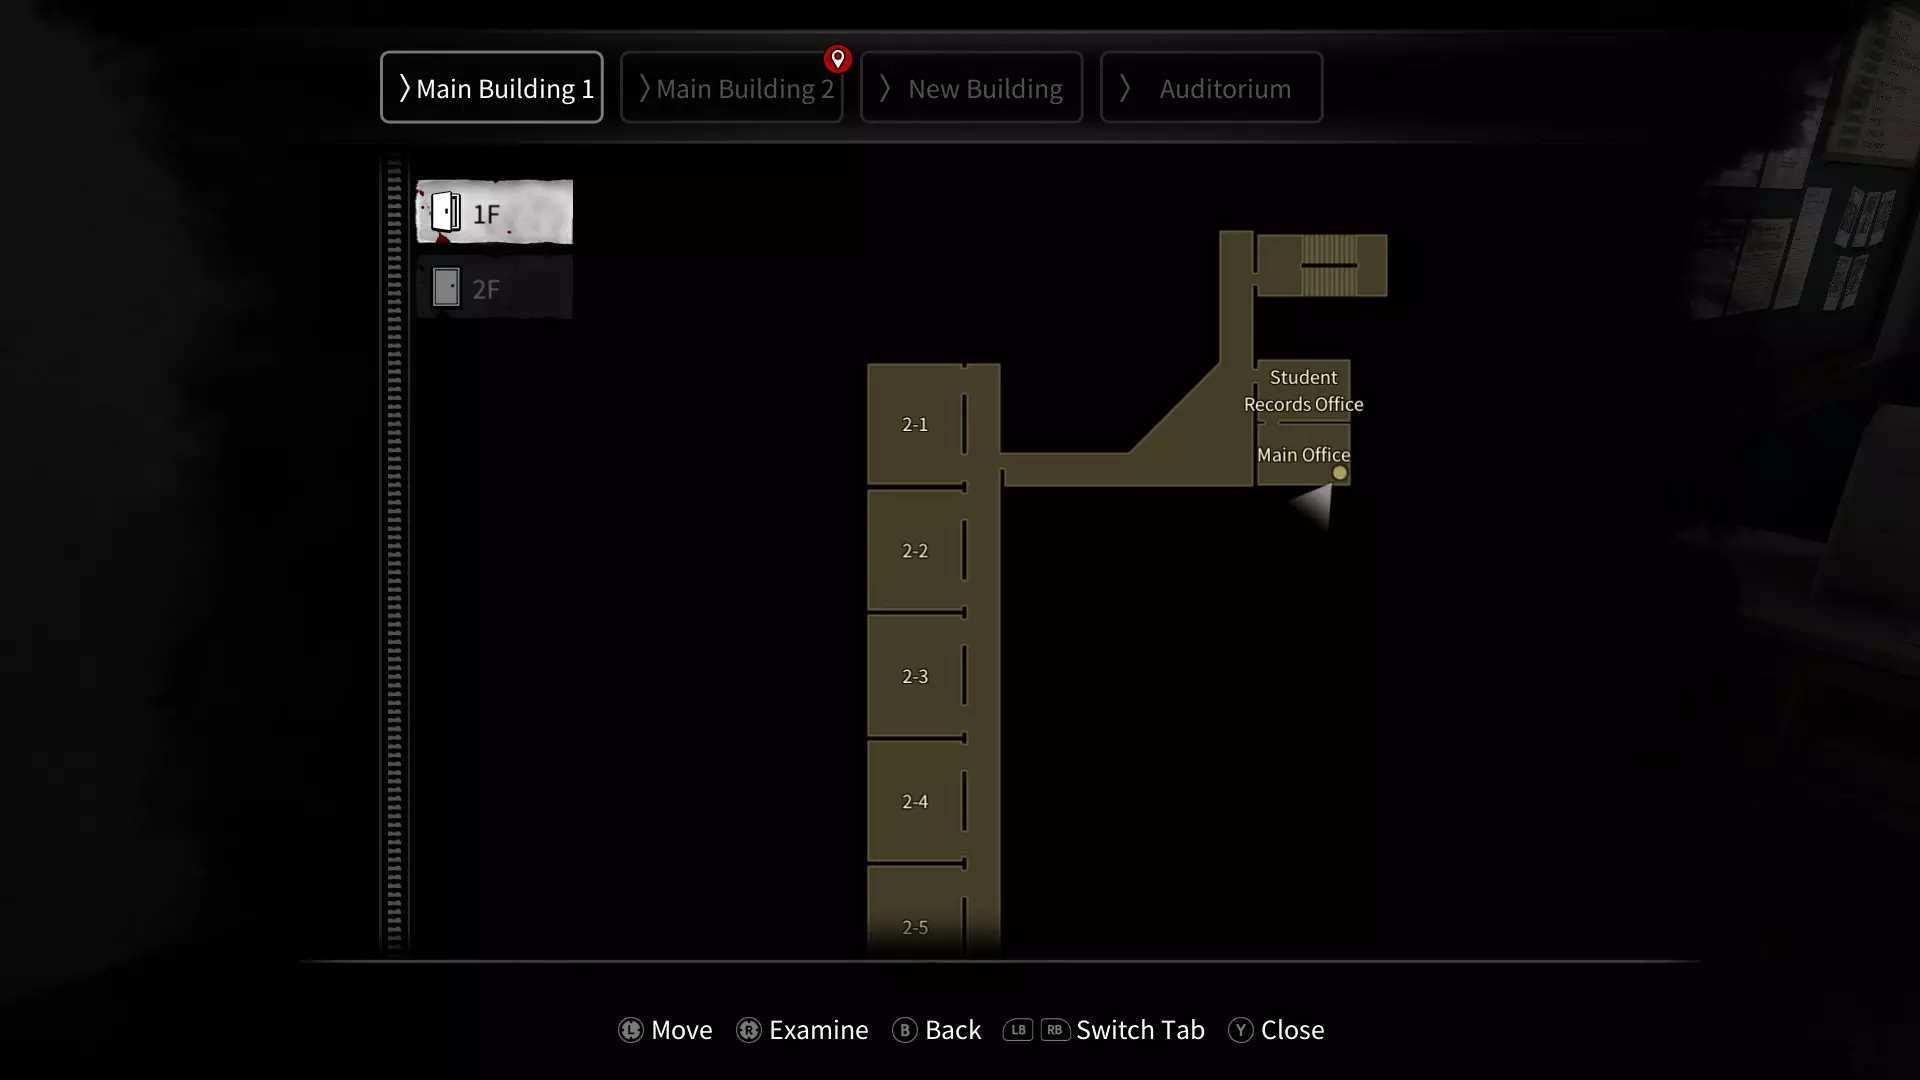
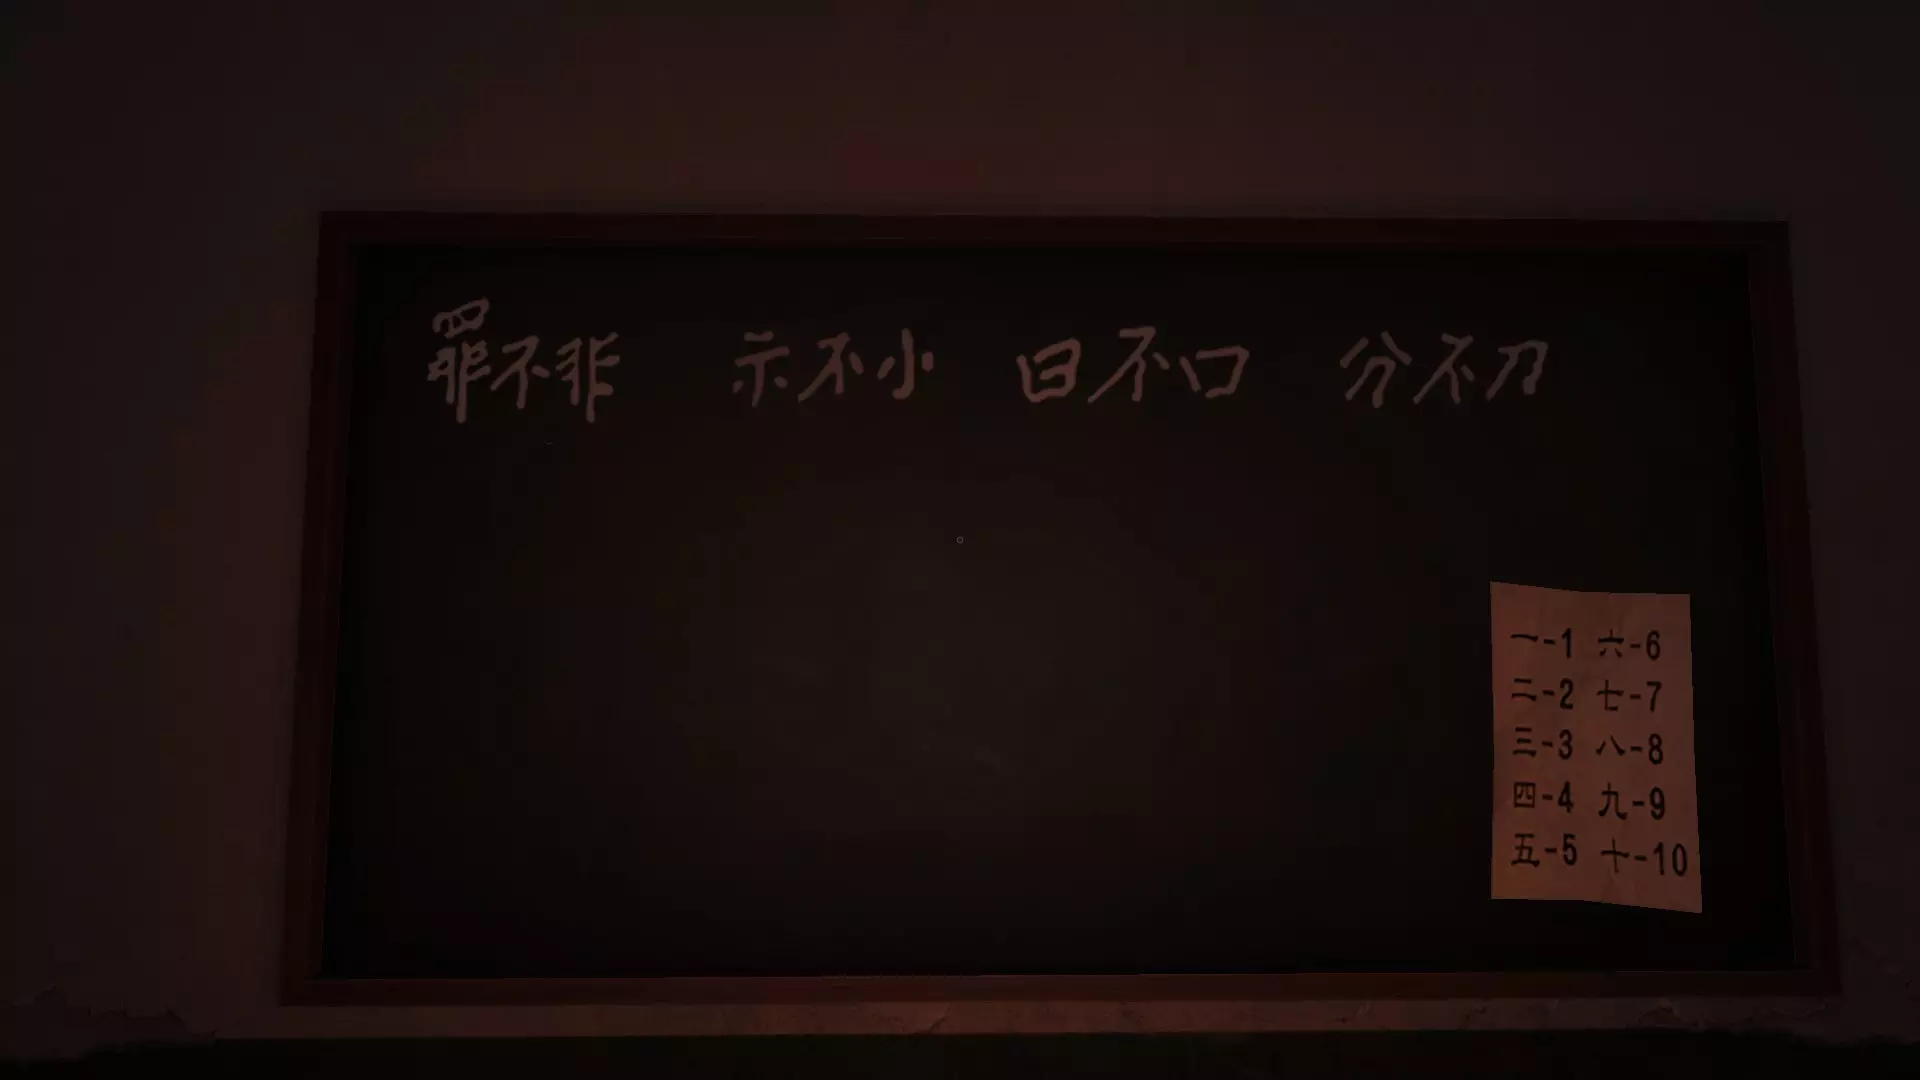
找到密码后,打开左侧的保险箱(输入数字时需左右交替),取出里面的化学溶剂。 现在需要用这些物品消灭5株邪恶植物。它们的位置如下:二楼卫生间附近的壁龛里、2-12房间外、广播室外、主办公室外、我们找到梯子的地方。 消灭所有5株植物后,前往2-2房间,按照提示击败 Boss。 返回2-8房间找到木质代币。用它打开我们之前使用金属代币的附近的门,进入主楼2。 主楼2 一进入主楼2,向前走一段距离触发过场动画。之后,进入教师办公室1,在其中一张电脑桌上拿起纸条。系统会提示校长办公室里有东西。 前往夜间值班室,拿到失物招领钥匙,然后去护士室,从夹克口袋里拿到钥匙。 上到二楼,你会看到另一个代币屏障。你还应该会在右边看到一幅奇怪的画。从画上取下画片,然后穿过双扇门。 打开学生处办公室,在灯关掉且打火机打开的状态下查看黑板。 密码总是由数字1、2、4、8组合而成。你需要根据那张纸,从四个字符串的左侧符号中擦去正确的符号来得出数字。在我的例子中,密码是4218。要记住,这些字符对应的就是这些数字。
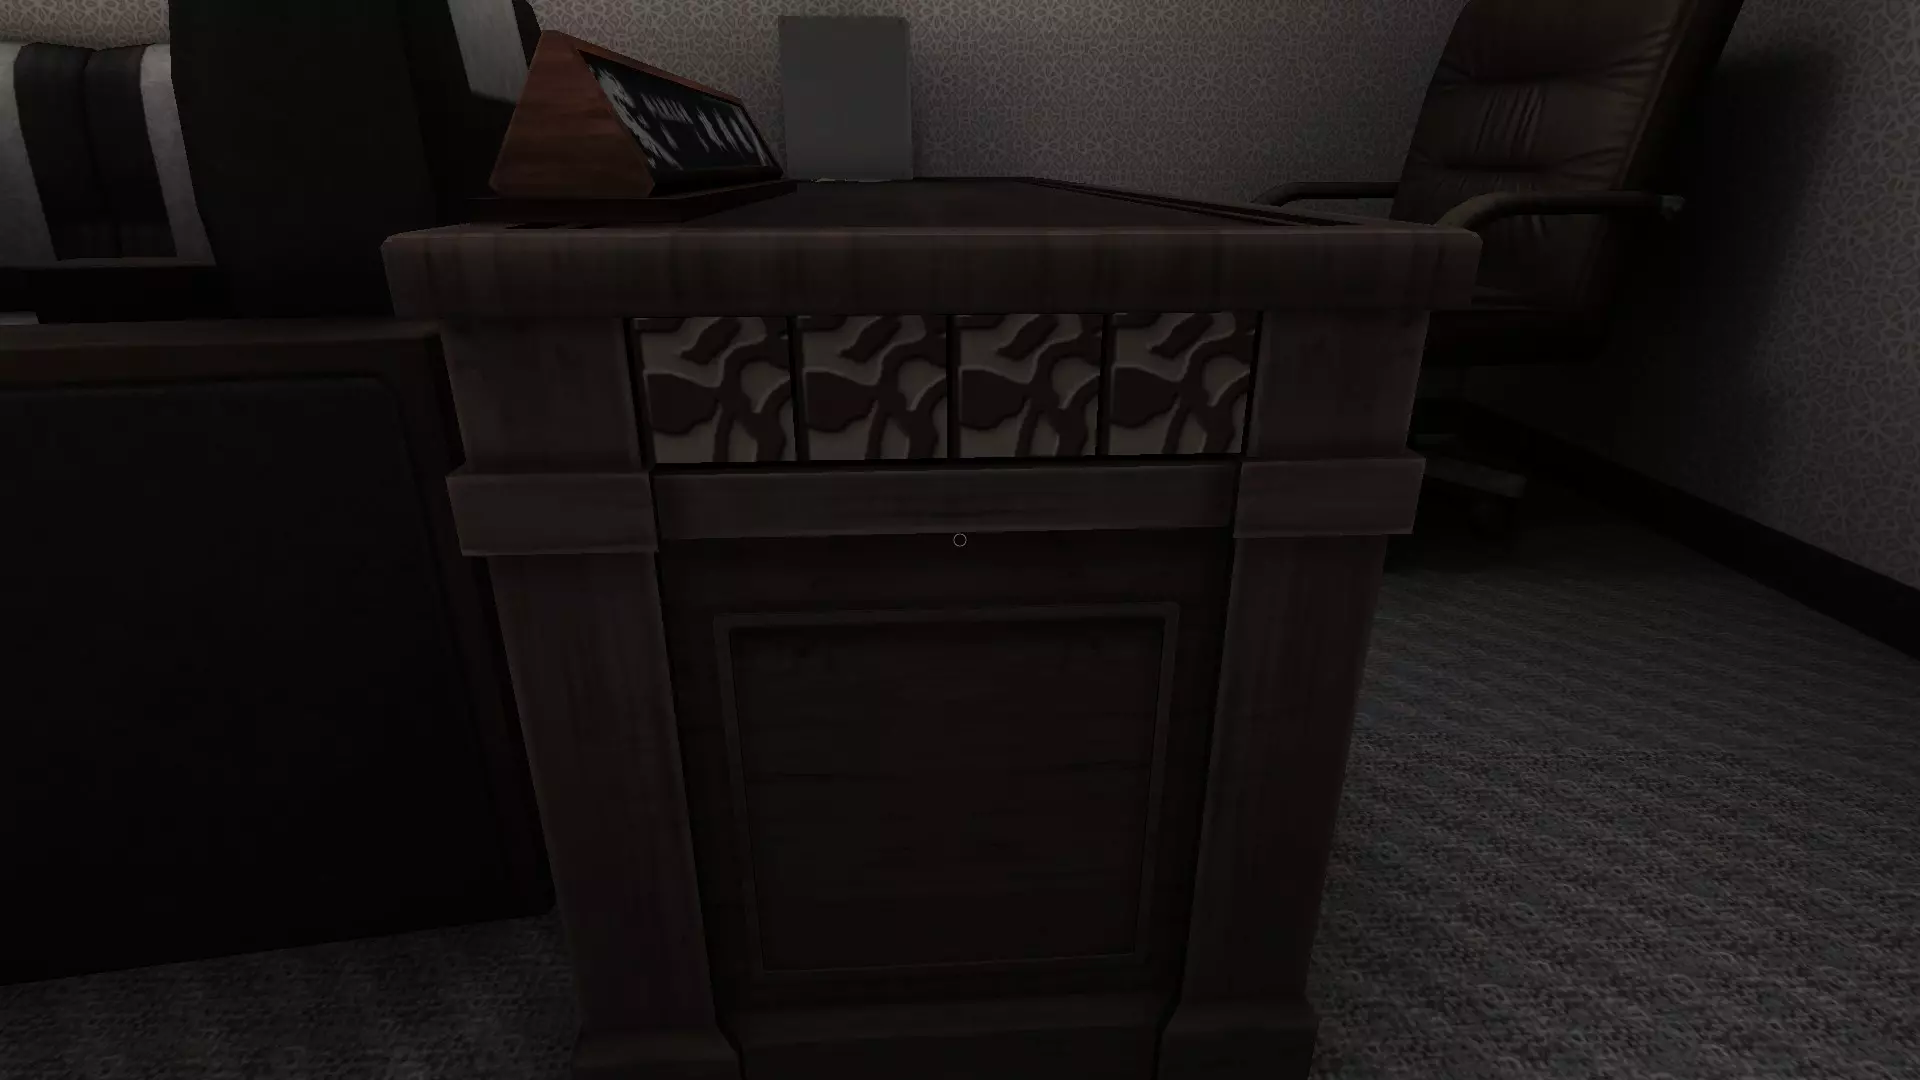
回到一楼,将此密码输入校长办公室的门。进入后,查看书桌侧面,记住图案的排列方向。在书桌正面重复该图案以打开抽屉。
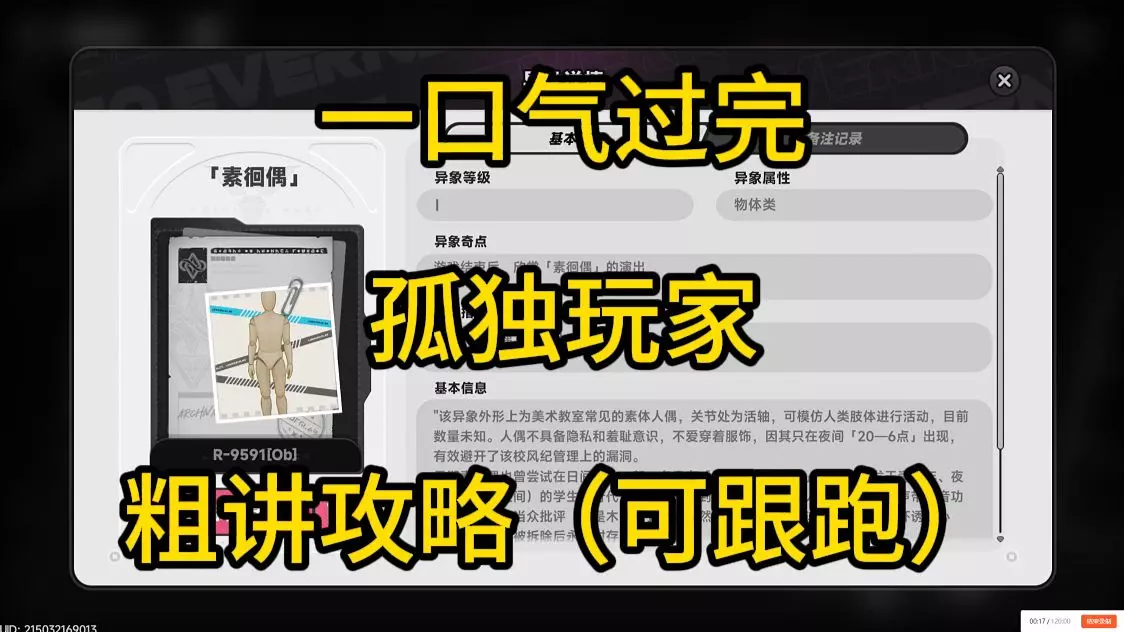
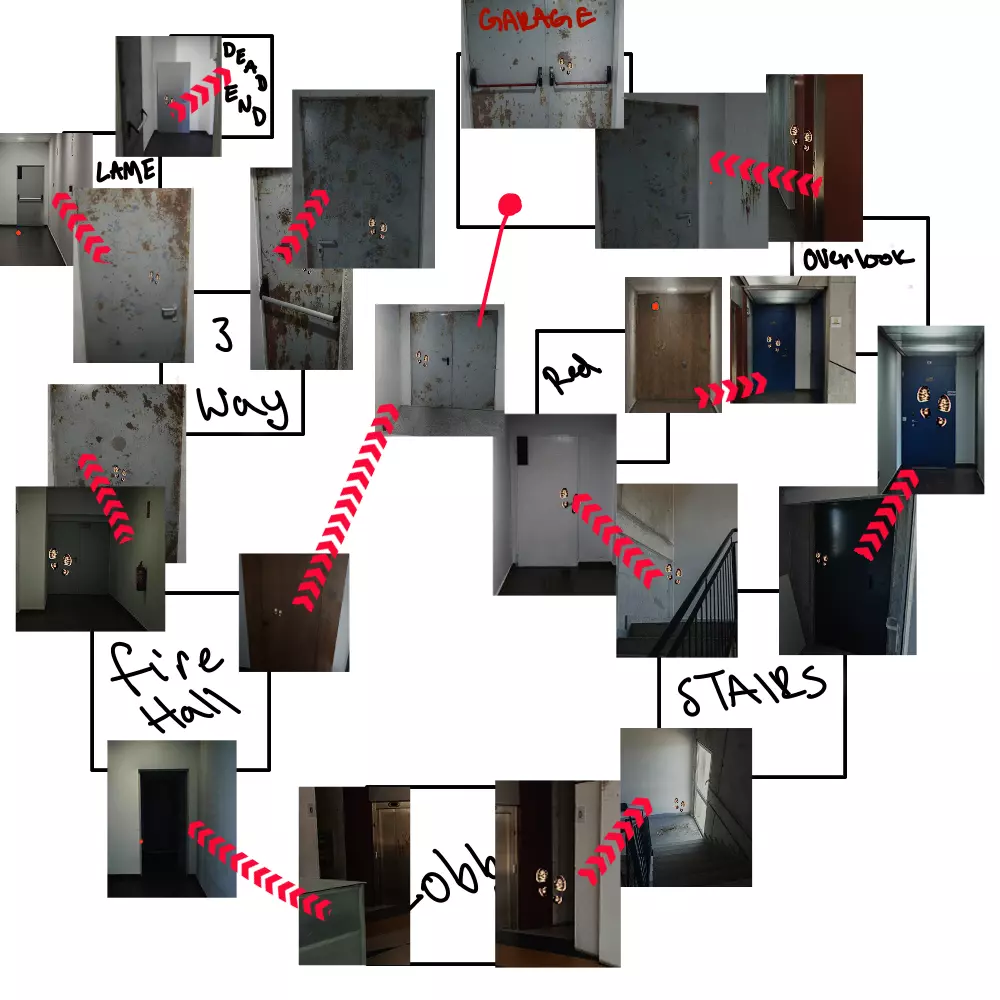
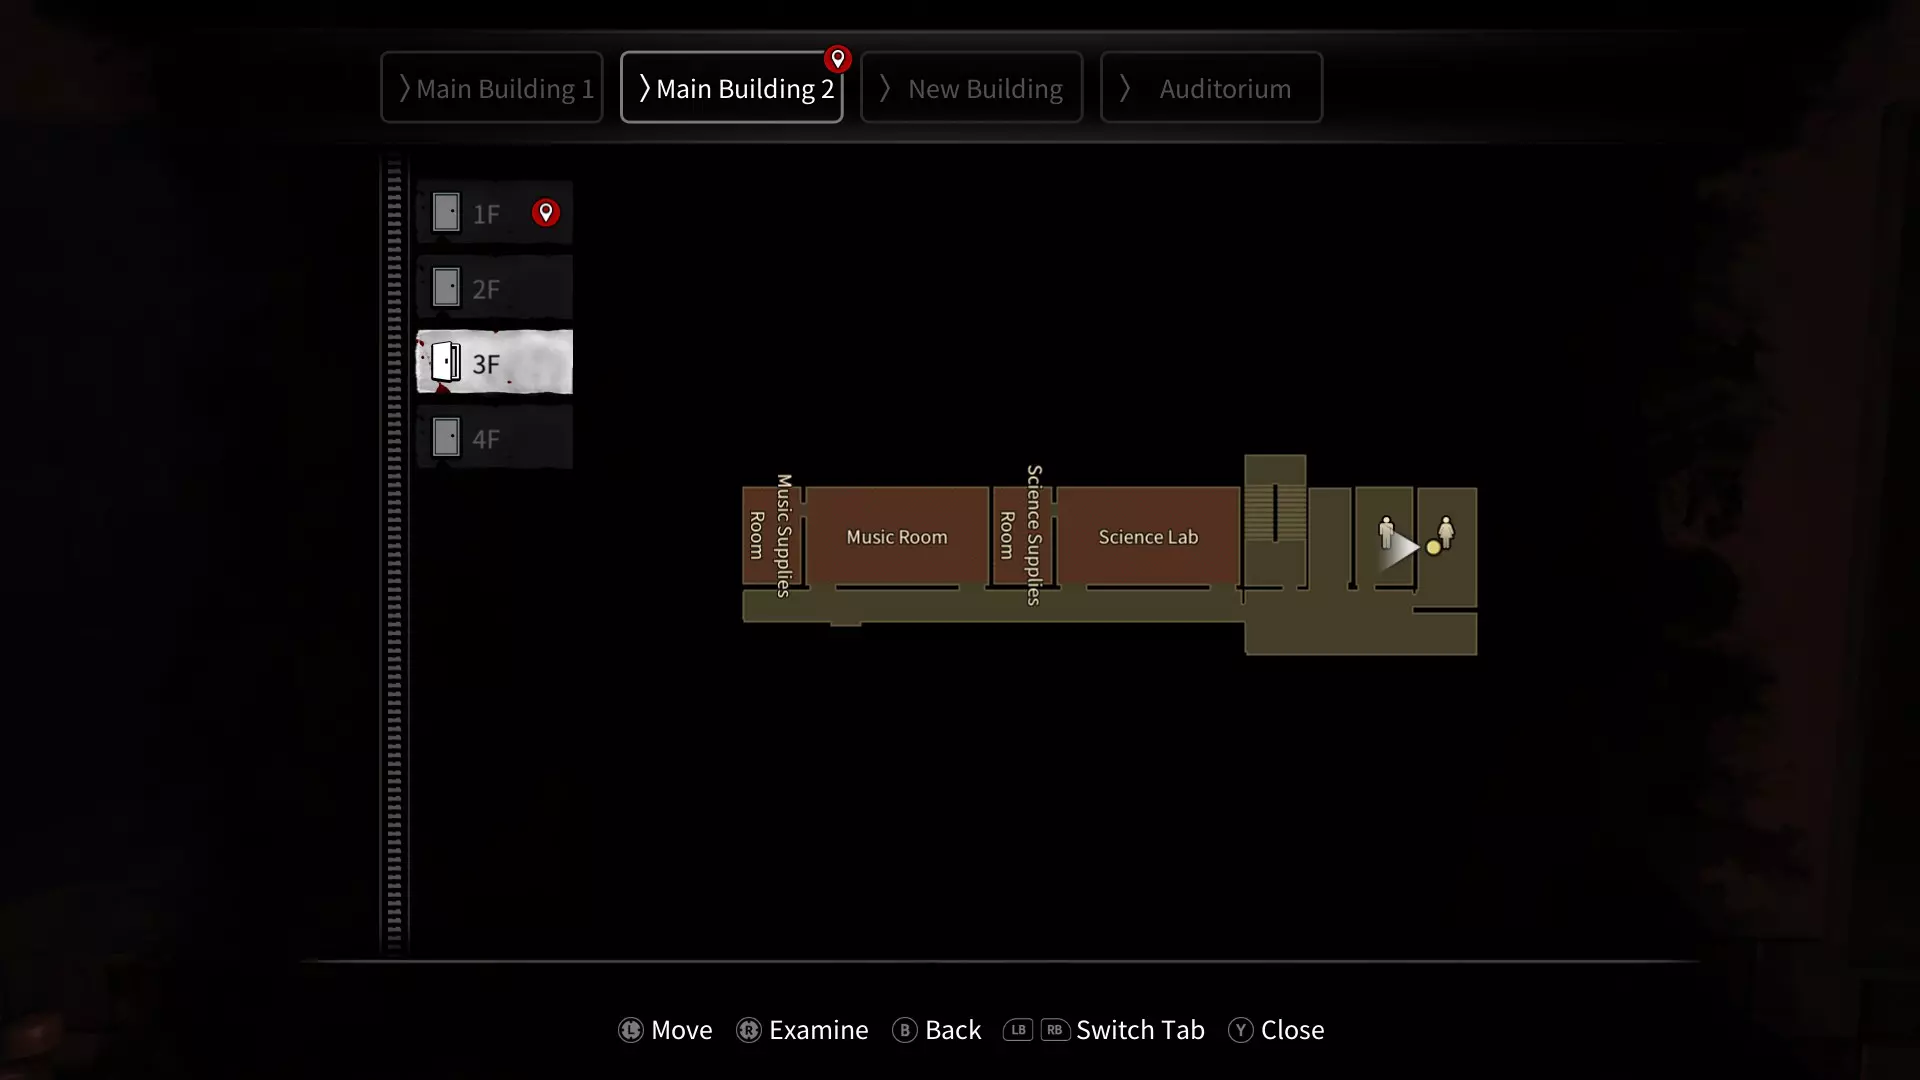
Grab the Video Tape, then interact with the top left monitor in the bookshelf. Once the Janitor is gone, head next door to the Faculty Office to find a Key on top of the shelves where the chair is. Head up to the 2nd floor Faculty Office, then go into the back room to find the Science key. Head back to the main room and open the radio up front to find a cassette. If you're on the White Chrysanthemum route you will automatically grab the cassette. Head up to the 3rd floor Science Supply Room via the Science Room. If you're on the White Chrysanthemum route you can skip this room. Afterwards, head to the Music Room and you'll spot a piano with blood dripping on it. There's only 5 keys we can hit, so hit them in this order: 3, 2, 4, 5, 4. Grab the key that falls then open the bench to find another picture piece. On the back of this piece is a code. Use this code to gain access to the Music Supplies Room. Once inside, grab the final painting piece. Keep the stereo in here in mind. We'll come back for that later. Head down to the 2nd floor Councilors Office and plug in the painting pieces. Go down the hall to the Lost and Found. Once inside, grab the vase and look inside it to find a remote. Remember that stereo in the Music Supply Room? Head back and interact with it to get a CD. Inspect the back of the CD to find the Art Room key. Go up to the Art Room on the 4th floor to trigger the 2nd timed boss fight. Our first goal is to run down to the Lost and Found again and grab the Clay Doll that fell. Next, head back to the 4th floor Art Room and fire the doll in the oven. Finally, head down to the Science Room on floor 3 and interact with the 3rd sink on your left. Once you have the finished doll, bring it back to the baby in the Art Room. Enter the room the baby was in to find the Earth Token. Take it down to floor 2 and head on over to the New Building. New Building After arriving in the New Building, make your way down to the 1st floor and grab the Yellow Keycard. If you're on the White Chrysanthemum route this will happen after you talk to So-Young. Head back up to floor 2 and open the yellow door at the far end of the hall. You'll now find yourself in a large atrium. Once inside, head down to the 1st floor and unlock the Dance Studio. Interact with the stereo to trigger our first boss fight in this area. The objective here is to match where the speakers are in the mirror while avoiding the doppelgangers attacks. Once you've done this 3 times, the window will shatter and you can grab the Red Keycard. After grabbing the card, head up to the 4th floor. Just past the Library is a power box. Turn off the Lights switch, slot the fuse into the Power slot, and turn on the Power switch. Enter the Library and turn on the AC. Grab the plaque that fell and interact with the door in the back of the Library. Shove the plaque all the way in, then slide it up and down slowly until the door unlocks. After the cutscene, grab the Yin-Yang Token from the podium, take a second to switch the fuse box over to the Alarm slot, then head down to the 1st floor Music Appreciation Room for our next boss. The goal here is to quickly find the girl and burn her with the token a few times. Easy peasy, but be quick! There's actually a camera manipulation method you can use to make this fight even easier. I'll provide a video at the bottom of the section. After defeating her, open the cassette player and take the drive belt out. Head back to the hallway we started this zone in and enter the Language Lab. In the top left corner is another cassette player. Slot the drive belt and cassette in then click play. After receiving the Blue Keycard, we need to turn on room lights in a specific order. The order is: 3-1, 3-5, 3-8, 3-10, and 3-12. After you've done that, go to the 1st floor and unlock the Electrical Room. Activate the lever inside to overload the lights. Grab the key that fell in the middle of the atrium. Next, we need to complete the painting and clock puzzle. In the Occult Club, the Art Studio, the Earth Science Lab, and the Computer Lab are a painting and a clock next to each other. Our first step is to locate the room that contains Greenwich and note the time the clock is set to. Once we've done that, set the other clocks in the following manner: Beijing +8, Moscow +3, and DC -3. So if Greenwich is 12, DC would be 9 for example. Once those are all set correctly, the locker in the Occult Club will open, Grab the Divining Rods inside. With these, we're set to tackle the roof. Go back to the hall we started the zone in and climb to the top of the small staircase (not the stairs in the atrium). After stepping outside, you'll now have the rods in your hands. They'll do one of two things; go straight, or go crossed. What you want to do is shimmy along the pool edge until they go straight, then walk in a straight line until they cross. Once they do, take a step back and turn your character side to side to find the next safe path we can take. Straight = safe. Once on the other side, drain the pool by turning the valve, then hop into the pool to find the Water Token. If you didn't set the fuse box to alarm yet, head back to the power box on the 4th floor. Turn off the Power switch, change the fuse over to the alarm slot, then back away from the box. If you don't do this now, you will automatically die in the next fight. Head back to the 2nd floor of the atrium and plug the token in to start our last boss of the zone. Run up to the 4th floor power box and turn the alarm on to defeat her! Now it's time to move on to the final area of the game.https://youtu.be/6x7RKarWI4Y Auditorium As soon as you load into the zone, head to the Projector Room and activate the lever. Head downstairs and make your way over to the Auditorium Control Room. Inside is a switch board with a single switch flipped up. Switch it down to trigger a cutscene. Exit the room and enter the gym floor to trigger the next boss fight. The goal here is to find 3 fire extinguishers and extinguish the flames. From where we start, hook a left and head to the right-most corner to find a fire extinguisher outside the right side Storage Room. Head over to the hallway outside the Girl's Locker Room and extinguish the flame. Inside is our last extinguisher. Next, head over to the hallway outside the Boy's Locker Room and extinguish the fire, then enter the locker room for another extinguisher. Take this over to the left Storage Room and extinguish the blue flame. Once that's out, grab the valve handle and head back to the Girl's Locker hallway. Just beyond the locker room is the Green Room. Slot the valve into the pipe and turn on the water system. After any cutscenes, grab the Fire Token and head up to the 2nd floor to slot it in. Labyrinth Grab the Fire Token as soon as you spawn. Facing the Fire Token holder, go straight until you hit a dead end. Hook a right, and then another right at the dead end. Follow the path forward until you spot the Metal Token on your right and the Wood Token a little further to your left. Facing the Wood Token holder, 180 and head down the path. You'll spot the Earth Token to your right. Grab it. Head back to the Metal Token and grab it. Facing the Metal Token holder, head right and follow the path until you hit a T-junction. Go left. Follow the path and hook the only left you can. Go straight until you come to a section where you can either go right, or continue straight a little to your left. Go straight. Continue going forward and you'll spot the Water Token glowing on your right. Grab it. Facing the Water Token holder, follow the path in a straight line (a little zig-zaggy, but straight, nonetheless) until your only option is to turn right. Do so. Follow the linear path back to the Wood Token and grab it.https://youtu.be/pWABxWP_rhQ Ji-Min After taking control of Ji-Min, run back to MB1 and go to where the White Chrysanthemum is. On the left wall, about shin height, is a blood stain. Interact with it. After the cutscene, head back to MB2 and go to the Music Room on the 3rd floor for another cutscene. Next, run down to the Counselor's Office on the 2nd floor. Run down the hall to the Lost and Found, then search the boxes on the floor to find Ji-Won Kim's Book. Now pop over to the New Building. As soon as you load in to the NB, go to the Art Room in front of you to find a book near the white board. Climb the small staircase nearby straight to the roof. Cross the pool and head inside. Go to Library 1 and locate the book on the back shelf. Slip into library 2 and locate the book again at the back. Cross over to the Reading Room and grab the book from the front. Go back to MB2 and head to the 2nd floor Faculty Office. Now in the Faculty Office, locate which desk has the vase on it and you'll spot a padlock beneath it. The idea is to use the numbers on the spines of the books, starting from the head of the tiger and going to the tail, to unlock it. Remember to alternate sides like a normal padlock. Now head back towards the stairwell to start a very lengthy stealth section. You will need to trail Choi Eun-mi without being seen. If you divert from following her, or get spotted, you'll instantly die. Also keep in mind that she'll randomly stop and look around. This section can take you roughly 7+ minutes. After trailing her back to NB, run up to the roof, cross the pool, and enter the main atrium. After the cutscene, sprint down to her body and collect the inhaler. You'll find yourself in a new area exclusive to Ji-Min. This area is similar to the Labyrinth, except we now have an active threat in the area who will insta-kill you if caught. If Seong-A spots you, you can run away and have her lose track of you. You need to use the beams of light to collect the Tokens in this order: White, green, yellow, blue, red. After collecting all 5 you'll find yourself back in MB1. You need to navigate your way back to MB2 while avoiding the onslaught of spirits. It's worth noting that you can kite the spirits into a more favorable position at times. Once in MB2 run over to the Music Room on the 3rd floor and prepare for some VERY fast QTEs. A small tip: You can preemptively guess the QTE by looking at what part of the screen the circle appears on. IE. if it's on top you'll be pushing up, if it's left you'll push left.https://youtu.be/34Ui9vdYNQ4