换一换
换一换 


Introduction Gammer is a playstyle near and dear to my heart, so in this guide I'm going to do a brief run down on the basics, how to build Gammer, and how to utilize it to its fullest potential. Introduction Gammer is a playstyle near and dear to my heart, so in this guide I'm going to do a brief run down on the basics, how to build Gammer, and how to utilize it to its fullest potential. Starting from the beginning, what is Gammer? Gammer, or Goo hammer, is a bit of a niche pick that trades a good chunk of fragging power for arguably the most insane stall potential and utility the game has on offer. By utilizing a few unique tools from the heavy kit, a good Gammer can offer support on par with the healbeamiest of healbeam mediums. A Gammer at his best is expected to play like a turtle, protected by their shell, rarely if not never giving chase, and nipping at anything that gets too close. Resultantly their kit is largely comprised of stalling based and defensive tools. There is some room for DIY, but the kit detailed below is my go to, and in my opinion the best there is for this playstyle. Items(cube) Going from the simplest tool to the most complex, we start at the humble grav cube. The gravity cube creates a radius in which anything within will float upwards with a weak initial velocity. The cube is shockingly versatile, able to hold, take, or just move cashouts. The cube's most basic use is area denial. Tossing this near a doorway or in the middle of a room can prevent enemies from entering, or give them areas that if they do enter, make them easy fodder due to the limited mobility. In the same vein, placing a cube directly on top of a cashout, especially one that’s been knocked over, can provide a mild stall that is difficult to deal with. This can grow more problematic if the Gammer in question protects the cube with barricades and/or goo, turning a 6 second stall into a 16 second one. Reinforcing this can either be done by wrapping the cashout in goo reinforced barricades, or building it a coffin of goo and simply placing the cube underneath. As a movement tool the cube is usable, if limited. When using it as such, it's important to remember that the cube’s base movement speed is weak, but if you enter it with any momentum, it'll carry it. This makes it much more usable both for vertical and horizontal movement. For vertical, it's essential that the player jumps AS they throw the cube, as once more, the base lift speed is very weak. For horizontal, the player should ideally slide and then jump into the cube, to gain as much forward momentum as possible. Regarding movement, one of the cubes greatest strengths is it’s ability to put you in places the opponent will not expect. For example: a player who has dropped through a whole in the floor and has broken line of sight with their opponent can place a cube near a window, using it to boost them up two floors. Not only is the enemy unlikely to follow due to the difficulty navigating in the cube, but they are more likely to assume the cube is only there for the purpose of blocking the window, neglecting the possibility that the Gammer is now above them, and much more of a threat because of it. The final use of the Cube, and likely its most known one, is cashout manipulation. The cube can lift a cashout through a hole above, which can be sealed with goo, it can be placed under the tracks of moving platforms, effectively nullifying any setup placed on the platform, and can prime it for winching or lockbolting. The cube is an incredibly versatile tool that opens up many opportunities for Gammer players, which both on its own and in coordination with other tools, can provide incredible control over both players and cashouts. Items(Barricade) Barricade is deceptive in its simplicity. At first glance it appears to be a mildly buggy reinforcement tool, but beneath its surface is a litany of uses derived from properties that may appear insignificant on first glance. Firstly as a preface it’s important to note how the barricade relates to hammer. When closing the distance with hammer, it's important to think of health as a currency which is expended the more enemies have a direct line of sight on you. If it drops too low the Gammer must reset, as engaging at that health would result in certain death. Thus the first use of barricade appears. Barricades deploy instantaneously, allowing for as much health saved as possible. If a Gammer is caught out of position, only barricade can prevent them from getting shot 100% of the time. Even a goo shield takes a second of setup. This allows for the Gammer to gain as much intel as possible, while risking relatively little, safe in the knowledge that at any time, a barricade can be placed between them and their enemy. Similar Barricades can break up a room consistently and uniformly, preventing kill room situations. By placing barricades in the center of a room, or near your team, even during a gun fight, players have an object to hide behind and move around, which disproportionately benefits the Gammer and their team. As a treat, a barricade is almost perfectly sized to completely block any doorway in the game. With a high health pool, and a singular weakness to explosions, a barricade is a safer bet in a doorway than even goo. Returning to that explosion weakness, it's important to remember how explosions work in the finals. If you can block line of sight with most explosives(with the possible exception of mines, C4, and breaching charges) they will not do damage to you. This allows a quick Gammer to block frag grenades and RPG shots with quick enough hands, before quickly picking the barricade up for reuse, which notably, comes at 0 cooldown cost. Barricades can also be used as an elite stalling tool, able to be quickly thrown down to guarantee a res or buy time for a steal, as once more, they are resistant to damage, quick to place, and block doorways almost perfectly. This doesn’t even begin to cover what a barricade is capable of in combination with other abilities, which will be covered later in this guide. Items(Lockbolt) The Lockbolt is one of the most important tools in the Gammer’s kit, able to punish overextension, provide intel, move cashouts precisely, and guarantee kills. The lockbolt is a device shot out from a launcher, which attaches to terrain on hit, and enters an incredibly short(about half a second) tracking phase. Any enemies in direct line of sight within a certain radius during this period will be “locked”, with a chain extending to them and limiting their movements to a certain radius around the lockbolt, with an elastic effect if they exceed this radius. This lock effect can apply to vaults and cashouts as well. On a successful lock, the lockbolt does 5 damage. The first and most obvious use of the lockbolt is ensuring kills. Given the Gammer player in question is using the sledgehammer, locking opponents to a radius can limit the biggest counter hammer has, running away. Aiming at the ceiling is typically more rewarding for this, as the lockbolt’s range is spherical, so creating vertical distance limits the total movement area they have. Similarly, if they attempt to escape by jumping out a window, whether to the ground or a lower floor, they will find themselves dangling like a pinanata, a free kill for either you or your opponents. In opposition to this first use, is controlling a fight’s pace. Locking an out of position player who you simply don’t pursue, instead focusing on their teammates, is a shockingly effective strategy. You can also lockbolt a team if you’re down a player, gathering time for either you or a teammate to revive them. When lockbolting a non occupied player, their first move will be to shoot the bolt, so expect a quicker return to engagement, however despite this, the utility of denying a team a proper push cannot be understated. The lockbolt isn’t just a tool for players however, it also succeeds at cashout and vault control. Firstly, regarding vaults, A successful lockbolt will cause an enemy player to drop what they are carrying, allowing a Gammer to set up directly at an empty cashout, lockbolt the player, steal the vault, and start it themselves while the player is trapped. This can be especially useful during endgame if a team is attempting to remove a vault from play. A successful lockbolt on an enemy player carrying a vault locks both them and the vault they carry, which is only broken by either the lock's destruction or an ally player picking up the vault. This can prevent last minute throws across the map, saving the required team to start a last minute cashout. Regarding cashout manipulation, A lockbolt can be used as effectively a more precise, albeit slower and more expensive winch. This process requires both a lockbolt and a carriable, with barrels or healing orb being ideal, and vault being a last case scenario, as using it both runs the risk of accidentally starting the cashout in an inopportune spot, and wastes time that could be spent making dough. By placing the carriable near the cashout, shooting the carriable with the lockbolt, and grabbing the carriable, the Gammer can now move the cashout by dragging the cashout behind them as they move away from it. This process should largely be used in one of four cases, although depending on your setup, can have many more uses. If a friendly cashout is out in the open, in an environment where a Gammer’s utility is limited, If a friendly cashout is near an elevator, where due to the combination of goo and the gravity cube a Gammer will have a very strong stalling setup, If due to map destruction a cashout needs to be moved to a new area where stalling is easier, or finally, if an enemy cashout is set up in an area that is exceptionally difficult to attack. The lockbolt is a phenomenal tool in both fragging potential and cashout based utility, and cannot be discounted as a vital part of a Gammer’s kit. Weapon(Hammer) The hammer, which has arguably the most depth of any weapon in the game, is the backbone of a Gammer’s kit, giving it 4 of the 5 letters in its name. Firstly it’s important to note the hammer’s strength isn’t its high damage, but its ability to destroy the environment. The alternate fire of the hammer both deals high damage, AND destroys a player sized hole in any destructible terrain in its path. This is a VITAL part of using hammer successfully. The first step to using hammer is to close the distance. A good hammer is like a mole, tunneling through terrain in strange and unpredictable ways to ambush opponents and get out of no-win engagements. By noting where enemies would expect a push from, and simply going from the nearest wall that isn’t in sight of that, you can get the drop on a lot of enemies. Furthermore, dropping from the ceiling almost instantly, or destroying the floor underneath a team are both viable options that allow a Gammer to disorient enemy teams while closing the distance. Another large thing to remember is your ability to engage in unconventional ways. If a cashout is at any floor other than the ground, it can be dropped, for literally zero cost. Depending on setup, and the size of the hole, this can force the opposing team to engage on your terms, slanting the engagement in your favor. Expounding on disorientation, if a team has a particularly irritating setup, you ALWAYS carry the option of adding disruption to the mix. Any hanging platform can be dropped, any building completely destroyed, the hammer carries the nuclear option regarding site setups. While such drastic actions often come at costs, largely that of a more open cashout, with more hiding spots, with chaos that is as much out of your control as it is the enemies, it is still something that cannot be discounted. Arguably, Hammer is at its strongest as a defensive tool however. If you are defending instead of attacking, the options Hammer provides feel endless. One of these boons is the creation of passages throughout rooms and floors. A good hammer can create shortcuts and flanks INTO the defense, allowing for silent movement throughout the cashout site. While these can be used by opponents, only the defending team will know the true extent and location of these passages, although it is wise to be careful around them, making sure they are watched carefully. Similarly, if you and your team are pushed back, you can flee to the floor above or below the cashout, either dropping the cashout itself, or quickly entering the room for a dangerous first strike. In dire circumstances, it is possible to combine these two techniques, to stall a cashout completely solo. By creating a series of tunnels interlinking floors and simply dropping the cashout and fleeing into the woodworks each time, before repeating the second the opponents try to take, it is possible to stall a cashout for upwards of 35 seconds, although any longer and you are likely to run out of floors. All of these uses make the hammer an incredibly potent, if mildly niche primary weapon. Specialization(Goo Gun) Saving the best for last, we now arrive at the most complex piece of the build, and undeniably the most vital. The goo gun, which is fully automatic, shoots out blobs of goo from 20 round cannisters, which stick to each other and players, allowing for setups, stalling, fragging, and much more. Starting from the simplest use, A player hit by goo is locked in place, and if the blob is covering their upper torso, is unable to shoot, for half a second. In a 1v1, this is an incredibly easy and safe way to close the distance or deploy other utility without getting blasted. Keep in mind that bullets cannot enter or exit goo, so if they are low, it may be wise to aim for the feet so your teammates can blast them. Gooing a player also interrupts a steal or revive, so it becomes an incredibly viable stalling tool, only really countered by a dome shield, or an opposing setup. Using the goo gun on players allows the Gammer to apply pressure, flee, and steal, giving it already an incredibly strong use case without even touching its other, more potent use. The real meat of the goo gun is its ability to waste time through rapid reinforcement. Whether it's by sealing an entire room, blocking a passage you just fled through, or blocking off a stairway, the Goo gun is the king of time wasting. Combined with the hammer, the Gammer is given the privilege of completely defining how every player has to move through the cashout through selective site redesign. The limit is your imagination. You can drop a cashout through the floor, sealing the hole once it's floated above, either stalling your own cashout, or stealing your opponents. You can create a secret room which is only accessible through a conveniently barricade sized door, allowing for cheeky revives under pressure. You can create stairways and bridges on the outside of buildings, allowing for stealthy movement that your enemies cannot predict, or hiding spots that without forewarning, are almost impossible to find. You can even goo yourself, by crouching and aiming at your feet to block as much damage as possible, to stall till help arrives or your objective is completed. Mastering the goo gun, and its myriad options, are essential to an effective Gammer. Some Tech Drop steal(Goo+Hammer)A drop steal is a nice way to apply pressure and maybe get a cheeky steal. By breaking the floor under a cashout and sealing it with goo, you can force your opponents to engage or lose the cashout. Full Drop steal(Cube+Goo+Hammer)A full Drop steal is usually a last ditch effort, performed under a time crunch, or an already weakened team. By cubing under the goo, you can ensure that your opponents are unable to actually drop down for the retake, forcing them to either relocate or find some explosives to break the goo before you succeed in your steal. Float steal(Cube+Goo+Hammer)A float steal is similar to a Drop steal, however it is performed from above a cashout. It carries the benefit that the hole is already cubed, and that most maps do not favor upwards movement, making retaking much harder. Elevator Hold(Barricade+Goo+Cube+lockbolt)A situational setup, if your cashout is in or near an elevator(if near use lockbolt to drag it within) you can barricade the doors, gooing the top to block fragile grenades, and goo the shaft entrance. You can then spam buttons and keep a gravity cube on the shaft entrance as long as possible. While this does cut you off from your teammates, who should be poking opponents from outside, it is incredibly difficult to breach. Goo lift(Goo+Hammer)A minor piece of tech, by placing a piece of goo on the floor, climbing on top and breaking the ceilings, even tall rooms can be scaled with ease. Goo flower(Cube+Goo)A minor stall technique, Cubing the cashout and building a “flower” in goo that supports it can be a useful stall, as either the enemy knocks it down(likely) wasting time, or you do by shooting the stem, which can disrupt steals. Airlock Holds(Barricade+Hammer)Airlock holds are an incredibly strong piece of tech. By placing a barricade in the corner of an important room and simply crouching, you can make yourself a massive problem for the enemy to deal with. Either they expend utility, by tossing grenades over, which can either be escaped by hammering the floor(gas or pyro), in a way that prevents them from safely following you, or nullified in the case of frags, which can be gooed, or they hop over themselves, allowing you to get a good hammer hit and guarantee a kill. Placing multiple of these can also add a whackamole issue, where they do not know which one has you, and the only way to find out is to expend utility or to get too close. Even if they are able to destroy the barricade, the Gammer is able to simply drop through the floor, sealing it with goo before the enemy can follow. These also make strong revive sites, for obvious reasons, as once again, if they want to interrupt, they likely have to engage a hammer in a point blank setting. Goo Reinforced Barricade(Goo + Barricade)A minor piece of tech, Goo can be used to block the gap that a barricade leaves when it seals a doorway, prevent grenades from being thrown overhead. Aggressive Goo Reinforced Barricade(Goo + Barricade)By placing the goo at the bottom a barricade that is being used to seal a door, you can shoot through the gap, allowing for your team to hold an area if under pressure.
游戏玩家,一种生活方式。

2026-02-15 22:00:09
发布在THE FINALS
转载

导读
这是一篇游戏Gammer(或称Goo hammer)玩法指南,介绍了该玩法以牺牲部分击杀能力换取超强牵制和辅助能力的定位,还详细讲解了重力方块、路障、锁栓、锤子、黏胶枪等核心装备的用法,以及多种实用组合技巧,帮助玩家掌握该玩法的搭建与极致运用。

评论
共0条评论

火炬之光 【火炬之光】剑走偏锋,护甲闪避双修猫2闪电链
2026-05-19 15:050赞 · 0评论

如何培养一名真正的乌克兰侦察兵?简直易如反掌! 只需要…
如何培养一名真正的乌克兰侦察兵?简直易如反掌! 只需要…… 到底为什么要加入侦察兵队伍呢? 优势: - 你将能够揭开你的美国朋友们(那些队友)的所有秘密 - 你…
2026-03-31 21:030赞 · 0评论

时之秘道 时之领域18关制胜秘籍 精准拆解Boss机制与爆发技巧
挑战时之领域第18关的最终boss宛如在刀锋之上起舞!其释放的双重大范围必杀技与恐怖的瞬间爆发伤害,足以令任何勇者胆寒。当boss生命值分别降至70%与30%的…
2025-11-20 14:140赞 · 0评论

如何解锁1HKO(无伤通关)成就
在这份超简短指南中,你将学到一个击败一击秒杀模式的简单技巧。我第一次尝试就成功了,但得承认其中有一点运气成分。 基础内容 一击秒杀模式相对简单。你需要花费1枚金…
2026-04-07 04:000赞 · 0评论

角色创建 - 构筑、种族、职业与英雄装备搭配
本指南将让你的角色变得强大。 种族 首先,你需要选择种族。每个种族都有加成,例如恶魔种族非常适合战士,但不太适合斥候。不过这些加成的影响并不大。 以下是游戏中每…
2026-02-15 19:000赞 · 0评论

首次打开游戏的玩家
1)我没有深入研究过游戏代码,主要参考的是自己的游戏经验,有时也会参考游戏的官方维基或开发者发布的帖子。 2)我并不声称自己的内容是绝对真理或某种“标准”,但我…
2026-02-15 13:000赞 · 0评论
RPG 【元气骑士前传S3】版本超标T0 46亿忍者 超全面解析 新手职业推荐
-
2025-10-10 22:480赞 · 0评论
布莱克特训 布莱克特训加成介绍
布莱克特训加成的技能是夜、火、电三选一,一般来说第三个就能用了,最后一个看需求,不知道怎么选择。 布莱克特训加成一览 主要分为三个板块:夜、火、电
2025-07-02 00:510赞 · 0评论

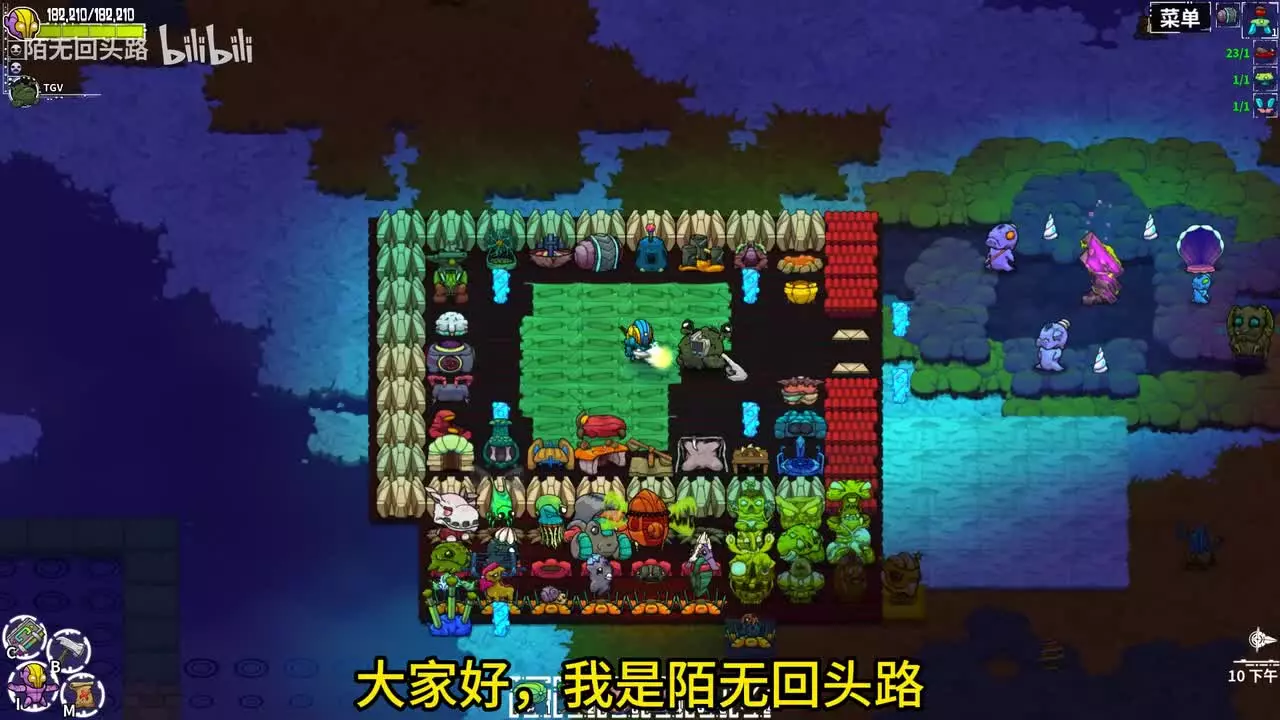
各种最强搭配组合
转自B站玩家:陌无回头路
2025-01-26 02:463赞 · 0评论
关于《皇室任务》中PvE黑暗骑士的一切你需要知道的内容
本指南将介绍《皇室任务》中的黑暗骑士职业。 这对于刚进入游戏并想了解该职业所有技巧和窍门的新手来说会很有帮助。我将详细讲解如何快速升级,以及该职业优先需要哪些装…
2026-03-19 13:000赞 · 0评论

暂无更多
最新更新
- 《THE FINALS》10.9.0版本更新内容 — 防御始于本土
- 商店更新 10.7.0 — 竞技场商店现已更新,别忘了去【龙之领地】看看,那里有激烈的战斗等着你,还有许多好东西! 商店 | 对峙者套装
- 《THE FINALS》10.4.1版本修复公告 — 《THE FINALS》成就修复公告 1. 我们已解决成就相关问题,成就功能现在应恢复正常。
- 《THE FINALS》10.4.0版本更新内容 — 准备好在竞技场中迎接本周商店更新带来的近身格斗吧。 以下是更新内容! 商店 | 宽视守卫组合包 使用宽视守卫组合包,高效解决任何争端并保护自己免受任何后果影响。…
- 《THE FINALS》10.3.1热修复更新内容 — 《THE FINALS》10.3版本后续修复公告 1. 游戏更新及平衡调整 ① gameplay ② 黏胶 - 暂时将黏胶与玩家重叠时的破裂时间从0.2秒增加至…
- 《THE FINALS》10.3.0版本更新内容 — 本周,我们将推出一项实验性的世界巡回活动、一些平衡性调整、性能优化、一长串漏洞修复、全新更新的商店以及一系列可收集的免费物品。阅读下方今日更新的全部内容,记得观…
- 存在问题的程序及反作弊冲突 — 以下是我找到的所有会与《幻兽帕鲁》中的3个反作弊系统产生冲突的操作、程序及覆盖层,希望能帮助大家避免因电脑上完全合法的良性程序而导致账号丢失或财产损失。 开场声…
- 俄罗斯地区《最终决战》中Denuvo(57,005)及连接问题(TFLA0029、TFAV8005)的解决办法 — 针对俄罗斯玩家的《最终决战》启动问题分步完整指南。本指南可解决两个主要错误:Denuvo反作弊程序故障(退出代码:57,005)和服务器连接错误(TFLA002…
- 如何使用轻型构筑游玩(助你100%提升《最终决战》游戏水平) — 这能让你成为《最终决战》中最佳职业的更强玩家 一步步指南 步骤1:安装《最终决战》 步骤2:选择轻型构筑 步骤3:进行一场比赛 步骤4:因为被红宝石段位/翡翠段…
- 《THE FINALS》商店更新10.1内容 — 加入吧! 复活节已降临赛场,为此我们将带回经典限时模式并加入新元素,同时商店也已更新。 活动 | 兔子跳