换一换
换一换 


《武装突袭3》Eden编辑器脚本集合 - 作者XallZall 各种脚本集合,可直接用于Eden编辑器。 这就相当于脚本界的即食拉面。 简介 专为Steam覆盖层设计,方便快速访问各种脚本。
“空谈无益,代码为证。”——林纳斯·托瓦兹 我最初创建这个是为了自己,多年来我收集、修改并编写脚本,以便能快速找到或提醒自己某些功能的工作原理或实现方法。 我觉得分享出来很有价值,而且在我制作自定义任务时,直接打开自己的指南也更方便。 如果你想要即用型的简单脚本,或者懒得自己琢磨,那你来对地方了! 请注意:由于我绝非编码/脚本专家,且用户自定义场景的变化和使用情况几乎无穷无尽:我不会回答任何关于这些脚本使用的问题!我不会修改任何应要求发布在此处的现有脚本,除非我认为有必要。 我这样说是因为编写脚本的方式和方法有无数种,你可能知道更好的方法,这很棒!我只是不想在这里不断修改内容。 这里的许多代码都要归功于 Bohemia.net 论坛上的各位。 我绝不想假装所有这些代码都是我创建的,虽然我自己编写了一些,但大部分是来自 Bohemia 论坛的修改代码。 你可以建议脚本,如果我理解其工作原理并认为它是有用的补充,我可能会将其添加到此集合中。我会不时积极添加新的代码和脚本,因此你未来再次查看本指南时可能会发现新内容。
话虽如此,我已对这些脚本进行了制作、记录和修改,大部分情况下只需复制粘贴,你只需根据个人使用情况稍作调整即可。 使用手册/重要信息
我设计这些脚本时,几乎所有脚本都可在Eden编辑器内完成,因此大多数情况下无需使用description.ext或init.sqf。 每当我提到Unit ID或其他带有ID的内容时,均指单位变量名。 本指南中列出的代码遵循以下格式,但有时由于文本长度限制可能会显示不全,因此为了更好地查看代码,建议将代码复制粘贴到记事本++或其他文本编辑器中。 Func = { CODE; }; 由于此处代码量较大,建议使用CTRL+F来搜索特定代码。 通常,大写的内容表示你需要根据自己的需求进行修改或更改。每个脚本代码前都有【Unit Init】或【Trigger】,这一点不言自明,但值得一提的是,Unit Init也可以是物体的初始化,例如箱子或载具。 你会发现我很不喜欢使用.sqf文件,我实在讨厌频繁切换窗口,因此这里的几乎所有代码都将专门在Eden Editor( Eden编辑器)内使用。不过需要注意,如果你希望在sqf文件中使用某些代码,可以提取函数代码,并使用nul=execVM "scripts YOURSCRIPTS.sqf";来调用它们,因为在很多情况下,我已经将.sqf脚本转换为了函数。在本指南最底部的【非编码相关工具】部分,我发布了一些外部网站,这些网站应能在任务创建过程中派上用场并提供帮助。 【通过按键触发的单位初始化动作】 这是一个通过你设置的自定义键盘按键来激活其他代码的模板。 代码:[] spawn { waitUntil {!isNull(findDisplay 46)}; (findDisplay 46) displayAddEventHandler ["KeyDown", { if(_this select 1 == YOURKEY) then { WHATEVERCODEYOUWANTTOACTIVATE; }; }]; }; 注意事项: 将YOURKEY更改为你想要的任意按键,可参考其他部分的链接来查找所需键盘按键的键码。 在WHATEVERCODEYOUWANTTOACTIVATE处,放置你希望在按键被按下时执行的任意代码。额外内容: 要查看按键列表,请访问相关页面。 【单位初始化】使用按键按下的动作(条件语句版本) 重要!此设置为“J”键。查看下方额外说明以获取其他按键的相关链接。 只需将提示信息替换为您希望执行的代码即可。 代码:[] spawn { waitUntil {!isNull(findDisplay 46)}; (findDisplay 46) displayAddEventHandler ["KeyDown", { if(_this select 1 == 0x24) then { hint "哈哈,这是一条消息!!!"; }; }]; }; 说明: 上述代码中的0x24是“J”键的标识符,若要更改,请查看此评论下方“额外内容”部分的链接,搜索J键对应的0x24,然后找到您想要的其他按键并替换它。 额外内容: 相关链接已屏蔽。【单位初始化】医疗动画 这是一个非常常见的动画,用于任何与医疗相关的场景,并且非常实用,因为它会根据站姿、站立、跪姿或俯卧等状态动态变化。 此外,当动画结束时,处于该动画中的玩家或AI会在动画完成后退出。 持续时间约7秒。 代码:this playActionNow 'Medic'; 注意事项: 单独使用时它只是一个动画,但你可以将其与例如添加动作来调用它,并与治疗代码结合使用。 【单位初始化】动画(新方法) 带有此代码的单位在检测到敌人时会无缝中断其动画。 将"SIT_LOW"替换为其他内容,可在相关链接中找到。
代码:[this, "SIT_LOW", "ASIS"] call BIS_fnc_ambientAnimCombat; 说明: 检测到敌人时会中断动画。 可无缝、自然地切换到战斗模式。 有关动画列表,请查阅相关游戏资料。 补充: 我尚未找到在单位中断环境动画以攻击敌人后重新进入环境动画的方法。因此使用此代码时请注意这一点。 【单位初始化】动画(旧方法) 应用此代码的单位将被设置为特定动画,即使检测到敌人也不会中断,除非在其初始化字段中同时添加以下“额外代码”。如果使用额外代码,过渡将不流畅(实际上非常生硬),但此方法比上面发布的新方法可使用更多动画。无法翻译的内容已删除
代码:[this, "WATCH", "ASIS"] call BIS_fnc_ambientAnim; 注意事项: 这种较旧的方法优势在于可以使用更多动画,但缺点是不像新方法那样无缝衔接;动画会突然变化,看起来很生硬。 有关动画列表,请访问相关游戏资料页面。 补充内容: 若要在检测到敌人后停止动画,可使用: { waitUntil {_this call BIS_fnc_enemyDetected}; _this call BIS_fnc_ambientAnim__terminate; }; 【单位初始化】将一个物体附加到另一个物体 首先确保为要附加的物体命名,然后修改坐标。 通过这种方法可以实现一些奇特的组合,但该方法不包含任何旋转选项。
代码:this attachTo [OBJECTNAMETOATTACHTO, [0, 0, 1]]; 注意事项: 为了更好地放置对象,无需在每次输入后都打开 Eden Editor, 给你要附加的对象命名一个ID,而不是使用“this”, 按下播放键,进入游戏世界后按ESC键,然后输入代码并在本地初始化,修改数值。 XYZ坐标说明:第一个是左右方向,第二个是前后方向,第三个是高度。 [单位初始化] 武器库(装备菜单)
代码:0 = ["AmmoboxInit",[this,true]] spawn BIS_fnc_arsenal; 说明: 放置任意物体并在其初始化字段中设置此代码。 【单位初始化】武器库/仅限RHS俄军和美军 重要提示:自然,你需要RHS模组才能使用此功能。 代码:[this, 0] call RHS_fnc_virtualAmmoBoxRus; [this, 0] call RHS_fnc_virtualAmmoBoxUSA; 说明: 你可以使用其中一个、另一个或两者都用。 此外,武器库会显示两次,但这不应该是问题。 【单位初始化】战地坦克控制(单人坦克控制) 如果你想像在战地系列游戏中那样独自控制坦克或任何载具,请使用此代码。
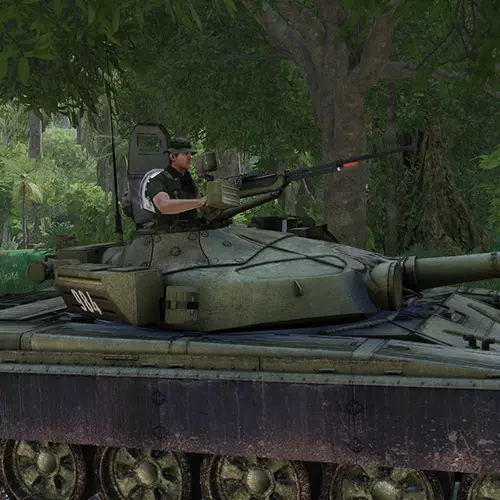
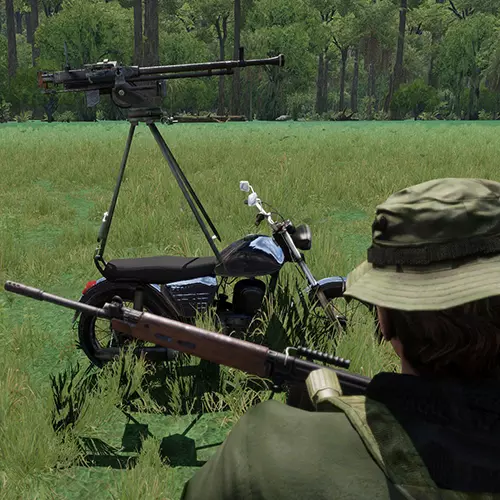
代码:此调用 { 若(为服务器)则 { _this 锁定炮塔 [[0], 真]; _this 锁定炮塔 [[0,0], 真]; _this 锁定货物 真; _this 添加多人事件处理器 ["MPKilled", { 若(为服务器)则 { _d = 驾驶员 (_this 选择 0); _g = 炮手 (_this 选择 0); 若(非空 _d)则 {删除载具 _d}; 若(非空 _g)则 {_g 设置损伤 1}; }; }]; }; 若(非(内容无法识别,已删除)说明: 将此代码粘贴到载具的初始化字段中。 【单位初始化】子弹曳光弹(穿透值) 注意:使用此代码时需谨慎,因为绘制过多线条会导致严重卡顿。另外请注意,除非你先“停止”子弹轨迹,否则这不知为何无法生效。 因此,首先运行停止代码,然后再运行实际代码以启动它。 更新:不先运行停止脚本也可能生效,但如果不行,只需使用停止脚本即可。
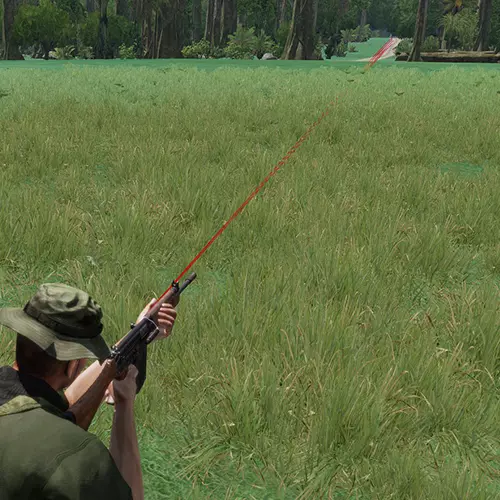
代码:[玩家] call BIS_fnc_traceBullets; 备用代码:[玩家, 200] call BIS_fnc_traceBullets; 注意事项: 要停止追踪,使用:BIS_tracedShooter = nil; 此外,在启用子弹追踪前使用此代码以确保其正常工作。 在备用代码中,数值(上例中的200)表示要追踪的子弹数量。 [单位初始化] 更改面部 一个用于更改单位面部的简单脚本,如果你希望玩家拥有特定的面部(例如用于故事或叙事任务),这会很有用,因为默认情况下,用户的自定义角色面部会应用到所选的可玩单位上。
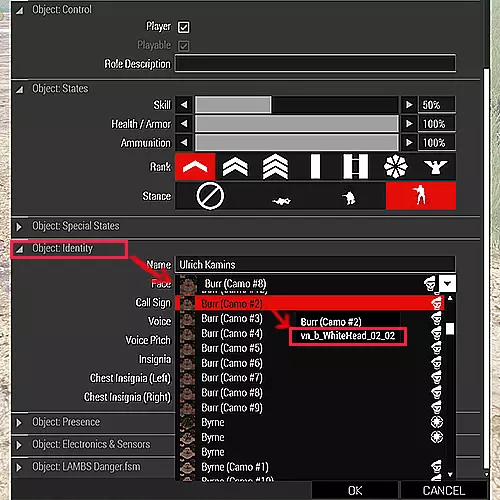
代码:this setFace "FACE_NAME"; 注意事项: 在单位属性中,进入【对象:身份】部分,选择一个面部并点击确定,然后可以在 eden 编辑器中预览该面部。 找到想要的面部后,再次返回【身份】部分,将鼠标悬停在面部上,会显示两行信息,取下方那行并将 FACE_NAME 替换为该面部名称。 【单位初始化】通过按键检查弹药 使用此代码可将武器弹匣中的弹药数量以提示框形式显示。 此代码的按键输入为 ALT+R。 如果想要更改按键输入,请查看下方注意事项。 代码:[] spawn { while {sleep 1.当前配置下,此代码的触发组合为ALT+R。其中,R键对应代码0x13(更多相关信息可查看“其他”部分),而“_alt”则指示脚本使用ALT键。在提示消息上方,你会看到“if (_alt) then”这一语句,你可以将其中的“alt”修改为“_ctrl”或“_shft”,以更改触发按键。此外需要注意的是,此处的休眠时间设置为1.0,这意味着弹药检查将每秒钟进行一次。如果你希望更流畅地检查弹药,可以降低此数值(例如降至0.1甚至0.01),但如果你不经常检查弹药数量,那么降低该数值并非必需。 额外内容: 【单位初始化】清空货物库存 可用于弹药箱或载具。
代码:clearWeaponCargoGlobal this; clearMagazineCargoGlobal this; clearItemCargoGlobal this; clearBackpackCargoGlobal this; 说明: 你可以删除此代码的部分内容,以仅移除特定类型的装备。 按原样使用此代码将移除所有装备。 【单位初始化】删除单位或道具 一个用于删除物体的简单代码。 代码:deletevehicle OBJECT_NAME; 说明: 如果你不想麻烦给道具设置ID,可以将OBJECT_NAME替换为“this”。 【单位初始化】强制第一人称视角 使玩家在尝试切换到第三人称视角时,自动回到第一人称视角。
代码:0 = [] spawn { while {time<30000000000000} do { sleep 0.05; if (cameraView == "EXTERNAL") then { vehicle player switchCamera "INTERNAL" } } }; 说明: 将此代码设置到可操控单位的初始化字段中。 【单位初始化】强制步行 此代码非常简单,更适用于过场动画场景或让玩家在叙事故事场景中步行。对于 Zeus 模式也相当实用。 代码:player forceWalk true; 补充: 若要允许再次奔跑,将 true 改为 false。 当将代码放入 AI 的初始化字段时,可将 "player" 替换为 "this"。 【单位初始化】锁定/解锁载具 这是一个快速简单的锁定或解锁载具的代码。 代码:this lock true; 说明: 如你所料,将 lock 设置为 false 即可解锁。【单位初始化】防止玩家立即死亡 将此代码放入可操控单位的初始化字段,可防止玩家因头部中弹等致命伤害而立即死亡。 这在叙事任务中非常实用,或者当你希望玩家有更多机会互相治疗,避免有人瞬间死亡时也很有用。 玩家可能会被击倒并失去意识,但不会被杀死。 有两个版本,分别适用于默认《武装突袭》和【Project Injury Reaction】。 默认版本: 代码:DamageSwitch = 5; this addEventHandler [ "HandleDamage", { _unit = _this select 0; _damage = _this select 2; if (_damage > 0.9 && DamageSwitch >= 0 ) then { DamageSwitch = DamageSwitch - 1; _damage = 0.添加动作 [ "自我治疗", "(_this select 1) setDammage 0, this removeItem 'FirstAidKit', DamageSwitch = 5, this playActionNow 'Medic'", nil, 6, true, true, "", "(getDammage _target) != 0 AND _this == _target AND 'FirstAidKit' in (items _this)" ]; 伤害反应项目版本: 代码:this addEventHandler [ "HandleDamage", { _unit = _this select 0; _damage = _this select 2; if (_damage > 0.9) then { _damage = 0.8; }; _damage; } ]; 说明: 默认版本: DamageSwitch = 5; 此参数控制无敌状态,数值越高玩家无敌时间越长,玩家仍会被击倒和受伤,但不会死亡。 5通常足以承受致命枪击,但地雷、火箭筒等大型武器仍会杀死玩家。将其设置为15左右可以抵御地雷和火箭筒攻击,设置为25则能承受炸药包爆炸。 使用此方法时,你需要使用“自我治疗”动作而非常规治疗,因为这会重置伤害开关(如果你受到伤害,伤害开关的数值会降低)。 自我治疗仅在玩家拥有急救包时生效,使用一次自我治疗会消耗一个急救包。 伤害反应计划版本: 在此版本中,玩家始终处于无敌状态,无法以常规方式死亡。但由于伤害反应计划包含流血和昏迷模式,这意味着玩家会被击晕,如果不及时治疗就会流血致死。 【单位初始化】将武器背在背上(使用自定义键位) 重要提示!此功能使用“5”键。不知道为什么这会如此复杂,但我找不到更简单的方法了。
无法识别或无法翻译,已删除。说明: 若想使用“5”以外的键盘按键,请将代码中的“0x06”替换为其他值,可通过相关资料查询按键输入代码。0x06对应5,位于数字键部分。 【单位初始化】移除地图 如果使用预设装备组,且希望无需修改这些装备组就能移除地图,此功能会很有用。

代码:this unassignItem "itemMap"; 说明: 将此代码设置到可操控单位的初始化字段中。 【单位初始化】设置高度 这是一个我在《武装突袭2》中经常使用的简单脚本,激活后可设置玩家、AI或物体的高度。
代码:this setPos [getPos this select 0, getPos this select 1, HEIGHT]; 说明: 虽然我们可以通过 Eden Editor 设置高度,这乍一看似乎没什么意义,但使用此代码的优势在于可以与生成物体相结合,例如生成一架直升机时,使用此代码可以设置其初始高度。 [单位初始化] 将单位设为俘虏 在单位的初始化字段中输入此代码,将使他们举手投降。

代码:this setCaptive true; this action ["Surrender", this]; [单位初始化]规定士兵清理 这将清空士兵的全部 inventory(物品栏)。

代码:removeAllWeapons this; removeAllItems this; removeAllAssignedItems this; removeUniform this; removeVest this; removeBackpack this; removeHeadgear this; removeGoggles this; removeAllContainers this; 说明: 可选择要移除的内容。如果使用全部代码,玩家或AI将被完全剥夺所有装备。 【单位初始化】静态人物 这在测试或过场动画场景中很有用。

代码:this disableAI "Move"; this setunitpos "UP"; 说明: 将上述代码复制粘贴到目标单位的初始化字段中。 这将禁用单位移动并使其直立站立。 【单位初始化】切换灯光/营火 此功能可用于打开或关闭路灯、营地灯等的灯光。 路灯/灯具版本 代码:this switchLight "OFF"; 备用代码:this addAction ["开灯", {LAMP_ID switchLight "ON";}]; this addAction ["关灯", {LAMP_ID switchLight "OFF";}]; 营火版本 代码:OBJECT_ID addAction ["营火开启", {CAMPFIRE_ID inflame true;}]; 说明: 此处第一段代码会关闭灯光,如需开启灯光,将OFF改为ON即可。Alt代码会为你提供一个addAction菜单来切换灯光,这对聚光灯或小型灯具很有用,但你必须给每个灯具一个唯一ID,因此需要为每个灯具更改LAMP_ID,并使用此代码在addAction代码中更改ID。 营火版本默认为开启状态,若要关闭燃烧的火焰,需将其设置为关闭。 【单位初始化/小组组长】巡逻 重要提示:确保此代码位于小组组长的初始化字段中,不要与小组的初始化字段混淆。必须放在士兵本人的初始化字段里。
代码:[group this, getPos this, 200] call BIS_fnc_taskPatrol; 说明: 设置巡逻半径的数值(单位:米)。本示例使用200米。 [单位初始化/小组组长]将士兵部署到建筑物内 重要提示:确保此代码位于小组组长的初始化字段中,不要与小组的初始化字段混淆。必须放在实际士兵的初始化字段内。
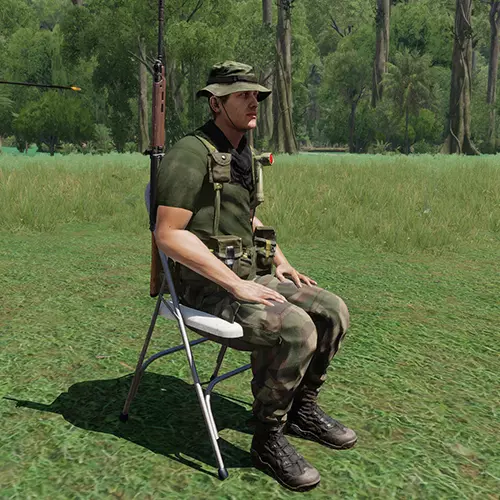
代码:如果(是服务器)则 { _单位组 = 单位组 组 此单位; _房屋 = 最近建筑 此单位; _房屋 = _房屋 建筑位置 -1; _房屋 = _房屋 调用 BIS_fnc_arrayShuffle; 如果(_单位组数量 > _房屋数量)则 {_单位组 调整大小(_房屋数量);}; { _单位 禁用AI "PATH"; _单位 设置单位姿态 随机选择 ["UP","UP","MIDDLE"]; _单位 设置位置(_房屋 选择 _循环索引); _单位 添加事件处理器["Fired",{参数 ["_单位"];_单位 启用AI "PATH";_单位 设置单位姿态 "AUTO";_单位 移除事件处理器 ["Fired",_此事件处理器];}]; } 循环 _单位组; }; 说明:此代码将士兵部署到其所在位置附近最近的建筑物中。一种巧妙的随机分配单位进驻房屋的方法:在考虑整个区域的部署时,将单位的部署半径属性设置为较高的值,它们就会随机生成在某个位置,然后进驻离它们最近的建筑。 【单位初始化/小组 leader】随机小组生成位置 重要提示:确保此代码位于小组 leader 的初始化字段中,不要与小组的初始化字段混淆。必须放在实际士兵的初始化字段里。 与部署半径不同(部署半径会随机化单位中每个士兵的位置),使用此代码会将整个小队随机放置在同一随机区域内。代码:_pos = [[[getPos this, 数字]]] call BIS_fnc_randomPos; {_x setPos _pos;} forEach (units (group this)); 注意: 将数字更改为你想要的数值,输入的数字单位为米。 [单位初始化 + 游戏逻辑] 让AI向选定目标开火 要实现此功能,你还需要一个游戏逻辑,可在以下位置找到: 系统选项卡(F5)-> 逻辑实体 -> 对象 在其中找到游戏逻辑,将其放置在某处并为其指定变量名,以下代码使用“GL1”作为游戏逻辑的变量名。 当然,你还需要为要射击的目标指定变量名。 这是一个实用的脚本,尤其在制作射击场时,AI可以按你设定的时间间隔向指定目标射击。 代码:null = this spawn {_this dotarget TARGET_1; sleep 0.5; while {alive TARGET_1 and alive _this} do {sleep TIME; GL1 action ["useweapon",vehicle _this,_this,0]; }}; 说明: TARGET_1是目标ID,TIME是射击间隔秒数。 补充: 在载具中同样适用,但需满足: 1. 代码需赋予炮手。 2. 根据载具不同,若有多名乘员可能无法正常工作,例如需要车长下达瞄准指令。仅保留炮手可使载具转向目标。 若载具中同时存在车长,可能出现载具射击但炮塔不转向设定目标的情况。 [单位初始化+指针] AI坐椅子 有两个版本,一个是坐在桌前并倚靠桌面,另一个是仅坐在任意原版椅子上。
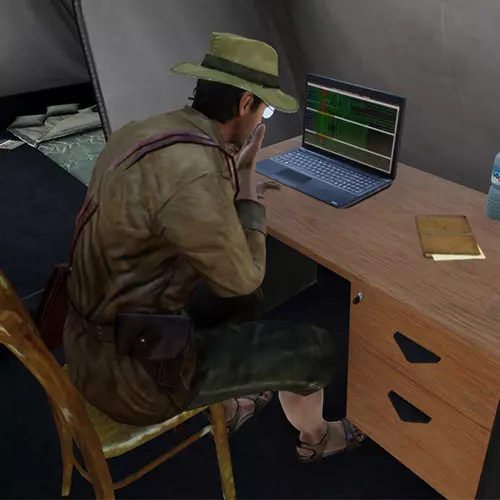
代码(基础椅子版本):[this,"SIT1", "ASIS"] call BIS_fnc_ambientAnim; 0 = this spawn {waitUntil {behaviour _this == "combat"}; _this call BIS_fnc_ambientAnim__terminate;} 代码(桌子版本):[this, "SIT_AT_TABLE","ASIS",POINTERNAME] call BIS_fnc_ambientAnim; 注意: 重要! 第一个版本(据我所知)仅适用于基础游戏中的资产,因此可能不适用于不同模组的椅子。 第二个版本,即桌子版本,需要设置一个指针(在道具/空物体部分找到的项目,例如:查找【青色指针】),并给它一个ID_NAME,即POINTERNAME。 将此指针放在椅子上方,因为AI实际上会坐在指针上。 【单位初始化/添加动作】添加动作(滚动菜单)
代码:OBJECT_ID addAction ["动作名称", {你想要执行的任意代码}]; 示例: this addAction ["玩家曳光弹", {BIS_tracedShooter = nil, [this, 20] call BIS_fnc_traceBullets;}]; 说明: OBJECT_ID是应具有滚动菜单的对象ID。 你可以将OBJECT_ID更改为"this",以指代玩家或对象。 动作名称是将显示在滚动菜单中的内容。 你想要执行的任意代码可以是任何内容,只需在其中放入你希望该动作执行的操作,例如传送或更改时间。 [单位初始化/添加动作] 更改AI的目标 此代码在射击场等场景中非常有用,你可以通过它更改AI的目标。 但你也可以考虑其他使用场景。代码:OBJECT_ID addAction ["动作名称", {UNIT_ID doWatch objNull, UNIT_ID dotarget TARGET_ID;}]; 说明: OBJECT_ID 是一个ID,也可以设置为"this"。 此代码使用addAction,但并非必须。 动作名称可以设置为其他任意名称。 UNIT_ID 是执行瞄准的单位。 TARGET_ID 是目标。 [单位初始化/添加动作] 玩家坐在椅子上 这又是一个将“坐在椅子上”这种简单操作复杂化的代码。 将此代码添加到椅子本身。(仅在地面上有效,在任何高处都无法正常工作。)
代码:切换动作函数={私有["_物体","_动画"];_物体=_this选择0;_物体切换动作_动画;};站立函数={玩家切换动作"";玩家移除动作站立;};坐下函数={_椅子=_this选择0;_单位=_this选择1;[[_单位,"乘员"],"切换动作函数"]生成BIS_fnc_MP;_单位禁用碰撞与_椅子;_椅子禁用碰撞与_单位;_单位设置位置(获取位置_椅子);_单位设置位置ATL(获取位置ATL_椅子);_单位设置方向((获取方向_椅子)-180);站立=_单位添加动作["<t color='#0099FF'>站起来</t>",站立函数];_单位设置位置[获取位置_单位选择0,获取位置_单位选择1,((获取位置_单位选择2)+1)];_单位设置位置ATL[获取位置ATL_单位选择0,获取位置ATL_单位选择1,((获取位置ATL_单位选择2)-2)];};this添加动作["坐下",功能设置]; 致谢:MacRaes [单位初始化/添加动作] 推动物体 将此功能添加到任意物体中,即可获得推动该物体的选项。最适合用于将搁浅的船只推回水中。
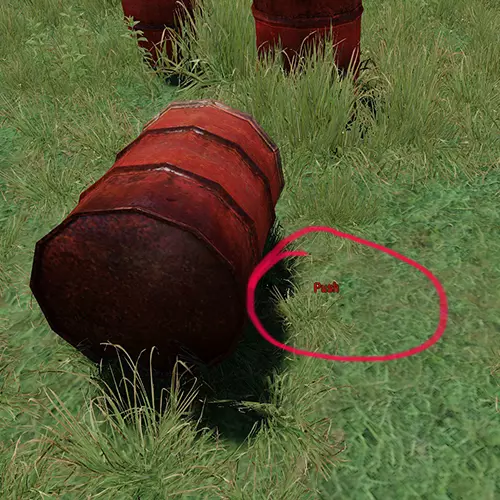
代码:pushObject = { _object = _this select 0; _user = _this select 1; if (_user != vehicle _user) exitwith {hint "你个笨蛋,不能在载具里推东西!"}; _dir = getDir _user; _dx = sin(_dir)*4; _dy = cos(_dir)*4; _object setVelocity [_dx,_dy,0]; }; push1 = [[this,["<t color=""#CC0000"">推</t>", pushObject,[], 9,true, false, "","((vehicle _target) distance (vehicle _this)) < 8"]],"addAction",true] call BIS_fnc_MP; 注意事项: 此功能可能被滥用,请注意使用,因为玩家可以推动引擎损坏的载具... 将*4设置为不同的值可以修改推力大小。 此外,并非所有物体都可以被推动,无法被推动的物体可能会杀死接触它的玩家或AI,似乎是因为速度被困在物体中或其他原因。credits: jinkerGM [单位初始化/添加动作] 背上武器 代码: if (hasInterface) then { player addAction ["背上武器", { player action ["SWITCHWEAPON",player,player,-1]; }, nil, 0, false, true, "", "vehicle _originalTarget == _originalTarget"]; }; [单位初始化/添加动作] 远程控制 代码: OBJECT_NAME addAction ["动作名称", {selectPlayer TARGET_UNIT_ID;}]; 注意事项: OBJECT_NAME 可设为 "this"。 ACTION_NAME 可自定义。 TARGET_UNIT_ID 是你希望控制的单位。 补充内容: this addAction ["返回", {selectPlayer PLAYER_ID;}]; 在目标单位的初始化字段中使用此代码,可返回玩家控制。 PLAYER_ID 即玩家自身的ID。【单位初始化/添加动作】修复并扶正载具/简易版 将SET_TIME更改为修复和扶正载具所需的持续时间,并将其放入载具的初始化字段中。
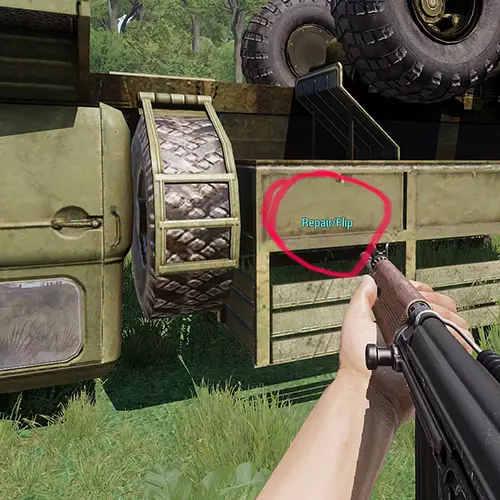
代码:repairFunc = { _timeForRepair = 设置时间; _vehicle = vehicle player; hint format ["请等待%1秒进行修理/翻转",_timeForRepair]; sleep _timeForRepair; if (_vehicle == player) then { _vehicle = cursorTarget; }; _vehicle setfuel 1; _vehicle setdamage 0; _vehicle = nil; _vehicle = _this select 0; _vehicle setvectorup [0,0,10]; _vehicle setPos [getPos _vehicle select 0, getPos _vehicle select 1,1.5]; }; this addAction [("<t color=""#66FFFF"">" + ("修理/翻转") +"</t>"), repairFunc,[],1,false,true]; 说明: 只需将此代码粘贴到载具的初始化字段中并编辑设置时间。 作者:TAW DAZ [单位初始化/添加动作] 跳过时间 代码:对象名称 addAction ["动作名称", {skipTime 数字;}]; 说明: 对象名称可设置为"this"。 动作名称可以是任意内容。将跳过时间数值设置为以小时为单位的跳过时长。 [单位初始化/添加动作] 自杀式炸弹脚本 此脚本供玩家使用,更适用于游戏管理员或远程控制。
代码:this addAction ["ㅤ","'R_80mm_HE' createVehicle position BOMBER_ID; removeAllActions BOMBER_ID"]; 注意: 激活操作会被其他玩家看到,因此炸弹激活的名称使用了隐藏字符以使其不可见。 单位必须有唯一ID,请将BOMBER_ID替换为该ID(变量名称)。 [单位初始化/添加动作] 传送 在各种场景中非常实用,通常用于旗杆上实现从一个地点传送到另一个地点。 代码:OBJECT_NAME addAction ["ACTION_NAME", {player setPos (getPos TELEPORT_LOCATION_OBJECT_ID)}]; 注意: OBJECT_NAME可以设置为"this"。 ACTION_NAME可以是任意名称。 TELEPORT_LOCATION_OBJECT_ID是玩家将被传送到的对象ID,可以是旗杆或箱子等。额外功能: 若需传送到包含高度的位置(例如传送到塔顶),可使用以下代码: OBJECT_NAME addAction ["ACTION_NAME", {player setPos (getPos TELEPORT_LOCATION_OBJECT_ID), player setPosATL (getPosATL TELEPORT_LOCATION_OBJECT_ID)}]; 【单位初始化/添加动作+触发器】补给区域 以下代码可通过添加动作菜单的道具,在触发器区域内为载具进行补给。 此脚本包含多个版本: - 维修 - 加油 - 装弹 - 维修与加油 - 维修、加油与装弹 请确保放置一个触发器并为其命名变量名。更多详情见下方说明。 将代码放入道具中(例如箱子或面板),该道具将获得添加动作菜单。
Tip: You can pick & mix these scripts. So you can take say the Repair Version and Rearm Version both and have a Repair and Rearm leaving out the Refuel Option. Repair Version Code:this addAction ["Repair", { RepairResetTimer = YOURTIMERVALUE; RepairField = YOURTIGGER_ID; RepairChangeTime = RepairResetTimer; for "_i" from RepairChangeTime to 1 step -1 do { hint format ["Repairs in progress... Time: %1" , RepairChangeTime]; RepairChangeTime = RepairChangeTime -1; sleep 1; }; { private _veh1 = _x; _veh1 setdamage 0; } forEach (vehicles select {_x isKindOf "VEHICLETYPE" && _x inArea RepairField}); hint "Repairs are completed."; RepairChangeTime = RepairResetTimer; }]; Refuel Version Code:this addAction ["Refuel", { RefuelResetTimer = YOURTIMERVALUE; RefuelField = YOURTIGGER_ID; RefuelChangeTime = RefuelResetTimer; for "_i" from RefuelChangeTime to 1 step -1 do { hint format ["Refueling in progress... Time: %1" , RefuelChangeTime]; RefuelChangeTime = RefuelChangeTime -1; sleep 1; }; { private _veh2 = _x; _veh2 setfuel 1; } forEach (vehicles select {_x isKindOf "VEHICLETYPE" && _x inArea RefuelField}); hint "Refueling is now completed."; RefuelChangeTime = RefuelResetTimer; }]; Rearm Version Code:this addAction ["Rearm", { RearmResetTimer = YOURTIMERVALUE; RearmField = YOURTIGGER_ID; RearmChangeTime = RearmResetTimer; for "_i" from RearmChangeTime to 1 step -1 do { hint format ["Rearming in progress... Time: %1" , RearmChangeTime]; RearmChangeTime = RearmChangeTime -1; sleep 1; }; { private _veh3 = _x; _veh3 setVehicleAmmo 1; } forEach (vehicles select {_x isKindOf "VEHICLETYPE" && _x inArea RearmField}); hint "Rearming finished."; RearmChangeTime = RearmResetTimer; }]; Repair and Refuel Version Code:this addAction ["Repair and Refuel", { ResetTimer = YOURTIMERVALUE; RepairAndRefuelField = YOURTIGGER_ID; RepairAndRefuelTimer = ResetTimer; for "_i" from RepairAndRefuelTimer to 1 step -1 do { hint format ["Repairs and Refueling is now in progress... Time: %1" , RepairAndRefuelTimer]; RepairAndRefuelTimer = RepairAndRefuelTimer -1; sleep 1; }; { private _veh0 = _x; _veh0 setdamage 0; _veh0 setfuel 1; } forEach (vehicles select {_x isKindOf "VEHICLETYPE" && _x inArea RepairAndRefuelField}); hint "Repairs and Refueling finished."; RepairAndRefuelTimer = ResetTimer; }]; Repair, Refuel and Rearm Version Code:this addAction ["Repair, Refuel and Rearm", { ResetTimer = YOURTIMERVALUE; RepairAndRefuelAndRearmField = YOURTIGGER_ID; RepairAndRefuelAndRearmTimer = ResetTimer; for "_i" from RepairAndRefuelAndRearmTimer to 1 step -1 do { hint format ["Repairing, Refueling and Rearming in progress... Time: %1" , RepairAndRefuelAndRearmTimer]; RepairAndRefuelAndRearmTimer = RepairAndRefuelAndRearmTimer -1; sleep 1; }; { private _veh00 = _x; _veh00 setdamage 0; _veh00 setfuel 1; _veh00 setVehicleAmmo 1; } forEach (vehicles select {_x isKindOf "VEHICLETYPE" && _x inArea RepairAndRefuelAndRearmField}); hint "Repairs, Refueling and Rearming are now all completed."; RepairAndRefuelAndRearmTimer = ResetTimer; }]; Notes: YOURTIMERVALUE this is how long the resupply process will take in seconds. YOURTIGGER_ID this is the Triggers Variable Name that you must place and name. VEHICLETYPE must be set to a vehicle type, such as Helicopter or Tank more info on this in Extras. The resupply will only work if a vehicle is actually inside the trigger that you placed. Extras: To set the VEHICLETYPE you can either do (in Eden Editor): Tools -> {} ConfigViewer or press Alt+G to open the Config Viewer and manually look for vehicles to check the type. Or Right-Click (one a placed vehicle) and press {} Find in Config Viewer... This will find the vehicle in the Config Viewer and tell you what the type is. Important: When opening the Config Viewer, it can take a long time to load, especially if you have allot of mods. So be patient as it may appear frozen. Examples: M1A1 Abrams from RHS Mod: ["rhsusf_m1a1tank_base","MBT_01_base_F","Tank_F","Tank","LandVehicle","Land","AllVehicles","All"] Mi-24 from RHS Mod: ["RHS_Mi24V_vvsc","RHS_Mi24V_vvs","RHS_Mi24V_VVS_Base","RHS_Mi24V_Base","RHS_Mi24_base","Heli_Attack_02_base_F","Helicopter_Base_F","Helicopter","Air","AllVehicles","All"] In the M1A1 Abrams you will see "Tank" listed. In the Mi-24 you will see "Helicopter" listed. I will type the the vehicle types here that I looked up and can think of, but if its not listed here check the config viewer or the link below to see if you can find it. Types: Car Motorcycle Tank StaticWeapon Helicopter Plane Ship Building Thing You can also check out this link to find the vehicle types: https://arma.fandom.com/zh/wiki/ArmA:_CfgVehicles Special Thanks to pierremgi from https://forums.bohemia.net/ for helping me with the creation of these scripts. [Unit Init + Trigger + Marker] Placing a Tracking Marker on a Unit This will place a marker on a unit so that it tracks the unit on the map. You will need to set a marker, and a trigger for this and set the MAP_UPDATE_TIMER_VALUE value of how often you want the marker to update itself.
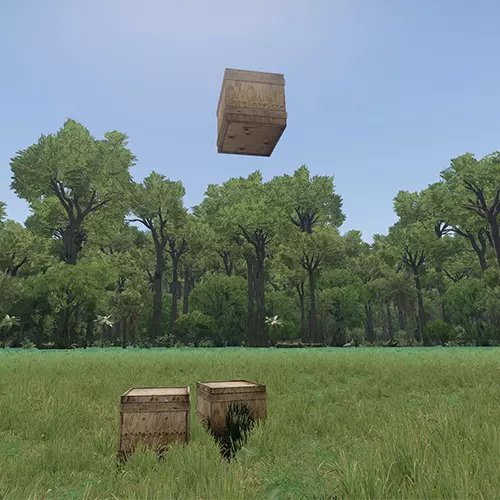
标记:追踪器标记 触发条件: 条件:非存活状态下的被追踪单位激活:删除标记"TRACKER_MARKER";单位初始化代码:[] spawn { while {not isnull 被追踪单位} do { "TRACKER_MARKER" setmarkerpos getpos 被追踪单位; sleep 地图更新计时器值; }; };; [触发器] 使用if语句进行倒计时并执行函数 代码:自定义计时器 = 设置你的时间; tList = list 触发器名称; 变量名 =[] spawn { while {自定义计时器 > 0} do { 自定义计时器 = 自定义计时器 - 1; hint str 自定义计时器; uiSleep 1; }; if (自定义计时器 isEqualTo 0) then { 你想要激活的任意代码 }; }; 注意:此列表无法工作,因为它位于代码块外部,因此你必须标记触发器名称,这里定义为"tList",在"代码块"内充当thislist,这是由于uiSleep或sleep函数的存在而必须执行的操作原因尚不清楚,该功能在这种模块之外无法使用。 [单位初始化]和[触发器]创建一个物品储存箱 此代码可让你为任何物品、对象或其他任何东西设置一个可存放装备的物品栏。 适用于将特定箱子设置为可存放货物,或让监狱牢房马桶等不起眼的道具变成隐藏的藏匿处。
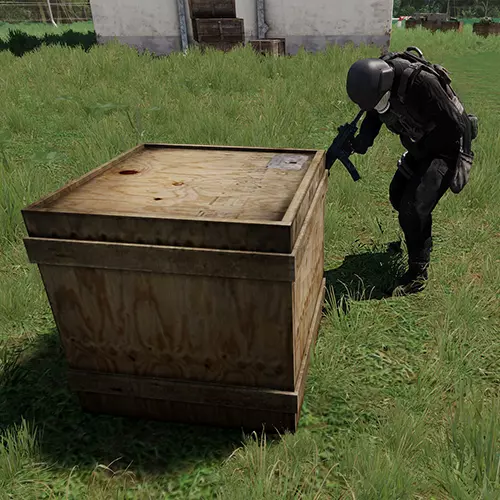
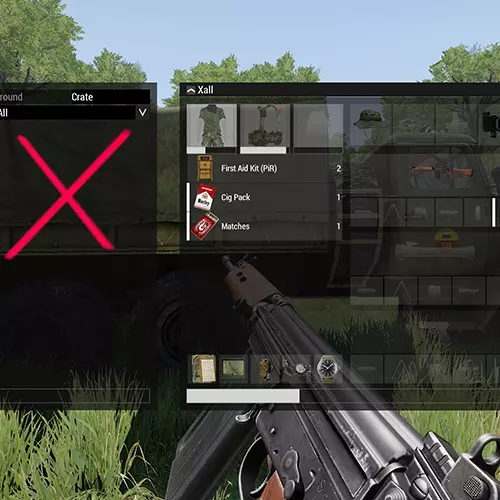
Unit Init Variant_cargo = "Supply500" createVehicle [0,0,0]; _cargo attachTo [this, [0,0,0.85]]; this addEventHandler ["Killed", { { detach _x, deleteVehicle _x; } forEach attachedObjects (_this select 0); }]; Trigger Variant Condition:true On Activation:EquipmentCrate = "Land_WoodenBox_02_F" createVehicle position thisTrigger; _cargo = "Supply500" createVehicle [0,0,0]; _cargo attachTo [EquipmentCrate, [0,0,0.85]]; EquipmentCrate addEventHandler ["Killed", { { detach _x, deleteVehicle _x; } forEach attachedObjects (_this select 0); }]; Notes: For the Unit Init variant its a simple case of copy and pasting the code onto an existing prop. For the Trigger variant you can change the item that is to be spawned, this example code uses "Land_WoodenBox_02_F", look for any prop and find its Classname, and simply replace the prop names. [Trigger] Creating Mist/Fog Condition:true On Activation:5 setFog [1, 1, 10] [Trigger] Damage or kill player/AI in trigger Useful for creating a limited play area. Code:{_x setDamage 1} forEach thisList; Note: 1 = 100% damage, 0.5 = 50% damage, etc. [Trigger] Death Counter This is a useful code which will count the amount of dead / killed units on a side that you can select. So for example you can count how many civilians were killed, and if a certain threshold is met, you can activate another code, say a lose condition. Conditiontrue On Activation:SideIs = XSIDEX; [] spawn { while {true} do { DeathCounter = {getNumber (configfile >> "CfgVehicles" >> typeOf _x >> "side") == SideIs} count allDeadMen; sleep 1; }; }; Notes: Change XSIDEX to a number, from 0 to 3: 0 = East, 1 = West, 2 = Independent, 3 = Civilian This code on its own does nothing more than count the number of dead, use it in combination with other codes. Extra: Paste this code just under sleep 1; to have a constant reading of how many are killed on a side. hintSilent format ["Killed: %1",DeathCounter]; Credits: Pierre MGI [Trigger] Ending a mission Set a condition, that could be for example a unit dying, and then add the following into the on activation: On Activation:call{endMission "END1";} [Trigger] Spawn Equipment On Trigger With this code you can add spawn any equipment on the trigger. Set the conditions to suit your needs. On Activation:Equipment = "U_C_Poloshirt_blue"; EquipmentSpawner = "WeaponHolderSimulated" createVehicle [0,0,0]; EquipmentSpawner setVariable ["BIS_enableRandomization", false]; EquipmentSpawner setPos (getPos thisTrigger); EquipmentSpawner addItemCargo [Equipment, 1]; EquipmentSpawner setDir floor (random 359); Notes: Change at the very top, the Equipment = "U_C_Poloshirt_blue"; to what you wish to spawn. Place an item/equipment in Eden Editor and hover over it to get the class name of the item. [Trigger] If Unit Is Dead This is very much like a if statement, if a unit dies then do X. Condition Code:call{!alive TARGET_UNIT_ID} On Activation:WHATEVERCODEYOUWANTTOEXECUTE Example: On Activation: call{Hint "Colonel is dead!"} [Trigger] If Losses are too great This code is useful when one side takes too much losses. Unlike the "[Trigger] Surrender after casualties" code, this checks for all of the units on a given side. So it does not merely check for a single squad but the entire western or eastern side is counted and they take a certain amount of casualties you can execute a code of your choice. Condition:_Counter = XSIDEX countSide allUnits; LOSSES > _Counter On Activation:WHATEVERCODEYOUWANTTOACTIVATE Notes: XSIDEX is the side you want to count, set this to west or east for example. _Counter counts all the units on the side you set in XSIDEX. LOSSES set this to the number of dead units to compare with _Counter. So if a force of 20 come at you from say the eastern side and you set LOSSES to 15, once you killed 15 units of the eastern units, you can activate a code. This could be for example a win scenario condition. Extra: Non-Trigger Version _Counter = XSIDEX countSide allUnits; if (LOSSES > _Counter) then { WHATEVERCODEYOUWANTTOACTIVATE; }; [Trigger] Modifying a players stats Here are some stuff you can put into a trigger to modify a players or units behaviour and stats. *Ignore the picture here, originally I had this set as a Unit Init, but a Trigger works better.
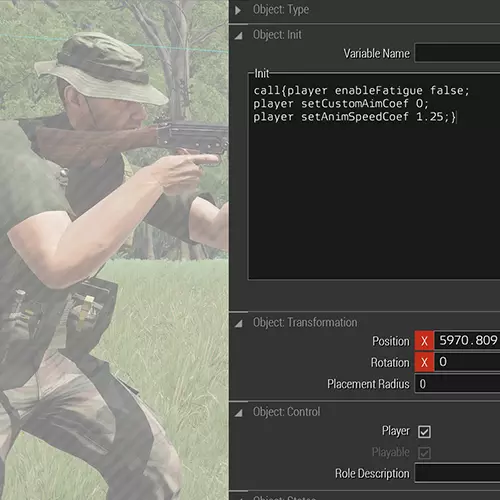
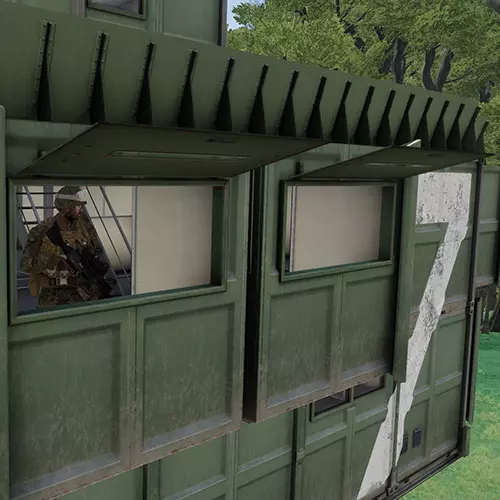
条件:true 激活时 等待直到{玩家不为空}; UNITNAME禁用耐力系统 false; UNITNAME设置自定义瞄准系数 0; UNITNAME设置动画速度系数 1.25; UNITNAME添加事件处理器["重生",{玩家禁用耐力系统 false}]; UNITNAME添加事件处理器["重生",{玩家设置自定义瞄准系数 0}]; UNITNAME添加事件处理器["重生",{玩家设置动画速度系数 1.25;}]; 注意事项: 设置触发器:计时器,计时器数值最小5、中间5、最大5 由于某些原因,如果立即激活此代码,它可能无法正常工作,因此5秒的延迟可以解决该问题。 额外信息: enableStamina = 是否启用耐力系统。 setCustomAimCoef = 武器晃动,0表示无晃动。 setAnimSpeedCoef = 整体加快动画速度,同时也会提高移动速度。【触发】游戏区域 使用此代码可设置一个有限的游戏区域,即一个边界框。如果玩家离开该区域,将在设定时间后死亡。 只需在停用代码中设置触发区域大小和计时器即可。 请阅读下方说明了解更多信息。变量名称:可游玩区域 条件:this && 玩家在该列表中 激活时:区域内可游玩 = true; 停用/未激活时:killFunc = {玩家设置伤害值 1;}; 区域外函数 = { 自定义计时器 = 10; 如果(区域内可游玩)则 { 变量名 =[] spawn { 当 {自定义计时器 > 0} 执行 { 自定义计时器 = 自定义计时器 - 1; 界面休眠 1; 提示 格式 ["你有 %1 秒时间返回可游玩区域", 自定义计时器]; 返回区域内 = [可游玩区域, 玩家] 调用 BIS_fnc_inTrigger; 如果(返回区域内)退出并执行 {提示 "已返回区域内";保持存活 = true;}; 如果(自定义计时器 == 0)则 {调用 killFunc;}; }; }; }; }; 调用 区域外函数; 注意: 不要忘记为此触发器命名并设置其大小。在“停用”代码中,你会找到custom_timer,其当前设置为10,这意味着处于区域外的玩家将在10秒后死亡。 根据你的需求修改此数值。 此功能不适用于直升机。 【触发器】打开/关闭大门 这适用于大门或路障栏杆,当你驶入触发器区域时,大门会打开;当你离开该区域时,大门会关闭。
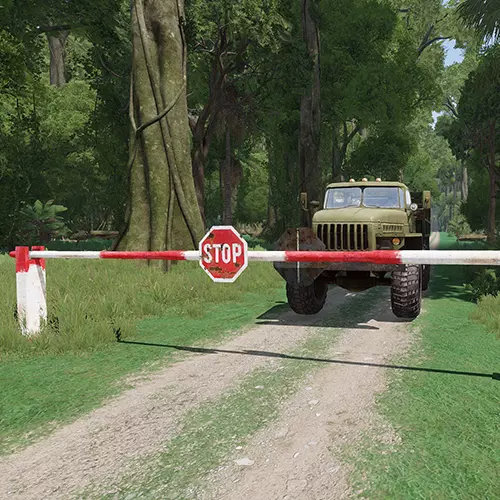
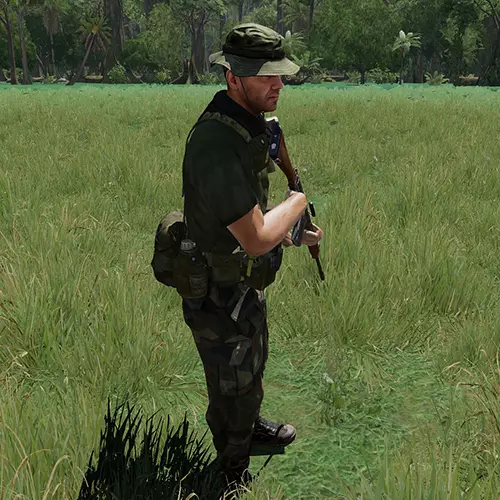
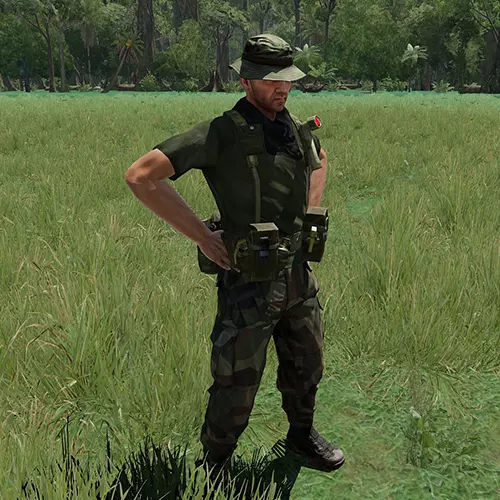
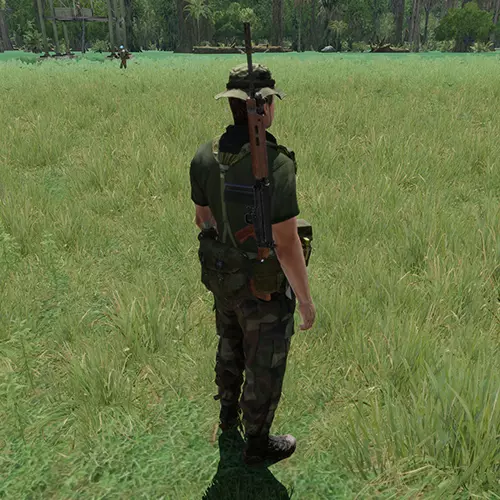
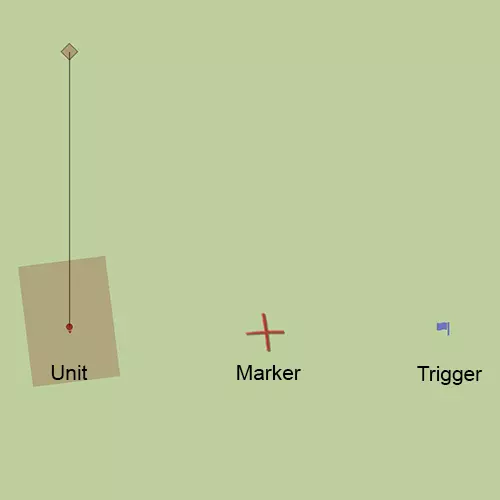
激活时:对象ID执行动画["Door_1_rot", 1] 停用/关闭时:对象ID执行动画["Door_1_rot", 0] 备注: 设置触发器大小,将激活条件设为任意玩家,激活类型设为存在。勾选可重复。 此设置适用于任何可开关的物体。 【触发器】随机时间与天气条件 一个简单的脚本,可在任务开始时随机化时间和天气条件。 增加了更多不可预测性和多样性。 条件:true 激活时:randomizer = random 1.00; randomTime = random 12; skipTime randomTime; 15 setFog randomizer; 60 setRain randomizer; 60 setOvercast randomizer; setHumidity randomizer; 备注: 这里控制随机化的两个主要参数是"randomizer"和"randomTime"。 对于randomizer,0表示不会改变任何内容,1表示...00表示可以达到100%。 如果你希望天气只是略微变差,将其设置为较低的值,例如0.20。 randomTime在此情况下会随机跳过0到12小时的时间。因此,无论你的起始时间是什么,它都会在起始时间上增加最多12小时。你可以根据需要随意更改此设置。 【触发条件】伤亡后投降 这适用于单个小队,因此请复制粘贴并为每个小队更改SQUADNAME,为每个小队创建一个触发器,并确保相应地更改小队ID。 此处的SQUADNAME指的是小组变量名称,要访问小组设置,请按小组的图标(不要与小组 leader 设置混淆),如下图所示。
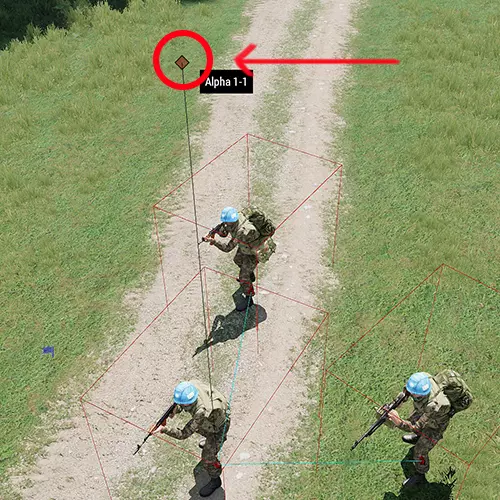
条件:({alive _x} count units SQUADNAME)< LEFTUNITS 激活时:{ _x setCaptive true; _x action ["Surrender", _x]; } forEach units SQUADNAME; 备注: 无论你为小组设置的SQUADNAME是什么,都要将相同的名称/ID放入触发器中。 LEFTUNITS是小队中剩余士兵的数量,如果士兵数量少于此数值,他们将投降。 例如,如果有5名士兵,你将LEFTUNITS设置为3,当单位中剩余士兵少于3名时,他们将投降,在这种情况下,剩余的2名士兵会投降。 [触发器+音乐文件夹+.OGG文件+description.ext]播放音乐

description.ext 文件代码: class CfgMusic { sounds[] = {01,02}; class 01 { name = "01"; sound[] = {"music YOURMUSIC1.ogg", db+10, 1.0}; titles[] = {0,""}; }; class 02 { name = "02"; sound[] = {"music jYOURMUSIC2.ogg", db+10, 1.0}; titles[] = {0,""}; }; }; 触发器: 条件:true 激活时:0 fademusic 1; playmusic "01"; 注意事项: 你需要在文档/arma3 中的任务文件夹内创建一个名为“music”的文件夹。 你需要创建一个 discription.ext 文件(可用记事本打开)。 在该文件中,你需要引用音乐文件。 音乐文件仅支持.OGG 格式! “01”是歌曲名称(在 discription.ext 中定义)。 这会使用游戏内的音乐音量。 确保不要将音乐关闭! [触发器 + 音乐文件夹 + 。【OGG文件】循环3D音乐 理解3D音乐的最佳方式是想象游戏中的收音机,它是音乐或声音的来源,你离它越近,声音就越大。 此脚本允许你通过触发器循环播放音轨。 条件:true 激活时:nul = [this] spawn { private _path = getMissionPath " Music YOURMUSICFILE.ogg"; MusicLength = XXX; MusicRange = XXX; while {true} do { playSound3D [_path, SOURCEOBJECT, false, getPosASL SOURCEOBJECT, 1, 1, MusicRange]; sleep MusicLength; }; }; 注意: 此代码假设你的任务文件夹中有一个名为“Music”的文件夹, 如果没有,请创建一个。 例如: C: Users YOURPCNAME Documents Arma 3 missions YOURMISSIONNAME.MAPNAME Music 将你的音乐或声音文件放入Music文件夹。据我所知,YOURMUSICFILE 必须是.OGG 格式。 将此重命名为你的音乐名称。 在 MusicLength 处,将 XXX 替换为你的音乐时长(以秒为单位)。 在 MusicRange 处,将 XXX 替换为你希望音乐被听到的距离,如果你输入 100,大约是 10 米,所以用米数乘以 10 即可。 将 SOURCEOBJECT 替换为触发器本身或其他对象的变量名称。 如果你遇到问题,我个人常遇到的情况是游戏内音乐被关闭,所以请确保音乐已开启,并再次检查你是否可以用可信的音乐播放器打开.OGG 文件,以确保该.OGG 文件能正常工作。 【触发器 + 视频文件夹 + .OGV 文件】播放影片 使用触发器播放过场动画。
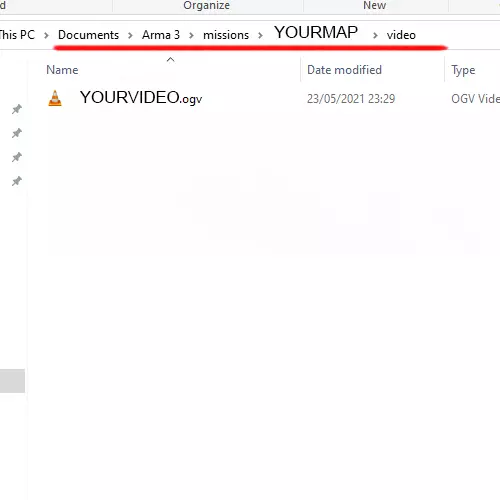
激活时:调用{["视频文件夹 视频名称.ogv"]调用BIS_fnc_playVideo;} 注意事项: 确保在任务文件夹中创建一个电影文件夹,并且格式必须为.ogv。 最后,确保为其他触发器设置计时器激活,以免中断过场动画,或在播放前结束其他内容。 示例: 文件夹路径:C: Users YOURPCNAME Documents Arma 3 missions YOURMISSIONNAME.MAPNAME music 视频文件:YOURVIDEOFILE.ogv 其他: 使用工具将mp4或其他格式转换为.ogv。 [触发器+标记]生成敌人小组并为其设置航点 为此,你需要放置一个触发器和一个或多个标记。 代码中列出的marker_Destroy是标记的ID,即生成单位将前往的航点。

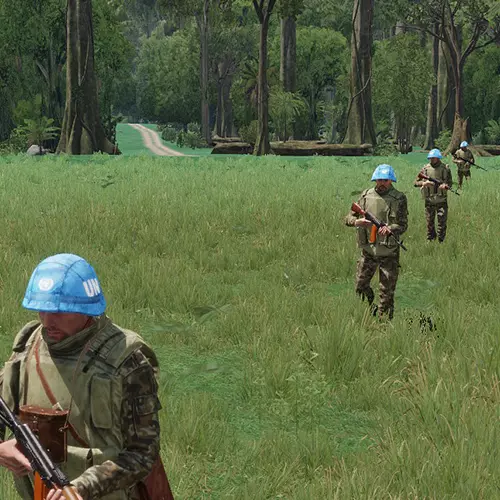
触发条件: 条件:true 激活时:randomAmbush = [ "生成位置_1","生成位置_2","生成位置_3" ] 调用 BIS_fnc_selectRandom; 生成单位 = [获取标记位置 randomAmbush,阵营, [ "单位类别_1", "单位类别_2", "单位类别_3" ] ,[],[],[],[],[]] 调用 BIS_fnc_spawnGroup; 路径点1 = 生成单位 添加路径点 [获取标记位置 "marker_Destroy",0,25]; 路径点1 设置路径点类型 "移动"; 路径点1 设置路径点行为 "安全"; 路径点1 设置路径点速度 "受限"; 备注: randomAmbush 可重命名。 生成位置_1 是生成点之一,可在此处添加任意数量的生成点。 阵营需设置为西方或东方等。 单位类别_1 是要生成的单位类别ID,更多详情见额外部分。在wp1中,25是航点的随机放置半径,数值越大随机性越强,0则表示完全精准。wp1还被设置为寻找marker_Destroy标记,该标记放置的位置就是生成单位将要前往的地方。根据需要更改类型、行为和速度。更多信息可搜索setWaypointBehaviour、setWaypointSpeed或其他与setWaypoint相关的内容。附加内容:
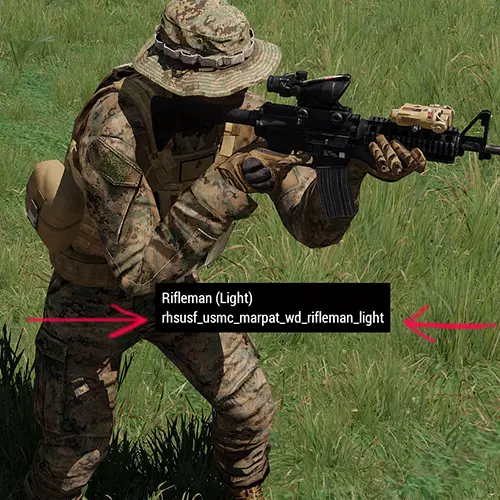
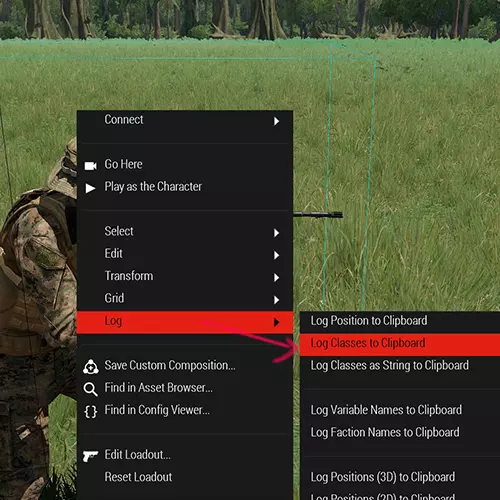
查看指定单位的类别名称,只需将鼠标悬停在该单位上,或者右键点击单位->日志->将类别记录到剪贴板。如果已记录到剪贴板,按CTRL+V即可粘贴类别名称。 【触发器+模块】通过添加动作激活模块(技巧) 这是一种非常特殊的通过触发器使用添加动作来激活模块的方法。我需要详细说明其工作原理,以便你能将此激活方法应用于除本例中将要使用的模块之外的任何其他类型的模块。 本示例将使用“显示/隐藏”模块。 首先放置两个此类模块。 在它们的属性字段中,将其中一个设置为“隐藏单位”,另一个设置为“显示单位”。接下来,将它们两者同步到那个要先隐藏后显示的对象上。 然后放置一个触发器,并在其条件字段中添加以下内容: 条件:!alive DESTROY_PROP; 接着,将此触发器同步到设置为“显示单位”的显示/隐藏模块。 放置一个道具(任何道具均可),并将其变量名命名为DESTROY_PROP。 然后再放置另一个道具,或者为“添加动作”选择你自己,并在初始化字段中输入以下内容: 初始化:this addAction ["显示", {deletevehicle DESTROY_PROP}]; 现在,当你运行游戏并使用“添加动作”菜单选择“显示”时,它将删除你设置并命名为DESTROY_PROP的道具。由于我们设置的触发器的条件为!alive DESTROY_PROP,当它检测到名为DESTROY_PROP的道具不再存在时,该触发器就会被激活。当单位摧毁道具后,会激活触发器,该触发器已同步用于激活模块。 注意: 此代码是为显示/隐藏模块设置的,但如果您了解其工作原理,可以将该模块更改为其他任何模块。 当然,如果您更改了要激活的模块,请将“UNHIDE”重命名为您正在执行的操作。 另请注意,使用此方法并不一定需要模块,您也可以仅用它来单独激活触发器。 【航点初始化】到达航点后删除单位 这适用于过场动画场景,例如让飞机飞过,然后在它飞远后将其移除。 代码:deleteVehicle (vehicle this);{deleteVehicle _x} forEach thislist; deleteGroup (group this); 注意: 将此代码复制粘贴到航点的初始化字段中。【扩展调试控制台】获取最近对象类别名 此代码可用于确定对象的ID类别名称,以便后续查找或使用。
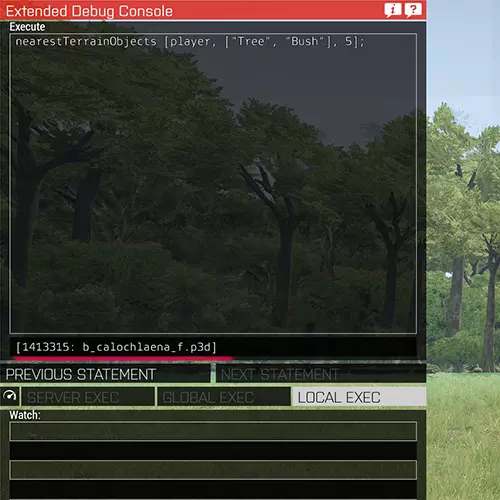
代码:nearestTerrainObjects [玩家, ["树木", "灌木"], 200]; 备用代码:nearestObjects [玩家, [], 10]; 补充内容: [扩展调试控制台] 获取按下的键盘按键编号 此代码将通过提示框显示你按下的按键编号。 代码:moduleName_keyDownEHId = findDisplay 46 displayAddEventHandler ["KeyDown", "hint str _this;"]; [扩展调试控制台] 获取单位战斗行为 代码:unitCombatMode 单位ID; 注意: 此代码将显示单位的行为模式,默认模式为“Yellow”。 [init.sqf + code.sqf] 现金/点数系统 我无法在不使用相关文件的情况下弄清楚如何使此功能正常工作。由于SQF文件需要存储金钱变量,所以必须将其包含在本指南中,因为它能带来多种可能性。 ini.sqf文件需放在任务文件夹中: C: Users YOURPC Documents Arma 3 missions YOURMISSIONNAME.MAPNAME 而subtractCash.sqf在本例中应放在名为Scripts的子文件夹内: C: Users YOURPC Documents Arma 3 missions YOURMISSIONNAME.MAPNAME Scripts 本示例中的代码文件名为subtractCash.sqf。 init.sqf cash = XXX; OBJECTID addAction ["查看现金", {hint format ["现金: %1", cash];}, [], 6]; OBJECTID addAction ["购买物品(花费XXX)", {[] execVM "Scripts\subtractCash.sqf";}, [], 5]; OBJECTID addAction ["增加现金(+XXX)", {cash = cash + 10; hint "现金 +XXX";}, [], 4]; subtractCash.sqf_cost = XXX; 如果 (cash >= _cost) 则 { cash = cash - _cost; 提示 "现金已扣除"; 执行动作; } 否则 { 提示 "现金不足!"; }; 注意: 从init.sqf开始, OBJECTID可以是一个对象,或者根据需要将其设置为玩家。 XXX 出现这些的地方,请将其替换为所需的数值,即初始资金和成本。 PURCHASE_ITEM,请将此替换为待售物品。 你可以从这段代码中挑选和组合所需的部分,例如,如果你不需要添加现金的部分,可以直接从代码中删除它。 这可能不是最简洁的方法,但对于每个可购买物品,你可以添加一个新的.sqf文件来加载。 因此,在这一行中: {[] execVM "Scripts subtractCash.sqf";} subtractCash.sqf文件可以命名为类似AK74Cost.sqf,并设置成本和代码来给玩家添加一把AK。 接下来是subtractCash.sqf, 在这里你可以为物品或其他任何东西分配成本。 EXECUTE_ACTION可以是任何你想要的内容,例如: player addweapon "WeaponClassName"; 你也可以随意将cash重命名为money或points等。 额外信息: 作者:h8ermaker [description.ext + init.]【多人自定义职业】 使用这些代码可以实现战斗职业功能。如果你熟悉《战地》系列游戏,其中有医疗兵、支援兵、工程兵、侦察兵等职业,这里的功能类似。你可以先通过武器库创建要使用的士兵,然后让这些士兵在任务开始时或玩家死亡重生后可供选择。 此代码比本指南中列出的其他代码稍复杂一些。 遗憾的是,据我所知,仅靠 Eden 编辑器无法实现此功能。
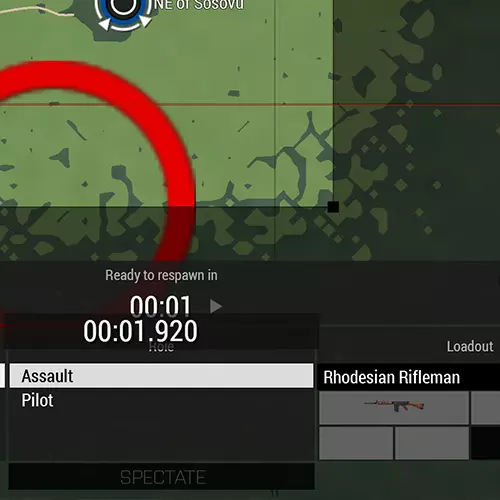
Important: Check the bottom section for further information found under Credtis. init.sqf[XSIDEX, "Alpha1"] call BIS_fnc_addRespawnInventory; description.sqf// START OF XSIDEX RESPAWN LOADOUTS respawnTemplateXSIDEX[] = {"MenuPosition", "MenuInventory"}; // Player loadouts class CfgRoles { class CLASSTYPENAME { displayName = "CLASSTYPENAME"; icon = " Images IconsTemplateTest.jpg"; }; }; class CfgRespawnInventory //config that calls in game respawn load-outs { //******************* // XSIDEX EQUIPMENT //******************* class Alpha1 //Classification for init.sqf { TOOLS->LOADOUT_TOOLS->EXPORT_LOADOUT(CfgRespawnInventory) }; }; Notes: "Alpha1" is found in both the description.ext and init.sqf you can add more like alpha2, bravo1 etc. XSIDEX change this to west or east etc. CLASSTYPENAME, call this something relevant like, Assault, Sniper, Riflemen, AT Soldier etc. TOOLS->LOADOUT_TOOLS->EXPORT_LOADOUT(CfgRespawnInventory) Within Eden Editor, Select a Soldier, that you have prepared using the "Edit Loadout" (Using Arsenal), and then do exactly that, go to the top tabs and find: Tools, Loadout Tools etc. Once you do that, it will save the information to the clipboard. Then paste that and overwrite TOOLS->LOADOUT_TOOLS->EXPORT_LOADOUT(CfgRespawnInventory) with it. Please read the Extra section for important information on this. Extra: Here is an example code of TOOLS->LOADOUT_TOOLS->EXPORT_LOADOUT(CfgRespawnInventory)class Alpha1 //Classification for init.sqf { TOOLS->LOADOUT_TOOLS->EXPORT_LOADOUT(CfgRespawnInventory) };Becomes something like this (Depending of course on your personal loadout):class Alpha1 //Classification for init.sqf { displayName = "Rhodesian Rifleman"; icon = "IconsTemplateTest.jpg"; role = "Assault"; show = "true"; uniformClass = "U_I_L_Uniform_01_deserter_F"; backpack = ""; weapons[] = {"CUP_arifle_FNFAL5061_wooden", "rhssaf_zrak_rd7j", "Throw", "Put"}; magazines[] = {"murshun_cigs_cigpack", "murshun_cigs_matches", "CUP_20Rnd_762x51_FNFAL_M", "CUP_20Rnd_762x51_FNFAL_M", "CUP_20Rnd_762x51_FNFAL_M", "CUP_20Rnd_762x51_FNFAL_M", "CUP_20Rnd_762x51_FNFAL_M", "CUP_20Rnd_762x51_FNFAL_M", "CUP_20Rnd_762x51_FNFAL_M", "rhs_mag_m67", "rhs_mag_m67", "rhs_mag_m67"}; items[] = {"PiR_bint"}; linkedItems[] = {"rhsgref_alice_webbing", "H_Booniehat_oli", "", "ItemMap", "ItemCompass", "ItemWatch", "ItemRadio", "ItemGPS", "", "", "", "", "", "", "", ""}; };In this example code, the displayName will be shown within the game. Set this to what you wish. Also change the role to whatever you set as the CLASSTYPENAME. In Eden Eden Editor place a marker and call it respawn_XSIDEX XSIDEX being the side of course, so for example respawn_west or respawn_east Next go to Attributes->Multiplayer (found at the top tabs in Eden Editor) and set it up to have: Respawn = Respawn on Custom Position Ruleset = Select Respawn Loadout, Select Respawn Location. Important! You will only get the Loadout Selection upon respawn, and it has to be in Multiplayer, so you first need to get killed or press Esc -> Respawn to get the menu. If you want to select your Loadout right from the start, add this to the discription.ext as well:respawnOnStart = 1; Credits: Shy While I did my best to make this as easy to understand as possible, you definitely want to check out Shy's guide which is allot more in-depth and will help you understand everything what is going on in much more detail. https://steamcommunity.com/sharedfiles/filedetails/?id=2725594828 [Universal] Countdown Timer Code:custom_timer = 10; VARNAME =[] spawn { while {custom_timer > 0} do { custom_timer = custom_timer - 1; hint str custom_timer; uiSleep 1; }; }; Notes: You can add additional functions by doing a if statements. [Universal] If Statement This is just a simple script for its proper format, I keep forgetting how to write it properly without it giving me errors so I included it here. Code:if (!alive this) then { hint "I'm dead" ; }; Alt Codeif (TIME < 5) then { YOURCODE; }; Note: The structure of the syntax is important here. Doing checks requires brackets. [Universal] Giving Multiple Objects to a forEach command I found it a bit tricky to figure out how to give multiple objects into a forEach command as Lists wont work and you will get an error saying that an Array/List has been provided but an object is expected. So here is one way of doing this without getting that error. Code:Object1 = Whatever; Object2 = Whatever; Objects = Object1 + Object 2; { _Anything = _x; _Anything whateverYouWantToDo; } forEach Objects; Notes: This ones more just a personal reminder than anything else, but perhaps it may be of help to you as well if you ran into this problem yourself at some point. Credits: killzone_kid from https://forums.bohemia.net/ [Universal] How to use sleep This $%&4! gives me constantly issues, it must be structured like the code below for it to work properly. Code:VARNAME =[] spawn { sleep 1; hint "Sleep"; }; [Universal] Random Chance Code Activation Here is a way of activating code depending on the probability you input. Code:rChance = random 100; if (PERCENTAGE > rChance) then { EXECUTEWHATEVERYOUWANT; }; Notes: Whatever you set PERCENTAGE to is the chance the code will be run. So setting it 10 means there is a 10% chance it will run. rChance is set to random 100 but you can change 100 to anything really. Extra: If you want to see what the randomly selected number was, use this code:hint format ["Chance = %1", rChance]; [ACE] Point Finger This is a specific code for ACE. The Ace "Point a Finger At" feature can only be used if a module has been placed in Eden Editor, however, if you are playing a game mode, say Antistasi or Liberation and it does not support ACE natively, you can still enable this feature as long as you have access to the debug console (Usually this is reserved for the Host and Admins). Access the Debug Console and run the code below to enable Ace Point Finger. Code: ace_finger_enabled = true; ace_finger_maxRange = 4; Notes: You can change the maxrange to something higher or lower. Credits: xJenny99 from Reddit [initPlayerLocal.sqf] Tab Key Inventory I had to include this one, this allows you to use the "Tab" key as the inventory button like in DayZ. If you set the Inventory button in the options, found under the Common section, as Tab, it will open it, but you cannot close it again with the same key. This code allows you to press Tab again to close it. Code:player addEventHandler ["InventoryOpened", { _this spawn { waitUntil { not isNull (findDisplay 602) }; INVCLOSED = (findDisplay 602) displayAddEventHandler ["keydown", { if ((_this select 1) in (actionKeys "gear")) then { (findDisplay 602) displayRemoveEventHandler ["keydown",INVCLOSED]; closeDialog 0 } }] } }] Notes: Save your mission, then find it in your documents folder under C: Users YOURPC Documents Arma 3 in either "missions" or "mpmissions" then open YOURMISSIONNAME. In there create a new text file and call it initPlayerLocal Now copy the code in there and save it. Change it from a .txt to .sqf. Important: Make sure its a .sqf in some cases people forget this and its a .sqf.txt at the end. Credits: das attorney .SQF Related While I try to limit this guide to using triggers and initialisation fields, there are cases where not using external .sqf files is just not possible or feasible. Here I wish to list some basics which is often used when working with .sqf files. Types of .sqf files:There are various .sqf files that will get activated based on how they are named. https://community.bistudio.com/wiki/Event_Scripts Useful commands:Execute .sqf file (mostly for init.sqf) How to run another sqf from either the init.sqf or a different .sqf file. execVM "YOURFOLDER FILENAME.sqf"; Separate .sqf files When your code gets to large, consider chopping it up and simply adding it to another file and then including it into your larger .sqf file. #include "FILENAME.sqf" Commenting out To disable code or add in notes. /* In between these, everything becomes a comment. */ // After these, everything becomes a comment. For Loop Proper construction of a for loop. for "_i" from 1 to 10 do { ANYCODE; }; Non-Coding Related I will use this section here to add in other topics that revolve around Eden Editor that are not coding related but good to keep in mind and to take advantage of. Multiplayer RelatedI will post here some information about features or functions that are often used when setting up a multiplayer mission. Consider this more of a checklist than anything, good for a quick glace. Respawn Markers In order to be able to respawn in a Multiplayer mission, you will need to set down a Marker and Name it. This here is a very simple method and serves only as a basis for respawning If a player is killed, they will respawn on the marker's location. Name the marker accordingly depending on the factions that can respawn: respawn_west, respawn_east, respawn_guerrila, respawn_civilian ModulesModules are found in the Systems Tab (F5) under the Module Section. Cover Map Module I find this Module very helpful to set a limited play area. It will only darken the rest of the map besides the X and Y values that you set as the playable area. It wont do anything besides darken the rest of the map so to warn the players that they are leaving the playable area you must use a trigger and cook something up in there. Show / Hide Module This module will make things invisible, disable their simulation and collision. Useful as a means to "Loading in" stuff. You need to place two of these, and set one of them to "Show Units" and the other to "Hide Units" which is done by modifying the settings in their Attributes Field.. Sync them both to everything that is to be hidden first and shown later. Next place a trigger, set the conditions as you please and sync the trigger to the Show / Hide Module that was set to "Show Units", now if the triggers conditions are met, the units or props that were set hidden now become activated and visible, loaded in so to speak. ToolsI will add here some external tools that are pretty useful to have quick access to. Online Notepad Useful for not needing to tab out http://justnotepad.com/ Bohemia Interactive Editing Wikis Quick access to Scripting Commands and Scripting Functions https://community.bistudio.com/wiki/Main_Page https://community.bistudio.com/wiki/Event_Scripts Text Color Picker Useful for setting text colors of Hints and addAction etc https://www.w3schools.com/colors/colors_picker.asp (WIP) Will add in more later on as I discover other things worth mentioning. Final Words and some Extras

特别感谢来自论坛的Larrow。我在寻找解决方案时经常看到他的帖子,他总能提供帮助。他为社区做出了巨大贡献,他的脚本帮我节省了无数时间,避免了许多麻烦,确实值得一提。如果你碰巧看到这个,Larrow,我只想说,谢谢你所做的一切! 多年来我整理了这些脚本,但大多已经记不清来源了,尽管我经常修改代码。如果你认出某些代码是你写的,请告诉我,我很乐意注明出处。我最近在写完自己的指南后发现了这份指南,其中也包含一些有用的脚本,因此我想在这里补充一下,值得大家一看。感谢阅读本指南,希望它能对您有所帮助。
祝你任务创作顺利。o7