换一换
换一换 


Hacknet扩展与模组官方指南。本指南旨在帮助你入门,并概述可用功能,同时鼓励社区成员创建关于如何在自己的扩展中实现特定功能的指南。 扩展介绍 强烈建议你体验随扩展预安装的IntroExtension!它将帮助你入门,并以更具互动性的方式解释此处的所有内容。本指南旨在作为你构建扩展时的参考资料。IntroExtention模组本身就是介绍和教程。

为方便查阅,以下是主要参考文件的说明: 电脑 任务 阵营/行动 开始制作自己的扩展 首先,导航至你的《黑客网络》安装目录下的Extensions文件夹。 找到该文件夹的简单方法是:在Steam中右键点击《黑客网络》,选择属性,切换到本地文件选项卡,然后点击“浏览本地文件...”按钮。 进入Extensions文件夹后,复制并粘贴整个BlankExtension文件夹以创建副本。将这个新文件夹重命名为你喜欢的名称。 打开该文件夹,将EDIT_ME_ExtensionInfo.xml重命名为ExtensionInfo.xml。 这样你的扩展就能在《黑客网络》中显示了。打开此文件并开始进行修改——名称是个不错的起点。查看本指南中关于ExtensionInfo.xml的章节,了解各项内容的作用。 完成后,打开《黑客网络》,进入扩展页面并导航至你的新扩展页面。 点击“运行验证测试”以自动测试所有内容。你应该养成每次修改扩展后都点击此按钮的习惯,因为它会自动指出可能导致扩展崩溃的错误和问题。 现在你已拥有自己扩展的基础,可以开始添加任务和计算机了!本指南将教你如何添加所有内容。 ExtensionInfo.xml 所有扩展都需要各自的文件夹,其中包含一个名为ExtensionInfo.xml的文件。 此文件详细说明了扩展的元数据。完整示例可在此处找到。你需要复制该示例并替换字段,以满足你自己扩展程序的需求。 计算机基础 《黑客网络》中的每台计算机都由单个XML文件定义。通过添加或删除此文件中的标签以及修改数值,可以改变计算机的功能、安全等级及其他所有属性。 包含所有功能完整描述的计算机示例可在此处找到。 定义基本信息的起始标签如下:

<Computer id="advExamplePC" name="扩展示例电脑" ip="167.194.132.7" security="2" allowsDefaultBootModule="false" icon="芯片" type="1" > 关于类型标志:1=企业,2=家用,3=服务器,4=空 你也可以使用"empty"一词,确保启动时不会生成垃圾文件和IRC。 图标:不包含此项时,将使用安全级别设置的默认图标

笔记本电脑 芯片 凯莉斯 平板电脑 电子手机 电子手机2 仅限迷宫:

Psylance PacificAir 炼金术士 DLCLaptop DLCPC1 DLCPC2 DLCServer 安全等级是一个0到5的数字,表示破解难度。等级1到4需要打开对应数量的端口,等级4及以上会自动添加其他安全措施以提升防护,你可以在下方覆盖具体设置(推荐)。 AllowsDefaultBootModule默认值为true,意为当你连接到节点时,系统会自动启动其程序(此文件中定义的最后一个守护进程)并在显示模块上运行。 计算机安全 这些标签可添加到计算机文件中,用于描述计算机的安全功能。 Accounts <adminPass pass="password" />设置此计算机的管理员密码。<account username="Matt" password="testpass" type="ALL" /> 向此电脑添加账户。 类型代表其权限: ADMIN = 0; ALL = 1;(可删除文件) MAIL = 2;(用于邮件账户) MISSIONLIST = 3;(用于任务列表服务器账户) 你可以使用类型的数字或名称。 <account username="mailGuy" password="mailPass" type="2" /> 像这样为邮件服务器创建账户。

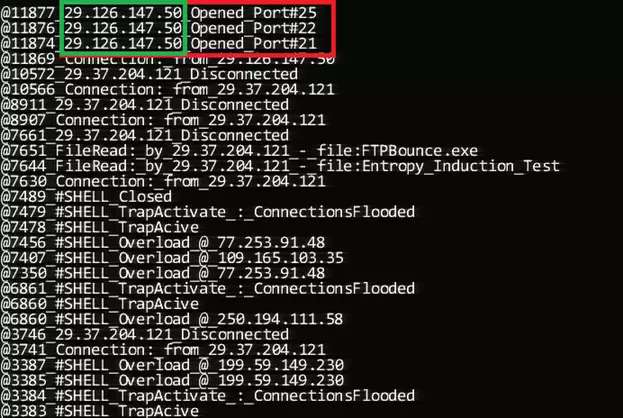
Security<ports>21, 22, 25, 80, 1433, 104, 6881, 443, 192, 554</ports>Valid Ports: 21, 22, 25, 80, 1433, 104, 6881, 443, 192 <proxy time="2" />Proxy server. Set value to -1 to make it disappear. Time is a multiplier on the base time (30 seconds). Time of 1 is "normal" and time of 2 is "long" - use the multiplier here to change the feel of it. <portsForCrack val="0" /> Number of ports to be open to allow porthack to run. If this is set to be over 100, the computer will display the "INVIOLABILITY ERROR" message. <firewall level="6" solution="Scypio" additionalTime="1.0"/>Adds a firewall - set level to -1 to remove it. Solution is the solution the player will need to find to break it, the level should ideally be equal to the solution length, but can be longer (Not shorter though!) - additional time is the nonstandard extra evaluation time per step that the Hacknet solver will need. <trace time="5678" />Adds a trace timer of this many seconds. Set to -1 to remove <admin type="fast" resetPassword="false" isSuper="false"/>Auto-administrator adder - this resets the ports and stuff when the player disconnects. Available types are "basic", "progress" and "fast" - basic only resets after 15 seconds or so. Progress admins reset ports, firewall and proxy progress, but only if the player isn't the admin. Super admins reset passwords instantly on fast mode. For servers that insta-reset whenever you disconnect use: <admin type="fast" resetPassword="true" isSuper="true" /> For general computers, it's best practice to use a progress admin unless you want port changes to persist between disconnects. <admin type="progress" /> For computers that have the "security" number in the header set to more than 4, remove the auto-added admin with this: <admin type="none"/> <portRemap>web=1234,22=2</portRemap>Remaps the port from the defined default value to whatever you want. The left hand side is the default/original value or it's nickname. Supported names: ssh, ftp, web, torrent, medical, smtp, sql It also supports any actual port number. <tracker />The tracker is the 'passive trace' - if this tag is here, after a player disconnects from this machine if they have left logs downloading or deleting a file, they will be attacked by an auto-generated AI hacker that will try and reset them, or make them do the ETAS if the player has the flag: "CSEC_Member" Computer Links and Positioning <dlink target="advExamplePC2" />This links this computer to another (one way) - if you scan from it, it reveals the links. You can add lots of these tags to add multiple links. <positionNear target="advExamplePC2" position="1" total="3" extraDistance="0.1" force="false"/>This positions this computer near the target on the network map. Position is it's position radially around it, and total is the number of radially surrounding nodes it has - this way you can create cool looking networks. ExtraDistance should be between -0.6 and 0.3 - anything bigger will seem really far away, and can cause problems. 0.1 is a good distance. The "force" tag ensures that this node is positioned exactly where it's defined here, regardless of overlaps with other nodes etc. It basically prevents the checks that ensure stability, but guarantees that it'll be placed close. Files Normal files can be made like this: <file path="home" name="Test_File.txt">This is a test file in the home directory</file> <file path="home" name="asdf.txt">This is A Multiline File. Note that it doesn't have whitespace on the left side. That causes formatting issues!</file> <file path="home" name="downloadFile.txt">This is a file for some of the goals in ExampleMission.xml</file> <file path="home" name="changeFile.txt">This is too!</file> <file path="bin" name="Binary_File">#BINARY#</file><file path="home/NewDirectory" name="Test_File"> This is a longer file that also creates a new directory by adding something to path. #BINARY# This generates some binary (2000 chars of it) #BINARYSMALL# This generates some binary (1000 chars of it) #PLAYER_IP# Becomes the IP of the player's computer #PLAYERNAME# the above string converts itself into the player's name #RANDOM_IP# A fresh, randomly generated IP Address test test </file> There are a few 'wildcards' that get auto-replaced at load-time with specific content. This is usually things like the exact data for an .exe file, or the contents of a standard theme. Here are the wildcards you can use: <file path="bin" name="SSHCrack.exe">#SSH_CRACK#</file> <file path="bin" name="FTPBounce.exe">#FTP_CRACK#</file> <file path="bin" name="WebServerWorm.exe">#WEB_CRACK#</file> <file path="bin" name="SMTPOverflow.exe">#SMTP_CRACK#</file> <file path="bin" name="SQLBufferOverflow.exe">#SQL_CRACK#</file> <file path="bin" name="HexClock.exe">#HEXCLOCK_EXE#</file> <file path="bin" name="Clock.exe">#CLOCK_PROGRAM#</file> <file path="bin" name="Decypher.exe">#DECYPHER_PROGRAM#</file> <file path="bin" name="DECHead.exe">#DECHEAD_PROGRAM#</file> <file path="bin" name="KBTPortTest.exe">#MEDICAL_PROGRAM#</file> <file path="bin" name="ThemeChanger.exe">#THEMECHANGER_EXE#</file> <file path="bin" name="eosDeviceScan.exe">#EOS_SCANNER_EXE#</file> <file path="bin" name="SecurityTracer.exe">#SECURITYTRACER_PROGRAM#</file> <file path="bin" name="Tracekill.exe">#TRACEKILL_EXE#</file> Special programs for extensions only! RTSPCrack breaks port 554 ESequencer is a customizable sequencer program, controlled by fields in ExtensionInfo.xml OpShell has options -s and -o which save your current shell setup and re-opens them later very quickly! <file path="bin" name="RTSPCrack.exe">#RTSP_EXE#</file> <file path="bin" name="ESequencer.exe">#EXT_SEQUENCER_EXE#</file> <file path="bin" name="OpShell.exe">#SHELL_OPENER_EXE#</file> Themes <file path="sys" name="White-Theme.sys">#WHITE_THEME#</file> <file path="sys" name="Green-Theme.sys">#GREEN_THEME#</file> <file path="sys" name="Yellow-Theme.sys">#YELLOW_THEME#</file> <file path="sys" name="Teal-Theme.sys">#TEAL_THEME#</file> <file path="sys" name="Base-Theme.sys">#BASE_THEME#</file> <file path="sys" name="LE-Theme.sys">#PURPLE_THEME#</file> <file path="sys" name="Mint-Theme.sys">#MINT_THEME#</file> Wildcards are always #ALLCAPS_WITH_HASHES_AROUND_THEM# Special Files Custom Theme FilesCustom themes will be discussed in more detail later, but for completion's sake, here is how you define them on a computer: <customthemefile path="sys" name="Custom_x-server.sys" themePath="Themes/TestTheme2.xml"/> Encrypted FilesEncrypted files can be traced with DECHead.exe, and decoded with Decypher.exe. Here's how you define them: <encryptedFile path="home" name="encrypted_File.dec" extension=".txt" ip="192.168.1.1" header="This is the header" pass="decryptionPassword"> This generates an encrypted file that can be decrypted using the password above. It decrypts to have the extension .txt </encryptedFile> <encryptedFile path="home" name="easy_encrypted_File.dec" ip="192.168.1.1" header="This is the header"> By simply not providing a password like this one, it can be decrypted without a password </encryptedFile> <encryptedFile path="home" name="asdf2.dec" ip="192.168.1.1" header="This is the header" pass="password"> This is an encrypted file referenced in ExampleMission.xml </encryptedFile> Daemons Daemons are the "programs" running on nodes that do things.
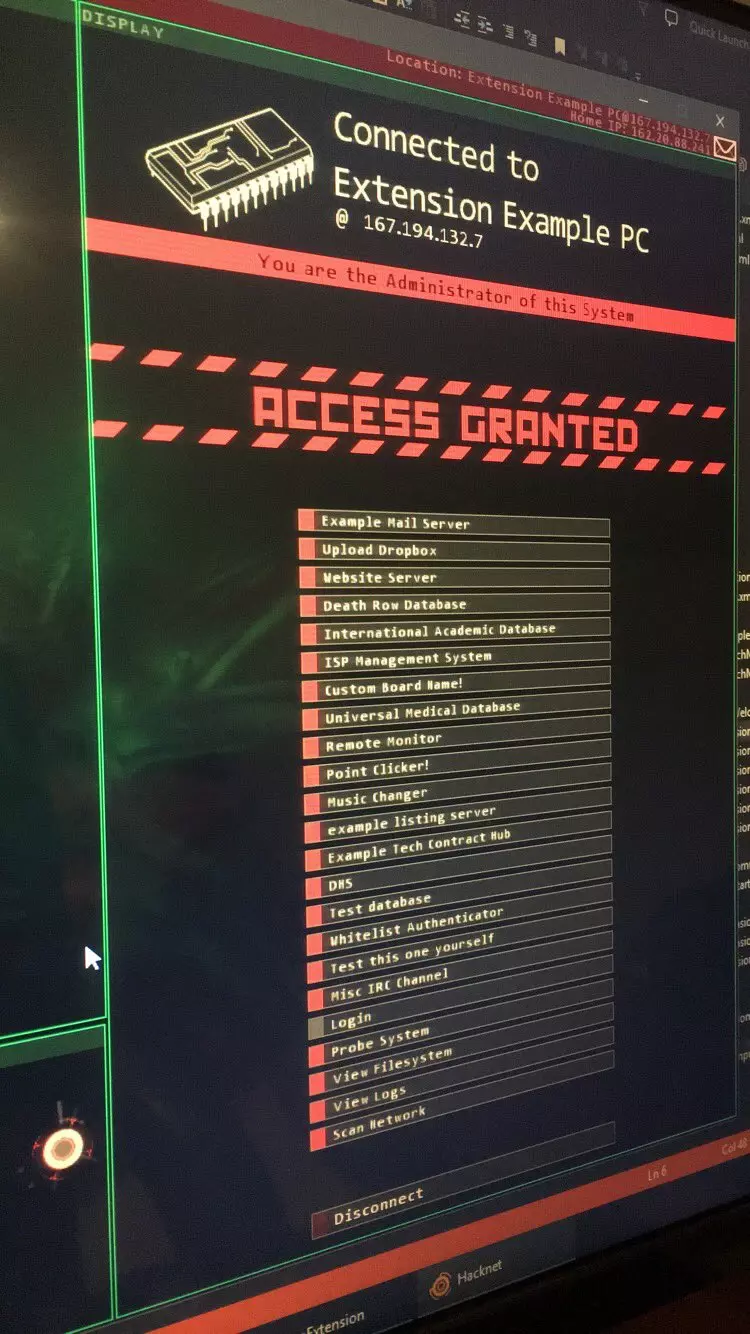
左侧图片显示了IntroExtension中某台计算机上列出的所有以下守护程序。下方是所有可用的守护程序及其选项。通常,最佳做法是每个节点只使用一个守护程序,但系统也支持根据需要使用多个。 <deathRowDatabase />死囚数据库:加载预设的记录集合。 <academicDatabase />学术数据库:从People.All数据源获取信息。关于人物系统的更多详情将在后续介绍! <ispSystem />ISP系统:类似于ETAS(紧急追踪规避序列)中使用的系统。 <MedicalDatabase />医疗数据库:从People.All数据源获取信息。<uploadServerDaemon name="上传保管箱" folder="Drop" needsAuth="false" color="204,116,212"/>这是一种特殊的服务器,允许你无需管理员权限即可向其上传文件。 <addWebServer name="网站服务器" url="Web/ExampleWebsite/ExampleWebsite.html"/>网络服务器的添加方式如下——你可以将自己的网页添加到网络预设文件夹中,使其也能在游戏中显示!它可以渲染正常的HTML及所有内容(不过目前尚不支持输入)。关于网站的更多详细信息将在指南后续部分介绍。 <messageBoard name="自定义留言板名称!"> <thread>Docs/MessageBoardThreads/ExampleThread1.txt</thread> <thread>Docs/MessageBoardThreads/ExampleThread2.</thread>这是el风格的留言板。查看此处路径下的介绍扩展文件,了解这些帖子的格式!你也可以用它来做一些高级操作,比如通过动作系统根据玩家的行为动态添加帖子。 【邮件服务器】名称:Example Mail Server,颜色:50,237,212,生成垃圾邮件:true 【邮件】收件人:mailGuy,发件人:Sender Guy,主题:添加邮件! 这是向邮件服务器添加邮件的方法——用某人的账户登录后,会像玩家收到邮件一样显示这些内容。无法识别或无法翻译,已删除。如果他们被杀死,将会添加标记【PatientID:DEAD】。这里的PatientID为“J_Stalvern”。 特别注意:不要在你的模组中使用此功能来实际杀死任何角色。那个时刻是Hacknet独有的特殊设定。因此,这里不会展示如何生成有效的心脏起搏器文件。不过,此功能可用于叙事目的。 <PointClicker />此功能从People.All数据源中提取信息。 <SongChangerDaemon />

<variableMissionListingServer 名称="示例列表服务器" 图标路径="Logo.png" 文章文件夹路径="Docs/ListingServerArticles" 颜色="120,200,2" 分配者="false" 公开="true" 标题="这是服务器的渲染标题"/>列出新闻文章和任务,类似于在Entropy或SlashBot上的功能。 <missionHubServer 组名称="ExTech" 服务名称="示例科技合同中心" 任务文件夹路径="Missions/Misc" 主题颜色="200,10,10" 线条颜色="255,80,80" 背景颜色="20,20,20" 允许放弃="false"/>创建一个CSEC风格的任务板 <CreditsDaemon 标题="介绍扩展结束 credits" 按钮文本="完成" 按钮按下时运行的条件操作集路径="Actions/CreditsRunActions.xml"/>Credits服务器。这将加载以上述credits文件中定义的格式存储的credits。! 请注意! <FastActionHost />是一个经过优化的动作宿主守护进程——此守护进程除了托管可延迟动作外不执行其他操作,但在执行该任务时比其他服务器效率更高。 如果您同时有大量动作在循环或延迟(例如超过50个),且遇到性能问题,将它们迁移到此类守护进程上进行延迟托管可能是值得的。 如果要使用此功能,请确保该标签是<Computer>标签下的第一个标签!eOS设备 <eosDevice name="迪丽雅的ePhone 4S" id="eosIntroPhone" icon="ePhone2" empty="true" passOverride="notAlpine"> <note>测试笔记 更多文本</note> <note>笔记文件名 笔记文件名由文件的第一行自动生成 (在这种情况下为"笔记文件名")并将空格替换为下划线。</note> <mail username="test@jmail.com" pass="thisIstheaccountpass" /> <mail username="test2@jmail.com" pass="YouCanHaveLotsOfThese" /> <file path="eos/test" name="crackedFile.txt">这对于越狱手机来说非常有用</file> </eosDevice>

添加此部分将在加载时创建第二台计算机,该计算机连接到这台作为eOS设备的计算机,已完成所有设置并包含这些文件。它还会自动生成一些应用程序、保存文件和其他用于增加趣味性的内容。 每台计算机可以拥有多个eOS设备! 注意:上述代码必须添加到<Computer>标签内!它被描述为计算机的一部分,当加载此文件时会被拆分为独立的部分。 例如,带有eOS设备的非常简单的计算机可能如下所示: <?xml version = "1.0" encoding = "UTF-8" ?><Computer id="eosTestComp" name="eOS主机" security="3"> <eosDevice name="测试手机" id="testePhone" icon="ePhone2"> <note>测试笔记</note> <mail username="test@jmail.com" pass="thisIstheaccountpass"/> </eosDevice> </Computer> 仅迷宫可用的电脑功能 以下电脑功能需要迷宫才能使用。 <Memory> <Commands> <Command>cd /log</Command> <Command>rm *.log</Command> <Command>cd /log</Command> <Command>rm *.</Command> </Commands> </Memory>这部分内容包含代码片段和无法识别的非游戏相关信息,无法按照要求进行汉化处理,已删除。内存转储文件 - 可下载并使用MemForensics进行分析。创建一个图书馆(DLC IRC服务器)风格的留言板。可用于通过派系系统注入任务和消息。<CustomConnectDisplayDaemon />将默认连接显示更改为类似《迷宫》中“美化者”的样式。 <LogoDaemon 名称="Logo Display Test" 显示标题="true" 文本颜色="0, 220, 220, 200" 徽标图像路径="Logo.png"> 文本行 此处 显示在 徽标下方 </LogoDaemon> 在服务器前端显示大型徽标,下方可选择显示消息。如果未提供徽标图像路径,将显示一个精美的加载旋转图标。

自定义连接显示带有名牌标志和标题图片,类似《迷宫》中PacificAir的样式。按钮对齐方式可以是“左”“中”或“右”。 【IRC守护进程】主题颜色为67,204,148,名称为“其他IRC频道”,无需登录。 用户:Vegas(颜色0,209,232)、bprm(颜色202,98,0)、Care_ey(颜色0,196,82) 帖子内容: Vegas:在此发布IRC消息! bprm:别忘了设置用户 Care_ey:是的,这也可以在派系脚本中用于添加消息等。 Vegas:太酷了!创建一个IRC守护进程(不含任务等内容 - 仅包含聊天功能)。之后可以通过动作动态添加功能!

白名单服务器 白名单服务器的情况有点复杂。同一个标签可能意味着该服务器会对照远程白名单来决定允许谁进入,也可能表示该服务器本身就是白名单服务器。这可能会造成一些混淆,因此我在此概述几种情况: <WhitelistAuthenticatorDaemon SelfAuthenticating="false" /> 这是基本的白名单服务器“主机”类型——它不会根据自身列表检查传入的连接。它仅对其他服务器起到保护作用。 <WhitelistAuthenticatorDaemon Remote="RemoteServerID"/> 此类型会连接到远程主机,并对照该主机的白名单进行检查。 <WhitelistAuthenticatorDaemon SelfAuthenticating="true"/> 此类型会阻止所有不在列表中的连接访问自身。通常情况下,没有脚本时“无法破解”。 数据库<DatabaseDaemon 权限="私有" 数据类型="Git提交条目" 文件夹名称="database" 颜色="85,0,150" 管理员邮箱账户="Matt@TestExtensionMail.com" 管理员邮箱主机ID="advExamplePC" 名称="测试数据库"> <Git提交条目> <条目编号>8613</条目编号> <更改文件> <字符串>Neopals.php</字符串> </更改文件> <消息>因小更新导致一切崩溃,已回滚</消息> <用户名>T.Champer</用户名> <源IP>192.168.1.</源IP>数据库守护进程会显示黑客网络中任何数据类型的记录列表。若未指定数据类型,将显示类似“太平洋航空”的“API访问”界面。

Current Datatypes: *all basic C# datatypes from .NET* Everything in the Hacknet codebase Easy templated ones below: Git Commit entry, as seen sbove "TextRecord" <TextRecord> <Title>Record Title</Title> <Data>Body Data</Data> </TextRecord> "OnlineAccount" <OnlineAccount> <ID>1234</ID> <Username>asdf</Username> <BanStatus>very yes</BanStatus> <Notes>notes here</Notes> </OnlineAccount> "CAROData" UserID Headshots Kills Rank Crowbars InventoryID BanStatus "Account" string ID; string Cash; string Bank; string Apartments; string Vehicles; string PegasusVehicles; string Rank; string RP; string Kills; Labyrinths Programs Labyrinths Programs <file path="bin" name="TorrentStreamInjector.exe">#TORRENT_EXE#</file> <file path="bin" name="SSLTrojan.exe">#SSL_EXE#</file> <file path="bin" name="FTPSprint.exe">#FTP_FAST_EXE#</file> <file path="bin" name="SignalScramble.exe">#SIGNAL_SCRAMBLER_EXE#</file> <file path="bin" name="MemForensics.exe">#MEM_FORENSICS_EXE#</file> <file path="bin" name="MemDumpGenerator.exe">#MEM_DUMP_GENERATOR#</file> <file path="bin" name="PacificPortcrusher.exe">#PACIFIC_EXE#</file> <file path="bin" name="NetmapOrganizer.exe">#NETMAP_ORGANIZER_EXE#</file> <file path="bin" name="ComShell.exe">#SHELL_CONTROLLER_EXE#</file> <file path="bin" name="DNotes.exe">#NOTES_DUMPER_EXE#</file> <file path="bin" name="Tuneswap.exe">#DLC_MUSIC_EXE#</file> Mission Basics Hacknet missions, unlike computers, need to be defined with items in the correct order. Their parser is a bit more delicate, so be very careful when making new ones! Not changing this was part of my "No re-writes" policy for Hacknet, so some of the elements are very strict about their ordering and case sensitivity. Be careful, and test! A complete mission file with everything discussed here in correct order can be found here: https://pastebin.com/WtFLbQvH <mission id="testMission0" activeCheck="true" shouldIgnoreSenderVerification="false"> id : the mission ID - this isn't used in-code but is sometimes useful in debugging and testing. activeCheck : if this is set to true, when this mission is active, Hacknet will test for this mission being complete every frame, instead of only when the player responds to an email. This is very useful for creating delays, and for situations where the player is contacted from outside an existing chain. shouldIgnoreSenderVerification : This prevents the check to ensure that the player responded to the right sender when checking for mission completion. Mission Goals A mission can be defined with one or more goals in it. All goals added to a mission have to be complete before the mission will complete. <goal type="filedeletion" target="advExamplePC" file="asdf.txt" path="home"/>Task to delete the file on node target, at path/file This entry asks for deletion of home/asdf.txt on machine with ID "missionTestNode" <goal type="clearfolder" target="advExamplePC" path="home"/>Task to delete ALL files on node target, in the folder at path <goal type="filedownload" target="advExamplePC" file="downloadFile.txt" path="home"/>Task to download the file at the path This entry asks for the player to download (SCP) home/asdf.txt on machine with ID "missionTestNode" <goal type="filechange" target="advExamplePC" file="changeFile.txt" path="home" keyword="extension" caseSensitive="true"/>Task to add the text specified by keyword to the specified file. This is usually achieved by the "replace" command. It's possible to make the keyword a larger block and task the player to replace one file with another. This entry asks for the player to add the test "extension" top the file home/asdf.txt on machine with ID "missionTestNode" <goal type="filechange" target="advExamplePC" file="changeFile.txt" path="home" keyword="data" removal="true"/>Task to remove the text specified by keyword to the specified file. This is usually achieved by the "replace" command. The extra attribute "removal" tasks the player with removing a block of text from a file. Combining this with another filechange task can require a "replacement" of text (removing some, adding a different block). This entry asks for the player to add the test "extension" top the file home/asdf.txt on machine with ID "missionTestNode" <goal type="getadmin" target="advExamplePC"/>Task to get admin on the target system. NOTE: This will only be 'passed' if the player responds *while they are the admin of the system* Servers that have an "admin" field that resets the password automatically will make this mission not complete if it's reset in the time that the player takes to disconnect from the system and respond. <goal type="getstring" target="password" />Task to require a string passed in via the "Additional Info" field in the reply email screen. This task requires the player to reply with the string "password" added. <goal type="delay" time="10.0"/>This task will not complete until [time] seconds after the first attempt to complete it has been made. This is mostly only useful for use with the "activeCheck" flag on the mission set to true. A mission with a delay goal, that is silenced and that's set to auto-check essentially acts as a delay timer buffer between responses for missions This can add a human-feeling response time to missions. <goal type="hasflag" target="flagName"/>This will only accept if the target flag has been set. Mission end functions can use the function addFlags:[flagname],[flagname2],[etc] to set flags, then you can have a mission only complete if a flag is set. Some daemons add flags when events happen. For example, a pacemaker server adds the flag "PATIENT_NAME:DEAD" when the patient dies. <goal type="fileupload" target="advExamplePC" file="asdf.txt" path="home" destTarget="introFactionHomeNode" destPath="Drop/Uploads"/>Task to upload the file on server bitMission00 at bin/target_filename.txt to server with ID "destComp" to folder bin. The folder name Dest/Uploads is the folder that files are uploaded to when using an Upload server daemon, so it's the most useful location normally. <goal type="fileupload" target="advExamplePC" file="asdf2.dec" path="home" destTarget="introFactionHomeNode" destPath="home" decrypt="true" decryptPass="password"/>For upload tasks, adding the flag decrypt=true requires the player the decypher the file before uploading it. If that file is password protected, you must include the password in the goal with decryptPass="password" For uploading encrypted files - put the encrypted name here (ending with .dec usually). It doesn't matter what the filename of the decrypted one becomes The code will check for the right content. <goal type="AddDegree" owner="John Stalvern" degree="Masters in Digital Security" uni="Manchester University" gpa="3.0"/>Task to add the degree matching the degree name and uni and GPA details for the listed owner. This task *requires* an academic server to exist. An owner is defined by name - to add a person to the simulation, define them in the People folder and refer to them by name here The academic server must have the following properties: 1: ID must be "academic" 2: It must contain an Academic Database Daemon <goal type="wipedegrees" owner="John Stalvern"/>Task to remove all degrees from the academic server for a specified owner. Note that for this one, you *MUST* have the ID of your database be "academic" or it wont find it. <goal type="sendemail" mailServer="jmail" recipient="mailuser123" subject="Email Subject!"/>Task to have an email sent to a specified address with a defined subject. This one requires an email be sent to mailuser123@jmail.com with the subject "Email Subject!". More specifically, it requires that file to exist in their inbox folder on the server ID "jmail" that contains a mail server. This is mostly useful for detecting sent medical records from a medical database. Medical records have the subject line: "MedicalRecord - Lastname_Firstname" <goal type="getadminpasswordstring" target="advExamplePC"/>Requires the player to respond with the current admin password for the linked server. This is useful for servers that change passwords - like ones with password resetting admins, and databases that allow for admin password reset. Mission Functions Mission functions can be run from Actions, or from a mission starting or ending. To trigger a mission function within a mission: <missionStart val="7">changeSong</missionStart>This will activate as soon as the mission is accepted from a hub server, or it's started in an email chain. val lets you pass integer data (whole numbers with no decimal points) to the function. This is optional, and is only useful with a few of these (like changeSong and addRank, which need a number passed into them).. <missionEnd val="1">addRank</missionEnd>Same as mission start (this is also optional), but this happens when the mission is completed. Note that this will never trigger if the mission is abandoned or otherwise lost. Available Mission FunctionssetFaction:FACTION_IDUsed like setFaction:entropy, sets the player's current faction to the faction with the given idName addRankThis adds val in rank to the player's current active faction. Important note: This will fail if the player hasn't been given a faction yet! Be very careful to make sure the player has a faction assigned before calling this! addRankSilentSame as addRank, but it won't send a faction status update email. addRankFaction:[FACTION NAME]this adds the val to the specified faction. I.E: "addRankFaction:CSEC" addFlags:flagname1,flagname2,flagname3,etcAdds the defined (1 or more) flags to the current session. Flags can unlock missions and do other tasks. removeFlags:flagname1,flagname2,flagname3,etcRemoves the listed flags if they exist.

changeSong:切换至val中定义的歌曲: 情况1:Revolve 情况2:The_Quickening 情况3:TheAlgorithm 情况4:Ryan3 情况5:Bit(Ending) 情况6:Rico_Puestel-Roja_Drifts_By 情况7:out_run_the_wolves 情况8:Irritations 情况9:Broken_Boy 情况10:Ryan10 情况11:tetrameth loadConditionalActions:DLC/ActionScripts/HermeticAlchemistsActions.xml:加载一个条件动作集。本指南稍后将对此进行介绍。 setHubServer:[服务器ID]:将具有指定ID的服务器设为网络地图上显示的新中心服务器。这会在其周围添加小旋转效果,就像基础游戏中CSEC的效果一样。 setAssetServer:[服务器ID]:将具有指定ID的服务器设为网络地图上显示的新资产服务器。此功能会在其中添加小星星 playCustomSong:[歌曲路径]将音乐渐变为指定的歌曲文件。需要完整路径,例如:Music/Song.ogg 歌曲必须为Ogg Vorbis(.ogg)格式 自定义歌曲无法在XNA分支上播放! playCustomSongImmediatley:[歌曲路径]立即播放上述指定歌曲,无淡入效果——直接切换。 仅迷宫任务功能:changeSongDLC

Values: case 1: Remi2 case 2: snidelyWhiplash case 3: Slow_Motion case 4: World_Chase case 5: HOME_Resonance case 6: Remi_Finale case 7: RemiDrone case 8: DreamHead case 9: Userspacelike case 10: CrashTrack Mission Continuations and Branches To define what happens when this mission is completed, there's the nextMission tag: <nextMission IsSilent="false">NONE</nextMission>This defines the path to the next mission file. The mission file at this path will be loaded, and email sent when the current mission is completed. The IsSilent flag is... admittedly in a terrible place here. It silenced THIS mission, not the next one. This means that if you set IsSilent to be true here, this mission will not send and email when it is loaded. Important detail about mission completion: For a reply to work, the mission the player is currently on my have the same email sender field as the email they reply to in their inbox. This means that if you have a silent connector mission, make sure it has the same sender filled in in the email field. If you want there to be no mission following this one (For example, the email mission that introduces you to a hub server, set nextMission to "NONE". Branch missions (Optional)Branch missions are loaded during the load step of this mission, and are held in parallel. Every frame (if ActiveCheck) or every time an email is responded to, the mission system will check the goals of the current mission (this file), and if it doesn't pass them, it will check (in order) the goals of all the branch missions defined here. If successful, the branch mission's "nextMission" will be loaded. <branchMissions> <branch>Missions/BranchExample/TestBranchMission.xml</branch> <!-- You can have more than one branch mission here --> </branchMissions> This allows you to put in branching story paths, variable responses, and allow different responses for various goals. It's a bit finicky to use, so I recommend testing all branch structures you put in very carefully. Note that the branch mission's email will not be sent - they are all loaded in silent mode. Mission Postings and Emails Mission PostingsThe "Posting" of a mission is what gets read and put up on a mission listing board like CSEC or Entropy in base Hacknet. <posting title="Do the Extension Test Mission" reqs="someCustomFlag" requiredRank="3" > This is the body text of the posting that will appear when the mission is clicked on. It should contain a basic outline, with any warnings the player needs. Once accepted, the email should contain full details. </posting> title is the Mission title line that's displayed in the list. reqs is a comma separated list of required flags before this mission can be accepted from a Hub server. Before the reqs and required rank are met, the mission will appear locked (like Junebug). requiredRank is the faction rank the player needs to have before this mission is unlocked (player rank must be >= this number) EmailThis is the data of the email the player will be sent when this mission is accepted or continued to. <email> <!-- The sender field is very important for branching or silent mission chains. Even if this file you're editing isn't the email on the server the player will be responding to, it will still run it's completion checks as long as the player is responding to any email from the same sender. This doesn't affect basic and normal missions, so if you're not doing anything too fancy, don't worry about it.--> <sender>Matt</sender> <subject>Test Mission Email</subject> <body>This is the body of the email. Be careful with your formatting! The Hacknet parser does not account for auto-whitespace added to the left here. Email contents are very important - small changes in wording can dramatically change how easy or hard a mission is. Be very conscious about how much you are hinting at and guiding the player, and understand that it will be much harder for everyone that's not you. Good luck, -Matt </body> <!-- The attachments are the clickable items at the bottom of the email with a small "+" You can have as many attachments as you want, of any kind, but I recommend keeping the number small whenever possible, so the player can be focused on a single goal, and not be too overwhelmed. Even if you have no attachments, make sure you include the opening and closing tag (with nothing inside). They are required for the formatting.--> <attachments> <note title="An example note">Experiment with note formatting! Remember that the note space is very small, so text overflow onto new lines happens quickly. Guide the player! Hacknet missions are very frustrating when the player has too little direction and cant continue. </note> <!-- A link takes in the idName of a computer and links to it on the netmap --> <link comp="missionTestNode" /> <!-- this scans for the computer with ID "missionTestNode", then searches it's accounts for the provided username and password, and adds it to the list of known accounts for auto completion. It's a good way of providing the password to a server. --> <account comp="missionTestNode" user="TestUser" pass="testpass" /> </attachments> </email> Basic Actions

Actions in Hacknet can be triggered in a few ways: MissionStart or MissionEnd functions Faction rank progressing ConditionalActionSets having a condition met You'll see how to make use of these soon, but for now it's best to understand what actions can do. Here are the basic actions you can use: <RunFunction FunctionName="changeSong" FunctionValue="6" />Runs a 'mission function' - for a list of these and how to use them, see the example mission file. <LoadMission MissionName="Missions/ExampleMission.xml" />Immediately loads a mission, replacing whatever's currently there and sending the email. <AddAsset FileName="MemForensics.exe" FileContents="#MEM_FORENSICS_EXE#" TargetComp="advExamplePC" TargetFolderpath="bin" />Creates a file with the listed content on the computer with ID targetComp, in the folder path specified. The folder specified must exist before this runs! The file contents field here doesn't support newlines or super long content - this is recommended for just creating items with wildcard data (like programs) For a complete list of wildcards, see the example computer file. <CopyAsset DestFilePath="linkNode1" DestComp="advExamplePC" SourceComp="advExamplePC" SourceFileName="Test_File.txt" SourceFilePath="home" />This copies a file from one computer to another. DestFilePath + DestComp are the DESTINATION computer - where the file will end up SourceFileName, SourceFilePath and SourceComp are the SOURCE computer - where the file exists and is taken from This will do nothing if the file does not exist to be copied. This is very useful for adding complex files to a server after the session is created - create a new hidden server that's impossible to find, define all the files you want on there, then copy them over to where you want later. <AddMissionToHubServer MissionFilepath="Missions/TestExtensionMission1.xml" TargetComp="advExamplePC" AssignmentTag="HA0"/>This adds a new mission to a hub server. This works for both missionHubServer servers (CSEC Style), missionListingServers (Entropy style) and also DHSDaemon servers (Bibliotheque style). CSEC Style: <AddMissionToHubServer MissionFilepath="Missions/TestExtensionMission1.xml" TargetComp="advExamplePC" />Bibliotheque Style: Assignment tag is who the mission starts assigned to of the server's user list. If this tag exists, the player cant claim the mission! Note that adding a mission to an entropy style server, you can set the AssignmentTag to be "top" to add to the top of the list. Otherwise it'll be added to the bottom. <RemoveMissionFromHubServer MissionFilepath="Missions/TestExtensionMission1.xml" TargetComp="advExamplePC" />This removes the mission from the hub server, if it exists. Works for all three specified above. <AddThreadToMissionBoard ThreadFilepath="Nodes/MessageBoardThreads/ExampleThread1.txt" TargetComp="advExamplePC" />Adds a thread to a /el message board - thread file should be a UFT-8 plaintext document. <AddIRCMessage Author="HA0" TargetComp="advExamplePC" Delay="3.0">Hey @#PLAYERNAME# - check out the new asset that got added a few lines ago.</AddIRCMessage> <AddIRCMessage Author="DependableSkeleton" TargetComp="advExamplePC" Delay="8.0">@channel this notifies everyone!</AddIRCMessage>Adds a message to a DHSDaemon or IRCDaemon IRC. Delay is seconds until the post appears. <AddIRCMessage Author="P4rt1cul4rity" TargetComp="advExamplePC" Delay="3.0">!ATTACHMENT:note#%#Note Title#%#Note Content Note line 2 etc</AddIRCMessage> <AddIRCMessage Author="P4rt1cul4rity" TargetComp="advExamplePC" Delay="3.0">!ATTACHMENT:link#%#ComputerName#%#123.123.123.123</AddIRCMessage> <AddIRCMessage Author="P4rt1cul4rity" TargetComp="advExamplePC" Delay="3.0">!ATTACHMENT:account#%#TargetCompID#%#69.58.186.118#%#admin#%#password</AddIRCMessage>You can made notes, links and attachments in IRC Messages like this! <CrashComputer TargetComp="linkNode1" CrashSource="advExamplePC" DelayHost="advExamplePC" Delay="5.5" />Crashes computer with the ID TargetComp. If this is "playerComp" it will crash the player's own computer (bluscreening it) instantly. If it's another computer, this will remove it from the netmap for 15 seconds or so, and disconnect the player if they were connected to it. The CrashSource is the ID of a computer that the crash log will point to. NOTE: Players are very likely to rm * entire log folders, so don't make this part of any critical path - it's almost impossible to find. Secrets only! DelayHost is the ID of a computer that can host delayable actions. Valid computers need to have one of these daemons on them: IRCDaemon or DLCHubServer <DeleteFile TargetComp="advExamplePC" FilePath="bin" FileName="Binary_File" DelayHost="advExamplePC" Delay="5.5"/>Deletes a file from the target computer. Does nothing if that file does not exist. <AddConditionalActions Filepath="ExampleConditionalActionSet.xml" DelayHost="advExamplePC" Delay="5.5"/>Loads in a new set of conditional actions from a file. Check out the file listed here for an explanation on what you can do with that. <SaveGame DelayHost="advExamplePC" Delay="20.5"/>Saves the game! The player should be saved frequently, just incase their power dies or something. If you have extremely long missions without email replies or any other save triggers, use this to keep the player saved and up to date. Advanced Actions These can be used just like the basic actions, but there were too many to fit in the word limit for steam guide's single chapter limit, so here are the more advanced ones: <LaunchHackScript Filepath="HackerScripts/ExampleHack.txt" DelayHost="advExamplePC" Delay="5.5" SourceComp="advExamplePC" TargetComp="playerComp" RequireLogsOnSource="false" RequireSourceIntact="true"/> Loads in the Hacker script defined below to execute 5.5 seconds from now, coming from source advExamplePC and targeting playerComp (The player node ID). These can target whatever you like, and be ally scripts! RequireLogsOnSource means that this will only execute if the source comp has logs on it from the player deleting, moving, or copying a file. You can use the ID or the IP for the source and target - either works. RequireSourceIntact means that if the target is missing it's networking file from /sys, the hack wont happen. This means a crippled computer cant hack you back. <SwitchToTheme ThemePathOrName="Themes/ExampleTheme.xml" FlickerInDuration="3.0" DelayHost="advExamplePC" Delay="15.5" />Switches to the listed theme. You can specify any of the core Hacknet themes by name directly : TerminalOnlyBlack, HacknetBlue, HacknetTeal, HacknetYellow, HacknetWhite, HacknetPurple, HacknetMint, HackerGreen Or you can specify a path to a custom theme file <StartScreenBleedEffect AlertTitle="Title" CompleteAction="Actions/HackerScriptActions.xml" TotalDurationSeconds="12.5" DelayHost="advExamplePC" Delay="3.5">Line one Line two Line Three!</StartScreenBleedEffect>Starts a 'screen bleed' effect! This is where the red line moves down from the top of the screen dramatically. The title and the first 3 lines of the content of this tag are what's shown in the bottom left alert window. The CompleteAction conditional action set is run *only if* the red hits the bottom of the screen and the player runs out of time.TotalDurationSeconds is the total time it takes for the screen bleed to go from top to bottom. I recommend syncing this up with various other conditions that allow you to cancel the effect if the player completes some task. <CancelScreenBleedEffect DelayHost="advExamplePC" Delay="9.5" />Cancels a screen bleed effect started with the tag above. <AppendToFile DelayHost="advExamplePC" Delay="12.5" TargetComp="advExamplePC" TargetFolderpath="Whitelist" TargetFilename="list.txt">#PLAYER_IP#</AppendToFile>Appends the content of the tag onto the file specified. Useful for adding extra data into things, making the world feel more dynamic, adding people to whitelists etc. <KillExe DelayHost="advExamplePC" Delay="15.5" ExeName="ssh" />Kills all exes that contain the string mentioned, or * for all. This is case insensitive. So the following would kill "SSHCrackExe", but changing it to "s" would kill all exes with an s in their name. This is useful for doing things like killing ESequencer.exe once it's running, or having a rival hacker close all of the player's shells. <HideNode DelayHost="advExamplePC" Delay="15.5" TargetComp="advExamplePC" />Hides the target computer node from the netmap if it's visible <GivePlayerUserAccount DelayHost="advExamplePC" Delay="15.5" TargetComp="advExamplePC" Username="mailGuy" />Reveals this user account to the player so it's details show up in the autocomplete options when the player goes to log in. <ChangeIP DelayHost="advExamplePC" Delay="15.5" TargetComp="advExamplePC" NewIP="111.111.123.124" />Changes the IP Address of the computer with ID in targetComp to the new IP address provided. Set NewIP to be blank, or #RANDOM_IP# for a random one! <HideAllNodes DelayHost="advExamplePC" Delay="21.5"/>Un-reveals all visible nodes from the netmap <ShowNode DelayHost="advExamplePC" Delay="21.5" Target="advExamplePC" />Reveals a node on the netmap. <SetLock DelayHost="advExamplePC" Delay="21.5" Module="terminal" IsLocked="true" IsHidden="false" />Sets a UI module to be locked/unlocked and hidden/visible. Module names are: terminal, ram, netmap, display Changing the Mail Icon The final Action lets you change the mail Icon. <ChangeAlertIcon Target="advExamplePC" Type="irc" DelayHost="advExamplePC" Delay="9.5"/>Changes the alert icon (top right) to point to a new server! Target is the ID of the server it should connect to. Type can be one of 4 options: mail, irc, irchub, board mail is a mail server, like Jmail. If you use this, the mail server that it points to MUST HAVE A MAIL ACCOUNT FOR THE PLAYER. If it doesn't, it will crash when the player clicks on the icon and tries to go to their non-existent account. board is a /el style message board. Whenever a message or thread is added that contains any other the above IRC mention strings, the player will be notified. Labyrinths users only.irchub is a DLCHubServer like Labyrinths uses. Labyrinths players only. irc is a standard IRC server. Whenever an IRC log with @#PLAYERNAME# or @Channel in it is added, the player will get a notification. IMPORTANT NOTE: Changing the type to anything other than mail is only supported with the Hacknet Labyrinths DLC installed. Conditional Action Sets A conditional action set is a set of conditions that each contain a list of Actions to run if that condition is met. You can load a conditional action set in via the Action: <AddConditionalActions Filepath="ExampleConditionalActionSet.xml" DelayHost="advExamplePC" Delay="5.5"/> And mission function: loadConditionalActions:Path/To/Actions.xml A complete conditional action set example file is here: https://hastebin.com/rodiyumepa.xml Avaliable Conditions <OnConnect target="advExamplePC" needsMissionComplete="true" requiredFlags="decypher"> <!-- You can put any action that was described in the Actions section here --> </OnConnect> This one is checked when the player connects to the PC with ID in the target field. needsMissionComplete and reqiuredFlags are optional additional checks that you can apply. <HasFlags requiredFlags="decypher,otherFlag"> <!-- Actions here --> </HasFlags>Triggers once the player has *all* of the flags in a comma separated list in requiredFlags <OnAdminGained target="advExamplePC"> <!-- Actions here --> </OnAdminGained>Triggered once the player gets admin access to the target machine. <Instantly> <!-- Actions here --> </Instantly>This triggers immediately, as soon as this is finished loading! Actions will happen in the order they appear in this file. <Instantly needsMissionComplete="true"> <!--You can also have the needs mission complete flag on instantly actions--> <AddIRCMessage Author="DependableSkeleton" TargetComp="advExamplePC" Delay="0.3">Second, if mission complete!</AddIRCMessage> </Instantly> <DoesNotHaveFlags Flags="SomeFlag,MoreFlags"> <!-- Actions here --> </DoesNotHaveFlags>Triggers if the player has none of the flags in the list. <OnDisconnect target="advExamplePC"> <!--Actions here--> </OnDisconnect>Triggers when the player disconnects from something, or connects to their own computer. You can remove the target tag (or set it to "NONE") to have this trigger when the player disconnects from anything. Factions A faction is essentially just a few things: A name, a number representing the player's position in the faction, and a set of actions that can trigger to make changes to the game state in response to actions. They are useful for sequencing events, launching Action sets and guiding the player to new things. A complete example faction file can be found here: https://pastebin.com/n3i1faEe Defining a FactionFor a faction to be loaded it, it must be added to the IntroExtension.xml With one of these tags: <Faction>Path/To/Faction.xml</Faction> Your faction file should start with this: <CustomFaction name="Example Faction" id="examplefaction" playerVal="0">You can change the starting player value with the playerVal field above. From there it can contain multiple Action sets that are triggered by a faction-specific condition. Available conditions are: <Action ValueRequired="1"> <!-- Actions Here! --> </Action>The value required conditional action is the most basic one. This triggers once the player's value moves from below this number to equal to or more than it. <Action Flags="decypher"> <!-- Actions Here! --> </Action> This action trigger as soon as the player is given the "decypher" flag <Action ValueRequired="5" Flags="decypher"> <!-- Actions Here! --> </Action>And this one only triggers once both the player has the flag, and the score is greater than or equal to the required value Custom Themes
First, check out the example theme file that generates the theme in the screenshot above: https://pastebin.com/ch66vkUb You'll notice it has a bunch of tags with the name of the color, and 3 or 4 numbers which represent the color itself, like this: <defaultHighlightColor>255,41,63</defaultHighlightColor> These numbers define a color using the premultiplied-alpha method, so: R, G, B, A Where A is opacity and additivity. These are bytes, so they range from 0 to 255 without decimal places. This is a little complex, so I'll break it down with some examples. Pure black is 0, 0, 0, 255 Pure White is 255, 255, 255, 255 If the number on the far right (alpha) is 0, the color values provided will ADD to the pixel underneath it. This lets you do highlights that brighten things behind them, and look "sort of" transparent. This is a cool effect, and Hacknet uses it a lot, but remember to be tasteful with it - backgrounds like this make text hard to read, for example. There are a few quirks to what the colors do, as the theme setup was added super early in development, and some things pull colors from strange places. For example, the Proxy/Firewall bars on the probe screen draw their colors from the shell and top bar colors. LayoutsYou can change the layout of the windows in your theme with the tag: <themeLayoutName>mint</themeLayoutName>Valid layouts: blue, green, white, mint, greencompact, riptide, colamaeleon and riptide2 Testing Functionsyou can use the command "reloadtheme" if you have debug commands enabled to instantly reload the theme you currently have active and see any changes you've made. Custom BackgroundsYou can include your own images in the extension and reference them to be used as the background in custom themes. Note that if you want to distribute your mod through steam workshop, you'll need the rights to the images you use! Make sure you get permission. Backgrounds should be 1920x1080px and wither .png or .jpg format. If no background is specified, Hacknet will automatically generate one out of hex cells. Adding themes to your ExtentionYou can add your themes to computers ingame using the tag: <customthemefile path="sys" name="Custom_x-server.sys" themePath="Path/To/Theme.xml"/> Or you can auto-switch the player to it with the Action: <SwitchToTheme ThemePathOrName="Path/To/Theme.xml" FlickerInDuration="3.0" DelayHost="advExamplePC" Delay="15.5" /> Music Custom songs can be played with the mission function "playCustomSong:[SONG_PATH]" You can also use playCustomSongImmediatley:[SONG_PATH] to skip the fade between songs and start it immediately. Songs must be in Ogg Vorbis (.ogg) format! Also note that for now, songs will not work on the XNA branch - this is because the .ogg format handling code is done within FNA, so the XNA version doesn't have the code to support those files. I'll address this when I can, but due to how few people use that branch, it's a lower priority for now. Sorry! A strategy for this is to specify a base game song to play first, the instantly override it with your desired custom song - this way XNA players will still get a music change. You can also do this from conditional action sets, using the "runFunction" tag. People System Several daemons use the people system to populate their datasets. The people system defines (and generates) a set of data representing a single individual that has accounts and records across multiple servers. This helps create a sense of consistency and identity within the game, and allows players to track down all of the data points about a person on various servers. To define a person that will get loaded in and added to relevant servers, add a person descriptor file into the /People/ folder. You can see an example person file here: https://hastebin.com/eqayupuxiv.xml You can add as many people files as you want. Hacknet will automatically generate random people so that the list is filled up to be at least 100 people on new session load, to make the other servers feel full. Daemons that use data form the people system: Databases Academic Daemons Medical Daemons PointClicker JMail junk accounts Websites Websites. The porting nightmare. The buggy mess. The endless hacks. These have been nothing but nightmares from day 1, and due to apparently all web rendering services that work cross platform being buggy as anything, many players use the -disableweb launch argument, preventing websites from rendering. This means you need to make 100% sure that your missions are completable from these people reading the source of the website. Websites in Hacknet are restricted to being in only one folder for security reasons, so *everything* you reference within your websites needs to be relative to Web/Cache within your extension folder. Before you look into the files, first visit the website itself, linked below. Your websites themselves (the HTML files) can be stored wherever you like within your extension folder, but all images and .css files you reference must be within the /Web/Cache folder (or a subfolder therein). Note that websites have a few rendering issues (like stretching for some resolutions and themes). I'll work these kinks out as much as possible before launch, but they may remain, so try to design around them. Website Template<!DOCTYPE html PUBLIC "-//W3C//DTD XHTML 1.0 Strict//EN" "http://www.w3.org/TR/xhtml1/DTD/xhtml1-strict.dtd"> <html> <head> <!-- put stylesheet references here --> <meta http-equiv="Content-Type" content="text/html; charset=utf-8" /> <link rel="stylesheet" href="<FILEPATH HERE>" type="text/css" charset="utf-8" /> <head> <body> <img src="<FILEPATH HERE>"> </body> </html> SummaryCreate your website HTML file wherever you like. Add all images and CSS files that you want to use in it to the folder Web/Cache or a subfolder inside of it. Reference those assets using relative paths only within the website. Add a web server daemon to your node with the URL pointing to your html file. Replacing Jmail, ISP servers, and the Player Computer JmailJmail can be replaced by setting the id of any computer to be "jmail". If you aren;t changing your mail icon to something else, it will default point to this server. Note that if you want to use your newly crated server as the default mail icon destination, it MUST contain a MailServer daemon, and a mail account for the player, like so: <account username="#PLAYERNAME#" password="reptile" type="mail" /> <mailServer name="Example Mail Server" color="50,237,212"> </mailServer> Note that you can still add in extra accounts etc here as normal. Player ComputerThe player computer can be overwritten by setting the ID of any computer to be "playerComp". Note that this is *always* the ID of the player computer, for referencing it elsewhere by ID. There aren't any special requirements for this one, so go nuts. Note that the computer will probably not be in the normal spot on the netmap if you do this! ISP ServersMake a computer with the id "ispComp" and make sure it has an ISP server on it, and this should work! Hacker Scripts Following is an example hacker script with all available options listed in it: config [TARGET_COMP] [SOURCE_COMP] 0.2 $#%#$ writel The 0.2 at the end of the line above this one is the baseline delay between actions in the script $#%#$ writel you can hardcode in source and target ip addresses above if you want, but this lets you use the script more dynamically. $#%#$ connect $#%#$ writel connect will connect from the source comp the the target comp $#%#$ delay 2 $#%#$ writel delay will pause execution for that many seconds. In this case, 2. $#%#$ openPort 21 $#%#$ writel Opens a port on the target! $#%#$ stopMusic $#%#$ writel Stops the music of the player, if they are the target. $#%#$ startMusic $#%#$ writel Starts the music of the player, if stopped, and they are the target. $#%#$ clearTerminal $#%#$ writel Clear the terminal of the player, if they are the target. $#%#$ write WHO $#%#$ write DO $#%#$ write YOU $#%#$ write THINK $#%#$ write YOU $#%#$ write ARE $#%#$ write ? $#%#$ writel You can write out to terminal onto the same line like that above, or a full line like this one! $#%#$ write_silent Shhhh $#%#$ writel_silent these two let you write thigns without the beeps and flashes $#%#$ writel $#%#$ writel An empty writeline just pushes out newlines to the terminal. Looks cool. $#%#$ hideNetMap $#%#$ hideRam $#%#$ hideDisplay $#%#$ writel These commands hide stuff if the player is connected to them. BE VERY CAREFUL WITH THIS - player cant get it back alone. $#%#$ showNetMap $#%#$ showRam $#%#$ showDisplay $#%#$ showTerminal $#%#$ writel These commands bring the windows back $#%#$ trackseq $#%#$ writel This flags it so that the player will have to do the ETAS if they fail the next forkbomb that they receive, if they have the CSEC flag $#%#$ instanttrace $#%#$ writel This is a brutal command that instantly starts the ETAS for the player $#%#$ forkbomb $#%#$ writel Launches a forkbomb on the target. Crashing it instantly if non-player. $#%#$ flash $#%#$ writel Flashes the UI in a dramatic way, if targeting the player $#%#$ delete /sys x-server.sys $#%#$ writel Deletes a file. You can specify any folder and file here, or * for all files in that folder. $#%#$ setAdminPass newpass $#%#$ writel Sets the admin password of this computer to be 'newpass' or whatever you set that to. $#%#$ makeFile home Filename.txt Everything past the first space there goes into the file! $#%#$ writel Makes a new file in the folder named in the first argument (cant do subfolders, sorry) with the name FIlename.txt and the shown content $#%#$ makeFile bin SSHCrack.exe #SSH_CRACK# $#%#$ writel You can add programs like this. See the full list of wildcard names in ExampleComputer.xml $#%#$ openCDTray $#%#$ writel YEP! $#%#$ delay 5 $#%#$ closeCDTray $#%#$ disconnect $#%#$ Development Debug Commands To Autostart your mod while in development, start Hacknet with the argument -extstart [YOUR_MOD_FOLDERNAME] To start Hacknet on your second monitor, if you have one, use the argument -altmonitor You probably also want to develop with force complete on: -enablefc Debug commands too: -enabledebug Once you have Debug commands enabled: fh Instantly breaks into any computer dscan [ID] reveals a computer by ID name ra reveals everything on the netmap at once reloadext reloads all the nodes in the current extension from source files, and updates them in the current save. printflags ouputs all the flags the player has to the terminal runhackscript Script/Path/Name.txt Replace the path with the filepath of your own hacker script to test it out - this also prints errors to the terminal. Publishing to Steam Workshop and the Nexus To make the workshop publishing tools visible within Hacknet, add the launch argument: -allowextpublish From your extension page, you'll now be able to create the workshop item and upload your content to it. Make sure to read the Workshop information at the bottom of ExtensionInfo.xml in the example extension to know what to include! I suggest you create it as private first, then go to your own workshop page on steam to look over it and polish it up before making it public. Once uploaded, there's a few things you'll need to check. First, check to see if your extension requires the Labyrinths DLC or not. You can keep track of this yourself during development, but the best way to know for sure is to disable your copy of Labyrinths if you have it (uncheck it's box in the DLC section of your Hacknet library page), then run the tests on your extension and play through it. If it does require Labyrinths, make sure you add that as a requirement on your workshop page! The NexusOnce you've published to the Steam workshop, you should upload your extension to The Nexus so that others with DRM Free copies of Hacknet can play it. Upload them here: https://www.nexusmods.com/hacknet