换一换
换一换 


这是一份《黑暗之魂3》的完整指南,涵盖了本体游戏、DLC、成就、支线任务、机制等内容。 ### 入门 - 基础知识 开始新游戏后,在一段过场动画结束后,你将进入角色创建界面。对于《黑暗之魂》系列的新手来说,这可能看起来很复杂,但请冷静,我们现在会逐步讲解。 首先是名字。请务必谨慎选择,因为这是后期无法通过常规方式更改的两个内容之一。其次是性别。同样,务必谨慎选择,因为这也是无法更改的设定(建议选择女性)。至于角色外观,影响不大,因为如果之后后悔了可以进行修改。接下来是角色职业,建议根据你打算重点培养的属性来选择初始职业。无论是力量、敏捷、智力、信仰还是幸运,选择对应属性初始值最高的职业即可。 力量适用于较重、较慢但单次攻击伤害更高的武器。 敏捷适用于速度更快、能连续造成更多伤害的武器。 智力和信仰适用于施法者职业。 幸运适用于那些打算使用游戏中“ hollowing ”机制的玩家,这部分内容我会在之后解释。如果你不确定该玩什么职业,选择一无所有者职业,因为它更容易塑造你的角色。关于陪葬品,选择黑火焰瓶,它在后期会很重要。 游戏机制说明: 这部分会涉及一些技术性的功能,这些功能并非你必须了解的内容。如果你愿意,可以跳过这部分,直接进入攻略部分,当你对某些内容感到疑惑时再回来查看。 移动: 你可以行走、慢跑和奔跑。奔跑会消耗耐力。 耐力由屏幕左上角的绿色条表示。游戏中几乎所有动作都需要消耗耐力,当不使用耐力时,它会自动恢复。当耐力值降至0时,你的角色将无法执行任何需要耐力的动作,这会使你陷入危险境地。你绝对不希望在战斗中耗尽耐力,所以要格外注意。
耐力通过升级耐力属性来提升,每升一级会获得更多耐力值。 你也可以翻滚和后跳。两者都会消耗耐力,且翻滚能为玩家提供无敌帧。翻滚时,你会在短时间内暂时无敌,这让你可以通过时机把握,在敌人攻击时翻滚以避免受到任何伤害。你的翻滚和后跳受装备重量影响。 装备重量是你能携带的重量数值,范围从0%到100%,它决定了你的整体移动速度。当耐力值低于30%时,你可以施展速度最快、距离最远的翻滚和后跳;耐力值在30%到70%之间时,你可以施展普通的翻滚和后跳;耐力值在70%到100%之间时,翻滚的无敌帧会从13帧减少到12帧,且翻滚变得缓慢而短促,后跳也是如此;耐力值超过100%时,你将无法进行翻滚和移动。
活力属性负责提升你的整体装备负重,以及对物理伤害的防御力。 伤害类型与防御机制说明:游戏中有五种主要伤害来源,分别是物理、暗、魔法、火焰和雷电。 物理伤害是游戏中最常见的伤害类型,可细分为四个子类别: 标准:对较弱的敌人(如活尸)效果显著。 打击:对装甲目标最为有效,可以理解为“冲击”类型的伤害。 斩击:顾名思义,对血肉之躯效果显著。 突刺:类似于“穿刺”伤害。 暗属性伤害:对非深渊敌人(占绝大多数)效果显著,但对活尸敌人(同样占很大比例)效果较弱。
信仰会提升此伤害及其防御力。火焰伤害对血肉敌人最为有效。
力量属性可提升对此类伤害的防御力。魔法伤害对重甲敌人效果最佳。
智力会增加此伤害及其防御力。 闪电伤害对龙类及类似生物最为有效。
耐力可以提升对此的防御力。 战斗:近战武器说明 每种武器都有不同的招式组合,但我可以解释如何更好地“使用”你拥有的武器。所有武器都有轻攻击、可蓄力以造成更多伤害的重攻击以及武器战技。 武器战技基本上就是武器的技能,部分武器拥有基于武器类型的通用技能,还有一些则具备独特专属技能,例如 Boss 武器。使用该技能会消耗专注值(专注值类似魔法值,由左上角的蓝色条表示),不同武器的技能各不相同,可能包括移动、自我 buff、连招等。通过轻攻击和重攻击,你可以在奔跑、翻滚、跳跃、下落、后跳等状态下攻击,以此来熟悉招式组合。 你可以双手握持武器,这会提升武器伤害、改变招式组合,并且能够弥补力量点数的不足。 部分武器支持双持,而非双手各持一把。遗憾的是,并非所有武器都能像以前那样双持(黑暗之魂2>黑暗之魂3)。 你可以锁定目标以简化战斗。 同时按下前向键和轻攻击键可以使用踢击,用以破掉敌人的防御。 当敌人被破防时,会受到暴击伤害。背刺或弹反敌人时也会造成暴击伤害。 近战战斗中的属性:你的近战伤害主要受力量和敏捷属性等级的影响。在某些情况下,武器的物理伤害也会受到【幸运】属性的影响。
幸运是一项提升物品发现率(即敌人战利品掉落率的百分比提升)以及出血和中毒累积效果的属性。你的伤害显示在攻击力部分,通常也被称为【AR】。
战斗:防御部分说明 你可能想在战斗中采取防御姿态,虽然我不建议过度依赖防御,但游戏中确实存在盾牌和其他防御装备。 首先,让我们解释防御属性的作用机制:游戏中有三个主要防御属性,分别是防御力、吸收值和抗性。
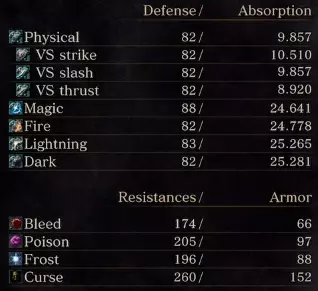
防御力由你所穿戴的护甲数量决定。这意味着四个装备槽都穿戴护甲才会影响该属性,无论是面罩还是铁头盔,效果都一样。 吸收值受你穿戴的护甲类型影响,并会为你提供百分比伤害减免。这意味着拥有25.000点火焰吸收值,将减少你受到的25%火焰伤害总量。 抗性用于对抗负面状态的累积,例如流血或诅咒。 至于盾牌,举盾防御时会提供吸收值,受到攻击时会根据盾牌的大小和稳定性消耗耐力。这意味着盾牌越大,其防御效果就越好。盾牌同样拥有战技,小型盾牌则提供【格挡】技能。 格挡可用于反击敌人的攻击,成功格挡时会瓦解敌人的防御并使其陷入可进行【反击】的状态。多种装备均可施展格挡,部分装备拥有更长的格挡判定帧,这能让玩家更容易抓住瓦解敌人防御的时机。 对于选择法术路线的玩家,战斗方式大致相同,但存在一些差异。 施放法术需装备【触媒】和【法术】,伤害会根据build和法术类型受【智力】与【信仰】属性影响。施放法术需要消耗耐力和专注值,专注值可通过提升【专注力】属性来增加。
专注值是一项属性,它能增加你可携带的法术数量以及专注值(FP)的总量。 更多关于属性和如何构建角色的内容 武器质变、强化和属性补正解析 我们已经了解了战斗机制、伤害计算方式、防御与元素伤害的运作原理,以及属性对伤害的影响。现在,让我们来探讨如何综合运用这些知识来构建一个优秀的角色。

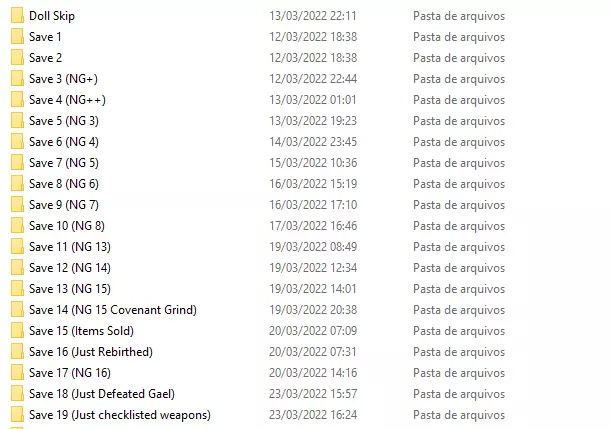
属性补正是武器根据你已提升的属性获得的额外伤害加成,其等级从E(最低)到S(最高)。简单来说,假设你得到一把匕首,力量补正为E,敏捷补正为C,这意味着如果你打算走力量流,这把武器表现不佳,但如果你选择敏捷流,它会更有用。 如前所述,有些武器会有 Luck(幸运)补正,这种补正不会像其他属性那样正常显示。具有幸运补正的武器包括暗变质武器和游戏中获得的部分特殊武器。 关于变质,指的是用特殊宝石对普通武器进行变质,以更好地将其属性补正引导至你所构建的属性方向。让我们回到匕首的例子,同一把拥有C级敏捷补正的匕首,可以通过镶嵌锋利宝石使其拥有A级敏捷补正。也就是说,武器天生更适合搭配特定的build。 有些质变会为武器增加元素伤害,同时降低其物理补正,并增加信仰或智力补正。 还有些质变不会为武器增加任何伤害,但会附加出血等特定异常状态累积。现在我们来谈谈属性如何根据补正影响武器伤害。这里有个叫做软上限的概念,大致是指伤害开始趋于平缓的临界点,因为你已接近属性上限。通常像生命或耐力这样的属性,软上限大约在40-45级左右,继续升级的收益会变得不值得。不过武器的属性补正有所不同。武器的伤害软上限取决于其属性补正,补正越好的武器越能突破40级的上限。A级补正的武器在50级左右开始出现收益递减,S级补正的武器则会持续到60级。法杖或圣铃等触媒类武器也是如此。 一些额外提示:除了防具之外,所有装备都可以使用楔形石来升级以获得更好的属性,不同武器所需的楔形石种类各不相同。大多数武器可以从+0升级到+10,但有些特殊武器只能升级到+5(这并不意味着它们的伤害更低,所有武器的平衡性都很好)。武器和盾牌可以通过法术进行 buff,buff 的强度取决于你使用的法术,并且这些 buff(大多数情况下)会受到你触媒的【法术加成】子类别的影响。 武器也可以通过特定消耗品来增加伤害,这些消耗品会提供你所选择的特定元素类型的【基础伤害】(即无属性加成的伤害)。 如何备份存档 在开始游戏指南之前,我们先来了解一个重要功能:备份存档以防出错。 在 Windows 系统中,按下 Windows 键 + R 打开运行窗口。 输入:"%AppData%",按回车键,然后选择 DarkSoulsIII 文件夹。
在里面,你会找到包含存档文件的文件夹。

复制文件夹或存档文件并粘贴到其他位置,别忘了为它们命名以便更好地整理。注意:不要重命名存档文件本身,只需重命名它们所在的文件夹。
我建议您时不时备份一下存档文件,尤其是在开始新游戏+或出售/丢弃物品之前。灰烬墓地

沿着小路来到一个洞穴,在洞穴右侧有一个【无名旅者之魂】。 - 这些物品相当于“灵魂包”,使用后可获得一定数量的灵魂。从现在开始,我将直接称它们为灵魂包。 返回后,再往前走一点会找到一个【原素瓶(灰)】。 - 它们可以恢复你的专注值。 贴着右侧墙壁前进,你会穿过一片积水区域,那里有一条“回头”的留言。继续往前走,你会到达一个区域,里面有一只【贪婪的结晶蜥蜴】,击败它会掉落【楔形石原盘】,在它附近还有另一个灵魂包。 - 楔形石原盘是一种强化材料,用于强化 Boss 武器和特殊装备。回到你来的地方,这次选择正确的出口离开洞穴。在悬崖左侧与营火互动并休息,可获得【休息】动作。 从营火出发,一直靠左走,从边缘跳下去,能到达一个类似棺材的物体上方,获得【楔形石碎片】。 - 用于强化普通武器。 下去后会看到一个入口,入口右侧是悬崖。小心地跳到悬崖附近,可获得【火焰壶】。 - 投掷后会爆炸并造成火焰伤害。 返回并穿过入口,中央有一个被剑刺穿的人。拔出剑会触发 boss 战——【灰烬审判者古达】。
弱点抗性状态:雷电、打击及火焰伤害抗性较低;黑暗、出血及冻伤伤害抗性较高 拥有1037点生命值 可被弹反 被视为深渊类型敌人 可被破防 击败古达后获得螺旋剑,并在篝火处休息 传火祭祀场 从古达篝火出发,到达并打开竞技场另一侧的大门 从那里向左走,有一把折断的直剑 - 只有疯狂的游魂才会选择用这个战斗 在有两个游魂的悬崖最左侧,有一个返回骨片 - 可用于传送回传火祭祀场或最后休息过的篝火处向上走,你会到达传火祭祀场的入口,左边的树上有一面东之盾。 上楼梯后会遇到一个名为“剑术大师”的敌对NPC,击败他会掉落打刀和大师套装。 - 对于选择敏捷加点的玩家来说,这是前期不错的武士刀。 回到树旁,从左边的楼梯上去,拾取一个余火。 - 余火能使你的最大生命值提升30%,并允许召唤和入侵。 注意:不要使用任何余火,它们在后期很重要。 继续向左走,在一些棺材附近可以找到一个返回骨片,往前走一段路,在一个下坡处靠近一只狗的地方还有另一个余火。 回到入口,进入传火祭祀场。
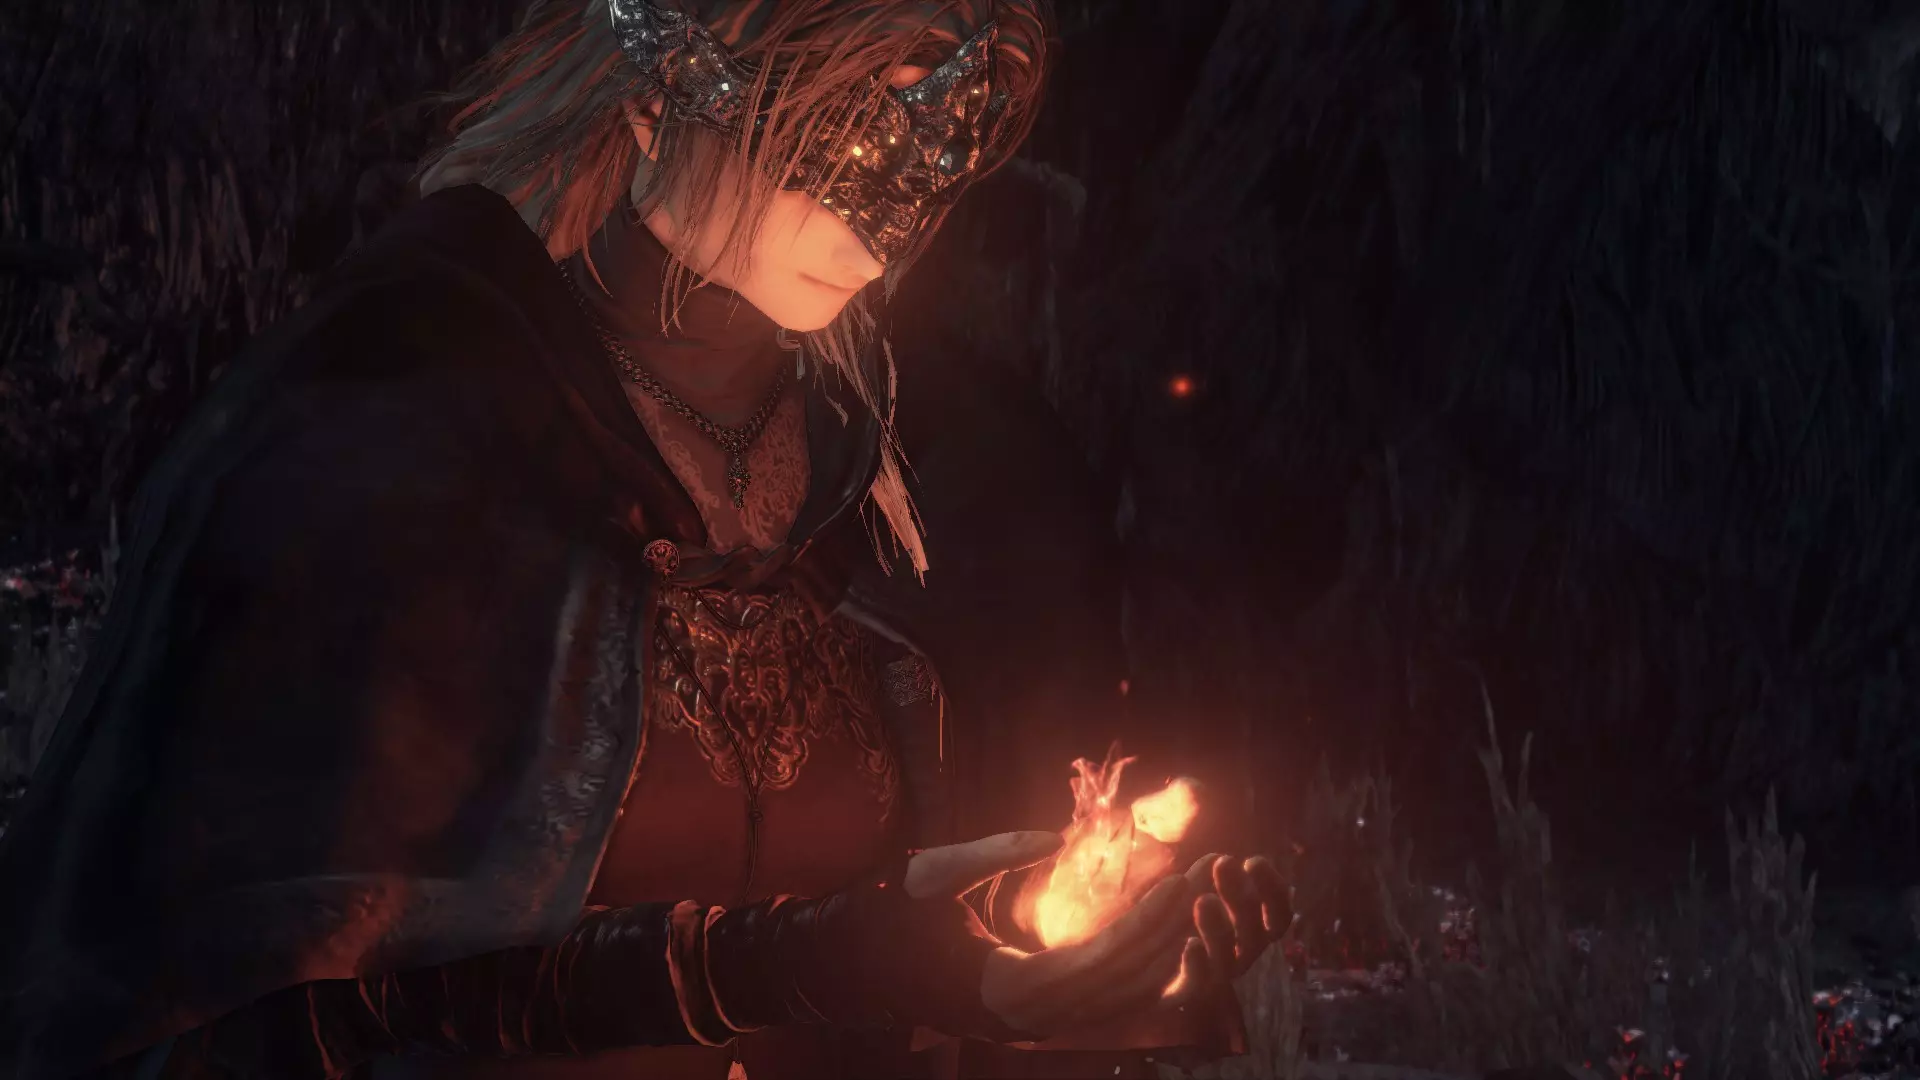
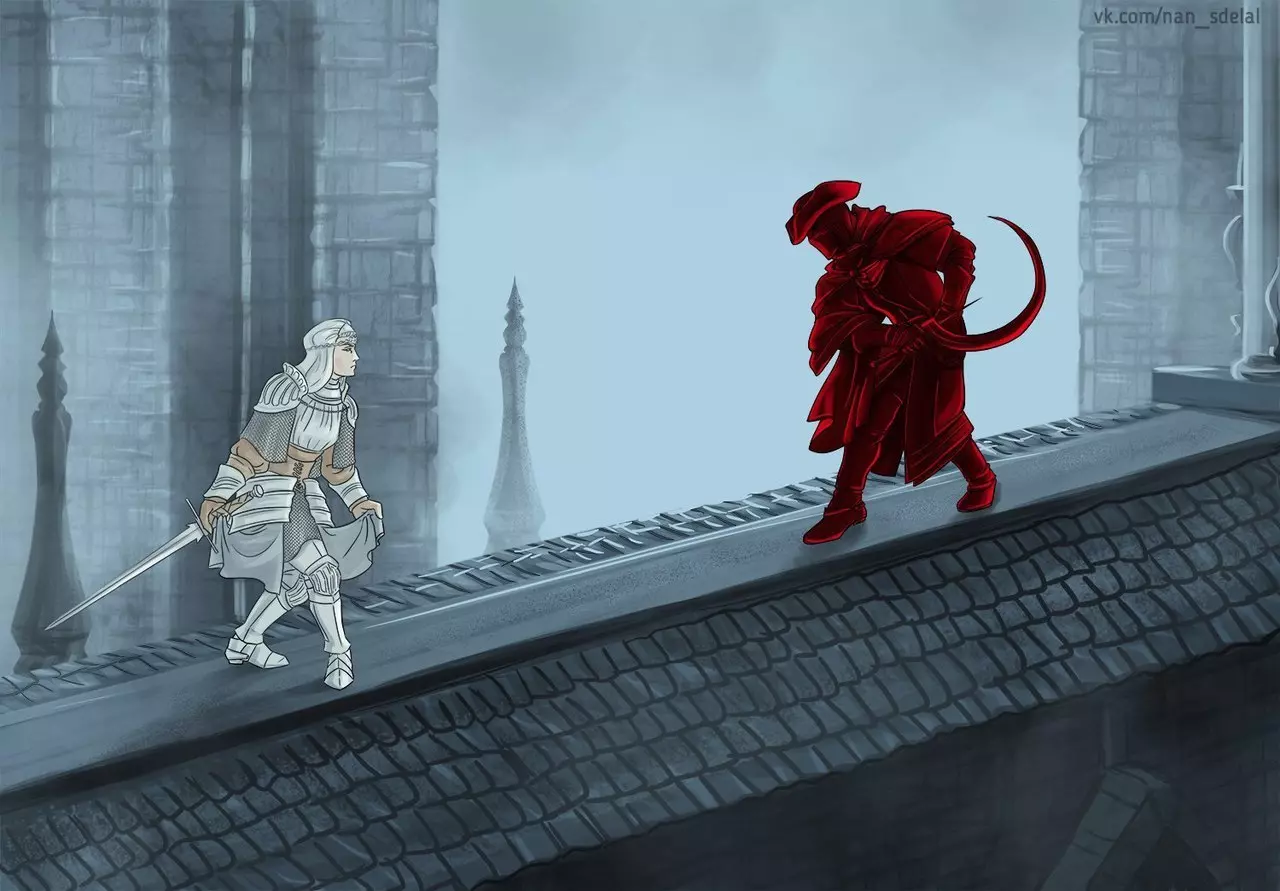
将螺旋剑放置在那里的火盆上以点燃篝火,之后你可以传送到洛斯里克高墙,但现在还不行,我们在这里还有事情要做。 在左侧楼梯上,你会找到逃兵霍克伍德,与他交谈可获得【崩溃】姿势。 在后方,你会找到侍女,她在游戏中出售各种物品,包括关键道具。 在最深处,你会找到铁匠安德烈,他是一名铁匠,这就是他的职责。与他交谈可获得【欢呼!】姿势。 你可能已经注意到篝火附近的金发女性,她是防火女,她可以消耗灵魂为你升级,并且是达成其中一个结局的重要NPC。 注意:我建议不要在这里花费任何灵魂,并且尽量不要失去任何灵魂。到这里你应该有大约6-7千魂,我们需要尽快凑齐2万魂,所以尽量不要死亡丢失魂。 洛斯里克高墙 从传火祭祀场的营火出发,传送到洛斯里克高墙并打开大门,走下楼梯并点燃营火。
Through the hole on the wall, take a drop to the left onto a wooden rafter. Downwards there are two Hollows and a Soul Pack . Going to the other tower, up the stairs there will be a Crossbow Hollow and a Hollow that will turn into a Pus of a Man, right now is the time to use the Black Firebombs, they deal a lot of damage but make sure to save at least one for later. Killing the Pus of a Man will hand you an Ember and a Titanite Shard. Close by there's a Longbow and a few Standard Arrows. Head back to the bonfire and go left this time. Down the streets there will be a Soul Pack, take the left before entering the structure, go up the stairs and to the left to get the Binoculars. Go down the stairs and at the left of the dragon there will be a place for you to drop, go down and pick the Gold Pine Resin. - Adds 95 raw lightning AR to your weapon for 60s. Go inside the building and there you will find some Firebombs. Go down the ladder and you will see another Soul Pack, go outside and rush upstairs, a dragon will appear so be quick and reach out for the metal door. On this room there will be a Mimic that drops a Deep Battle Axe - Good early Dark and Slash weapon, has no scalling so it's perfect for low levels. Sniping the dragon away grants you a Large Titanite Shard. Grab all the items there: An Ember, Claymore, A club and another Soul Pack. - The Claymore is good hydrib Str & Dex weapon. With those at hand you can reach for the other door that opens a shortcut. You should see a lothric knight, to the left of the entrance there's another Soul Pack. Inside on a wood beam there will be more Firebombs and at the right you should go upstairs and light a bonfire, close to the balcony in front of the bonfire there will be a Titanite Shard. Obs: If you have enough to get 20k souls, recommend seeing the Firelink Shrine - Part 2 section before continuing. Go down to the second floor, go through the door and to the right there's a Soul Pack. Going further there will be some Firebombs on a corpse and another Pus of A Man will transform, killing it will hand you an Ember and another Titanite Shard. On the roofs to the left side you'll find another Crystal Lizard that drops a Raw Gem - Used on weapons to have only it's raw damage. Close to it theres another Soul Pack. Go down the ladder on the rooftops there will be some Black Firebombs and on the side with the crossbow hollows there's regular Firebombs. Go inside the building next to the ladder and enter the left, behing the pots there is a Undead Hunter Charm - Where thrown, it blocks the use of Estus and can also open the Mimics mouth to get it's treasure. Up the stairs and through the door theres a Titanite Shard. Go back on the room with a lothric knight and through the other door. At the left there's a room with a Broadsword. - When raw infused, it has the highest damage output of most straight swords. Down the right stairs you'll go through a door and see a room with alot of enemies, you can throw Firebombs on the barrels to explode or kill them normally. You can pick a Estus Shard on an anvil. - Bring it to Andre to increase your Estus capacity. At your back there's a Titanite Shard and on the downstairs at the end of room there's a dog guarding the Cell Key. Go back up the stairs and right before the entrance you can follow a path to the left to find a chest with the Silver Eagle Kite Shield. - Has a low Str requirement and provides 100% physical damage absorption. Back up once again and before the room with the lothric knight on the left you can roll on some barrels to go through and further there's some Green Blossoms. - Increases stamina regen when consumed. Drop on the other plataform and pick the Astora Straight Sword. Firelink Shrine - Part 2 If you spared souls along the way, you should now have around 15-16k souls (any case you can farm the Lothric Knight outside, he gives 220 souls and you can sell his equipment also). Head back to firelink and sell the Embers you got to the Shrine Handmaid, she pays 1k souls for each. With 20k souls at hand now buy the Tower Key and go at the leftmost outside of firelink. There you should see a tower with a Soul Pack sitting right next the door, open it a go up the stairs. Instead of crossing the bridge, take a drop on the roofs and kick the stairs at the left. On the rooftop, you will hear a dialogue and see a bird nest, on this nest there is an npc that trades certain items, it's called Pump-a-Rum. Stand on the nest, go in your inventory and leave 1 of each of the following items: Homeward bone trading for Iron Bracelets and the gesture Call Over Firebomb trading for a Large Titanite Shard. Black Firebomb trading for a Titanite Chunk. At the back of the roofs you'll hear a twinkling sound, it's a Crystal Lizard, killing it will hand you a Twinkling Titanite. - They upgrade unique gear. Go around the left side where you killed the Sword Master, go further after the entrance and on the roof there will be some Homeward Bones. Go back through the entrance and on the rafters there will be an Estus Shard. At the backside of the rafters there is fake wall that dissapears when hit, downwards there's a chest with a Covetous Silver Serpent Ring - Increases the amount of souls you get by 10% Go back to the tower and cross the bridge, go up the elevator and at the top of the tower you'll get a Fire Keeper Soul. - Give it to the Fire Keeper, DO NOT heal the Dark Sigils in any circunstance. Go down the elevator and before the door at the right side there will be a glowing item close to the wall, manage to drop right on it and pick a Fire Keeper Set. At the base of the tower there will be an Estus Ring - Increases the HP healed by the Estus by 20% High Wall Of Lothric - Part 2 Back track to the Tower on The wall bonfire, proceed until the part with crossbow hollows and go down the ladder. Going through the gate, around this place with a Winged Halberd Knight, you will find a Rapier and two Embers. - The Rapier is a good utility weapon, use in the offhand to stunlock and parry enemies. Go through the gate and take the right, go up the stairs and at the right there will be another Soul Pack Jump on the wooden raft to get a Ring Of Sacrifice - You lose nothing upon death, however the ring will break. Back through the entrance, at the left there's more Green Blossoms and further on there's and elevator, go up and unlock the shortcut opening the door. There's some Throwing Knifes behind the elevator. After unlocking the shortcut to the High Wall Of Lothric bonfire, head back all the way to the big gate and in front of you there will be a Soul Pack and Lion Knight Alberd's summom sign. Take the left and the left again, you'll find a blue caped Lothric Knight that drops a Refined Gem. - It balances Str and Dex scalling Go through the door and talk with Emma, High Priestess of Lothric Castle, she will give you the Small Lothric Banner and the Way Of The Blue covenant. Outside take the left to find a Lucerne. Go back to the stairs and towards the big gates, go further and close to the roots to trigger a boss fight. Vordt Of The Boreal Valley
弱点抗性状态:暗属性 打击:标准 斩击: 突刺: 魔法:免疫 拥有1328点生命值 保持在他的背部 深谷战斧很有用 击败沃尼尔后,原本关闭的大门会打开,你可以前往不死聚落,但在此之前先返回高墙塔篝火处。 注意:不要使用他的灵魂。 回到传火祭祀场,与无名指莱昂哈特对话,他会给你龟裂血红眼眸宝珠。 传送到高墙塔,下到三楼,穿过被持戟活尸守卫的入口。 内部右侧有一些飞刀,再往前走有一把破甲细剑。 下楼梯后,你可以用牢房钥匙打开不死聚落的葛雷瑞特的牢房,与他对话会开启他的任务线并获得蓝泪石戒指。- 当生命值低于20%时,所有吸收类型提升20% 现在你可以返回【冷冽谷的波尔多】篝火,前往下一张地图。 【不死聚落】 在升起【小洛斯里克军旗】并被传送到不死聚落之后,点燃篝火。
From the bonfire, go left for a Soul pack. Go back and down the stairs, close to a wagon there will be two dogs chewing on a Alluring Skull. - When thrown, it lures certain types of enemies. Furthermore you'll notice alot of dead pilgrims, close to the right side you will find Yoel Of Londor, talk to him and accept his services moving him to Firelink Shrine. At the leftmost end of the bridge, there's some Homeward Bones. Go towards and through the metal gate, furthermore there's a bonfire under a hut. Travel back to Firelink Shrine and go the entrance in your left, Yoel will be there, talk to him to receive the Beckon gesture and select the option Draw Out True Strength, this will allow you to gain a level for free. Now kill yourself 15 times, go hollow and come back to Yoel Draw Out True Strength until he says you've attained ample strength. With this, as soon as you reload the area, Yoel will be dead and Yuria Of Londor will appear. Talk with her to get the Dignified Bow gesture and progress towards another alternative ending Also buy the Londor Braille Divine Tome from her. Travel back to the Undead Settlement bonfire and go towards the house. Inside theres a Small Leather Shield on the corpse. Go down on the lower floor and there will be an exit leading to the balcony, outside hit the corpse hanging, at the end there's some Repair Powder. - When used, those re-fill the durability of your gear. Go back inside to get a Charcoal Pine Bundle and downwards there's another one. - Adds 110 raw fire AR for 10s. Outside of the house, pick Loretta's Bone on the corpse that you dropped earlier. To the left there's a gate with a Soul Pack, around the burning tree there's an Estus Flask Shard and a Ember. Look above and you should see a corpse hanging, shoot it down and you'll pick some Kukri's on it. - Those throwing knives inflicts Bleed when hit Go to the right and close to the entrance there's a Titanite Shard, go to the left and open the door. Inside you'll pick up a Charcoal Pine Resin and see a hole, drop into it, inside there's an estus soup and the Warrior Of Sunlight covenant. Open the door and on the stairs at your left there's another hanging corpse with a Soul Pack. Go through the hallway and at arriving back on the streets, take your right rolling on some crates to get a Soul Pack close to the cliff. Head back to the streets and on one of the houses at the left there's a Whip - Whips cannot be parried, but also cannot riposte or backstab. Further more you take another right and close to the cliff there's a Titanite Shard. Above you'll see an Evangelist, close to it there's a Titanite Shard. Go towards the roofs and jump onto a raft to get a Rusted Coin. - Those increase the Item Discovery by 50 for 65s. There's also a Crystal Lizard that drops a Sharp Gem. - This gem makes weapon have better scalling in Dex. Around here use an Ember, this causes Holy Knight Hodrick to invade you, killing him will give you a Vertebra Shackle. Go close to the cliff and light the Dilapited Bridge bonfire. Travel to Firelink and give Loretta's Bone to Greirat, reload the game and interact with him to get the Curl Up gesture, quit out and interact again, he will ask to go pillage Undead Settlement, grant his request. Now travel back to the Undead Settlement bonfire. Undead Settlement - Part 2 From the bonfire, go the path you went before but take the right after the first house and cross the bridge. Enter another building and to the left there's a Soul Pack, furthermore there's two double doors, open them and grab the Caduceous Round Shield at the right. Go back to the bridge and roll over some crates to arrive at a place full of thralls. In the middle there's a Soul Pack. Go left of the house with a ladder to get a Plank Shield, up the ladder and to the left again on the roofs you'll find some Firebombs, on the roofs of the house with a ladder there's some Homeward Bones. Manage to jump on the right side, you should see a Machette-Wielding Hollow with a cage on his back, furthermore there's a corpse with the Flame Stoneplate Ring - Increases fire damage absorption by 13%. Interact with the cage-hollow, after arriving at the cave, talk with Hodrick to receive the Mound-Makers covenant and a Homeward Bone, to the right there's a Wargod Wooden Shield. Bone out, take the same path from the double doors, and on the bridge take a drop to the right. At the back side there's an Titanite Shard. Go back and light the Cliff Underside bonfire. Go up the stairs and above the roofs, you should see another hanging corpse, drop it to get a Partizan. Progress through the rafts to find Cornyx of The Great Swamp talk to him and move him to Firelink Shrine. - Cornyx teaches you pyromancies. Close to his cage there's a Hand Axe. Go back to Firelink and interact with Cornyx, he will give you a Pyromancing Flame and the Welcome gesture. - This flame is the main catalyst for pyromancies, Cornyx can level it up using Titanites Go down from the roofs, and on the gallow there's another Soul Pack, furthermore there's a broken wooden bridge with the Fire Clutch Ring - Increases your fire damage by 15% while decreasing all physical absorptions by 10% Go back and through the stone arch, down the stairs, towards the trees and there will be a dog guarding an Ember. Head towards the bridge and take the right through an entrance with another dog, this leads you to some sort of sewers, further there's a Caestus and a giant rat that drops the Bloodbite Ring - Increases your bleed resistance by 90 points Up the ladder you can open an shortcut to the Dilapited Bridge. Go back and on the bridge there's an Ember, crossing it on the right there's a Soul Pack and further behind the house there's more Alluring Skulls. Go towards the big gates and open them, the elevator should start going up and you'll meet with Siegward Of Catarina, talk to him and go down the elevator. Soon you'll arrive at a room with an Ember and a Outrider Boreal Knight that drops an Irythyll Straight Sword, - Sword that inflicts the status Frostbite. Open the doors and light the Road of Sacrifices bonfire. Go up the elevator and once at the place you where, activate the elevator but jump out of it, this will allow you to take the elevator that takes you upwards on the tower. Arrving on the top, talk with the Giant to get a Young White Branch. - This is a symbol of friendship, the Giant will aid you in your journey. Behind the elevator there's another Soul Pack. Going down you'll hear some "Hmm's...", manage to take a drop on some rafters and go outside to meet with Siegward once again. At the right there's a Homeward Bone, the Fire Demon will aggro and Siegward will join you in battle. After the fight you'll receive a Fire Gem. - Infuses weapon with raw fire damage. Talking to Siegward will give you a Siegbrau, the Toast gesture and the Sleep gesture. There's a Large Club close to where the demon was. On the right there's two hanging corpses with a Pale Tongue and the Nouthern Set. On the houses at the other side there will be a corpse with Red Bug Pellets - Increase fire damage absorption by 15% for 120s. Going up the stairs on the left there's an Alluring Skull, forward there's a room with a chest containing some Human Pine Resins. - Adds 95 raw dark AR to your weapon for 60s. Up the stairs at the very ledge of the house there's the Flynn's Ring - The lighter you are in terms of equip load, the more damage you deal. You should see a tower in front of you, there will be some rafters you can use to reach it, behind the tower there's some Homeward Bones. Going all the way down there's the Mirrah's Set and the Chrolanthy Ring - Increases your stamina regen speed. With those at hand, go back to Firelink and talk to Ringfinger Leonhard, he will give you the Lift Chamber Key. Now travel back to the Tower on The Wall bonfire and on the third floor there's a door you can open with this key. Go down the elevator and kill the Darkwraith to receive the Red Eye Orb. Talk to Leonhard after this to receive the Applause gesture, aswell as progressing his questline. Undead Settlement - Part 3 From Dilapited Bridge bonfire, go forward and through the gate, the giant you made peace with will cover you up while you loot the place. To the right there's an Undead Bone Shard . - Reinforces the heal of your Estus Flask. Around the tree there's two Soul Packs, an Ember, a Reinforced Club and three White Young Branches. Towards the left-side trees, there's the Clerics Set close to a cabin, and close to the gate there's Mortician's Ashes. With those at hand, travel back to Firelink, give the ashes to the Shrine Handmaid and buy the Grave Key. Travel to dilapited bridge and take the right through that door you opened before. Down at the sewers close to the Giant Rat there's a door on the right that opens with the Grave Key you just bought. Go further in and take the right to pick a Loincloth, take the left and pick a Red-Hilted Halberd, furthermore there's a Soul Pack. Outside you may look at the right and see a Crystal Lizard, killing it drops a Heavy Gem. - This gem makes weapons have better Str scalling. There's also two Titanite Shards there. Go back and to the other side, look up and you'll see a hanging corpse with a Blessed Red & White Shield, go left and inside the room there's the Saint's Talisman. - Has very high spell buff, which is very useful for a faith utility build. Up the stairs you'll arrive at Irina Of Carim's cell, talking and accepting her services will give you the Prayer gesture and move her to Firelink Shrine. - She will teach you miracles. Open the cell gates and talk to Eygom Of Carim outside aswell. - He will aid you during the game, as long as you ensure the girl's safety. Go back to Firelink and Irina will be at the rightmost side, talk to her and buy the Saint's Ring. - Gives you a additional attunement slot. Back to the dilapited bridge again, go all the way to the house and after the stairs jump on some broken wooden planks to get a Great Scythe. - Good range as well as a nice Dex scalling, it's also very effectiive against shields. Go towards the building and open the gate at the right. To the left, you can trigger an optional boss fight. Curse-Rotted Greatwood
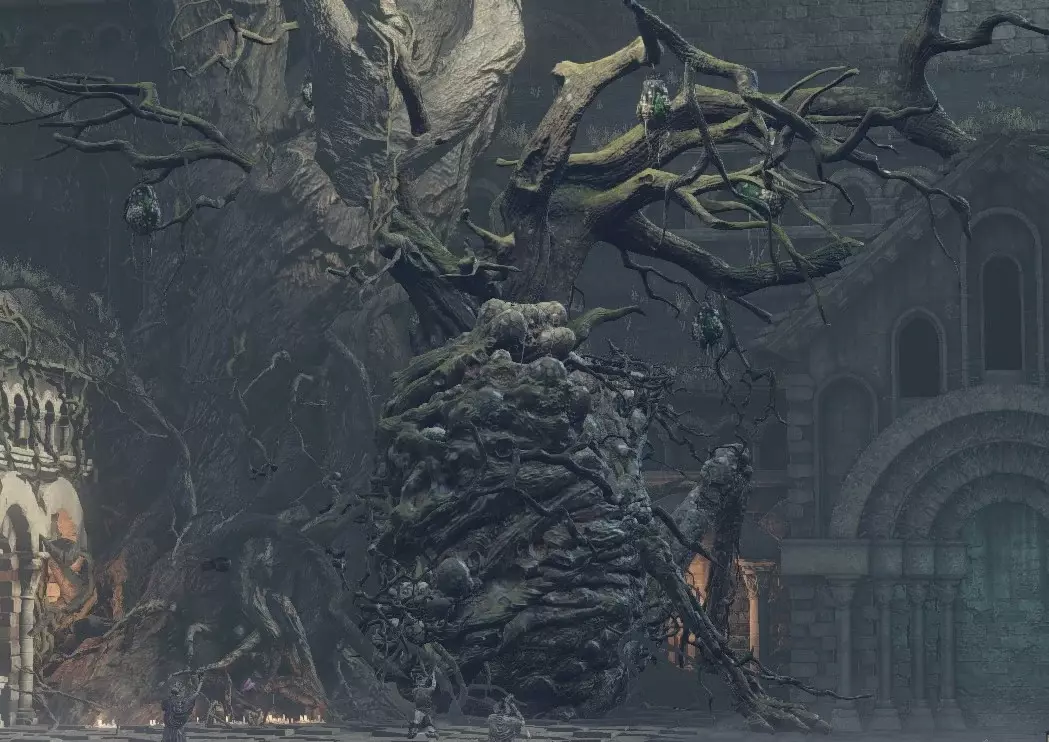
弱点抗性状态 斩击 突刺 火焰:无/免疫 拥有5405点生命值 木质部分不受伤害 摧毁苍白囊体后会受到暴击伤害 使用我们之前获得的木炭松脂 击杀它后,你将获得【质变炉】 返回传火祭祀场,与坐在阿尔德里奇旁边王座上的【鲁道斯·卡兰德】对话,将质变炉交给他,并将【沃尼尔的灵魂】质变成为【教宗左眼】 - 连续攻击时治疗玩家 将【大树的灵魂】质变成为【游魂大剑】 与【霍克伍德】对话可获得【厚重宝石】 完成这些后,我们可以前往下一个区域:【牺牲之路】
从献祭之路篝火出发,直走后从左侧跳下,可获得【净除石】。 - 净除石可移除武器上的实际质变。 继续前进,靠近一辆马车处有【灵魂包】。 向左走,靠近悬崖边会看到一块岩石,跳到岩石上,再设法落到【土匪双匕首】附近。 往上走有【土匪套装】。此外,还有名为“疯女人”的敌对NPC,击败她会掉落【屠夫刀】和【土匪斧】。 向上走,沿着通往桥梁的路前进,过桥后可获得【楔形石碎片】。 返回,会看到另一座桥,桥的右侧有另一处可跳下的地方,那里有两只狗守护着【摩恩戒指】。 - 摩恩戒指能使攻击性奇迹伤害提升12%。 附近还有【卡利姆盲文圣典】。向上走,在拿着法杖的鸦人附近有一个余火。穿过大门,点燃中途要塞的营火。旁边有两个NPC,分别是亚斯特拉的安里和沉默的霍拉斯,与安里对话可开启任务线,与霍拉斯对话可加入青之守护者誓约。返回传火祭祀场,楼梯上会出现一个名为无火之灰的希里斯的新NPC,与她对话开启她的任务线。找到伊莉娜,将之前获得的卷轴交给她以推进她的任务线。注意:不要给她任何黑暗卷轴。如果已经给了,不要从她那里购买任何黑暗奇迹。回到要塞营火处,继续前进,不要向左走,而是向前跳下,那里有一个灵魂包。现在你应该在湖的右侧,继续前进直到进入一座建筑,向左转,你会看到一名黑骑士。 在他的右侧你会找到佣兵套装,套装下面是佣兵双剑。 - 游戏中最强的敏捷武器之一。 此外你还会找到法兰余烬。 - 将其交给安德烈,可解锁厚重、锋利和毒质变。 原路返回并穿过湖泊,会有一只狗守护着一块楔形石碎片。 沿着岩石的左侧前进,直到找到另一块楔形石碎片,继续靠左走,直到发现被一群毒蘑菇守护的楔形石碎片。 从那里往前是双龙大盾。 - 重量最轻且稳定性非常好的大盾。向左走,直到找到一个灵魂包和一个向上的拱门,穿过拱门后继续向左,即可找到【受难森林】篝火。 跳入湖中会吸引巨型螃蟹的仇恨,同时会被【黄指海泽尔】入侵。击杀她会掉落【海泽尔的镐】和【黄王冠】。 湖岸边有【落骑士套装】。 湖的右侧可以找到【草纹盾】,该盾牌能提升耐力恢复速度。 附近还有【绿花草】。 湖中有一只巨型螃蟹,击杀后掉落【大沼戒指】,该戒指能使攻击性咒术威力提升12%。 此外,还能找到【咒术师套装】和【大沼咒术书】。 湖的左侧,一棵树旁有一些【绿花草】。此外,墙上有个洞,在里面你能找到【贤者戒指】——提升虚拟敏捷以达到施法速度上限。附近还有【法师套装】。 出去后,走左边的楼梯。进入建筑后,走右侧的楼梯,穿过一个通往阳台的入口,从那里跳下去可以找到【牺牲戒指】。 返回并通过同样的楼梯,你会看到墙上有个洞,沿着这条路走能拿到【金隼盾牌】。 回到建筑,但这次从门进去,里面有一只水晶蜥蜴,会掉落【水晶宝石】——为武器注入纯粹的魔法伤害。 向前走然后左转,有一个房间里有多个游魂,【异端法杖】就在平台下方。出门后向右走,绕到建筑物后方,跳下去可以拿到一个元素瓶碎片。靠近篝火的前方有一个余火,右侧还有一个灵魂袋。回到活祭品之路,前往之前去过的那栋建筑,但不要向左走,而是直走并上右侧的楼梯。在那里你会遇到威尔海姆的欧贝克,与他交谈并做出承诺,将他移动到传火祭祀场。需要至少10点智力才能与他对话,他会教你魔法。另一边有一些破损的楼梯,上面有蓝色昆虫药丸。蓝色昆虫药丸效果:120秒内增加15%魔法伤害吸收。在平台下方,一些柱子周围可以召唤艾ygon协助你,向上走并穿过大门。结晶老者

弱点抗性状态:物理、火焰、雷电及暗属性魔法,毒、冻伤 拥有2723点生命值 可被弹反 倾向于待在竞技场角落 击败他后,点燃篝火并返回传火祭祀场 用结晶老者的灵魂兑换结晶老者刺剑【装备时增加50点物品发现率】 同时将之前拾取的咒术书交给柯林 深邃教堂 从结晶老者篝火出发,穿过左侧的门 很快会再次听到叮当作响的声音,这里有两只结晶蜥蜴,会掉落楔形石原盘 继续前进,直到找到有传火祭祀场 Evangelist 的区域,在其附近可以获得传令兵套装 穿过桥梁并点燃篝火
From there take the left and downwards to find an hostile npc, behind him there's the Paladin's Ashes. Back to the bonfire, go up the stairs, go left and then right to find a Titanite Shard. Now take the right path from the bonfire, and go all the way up on the cliff to find a Crest Shield. From there you can take a drop on another hostile npc, this one drops the Spider Shield. After going through the entrace, stick to the right to find another Soul Pack, proceed to another entrance and down the streets until you arrive at some double doors, through it and light the Cleasing Chapel bonfire, and on the same room there's a Notched Whip. Obs: For this next segment, i'd recommend you buy a Torch from the Shrine Handmaid. Go through the door and to the right on an altar there's a Estus Flask Shard. Upwards and right again, take a drop on some sort of river, there will be Leeches there, the Torch cancels the bleed build-up. Proceed on the river and on the right there's a Saint-tree Bellvine. To the right and upstairs there's a Crystal Lizard that drops a Twinkling Titanite and a Titanite Shard behind the rails. Furthermore there's another Crystal Lizard that drops a Twinkling Titanite and to up on the mount to the right there's another Titanite Shard close to a tree. You should also see a Ravenous Crystal Lizard that drops a Titanite Scale. Close to the lizard there's a thin passage that you can go through, there you'll find the Poisonbite Ring - Increases both toxic and poison resistance by 90 points. Go back and upwards to the left, you'll find another Titanite Shard on a windown that goes back to the Cleasing Chapel. Upwards again and follow the path, keep going left to pick Astora's Greatsword close to an altar. - The lightest UGS, has high damage and awesome scalling when Sharp infused. Once again keep left until you arrive on a circular area with an Soul Pack and the Executioner's Greatsword . - Provides 6 FP for each kill the user gets. Manage to get out of the arean arriving at a bridge with some Pale Hollows. Go up the stairs and take the left to see a white tree, once again the Giant will cover you up. Around here you can pick two Young White Branches, two Soul Packs, a Repair Powder and an Undead Bone Shard. Back track a bit and go up the stairs once more, take a left towards the building and to the left there's a Titanite Shard on the railing, inside the build there's the Curse Ward Shield and a ladder to open a shortcut. Go up the stairs and at the left of the big gates there's a Rusted Coin, to the right there's some Red Bug Pellets. Walk on some rafter at the left and proceed to the roofs, at the right around the balcony there's a Soul Pack. Downwards there's a place with alot of Crossbow-Wielding Hollows, go up some stairs and take the right to find some Red Bug Pellets and on the other side there's an Undead Hunter Charm. Back track to that area and go down the stairs at the right side, at the left there's a building with another Soul Pack. Up the stairs and up the left you'll arrive at the catedral's side gates, forward a bit there's an Ember guarded by a bunch of Hollows. Open the gates and head in, down the stairs there's a Duel Charm. - When thrown, disables especial effects like buffs or spells. Proceed to the other room and to the left there's an elevator that opens another shortcut to the Cleansing Chapel bonfire. Cathedral Of The Deep - Part 2 Up the elevator and go down the stairs on the right, you find an evangelist guarding a Deep Gem. - Infuses weapon with raw dark damage. Up again and through the entrance, there's going to be a Giant that is going to hit you hard, manage to get all three items here: A Soul Pack, Lloyd's Sword Ring and an Exploding Bolt. - L'sSR increases your AR by 10% when your HP is full. On the other side there's a door, down the stairs and to the left, there's a ladder and to the right there's a bridge, cross it to get the Seek Guidance miracle. Go up the ladder and on the balcony there's an Ember. Go through the door again and all the way down, you'll arrive in a room with a Mimic, kill it to get the Deep Braille Divine Tome. Outside the room, you will see a Cathedral Knight and behind him, a door. In the room there's an Ember and an Deep Accursed that drops Aldrich's Sapphire. - Recovers 15 FP when a critical is dealt. Up the stairs on the right and you'll arrive at the cathedral's hall. If you are embered, Longfinger Kirk will invade you, killing him gives the Barbed Straight Sword and the Spiked Shield. Go left and on the mud you'll see that Giant from before, kill him this time and he will drop a Dung Pie and a Large Titanite Shard. - Dung Pies inflicts poison when thrown, both on the target and on the user. On the mud there's also a Soul Pack and the Maiden's Set. Open the big set of doors and outside there's a Saint Biden and a Homeward Bone. Back track to the place with water and to the left there's another Soul Pack, furthermore to the left there's a set of stairs that leads to two big doors, open the one in front but not the one on the side, the one in the front opens another shortcut to the Cleasing Chapel. Up the elevator and towards the other Giant, upon killing him, he drops a Large Titanite Shard and more Dung Pies. On the mud you can also get the Drang Armo Set and Drang Hammers aswell as another Soul Pack & Pale Tongue. Up the stairs on the left, there's an Ember right on the edge, and close to the seats there's another elevator. Open the big pair of doors that leads outside and go down the stairs, you'll meet once again with Siegward of Catarina, to the right there's another Duel Charm. Cross the bridge and get bamboozled. Travel back to Cleasing Chapel and open that set of doors of before, up the elevator and sneak on the edge to find a ladder. On the top, kill the deacon to get a Deep Ring. - Increases attunement spell slots. Jump on the roofs once again, on those roofs you'll find an Arbalest to the right, and at the end there's a Pale Tongue. Inside the cathedral rafters, to the rightmost side there's a Blessed Gem. - Infuses weapon with blessed damage. On the rafters to the right there's a drop you can make to reach the other side of the bridge. There you should meet with Unbreakable Patches, responding with "you know who i am" will give you the Prostration gesture and a Rusted Coin. Buy the Catarina Armor Set from patches and go up the stairs, kill the non-hostile man grub to get a Red Sign Soapstone and open the big set of doors. Inside you should find the Armor Of Thorn's Set and Rosaria, Mother of Rebirth, talk to her and ask to join the covenant to receive Rosaria's Fingers. Obs: DO NOT OFFER HER ANY PALE TONGUES YET. Light the bonfire, and go back to the altar with the seats. Behind the altar there's Anri's and Horace's summon sign, go down the stairs and through the fog gate to start a boss fight. Deacons Of The Deep.

弱点抗性状态:物理、魔法 暗属性、冻伤 拥有4099点生命值 被视为空洞类型敌人 使用远程武器较为轻松 击败后可获得【执事灵魂】和【小玩偶】 在篝火处休息可生成【大主教套装】 返回传火祭祀场与安里对话以推进其任务线 可将【执事灵魂】兑换为【深渊灵魂】 法兰要塞 在【活祭品之路】篝火处,向前走直到看到两名敌对NPC,击败他们会掉落【巨型棍棒】和【流放者大曲剑】 -【巨型棍棒】是游戏中最优秀的力量型武器,因其可附魔且可 buff -【流放者大曲剑】在所有大曲剑中拥有最高的伤害输出左边有一个【灵魂包】,梯子更远处有一个【返乡骨片】,下梯子后点燃【法兰要塞】的篝火。
Head right, on the mud you'll find a Purple Moss Clump. - Cures poison status. Close by, the Iron Flesh pyromancy. Head back and left this time, there's a Ragged Mask with some slugs around, further more there's a Titanite Shard. Close to a structure there's an Estus Flask Shard, on the land there's some Prisms Stones another Titanite Shard and a Stone Parma. Proceed forward until a Dark Wraith aggro on you, behind him there's a structure with the Sage's Coal. - Give it to Andre to enable magic, dark and blessed infusions. Stick to the right until you are able to go upstairs, through the arc on the structure you can extinguish the flame and pick some Rotten-Pine Resins. - Adds poison effect to your weapon for 60s. Down the stairs take the right and pick up a Titanite Shard close to a wall, furthermore there's two ramp-like structures, on them you can get a Greatsword and more Purple Moss Clumps. - The Greatsword is the longest UGS of the game. Go back to the stairs and forward this time, after the Ghru Leaper there's a Titanite Shard, up the stairs and extinguish the second flame. There's a sort of bridge that connects two lands, cross it and light the Keep Ruins bonfire. Outside, take the right and downwards, there's an structure full of slugs and on the middle there's an Undead Bone Shard. Proceed until you see a ladder surrounded by slugs, go up all the way and take the right of the door. You should see a Crystal Lizard that drops a Twinkling Titanite, backwards a bit there's a fake wall that let's you pick the Dreamchaser's Ashes. Interact with the big wolf to get the Watchdogs Of Farron covenant, the Legion Etiquette gesture and light the bonfire. Up the elevator and the stairs at the right, on the road there's an Stray Demon, two Embers and a Greataxe. - Pretty good Str slash weapon. Back track and this time get close to a hole on the railing and take a drop. Go forward and as soon as you arrive there's going to be two Crystal Lizards that drop a Large Titanite Shard. Also find the Lightning Spear and the Dragon Crest Shield. close to a set of stairs there's another Crystal Lizard that drops a Heavy Gem. Warp to firelink and give the ashes to the Handmaid and trade the Soul Of A Stray Demon for a Havel's Ring. - Increases your overall Equip Load. Back at the keep ruins bonfire, take the left this time, droping close to the ramp to find a Titanite Shard. Furthermore there's another Giant Crab that drops the Lingering Dragon Crest Ring. - Increases spell duration by 30%. There's alot of items here including: two White Young Branches, a Crown Of Dusk, an Ember, two Soul Packs and a Gold Pine Bundle. - CoD increases the magic damage of spells by 10%, of weapons by 5%, and decreases magic damage absorption by 30%. Furthermore there's a land with some dead shrooms guarding the Sage's Scroll. Behind the building there's three Elder ghrus, killing them gives you the Black Bow Of Pharis, the Pharis Hat and on the middle of them there's a Poison Gem. - Infuses weapon with poison status. Warp back to Firelink and talk to Sirris to get the Darkmoon Loyalty gesture and progress her questline, also give the Sage's Scroll to Orbeck. From Keep Ruins, take the same path on the right as before but this time pass the ladder and grab a Wolf's Blood Swordgrass. On the lands there's a Titanite Shard, close to a tree there's another Titanite Shard and close to the wall's on a corner there's the Nameless knight Set. Go up the stairs and extinguish the flame up there, behind the wall there's a Rusted Gold Coin. Break some wooden stuff on the other side and go down the stairs, at your right there's a Soul Pack and to the left aswell. Proceed forward to get a Repair Powder and inside the cave there's the Golden Scroll, on the chest pick up the Antiquated Set and warp back to Keep Ruins. Now go through the big gates and pick a Shriving Stone right after, go up the hill and to the right through an entrance, there you will find the Farron Keep Perimeter bonfire. Londor Pale Shade's summon will be next to the bonfire, summon him to get the Duel Bow gesture. From there go backwards until you see a Ravenous Crystal Lizard that drops a Titanite Scale, open the door to road of sacrifices and back track a bit. As you see a hole in the wall, drop on it to pick Attonement. There's a Hollow Gem downwards as well. - Infuses weapon with hollowing, granting it a Luck scalling. Back to Firelink, give the Golden Scroll to Orbeck. Buy from him: Pestilent Mist, Aural Decoy, Spook and Farron Flashsword to receive the Young Dragon Ring, the Slumbering Dragoncrest Ring and the Silent Ally gesture. - YDR boosts offensive spell damage by 12%. - SDR masks your footstep sounds. Now go outside and to the right you should find an Ember, and upwards on a hill there's a Black Bug Pellet . - Increases dark damage absorption by 15% for 120s. Before the big gates, you can summon Black Hand Gotthard to get the By My Sword gesture. Now open the big gates and go through to trigger a boss fight. Abyss Watchers
弱点抗性状态:雷电、黑暗、出血 拥有1548点生命值 可被弹反和背刺 容易被打硬直 拥有多条血条 存在友军伤害 击败它们后,获得深渊监视者的灵魂和王者余烬。 返回传火祭祀场,用 boss 灵魂兑换法兰大剑。 - 对深渊类型敌人效果显著,且拥有强力招式。 与霍克伍德对话,获得法兰戒指。 - 减少25% FP武器战技消耗。 重新加载区域,霍克伍德的盾牌会出现在传火祭祀场外面靠近狗的位置。 卡萨斯地下墓地 在深渊监视者篝火处前往祭坛,打开通往卡萨斯地下墓地的道路。
往那里左转,可以找到【卡萨斯红刃】。 - 可为武器附加出血状态。 过桥后上左侧楼梯,右转能找到【灵魂包】。 往回走一点到楼梯处,前往另一侧,右边有个梯子,下去能找到另一个【灵魂包】。 进入房间后,在坠落处附近获取【锋利宝石】,然后击打右侧的幻影墙壁,可得到【卡萨斯咒术书】。 继续前进,在有两个巨型骷髅的房间里有两块【楔形石碎片】,下楼会遇到安里,她独自在那里询问是否见过霍拉斯,回答以推进她的任务线。 外面有一些【血苔团】和一只会掉落【光辉楔形石】的水晶蜥蜴。 - 【血苔团】可治愈出血累积。回到深渊监视者篝火处,这次向右转并向下跳几层。 向上的楼梯上有一个余火。 向下走并穿过入口,会遇到一名骷髅法师。杀死它后,骷髅球也会随之消失,并掉落一个不死人骨片。 接着向右走,在一些罐子后面可以找到【卡萨斯米尔戒指】——它能增加3点敏捷,并使你的翻滚变为隐形。 你会到达一个死胡同,左侧有一处下落点。向右走,尽头有一个灵魂包和一个余火。 穿过右侧的入口,在骷髅球后面有一个大块楔形石原盘。向左走,点燃卡萨斯地下墓地篝火。 向左下楼梯,右转可以找到一个楔形石原盘,再往前还有一个【卡萨斯血戒指】。- 增加翻滚无敌帧,从13帧提升至17帧,但整体吸收减少30%。 返回并上楼至右侧,你会找到另一名骷髅法师,击败它可阻止滚球并获得暗宝石。 - 为武器附加随属性变化的暗属性伤害。 栏杆附近还有一些卡萨斯红刃。 返回并走向另一侧,可找到大块楔形石原盘和墓王骨灰,下楼后击碎幻影墙壁回到大厅。 大厅内柱子附近有楔形石原盘,最深处右侧有一条通路。 洞穴中有一只水晶蜥蜴,击败后掉落火宝石,左侧有一些黄色虫药丸。 - 120秒内提升15%雷电吸收。右转,拾取灵魂包和黑虫药丸,打开大门并穿过,获取余烬。 此处会有“骑士杀手”卓力格入侵,击败他可获得骑士杀手戒指和“感激不尽!”姿势。【骑士杀手戒指效果:使敌人格挡的耐力消耗增加20%】 返回并前往桥的右侧,会再次遇到安里,她会询问是否见过霍拉斯,回答以推进任务线,然后过桥。 打开大门,与祭坛上的杯子互动,拾取墓王咒术书后触发 boss 战。 boss:霸王沃尼尔
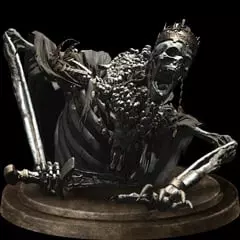
弱点抗性状态打击 祝福 黑暗 毒素 拥有15041点生命值 被视为深渊类型 对黄金手镯部位有弱点 建议远离其胸腔 击杀后获得沃尔尼的灵魂,可与黑蛇进行交易。 烟熏湖 从沃尔尼的营火出发,返回桥梁并向下走。 下降后,穿过入口。 路径尽头有一个宝箱怪,会掉落黑刃,同时还有一个火焰恶魔。 下楼后,该区域有一个灵魂包和一个大块楔形石原盘。 再次下楼,可找到女巫戒指和老贤者的蒙眼面具。 - 提升攻击性咒术伤害25%。 向左走,点燃烟熏湖的营火。
继续前进并进入湖泊,在那里你会找到一块【大块泰坦石碎片】和一棵可以藏身的树。 树后还有另一块【大块泰坦石碎片】,此时会出现一只巨型蠕虫。再次冲到树后,使用弩炮击败蠕虫,它会掉落【不死人骨片】和【雷枪】奇迹。 右侧悬崖上,你可以爬上去获取另一块【大块泰坦石碎片】并点燃【恶魔遗迹】篝火。 回到湖泊以及蠕虫出现的位置,你可以拾取【渴望盾】和一块【大块泰坦石碎片】。 - 渴望盾能使灵魂获得量增加20% 紧贴岩壁前进,直到找到一面砖墙。想办法让弩炮摧毁它,然后拾取【斑点石质戒指】。 - 该戒指能使所有元素吸收增加5%继续前往岩壁,你会在一些巨型螃蟹旁边找到【混沌宝石】。 - 为武器附加随属性变化的火焰伤害。 前往湖中央,你会发现一片砖砌地面,再次用弩炮射击它以打开捷径,但暂时不要下去。 在湖的更远处,你会找到另外两块【大块泰坦ite碎片】和一个洞穴。 洞穴内有两只【水晶蜥蜴】,它们会掉落【楔形石原盘】和【泰坦ite chunk】。 此外,你会发现被【黑暗印记】腐化的霍拉斯,杀死他可获得【卢恩盾牌】。 - 哦,霍拉斯,为什么……不要离开我,不要是你……不要像其他人一样…… 他周围有一些【黄色虫丸】和两块【大块泰坦ite碎片】。 回到【恶魔遗迹】篝火处,如果你之前杀死过索里格,可以召唤他。 走下楼梯,你会找到一个【余烬】。在出口右侧,你会遇到一些咕噜怪,此外还有一个余火。你能看到对面有个物品,但不建议现在去拿。 返回你拿到第一个余火的地方,下楼。在大厅尽头,你可以获得一个不死人遗骨。 继续前进,穿过大厅左侧的入口,击打幻影墙壁,会出现一个房间,里面有黑骑士剑。 从这个房间出来后向右走,沿着小路一直走,在一些楼梯前左转,可以找到一个余火。 上楼后是老王前殿篝火。 走左侧路径并向前,能找到伊扎里斯的咒术书。返回后向左走,会遇到一只水晶蜥蜴,它会掉落另一颗混沌宝石。篝火右侧有一面幻影墙,打破后沿小路走到尽头可获得元素瓶碎片。拿到碎片后,从洞口跳下回到走廊。这次向右走,再右转,打破这里的幻影墙能得到克拉娜的咒术之火。这里有一段向下的楼梯通向熔岩池。注意:建议从柯尼法处购买【火焰防护】,搭配【咒术师套装】和【古旧套装】,装备【火焰石戒指】并使用【红虫药丸】,这样应该就能拿到物品了。熔岩池中有【剧毒雾】和【白发护符】。返回后从右侧入口进入,很快会遇到一只巨型老鼠,它右侧的墙壁是另一面幻影墙。内部有一个宝箱,里面装有一些大块楔形石原盘,还有一面幻影墙壁,穿过它向下走可以获得伊札里斯法杖。此外,在一些石化蜥蜴旁边有一块楔形石圆盘,左侧有一条向下的小路。在那里你会再次遇到敌对的索理格,他会掉落烟之特大剑和黑铁大盾。再次穿上抗熔岩装备,以获取余火和原初之火。这次上楼,穿过桥梁会遇到一名黑骑士,桥的另一边有一个灵魂容器。爬上梯子,设法落到旁边的岩石上可以获得龙骑兵弓。再次爬上梯子,紧贴左侧可以找到一些返回骨片,沿着悬崖向上走,到达巨型弩炮处,转动其底部的杠杆来停用它。传送回恶魔遗迹篝火,走向雾门,在楼梯底部有大沼的库库鲁斯的召唤印记,召唤他后进入雾门。老恶魔王
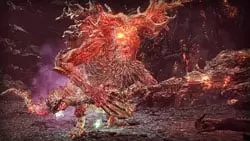
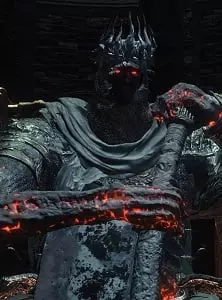
弱点抗性状态:暗、火、毒 拥有5301点生命值 被视为恶魔类型 可被破防 生命值降至10%-30%左右时会放弃战斗 击败他后,可用恶魔之魂兑换恶魔大斧或恶魔拳套,用老王之魂兑换混沌温床残渣咒术 传送回首次找到柯林的地方,可获得柯林套装和斑点鞭 【柯林必须存活,物品才会出现】 冷冽谷的伊鲁席尔 从沃尼尔的营火出发,上楼并到室外即可抵达伊鲁席尔,建议截图并点燃营火
Go on the bridge and kill the Sulyvanh's Beast to get the Pontiff's Right Eye. - Boosts weapon damage by 3/5/10% when attacking conscecutively There's also a Homeward Bone on the bridge. Cross the invisible barrier and around the fountain there's a Rime Moss Clump and two Soul Packs. - RMC cures the frosbitten status. Back at the bridge, you should now see a summon sign, it's Sirris asking for your aid. Help her defeat Creighton and warp back to Firelink. Talk to her there to receive a Blessed Mail breaker and the Silver Cat Ring. - Reduces/negates damage from falling as long as the fall is not letal. Go up the streets from the bonfire, pick up a Soul Pack on the balcony at the left side and a Large Titanite Shard at the right side. Upwards and around the fountain there's another Soul Pack and a Budding Green Blossom. Close to a tree on the snow there's more Rime Moss Clump, on the balcony where the fire witch was there's another Large Titanite Shard. At the left side of the streets you'll find a Crystal Lizard that drops a Twinkling Titanite, hit the railing on the right to reveal a set of stairs that leads downwards. To the right there's a Large Titanite Shard and to the left there's an area with a Evangelist that drops Dorhy's Gnawing and the Witchtree Branch. Up on the streets again and on the left close to a wall there's a Soul Pack, to the right there's a Large Titanite Shard close to the railing and another Large Titanite Shard to the left close to some trees. Go upstairs to arrive at the Church of Yorshka, there you'll find a Proof Of A Concord Kept on the altar and on the side of the bonfire you'll find Anri, it will give you the Ring of Evil Eye and the Quiet Resolve gesture. - RoEE heals 30hp for each killed foe. down the left stairs and to the right there will be a Roster Of Knights. Outside close to the cliff there's a Soul pack, on the right another Soul Pack, in front of the tombstone there's some Homeward Bones and behind an Undead Bone Shard. Creighton The Wanderer will invade you here and drop the Dragonslayer's Axe, go back to the bridge to grab the Mirrah Chain Set. -The Dragonslayer's Axe is a pretty good weapon, one of the few weapons that has elemental damage but can still be buffed and infused. Downstairs and to the left you'll find some Kukri's and Rusted Gold Coin. Inside the dark room, down the stairs you'll find some Blue Bug Pellets on the left side, towards the right side there's a ladder. Go on the rafters to pick a Shriving Stone and at the end towards the right side, you can take a drop on the lower rafters to get Yorshka's Spear on a chest. Outside, drop down through the broken railing, close to the tree there's a Blood Gem. - Infuses weapon with bleed. Go forward and stick to the staircase until you hear the twinkling sounds, hit the illusory wall and kill the Crystal Lizard that drops a Twinklink Titanite. Back track to the tree and jump on the lake through the broken railing to get a Ring Of Sacrifice. Furthermore there's a Green Blossom, on a land there's a Soul Pack, sticking to the right you'll find the Great Heal. Close to the wall, another Green Blossom, and towards the big entrance you'll find another Green Blossom. Through the entrance and downstairs to lit the Distant Manor bonfire. Go back to Firelink and talk to Greirat, he will ask to pillage Irithyll, grant his quest and travel back to Distant Manor bonfire. Upstairs and inside the sewers on the right, on the right there's Dung Pies, on the left aswell and before the stairs leading to a room, you can pick the Excrement-covered Ashes. Upstairs you will find Siegward sleeping, talk to him to receive Emit Force and another Siegbrau. Upstairs again and to a room with a Silver Knight that drops a Divine Blessing and a Large Titanite Shard, head to his left and you'll find two more Silver knights that drop Large Titanite Shards. On the other side there's three chests containing the Leo Ring, Smough's Great Hammer and another Divine Blessing. - Strengthens thrust weapon counter attacks by 15% Outside, you can proceed forward to find a Soul Pack close to a tree and further up an elevator shotcut leading to Yorshka's Church, there's also a Large Titanite Shard on a railing close by. Go upstairs and take a drop to the left to find a Large Titanite Shard. Up the ladder and on lower floor of the room there's some Blue Bug Pellets. Outside, to the left there's an Soul Pack, upstairs and downwards on the other side you can open a another shortcut, turn around and grab an Ember close to the tree. Go up again and take a drop on the altar facing away from the fog door to get the Ring Of The Sun's First Born. - Boosts offensive miracle damage by 20% Drop again to get a Lightning Gem, on your left there's an illusory wall, go through to get the Magic Cluch Ring. - Increases magic damage by 15% while diminishing all your physical absorptions by 10% On the right side, you'll find another Soul Pack close to the Fire Witch, also another Soul Pack above it on the railing. Back to the fog door, around there you can find Anri's, Londor Pale Shade's and Gotthard's summon sign. Cross the fog to start a boss fight. Pontiff Sulyvanh
弱点抗性状态 突刺 火焰 雷电 黑暗:无/攻击 毒素 出血 冻伤 拥有5106点生命值 可被弹反 可被处决 击败他后,可用苏尔凡的灵魂兑换一把巨剑,葛雷瑞特也会返回传火祭祀场。 与尤莉亚对话以推进她的任务线,她会提及安里并表示仪式已准备就绪。 亚诺尔隆德 从苏尔凡的竞技场出去,会找到两只水晶蜥蜴,各掉落一块楔形石原盘。 右侧还有一块大泰坦ite碎片。 现在向左走并上楼,前往左侧平台下方的黑暗房间,可找到黑暗石板戒指。 【效果:增加13%的黑暗伤害吸收】现在前往另一侧,然后再次上楼,你应该会在这条路上看到一群执事,在右侧可以找到一块【大块泰坦石碎片】。 现在进入背对执事的教堂,走左侧的路,会发现另一只【水晶蜥蜴】,它会掉落【愚者宝石】。 - 为武器附加随魔力补正的魔法伤害 穿过桥梁,在尽头会遇到一只【宝箱怪】,它会掉落【黄金仪式矛】。 注意:建议不要在这里杀死这只宝箱怪,使用【不死人猎人符咒】获取物品,如果你愿意,可以刷取【贪婪金蛇戒指】,它能提高物品掉率和灵魂获得量。 返回有巨人的开阔区域,在那附近可以找到一个【余烬】、一个【灵魂包】,以及右侧草丛附近的一块【大块泰坦石碎片】。你还会遇到两个敌对NPC,其中一个会掉落【德兰双矛】。 上楼后,在左侧房间内有一面幻影墙,攻击它后顺着梯子下去。 在下面你会发现两只【苏美鲁之兽】,击杀它们可获得【宠爱戒指】——效果为生命值提升3%、耐力提升8.5%、装备重量上限提升5%。你还能找到【人性残渣】和【深邃宝石】。 在最左侧的角落附近,有一个名为【大主教麦克唐纳】的NPC,与他互动可加入【艾尔德里奇的信徒】誓约。 顺着梯子回到楼上,角落里的尸体上有【楔形石原盘】。 在房梁上,前往最右侧的房梁可获得【大楔形石碎片】,继续向上走并向右跳下可获得【东方骨灰】。沿着屋顶前进,找到通往建筑内部的入口,前往另一侧,穿过椽子后,在拐角处可以找到一块【大块楔形石原盘】。 在同一位置,你可以走向一座带有梯子和门的塔,这扇门是一个捷径。 返回椽子处,跳下去可以获得【屠龙者巨弓】和几支【屠龙者巨箭】。 现在,进入建筑后左转,你会发现一个朝圣者在另一个入口附近,与它对话可获得【誓约之剑】。 在左侧你能找到【黄铜套装】,此外,你会看到祭坛上的安里尸体,与之互动可获得【黑暗印记】并推进尤莉亚的任务线(安息吧)。 退出游戏再重新进入,即可在祭坛上拾取【安里直剑】。在右侧你会找到一个装有【反转戒指】的宝箱。 - 该戒指会改变角色的动作动画,使其更接近异性的风格。 返回并从朝圣者的尸体上拾取【变色龙】法术,然后前往另一侧,拉下拉杆并拾取其附近的【余烬】。 在顶部,再次扳动拉杆并点燃【亚诺尔隆德】的篝火。
回到楼下,你会发现那条断裂的路径通向一座塔,在那里你可以轻松地在空中行走并到达塔内。你会遇到一个名为【幽儿希卡队长】的NPC,做出暗月手势即可加入【暗月之剑】誓约。杀死她可以获得【幽儿希卡圣铃】——这是游戏中最好的圣铃,尤其适合法术 buff,完全升级后信仰补正为S。在建筑内部,有更多的椽木。向下走可以找到【画中守护者剑】和【画中守护者套装】。回到【亚诺尔隆德】,上楼后向左走可以找到一个【灵魂容器】,向右下楼则能找到另一个【灵魂容器】。现在前往楼梯左侧的建筑内,可以找到【巨人的煤炭】。- 将其交给安德烈,即可解锁普通、混沌和雷电属性的质变。 向上走并穿过一个入口,下楼后你会找到【誓约之证】。 在另一侧的楼梯上有一些【月光箭】。 走向大门,使用左侧的拉杆将其打开。 一个【深邃咒术师】会从屋顶落下,击败他可获得【阿尔德里奇的红宝石】。 - 发动致命一击时恢复85点生命值。 这里还有一个宝箱,里面有【元素瓶碎片】。 现在,穿过雾门开始另一场 boss 战——【噬神者阿尔德里奇】。
弱点抗性状态:火焰、突刺、雷电、魔法、黑暗、出血、冻伤 拥有4727点生命值 被视为深渊类型敌人 攻击人类部分可造成更多伤害 爆头仅造成50%伤害 其竞技场两侧有一些电梯,乘坐电梯上去并走向祭坛可获得太阳公主戒指 - 每秒恢复2点生命值 返回传火祭祀场,用他的灵魂兑换猎命镰刀 与尤莉亚交谈以推进她的任务线 传送到废弃桥梁,前往之前诅咒大树所在的位置,会再次发现希里斯的召唤印记,请求你的帮助 帮助她击败霍克伍德 现在前往塔楼顶部你曾遇到巨人的地方,他现在已经死亡,旁边有鹰之戒指 - 增加弓、弩和消耗品的射程击败霍里克后,在空洞之 pit 拾取日落套装,并在古达篝火右侧靠近悬崖处获取日落盾牌。 在传火祭祀场,与希里斯对话并接受她成为你的骑士,这样你可以在后期 boss 战中召唤她,同时还能获得她的装备。 冷冽谷的地牢 传送到远方宅邸篝火,下楼。从右侧跳下可获得锈蚀金币。 在你跳下的平台下方有一块大泰坦ite 碎片。 一出到外面,被弃者的探索者阿尔瓦就会入侵你。杀死他可获得【村正】——所有大曲剑中攻击范围最大,锋利质变后敏捷补正为 S。 下楼并点燃冷冽谷的地牢篝火。
左侧第一个牢房内有【锈蚀硬币】,第二个牢房内有【大块泰坦ite碎片】。边缘处有一个【灵魂包】,在尽头还有另一个【大块泰坦ite碎片】。从侧面跳下可获取一个【灵魂包】。继续前进,在其中一个牢房内可以找到【古老法师套装】。最后一个牢房里有一个受感染的敌人,击败后会掉落【大魔法盾】。再次返回,这次穿过桥梁。右侧最后一个牢房内有【大块泰坦ite碎片】。在附近一个牢房内的破墙旁可以找到【苍白松脂】。【苍白松脂】效果:60秒内增加90点魔法伤害。从牢房出来时,打开左侧的捷径门,转身在一个牢房内获取【越狱者钥匙】。返回桥梁另一侧,在之前尸体发出叫声的位置,翻滚撞向木箱以打开窗户。跳到壁架上拾取【龙吼龙徽戒指】 - 提升20%防御性法术伤害 在你跳下位置的边缘附近有一个【返回骨片】。 重新进入地牢,击杀【结晶蜥蜴】获取【楔形石原盘】。 此外,你可能会在其中一个牢房里找到【愚者宝石】。 前往室外并走向房间。那里应该有一只【宝箱怪】,击败后掉落【元素瓶碎片】。 沿着走廊走到尽头,那里有一个【灵魂容器】。 稍微往回走,跳下第一个洞口。迅速消灭【结晶蜥蜴】获取【楔形石大碎片】,并在巨人苏醒前拿到【灵魂容器】。 跳到桥上,向前走获取【鹤嘴锄】。 - 其战技【充能】可提升持有者的耐力恢复速度。继续获取灵魂包及更高等级的物品,直到看到两个宝箱,先打开右侧的宝箱以获得旧牢房钥匙。 击杀出现的石化蜥蜴,然后杀死左侧的宝箱怪以获取黑暗之握戒指。 【黑暗之握戒指效果:增加15%黑暗攻击,降低10%整体物理吸收】 返回并进入隧道,拾取一些粪块后打开门。 你的左侧有一些大块楔形石碎片。 上楼,拾取龙体石。 【龙体石效果:未装备盔甲时使用,可变身为龙。再次使用该石头会在5秒内提升10%攻击力。此龙形态意味着几乎裸体,因此防御力为0。你会获得一些火焰、魔法和黑暗吸收,但会大幅降低雷电吸收】右侧上行处有一部电梯,捷径门旁边放着一个灵魂包。 乘坐电梯下行时,在中途设法跳下可获得奇迹【雷电剑】。 - 附加相当于咒术之火/触媒法术buff值0.95倍的雷电攻击力,持续60秒。 在大房间内,向左前往牢房可找到【禁忌余烬】。 - 允许进行暗、血、游魂质变。 房间中央有一个余火。 右侧还有一个余火。 左侧走廊里有一只宝箱怪,击败后掉落【龙鳞楔形石】。 左侧第二个牢房内可找到【黄王骨灰】和【黄昏王冠戒指】。 - 减少25%法术的专注值消耗,但最大生命值降低15%。 右侧可找到【阿尔瓦套装】。 前往室外获取一个灵魂包,然后穿过桥梁。 【禁忌之都】
过桥后落下,爬上梯子。 拾取【不死人遗骨】并点燃篝火。 从同一梯子下去,来到外面。 向左走,再次爬上梯子获取【锈蚀金币】。 朝着入口方向,向左走会发现一只【水晶蜥蜴】,击败后掉落【楔形石原盘】,右侧还有另一只。 最左侧有一枚【锈蚀金币】。 前往右侧可找到【开花紫苔藓球】。 - 治愈毒素与中毒状态。 在沼泽洞穴中,你能找到【防咒戒指】。 - 增加150点咒死抗性。 在那附近还能找到【毒宝石】和【赎罪石】。 - 逆转 hollowing 状态。 在外面,你可能会看到一座建筑,其后方有一块【净罪石】。建筑物内有手之巨人,击杀其中一个可获得艾莲诺拉。墙边有更多净化石。返回洞穴,爬上左侧的梯子。在屋顶上,击杀宫廷法师可获得罗根卷轴。屋顶上还有一些毒箭。从屋顶有一个进入内部的入口,跳下去可获得神怒奇迹。下楼后有一些垃圾——没用的东西。在屋顶上,你可能会看到墙上有个洞,跳进去。在里面,打开笼子释放希夫,然后在右边拿起贪婪金蛇戒指——增加50点物品发现率。与希夫交谈可获得楔形石原盘并推进他的任务线。回到外面,走上楼梯,在走廊尽头你会找到狱卒钥匙。 从洞口出去,拾取两个大块楔形石原盘以及咒术【混沌火焰】。 在入口处,乘坐电梯上去,打开通往冷冽谷的地牢篝火的捷径门。 返回,然后走上左边的楼梯。 你会遇到一个宝箱怪,它会掉落一些龙血骑士雷电箭。 爬上梯子,穿过下水道,来到再次有狱卒的房间。 打开右边的牢房释放卡菈。 - 她会教你奇迹和咒术 - 给她隆道尔与深渊的圣典以及墓王与克拉娜的咒术书。 回到罪业之都篝火处,从另一边爬下梯子。过桥可以获得一些斩鬼大箭和灵魂包。回到桥上,在中间位置向下跳并往回走,能找到一把斩鬼大弓。继续向下跳可获得一枚锈蚀硬币。在最深处还有另一枚锈蚀硬币。向前走,上楼梯后右转,那里有三个宝箱。最右边的宝箱里有一个余烬,中间的两个是宝箱怪,里面分别装着荣耀大盾和两枚锈蚀金币。【荣耀大盾是游戏中所有盾牌里稳定性最高的】。现在,前往雾门开始 boss 战——巨人尤姆。进入雾门后,卡塔利纳的希夫雷特会自动加入战斗。在他王座的右侧,有击败该 boss 的关键武器——风暴管束者。使用它的武器战技向巨人蓄力发出强力一击。
弱点抗性状态:雷电 黑暗斩击 突刺免疫 拥有27822点生命值 攻击头部效果显著 在其硬直后可进行弹反 击败他后,希夫的使命将完成,你可以在尤姆的竞技场拾取穿刺盾牌和卡塔利纳套装。 可将尤姆的灵魂兑换为他的大曲刀或巨盾。 妖王庭院 一旦你击败第三位薪王,艾玛会将你传送到洛斯里克高墙。 她会给予你誓约水盆,这将触发一场 boss 战。 冷冽谷的舞娘

弱点 抗性 状态 黑暗 雷电 打击 无 出血 拥有5111点生命值 可被破防 可被弹反 可交易【舞者灵魂】以获得【阳光疗愈】奇迹 将【誓约盆地】放置在石板上,然后爬上梯子 向左走进入【吞噬神明的艾尔德利奇的花园】
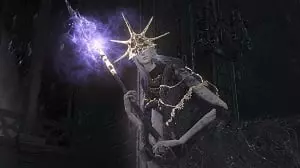
靠近栏杆处有一个【灵魂容器】。 乘坐电梯下行,在中途跳下,向右走可以找到一个【元素瓶碎片】。 另一边的破损建筑上有一块【楔形石原盘】。 电梯右侧可以找到【牺牲戒指】。 建筑下方有一些鼻涕虫,在那里可以找到【黑火焰壶】、【弯钩刀】、【影子套装】和【人性松脂】。 左侧楼梯处有一颗【黑暗宝石】,其上方还有一块【楔形石原盘】。 前往花园最右侧,乘坐电梯上楼。 通往捷径门的路上会发现一块【楔形石大碎片】和一块【楔形石原盘】。 回到电梯处,再次在中途跳下,获取【龙鳞戒指】。该戒指可使背刺伤害减少30%。 在两名大教堂骑士前可以召唤霍克伍德。击杀其中一名骑士可获得魔法石肤戒指。- 提升13%魔法伤害吸收。前往雾门开始 boss 战。老王欧斯罗艾斯
弱点抗性状态:雷电、魔法、出血 冻伤 拥有8087生命值 可弹反 击杀后,用【欧塞罗斯的灵魂】兑换【白龙吐息】 打开竞技场尽头的大门 进入有【人蛇】的房间,前方尸体上可获得【古龙之道】姿势 打开左侧宝箱获得【龙鳞楔形石】 房间尽头的宝箱也有【龙鳞楔形石】 击打宝箱后方的幻影墙,开启通往【无主墓地】的道路 无主墓地
篝火旁有一块净身石。 向左走,能找到被鸦人环绕的【原素瓶戒指】。 - 使原素瓶恢复的专注值增加20%。 中央附近有一个灵魂包。 向左走可获得楔形石大碎片。 向右走有另一个楔形石大碎片。 前往被淹没的区域,会遇到两只贪婪的结晶蜥蜴,每只掉落两个楔形石原盘。 爬上悬崖左侧,会被【结晶的女儿克瑞米尔德】入侵。 向左跳下可获得【隐藏祝福】。 - 完全恢复专注值。 竞技场外可以召唤【剑术大师】。 靠近古达即可触发 boss 战。 【英雄古达】

弱点抗性状态:雷电、打击、斩击、冻伤、出血、中毒 拥有4956点生命值 可弹反 可破防 用古达的灵魂兑换【囚徒锁链】。 - 增加5点活力、5点耐力和5点体力。 他的竞技场中有一把【黑骑士大镰刀】。 传火祭祀场外靠近的地方,右侧之前有狗的位置有一个【黄蜂戒指】。 - 增加30%的暴击伤害。 在之前剑术大师所在的位置,可以找到【混沌之刃】。 传火祭祀场内,之前篝火的位置可以拾取【螺旋剑碎片】。 - 效果与【返乡骨片】相同,但为无限使用的消耗品。 在之前安德烈所在的位置,可以拾取【铁匠锤】。 在之前伊莉娜所在的位置,幻影墙壁后面可以获得【防火女之眼】。 - 将其交给防火女可解锁一个结局。从侍女处购买【狼骑士套装】和【圣女戒指】。前往塔楼,在树附近可以拾取【巨树种子】。 【古龙顶端】 返回【冷冽谷的地下监狱】,前往之前获取【龙体石】的位置。使用【古龙之道】姿势传送至【古龙顶端】。
前方树木附近有一个灵魂包。 在大岩石上你会找到一个楔形石大碎片。 左侧悬崖附近有一些返回骨片。 再往前的一些岩石后面有一个楔形石大碎片。 左边有一个余火和一处营火。 朝着大门前进,建筑右侧有一个灵魂包,左侧有一个楔形石大碎片。 上方你会找到另一个楔形石大碎片和古龙之盾。 大门左侧的小路上可以找到雷电怪手戒指【效果:雷电攻击力提升15%,整体物理吸收降低10%】。 穿过大门会触发 boss 战。 古老飞龙 这个 boss 比较特殊,快速冲过这个区域即可。当你到达一些椽木处时,你将有机会跳到龙身上,对它的头部进行下落攻击,将其秒杀。杀死它后,你会被传送到【龙族陵墓】篝火处,并获得【龙头石】。返回【飞龙竞技场】。中间有一个【灵魂包】。向右走,拾取【粪块】和两个【余烬】。贴着右侧的边缘可以拿到【钢铁防护戒指】——提升10%的整体物理吸收。向左走的路上还有另一个【灵魂包】。靠左走可以找到一些【雷电壶】,然后到达一座圆顶建筑,获得【泰坦ite chunk】。【雷电壶】投掷时会造成雷电伤害。从右侧的梯子下去,获得【楔形石原盘】。楼上靠近边缘处有一些粪块。 在塔顶,你可以找到一块楔形石原盘和一些雷枪。 朝着椽子方向走,不要跳下去,继续前进可以拾取一些光辉楔形石。 从古龙院的篝火处,击败龙血骑士可获得龙血大剑。 篝火左侧有一个电梯捷径。 前往你获得【古龙之道】姿势的地方,拾取龙血套装。 在祭坛前使用【古龙之道】姿势,可获得灾难戒指。 - 受到的伤害增加100%。 在祭坛处转身,沿着小路前进,会找到一块楔形石鳞片,再往前走还有另一块楔形石鳞片。 左后方有一个灵魂包。右上角外侧有另一块楔形石原盘。 上楼并靠近大门处,你可以找到屠龙者的矛。 下楼向前走,在木制结构上,爬上梯子可以找到雷之石甲戒指。 【效果:提升13%的雷电伤害吸收】 穿过椽子,建筑物内有一只水晶蜥蜴和一块光辉楔形石。 再往上走可以找到一个装有楔形石原盘的宝箱。 窗台上有一个灵魂包。 一旦到了外面,会出现一只飞龙,杀死它可以获得楔形石大碎片、楔形石原盘和光辉楔形石。 向上走,进入建筑物内,杀死细剑骑士可获得里卡德的细剑。 穿过走廊,点燃大钟楼篝火。在外面你会找到霍克伍德的召唤印记,他会协助你到达山顶。 到达山顶后,最后一次做出【古龙之道】手势,即可获得【光辉龙体石】。 向下走,在右侧悬崖附近可以找到【逐龙者骨灰】。 中央有一个【灵魂包】。 进入左侧的建筑,里面有一个宝箱,内有【光辉楔形石】。 爬上梯子,在顶部你会发现哈维尔站在一个死去的辉石镇居民旁边,杀死他可以获得【哈维尔大盾】和【龙齿】。 【哈维尔大盾】拥有【石肤】战技,能大幅提升物理吸收,但会降低移动速度。 附近还有一块【楔形石原盘】。向左走,跳到平台上获取【大魔法屏障】奇迹。 前往与离群恶魔战斗的地点,在墙边找到【哈维尔套装】。 回到传火祭祀场,与安德烈对话,获得【霍克伍德的剑草】。 前往深渊监视者篝火处,与霍克伍德进行生死决斗,获胜后得到【光辉龙头石】。 在大钟楼篝火处,拉动拉杆敲响钟声,穿过雾门开始 boss 战。 风暴之王 弱点:雷电 抗性:火焰 状态效果:冻伤、出血、中毒 生命值:4577 攻击头部效果显著 在其硬直后可进行弹反 无名王者
弱点抗性状态:火焰、黑暗、雷电、出血、冻伤、中毒 拥有7100生命值 可弹反 可破防 击败他后,在篝火后方获取余烬 竞技场中有一块楔形石原盘和屠龙者套装 可用无名王者的灵魂兑换奇迹【雷暴】 洛斯里克城 在传火祭祀场,派葛雷瑞特去洛斯里克城进行掠夺 从舞者的篝火出发,这次爬上梯子后直走 祭坛上有灵魂包 向右走并点燃洛斯里克城的篝火
下一个房间里有一个宝箱,里面装着【祈祷套装】。栏杆上有一块【楔形石大碎片】。上楼后在左侧可以找到另一块【楔形石大碎片】。右侧建筑内有一块【光辉楔形石】和一名【翼斧骑士】。爬上梯子,尽头有一面幻影墙,后面的房间里有【翼骑士套装】和【圣花盾牌】。到外面上楼,左侧有一个【灵魂包】。右侧有另一块【楔形石大碎片】。继续上更多楼梯,向左走点燃【龙兵营营火】,附近有一个【余烬】。楼上左侧有一名【洛斯里克骑士】守护着【巨型骑枪】。朝着双足飞龙跑去,在尽头跳下去可以获得【不死人骨片】。继续前进,有两块楔形石原盘和一块光辉楔形石。 摧毁右侧的木箱可获得一些雷电壶。 穿过入口来到外面,击杀结晶蜥蜴可获得一块光辉楔形石。 再往前走,右侧有一个灵魂容器。 登上有翼骑士所在的小楼梯,在他身后可以拾取狙击弩和狙击弩矢。 回到桥上,从之前的位置跳下去可获得一块楔形石原盘。 向左走进入建筑内,能找到一个灵魂容器和一块粗制宝石。 下楼后,会遇到一名放逐之境的北方骑士,击败他可获得伊鲁席尔刺剑。 这个房间里的宝箱中装有光辉楔形石、楔形石鳞片和灵树纹章盾。 到达飞龙喷火的位置,然后冲向那扇门。左侧有一些黑火焰壶。 右侧梯子上去可获得灵魂包。 在飞龙爪子附近会出现人之脓,击杀它可获得楔形石原盘和余火。 穿过飞龙所在的位置,有另一个楔形石原盘。 从后院出去,能找到一个楔形石原盘,一只会掉落楔形石辉石的结晶蜥蜴,尽头还有一个楔形石鳞片。 飞龙死后,可在外面拾取两个余火、一个光辉宝石和一些雷电壶。 在黑暗房间里,向左上楼。 会遇到一个宝箱怪,掉落楔形石鳞片,附近有一些白松脂。 从后院出去,获得另一个楔形石鳞片。 现在从另一边走,拉动拉杆打开大门。 下楼后向右走,有一个余火。再次上楼,从左侧出去,你会找到一个捷径电梯和一枚阳光勋章。 向右走,进去后能看到艾ygon的召唤符、一枚锈蚀硬币,以及一个装有楔形石原盘的宝箱。 穿过墙上的洞口,向右走可以获得红泪石戒指。【当生命值低于20%时,整体伤害提升20%】 从屋顶再跳下去,拿到卡缇亚的圣铃。 返回电梯,这次向左走,从破损的栏杆处往下看,跳下去杀死人之脓,获得一块楔形石大碎片和另一块余烬。附近还有一个灵魂容器。 进入建筑,你会发现一个宝箱怪,击败它会掉落阳光直剑;建筑外右侧有洛斯里克的盲文圣典。再次从电梯向左走,爬上梯子。在屋顶的边缘你会找到一块楔形石原盘。朝着十字弓活尸的方向前进,进入内部后跳下去获取骑士戒指。【效果:力量属性+5】此外,有一扇门由一名持大剑的洛斯里克骑士看守,打开这扇门。门内有太阳战士的祭坛,向祭坛祈祷可获得“赞美太阳”姿势。还有一个宝箱,里面装有更多楔形石鳞片。希里斯的召唤符也在附近,穿过雾门即可开始 boss 战。猎龙铠甲
弱点抗性状态 打击 斩击 雷电 黑暗 冻伤 拥有4581点生命值 被视为深渊类型 可被弹反 在传火祭祀场,将所有非黑暗的神圣卷轴交给伊莉娜并购买她所有的奇迹,以完成她的任务线。前往伊莉娜的牢房,艾戈恩会已死亡,你可以拾取他的摩恩大锤和悲叹盾牌。用猎龙铠甲的灵魂兑换他的巨斧或大盾。【推荐猎龙巨斧,它是最强力量武器之一,且拥有最酷的战技】。大书库 从铠甲篝火出发,向右走拾取一块楔形石原盘。此外,点燃大书库篝火。
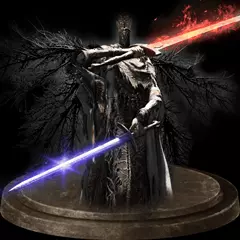
Grab the Grand Archives Key and the Gotthard Twinswords on the corpse. Inside, a Crystal Sage will spawn, kill him to get the Crystal Scroll. - Give it to Orbeck and buy all his spells, he will be summonable for late game bosses. Head left upstairs to find a Crystal Lizard a Crystal Gem and a Twinkling Titanite. After the lizard, head left upwards to grab to find a Soul Pack. Now upstairs and right to get a Titanite Chunk. Dump your head in wax altar, this prevents curse build-up by the hands. Backwards you will find a Crystal Chime guarded by a Lothric Knight. Go back outside, on the left is a Titanite Chunk. Drop down for another Titanite Chunk. There's a Titanite Scale above the bookcases. Inside the dark room on the right of the altar, there are two Crystal Lizards that drop a Twinkling Titanite each and a Chaos Gem. There's a Soul Pack in the same room. Against a wall there's a lever which unlocks a hidden room with the Witch's Locks and Power Within. At the top left upstairs there's a Titanite Scale. Outside of the dark room, head right for a Titanite Chunk, also kick down the shortcut-ladder. At the left you will find a Crystal Lizard that drops a Twinkling Titanite. Pull a lever between bookcases to open a secret room with a Titanite Slab close to the altar on the lower floor. Outside you will find a Homeward Bone on the balcony. Up the left stairs to find another wax altar and a Titanite Chunk. Near the broken railing with a single Scholar, take a drop down onto the bookshelf below to find a Titanite Scale and then roll off these onto bookshelves even farther below for the Avelyn. Head to the upper levels to find a Titanite Scale. There's an illusory wall that reveals a room with a Outrider Boreal Knight that drops the Outrider Knight Set. Exit through the other side to get the Soul Stream sorcery. Outside of the room, take left for another Titanite Scale. Go down the ladder to find a Shriving Stone. Pull the lever there to unlock access to the Scholar Ring. - Increases Int by 5 levels. Take a drop from the broken railing on the bridge and head upstairs. On the right, there's an Shortcut-elevator that takes you to the main entrance. Back at the bridge, take a drop from the railing outside to kill a Crystal Lizard that drops a Titanite Scale. From the elevator, go upstairs. There's going to be a Soul Pack behind the bookcases. Also a chest to the left of the exit containing more Titanite Scales. Upstairs and to the right, there's a Crystal Lizard that drops a Refined Gem and a Twinkling Titanite. The Fleshbite Ring will be further on. - Raises poison, bleed, frost and curse resistance by 40 points each. On the rooftops, at the ledge you will find a Titanite Chunk. Along the roofs, keeping the left there's a Soul Pack. You will find two Crystal Lizards that drop Twinkling Titanites, a Heavy Gem and a Sharp Gem. Take a drop on the plataform with Corvians and head right to pick a Hollow Gem. Head right for a Titanite Chunk. Past the corvians, jump on the other plataform to get some more Titanite Scales and Greirat's Ashes(R.I.P). Back at where the lizards where, proceed along until you fall on another set of roofs to find a Titanite Chunk. Go through the broken windows and grab an Undead Bone Shard and an Ember. Kick down the ladder-shortcu and past the exit to find Titanite Chunks. Go back and exit, furthermore you will find a Soul Pack. There are three hostile NPC's here, they drop: the Onikiri and Ubadachi, the Sage's Crystal Staff, and the Golden Wing Crest Shield. Inside the building, there's an elevator-shortcut to the Grand Archives bonfire. Go outside and up the stairs at the left, you will find a Soul Pack close to the railing. Up to the area with a dome-shaped building, there are three Golden Winged Knights, killing them rewards you with a Titanite Slab. - Only once though. To the rightmost side, there's the last Estus Flask Shard. Head to the very top of the building to get the Hunter's Ring. - Increases Dex in 5 levels. There's an entrance inside the tower on the lower levels, you will drop into a cage with the Divine Pillars of Light miracle. Drop on the rafters to grab a Bleesed Gem. Drop on the stone rafters and towards the Man-Grub, go down the ladder to find two chests containing a Divine Blessing and some Twinkling Titanites. Now going back after the elevator, proceed through the barricades up until a large set of doors, on the right there's another shortcut-elevator. This elevator actually has two ways, one that goes upwards and other that goes downwards, head downwards to get a Titanite Slab. Go back and open the big set of doors, this leads to a boss fight upwards. Orbeck and Sirris are summonable for this boss. Twin Princes
弱点抗性状态:闪电、魔法、物理、黑暗、冻伤、出血 洛里安拥有4294-3436点生命值,且可被弹反 洛斯里克拥有5799点生命值 战斗结束后,返回霍德里克的墓碑处可找到无日护符 前往大书库中屋顶前的位置找到欧贝克的骨灰,将骨灰交给尤莉亚可获得摩恩刃 用双王子的灵魂兑换其中一把剑 -需要洛里安的大剑和洛斯里克的剑才能将它们合成双王子大剑 一周目结局 前往罗莎莉亚的寝室,向她献上发青舌头 莱昂哈特会出现在门附近,与他对话后重新加载区域 罗莎莉亚现在会死亡,与她的尸体互动可获得黑眼珠传送到阿尔德里奇的营火,乘坐电梯上去。在格温薇儿的房间内,使用黑眼眸宝珠入侵莱昂哈特的世界。击败他,可获得罗莎莉亚的灵魂、新月弯刀以及他的银面具。将罗莎莉亚的灵魂兑换为阳光滋润奇迹。返回传火祭祀场,将主祭的余烬放置在各自的王座上,然后前往营火。传送到初始之火的火炉,点燃无火祭祀场的营火。在常规的传火祭祀场,卢德雷的王座上可以找到骷髅戒指【效果:更容易被敌人发现,并改变敌人的目标优先级】。在无火祭祀场外部,通过营火传送,直到抵达初始之火的火炉,点燃营火后向上前进,面对游戏主线的最终Boss。
在这场 boss 战中,你可以召唤尤莉亚和隆道尔的白影。注意:尤莉亚必须在战斗中存活。【薪王们的化身】
弱点抗性状态:雷电、黑暗、火焰、出血、冻伤 第一阶段生命值为6557 第二阶段生命值为4209 可被破防 战斗结束后,用【薪王的灵魂】兑换【阳光枪】 在尤莉亚通常所在的位置获取【尤莉亚套装】和【黑暗漂流】 现在有两个结局可供选择 【传火结局】:在营火旁召唤防火女,让她熄灭火焰 【篡火结局】:直接与营火互动,即可触发篡火 建议选择【篡火结局】以获取成就,因为在下周目中我们会故意失败尤莉亚的任务线来获取所需的剩余物品 【艾雷德尔之烬】(DLC) 前往【净身小教堂】营火,与祭坛旁的【奴隶骑士盖尔】对话传送后,向后走可以找到一个霜蓝色的苔藓簇。到达外面并点燃篝火。
左侧有一个灵魂包,此外还有一颗毒宝石,由一只巨型苍蝇守护。 从篝火向右走,爬上雪山可以拾取一块霜蓝苔藓团。 雪山会崩塌,向右上方走可以找到一个灵魂包和追随者标枪。 回到从雪山上掉落的位置,在一棵树附近可以找到一枚锈蚀硬币。 此外,你会吸引到守墓人的巨狼,击败它可获得一块大泰坦ite碎片(Large Titanite Shard)。 在巨狼注意到你的地方周围,有一个灵魂包。 另外,在一棵树附近还有一个灵魂包。 沿着右侧走,在悬崖尽头可以找到一些返乡骨片。 在靠近塔楼的建筑上可以找到一颗粗制宝石。 沿着塔楼的边缘绕到其左侧,可以找到一颗祝福宝石。在塔内,你会在底部找到一个灵魂包。 上楼并爬上梯子。 从那里稍微往下走,就能找到幽邃橡木盾。 继续前进,你会发现一只水晶蜥蜴,它会掉落楔形石原盘。 在塔顶的椽子上,你会找到一个灵魂包和队长骨灰。 设法从椽子上跳下去,在尸体上可以获得米尔伍德战斧。 塔外,朝着树木繁茂的山丘前进。 向左走,找到米尔伍德巨弓和一些米尔伍德巨箭。 现在回到塔内,从另一条路上去,守墓人的巨狼会再次出现,击败它可获得一些大块楔形石碎片。 当雪地再次塌陷后,拾取一个灵魂包。向左上方前进,在圣女树处可以拾取一枚黑火焰壶,再往左还有一块大楔形石原盘。 在巨型苍蝇所在的位置,可以捡到【冻结武器】咒术。 - 为武器附加48点冻伤伤害,持续60秒,不会增加攻击力。 - 不太值得使用,更好的选择是沃尼尔的巨锤。 - 个人认为它唯一的用处是,敏捷流派使用快速武器时搭配此咒术。 现在返回,直到看到一座绳桥,右侧的小洞穴内有一处篝火。 穿过绳桥,在礼拜堂右侧附近可以找到一块幽邃宝石。 进入礼拜堂,点燃篝火并与芙莉德对话,获得冰咬戒指。 - 冻伤抗性提升140点。 放下吊桥并沿桥下行。在右侧,你可以找到一处雾蓝色的苔藓簇。顺着树根向下,有一只水晶蜥蜴,击败它会掉落楔形石原盘。沿着右侧前进可以找到余火。向上返回一小段距离,从树根处跳下,能找到追随者弯刀。抵达结冰的湖泊后,点燃【画中世界深处】篝火。向右走,你会来到一片开阔区域,朝着竞技场方向前进会触发Boss战——【 Champion's Gravetender & Gravetender's Greatwolf】。

WeaknessResistanceStatusStrike FireN/ABleed Poison Gravetender has 2791 HP. Greatwolf 4193 HP Gravetender can be parried Upon defeating them, receive the Valorheart and the Champion's Bones. (R.I.P PvP) IBack at the bonfire, head left, three Giant Snow Crabs will uprise, killing one of them will grant you a Crystal Gem. Go through the frozen passage with the Maiden-trees, at the end there's a Crazy Maiden-tree guarding the Snap Freeze sorcery, killing her unlocks a ladder up on the left hill. Towards the ladder you will find some Homeward Bones. Up the ladders, at the top, you can pick up a Titanite Slab. Drop furthermore to get a Shriving Stone. Proceed forward ignoring the ladder to find a Crystal Lizard that drops a Large Titanite Shard. Slide down the snow hill. To the right close to cliff there's an Soul Pack. Stick to left taking a few drops to find a Budding Green Blossom close to the ledge. Enter the Corvian Settlement and head right to find a Soul Pack. Furthermore there's an Ember close to the ladder. Up the ladderand inside the house, you will find a Corvian NPC, answer "I am ash" to him. Outside of the house, enter a door on the left to find the Corvian Settlement bonfire. Painted World of Ariandel (DLC) - Part 2 Cross the bridge, enter the leftmost house to find an Ember. Outside, head the right path and take a drop downwards to find a Simple Gem, Open the gates and head back to the bonfire. Go cross the bridge again, go left and jump onto some rocks to get a Soul Pack. Enter the broken and keep the left of the wall to find a Crystal Lizard that drops a Large Titanite Shard. Head back to the broken structure, look downwards and take a drop onto the rocks to get the Crow Quills. Once again at the bonfire, cross the bridge and keep to the right at the farthest cliff to get a Dark Gem. Proceed along the cliff to find a Soul Pack. At the backside, you find a railing leading to a ladder, up the ladder and drop towards the bridge. Head inside the house, through the door and outside. On the roofs you will find a Soul pack an the Crow Talons. Go up the ladder and the tower, at the base of the tower you will find the Slave Knight Set. Head up to the tower again and up the ladder, take a drop on the roofs to get a Rusted Gold Coin. On the top of the tower again, this time cross the bridge, there's another bridge close with a Crystal Lizard that drops a Twinkling Titanite. You will see a church, on it's roofs you will find a Soul Pack. Manage to drop into the church's rafters to get another Soul Pack. On the altar there's the Way of White Corona miracle. Exit the church and open the gates outside. Go towards the other building, at the right side close t the trees you will find a Young White Branch and a Rusted Coin. Inside, Sir Vilheim will be there, fight and defeat him to get the Onyx Blade and Contraption Key. - Onyx Blade is a good mixed dark/fire weapon for Fth builds. Activate the lever and go up the ramp. Head to the exit and to the right light the bonfire. Up the hills, keep left to find some Prism Stones. Head right and stick to the cliff to find the Follower Shield. Going up the hills, you will find an Ember in a small cave on the right. Towards the tower, you should find a Titanite Chunk. When you go past the bell, keep right to find a decayed tree, interact to take it down opening a shortcut. To the right, there's another tree bridge that leads to a Titanite Chunk. Back at the bell, go up the hill and turn left, you will meet with some wolves, on the left there's more Large Titanite Shards. Take the path downwards to find a Follower Torch. Head back at bell once again and up the hill, there's anoher snow plataform that will fall once you get above it. Entering the cave on the leftmost side there's an Earth Seeker. On the area, you will find three Soul Pack. Where you found the wolves, now go all the way up the hill. Taking the left cave, there's a Quakestone Hammer guarded by a Milwood Knight. On the right path, you can proceed until you find a Large Titanite Shard. Another shortcut-tree will be in front of you, take it down. Head inside the cave and upstairs into the room with flies. On the right wooden beam there's some Dung Pies. You can go to the other side using a wooden rafter and through the door, upstairs you can open a short-cut door to Ariandel's Chapel. There's an illusory wall at the left side, leading downstairs. You can a Blood Gem at the centre and Vilheim's set close to the corner. Close to one of the right pillars there's a lever that opens the passage on the chapel. At the back walls of the room, you will hear a twinkling sound, hit the illusory wall to reveal a room with two Crystal Lizards that dropa Twinkling Titanite. Take the exit and downwars using the roots. At the structure you will find the Pyromancer's Parting Flame and some Homeward Bones. Furthermore you will be invaded by Livid Pyromancer Dunnel, killing him grants you the Floating Chaos Pyromancy. Back at Ariandel's Chapel, you can summon Slave Knight Gael. Go downstairs and towards Father Ariandel to trigger a boss fight. Sister Friede & Father Ariandel

弱点抗性状态:打击、魔法、出血、中毒 第一阶段生命值为6863 第二阶段生命值为7150 第二阶段生命值为6864 芙莉德可被弹反和背刺 艾尔德利奇可被破韧 在第二阶段和第三阶段之间,你将获得一块楔形石原盘,仅一次 击败她们后,返回鸦人NPC处可获得一块楔形石原盘 可用芙莉德的灵魂兑换她的镰刀或艾尔德利奇的鞭子 【灰烬墓地】(DLC) 可从芙莉德的营火或初始之火的营火传送到灰烬墓地 到达后,点燃营火
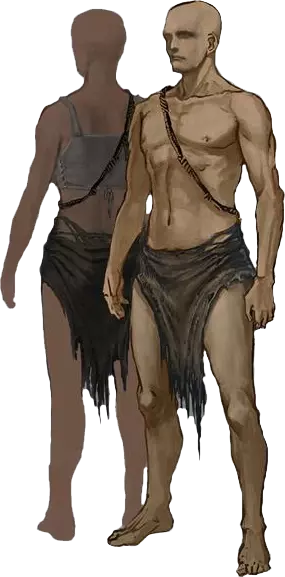
在外面你会遇到一位售卖一些商品的老朝圣者。 锥形屋顶周围有一个余火。 从灰烬处跳下去,朝着建筑物前进,上左边的楼梯。 在有哈兰德骑士的区域,有一块楔形石原盘。 楼上有一把海蓝石匕首。 往回走一点,朝着靠近悬崖的物品走去,地板会断裂。 你不会受到伤害,在这个房间里你会找到灵魂包、楔形石大碎片、光辉楔形石和污浊之手镰刀。 走到外面,会生成一个天使向你射击,从断裂的栏杆处跳下去。 落下后,往回走可以找到一个女神祝福。 利用椽子绕到建筑物周围,拿到钢铁防护戒指+3。【效果:提升17%的整体物理伤害吸收】靠近墙壁拿起闪电 urn。祭坛上有一个灵魂包。到外面后,向右走,在喷泉后面找到一枚锈蚀硬币。在房子里你会找到一块楔形石原盘和一把浑浊长杖。击打左侧的幻影墙壁,会出现一段楼梯。上楼后在左边拿起余烬。再次回到外面,靠近阳台的地方可以踢下一个捷径梯子,此外还有“大灵魂沉淀物”法术。从阳台左侧跳下去,拿到贪婪银蛇戒指+3【增加35%灵魂获取量】。从教堂下来,上方会有一座塔倒塌,不必担心。你会看到一个怪异的血肉生物,杀死它可以让天使失效,并获得两个楔形石碎片。回到教堂,穿过桥塔。与失忆的拉普交谈以开启他的任务线。 前进并选择左侧路径,击败 Harald Knight( Harald 骑士),在附近获取楔形石原盘和返乡骨片。 从悬崖再次跳下,点燃“土之祭坛遗迹”篝火。 返回拉普所在的位置,这次向右跳下。 继续前进,在右侧角落可以找到“投射治疗”。 再次跳下到洛斯里克骑士处,拾取灵魂包和“洛斯里克战旗”。 - 洛斯里克战旗的战技可在120秒内提升15%的整体伤害。 在“土之祭坛遗迹”篝火处,向左走可以找到一些黑火焰壶。 此外还有一块楔形石原盘。 在木屋里可以找到“沙漠咒术师罩衣”。 在下一个木屋附近有一些楔形石原盘。紧贴悬崖向下走,尽头会找到【巨型门之盾】。 返回并靠近有树根的建筑,在被树根挡住的一侧,实际上可以从上方走过去,拿到【楔形石原盘】。 在沼泽入口处,会发现一个被【奴隶】守护的【余烬】。 回到第一个倒塌的塔,跳下去拿到【龙鳞楔形石】,然后进入沼泽。 向右走可以获得【沙漠咒术师手套】,在附近的沼泽中还能找到【沙漠咒术师裙子】。 在左侧的小屋里可以找到一些【紫苔藓球】。 爬上巨大的树根,拾取【宠爱戒指+3】,跳到下方的树根上可以获得【楔形石大碎片】。 - 增加6%生命值、11.5%耐力和8%装备重量上限。向下进入洞穴,你会找到一个灵魂包和一块楔形石原盘。回到土峰废墟篝火处,拉普应该在那里,与他对话可获得希夫拉酒。如果多次重新加载该区域,拉普会交给你楔形石原盘。回到洞穴外,沼泽上有一个灵魂包,靠近房屋处有一块楔形石大碎片。在较远一侧的岛屿上有一条缠腰布。沿着树根下方的路径走,你会找到 Harald 弯曲巨剑和一个返回骨片。顺着树根向上,在木制屋顶上你会发现另一个腐人,杀死它可以使天使失效,并获得两个楔形石辉石。从树根处向下跳,可找到一块楔形石大碎片。这次沿着树根向上并前往另一侧,你会发现一个敌对NPC,名为【沙漠咒术师佐伊】,击杀她可获得咒术【火焰扇】。 在那附近,你能在右侧树根后方找到一些【楔形石原盘】和【沙漠咒术师兜帽】。 跳到较细的树根上可获得【光辉楔形石】。 沿着树根走,跳到一个木制屋顶上可获得【隐藏的祝福】。 顺着树根向下,会找到一个【余烬】和另一个会掉落一些【光辉楔形石】的【活尸】。 返回上层,跳到破损的建筑上,点燃【土之塔遗迹内部】篝火。 在这里,你可以召唤【奴隶骑士盖尔】和【失忆的拉普】。 纵身跃下即可触发Boss战:【恶魔王子】。
弱点抗性状态:斩击、火焰、出血 生命值7045 视为恶魔类型 stagger后可进行弹反 建议优先击杀痛苦恶魔 击败他后,用他的灵魂兑换混沌之火咒术 进入建筑拾取小使者旗帜 到外面举起旗帜传送至下一张地图 环城(DLC) 转身获取楔形石原盘
Go downstairs and light the bonfire. Drop on the rightside to get the Ruin Set. At the bridge, a Judicator will spawn a lot of archers to defend the city, use the stone barriers to mow through. Drop on the rightside onto the structure, drop again to grab a Soul Pack. Around the ledge, you will find a Crystal Lizard that drops a Titanite Scale and a Twinkling Titanite. Up the ladder, upstairs, kill the Judicator to get a Divine Blessing. Back at the bridge you can find a Soul Pack, some Titanite Chunks, an Ember and a Budding Green Blossom. Inside the room below where the Judicator was you can find a Hidden Blessing. Go down the stairs behind where the Judicator was and follow along to find a Purging Stone. Go inside the building and light the bonfire, on the right path outside you will find Lapp who will give you another Siegbrau. There's also an Ember next to him. Proceed through the entrance, down the stairs to find a Hollow Gem and a Titanite Chunk close to the railing. Inside the dome building, take a drop on the chandelier and onto the plataform to get a Twinkling Titanite. On the lower floor you can find a Shriving Stone. Head outside and upstairs towards the doors, talk to Shira and answer "Gwyn" to accept her request and receive the Sacred Chime of Fillianore. Take a drop on the right to get a Titanite Chunk. Towards the bridge there's some Mossfruits. Cross the bridge and to the left enter on the alley, keep left until you reach the end. You will be invaded by Alva, Seeker of The Spurned once again, kill him to get the Wolf Ring +3. - Increases poise by 9 points. Behind Alva, you will find the Black Witch Set. Head towards the big set of stairs and go downwards, on the left corner you will find a Mossfruit. Head to the right side to find a Ringed Knight Spear. Drop on the streets to get a Soul Pack. Entering the swamp, you will find a Dark Gem close to a collapsed building. Keep right to find some Prism Stones behind a Locust and light the Ringed City Streets bonfire. Outside, take a drop onto a plataform and head left to find a White Preacher Head. Head towards the bonfire but go past it to find a Soul Pack, furthermore a Titanite Chunk. Kill the Judicator to get a Hidden Blessing. Stick to right and up the hills to find a Ringed Knight Straight Sword close to some rocks. Head back down to find two Soul Packs and a Preacher's Right Arm. Go past the collapsed church, behind some rocks there's a Titanite Chunk. At the right side there's the Black Witch Veil. Go up the church and behind the building you will find a Twinkling Titanite. Head right and up the hill to find a shortcut-door to the bonfire. At the center of the swamp, consume some Young White Branches until you turn into a Humanity. - Humanity looks like a black phantom with white eyes. Go back to the bonfire without undoing the Humanity form, past the door and close to one of paintings, a ladder will drop down. Up the ladder and outside, kill the Judicator to get another Divine Blessing. Down the stairs and down a ladder to get a Soul Pack, cross to the other side to find the Purging Monumentum. Head back to the other side of the bridge to find a Dragonhead Shield. Take a drop and head towards the right, inside the building you will find the Covetous Gold Serpent Ring +3. - Increases Item Discovery by 115. You will also find Lapp, tell him of the Monumentum to progress his questline. Outside, head towards the other building, go around it and you will find a Crystal Lizard that drops a Twinkling Titanite. Drop on the mount and go upwards, inside the building you will be invaded by Silver Knight Ledo, kill him to get the Ledo's Great Hammer. - Has one of the best Str scalling and a pretty good Weapon Art. On the left side there's a Titanite Chunk. Back outside, take a few drops on the right rocks to get the Havel's Ring +3. - Increases Equip Load by 19%. Behind the Turtle-monks there's a Soul Pack. Keep the left side towards the swamp to find a Titanite Chunk. Stick to the left until you find a Twinkling Titanite. Arriving at a cliff, up the hill to find a White Birch Bow and a Titanite Chunk. Downwards you will find some White Young Branches. Enter the building with monks around to find the Church Guardian Shiv. - It's like a homing throwing blade that comsume FP. Outside, close to a tree there's a Soul Pack. Around the end of the swamp here, you will find two Titanite Scales. You will also find the Dragonslayer Armour again, he will drop the Iron Dragonslayer Set. The Ringed City (DLC) - Part 2 At the Ringed City Streets bonfire, go right and head towards the bridge. Take a drop at the right close to the cliff to get a Titanite Scale and a Dragonhead Greatshield. Where Midir attacks you, there's a Soul Pack, a Titanite Scale, a Rubbish and another Soul Pack. On the left side, take a drop to get more Titanite Scale. As soon as you enter the graves, there will be a Crystal Lizard, go towards him and the floor will break. you will be invaded by a Moaning Knight, kill him to get a Blindfold Mask. - Increases dark damage from spells by 10%, weapon damage by 5% and decreases your dark defense by 30%. The first room in the left there's a Lightning Gem. Upwards there's a Simple Gem. Drop down a second time, head to the other side, Lapp should be inside the room, talk to him to receive the Patches Squat gesture. Get bamboozled once again and kicked down by Patches. Look back to find a Blessed Gem. Up the stairs, inside a room there's a Mimic with the Ring of Evil Eye +3. - Heals 37 HP from each killed enemy. Where Lapp was, you will find Lapp's Set. Manage to reach and light the Grave's bonfire. Head outside to fight Midir, down him off the bridge. There's a Titanite Scale on the bridge as well. Inside the room, at the right of the stairs there are two illusory walls hiding a Soul Pack and the Lightning Arrow miracle. Upstairs you will find a Crystal Lizard that drops some Titanite Scales. Take the elevator leading and open the shortcut-door to the Ringed City Inner Walls bonfire. Down the elavator but take a right midway, drop down and grab the Chrolanthy Ring +3 on the statue. - Raises Stamina regen by 10 points. Back up the elavator and enter on the other side to pick up an Ember. Hit the illusory Statue on the right, go behind the ladder go grab a Fillianore's Spear Ornament. Down the ladder, you will find the Antiquated Set on the altar. Shira, Knight of Fillianore can be summoned close by. Take a drop on the hole to start a boss fight Darkeater Midir
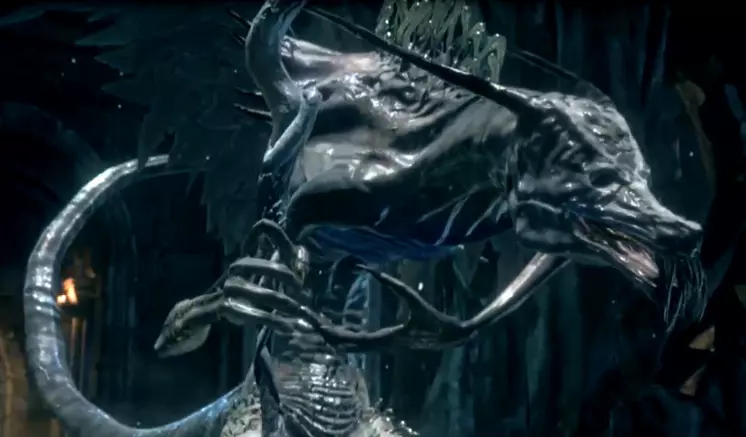
弱点抗性状态:雷电 突刺 黑暗 火焰 魔法免疫 拥有15860点生命值 攻击其头部效果显著 被视为深渊类型敌人 击败他可获得【教堂之枪】誓约 用【米狄尔的灵魂】可兑换【古老月光】 回到希拉的门前,她会给予【楔形石原盘】 返回营火处,乘坐电梯下楼并前往室外 在左侧获取【发芽的绿花草】 台阶上方有一名【环印骑士】,击杀后可获得【环印骑士成对大曲剑】 祭坛附近可找到【仪式矛碎片】 从左侧跳下可发现一些【光辉楔形石】 此处可召唤【不屈的帕奇】 打开大门并穿过雾门开始 boss 战 【教堂之枪】霍尔夫莱特
弱点抗性状态:闪电 火焰:无效果 出血 中毒 冻伤 拥有3350点生命值 可弹反 可背刺 击败他后,你将获得另一个菲莲诺尔枪饰和一块楔形石原盘。 前往他的竞技场后方并点燃篝火。 乘坐电梯上楼,与菲莲诺尔互动。 点燃菲莲诺尔的安息篝火并前往室外。 前往沙漠左侧,会发现一名环印骑士,击败后掉落一块楔形石原盘。 在右侧,你会找到一处破损建筑,在那里你会被希拉入侵,击败她后掉落狂王十字。 再次回到希拉的门前,门将会打开,你可以在里面获得希拉套装。 回到灰烬墓地的第一个篝火处,你会在老妇人曾坐过的地方找到老妇人的骨灰。从芙莉德修女的休息处篝火出发,向前走即可触发《黑暗之魂3》系列的最后一场 boss 战——奴隶骑士盖尔。
弱点抗性状态打击斩击 黑暗冻伤 中毒 出血 拥有15037点生命值 被视为空洞类型 可被击晕 击败他后,可用盖尔的灵魂兑换他的大剑或连发十字弩。 回到艾雷德尔礼拜堂,爬上梯子,将黑暗之魂的血液交给画家。 刷取与刷级 既然主线任务已经完成,在进入二周目之前,让我们收集剩余的物品。 灵魂刷取 有两种高效的灵魂刷取方法 一种是在大书库顶部,你最初发现金色羽翼骑士的地方。 另一种是在古龙顶的龙血骑士处。 在解释方法之前,让我们先获取刷取装备。 物品属性位置贪婪金蛇戒指

获得50%以上灵魂及100物品发现率:在教宗沙力万的教堂使用不死猎人护符刷宝箱怪,直到它掉落一个。(你也可以刷尤姆BOSS战场地附近的两个宝箱怪)建议使用【CGSR+3】、锈蚀金币和结晶老者的刺剑来提高掉落几率。

35%+ 魂:位于【灰烬墓地】教堂后的露台上,靠近【灰烬巫师】处。【渴望盾】
持有灵魂增加20%以上。位于熏烟湖,靠近卡萨斯蠕虫所在位置。【托钵杖】
持有灵魂增加20%。传送到大钟楼,经过钟后,装备增加物品发现率的装备,使用锈蚀金币,击杀蛇人召唤师,返回篝火并重复此过程,直到获得(我们需要2个)。 大书库方法: 需要15点智力。 全套灵魂 farming 装备。 以及和睦 pyromancy(原词:Rapport pyromancy)。 - 给卡菈奎拉娜的 pyromancy 咒文书后从她那里购买。 - 精神控制敌人,使其在30秒内成为盟友。 右手装备你偏好的强力武器和托钵杖。 - 如果你是强力法术build,可以用托钵杖击杀骑士。 左手装备 pyromancy 火焰和太阳直剑(原词:SoW)。 前往骑士所在的位置,穿过拱门触发他们。精神控制前两个敌人中的一个,协助他杀死另一个。在和睦效果消失前,杀死被精神控制的敌人。从第三个敌人背后潜行,同样对其进行精神控制并杀死。不要忘记装备CSSR+3,并交换左右手装备以获得40%以上的灵魂。返回营火,休息并重复上述步骤,直到获得所需的全部灵魂。 关于陵墓方法: 你需要全套灵魂 farming 装备。传送到古龙陵墓营火。外出杀死龙血骑士。等待其重生,再次杀死,重复此过程。再次提醒,不要忘记交换装备,因为只有持有这些物品时才能获得灵魂加成。 现在是战利品和物品 farming。以下物品将简化从敌人处获取掉落物的过程。 物品 属性 位置 贪婪之符
50%以上灵魂获取率及100物品发现率:在教宗沙力万的教堂处使用不死猎人护符攻击宝箱怪,直到它掉落一个。(你也可以使用尤姆boss战场地附近的两个宝箱怪)- 建议使用【CGSR+3】、锈蚀金币和结晶老者的刺剑来提高掉落几率。
+115 物品发现率 在两个环印骑士之后的圆顶形房间内。 结晶老者的刺剑

【物品发现率+50】由结晶老者的灵魂炼成。锈蚀金币
+50物品发现率,由不屈的帕奇无限出售(关于帕奇,前往传火祭祀场的塔电梯触发他出现在那里并将你锁在塔中。使用返乡骨片出去后,你会在传火祭祀场右上方找到他)。99点幸运值
+99物品发现(每级1点)使用我们之前介绍的灵魂农场,如有需要也可通过罗莎莉亚进行属性洗点。 誓约 现在我们已有提升物品发现的装备,可以开始处理誓约部分了。 由于服务器现已关闭,我们只能通过击杀掉落物品的敌人来刷取道具。 下面开始。 注意:关于刷物品装备,如果你已洗点将幸运值加到99,强烈建议你升级并使用安里直剑来刷取,因为它的幸运值加成非常高。 暗月之剑
如果你按照上述攻略操作,应该已经获得了2个【誓约之证】。 - 这是用于提升誓约等级的道具。 我们还需要26个。 10个可兑换1级奖励:暗月戒指 - 增加咒术栏位 30个可兑换2级奖励:暗月之剑 - 为武器附加相当于催化剂法术 buff 值 0.95 倍的魔法攻击力。 你可能会说:“但26加2不等于30啊”。如果你按照上述攻略操作,我们已经击杀了尤莉亚来获取她的圣铃,所以只能在下一周目中提交誓约之证。 并且在下一周目中,我们可以像一周目那样再额外获得2个誓约之证。 传送到亚诺尔隆德的篝火,然后上楼。 击杀两名银骑士——当然,要装备好刷物品的装备——然后下楼。 在篝火处休息,重复此过程直到获得全部30个誓约之证。即使装备了全套物品发现装备(包括锈蚀硬币和99点幸运值),这仍然需要花费大量时间。我们这里讨论的掉落概率大约为5%。如果你没有杀死尤莉亚,可以献上30个誓约道具来获取所有奖励。【青教群隆】
如果你按照上面的攻略操作,应该已经获得了1个脊椎骨枷锁。 - 这是用于提升该誓约等级的物品。 - 我们还需要29个。 - 你可能需要多准备1个,用于在庞姆鲁姆进行露卡提耶面具的交易。 10个脊椎骨枷锁可兑换1级奖励:嗜血 30个脊椎骨枷锁可兑换2级奖励:温暖 前往卡萨斯地下墓地的篝火处,向右转,经过滚石后进入隧道。 击杀前两名卡萨斯士兵,然后返回篝火处。休息并重复此过程,直到收集到全部30个脊椎骨枷锁。 如果装备了所有增加物品掉率的装备,其掉落率约为5%,所需时间与收集证明大致相同。 完成收集后,你可以传送到空洞之 pit,献上30个脊椎骨枷锁以获取奖励。 太阳战士

如果你按照上面的攻略操作,应该已经获得了1个阳光勋章。阳光勋章是用于提升这个誓约等级的道具。我们还需要29个。 10个阳光勋章可兑换1级奖励:神圣誓约。神圣誓约能在60秒内提升10%的攻击力和所有吸收效果。 30个阳光勋章可兑换2级奖励:巨雷枪。 前往洛斯里克城篝火处,击杀你右侧的洛斯里克骑士。休息后重复此过程,直到收集到全部30个勋章。装备全套增加物品发现率的装备后,掉落率约为10%,因此这次会更快。 完成收集后,传送到猎龙铠甲篝火处,进入有祭坛的房间,献上30个勋章。【暗月之剑】
如果你按照上面的攻略操作,应该已经获得了1个人类残渣。 - 用于提升该誓约的等级。 我们还需要29个。 10个可兑换1级奖励:大灵魂洪流 30个可兑换2级奖励:大主教的大杖 前往阿尔德里奇的营火,在外面击杀楼梯周围和阳台上的所有主教。 休息并重复此过程,直到收集到全部30个人类残渣。 装备全套物品发现装备后,小型主教的掉落率约为5%,大型主教约为10%,这样效率会更高。 完成收集后,传送到水之储备处,麦克唐纳会在角落里等你上交30个人类残渣。 法兰的不死队
如果你按照上面的攻略操作,应该已经获得了1个狼血草。 - 这是用于提升该誓约等级的物品。 我们还需要29个。 10个可兑换1级奖励:老狼曲剑 - 它同时具备教宗左眼戒指和右眼戒指的效果,并且可以与这些戒指叠加。 30个可兑换2级奖励:狼骑士大盾和狼戒指 前往废墟营火,击杀桥上的咕噜。 休息并重复此过程,直到收集到30个狼血草。 装备全套增加物品发现率的装备后,掉落率约为7%,而且咕噜离营火很近,所以效率会高很多。 收集完成后,传送到法兰老狼营火处,献上30个狼血草。 罗莎莉亚的指头
If you followed the walkthrough above, you already have 3 Pale Tongues. If you did Leonhard's you will have already offered one. - Pale tongues serve to rank up the covenant, but also as items used to Rebirth. We need more 27. 10 for Rank 1 reward: Obscuring Ring - Makes user invisible to others at long distance. 30 for Rank 2 reward: Man-grubs staff Warp to Farron Keep Perimeter bonfire and head outside, look left to find two Darkwraiths. Kill both and go back to the bonfire. Rest & repeat until you have all 30 Pale Tongues. You should have no problem farming Pale Tongues since it's around 20-25% drop chance with Item Discovery gear. Once done, you can warp to the Rosaria's Chamber bonfire and offer the 30 Tongues. Quick Addendum In the next sections we will cover the items. Like Armors, Weapons, Spells, Rings and even Gestures. With that said, some of those are missable, like Gestures. Others require multiple playthroughs to get, like the items that are transposed by boss souls. So, write down what you are missing and get on the next New Game+. Weapons, Shields, Catalysts And More Use the Item Farm Gear, to ease the process of the getting enemy loot. Daggers, Straight Swords, Greatswords, Ultra Greatswords, Curved Greatswords, Thrusting Swords & Katanas. Daggers Dagger Sold by the HandmaidParrying Dagger Sould by PatchesMail Breaker Close to Greirat's cell upstairsHarpeDropped by Hollows around the white tree after Dilapited BridgeBandit's KnifeSold by Greirat Rotten Ghru Dagger Dropped by Ghru's, can be farmed close to Farron Keep Ruins bonfireCorvian Greatknife Dropped by Corvian's, can be farmed close to Halfway Fortress bonfireMurky Hand Scythe Found after falling from the cliff onto a church on The Dreg HeapHandmaid's Dagger Dropped by Jailer's close to Yhorm's bonfireScholar's Candlestick Transposed by the Deacon's SoulAquamarine Dagger Close to the Harald Knight after The Dreg Heap's first bonfireTailbone Short Sword Dropped by Wretches, can be farmed on the two Wretches on the cells close to the first bonfire of Irithyll DungeonBrigand Twindaggers Found close to the cliff in Road of Sacrifices Straight Swords Shortsword Sold by the HandmaidLong Sword Sold by GreiratBroadsword Found in a corner on a room guarded a Spear Lothric Knight after the Tower on The Wall's bonfireBroken Straight Sword Found close to a tombstone after Gundyr's bonfireAstora Straight Sword Found in a chest on a wooden balcony, also after the Spear Lothric KnightLothric Knight Sword Dropped by Lothric Knights, can be farmed close to Lothric Castle's bonfireBarbed Straight Sword Given to you after defeating Longfinger KirkDark Sword Droped by Darkwraiths, can be farmed after Farron Keep Perimeter's bonfireCleric's Candlestick Transposed by the Deacon's SoulIrithyll Straight Sword Give to you by defeating the Outrider Boreal Knight before Road of Sacrifices bonfireAnri's Straight Sword Found at the altar after the ceremony, given by Ludleth or dropped by Anri after killing itSunlight Straight Sword Dropped by a Mimic on Lothric Castle before Dragonslayer's ArmourMorion BladeGiven by Yuria after handing her Orbeck's AshesRinged Knight Straight Sword Droped by Ringed Knights, can be farmed from the Knight close to the cliff before Midir's BridgeLothric's Holy Sword Transposed by the Twin Princes SoulGotthard Twinswords Found before Grand Archives after defeating three lordsValorheart Given after defeating Champion's Gravetender Greatswords Bastard Sword Sold by GreiratClaymore Found on the area where the Wyvern spits fire on High Wall of LothricFlambergeDropped by Hollows wielding it, can be farmed close to Cliff's Underside by killing the Thrall inside the roomDrakeblood Greatsword Give after defeating the Drakeblood Knight close to Dragon-kin Mausoleum's bonfireExecutioner's Greatsword Found on a circular area on Cathedral of The Deep's bonfireBlack Knight Sword Found in a secret room after the hallway close to Old King's Antechamber bonfireOnyx Blade Give after defeating Sir VilheimHollowslayer Greatsword Transposed by Greatwood's SoulWolnir's Holy SwordTransposed by Wolnir's SoulGreatsword of Judgment Transposed by Sulyvanh's SoulStorm Ruler Found in Yhorm's arena, dropped by Siegward if killed (don't)Wolf Knight's Greatsword Transposed by Abyss's Watchers SoulMoonlight Greatsword Transposed by Oceiro's SoulFirelink Greatsword Transposed by Soul of Cinder's SoulTwin Princes' Greatsword Can be transposed by Ludleth using Lothric's Sword & Lorian's GreatswordGael's Greatsword Transposed by Gael's Soul Ultra Greatswords Zweihander Sold by GreiratGreatsword Found in a ramp-like structure in Farron Keep's swampAstora Greatsword Found close to an Tombstone on left in Cathedral of The Deep's cemetaryLothric Knight Greatsword Sold by GreiratCathedral Knight Greatsword Droped by Cathedral Knight's, can be farmed close to Deacon's bonfireBlack Knight Greatsword Droped by Black Knight's, can be farmed after Champion Gundyr's bonfireFume Ultra Greatsword Given after defeating TsorigProfaned Greatsword Transposed by Sulyvanh's SoulLorian's Greatsword Transposed by the Twin Princes SoulRinged Knight Paired Greatswords Give after defeating the Ringed Knight before Halflight's arenaFarron Greatsword Transposed by Abyss's Watchers Soul Curved Greatswords Murakumo Given after defeating Alva, Seeker of the Spurned before Irithyll DungeonCarthus Curved Greatsword Dropped by Cathus Soldiers, can be farmed close to Catacombs of Carthus's first bonfireExile Greatsword Dropped by the Exile knight close to Cruscifixion WoodsHarald Curved Greatsword Found at the end of the swamp in The Dreg HeapOld Wolf Curved Sword Rank 1 reward from the Watchdogs of Farron covenant Thrusting Swords Rapier Found close to the fountain with a Winged Knight after Tower on The Wall's bonfireEstoc Sold by GreiratRicard's Rapier Dropped by the NPC summoned by the Man-serpent close to Great Belfry's bonfireIrithyll Rapier Dropped by the Outrider Boreal Knight close to the Lothric Castle's gatesCrystal Sage's Rapier Transposed by Crystal Sage's SoulCrow Quills Found at a rock on the Corvian settlement Katanas Uchigatana Dropped by the Sword Master at the left side of FirelinkWashing Pole Sold by the HandmaidBlack Blade Dropped by a Mimic before Smouldering Lake's bonfireBloodlust Rank 1 reward from the Mound-Makers covenantChaos Blade Found in Untended Graves at the left side of FirelinkDarkdrift Found at Yuria's place if she survives the SoC fight, dropped by Yuria if killedFrayed Blade Transposed by Midir's SoulOnikiri and Ubadachi Dropped by Black Hand Kamui at the top of Grand Archives Weapons, Shields, Catalysts And More - Part 2 Axes, Greataxes, Hammers, Great Hammers, Spears, Pikes, Halberds & Reapers. Axes Hand Axe Found close to Cornyx's cell in Undead SettlementThrall Axe Dropped by Thralls, can be farmed in the house after Undead Settlement's bonfireBattle Axe A deep variation is dropped by a Mimic before Tower on The Wall's bonfireBrigand Axe Found in Road of Sacrifices close to a cliff before the bridgeDragonslayer's Axe Given after defeating Creighton the WandererMillwood Battle Axe Found on the rafters at the Milwood towerMan Serpent Hatchet Dropped by Man-serpents, can be farmed at the first bonfire of Archdragon PeakButcher Knife Dropped by an Hostile NPC close to the Brigand Axe on Road of SacrificesEleonora Given after killing one of the hand ogres from Profaned CapitalWinged Knight Twinaxes Dropped by Winged Knights, can be farmed after Lothric Castle's bonfire Greataxes Greataxe Found at the bridge where you fought the Stray DemonGreat Machete Dropped by the Cage Hollows, can be farmed from Dilapited's Bridge bonfireBlack Knight GreataxeDropped by Black Knights, can be farmed after Champion Gundyr's bonfireDemon's GreataxeTransposed by a Demon's SoulDragonslayer GreataxeTransposed by Dragonslayer Armour's bonfireYhorm's Great MacheteTransposed by Yhorm's SoulEarth Seeker Found at the frozen lake close to the giant bell in the Painted World Hammers Club Found at the area where the first Wyvern spits fireReinforced Club Found around the white tree close to Dilapited's Bridge bonfireMace Sold by GreiratMorning Star Sold by the HandmaidWarpick Sold by GreiratBlacksmith HammerFound at Andre's anvil on Untended GravesHeysel Pick Given after defeating Yellowfinger HeyselDrang Hammers Found at the swamp on Cathedral of The deep where the Giant stands Great Hammers Large ClubFound close to the Fire Demon of Undead SettlementGreat Club Dropped by a Exile Knight in front of Cruscifixion Woods bonfireGreat Mace Dropped by Cathedral Knights, can be farmed close to the Deacon's bonfireSpiked MaceDroped by Evangelists, can be farmed close to Dilapited's Bridge bonfirePickaxeFound at Irithyll Dungeons sewer entrance close to the GiantGreat Wooden HammerDroped by Hollows wielding this weapon, can be farmed also close to Dilapited's Bridge bonfireGargoyle Flame HammerDropped by Gargoyles, can be farmed close to Yhorm's bonfireMorne's Great HammerFound at Eygon's corpse on Irina's cell, dropped by him if killedSmough's Great Hammer Found at a chest after irithyll's sewersQuakestone Hammer Found at the top of a cliff guarded by a red-eyed Milwood KnightLedo's Great Hammer Given after defeating Silver Knight LedoVordt's Great HammerTransposed by Vordt's SoulOld King's Great Hammer Transposed by Old Demon King's SoulDragon ToothGive after defeating Havel close to a dead wyvern in Great Belfry Spears SpearSold by GreiratWinged SpearSold by PatchesPartizanFound on a corpse hanging right above Cliff Underside's bonfireRotten Ghru SpearDropped by Ghrus, can be farmed close to Keep Ruins bonfireFour-Pronged Plow Dropped by Hollows, can be farmed after Undead Settlement's bonfireSaint BidentFound after at the right after the double set of doors close to the swamp in Cathedral of The DeepFollower JavelinFound on the cliff turning right close to the Painting's bonfireGargoyle Flame SpearDropped by Gargoyles, can be farmed close to Yhorm's bonfireSoldering IronDropped by Jailers, can be farmed in that room with a lot of them right before Profaned CapitalYorshka's SpearFound on a chest in the dark room after Church of Yorshka's bonfireDragonslayer SpearFound at Nameless King's arena, close to the gateGolden Ritual SpearDropped by a Mimic above Sulyvanh's arenaTailbone SpearDropped by Wretches, can be farmed in that room with alot of Jailers at the side cellsArstor's SpearTransposed by Greatwood's SoulDragonslayer SwordspearTransposed by Nameless King's SoulDrang TwinspearsDropped by an hostile NPC right before the Water Reserve bonfire Pikes PikeDropped by Hollows wielding a tree-branch, can be farmed close to Cruscifixion Woods bonfireGreatlanceFound at the left of the Dragon Barracks bonfireLothric Knight Long SpearSold by GreiratLothric War BannerFound on The Dreg Heap, after meeting Lapp, take a drop to the right and stick to it until you find the spearRinged Knight SpearFound at the end of the right corridor on the stairs after Shira Halberds HalberdSold by the HandmaidRed Hilted HalberdFound close to skeletons after using the Grave KeyLucerneFound at the right side right before Dancer's arenaGlaiveSold by GreiratCrescent AxeSold by the HandmaidWinged Knight HalberdDropped by Winged Knights, can be farmed at the top of Grand ArchivesSplitleaf GreatswordSold by the Old Woman in the Dreg HeapBlack Knight GlaiveFound in Champion Gundyr's arenaCrucifix of the Mad KingGiven after defeating Shira at the right of Fillianore's rest bonfireImmolation TinderDropped by Fire Witches, can be farmed right after Distant Manor bonfireGundyr's HalberdTransposed by Champion Gundyr's Soul Reapers Great Scythe Found at a hut before Greatwood's arenaGreat Corvian ScytheDropped by Corvians, can be farmed right before Halfway Fortress bonfirePontiff Knight Great ScytheDropped by Pontiff Knights, can be farmed right outside of Sulyvanh's ArenaFriede's Great ScytheTransponsed by Friede's Soul Weapons, Shields, Catalysts And More - Part 3 Whips, Fists, Claws, Bows, Greatbows, Crossbows, Staves, Pyromancing Flames, Talismans, Sacred Chimes & Torches. Whips WhipAt a left house in the streets right before Dilapited's Bridge bonfireNotched WhipFound at the same room of the Cleasing Chapel bonfireSpotted WhipFound in Cornyx's cage after the Old Demon King bonfire if Cuculus survives the fightWitch's LocksFound at the secret room in Grand Archives right after the first wax altarRose of AriandelTransposed by Friede's Soul Fists CaestusFound in the sewers close to Dilapited's Bridge bonfireDemon's FistTransposed by a Demon's SoulDark HandSold by Yuria Claws ClawFound under a plataform in Consumed King's GardenManikin ClawsGiven after defeating Londor pale ShadeCrow TalonsFound at right house roofs in Corvian Settlement Bows Short BowSold by GreiratComposite BowSold by the HandmaidLongbowFound at the right tower of the High Wall of Lothric's bonfireBlack Bow of PharisDropped by one of the three Ghrus found at the leftmost side after Keep Ruins bonfireWhite Birch BowFound at a mount on the leftside of the swamp in the Ringed City Streets bonfireDragonrider BowAt the right after of the ladder going up to the ballista in Smouldering LakeDarkmoon LongbowTransposed by Aldrich's Soul Greatbows Dragonslayer GreatbowFound at the lower roofs after the rafters above Water Reserve bonfireOnislayer GreatbowFound at the rightside of the bridge leading to YhormMillwood GreatbowClose to some tress at the left side from the Milwood tower Crossbows Light CrossbowSold by GreiratHeavy CrossbowDropped by Cathedral Knights, can be farmed right at the bridge close to Rosaria's chamber, look above and snipe the Cathedral Knight wielding it downSniper CrossbowAt the top of a gatehouse just before the dragons in Lothric CastleArbalestFound at the rafters of the Cathedral of The Deep, right after the cleasing chapel's leftmost elevador leading to the roofsKnight's CrossbowDropped by Lothric Knights, can be farmed at the Lothric Castle's bonfireAvelynCan be find above a bookshelf in Grand Archives, on the broken balcony with a single Scholar standing on, you can take a drop to get itRepeating CrossbowTransposed by Gael's Soul Staves Sorcerer's StaffSold by the HandmaidHeretic's StaffFound on the structure to the left of Cruscifixion WoodsCourt Sorcerer's StaffDropped by a Mimic in the room with hand Ogres in Profaned CapitalWitchtree BranchClose to the Evangelist in irithyll's streetsStoryteller's StaffDropped by Corvians, can be farmed right before Halfway Fortress bonfireMendicant's StaffDropped by Man-serpent Summoners, can be farmed close to the Great Belfry bonfireMurky LongstaffFound after the church with Lothric Knights in The Dreg Heap, right inside the houseIzalith StaffFound close to a chest in Smoudering Lake, right close to a Giant Rat and after an illusory wallArchdeacon's Great StaffRank 2 reward from Aldrich's Faithful covenantMan-grub's StaffRank 2 reward from Rosaria's Fingers covenatPreacher's Right ArmFound close to a Judicator in the Ringed City Streets swampSage's Crystal StaffDropped by Kriemhild after killing her at Grand Archives Pyromancy Flames Pyromancy FlameGiven by Cornyx after speaking to him in FirelinkPyromancer's Parting FlameFound at the broken bridge of the structure that you reach by taking drops on roots under Ariandel's Chapel bonfire Talismans TalismanSold by the HaidmaidCanvas TalismanSold by the HandmaidSaint's TalismanFound at the base of the ladder leading up to Irina's cellSunlight TalismanFound after the ladder surrounded by slugs, close to an Estus SoupSunless TalismanFound at Sirri's grandfather grave after her questline, dropped by her if killedWhite Hair TalismanFound in the lava pool after taking the right from the hallway, hitting the illusory wall and heading downstairs Sacred Chimes Cleric's Sacred ChimeDropped by Hollows, can be farmed at the bonfire before Gundyr's fight in Cemetary of AshPriest's ChimeSold by GreiratSaint-tree BellvineFound near the Leeches after Cleasing Chapel's bonfireYorshka's ChimeDropped by Company Captain Yorshka if killedCaitha's ChimeFound after taking a drop on the roofs from the hole close to Dragonslayer's Armour bonfireCrystal ChimeFound at the back side of Grand Archives close to the first wax altarSacred Chime of FilianoreGiven by Shira after accepting her quest to defeat Midir Torches TorchSold by the HandmaidFollower TorchFound close to a cliff at the left upper side after Snowy's Mountain Pass bonfire Weapons, Shields, Catalysts And More - Part 4 Small Shields, Shields & Greatshields. Small Shields BucklerSold by GreiratTarget ShieldSold by GreiratSmall Leather ShieldFound in a corpse hanging inside a houseafter the Undead Settlement bonfireLeather ShieldSold by the HandmaidCrimson ParmaSold by the HandmaidRed and White Round ShieldFound on a hanging corpse at the Undead Settlement cliffCaduceus Round ShieldFound at the left side of the bridge a little bit before Cliff Underside's bonfireElkhorn Round ShieldSold by GreiratWarrior's Round ShieldSold by the HandmaidPlank ShieldFound behind the house with a lot of Thralls around in Undead SettlementGhru RotshieldDropped by Ghrus, can be farmed from Keep Ruins bonfireIron Round ShieldDropped by Hollows, can be farmed after Lothric Castle's bonfireHawkwood's ShieldFound at the right outside of Firelink as you progress through Hawkwoods questlineLlewellyn ShieldDropped by corrupted Horace when killed in Smoudering LakeEastern Iron ShieldSold by the HandmaidGolden Falcon ShieldFound at Cruscifixion Woods, going down the left side after going up the structureSacred Bloom ShieldFound after an illusory room in the room with a Winged Knight at Lothric castleDragonhead ShieldFound at the other side of the bridge from the Purging Monumentum Shields Large Leather ShieldSold by the HandmaidCarthus ShieldDropped by Cathus Soldiers, can be farmed at the Catacombs of Carthus bonfireEast-West ShieldFound at a tree on the left side of FirelinkBlue Wooden ShieldFound close to a hut after Dilapited's Bridge bonfireRound ShieldSold by GreiratWooden ShieldDroped by Hollows, can be farmed right before Vordt's bonfireWargod Wooden ShieldFound close to the Mound-Makers covenantFollower ShieldFound close to the cliff on the Snowy Mountain Pass bonfireKite ShieldSold by GreiratSilver Eagle Kite ShieldFound in a chest on the room with Greirat's Cell keyKnight ShieldSold by GreiratLothric Knight ShieldDropped by Lothric Knights, can be farmed at Lothric castle's bonfireSpider ShieldDropped by an NPC on the stairs after the Cathedral of The Deep's bonfireSunset ShieldFound at Hodrick's grave after defeating him with SirrisSunlight ShieldTraded in the Pump-a-Rum by an Mendicant's StaffStone ParmaFound at the leftside after Farron keep's bonfireSpiked ShieldGive after defeating Longfinger KirkPierce ShieldCan be found at Yhorm's arena after defeating him with Siegward, dropped by Siegward if killed (don't)Porcine ShieldTraded in the Pump-a-rum in an Undead Bone ShardGrass Crest ShieldFound in the lake of Road of Sacrifices close to a treeCrest ShieldFound at the rightmost cliff after Cathedral of The Deep's bonfireDragon Crest ShieldFound near a dead Wyvern after the Old Wolf of Farron bonfireSpirit Tree Crest ShieldFound inside a chest close to the Outrider Boreal Knight after Dragon Barracks bonfireGolden Wing Crest ShieldDropped by Leon Knight Alberd in Grand ArchivesPontiff Knight ShieldDropped by Pontiff Knights, can be farmed at Irithyll's first bonfireBlack Knight ShieldDropped by Black Knights, can be farmed after Champion Gundyr's arenaSilver Knight ShieldDropped by Silver Knights, can be farmed at Anor Londo's bonfireEthereal Oak ShieldAt the base of the Milwood's towerShield of WantFound at Smoudering Lake close to where the Carthus Worm appears Greatshields Twin Dragon GreatshieldFound at little backwards from the Cruscifixion Woods bonfireBlack Iron GreatshieldGiven after defeating Tsorig in Smouldering LakeLothric Knight GreatshieldSold by GreiratCathedral Knight GreatshieldDropped by Cathedral Knights, can be farmed a little bit further from the Dancer's bonfire heading to Consumed King's GardenStone GreatshieldDropped by Elder Ghrus, can be farmed after Keep Ruins bonfireBonewheel ShieldDropped by Bonewheel Skeletons, can be farmed close to the Catacombs of Carthus bonfireAncient Dragon GreatshieldFound above the arch right after Archdragon Peak's first bonfireGreatshield of GloryDropped by a Mimic close to Yhorm's bonfireMoaning ShieldFound at Eygon's corpse on Irina's cell, dropped by Eygon if killedWolf Knight's GreatshieldRank 2 reward from the Watchdogs of Farron covenantHavel's GreatshieldGiven after defeating Havel in Great BelfryCurse Ward GreatshieldFound in an altar right before kicking down a ladder-shortcut in the Cathedral of The DeepDragonslayer GreatshieldTransposed by Dragonslayer Armour's SoulYhorm's GreatshieldTransposed by Yhorm's SoulDragonhead GreatshieldFound close to the cliff before the bridge where Midir's bonfireGiant Door ShieldFound at edge of the cliff close to Earthen Peak Ruins bonfire Armor & Clothing Armor Sets Hard Leather SetSold by GreiratBriggand SetFound close to the cliff at the left side of Rado of SacrificesLucatiael's SetThe set is found at the base of the tower in Undead Settlement, you can reach it by the path from the Fire Demon. The mask is traded in Pump-a-Rum by a Vertebra ShackleChain SetSold by the HandmaidNorthern SetFound on a hanging corpse close to the Fire DemonMirrah Chain SetFound at the Irithyll's bridge after defeating Creighton when he invades youArmor of The Sun SetGotten in Pump-a-Rum after trading a Lightning Urn, a Homeward Bone, a Seed of a Giant Tree and a SiegbrauSellsword setFound in Road of Sacrifices, right after a Black Knight, close to the Farron CoalDrang Armor SetFound close to a Giant on the mud at Cathedral of The DeepFollower SetDropped by Followers, can be found at Snowy Mountain's Pass bonfireShira's SetFound at Shira's room in Ringed City Streets after defeating her at Fillianore's RestUndead Legion SetSold by the HandmaidHerald SetFound right before Cathedral of The Deep's bonfireKnight's SetSold by GreiratNameless Knight SetFound at the swamp after Keep Ruins, at the leftmost side close to a wallFallen Knight SetFound right in front of Cruscifixion WoodsElite Knight SetSold by the HandmaidAlva's SetFound at the room with a lot of Jailers after defeating Alva before Irithyll DungeonDrakeblood SetFound at the place where you get the Path of The Dragon set after defeating the Drakeblood knight in Dragon-kin MausoleumFaraam SetSold by the HandmaidSunset Armor SetFound at the Pit of Hollows after Hodrick's fight with SirrisSunless SetSold by the HandmaidBrass SetFound in a hall right before the ceremony altar in Anor LondoSlave Knight SetFound in Corvian Settlement, after going up the ladder close to the cliff, take a drop on the first entrance to find itVilheim's SetFound at the room full of Giant Flies under Ariandel ChapelFavor SetSold by the HandmaidEastern SetSold by the HandmaidArmor of Thorns SetFound at Rosaria's chamber after defeating KirkCatarina SetSold by Patches, found at Yhorm's arena after defeating him with Siegward, dropped by Siegward if killed (don't)Morne's SetSold by the HandmaidLapp's SetFound in the Ringed City Graves right after Midir's bridgeFavor SetSold by the HandmaidLothirc Knight's SetDropped by Lothric Knights, can be farmed at the Lothric Castle's bonfireCathedral Knight SetDropped by Cathedral Knights, can be farmed right before the Deacon's bonfireWinged Knight SetFound in the room with a Winged Knight after Lothric Castle's bonfire, behind an illusory roomMilwood Knight SetSold by the HandmaidHarald Legion SetDropped by Harald Knights, can be farmed in the swamp of the Ringed City StreetsRuin SetFound at the right side of the first Ringed City bonfireOutrider Boreal Knight SetGiven after defeating the Outrider Boreal Knight in Grand ArchivesPontiff Knight SetDropped by Pontiff Knights, can be farmed after the first Irithyll bonfireFire Witch SetDropped by Fire Witches, can be farmed after Distant Manor bonfireDancer's SetSold by the HandmaidDark SetDropped by Dark Wraiths, can be farmed close to Farron Keep Perimeter bonfireBlack Knight SetDropped by Black Knights, can be farmed after Champion Gundyr's bonfireSilver Knight SetDropped by Silver Knights, can be farmed close to Anor Londo's bonfireRinged Knight SetDropped by Ringed Knights, can be farmed close to the bridge after Ringed City Streets bonfireDragonslayer SetFound in Nameless King's arenaWolf Knight's SetSold by the Untended Graves HandmaidSmough's SetSold by the HandmaidIron Dragonslayer's SetGiven after defeating the Dragonslayer Armour in Riged City Street's swampLorian's SetSold by the HandmaidDragonscale SetSold by the HandmaidFirelink's SetSold by the HandmaidBlack Iron SetSold by the HandmaidExecutioner's SetSold by the HandmaidExile's SetSold by the HandmaidGundyr's SetSold by the HandmaidHavel's SetFound at the bridge up the elevator from Old Watch of Farron close to where the Stray Demon wasAssassin's SetSold by the GreiratBlack Hand's SetSold by the HandmaidBlack Leather's SetSold by PatchesThief's SetSold by GreiratShadow's SetFound under a plataform surrounded by slugs in Comsumed King's GardenLeonhard's SetSold by the Handmaid, the mask is given after defeating him in Rosaria's Killer WorldPale's SetFound at the left inside of Firelink where Yoel would be if you defeat Londor Pale Shade in Farron Keep and in IrithyllBlack SetFound at the left inside of Firelink where Yoel would be if Yuria survives the Soul of Cinder's fightPaiting Guardian's SetFound at the rafters inside Church of YorshkaAntiquated Plain's SetFound on the altar right before Midir's arena, the Loincloth can be found at the Earthen Peak Ruins's swamp Armor & Clothing - Part 2 More Armor Sets. Sorcerer's SetFound at the left ruins after Cruscifixion Woods bonfireClandestine's SetSold by the HandmaidOld Sorcerer's SetFound in Irithyll Dungeon on a corpse in a cell on the lower level closest to the bonfireCourt Sorcerer's SetFound in Profaned Capital's church swamp near the Hand Ogres on the second floorKarla's SetSold by the HandmaidBlack Witch's SetFound in Ringed City Streets, behind Alva when he invades youAntiquated's SetFound in a chest inside a cave surrounded by Basilisks in Farron Keep, the Crow can be found at the left of the Keep Ruins bonfire close to a white treeXanthous's SetSold by the Handmaid, the Xanthous Crow is given after defeating Yellowfinger HeyselPyromancer's SetSold by CornyxCornyx's SetFound near his cage in Undead Settlement, the Blindfold is found right before Smoudering LakeConjurator's SetFound in Road of Sacrifice's lake close to a treeDesert Pyromancer's SetFound in the swamp after Earthen Peak Ruins, all four pieaces are in different placesCleric's SetFound in at a hut after Dilapited's Bridge bonfireMaiden's SetFound on the mud close to a one of the Cathedral of The Deep's GiantOrdained's SetSold by the HandmaidEvangelist's SetDropped by Evangelists, can be farmed right under Cliff Underside's bonfireDeacon's SetDropped by Deacons, can be farmed close Aldrich's arenaArchdeacon's SetFound at the Deacon's altar after the boss fightJailer's SetDropped by Jailers, can be farmed all around Irithyll DungeonPrayer's SetFound inside a chest after Lothric Castle's bonfireFirekeeper's SetFound inside Firelink's tower, right under the bridge that connects to the elevator, at the left sideMaster's SetDropped by Sword Master after killed, the Mask can be found at the left of after Farron Keep's bonfireWorker's SetDropped by Workers, can be farmed close to Undead Settlement's bonfireGraven Warden's SetDropped by Grave Wardens, can be farmed close to Untended Grave's bonfireDeserter's SetDropped by Hollow Soldiers, can be farmed close to Vordt's bonfireLeather Armor's SetSold by the Handmaid, the Hat is dropped by an Elder Ghru at the leftside of Keep Ruins bonfire Standalone Pieces. Black Witch VeilFound at the back of the sunk church after Ringed City Streets swampCrown of DuskFound at the left of Keep Ruins bonfire, close to a white treeSage's Big HatSold by the HandmaidThrall HoodDropped by Thralls, can be farmed in the house after Undead Settlement's bonfireWolnir's CrownSold by the HandmaidBlindfold MaskGiven after defeating the Moaning Knight in Ringed City's GravesSymbol of AvariceDropped by Mimics, can be farmed outside at the left of Yhorm's arenaWhite Preacher HeadFound outside of Ringed City Streets bonfire room at the leftLoinclothFound at the right, inside the place you use the Grave Key to open close to Dilapited Bridge's bonfire Spells Sorceries. Soul Arrow Sold by Yoel, Yuria & OrbeckGreat Soul Arrow Sold by OrbeckHeavy Soul Arrow Sold by Yoel, Yuria & OrbeckGreat Heavy Soul Arrow Sold by OrbeckGreat Heavy Soul Arrow Sold by OrbeckFarron Dart Sold by OrbeckGreat Farron Dart Sold by OrbeckFarron Hail Sold by OrbeckHoming SoulmassSold by OrbeckHoming Crystal SoulmassSold by OrbeckCrystal Hail Transposed by Crystal Sage's SoulSoul Spear Sold by OrbeckCrystal Soul Spear Sold by OrbeckWhite Dragon Breath Transposed by Oceiros's SoulSoul Stream Found at a corpse on a chair in Grand ArchivesSoul Greatsword Sold by Yoel, Yuria & OrbeckFarron Flashsword Sold by OrbeckMagic WeaponSold by Yoel, Yuria & OrbeckGreat Magic Weapon Found at the back of the Farron Keep Perimeter's bonfireCrystal Magic Weapon Sold by OrbeckMagic Shield Sold by Yoel, Yuria & OrbeckGreat Magic ShieldGiven after defeating a Leecher inside a cell in Irithyll DungeonSpook Sold by OrbeckAural DecoySold by OrbeckPestilent Mist Sold by OrbeckCast Light Sold by OrbeckRepairSold by OrbeckHidden Weapon Sold by OrbeckHidden Body Sold by OrbeckChameleon Found at the Pilgrim's body after the ceremony, dropped by her if killed at Church of YorshkaTwisted Wall of Light Sold by OrbeckDeep Soul Transposed by the Deacon's SoulGreat Deep Soul Rank 1 reward from the Aldrich Faithful covenantAffinity Sold by KarlaDark EdgeSold by KarlaFrozen Weapon Found right before Rope Bridge Cave's bonfireSnap Freeze Close to a mad tree to the left of Depths of the Painting bonfireGreat Soul Dregs Found on the building at the left right after the church with Lothric Knights Pyromancies. FireballSold by CornyxFire OrbSold by CornyxBursting FireballSold by CornyxGreat Chaos Fire OrbSold by CornyxChaos Bed VestigesTransposed by Old Demon King's SoulFire SurgeSold by CornyxFire WhipSold by KarlaFirestormSold by KarlaChaos StormSold by CornyxGreat CombustionSold by CornyxSacred FlameFound in a lava pool right after Tsorig's fightProfaned FlameClose to a Giant in Irithyll DungeonPoison MistSold by CornyxToxic MistSold by CornyxAcid SurgeSold by CornyxFlash SweatSold by CornyxProfuse SweatSold by CornyxIron FleshFound in the deeper swamp at the right, outside from Farron Keep's bonfirePower WithinFound inside a secret room right after the first wax altar in Grand ArchivesCarthus BeaconSold by CornyxCarthus Flame ArcSold by CornyxWarmthRank 2 reward from the Mound-Makers covenantRapportSold by KarlaBoulder HeaveTransposed by the Stray Demon's SoulBlack FlameSold by KarlaBlack Fire OrbSold by KarlaBlack SerpentTransposed by Wolnir's SoulFloating Chaos Given after defeating Dunnel on the tower below Ariandel ChapelFlame Fan Given after defeating Zoey in The Dreg HeapSeething Chaos Transposed by the Demon Prince Soul Miracles Heal AidSold by the HandmaidHealSold by IrinaMed HealSold by IrinaGreat HealFound at a man-grub's corpse right before Distant ManorSoothing SunlightTransposed by Dancer's SoulReplenishmentSold by IrinaBountiful LightSold by IrinaBountiful SunlightTransposed by Rosaria's SoulCaressing TearsSold by IrinaTears of DenialSold by IrinaHomewardSold by IrinaSeek GuidanceFound on a plataform, inside on the left, right after the first GiantSacred OathRank 1 reward from the Warrior of Sunlight covenant ForceSold by IrinaEmit ForceGiven by Siegward after meeting him in IrithyllWrath of the GodsFound on Profaned's Capital church, on an altar that you need to drop from the roofs to reachLightning SpearClose to a dead Wyvern right above Old Wolf of Farron's bonfireGreat Lightning SpearRank 2 reward from the Warrior of Sunlight covenantSunlight SpearTransposed by Soul of Cinder's SoulLightning StakeGiven after killing the Carthus WormLightning StormTransposed by Nameless King's SoulDivine Pillars of LightIn a cage inside the top tower of Grand Archives guarded by three Golden Winged KnightsBlessed WeaponSold by IrinaLightning BladeFound at a midway elevator plataform in Irithyll Dungeon, right before where you use the Path of The Dragon gestureDarkmoon BladeRank 2 reward from the Blades of the Darkmoon covenantMagic BarrierSold by IrinaGreat Magic BarrierTo the left of where you can find Havel in Great BelfryDark BladeSold by KarlaVow of SilenceSold by KarlaDead AgainSold by KarlaAtonementClose to a hole in the wall in Farron Keep PerimeterDeep ProtectionSold by KarlaGnawSold by KarlaDorhys' GnawingGiven after killing the Evangelist in Irithyll's streetsLifehunt ScytheTransposed by Aldrich's SoulWay of White Corona Found on a corpse in the Corvian settlement churchLightning Arrow Foud after the bridge where you fought Midir, behind a few illusory wallsProjected Heal Found after taking a drop on the right from where you first met Lapp Gestures Gestures - Not counting those that you already have from the beginning. Beckon Talk to YoelCall OverTrade a Homeward Bone in Pump-a-RumWelcomeTalk to CornyxApplauseTalk to Leonhard after killing the DarkwraithQuiet ResolveTalk to Anri at the churchRejoiceThrow Siegward's armor back to himHurrah!Talk to AndrePraise the SunInteract with Warrior of Sunlight altarMy Thanks!Kill TsorigProper BowSummon Heysel at Farron KeepDignified BowTalk with YuriaDuel BowSummon Londor Pale Shade at Farron KeepLegion EtiquetteInteract with the Old Wolf of FarronDarkmoon LoyaltyTalk to Sirris after finding the Dreamchaser's AshesBy My SwordSummon Black Hand Gotthard at Farron KeepPrayerTalk with IrinaSilent AllyBuy Aural Decoy, Farron Flashsword, Pestilent Mist, and Spook from OrbeckRestInteract with a BonfireCollapseTalk with HawkwoodPatches SquatInteract with Patches at FirelinkProstrationRespond "You Know Who I Am" to PatchesToastHelp Siegward defeat the Fire DemonSleepInteract with Sleeping SiegwardCurl UpGive Loretta's Bone to GreiratStretch OutFound on Gilligan's body on Profaned CapitalPath of The DragonFound on a corpse after Oceiro's arena To see if you are missing any, simply count, there should be 33 Gestures counting with the ones from the very start of the game. Now, if you missed any ones that are missable, write them down to get on the next New Game+. If you followed the walkthrough above, you should be missing the Proper Bow gesture. Don't worry, we'll get it. Rings If you followed the walkthrough above, you should have most of rings, only missing ones that are selled by NPC's or Transposed by boss souls. Life Ring - Sold by the Handmaid Sun Princess Ring Estus Ring Ashen Estus Ring Chloranthy Ring Havel's Ring - Get on the next playthrough if you picked the Boulder Heave instead. Ring of Favor Prisoner's Chain - Get on the next Playthrough if you picked Gundyr's Halberd instead. Ring of Steel Protection Magic Stoneplate Ring Flame Stoneplate Ring Thunder Stoneplate Ring Dark Stoneplate Ring Speckled Stoneplate Ring Bloodbite Ring Poisonbite Ring Cursebite Ring Fleshbite Ring Knight's Ring Hunter's Ring Scholar Ring Priestess Ring - Sold by the Untended Graves Handmaid Covetous Gold Serpent Ring Covetous Silver Serpent Ring Saint's Ring - Sold by Irina Deep Ring Darkmoon Ring Young Dragon Ring Bellowing Dragoncrest Ring Great Swamp Ring Witch's Ring Morne's Ring Ring of the Sun's First Born Lingering Dragoncrest Ring Sage Ring Dusk Crown Ring Leo Ring Wolf Ring Hawk Ring Hornet Ring Knight Slayer's Ring Ring of the Evil Eye Farron Ring Dragonscale Ring Horsehoof Ring - Sold by Patches Wood Grain Ring - Sold by the Handmaid Flynn's Ring Magic Clutch Ring Lightning Clutch Ring Fire Clutch Ring Dark Clutch Ring Red Tearstone Ring Blue Tearstone Ring Lloyd's Sword Ring Lloyd's Shield Ring - Sold by the Handmaid Carthus Milkring Carthus Bloodring Pontiff's Right Eye Pontiff's Left Eye - Get on the next Playthrough if you picked Vordt's Great Hammer instead. Aldrich's Ruby Aldrich's Sapphire Silvercat Ring Slumbering Dragoncrest Ring Obscuring Ring Untrue Dark Ring: - Sold by Yuria Untrue White Ring - Sold by Yuria Reversal Ring Skull Ring Calamity Ring Ring of Sacrifice Chillbite Ring Chloranthy Ring+3 Ring of Steel Protection+3 Wolf Ring+3 Ring of Favor+3 Covetous Gold Serpent Ring+3 Covetous Silver Serpent Ring+3 Havel's Ring+3 Ring of the Evil Eye+3 Addendum before New Game + & New Game ++ Now that we checklisted everything we have, it's time for us to go on our second journey and third to get the remaining items. If you followed the walkthrough step by step, with the exception of items transposed by boss souls, you should only be missing the Proper Bow gesture, the Manikin Claws and the Pale Set. Also the Porcine Shield if you burned all Undead Bone Shards. Talking about boss souls, in this second journey you should Transpose the items that you didn't do on the first journey. You should also work towards the other endings, if you followed the walkthough and have done the Usurpation of Fire, now progress towards getting the Link of Fire & the End of Fire. Before actually starting a New Game+, i recommend backing-up your save. New Game + Cemetary of Ash Grab the Speckled Stoneplate Ring +1 close to the Ravenous Crystal Lizard. High Wall of Lothric Grab the Fleshbite Ring +1 on the other house's roofs after the roof with the Crystal Lizard. Undead Settlement Upon meeting Yoel, you can get the 5 free levels from him, and upon meeting Yuria, kill her. Grab the Life Ring +1 close to Siegward right before fighting the Fire Demon. Grab the Pale Tongue on the corpse as well. Grab the Poisonbite Ring +1 behind the well close to where the Giant is shooting arrows after Dilapited's Bridge. Also grab the Undead Bone Shard and trade it on the Pump-a-Rum to get the Porcine Shield. Road of Sacrifices Grab the Lingering Dragoncrest Ring close to a tree close to Cruscifixion Woods. Cathedral of The Deep Grab the Ring of Evil Eye +1 close to a altar right before the Deacon's boss fight. Offer the Pale Tongue to Rosaria. Farron Keep Head right, and Londor Pale Shade should invade you, kill him to receive the Manikin Claws. Grab the Magic Stonesplate Ring +1 on the deeper swamp there. Grab the Wolf Ring +1 outside of the Keep Ruins building. Downwards the ramp of Keep Ruins you can summon Heysel to get the Proper Bow gesture. Catacombs of Carthus Grab the Thunder Stoneplate Ring +1 between the vases after the first skeleton ball. Smouldering Lake Grab the Bloodbite Ring +1 near the ballista. Irithyll of The Boreal Valley Pick up the first Proof of a Concord Kept on the altar at Church of Yorshka. Grab the Covetous Gold Serpent Ring +1 by taking a drop from the right railling outside of the dark room after Yoshka's Church. After exiting the room with Silver Knights, Londor Pale Shade will invade you, kill him and go at where Yoel would be in Firelink to get the Pale's Set. Pick up the Chrolanthy Ring +1 behind the altar with the Lightning Gem right before to Sulyvanh's boss fight Above Sulyvanh's arena, grab the Ring of Favor +1 on the railling. Anor Londo Grab the second Proof of a Concord Kept surrounded by Deacons close to Aldrich's bonfire. Offer the Proofs to Yorshka to get the rewards. Profaned Capital Grab the Flame Stoneplate Ring +1 on a ledge below where you fight the enemy that drops Logan's Scroll, the ledge is in front of the entrance to the room with Hand Ogres. Pick the Covetous Silver Serpent Ring +1 on a raft close to the elevator that leads up to the first bonfire. Comsumed King's Garden Grab the Wooden Grain Ring +1 behind the elevator when it's downed. Untended Graves Grab the Ring of Steel Protection +1 close to Firelink's tower. Archdragon Peak Grab the Havel's Ring +1 at the other side of where you get the Dreamchaser's Ashes. Lothric Castle Grab the Life Ring +1 close to a Titanite Chunk, right outside that room where you can hit the Pus of Man in the Wyvern's paw. Pick the Dark Stoneplate Ring +1 on the balcony outside of where you find the Mimic with the Sunlight Straight sword. Grand Archives Grab the Sage's Ring +1 at the lower rafters from the cage after the three Golden Winged Knights. New Game ++ Cemetary of Ash Grab the Wolf Ring +2 at the left of the doors in Gundyr's arena. High Wall of Lothric Grab the Ring od Evil Eye +2 behind some barrels at the left of the room where you find the Cell Key. Undead Settlement Grab the Covetous Silver Serpent Ring +2 close to Flynn's Ring just on the lower roofs at the left. Road of Sacrifices Grab the Chrolanthy Ring +2 behind the first Corvian Storyteller at the left. Cathedral of The Deep Grab the Ring of Favor +2 on the roofs outside of the cathedral that lead to Rosaria's Chamber, is at the leftmost side guarded by a Greataxe Hollow. Farron Keep Grab the Dark Stoneplate Ring +2 behind the building after extinguishing the second flame. Catacombs of Carthus Grab the Ring of Steel Protection +2 on top of the pillar at the left of the first bridge. Smouldering Lake Grab the Flame Stoneplate Ring +2 near where you get an Undead Bone Shard. Irithyll of The Boreal Valley Grab the Wood Grain Ring +2 right outside of the room with the Silver Knights. Anor Londo grab the Havel's Ring +2 on the rafters of Yorshka's Church. Profaned Capital Grab the Magic Stoneplate Ring +2 on the set of stairs leading downwards outside of the building. Comsumed King's Garden Grab the Sage's Ring +2 at the left side on a broken structure close to the railing where you find a Titanite Chunk. Untended Graves Grab the Life Ring +3 behind Lothric's throne. Archdragon Peak Grab the Covetous Gold Serpent Ring +2 at Nameless King's arena. Lothric Castle Grab the Thunder Stoneplate Ring +2 on the roof above the Caitha's Chime close to Dragonslayer's Armour boss fight. Grand Archives Grab the Lingering Dragoncrest Ring +2 behind the tower where you fight the Golden Winged Knights. The End - Goodbye & Thanks So.... yeah, i think it's done. We went through all that this game has to offer in a single-player experience. It was a long journey, but at last we finish it. Once again, thank you for reading through all this guide, i hope it actually helps you. Please, comment below if you find any inconsistency or error and i will fix it as soon as possible. And that's it, until next time!