换一换
换一换 


Companion break down and guide to creating strong teams for unfair that dont rely solely on buffs or multiple respecs as you play through the game. Updated for DLC 1, DLC 2 and Patch 1.5. Fully viable builds from prologue until end game. Introduction This is a guide aimed at giving newer players a skeleton to work with, so they dont have to worry too much about optimising and can focus on enjoying the game. It can also be used by more advanced players, that as they deep dive mechanics, want builds to compare their own plans to. For this I will explain the roles of each companion. The options you have to build them and what I choose to play them as. These wont be their most optimised end game build but playable 1-55 builds not reliant on end game items to work OR being entirely reliant on buffers like some guides but something that will never require a respec with loot giving power spikes rather than coming online at ridiculous late levels or as said before, not being solely reliant on companion buffs like many creators do. This spreadsheet will have all the builds covered, some alternative builds, builds for your rogue trader, builds from other creators, loot tables and some information to help you with space sections. https://docs.google.com/spreadsheets/d/1rskX4sYcNm6Wqt4rtm8EQqRR4__yrEuxCEzjwoKlHOY/ The guide wont explain how to fully gear every companion at every stage in the game or their ability rotations or the best buff support but for those looking for guides on that this playlist will help: https://youtube.com/playlist?list=PLrqfcSvSc1aUy6YKaBh-Yr27xSZlTQ3z_&si=Fklr4x8-ce003dqr This guide is based on the youtube channel of the author, Revan619: https://www.youtube.com/@Revan619/ https://steamcommunity.com/sharedfiles/filedetails/?id=3399032797 Characteristics In Rogue Trader there are 9 characteristics that you have the option to level up through play. This is a table designed to explain what they do and their benefits: CharacteristicExplainationBenefitsWeapon SkillMelee hit, parry, critical chanceMelee focused archtypesBallistic SkillRanged hit, critical chance, recoil reductionRanged focused archtypesStrengthMelee damage, increase for 2hMelee focused archtypesToughnessWounds, physical resistenceAll / Tank ArchtypeAgilityInitiative, dodge, dodge reduction 1/2 meleeDodge focused archtypesIntelligenceArea damageOperative abilitiesPerceptionDodge reduction, InitiativeRanged focused / (All)WIllpowerMental resistance, some origin benefitsPsyker damage, Navigators / (All) , Priest OriginFellowshipResolveOfficer buffs, (All)Initiative1d10 + Agi Mod + 1/2 Per ModDetermines which initiative block allies and enemies will go into to take turns Skills There are 13 skills in rogue trader, not to be confused with the 9 characteristics. These skills are used for various RNG roll checks throughout the world via intractables, dialogue and story book narratives. You can maximise two skills in each of the three level tiers per companion. Some classes can also take one point in a third skill. You want your team composition to cover as many of these 13 skills as possible to get the best results, exp, rewards and bonuses to encounters. When I plan my parties I think about what companions can effectively cover these checks based on the characteristics that best enhance it. Skill Recommended Companions (Pick 2 per member to min-max) Athletics (Str) Abelard, Heinrix, Ulfar, Marazhai, Kibellah Awareness (Per) Cassia, Pasqal, Idira, Yrliet, Argenta, Solomorne Carouse (Tgh) Abelard, Heinrix, Ulfar, Marazhai, Kibellah Coercion (Fel) Cassia, Jae, Solomorne* Commerce (Fel) Cassia, Jae Persuasion (Fel) Cassia, Jae Demolition (Agi) Argenta, Ulfar, Kibellah, Yrliet, Marazhai, Solomorne Logic (Int) Pasqal, Idira, Yrliet, Jae Lore (Imperium) (Int) Argenta, Idira, Jae, Yrliet Lore (Warp) (Int) Idira, Heinrix, Cassia* (navigator checks) Lore (Xenos) (Int) Heinrix, Jae, Idira, Yrliet, Marazhai Medicae (Int) Kibellah, Heinrix (1 pt for medicae kits) Tech-Use (Int) Pasqal, Idira, Yrliet, Jae For my example team I am planning to bring the following five companions: Abelard, Idira, Cassia, Argenta, Pasqal. Based on the skills they can cover this means my Rogue trader will need to cover Medicae, Commerce or Coercion. The checks increase in difficulty on higher difficulties which require more min-maxing to get the best results. Jae has some unique bonuses that come from gaining reputation with the various vendors: Drusians: +(2x reputation level) % to all resistance tests and +(4x reputation level) to Lore (Imperium) Explorators: +(2x reputation level) % to armour and +(4x reputation level) to Tech-Use Kasballica Mission: +(2x reputation level) % to dodge and parry and +(4x reputation level) to Commerce Fellowship of the Void: +(2x reputation level) % to critical hit chance and +(4x reputation level) to Coercion The Imperial Navy: +(2x reputation level) % to cover efficiency and +(4x reputation level) to Persuasion Companion Roles Based on their origins, starting stats, homeworlds and base archtypes the 12 companions has various roles that they can be built to fulfill. Whilst you dont have to lean into them and can build them differently. This is the setups that I have found trivilise the game the easiest: CompanionsRoleAbelardFrontline Damage / TankIdiraPsyker Support / Disruptor / BlasterArgentaRanged DamageCassiaNavigator Support / Disruptor / Secondary DamagePasqalDisruptor / Secondary Damage / Secondary SupportHeinrixPsyker Frontline Damage / Blaster / Secondary TankJaeSupport / Secondary Damage / Skill Monkey / Tank (with gear)YrlietSecondary Damage / DisruptorUlfarMixed DamageMarazhaiArmour / Dodge Tank - AoE Death AuraKibellahDodge-Tank Frontline DamageSolomorneCrowd Clearing & pet support I highly recommend you read the basics of each archetype for every companion as I will not be explaining mechanics that are overtly explained in game when you select the archetype.
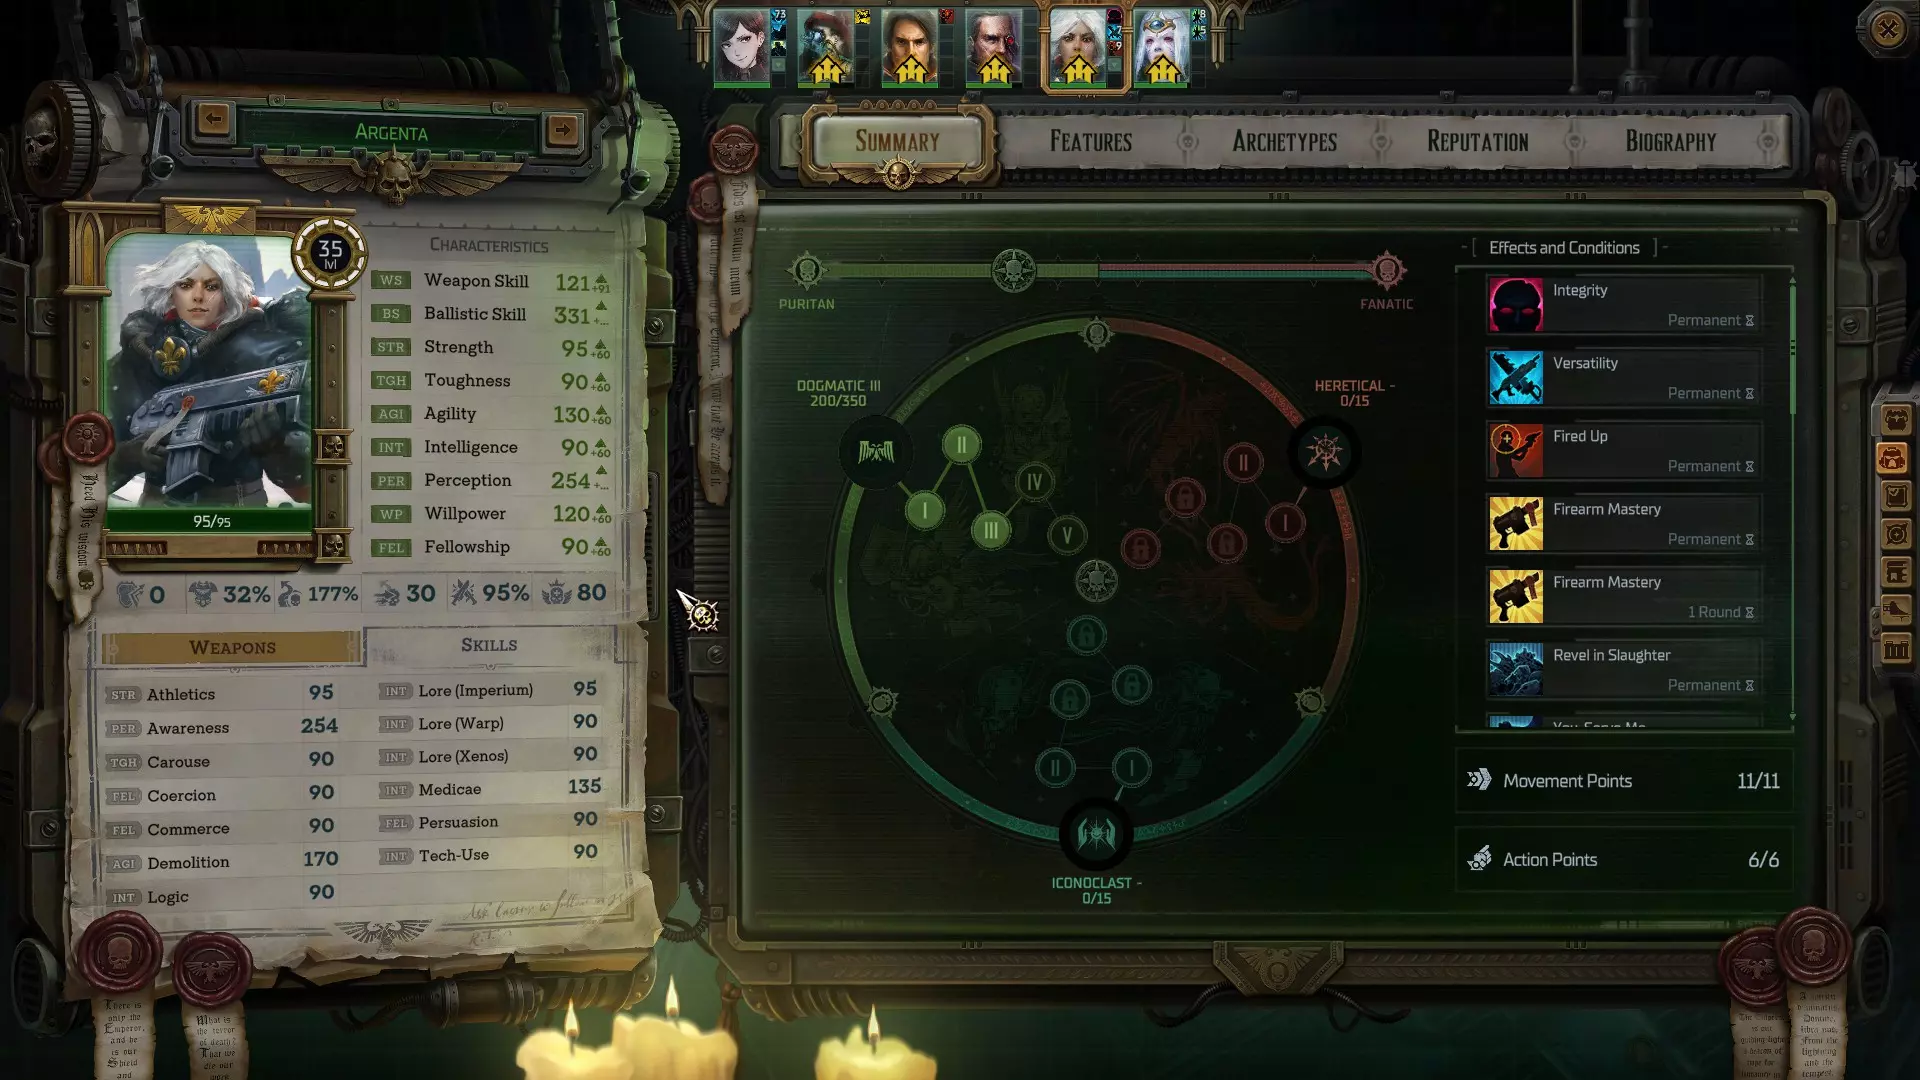
Mechanics tidbits How does burst fire work? This question should be more how does recoil work as burst fire is quite literally just auto hit attack that if the bullets on their trajectory path hits an enemy it always hits but that does not mean enemies cant dodge effectiveBS = (40 + BS/2 + accuracy bonuses - recoil (if 2nd+ shot) ), capped betwen 30 and 95 central_line_chance = effectiveBS/ 2, but no lower than 30 and no higher than 95/2 slight_deviation = effectiveBS - central_line_chance strong deviation = 100 - central - slight (or simply speaking the rest of the chance) code is in RuleCalculateScatterShotHitDirectionProbability if you want to check it yourself later central line trajectory probability can vary between 15% and 48%, with BS having half of the effect of Recoil per point. Slight caps at 95%, with the same tendencies. WIth in effective range How does area damage work? Area damage again seems like an auto hit but the way it works is even if the attack misses the damage still does half damage to enemies, however that does not mean enemies cant dodge the attack To note, burst and area are two very different damage types which will not stack range abilities like concentrated fire. Concentrated fire will not increase the damage of burst attacks. What is the psyker staff bug? Psyker powers are neither melee nor range with their damage being auto hit, undodable and being entirely on psy rating and sometimes willpower. There are even some buffs that will use other stats So what is the bug? Well psyker staff powers actually count as melee attacks. Will gain benefits from melee talents and abilities. Such as a pyromancy staff will gain damage increases from strength and reckless strike Whilst this benefit applies to all psyker staffs, some range talents or universal talents will also benefit but there is a drawback specifically for pyromancy inferno staff abilities. Enemies can parry this if your weapon skill is too low or dodge this attack if your perception is too low, this means especially for pyromancy you have to treat this ranged inferno power as essentially a normal melee weapon attack to make use of it. How does Initiative work? Initiative is 1d10 + agi mod + 1/2 per mod - however it gets a little clunky because they alternate initiative blocks. So if two allies get the same role and have the highest they both go first, then the next highest block of enemies, then back to allies then back to enemies. It essentially forces all your low agility characters to go dead last and can cause ally clumps at the back depending on how many enemy blocks there are. It gets even more borked by grand strategist creating new initiative blocks at the front and being pulled out of their own blocks then moving up enemies. Abelard Abelard is the first companion you meet in Rogue Trader that joins you in the prologue. Prior to patch 1.5 Abelard was a vanilla imperial world warrior that mechanically was entirely forgettable but was very precious to players from a story standpoint. Since the 1.5 patch drastically enhancing the Navy Officer origin, Abelard finally can match the memes to make an incredibly powerful frontline companion. Whilst you can build Abelard for the use of shields, they mostly only offer 2 deflection and add very limited stat based damage. Due to the use of fleet combat training that on successful critical attack or melee parry, Abelard is able to make an attack with his offhand weapon which makes it more valuable to be a high damage, high armour pen one handed weapon than a shield. The vicious solution reward from Eurac V in act 1 can also give Abelard +1 deflection at the cost of 10 agility which is a very small cost considering how initiative is calculated and that Abelard can build into perception for dodge reduction. Contrary to popular reddit belief, Vanguard is bottom 1 in terms of tier 1 archetypes, adding very little to the win condition of battles and mostly slowing down your turns. Stronger options for Abelard are dual wield Arch-Militant, Xenos Weapons Executioner or even Agility built Assassin. Vanguard is low armour, low damage, low mobility and low attack economy compared to all the other advanced archetypes and entirely reliant on beacon of might + malpain shroud is late combat turns to do anything effective. Fleet combat training in essence makes Vanguard obsolete as it can offer the counter attack strategy to the superior archetypes which dont get movement trapped after attacking like vanguard which in turn means they are a better candidate to receive finest hour from an officer companion. In act 1 the pneumo boots will allow Abelard to make 1 ap charge attacks. The Epiphany sword in act 2 will allow Abelard to make additional 1 ap charges on charge kill after the first to chain attacks. Malpain shroud in act 2 will allow you to turn temp hp into % damage from foulstone colony. Then the shop brought act 2 item invigorating resolve will allow any archetype to infinitely stack temp hp on resolve again, thus once again making vanguard kit not relevant. This sword setup with a strong offhand power maul or Axe will keep Abelard being a power house from start to end game. In act 4 you can easily upgrade to the void veteran boots which will allow Abelard to gain a 0 AP charge on melee kill to essentially solo every encounter with ease. You can secondary slot a two handed weapon early game then upgrade to a secondary rock saw from the mid game. Gameplay will mostly consist if using endure to tank the enemy attacks, reckless strike to guarentee a critical for an offhand attack then following the gameplan of your tier 2 archetype, in this scenario I am building Abelard as a Arch-Militant so will want to use wildfire to make area attacks to build versatility which will enhance both attacking and defence. Reckless rush will allow Abelard to not become movement trapped after attacking with daring breach combing another extra turn as well as MP generator. For visual reference, the first video was made during testing the 1.5 patch then the second was updated recently once more testing was allowed thus moving away from shields to pure dual weilding. Abelard Levels Warrior Level 1 : Charge Level 2 : Medicae Level 3 : Endure Level 4 : Daring Breach Thick Skin Level 5 : Hardened Scars Weapon Skill Level 6 : Taunting Scream Athletics Level 7 : Weapon Skill Fleet Combat Training Level 8 : Athletics Ramming Speed Level 9 : Daring Breach II Level 10 : Impetus Toughness Level 11 : Reckless Strike Get off me! Level 12 : Toughness Carouse Level 13 : Reckless Fury Carouse Level 14 : Perception Dual-Weapon Combat Level 15 : Daring Breach IV Arch-Militant Level 16 : Versatility Level 17 : Wildfire Level 18 : Always Ready Level 19 : Steady Superiority Level 20 : AP +1 Weapon Skill Level 21 : Dependable Weapon Skill Level 22 : Reckless Rush Melee Weapon Specialist / Instant Retribution Level 23 : Athletics Allout Level 24 : Toughness Dual-Weapon Specialist / Shield Mastery Level 25 : Flashfire Level 26 : Athletics Toughness Level 27 : Steady Superiority IV Level 28 : Carouse Adaptability Level 29 : Perception Stentorian Voice Level 30 : Kick Level 31 : Martial Art Level 32 : Perception Carouse Level 33 : Critical Versatility Perception Level 34 : Strength Power Armour Proficiency Level 35 : Steady Superiority II Exemplar Level 36 : Eagar for battle Easy Target Level 37 : Athletics Contempt for the weak Level 38 : Weapon Skill It Will Not Die Level 39 : Forceful Strike Athletics Level 40 : Degraded Defence Focal Point Level 41 : Weapon Skill Crowd Kill Level 42 : Devastating Attack Toughness Level 43 : Breaking Attack Power Weapon Specialist Level 44 : Carouse Destroyer Level 45 : AP +1 Level 46 : Open Engagement Carouse Level 47 : Desolation Medicae Level 48 : Exploit Weakness Toughness Level 49 : Strength / Agility Medicae Level 50 : Peak Condition Contempt Level 51 : Distract Medicae Level 52 : Preferred Targets Know No Heresy Level 53 : Sworn Enemy / Break Through Strength Level 54 : Extermination Accustomed to Glory Level 55 : AP +1 Abelard Gear Slot Gear to Consider Helm The Guardian Crown / Tactical Genius / Retinal Analyser Armour Invincible Onslaught Armour / Sanguine Judgement / Adherent of Mankind Cloak Malpain Shroud / Swashbuckler Cloak Neck Invigorating Resolve / Solid Shield Enarmes / Bonebreaker Neck Accessory 1 Empyrean Transceiver / Sturdy Shield Straps / Bead of Might Accessory 2 Peculiar Trinket / Hellbrute Horn Trophy / Bead of Might Gloves Adaptive Gloves / Relish Anguish / Metal Claw Gloves Boots Pneumo Boots / Void Veteran Boots / Enforcer's Light Boots Weapon Set 1 (Main) CoffinMaker's Sledge / Heavy Maul / Auto-Striking Power Sword / Bonebreaker Weapon Set 1 (Off/Shield) Tearing Vengeance / Advanced Shield / Defender / Kinesiostatic Shield Weapon Set 2 Carnage / CoffinMaker's Sledge / Well-Maintained Rock Saw Weapon Set 2 (Off) Tearing Vengeance Idira Idira is an unsactioned psyker and as such has an always on chance to accidentally explode, die and take out the party with her whilst summoning a daemon from the prologue. That is right, the patch that said they fixed this was a lie. Even worse, sanctioned psykers like Heinrix or the Rogue Trader not only can only have these peril chances at 15+ veil degradation but can mitigate the perils to enemies with psyber raven ability warp buffer. Idira however cannot pass daemon incursions thus making her a terrible choice for the shimmering emulsion injection. With that in mind from changing from 1.4 to 1.5 I have moved Idira away from being a buffing companion as she is more likely to kill your team than help. So in the early game she is built as an operative sniper which will progress into a psyker power focused damage dealer in the mid game but keep in mind the more Idira increases her psy rating, the more likely she is to explode and die. BALLISTIC SKILL IS NOT WASTED ON IDIRA. READ PSYCHIC BARRAGE. The above is in caps because in the last year I have received over 200 messages accross various platforms from people that dont read what the talents do then point out this skill investment, telling me I am building this companion wrong by wasting stat points on ballistic skill, despite even directly mentioning using Idira early game with the longlas as a sniper which can also be progressed into various other useful snipers if you want to continue this path. Since launch there has been a psyker staff power bug. Psyker staff powers actually count as melee attacks. IE wrath of the emperor from a sanctic staff or Inferno from a pyromancy staff are melee attacks. Specifically Inferno can be dodged and parried as if it were a melee attack. However Biomancy and Sanctic staff powers cant be dodged and parried. All psyker staff power attacks will gain benefit from melee talents and abilities on warrior and blade dancer. Universal talents like ballistic calculations from operative and 'rack and ruin' from soldier will also apply. Interestingly the pain bond feature of psyber raven when it retransmits damage to enemies will reapply damage multipliers such as weak hearts and degraded defence which can easily turn a 2k damage psyker power into a retransmitted 10k extra damage power. This makes overseer the best Tier 2 for Idira. Strategic adaptation can also increase her attack economy on kill as well as allow AoE buffs (though im not specifically building for them) and the heroic will allow AoE single target attack spells using the psyber Raven's willpower. Early level gameplay will be using longlas, cruel fate in act 2 is an amazing Sniper for Idira, mid level gameplay will be using the psyber raven skill to link 3 enemies followed by a staff or psyker power for damage which by end game will suddenly get some obscene damage multipliers. Gear like spirit drape will be less valuable to a damage focused Idira but you could always drop sanctic powers to build into biomancy but keep in mind the more powers you use, the more likely Idira is to explode. Alternatively you can also build Idira for arc rifles. Idira levels Operative Level 1 : Analyse Enemies Level 2 : Awareness Level 3 : Expose Weakness Level 4 : Dismantling Attack Uncanny Sight Level 5 : Ballistic Skill Second Sight Level 6 : Tide of Excellence Ballistic Skill Level 7 : Pyromancy Medicae / Lore Warp Level 8 : Pain Channelling Thriving in Peril Level 9 : Dismantling Attack III Awareness / Lore Warp Level 10 : Lore Xenos Perception Level 11 : Ballistics Calculation Lore Xenos Level 12 : Sensory Deprivation Psyker Minoris Level 13 : Backdraft Perception Level 14 : Intelligence Psychic Barrage Level 15 : Dismantling II / IV Overseer Level 16 : Psyber-Raven Proficiency Level 17 : Strategic Adaptation Level 18 : Warp Buffer Level 19 : Overcharge Level 20 : AP +1 Willpower Level 21 : Psyker Majoris Willpower Level 22 : Sanctic Powers Awareness / Lore Warp Level 23 : Sacrificial Penance Level 24 : Perception Fire Within Level 25 : Rite of Calibration Level 26 : Perception Awareness / Lore Warp Level 27 : Overcharge II Level 28 : Psy-Resonator Subtle Manipulation Level 29 : Intelligence Lore Xenos Level 30 : Psychic Assault Level 31 : Castigating Echoes Psyker Terminus Level 32 : Intelligence Lore Xenos Level 33 : Enhanced Augmetics Level 34 : Weak Hearts Level 35 : Overcharge I Exemplar Level 36 : Eager for Battle * Fresh Target Level 37 : Awareness / Lore Warp Impure Force Level 38 : Willpower Grenadier Level 39 : Prescience Awareness / Lore Warp Level 40 : Degraded Defence Psyker Extremis Level 41 : Willpower Continuous Analysis Level 42 : Mind Rupture Perception Level 43 : Fatebringer Melting Armour Level 44 : Lore Xenos Extermination * Level 45 : AP +1 Level 46 : Passive Learning Lore Xenos Level 47 : Comprehensive Analysis Medicae / Lore Warp Level 48 : Psalms of Heroes Perception Level 49 : Intelligence Medicae / Lore Warp Level 50 : Malign Influence Edge of Dawn Level 51 : Brother-in-Arms Medicae Level 52 : Weak Body, Weak Soul Mind Siege Level 53 : Complete the Cycle Intelligence Level 54 : Cataclysm Eternal Glory Level 55 : AP +1 Idira Gear Slot Gear to Consider Helm Ghost Helm / Cultist Hood / Ethereal Visor / Dark Visionary Hood Armour Psychic Bodyglove Cloak Psychic Cape / Singed Cape / Xeno Emitter Neck Vortex Pendant / StarMist Scarf Accessory 1 Warp Surge Brooch / Metronome / Grimoire of the Void Accessory 2 Experimental Psy-Amplifier / Chains of Domination Gloves Warp Conductor Gloves Boots Psyker's Footwear / Boots of Decay / Battle Psyker's Boots Weapon Set 1 Detachment from Death / Staff of Mindsight Weapon Set 2 Sanctified Staff / Solar Staff / Staff of the Righteous Pyre Pet Blessing of the Immaterium / Synergy / Grave Chill Argenta Due to the 1.5 priest rework, the unique Corruption Eradicator Helmet and One star power Armour. Argenta is the top ranged damage companion. No, a fortress world Rogue Trader, will not out compete Argenta for damage as a heavy gunner because they simply do not have access to her unique gear. If you really want to also be a soldier priest then it is better to build for regular bolters whilst letting Argenta keep the big guns or build a heretic fortress world priest for heavy guns to double up so you will be a great Luigi to her Mario but you are still going to want to give Argenta the best rate of fire gear in terms of compensator gloves and the tactical backpack. The MC using artificer power armour will however be more AP efficient for burst attacks. The first thing you need to do with Argenta in the prologue is to put the unfading valor in the bin, it has 40 recoil, give Argenta even a scrap autogun or lasgun if the Rogue Trader is a soldier, then Argenta will be online from the prologue. Previously in 1.4 I had built into early shotguns for Argenta and whilst they remain Argenta's best secondary option, with the changes in 1.5 to priest you want to build for rapid fire bolters ASAP. Get litany of hatred online then tenets of retribution, give Argenta the modified bolter from the bunker act 1 vendor then watch her trivialise the entire game on unfair difficulty. It is unfortunately that simple. Cassia + Argenta = Easy Game. I have redesigned the build so that heavy bolter Argenta will be online from level 21 so you will likely change from the imperial pride bolter to the act 2 heavy bolter at this point. Breaking point at level 22 and overpower at level 24 will give a really huge damage spike but even from level 22, Argenta from a bring it down self buffing with litany of hatred can heavy bolter rapid fire one burst the daemon engine on the derelict voidship. Whilst I have allowed a level path at 29 to swap to heavy flamers you can easily keep to shotguns for the entire game as a secondary to build versatility for Argenta. Whilst Argenta cannot succeed lore imperium checks on unfair, the reason I have added it as an option is for damage min-maxers that want to use saint congnacious' scriptures as a damage item on Argenta for when they turbo buff with Officer, Navigator, Psyker and Master Tactician. Whilst a single officer grand strategist can allow Argenta to one burst the act 4 Changer of Ways boss on unfair, having extra buffers will make for more impressive reddit screenshots. Argenta Levels Soldier Level 1 : Run and Gun Level 2 : Demolition Level 3 : Revel in Slaughter Level 4 : Firearm Mastery Muzzle Velocity Level 5 : Ballistic Skill Rapid Reload Level 6 : Ballistic Skill Rapid Fire Level 7 : Agility Litany of Hatred Level 8 : Unfaltering Fire Demolition Level 9 : Firearm Mastery II Level 10 : Fired Up Agility Level 11 : Concentrated Fire Awareness / Lore Imperium Level 12 : Strength Tenets of Retribution Level 13 : Swift Slaughter Bolt Weapon Expert Level 14 : Heavy Weapon Proficiency Awareness / Lore Imperium Level 15 : Firearm Mastery III Arch-Militant Level 16 : Versatility Level 17 : Wild Fire Level 18 : Always Ready Level 19 : Steady Superiority Level 20 : AP +1 Ballistic Skill Level 21 : Heavy Gunner Ballistic Skill Level 22 : Reckless Rush Breaking Point Level 23 : Demolition All out Level 24 : Agility Overpower Level 25 : Flashfire Level 26 : Demolition Agility Level 27 : Steady Superiority IV Level 28 : Awareness / Lore Imperium Adaptability Level 29 : Perception Flame Weapon Expert / Stronger Together Level 30 : Devastating Attack Level 31 : Breaking Attack Level 32 : Perception Awareness / Lore Imperium Level 33 : Critical Versatility Perception Level 34 : Perception Litany of Purification Level 35 : Steady Superiority II Exemplar Level 36 : Eagar for Battle Rack and Ruin Level 37 : Demolition Distract Level 38 : Ballistic Skill Grenadier Level 39 : Entrench Demolition Level 40 : Degraded Defence Preferred targets Level 41 : Ballistic Skill Demolition Engineer Level 42 : Kick Perception Level 43 : Ingenious Know No Heresy Level 44 : Awareness / Lore Imperium Deadly Aim * Level 45 : AP +1 Level 46 : Point Blank Awareness / Lore Imperium Level 47 : Enough Bullets for everyone Medicae / Awareness Level 48 : Exploit Weakness Perception Level 49 : Agility Medicae / Awareness Level 50 : Extermination * Tenderise / Integrity Level 51 : Contempt for the weak Medicae / Awareness Level 52 : Dismantle Stronger Together / Swift Movements Level 53 : Controlled Shot Agility Level 54 : Pinpoint Accuracy / Masterful Display Accustomed to Glory Level 55 : AP +1 Argenta Gear Slot Gear to Consider Helm Corruption Eradicator Helm / Gunslinger's Helm Armour One Star Power Armour / Adherent of Mankind Cloak Aquila Pendant / Dog Tags / Fury Incarnate / Focus Incense / Ruby Splash Neck Blessed Bolter Casing Accessory 1 Chains of Domination / Demolition Instructions / Echo of Victory Accessory 2 Bead of Might / Book of War Prayers / Saint Cognatius Scriptures Gloves Compensator Gloves / Marksman Bracers / Gloves of Rapid Desolation Boots Caligae of Saint Keefe / Sororitas Boots / Inertia Boots Weapon Set 1 Improved Heavy Bolter Weapon Set 2 Judex / Fiery Retribution / Purging Fury / Double-Barrelled Shotgun Cassia Cassia is unironically a win condition. There is no doubt that officer grand strategist is the strongest, top 1, support option in the game. Even more so with Cassia having unique Navigator buff, debuff and damage options. Whilst you could build Cassia to be trash killer for easy finest hour generation with sororitas boots or go heavy debuff with castigation staffs, I found even on unfair difficulty all you really need is decsisive response, infusing staff and reveal the light to make Cassia trivilise the game. My build goes for zone of fear at level 12 into point of curiosity at level 17 but you could easily change to held in my gaze at level 12 then go for waking nightmare at level 17 then grab warp curse later in grand strategist. It is up to you. The game plan for cassia, point the best companion carry to clear the encounter, give them voice of command, reveal the light from an infusing staff then get bring it down to start pumping damage. If your duo does enough you can probably generate a finest hour for another extra turn. From act 2 footfall you will have access to devestating staffs, sororitasa boots and stimms to allow for incredibly easy 1 turn setups. Killing 5 enemies with two lidless stares is pretty easy to get a finest hour from sororitas boots. If you plan to do this strategy a lot then you will want to take blood augury earlier, especially if you go for held in my gaze at level 12. Grand strategist can seem like a complicated tier 2 but learning how the zones work is vital. Improvised strategy giving you a random stratagem can completely change the flow of combat. Whilst I dont build heavily into stratagems for cassia, on a non cassia grand strategist I do and it is very strong. Mend reality is a great AOE party buff if you are holding your infusing staff. Cassia will mostly want to build Willpower, Perception and fellowship with a little bit of overflow into intelligence. The most important skill for cassia is persuasion to use with the black signet ring of the inquisition. Inquisitors tenet ability from the end of act 2 to act 5 makes the game difficulty evaporate. Cassia is also shockingly tanky as well as very nimble. Not having Cassia in the party is the first requirement for any challenge run. Cassia Levels Officer Level 1 : Voice Of Command Level 2 : Persuasion Level 3 : Bring it Down ! Level 4 : Finest Hour Lasting Impression Level 5 : Willpower Mastery of Time Level 6 : Decisive Response Willpower Level 7 : Reveal the light Eye of Oblivion Level 8 : Focus Persuasion Level 9 : Finest Hour IV Level 10 : Lore Warp / Awareness Perception Level 11 : Mind over Matter Perception Level 12 : Zone of Fear Strange Vitality Level 13 : Undam The Sea of Souls Lore Warp / Awareness Level 14 : Fellowship Pass Unscathed Level 15 : Finest Hour I Grand Strategist Level 16 : Combat Tactics Level 17 : Point of Curiosity Level 18 : Improvised Strategy Level 19 : Take and Hold Level 20 : AP +1 Willpower Level 21 : Personal Combat Zone / Fire at Will Willpower Level 22 : Held In my Gaze Level 23 : Lore Warp / Awareness Unnatural Allure Level 24 : Perception Blood Augury Level 25 : Veil of Protection / Ebb and Flow Level 26 : Perception Lore Warp / Awareness Level 27 : Take and Hold IV Level 28 : Guide of Souls Fellowship Level 29 : Fellowship Persuasion Level 30 : Mend Reality Level 31 : Stable Routes The Course Untravelled Level 32 : Persuasion Intelligence Level 33 : Intelligence Threads and Faults Level 34 : Characteristic Training: Int / Veil of Protection Level 35 : Take and Hold III Exemplar Level 36 : Eager for Battle Be Vigilant! Level 37 : Lore Warp / Awareness Fire at Will / Tonicity Level 38 : Willpower Grenadier Level 39 : Air of authority Lore Warp / Awareness Level 40 : Firebrand Tonicity / Fire at Will Level 41 : Willpower Inspiring speech Level 42 : Combat Locust Perception Level 43 : Blurred Locus Open to the warp Level 44 : Persuasion Eager Subordinates Level 45 : AP +1 Level 46 : Seize the Initiative Persuasion Level 47 : Steel Resolve Lore Warp / Awareness Level 48 : Strategic Offensive Perception Level 49 : Fellowship Lore Warp / Awareness Level 50 : Degraded Defence No Respite Level 51 : Personal Zone Awareness / Lore Warp Level 52 : Personal Oversight Characteristic Training Will Level 53 : Blitz Statagem Fellowship Level 54 : Combat Meditation Physical Encouragement Level 55 : AP +1 Cassia Gear Slot Gear to Consider Helm Commander's Monocle Armour Slick Bodyglove Cloak Cloaking Field Emitter / Mercy's Gift / Cloak of Mercy Neck Medal of Alacrity / Daemon Tool / Aquila Pendant Accessory 1 Black Signet of the Inquisition Accessory 2 Precinct Vox Relay / Commander's Notes Gloves Noble Silk Gloves / Thrice Pioneers Bracers / Grenadier's Gloves Boots Sororitas Boots / Adrenaline Warboots Weapon Set 1 Warp Guide Staff / Astronomican Regalia Weapon Set 2 Red Crystal Staff / Staff of Orsellio Novator Pasqal Pasqal is a very unique support companion. Whilst as of patch 1.5, Operative has still not recovered from the launch nerfs, making it the bottom 1 tier 1 archetype. Operatives are low impact in terms of damage, support and attack economy. There is no amount of coping that will change my mind that at level 55 with 100+ intelligence that the most this archetype can do is add 3% crit chance to the party with joint offensive or add +10 damage to ally attacks via joint analysis. Single shot type attacks have low support with at most the operative can add 15% via ballistics calculations when enemies are 5+ cells away AND have to have an exploit on them when exploits do not activate on extra turns. Even worse burst and area attacks are bugged for operatives, do not consume exploits thus cannot proc tide of excellence. So what is the good news? 1.5 gave us 5 new plasma gun talents which work exceptionally well with Pasqal's unique tech priest origin and specifically overcharge protocols. This means Pasqal is a unique operative that can support the party with remove enemy dodge/armour, add a small increases to their base damage but also slowly ramp up some very strong damage. However it will never compete with a burst or area build soldier but it doesnt quite need to. Bounty hunter is by far the best tier 2 for Pasqal. Grand strategist is not all that worthwhile for an operative, Assassin is the second weakest T2 archetype being entirely reliant on notes on weakness from act 4 to deal any damage (or the death aura build you will see on marazhai later) and Pasqal does not have the attack economy to make an effective Executioner. On paper Bounty Hunter should be stronger than arch-militant, it gains a lot of damage from attacks, generates a lot of ap, turbo stacks armour piercing and generates extra attacks when killing elite enemies. So why doesnt it out perform Arch-Militant? Well operative being far weaker than Warrior, Soldier or Bladedancer is one reason, the other being there are not that many elite enemies to use most of the bounty hunter kit on. You often wont kill enough high tier enemies to activate expert finesse and excess armour penetration does quite literally nothing. If you have 120% armour penetration but enemies only have 10% armour then that extra 110% does nothing. This is why melta guns are so worthless. The better news is overcharge protocols keeps winning. Everytime Pasqal interacts with a plasma gun he gains 10% damage. This includes shooting and RELOADING. With the new talents for 0 ap reloads on the rifles every shot then reload will generate damage. Whilst area attacks cannot consume exploits for talents like tide of excellence, they can still game the damage increase, so abusing area attacks on operatives for damage increases is very viable. Pasqal's machine spirit communion can also be upgraded to AoE spread exploits on extra turns. Then the final cherry on the cake is when you use claim the bounty, reload using the extra attack talent for plasma weapons, Pasqal can make a second claim the bounty attack as well as then make a normal attack. Even potentially use hunter's ambush with either self calibrating goggles or lidless strare stun to generate another attack with potential activation of deathdealer or expert finesse with reloads between all of the previous, giving Pasqal a lot of damage boosts. On top of this Pasqal will also want to engage in normal operative gameplay of using analyse enemies on high tier enemies with expose weakness to reduce their dodge and armour for the party to kill. The first video was from 1.5 launch with the updated video being after discovering the plasma gun exploits. Pasqal Levels Operative Level 1 : Analyse Enemies Level 2 : Tech-Use Level 3 : Expose Weakness Level 4 : Dismantling Passive learning Level 5 : Ballistic Skill Scanner Mechadendrite Level 6 : Uncanny Sight Intelligence Level 7 : Joint Analysis Tech-Use Level 8 : Tide of Excellence Aiming Protocols Level 9 : Dismantling III Medicae Level 10 : Logic Perception Level 11 : Ballistic Calculations / Sharpshooter Logic Level 12 : Perfect Spot External Power Block Level 13 : Sniper Expertise Perception Level 14 : Intelligence Plasma Bank Level 15 : Dismantling II Bounty Hunter Level 16 : Hunt Down The Prey Level 17 : Claim the Bounty Level 18 : Hunter's Ambush Level 19 : Wild Hunt Level 20 : AP +1 - Ballistic Skill Overcharge Protocols Level 21 : Ballistic Skill Hunting Surge Level 22 : Cull the bold Level 23 : Flay the bold Tech-Use Level 24 : Intelligence Safety Training Level 25 : Heightened Concentration Level 26 : Tech-Use Intelligence Level 27 : Wild Hunt II Level 28 : Savour the kill Level 29 : Logic Perception Level 30 : Filtering Protocols Hot on the trail Level 31 : Trail and Shatter Level 32 : Perception Logic Level 33 : Expert Finesse Level 34 : Pinnacle of Weaponry / Machine Spirit Scan Protocols Level 35 : Wild Hunt III Exemplar Level 36 : Eager for Battle * Fresh Target Level 37 : Tech-Use Share the Spoils Level 38 : Ballistic Skill Grenadier Level 39 : Tactical Knowledge Tech-Use Level 40 : Degraded Defence Inspiring Trophy Level 41 : Ballistic Skill Improved Tactics Level 42 : Piercing Shot Intelligence Level 43 : Pierce and Ruin Enhanced Splash Area Level 44 : Logic Deathdealer * Level 45 : AP +1 Level 46 : Combat Insight Logic Level 47 : Sharpshooter / Ballistic Calculations Awareness Level 48 : Pierce the Armour Intelligence Level 49 : Perception Awareness Level 50 : Deadly Aim / Extermination Weak Body, Weak Soul Level 51 : Gruesome Kill Awareness Level 52 : Comprehensive Analysis Machine Spirit Scan Protocols Level 53 : Precise Attack Perception Level 54 : Extermination / Masterful Display Insightful Precision Level 55 : AP +1 Pasqal Gear Slot Gear to Consider Helm Self-Calibrating Goggles / Self-Calibrating Helm / Enhanced Data-Tether Mask Armour [Hive World] Voidsman Armour / Adaptive Flak Vest / Skitarii Ranger Armour Cloak Shadowguide Cloak / Cape of Righteous Fury / Zealot Cloak / Von Valancius Cloak (might be a bug not being RT restricted) Neck Synaptic Coagulator / Warlord's Amulet / Hypnotising Pendant Accessory 1 Long-Range Aim Lens / Untuning Combi-tool Accessory 2 Prey Scanner / Vid-Capture Relay / Untuning Combi-tool Gloves Plasmashaper Gloves / Overcharge Gloves Boots Sharpshooter Boots / Tracking Boots Weapon Set 1 Omnissiah's Providence Weapon Set 2 Ragefire Plasma Gun / Ancient Plasma Rifle / Incandescent Storm Heinrix Prior to patch 1.5, Heinrix was just a straight combat upgrade to Abelard. He did everything better and would just replace the same role. At the start of 1.5 I looked to change Heinrix to be a defensive paladin style bufer for the party which was very fun and effective. However, the developers then fixed shearing strikes with rigorous training opening the doorway to the most fun Heinrix build, a dual weild executioner with a secondary staff ranged option. Remember in the Idira section where I mentioned psyker staffs are bugged and count as melee attacks? This means to make a GISH build you just make a melee build then give them a psyker staff in their secondary. Yes Heinrix can add agility to damage on a pyromancy staff, use reckless strike on it and even use WHERE IT HURTS from executioner to extra proc dot damage. Early game you build heinrix for break through and shearing strikes with offhand veilrender to really stack up early game damage. Focusing on biomancy buffs early as Heinrix really benefits from shimmering emulsion injection to have 3 psy rating in act 1. Executioner is without a double the strongest tier 2 for Heinrix and shearing strikes with inertia boots from footfall act 2 will allow Heinrix to have obscene attack economy and MP generation. Due to the change in carnival of misery no longer allowing for map wide inflame procs I do not even build Heinrix for self ignite until act 3. Focusing mostly on bieng a dual weapon fighter using pyromancy staff for range attacks. By act 4 I pick up heavy armour solely for Psyker's Breastplate to be able to stack psy rating. Heinrix has a lot of powerful gear options that come his way, in the early game you will need medicae gear as heinrix cannot stack medicae like a bladedancer. So mechanicus respirator and Diagnostor are a must in act 2. Offhand Veilrender will carry Heinrix all the way until you get access to two warp fire force swords. Initially you will primary hand cursebringer but once you get Incinerator this will become your new primary with cursebringer changing to your offhand. Warp surge brooch in act 2 will give psy rating attack economy turn 1 which is another huge upgrade and spirit drape will allow for 0 ap buffs turn 1 making Heinrix incredibly potent in act 2. By act 4 when you can secondary rock saws or higher tier pyromancy staffs, nothing can stop him. You can choose to stick with inertia boots from act 2 until end game or if you really want to deprive Abelard you can take the void veteran boots and Well-maintained rocksaw. From act 3 when you have body of flames you can ignite yourself and warp surge brooch will keep your attack economy fine to map clear. As your pyromancy staff counts as a melee attack this will generate a lot of MP from inertia boots, you will tend to save where it hurts for your inferno casts as it has a lot of multiple hits. Hand of avolius will be great to have multiple bleed procs, dogmatic 2 will add more fire procs and biophysical distortion will add your toxin dots. Level 28 if you really want to hyper attack focus you can change for fire within. Racking weakness with multiple sources of armour strip will be your highest damage increase and you will want to apply any combat buffs to intelligence to really up this damage. The first video showcases the 1.5 launch overseer paladin build with the updated video being after the shearing strikes fix which is what this build focuses on. Final note, sword of faith is terrible and worse than normal melee as most damage riders do not apply to it. Sanctic talents and abilities like edge of dawn or hammer of the emperor do not apply and even degraded defence does not benefit it. Heinrix Levels Warrior Level 1 : Charge Level 2 : Coercion Level 3 : Endure Level 4 : Daring Breach Rigorous Training Level 5 : Desolation Weapon Skill Level 6 : Break Through Medicae Level 7 : Weapon Skill Psyker Minoris Level 8 : Medicae Shearing Strikes Level 9 : Daring Breach II Level 10 : Thick Skin Agility Level 11 : Enfeeble Biophysical Distortion Level 12 : Agility Athletics / Lore Xenos Level 13 : Cautious Disengage / Blade of Light Athletics / Lore Xenos Level 14 : Strength Psyker Majoris Level 15 : Daring Breach IV Executioner Level 16 : Forced Repentance Scourging Strike + Where it hurts Level 17 : Warp Speed Level 18 : Anatomy Expert Level 19 : Carnival of Misery Level 20 : AP +1 Weapon Skill Level 21 : Weapon Skill Sower of Distress Level 22 : Pyromancy Level 23 : Sparks of the Greater Flame Medicae Level 24 : Agility Psyker Terminus Level 25 : Master of Torture Level 26 : Agility Medicae Level 27 : Carnival of Misery III Level 28 : Perfect Anatomy / Invigorating Screams Level 29 : Willpower Athletics / Lore Xenos Level 30 : Orchestrate Flame Characteristic Training: Per Level 31 : Deep Laceration Level 32 : Perception Athletics / Lore Xenos Level 33 : Fragile Playthings Level 34 : Perception Psyker Extremis Level 35 : Carnival of Misery IV Exemplar Level 36 : Eagar For Battle * Easy Target Level 37 : Medicae All-Encomposing Agony Level 38 : Weapon Skill Body of Flames Level 39 : Reckless Strike Medicae Level 40 : Degraded Defence Racking Weakness Level 41 : Weapon Skill Impetus Level 42 : Inflame Agility Level 43 : Edge of Dawn Heavy Armour Level 44 : Athletics / Lore Xenos Destroyer * Level 45 : AP +1 Level 46 : Fire Within Athletics / Lore Xenos Level 47 : Hymns of Hatred Carouse Level 48 : Psalms of Heroes Agility Level 49 : Perception Carouse Level 50 : Peak Condition Deterioration Level 51 : Relentless Blaze Carouse Level 52 : Corpus Conversion Melting Armour Level 53 : Reckless Abandon Perception Level 54 : Extermination Eternal Glory Level 55 : AP +1 Heinrix Gear Slot Gear to Consider Helm Eyes of Joyeuse / Carmine Crown / Mechanicus Respirator Armour Armour of Hidden Promise / Psychic Bodyglove / Psyker's Breastplate Cloak Swashbuckler's Cloak / Pack of Reagents / Cloak of Bloodthirst / Lady Theodora's Mantle Neck Starmist Scarf / Requiemator / Psy Focus Accessory 1 Warp Surge Brooch / Spirit Drape Accessory 2 Hand of Offence / Spirit Drape Gloves Augmented Gloves / The Hand of Avolius Boots Inertia Boots / Void Veteran Boots / Fencing Boots Weapon Set 1 Incinerator / Cursebringer (Veilrender offhand early game) Weapon Set 2 Solar Staff / Bloodrinker Staff / Sanctified Staff Jae Jae is a very interesting character, probably the most well written female character in video games as it is not afraid to have her be an actual woman but also she is obscenely strong mechanically. Jae's cold trader origin makes her the only viable skill monkey companion in game. Due to intelligence being a terrible stat with only one boosting item in the game that comes in act 4 of dlc 2, be smart is not a valid or viable option. Jae can cover intelligence checks with fellowship which is the most supported stat in the game. Jae can also turn fellowship and lore imperium into armour with helm of determination, breacher's armour and saint cognacius' scriptures making her the best armour tank in the game. Jae's only downside is her terrible base build, whilst 1.5 gave Jae access to the best finest hour upgrades, she still has terrible talents: March and Heroism. Leader's assault and commanding voice whilst not terrible are questionable in tier 1. Take aim is also not valuable on unfair and limited use on gimmick max slider runs. Jae needs decisive response to make her effective as a support damage companion. If March was changed to Decisive response and heroism was changed to Focus! then Jae would be the premier officer companion. Take Aim being swapped to air of authority with inspiriting speech being also worked into tier 1 would have been fantastic. It is however, what it is. Jae can be built effectively as an AoE buffer via servo-skull overseer, a tanky officer as a vanguard using gun parry bracers or as per my favourite, a dual gunslinger master tactician. Unfortunately a Rogue Trader Hive World Commissar Officer Master Tactician is a superior gunslinger, they do not have access to Jae's unique offhand origin talent or cold trader bonuses. Mid game Jae will be slow to get going due to not having decisive response but she will act fine as an officer buff companion. Just dont think you will be able to effective support and damage before 36. Prior to 36 focus on giving buffs to allies and extra turns to allow them to stack linchpin / inspire. Once you hit 36, you can even double rotation buff yourself with linchpin, inspire, strongpoint, ferver then coming back for more linchpin and inspire before opening a burst volley and a pair holster infused second burst attack that you can press the advantage on. Whilst still giving allies officer buffs. Another note to keep in mind, pair holster is an incredibly powerful item. Any Rogue Trader gunslinger build wants it, an executioner Yrliet build wants it and Ulfar very much wants it. Not enough to go around. The video build takes fervour earlier than the steam guide but I changed my approach since 1.5 launch to be that of the steam guide Jae Levels Officer Level 1 : Voice Of Command Level 2 : Commerce Level 3 : Bring it Down ! Level 4 : Finest Hour Comanding Voice Level 5 : Fellowship Nimble Level 6 : Lasting Impression Fellowship Level 7 : Move, Move, Move Swift Movements Level 8 : March Commerce Level 9 : Finest Hour I Level 10 : Lore Imperium Ballistic Skill Level 11 : leader Assault Ballistic Skill Level 12 : Take Aim! Characteristic Training : BS Level 13 : Heroism Lore Imperium Level 14 : Willpower Characteristic Training : FEL Level 15 : Finest Hour IV Master Tactician Level 16 : Tactical Advantage Press The Advantage Level 17 : Linchpin Level 18 : Reliance Level 19 : Orchestrated Firestorm Level 20 : AP +1 Ballistic Skill Level 21 : Ballistic Skill Joint Offensive Level 22 : Inspire Level 23 : Unwavering Motivation Lore Imperium Level 24 : Fellowship Base Skill: Logic Level 25 : Hidden Advantage Level 26 : Logic Fellowship Level 27 : Orchestrated Firestorm II Level 28 : Against All Odds Level 29 : Logic Agility Level 30 : Characteristic Training: Perception Strongpoint Level 31 : Stronghold Level 32 : Perception Logic Level 33 : Dawn of Victory Level 34 : Perception Grenadier Level 35 : Orchestrated Firestorm III Exemplar Level 36 : Eager for Battle * Decisive Response Level 37 : Logic Stacking the Deck Level 38 : Ballistic Skill Base Skill: Lore Xenos Level 39 : Air Of Authority Logic Level 40 : Firebrand * Undisputed Advantage Level 41 : Ballistic Skill Inspiring Speech Level 42 : Fervour Fellowship Level 43 : Logistical Superiority * Advanced Skill: Logic Level 44 : Lore Xenos Degraded Defence Level 45 : AP +1 Level 46 : Focus! Lore Xenos Level 47 : Steel Resolve Lore Xenos Level 48 : In the hero's footsteps Fellowship Level 49 : Perception Lore Xenos Level 50 : Eager Subordinates Steady! Level 51 : Support The Advance * Lore Xenos Level 52 : Be Vigilant! Ready to Serve Level 53 : Assign Objective Perception Level 54 : Attention! Primary Objective Level 55 : AP +1 Jae Gear Slot Gear to Consider Helm Helm of Determination / Commissar Cap / Gunslinger's Helm Armour Breacher Armour / Duellist Uniform Cloak Rogue Trader's Cloak / Tactical Backpack / Tempestus Elite Carapace Backpack Neck Medal of Alacrity / Omnissiah Holy Symbol / Soldier Aquila Pendant Accessory 1 Saint Cognatius Scriptures / Pair Holster Accessory 2 Commander's Chrono / Heart of the Nameless / Tactica Imperialis Excerpt Gloves Thrice-Pioneer's Bracers / Gloves of Rapid Desolation / Freedom and Vengeance / Compensator Gloves Boots Commissar Boots / Recoil Warboots Weapon Set 1 Upgraded Shuriken Pistol / Quick-Firing Laspistol Weapon Set 1 (Offhand/Alt) Desolation Blast Pistol / [Sol Pattern] Laspistol / Anti-Vehicle Revolver Weapon Set 2 Chorus of Battle / Blessing of Death / Gift of Kurnous Yrliet Yrliet at launch could do 20k damage shots as an assasin which caused the greatest overnerf of all history to operative for some reason. Whilst assassin got relegated to being mediocre but still better than vanguard as a melee build, for a ranged build it is barely playable. Even worse Yrliet's operative build tries to reference talents no longer in game so she gets some random pointless talents for her base build. Even worse the developers made both Idira and Yrliet a low intelligence operative. You know, the intelligence archetype. In patch 1.5 the developers decided they would buff Operative by giving YRLIET personally talents and gear to fix the attack economy issues. Why they didnt make this available to Rogue Trader operatives? Dont know. Anyway path of the outcast Yrliet talent, hunter father's armour from act 2 and the wonderer's potent rework makes Yrliet pretty viable as a support damage companion in act 2. Like with Pasqal bounty hunter is her best option due to the damage, armour pen and attack economy. Deadly accuracy added in 1.5 however is the most nothing burger of all nothing burgers. I thought on critical it would add base damage but no, it adds flat damage to the end of the damage you have have done based on perception. Hurrah my 400 damage shot becomes a 408 damage shot. For path of the outcast Yrliet will want to focus on Aeldari snipers with many new and potent ones being added to act 4. I still build Yrliet to take drukhari weapon proficiency and drukhari equipment so Yrliet has access to weapons and armour in act 3 before you recovery your gear. Heretic 2 with path of the outcast, hunter's ambush, expert finesse, deathdealer and snipers like eye of hecaton will really help give Yrliet more attack economy but damage and kills will never compete with a burst build. So keep Yrliet back and helping pick off targets with the party, Yrliet due to having high agility and perception will likely act before other damage companions so plan your turn around how you expect to follow up with those companions. Yrliet Levels Operative Level 1 : Analyse Enemies Level 2 : Awareness Level 3 : Expose Weakness Level 4 : Dismantling Attack Sharpshooter Level 5 : Perception Nimble Level 6 : Ballistic Calculation Perception Level 7 : Precise Attack Awareness Level 8 : Fresh Target Swift Movements Level 9 : Dismantling III Lore Xenos Level 10 : Lore Xenos Ballistic Skill Level 11 : Insightful Precision Medicae Level 12 : Perfect Spot Las Weapon Expert Level 13 : Comprehensive Analysis Ballistic Skill Level 14 : Intelligence Swift Sight Level 15 : Dismantling IV Bounty Hunter Level 16 : Hunt Down The Prey Level 17 : Claim the Bounty Level 18 : Hunting Surge / Hunter's Ambush Level 19 : Wild Hunt Level 20 : AP +1 - Ballistic Skill Path of the Outcast Level 21 : Intelligence Hunter's Ambush / Hunting Surge Level 22 : Cull the Bold Level 23 : Flay the Bold Lore Xenos Level 24 : Perception Deadly Accuracy Level 25 : Heightened Concentration Level 26 : Lore Xenos Agility Level 27 : Wild Hunt II Level 28 : Savour the kill Level 29 : Awareness Perception Level 30 : Drukhari Weapon Prof Ensnare the Prey Level 31 : Inspiring Trophy Level 32 : Intelligence Awareness Level 33 : Expert Finesse Level 34 : Drukhari Equipment Level 35 : Wild Hunt III Exemplar Level 36 : Eager for Battle Uncanny Sight Level 37 : Awareness Withdraw Level 38 : Ballistic Skill Grenadier Level 39 : Joint Analysis Awareness Level 40 : Degraded Defence Pierce the Armour Level 41 : Ballistic Skill Tide Of Excellence Level 42 : Hot on the trail Agility Level 43 : Trail and Shatter Characteristic Training: PER Level 44 : Lore Xenos Deathdealer Level 45 : AP +1 Level 46 : Combat Insight Lore Xenos Level 47 : Sniper Expertise Demolition Level 48 : Gruesome Kill Perception Level 49 : Perception Demolition Level 50 : Deadly Aim / Extermination Continuous Analysis Level 51 : Share the Spoils Demolition Level 52 : Weak Body, Weak Soul Characteristic Training Int Level 53 : Piercing Shot Intelligence Level 54 : Vital Points / Critical Velocity Pierce and Ruin Level 55 : AP +1 Yrliet Gear Slot Gear to Consider Helm Self-Calibrating Goggles / Outcast's Visor / Hunter's Focus Armour The Hunter-Father's Armour / Khaine's Revenge Cloak Backpack With Armour-Piercing Ammo / Cape of Righteous Fury / Xeno Emitter / Shadowguide Cloak Neck Wraithbone Necklace Accessory 1 Armour-Piercing Ammo / Target Designator / Aeldari Flow Accessory 2 Aeldari Ranger Sight / Aeldari Flow Gloves Apex Predator's Gloves / Marksman Bracers Boots Sharpshooter Boots Weapon Set 1 Deadshot Splinter Rifle / Wanderer's Potent / Lullaby of Sha'eil / Gift of Kurnous / Chorus of Battle Weapon Set 2 Eye of Hecaton / Blessing of Death / Wanderer's Potent Ulfar Ulfar is by far one of my most favourite companions thematically, with the other being Pasqal. However Ulfar is done quite dirty by gear restrictions. Ulfar is a soldier companion, their potential is determined by rate of fire gear which Ulfar simply cannot use. He does not have access to compensator gloves, tacticial backpack or tempestus elite carapace backpack, this means not only can Ulfar never compete with Argenta as a heavy gunner damage companion, it means he should not even try as he will be double dwarfed by Argenta's priest origin and unique gear. In terms of Tanking Ulfar has incredibly high physical stats and HP however he does not have access to the warrior damage mitigation talents so once again Ulfar cannot complete with say Heinrix, Abelard or even Kibellah in terms of end game tanking due to Kibellah having access to Anatomy expert and perfect anatomy. Ulfar also cannot use medicae or stimms so is much weaker than other companions in those terms but not "weak" overall. In patch 1.5 Ulfar's unique flamers also got heavily nerfed making them not viable for high level play. Why? Dont know, maybe the developers hated the idea of flamers being viable. However Ulfar does have access to the only viable bolt pistols in the game but once again as another F you to Ulfar he cannot equip dual pistols. Moreover the developers also hid Ulfar's best melee weapons in act 5 right before the end boss so you will never have a battle where they are useful. What they did add is some very nice gear but this is unfortunately end game act 4 on Caligos Winterscale's world during the lab section. Whilst the gloves add practically nothing, the boots reset kick on range kill and the armour resets go for the throat on kill. With this in mind I build ulfar to use broad expertise and armsmaster. This means Ulfar will have very high crit chance for both ranged and melee. Ulfar will also have very effective burst attacks at 1 ap after a melee kill and effective 1 ap area melee attacks after a ranged kill. With kick also being reset on range kill this means Ulfar can use the slicing symbol to generate a lot of free MP in act 4 with 1 ap burst kills giving another 0 ap melee kick thus creating a very effective kill loop for Ulfar to trash clear. Whilst Ulfar will never be the space marine power fantasy boss killer, he can at least live part of that fantasy killing trash mobs. The Typhoon bolter is pretty funny but an entire ass gimmick. Ulfar Levels Soldier Level 1 : Run and Gun Level 2 : Athletics Level 3 : Revel in Slaughter Level 4 : Firearm Mastery Fired Up Level 5 : Agility Rapid Reload Level 6 : Agility Controlled Shot Level 7 : Ballistic Skill Duelling Mastery Level 8 : Rack and Ruin Awareness Level 9 : Firearm Mastery II Level 10 : Alacrity Ballistic Skill Level 11 : Rapid Fire Demolition Level 12 : Perception Dual-Weapon Combat Level 13 : Unfaltering Fire It Will not Die Level 14 : Chain Weapon Expert Demolition Level 15 : Firearm Mastery III Arch-Militant Level 16 : Versatility Level 17 : Kick Level 18 : Martial Art Level 19 : Steady Superiority Level 20 : AP +1 Ballistic Skill Level 21 : Always Ready Toughness Level 22 : Wild Fire Bolt Weapon Expert Level 23 : Athletics Broad Expertise Level 24 : Perception Brutal Hunter Level 25 : Armsmaster Level 26 : Athletics Agility Level 27 : Steady Superiority IV Level 28 : Awareness Flashfire Level 29 : Ballistic Skill Combat Master Level 30 : Reckless Rush Level 31 : Dependable Level 32 : Toughness Awareness Level 33 : Adaptability Toughness Level 34 : Perception Grenadier Level 35 : Steady Superiority II Exemplar Level 36 : Eager for Battle * Muzzle Velocity Level 37 : Athletics Critical Versatility Level 38 : Ballistic Skill Swift Movements Level 39 : Entrench Athletics Level 40 : Degraded Defence Contempt for the Weak Level 41 : Ballistic Skill Swift Slaughter Level 42 : Devastating Attack Agility Level 43 : Breaking Attack Power Weapon Expert Level 44 : Awareness Destroyer * Level 45 : AP +1 Level 46 : Enough Bullets for Everyone Awareness Level 47 : Integrity Awareness Level 48 : Exploit Weakness Agility Level 49 : Toughness Awareness Level 50 : Peak Condition Camaraderie Level 51 : Distract Demolition Level 52 : Preferred Targets Trusty Weapons Level 53 : Dash Toughness Level 54 : Extermination Accustomed to Glory Level 55 : AP +1 Ulfar Gear Slot Gear to Consider Helm Red Wolf Skull / Emperor's Justice Armour Might of Fenris Armour / Holy Power Armour / Bloodcraver Cloak Wolf Pelt Cloak / Shroud of Dauntlessness Neck Invigorating Resolve / Slicing Symbol / Fury Incarnate / Wolf Tooth Necklace / Ruby Splash / Laughing God's Pendant Accessory 1 Hellbrute Horn Trophy / Echo of Victory / Litany of Exhaustion / Secrets of the Forerunner / Bead of Might Accessory 2 Pair Holster / Secrets of the Forerunner / Bead of Might Gloves Blood Ice Gauntlets Boots Icebreaker Sabatons Weapon Set 1 [Mezoa-Pattern] Astartes Bolt Pistol Weapon Set 1 (Offhand/Alt) Grin of the Iron Wolf / Mjodlner / Astartes Power Sword / Untainted Sacrament Weapon Set 2 Typhoon / Annihilating Astartes Bolter / Storm Bolter Marazhai Oh Marazhai. You would be the perfect companion if only you were level locked to 15 not 29 so I could make you an executioner then use your amazing origin which gives huge bonuses based on bleeding enemies. Marazhai unfortunately comes as a level 29 locked assassin meaning his damage potential is locked to act 4 when he gets notes on weakness. However! Marazhai is a dark horse, did you know he is actually the tankiest, most dodge stacking and best map clear companion in the entire game? I bet you didnt and all you know about him was the reddit gooner bait. Due to 1.5 fixing shearing strikes Marazhai can abuse the heck out of his unique undying rage gauntlets. Every attack stacks Marazhai's agility mod to his armour. If you use a scorcher on a finest hour turn or even after using daring breach you can make infinite death whisper attacks thus stacking armour as much as you like. On top of that you can then use bloodseeker klaive to aoe attack which will convert all enemies with bleed on them to having toxin instead which will then stack Marazhai's dodge. So even from act 3 when you recruit him, Marazhai is untouchable in combat. From Act 4 things get even more interesting, by combining malign influence with lethality we can make a death aura build for marazhai where every willpower check causes direct damage to enemies. Using items like interrogator dagger, notes on weakness, self calibrating goggles and talents like lethal threat. You just nuke the map by moving about it, you can use slicing symbol to generate mp as well as swiftshroud cloak. Honestly assassin has two options, mediocre "honest" play or game breaking death aura build. Marazhai Levels Warrior Level 1 : Charge Level 2 : Athletics Level 3 : Endure Level 4 : Daring Breach Defensive Manoeuvres Level 5 : Easy Target Weapon Skill Level 6 : Break Through Athletics Level 7 : Weapon Skill Nimble Level 8 : Carouse Rigorous Training Level 9 : Daring Breach I Level 10 : Blade Flurry Agility Level 11 : Reckless Strike Duelling Mastery Level 12 : Agility Carouse Level 13 : Desolation Coercion Level 14 : Strength Combat Master Level 15 : Daring Breach II Assassin Level 16 : Seek the Opening Level 17 : Danse Macabre Level 18 : An Eye for the Unscathed Level 19 : Dispatch Level 20 : AP +1 Agility Level 21 : Lone Killer Agility Level 22 : Athletics Death Whisper Level 23 : Lethality Heightens Level 24 : Weapon Skill Dual Weapon Combat Level 25 : Deadly Calculations Level 26 : Weapon Skill Athletics Level 27 : Dispatch II Level 28 : Characteristic Training: AGL Ambush Level 29 : Perception Lore Xenos Level 30 : Killing Edge Level 31 : Finesse Disarray Level 32 : Medicae Level 33 : Seize the Advantage Perception Level 34 : Trueborn Superiority Level 35 : Dispatch III Exemplar Level 36 : Destroyer * Shearing Strikes Level 37 : Coercion Morbid Pirouette Level 38 : Weapon Skill Mantle of Agony Level 39 : Taunting Scream Coercion Level 40 : Degraded Defence Lethal Concentration Level 41 : Weapon Skill Open Engagement Level 42 : Elusive Shadow Agility Level 43 : Create an Opening Prey on the Weak Level 44 : Coercion Malign Influence Level 45 : AP +1 Level 46 : Thick Skin Coercion Level 47 : Impetus Coercion Level 48 : Imminent Demise Agility Level 49 : Perception Athletics Level 50 : Lethal Threat Crowd Kill Level 51 : Perfect Opening Athletics Level 52 : Killing Spree Emboldened by Bloodshed Level 53 : Sworn Enemy Perception Level 54 : Eager for Battle * Esquive Level 55 : AP +1 Marazhai Gear Slot Gear to Consider Helm Self Calibrating Goggles / Weakness Detector Armour Ghostplate Armour / [Black Heart] Kabalite Armour / Wytch's Last Cry Cloak Swishshroud Cloak Neck Slicing Symbol Accessory 1 Notes on Weakness Accessory 2 Iron Cape Gloves Undying Rage / Riposte Gloves / Claws of the Black Hunt Boots Blitz Boots / Enforcer's Light Boots / Skirmisher Boots / Spiked Boots Weapon Set 1 Interrogator Knife / Serrated Glimmersteel Blade / Hekatarii Blade of Bloodthirst / Heart Piercer Weapon Set 1 (Offhand/Alt) Serrated Glimmersteel Blade / Heart Piercer / Blood Hunter Weapon Set 2 Bloodseeker Klaive / Carnivorous Blade / Suffering Collector Weapon Set 2 (Offhand/Alt) Hekatarii Blade of Bloodthirst / Slithering Slaughter Kibellah Kibellah is a bladedancer. An archetype so powerful it breaks the entire gameplay loop of every other archetype in Rogue Trader. It is without a doubt top 1 in terms of damage archetypes for tier 1 which combines with executioner in tier 2 to be the most dominating damage setup. KIbellah's origin is not one I fully explored for this guide as I simply didnt need to directly invest into her bloodcult assassin traits, though I did take the gloves to proc blood explosions for passive damage buffs. Potentially you could customise the build to start picking those talents from level 30 but that would weaker the build's base damage before you gain peak condition at level 50. Kibellah's voidborn origin is mostly not be directly built into though you can take jinx or bloody mess at level 8. The strongest build in the game is a psyker death world blade dancer executioner which takes facing the end and wounded beast to trauma stack intentionally. Whilst this build does take facing the end, I do not encourage actively taking traumas until much higher levels due to the drawbacks of ap and mp penalties and just enjoying small boosts early as injuries naturally occur. With 1.5 death warden is now a default talent for kibellah which is a huge upgrade. As death from above got a small 10% dodge penalty cost added per every use of death from above that turn we build into parry from duelling mastery and dance partners to to keep ourselves safe from enemy melee attacks. Acrobatic artistry will double as an offensive tool to use more death from above but also a defensive tool so we do not end our turn in front of enemy range. The gameplan of bladedancer is to use blood rush with blood oath to designate enemies and generate mp, the next attack will be a guarenteed hit that if killed will give back hp as well as once per turn givng +1 attack. Kills not caused by death from above will generate death from above which will allow even more mobility and opportunities to kill. Talents like guillotine will make death from above do extra damage for your turn jumps with acrobatic artistry and talents like sweeping motions will give you access to 1 ap area attacks to get more kills per attack. Death waltz is an insane ultimate which will armour strip, build damage, give free charges and make 6+ attacks. It is obscenely overpowered. Bladedancer is very viable on all tier 2 but executioner clearly stands leagues ahead of all other tier 2 archetypes in terms of tanking and damage. As you build into executioner weapon skill will stack into medicae and then that medicae will become crit damage, HP, Armour and even more damage. You melee attacks as an executioner will apply bleed, with dogmatic 2 conviction your criticals turn 1 will apply burn and with drukhari weapon investment your attacks will also apply toxin. So with all that in mind executioner wants to have very high attack economy to apply and trigger damage over time effects for very high damage output. Pain resonance gives you an aoe detonation ability for your dots, reckless abandon gives you free damage increase and exsanguination will give you even more MP. This build will also allow you to use agility instead of strength for damage with finesse. Later your main damage focus will be applying as many instances of armour strip with gear like carmine crown, metal claw gloves, talents like fragile playthings and destroyer. This will cause your medicae to turbo your damage from racking weakness and items like voidborn's pride will turbo juice medicae on kill even more. Kibellah Levels Blade Dancer Level 1 : Blade Dance Level 2 : Medicae Level 3 : Death From Above Level 4 : Death Waltz Death Warden Level 5 : Duelling Mastery Weapon Skill Level 6 : Blood Oath Medicae Level 7 : Weapon Skill Blood Rush Level 8 : Awareness Nimble / Jinx / Bloody Mess Level 9 : Death Waltz II Level 10 : Dance Partners Agility Level 11 : Acrobatic Artistry Facing the End Level 12 : Agility Awareness Level 13 : Characteristic Training: Per Demolition Level 14 : Perception Guillotine / Sweeping Motions Level 15 : Death Waltz III Executioner Level 16 : Forced Repentance Scourging Strike + Where it hurts Level 17 : Pain Resonance Level 18 : Anatomy Expert Level 19 : Carnival of Misery Level 20 : AP +1 Weapon Skill Level 21 : Weapon Skill Does It Hurt? Level 22 : Reckless Abandon Level 23 : Sower of Distress Lore Xenos Level 24 : Agility Drukhari Weapon Prof Level 25 : Master of Torture Level 26 : Agility Medicae Level 27 : Carnival of Misery III Level 28 : Invigorating Screams / Perfect Anatomy Level 29 : Perception Medicae Level 30 : Exsanguination Finesse Level 31 : Deep Laceration Level 32 : Perception Demolition Level 33 : Fragile Playthings Level 34 : Perception Dual Weapon Combat Level 35 : Carnival of Misery I Exemplar Level 36 : Eager for Battle * Sweeping Motions / Guillotine Level 37 : Medicae Racking Weakness Level 38 : Weapon Skill Dance of Blood Level 39 : Captive Audience Medicae Level 40 : Degraded Defence All-Encompassing Agony Level 41 : Weapon Skill Grand Performance Level 42 : Terrifying Strike Agility Level 43 : Unbearable Presence Open the Veins Level 44 : Awareness Destroyer * Level 45 : AP +1 Level 46 : Rising Tempo Awareness Level 47 : Duellist Awareness Level 48 : Maddening Flames Agility Level 49 : Perception Awareness Level 50 : Peak Condition Race Against Death Level 51 : Sickening Pain Demolition Level 52 : Bloody Requiem Wounds Streaming Blood Level 53 : Gift of Torment Perception Level 54 : Extermination Blade in His Hand Level 55 : AP +1 Kibellah Gear Slot Gear to Consider Helm Carmine Crown / Mechanicus Respirator Armour High Spinner Armour / Shadow of the undying One / Armour of Hidden Promise Cloak Swashbuckler Cloak / Malpain Shroud / Pack of Reagents / Blade Dancer's Mantle Neck Anatomist's Amulet / The Vial of Falstow Accessory 1 Chirurgeon's Manual / Bead of might / book of war prayers / knuckle Guard Accessory 2 Voidborn's pride / Diagnostor / Iron Cape Gloves Crimson Oblivion / Augmented Gloves / Inevietable Demise / The Hand of Avolius / metal claw gloves Boots Fencing Boots / Sororitas Boots / Enforcers light boots / Inertia Boots Weapon Set 1 Symphony of Pain / Imminent Torment / Blood Hunter Symphony of Pain / Imminent Torment / Virulent Slicer Weapon Set 2 Djin Blade of Yremeryss / Well-Maintained Rocksaw Insatiable Djin Blade Solomorne Solomorne is the DLC 2 companion. Soldier is not the best overseer cyber-mastiff user but it is not the worse either. Solomorne does not have access to the conviction pet upgrades which seems like a huge oversight as companions really should get conviction rewards to pets as you progress their stories to make overseer more viable. Whilst area builds focusing on shotguns like Arbites Vigilant will not output the damage of a burst arch-militant, they are still very usable and fun to play. Solomorne's main issue is he does not have the MP upgrade to firearm mastery or dash in his tier 1. Solomorne will aim to use medium armour, keep his pet close for camraderie boost, get close to enemies to use point-blank with his shotgun, attach glaito before blasting with apprehend to trigger his swift justice passive and to give the dog follow up attacks when he blasts. Early game dual shotguns with cresendo is very potent for high attack economy and enemy clearing, you will need to rely on boots like inertia boots for MP generation as his other movement boot options dont come until act 4. Speaking of act 4, gunnery shield with double-barreled shotgun is a huge upgrade. There are some potent item combinations that solomorne has access to like Vial of Falstow and Navy Breacher Boots to enhance his attack economy. Early on the pet damage can feel a bit impotent but via the use of advanced tracking and taking the dog for a walk, you can add a lot of flat damage to attacks. Multiple follow ups on an apprehend enemy can absolutely shread an enemy. One very potent combination against the forgefiend was using protect on Abelard, having Abelard hit the forgefiend which then created an infinite loop, the forgefiend would attack Abelard, the pet would then attack the forgefiend which would then cause the forgefiend to attack Abelard. The damage circle quickly kileld the Forgefiend. Consolidation will be another useful ability for giving Solomorne movement to keep blasting enemies as well as Strategic Adaptation to refund attacks on kills. Late game you can even use strategies like passing over metabolic overcharge to Solomorne then banking that ap with entrench to use on a finest hour turn later. Adamantium Alloys is currently bugged and when combined with pet protocols that enhance HP will allow glaito to have some obscene HP after buffs. Eager Subordinates will also enhance the pet damage. Whilst overseer pets cannot build stacks of degraded defence they will enhance their damage from when allies place it. Pets will also greatly benefit from AoE buffs and damage enhancements like litany of hatred or hammer of the emperor. Solomorne Levels Soldier Level 1 : Run and Gun Level 2 : Demolition Level 3 : Revel in Slaughter Level 4 : Firearm Mastery Rack and Ruin Level 5 : Ballistic Skill Demolition Engineer Level 6 : Ballistic Skill Grisly Adjudication Level 7 : Agility Lawful Intervention Level 8 : Second Skin Demolition Level 9 : Firearm Mastery III Level 10 : Point-Blank Agility Level 11 : Concentrated Fire Coercion Level 12 : Perception Armour-Piercing Level 13 : Camaraderie Prepared Prosecution Level 14 : Pillar of the Law Coercion Level 15 : Firearm Mastery IV Overseer Level 16 : Cyber-Mastiff Proficiency Level 17 : Advanced Tracking Level 18 : Relentless Pursuit Level 19 : Overcharge Level 20 : Ap +1 Ballistic Skill Level 21 : Rite of Calibration Ballistic Skill Level 22 : Consolidation Coercion Level 23 : Enhanced Augmetics Level 24 : Agility Law and Order Level 25 : Chain-Maw Level 26 : Agility Demolition Level 27 : Overcharge II Level 28 : Shotgun Mastery Dual-Weapon Combat Level 29 : Perception Demolition Level 30 : Strategic Adaptation Level 31 : Perimeter Defence Public Sentencing Level 32 : Perception Coercion Level 33 : Side by Side Level 34 : Mob Justice Level 35 : Overcharge I Exemplar Level 36 : Eager for Battle Swift Slaughter Level 37 : Demolition Automatic Protection Level 38 : Ballistic Skill Grenadier Level 39 : Dash Demolition Level 40 : Degraded Defence Suppression Factor Level 41 : Ballistic Skill Fired Up Level 42 : Bite! Agility Level 43 : Brother-In-Arms Know No Heresy Level 44 : Coercion Extermination / Eager Subordinates Level 45 : AP +1 Level 46 : Enough Bullets for Everyone Coercion Level 47 : Tenderise Medicae Level 48 : Dependable Ally Agility Level 49 : Perception Awareness Level 50 : Adamantium Alloys Integrity Level 51 : Battle Mode: Terror Awareness Level 52 : Cohesion / Master's Patronage Solid Projectile Weapon Expert Level 53 : Entrench Perception Level 54 : Deadly Aim On the Double Level 55 : AP +1 Solomorne Gear Slot Gear to Consider Helm Steel Guidance / Arbites Helmet / Commissar Cap Armour [Hive World Origin] Voidsmen Armour / Warrior Armour Cloak Cloak of Hatred / Sensory-motor Modulator Neck Vial of Falstow / Ironclad Argument Accessory 1 Demolition Instructions / Bayonet Chain Knife Accessory 2 Bead of Might / Portable Motive Force Storage / Seal of the Purifier / Iron Cape Gloves Elastic Gloves / Inevietable Demise / Marksman Bracers Boots Navy Breacher Boots / Heavy Breacher Boots / Inertia Boots (still bugged for range) Weapon Set 1 Double-Barreled Shotgun Gunnery Shield Weapon Set 2 Scoped Shotgun / [Sol-Pattern] Shotgun / The Rack Crescendo / The Ruin Pet Pack Hunting / Heel! Protocol Compositions For lower difficulties you are somewhat free to take whomever you like but as you go above Daring you will need to start planning your compositions around the 13 skill checks. On unfair you need 200 in a skill check to always 100% pass as some skill check modifiers in act 4 are -100. The easiest way to build a part is to have either the Rogue Trader be an officer Grand strategist or if the Rogue Trader is a damage build to have Cassia become an officer Grand Strategist. This will allow very easy 1 turn victories before the enemy can overrun the party as threat control does not really become available until exemplar levels with lethal threat and taunting scream wont cover the whole map with vanguard being useful for priority control. Pasqal and Jae are the only two effective companions for covering tech-use and logic but Jae can cover 6 skills on unfair with no other companion being able to cover more than 2 skills. Something to keep in mind. You will often one one front line fighter like Abelard, Heinrix, Ulfar or Marazhai. A strong range damage companion like Argenta or Solomorne. A first turn buffer like Cassia or Act 4 Jae with Commander's chrono. The last slot usually I rotate being Kibellah, Idira and Yrliet depending on whom I want in the party at the time but your decisions will need to take into consideration what role and skill checks your Rogue Trader is covering. Be smart and calculated relations is a noob trap for higher difficulties as intelligence has no talent or gear support compared to fellowship. Just taking chartist pendant on a pure fellowship MC will cover more skills effectively as a skill monkey which could even then go into servo skull overseer to get a unique skill item. My final piece of advice will be to plan your Rogue Trader first then build your party around them, not try to force your Rogue Trader into the party you planned first.