换一换
换一换 


这是一份适用于免费版普通/硬核/可能还有团队铁人模式玩家的通用指南。也适用于普通和终极铁人模式账号。 简介 这是一份适用于免费版普通/硬核/可能还有团队铁人模式玩家的通用指南。不过,你或许也可以将其中一些方法用于免费版普通和终极铁人模式账号。本指南并非为追求效率或展示经验率而设计,而是作为新手玩家快速且简单(也许我做得太详细了)的起点。这些方法不会专门涉及tick操作或多账号操作,但如果你能够/想要使用这些操作,也可以随意尝试。如果你确实想了解更多相关信息,可以查看免费版wiki和常规OSRS wiki。那里有更多的指南和玩家,他们在免费版游戏机制方面比我更专业。不过既然我有时间且对此有热情,不妨也来分享一下。Runelite客户端 首先,我推荐使用Runelite,这是我正在使用的OSRS客户端。它有许多实用的插件和详细功能。 什么是Ironman? Ironman账号意味着你需要自己获取所有物品。你不能使用大交易所,不能与其他玩家交易,只能购买债券。此规则有多种例外情况。 以下是其他Ironman类型的简要概述。硬核铁人模式与普通铁人模式完全相同,但玩家不能死亡,否则会失去该模式状态并变为普通铁人。 组队铁人模式(发布时为新增模式)共享银行,玩家可以一起进行游戏活动。 终极铁人模式与铁人模式类似,但玩家无法使用银行。
账户的启动与目标 在《旧派符文工厂》(Old School Runescape, OSRS)中创建新账户的最佳方式是确定账户的限制条件(例如铁人模式)或目标。这将极大地决定你的游戏方式。如果你是OSRS的完全新手,建议创建一个普通账户并完成所有免费版(F2P)任务。不过总体而言,你可以定义自己的游戏方式。 下一部分提供了一个免费版收集日志,供你参考。 免费版收集日志 要“完成”免费版内容,以下是需要做的事情: 1. 将所有可用技能提升至99级(这本身就是一项艰巨的任务) 2. 完成所有免费版任务(在任务部分有详细说明) 3. 获得所有新手线索卷轴的独特奖励

- 鼹鼠拖鞋 - 青蛙拖鞋 - 熊爪 - 恶魔之足 - 小丑披风 - 肩鹦鹉 - 僧侣长袍上衣/下装(t) - 防御项链(t) - 三明治女士套装 - 符文弯刀装饰包(古特ix/萨拉多明/扎莫拉克) - 黑镐
所有随机事件独特物品 - 养蜂人套装 - 僵尸套装/表情 - 皮裤套装 - 迷彩套装/表情 - 不新鲜的法棍 - 哑剧套装/表情 - 青蛙代币/套装 所有免费战斗成就(战斗技能部分列出的14个) 完成所有假日活动(圣诞节/万圣节/复活节/生日)并获取 cosmetics 萨满面具 头骨权杖部件/灌注法杖本身 完全升级坎多扎尔废墟以及巴伦ite战锤部件/战锤本身/远古遗骸 奥伯的棍棒 全套黑色收藏(所有盔甲和武器)
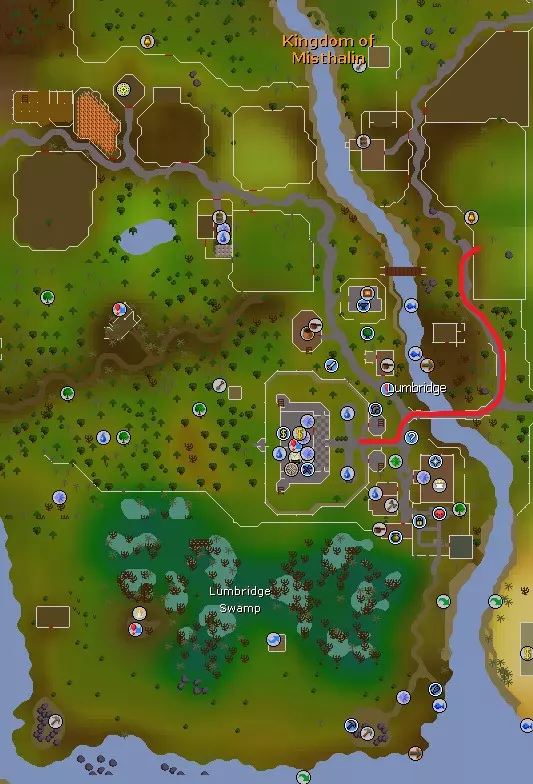
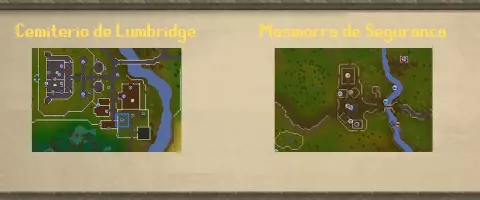
All Castle Wars Shop Items Get all F2P Music Tracks (Obviously not going to list them, or will I? Just kidding. Or Am I? Nah I joke.) However here is a doc list put together by fe Kat[docs.google.com] from the F2P Wiki and a list from the OSRS Wiki[oldschool.runescape.wiki] Ornate Armor Set (Guide on how to get it below) https://steamcommunity.com/sharedfiles/filedetails/?id=2415853256 F2P Information Quests Part 1 (Easy) Here are all the F2P Quests. I am going to list the requirements, required materials, rewards, and a video on how to complete it. They aren’t that bad to complete, so as long as you have all the required items on you, should be good. I tried to order them in a way I would do them and by difficulty. All the video quest guides are from Slayermusiq1. Just keep in mind that some of the teleports, potions, etc. are members. P.S. I didn't add the combat levels and enemies needed to be avoided until the more difficult quest. If you need me to add em or if would be really helpful let me know. Easy[Cook’s Assistant][oldschool.runescape.wiki] Level/QP Requirements: None Item Requirements: Pot or Pot of Flour Bucket or Bucket of Milk Egg Rewards: 1 Quest Point 300 Cooking XP, Access to the Cook-O-Matic 100 (cooking range in Lumbridge Castle) https://www.youtube.com/watch?v=ehmtDRelj3c [Sheep Shearer][oldschool.runescape.wiki] Level/QP Requirements: None Item Requirements: Shears OR 20 Balls of WoolRewards: 1 Quest Point 150 Crafting XP 60 gp [The Restless Ghost][oldschool.runescape.wiki] Level/QP Requirements: None Item Requirements: None Rewards: 1 Quest Point 1125 Prayer XP Ghostspeak Amulet [X Marks the Spot][oldschool.runescape.wiki] Level/QP Requirements: None Item Requirements: Spade Rewards: 1 Quest Point 200 gp Antique Lamp (Gives 300 XP to a skill you choose) a beginner clue scroll [Romeo & Juliet][oldschool.runescape.wiki] Level/QP Requirements: None Item Requirements: Cadava Berries (found in South-East of Varrock in bushes)Rewards: 5 Quest Points [Misthalin Mystery][oldschool.runescape.wiki] Level/QP Requirements: None Item Requirements: Bucket (can be obtained during quest) Tinderbox (can be obtained during quest) Knife (can be obtained during quest) Rewards: 1 Quest Point Uncut Ruby Uncut Emerald Uncut Sapphire 600 Crafting XP [Doric’s Quest][oldschool.runescape.wiki] Level/QP Requirements: Mining Level 15 (only if you are mining the iron ore yourself)Item Requirements: 6 clay 4 copper ores 2 iron ores (gotten by killing flesh crawlers, mind/body golems, or dwarfs, maybe others)Rewards: 1 Quest Point 1300 Mining XP 180 coins Ability to use Doric’s anvilTip: If you have all the items on you before the quest, there is some unique/funny dialogue that can happen. [Imp Catcher][oldschool.runescape.wiki] Level/QP Requirements: None Item Requirements: 1 Red 1 Yellow 1 Black 1 White beadRewards: 1 Quest Point 875 Magic XP Amulet of AccuracyTip: If you ever loose your Amulet of Accuracy, just take the beads back again to Wizard Mizgog and he’ll give you a new one) [Witch’s Potion][oldschool.runescape.wiki] Level/QP Requirements: None Item Requirements: Burnt Meat Eye of newt (can be bought in Betty’s Magic Emporium in Port Sarim) Onion Rat’s tail (only obtainable after starting quest)Rewards: 1 Quest Point 325 Magic XP [Rune Mysteries][oldschool.runescape.wiki] Level/QP Requirements: None Item Requirements: None Rewards: 1 Quest Point Ability to mine Rune Essence 1 Air Talisman Ability to use Lamps and Books of Knowledge of Runecrafting 5 kudos in the Varrock MuseumNote: If you want the best Runecrafting XP for F2P ironmen, DON'T do this quest. [Goblin Diplomacy][oldschool.runescape.wiki] Level/QP Requirements: None Item Requirements: 3 goblin mail 1 Blue Dye 1 Orange DyeRewards: 5 Quest Points 200 Crafting XP 1 Gold Bar [Ernest the Chicken][oldschool.runescape.wiki] Level Requirements/QP: None Item Requirements: Spade (can get during quest) Fish Food (can get during quest) Poison (can get during quest)Rewards: 4 Quest Points 300 gp Below Ice Mountain[oldschool.runescape.wiki] Level/QP Requirements: 16 Quest Points 10 Mining (if skipping fight)Item Requirements: Cooked Meat (can get during quest) Bread Knife Any Beer (can buy for 3 gold during quest) Pickaxe (if skipping fight)Rewards: 1 Quest Point 2000 gp Access to Ruins of Camdozaal Flex Emote (one of the best in the game) Ability to make the Steak Sandwich [Pirate’s Treasure][oldschool.runescape.wiki] Level/QP Requirements: None Item Requirements: Karamjan Rum (can buy for 30 gold during quest) White Apron (can get during quest) 60 gp 10 bananas (can get during quest) Spade (can get during quest)Rewards: 2 Quest Points Ability to use Pay-Fare option to and from Karamja One-Eyed Hector’s Treasure (a gold ring, an emerald, and 450 gp) [Prince Ali’s Rescue][oldschool.runescape.wiki] Level/QP Requirements: None Item Requirements: Lots of em... Ahem Soft Clay 3 Balls of Wool Yellow Dye OR 2 Onions and 5 gp Redberries Ashes Bucket of Water OR Jug of Water (can get during quest) Pot of Flour Bronze Bar Pink Skirt 3 Beers Rope At Least 100 gpRewards: 3 Quest Points 700 gp Free passage from the Lumbridge - Al-Kharid Toll Gate (really useful IMO) Quests Part 2 (Medium and Hard) Medium[The Knight’s Sword][oldschool.runescape.wiki] Level/QP Requirements: 15 Mining (Level 10 if you get an iron bar) 15 Smithing 10 CookingItem Requirements: Redberry Pie Any Pickaxe 2 Iron Bars Blurite OreRewards: 1 Quest Point 12,725 Smithing XP (gets you to Level 29 if you complete this at Level 1) Ability for Thurgo to make you a Blurite Sword (give him 2 Iron Bars and 1 Blurite Ore) [Black Knights’ Fortress][oldschool.runescape.wiki] Level/QP Requirements: 12 QP Ability to Avoid Level 33 Black KnightsItem Requirements: Cabbage not from Draynor Manor (very specific) Iron Chainbody Bronze Med HelmRewards: 3 QP 2500 gp [Demon Slayer][oldschool.runescape.wiki] Level/QP Requirements: Ability to kill with MELEE (Again specifically MELEE) Level 27 demon 3 Level 20 Dark Wizards 2 Level 7 Dark WizardsItem Requirements: Bucket of Water (can get during quest) 25 unnoted bones 1 gp MELEE skillsRewards: 3 Quest Points Silverlight (“best” weapon in the game of course) 5 Kudos when you talk with Historian Minas in the Varrock Museum [Vampyre Slayer][oldschool.runescape.wiki] Level/QP Requirements: Ability to defeat a Level 34 Vampyre with Fast Health RegenerationItem Requirements: Hammer OR 1 gp Beer OR 2 gp Garlic (can get during quest) Stake (can get during quest, not the tasty kind)Rewards: 3 Quest Points 4825 Attack XP (Careful for those attack pures) [Shield of Arrav][oldschool.runescape.wiki] Level/QP Requirements: None Item Requirements: EITHER 20 gp (Phoenix Gang) OR 2 Phoenix Crossbows (Black Arm Gang)Rewards: 1 Quest Point 600 gp 5 Kudos Antique Lamp when talking with Historian Minas at the Varrock MuseumNote: This is not exactly difficult but finding someone to do it with is annoying. Also you can trade the specific items by using the item on the other person, even as an ironman. Hard[Dragon Slayer 1][oldschool.runescape.wiki] Level/QP Requirements: 32 Quest Points Ability to defeat a Level 83 Dragon (Level 40 to 50 Combat Stats should work) 8 Crafting 34 Smithing 33 Magic (or 10000 gp down the drain) 37 Prayer (helps in the Elvarg Fight)Item Requirements: Now THIS is the BIG list Unfired Bowl Wizard Mind Bomb Lobster Pot Silk Magic/Ranged Weapon with Ability to cast Telekinetic Grab OR 10000 gp Hammer Anti-dragon Shield (can get during quest) 90 steel nails 3 regular planks 2000gpRewards: 2 Quest Points 18650 Strength XP 18650 Defense XP Ability to wear Green D’Hide Body and Rune Platebody Access to Crandor and Corsair Cove Resource Area Random Events Random events[oldschool.runescape.wiki] happen randomly (obviously) but you can manipulate the spawns with a few things. I know there are specifications for them but for that just check the wiki. Any way here are the events and if you should do them. Old Man: This event can be 1 of the 3 below Maze: Awesome rewards. As long as you can do it above 70%, you are golden. In this event you have infinite stamina, so don’t stop running. You’ll get the hang of it eventually. Mime Show: You can get the Mime set and emotes here. After that I wouldn’t recommend. It takes too long for what you get. Gift: Do it, if you don’t get something you like/need, drop it. Drill Demon: Same as the Mime, get all cosmetics, then ignore. Freaky Forester: Same as the Drill Demon, get all cosmetics, then ignore. Cool area though. Beekeeper: Used to be one of the worst random events. It was broken. Never did it until they fixed it. Same as the Freaky Forester, get all cosmetics, then ignore. Leo: Same as the Beekeeper, get all cosmetics, then ignore. Certers (Niles, Miles, and Giles): Do it, if you don’t get something you like/need, drop it. Evil Bob (Prison): Do it, if you don’t get something you like/need, drop it. Rick Turpentine: Do it, if you don’t get something you like/need, drop it. Pillory Guard: Unless you hate having tomatoes thrown at you or hate tomatoes (clearly not Spanish then), do it. if you don’t get something you like/need, drop it. Evil Bob (Island): Cool area, that’s about it. I would only do it if your levels in Fishing or Magic levels are very low. Funny dialogue too. Molly: Do it, anything for Molly. Also, it gives gems. Pinball (Flippa and Tilt): Absolute banger of a song. It gives gems so DO IT. Frog Prince/Princess: Same as the Leo, get all cosmetics, but ignore if you want. The Frog tokens are a pretty good collectible. Might as well. Capt'n Arnav: Only do it at the beginning of the game when you have no money. The rewards become exponentially worse as time goes on. Drunken Dwarf: What a bro. You get a beer and a free kebab. Nuff said. Sandwich Lady: This lady spends her hours working diligently to supply you with a sandwich. The least you can do is accept her gift with gratitude. The “sandwiches” heal a slight bit of health. You can also save it as a collectible, treasuring it, as it is available nowhere else in the F2P world. Quiz master: This is another rewarding event. At the end, Regis Philbin will give you a choice, 1000 coins or a mystery box. Go for the mystery box or you’re a LOSER. This has a super rare chance (1/256 I believe) to give you the Stale Baguette (wonder who he got this from). The mystery box is bankable so another collector’s item. Genie & Surprise Exam: A staple of all region-locked accounts, great event. The lamps and books your get will give you some XP towards a specific skill, scaling to the level. It is recommended to put it towards Runecrafting, Prayer, or Smithing. You can’t bank the lamps or books, but the lamp (only) can remain in your inventory, and you can get multiple. Miscellaneous (Part 1) Travelling Options Some methods to get around Gilenor. Home Teleport (to Lumbridge, has a 30-minute cooldown) Teleports Using Magic Varrock (Magic Level 25, Runes: 3 air, 1 fire, 1 law) Lumbridge (Magic Level 31, Runes: 3 air , 1 earth, 1 law) Falador (Magic Level 37, Runes: 3 air, 1 water, 1 law) Chronicle (bought from Diango, charges for it also bought from Diango, teleports you to Champion’s Guild) Skull Scepter (teleports you to Barbarian Village, Stronghold of Security entrance) Port Sarim Through Shantay’s Pass (by telling Shantay you’re an outlaw) Last Man Standing and Castle Wars Minigame teleport (20-minute cooldown) With a certain Woodcutting Levels you can unlock various canoes (an axe as well) A Log (Woodcutting Level 12, can take you one stop) A Dugout (Woodcutting Level 27, can take you two stops) A Stable Dugout (Woodcutting Level 42, can take you three stops) A Waka (Woodcutting Level 57, can take you unlimited stops) Changing your Spawn Location Normally you spawn in Lumbridge. However, you can change it to either Edgeville or Ferox Enclave in F2P. If you want to get Lumbridge back, just talk to who changed your spawn point. For Edgeville, speak to Krystilia and pay a one-time fee of 5 million GP or 5,000,000 coins For the Ferox Enclave, speak to Ferox and pay a one-time fee of 5 million GP or 5,000,000 coins Fashionscape The best part of OSRS to some is the look of their character when traveling Gilenor. Here are some notable places or things to do to get adequately dressed. Random Events or Clue Scroll Uniques Ying-Yang amulet from the Makeover Mage Unlock the Alternative Home Teleport, Runefest Shield, and Premier Shield emote using the codes osrsrf2014, runefest17, and premierclub18 at Diango, Talk to him and you can get the Banana Hat. Unlock the event cosmetics from Diango (after completing that years respective event) The shop of Diango Diango Did I mention Diango? Thessalia’s Fine Clothes in Varrock The Grand Exchange (Just kidding, unless?...) Potions The only F2P Potions can be made at the Apothecary[oldschool.runescape.wiki] in Varrock. There are 4: Acne, Strength, Energy, and Antiposion. In order to get them from him, you need to give him ingredients and coins depending on the one you want, aside from the Acne one. Each has 4 charges. Potion Just ask him for it, works 50% of the time Provides a relief to itching Strength Potion 5 gp Limpwurt Root Red Spiders’ Eggs (In Varrock Sewers close to the Moss Giants) Provides Strength boost of 3 + 10% of your current strength level Energy Potion 2 Limpwurt Roots Chocolate Dust (Use a Knife on a Chocolate Bar found in the Cooking Guild) Restores 10% of your run energy Antipoison 5 gp Limpwurt Root Cadava Berries (South-East right outside Varrock, found in the bushes) Provides a cure to poison and immunity to poison for 90 seconds Dyes Aggie the Witch in Draynor Village will sell dyes if you give her the right material. She only can give you blue, red, and yellow, BUT you can mix two of these to make green (blue + yellow), purple (red + blue), and orange (red + yellow). Blue Dye 5 GP 2 Woad Leaves (Talk to Wyson the gardener in Falador Park and offer him 20 coins for 2)Red Dye 5 GP 3 Red Berries (South-East right outside Varrock, found in the bushes) Yellow Dye 5 GP 2 Onions (In Farmer Fred’s backyard North of Lumbridge or in a Rimmington field) Miscellaneous (Part 2) Tick Manipulation[oldschool.runescape.wiki] As you may or may not know, OSRS runs on ticks. Everything takes a certain number of ticks to do. This is a more advanced technique that is used to reduce time in a certain task. This is used often during skilling grinds. This guide doesn’t talk much about those. However, one easy one to master is burying bones while attacking an enemy. Right when you hit them you click on the bones to bury them, and immediately after, you click on the monster to attack it again. Prayer flicking is also another common one. Instead of using prayer points and having to run to an altar constantly, you can enable and disable the prayer real quick. If I am praying Protect from Melee, I will wait until the monster is about to attack me and turn it on an off in a certain rhythm. This can take a bit to master but pretty useful, not necessary. Beginner Clue Scrolls[oldschool.runescape.wiki] If you look at efficiency and money, clue scrolls are not worth doing. However, if you look at the uniques or want a break from the monotony of your task, they’re perfect. You can find them while mining, fishing, woodcutting, and most commonly killing things. If you want to get clue scrolls fast, you can either do the goblins in Lumbridge or the Minotaurs in the Stronghold of Security. Early on, you can get upgrades which are nice. DO THEM. If you need help with a clue it should be on the wiki. Also if you use the Runelite client, you can have it help you with them. Wilderness[oldschool.runescape.wiki] A perilous and desolate wasteland. Players can kill you here if they are a close enough combat level. The further you go into the wilderness the bigger difference combat level the players around you can be. Here are some notable places and things to do. Go to the Ferox Enclave[oldschool.runescape.wiki], the only settlement in the Wilderness (was pretty cool when added, makes Wilderness only Ironmen possible). Say “Hello” to a wilderness-only ironman Bandit Camp[oldschool.runescape.wiki] General store buys items for high alch value, sell at your own risk. Fat Tony in Bandit Camp sells pizza bases Top right of the wilderness you can tele-grab nature runes Hill Giants in Lava Maze[oldschool.runescape.wiki] (increased drop chance for Giant Key) Waka Canoe exit, Moss Giants nearby (increased drop chance for Mossy Key) Boneyard [oldschool.runescape.wiki]has lots of Big Bones Mine the 1 Rune Ores spot in F2P north of the Lava Maze (without dying) PK’ing (Player Killing) Noobs Getting PK’ed Castle Wars[oldschool.runescape.wiki] & Last Man Standing[oldschool.runescape.wiki] I have no idea how these games work. Will update when I start playing them/figure it out. Just keep in mind they are safe activities, meaning that if you die in them, you don't lose hardcore status. Gathering/Crafting Skills Mining Mining is used for Runecrafting, Crafting, and Smithing. A useful but not all that necessary skill. Still really nice to have and levels coincided with the skills listed above. Use the best pickaxe available too. Pickaxe Requirements: Bronze: Mining Level 1, Attack Level 1 Iron: Mining Level 1, Attack Level 1 Steel: Mining Level 6, Attack Level 5 Black: Mining Level 11, Attack Level 10 Mithril: Mining Level 21, Attack Level 20 Adamant: Mining Level 31, Attack Level 30 Rune: Mining Level 41, Attack Level 40 Ore Requirements: Clay: Mining Level 1 Rune Essence: Mining Level 1 Copper Ore: Mining Level 1 Tin Ore: Mining Level 1 Iron Ore: Mining Level 15 Silver Ore: Mining Level 20 Coal: Mining Level 30 Gold Ore: Mining Level 40 Mithril Ore: Mining Level 550 Adamant Ore: Mining Level 70 Rune Ore: Mining Level 85 Startup Method: Doric’s Quest and Mining Bronze and/or Tin Requirements: Doric’s Quest Done Locations: South of Lumbridge, South-East Varrock Mine, Rimmington Mine, Al-Kharid Mine, Dwarven Mine This quest will take you to Mining Level 11. I highly suggest doing that. If you aren’t mine bronze and/or tin to that level. Either way you need to continue mining until Level 15 to get to Iron Ore. Method 1: Mining Iron Ore Requirements: Mining Level 15 Locations: South of Lumbridge, South-West Varrock Mine, Rimmington Mine, Al-Kharid Mine, Dwarven Mine, Mining Guild (Need Mining Level 60), Wilderness The most efficient way to 99 for mining, iron ore is a staple. You find three Iron Rocks next to each other, go between them and start mining. This can be hard to find at times as bots and players like to train there. Once you hit Mining Level 60, go to the guild, much less competition. If you want to bank for Smithing or Smith right there, this will be outlined in the next section. Method 2: Mining Silver Ore Requirements: Mining Level 20 Locations: South-West Varrock Mine, Al-Kharid Mine, Crafting Guild (Crafting Level ? Required and wearing brown apron) An alternative if you are going to level Crafting. These are either banked or smithed right after mining an inventory. Crafting Guild, in my opinion, is the best because you don’t have to hop worlds. If you do hop worlds, only stick to 2 different ones for the others. Method 3: Mining Rune Essence Requirements: Rune Mysteries Completed Locations: Rune Essences Mine (Talk to Aubury in Aubury’s Rune Shop in Varrock to get teleported there) If you are going to train Runecrafting using the essences, this is a good way to level Mining, especially if you are going to Runecrafting Level 99. By the time you get enough, you’ll almost have Mining Level 99. AFK Method: Mining Crashed Stars[oldschool.runescape.wiki] Requirements: Mining Level relative to Tier of Star Location: I wish I knew, check the wiki[oldschool.runescape.wiki] Star Tier Requirements: Tier 1: Mining Level 10 Tier 2: Mining Level 20 Tier 3: Mining Level 30 Tier 4: Mining Level 40 Tier 5: Mining Level 50 Tier 6: Mining Level 60 Tier 7: Mining Level 70 Tier 8: Mining Level 80 Tier 9: Mining Level 90 Mining the stardust or cursed popcorn (as I like to call it) from the Crashed Stars is just a collector’s pastime. There is no way to use stardust in F2P, but people do it to acquire a large amount of them. These stars spawn in various places, different in each world (only 1 per world). Some people hunt these so if you can get a hook up to the location, you’re good. On the wiki are the possible locations here[oldschool.runescape.wiki]. Also, above this I made the mining requirement for each star tier. The star will start at a random tier when first mined. Good luck to all the stardust (or cursed popcorn) enjoyers out there. Smithing An essential skill for ironmen as some items cannot be dropped by monsters and need to be smithed. The some notable ones being the Rune Scimitar and Rune Axe. This skill cannot be skipped (if you want those items I mean). I would HIGHLY recommend if you’re doing the iron methods, to get a ring of forging. Because Iron has a 50% chance to be smelted, the ring guarantees that it will smelt, giving you more EXP in the long run. You need to take a ruby ring and 250 gp to Murky Matt in the Grand Exchange to obtain one. Startup Method: Knight’s Sword Quest and Smithing Best Bar/Item If you do this at Level 1 Smithing, you get up to Level 29. Pretty insane. This is recommended. Then you can smith iron and best item you can up to Level 33 Smithing, as Iron Bars to Iron Platebodies are the fastest XP in F2P. If you want to take the longer way to 33 just start with Bronze and make your way to Iron. Either way, you need to get to 33 to be able to smith Iron Platebodies. Method 1: Banked Iron -> Iron Platebodies Requirements: Smithing Level 33, Iron Banked This one is fairly straight-forward. When you mine, you’ll bank your iron. Then go to Edgeville or wherever has a close furnace, and bank the iron bars. You take a hammer when you are done and go to the West Varrock bank. Withdraw the iron bars, go South to the anvil, and make the platebodies. You can either drop them, bank them, or sell them. Entirely up to you. Method 2: Superheating Iron -> Iron Platebodies Requirements: Smithing Level 33, Magic Level 43, Mining Level 15 (most likely), Nature Runes and Fire Staff (to cast Superheat Item) Same thing here, except you will mine and superheat at your iron mining spot. Best spot would be the Dwarven Mine as there is an anvil nearby. Make sure to have a hammer with you if you aren’t banking the iron. Also, most people drop the platebodies, but you can bank/sell them as well. Method 3: Banked Silver Ore Requirements: Smithing Level 20 You can smelt Silver Ore to bars on the way to the bank, depending on your location. Otherwise, use the furnace to turn these into bars. If you are doing your Crafting Level to 99, Smithing is definitely needed. You’ll make either tiaras or unstrung holy symbols right after. More information on this in the Crafting section below. Crafting This is a skill I used to hate before trying a F2P Ironman. It’s a great skill that you can use for early game money and necessary for any best-in-slot F2P amulets. Silver is your best friend here. In the Mining section I outlined the optimal locations for you to mine them at. You can get the molds or crafting tools either from Dommik’s Crafting Store in Al-Kharid or find them in the Crafting Guild. Startup Method: Make the best leather gear you can from Level 1 to 16. Requirements: 151 Leather, Needle, and Thread In the early levels of Melee training, you will likely train on cows. They drop leather that you can use for this. Go to Al-Kharid to the tanner and make them into soft leather. From 1 to 6, make 48 leather gloves. From level 7 to 9, make 20 leather boots. From level 9 to 11, make 22 leather cowls. From level 11 to 14, make 35 leather vambraces. Finally, from level 14 to 16, make 26 leather bodies. Method 1: Crafting Unstrung Holy Symbols Requirements: Level 16 Crafting Generally, if you are going to make tiaras for Runecrafting, you stop crafting these at level 25. However, you can do these until 99. It takes 260,634. Simply mine silver ore, turn them into bars, and using the Holy Symbol mold, make the Holy Symbols. The Edgeville or Al-Kharid furnace are close locations to a bank to do this at. However, if you want to mine and do the process immediately after, that works as well. Whatever furnace is closest to your run. You can bank them, sell them, or drop them. This is up to you. Method 2: Crafting Tiaras Requirements: Level 25 Crafting The process is the same as the Holy Symbols, except it uses the tiara mold and takes 248,126 to get to 99 Passive Method: Cutting Gems Requirements: Being able to cut Sapphires (Level 20), Emeralds (Levels 27), Rubies (Level 34), or Diamonds (Level 43) Optional Requirements: Ruins of Camdozaal Quest and The Corsair Curse Quest Done In Ironman, it is difficult to get gems in vast quantities. As a result, this will only be passive Crafting XP. You obtain frequent gem drops from killing golems in the Ruins of Camdozaal and less at Ogresses at Corsair Cove. Just keep a chisel on you, and when they drop chisel them. Then either bank or drop them. This is entirely up to you. Runecrafting Probably one of the least popular skills in OSRS, Runecrafting is by far the most challenging and longest grind to get through. Not only is the pay-off really not that good, but the amount of prep work and time spent to get those levels is dreadfully slow. However, I see it as the most rewarding because of this, a sign of prestige. Only CHADS level Runecrafting in F2P. Method 1: Making Air Tiaras Requirements: Rune Mysteries Quest Unfinished This is the fastest method for Ironmen and one that requires a lot of prep work. For any tiara grind, you need to collect silver and make the tiaras yourself. If you are doing this method, you can train crafting first or along with this. You will need to make 521,378 of them for a full 99. In addition to this, you need to get an equal amount of air talismans from the Duke in Lumbridge. Before you complete Rune Mysteries, as long as you don’t have any talismans in your inventory or bank, you can keep claiming them. What you do is first withdraw all your talismans as bank notes and go talk to him. Get another one and drop the talisman (Using shift drop). Do this until you can fill up your inventory (26 or 27) with them. Be careful as not being fast enough will make them disappear. After, go to the bank and turn them into bank notes. You can hypothetically do this infinitely. From my experience you can get around 500 per hour so good luck. :) The actual run itself starts in Falador east bank. Run down to the air altar and use a talisman on it. Craft the air tiaras and either run back or use the Falador teleport (which is faster). You can keep them/drop them/sell them. Really this part is up to you and however you value them. Method 2: Making Earth/Body Runes Requirements: Rune Mysteries Quest Done, Level 9 Runecrafting for Earth Runes, Level 20 Runecrafting for Body Runes Another viable method, but not as fast. Preferably you should do Earth runes. This is especially true if you want to have a more relaxed/afk grind. They take a bit longer (and by a bit, I mean over 800 hours). To start with either method you need to mine the essence yourself and bank at Varrock east bank. For earth you need 2,369,800 essence and for body you will need 1,737,800 essence. It is possible to obtain noted essence from the golems in Camdozaal, but it is something you should get passively. I will talk about those later. Earth rune runes start at Varrock east bank. Run to the earth altar with an earth tiara on and click on the altar. Craft the runes and either run back or Varrock teleport (again this is faster and more efficient). You bank and repeat the process. Body runes are faster but require more attention and setup. You need to first have the Edgeville spawn, which costs 5 million gold. Then you need an alt to kill you in a PVP world after you craft the runes. You could possibly do this without the setup but its not as good as earth runes then. The only way I could see this working without that is if you want a change of scenery or really need body runes. Instead of dying, you can run back to either Edgeville or Varrock Teleport. Passive Method: Body Golem Cores Requirements: Ruins of Camdozaal Quest Done, Level 25 Runecrafting This is something you will do passively in combination with training Melee stats. When you train on the golems, you want to do the highest you can. Body Golems give rune essence and body cores, which can be used on the body altar for XP and runes. If you store them and have a nice collection, this can be some sweet Runecrafting XP. If you really want to, you can take this to 99 by getting 173,733 of them, starting at level 20. Passive Method: Mind Golem Cores Requirements: Ruins of Camdozaal Quest Done, Level 2 Runecrafting Mind golems are usually not gone for from my experience, but if you want to, this would all just apply to the mind altar and instead of Varrock or Edgeville, start at Falador west bank. The only reason you would do mind instead of body is if you are a lower combat level Passive Method: Making Body Tiaras Requirements: None This is the last method for Runecrafting we will go over. This method is similar to crafting Body runes, but you are making tiaras instead. I highly advise you don’t use this as a primary method unless you are a regular. You can buy the body talismans from the Grand Exchange, making it the quickest way to 99 for regulars. However, with ironmen there is no easy/quick way to get them. You might get these from hill giants, but rarely. If you bank them, you might have a few that you want to use. Craft the number of tiaras you need and do the run you would for the body cores or runes. Fishing & Cooking Fishing and Cooking should be leveled together for efficiency. There are two ways in which you can do this. The first is to fish the fish and bank them to cook later. Second is to cook them immediately after fishing, either dropping or banking them. Just keep in mind that with Cooking, just because you have the level to cook the item, doesn’t mean it will be successful. Fishing Items in F2P: - Small Net - Fishing Rod + Bait - Fly-Fishing Rod + Feathers - Lobster Pot - Harpoon Good Food/Healing Items: Before going into the methods, here are some good healing items I would recommend for combat. - Kebabs (for Melee training, can be bought for 1 GP in Al-Kharid kebab shop from Karim, random how much it heals but still worth it, especially for price, scales based on health, the more health, the more average healing you receive) - Jugs of Wines (made at Level 35 Cooking, for Ranged and Magic training, can be bought from Fortunato for 2 GP in Draynor, heals 11 HP but lowers the Attack stat by 2) - Anchovy Pizzas (made at Level 55 Cooking, heals 18 HP total in two parts, 9 HP per half) - Swordfish (cooked at Level 45 Cooking, heals 14 HP) - Lobsters (cooked at Level 40 Cooking, heals 12 HP) Startup Method: Catching Shrimp/Anchovies Requirements: Small Fishing Net Location: East Lumbridge Swamp (South of Lumbridge), West of Draynor Village bank, Wilderness Bandit Camp (Anchovies only) From Fishing Level 1 to 15 you will only catch Shrimp. Then from 15 to 20, you’ll catch both. Shrimp can be cooked at Cooking Level 1 and stop burning at Level 33 (35 on a fire). Anchovies can be cooked at Cooking Level 1 and stop burning Level 34 Cooking. These Anchovies can be put on plain pizzas at Level 55 Cooking. Save them if you plan on doing this. Method 1: Fly-Fishing Trout and Salmon Requirements: Level 20 Fishing Location: Barbarian Village, Fly-Fishing Rod, Feathers Funny how both of the most efficient Fishing methods in OSRS (P2P and F2P) are with Barbarians. Anyways, this is the fastest way to go up to 99 in Fishing. There’s a permanent fire nearby, so right after you get an inventory, cook’em. You can also just take this up to 40 and move onto lobsters. Trout stops turning at Cooking Level 50, and Salmon stops at Level 58. Method 2: Lobsters Requirements: Level 40 Fishing, Lobster Pot, Pirate’s Treasure Quest done (optional), The Corsair’s Curse Quest done (optional), and Dragon Slayer 1 Quest done (optional) Location: Musa Point on Karamja and Corsair Cove Resource Area Wow, that’s a lot of quests to complete, you might be saying. This is for your convenience. Pirate’s Treasure is so that you unlock Karamja and quick-pay to sail to there from Port Sarim for the deposit box and back. The other two is to unlock the Corsair Cove Resource Area. This method is very AFK. You can take it all the way to 99 if you want. Lobsters can be cooked at Cooking Level 40 and stop burning at Level 74. Method 3: Tuna/Swordfish Requirements: Level 50 Fishing, Harpoon, all the Quests that the Lobster one had Location: Same as the Lobster ones This is all the same as the Lobsters aside from using the Harpoon instead of the Lobster Pot. Not as AFK, but still decently so. It gives better XP. Some people like to drop the tuna and just fish for the swordfish, but I keep both personally. Tuna can be cooked at Cooking Level 30 and stops burning at Level 63 (64 on a fire). Swordfish can be cooked at Cooking Level 45 and stops burning at Level 86. Not Recommended Cooking Method: Wines Requirements: Level 35 Cooking, Jugs of Water, and Grapes This is a slow process without the GE. It is the fastest method in regular F2P but expensive. Grapes can be found in the Cooks’ Guild and the Phoenix Gang Hideout (for those who picked’em in Shield of Arrav). Jugs of water can be found in the Al-Kharid Palace. Regular jugs can be bought in any general store. Lots of prep work, not a lot of pay off. Might as well buy em from Fortunato. Woodcutting & Firemaking Similar to Fishing and Cooking, Woodcutting and Firemaking go hand-in-hand. If you train one, you’ll almost always train the other. You will cut the best tree you can, with the best axe you can until Willows. Then while you cut the logs, burn the logs with a tinderbox every full inventory. Keep in mind that if you are going for efficiency, you won’t do this until you get the required smithing levels for each axe. Bob’s Brilliant Axes (axe shop in Lumbridge) is the only place you can purchase axes in F2P. Steel is the best one you can get, so it’ll take a while without the best one. Axe Level Requirements Bronze: Woodcutting Level 1, Attack Level 1 Iron: Woodcutting Level 1, Attack Level 1 Steel: Woodcutting Level 6, Attack Level 5 Black: Woodcutting Level 11, Attack Level 10 Mithril: Woodcutting Level 21, Attack Level 20 Adamant: Woodcutting Level 31, Attack Level 30 Rune: Woodcutting Level 41, Attack Level 40 Startup Method: Best Tree Until Willows From Level 1 to 15 cut and burn regular trees. From Level 15 to 30 cut and burn oak trees. Efficient Method: Willows Requirements: Level 30 Woodcutting The best way to reach 99 Woodcutting is with Willows. If you tick cut, it can even be faster. The best location for this is Draynor Village, south of the bank. If it’s constantly being used, you can try to find some other locations, unless you want to bank. Some other locations are Lumbridge, Rimmington, and South of Port Sarim. AFK Method: Yews Requirements: Level 60 Woodcutting A slow but AFK method. Yews take a while to cut down, even if they are more XP. This makes them not as good. It’ll take a while more (I don’t know by how much though). Locations are scattered throughout F2P. They are generally marked on the map and unless you are trying to bank them, finding an open one isn’t difficult. Not Recommended Method: Maples Requirements: Level 45 Woodcutting, The Corsair Curse Quest Started, Dragon Slayer Quest Done I honestly have not idea. Maybe it’s AFK. Maybe it’s awful XP. Never tried it. Never was recommended it. It is still possible to get to 99 in both. Then again you can do that with just regular trees and a bronze axe. If you really want to try it, the only maple tree in F2P is in the resource area in Corsair Cove. Combat Skills I am grouping the first 2 skills, melee and ranged (Technically 4) together. The monsters to train them on are very similar, given a few exceptions. You can max with any of these, but some are more efficient than others. Ranged Setup It’s very simple (not that Melee training isn’t simple). Attack with bow, level with bow. Make sure to safespot (attack from a place they can’t hit you, but you can hit them). Gear-wise you want the best armor you can with the best shortbow you can. Longbows only look cooler but attack slower. Don’t let that stop you from your fashionscape. Your bow should be set to either accurate or rapid (Idk which ones is better). For arrows, use bronze and iron. Then if you can afford them or do ogresses, get adamant arrows at around Level 45 Ranged. Weapon Requirements Cursed Goblin Bow: Ranged Level 1 Shortbow/Longbow: Ranged Level 1 Training Bow: Ranged Level 1 Bronze Crossbow: Ranged Level 1 Phoenix Crossbow: Ranged Level 1 Oak Shortbow/Longbow: Ranged Level 5 Willow Shortbow/Longbow: Ranged Level 20 Maple Shortbow/Longbow: Ranged Level 30 Arrow Requirements Bronze Bolts (used only for the crossbows): Ranged Level 1 Bronze: Ranged Level 1 Iron: Ranged Level 1 Steel: Ranged Level 5 Mithril: Ranged Level 20 Adamant: Ranged Level 30 Early Armor (Leather) Setup Leather Cowl Amulet of Accuracy (From Imp Catcher Quest) Leather Body (Hard Leather Body at 10 Defense and Studded Leather Body at 20 Ranged and 20 Defense) Leather Chaps Leather Boots Leather Gloves Leather Vambraces Cabbage Cape Best Armor Setup (Level 40 Ranged) Coif Amulet of Power Green D’Hide Body Green D’Hide Leggings Leather Boots Leather Gloves Green D’Hide Vambraces Cabbage Cape (of course) Melee Setup The way I level Melee train is Strength -> Attack -> Defense by levels of 5 to 10. If I have 50 (as an example) in these 3, I would level Strength to 55 or 60 and then level the rest to that level. Wear the best armor you can based on your Defense level. Wield the best scimitar you can based on your attack. I understand that it might be difficult to get some of the material because of money issues and Smithing level requirements. Just do the best you can. Armor Requirements Bronze: Defense Level 1 Iron: Defense Level 5 Steel: Defense Level 10 Black: Defense Level 15 Mithril: Defense Level 20 Adamant: Defense Level 30 Rune: Defense Level 40 Weapon Requirements Bronze: Attack Level 1 Iron: Attack Level 1 Steel: Attack Level 5 Black: Attack Level 10 Mithril: Attack Level 20 Adamant: Attack Level 30 Rune or Others (Barronite Mace, Obor’s Club): Attack Level 40 Best Armor Setup Rune Full Helm Amulet of Power (Amulet of Strength if you don’t have Level 70 Crafting) Rune Platebody (or Chainbody if facing Hill Giants, Moss Giants, Ogresses, or any other thing that uses crush attacks) Rune Platelegs (or Plateskirt if you’re a girl (1 of you) or Scottish) Golden Castle Wars boots (or the Stronghold of Security boots) Leather Gloves Green D’Hide Vambraces (Leather if you don’t have the Ranged level yet) Rune Kiteshield Cabbage Cape (of course) Best Weapons Rune Scimitar (#1 of course but need level 90 in Smithing, OOF) Barronite Mace (#2 but better crush attack and a whole lot easier to get than #1) Rune Longsword (#3) Ranged & Melee Methods Method 1: Chickens/Cows Combat Type: Melees Level 1-20, Ranged 1-20 (Only if you really need the feathers or leather) Requirements: None Notable Drops: Feathers and Leather Locations: North and North-East of Lumbridge I am grouping these two because they are something you are going to do in the early levels. Enemies hit hard so this is a good way to start. If you gather the meat/chicken, you can cook it and eat it during the “grind”. Chickens give you feathers for fly-fishing, and cows give you leather for crafting. You certainly can do this with ranged, but the next option in my opinion is much better for ranged. Method 2: Minotaurs Combat Type: Ranged 1-20, Melees 1-20 (Only if you need arrows and the piece of the skull scepter they drop) Requirements: None Notable Drops: Iron Arrows and Right Skull Half Location: Stronghold of Security Fantastic for iron arrows, something you can farm if you need them as they are your best in slot until ogresses (cost-wise). You can safe-spot them easily and they drop the right skull half, a material needed to craft the skull scepter AND recharge said skull scepter). Not recommended for Melee, but if you really need either of the drops. Method 3: Hill Giants Combat Type: Melees Level 20-50, Ranged Level 20-40 Requirements: Brass Key (Only in Ones Close to Varrock) Notable Drops: Giant Keys (Better Rates in Wilderness), Limpwurt Roots, Law and Nature Runes, Body Talismans (Small Chance), Big Bones, Small Amount of GP, Gems (Small Chance). Locations: East of Al-Kharid or South of the Duel Arena, Edgeville Dungeon (Shortcut needs a Brass Key), and Lava Maze in Wilderness Not a good money maker but don’t hit that hard. I would recommend the location close to Al-Kharid. There is one safespot location, but no one is ever there. There is a slight difference in drops (Iron Med Helms and Iron Scimitars instead of Iron Full Helms and Iron Longswords). Anyone that is there isn’t a bot, so ask them nicely not to hit your safespot hill giants. Hardcores are not recommended to do the Wilderness ones because of potential PK’ers. You could max your Melees here, but the next methods are much better. Method 4: Mind Golems/Body Golems Combat Type: IDK Recommended Melees Level Here, Maybe Levels 40 to 50 for Body Requirements: Ruins of Camdozaal Quest Done Notable Drops: Gems, Mind/Body Cores, Barronite Mace Head, and Barronite Shards Locations: Ruins of Camdozaal An alternative to Hill and Moss Giants. These are a good source of gems and passive Runecrafting XP with the mind/body cores. You can also get Barronite Shards for the Maze Runs (IDK WHAT CALLED). The best way to do these is with the Barronite mace, as it does more crush damage and extra to the golems. There is a ruin upgrade that increases your defense against the golems. Once you hit maybe 40 to 50, start doing Body Golems instead of Mind. Maxxing Melees to 99 with these is an option. Method 5: Moss Giants Combat Type: Melees Level 50-90, Ranged Level 20-50 Requirements: Knife or Sharp Weapon, Woodcutting Axe Notable Drops: Mossy Key (Better Rates in Wilderness), Law and Nature Runes, Steel Bars, Decent Amount of GP, Black Square Shield, Spinach Roll (Last two being for collectors) Locations: Varrock Sewers, Crandor, and Wilderness close to Canoe Exit Moss Giants start to be great money makers, letting you afford better stuff. The safest place is the Varrock sewers. Make sure to get a knife or sharp weapon for the web, while going to their location. This area is multi-combat so be careful. If you wait long enough, they can deaggro. However, there are locations where they can funnel in one by one. Wilderness ones are again not recommended for Hardcores. You can certainly max both Melees and Ranged while doing these. The money isn’t as good as ogresses though. Method 6: Ogresses Combat Type: Melees Level 90-99, Ranged Level 50-99 Requirements: The Corsair Curse Quest Completed, Dragon Slayer 1 Quest Completed (Optional) Notable Drops: Limpwurt Root, Lots of Runes (specifically law/nature runes), Gems (more common), Lots of GP, Big Bones, Rune Med Helm, Full Helm, and Battleaxe, and Shaman Mask (for Collectors) Locations: Corsair Cove Dungeon, Resource Area Dungeon Ah yes, the kings of F2P money-making. They’re drops are insane. Good XP. Certainly, you can take this to 99. Nuff said. Not Recommended Method: Flesh Crawlers, Catablepons, Ankous Combat Type: Various Levels Requirements: None Notable Drops: Skull Scepter Parts Locations: Stronghold of Security Levels 2, 3, 4 Respectively The only reasons you should be killing these is the Skull Scepter parts. Once you get this from them, don’t do them again. Minotaurs are where you get the skull fragments as they are the easiest to kill and seems to drop the most frequently. Flesh crawlers maybe super afk, but no drops (aside from scepter part, not recommended). Catablepons are annoying. Ankous are good for law runes, but there are much better options like Ogresses. Not Recommended Method 2: Ice Giants Combat Type: I don’t know the Levels Requirements: None Notable Drops: Black Kiteshield, Mithril Mace and Square Shield, Adamant Arrows, and Decent number of Runes, Gems (Not Common), Decent GP, Mithril Ore Location: Asgarnian Ice Dungeon and Frozen Waste Plateau (North-West Wilderness Ice Area) There is no reason to do these. That being said, I do think that there might be a boss themed around these giants, just like Obor for the Hill Giants and Bryophyta (IDK HOW SPELL) for the Moss Giants. Blurite and the Mudskipper Point Dungeon are underused, barely in P2P. Hear me out, maybe the Blurite crossbow can come to F2P or the new boss would drop something that when combined with the Blurite is the best F2P ranged weapon or something. Obor has his club for Melee, Bryophyta has Magic with her staff (that’s not F2P), and this new ice giant boss would be Ranged. Just a thought. (Just a FYI, this section is just an excuse for me to suggest this.) Magic Magic is more flexible to train because you have combat and utility spells. It can be pretty expensive until you get the ogresses. Splashing If you are going to level Magic, splashing is something you should know about. It’s when you cast a certain spell and it misses all the time. You might see people doing this on rats everywhere in F2P. I don’t know about y’all, but I’ve seen them everywhere. This is achieved with -65 Magic if you look on your equipment stats. You need any kind of full helm, platebody, platelegs/plateskirt (if you’re a girl, gotta be gender inclusive), stronghold boots, and d’hide vambraces. If you don’t have or can’t equip the d’hide vambraces, you’ll have to use a cursed goblin staff that Diango sells instead of the elemental staves. Method 1: Combat Spells Requirements: Depends on Combat Spell Use the highest-level combat spell you can, with the elemental staff that corresponds to the same element. Every cast gives you XP, so splashing can be an alternative here. I’m not sure what enemies to train the spells on but as long as you can feasibly kill them, you are good. My personal recommendation would be to level until you get Fire Strike (Magic Level 13). After that, level until 35 to get Fire Bolt. If you have the Chaos Runes but not Death you can do this to 99. Best EXP though goes to Fire Blast which unlocks at Magic Level 59. With Fire Bolt and Fire Blast you want to be killing ogresses. Method 2: Crumble Undead Requirements: Magic Level 39 Not very used, but better EXP with Chaos Runes than Fire Bolt. For this method, you want the Imbued Skull Scepter and be close to the wilderness just enough to cast the spell on. The Skull Scepter lets you auto-cast the spell. I think that covers it. Method 3: Curse Splashing Requirements: Magic Level 19 Just a splashing setup with curse. Early on, very fast levels. Best place to do this, in my correct opinion, is on the Monk of Zamorak underneath the stairs in Varrock palace. Though, you can do this on rats or any other safe enemy. Method 4: Telegrabbing Nats Requirements: Magic Level 33 High-risk method that requires you to go into the Wilderness, east of Lava Dragon Isle on an island. There are two Nature Runes you can get by telegrabbing and hopping worlds. However, this is a common PK spot. You can do this if you really need the Nature Runes and have lots of Laws. Not recommended for Hardcores. Method 5: Superheat Item Requirements: Magic Level 43 Should be used together with Mining for Smithing and Magic EXP. Will get you to 99 easily if you do it this way. Passive Method: Casting High Alchemy Requirements: Magic Level 55 See valuable drop, have Runes, cast High Alch, get Money. You’ll level this while you’ll level combat, especially at ogresses. Prayer This probably the second most passive skill (at least how I level it up). You get XP while burying the bones during your combat grinds. There are a few ways to do this actively though. Realistically, you don’t need more than 45 because that’s when you learn the last prayer spell, but it never hurts to have more Prayer points. Method 1: Big Bones at the Boneyard in the Wilderness This is the most dangerous of the methods here. It is recommended that Hardcore Ironmen don’t do this one as you can get PK’ed. North-east of Ferox Enclave, is the boneyard, where big bones spawn. You basically just run around, pick them up, and bury them. Method 2: Big Frogs This is one targeted to Hardcore Ironmen. In Lumbridge Swamp, go around killing the big frogs. They only drop big bones. So again, pick them up and bury them. I wouldn’t recommend this because of the passive prayer you can get. Method 3: Ruins of Camdozaal Offering Fish A good change of pace to the other methods. With this one you get Fishing, Cooking, and Prayer all in one. The XP isn’t too hot BUT it is a nice alternative. The higher level the other skills are, the better your XP will be. I also do think that the boost you can pay for with Barronite shards helps that XP. 3 for 1 deal, sounds good to me. Passive Method: Burying the Bones of your Enemies You train combat. They drop bones. You pick up bones. You bury bones. You get XP. Simple as. Hitpoints Hitpoints is an exclusively passive skill. While leveling up the other combat skills, you level up this one. Can’t say much more than that, aside from the obvious, it determines how much health you have. Sorry if you wanted to do a Hitpoint pure. F2P Bosses There are only two bosses in F2P. No idea on how to do them properly. Will update this later. For now I put the wiki page of the bosses. Oborhttps://oldschool.runescape.wiki/w/Obor Bryophyta https://oldschool.runescape.wiki/w/Bryophyta Combat Achievements Here is a list of all the combat achievements you can complete in F2P (If I missed 1 or 2 let me know) Greater Demon Easy A Greater Foe Kill a Greater Demon. Not So Great After All Finish off a Greater Demon with a demonbane weapon (Silverlight being the only one available Obor Easy Fighting As Intended Kill Obor on a free to play world. Obor Novice Kill Obor once. Sleeping Giant Kill Obor whilst he is immobilized.Medium Squashing the Giant Kill Obor without taking any damage off prayer. Back to the Wall Kill Obor without being pushed back more than one square by his knockback attack. Obor Champion Kill Obor 5 times Bryophyta Easy Fighting As Intended II Kill Bryophyta on a free to play world. Bryophyta Novice Kill Bryophyta once. Preparation Is Key Kill Bryophyta without suffering any poison damage. Protection From Moss Kill Bryophyta with the Protect from Magic prayer active.Medium Quick Cutter Kill all 3 of Bryophyta's growthlings within 3 seconds of the first one dying. Bryophyta Champion Kill Bryophyta 5 times. Conclusion And that’s the guide. I know I went a bit overboard on some of the information, but better more than less. If I missed something or something is wrong, let me know. I got all my information from the OSRS wiki[oldschool.runescape.wiki], F2P wiki[www.f2p.wiki], members of the clans F2P IM and W 385, and my own experience. The pictures are from the OSRS wiki[oldschool.runescape.wiki], and I took them in-game. The quest guide videos were from Slayermusiq1. This guide is still a work in-progress. I need to add pictures and stuff to make it look visually appealing and some sections are missing. As the semester is in full swing, I have a bit of work and outside responsibilities, but bear with me. It will get done eventually.