换一换
换一换 


这份指南包含了大量关于各种主题的信息,旨在帮助玩家打下理解游戏的基础,提升知识和技能,并以其他方式增强游戏体验。 你好,猎人!
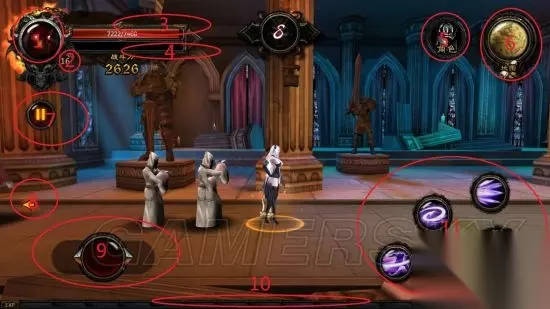
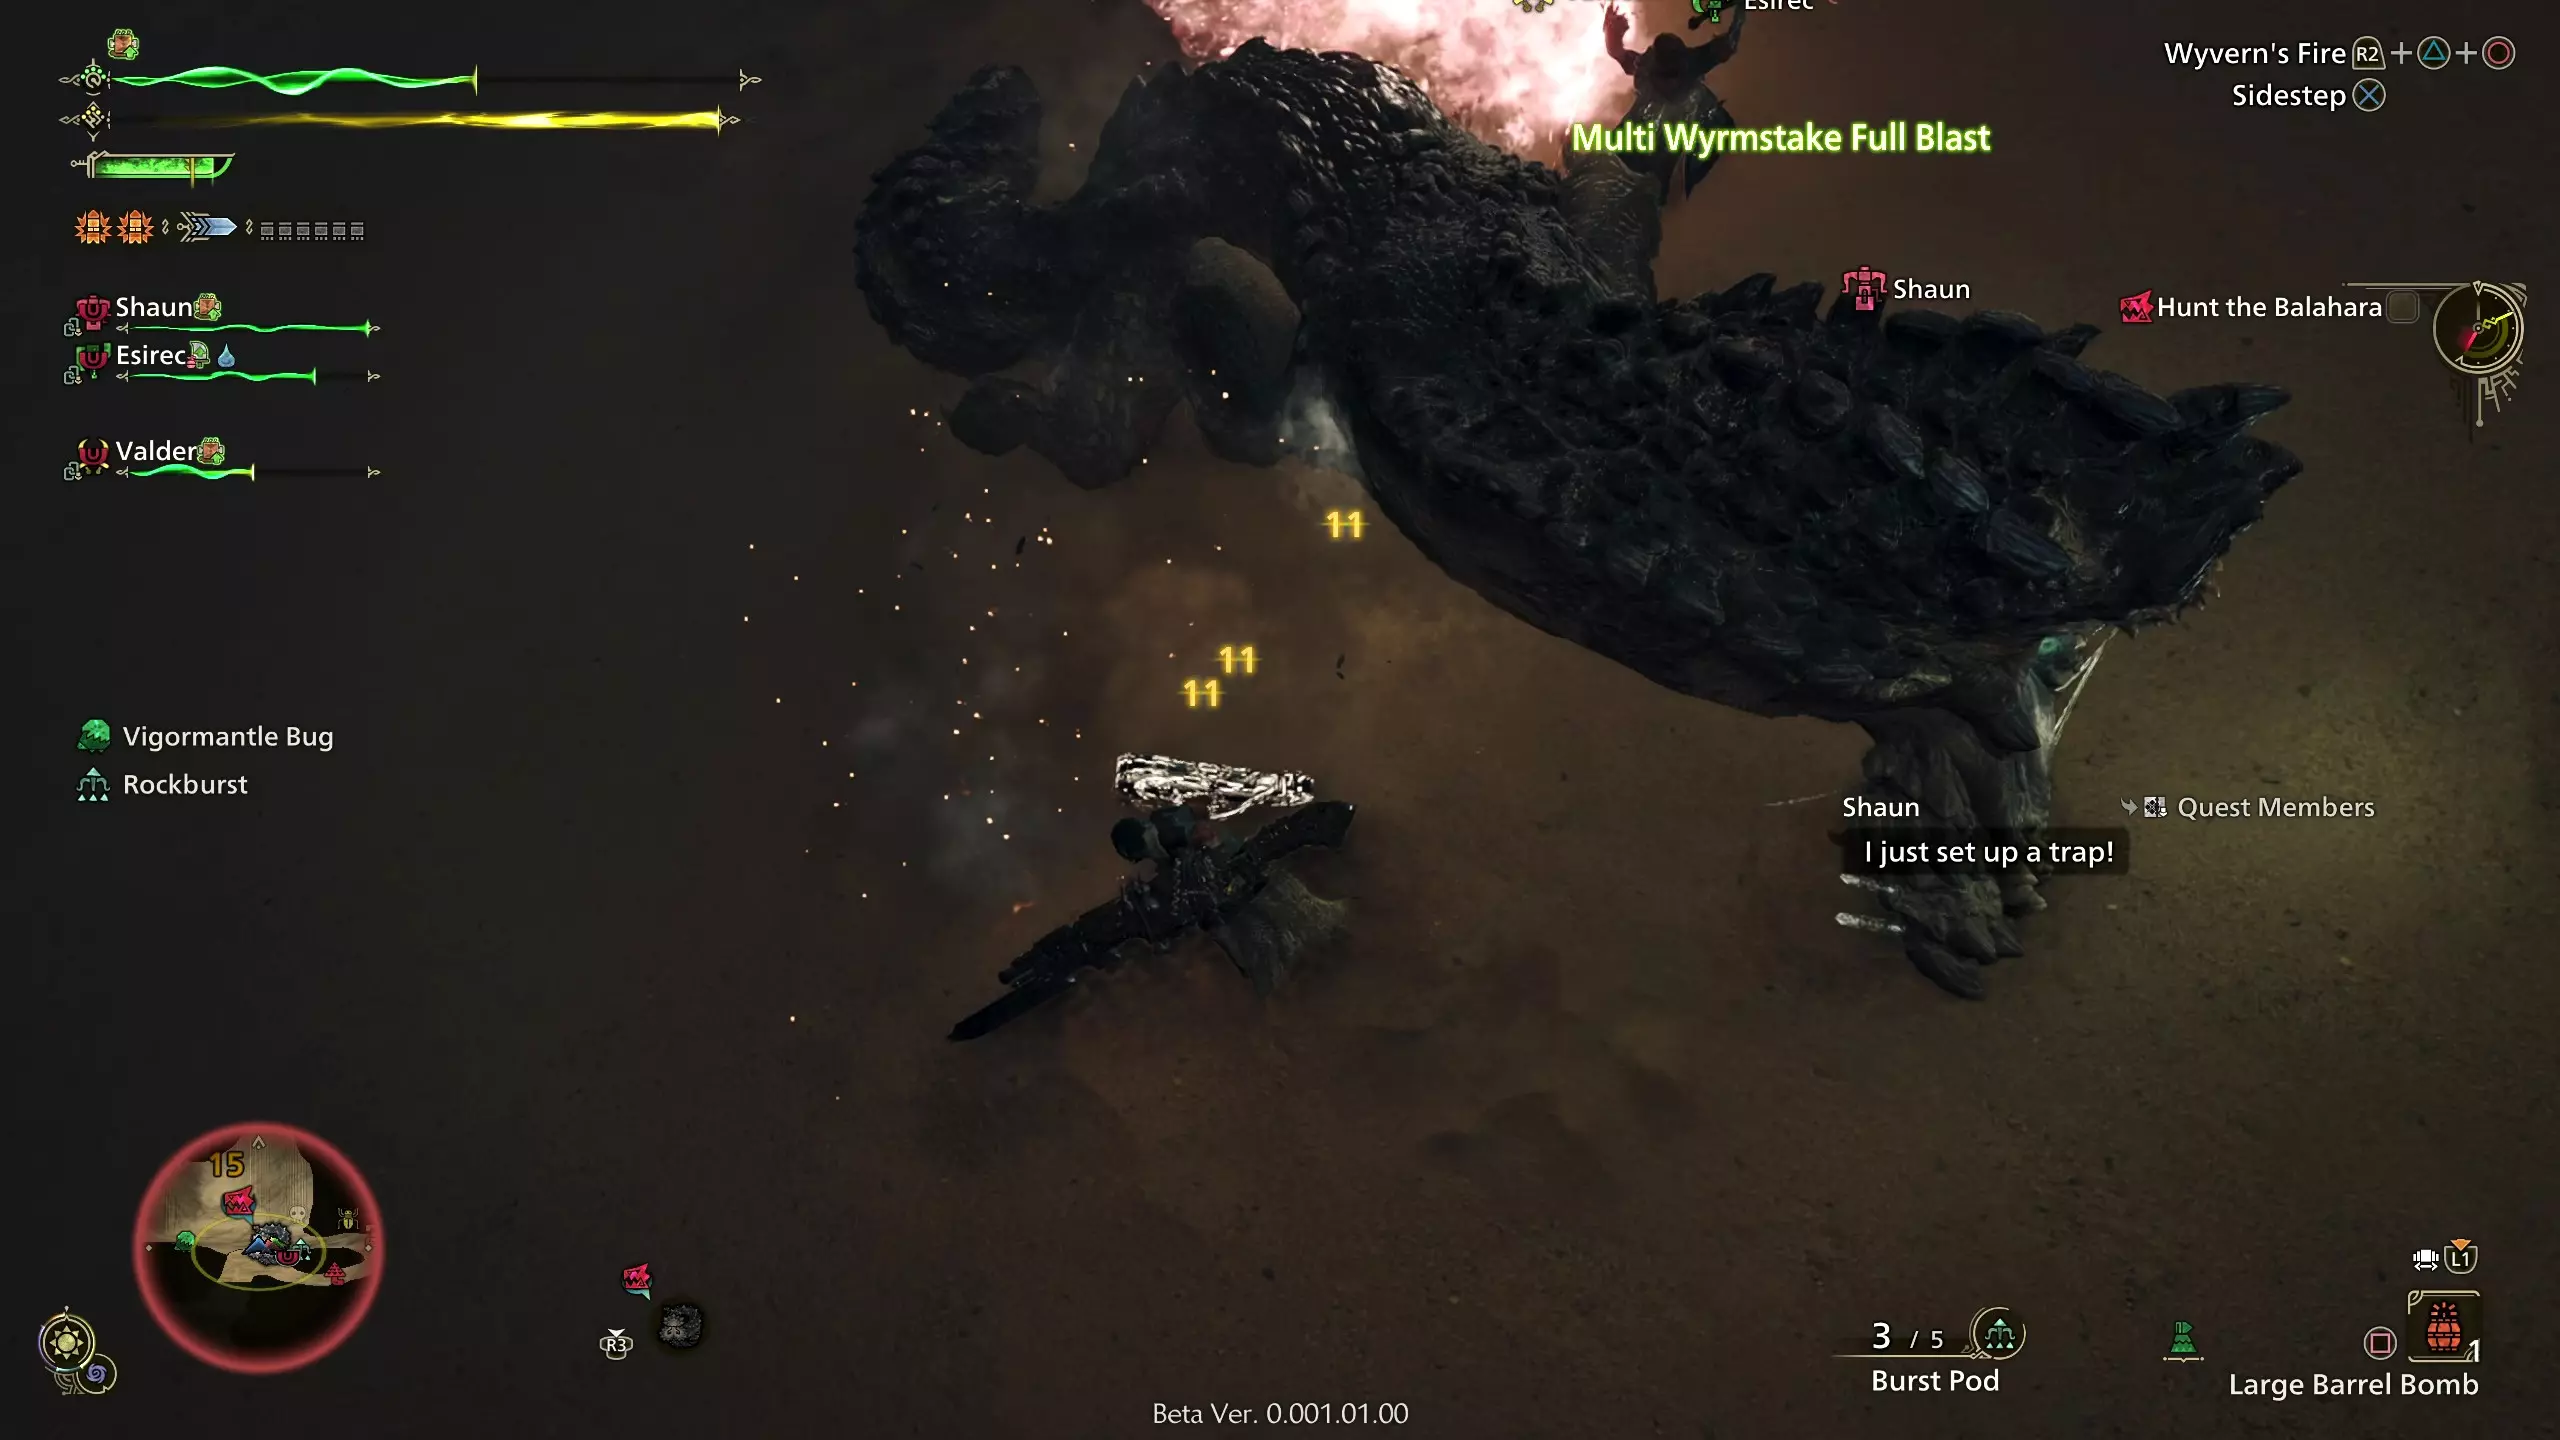
Welcome to Monster Hunter Wilds! The Monster Hunter series has seen explosive growth in popularity over the past few years, and Wilds promises to continue that trend. This is a wonderful, quirky series with a lot of content. Each game offers dozens to hundreds of hours worth of entertainment for those willing to dive in. With that amount of content, there is a lot to know, and so much to learn. This guide aims to help ease in new players to the series, or refresh the memory of returning veterans. Some key things to understand about Monster Hunter: This is a notoriously difficult series to get into. It took me three solid attempts over several years to break in and finally "get" it. Capcom has made great strides to make each successive game more approachable, but don't feel discouraged if you don't enjoy the game; it's not for everyone. Combat is slow and deliberate. It's not a spectacle fighter. When you hit an attack button, you commit to that attack. With few exceptions, you can't dodge or block until it's complete. You have to read your opponent and anticipate their attacks so you can respond in kind. Your character has no "stats," and doesn't level up. Your character is exactly the same at the beginning of the game as they are at the end-game. The only things that improve are your supplies, weapons, armor, and your own skill and knowledge as a player. There's only so much a guide can teach. If you know someone who plays Monster Hunter, ask them. Nothing can compare to a veteran teaching you the game and answering your questions as they come up. Even if you don't know someone in-person or online, there's plenty of resources dedicated to helping people learn this wonderful series, including the many discord servers dedicated to Monster Hunter. The Monster Hunter Gathering Hall[discordapp.com] is the officially partnered one.All in all, there are two priorities in Monster Hunter: Don’t get hit Hit the monsterThe order is important. If you can remember and abide by that mantra, you’ll be all right. Trying to learn everything about a game as big as Monster Hunter Wilds all at once can be intimidating. Don't worry! Take your time. It will all become second nature as you get familiar. Monster Hunter is a long game, and you have plenty of time to get acclimated at your own pace. Keep in mind this game just came out. While most of this guide's information is based off demo playtime and official media sources, some parts are speculation based off trends from previous games. I will update the guide accordingly once information becomes available. What's the Story? Do I need to know the lore of the past games to know what's going on?No. The Monster Hunter series has barely any story at all. Most games can nearly all boil down to: "a big monster is threatening the local ecosystem; can you take care of it?" You can jump straight into Monster Hunter Wilds without any trouble. Seriously, give it to me. What's the lore?Take this first paragraph with a grain of salt; very little of it is referenced in the series directly. Some of this info comes from notes from artbooks and concept art, and may or may not be considered canon. Either way, it can be fun to think about. A long time ago, there was an ancient civilization[monsterhunter.wikia.com] of many races, including humans and wyverians, who are humanoids with four fingers and pointed ears. They possessed great knowledge and had an advanced level of technology unknown today. They exploited the wyverns and elder dragons of their time. At some point, they performed The Forbidden Act, killing numerous wyverns to create their own massive bioweapon lifeform called the Equal Dragon Weapon/Wyvern Machine Soldier. Many of these bioweapon lifeforms were made. This greatly angered the dragons, sparking the Great Dragon War. It was a terribly violent conflict that left the ancient civilization in ruins and most dragons extinct. With most of the world in shambles and the knowledge and technology of the ancient civilization lost, humans and wyverians adopted a new culture. Instead of directly antagonizing wyverns and dragons, they would instead live alongside them with a healthy respect for nature. This isn't to say conflict ceased entirely: wyverns are a constant threat to humanoids and other monsters alike, and something needed to be done to protect the peace. The Hunter's Guild was formed to maintain that peace. It's the central governing body of the world, and the primary way monster-related problems get solved. Officially-sanctioned hunters are not out to annihilate all monsters, rather, they're more glorified park rangers. They hunt down overpopulated animals, eliminate disruptive invasive species, and protect towns from marauding monsters. Guild Knights are dispatched to execute poachers that disobey these rules. Everything is done to learn more about the world and protect the world's ecosystem. The Monster Hunter setting is sometimes referred as something akin to "cave punk", a world where many structures and tools are made of wood, stone, and dinosaur bone. That isn't to say the culture is primitive—alchemy, metallurgy, and aviation are all present. Access to fantastical monster parts and recovered ancient technology has led society to develop airships and advanced weaponry like dragonators and charge blades. A few months before the game released, Capcom released this video: https://www.youtube.com/watch?v=FWnKdXMgNeQ It serves as a good introduction to the Monster Hunter world, though some (in good fun) conspiratorially call it pro-Guild propaganda. All right. How about Monster Hunter Wilds specifically?A young boy named Nata is discovered near the border of the Forbidden Lands, an area believed to be uninhabited ever since access was restricted a thousand years ago. He wants to return to his clan, the Keepers, who supposedly live there. He fled his village after a monster attacked, and from his descriptions, it seems to be a fearsome monster long thought extinct. Scholars remained skeptical, until they examined his pendant and found it to be made of material they've never seen before. The Hunter's Guild organized an expedition into the Forbidden Lands to find the Keepers and this mysterious monster. You are among the hunters assigned to the mission to handle any monsters that get in the way of the investigation. You are leader of the Avis unit, a small team also tasked with protecting Nata during the expedition. Your unit includes Guild Handler Alma, Gemma the Smithy, and your trusty sidekick Palico. Understanding the UI - Combat Monster Hunter has a lot of information on screen, so let's break down what you're looking at to get a better sense of what's going on. Click the image below to make it larger if you need to see more detail.
左上角 让我们从左上角开始,按顺时针方向介绍。在最顶部,绿色条上方是增益效果图标。如果你有任何临时效果,增益和减益效果都会显示在这里。绿色条本身是你的生命值。黄色条是耐力条,在进行跑步、闪避和一些特殊攻击等动作时会消耗。 耐力条下方是武器状态图标。这些图标会根据你所使用的武器而有所不同。这位玩家使用的是锤子,所以没有任何图标。其他武器,如太刀或铳枪,则有特殊的计量条或弹药显示。除了武器特有的指示器外,所有近战武器(“操虫棍”)都会有锋利度计量条,通过其颜色和填充程度来显示武器的状态。每次攻击怪物时,你的锋利度都会下降。当锋利度降至更低等级时,会降低你的伤害输出,甚至可能导致攻击被怪物弹开。关于锋利度的更详细说明,请参见下方的武器部分。 下方是你的狩猎小队信息。这里会显示队伍成员的生命值、增益效果、减益效果,以及他们是否正在与怪物战斗(武器上方会显示红色眼睛图标)。 右上角 屏幕右上角是行动建议区域。这里会列出玩家当前可执行的大部分动作以及对应的按键提示。该区域会根据玩家当前的行为动态变化。其左侧的绿色高亮大文字显示的是你当前正在执行的动作。学习游戏时,留意这个角落会有所帮助。如果觉得它分散注意力,可以在选项中关闭它。 其下方是当前的任务目标和时间限制。此示例中的狩猎已进行约4分钟,时间限制为30分钟,相当简单明了。 目标下方是通知区域。这里会显示调查研究、追踪信息、玩家聊天、NPC对话、战斗通知、环境事件以及获得的战利品。 右下角 屏幕右下角是物品栏的缩略版。最显眼的物品是当前选中的物品。在武器收鞘的状态下,按下显示的按钮即可使用该物品。按住物品栏顶部显示的按钮,可以切换当前选中的物品。 物品栏左侧是小型的衣装状态指示器,显示衣装是就绪、已装备还是处于冷却中。 其左侧是投射器当前装备的弹药。 屏幕左下角 屏幕左下角,小地图右侧是怪物锁定功能。若周围有多个怪物,你可以选择锁定不同的目标。 左下角显眼位置显示的是小地图,它会展示大致地形,并标注采集点等兴趣点。小地图的边框颜色会显示你的当前状态:战斗中为红色,非战斗时为黑色,靠近未察觉你的怪物时为灰色。屏幕角落显示当前的时间和天气。在示例图片中,生态系统正处于休耕期的深夜,黎明将至。圆圈周围的彩色边框表示每个时间段的持续时间,以及距离下一个时间段的剩余时间。 小地图上方列出了附近的兴趣点。通常你可以用投射器与这些物体互动。留意你可能需要的物品,比如投射器弹药、自然治疗资源或可利用的环境陷阱。 你可以在选项中自定义许多界面元素,包括大小和可见性。 生命值和耐力条 - 详细说明 让我们仔细看看屏幕左上角的部分。在很多方面,这是界面中最重要的部分之一。

你可以再次在生命值和耐力值条上方看到增益和减益效果。如果你按住物品栏的物品切换按钮(默认是左肩按钮),会看到一个圆形计时器,显示这些效果的持续时间。当增益或减益效果即将结束时,会显示剩余秒数。 生命值条的长绿色部分显示你当前的生命值。红色部分表示你最近受到的伤害。只要不再受到伤害,这部分生命值会随时间恢复。右侧的灰色空白部分不会自行恢复,需要通过治疗来恢复。你可以通过多种方式治疗,比如喝药水,或者与某些(绿色的)植物和动物互动。 奇怪的是,这个耐力值条是蓝色的。为什么呢?该玩家身上带有水滴图标所示的水蚀debuff。这种异常颜色表明你的耐力消耗或恢复受到了影响。 可能不太容易注意到的是,耐力条虽然没有填满整个进度条,但实际上已经处于满值状态。这是因为随着时间推移,猎人会感到饥饿,导致最大耐力值低于正常水平。你可以通过食用口粮、全熟牛排或其他熟食来缓解这种状况。 在生命值和耐力条的左侧,你会看到绿色和黄色的小点,形状有点像动物的爪子。这些小点是你最大生命值和耐力值的另一种指示器。如果五个小点都处于明亮状态,说明你的生命值或耐力值已达到最大上限。如果其中一些显示暗淡,说明你的生命值或耐力值被限制在最大值以下。 尽量始终保持生命值和耐力值处于满状态。你可能需要通过帐篷的餐食或便携烧烤架来补充。 你的生命值条也会对危险做出反应。当生命值极低时,它会闪烁绿红光芒以引起你的注意。如果怪物即将使用特别强力的攻击,你的生命值条会剧烈晃动。

受到那样的攻击会让你的生命值大幅下降,甚至可能直接被击倒。 了解用户界面 - 地图 让我们调出地图,好吗?如果需要仔细查看,可以点击下方的图片。通过底部的控制按钮,你可以自由移动、旋转和缩放地图来确定自己的位置。如果需要更大的空间,你还可以将地图全屏显示。
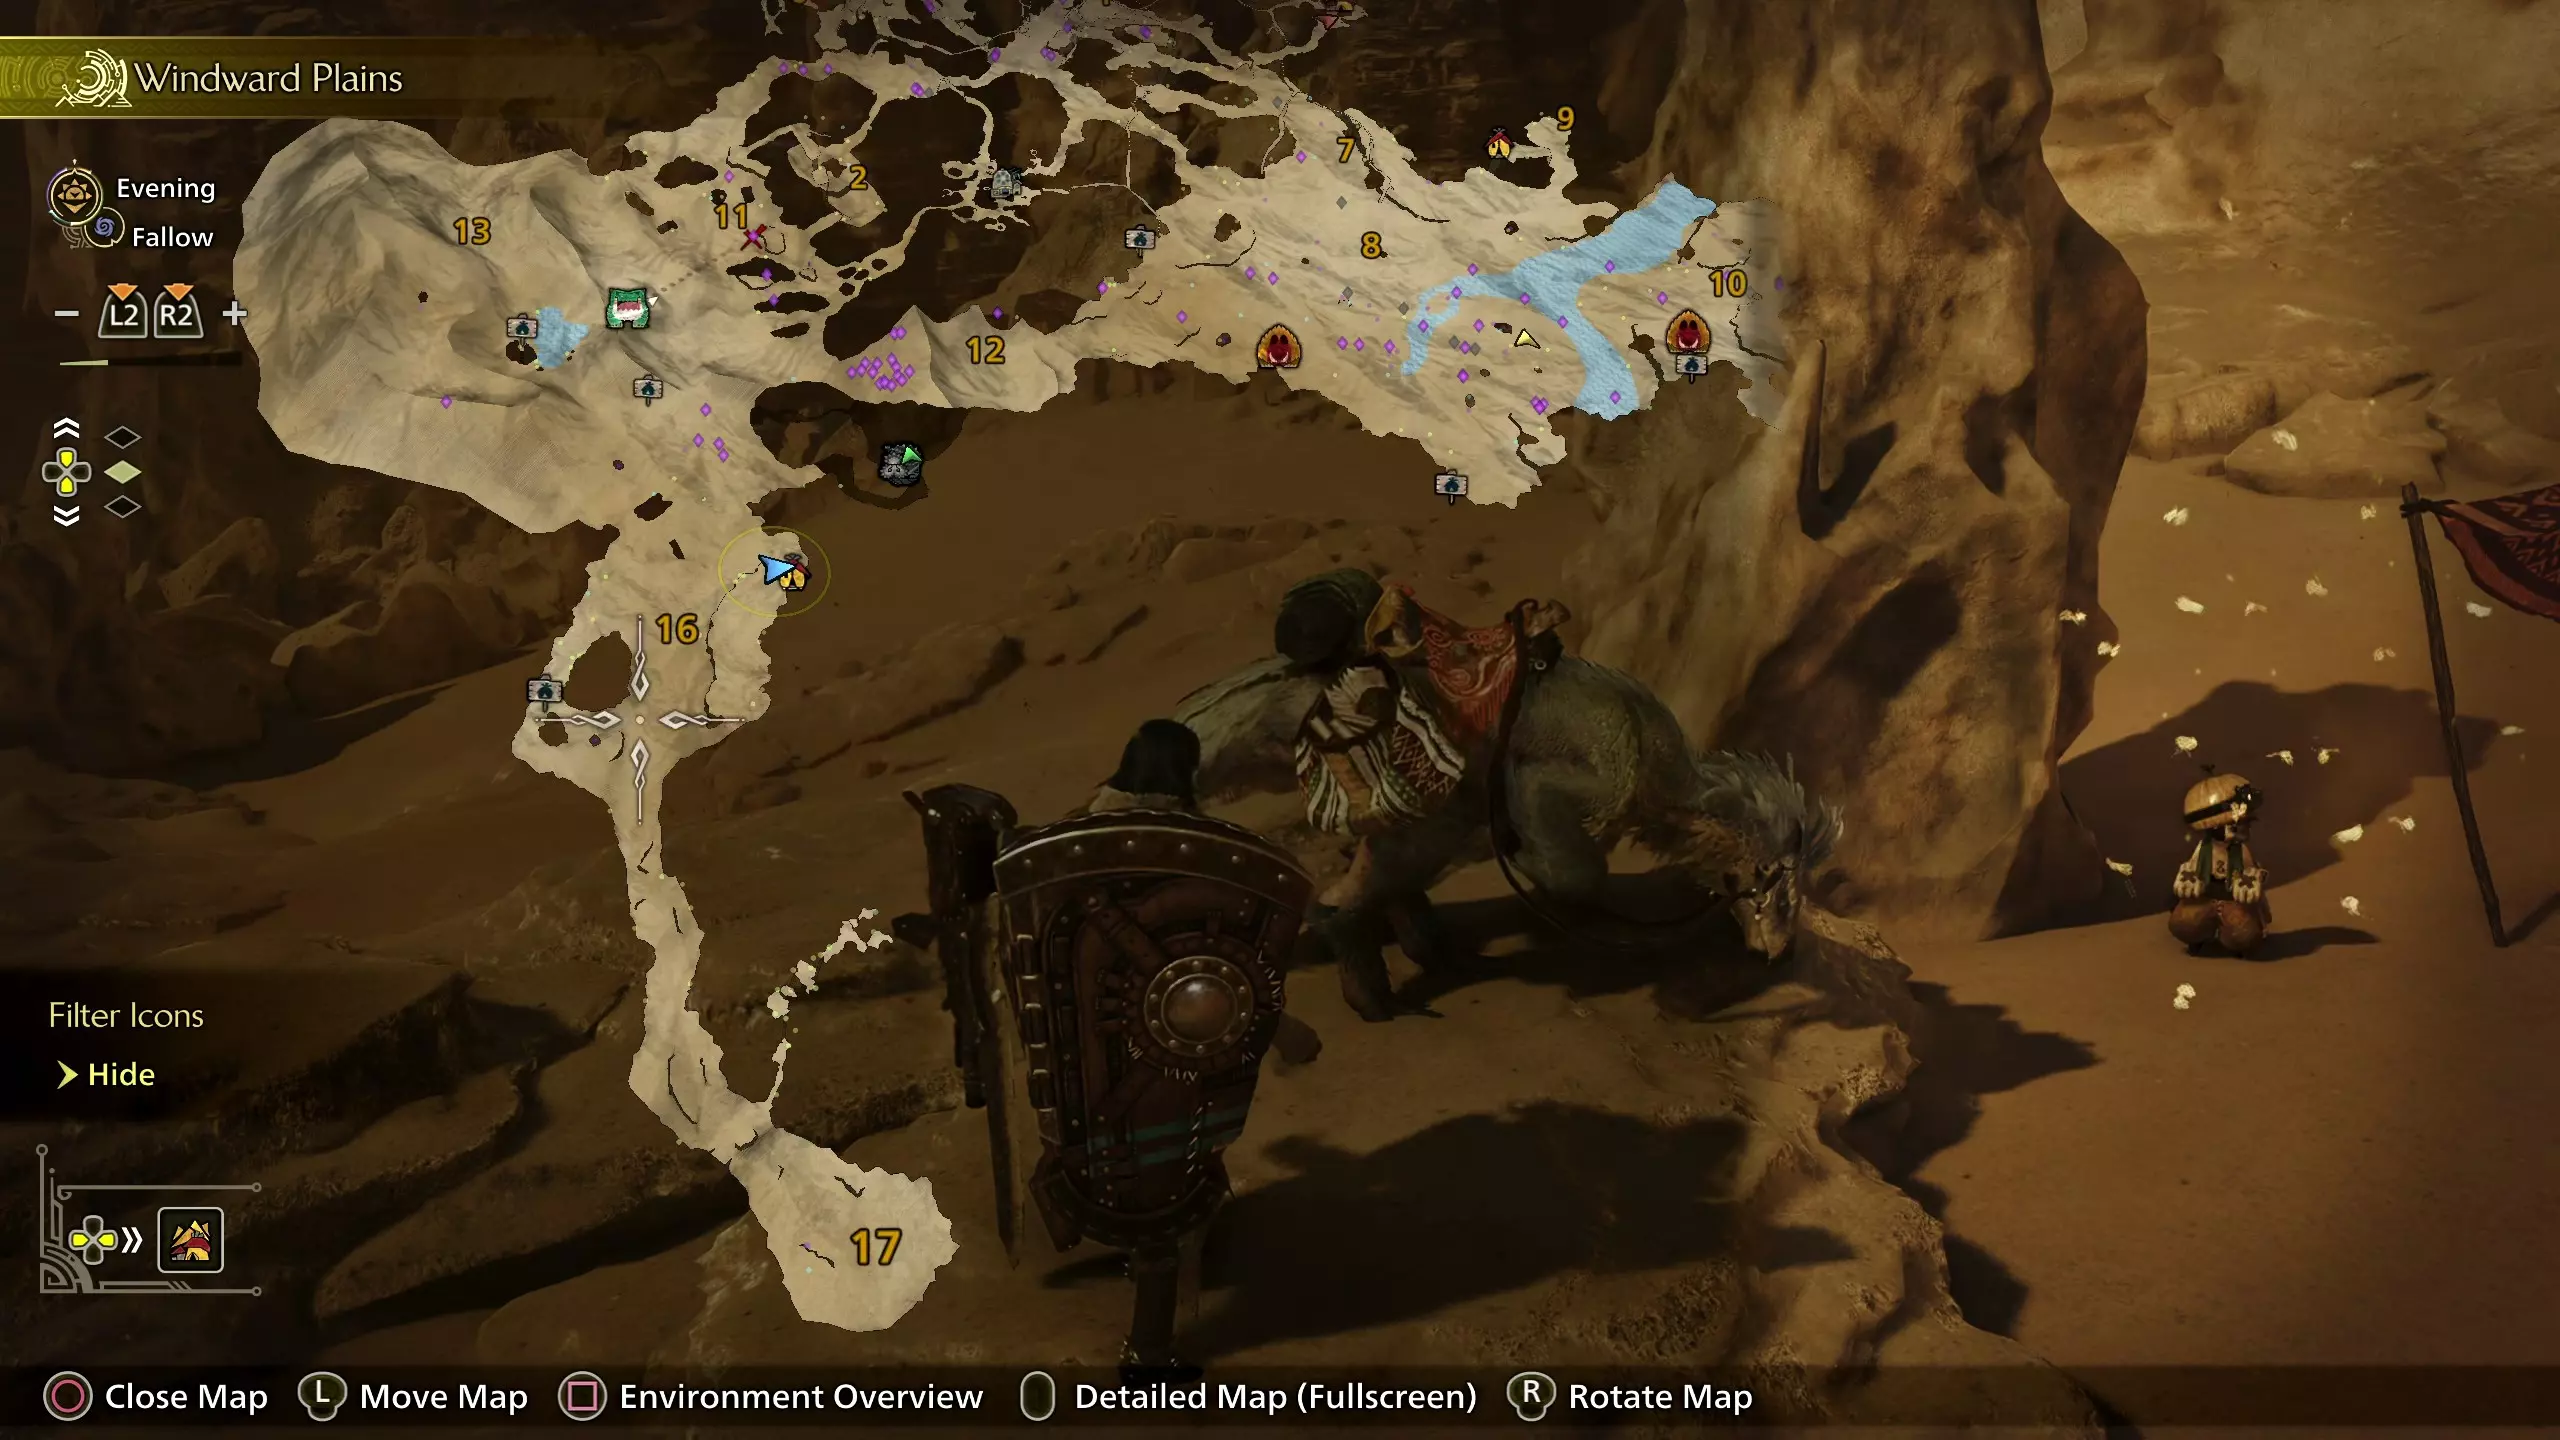
这次,我们从地图本身开始讲起。通常,地图上的黄色箭头是你的角色,指向角色面朝的方向。如果是多人游戏,其他玩家会以各自颜色的箭头显示。无论你的箭头是什么颜色,你的图标总会发出小圆圈,以突出显示你的位置。打开地图时,通常会以你的角色为中心。 在这个例子中,我正在玩多人游戏。主机(黄色箭头)在右上角的河流附近。我(蓝色箭头)在一个帐篷附近,有一个圆圈指示我的位置。绿色玩家在较低的区域,靠近Balahara。 你可以看到地图上标有13、11、2等数字。在多人游戏中与其他猎人协作时,这会很有用。例如,“我们去10区狩猎【土砂龙】吧”。 在9区和16区附近,你可以看到营地帐篷图标,这表示玩家已在那里放置了帐篷。你可以快速旅行到这些地点,补充物品、更换装备等。其他潜在的帐篷位置由小路标图标指示。通常,帐篷位置越靠近中心或越开阔,就越容易被怪物发现并摧毁。 左上角是你所在地图的名称和图标。其下方是当前时间和天气。在这个例子中,【迎风吹拂的平原】当前处于旱季的傍晚。 时间和天气下方是缩放级别。按指示的按钮可以放大或缩小。地图缩放级别下方是地图海拔高度。按指示按钮可更改当前查看的地图海拔。每次打开地图时,默认显示当前海拔高度。

在左下角,按左右键会调出地图的额外菜单。第一个选项是快速旅行,用于快速选择要飞往的地点。这通常比手动在地图上移动光标选择旅行目的地更快。 默认情况下,地图上会有许多图标,显示可收集的物品、游荡的怪物、营地位置等等。这对于收集物品或确定前往地点很有帮助。你可以在地图上选择任何地点,然后点击【设置路标】,让你的随从自动前往那里,或者让导虫在你步行时为你指引方向。
如果地图上的图标太多,你可以根据自己的喜好筛选图标。你可以选择只显示采集点、投射器弹药、陷阱/环境提示、环境生物、小型怪物,或者什么都不显示。在我的示例中,我隐藏了一些图标来简化地图。 按下环境概览按钮后,屏幕右侧会显示详细信息。这将展示该地图的整体有用信息。第一页【更新】会显示最近发生的任何新事件。
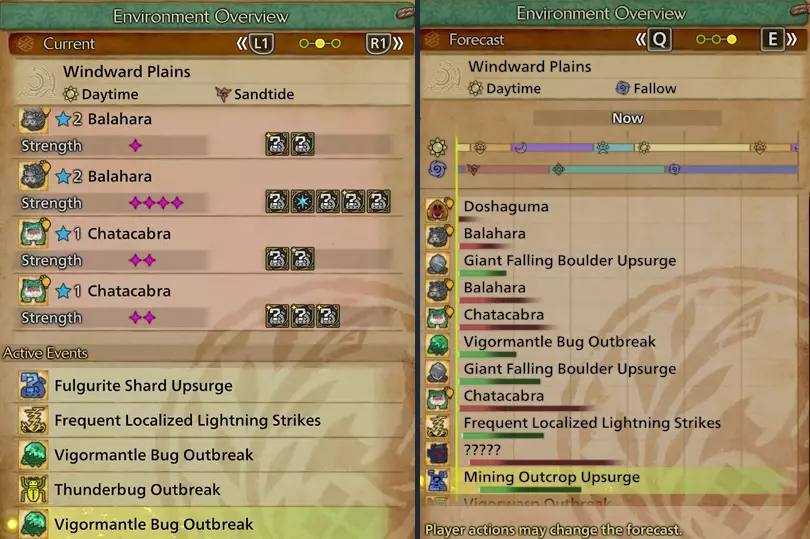
Perhaps more useful is the second page, Current (displayed on the left), which shows every large monster and event that's present on the map at this point in time. The five-pointed star indicates the level of a quest. If the five-pointed star is blue, it's a low rank quest. If it is orange, it is a high rank quest. The pink/purple four-pointed stars next to a monster show its relative strength compared to others of the same species. You'll also get a preview of some rewards if you hunt that particular monster. Keep that in mind if you're looking for something specific. The third page, Forecast (displayed on the right), shows what's coming up soon. At the top, you can see the current time and weather. The colored bars show when the ecosystem's weather will change over the next day/night cycle. The large section taking up most of the page shows what monsters (red bar) and events (green bar) will appear and how long they will stay in the area. You might notice the red monster bar fades while the green event bars end abruptly. Events have a set duration that do not change from outside interaction. Monsters, though, will leave the area at varying times due to outside stimuli. They may leave earlier if they're close to an exit, or stay longer if they're in combat. Common Recommended Options Whenever you're taking a break early on, take some time and look through the options menu and make sure everything is to your liking. There are some settings that veteran hunters recommend. Some options, mainly ones related to graphics, can only be changed from the title screen. The game plays a lot better with a high framerate. On PC, adjust your settings so you have a decently high framerate. On console, set graphics settings to prioritize framerate. Within the Options Menu: If the game looks dull or washed out, chances are your brightness is set too high. Many players found the game looks much better by going into Display ➔ Brightness and tuning Brightness Adjustment 3 (Overall Luminosity) according to the on-screen instructions. If you have framerate issues while in Base Camp, enable the option to hide other players' Seikrets. That can significantly reduce the amount of models, textures, and animations taking up resources. Turn off Seikret Auto-Explore. This option affects Manual Control mode. Most players prefer to sit still when not pressing any inputs. Auto-Explore has no effect on how your Seikret moves in Auto Mode. Set Hold Confirmation Duration to short. This shortens the time it takes to call your Seikret, as well as a few other commands. It may only save a small amount of time, but over a long play session it'll add up. It can also make the difference between carting and getting away in emergencies. Disable Auto Sheathe. This causes your character to automatically sheathe their weapon while standing still a few seconds. It's a small thing, but it is an interruption to controlling your character. This can cause you to put your weapon away when you don't want to, like locking you into the animation when a monster just spotted you and is about to attack. This option still allows you to automatically sheath when running. Aim/Focus Mode can be changed to Hold or Toggle. Try out both to see what fits your playstyle. This may depend on the weapon. Some benefit more from being in Focus Mode than others. You can also choose to have the Aim/Focus Mode Hold/Toggle set differently between melee and ranged weapons. Set Seikret Manual Controls to Type 2. While in Manual Mode, your Seikret will control more similarly to how your Hunter does. Set Camera Distance: Zoom to 10. The further away your camera is, the more you can see what's going on during a fight, especially against larger monsters. By default, the camera tries to keep large monsters in view. If you find yourself fighting this automatic adjustment, disable Focus Camera. Despite the name, this is unrelated to Focus Mode. When you first encounter a monster, the camera will forcefully zoom in on it for a few seconds. You can disable Monster Sighting Camera to stop this behavior. Here's a few more suggestions that are outside of the Options Menu: While in the in-game menu, hit the Sub Menu button to edit tabs. You can enable a Favorites Tab, which you can customize to have your most commonly used menu items for easier access. During hunts in multiplayer, you may notice that players automatically send chat messages when certain things happen, such as mounting a monster or placing a trap. You can customize these in the communication menu. Enable or disable them as you please. Most players leave them with default settings, but some change these call-outs to say something that reflects their character. While looking at stickers in the Communication menu, you can press a button to customize the text displayed within the sticker. Using customized stickers can add extra personality to your messages. Of course, these are just recommendations. Give them a try, but if you prefer the default, feel free to go back. What's most important is using what works for you! Looking for quest-specific options? You need to talk to Alma. In the Post/Join Quest menu, select Settings. You can choose the maximum number of players to hunt with. This can be useful to ensure that groups of 2 or 3 can play together without extra people joining. You can even set it to 1 to always play solo. Multiplayer Settings let you choose who joins you whenever you use an SOS Flare: only other players, only NPCs, or allow both. There's an option to automatically shoot an SOS Flare at the start of every quest, to ensure constant support without having to manually do so. You can also set a Passcode to ensure you only play with people you want to. While that covers the basics and will take you through low rank, eventually you're going to want to start customizing item sets, equipment sets, the radial menu, and maybe even the item bar. However, setting all that up at the beginning can be overwhelming at first. They can wait until you're settled in. These take some time to set up, but save you a lot more time in the long run. Saving an item set allows you to quickly retrieve or restock your preferred items while depositing everything else. Saving equipment sets allows you to change between combinations of armor, weapons, and decorations without having to swap it all out one-by-one. For example, my first equipment set would be a general-purpose loadout used for most hunts. Additional equipment sets are for more situational benefits, such as item gathering. I also build sets to counter specific monsters, such as having one with high elemental resist or poison immunity. Having these saved in advance allows me to change to what I need instantly any time I'm in a tent. Take some time to customize your Radial Menu so you have quicker access to your preferred actions. This can include crafting items, using specific items, quick chat, stickers, and emotes. It's a little unintuitive to control the setup, but you can also customize your Item Bar. This can be immensely useful for sifting through items faster, especially since you can now stack item bar entries vertically. Check your options on different methods of opening and navigating your Item Bar. Performance-Enhancing TweaksIt's no secret that Monster Hunter Wilds runs poorly on many PCs, so people have put in a lot of work in squeezing out extra performance without sacrificing visuals too much. These changes require modifying game files and/or installing software, so only look into this if you are comfortable doing so. Results may vary depending on your setup. Monster Hunter Wilds Performance Megathread DarkHero 2's Boost FPS and Increase Performance Guide Introduction to Weapons Monster Hunter Wilds has fourteen different weapon types to choose from. You are not locked in to one. Your character is free to use as many of them as they see fit, and change between them as much as they want. You start with a basic weapon of every type, so do yourself a favor. This game offers dozens to hundreds of hours of gameplay, so at least spend a few minutes on the training dummy with each weapon to familiarize yourself with each one. Then do a hunt or three with the few weapons that seemed interesting to you. It's fine to "main" a single weapon type, but versatility can be helpful if you want a change of pace. This is especially true now that we can have two weapons equipped to our loadout. At any time while riding your Seikret, swapping weapons is a button press away. This is great for adapting strategies on the fly! If you main a blunt weapon, your secondary could be a cutting weapon for severing tails. Maybe you keep a Hunting Horn on the side for buffs, or a Light Bowgun for inflicting status ailments. Perhaps you have a weapon you like while playing solo, and can switch to a weapon your prefer in multiplayer when other players join up. You can even have two of the same weapon type equipped, perhaps to take advantage of elemental weaknesses or status effects. When choosing weapons, don't compare damage values between weapon types. Only compare Lances to Lances, Bows to Bows, etc. You may notice that Greatsword has a much higher damage value than most other weapon types, but that's because it's much, much slower. So don't worry about finding the "best" weapon type and use what you find works for you. Overall DPS is comparable across the board assuming basic competence with the weapon. You can change weapon display to show "true values" by going into the Game Settings in the Options menu and setting Weapon Attack Power Display to "Display Without Coefficient". This doesn't change anything gameplay-wise; it's just an alternative way to compare weapons when looking at stats. You may sometimes see melee weapons referred as "Blademaster" weapons and ranged weapons as "Gunner" weapons; this is a distinction from older games in the series, so the terms are often used interchangeably. The official Monster Hunter channel has a good video for a quick overview and demonstration of each weapon's capabilities. https://www.youtube.com/watch?v=g7Iwrf2R5Uo When trying out weapons, it's highly recommended to open up the menu and navigate to: Info ➔ Play Guide ➔ Weapon Controls This will show additional information about each weapon, including some combos. Choose Your Weapon - Part 1 I've linked several guides for each weapon; I recommend watching more than one since no single source really covers everything a weapon is capable of. Many weapons have subtle nuances and hidden peculiarities that are easy to miss. Many of these initial videos were made during the beta tests - some weapons have had movesets adjusted or have new attacks. I'll be adding more links over time as more detailed, comprehensive guides become available.

大剑 毫无疑问是该系列中最具标志性的武器。虽然速度较慢,但却能造成极具毁灭性的伤害。大剑使用者最能从了解怪物中获益。他们通常采用游击战术:攻击怪物的弱点,然后撤离并等待下一次机会。 肩撞可以轻松在怪物咆哮时维持蓄力状态,进而使出强大的真蓄力斩。当怪物处于睡眠状态且不进行捕获时,大剑使用者就是最佳的唤醒者。但要注意不要过度蓄力而错失伤害机会。 大剑可以使用力量冲撞和偏移攻击。FightinCowboy的大剑入门指南 LightItUpDan的大剑武器大师指南 Revvy的大剑新手指南 Arrekz的 longsword教程

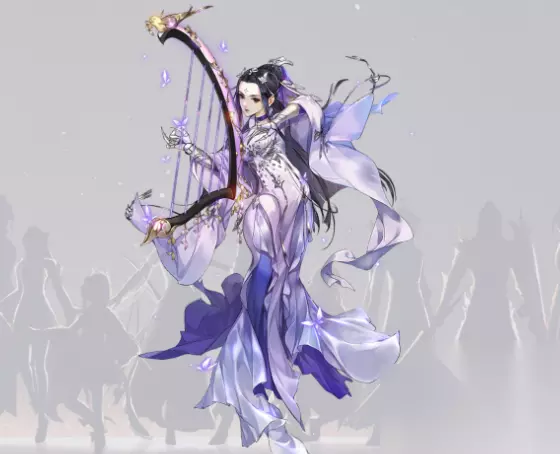
太刀 凭借长攻击距离和大范围横扫攻击,太刀广受欢迎也就不足为奇了。通过命中攻击或成功反击,太刀可以提升其气刃槽。施展气刃连击的最后一击后,太刀会变得更强。在某种程度上,它可以被视为一种 momentum 武器:只要能保持气刃等级,伤害就会持续处于高位。它可以在连击过程中使用袈裟斩进行位移,还能通过见切斩进行反击,且不会中断节奏。高角度的纵斩使其能轻松切断怪物的尾巴,而其华丽的终结技——气刃兜割,具有毁灭性的威力。FightinCowboy的太刀入门指南 Revvy的太刀新手指南 LightItUpDan的太刀武器大师指南

片手剑 常被认为是简单武器的片手剑不容小觑。它整体泛用性很强,除了攻击范围外,在任何方面都不逊色。片手剑的独特之处在于可以在武器未收鞘的情况下使用道具。最适合搭配属性武器和状态异常武器。使用盾牌的攻击会造成眩晕值伤害,能够击晕怪物。 片手剑可以进行蓄力反击。

双剑:凭借快速攻击和冲刺,双剑是元素伤害与异常状态施加的大师。进入 demon mode(恶魔模式)并消耗耐力后,它们会获得更强的招式组合,同时对小型击退效果免疫。若造成足够伤害使能量槽达到最大值,便会进入 archdemon mode(狱狼龙模式),提升攻击力并延长持续攻击。在怪物攻击前进行完美闪避,可进入进一步强化状态,能在闪避的同时发动攻击。标志性的 demon dance(恶魔之舞)攻击被拆分为三部分,允许使用者在舞蹈过程中闪避或切换至其他连招。耐力管理是其策略的关键。FightinCowboy的双剑入门指南 LightItUpDan的双剑武器大师指南 Arrekz双剑教程 选择你的武器 - 第二部分

长枪 长枪拥有最强的盾牌,但别被这一点误导:它是游戏中最具攻击性的武器之一。其他武器需要收刀奔跑来躲避危险攻击,而一名合格的枪兵会持续对怪物施加压力。他们几乎能在所有攻击之间进行防御;完美防御后可以发动反击,确保持续的攻击。当怪物逃跑时,长枪可以冲锋并追上那可怜的家伙。他们甚至可以在坐骑上进行 joust。长枪会自动造成钝击或切割伤害,具体取决于命中部位哪种伤害更有效。不过,只有盾牌攻击可以造成眩晕。 长枪可以进行力量冲突。FightinCowboy的长枪入门指南 LightItUpDan的长枪武器大师指南 AManInTheWest的荒野长枪三级进阶:从新手到精通

铳枪,常被戏称为“欢乐枪”。这是一种附有短程火炮的长枪,既能刺击,也能射击!通过各种龙杭炮攻击,它可以同时进行刺击和射击——先将龙杭钉入怪物体内,随后引爆。铳枪的爆炸无视怪物的防御力,对于难以破坏的坚硬部位非常有效。最后,龙击炮虽然需要较长的蓄力时间,但能造成巨大的爆发伤害。此外,炮弹几乎不消耗锋利度,真是太棒了! 铳枪可以使用威力格挡。

锤子 大道至简,美在纯粹。拿起这大家伙,直接朝着怪物的脑门招呼就对了。锤子堪称击晕之王,在多人狩猎中,它对怪物头部拥有优先打击权。通过蓄力,锤子能快速进入强化状态,然后全力输出。蓄力攻击适合打带跑战术,而大爆炸连招则在怪物被击晕或麻痹时效果最佳。作为钝器,锤子无法切断尾巴,但它造成的伤害能更快让怪物陷入疲劳状态。 锤子可以使用偏移攻击。

狩猎笛 每个人都喜欢狩猎笛玩家。使用该武器的每一次基础攻击都会演奏一个音符。每把狩猎笛都有其独特的乐曲集。按正确顺序演奏音符并开始演奏,即可将乐曲效果施加给自己和附近的队友。但不要只在角落里演奏……你是战斗 bard,不是啦啦队员!你的乐曲威力巨大。用音乐的力量击杀怪物吧!虽然大家都喜欢这些增益效果,但鲜为人知的是,狩猎笛是【眩晕之王】。被狩猎笛击中的怪物会比正常情况下更快疲劳,这意味着轻松的狩猎会变得更加轻松。新加入的技能是回声泡泡,它会在场上生成一个圆形区域以提供额外效果。 狩猎笛可以使用偏移攻击。FightinCowboy的狩猎笛入门指南 LightItUpDan的狩猎笛武器大师指南 Taxman HH的综合指南 - 艺术大师

Switch Axe Switch Axe是一种机动性不错的斧头,拥有较远的攻击距离和较广的攻击范围,并且带有能量槽。当能量槽积累到一定程度时,它可以变形为剑形态,此时攻击坚硬的怪物部位不会弹刀。当第二个能量槽充满后,还能获得瓶效果加成,可能是额外的物理伤害、元素伤害、状态异常效果,或是击晕/ exhaustion效果。它具备元素爆发能力,能造成持续伤害并以巨大的爆炸收尾。只要有足够的能量,你可以在连招过程中无缝切换剑形态和斧形态,实现流畅的攻击节奏。注意管理剑形态的能量槽,不要让它过低。 Switch Axe可以使用偏移攻击。FightinCowboy的操虫棍入门指南 LightItUpDan的操虫棍武器精通指南 Im a Giraffe的帅气步伐:操虫棍进阶指南 Arrekz操虫棍教程 选择你的武器 - 第三部分

充能斧可以说是最复杂的武器,但一旦掌握,也是用途最广且最有成就感的武器之一。充能斧通过剑形态的攻击积累剑能量。用这些剑能量为瓶充能,以解锁战斗中的多种选择。你可以用瓶为剑充能,使出更强的剑击;或者,更进阶的用法是将充能瓶注入盾牌,强化防御能力,并在将充能斧变形为斧形态时获得更多选择。充能状态下,斧形态的每一击都有额外效果,尤其是在强化的超解形态下。然而,没有什么能比得上其终极技能【超级强化元素释放】的华丽效果,它会引发一系列巨大的爆炸,造成同样巨大的伤害,作为长时间蓄力后的令人满意的回报。只是别打偏了! 充能斧可以进行威力格挡。

操虫棍 操虫棍实际上是由两种武器组成的:棍子本身和猎虫。猎虫是一种会听从你指令飞行的虫子。你的首要任务是指挥猎虫飞过去攻击怪物的各个身体部位,收集萃取液并带回给你,为你提供增益效果。现在有了专注模式,猎虫会配合你的攻击行动,这让收集萃取液变得容易多了。你也可以给猎虫充能,让它刺穿怪物并尽可能收集所有萃取液。当获得全部增益效果后,操虫棍会成为拥有强化攻击动作的强力武器。操虫棍可以撑杆跳至空中,用于重新调整位置、躲避攻击以及从上方攻击怪物。他们的新招式【螺旋升龙斩】会消耗所有增益效果以造成巨额伤害,但同时也会从命中的任何部位重新获得萃取物。虫棍可以使用偏移攻击。

与依赖锋利度的剑士武器不同,弓拥有无限箭矢,但需要消耗能量来施加特殊箭涂层。通过为箭矢施加涂层,可赋予其额外属性,例如增加伤害或附加状态效果。射击时,需保持适当的暴击距离,瞄准怪物时确保准星显示两个完整圆圈。距离怪物过远会导致箭矢伤害降低。按住按钮蓄力射击,或连续射击,以保持攻击节奏。龙击炮攻击在蓄力时会使你固定在原地,但穿透怪物时能造成极高伤害,对体型较长的怪物尤其有效。《荒野》新增了发射追踪箭的能力,该箭矢能让所有箭矢在短时间内追踪其位置。和双剑一样,耐力管理是成功的关键。

轻弩 轻弩作为弩炮的“小兄弟”,牺牲了部分伤害以换取更高的机动性。弩炮使用者必须购买或制作弹药,但每种弩炮都拥有无限的基础弹药供应。轻弩可以进入“能量模式”以实现更快的射击速度。轻弩的独特能力名为龙击弹,这是一种类似爆炸地雷的装置。你一次最多可以在地面上放置三个。每当对其造成伤害时,它们就会爆炸,对周围区域造成大量伤害。弩炮可以在铁匠铺进行自定义改造,能够提升攻击力、增加射程、减少后坐力等等。随着你对弩炮进行升级,你将获得更多的自定义改造槽位。和弓类似,你需要保持在合适的距离才能造成最大伤害,但这会根据你当前使用的弹药而变化。

重弩 重弩的移动速度比重弩慢,但弹夹容量更大,威力也更强。弩手必须购买或制作弹药,不过每种弩都拥有无限的基础弹药。它具备蓄力射击的能力,很像大剑。重弩有两种不同的特殊弹药,具体取决于枪械类型。第一种是龙击弹,能让武器在一段时间内变成机关枪,可以进行短点射或持续扫射。第二种是龙杭弹,能够击退怪物的攻击。重弩可以采用与轻弩相同的方式进行自定义,但重弩的专属选项之一是可以自动格挡攻击的盾牌。重弩可以进行蓄力铁壁和偏移攻击。

虽然“豪鬼”并非严格意义上的武器,但装备《街头霸王》联动任务线中的豪鬼恶魔装甲套装后,你将获得一种基于使用独特物品和表情动作进行攻击的战斗风格。你仍会装备一把标准武器,其属性将影响你的伤害输出,但你会将武器收鞘,转而使用豪鬼的拳脚与特殊招式。你将拥有一个特殊计量槽,使用“驱动冲击”招式时会消耗该计量槽,此招式兼具偏移攻击和蓄力打击的效果。计量槽未充满时无法使用驱动冲击,但每30秒会自动充能完毕。此外,如果你知道输入指令,还能使用一些秘密招式或快捷方式。即使将恶魔铠甲用作幻化套装,你仍然可以使用其招式组合,但效果会有所降低。 豪鬼可以使用偏移攻击,但仅在装备真实铠甲套装(非幻化)时才能使用。 专注模式、力量冲突与偏移攻击 《怪物猎人:荒野》拥有能扩展我们战斗能力的新功能。 专注模式:所有武器都能进入专注模式。根据你的设置,可通过按住或切换的方式进入。无论使用哪种方式,屏幕中央都会出现一个瞄准十字准星。如果你正指向怪物,准星将呈橙色;否则,将呈灰色。对于远程武器,橙色表示你处于【暴击距离】内,这是当前装备弹药的最佳射程。灰色则意味着,虽然你可能击中怪物,但任何射击都会造成【伤害降低】。

激活专注模式后,你可以在攻击时自由瞄准镜头。这对某些武器进行更精准的攻击很有用。部分武器在专注模式下会改变其招式组合。例如,操虫棍的虫技在专注状态下会配合你的部分攻击协同作战。 怪物的伤口通常是可见的,但在专注模式下,导虫会在伤口周围发出红光,使其更容易被发现。 每种武器都有一种名为【专注攻击】的特殊攻击。它们本身就是很有用的招式,但如果命中伤口,会造成严重伤害并立即破坏伤口。少数武器甚至可以在半空中进行专注攻击。部分武器的专注攻击还带有特殊效果。以操虫棍为例,其「蓄力斩」在破坏怪物的伤痕部位后,会让玩家获得所有增益萃取物。 许多怪物还有特殊的弱点部位,当被蓄力斩命中时,这些部位会被视为伤痕。这类部位通常比较直观,比如柔软的腹部、张开的嘴巴、伸出的舌头等。它们只会在短时间内出现,通常是在大型攻击前后。当你处于专注模式时,可以通过侦察flies是否在该部位周围发红光来判断这些特殊弱点是否出现,即便那里原本没有伤痕。 专注模式的一个隐藏优势是,在某些攻击动作中,它会延长你向怪物移动的距离。你可以在相关视频中找到例子,核心原理是部分武器攻击会让你移动一段固定的距离。启用专注模式能让你移动得更远,从而拉近与那些原本可能无法触及的怪物之间的距离。在考虑攻击范围和站位时,记住这一点很有帮助。 力量冲突:所有能够防御的武器都可以进行力量冲突。这包括片手剑、长枪、铳枪、大剑、盾斧和重弩。
每次成功防御怪物的近战攻击时,游戏中会有一个隐藏计量条开始累积,类似骑乘或施加异常状态时的机制。当计量条超过阈值时,就会触发力量对决。此时怪物会向你逼近,你需要在一个小型快速反应事件中奋力抵抗。 疯狂点击攻击键来坚守阵地。如果失败,怪物会将你压制;如果成功,你将对怪物造成重创并将其击退、击倒。 完美防御(在即将被击中的极短时间内格挡)积累力量对决计量条的效率与普通防御相同,因此无需刻意追求完美时机。武器类型也不影响计量条积累效率,剑盾和长枪积累力量对决计量条的速度一样快。即使你已击败足够数量的守卫,达到触发力量对决的条件,也不一定能立即开始。你必须格挡一个可触发对决的特定招式。格挡远程攻击不会积累力量对决进度,且部分怪物完全无法进行力量对决。偏移攻击
部分武器攻击会造成【偏移】伤害。能够造成偏移伤害的武器包括:大剑、锤子、狩猎笛、充能斧、操虫棍和重弩。使用偏移攻击时,若攻击与怪物对你的攻击同时命中,你可能会击退怪物,使其产生畏缩或倒地效果。这种效果的持续时间不如击倒长,但它是一种强大的半反击手段,可抵消怪物的攻击。偏移效果触发后,会有一段短暂的冷却时间,之后才能再次触发。部分武器还可以在偏移后衔接新的攻击。 大多数能够触发偏移的攻击在名称中包含【偏移】字样。同样,若武器可以在偏移后使用特殊攻击,其名称中会包含【后续】字样。武器派生攻击 大剑:派生攻击-蓄力斩派生-交叉斩 斩击斧:斧形态-派生-蓄力斩派生-重劈或派生-变形劈 锤子:上挥-蓄力派生 狩猎笛:派生旋律-无 操虫棍:下劈斩-无 重弩:龙击炮-无 豪鬼:驱动冲击-无 潜行攻击 所有武器均可进行潜行攻击。当你收起武器站在未察觉你的怪物身后时即可使用。通常在战斗开始时可以进行。无需蹲下、躲在灌木丛中或装备吉利服,但这些行为会有所帮助。 当怪物在领地争夺中停止关注你时,如果你收起武器并绕到其身后,可能会获得再次进行潜行攻击的机会。在战斗中使用烟雾弹或吉利 mantle 也能轻松发动偷袭。成功发动偷袭后,需要等待一段时间才能对同一只怪物再次发动偷袭。部分武器在发动偷袭时会获得独特增益,例如充能斧会进入强化斧状态。 额外武器信息 锋利度所有近战武器都有一条彩色的锋利度条,大致如下:
颜色总是按以下顺序排列:红、橙、黄、绿、蓝、白。当你外出狩猎并攻击怪物时,武器会逐渐变钝。该武器会从白色锋利度开始,降至蓝色锋利度,然后是绿色锋利度,依此类推。锋利度通过倍率提升伤害,但武器的物理伤害部分和元素伤害部分的提升方式有所不同。物理伤害:

元素伤害

色条的大小表示该武器在降级前能承受的攻击次数。
拥有这种锋利度条的武器,只需几次攻击,白色锋利度就会下降到蓝色。蓝色锋利度会持续一段时间后才会下降到绿色。狩猎时请记住这一点。
在狩猎过程中,锋利度条的整体颜色代表你当前的锋利度等级。刀刃上的小型彩色标记可大致显示在锋利度降至更低等级前还能攻击多少次。当你进入不同的锋利度等级时,该标记会闪烁并改变颜色。 使用磨刀石时,每次动画中的“擦拭”动作都会恢复锋利度。虽然磨刀石是无限使用的,但使用消耗品【砥石鱼鳞片】能更快地打磨武器。 部分怪物部位的硬度更高。如果你攻击怪物的某个部位时出现弹刀,说明你的武器锋利度不足。每次弹刀时,你会陷入弹刀动画,武器锋利度的损失是普通攻击的两倍。不过,你对该部位仍能造成全额伤害,所以如果你想破坏那个部位,就去攻击吧。弹刀可以通过名为心眼的技能来减轻,该技能能让你攻击时不会弹刀(但锋利度仍会双倍损失)。部分武器的攻击天生自带心眼效果。 简而言之,高锋利度好,低锋利度差。要始终让武器保持在最高的两个锋利度等级。 注意,像锤子和狩猎笛这类钝器也需要磨刀。怪物猎人系列从未解释过原因,就是这么奇妙。 会心
部分武器还拥有会心。这是《怪物猎人》系列中对暴击几率的术语。暴击会造成25%的额外伤害。负会心意味着负暴击,会造成25%的伤害减少。这相当简单明了。假设一把武器有30%的会心,那么每次攻击都有30%的几率触发暴击,造成25%的额外伤害。攻击时出现明亮的视觉效果即表示触发了暴击。 一些高基础伤害的武器可能会通过负会心来平衡。因此,一把拥有-20%会心的武器,每次攻击都有20%的几率造成25%的伤害减少。你觉得自己运气好吗? 【暴击强化】技能可以提升暴击的额外伤害加成。 状态异常和属性伤害默认无法暴击,但部分技能可以使其能够暴击。元素伤害 许多武器除了原始物理攻击力外,还会造成元素伤害。正如你所料,这些武器对弱该元素的怪物会造成额外伤害。游戏鼓励玩家提前准备并更换装备来对抗目标怪物。 如何判断怪物的弱点呢?有几种方法。如果你狩猎某种怪物足够多次,猎人笔记中的该怪物条目会显示其弱点。如果你在铁匠铺查看该怪物的 armor set,其 armor resistances 大致与怪物自身的抗性相符。如果其他方法都行不通,你也可以上网查询。 有些武器可能带有元素,但该元素呈灰色并被括号括起来。这表示该武器具有隐藏元素。如果你在狩猎时使用这把武器,其元素属性将完全无效,仿佛不存在一般。你需要名为【自由元素】的技能才能唤醒该武器的元素属性。 状态异常:与元素属性类似,部分武器可对怪物造成状态异常效果。怪物对每种状态异常的抗性各不相同,但通常情况下,每次狩猎至少能触发一到两种状态异常。 对怪物生效的状态异常:怪物的状态异常会在后台累积。触发状态异常需先达到初始阈值。一旦状态异常触发,阈值会提升,这意味着你需要施加更多效果才能再次触发。此外,如果长时间未再次施加该状态异常,已累积的状态值会缓慢衰减。你需要持续攻击以确保状态触发。即使怪物已处于某种状态,你仍可以继续为下一次异常状态积累层数,因此当怪物已中毒时,你的中毒触发不会浪费。多种不同的状态效果可以同时积累。主要状态效果:带有这些状态效果的武器仅33%的概率会积累(触发)状态。命中时若显示相关粒子特效,则表示状态已施加。这为狩猎带来了一定的随机性,但从长期来看整体仍保持一致性。
中毒 一种持续性状态,对大多数怪物都出奇地有效。触发时,会对怪物造成持续伤害,表现为怪物嘴边出现紫色泡沫。 小贴士:如果让怪物中毒,你可以用更少的攻击次数击败它,尤其是在捕获怪物时。不过如果你的目标是破坏怪物部位,就要注意控制中毒伤害了。
麻痹 终极的团队协作状态。当麻痹触发时,怪物会原地僵直,数秒内无法行动。这在多人游戏中效果最佳,此时所有人应全力攻击怪物,造成尽可能多的伤害。虽然麻痹和陷阱看起来相似,但它们被视为独立效果,互不干扰。
睡眠 这是所有状态异常中技术性最强的一种。触发后,怪物会陷入睡眠状态,表现为战斗音乐停止,怪物头上冒出睡眠泡泡。玩家在动画期间有几秒钟时间停下动作,以免意外惊醒怪物。首次攻击将怪物唤醒时会造成双倍伤害,因此像大剑的真蓄力斩这类高单次伤害的攻击在这里非常实用。此加成同样适用于放置的桶爆弹。因此,睡眠是【睡眠爆弹】战斗策略中不可或缺的一环。当怪物重伤回到巢穴时会自然入睡。在巢穴中入睡的怪物会缓慢恢复生命值。玩家诱导的睡眠不会使怪物恢复生命值。小贴士:部分怪物被击倒或从睡眠状态起身的动画时间比其他怪物更长。因此,当怪物进入睡眠状态时,持续猛攻是一种不同的战术,这本质上可以作为麻痹的替代方案,尤其适用于对麻痹抗性较高和/或对睡眠弱点明显的怪物。由于这是一种不太常见的策略,大多数随机加入的玩家(例如通过求救信号加入的玩家)会认为不应该攻击,从而错失机会。请多体谅。在多人游戏中,除非队伍另有说明,否则应默认采用睡眠爆弹战术。
爆破 谁不喜欢爆炸呢?当爆破状态积累到一定程度时,会在怪物最后被击中的部位发生爆炸,造成固定伤害,无视怪物防御力。爆破非常适合破坏怪物部位。 次要状态异常
KO,也称为眩晕,每当对怪物头部造成钝器伤害时就会累积。当KO值累积到一定程度,怪物会头上出现黄色星星并倒下,陷入无助状态。虽然锤子和狩猎笛的大部分攻击都能造成钝器伤害,但其他武器也能在一定程度上造成钝器伤害,通常以盾击或特定瓶型、弹药的形式实现。
疲劳状态 所有怪物都拥有耐力。每次攻击都会消耗一定耐力。当耐力耗尽时,怪物会变得行动迟缓、步履蹒跚,其攻击也会变弱或无法使用。对怪物造成钝器伤害会消耗其耐力,使其更快进入疲劳状态。怪物可以通过成功进食或完成一次睡眠来恢复耐力。 狂暴状态 当受到足够伤害后,怪物可能会进入狂暴状态。这会使其变得更加具有攻击性,提升速度、攻击力,有时还会提升防御力。狂暴状态可能会改变怪物的行为,例如偏好使用特定攻击、对道具产生免疫或变得脆弱等。狂怒状态会完全覆盖疲惫状态,但狂怒结束后会恢复疲惫状态。
镇静值 虽然未被广泛认知,但镇静值是一种状态效果。当怪物被镇静炸弹、镇静飞刀或镇静弹药击中时,镇静值会累积;若施加过早,镇静值可能会消退。 伪状态效果 尽管不完全被视为状态,但这些效果会以类似的方式在怪物身上累积。 骑乘 空中对怪物造成的伤害被视为骑乘伤害。当骑乘伤害累积到足够程度时,骑乘状态会触发,猎人即可骑乘怪物。 力量碰撞 格挡近战攻击会累积力量碰撞的潜能。当潜能足够高时,格挡特定的怪物攻击即可触发力量碰撞。 影响猎人的状态效果 - 第一部分 主要影响怪物的那些状态效果同样也会影响猎人。你也可能会陷入麻痹或中毒状态,但与怪物不同的是,多次受到这些状态影响后,你不会产生抗性。
中毒 受到中毒攻击时,你的生命值条会变为紫色,并留下红色的生命值。虽然中毒状态会自行消退,但根据中毒来源的不同,可能需要一段时间。你可以通过服用解毒剂或草药、让你的艾露猫使用【纯黄蜂投掷】技能治疗,或者返回营地的帐篷来立即解除中毒状态。你可以通过【毒耐性】技能来减少中毒效果或获得中毒免疫。
剧毒 剧毒是毒性更强的版本。你的生命值条会闪紫并快速流失。强烈建议立即治愈,因为生命值损失是致命的。幸运的是,任何能治愈中毒的物品都可以治愈剧毒。
麻痹状态 处于麻痹状态时,你会立即倒地并失去行动能力。如果你的艾露猫在身边,它会尽力帮你解除麻痹。其他玩家若足够留意,也可以这样做。否则,你只能等待麻痹效果自行消退。你可以通过麻痹抗性技能来减少麻痹效果或获得麻痹免疫。
睡眠 与麻痹不同,陷入睡眠状态时,你有几秒钟时间在倒地前调整自己的位置。试着在倒下前远离怪物或靠近队友。如果你携带能量饮料,可以在倒下前将自己唤醒。你的艾露猫可能会尝试叫醒你,或者寄希望于其他猎人愿意提供帮助。你可以通过睡眠抗性技能来减少睡眠效果或获得睡眠免疫。不过,睡眠很少构成威胁。
爆破异常状态 当受到爆破攻击命中时,你可能会陷入爆破异常状态。此时你会被爆炸性粉末覆盖。当猎人再次受到攻击时,你会发生爆炸。此外,若经过足够长的时间,你也会自行爆炸。通过多次翻滚、食用打消果实或返回营地帐篷可以解除该状态。你可以通过【爆破抗性】技能来减少或免疫爆破异常状态。
火属性异常状态 当受到火焰攻击时,你可能会陷入火属性异常状态,通俗来说就是角色身上着火了。你的生命值会缓慢减少,同时留下红色的生命值(即无法恢复的部分)。应对方法很简单:停下、倒地并翻滚几次来灭火。在水中翻滚可以立即灭火。食用打消果实或返回营地的帐篷也能解除该状态。你可以通过异常状态抗性技能来减少或免疫元素异常状态。当你的火属性抗性达到20点时,也会对火属性异常状态免疫。
水异常状态 受到水属性攻击时,你可能会陷入水异常状态。耐力条会变为蓝色,且消耗后恢复速度大幅降低。这对双剑和弓使用者的影响尤其严重。可以等待状态自然结束、食用打消果实或进入营地的帐篷来解除。通过异常状态抗性技能可以减少或免疫元素异常状态。当水抗性达到20时,你也会对水异常状态免疫。
雷异常状态 受到雷属性攻击时,你可能会陷入雷异常状态。这会增加你被眩晕的几率。你可以等待异常状态自然结束、食用打消果实或进入营地的帐篷来解除该状态。通过装备技能获得眩晕抗性也可以减轻这种效果。你可以通过异常状态抗性技能来减少或免疫元素异常状态。当你拥有20点雷抗性时,也会对雷异常状态免疫。
冰异常状态 受到冰属性攻击时,你可能会陷入冰异常状态。这会大幅增加耐力消耗,和水异常状态一样,对双剑和弓使用者的影响相当大。可以等待效果自然结束、食用打消果实或进入营地的帐篷来解除。通过异常状态抗性技能可以减少或免疫元素异常状态。当你拥有20点冰抗性时,也会对冰异常状态免疫。
龙属性异常状态 受到龙属性攻击时,你可能会陷入龙属性异常状态。这会使你造成的所有元素/状态伤害无效化,包括投射器发射的弹药。等待状态自然结束、食用打消果实或进入营地的帐篷即可解除。你可以通过异常状态抗性技能减少或免疫元素异常状态。拥有20点龙属性抗性也能免疫该异常。 状态效果(影响自身)- 第二部分
眩晕 当被怪物的攻击命中时,你有几率进入眩晕状态。此时你会原地站立,头上出现星星,无法行动。其他猎人或你的艾露猫如果运气好的话,可以通过攻击将你打醒。你可以通过眩晕耐性技能来减少眩晕几率或获得眩晕免疫。
流血 当受到流血攻击时,你移动时会持续损失生命值。你可以通过食用任何肉类物品来恢复,例如口粮或全熟牛排。如果没有肉类,你也可以通过原地蹲下几秒钟来恢复。从流血状态恢复后,你的红色生命值在短时间内会比正常情况下恢复得更快。
蛛网缠身:被蛛网命中后,你将陷入束缚状态,无法攻击或回避。可使用【清洁药】立即解除,或通过快速摇动摇杆、反复按动键盘移动键挣脱。其他猎人或你的艾露猫也可能将你从蛛网中打出来。 冰冻异常:受到特别冰冷的攻击时,你可能会暂时被困在冰牢中。使用【清洁药】可立即脱困,或通过快速摇动摇杆、反复按动键盘移动键加速挣脱。
恶臭 你被某种极其难闻的东西覆盖,周围环绕着一股散发恶臭的棕色气体。处于污染状态时,你无法食用任何消耗品,例如药水、口粮或牛排。等待效果自然结束,使用除臭物品,或进入营地的帐篷即可解除。
防御降低 受到防御降低效果影响时,你的防御力会下降,从而承受更多物理伤害。可通过等待效果自然结束、使用坚硬化石或硬化皮肤,或进入营地帐篷来解除该效果。
抗性降低 正如其名,当陷入抗性降低状态时,你的抗性会下降,受到的元素伤害会增加。可以通过等待状态自然结束、使用坚硬化种子或硬化皮肤,或进入营地的帐篷来解除该状态。
狂气病毒 首次感染时,病毒处于潜伏期。它会迫使你变得富有攻击性:你需要在有限时间内对怪物造成足够伤害。你可以食用【苦虫】来延长潜伏期。
如果你失败,病毒会使你虚弱,【抵消所有自然生命值恢复】。此外,你还会受到怪物所有狂怒强化攻击造成的额外伤害。
如果你成功战胜病毒,它会转化为嗜血状态。你将获得亲和力加成,并在一段时间内对进一步感染免疫。
泡泡疫病 若受到泡泡攻击,你可能会被泡泡包裹。这将使你获得【闪避+1】和【体质+1】。
这相当有用,但如果你获得更多气泡并进入【大型气泡异常】状态,你会四处滑动,导致难以进行精确移动。可以通过等待效果消失或被攻击命中来解除该状态。 锻造武器 既然你已经了解了武器、元素和状态,接下来我们来介绍武器的打造和升级方法。 前往铁匠铺,与铁匠杰玛交谈即可开始。选择【锻造/升级武器】选项,然后选择你想要的武器。
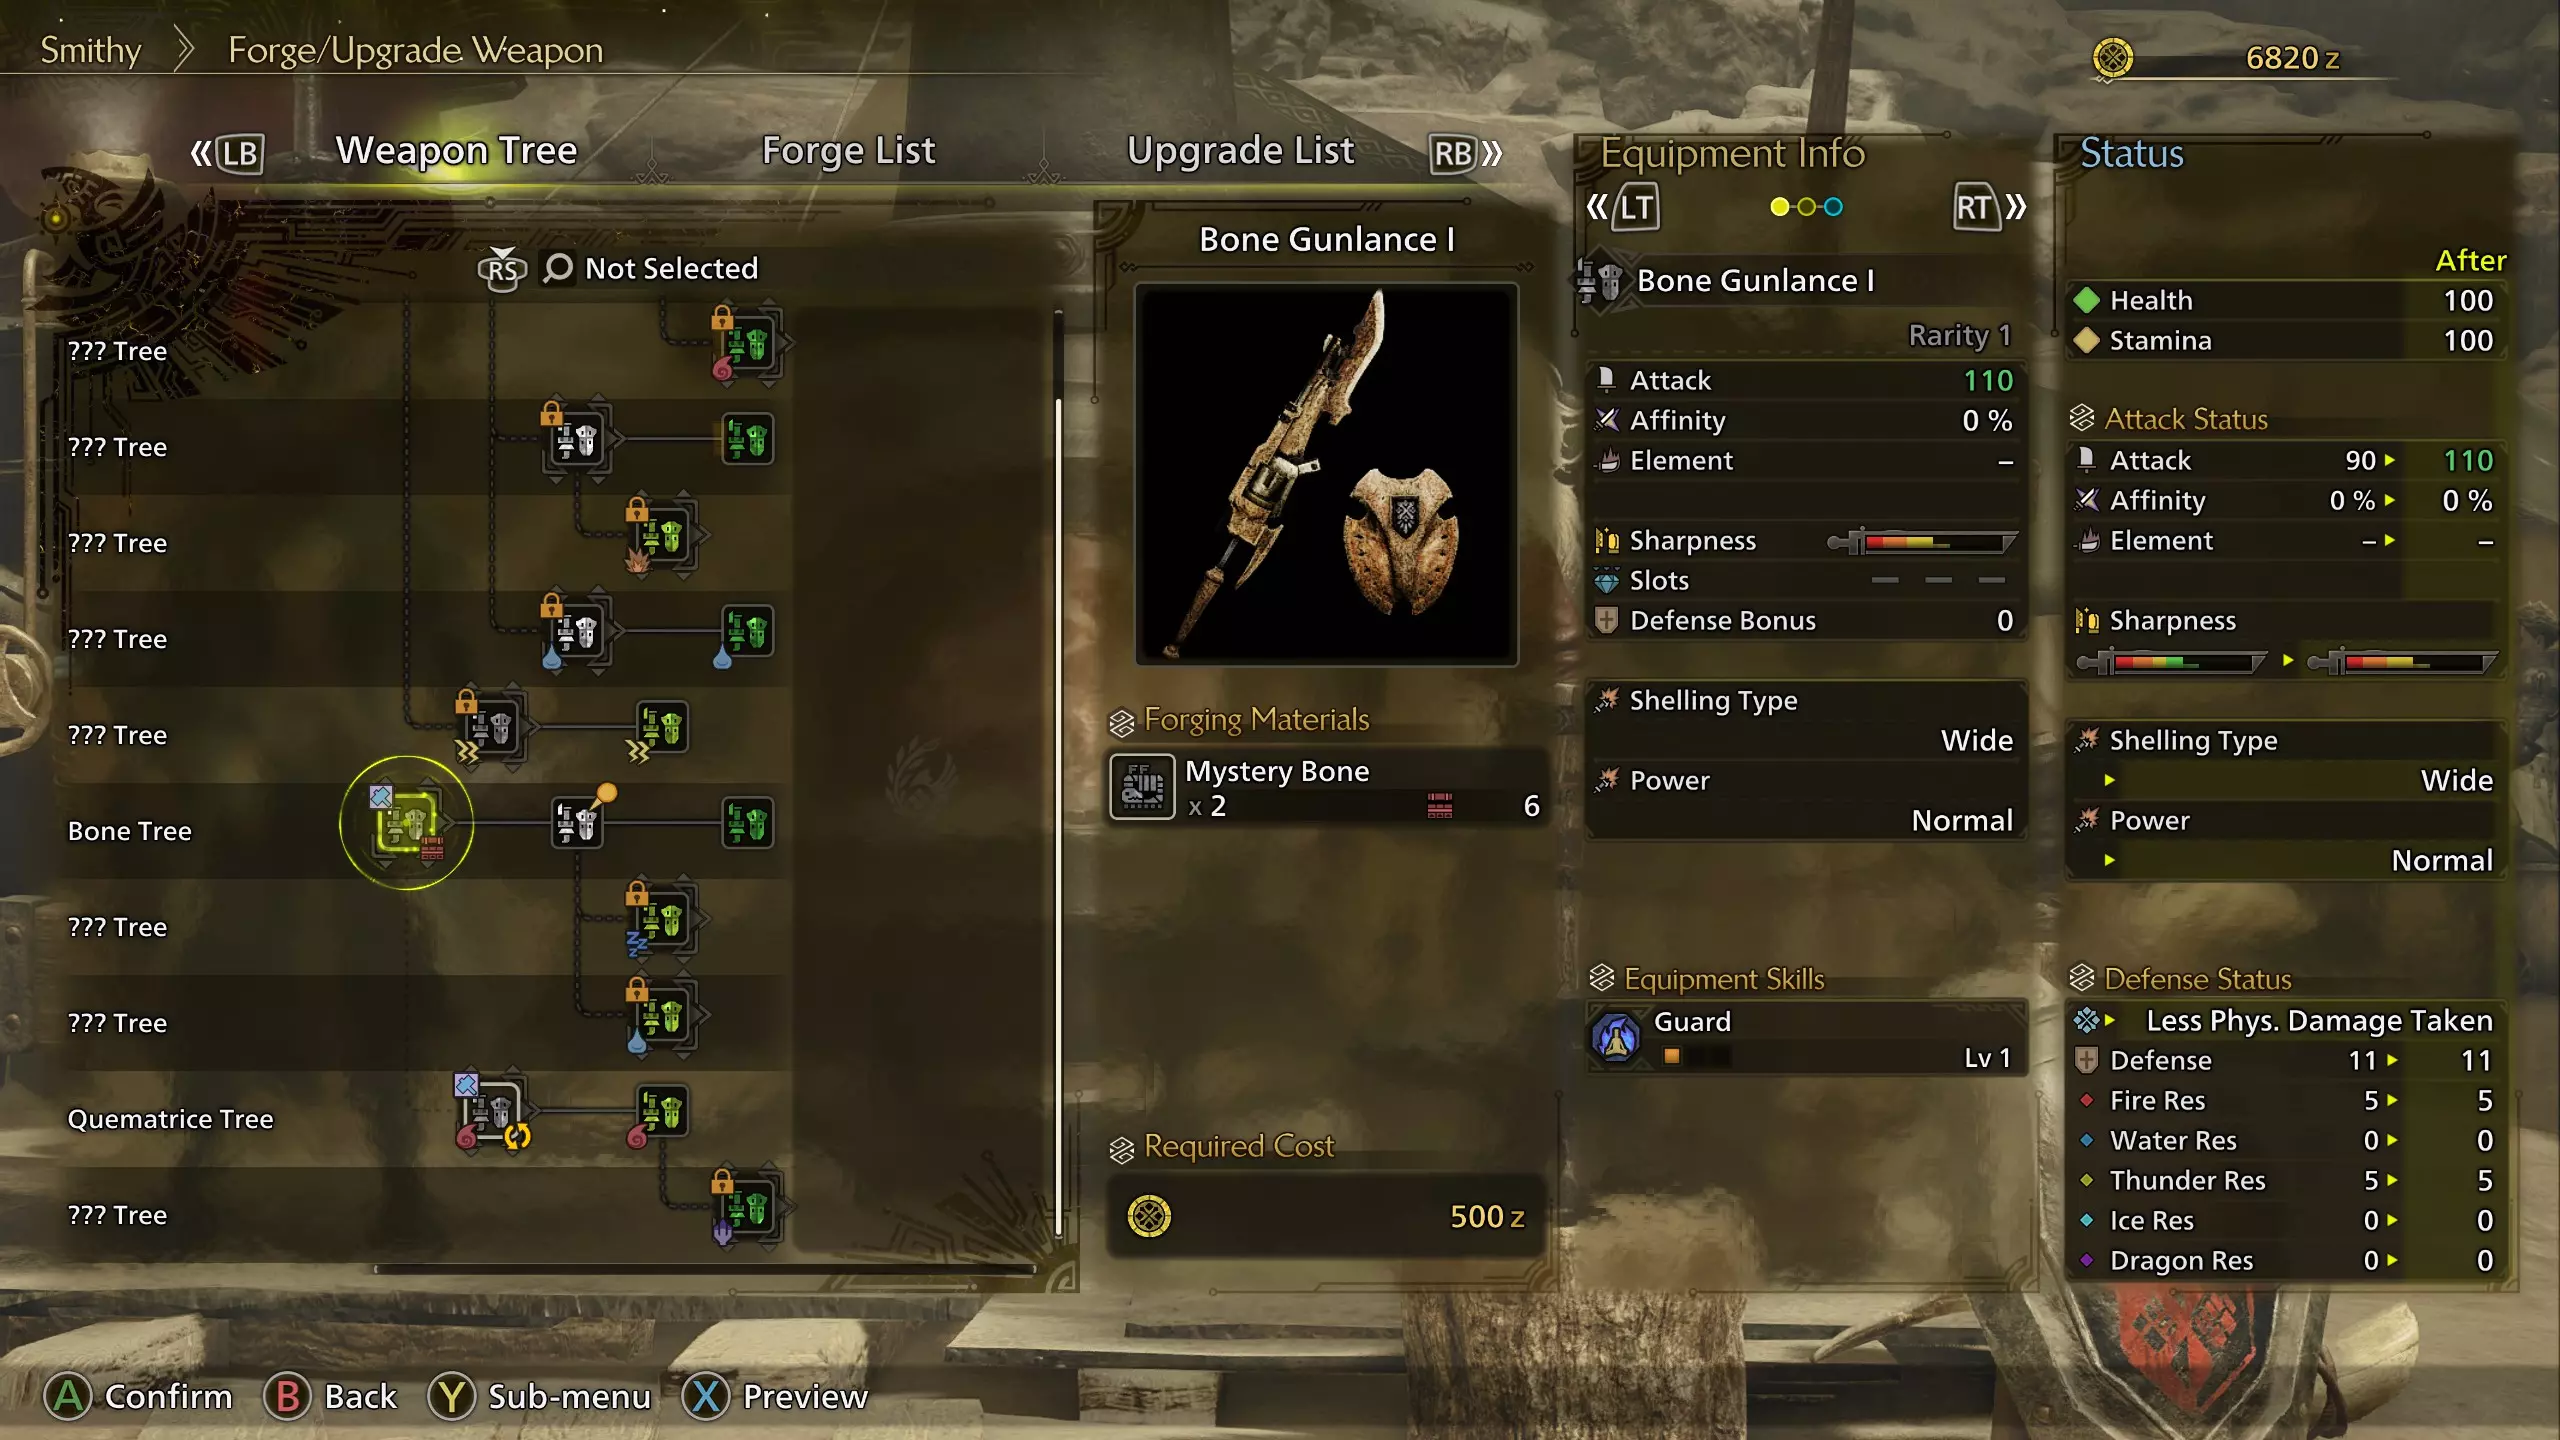
在左侧,你会看到武器树。每一行代表其所属的武器“系列”。例如,麻痹系列的武器会带有麻痹效果,而奎玛特里斯系列则由奎玛特里斯素材制成,并展现出奎玛特里斯的特性(如火焰属性)。 有些武器系列是独立的,不会与其他系列交互,而有些系列则会分支并可能成为不同类型的一部分。例如,希望/探险系列是初始武器套装。它们可以沿着希望/探险路线升级,也可以分支到矿石系列,使用在野外收集的金属作为材料,并拥有不同的外观和属性。 武器树的大部分内容最初是隐藏的,以避免剧透。随着你在游戏中的进度推进,遇到更多怪物和素材后,技能树会解锁更多内容。 通过按下左上角指示的按钮,你可以切换到锻造列表或升级列表视图,以不同角度查看同一菜单。 你可能会注意到锻造菜单中的武器锋利度条末尾有一小段额外的锋利度。
This indicates how much extra sharpness the weapon will have if you equip the Handicraft skill. This allows weapons to stay at their highest sharpness level for longer. Some weapons can even upgrade to a higher sharpness level with Handicraft. This is quite desirable, since a higher sharpness tier has a higher damage multiplier and is less likely to bounce off tough monster parts. Weapon Tree IconsAround each weapon can be several icons. A blue hammer in the top left indicates a base-level weapon you can craft to start with. An orange padlock cannot be crafted at this point in time, usually because you haven't discovered the relevant monster or gathered the right material. Two green arrows at the top indicates a direct weapon upgrade from the previous tier. A red box on the bottom right indicates that you currently own that particular weapon at that upgrade tier. A yellow checkmark means you have it currently equipped. A yellow circle of arrows means that weapon is equipped as your secondary. An element or status icon on the bottom left indicates that the weapon has that specific element. A weapon with no element icon is elementless, commonly referred to as "raw". They typically have higher attack values to make up for it. By selecting a weapon and using the submenu, you can add it to your wishlist. This puts a pin icon on that entry, and the game will have the same icon on anything that can provide the required materials, be it monsters, quests, or gathering spots. You'll get a notification as you obtain each materials, and then another notification if you have everything required to make a wishlisted item. Weapon SkillsYou might notice that weapons come with skills equipped on them. This was something of a design necessity because we can bring two weapons per loadout. Players equip skills that bring the most out of their weapon. With two weapons, we could have a conflict - some skills don't work with certain types of weapons, or are far less effective. Speed sharpening is nice if you have a melee weapon, but worthless on a ranged weapon. Offensive Guard is a great skill for Lance, but it does little good for a Hammer. By having specialized skills directly on weapons instead, it opens up more freedom to use whichever pair of weapon types you like without feeling like one of them is "missing out" because it's not using your full skill potential. As you further enhance a weapon, more skills could be added, the skills could improve, or you could even get decoration slots for further customization. Decorations are explained later in the guide. This Armor Isn't Just for Protection The central form of character progression is your armor. It's not just about protecting you, however. There are four major things to consider when forging armor: 1. Can I make it? Armor pieces require materials to make. Take a look at the required materials to see what you need. You might have to hunt a monster several times before you get the material. Some pieces require parts of a different monster, too. Some armor don't require monster parts at all. 2. Does it have a skill I want? Armor pieces grant skills, which grant you various bonuses. It might make you resistant to status effects, let you gather more materials, it might boost attack, or mount monsters easier. Similar skills can stack, up to a point. You can specialize or generalize as you please. Some armor pieces have decoration slots, which allow you to slot in a skill of your choice for extra customization. 3. Does it have defenses and elemental resistances I want? This is a lesser consideration compared to skills. Defense can always be upgraded, and elemental weaknesses can be mitigated somewhat with meals. However, it is something to be mindful of. If your armor set is very weak to fire, you should be cautious around fire-breathing monsters. 4. Do I like the way it looks? While some players don't care and are fine hunting in a clown suit, you have to admit you'll hunt a bit better if you look cool doing it. Embrace the fashion hunter. As you progress through the game, you'll unlock armor dye options for further customization and "Layered Armor" to completely cover up armor pieces with a different appearance. Just like when making weapons, you can mark an armor piece in the Forge/Upgrade Armor page to add it to your wishlist. The game will notify you when you're able to craft it. You can also hit the Submenu Button and select "Toggle Comparison" to open up a window that compares your currently-equipped armor piece to the one you have selected in the menu. Upgrading ArmorNow, let's say you've made your armor and you like it. Great! However, it can only last you so long before you're getting crushed by monster attacks again. You need to upgrade that armor so the defense is up to par. In the Smithy menu, select Forge/Upgrade Armor. Find the armor piece you'd like to upgrade.
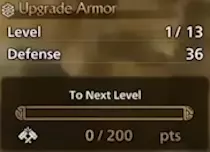
在屏幕底部中央附近,你会看到该 armor piece 的等级、防御力,以及一个显示升级到下一级所需点数的进度条。在游戏过程中,你通过任务奖励和采矿获得了 Armor Spheres,这些可以为进度条增加点数。请记住,你可能无法立即将任意 armor piece 完全升级。这不仅需要消耗大量资源(包括 armor sphere 点数和 zenny),而且在故事进一步推进前,你可能会被限制在特定的升级等级。 最终,你将能够与 Smelting Foundry 的 Roqul 对话。你可以给他怪物素材,将其熔炼成 Armor Spheres。 套装奖励:装备同一套装的多件 armor 可能会为你提供套装奖励技能。例如,装备足够的土砂龙 armor 会激活【土砂龙之力】,赋予你【强打者】技能。 部分 armor 属于同一【套装】。装备足够数量的同套装 armor 可启用套装技能。例如,装备足够的 Leviathan 类型怪物 armor 部件,会激活【鳞之强韧】,赋予你【达人艺】技能。 α 和 β 装备套装 当你达到高等级后,会发现装备套装变得更为复杂。每种怪物不再只有一套装备,而是有两套:α 套装和 β 套装。这些套装外观略有不同,但主要区别在于 armor 技能的配置方式。 α 套装被认为是更“完整”的套装,内置完整的 armor 技能。在高等级初期,当你还没有收集到大量装饰品时,这会更加方便。你可能会问,什么是装饰品?我们将在下一部分详细介绍。 β套装被视为“未完成”的套装,它拥有装饰品插槽,供你根据自己的喜好进行自定义。大多数游戏后期玩家会制作β装备套装,这样他们就不会局限于α装备的预设技能。 装饰品和护符 最终,你会获得装饰品,它们是可以镶嵌在武器和 armor 插槽中的宝石。每个装饰品都能像武器和 armor 一样为你提供技能点。通过收集装饰品,你可以根据自己的喜好调整和改进技能组合。 不过,装饰品需要匹配插槽尺寸。根据技能的不同,每个装饰品都有不同的尺寸。技能的价值越高,其规模就越大。
1级装饰
2级装饰
Level 3 Decoration Decorations can only fit in a slot that's big enough. You can't use a level 3 decoration if your equipment has no level 3 slots. However, smaller decorations can fit into larger slots. Level 1 decorations can fit into anything. Keep slot size in mind when crafting weapons and armor. A weapon might look more powerful than another, but if you're hurting for level 3 decoration slots it might be handy to take the weaker weapon that offers two of them. Monster Hunter Wilds split decorations into two categories: armor decorations and weapon decorations. Decoration skills do not share between categories - for example, Attack Boost decorations always go in weapon slots, never armor slots. Weapon DecorationsWeapon decorations can only be slotted into Weapon decoration slots. These are usually offensive skills such as: Raw (Attack Boost) Affinity (Critical Boost, Critical Eye, Critical Draw) KO (Slugger, Punishing Draw) Elemental (Element Attack, Critical Element) Status (Status Attack, Critical Status, Poison Duration Up) Ranged (Piercing Up, Special Ammo Boost, Rapid Fire Up) Sharpness (Handicraft, Speed Sharpening) Weapon-Specific (Focus, Guard Up, Power Prolonger, Rapid Morph, Horn Maestro, Load Shells)These examples are not an exhaustive list - it's just to give an idea of what you can expect to find. Armor DecorationsArmor decorations can only be slotted into Armor decoration slots. These are usually defensive or miscellaneous skills such as: Defensive (Defense Boost, Divine Blessing) Utility (Earplugs, Quick Sheath, Evade Window) Quality of Life & Support (Speed Eating, Wide Range) Gathering and Items (Botanist, Free Meal) Stamina (Constitution, Stamina Surge) Conditional Attack bonuses (Weakness Exploit, Agitator, Peak Performance) As with weapon skill list above, this is not a comprehensive list of armor decoration skills. These are just examples. Mixed DecorationsIn previous games, you might not receive a decoration that's critical to your build thanks to poor luck. To mitigate this in Wilds, you will be able to craft decorations with a single skill on it if you really need it to fit your build. That said, it's the randomly-obtained decorations that can have multiple skills or higher levels for more versatility or power. Mixed decorations are typically Level 3 decorations that have 4 points worth of skills, making them quite valuable if you get one with a combination of skills you need. You can obtain mixed decorations as rewards for hunting end-game monsters. CharmsIn addition to skills on Weapons, Armor, and Decorations, you'll have one more piece of equipment to supply your skills: Charms. These function similarly to Monster Hunter World, where you use specific materials to create a charm. Level 1 charms give 1 point in a particular skill. Eventually, you'll be able to upgrade them, giving more points in that skill. Like in World, there may be a few charms that give multiple different skills, but they're typically reserved for less impactful, quality-of-life skills. Food to Fortify; Meals for Might In previous Monster Hunter games, meals were made with ingredients you unlock, but then have infinite supply of. In Monster Hunter Wilds, each meal will require items from your item box. They will deplete over time as you use them, so you must pay attention to keep your preferred ingredients stocked. You can cook meals in a tent with the "Grill a Meal" option, or anywhere else by using your Portable BBQ Grill item. You do not need to keep ingredients on hand; cooking always takes directly from your storage, no matter where you are. If you select Recommended Meal, the game will pick the ingredients for you. It's good for standard, low-effort meal-making. Choosing to Cook Only with Rations uses only the bare minimum to give you max health and stamina. You won't receive much extra in the way of buffs, but it can conserve ingredients if you find yourself critically low. Making Custom Meals is the best way to maximize the benefits. Choose each ingredient for the buffs that best suit your needs for your current situation. You can save your favorite combinations for quick selection in the future. Meals consist of three parts: Ration, Additional Ingredient, and Finishing Touch. All meals must have a Ration, as that forms the basis for your food. Your choice in ration offers different bonuses: Meat increases attack. Fish increase defense. Veggies increase elemental resistance, as well as a smaller defense bonus. By default, a meal lasts for 30 minutes. Adding an Additional Ingredient increases the duration to 50 minutes in addition to its own bonus. Adding a Finishing Touch increases elemental defense in addition to its own bonus. Meal effects do not wear off until the duration ends or you eat a new meal to replace it.As a fun detail, the cooking animation will feature the exact ingredients you picked. Keep in mind that the Ration item that you can eat to restore max stamina is the same thing as the Ration used as the basis for meals. Always keep a healthy supply! Speak to the felyne Tom at the Ingredient Center in Base Camp to regularly receive Rations. You can get various ingredients as quest rewards or find them out in the field. Others, you will have to trade for with NPCs among the various people out in the world. Trades are somewhat randomized; the items they give and the items they ask for can differ from day to day, and they only trade so much at a time. Advance time to the next day to refresh their offers. When you progress far enough in the story, you'll unlock the Village Intermediary in the Base Camp, who will handle item trades for you so you don't have to travel to each individual for trades. The meal buff pauses while you're in camp, so there's no need to rush while you're buying supplies or crafting weapons and armor. Additional Ingredients Ingredient EffectHow to ObtainKunafa CheeseSometimes decreases damage takenQuests related to/Trading with Kunafa residentsSharp Kunafa CheeseOften decreases damage takenTrade rare items with Kunafa residentsDroolshroomReduce stamina depletion when performing stamina-draining moves such as evadingQuests related to/Trading with Wudwuds in ForestDelishroomGreatly reduces stamina depletion when performing stamina-draining moves such as evadingTrade rare items with Wudwuds in ForestMud ShrimpSlightly increases invincibility frames while evadingQuests related to/Trading with craftsmen in AzuzTurbid ShrimpIncreases invincibility frames while evadingTrade rare items with craftsmen in AzuzFluffy EggActivates temporary attack boosts at random intervalsQuests related to/Trading with Suja residentsAiry EggActivates large temporary attack boost at random intervalsTrade rare items with Suja residentsSild GarlicPrevents fainting one timeQuests related to/Trading with Sild residentsSpecialty Sild GarlicHeals you after preventing fainting one timeTrade rare items with Sild residents Finishing Touches Ingredient EffectHow to ObtainWild HerbLessens effects of status ailmentsTrade with Musharpeye/Gawdygog, gather from rare herb nodesEastern HoneyIncreases health recovered when healingTrade with Gawdygog, rare loot from catching vigorwasps and gathering honeyJeweled Mullet RoeIncreases attack when wetTrade with Gawdygog, catch Gravid Bowfin fishMonster ChiliNegates negative effects of environmental temperaturesTrade with Kilama/Gawdygog/Aida/Dogard, gather from rare sandpepper nodesWild Seed OilIncreases potency of status attacksTrade with Gawdygog/Yabran, gather from rare seed/nut nodesTruffle Du CongaSometimes increases items obtained from gatheringTrade with Rove, interrupt Congalala while it digs or eats black truffles Some event quests feature ingredients as rewards, if you prefer to hunt instead of trade. They're not always available, however. Standard Hunting Procedure At camp, you can do several things. You can go into the tent to retrieve items out of your storage, you can change your equipment, and you can change your palico's equipment. If you forgot to eat, you can make a meal. In older games, you could get free hunting supplies from a blue box at the beginning of most quests. Since you can start quests anywhere in Wilds, this functionality has been moved to the Seikret. While riding your Seikret with a quest active, check its inventory for some extra items. Some of these may be specifically useful against your target, such as Screamer Pods against burrowing monsters. Keep an eye out for notifications that your Seikret's pouches have been stocked; you may get multiple resupplies in a hunt.

秘药箱中的大部分物品都可以保留,但有一些标有蓝色公会纹章并标注为补给品的物品除外。这些物品会在任务完成后被移除,所以一定要优先使用这些物品,再使用你自己的补给。 你可能会注意到许多发光的小昆虫在你面前形成路径,或在感兴趣的物体周围飞舞。这些是导虫,是经过训练的小虫,能帮助猎人追踪怪物和识别有用的资源。 在四处探索时,不妨“顺手牵羊”。尽可能收集所有东西,因为几乎每样东西都有用。随着时间推移,你会逐渐了解哪些物品更有用。当你带着秘药箱在地图上移动时,可以用投射器轻松收集沿途的素材。不过,投射器仅能用于拾取较小的物品。较大的物体,例如矿石节点和骨堆,必须在靠近时才能拾取。

留意可互动物体和环境生物。它们可以直接使用并产生效果。生命力粉尘和回复黄蜂都可以击打以恢复生命值。食用摇曳荔枝可在一段时间内减半耐力消耗。麻痹蟾蜍会释放麻痹毒素,对怪物和猎人都有影响。大多数可通过站在附近或使用投射器来使用,但部分陷阱需要投射器才能激活。四处看看,还有很多东西等着你去发现。 抬头看!许多猎人没有意识到他们上方通常有可互动的东西。明显较大的岩石或水晶可以用投射器拉下来砸向怪物头部,造成巨大伤害并使其立即倒地。楔虫是遍布地图上空的亮黄色昆虫。它们提供了躲避攻击、骑乘怪物或在地图上快速移动的便捷方式。附近有楔虫时,你会听到独特的口哨声。 向下看!在你四处移动时,可能会发现下方有长长的落差和陡峭的悬崖。别担心!怪物猎人系列不存在坠落伤害!掉落的岩石和水晶可能会伤害怪物,但人类坠落是完全安全的!你可以从数百英尺的高度坠落而毫发无损。你的膝盖骨是用铠玉做的! 有些环境温度过高或过低。使用环境生物、消耗品或食材来帮助你抵抗极端温度的不利影响。 如果你需要帮助,可以发射求救信号弹寻求协助。这会允许其他玩家加入你的游戏。如果经过足够长的时间,NPC支援猎人将会前来协助。如果最终有玩家加入,他们会取代其中一个NPC的位置。如果你希望NPC猎人提供帮助但不希望其他玩家加入,或者希望SOS始终处于激活状态,可以在与阿尔玛对话时通过任务选项进行设置。 攻击怪物时,你可能会注意到相同的攻击造成不同的伤害量。怪物的不同部位对不同伤害类型的抗性或弱点各不相同,通常被称为【 hit zones 】。坚硬的外壳可能抵抗斩击伤害,但对钝器伤害较为脆弱。怪物的头部和尾部往往比主体更柔软。翅膀通常对弓箭和弩箭的攻击较为脆弱。当你狩猎特定怪物达到一定次数后,你的狩猎笔记会更新,并明确告知你该怪物各部位的弱点。 在多人狩猎时,留意其他玩家使用的武器。如果队伍中有使用锤子或狩猎笛的玩家,应让他们优先攻击怪物头部,这样他们可以将怪物打晕。而使用斩击类武器的玩家则应优先攻击尾部,这样既能消除尾部攻击的威胁,又能获得尾部剥取素材,一举两得。 当怪物撤退到地图其他区域时,花点时间评估一下自身状况。你是否需要返回营地补充物资或更换武器?是否已经破坏了怪物的某个部位?别忘了剥取掉落在地上的尾巴,或者拾取可能掉落的投射器弹药。如果你只想继续追击,就召唤你的【秘药】并展开追逐。途中务必记得回复生命值和打磨武器。有时查看地图并快速传送到离怪物更近的营地,会比徒步前往更快。 闪光弹虽然能将飞行怪物击落,但在多人游戏中当队友正在骑乘怪物时要格外注意。许多有翼怪物在被骑乘时会开始飞行,此时使用闪光弹会立即终止骑乘尝试,白白浪费之前的努力。同样,在骑乘结束前,尽量不要对怪物使用蓄力攻击。
有时,怪物会专门盯上你,无视其他目标。这种情况会通过你和怪物之间的一条红色短线来指示。此时你需要准备好闪避、反击或防御,几乎没有机会治疗。这也可能带来好处:如果你擅长吸引怪物的注意力,其他玩家就能自由攻击。如果你正在防御,这可以快速触发力量碰撞。你还可以将怪物引到更有利的位置,比如陷阱或环境危险区域。 如果你注意到怪物慢慢倒下且音乐停止,立刻停止攻击!你的队伍中有人使怪物进入了睡眠状态。对睡眠中的怪物发起的第一次攻击会将其唤醒,但也会造成额外伤害。放置爆炸桶来唤醒怪物是基本常识,但如果没有爆炸桶,就让拥有最高单次攻击力的人(提示一下,通常是大剑使用者)来粗暴唤醒怪物。不过有一种罕见的例外情况:如果施加睡眠状态的人继续攻击——他们是将睡眠当作麻痹的替代手段,这时你可以继续攻击。 另一方面,当狩猎接近尾声时,怪物可能会一瘸一拐地离开,并试图在巢穴中睡觉恢复体力。此时同样适用睡眠礼仪,但你现在也可以选择捕获怪物而非击杀它。 捕获怪物 捕获怪物有三个要求: 1. 怪物处于低生命值状态。 这一点很容易判断。1. 击败怪物,但必须彻底打倒才算结束。当怪物开始一瘸一拐时,它很可能可以被捕获。查看地图或小地图,如果怪物图标上有 skulls 飞出,就说明怪物已处于可捕获范围内。你也可以在屏幕底部的怪物图标下方看到其心跳变得微弱,但这一方法并不可靠。如果怪物处于力竭状态,可能会出现误判;如果怪物处于发怒状态,其活跃的心跳会掩盖它生命值较低的事实。 2. 怪物处于电击陷阱或落穴陷阱中。如果你有把握,可以在战斗中放置陷阱,希望怪物会落入其中。或者,你也可以等待怪物回到巢穴后再进行捕获。无论是在电击陷阱还是落穴陷阱中,效果都没有区别,但电击陷阱更为常见,因为它们更容易制作且部署速度更快。 如果你放置了陷阱,但怪物没有触发就逃跑了,你可以将陷阱捡起来放回物品袋。 尽管藤蔓陷阱等环境危险能束缚怪物,但它们无法用于捕获怪物。 3. 怪物陷入麻醉状态。 猎人会将麻醉弹直接扔向地面,因此要靠近怪物后再投掷。两颗麻醉弹就足以捕获一只怪物。如果你使用的是弩炮,也可以使用麻醉弹。
在物品制作列表中,你可以将镇静玉与投掷小刀组合制作出镇静刃,其精准度更高。投掷小刀的数量是无限的,所以你可以随意制作。这使得远程捕获成为可能,对于无法像枪手那样使用镇静弹的剑士来说尤其有用。 当以下三个条件同时满足时,怪物就会被捕获。不过要注意,这三个条件不一定需要按特定顺序发生。你可以在放置陷阱前预先对怪物使用镇静效果,这样仍然可以成功捕获。如果你已经对怪物使用了两次镇静效果且怪物已处于陷阱中,它们的生命值可能还不够低。快速用武器攻击它们,你或许有机会在陷阱失效前将其生命值降至足够低,从而完成捕获。 捕获怪物能获得与击杀并剥取不同的奖励。如果你在刷怪物却一直得不到所需物品,不妨尝试捕获而非击杀,反之亦然。 关于捕获的补充说明: 如果任务在你的秘密背包中提供了简易陷阱或简易麻醉药,优先使用这些道具以节省你自己的补给。如果操作失误,你仍可以使用自己的道具。 麻醉攻击命中怪物的位置无关紧要。只要麻醉效果命中怪物身体的任何部位,就能生效。 麻醉弹和麻醉弹药不会造成伤害,因此你可以对睡着的怪物使用麻醉。麻醉刀刃会造成伤害,所以会惊醒怪物。请注意,怪物对不同类型陷阱的反应各不相同。有些怪物会无视电击陷阱,甚至会被其强化。有些怪物落入落穴陷阱后仍能反击。还有些怪物可以在不触发陷阱的情况下将其破坏。 古龙种对陷阱免疫,且无法被捕获。虽然《荒野》中可能存在古龙种,也可能没有,但在游玩旧作时最好记住这一点。 你的最佳伙伴:艾露猫 在游戏开始创建角色后,你可能注意到还创建了一只猫,在游戏世界中,这个种族被称为艾露猫。这就是你的艾露猫,一个会在野外协助你的狩猎伙伴。它们和你一样装备武器和防具,只是尺寸更小。尽管它们在战斗中会受到伤害,但这只会让它们暂时失去行动能力。它们不需要消耗品来治疗,并且实际上是无敌的;你无需担心它们的状态。 你的艾露猫有一个决定其基础属性的等级。当你与它们并肩狩猎怪物时,这个等级会提升。如果你让它们处于待命状态,它们会投入时间进行训练并提升等级,以免落后。 在地图上移动时,你的艾露猫(阿尔玛的程度较低)会在你穿越地形时收集物品。战斗中,你的艾露猫会使用你为其装备的武器,以及一些用于输出伤害和提供支援的各种小工具。它们可以治疗你、解除状态异常并提供增益效果。如果你完成艾露猫的支线任务,它们还能在狩猎时额外获取怪物素材,并在你濒死时救你一命。
在铁匠铺选择【打造艾露猫装备】来为你的艾露猫制作武器和防具。制作过程非常简单,无需考虑升级或技能。每套装备仅有三个选项:武器、头部防具和胸部防具。每件装备只需一到两个常见素材即可制作。由于艾露猫拥有近乎无敌的生存能力,猎人通常会根据外观而非属性来选择防具。当你达到高等级后,艾露猫也能使用幻化装备,届时你可以先给它们穿上性能优良的防具,再幻化上你喜欢的外观。 目前,最受欢迎的艾露猫武器选择是带有异常状态效果的,例如毒、麻痹或睡眠。只要在一次狩猎中异常状态触发一次,就是值得的。如果你发现某种状态一直无法解除,或许你最好尝试其他方法。 有些玩家喜欢不带艾露猫进行狩猎。通常这是为了让怪物的行为更可预测,因为目标减少了,但你会失去艾露猫的支援。你可以在任何营地帐篷或装备箱处将艾露猫设为待命状态。 不要把艾露猫仅仅当作一个次要的附加角色——它们对狩猎的贡献比你想象的要大。如果你觉得游戏太简单,可以考虑让艾露猫待命,看看会有多大的区别。 【内容建设中,稍后将添加更多信息】 你的华丽坐骑 就像艾露猫是你的伙伴一样,坐骑就是你的代步工具。它们提供了一种快速遍历地图上几乎任何地点的方式,并在战斗中提供一些额外功能。 你几乎可以在任何时候呼叫你的【Seikret】,让它靠近并接你。 按手柄方向键上或键盘Tab键,以自动模式呼叫你的【Seikret】。 按手柄方向键下或键盘Q键,以手动模式呼叫你的【Seikret】。 按手柄方向键右或键盘X键,切换到你的副武器。 按手柄方向键左或键盘N键,打开任务补给袋。
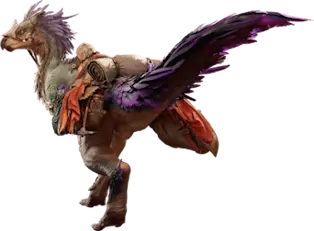
在自动模式下,你的【Seikret】会自动朝当前任务目标或地图标记移动。你可以按住相应按钮来提高或降低速度。如果有意偏离路线或按下手动模式按钮,就会切换到手动模式。 在手动模式下,你可以直接控制【Seikret】的移动。随时按下自动模式按钮即可返回自动导航。 如果你不喜欢【Seikret】的操控方式或行为,可以在选项菜单中查看其他控制方法和默认行为设置。关闭【Seikret】自动探索是非常常见的建议。 由于【Seikret】非常灵活,它可以走你步行无法通过的路径和捷径。不过,【Seikret】并不能带你去所有地方。一些秘密地点需要你蹲下或在水下游泳,此时你的牙猎犬无法跟随。这些地方主要用于收集物品和环境生物,大型怪物通常不会在这些位置威胁你。 骑乘牙猎犬时,你可以自由使用大多数物品。治疗、磨刀、装填弹药、打开菜单、查看地图……让牙猎犬负责导航,你则专注于在狩猎中保持最佳状态。 大多数小型物品可以用投射器从远处收集,你甚至无需四处张望或瞄准。要获取矿石和骨头等较重的物品,你仍需靠近并用手采集。 正如你可以用投射器拉取物品一样,你也可以发射投射器弹药。在战斗中充分利用它。 你可以在骑乘【Seikret】时进行攻击,尽管招式有限。你可以从【Seikret】上发动跳跃攻击,对目标造成骑乘伤害。 根据你使用的武器,骑乘【Seikret】时可以施展一些巧妙的战斗技巧。使用长剑的猎人可以在 dismount 时进行反击,获得额外的气刃槽充能。使用长枪和铳枪的猎人可以将武器向前挺出,使出 jousting 攻击,对于追击逃跑的怪物尤其有效。使用弩的猎人可以在骑乘时射击,提升机动性并减少后坐力,但代价是射击速度变慢且伤害降低。
在任务过程中,阿尔玛会将物品放入任务补给袋。记得拾取这些物品!它们可以免费使用。如果任务持续时间足够长,她可能会添加更多物品。 即使被击倒在地,你仍然可以召唤你的塞克雷(Seikret)。当你感觉身处危险时,塞克雷会俯冲下来将你带离大型怪物,为你提供恢复的喘息空间。它的自动模式会尽力躲避攻击,但并非完美无缺。 最终,你将能够自定义你的塞克雷,包括羽毛样式、颜色和马具装备。完成第一章第四节【猎人的骄傲】后即可解锁此功能。前往库纳法村,寻找标有【塞克雷自定义】的地图图标。前往该处并与诺娜交谈,即可解锁塞克雷自定义功能。你可以在此处或在帐篷内随时进行调整。 猫车(狩猎中失去所有生命值)
So you went down to 0 HP and got carted. Don't worry about it; it happens to everyone. The important thing is that you learned from it. So, you're back at camp, maybe without most of your healing items. What now? First, head back into the tent and restock all of your items. If you have an item loadout prepared, great! That saves a lot of time! If not, you can try the restock button, but that won't work on items you've used up entirely. You'll have to pick those up manually. Before you leave the tent, reflect a moment. Can you change tactics? Maybe swap to a different weapon or armor better suited to the situation. Second, check if your meal has expired, or is running low on time. If needed, make a meal to refresh your maximum health, stamina, and buffs. It helps to have your favorite meal saved so you can select it quickly. Third, on your way back to the monster, check your Seikret's pockets to see if there are any supplies you may have forgotten to pick up, or perhaps it restocked since you last checked. If you’re down to 1 cart left in the quest, be extra careful for the rest of the hunt. If anyone else carts, the quest fails immediately. If you're hunting with Support Hunter NPCs, they don't count against you if they go down. Monster Behavior The developers worked tirelessly to make the game as detailed as possible, in ways that most players would never notice. They wanted Monster Hunter Wilds to feel like a living, breathing ecoystem. For example, monsters in a herd change their behavior not only by the actions of the leader of the pack, but their proximity to them. Those close to the leader are inclined to follow the leader's actions, while those furthest away are more likely to think based on their own individual needs instead. Chatacabra coats its arms in different materials depending on where it's located, giving its arm attacks different properties. As an amphibian, if it gets too warm, it will seek out a body of water to cool down in. If it's too cold, it will find a nice spot to sunbathe. Moving away from minutiae, let's focus on monster behavior as it pertains to gameplay. When out on a quest, keep in mind what monster you're hunting. Particular monsters prefer different locales, and stick to those locations. You won't find a burrowing monster like Balahabra high up in the treeline, for example. If you learn where the monster patrols, eats, and sleeps, you'll have a much easier time finding them on the map. Some monsters are aggressive, some are passive. If a monster sees you, its reaction can give you some insight on its temperament. It might attack you right away, seeing you as a meal. It might ignore you, considering you not a threat. Once you attack, lesser monsters might run away, while larger monsters (most quest targets) will fight back. Pay attention to the monster's body during the fight. It has a windup or tell before each attack. If it raises up a claw, it's likely to swipe with it. If it raises its tail up, it's likely about to slam it down. If it curves its tail to the left, it may sweep it horizontally to the right. Over time, you'll be able to distinguish exactly what a monster is about to do. Generally, the more dangerous an attack is, the longer windup will be. With time, you will be able to read the monster's body language and learn the proper response for any given attack - the places where it is dangerous to stand, whether it is blockable or dodgeable, how long the attacks last, and safe times/locations to attack the monster. For two examples, if Rathalos roars while standing on the ground, it will often follow up by jumping backward while shooting a fireball where it stood. When enraged, Rathian will charge forward, stop, turn, and charge again multiple times in a row. Keep in mind that monsters will overall become faster and more aggressive when you reach High Rank, and again in Master Rank. What was a safe window before might not be so after. Once you get used to higher ranks, Low Rank monsters will seem sluggish and lethargic in comparison. With enough experience, you'll begin to read monsters on intuition without even thinking about it, and be able to somewhat reliably predict what moves a monster will do even before they finish the previous attack. Several times during the hunt, a monster will leave the area and move to a new location. Simply follow it and continue the fight. If you get lost, the scoutflies should be able to guide you. Sometimes, you'll be able to interrupt a monster before they leave, such as with a stagger, mount, luring pod, or trap. Just be wary of fighting in tight spaces that limit your maneuverability. If you're fighting in a bad location, or there are multiple monsters fighting in an area, you can force a monster to relocate immediately by firing a dung pod at them.
When monsters are close together in combat, a turf war might occur. Many of them are unique animations where they fight and deal damage to each other. In some cases, one monster will dominate the other; in others, it will be are more even match. Some monster interactions don't have unique turf wars, but they can still fight each other using their regular attack animations. Fights like those can involve entire packs of monsters. You can use turf wars to your advantage by intentionally leading monsters close together. Not only will they damage each other, they will no longer pay attention to you, giving you time to recover, continue fighting, or even initiate a sneak attack. After taking enough damage during a hunt, a monster will become enraged. They usually announce this with a roar. Monsters have unique indicators to express their rage state, such as elemental effects around their mouth or claws, horns or scales become more prominent, body parts begin glowing with luminescence, and more. They attack faster and deal more damage. Fight cautiously when a monster is enraged. If an enraged monster is focusing on you, it will follow you relentlessly. This can be dangerous, but can be used to your advantage. You can lead it to another monster to initiate a turf war, or lure it to an area with environmental hazards to knock it down. On the other hand, monsters can also become exhausted. Monsters have stamina, which depletes by using attacks and taking blunt damage. If a monster is exhausted, they move and attack slower, and special attacks may fail. This is a great opportunity to deal damage. An exhausted monster will try to eat food, or bite at a hunter, to restore stamina. Most of the time, when a monster is at low enough health, they will limp and move towards their nest area to rest. While sleeping, the next attack against the monster will deal double damage. People often place barrel bombs next to the monster to provide a burst of damage in addition to the wakeup. Otherwise, the hunter is free to use tranq bombs and a trap for an easy capture. Mounting the Monster Most attacks dealt to a monster while a hunter is midair builds up an invisible "mount" meter. Once it fills up, the hunter that dealt the last midair attack will automatically climb onto the monster, called "mounting." Some weapons have jumping attacks built in to the moveset, such as the Insect Glaive and the Lance. Other weapons will have to use the environment to mount the monster. Keep an eye out for slopes or cliffs to jump off of and make a leaping attack. If you look up, you can make use of Wedge Beetles to zip up into the air and make an attack from above. You can also make jumping attacks while dismounting from your Seikret. Monsters have a low mounting threshold initially, so you should be able to mount quickly off the first few attacks. Subsequent mounts will take more hits, however. There are several advantages to mounting a monster. It's a fast and easy way to create wounds on different body parts. Mounting also acts as a soft form of crowd control: the monster's attention is focused on knocking the hunter off instead of attacking. Other players will have the chance to heal up, sharpen, reload, or even continue attacking the monster. Successfully mounting a monster will topple it, granting a huge window for the hunting party to attack weak spots, especially any newly-opened wounds. So, you've mounted the monster. Now what? You slowly lose stamina while mounting, so you should act quickly. Your options are: Weapon Attack will use your weapon to damage the monster. This deals the most damage and creates wounds fastest, but has more commitment than the knife attacks. If there's a wound at your location, Weapon Attack is replaced by Draw Finisher, which deals much more damage and destroys the wound. Try to always end mounts with a Draw Finisher. Light Knife Attack will deal a small, fast attack. Strong Knife Attack will deal a more damaging, but slower attack. Hold down the Brace button to hold onto the monster. This is meant for when the monster is trying to knock you off. This slowly consumes stamina, but you'd lose more if you weren't bracing while the monster flails around. You can jump around to different body parts by moving in their direction. Monsters typically have two to three locations to hold onto: Head, Body, Lower Back/Tail. You can also dismount to immediately jump off.First off, you can ignore bracing. If the monster tries to throw you off (indicated by the edges of the screen darkening or the monster icon in the bottom left changing color), just jump to a different body part instead. It uses less time and stamina, and you can keep attacking while the monster continues thrashing about. It can be tempting to spam attack and immediately use a Draw Finisher, but there's another option. Try spending some time making multiple wounds by jumping to other parts of the body after making one. That way, you'll have more wounds to take advantage of after the mount. This means you and your team benefit even if you get knocked off. Monsters in the end-game tend to fall over before you can create three wounds, so it may be best to stop at 2 if you intend to use a draw finisher. You might notice sometimes that the monster will fall over even if you didn't do your finisher. There are several possibilities for this. You might have run out of stamina. The monster itself might have run out of stamina, too (described in the next paragraph). Other hunters, or your palico, might have done enough damage to the monster to stagger it, causing it to fall over. Same goes if they gave it paralysis or sleep, or they break a wound. The monster might have even staggered itself in its attempts to knock you off by hitting a wall or obstacle.
一个容易被忽略的点是,你不仅要管理自己的耐力,还需要留意怪物的耐力。当骑乘怪物时,屏幕左下角附近的怪物身边会有一个旋转的彩色圆圈。蓝色表示怪物耐力充沛,变为黄色时说明它开始疲劳,一旦变成红色,怪物就快要倒下了,此时你应该尽快完成终结技。 因此,我强烈建议在其他人骑乘怪物时,不要使用闪光弹或破坏伤口。让其他玩家有机会制造更多伤口通常更有用。将你的蓄力攻击留到之后再使用,以最大化收益。如需更直观的指南,我推荐Rurikhan对骑乘机制的讲解。 实用工具 默认情况下,你的物品栏中有一些实用工具,它们不会占用野外背包空间。如果你不喜欢这些工具占用物品栏,并且不打算使用它们,可以随时在物品栏自定义子菜单中禁用每一个工具。

望远镜 望远镜能让你更近距离地观察任何事物。无论是需要识别远处的物体,还是欣赏近处事物的细节,望远镜随时满足你的观察需求。作为系列首次,望远镜还能显示怪物是否为冠位尺寸,这为冠位猎人节省了大量时间!

鱼竿 想放慢节奏,放松一下吗?你可以用鱼竿慢慢钓鱼。抛出鱼线,通过移动浮漂来引诱鱼儿。两种主要方法是快速交替上下移动,或者快速点击(不要按住)向下键。如果一种浮漂移动方式没能吸引到鱼,就试试另一种。 如果有鱼咬钩,就收线把它钓上来。如果失败了,鱼会留在附近,你可以再试一次。你还可以选择使用各种鱼饵来吸引特定的鱼,这些鱼饵通过钓鱼支线任务解锁。 有些大鱼需要花更多力气才能钓到。如果收线太猛,鱼线会断。首先要通过朝着鱼游动的同一方向左右移动来耗尽鱼的体力。当鱼停下来,你的角色向后倾斜时,就开始收线。你可能需要多次耗尽鱼的体力才能最终钓到它。如果遇到困难,【户外专家】技能可以让钓鱼变得更容易。

捕获网 使用捕获网会将其装备到你的投射器上,投射器会部署一张短距离网来捕捉环境生物,包括鱼类。如果你没耐心使用鱼竿,可以直接用捕获网捕鱼,但未捕获的鱼会逃跑,且捕获的鱼不计入支线任务完成进度。

便携烧烤架 你的食物吃完了但又不想回帐篷?便携烧烤架来帮忙!你无需随身携带食材,无论身处何地都能获取。在野外进食没有惩罚,但如果处于危险环境中,烹饪动画期间可能会遭到攻击,请自行判断。 如果你有生肉,也可以用便携烧烤架制作牛排。这是一个快速的时机小游戏。如果立即停止烹饪,生肉会保持原样,没有任何负面影响。
真正的时机窗口是角色翻转肉的时候:如果在肉变色前太早停止,你只能得到1块全熟牛排和2块三分熟牛排。如果握太久导致肉烤焦,你会得到2块全熟牛排和2块焦肉。正确的时机是在肉一变成不同颜色时就移开。这是一个突然的颜色/质地变化,大约在翻转后1.5秒。观察右侧的动画图像——它们展示了完美的烧烤过程是什么样的。
如果你在正确的时机抽回,就会开始小游戏的第二部分。猎人会根据音乐的节拍砍五次牛排。要随着切割动作或音符按下按钮。 如果什么都不按,你会得到6块全熟牛排。 部分成功会得到8块。 完美完成则能获得12块全熟牛排! 和钓鱼一样,如果你在时机把握上有困难,【户外专家】技能会有所帮助。你也可以使用便携烧烤架进行休息,这能让你改变天气和时间。这是快速刷新生态系统中怪物的方法。注意:这种方式不会以保留生态系统预测的方式推进时间。这是一次完全刷新,所以预测中的所有内容都会改变。这句标志性台词仅在特定条件下触发:你必须在安全级临时营地附近,使用便携烤肉架完美烹饪生肉。 披风 披风是一种可装备的特殊效果服装。大多数披风持续固定时间,但部分披风若在持续时间内损坏,效果会提前消失。装备披风后,会开始冷却倒计时,冷却结束前无法再次使用。随时查看屏幕右下角的小图标,即可了解披风的冷却状态。无需手动收起披风,冷却时间不受影响。 猎人的装备栏中会始终保留吉利披风,而第二个披风槽可装备任何已解锁的其他披风。你可以正常使用第二个披风,也可以通过按住L1+R2快速使用。使用快捷方式可以让你在武器出鞘的情况下装备披风。
吉利 mantle 持续时间:2分钟 冷却时间:5分钟 效果:使你从怪物视线中隐藏,便于潜行接近或逃脱。若进行攻击或受到任何伤害,效果将立即失效。 解锁条件:向补给品仓库的杰克交付蜂蜜
不动衣 持续时间:1.5分钟 充能时间:10分钟 效果:确保你在受到伤害时不会以任何方式被击退,模拟防御强化、耳塞、耐震、防震和防风装甲技能的效果。 解锁条件:击败黑炎之后与铁匠铺的杰玛对话 注意 - 装备不动衣时,怪物的快速连续攻击非常危险。
修补披风 持续时间:1.3分钟 冷却时间:10分钟 效果:随时间恢复生命值 解锁条件:击败徐武后与铁匠铺的杰玛对话
回避披风 持续时间:1.75分钟 充能时间:10分钟 效果:增加回避时的无敌窗口,在最后一刻回避怪物攻击后获得临时攻击提升。 解锁条件:击败狂化影蜘蛛后与铁匠铺的杰玛对话。
腐蚀护衣 持续时间:1.5分钟 冷却时间:10分钟 效果:使你感染狂气病毒。若成功克服,将获得5%攻击力和10%会心。同时提供武器专属加成。 解锁条件:击败 Gore Magala 后,与铁匠铺的 Gemma 对话。 武器加成效果 大剑:蓄力时间缩短 太刀:气刃槽积累速度加快,消耗速度减慢 片手剑:??? 双剑:鬼人化耐力消耗减少;超鬼人化持续时间延长 长枪:反击伤害提升 铳枪:蓄力炮击充能加快,龙击炮恢复加快 锤子:蓄力时间缩短 狩猎笛:回声泡泡冷却时间缩短 斩击斧:变形槽积累速度加快,消耗速度减慢 盾斧:???操虫棍 猎虫充能速度加快,耐力恢复速度加快 弓 蓄力时间缩短,技巧箭槽充能速度加快 轻弩 速射槽充能速度加快 重弩 起爆槽充能速度加快 伤痕 在早期的怪物猎人游戏中,你可以对怪物的身体部位造成伤害、破坏甚至切断。这通常会在任务结束时获得额外的战利品。如果你切断了怪物的尾巴,怪物的尾部攻击威胁性会大大降低,你还可以在地上剥取尾巴获取额外素材。
在《荒野》中,该系统得到了扩展,新增了【伤口】机制。特定身体部位反复受到伤害会形成伤口,表现为明显的红色变色。在专注模式下,伤口更容易被发现,因为导虫会在伤口周围发出明亮的红光。 攻击伤口会造成额外伤害,伤害数字旁会显示四个小箭头。对受伤部位造成足够伤害使其破坏,将立即获得该部位破坏的战利品。根据被破坏的部位,怪物会做出不同反应。如果是腿部或翅膀,怪物可能会倒下。其他身体部位被破坏则会导致怪物畏缩或蹒跚。 处于专注模式时,武器可以使用名为【专注攻击】的特殊攻击。若命中伤口,将立即破坏伤口并造成大量伤害。你也可以在空中使用蓄力攻击。部分武器通过蓄力攻击破坏怪物的伤口时会获得特殊加成。大多数被破坏的伤口会掉落怪物素材作为奖励。
破损的伤口会愈合为疤痕组织,但如果受到足够的伤害,疤痕可能会重新裂开成为伤口。 伤口管理是一种平衡策略。你是希望保留伤口以在整个狩猎过程中增加伤害,还是立即破坏伤口以获取战利品或获得特殊武器增益? 通常情况下,你需要让伤口至少保持一段时间,但如果等待过久,你会在未获得专注一击增益的情况下破坏伤口。最佳时机需要你自行判断。 在多人游戏中,这一考量更为重要。要留意并让其他玩家也有机会破坏伤口,尤其是当他们的武器能从专注一击中获益时。如果有其他玩家正在骑乘怪物,在此之前请不要使用蓄力攻击,以免破坏部位并打断骑乘。 临时营地
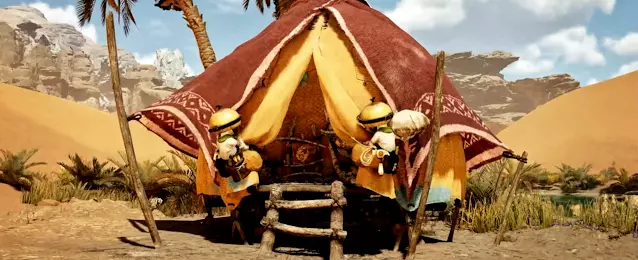
虽然你始终可以快速旅行到主要兴趣点,例如基地营地或其他友好定居点,但它们在狩猎时并不总是靠近你想去的地方。幸运的是,你可以搭建名为【临时营地】的半永久性帐篷。这些帐篷有多种用途。 它们可作为快速旅行点。战略性放置的临时营地能大幅减少在地图上移动时的旅行时间。开始或加入任务时,你可以选择从任意临时营地出发,从而加快狩猎时间。 它们是休息区。进入帐篷可完全恢复你的生命值并治愈所有异常状态。 如果你失去所有生命值,会在离你位置最近的帐篷处重生。 你可以随时补充物品和更换装备,即使在任务进行中也可以。这同样适用于管理你的艾露猫的技能和装备。烹饪食物可以增加你的最大生命值、耐力,并获得特定的食物增益效果。 你可以通过在帐篷休息来改变一天中的时间/天气。这会重置环境预测中的所有内容。 你可以自定义帐篷的外观,并在该区域放置装饰品和便利设施。你甚至可以设置在附近时播放的背景音乐。 你可以重新自定义角色和艾露猫的外观或应用幻化装备,为武器装备装饰护符,以及自定义你的秘密基地。 在探索区域时,你可能会发现名为四叶虫的环境生物。它们在地图上以蓝色蝴蝶图标标记。它们会在潜在的临时营地位置周围飞行。如果你之前去过那里,或者曾经在那里搭过帐篷,地图上可能会用带有蓝色帐篷图标的小路标标记该区域。
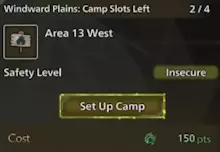
如果你觉得某个地点不错,可以亲自前往,并使用物品栏中的【便携营地】道具。此时会弹出一个窗口,显示该地点的相关信息。 搭建帐篷时,最重要的考量因素是它作为快速旅行地点的实用性以及安全等级。安全等级分为三级:危险、不安和安全,这取决于该区域周围游荡的怪物数量。 你还可以通过与基地营地的艾露猫对话来建造和自定义便携营地。每个区域最初最多可设置2个便携营地,随着剧情的推进,最大数量会增加。若要腾出营地位置,你需要与帐篷旁的艾露猫对话并选择【移除营地】来自行拆除帐篷。花费少量公会点数后,你的新营地将在片刻内建成。你可以立即使用营地的各项设施。
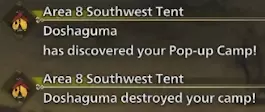
如果怪物发现了你的弹出营地,它们很可能会将其摧毁。这种情况可能发生在你远在地图的另一端时,也可能发生在你就在相关帐篷内时,或者当怪物追逐你时,你可能会无意中将其引到帐篷处。有时,这纯粹是运气不好。 只要等待足够长的时间,乐于助人的艾露猫就会自动免费修复被摧毁的帐篷。 如果你想立即修复被摧毁的帐篷,可以前往帐篷原来的位置,与那里的艾露猫对话。支付一定的公会点数费用后,它们就会快速修复帐篷。你也可以通过休息来消磨时间,这样所有帐篷都会被修复,且无需额外费用。如果你在寻找弹出营地的位置时遇到困难,本视频包含每个位置的攻略,你可以跟着操作来解锁各个地点。 不要低估投射器 你的投射器是绑在左臂上的多功能迷你十字弩/抓钩。正确使用它能让你在地图上的移动更快,与怪物的狩猎也会更轻松。 虽然拉动物体的专业术语是“钩爪投射器”,但大多数人不管是向内拉东西还是向外射东西,都直接称之为投射器。 移动 攀爬藤蔓时,你可以按一个按钮使用投射器向上抓钩。这比正常攀爬更快,但会消耗一点耐力。部分武器拥有利用投射器进行位移的攻击或招式,例如锤子的蓄力跨步或双剑的凝神斩。这一细节很好地展现了猎人运用这种多功能工具的聪明才智。
留意那些悬挂在头顶的楔形甲虫。楔形甲虫是亮黄色的昆虫,遍布整个地图,尤其在藤蔓和悬崖附近。它们能提供快速躲避攻击、骑乘怪物或在地图上快速移动的途径。如果听到口哨声,就说明附近有楔形甲虫。 收集物品和触发环境危险 在四处探索时,尤其是骑乘你的Seikret时,你可以轻松快速地收集各种战利品。 环境危险的触发方式类似。拉动悬挂的巨石、巨大的柱子或其他沉重的危险物体,使其坠落,有望对怪物造成巨额伤害并将其击倒。你也可以使用钩爪发射器从远处激活环境生物,例如大雷光虫和麻痹蟾蜍。 发射投射物:无论武器是否收鞘,你都可以将物品装填到投射器中并向目标发射。如果武器处于拔出状态,需进入瞄准模式(默认控制器按L3)进行瞄准和发射。 捕获网始终随身携带,可随时装备或卸下。发射时,它会射出一小段距离。小型环境生物(如鸟类或昆虫)会被捕获,较大的生物则会受到少量伤害。 在部分任务中,你可以在塞克特的补给袋中找到投射器弹药,例如音爆弹。它们可以像捕获网一样从物品栏装备。 投射器一次只能装备一种弹药。当你装备新弹药时,若旧弹药是自制的,会返回背包;若是从环境中获取的,则会掉落在地上。你制作的投射器弹药(如闪光弹和粪便弹)会被保留。 大多数弹药呈直线发射,但名称中带有【Heavy】的弹药射程较短。它们会以短弧线飞行后落地,因此需要在靠近目标时发射。 即使武器收鞘,也可以发射投射器弹药;在专注模式下按下左摇杆即可。但此操作不适用于Heavy弹药。 部分投射器弹药直接命中怪物或击中地面会产生不同效果。若怪物未察觉你的存在,你可以发射弹药来分散其注意力。如果怪物正在攀爬某物,通常用投射器弹药攻击它们可以将其击落。 投射器弹药 固定弹药:这些弹药始终可供你使用,无需制作,且数量无限。 - 投掷匕首:一种小型刀刃,造成少量切割伤害。当你距离过远时,可用于造成少量额外伤害,并且能够切断怪物的尾巴。 - 染色球:用橙色星形圆圈标记怪物或位置,使其在地图上更容易被找到。这有助于在一群相似种类的怪物中区分出特定目标。 环境弹药:这些弹药在野外环境中自然生成,无法存放在你的 inventory(物品栏)中留待日后使用。 - 爆破弹:一种简单的弹药,击中任何怪物后会使其轻微 stagger(僵直)。从成堆的合适岩石中获取。 荆棘草荚 - 会粘在怪物身上。当被击中时,会对附着部位造成额外伤害。从荆棘草中获取。 亮苔 - 撞击时会发出明亮光芒。这可以照亮黑暗区域,但最有用的是射向怪物的头部。这会使其失明,效果类似闪光弹,使其无法目视判断你的位置。如果在怪物飞行时击中它,会将其击落至地面。 亮苔会吸引昆虫。你可以用它引开昆虫,避免它们打扰你,或者投向大型怪物,引诱黄蜂等昆虫群攻击目标。
火炬弹:直接射向怪物会造成少量火焰伤害。更有用的用法是射向地面,它会在原地燃烧一段时间,对站在上面的任何目标造成持续伤害。也可以射向易燃物体将其点燃。非战斗状态下,火焰会根据怪物的性情来驱退或吸引它们的注意力。可从火石等物品中获得。 接地弹:释放电流。当雷兽处于强化状态时射向它,或射向带电地面,可减弱电效果。可从带电区域的接地石中获得。 冰霜弹:穿透怪物,造成多次冰系伤害。可从霜灯草等寒冷来源中获得。 水苔:造成水系伤害。可从潮湿地区生长的苔藓中获得。雷电水晶:造成雷电伤害。从带电的来源处获得。 麻痹孢子:造成麻痹效果。可从小型怪物拉夫玛的角上获取。 出血孢子:能有效造成伤口的孢子。从会投掷锯齿状材料的生物身上获得,例如小型怪物加吉欧斯的锯角。 怪物孢子:当怪物的伤口被破坏时,有时会掉落弹药。“重型”孢子飞行距离较短,但威力更强。 重型切断孢子:造成多次强力切割伤害。对切断尾巴尤其有效。 重型钝击孢子:造成多次强力钝击伤害。对击晕怪物或消耗其耐力尤其有效。 重型穿刺孢子:像弩炮的穿刺弹药一样穿透怪物。飞行途中对怪物造成持续伤害。若贯穿怪物整个身体,效果尤为显著。 刃鳞弹:附着在怪物身上。受到攻击时,对附着部位造成额外伤害。 可制作弹药:你也可以自行制作投射器弹药。与天然投射器弹药不同,这些弹药由你收集的材料制作而成,并保存在你的物品栏中。 粪便弹:向怪物发射时,会使其转移到其他区域。在从群体中吓退单个目标时非常有用。 大型粪便弹:这类弹药会在大范围爆炸,将其广阔作用范围内的所有怪物驱散。适用于吓退所有怪物,避免同时与多只怪物战斗,尤其对那些喜欢群体狩猎的怪物效果显著。诱饵玉:若命中地形,会将怪物吸引至特定位置;若直接命中怪物,则会将其吸引至你身边。适用于将怪物引向其他怪物引发地盘争夺、引诱它们进入陷阱,或阻止其逃跑。也可由能防御的玩家使用,以创造更多力量碰撞的机会。 闪光玉:在怪物前方发射时,会使其失明,导致它们因无法视物而行为异常。当怪物飞行时使其失明,会使其无助地坠落到地面,这让对付飞行 wyvern(飞龙)的狩猎变得容易得多。每次成功闪光后,怪物的抗性会增强。对没有眼睛或对强光有抗性的生物无效。由闪虫制作而成。尖叫荚:当对巴拉哈布拉等掘地怪物的上方发射时,会使其从地下钻出并陷入混乱状态。需要注意的是,部分怪物在发怒时不会受到尖叫荚的影响。若附近有翼龙,可使用投射器抓取尖叫荚。 麻痹小刀:作为麻痹弹的远程替代道具。 如狩猎流程部分所述,可使用投射器弹药攻击(或用钩爪拉动)明显的巨石或其他自然构造物,使其坠落并砸向怪物,造成大量伤害并使其立即倒地。 生态系统与天气循环

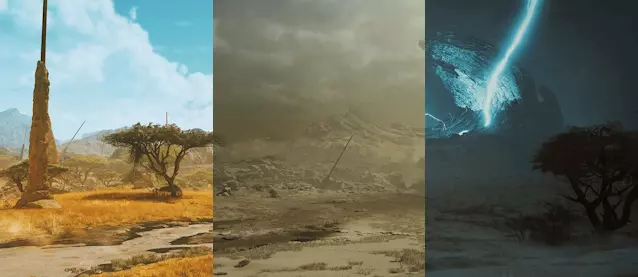
除了昼夜循环外,生态系统还会通过一种类似季节或天气的过程改变环境条件。它会在三个时期之间不断循环:丰饶期、休耕期和严酷期。

丰饶季 - 丰饶的季节。这片区域物产丰富、生机勃勃。资源随处可见,特有生物繁衍兴旺。

休耕期 - 资源匮乏季节。资源变得更加稀有,怪物也更加具有攻击性。

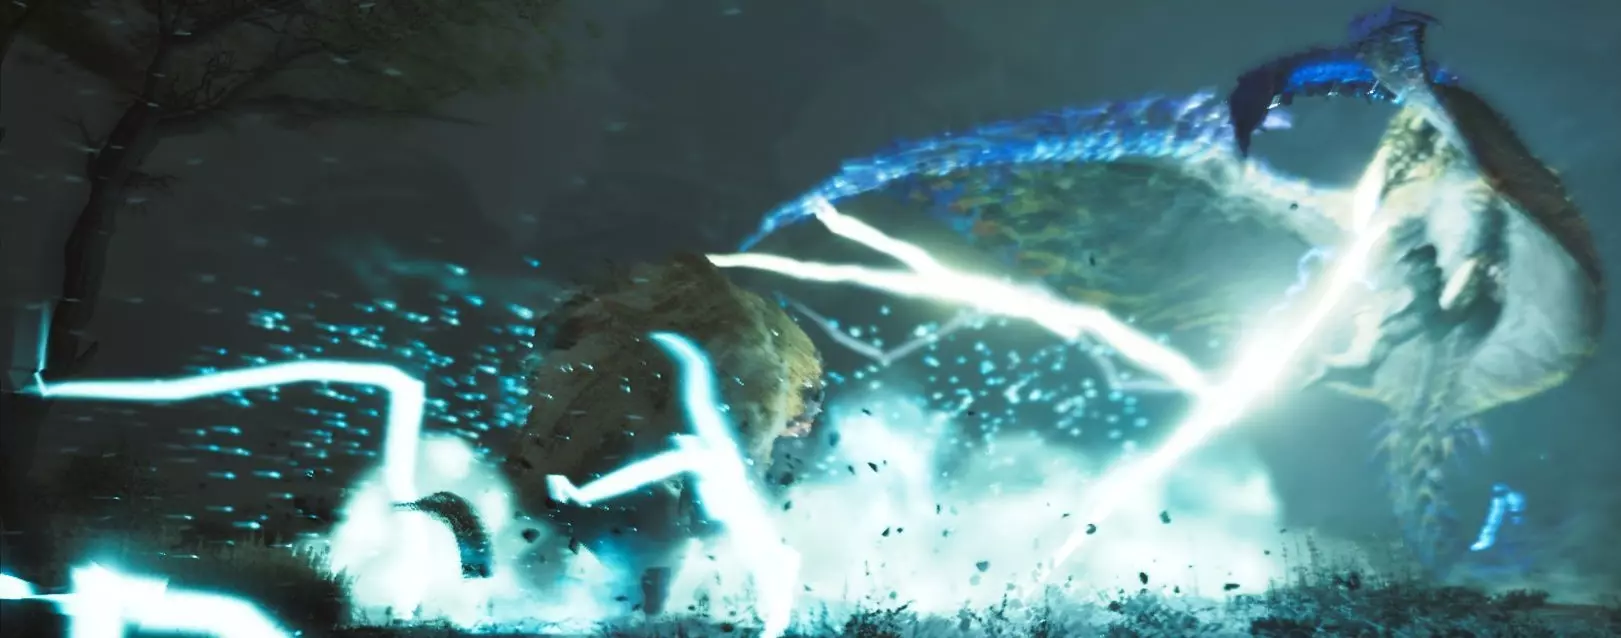
险恶时节 - 危险季节。天气剧烈变化,环境本身也变得充满敌意。 屏幕左下角会显示当前的时间以及天气/季节。 迎风平原 作为一片沙质沙漠与草原,除了小型绿洲、河流和水下洞穴外,这片区域依旧干燥恶劣。这里是你的探险队建立主营地的地方。 库纳法村,也被称为风歌村,坐落在中央悬崖之间,是个宁静的村庄。村民们与自然和谐共处。他们饲养塞克雷幼崽,并将其训练成终身伙伴。他们还以用达尔西登牲畜制作特色奶酪而自豪。风息平原的恶劣天气被称为沙潮,它始于突然袭来的沙流,伴随着强风席卷整个区域。随着天气愈发恶劣,人类和怪物都会寻找掩护。请警惕即将到来的雷击迹象。
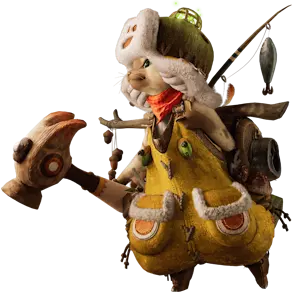
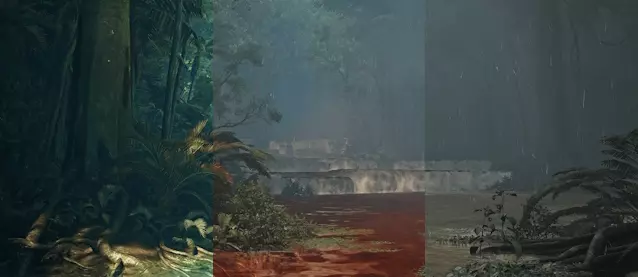
猩红森林:一片植被茂密、水源充沛的翠绿森林。因其在休耕期时,流经这片土地的深红色河水而得名。请留意隐藏在茂密枝叶间众多藏身处中的特有生物。 若深入森林探索,你可能会发现伍伍德藏身处,那里居住着一个名为伍伍德的隐藏艾露猫部落。他们依靠这片土地生活,以捕鱼、采蘑菇和收集蜂蜜作为主要食物来源。 猩红森林的恶劣天气是倾盆大雨,这场暴雨会冲刷掉红色河水,并增强那些将森林视为领地的水生生物的力量。
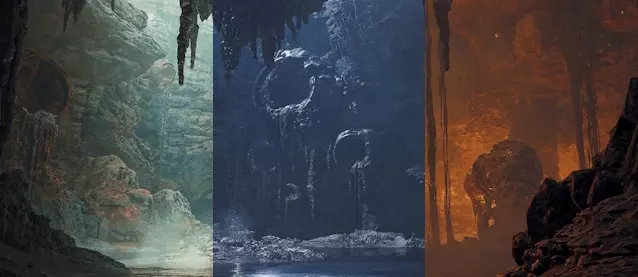
油井盆地 这片巨大的盆地资源丰富,地面上溢出的物质汇聚成油泥池。在各种泥潭和淤泥中穿行时要注意脚下,这些会使移动变得困难。 洞穴中矗立着宏伟的永恒熔炉,阿祖兹村就围绕着它而建。村民们都是技艺精湛的工匠,他们利用该地区的特殊材料来磨练技艺。 油井盆地的恶劣环境是火泉,火花事件会点燃大量的燃料池。务必保护好自己,远离燃烧威胁,直面持续的火海。
冰刃峭壁。人们对冰刃峭壁知之甚少。这里气候极度严寒,其地貌和栖息生物似乎违背了重力规律。
第五个地点将留给你自行探索。许多故事的谜团都将在那里揭晓。

通用技巧与窍门 - 第一部分 探索、自定义与收集 游戏初期会有大量教程。不必担心!即使不能完全理解所有内容,你也可以先初步体验游戏,之后当你对游戏有了更好的掌握,随时可以查阅猎人笔记(或此类指南)。 仔细查看选项设置;有很多可自定义的内容,例如当你位于怪物后方时显示自身轮廓以提高可见度、瞄准时机身灵敏度、你的随从的操控方式,或执行特定动作所需的按键长按时间。 不喜欢角色或艾露猫的外观?在帐篷休息时,你可以通过外观菜单更改大部分细节。高级选项,如性别、声音或名称无法更改,除非你在标题界面使用角色自定义券。虽然我们可能会免费获得一到两张,但要获取更多则需要购买付费DLC。 你制作的每一件上位装备都会解锁该装备的外观作为幻化装备,这意味着你可以将该部位的任何装备外观更改为该幻化外观。 你可以在帐篷内的外观菜单中选择装备外观来使用幻化装备。你也可以为你的艾露猫进行同样的操作。 当你首次访问新地点时,花些时间熟悉周围环境。寻找捷径、稀有物品刷新点、临时营地位置以及其他秘密。在这样探索时,装备捕获网是个好主意,这样你就能捕捉到大量本地生物添加到收藏中,并轻松获得公会点数。你可能会发现可以潜入水中的区域。这不像《怪物猎人》第三代那样可以自由游泳——你是“在轨道上”游到对岸。不过,你仍然可以环顾四周,用投射器收集物品,或者用捕获网捕鱼。 如果你在野外发现大雷光虫,可以与它们互动,使附近的任何生物麻痹。不过,通常用捕获网捕捉它们更有用,能获得一个免费的电击陷阱,还能额外获得一些公会点数。在采集可获得多个物品的资源时,例如开采矿石节点或剥取怪物素材,你可以按住按键持续采集所有物品,无需多次点击。 采集物品后,你可以在地图上查看其图标,了解该资源的重生时间。 在野外获取物品时,许多物品会进入你的【原野囊】。这是专门用于存放此类物品的额外背包,但空间有限。每次进入营地帐篷时,原野囊中的物品会自动存入仓库,因此记得时常进入帐篷以腾出物品空间。 你有时会发现怪物的痕迹,例如毛发或爪印。调查这些痕迹,通常可以获得免费的怪物素材。屏幕左侧会显示附近的兴趣点。如果列表中有显示但你在场景中找不到,可以选中它,然后按方向键的左右键,镜头就会转向选中的物品。 有时,怪物在地下挖掘时会挖出物品,一定要捡起这些稀有物品! 在冰shard悬崖探索时,你可能会偶尔发现被蛛网缠住的罗夫。解救他可以获得物品奖励。 小型昆虫类怪物被击杀后,有时会直接消散,而不会留下可剥取的尸体。你可以通过用毒、投掷飞刀击杀它们,或者装备昆虫学家技能来减少这种情况的发生。 怪物尸体一段时间后会腐烂。如果剥取太晚,你将无法再获得怪物特定的战利品。你将获得普通的骨头和其他与旧 carcass 相关的物品。 如果你想捕捉稀有环境生物,装备吉利 mantle 并蹲下以减少存在感可能会有所帮助。这样你应该能更靠近而不会吓跑猎物。 有些环境生物被闪光弹或音爆弹击中后会被击晕。利用这一点靠近并进行捕捉!
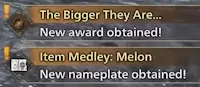
在游戏中多次执行各种杂项操作可获得称号或公会卡片/猎人档案背景等奖励。偶尔变换一下游戏风格,或许能获得意想不到的收获。例如,尝试钓鱼或进行更多潜行攻击。 游戏设有自动合成功能:你可以设置选项,在野外拾取原材料时自动合成物品。游戏默认开启了大部分实用的自动合成功能,比如从一开始,你就能自动用草药合成药水。如果你发现拾取了某个物品却在背包里找不到,要记住:它很可能已被自动合成为其他物品。自动合成的缺点很少,因为基础素材通常没有其他用途。如果你发现自己需要某个正在被自动合成的物品,可以在选项菜单中关闭特定的自动合成功能。 需要更多zeni吗?别忘了出售那些兑换物品!进入物品箱并选择出售物品。点击按钮自动排序物品(时不时这样做是个好习惯)。翻到物品列表的最后一两页,在所有碎片之前应该就是兑换物品。它们的物品描述会注明售价高昂,这些物品除了卖钱外没有其他用途。你也可以卖掉一些可能不需要的多余怪物素材。有25个以上的火龙之壳?你永远用不了那么多,卖掉一些吧! 出售物品时不要过于冲动,没有撤销按钮。建议保留右上角带有小图标的物品,比如橙色刀叉图标代表食材,蓝色羽毛笔和羊皮纸图标代表特殊物品。如果还是缺钱,你有几种选择。经典方法当然是“猎杀怪物并出售战利品”,但要是想暂时不打猎的话,可以试试采集矿石和骨头!这些材料的售价虽然中低,但如果装备上快速采集、地质学家和采集大师等技能,就能加快采集速度并增加战利品数量,弥补售价的不足。在地图上寻找合适的路线,让你的塞克雷特(Seikret)主要负责移动。查看地图的环境概览预测,留意“采矿点激增”之类的信息。尽可能利用那些活动。 如果你想刷公会点数,做法和上面一样,但要专注于能获得公会点数的物品。这些物品包括化石、宝石、水晶、琥珀、宝藏等等。留意任何适用的数量激增情况。 这些物品还可用于与特定NPC交易,以获取食材和怪物素材。 在物品与装备菜单中,进入每日登录奖励可每天领取免费物品。 你可以在营地支援台找名为科努特的艾露猫领取已购买、预购、测试参与、前作存档数据以及社区物品奖励。 科努特还提供限时悬赏任务,这些是可完成以获取奖励的小型目标,每几天刷新一次。通用技巧与窍门 - 第二部分 狩猎准备 不要一开始就在补给品储备处购买过多物品。偶尔会有促销活动,许多物品会半价出售。抓住机会在促销期间批量购买。 每隔一段时间,会有支援船抵达营地售卖稀有物品。这些物品需要用公会点数而非zeni购买,但通常非常值得。它们偶尔会出售其他地方无法获得的物品! 务必定期查看支援站/食材中心以获取更多口粮。虽然口粮会随时间积累,但最多只能存放10份。领取这些口粮,这样它们才能继续补充。如果任务中的秘密口袋补给给了你通常无法获得的额外物品,这些物品就是利用任务怪物弱点或防御其能力的提示。例如,如果你获得了除臭剂,那么它很可能对该怪物施加的某种异常状态有效。 尝试携带对目标怪物有用的物品: - 解毒剂或草药可以治愈中毒状态,从长远来看能帮你节省大量回复药。 - 对喜欢飞到攻击范围外的怪物使用闪光弹。如果能在它们飞行时将闪光弹扔到其眼前,可能会使其坠落到地面并陷入无助状态。 - 同样的原理也适用于对钻地怪物使用音爆弹。 - 面对青熊兽及其散发的臭气时,除臭剂是必不可少的物品。
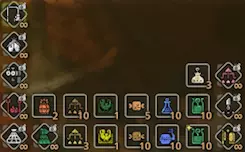
When figuring out what items to bring with you to a hunt, it may be tempting to bring everything that could be useful. But... do you really need all that? You don't need antidotes while fighting Rey Dau! Holding too much stuff will clutter your inventory and make it harder to find what you want in the Item Bar. Bring what you like, but every once in a while, take note if you're carrying any items you're never using. Sometimes, less is more. As an added recommendation, try organizing your lesser-used items vertically on the item bar, since you might not need them as urgently.While many items from your Seikret pouch are free to keep, you can't pick them up if you're holding the maximum amount already. it may be a good idea to use an item loadout to keep your inventory half-stocked. That way, each time you use the item loadout, each quest will give you the maximum free supply of potions, rations, and other goodies. You can use item loadouts inside camp tents, at item/equipment boxes, and at Provisions Stockpile merchants. Two sidequests in high rank will ask you to fight in the Wounded Hollow arena. They will reward you with a Powercharm and an Armorcharm. These increase your attack and defense as long as you hold them in your inventory. Put them in your item loadout and keep them there forever. If you don't want them clogging up the item bar, place them vertically above something else. You can also earn the Powercharm and Armorcharm through the standard arena quests in the Gathering Hub. You can place a barrel training dummy outside of your Pop-up Camps. You can attack it to charge up your weapon gauges before setting out to fight a nearby monster. Another Pop-up Camp decoration with a potential use is the roasted meat. You can pick up rations from it from time to time. Every once in a while, you'll be invited to a feast with various people you interact with throughout the story. These provide more attack, defense, resistances, and food skills than you could ever obtain by cooking on your own. Take advantage of these when you can, especially if you're about to take on a more difficult hunt. Since your maximum stamina depletes over time, you may be tempted to eat a new meal. If you want to keep the previous meal's buffs (especially those from feasts), eat a ration, well-done steak, or a wriggly litchi to restore some maximum stamina. In the Grand Hub, every once in a while a short concert will begin. If you're near the stage as the song finishes, you'll obtain a random buff of these four: Demondrug - Attack Boost Armordrug - Defense Boost Dash Juice - Reduced stamina consumption Immunizer - Faster red health recovery General Tips and Tricks - Part 3 Quest DetailsPay attention to the quest objective. If it says Slay, you must kill the monster - attempting to capture will not end the quest. If it says Capture, you must capture - killing the monster fails the quest. If the quest objective is Hunt, then you are free to slay or capture as you please. If you start a quest from attacking a monster out in the field, you will remain in the world afterward. If you start a quest from the quest board, you will be sent back to Base Camp afterward, so be sure to carve the monster first before you leave! Every day you play, you'll gain login bonus items, including a Lucky Ticket. You can hold up to 5 at a time. Spend these when starting or joining a quest to gain bonus rewards. This will apply to everyone in the same lobby. You'll receive a notification if someone else uses a ticket, giving you bonuses on your next quest. During downtime, Bowgun users can hold down the reload button to sequentially reload everything without needing to do further input. Don't forget about endemic life while going through hunts. Wedge Beetles, Paratoads, Vigorwasps, and the like can make a difference. Heatmantle and Chillbugs heal you in addition to the hot/cold resistance effect. Farming a monster over and over for specific drops? While it is fast to constantly repeat quests from Alma, don't forget to keep an eye out if your target is currently out in the field. You can check the Environment Overview from the map to see what extra rewards you'll get for hunting that particular monster. You might find a guaranteed drop of what you're looking for. Joining other people's SOS quests are another good way to find what you need. If you find a monster in the field that you want to hunt, you have the option to select it in the map and save it as an Investigation quest for you to hunt later. This can be useful if you don't have the time or supplies to hunt it right now. Talk to Alma to activate an Investigation. Investigations can be done up to three times, so if you find a particularly good hunt, try saving it as an investigation to obtain the rewards multiple times. After saving the investigation, you can even hunt the monster directly from the field anyway for a total of four sets of quest rewards. Investigations also save the size of the monster, so if you find a gold crown size monster, large or small, you can save it for later to share with friends and colleagues online. If you completed a hunt in the field and decided that you should have made it an investigation, it's not too late. Open up your Field Survey history and you'll be able to see recently completed hunts to create an investigation.Material rewards can vary between killing the monster or capturing it. Try changing tactics if you're still not finding what you need. Some might even be exclusive to carving severed parts. Keep an eye out for Event Quests! These are special quests that Capcom releases for a limited time, and usually offer unique or special experiences and rewards. This can range from absurdly big or small monsters (nigh guaranteed crown size), higher-than-average quest rewards (such as for zenny, guild points, ingredients, hunter rank, or decoration drops), cosmetics (layered armor, stickers, emotes), or even unique weapons and armor you can't get anywhere else! You can find an event quest schedule[info.monsterhunter.com] on the official Monster Hunter website. Similarly, be sure to do sidequests sooner rather than later. They can unlock extra features that can help you in the long run. Take some time to hunt some small monsters, too. Their parts might unlock armor pieces that you never would see otherwise. You can carve Gypceros while it is feigning death, but you might take damage for doing so. I've tested and confirmed that this is an extra carve you wouldn't get otherwise, as it doesn't reduce the amount of carves after you slay it for real. Weigh the benefits of one extra carve vs. healing back up. Monsters of the same species can vary in size. Your hunter’s profile/guild card records the largest and smallest monsters you’ve killed or captured. Exceptionally large or small monsters will show a crown icon when viewed through binoculars. Defeating these will subsequently put that crown on your guild card for that monster. If the monster is as large or small as they can possibly be, that will be indicated with a gold crown. Monsters that are close to that threshold, but not quite, will have a silver crown. Defensive Combat Tips and Tricks If you're playing alone offline, you can pause the game, even mid-combat. This can be useful if you're expecting real-life interruptions. Using an item while you're wielding your weapon will automatically sheath and use it as fast as the animation allows. You can slowly walk around while using consumables like potions, or while riding your Seikret. Using Optimal Health Recovery or Optimal Status Recovery in the radial menu will automatically choose an item that fits your situation. This is very useful, as it won't waste a Mega Potion if a regular Potion will do. If you have honey in your inventory, using Optimal Health Recovery while heavily injured will automatically combine a First Aid Med+ and use it immediately. While you can make First Aid Med+ in advance, keep in mind it's still considered a Supply Item, so any that you don't use by the end of the quest will be lost.You can dodge during most animations while your weapon is sheathed. If you're drinking a potion and it gets canceled from dodging or being hit, you keep the health you recovered so far but lose the rest of the potion.
有些怪物的攻击极为危险,你需要【躲避并掩护】。这就是紧急翻滚的作用!当你靠近怪物且武器收鞘时,直接向远离怪物的方向奔跑并按下闪避键。你会跃向空中,然后狼狈地扑到地上。在整个动画期间,你是100%无敌的,这对于大型怪物发动的最危险攻击非常有用。要成功施展紧急翻滚,请记住以下几点: 1. 武器必须收鞘。 2. 必须有足够的耐力进行闪避。 3. 必须朝着远离怪物的方向奔跑。这与普通奔跑的动画不同。 如果你被重击倒地,在起身之前你也是无敌的。有时候,不按任何按键,等怪物攻击结束后再按键起身是个不错的主意。不过这并非完美的解决办法:几秒钟后你会自动站起来,所以如果时机把握不好,你站起来时可能正好撞上怪物的另一次攻击。 战斗中要留意你的艾露猫。它们可能会喊出“它要搞事情啦!”之类的话,提醒你怪物正在蓄力准备发动强力攻击。 如果场面变得难以控制,别犹豫,召唤你的伙伴来喘口气、恢复生命值、装填弹药或打磨武器。 如果你生命值很低且靠近营地,尽管跑回帐篷。帐篷会完全恢复你的生命值、治愈所有状态异常,并打磨你的武器。这能为你节省一些时间和消耗品。注意不要让大型怪物跟着你并摧毁帐篷。 记得让自己保持最佳状态。维持食物增益效果会带来很大不同。你可以随时使用便携烤肉架进食。 时不时去铁匠铺确保你的武器和 armor 已升级。避免在狭小区域战斗,比如区域间的走廊。尽量将战斗保持在大型开阔区域,为你和狩猎小队提供更多周旋空间。如果再有一两只愤怒的怪物出现,你不会想被困在死亡走廊里。 防御战斗技巧 如果你独自挑战某个任务时遇到困难,可以尝试多人模式。不要忘记 SOS 信号弹,它就是为此设计的。如果你在多人模式中难以完成任务,试试单人模式。相信我,很多难缠的怪物在单人模式下会更容易应对。虽然它们的注意力会更多地集中在你身上,但它们的生命值更低,造成的伤害也更少,这意味着致命连招或秒杀的可能性更小。 如果仍然难以对付某个特定怪物,可以试试这个方法:停止战斗,观察几分钟。了解它的行为模式:攻击前的预兆、攻击范围以及恢复时间。任务的时间限制通常很宽松,放慢节奏!没必要急于求成,采取防御性的玩法。 部分问题可能在于你只装备了攻击技能,而没有选择提升生存质量或防御类的技能。网上的攻略和主流配装往往追求极限输出,但这是建立在你大部分时间都懂得如何格挡、壁击或闪避的前提下。如果你一直在治疗或频繁猫车,那你的DPS(每秒伤害)就是零。 许多防御技能,比如回避性能或回避距离,其实能提升你的DPS。通过减少受到的伤害,你会有更多机会攻击怪物,也能减少后退治疗的时间。 防御技能的性价比其实比攻击技能更高。数据计算显示,平均而言,纯输出配装和优先防御的配装之间的差距在于:输出降低10%,但对物理伤害的生存能力提升35%,对元素伤害的生存能力提升80%。【强化】技能在你狩猎中猫车后,能显著提升你的基础攻击力和防御力。关键在于【强化】技能具有追溯效果:你可以先用主装备套装猫车,然后在猫车后切换到带有【强化】技能的其他套装,仍然能获得该技能的加成。你可以享受高达+21%的额外基础攻击力和32%的额外防御力!如果先猫车的话,它可以说是游戏中性价比最高的技能之一。 在多人游戏中,如果其他玩家被冰冻、束缚、眩晕、睡眠或麻痹,你可以攻击他们以提前解除这些异常状态。如果怪物原本会攻击他们,这一操作可以挽救他们的生命。
Some monsters are able to grab you. You're not completely helpless; you're able to use a small knife attack or fire your slinger to defend yourself and hopefully break free. Are you in a real pickle and need to get out quickly? You're still able to fast travel while in combat. You can quickly open the map, hit left on the d-pad, then hit confirm -> confirm to swiftly escape. Alternatively, you can open the map via the menu under the Info tab, or even make it faster by setting it as the top option in the favorites tab. You'll eventually encounter a very large ice-element monster with an exceptionally dangerous attack. There's two "intended" ways of dealing with it: Use your slinger to pull down an ice chunk; it will create a barrier to block the attack. However, many of the monster's attacks destroy the chunks, so if you bring one down early, it might not be there when you need it. It can't do the big attack at all if you break off the metallic fins on its back. They're quite tough, so use explosives, mind's eye attacks, or focus attacks when it's knocked over. and a few "unintended" ways: Bring up the map and fast travel to camp. Simple as that. Place a large barrel bomb and get caught in the barrel explosion so that you're flat on the ground, invincible for the duration. Switch Axe and Long Sword can counter with perfect timing. Dual Blades can Demon Dodge repeatedly if empowered with Demon Boost Mode. Lance and Gunlance can survive if they block with guard, guard up, and effects that reduce stamina consumption. You can also survive with a ton of ice resistance if Divine Blessing triggers. Later, you'll encounter yet another large monster with an exceptionally dangerous attack. This one is less intuitive: It leaves crystallized wylk deposits after many of its attacks. Hit them with elemental slinger ammo to detonate them. Bear in mind, your slinger won't deal elemental damage if you're afflicted with dragonblight! Its big attack has four ways of dealing with it: The large wylk crystal deposits are explosive. They will NOT protect you. If the monster hits them, they damage you. If you detonate them yourself, you can damage the monster instead, and create safe spots where they once stood. Run to the opposite side of the arena; call your Seikret if necessary. Return to camp by using the map or a Farcaster item. The monster is up against the wall the first time it uses the big attack, but every big attack after the first, it's safe to stand behind it. Offensive Combat Tips and Tricks Remember that different parts of a monster take different amounts of damage. A slashing attack on a wing might be weaker than that same attack on the tail, for example, but the opposite might be true for a bowgun's shot. If you're not aiming to break body parts, try to hit where the monster takes the most damage. Sometimes, these "hit zones" change during the fight. Some monster parts get stronger or weaker when they're enraged. For a more specific example, Gravios takes a lot more damage once its hard shell is broken. You can see where monsters take the most damage (and their element/status weaknesses) in the hunter's notes.Some late-game monster tails can't be cut until they reach a certain "phase" of the fight. That's not to say attacking the tail early is pointless—severing damage will be saved to the point where it may be cut off immediately once it takes 1 more damage. Many weapons have small movement improvements. By holding a direction during or between some attacks, you may be able to reposition yourself when you couldn't before in previous games. Weapons that can guard can guard cancel, which lets them reset animations slightly faster. This can allow you to do more actions in a set amount of time. This video covers the Great Sword, but the general principle applies to all weapons capable of guarding. Focus mode allows some weapons to change the direction they're facing mid-attack. This is especially useful for Great Sword while charging, or Lance for pin-point precision on weak points. Focus mode also increases the distance of some movement-based attacks, allowing you to close the distance on monsters faster than normal. If a monster opens its mouth, that's likely a weak point. Take a stab at those open mouths and extended tongues; it will likely pay off. You don't have to sheathe to sharpen your weapon. While your weapon is out, simply use your Whetstone or Whetfish Scale and your character will begin sharpening as normal. It's easy to forget you have a lot of tools at your disposal. Utilize consumables such as Demondrugs and Lifepowders. Lure monsters together to start turf wars. Use traps offensively instead of just for capturing. Pitfall Traps and Shock Traps hold a monster longer if they're exhausted. If enraged, monsters break out of traps faster. Large Barrel Bombs can now be picked up, rolled, or returned to your inventory. Check the control prompts to learn these new interactions. When you place a Large Barrel Bomb next to a sleeping monster, your Palico and Support Hunters will often place their own for a free damage boost. If you're low on supplies, you can put your Barrel Bomb back in your inventory to take advantage of the NPC bombs without spending any of your own. The Airborne offensive skill says it increases damage done while in the air. This doesn't just apply to jumping attacks; this increases the damage of any attack that has your feet leave the ground during any point in the animation. Pretty much every weapon except the bowguns benefit from this unexpected bonus. If you like to use Sleep weapons in multiplayer, I strongly recommend going into the Communications tab and enabling the auto-shoutout when Sleep activates. It will be easier for other players to notice when it triggers and prevent mishaps. You can fire Slinger Ammo with your weapon out. Click in the left joystick while in Focus Mode. This works for most ammo, but heavy ammo dropped from monsters use a different animation and require your weapon to be sheathed to fire. Late-area tip:
守护怪物在蕴含威鲁克的地面上战斗时,有时会留下凝固的威鲁克。使用任意属性的投射器弹药射击它们即可引爆。 烟雾弹和吉利 mantle 都能让怪物在战斗中失去对您的视野。这是获取更多偷袭机会的简便方法。进行一次偷袭后,短时间内无法再次偷袭,因此不要计划连续使用。 投掷匕首造成切割伤害,因此可以切断怪物的尾巴。在跑向怪物时或怪物发动危险攻击不便靠近时进行几次射击,或许就能成功断尾。 踏入斗技场 当您取得足够进展并抵达集会所后,将解锁斗技场任务。你必须身处中央大厅,并与竞技场接待员对话才能开始它们。
标准斗技场任务始终可用。它们的规则与标准狩猎不同。每个斗技场任务都会让你对抗特定的怪物或怪物群,同时提供特定的 armor(装备)、武器和道具,你无法携带自己的装备。这是对猎人武器理解和道具运用能力的考验。对于单一玩法的猎人来说,这会迫使他们走出舒适区。 斗技场任务在【伤痕山谷】地图进行。 最多可2名玩家参与任务。 你可以请求NPC支援猎人加入。 玩家无法加入进行中的斗技场任务。 你的艾露猫不会参与斗技场任务。 所有斗技场任务都有时间限制,并根据特定时间阈值划分等级。完成速度越快,获得的奖励越多。挑战任务是具有上述相同限制的斗技场任务,但它们也是限时的。通常会有特殊奖励。一段时间后,它们会轮换下架,不再可用。之后可能会再次开放。 自由挑战任务在斗技场进行,但没有标准的斗技场限制。你可以携带自己的装备,最多支持四名玩家、支援猎人或你的艾露猫。不过这些任务也是限时的,所以请尽快完成。 完成斗技场任务可以解锁其他地方无法获得的特殊 armor pieces,所以不妨一试!紫色赛后内容 历战怪物 如同《怪物猎人:世界》中一样,游戏后期的进程会让你面对强大的怪物变种,它们被称为历战怪物或老练怪物。你会发现它们的图标周围有紫色轮廓。这些目标在战斗中表现出更强的实力,与普通版本相比,它们拥有更高的生命值和攻击力。它们的鳞片或毛发会带有轻微的金属光泽。

历经无数战斗后,历战怪物身上会留下战斗的伤疤。通过反复攻击这些已存在的伤疤,你可以将其重新打开,使其成为特殊的弱点,这些弱点会被蓝色导虫而非通常的红色导虫标记。攻击这些部位会特别有效,破坏它们还会掉落特殊素材。 击败这些怪物会获得用于技能自定义的混合装饰品和【Artia】武器零件。将三个相同稀有度的【Artia】武器零件组合,即可打造【Artia】武器系列中可自定义的武器。不同的武器需要不同的零件,任何不需要的零件都可以用作炼金材料。 最终,你可能会遇到历战王怪物。它们是精英中的精英。它们的图标周围有橙色轮廓,不容小觑。它们会提供独特的 armor sets。 狂怒怪物 另一种“紫色”终局怪物是感染了狂怒病毒的怪物。这些怪物的色素沉着更深,会呼出黑色病毒颗粒,眼睛通常呈红色。受病毒影响,它们的生命值较低,但比平时更具攻击性。它们的攻击速度比基础变种更快,部分攻击还会将狂怒病毒传染给你。 起初,病毒会在猎人身体内潜伏。如果不加以控制,病毒会使你虚弱,导致你无法再从生命值条的红色部分随时间恢复生命值。你还会受到狂怒类攻击造成的额外伤害。在病毒成熟前,要积极主动地攻击怪物。使用【打消果实】无法治愈病毒,但能减缓其发作速度,为你争取一些时间。若成功做到,你将克服感染,获得武器会心提升和暂时性的感染免疫。 **后期战斗技巧** 历战和狂怒状态的怪物是这些物种中最为强大且危险的形态。你需要全力以赴应对。 1. 确保你的武器和防具都已尽可能完全升级。 2. 根据任务合理进食。如果你要对抗历战雷狼龙,选择提升元素抗性的食物或许是个不错的主意。 3. 做好准备:携带【鬼人药】、【硬化药】、【生命粉尘】、【闪光弹】、【粪便玉】、陷阱、【麻醉玉】等物品,必要时可携带更多。随着你对这些怪物的战斗越来越熟练,可能不需要携带所有物品,但一开始准备充分总没坏处。 别忘了前面列出的攻防技巧,它们真的能带来很大帮助。 保持耐心,没必要急于求成。不要冒不必要的风险,明明可以多花两分钟确保安全,却因为鲁莽而猫车。记住,你随时可以回到营地治疗和补充物品。 如何与朋友一起玩? 《怪物猎人:荒野》在组队方面的操作有些复杂。 当你启动游戏开始游玩时,可以选择离线单人游玩,或创建/加入私人大厅或公共大厅。每个大厅最多可容纳99名其他玩家。你将能够看到大厅中其他所有人的聊天消息并加入他们的任务。 由于渲染100名猎人及其随行艾露猫和牙猎犬会严重消耗资源,因此游戏会随机选择最多15名其他玩家,让你能看到他们在营地中走动。一旦你开始任务或进入野外,他们就会在你进入自己的环境时消失。除非你允许,否则其他玩家无法加入你的狩猎,这取决于你的任务选项以及你是否发送了求救信号弹。 从这里开始,最重要的是确保在游戏中成为好友,以便将来更容易加入彼此的游戏。有几种方法可以做到这一点。 第一种方法是找到并分享你的猎人ID。你可以在猎人档案中找到它,或者通过打开游戏内菜单 ➔ 通讯选项卡 ➔ 玩家列表。默认情况下,你会位于列表顶部。

Share your Hunter IDs with each other and send friend requests. Alternatively, have everyone join the same lobby via the Lobby ID and send friend requests via the lobby members list. You can accept invitations directly from the game notification. If you miss it, you can accept or decline invitations in the menu under "Invite Notification List". You can also form a Link Party. This will link you all together in a way that allows you to see and join each other's quests, even if you're in different lobbies. When anyone starts a quest, the game will send an automatic invite to all others in the Link Party. If you missed the invitation, you can also join via the Post/Join Quest Menu ➔ Link Member Quests. You can send friend requests via the Link Party member list. Once you're all connected as friends, this becomes simpler. On the Title Screen, you can join a friend's lobby by going into Lobby ➔ Lobby Search ➔ Hunter Friend Search. In-game, you can join a friend's lobby via invite, or joining with a Lobby ID code. If you're just doing quests through Alma, keeping friends together in a Link Party or Private Lobby is all you need to do. If you want to explore the world together and hunt monsters that organically spawn, proceed with the below instructions. While in a Link Party, there's the option of forming an Environment Link. This effectively turns the game into an exploration, expedition, free-hunt mode. This is the only way for friends to see each other out in the field outside of quests. You'll all share the same environment to explore. You can start quests against free-roaming monsters in the Environment Link, but the main downside is that you can no longer post quests from Alma. If you're looking to hunt a specific monster but they're not out in the world at the moment, you'll have to leave the Environment Link. In addition, if you abandon a hunt while connected to an Environment Link, you will be removed from the Environment Link. Link Parties, Environment Links, and Private Lobbies are temporary and you'll have to recreate them for each game session. A way to help alleviate this, aside from being friends, is to create or join a Squad. You'll unlock Squads by talking to Felicita, who is in charge of the Squad Information Counter. She sits just outside the big meeting tent at Base Camp. A squad is persistent between game sessions, allowing you to create Squad Lobbies that only allow Squad members. You can also send squad messages that other players can read even after you've gone offline. In short, if you want to post and join each other's quests from Alma, be in a Link Party. Being in the same lobby is preferable, but optional. A private lobby will prevent random players from distracting your group, and being in a squad together makes creating lobbies easier. If you want to free roam and hunt monsters that show up in the field, form a Link Party then start Environment Link.Joining an Environment Link automatically puts you in the same lobby. Monster Hunter Wilds features cross-play, so you can hunt with friends no matter if they're playing PC or Console. This is why they went with Hunter IDs—to make it easier to connect players on different platforms without having to sign in to yet another account system like Capcom ID. How do we play together during the main story?It can be done, but it's a little cumbersome. As expected, this is best done in a Link Party. Everyone will need to watch their story cutscenes separately in order to unlock the next hunt. When a cutscene is finished, do not attack the monster to start the quest. Wait until everyone has finished their cutscene, then have a player attack the monster to start the quest. If you're in a Link Party, the game will invite you to join that player. As long as you're all on the same part of the story, quest progress should count for all of you. After the hunt, you'll be separated again. If someone started their quest before everyone else finished their cutscene, they may need to back out of the quest and start it again so everyone can join. Some parts of the story require you to find or repel a monster before the quest "officially" starts and you're able to let others join. For further details, this Steam Guide goes more in-depth. It has great tips on online etiquette and multiplayer tactics! https://steamcommunity.com/sharedfiles/filedetails/?id=3435493455 So many details! Seriously, there's enough details packed in this game to make full-on nature documentaries. This is just a small section to appreciate the little things that can often be overlooked. Each weapon has a different animation for a sneak attack done from a higher elevation. Slow down and observe your walking animations. You'll have different movements depending on whether you're walking on open ground, through grass, stepping in low water, wading through oil, stumbling in sand and snow, carefully maneuvering unstable terrain, and hot-stepping on lava flows. There's many idle animations while standing, riding a Seikret, or sitting down. Emotes used to lock you in place in older games. In Wilds, many emotes allow you to move around while gesturing. Try it out! Have fun with the Fireworks emote. It produces different patterns each time it's used. Use it to celebrate, or call attention to a specific area. Your hunter reacts differently depending on the size of each whopper-class fish they catch. You go from matter-of-fact acknowledgement of a smaller one to a triumphant cheer on a gold-crown size. Your waist-slot armor, or layered armor, determine the look of your carving knife. A few arm-slot armor pieces change the visuals of your hook slinger. Some armor pieces are living creatures, such as the Amstrigan hat or the frog for your palico. Their facial expressions will change to match that of yourself or your palico, too. It's most noticeable during emotes. When catching small endemic life that you immediately extract items from, you may have a special animation of squeezing its material into a vial and letting them go. Felynes in particular have a lot of details put into their animations. Take some time to watch some of the felynes as they go about working in base camp; you may see something entertaining. Sometimes when you get KO’d, you can follow the Cart Felyne as it runs all the way back to Base Camp. When you use photo mode, a felyne shows up to diegetically "paint" your screenshot. Alma will sometimes pull out and admire one of her archaeological artifacts. She will also respond to many emotes, or wave when you point the camera at her in photo mode. Your hunter, palico, and Alma have idle animations when they're in hot or cold environments without proper protection. Alma will even pull out her own hot drink to heat up. Your Palico has numerous animations for various situations, such as interactions in a camp tent, animations during quest completion, reactions to your emotes, fishing when you fish, or the fact that they use a little raft when going through water too deep for their legs. If idle near something interesting, they may look at it, interact with it, or even imitate it! At high vantage points in various locales, you can see the other game environments. The weather over each one will reflect their actual state on your map. Monsters, endemic life, and NPCs all have different animations and behavior depending on the time of day and weather. Mimiphyta are endemic life in the forest that mimic flowers during the Plenty and mushrooms during the Fallow. Nearly all living creatures' eyes dilate and contract according to ambient light, and close their eyes in response to bright lights or dust in the air. Some monsters have nictitating membranes (third eyelids) that reduce their sensitivity to outside stimuli. Small monsters become more confident and aggressive in large groups. If alone, a small monster may run away from a large monster, but as a pack they're more likely to defend themselves with tooth and claw.
Small monsters and endemic life have small variations in size, color, and other characteristics such as horn shape or number of antennae. Florashell Crabs have different plant growths or dirt clumps, and Dapperwings have various color combinations. Rarely, you can find melanistic Ceranototh. Speaking of, male Ceranototh can have different configuration of spikes on their backs. Female Ceranototh try to stay near the males for protection from lightning strikes during the Sandtide. Wind pressure from flying wyverns can scatter petals and leaves on the ground. Rey Dau's "railgun" attack may leave deposits of fulgurite if the electricity hits sand. In the rare occasion that a Gypceros feigns death while fighting another monster, the other monster will disengage, thinking themselves victorious. Bulaqchi can climb walls and ceilings. They may pounce on you from above as an ambush tactic. Amstrigians (the birds that look like small Pukei-Pukei) make nests in trees. If you capture a parent, the baby birds in the nest will sadly perish over time as the nest crumbles. Dapperwings can be seen using their wide wings for attracting mates and courting. Some attempts succeed, and others fail. Dapperwings can sometimes get caught and eaten by carnivorous plants. You can watch Vigorwasps approach flowers to harvest their healing nectar. Small bits of monsters can fall off when damaged. Scales, spikes, and fur can fall to the ground when hitting specific body parts. After you kill a large monster, after a set amount of time, it will begin to decay and rot. This will alter the carve rewards if you haven't carved it already. Fungi may grow on the carcass in rare cases. Small scavenger monsters may come by to snack on the rotting meat. If a Chatacabra charges into a barrel bomb with its mouth open, its tongue will stick to the bomb and lift it in a special animation before exploding. In the last area of the game, if you kill a guardian monster atop wylky ground, observe for a few minutes and you'll see the body absorb the wylk and crystallize. You can carve wylky crystals off the body. Fire damage can cause small brushfires in dry grass or set fire to oilwells, which can deal a small amount of damage to you or a monster. Be mindful of that, especially when fighting with a Gunlance or overcharged Charge Blade. The glowing water in parts of the Oilwell Basin is caused by bioluminescent bacteria. This phenomenon can rarely be found in real life coastal regions of Japan, Taiwan, Africa, the Bahamas, Mexico, and the United States. This suggests the Oilwell Basin waters are rich in nutrients. Some events, monsters, or items only show up during certain combinations of time of day or season; and some only show up during certain phases of the moon. Later in the game, in the town of Suja, you'll find Poogie! Between each hunt, you can pet them. Press the interact button at the right time (with the animation/music as a cue) to get a joyful token of appreciation! It's Monster Hunter tradition to say that petting Poogie helps with item drop RNG. The late game monster Zoh Shia has a lot of similarities with the legendary dragon Fatalis. They share the same resting pose, and some of its attacks match those of the Crimson, White, and Black Fatalis variants. In the Gathering Hub, you can find a hidden massive Downy Crake. It sometimes leaves items in its nest. Starting from the Hub entrance, you can find it by hugging the far wall (vaguely in the direction of the barrel bomb bowling), climbing some vines, jumping across some cliffs and through a waterfall. Quick note about missing images Unfortunately, Steam sometimes deletes guide images without warning. This has been happening for years, and the pattern of what stays and what gets lost is inconsistent. If this guide references a missing image, or it seems like an image should be somewhere but there isn't, that's probably what's happening. Let me know in the comments and I'll re-upload the file. Cheers, and thank you for reading the guide to the end! Credits and Useful Links Can't get enough of Monster Hunter Wilds? Try for 100% completion! https://steamcommunity.com/sharedfiles/filedetails/?id=3435493260 The official Monster Hunter website[www.monsterhunter.com] is a great source for basic information, screenshots, footage, and art. It's new and not fully up-to-date yet, but https://monsterhunterwiki.org/ is a passion project for creating a wiki with higher standards and without the issues other wikis may have. The Monster Hunter Fandom Wiki[monsterhunter.fandom.com] is a decent repository of information. An alternative is the Game8 Monster Hunter Wilds Wiki[game8.co]. Kiranico[mhwilds.kiranico.com] is one of the most in-depth databases for the Monster Hunter series. You can try making your own armor builds by trying out this[www.mhwildshub.com] or this[cecilbowen.github.io]. Arekkz Gaming has a ton of content dedicated to Monster Hunter. RageGamingVideos is another channel which covers a lot of Monster Hunter content. gaijin hunter is a long-time Monster Hunter content creator with plenty of insight on the series. Back before the games were simultaneous release, gaijin hunter was often the one who brought news to the west. dreamingsuntide is great at describing armor and weapon skills in-depth. Mahnster Hunter is breaking into more educational content for the Monster Hunter series, with a focus on learning how to become a better player.