换一换
换一换 


一份由@stoin、Steam平台上线前的@Veteran及其TITANHEIMR服务器成员共同制作的完整且全面的游戏指南。包含以下章节:游戏介绍、设置与控制、可玩物种、计划推出物种、角色自定义、角色属性、祭坛与神明、天赋、传承、世界机制(如天气、海拔)、战斗机制、社交机制、成长以及筑巢。

《百慕大野兽》是一款抢先体验阶段的多人游戏,玩家将扮演恐龙或已灭绝的史前爬行动物,在充满各种机制的环境中生存!在TITANHEIMR服务器中,我们特别注重生态系统的维护,确保每种生物都有一定且健康的玩家数量。我们通过巢穴事件和极其复杂的群体限制计算来实现这一点。简而言之,我们通过对服务器的优化,从本质上改善了游戏体验,使其更加有趣。在我们的【生命周期(启用成长)】服务器中,最终目标是生存并不断成长。 在《百慕大野兽》中,你可以扮演陆生、半水生、水生以及空中生物!最近,游戏通过模型重塑和即将推出的地图【Titania】的开发工作,一直在提升画面质量。运用你的能力来确保生存,并小心强大的自然灾害。 如果遇到需要报告的漏洞,请自行搜索官方的Beasts of Bermuda服务器进行反馈!开发团队虽然没有过往项目经验,但这款游戏显然是倾注了大量热爱与心血的 passion project。 最低系统要求 操作系统:Windows 8或更高版本,仅支持64位 处理器:Intel Core i5或同等配置 内存:8GB RAM 显卡:NVIDIA GeForce GTX 680或同等配置 DirectX版本:12(如有需要,可在启动选项中设置为11) 网络:宽带连接 存储空间:20GB可用空间 设置与控制

On launch, you will be presented with a menu that allows you to select Multiplayer, Join Last Played Server, Settings, Help Menu, View replays, Creature Editor, and Exit Game. Select Settings! Beasts of Bermuda even has support for colorblindness, as you will see in the first tab. Make sure, under Gameplay Settings, "Interaction prompt" is set to "On". This will give you helpful hints when you use your Scent keybind. Make sure to check out your Controls! The "Use" keybind is what you will use to pick up another player, pick up an object, eat, drink, or as an aquatic, breathe. Your "Creature Ability" keybind is also important for combat! The "Creature Special" key is only used by Auroraceratops, Elasmosaurus, Kronosaurus, and Oryctodromeus. Check out the next section for more information about any one of those creatures! Your "Talents Screen" lets you unlock specific skills for your creature, and "Character Menu" lets you check your stats! As to not be at a disadvantage, you should also set your Field of View slider all the way up to 110 to see immediate dangers. Veteran players usually have this set to 110! You should also open the console key (F12 by default) and use Gamma 3 to brighten your game if you can't see! Using Gamma restores it to default, and you can go higher than 3. The older veteran players typically have View Distance set to the lowest option, which makes smelling scents in the distance easier as they are unobstructed. View Distance does not affect scent ranges (475m or 19 1.0 Apatosaurus in distance), creature render ranges (250m or 10 1.0 Apatosaurus in distance), or carcass render ranges (200m or 8 1.0 Apatosaurus in distance). Optimization Most players of Beasts of Bermuda are not presently able to play with all Cinematic (the highest setting) Graphics settings. The game as it stands is not optimized, but aiming to be. Here are some tips to improve the performance of players with both minimum requirement and high-end systems! The following can be changed in your Settings. The Settings panel is also accessed through the "Options" button in the Esc menu if you joined a server already! Latency caused by your Internet connection will not result in lower FPS. You will find your creature rolling back to a spot it was at a few moments ago and unable to send messages in chat for short periods of time. If you're playing in TITANHEIMR, open a technical support ticket in our #support channel. Game Window Mode: Windowed recommended Use VSync: disabled recommended Resolution scale: lower for minimum specs or below only, otherwise keep at 100 AMD Upscaler: Use this as a last resort after reading all these settings along with resolution scale if your FPS is still low. Keep in mind if you're playing a server other than TITANHEIMR, the fault may be in the custom map work (and/or many buggy store assets other servers may use in map work) assuming your specs are good. Max FPS: adjust this if you are having FPS issues on multiple servers, you may have it too high or too low; I would never set mine to 200 even with a good machine Field of View: As to not be at a disadvantage, I recommend setting this all the way up to 110 to see immediate dangers. Veteran players usually have this set to 110! Gamma Correction: Set this to 3.0 if you have trouble seeing in the dark, or 4.0! This will automatically keep your Gamma higher instead of the default. Max View Distance: As to not be at a disadvantage, I recommend setting this to Low. This does not affect scent render range (~475m), creature render range (~250m), or carcass render range (~200m) but it does affect Delicious "fat" Plant render range. This just makes it easier for veteran players to spot creatures hiding behind map objects (rocks, trees) and see scents. Anti-Aliasing: As to not be at a disadvantage, Low recommended. This allows you to see the slightest movements and is ideal for spotting small creatures. The main culprits of low FPS in your settings are Shadow Quality, Texture Quality (somewhat, note anything above High will just make textures extremely "crunchy"), Effects Quality (i.e. clouds, light particles in the ocean), and Ocean Quality. As to not be at a disadvantage, Low Foliage Quality is recommended. Veteran players may set this to low to hide the base map grass or plants small creatures use to hide. This will however not help you very much in TITANHEIMR. Lens Flare Quality should be set to None if you have epilepsy. This still does not make the game entirely safe for you, though! Playable and Planned Genera

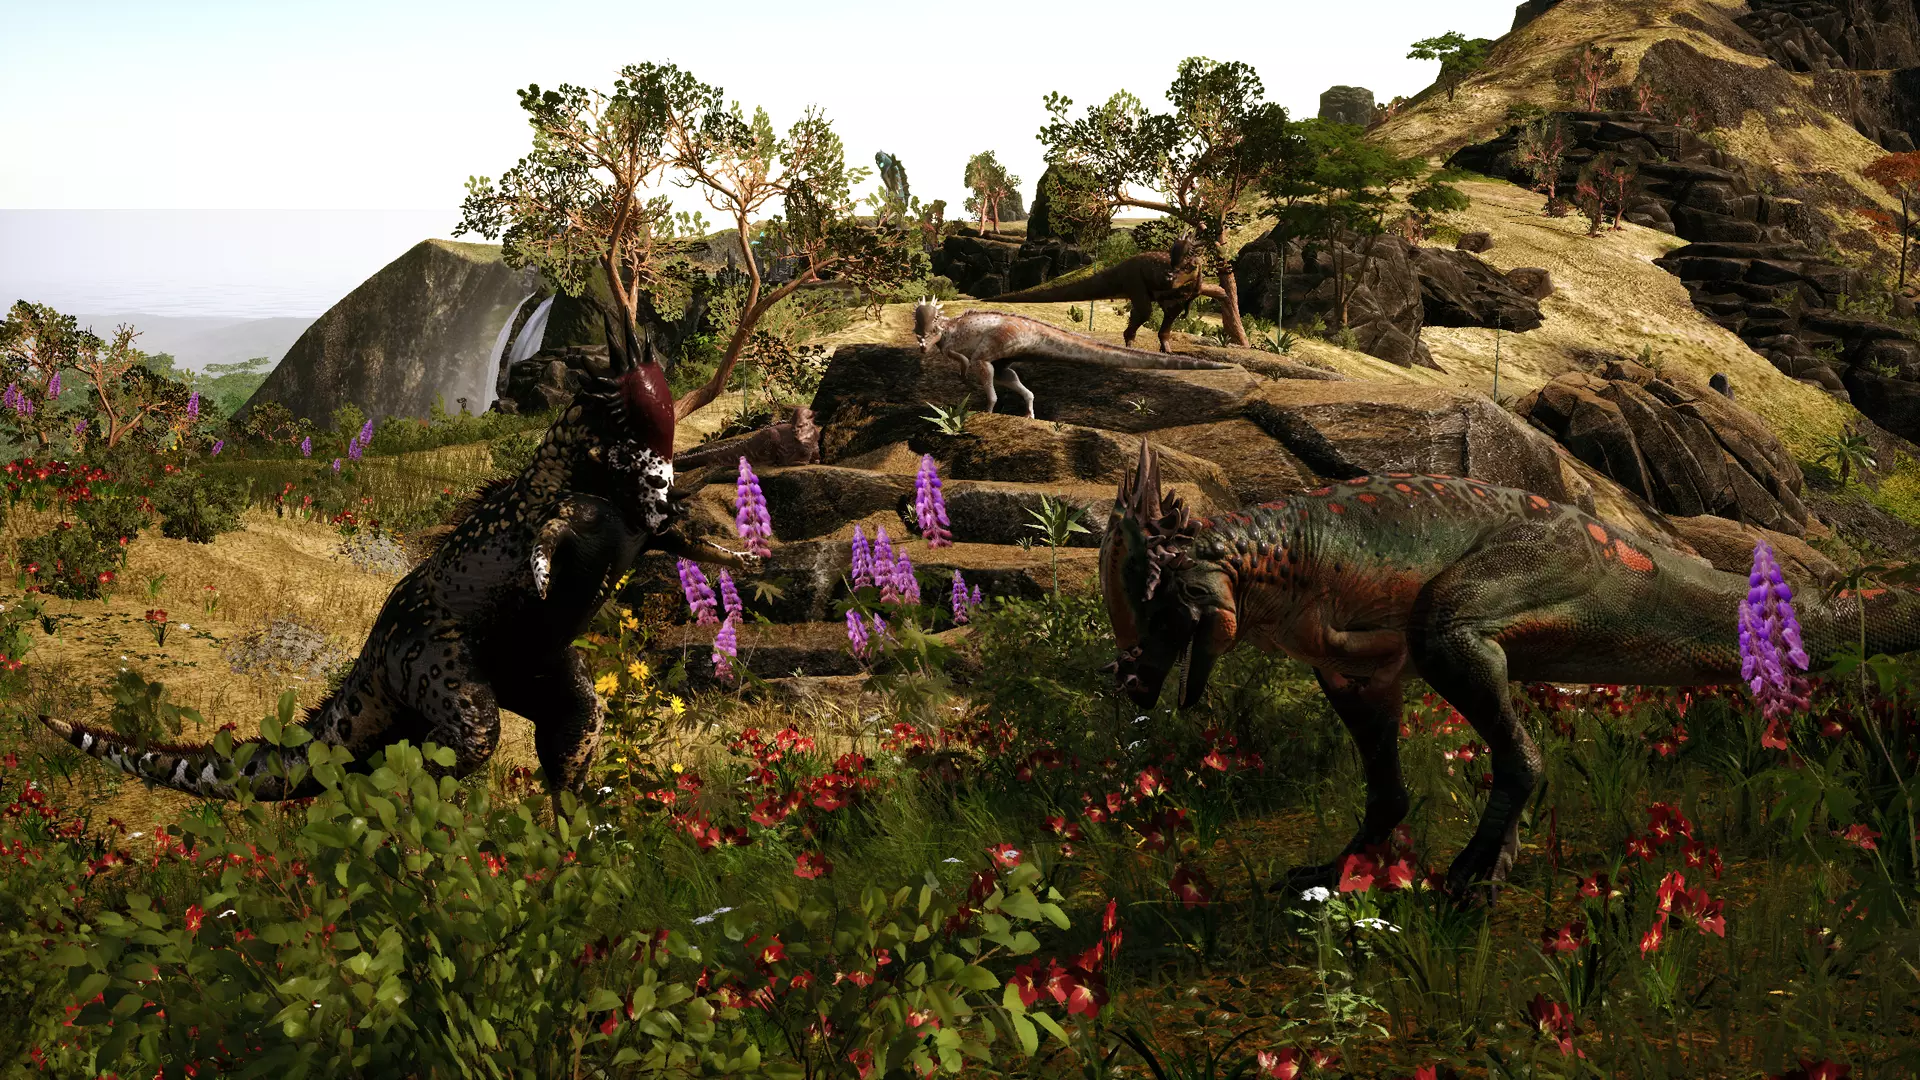
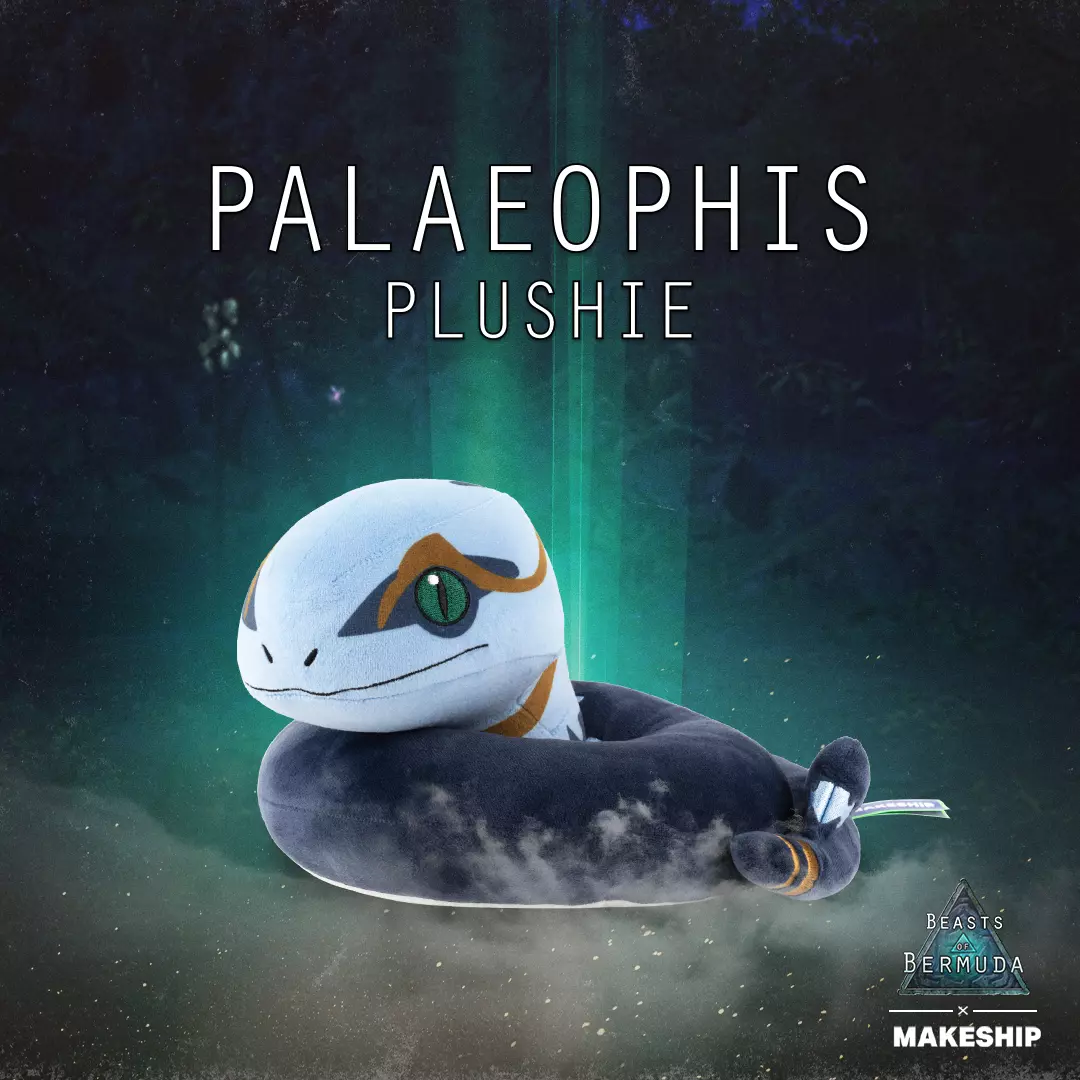
可游玩生物列表 高棘龙(陆生 carnivore) 迷惑龙(陆生 herbivore) 古巨龟(水生 omnivore) 科阿韦拉角龙(陆生 omnivore) 薄板龙(水生 piscivore) 鱼猎龙(半水生 piscivore) 野猪鳄(半水生 carnivore) 克柔龙(水生 carnivore) 沉龙(半水生 herbivore) 斑龙(陆生 carnivore) 大盗龙(陆生 carnivore) 沧龙(水生 carnivore) 掘奔龙(陆生,穴居 herbivore) 厚头龙(陆生 omnivore) 古蛇(待添加) 副栉龙(陆生 herbivore) 无齿翼龙(飞行 piscivore) 美甲龙(陆生 herbivore) 风神翼龙(飞行 frugivore/herbivore) 准噶尔翼龙(飞行 piscivore) 霸王龙(陆生 carnivore) 犹他盗龙(陆生食肉动物)迅猛龙(陆生食肉动物)祖尼角龙(陆生食肉动物)杂食动物和食鱼动物需要肉类,因此在《泰坦heimr》中,我们将它们视为掠食者,并允许杂食动物进行捕猎。目前有18种可玩的食肉生物,而食草生物仅有6种。 自定义

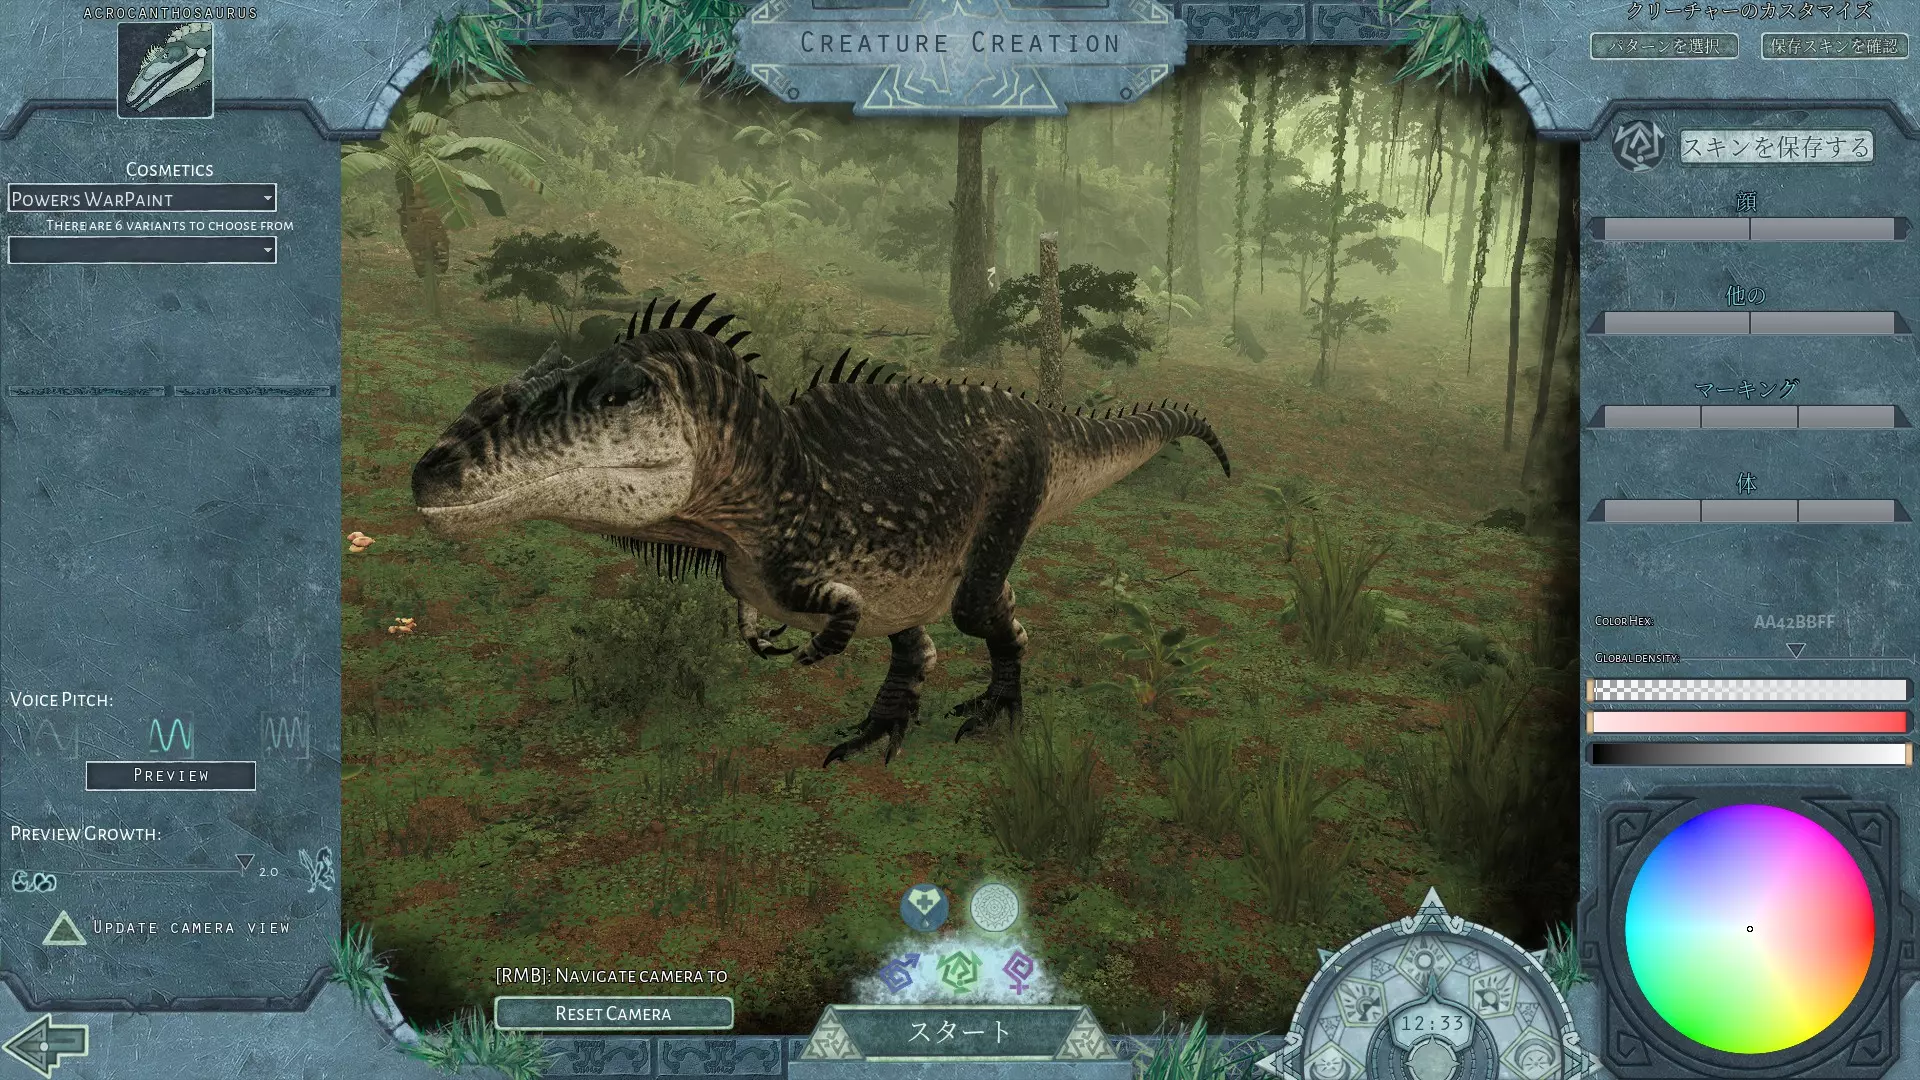
《百慕大野兽》拥有Steam平台上最先进的皮肤自定义系统之一。通过嵌套系统,你还可以将一代又一代的皮肤混合在一起!《百慕大野兽》每个属也有大量独特的皮肤图案! 从生物创建界面创建角色 当你在角色选择菜单中,点击一个生物后,点击【选择图案】,屏幕右侧会出现一系列皮肤图案。选择一个皮肤图案后,该皮肤的默认颜色将加载到你的生物模型上!确保将【全局密度】滑块一直向右移动,否则默认颜色会在你的自定义皮肤中半透明显示。在该界面中,你还可以选择生物的性别。如果意外选错性别,或者在被孵化时获得的性别与期望相反,你可以每周在TITANHEIMR的【获取支持】频道申请一次性别变更(全账号通用,主角色和副角色不能各申请一次)。其他服务器会为此收取真实货币或需用货币购买的点数,我们不会这么做,因为这是掠夺性的行为。涉及法定货币的此类行为也违反Steam用户协议。 当成长值达到0.7时,你将无法再更改皮肤。但在TITANHEIMR中,此阈值调整为1.21成长值。在《泰坦heimr》中,你也可以每24小时通过特定渠道申请“换肤”来更改外观。其他服务器会为此收取真实货币或需用货币购买的点数,我们不会这么做,因为这是掠夺性的行为。涉及法定货币的此类行为也违反了Steam用户协议。在《泰坦heimr》中战斗时,你不能更改皮肤,这可能会让攻击者混淆,导致他们失去已锁定的目标。 你可以查看完整指南以获取皮肤自定义帮助以及有关带有发光层皮肤的信息!完整指南无法在Steam上完整展示。

Health Your creature's health is represented by how full the HUD circle with the skeleton is. World items such as crystals and tall, pink Ivan flowers, also called “health flowers”, heal you. Red flowers and purple flowers on our map also heal you! Crystals heal you much more than flowers! On our map, we also have beehives which will restore your entire health pool. We do not use crystals on our map as they take away from our map’s realistic themes. Comfort Your creature's Comfort is represented by the color of the HUD circle with the skeleton. How full this circle is your health, and your Comfort can start to give you health damage if it falls below 30. Stressful weather can make your creature more sensitive, and start taking damage under 40 Comfort. 50 Comfort is the base, neutral Comfort level of all creatures. However, Oryctodromeus outside their burrow default to 47.3 Comfort. The Resilience Talent at 3/3 raises this to 65! Your Comfort directly influences your healing rate, aside from the Healing Talent. Unlike other mechanics, Comfort ticks are every 1 second rather than 15 seconds. Resting allows you to recover lost Comfort faster. Stamina Your creature's Stamina is represented by the footprint HUD icon. Your Stamina allows you to sprint, jump, climb altitude (fliers), and take off (fliers). The Dart and Lunge abilities also cost Stamina, Tyrannosaurus uses Stamina during its Devastating Ambush, and Pachycephalosaurus uses Stamina during its Charge. Stamina can be drained through the Intimidating Roar of Acrocanthosaurus, Venom of Palaeophis and Zupaysaurus, drowning (except for aquatics), and the Exhausting Bite Talent. You will be unable to sprint, jump, climb altitude (fliers), and take off (fliers) with enough Injury, too. For more information on Injury, check out the Combat Mechanics section! Ability Power Your creature's Ability Power is represented by the red circle HUD icon. It allows you to perform attacks, use abilities, and use creature special abilities! You are unable to defend yourself with low Ability Power! Ability Power can be drained by the Venom of Palaeophis and Zupaysaurus at high dosages (45+ Venom, drains extremely fast at 75+ Venom). Salt Salt is an extremely difficult resource to maintain as a herbivore. It is found along coasts. Carnivores, omnivores, and piscivores naturally obtain salt from the meat they eat and do not need to eat salt deposits. The salt bar is equal to 240 Salt. Small salt crystals grant +6.0 Salt, medium +12.0 Salt, and large +18.0 Salt. If a smaller bar appears to be 1/4 of the whole meter, it is equal to 60 Salt, 1/4 of 240. The end bar on the meter for Apatosaurus takes up 1/2 of the meter, or 120 Salt. On our map, salt is also found around the shores of water sources that connect to the ocean and the base of some mountains in smaller amounts. We also have much more salt on our map, opposed to default maps. Diet System Upon opening your character screen, you will see your diet. You must aim to get the marker on each meter over the large bars for a proper diet. Having an Unhealthy Diet results in slower Stamina regeneration, slower sprinting speed, and faster Stamina drain. Having a Poor Diet has no negative effect and is a warning debuff notifying you that you will have the Unhealthy Diet debuff soon. A Balanced Diet is a neutral, good diet with no effect. A Superb Diet grants faster egg gestation and reduces the movement speed penalty when carrying items. Food Your creature's Food is represented by either a seaweed HUD icon (Archelon and Lurdusaurus), leaves HUD icon (all herbivores except Archelon and Lurdusaurus), meat HUD icon (all carnivores), or fish HUD icon (all piscivores). Your Food at 100% increases your Growth rate, or decreases your Growth rate if below 100%. Being Well Fed or having Food Satiation does not impact your Growth rate, and is considered 100% Food in the Growth rate equation. By eating the food you are supposed to eat according to your HUD icon, you gain Food Satiation. Eating rotten meat as a carnivore or piscivore without the Scavenger Talent can result in negative Comfort Bias! If you turned "Interaction prompt" to "On" under Gameplay Settings, smelling meat will tell you if it is rotten. If the tooltip says "It's likely to make you sick" or "It will make you very sick to eat", it does not count as food, and you may hunt. Water and Air Terrestrial, semi-aquatic, and aerial creatures have a Water mechanic symbolized by a droplet HUD icon. Aquatics have an Air mechanic symbolized by a bubbles HUD icon. Water and Air both affect your Growth rate! Water Satiation also increases your Growth rate as a terrestrial, semi-aquatic, or aerial creature. Check out the full guide[docs.google.com] for an expanded version of this section! The full guide does not fit on Steam. Shrines and Deities

There are 6 shrines total on each map! There are 3 in the ocean and 3 on land. The green shrines are for the Mobility “Speed” deity, the blue for the Survival deity, and the red for the Power “Combat” deity. Being near a shrine prevents you from growing. TITANHEIMR Shrines have been remade into more natural graveyard scenes. Trials A character that has been “dirtied” through console commands (can include SetFriendship, MatePlayers, GiveEgg, SetGrowthLevel, etc.) cannot gain further Trials. Trials determine how much your character is worth or costs for the resurrection system, or the amount of inherits received when reincarnating. Trials do not change according to the following server configuration: Growth Rate, Food Drain, Water Drain, and Water Dirtying which can negatively affect Trials if set above Normal. The Food Eaten Trial will assume you are not eating enough with a VeryEasy Food Drain configuration setting. Terrestrials have the Travel Distance (Mobility), Water Sources Visited (Mobility), Water Quality (Mobility), Water Satiation Drank (Mobility), Shrines visited (Mobility), Water Drank (Survival), Comfort Bias Consumed (Survival), Total Offspring (Survival), Storm Time Weathered without Shelter (Survival), Age in minutes (Survival), the highest Friendship Grade (Survival), Food Satiation Eaten (Power), Food Eaten (Power), Hunt points (Power), and Scents Identified (Power) Trials. Fliers lack the Travel Distance (Mobility) Trial, with no flight speed cap. They are somewhat easier to accumulate good Trial Scores with, namely in Mobility. Aquatics lack the Water Sources Visited (Mobility), Water Quality (Mobility), Water Satiation Drank (Mobility), and Water Drank (Survival). Despite their very high speeds and little to no Comfort damage taken during storms, aquatics still have the Travel Distance (Mobility) and Storm Time Weathered without Shelter (Survival) Trials. Aquatics are the easiest to accumulate good Trial scores with, namely in Mobility and Survival. Semi-aquatics have the same Trials as terrestrials, but must visit all 6 shrines instead of 3. Semi-aquatics are therefore the most difficult (barely so) to accumulate good Trial scores with, namely in Mobility. Resurrection and reincarnation If a player desires to use an in-game system, dead characters cost a certain score to resurrect. Another creature must be sacrificed to resurrect this dead creature. Creatures also lose growth upon being resurrected, following an exponential formula; larger creatures have more Growth subtracted. You will not lose Growth if below 1.0 Growth. You can select to sacrifice other, living creatures to resurrect a dead one. If the sacrificed creature was not enough, it will subtract from the cost and another creature or multiple will also be required to resurrect. Worth is calculated as PointValue = NumMinutesPlayed * TrialCategoryScore, where TrialCategoryScore ranges from 0 to 1.0 based on the average scores of the Trials in that category. If you have a Mobility score of 105, its Category Score is 0.7 as 105 is 70% of the 150/150 score. If dead and neither sacrificed nor pledged, PointValue = (NumMinutesPlayed * TrialCategoryScore) * 0.75. If your creature is under 1.1 Growth, the cost is calculated as Cost = (30 * [Growth/1.1]²). If your creature is 1.1 Growth or higher, the cost is calculated as Cost = (30 * [Growth/1.1]⁵). You can also choose to reincarnate a dead creature if it is 0.8 Growth or higher. It will start back out at 0.4 Growth, but will receive nesting inherits as if your character mated with itself (not incest) that are improved by Trial scores. You will receive a skin that would result from the reincarnated character breeding with itself, and yes, you can get albinism and other mutations. Currently, you can reincarnate at 1.0 or 1.2 Growth, with somewhat below average or average Trial scores for many +2s. A good Power score will result in an increased likelihood of receiving Power tree inherits. Deity pledges and sacrifices apply to these inherit calculations exactly as they do when computing resurrection point values. Your creature will maintain the same sex. Reincarnation, in TITANHEIMR’s extensive testing, is simply much better than nesting at the moment. Sacrificing or pledging can be done at a shrine. Sacrificing at a shrine is a good way to respawn without leaving a massive, free player carcass behind. If killed too close to a shrine, this kill constitutes a shrine sacrifice. A character that is neither pledged nor sacrificed is only worth 75% value when used to resurrect another. The cost or worth of your character depends on your Mobility, Power, and Survival Trial scores. You should pledge to the deity you have the lowest score in, and upon sacrificing, your lowest score changes to your second-highest score. The highest possible score is 150. For example, if you have 40 in Power, 110 in Mobility, and 140 in Survival, you should pledge to the Power deity. Your character is worth 110 Power, 110 Mobility, and 140 Survival when used to resurrect another. If a creature sacrifices themselves at a shrine to a specific deity, the corresponding point value in that Trials category is instead set to the maximum of the three Trials categories (150/150). You can change your pledge at any time by visiting the appropriate deity shrine. The previous pledge is overwritten by the new pledge. A character that has been “dirtied” through console commands (can include SetFriendship, MatePlayers, GiveEgg, SetGrowthLevel, etc.) cannot be resurrected, reincarnated, or sacrificed to resurrect another. Talents and Inherits

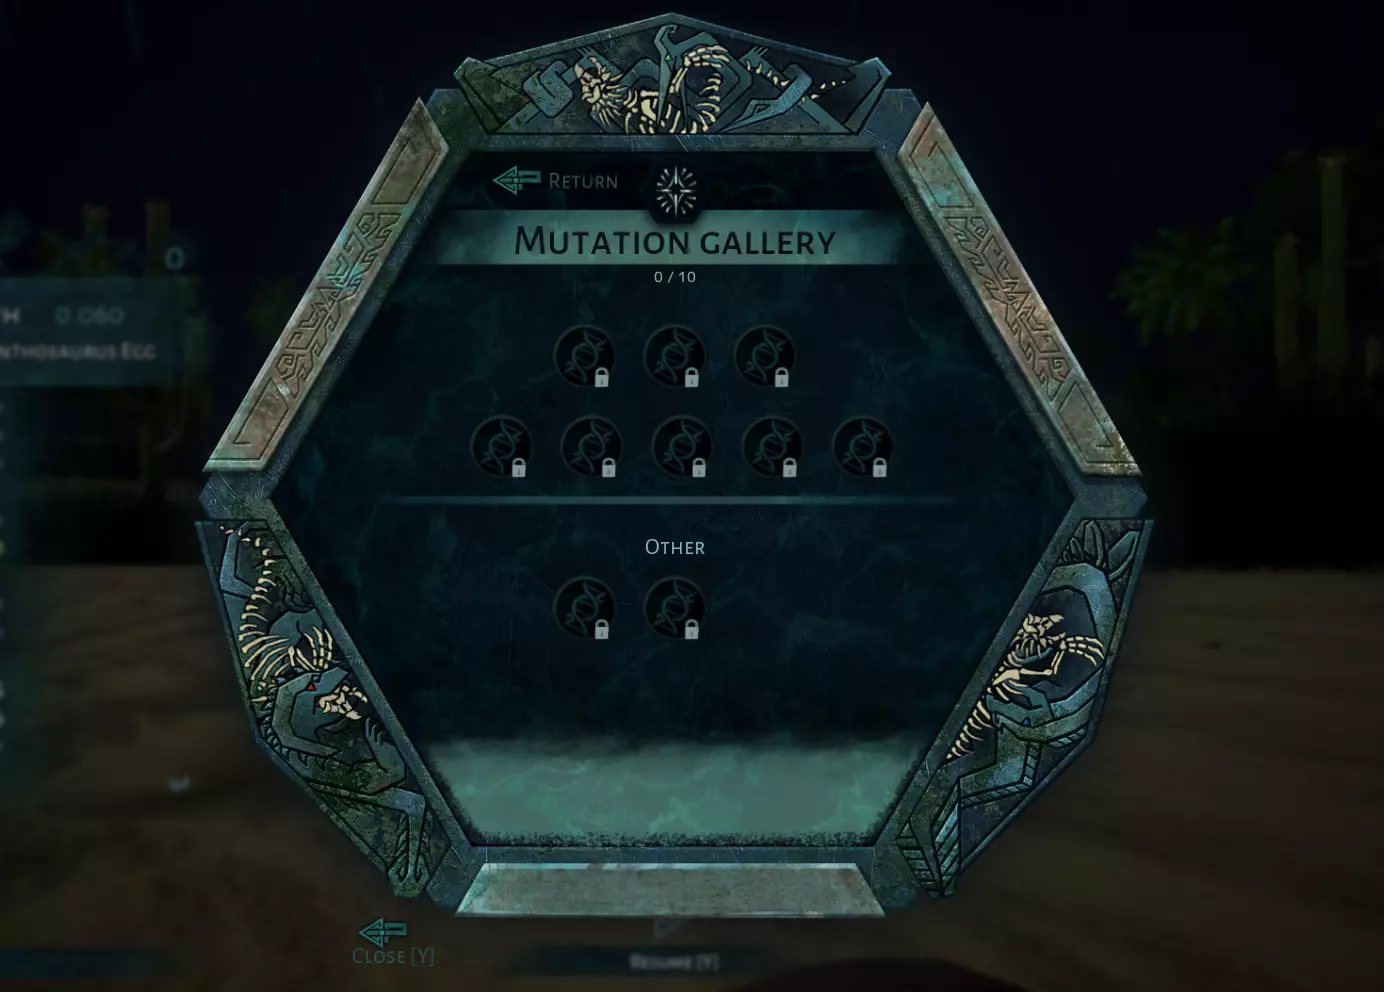
天赋是提升生物自然能力、移动性、防御力、成长速度(间接提升)和攻击力的技能。若要为距离中心较远的天赋加点,需先解锁连接该天赋与中心的天赋。每棵“天赋树”包含10个天赋。屏幕左下角为战斗树,右下角为生存树,顶部为速度树。 当处于嵌套状态时,成长值达到0.25时可获得首批天赋点(2点)。成长值0.4时(新生成生物的初始状态),有10点天赋点可分配。成长值0.85时,拥有25点天赋点。成长值1.0时:28点天赋点;成长值1.15时:30点天赋点(足够填满1棵天赋树);成长值2.1时:45点天赋点(足够填满1.5棵天赋树),3.0成长值:60点天赋点(足够点满2棵天赋树),3.94成长值:75点天赋点(足够点满2.5棵天赋树),最终在4.9成长值时,你将拥有90点天赋点,足以点满所有天赋树。能达到这个阶段就已经很幸运了! 直接嗅闻生物的身体可以得知它们的天赋点分配情况。至于迅猛龙,目前无论其天赋配置如何,羽毛都会亮起红光,因此可以忽略它们的翅膀和尾巴。生存天赋对应深蓝色,战斗天赋对应亮粉色,速度天赋对应霓虹绿色。速度-生存混合型为青色,生存-战斗混合型为粉紫色,战斗-速度混合型为黄色。主要属性为战斗且带有一些速度属性的生物呈橙色;速度属性高于战斗属性的生物呈亮青柠绿色(速度属性的颜色非常突出);速度属性高于生存属性的生物呈海泡沫绿色;生存属性高于速度属性的生物呈极浅紫色;战斗属性高于生存属性的生物呈粉色;生存属性高于战斗属性的生物呈紫色。 【遗传天赋点】是指无需消耗0.04点成长值的天赋点。+1通常表示你能在某个天赋中获得1点天赋点的效果,而无需花费那1点天赋点。+2通常表示获得2点天赋点的效果。目前,+1的效果往往强于1点天赋点,+2的效果往往强于2点天赋点。这是因为大多数天赋点/继承是乘法叠加的。并非基于基础伤害进行乘法计算,3/3 +1是在3/3的伤害基础上进行乘法叠加,而3/3 +2则是在3/3 +1的伤害基础上进行乘法叠加。你无法获得+3,但可能会因近亲繁殖和/或对妊娠母体造成伤害而获得-3。你有机会在成长值为0.45、0.60、0.80、1.00和1.20时获得继承! 作为一个初始成长值为0.4的新生成生物,你必定会获得3个正面继承。作为新生成生物,你总共可以获得5个继承。一个+2不会占用这5个可能的继承槽位中的2个。例如,你可能在新生成时获得2个+2和3个+1!作为新生成生物,你无法提高获得特定继承的几率。新生成角色不会获得负面遗传(若出现此情况则为bug)。 关于巢穴系统,你可以在其中获得更多遗传,但也有获得负面遗传的风险,详情请查看【成长与巢穴】部分!获得负面遗传是正常现象,因为遗传是随机数生成的,某些变量会增加正面遗传的概率、特定技能树/天赋的遗传概率、+2遗传等。你也可以让已死亡的生物转世,游戏会将该生物视为两个父母。目前,转世在遗传方面比巢穴系统更有成效。 世界机制

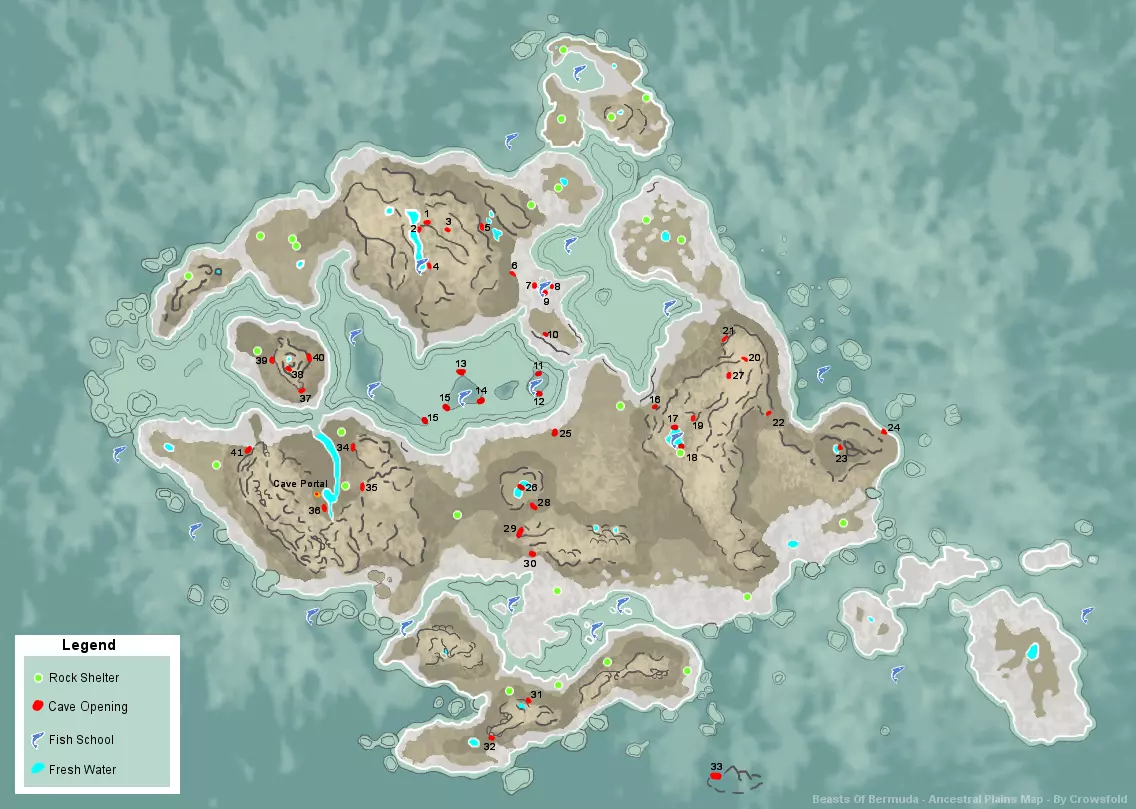
Beasts of Bermuda is very attractive due to its extreme weather system with natural disasters! There are other world mechanics to be aware of too! Beasts of Bermuda also has many maps! You can see map guides for them all linked on our website at https://titanheimr.boards.net/ under the “INFO AND ROLEPLAY” tab. Our custom Forest Island Canvas map[dl.dropboxusercontent.com] Titania map (rough)[dl.dropboxusercontent.com] Ancestral Plains map[dl.dropboxusercontent.com] Rival Shores map[dl.dropboxusercontent.com] Forest Island map[dl.dropboxusercontent.com] Weather can be both beautiful and dangerous, all depending on whether you have a front row seat or a safe, back row seat in shelter or with friends. Fog makes it difficult to see distant islands, features, and food. Fog is especially detrimental to carnivores looking for meat. A rain value also has natural fog, even if the fog value is at 0. Light rain is rain ranging from a value of 0.01 to 1.99. Light rain typically does not make creatures uncomfortable, but all hatchlings should immediately be provided shelter. Being over 1.0 Growth does not increase natural weather resistance. Upon logging in to a creature, you have a few moments of no Comfort loss at all to seek shelter. Being under the surface of water as Ichthyovenator or Lurdusaurus, or flying as an aerial creature, does not affect natural weather resistance. An Enhanced Growth storm or "Growth storm" is caused by a rain value of 2.00 or higher, 3.00 seems to be the intensity cap of rain. Your Growth rate is increased in such a storm, but being out in the weather typically causes great stress. Wind Intensity, or just wind, affects characters at the same intensity a rain value does. A tornado cannot pick up an Apatosaurus 0.8/+ Growth, Kronosaurus 1.38/+ Growth, Mosasaurus 1.213/+ Growth, Parasaurolophus 3.08/+ Growth, or Saichania 3.637/+ Growth. Otherwise, a tornado picks up and launches players through Knockback! They spawn during high wind storms. A maximum of 3 tornadoes are able to co-exist at any one time unless console commands are involved. Tornadoes are disabled in TITANHEIMR due to an uncommon, not rare, bug where if one player is lagging all players will be kicked because the server depends on the lagging player for tornado movement code. This was last labeled as a “non-issue”. TITANHEIMR provided logs detailing this occurrence multiple times, so the team has what they need to fix it. We should hopefully see a fix in the near future. Lightning typically occurs in Enhanced Growth storms! If there is any lightning at all while it is raining, regardless of if that buff appears, Growth rates are increased. Past a rain value of 1, your Growth rate is increased. With a rain value of 2, your Growth rate is 125.255102%. With a rain value of 3, your Growth rate is 150.64%. Lightning deals 2,400 damage and a player only becomes immune to lightning damage with 3 points invested (2/3 +1 or 1/3 +2 work too) in the Weather Resistance Talent! They can still be struck, but this will not deal any damage. However, Weather Resistance means nothing when fire spawns near you or under you. Dry Lightning is revivable in TITANHEIMR due to these storms lasting longer than Enhanced Growth storms and sometimes having no warning at all besides minor cumulus. Cumulus is defined by overcast, or dense cloud cover. Cumulus can mean you're about to combust into flames if it's a dry lightning storm, that a tornado may spawn if wind is high (high wind can easily accompany another storm though), or that it will rain soon. Forest Fires, which are enabled in TITANHEIMR, start from lightning or severe droughts and take 90 seconds to gain full spread speed. Fires cannot spawn within 100 meters of players. Fire in a drought does not require lightning to spawn. Touching a small flame lights you on fire, which deals percentages of your health pool. Touching a large flame, such as one igniting the bottom of a tree, is near instant death. Entering the water removes the On Fire debuff and standing in it prevents you from lighting on fire. Wind direction and available fuel affect the path of a forest fire as well as its spread speed. Being too close to a lot of fire, smoke, or ashy turf will give you the Stressful Scene debuff. This debuff applies massive Comfort loss. If close to even higher amounts of fire, smoke, or ash, you will receive the Suffocation debuff. This starts the air timer as though you were underwater, and depending on what you are can be very fast. Check out the Your Character Air section for your breath timer! You can spot a fire from a distance from the large puffs of smoke released from it up into the sky sphere. Shelter is sought to remove the negative Comfort effects of rain and/or wind. Shelter does not influence meat rot rate. If you have 100% Shelter and a predator also has 100% Shelter, the cave filter makes your scent cloud much more difficult to see. Elevation can cause the High Pressure debuff or Thin Air debuff. Both debuffs chip away at your health. High Pressure is caused by being too deep in the ocean, and the Thin Air debuff is caused by being too high in the sky. The Thin Air debuff is not determined by the limit of the skybox, but rather your distance in elevation from the terrain. This is why the Thin Air debuff may appear when flying over the ocean but not when passing over land despite not changing your elevation. Burrowing is exclusive to Oryctodromeus. A burrow offers 100% shelter, protection from most predators, and is weatherproof, aside from floods and wildfire smoke! If an entrance was recently entered, it has a purple scent. While in a burrow as an Oryctodromeus in the default dig stance, you can dig with LMB and cover a block with RMB. You can generate an item by re-digging a block over and over! Digging in a burrow has a chance to spawn pebbles, a rock, ruins, a pot, a log, a bone, an Apatosaurus skull, large ribs, large vertebrae column, Acrocanthosaurus statue, large boulder, roots, leaves, crystals (both edible and large, decorative), fog, water droplets, various foods, and "haunted" audio. Careful not to block air with a spawned object! Use the Creature Ability key to pick up objects in order to move them. The Burrow Master Talent improves this ability and allows the moving of more rare objects. Check out the full guide[docs.google.com] for the full version of this section, which includes natural weather immunity! The full guide does not fit on Steam. Combat Mechanics

Stress defines the Comfort loss experienced from the Intimidation debuff and Enemyship. The effect of Intimidation turns negative for ungrouped players. If a player has invested Talent points in the Intimidation Talent, this negative effect is almost immediately noticed by others near them in the form of rapid Comfort loss. The debuff is only visible when the Comfort loss is substantial enough. Enemyship is the opposite of a Friendship Grade, and is gained by remaining near an ungrouped creature for too long. Enemyship is character-unique, like Friendship. Enemyship increases the effect of Intimidation but degrades over time so long as the two players get some space. At -601 or more total Friendship, you receive X Grade Enemyship. At -1201 or more total Friendship, XX or x2 Grade Enemyship. At -1801 or more total Friendship, XXX or x3 Grade Enemyship. You deal 300 Enemyship if you hit someone for exactly 100% of their health. You deal 225 Enemyship if you hit someone for exactly 75% of their health, 150 for 50%, 75 for 25%, or 15 for 5%. Enemyship above 300 is only gained in one hit if a creature was hit for more than their maximum health, where Sturdy was needed to survive. Injury coincides fall damage and can be applied by other players! With 25 Injury you walk at 83% your normal speed, at 50 Injury 65%, at 75 Injury 47%, and at 100 Injury you walk at 30% your normal speed. With 25 Injury you sprint at 80% your normal speed, at 50 Injury 60%, at 75 Injury 40%, and at 100 Injury you run at 20% your normal speed. You know you have Injury when white cracks appear at the corners of your screen. The visual has a faint red background, so how red the corners of your screen are is not a good indicator of how much health you have left if you also have Injury. An old graphic bug is still in the game, where a very faint, red Injury line is visible in the top left corner. You do not have Injury, this is a visual bug! If you have above 45 Injury, the debuff will appear in the top left corner of your screen! Venom is in very early development and subject to change. Venom is inflicted by a bite from a Zupaysaurus or Palaeophis! Venom at a value of 1-44 drains Stamina, and at 45-100 drains Stamina and Ability Power. At the 75 Venom Mark, the Ability Power drain is very fast! Venom causes purple veins at the corner of your screen and also reskins your HUD. At 25 Venom, your Health, Stamina, and Ability icons appear slightly discolored. The heart in the Health icon is more pink, and the skeleton changes from white to a faded green-grey color. At 45 Venom, your Health, Stamina, and Ability icons have a very noticeable pink tint. The heart in the Health icon is pink and the darkest color in the icon, and the skeleton is dark grey. At 75 Venom, your Health, Stamina, and Ability Pool icons are hot pink. The heart in the Health icon is black, along with the skeleton. At 100 Venom, your Stamina icon is a deep purple and your Ability Pool icon has a purple ring. The purple vein vector in the bottom right corner of the screen reaches the middle of your screen at 100 Venom, too. Bleed prevents you from recovering health (30/+ Bleed), healing Injury (30/+ Bleed), healing Venom (30/+ Bleed), or raising your Comfort. Bleed also reduces your damage to 91.29607568627452% if you have 50 Bleed and 81.67019725490196% if you have 100 Bleed. Bleed appears as blood drops over your Health UI icon. Walking neither worsens nor heals it, but sprinting will add more Bleed. Standing still, sitting, or sleeping will remove Bleed. Healing ticks are every 15 seconds, so you can move freely in between the ticks. Bleed does not deal damage unless you are at very low Comfort, where it may pose a threat. Having low Comfort causes health loss over time. It is deadly combined with Intimidation and allows long persistence hunts. Acrocanthosaurus applies an average of 20.91 Bleed per bite and Megalosaurus 5.56 Bleed (26.6% of the amount Acrocanthosaurus deals). Regardless, any amount of Bleed carries with it the negative effects. The Clotting Talent increases how much Bleed you heal per tick, allows you to heal Bleed while walking, and reduces how much Bleed damage a player can inflict by attacking you while you are sprinting. Growth does not change the amount of Bleed you heal. Check out the full guide[docs.google.com] for the full version of this section! The full guide does not fit on Steam.