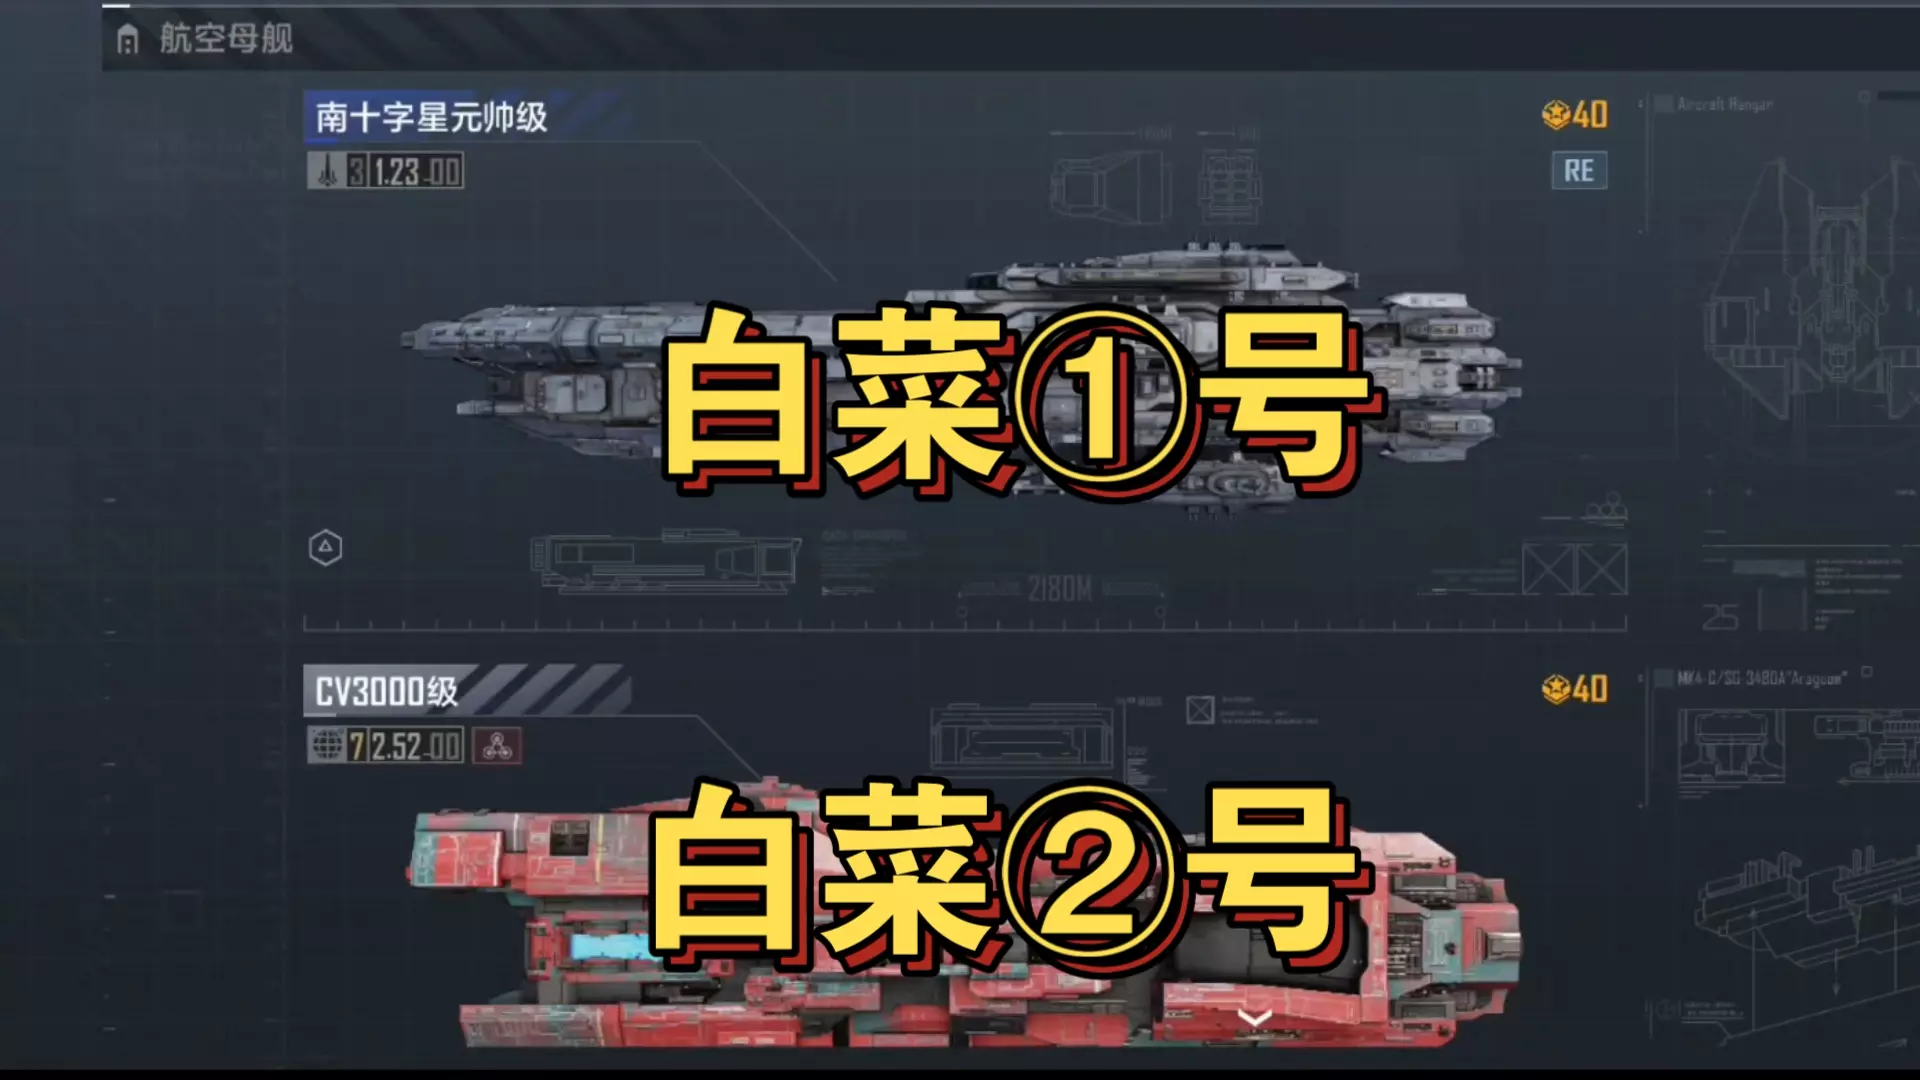
换一换
换一换 


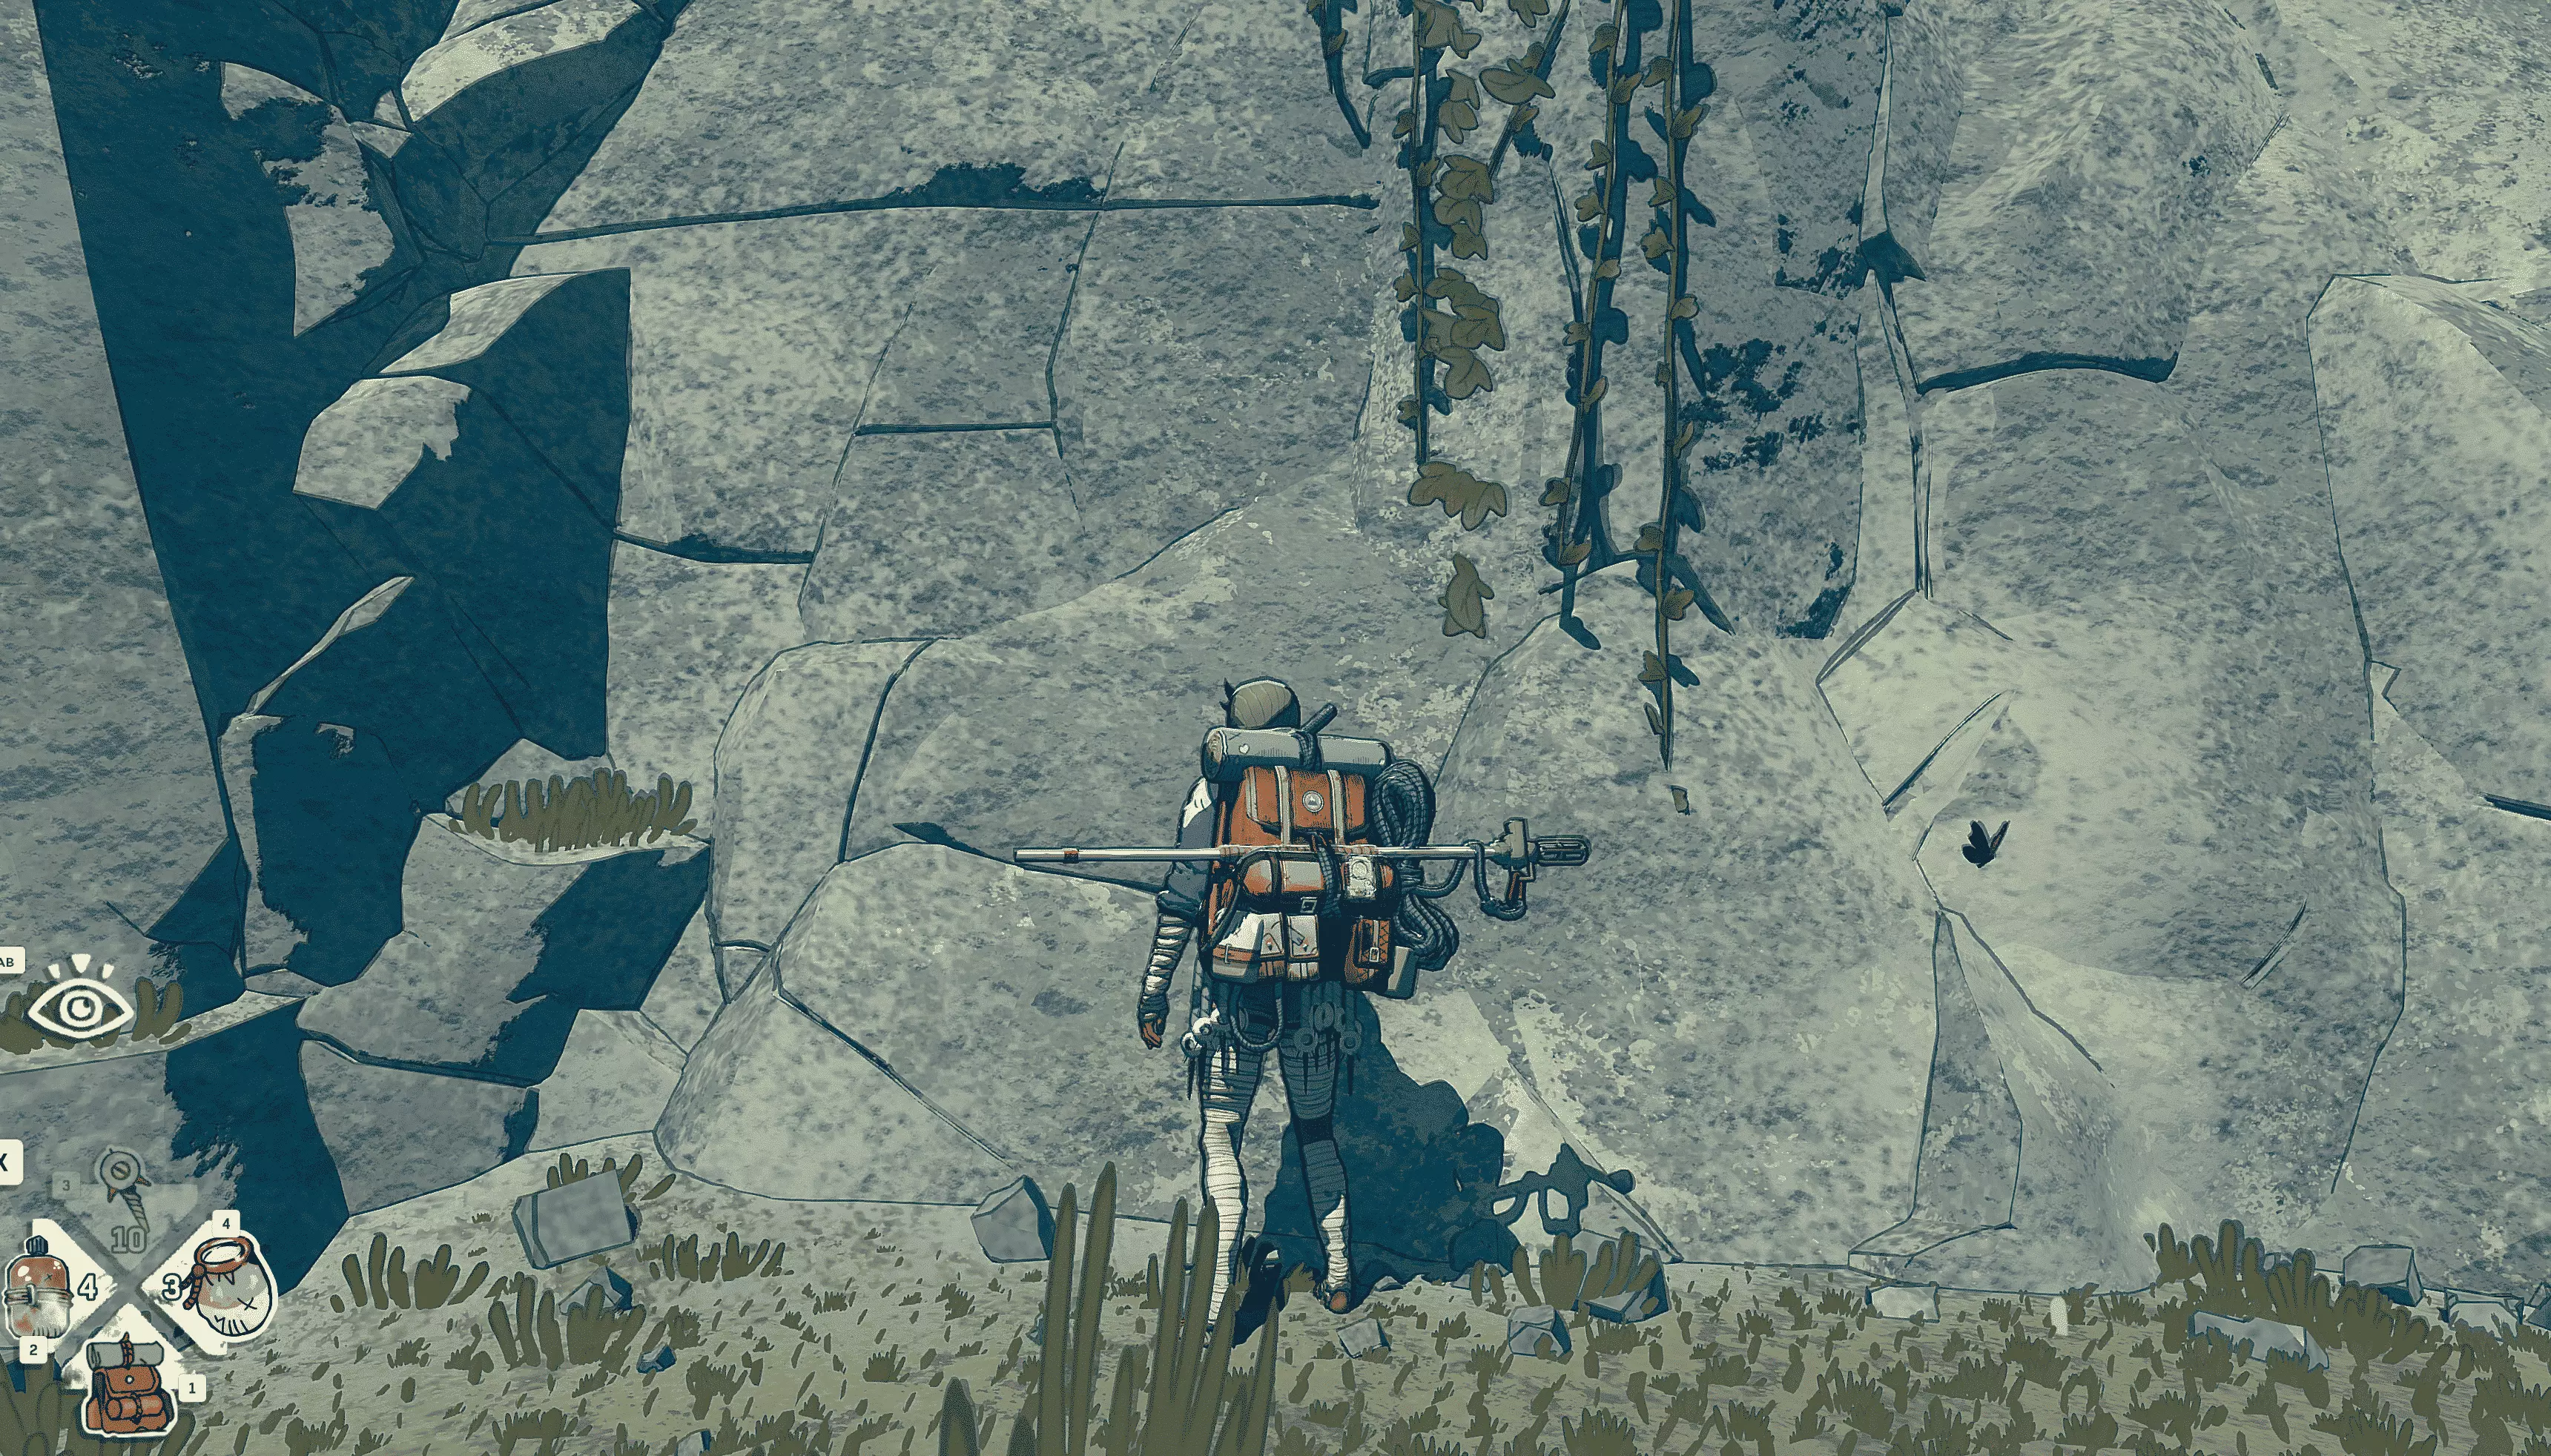
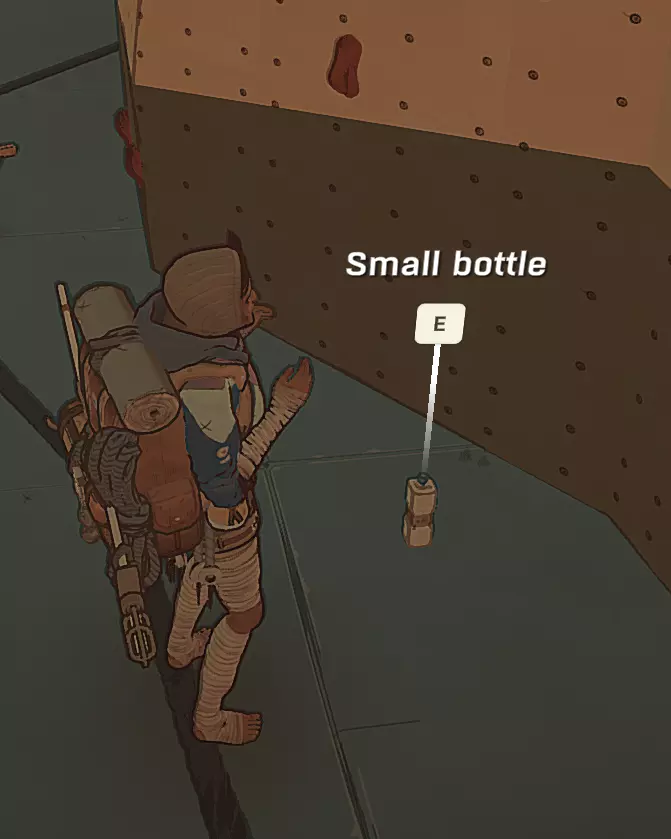
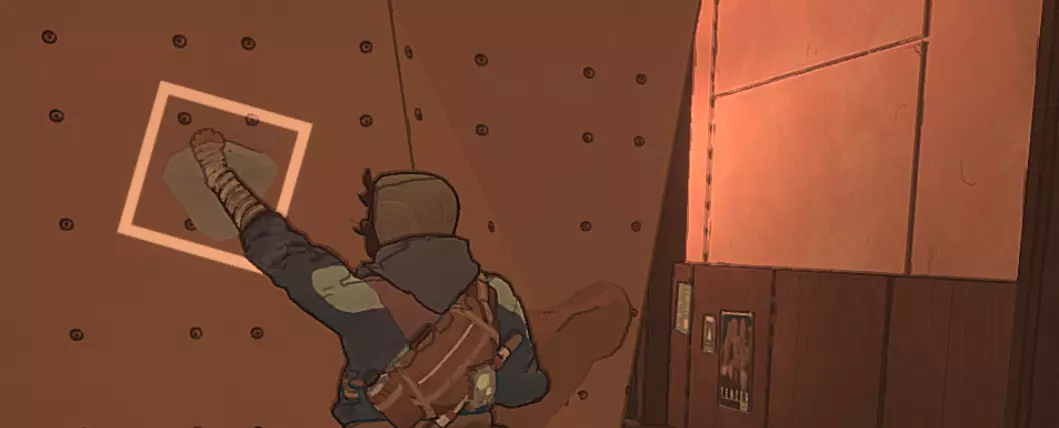
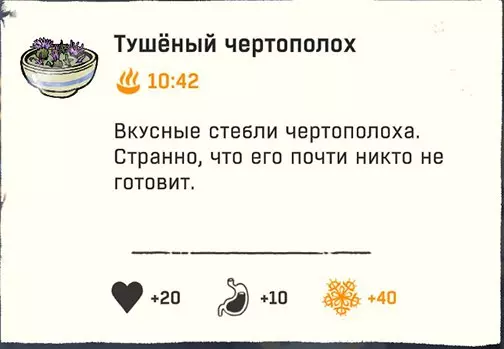
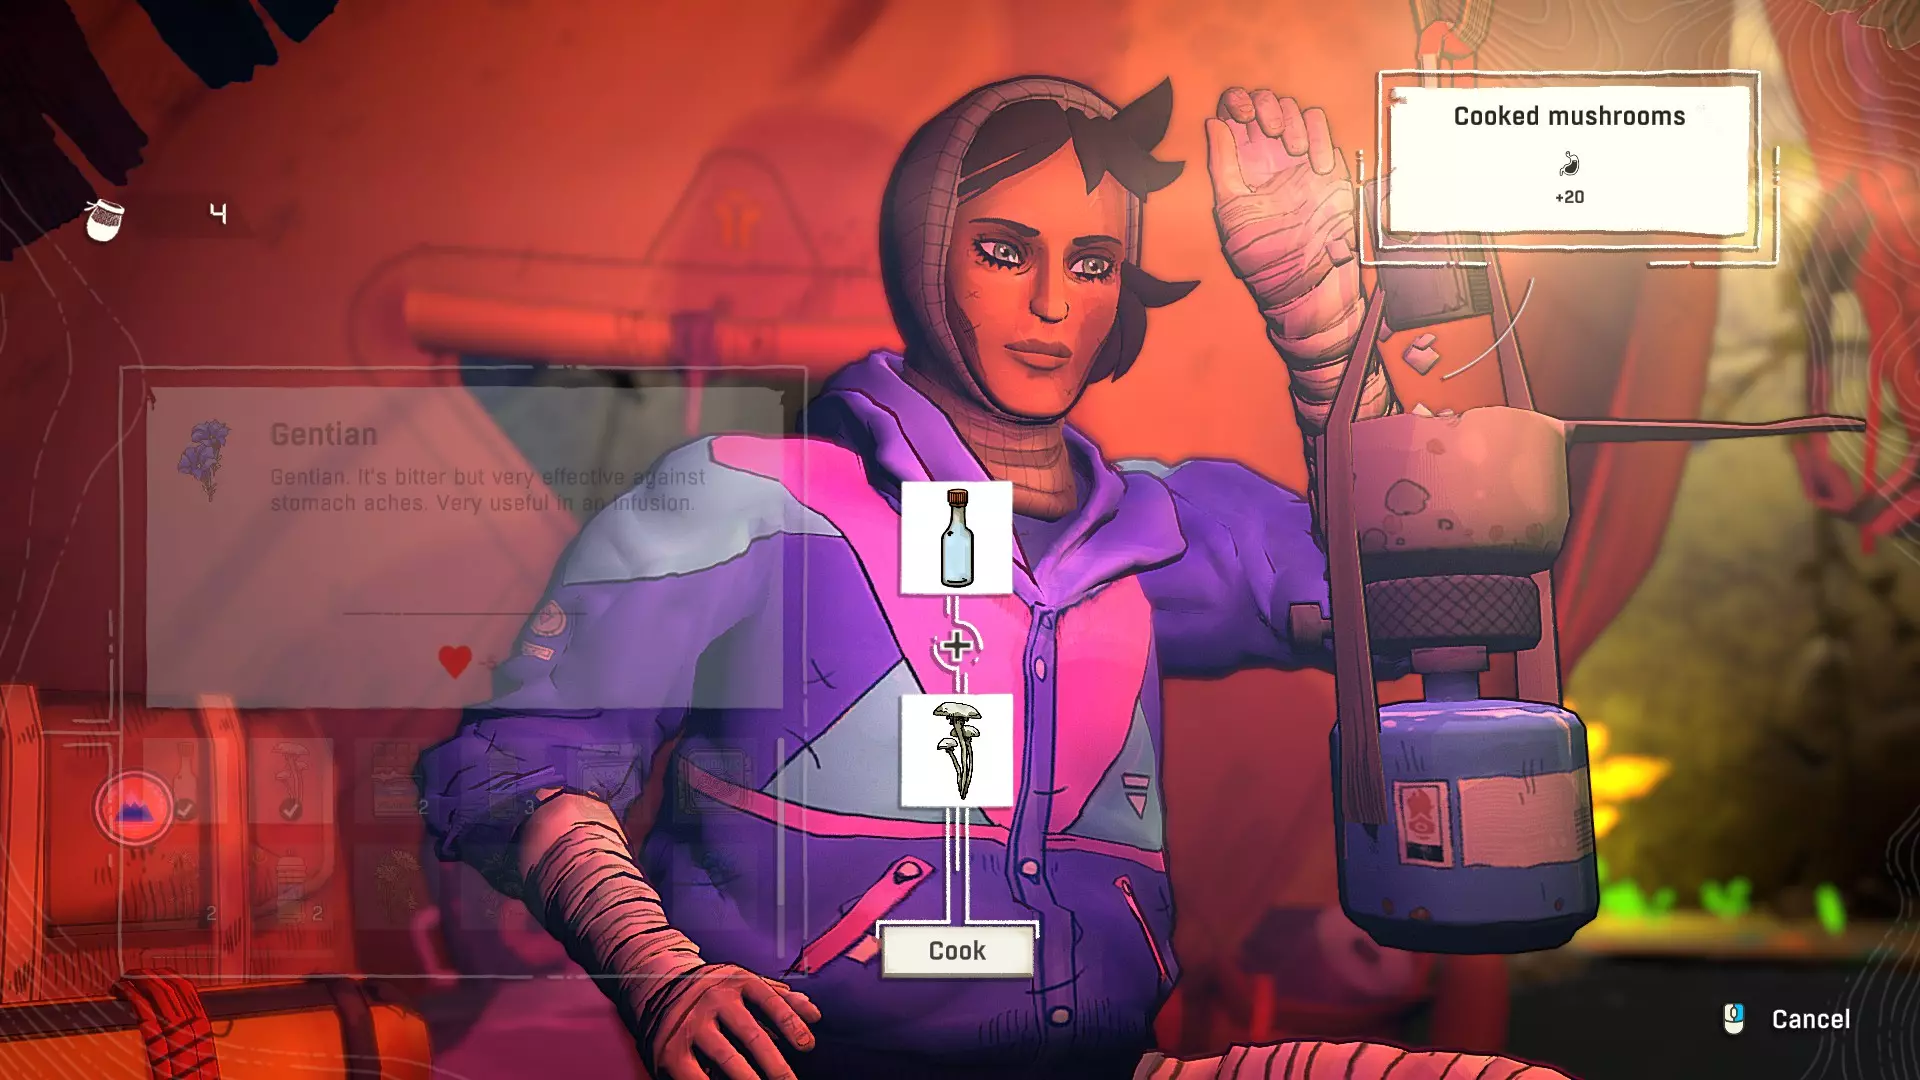
Climbing up this infernal mountain can be a proper challenge even for the most experienced, and chances are, many of you looking at a guide won´t be. But I have figured out a few valid pointers that should help even the odds. I will try to cover climbing tactics, grip parametres and some strategies to make your ascent of mt. Kami a little more viable, and less frustrating. Climbing Basics. (And how to stop relying on your pitons all the time.) Typically one of the most important aspects of your climb will be to actually make sure you do not slip off the wall all the time. If you can not clamber up a rock face without slipping or tiring yourself out, you are doing it wrong. How exhausting your holds are really riles on one thing above all, GRIP SECURITY. In a nutshell, any grip on the wall that is insecure is considerably more tiring to hang on to, so if you place your hand on a flat surface and you are just hanging onto that using friction alone? (This is called a "Smear" grip from what I have been told, and it is by far your worst option most of the time.) Do not expect to hold onto that position for long, especially if your body weight is pulling on it. There is some basic psysics to bear in mind here though, a smear grip is a poor option to hang onto, but it is decent for PUSHING AGAINST. If you have your hand pressing against a surface from below or pushing to the side, it is not worthless. I will go into more details on that with more advanced tactics. If you want a secure grip, every little detail on the wall is important. The obvious options are long cracks or the occasional flat surface, but these are just the most obvious ones. There are more subtle options, protruding handholds can be easily missed, and these can be big enough to wrap your hand around, giving an excellent grip. The hardest to spot option are tiny thin slits along the rock, or tiny dimbles, holes or round divots you can come across. Now these tiny weaknesses make for decent handholds, but due to you sometimes only being able to jam a few fingers or just a part of a knuckle in it, these grips can wear out your hand more, leading to more liberal use of climbing tape later to patch your torn up hands later. But in general, as long as you do not slip off the cliff all the time, your hands should not degrade too fast, security in your climb is the best way to preserve resources, so take it at a pace you can do safely. If your pitons have to catch you all the time, go off-belay and rethink your options. Now footholds are another story. Since your feet are more rigid than your hands, your options are a bit different. Obviously, setting your feet down on a ledge or a horizontal crack takes a massive load off your hands, so even poor handholds can be viable as long as you have solid enough footing. But due to your feet being less nimble, you can not utilize tiny cracks or holes as well as your fingers can, they are still better than nothing, but do not be surprised if your foot slips when you place your foot over a cack where you could barely get your pointer in. If your feet slip, this should be the first warning sign that you need to reposition. Each slip can ruin your approach and take a big chunk off your stamina. One rule I learned in some wall climbing is that your hands are mostly there to secure you to the wall, your feet are doing the heavy lifting, as such this is what you want to usually push you up section by section. A simple but helpful strategy is this: do not be afraid of stretching out into a near split. In a climb, you use two parts of your foot, both ends. Your soles do almost nothing. Either jam the end of your foot into a crack or against a flat enough surface, or reach up and slam your hell down against something to your side, you would be surprised how much farther you can go if you use the full length of your leg. Again, grip security is key. If most or all of your current holds are secure, then you can practically take a breather on the climb without pitons or anything. If one of your hols is insecure, resolve that when you can, if MULTIPLE holds are insecure, either backtrack to a safer point, or rush to whatever safe position you have in mind. Sometimes reaching to a better grip above you is better than spidering up with poor footholds. Most importantly, LISTEN. You can easily tell how tiring your position is by Aava´s breath. If her breath is long and calm, you are secure like a rock. If it is picking up, then she is straining a bit too much. Lean to gauge how taxing a climbing route will be based on this and do not be afraid to backtrack. Advanced Tactics (And how to improvise) Sometimes you climb is not kind enough to leave a bnch of telltale handholds to utilize, then it is time to improvise or plan for other options. Your body is a very versatile tool, so with some knowledge, anything is possible here. Let´s go over my favorite strategy first, shafting. (I think professional climbers call it "The chimney" but i´ll stick to a shaft.) Essentially, this is a tactic where instead of relying on handholds, you push against the sides of two opposing walls to increase resistance. The good news with this strategy is that it allows you to climb up very quickly when the terrain allows, and it is not that tiring to Aava, even when you usually will not have access to good hand or footholds. The bad news is that this can only be done as long as there is a good enough section, and the lack of holds means that you are constantly wearing yourself out. While it is not THAT tiring, it is not restful either, so move fast if attempting this, and only stop to rest if you can secure both your feet on either side of the climb. Next up, how to deal with inclines and overhangs. Now it just goes to show that a positive angle (AKA anything MORE than a 90 degree incline) is easier to climb on as you do not have to hold your whole bodyweight on your holds. This means you can be a bit more aggressive, as your grip is stronger and your stamina is less restrictive. As soon as you are dealing with an overhang or a negative angle (AKA the angle becoming more acute, LESS than 90 degrees) then the rules flip. Your grip is overall a bit weaker and your stamina drains faster with poor holds or positions. It may be tempting to get past the overhang fast, but this is a CLASSIC mistake. Speed kills in this case, as trying to rush past the overhang means more room for error and these errors, are more costly. When dealing with an overhang, take is low and slow, and calculate each move you make. This is also a very good time to use your chalk of course, as it can help negate the grip drawbacks of an overhang. Now, regardless of how well you plan your route, sooner or later you may find yourself in a tricky position. Every once in a while you may need a tactical risk, such as accepting a bad hold in order to get the the position you need. In this case my advice is this, prioritise your footholds. A poor handhold is only exhausting, but a poor foothold can slip at the worst moment and sabotage your entire push. My other advice is that a push meaneuver needs speed and an endgame. Everything in between is less tactical and more quick-thinking. Try to consider how long you can push for before stamina becomes a problem. Of course, when attempting ANY tactic you are unfamiliar with or if you are attempting a push, use your pitons. You are going to need them. Handling Of Resources and Boosting Your Climb While Aava did bring some basic supplies for the journey, you will have to learn to live off what you come across. The mountain is not exactly flush in resources, but if you keep your eyes open and visit a few landmarks along the way, you should find enough supplies to keep you going, as well as find a few items to simplify your climb considerably. First things first, WATER. Not only do you drain your hydration quick in a climb, you will also need water as a common base for cooking, as the only utensils you have is a field kitchen with a cooking pot, that´s it. So I hope you like boiled... Everything. Of course you will learn that you can adapt a bit as well, clean water can be found here and there along the climb, but you can also use less conventional liquids for cooking as well, from trout cooked in goats milk to dandelion soup in homemade berry juice. Since you need plenty of liquids, keep an eye out for any intact containers to carry it in, your canteen only holds so much. (Tip, there is an abandoned but intact water bottle in the Tenzen climbing hall, be sure to grab that.) Now, your canteen is not just your best container to start with, it is also the only bottle you can access during a climb without going off-belay first. This means that you want to fill your canteen with something that will not just keep you hydrated, but also provide a good boost during the climb. A good brew tea helps your FOCUS, which allows you to rest easier during the climb as long as your position is semi- comfortable. Normally you only rest effectively if you are in a secure position, (Or you can boost your stamina recharge a little by shaking off a limb, but this still relies on being in a decently secure position) but if you have FOCUS active, your threshold for resting is higher, so previously uncomfortable positions can be more restful. This can make your climb less taxing and therefore less problematic if you need to push or use odd grips. An infusion with other herbs has a different effect, Gentian creates a healing remedy which is helpful in case of frequent accidents or if you like moving fast on the ground. Nettle tea is a good replacement for the peppermint stuff you can find along the way, and Juniper infusions helps your resilience. (With enough herbs brewed correctly, you can make something very useful.) In general, any mix of mountain herbs can give you a buff, which rises more and more the more herbs you put in it, whilst something sweet, such as a raspberry mixture can give a boost instead. BOOST essentially increases your limb speed, allowing you to grab new holds faster, spending less time draining stamina on bad holds or positions. It takes some practice to use it effectively, but in skilled hands, it can be crucial for more draining routes. GRIP is probably the most practical of the bunch, if boosted this way, all holds are upgraded somewhat, so even a hold that would normally have limited use to your situation suddenly becomes perfectly solid. This is especially helpful overall since increased grip strength can allow you to hang onto any little crack like never before. It can never make constant smearing viable, but it is a massive boon, especially when climbing vertical cracks. WARMTH usually only has value if you favor nightime climbs, at least early on. It becomes alot more viable as you start getting to the cold and snowy section of the climb. But it also helps counter the effects of heavy winds and constant rainfall. Finally, we have GRIT, this is essentially your ability to block out pain and misery. When under the effects of grit, your endurance bar is armored, which can negate the effects of a survivable fall or help you counteract the effects of a nasty climb. Each climb, especially if holding onto painful grips, can decay your endurance, grit prevents this. However this buff is best used to temporarily halt the drain of your other stats, your warmth, thirst and hunger bars are STALLED as long as grit is in effect, which can help you prolong your rations and supplies, or help you handle a serious cold spell. And finally, the game already tells you this but do not underestimate your chalk, it is not too hard to replenish and it makes your next few handholds about twice as potent. If you are dealing with an especially harsh route, chalk can even the odds, especially if you are already under the influence of other boosts as well.
Professional Handholding. You may eventually comes across routes or holds which are not as obvious as others. I have mentioned vertical cracks before, while these give a decent place to put your hands and feet, it is DANGEROUS to rely on them. This is due to a simple fact, gravity still applies, and pushing against the sides of a crack where you barely have the space to put your hand in, is exhausting. Vertical cracks are a common trap, as they give the illusion of a valid route. You can maybe make it more practical with liberal use of chalk and grip boosts, but even so it can be a hazard. Or at the very least, an uneccessary drain on your resources. Instead, you want to look for reachable PAIRS of vertical cracks, this allows Aava to grab onto one on either side and pull on them, giving a very solid hold. If you have to use a single crack, do not assume that alone is going to support you forever. The most important lesson here is physics, your center of gravity always applies and you can observe Aavas hold on each section to see how she is using it, a flat hand usually means she is pushing against it, (Unless you are using a smear hold, in this case she is just grasping the wall) curved fingers means hanging on or pulling off of it and a flat hand in a crack means just jamming the hand in there and using the wrist to maneuver. (This one is painful, watch the use of your climbing tape) Depending on where your body is, handhold can behave differently too. If you are grabbing something below your chest, this becomes a underhand grip, pulling up for stability. Something above usually results in a hang and so on. Understanding how these grabs affects your body will give you a general idea of how stable it is. If you are holding a vertical crack from the side for example, make sure your body is on the pulling side, otherwise this grab becomes a push away which does not do you much good. Now you always have the option to shake your limbs during the climb, this action does help reset your stamina, but ONLY if you are in a reasonably comfortable position. If your current holds are miserable, it only serves to waste precious time as you start to slip from your holds. Aava´s character flashes when using this rest maneuver, blue means you are comfortable enough to get a full stamina reset, whereas a yellow flash means it did not help much, if it flashes red, you are probably too late. Training For The Insane. A Free Solo is no joke, professional climbers know that if you attempt one, you either have a death wish, or you better know what you are doing. Obviously, it is NOT recommended to try this straight off the bat, but there is a way to practice for it. Normally, people climb Kami assisted, in other words, the piton and rope plays an active role in the climb, not just for personal safety. In order to practice for a free solo, try to use your pitons normally, but do your best to avoid going off-belay. If you manage a route without needing to actively use the rope, you are essentially learning to stop relying on it, a crucial skill if you want to attempt a successful Free Solo one day. Now a Free Solo follows one hardcore rule, no saves. (Besides an exit save so you can pick up later of course.) But you are not COMPLETELY up ♥♥♥♥♥ creek, you do get to carry one unique item, a rare flower that ONLY ONCE, can reset a fatal accident. As long as you carry this bloom, you get one second chance, but even that has it´s limits. If you die without it on you, that is it. No second chances, you will have to start your climb again from the start. Since you won´t have your rope, you will have to rely on chalk and buffs to assist the climb, but there is another problem. You are using a smaller backpack, on the Free Solo, Aava has sacrificed weight for maneuverability, so you will have to manage your resources carefully, and only bring what you know you are going to need. I advise grabbing a few herbs and plants early on and making one powerful infusion in your canteen, might just save your life. Advanced Provisions. In general, when cooking up your provisions you want to have an endgame in mind. If you are just cooking for sustenance, just add water or spice up whatever is in your canteen. If you are however cooking to help your ascent, only one word comes to mind: CONCENTRATION. Tea, coffee and infusions are made in greater quantities if you use a larger full bottle. But the strength of the mix depends on how much of the catalyst you use. Basic coffee only does so much, but add another packet, and you get coffee strong enough to wake the dead, this will give a more intense mix, that has twice the kick. This makes it more helpful as a booster than a survival ration. Same thing applies with tea. Infusions follow a different rule, the first herb determines what it does in the first place, but adding more herbs will intensify the effect. With three different herbs blended in, you get a natural energy drink that will be your best friend on the climb. Just do not start with dandelion, thistle, wild garlic or plantain. These will only be cooked on their own, you need to start with something you infuse naturally, like Gentian, Nettle or Juniper. Finally, let´s get into booze. On a few locations of the climb, you may stumble upon some local moonshine, now this stuff has limited value on it´s own, but you can experiment alot. So far I have found that making spiked coffee or Hot Toddy (Mix booze with tea) are some of the more useful mixes. In this area, there is alot of stuff you can do, you will just have to fiddle around and see what happens.