换一换
换一换 


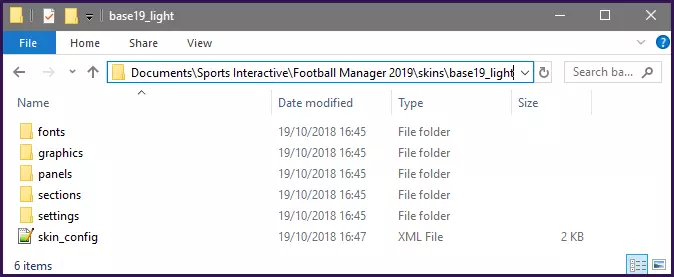
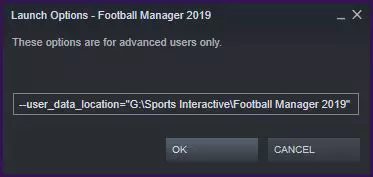
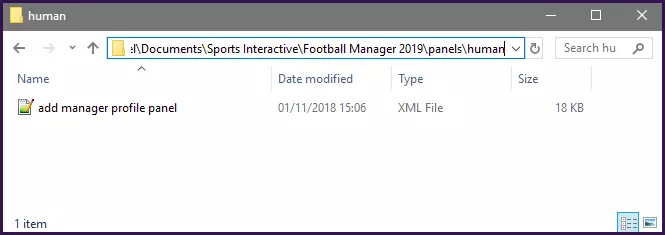
与前几个版本一样,《足球经理2019》不再允许为经理添加图片,而是鼓励使用Facegen系统。 这是一个简单的模组,重新启用了为经理使用图片的旧选项,但存在一些限制。 简介 与前几个版本一样,《足球经理2019》不再允许为经理添加图片,而是鼓励使用Facegen系统。不过之前的模组仍然有效,因此目前你可以通过一些操作添加经理图片,但该功能可能会在后续补丁中再次被禁用,并且仍存在与之前版本模组相同的限制。 感谢Cyrius50在相关网站上所做的一些工作。现在在游戏中添加经理时可以添加经理头像,但目前无法将头像应用到现有档案或更改图像,因此请在应用前确保你对头像满意。 安装说明: 下载并解压以下压缩文件后,你应该会得到一个名为panels的文件夹。如果您使用默认皮肤: - 将panels文件夹放入您的用户数据位置,默认路径为:文档\Sports Interactive\足球经理2019 如果您使用自定义皮肤: - 将panels文件夹放入您正在使用的皮肤文件夹中,默认路径为:文档\Sports Interactive\足球经理2019\skins\<皮肤名称> 其中<皮肤名称>是您使用的皮肤文件夹的名称。 如果操作正确,上述任一位置中的panels\human文件夹内容应类似如下:
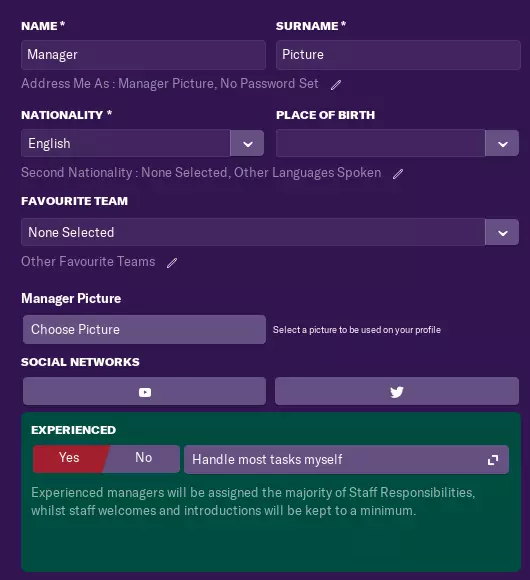
如果系统要求你覆盖任何文件,最好查看下方的手动说明,这意味着你正在使用的皮肤已经自定义了所使用的文件,因此你需要自行修改该文件。 - 接下来启动游戏,如果皮肤缓存处于开启状态,请将其关闭并重新加载皮肤,然后按照以下步骤添加你的图片。(确认“添加图片”框出现后,你可以重新开启皮肤缓存)。 如何添加经理图片 安装模组后,在“添加经理”面板上选择“编辑个人资料”或“新建个人资料”,然后在个人资料页面上,你应该会在“社交网络”上方看到一个新选项,如下图所示:
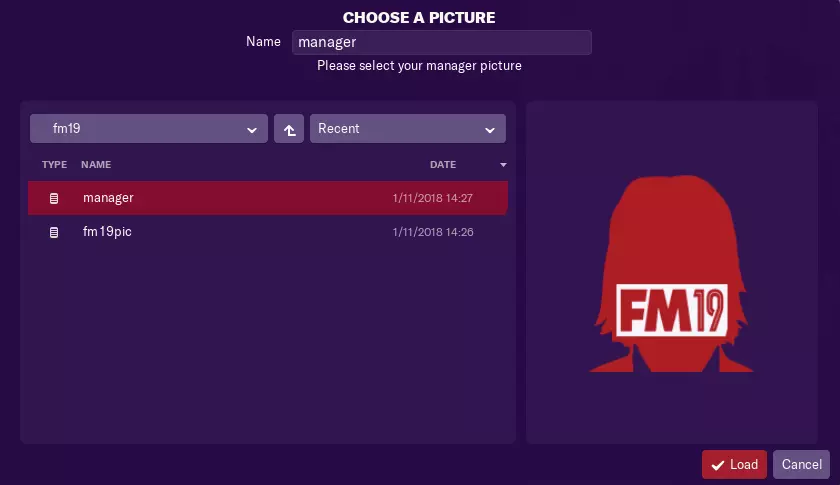
点击“选择图片”应会打开文件选择弹窗,从这里浏览到硬盘上图片所在的位置并选择图片,在以下示例中,我选择了一张将FM19徽标叠加在默认头像红色版本上的图片。
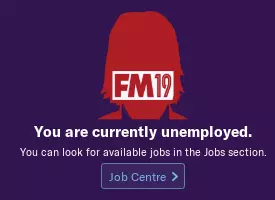
完成后,正常填写个人资料的其余部分,继续完成个人资料设置。进入游戏后,你的头像应该就能显示了。
Again this method has it's limitations: You cannot assign a picture to an existing manager, if you want an existing manager to have a picture you would need to retire that manager and create a new one to take over but you won't be able to keep any of your in-game progress. It isn't possible to change the image after the profile has been created so make sure you are happy with the image before you get too far into your game. Whilst you can now edit your manager in game this feature doesn't allow you to change the profile picture nor will editing the face here override the set picture. Also be aware this feature is unsupported and might be removed in a patch, also I have only tested to see if the image will appear I have no idea if it will cause any issues further into the game, so it is used at your own risk. How To Create The Mod These instructions are only really needed if you want to know the code used to create the mod or are using a custom skin that has a modified version of this panel, if you just want to use the mod then refer to the download link and instructions at the start of this guide. To create the mod for Football Manager 2019 you will need to extract the add manager profile panel xml file from the panels human folder found inside the panels fmf file. If the skin you are using already has a copy of this file then it is best to use that one instead. If you have extracted the add manager profile panel file you will need to copy it into the panels human folder for the skin you are using. (If you are using the default skins you can just place it in the panels human folder directly in your User Data Location instead of inside a skin) and if the folders don't exist just create them. Now there are a few changes we need to make to that file, so open the file and locate the following section of text (Line #25): <layout class="grid_layout_attachment" row_layout="20,30,24,20,30,24,20,30,24,1,22,30,160" mode="auto" vertical_gap="5" vertical_offset_start="35" vertical_offset_end="0"> That line tells the game how many rows to to display on the Add Manager Screen, so what we need to do is add a couple of extra rows for the Manager Picture items to fit in. It doesn't really matter where you add the extra rows it will just affect where you have to add the later code and where the picture box will appear in game. For example we are going to add the Manager Picture just above the Social Media boxes and in the above code the 1 value denotes a spacer, the 22 and 30 are for the Social Media rows and 160 is for the Experience box at the bottom. And as the Social Media buttons are a good size we'll just copy their row sizes so the code now looks like this: <layout class="grid_layout_attachment" row_layout="20,30,24,20,30,24,20,30,24,1,22,30,22,30,160" mode="auto" vertical_gap="5" vertical_offset_start="35" vertical_offset_end="0"> If you want different row heights then you can just input different numbers. Now if you scroll down a bit you'll notice a load of code that looks like this: <record> <string id="column_layout" value="-1" /> <integer id="horizontal_offset" value="10" /> <integer id="horizontal_gap" value="0" /> </record> <record> <string id="column_layout" value="-1,-1" /> <integer id="horizontal_offset" value="10" /> <integer id="horizontal_gap" value="5" /> </record> <record> <string id="column_layout" value="-1" /> <integer id="horizontal_offset" value="10" /> <integer id="horizontal_gap" value="0" /> </record> </list> </layout> This code tells the game how to layout the columns in each row, so again we need to add some code to position the Manager Picture code and again where you add the code will depend on where you want the Manager Picture option to appear, in this example we placed the code above the Social Media boxes so we need to add the new code above that. When you scroll through the code each record corresponds to each row so just count them off to you get to the right place, in this case we want to enter the new code above the last three entries (shown above) which correspond to the Social Media buttons, header text and the Experience box and we need to add in two rows one for the header and another for the picture box and as the Social Media records already contain the code we need we can just copy them so that section should now look something like: <record> <string id="column_layout" value="-1" /> <integer id="horizontal_offset" value="10" /> <integer id="horizontal_gap" value="0" /> </record> <record> <string id="column_layout" value="-1,-1" /> <integer id="horizontal_offset" value="10" /> <integer id="horizontal_gap" value="5" /> </record> <record> <string id="column_layout" value="-1" /> <integer id="horizontal_offset" value="10" /> <integer id="horizontal_gap" value="0" /> </record> <record> <string id="column_layout" value="-1,-1" /> <integer id="horizontal_offset" value="10" /> <integer id="horizontal_gap" value="5" /> </record> <record> <string id="column_layout" value="-1" /> <integer id="horizontal_offset" value="10" /> <integer id="horizontal_gap" value="0" /> </record> </list> </layout> On the above lines the string line tells the game how many columns you want on the row - you'll notice the top record only has one as we only have the header text, whilst the second record has two because we have two items to add to that row. The integer lines control the layout of the items but for the most part you shouldn't need to adjust them. Now we have set up the table next we need to add the actual code to call the Manager Picture, if you scroll down you'll see the code that is used to display the various items and we now need to insert our Manager Picture code in here and where you put it depends on where you added the above code, in this case we are adding it above the Social Media stuff so scroll down until you need this section of code: <widget class="spacer" /> <!-- encapsulate social media widgets to aid code driven removal whilst keeping layout intact --> The widget is just the space (the 1 row) and the comment is the start of the Social Media code, so we want to add our code inbetween this two bits of code. So just paste the following code into the gap between the above lines: <!-- Manager Picture --> <container> <!-- Title --> <layout class="stick_to_sides_attachment" alignment="all" apply_to_children="true" inset="0" /> <widget class="label" alignment="left, centre_y" style="semi_bold"> <translation id="text" translation_id="292605" type="use" value="Manager Picture[COMMENT: add_manager_panel; select manager picture]" /> </widget> </container> <container> <!-- Button --> <layout class="stick_to_sides_attachment" alignment="all" apply_to_children="true" inset="0" /> <widget class="icon_button" id="slpc" alignment="left, centre_y" icon="icons/actions/select picture" fixed="true" auto_size="vertical"> <translation id="text" translation_id="361086" type="use" value="Choose Picture[COMMENT: Minor wording change, meaing the same, us etop 10 matches; Add Manager Wizard - Button that lets the manager select a picture of himself for his ingame manager profile]" /> <event id="click_event" event_id="sepi" event_target="sepi" /> </widget> </container> <container> <!-- Text --> <layout class="stick_to_sides_attachment" alignment="all" apply_to_children="true" inset="0" /> <widget class="text" alignment="left,centre_y" size="7" multiline="true"> <translation id="text" translation_id="292607" type="use" value="Select a picture to be used on your profile[COMMENT: add manager panel, option asking the user to select a picture for their profile]" /> </widget> </container> <!-- End Manager Picture --> In that code the first container just contains the header text, the second is the important bit with the actual button, whilst the last one is just some explanation text. If you want you can play around with the alignments and font settings to suit your needs. Redistribution Terms You are free to post this content to your website provided: 1. It is not sold or behind a paywall. 2. You don't advertise it as being exclusive to your website. 3. My username and blog address are included: http://michaeltmurrayuk.blogspot.co.uk/ If you like my work then feel free to send me a donation[www.paypal.me] this is completely optional all of my content is and will always be free to access. Also if you have any questions then the best place to ask them is in the Skinning Forums[community.sigames.com] at the Official SIGames Forums where I can be found most days.