换一换
换一换 


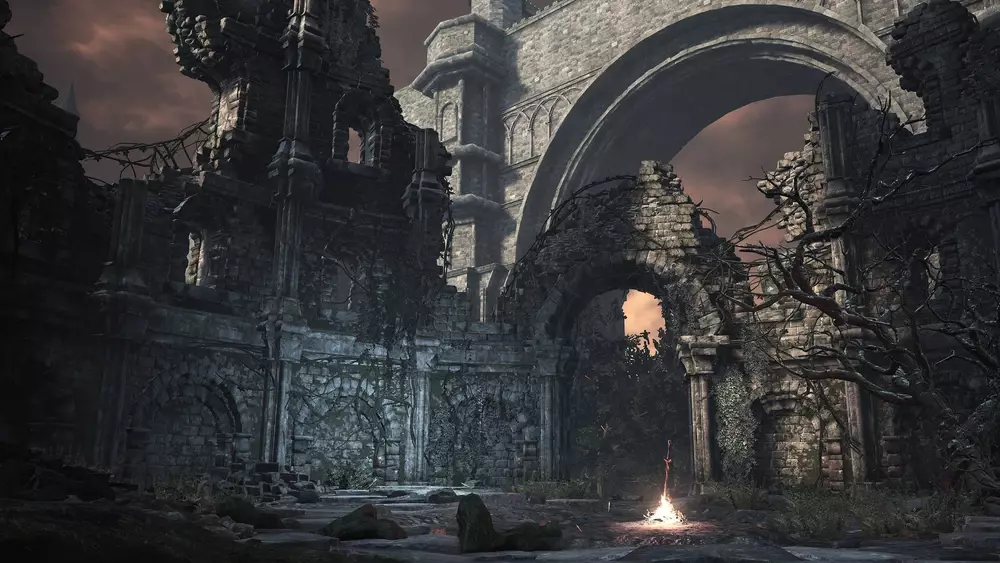
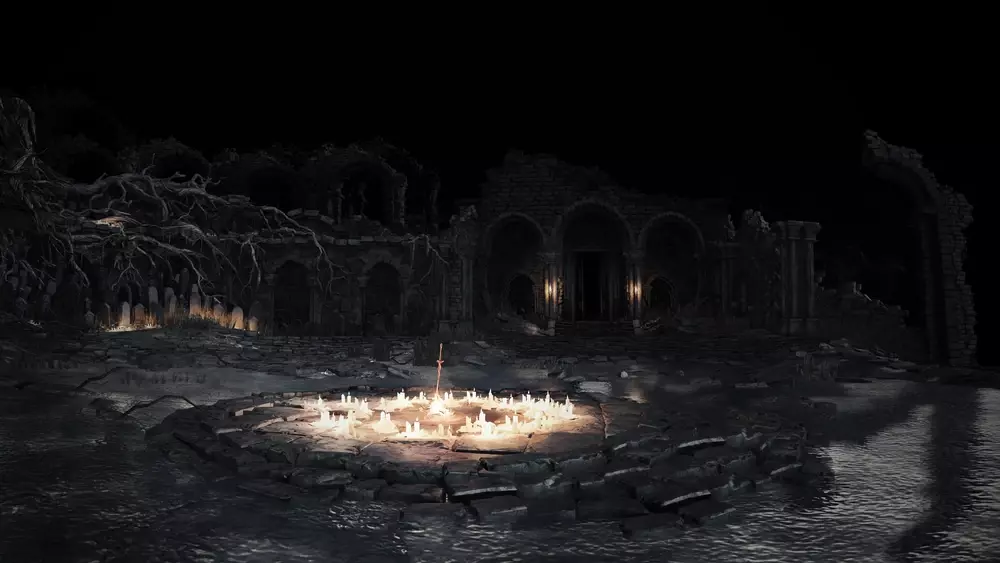
本指南包含逐步攻略,展示资深玩家如何在《黑暗之魂3》中从零开始创建新角色。在本指南中,我将演示如何在单周目内完成所有NPC任务线(因为许多任务线较为隐晦且容易错过),创建属性点分配高效的角色,并推荐一些游戏中值得考虑使用的强力武器。 简介 有一个彩色编码版本的本指南,更容易快速浏览。你可以在我的Steam个人资料上找到相关链接。欢迎在那里提问并留下反馈。我的《艾尔登法环》及其他《黑暗之魂》系列游戏的指南也在我的Steam个人资料上有单独链接。本指南中使用的示例加点为“水桶号”,即力量和敏捷属性均衡加点。水桶号拥有游戏中最丰富的武器选择。 在《黑暗之魂3》中,成功的一半取决于操作技巧,另一半则在于培养强大的角色。本指南将分享我在角色培养方面的专业知识。需要提醒的是:通过极致优化让角色变得尽可能强并非唯一的玩法,最重要的是享受游戏乐趣。 攻略信息 本指南默认你已掌握《黑暗之魂3》的基本机制。一旦你击败某个区域的 Boss,该区域内所有 NPC 的任务线都将无法继续,因此在击败区域 Boss 前完成该区域的所有任务线非常重要。本攻略强调在挑战每个 Boss 前尽可能提升自身实力,通常建议优先挑战较弱的 Boss。你可以在攻略的谷歌文档版本中链接的维基百科上学习轻松击败 Boss 的策略。强烈建议 solo 挑战 Boss,因为每召唤一名盟友,Boss 的生命值就会增加 100%。在整个流程攻略中,我会提到“退出游戏”。当我说“退出游戏”时,指的是立即退出游戏回到主菜单,然后重新进入游戏。这不仅会重置敌人位置,还能推进NPC任务线,无需传送后再返回。保留余火以便召唤入侵NPC。如果你卡在某个Boss处,余火提供的30%额外生命值并不会让你变成更优秀的玩家。 最后,记得每当找到元素瓶碎片时,去传火祭祀场的铁匠安德烈那里强化元素瓶,游戏中共有11个元素瓶碎片;每当找到不死人遗骨时,在传火祭祀场的营火处使用,游戏中共有10个不死人遗骨。这样可以将元素瓶的治疗能力提升至最大,并让你在营火补充前能饮用15次。升级策略 我在攻略部分详细介绍的策略是,首先制作一把火焰武器,因为火焰、深渊和粗制武器的伤害是固定的,与你的力量或敏捷属性无关。这能让你自由地将点数投入到防御和实用属性上,比如生命力、耐力和活力。其次,提前从未知的后期区域获取稀有的制作材料,以便将你的火焰武器升级到较高等级。 我用绿色标出的升级要求是你在游戏该阶段应达到的最低等级,你可以参考下方指南的属性部分,了解我推荐接下来升级哪些属性。可能需要进行一些灵魂 farming。我建议在整个一周目流程中佩戴贪婪银蛇戒指,以获取足够的魂来升级。 以下是我推荐的属性加点顺序,详细内容可参考下方的属性部分: 1. 将生命力和耐力提升至13点。 2. 将敏捷提升至14点。 3. 将生命力和耐力提升至15点。 4. 将生命力、耐力、活力和敏捷提升至16点。 5. 将耐力提升至17点。 6. 将活力提升至19点。 7. 将智力提升至10点。 8. 将活力提升至25点。 9. 将生命力提升至27点。 10. 将活力提升至30点。 11. 将耐力提升至25点。 12. 将生命力提升至34点。 13. 将耐力提升至35点。 14. 将敏捷提升至40点。 15. 将力量提升至40点。 灰烬墓地

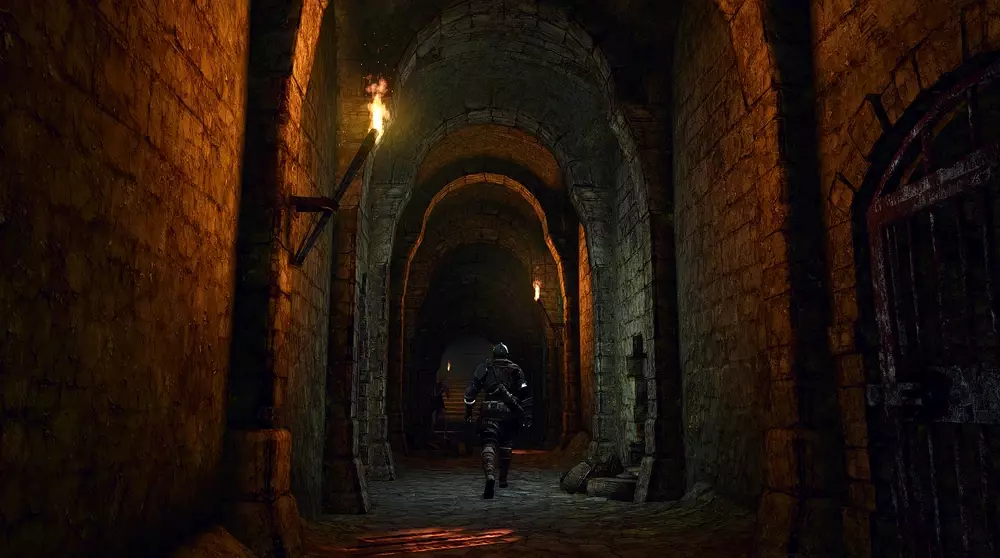
图片来源:黑暗之魂维基 fandom 遵循知识共享署名-非商业性使用-相同方式共享 3.0 协议 视频攻略第一、二部分: 1. 创建新角色并选择【骑士】初始职业;这是最强大的初始职业,拥有最佳的初始属性和装备。我推荐的加点方案无法在其他职业上实现,因为它们的属性组合不够理想。推荐选择【生命戒指】作为初始礼物,它比消耗品类初始礼物能提供更持续的收益。最后,有些玩家倾向于选择体型较小的女性角色,因为她们对视野的遮挡更少,不过实际上差异不大。 2. 在灰烬墓地苏醒后,捡起破碎喷泉旁的【原素瓶】。这片区域有游魂,很适合用来练习战斗技巧。不过没必要过多击杀它们,因为它们不会掉落任何有用的东西。右侧的死胡同小路通向一具废弃尸体的灵魂,你可以去拾取。 3. 穿过喷泉,你会遇到一个手持十字弩的游魂挡住去路。在游魂所在的位置向右转,蹚过齐腰深的水,直到抵达一个有贪食水晶蜥蜴栖息的开阔区域。不要尝试与它战斗,而是跑到区域后方,拾取一个无名旅人的灵魂。现在回到手持十字弩的游魂所在位置,沿着悬崖边的小路向上,前往灰烬墓地营火。在营火处休息可以完全恢复生命值并补充元素瓶,但也会使大多数敌人重新刷新。 4. 过了营火后,靠左走,贴着悬崖边,你会遇到另一个站在悬崖边的活尸。跳下悬崖,落到峡谷中的石棺上,在那里可以拾取一块楔形石碎片,这是一种珍贵的制作材料。通常,跳跃的操作是在 sprint(冲刺)时按下闪避键。如果跳失败了,你可以一路战斗回到营火处再试一次。 5. 从峡谷中你可以看到区域 boss 的雾墙。不过现在先不要尝试与他战斗。在雾墙的右侧,你会看到悬崖边缘。悬崖下方有一条狭窄的小路,在那里可以拾取五个火焰壶。从这里往山上走,你会到达篝火处。休息之后,你就应该去挑战 Boss 了。 6. 进入雾墙,取回螺旋剑,并击败【初始之火的守护者】。对付这个 Boss 时采取积极进攻的策略比较好,因为他的生命值不高。在第二阶段,他对火焰伤害比较脆弱,但至少要留一个火焰壶到后面用。击败他之后,你可以在【初始之火的守护者】篝火处休息。击败 Boss 你会获得大量灵魂。如果你死亡,会失去所有灵魂,但只要回到死亡地点并拾取你的血迹,就能找回它们。如果在拾取血迹前再次死亡,灵魂就会全部丢失,所以拾取血迹至关重要。如果失去太多灵魂,你将无法升级。 7.沿着山坡向上走,你会看到一座名为【传火祭祀场】的大型建筑。进入之前,先绕到祭祀场的右侧,可以找到一块余烬,这是你之后会用到的贵重物品。祭祀场的左侧有几段楼梯。如果往这个方向走得太远,你会遇到一个名为【剑术大师】的危险敌人。不过,这里有一段向右分叉的楼梯,由两个【游魂】把守。击败游魂并捡起他们守护的余烬。现在你可以进入【传火祭祀场】了。
8. 进入传火祭祀场后,走下楼梯到房间中央,插入螺旋剑点燃传火祭祀场的营火。与站在营火附近的防火女对话。坐在附近楼梯上的是逃兵霍克伍德,与他对话可习得一个姿势。爬上楼梯到王座处,与坐在其中一个王座上的库尔兰的鲁道斯对话。王座对面是一条走廊,你会在那里找到祭祀场侍女,她是一名商人。走过她之后,你会听到亚斯特拉的铁匠安德烈在打铁。让他将你的元素瓶分配为4个原素瓶和0个灰原素瓶,然后与他对话两次可习得一个姿势。记得在装备页面卸下空的灰原素瓶。前往传火祭祀场的顶层,从窗户出去。在一扇紧闭的大门旁,有一具废弃尸体,可拾取其灵魂。从那里,借助树木跳到祭祀场的屋顶,在屋顶上可以收集到三个返回骨片。从屋顶绕到祭祀场前方,进入传火祭祀场的房梁。 10. 在所有房梁交汇的中央有一个鸟巢。在这里,你可以用一个火焰壶交换一个大块楔形石碎片,用一个返回骨片交换一个动作。只需站在鸟巢上,将所需物品放在地上即可。记得拾取其中一根房梁上的元素瓶碎片。在王座上方的远端房梁尽头,有一面幻影墙壁。攻击或翻滚穿过它即可驱散。幻象墙后面有一个平台,你可以跳下去。这里有一个宝箱,打开后可获得贪婪银蛇戒指。将戒指装备在你的一个空闲戒指槽中。从这里你可以跳下去到达篝火处。 11. 消耗你背包中的灵魂,通过与防火女对话升级你的生命力和耐力至13级,敏捷提升至14级。记得让铁匠安德烈用你找到的元素瓶碎片强化你的元素瓶。 12. 使用篝火传送到灰烬墓地篝火处。返回并击杀贪婪水晶蜥蜴。接下来,传送回传火祭祀场并击败剑术大师。与这两个敌人战斗时要谨慎。专注于躲避它们的攻击,并在攻击间隙进行反击。 13.将活力和耐力提升至15级。现在使用营火传送到下一个区域:洛斯里克高墙。
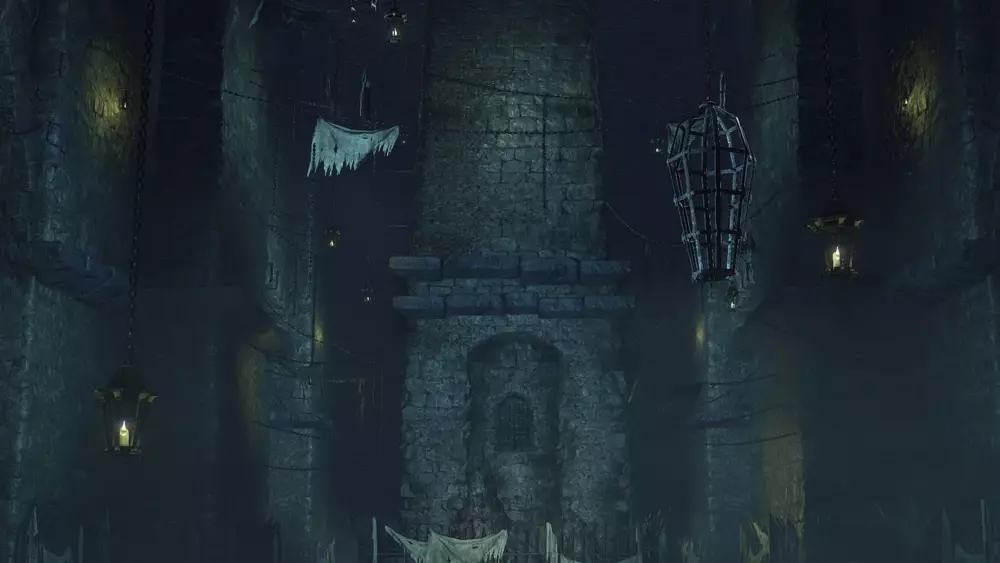
14. Warping will place you close to the High Wall of Lothric bonfire. From the bonfire, there’s a left and right path. Take the right path, and at the top of the staircase are several praying hollows and a crossbow-wielding hollow. As soon as you reach the top of the stairs, the hollow closest to the crossbow-wielding hollow will start to transform into a Pus of Man, an enemy too strong for you to fight right now. If you sprint, you can kill it before it transforms and safely loot the nearby longbow. If you were slow, you can grab the bow anyway. 15. Now take the left path from the bonfire. Here you’ll encounter sleeping hollow soldiers, and patrolling lantern-bearing hollows. These guys will scream, waking the sleeping hollows, if you don’t kill them fast enough. Head up the stairs on the left and you'll find a wyvern's corpse. Drop down to a window ledge near the wyvern’s foot, then climb down the ladder in the middle of the floor until you reach a staircase outside. 16. Start heading up the staircase and a Lothric Wyvern will land on the building in front of you and start breathing fire everywhere in waves. You’re safe from the fire as long as your head is a bit below the top of the staircase. Wait for a gap between bursts of fire breath and sprint towards the Wyvern and through the door beneath it to safety. Ignore the chest in this room for now, instead climb up the ladder and unlock the back door. 17. Past the back door you’ll see a Lothric Knight come out of another doorway. He’s a good enemy to practice combat against, but you don’t have to fight him now. You can run past him through the door, and head right up the staircase to the Tower on the Wall bonfire. If you’re too slow, a hollow thief will follow you up the staircase and you’ll have to kill it before you can activate the bonfire. Don’t miss the titanite shard hidden past the bonfire. 18. Return to the room beneath the wyvern with the treasure chest. This chest is actually a dangerous enemy called a Mimic. Mimics can be identified by the fact that their chain is uncoiled, while real treasure chests always have a coiled chain beside them. Mimics also visibly breathe, while real chests do not. Wake the Mimic up by attacking it until your stamina bar is empty. Mimics attacks deal very high damage, but can be avoided if you strafe in circles around them, never be in front. Kill the Mimic to get a deep battle axe and equip it in place of your long sword. 19. Leonhard the Ringfinger appeared in Firelink Shrine after you lit the Tower on the Wall bonfire. Visit Firelink Shrine and talk to him, then return. 20. From the bonfire, head back down the stairs, drop down one floor, and head out the door. There is a praying hollow on the rooftop in front of you. Try to kill it before it transforms into a Pus of Man. Past it on the left is a crystal lizard. Chase and kill the lizard before it disappears. Lizards that disappear will respawn when you rest at a bonfire. On the right side of the rooftop you can drop down onto a narrow walkway where you can loot three black firebombs, save one of these for later. Now turn around and enter the doorway. 21. You’ll enter a room guarded by a spear and greatshield-wielding Lothric Knight. Try to dodge his attacks and counterattack before he can raise his shield. Up the stairs in a side room you can loot a titanite shard. Now head past the Lothric Knight into the hallway he came from. Head down the stairs to an elevated platform overlooking a room crawling with strong enemies. Don’t go down the stairs to the left, instead head to the right and loot the silver eagle kite shield from a chest. Equip it in place of your knight's shield. 22. Now return back up the stairs you came from. On the left is a path blocked by debris. Break through the debris and drop down a hole leading to the lower walkway. From this vantage point you can get the drop on the enemies below. Sitting on an anvil in the middle of the room is an estus shard. Down a set of stairs guarded by undead dogs you can loot the cell key. There’s also a titanite shard you can loot behind some boxes under the main staircase. Once you have those return to the Tower on the Wall bonfire. 23. Climb all the way down the tower to its lowest level. Past a bunch of explosive barrels you’ll come to a prison cell. Use the cell key to rescue Greirat of the Undead Settlement. Accept his quest and equip the blue tearstone ring he gives you. Greirat will now warp to Firelink Shrine to the left of Andre the Blacksmith. You should go visit him. 24. Buy ~87 standard arrows from Greirat for 10 souls each. Return to the staircase where the Lothric Wyvern breathed fire at you and equip the longbow in two hands. Shoot down the Lothric Wyvern to get a large titanite shard. Standing on the far side of the wooden platform next to the stairs will get you out of range of its flames while providing a good vantage point to shoot at its chest. The head and wings have small hitboxes and are difficult to hit. Expect no less than 70 arrows to fell the Wyvern. With the wyvern dead you can safely loot the claymore and an ember nearby. 25. From the Tower on the Wall bonfire, head out to the rooftop with the Pus of Man, and down to the right near where you found the black firebombs. Closeby, a crossbow-wielding Hollow guards a ladder. Descend the ladder to reach the courtyard patrolled by a Winged Knight. Past the courtyard, head to the right up the stairs. On your right you can loot a ring of sacrifice which can be sold for 2000 souls. At the top of the stairs you’ll spot an elevator. Open the door at the top of the elevator to open a shortcut to the High Wall of Lothric bonfire. 26. Head back down the stairs to the area patrolled by Lothric Knights. Past them and through a doorway you’ll find Emma, High Priestess of Lothric Castle. Talk to her twice to get the small Lothric banner and join the Way of Blue covenant. On your right after you leave Emma’s room is a red-eyed Lothric Knight, which is stronger than normal. He drops a refined gem if you kill him. At the bottom of all the stairs, past the patrolling knights, is the boss’ fog wall. Make sure you’ve done everything you wanted to do before entering the fog wall, as any unfinished questlines in the area become locked once the zone boss dies. 27. Use the souls you’ve gained by fighting your way through the High Wall of Lothric to level up your vigor, endurance, vitality, and dexterity to level 16. 28. Now that you’ve leveled up, enter the fog wall and kill Vordt of the Boreal Valley. Standing underneath this boss will make it hard for it to hit you during its first phase. With the boss dead and the small Lothric banner in hand, head to the ledge and travel onward to the Undead Settlement. Undead Settlement
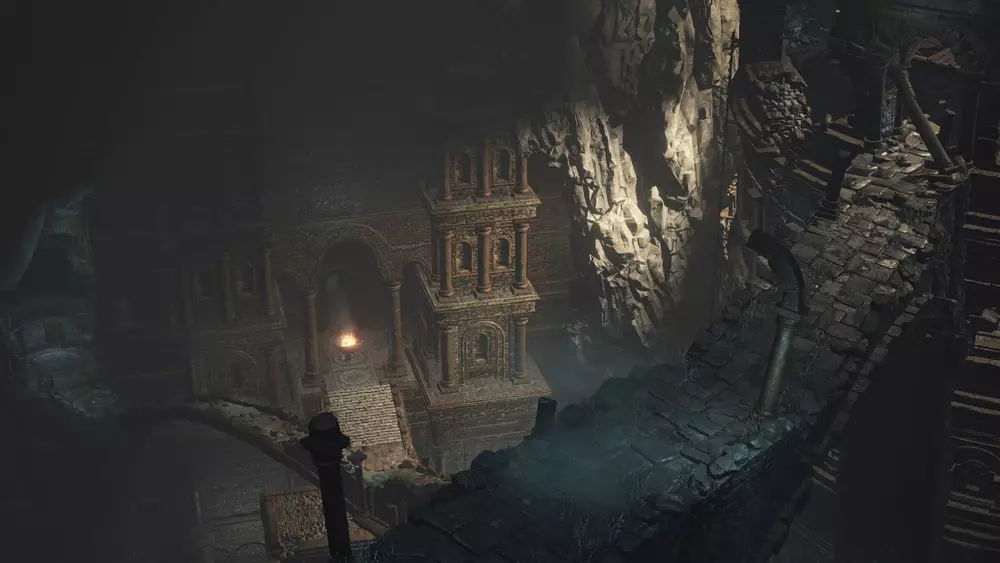
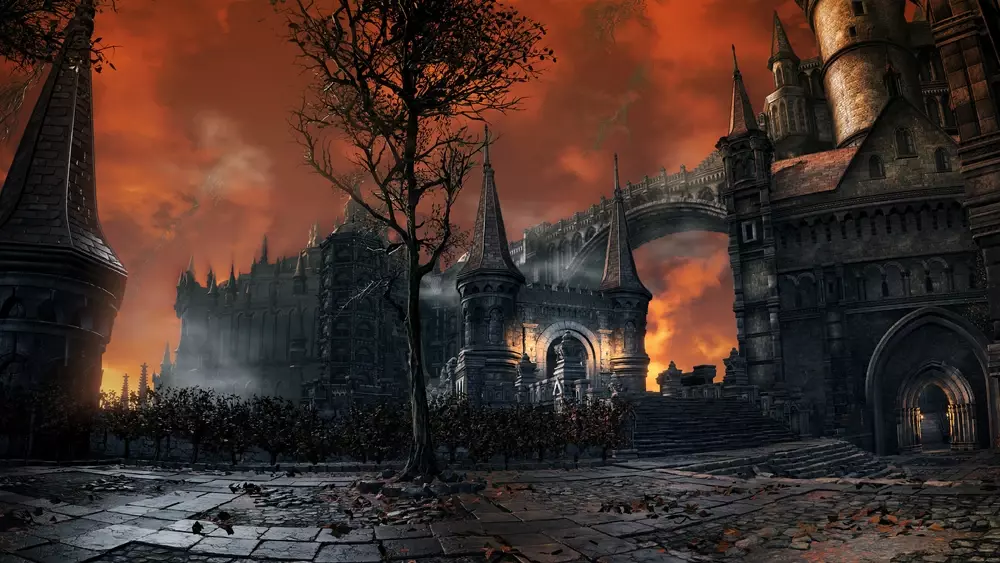
29. You’ll be dropped off near the Foot of the High Wall bonfire. Head left at the bottom of the staircase and you’ll find the corpses of many pilgrims of Londor. One of them is alive. Talk to Yoel of Londor and accept his offer. Yoel will warp to Firelink Shrine, at the end of the hallway Greirat is facing. Now turn around and use the lever to open the gate up ahead that’s guarded by several Starved Hounds. Just past it is the Undead Settlement bonfire. 30. Warp to Firelink Shrine and talk to Yoel of Londor to learn a gesture, then select the option to draw out your true strength, which increases your soul level by one. Use this method to level up your intelligence to level 10, endurance to level 17, and vitality to 19. You will need to draw out your true strength all five times to do this, and Yoel will only let you draw out your true strength again if you’ve died twice since the last time. The quickest way is to warp to the Undead Settlement bonfire and jump off the cliff and twice. Remember to pick up your bloodstain between each jump. After doing this all five times, quit out, and Yuria of Londor will appear next to Yoel. Buy the braille divine tome of Londor from her for 50 souls. 31. In the wooden building past the Undead Settlement bonfire, there’s a corpse hanging by a rope on the top floor balcony. Cut the rope and loot Loretta's bone from the corpse, then bring it to Greirat of the Undead Settlement in Firelink Shrine. Quit out, talk to Greirat to learn a gesture, quit out again, then send him to pillage the Undead Settlement. He’ll return once you defeat a boss. 32. Past the wooden building is a clearing where you can loot an estus shard guarded by an Evangelist and a horde of Hollow Workers. On the far side of the clearing is a house with a closed door. Open the door and drop down through a hole in the floor to loot the Warrior of Sunlight covenant item. Return to the clearing and cross the rope bridge near the Evangelist. Break through the barrels on the right, at the end of the bridge, and follow the hidden path up. 33. Here, A swarm of Thralls guard a house. Talk to the Cage Spider NPC behind the house, then climb the ladder to the roof and jump to the area patrolled by a Hollow Manservant. Don’t attack him, this one’s friendly. Instead, find the corpse hanging by a rope next to the cliff. Cut the rope and try to loot the flame stoneplate ring off the corpse. Equip the ring if you get it, or come back to it once you reach the area below the cliff if you missed. Now, examine the Hollow Manservant to move to the Pit of Hollows, then talk to Holy Knight Hodrick twice to join the Mound Makers covenant and get two homeward bones. Use one to teleport to the last bonfire rested at. 34. Return to the clearing and this time cross the rope bridge and head straight out the doors. You’ll come to an area where hollow workers will throw firebombs at you from a balcony. Quickly drop down to a ledge below the cliff on the right, this leads to the Cliff Underside bonfire. Climb up the stairs to the balcony and rescue Cornyx of the Great Swamp. Ask him to teach you pyromancy and he’ll warp to Firelink Shrine, on the other side of Andre, opposite Greirat. Talk to Cornyx in Firelink Shrine to get a pyromancy flame, quit out, and talk to him again to learn a gesture. 35. From the Cliff Underside bonfire, climb down the stairs, turn around, and cross the bridge guarded by three Hollow Manservants who will throw pots at you. Talk to Eygon of Carim sitting to the left, then open the doors to the tower in front of him. Talk to Siegward of Catarina, then run across the lift’s pressure plate so it goes down without you on it. A second lift platform will descend which you can ride to the top of the tower and talk to the Giant of the Undead Settlement. Make peace with him to receive a unique white birch branch. While this is in your inventory he will not shoot you. 36. Take the lift back down and look for a wooden platform you can jump to before reaching the bottom. Talk to Siegward again, then drop down the roof and kill the Fire Demon to get a fire gem. Talk to Siegward three times to receive a siegbrau and two gestures. Cut down the corpse hanging by a rope nearby to get a pale tongue. One of the buildings has stairs that will take you to the roof. Jump off the roof to the balcony of another tower. Descend the tower and loot the chloranthy ring. Equip the chloranthy ring in place of your blue tearstone ring. 37. Now that you have a pale tongue, talk to Leonhard the Ringfinger in Firelink Shrine to get the lift chamber key. Warp to the Tower on the Wall bonfire, descend to the bottom and open the locked door there with the lift chamber key. Kill the Darkwraith there to get the red eye orb, then return to Firelink Shrine and talk to Leonhard to get a gesture. 38. Return to the Cliff Underside bonfire and head towards the bridge with the three Hollow Manservants. Opposite the bridge is a door leading to the sewer. Climb the ladder at the end of the sewer and open the gate, past it is the Dilapidated Bridge bonfire. Above the bonfire is a crystal lizard. Kill it to get a sharp gem. Consume an ember near the bonfire and you’ll be invaded by Holy Knight Hodrick. Kill him to get a vertebra shackle. Beware that he can parry you when his shield is in his hand. Know that his warmth pyromancy will heal whoever it’s touching. 39. Up from the bonfire is a house. Past it you can loot two titanite shards. In the opposite direction, past a gate, is an area crawling with Hollow Workers. This area is safe now that you’re allied with the Giant. To the right you can jump to a small piece of land and loot an undead bone shard. Burn these at the Firelink Shrine bonfire to increase the healing of your estus flask. To the left, up a hill, you can loot the mortician's ashes. There’s a house nearby that leads to the boss’ fog wall. Ignore the fog wall and instead open the large doors creating a shortcut to the Cliff Underside bonfire. Give the mortician’s ashes to the Shrine Handmaid in Firelink Shrine and buy the grave key from her for 1500 souls. 40. Use the grave key to open the locked door in the sewer near the Dilapidated Bridge bonfire. At the end of this area, talk to Irina of Carim, touch her, talk to her again, then talk to Eygon of Carim who’s right outside. Irina will warp to Firelink Shrine, at the end of the hallway Cornyx of the Great Swamp is facing. Do not, under any circumstances, give her the Londor divine tome. 41. Save up 20,000 souls and buy the tower key from the Shrine Handmaid. Return to where you performed the tree jump and unlock the tower door. Jump off the bridge onto the roof to find another crow’s nest and trade a black firebomb for a titanite chunk. Turn around towards the bridge and jump off the roof to kill a crystal lizard. Now cross the bridge into the shrine belltower. Ride the lift up and loot the Fire Keeper soul. Take the lift back down and jump down the coffins to the bottom of the tower where you can loot the estus ring. Equip the estus ring in place of your flame stoneplate ring, then return to the Fire Keeper and give her the Fire Keeper soul. Talk to Ludleth of Courland again, then warp back to the Cliff Underside bonfire. Road of Sacrifices
42. 返回巨人塔,乘坐升降机下到下层。跑过巡礼者骑士,点燃献祭之道篝火。现在回去击杀该骑士,你可以利用它无法离开建筑这一点。 43. 最终你会来到一座由孤影骑士守卫的大桥。在桥的起点,从右侧跳下到狭窄的悬崖上。沿着悬崖向上走,夺取卡里姆盲文圣典,它由两只饥饿猎犬守护。 44. 过桥后是中途要塞篝火。与亚斯特拉的安里和沉默的霍拉斯交谈,加入青之守护者誓约,然后传送到传火祭祀场,与坐在防火女附近楼梯上的无火之灰的希里斯交谈。将卡里姆盲文圣典交给卡里姆的伊莉娜。一定要确保你不会误把隆道尔的盲文圣典给她,那真的会害死她。 45. 从半路要塞篝火出发,下山后向左走。拾取草纹盾,并装备它来替换你的银鹰鸢盾。附近的小山顶上是受难森林篝火。返回半路要塞篝火,这次沿着区域的右侧走。穿过一个门口,可以拾取法兰楔形石圆盘和被黑骑士守护的佣兵双剑。装备佣兵双剑来替换你的幽邃战斧。 46. 返回传火祭祀场的铁匠安德烈处。把法兰楔形石交给他,让他用你的火焰宝石为佣兵双剑进行质变,并用12块楔形石碎片和2块楔形石大碎片将其强化至+4。现在,右键/L1不再是格挡,而是主要攻击键。你可以回去击杀洛斯里克高墙上的两个活尸脓液了。它们对火焰攻击极其脆弱,首次击杀会掉落余烬和楔形石碎片。 47. 在你拾取佣兵双剑的沼泽附近,可以找到沼泽咒术书。将其交给传火祭祀场的大沼的柯林。从幽邃教堂篝火处下坡,绕到一座石制建筑的侧面,经过一个红眼狼人敌人后,可以拾取到一个元素瓶碎片。 48.通过墙上的洞口进入石制建筑,爬上两段楼梯到达顶层。与 Vinheim 的 Orbeck 对话。由于你拥有 10 点智力,可以请求他学习法术并同意他的条件。之后他会传送到火祭场,位于 Great Swamp 的 Cornyx 对面。这座建筑通向一面雾墙,但不要穿过它,而是从建筑侧面出去,前往沼泽另一边的岸边。 49. 杀死守卫通往下一区域楼梯的两名 Farron 流放者。他们身后有一个梯子。如果你稍微爬下梯子,他们会跳下来摔死,但公平地与他们战斗更有趣。梯子底部是法兰要塞篝火。返回传火祭祀场,从祭祀场侍女处购买流放者头盔、护手和腿甲,总共花费9000灵魂,尤其要装备流放者头盔。 50. 传送回磔罚森林营火并使用余火。穿过沼泽跑到你与法兰的流放者战斗过的岸边,此时黄指头海泽尔会入侵。击败她,但要注意她会使用隐身魔法潜行接近。在磔罚森林营火附近的石制建筑外可以召唤圣骑士霍克伍德。作为疯狂灵体,霍克伍德会攻击一切目标,可用于击杀该区域的其他敌人,比如巨型螃蟹,其中一只会掉落沼泽戒指。 51. 返回不死聚落的悬崖底部营火。进入雾墙并击败咒蚀大树。咒蚀大树只有分布在其身体各处的脓疱是弱点,击破这些脓疱即可杀死它,且脓疱对火焰攻击尤为脆弱。将它掉落的【质变炉】交给传火祭祀场的鲁道斯。与逃兵霍克伍德对话,他会因你击败大树而奖励你一块【厚重宝石】。最后,在侍女处花费300魂购买一把匕首。 法兰要塞
52. 传送到法兰要塞篝火处。靠左走,拾取元素瓶碎片,继续前进直到遇到守护贤者煤炭的暗灵。下次回到传火祭祀场时,将煤炭交给铁匠安德烈。你可以双持匕首,使用快速步武器战技来更快地穿越沼泽。爬上附近的楼梯并熄灭火盆。你需要熄灭所有三个火盆才能打开通往Boss的门。 53. 火盆旁有另一段通往沼泽下方的楼梯。你应该能看到远处有一段通往第二个火盆的楼梯。穿过桥梁,找到要塞遗迹篝火。从这里走下斜坡,在一个满是鼻涕虫的小凉亭里拾取一个不死人遗骨。 54.在斜坡后方,你可以从三只咕噜怪的守护下拾取金色卷轴。回到曾有不死人遗骨的凉亭,沿着墙壁穿过一群石化蜥蜴。在这里,你可以从一个洞穴中拾取贤者卷轴。下次回到传火祭祀场时,将这两个卷轴交给 Vinheim 的欧贝克。 55. 洞穴过去有一段楼梯通往第三个火盆。熄灭它之后,使用余火,黄指头海泽尔会在楼梯底部入侵你。第二次杀死她后,返回要塞遗迹篝火处。 56. 走下斜坡后向右转。一个高高的梯子会带你上去找到法兰老狼,以及同名的篝火。加入法兰守卫誓约,然后在建筑外侧的一面幻影墙后方找到追梦人的骨灰。将余烬交给传火祭祀场的侍女,然后退出游戏再重新进入,与无火的余灰希里斯对话可习得一个动作。 将活力等级提升至25级,并装备流放者臂甲。 乘坐法兰老狼旁的电梯上到桥顶。左侧是离群恶魔,但先向右走,从桥右侧跳下至隐藏路径。击杀这里的前两只结晶蜥蜴,获取两个大块泰坦ite碎片。 击杀离群恶魔以获得离群恶魔的灵魂。不要在恶魔面前停留过久,否则会被它抓住。在特定角度下,它会将你扔下桥,导致你立即死亡。对其腿部造成足够伤害后,腿部会断裂。向库尔兰的鲁道斯支付5000灵魂,将离群恶魔的灵魂转化为哈维尔戒指。装备该戒指以替代绿花戒指,并装备流放者腿甲。 60.传送到废墟营火,走下斜坡,穿过三个火盆开启的大门。向右转,你会找到城墙外围营火。营火旁有一只贪婪水晶蜥蜴,还有一扇可以打开的门,通往献祭之道。返回城墙外围营火,使用余火,召唤隆道尔的白影学习一个姿势。在蜥蜴相反的方向,两名暗灵正在双门外屠杀咕噜,门后是 Boss 房间。附近可以看到黑手歌德希尔德的召唤符,他也会教你一个姿势。用你的黑色分离结晶将他们送回。先不要穿过双扇门,而是传送到【受难森林】篝火处。 61. 进入你找到【凡荷姆的欧贝克】的建筑,穿过雾墙,击败【结晶老者】。老者会生成自身的分身,紫色的分身是真身,蓝色的是假身。让【库尔兰的鲁道斯】将其灵魂转化为【结晶老者的刺剑】。穿过结晶老者后,你会找到【深邃教堂】篝火。 深邃教堂

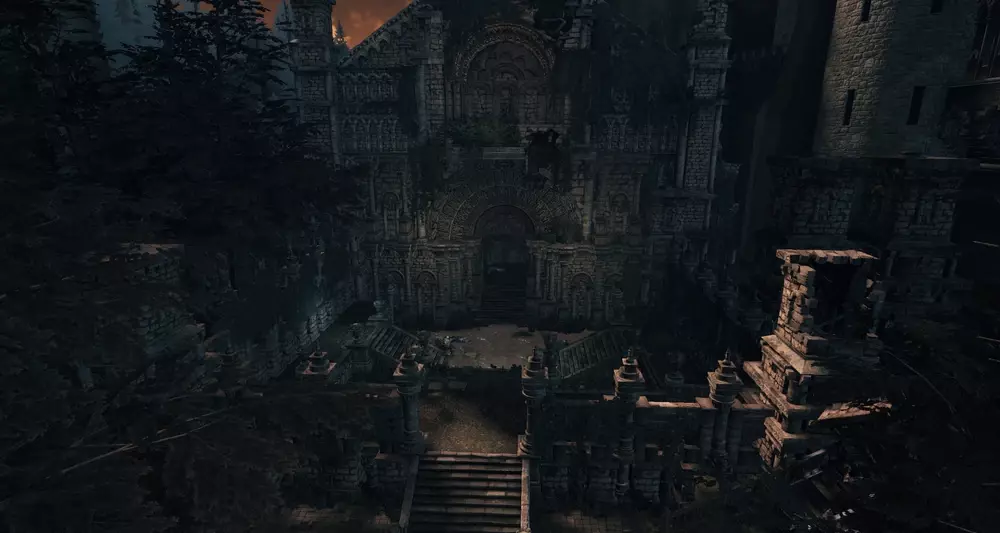
62. Grab the paladin's ashes from the ravine to the left of the bonfire and give them to the Shrine Handmaid. Buy at least two undead hunter charms from her for 500 souls each, and a torch for 300 souls. If you get hit by a maggot-infested enemy you will be afflicted by the maggots debuff. Holding a torch in either hand for any amount of time will nullify it. 63. Keep going up to the Cleansing Chapel bonfire. Talk to Slave Knight Gael to warp to the Painted World of Ariandel. Light the Snowfield bonfire there, then warp back to the Cleansing Chapel. 64. Pick up the estus shard just outside the chapel. The nearby path leads up to the Cathedral of the Deep. Run past the undead, and across the bridge. The Giant of the undead settlement will shoot nearby enemies here. Loot the undead bone shard from a coffin jutting out from the cliffside. If you head up the stairs, the left path will take you into the cathedral, but first head right and descend the tall ladder. Down here you can kill a crystal lizard and a ravenous crystal lizard. 65. Head back up the ladder and towards the cathedral. Here you’ll have to run across several buttresses and rooftops. An Evangelist nearby guards three undead hunter charms. At the end of this area are a pair of large doors. You can exploit the fact that you don’t have a hitbox during the door opening animation. Once inside, a nearby lift will take you down to a door you can open, creating a shortcut to the Cleansing Chapel bonfire. 66. Take the lift back up and run through the next area, dodging the giant that will attack you, and dive through the door to safety. Just ahead is a Mimic. Throwing an undead hunter charm at the Mimic will put it to sleep, which has a chance to drop the symbol of avarice helmet. It will also drop the deep braille divine tome. Do not give it to Irina of Carim. The Mimic will wake up after a bit and you can throw another charm at it. Waking up means returning to its default state, not aggroing. Kill it once you've got the helmet. There is a short delay between when you kill a boss and when you get souls, you can swap your helmet to the symbol of avarice immediately after killing a boss to receive 50% more souls. 67. Past the Mimic is a Cathedral Knight, and past him is a room with a Lion Spider. Kill the Lion Spider, it won’t respawn. Be aggressive, it doesn’t have much health. Head out the door of the Cathedral Knight’s room into the Cathedral’s main hall. Run straight across to the other side of the hall, to the right, then out a doorway that leads to another shortcut to the Cleansing Chapel bonfire. 68. Consume an ember and return to the center of the main hall. Longfinger Kirk will invade you here. Kill the two giants in the main hall for two large titanite shards, then upgrade your fire sellsword twinblades to +5 with four large titanite shards. The giant who first attacked you is next to a door you can open, the other giant is next to the stairs that lead to the boss’ fog wall. Ignore the fog wall and instead ride the nearby lift up. From here you’ll be able to open the Cathedral’s outside doors. 69. Near the outside doors, inside the Cathedral, you’ll spot a Siegward impersonator next to a narrow platform that forms a bridge to the other side of the Cathedral. Walk across the platform, then turn around and head out the shortcut toward the Cleansing Chapel bonfire you recently opened. Just before you reach the Cleansing Chapel is a lift. Ride the lift up and kill the Deacon at the top of the tower to get the deep ring. Jump onto a buttress and loot a pale tongue guarded by Thralls. The nearby doorway leads to the cathedral rafters. On the other side of the rafters is a spot where you can drop down to a platform. 70. Past the platform you’ll find Unbreakable Patches. Choose to not forgive him to get a rusty gold coin and a gesture. Buy the full Catarina armor set from him for 15,000 souls. Just ahead of him you can loot the red sign soapstone guarded by Man-Grubs. Enter the large doorway here to find the Rosaria’s Bedchamber bonfire. 71. Talk to Rosaria, Mother of rebirth, and join the Fingers of Rosaria covenant. Don't offer Rosaria a pale tongue, that will break Sirris of the Sunless Realms’ questline. Instead, have her respec your stats, which also costs a pale tongue. Drop your intelligence to level 9 and put that point into vigor. 72. Warp to the Cleansing Chapel bonfire and toss the Catarina armor set down to its rightful owner: Siegward of Catarina. 73. Warp to Firelink Shrine and climb up to the belltower where the Firekeeper soul was. Ride the lift back down and talk to Unbreakable Patches. Talk to him again on the top floor of Firelink Shrine, near the window. Don't forgive him, quit-out, then talk to him to learn a gesture. 74. Warp to the Cleansing Chapel bonfire and head up to the fog wall. Kill the Deacons of the Deep to get the small doll. This is an easy boss, though it’s even easier in subsequent playthroughs when you have ultra-greatswords that have been leveled up. Just smack whichever Deacon is glowing red, then when Archdeacon Royce arrives, give him the same treatment. You can rest at the bonfire to get the archdeacon armor set after killing the boss. Now return to Firelink Shrine and talk to Anri of Astora, then warp to the Snowfield bonfire in the Painted World of Ariandel. Painted World of Ariandel Part One
75. 从篝火向右走,一路下到悬崖边。一只巨狼会刷新并挡住悬崖边的路径。这个区域目前超出你的等级,建议直接跑过敌人。穿过巨狼后是一片空地,有米尔伍德骑士巡逻。爬上米尔伍德骑士的塔楼顶部,拾取队长的骨灰。在塔楼前方的小山上,巨狼会再次出现。逃到山顶,你会发现前方就是绳桥洞穴篝火。将队长的骨灰交给侍女,花费总计13500灵魂从她那里购买米尔伍德骑士头盔和胸甲,并装备它们。 76. 穿过绳桥,与维尔海姆爵士和芙莉德修女交谈,点燃艾雷德尔礼拜堂篝火。返回桥对面,从右侧滑下山坡。穿过墙上的洞口,爬上梯子,你会进入一间屋子并遇到鸦人定居者。告诉他你是灰烬。经过他,在另一间屋子里有鸦人聚落的营火。 77. 穿过聚落向上走,沿着右侧的悬崖边,爬上几个梯子。穿过位于聚落上方的石桥,跳到一座教堂的屋顶上。从其中一扇窗户进入,并打开教堂的门。门外有一扇可以打开的门,形成一条捷径。 78. 进入教堂对面的建筑,会被维尔海姆爵士入侵。双手持盾,用盾击将维尔海姆爵士打下悬崖,获得升降梯房间钥匙。使用钥匙打开威尔海姆建筑的二楼,与画中女人交谈。从二楼阳台前往雪山通道篝火处。 在篝火旁的区域,收集六块大块楔形石原盘和两块楔形石圆盘,然后让铁匠安德烈将你的火焰佣兵双剑强化至+7。该区域有两棵腐烂的树木,推倒它们可以创建捷径。在区域尽头,你可以进入艾雷德尔礼拜堂的地下室。上楼打开返回艾雷德尔礼拜堂篝火的捷径。地下室中有一面幻影墙壁,通向楼下,那里有一个机关可以打开通往 boss 房间的道路。这里的另一面幻影墙壁通向《黑暗之魂》初代中普莉希拉的旧 boss 房间。从艾雷德尔礼拜堂出发,砍断绳桥,顺着桥爬下去,再沿着树根向下走。树根下方是画中世界深处篝火。篝火右侧的悬崖下方是英雄古达的 Boss 房间,我们选择向左走。在这片区域的尽头有一个行为怪异的树女,杀死她后,其他树女附近会生成一个高梯子。爬上梯子可以获得一块楔形石原盘。 81. 将生命力等级提升至 27 级。 82. 传送到高墙外围篝火,进入雾门,击败深渊监视者。在第一阶段,与其中两个保持距离,它们会自相残杀。在传火祭祀场与卡利姆的艾果尔和逃兵霍克伍德对话,然后传送回深渊监视者篝火,进入卡萨斯地下墓地。 卡萨斯地下墓地
83. 穿过桥梁,在桥的尽头前向左跳下至一个平台。在这里可以拾取【卡萨斯咒术书】,下次回到传火祭祀场时可以将其交给【大沼的柯林】。在走下斜坡前,进入附近的门内与【亚斯特拉的安里】对话。杀死斜坡底部戴着帽子的骷髅,它操控的【骷髅球】会掉落【不死人遗骨】。 84. 沿着路径前进,直到遇到另一个骷髅球。 sprint 到左侧的小路上躲避它,到达【卡萨斯地下墓地】篝火处。径直走下楼梯,直到抵达一扇大门。使用【余火】,【屠骑者托里格】会在此入侵。杀死他可习得一个动作。附近的楼梯上方,有一个戴着帽子的骷髅在操控这个骷髅球。在它身后,可以找到墓地守卫的骨灰,你可以将其交给传火祭祀场的侍女。 85. 在你拾取墓地守卫骨灰位置附近的门后,有一个可以打开特瑟里斯之门的拉杆。先忽略绳桥,直接跑过石笋区域,再次与亚斯特拉的安里对话。绳桥的另一端是 Boss 房间。不要触碰那个会触发 Boss 战的酒杯,而是将桥破坏,然后像爬往艾雷德尔礼拜堂的桥那样从断桥爬下去。 86. 下一个房间里有一个火焰恶魔,但你可以寻求帮助。唤醒楼梯顶部附近的拟态者,然后将它引向火焰恶魔。恶魔会被拟态者和附近的骷髅吸引仇恨。当恶魔解决掉他们后,将其彻底击败以获取【恶魔之魂】。穿过恶魔所在区域,可以找到【废弃墓地】篝火以及通往【烟熏湖】的入口。 87. 将生命力等级提升至30级,之后不要再升级该属性。

88. 向左跑,躲避巨型弩炮的攻击,然后拾取卡萨斯沙虫附近的渴望盾。将渴望盾装备上,换下草纹盾。沙虫身后有一块突出地面的岩石,你可以躲在后面。躲在这里时,巨型弩炮攻击你时会击中卡萨斯沙虫。沙虫死亡后会掉落不死人骨片。穿过沙虫后,你会看到 Boss 的雾墙。沿着雾墙右侧的斜坡上去,到达恶魔遗迹营火。 89. 传送回废弃墓地营火,贴着右侧墙壁走,直到进入一个狭窄的洞穴。杀死洞穴里的结晶蜥蜴,获得楔形石大碎片。洞穴通向一个开阔区域,你会在这里遇到已经 hollow 的沉默者霍拉斯。击败霍拉斯后,传送到传火祭祀场,从侍女处花费总计10000灵魂购买刽子手头盔和胸甲,并装备它们。传送到卡萨斯地下墓地篝火处。回到亚斯特拉的安里那里,告诉她关于烟熏湖的消息,然后传送到恶魔遗迹篝火处。 90. 接下来的区域基本上是一个布满幻影墙壁的迷宫,但我会尽力给出一些方向指引。从篝火出发,下楼梯,经过一名恶魔祭师,再下第二段楼梯,来到一个由另外两名恶魔祭师巡逻的长方形长房间。向左转,在房间尽头拾取不死人遗骨。转身,径直走向房间另一端,进入一条走廊。破除你面前的幻影墙壁,杀死房间里的黑骑士。这条走廊向左转,你可以一直走到老王前厅篝火处。 91. 从篝火处向右走,你可以在一个由咕噜怪守卫的房间里找到伊札里斯咒术书。找机会把它交给柯林。篝火房间对面的墙壁有一部分是幻影墙,打破后会露出一条走廊,尽头有一个开口。向右转,在一群燃烧腐肉怪的守卫下拾取一个元素瓶碎片。现在跳下那个开口,回到那个长长的矩形房间。 92. 前往矩形房间的左端,靠近你与黑骑士战斗的地方,但不要直走,而是进入右侧的另一条走廊。第一个右转进入一个老鼠横行的房间,打破你面前的幻影墙。在它后面你可以拾取【奎拉娜的咒术书】。返回那个老鼠横行的房间,走下楼梯。不要理会第二个楼梯,而是驱散它旁边的幻影墙壁。不出所料,在那后面还有另一堵幻影墙壁,穿过它后你可以跳入一个爬满石化蜥蜴的洞穴。 93. 穿过石化蜥蜴区域后有一段楼梯。在走那条路之前,先向左走。在这里你会遇到真正的【屠骑者托里格】。一个简单的击败他的方法是将他引到熔岩里。他的AI没有设置躲避熔岩的程序。他死后,回到楼梯处,经过一名黑骑士,然后爬上高高的梯子。这个区域的尽头是【巨型弩炮】。跑过去并使用杠杆装置将其停用。如果你需要弩炮来摧毁某些东西,可以通过该机制重新激活它。该区域的部分物品只能通过这种方式获取。现在,跳下悬崖返回传火祭祀场。从侍女处花费5000灵魂购买黑铁腿甲并装备。 传送到恶魔遗迹篝火处,在雾墙外侧召唤大沼的库库鲁斯。击败老恶魔王。库库鲁斯必须在 boss 战中存活。如果他死亡,使用返乡骨片重试。由于你召唤了灵体,老恶魔王的生命值会翻倍。不要召唤其他灵体,因为他们造成的伤害无法弥补 boss 更高的生命值。战斗结束后,如果库库鲁斯幸存,你可以在不死聚落解救大沼的柯尼法斯的笼子里,拾取斑点鞭子。 95.传送到卡萨斯地下墓地篝火处。穿过绳桥,与 Boss 房间里的酒杯互动。攻击海泽尔的手镯来击杀他。通过跑到 Boss 房间的后方来躲避他危险的吐息攻击。如果你没有足够快地杀死他,他会召唤骷髅。你可以从海泽尔面前拾取墓王咒术书。穿过他的 Boss 房间就是冷冽谷的伊鲁席尔篝火。 冷冽谷的伊鲁席尔

96. Head part of the way across the bridge, then turn around. Kill Sullivan's Beast, then rest at the Central Irithyll bonfire at the end of the bridge. You can’t cross the bridge without the small doll dropped by the Deacons of the Deep. Head back along the bridge, close to where you encountered Sullivan’s Beast, and answer Sirris of the Sunless Realms’ summon sign. Help her kill Creighton the Wanderer, then talk to Sirris in Firelink Shrine to get the silvercat ring. 97. Head up the stairs past the Central Irithyll bonfire. Next to a crystal lizard up the road is an illusory wall. Further up the road on the left is the Church of Yorshka bonfire. Talk to Anri of Astora next to the bonfire to learn a gesture. Don’t kill the Londor Assassin disguised as a statue in the corner. You can pick up the roster of knights near the door leading to the graveyard behind the church. 98. Consume an ember and enter the graveyard. Head to the right and you’ll be invaded by Creighton the Wanderer. Kill him a second time, then loot the undead bone shard next to a grave nearby. You can return to the bridge where you first fought him to loot his armor. 99. Return to Firelink Shrine and send Greirat to pillage Irithyll of the Boreal Valley. Return to the church graveyard and head left this time, down the stairs to a dimly-lit area. Keep going and you’ll reach the lake below Irithyll. All the way on the left side of the lake, inside a big building overlooking the cliff, you’ll find the Distant Manor bonfire. Going too far past this bonfire will cause Greirat to die, unless you've killed a boss since you sent him to pillage. To that end, from the Distant Manor bonfire, head back to the lake and into the sewer entrance on the right. 100. Past a swarm of Sewer Centipedes, loot the excrement covered ashes, which you should give to the Shrine Handmaid the next time you’re in Firelink Shrine. Head up the stairs out of the sewer, then talk to Siegward of Catarina and exhaust his dialogue. If you didn’t purchase Siegward’s armor from Unbreakable Patches and throw it down the well back to him, Siegward won’t be there. You can instead tell Patches where Greirat has gone and he’ll don the armor and save Greirat, assuming you bought none of it from him. If neither of the men have the armor, then Greirat will die and leave his ashes in the Irithyll Sewers, locking you out of future items he would sell. 101. Level up your endurance to level 25 to hit the breakpoint that, when wearing the ring of favor, allows you to use the sellsword twinblade’s right click / L1 six times before depleting your stamina bar. 102. Past Siegward’s room and up many staircases is a lift you can ride up to open a shortcut back to the Church of Yorshka bonfire. Up a few more staircases you’ll reach the boss’ fog wall. Down some stairs nearby you can open an even better shortcut back to the bonfire. Now enter the fog wall and kill Pontiff Sullivan. Some of his attacks can be parried. Target his clone immediately after it’s summoned, it doesn’t have much health. Once he’s dead, warp to Firelink Shrine and exhaust Yuria of Londor’s dialogue. Greirat will have returned to the Shrine, and you can now buy the Lothric Knight Sword from him for 4000 souls, and Lothric Knight Greatsword from him for 7000 souls. You don’t need to buy them now though, they’re just cool. 103. Behind the boss room is Pontiff's Backyard: a community favorite PvP spot. You’ll spot two Drang Knights in the distance past some sleeping giants. Kill the Drang Knights as they don’t respawn, then enter the building above the stairs they were guarding. On the left is an illusory wall that will reveal a ladder. Descend the ladder and kill the two Sullivan's beasts to get the ring of favor, then equip it in place of your estus ring. I highly recommend taking them on one at a time. Once both beasts are dead, the Water Reserve bonfire will appear. Now talk to Archdeacon McDonnell sitting in the corner to join the Aldrich Faithful covenant. 104. Climb back up the water reserve ladder and up the stairs to the flying buttresses. Climb up the buttress, dodging great arrows fired by Silver Knights, then head down the stairs on the right and loot the Easterner's ashes. Give them to the Shrine Handmaid the next time you’re in Firelink Shrine. Now head the other direction along the platform above the flying buttresses, past the Silver Knights. Down the small buttress on the left is a shortcut you can open back to the Pontiff Sulyvahn bonfire. Climb back up the buttress and through a doorway in front of you. 105. To the right you can talk to the Londor Assassin and get the sword of avowal. Walk past her into Gwyn’s Tomb and complete the marriage ceremony. You can quit-out here to get Anri’s straight sword. Now leave the tomb and use the nearby lever to summon the rotating staircase of Anor Londo. Use the mechanism at the top of the stairs to raise them up to the Anor Londo bonfire. 106. Walk back down to the bottom of the stairs, that seem to lead to nowhere, but there is actually an invisible bridge here that you can cross over to the adjacent tower. Here you’ll find the Prison Tower bonfire and Company Captain Yorshka next to it. Talk to her to join the Blades of the Darkmoon covenant. You can use the silvercat ring to safely drop down the wooden planks inside the tower back to the Church of Yorshka. From here, warp back to the Anor Londo bonfire. Anor Londo
107. 走上楼梯,经过银骑士,进入左侧的门。拾取巨人煤炭,并记得将其交给铁匠安德烈。爬上楼梯进入主大厅,在大厅中央附近的箱子里拾取元素瓶碎片。在雾墙对面的房间一侧,使用机关打开亚诺尔隆德的门,创建一个通往篝火的捷径。注意这里会有狮面蜘蛛伏击你,务必将其击杀。小心,当你的咒死条充满时你会死亡。完成后,传送到远方宅邸篝火。 冷冽谷的地下监狱
108. 从营火旁走下楼梯,出门来到狭窄的悬崖边。在这里你会被【被弃者的探索者阿尔瓦】入侵。击败他后,穿过他身后的洞穴就能找到【冷冽谷的地牢】营火。 109. 将你的生命力等级提升到34级,之后不要再升级。 110. 过了营火,地牢由狱卒看守。这些行动缓慢的敌人生命值不高,但仍然极其危险。当他们靠近你时,会迅速将你的最大生命值降至1,而且如果被他们击中,你会暂时变得超重。要么快速杀死他们,要么跑过去。待在地牢的顶层,向右经过一个狱卒,向左穿过由两个狱卒守卫的桥,再向右经过另一个狱卒,然后向左穿过一个门口。向左走,经过一个活尸后有一个可以打开的捷径,最里面右侧有一个可以打开的牢房,里面可以拾取【越狱者钥匙】,很简单。 111. 回到营火处,再次向右走,经过第一个狱卒后,走廊尽头有一扇窗户可以用钥匙打开。跳下去,楼梯底部的房间里有一个宝箱怪,会掉落【元素瓶碎片】。经过宝箱怪后,左侧有一个梯子可以爬下去。打开底部的门,然后爬回来。 112. 在房间尽头,经过所有的农民活尸后,有一个可以跳下去的洞,下去后经过沉睡的巨人,会来到一个类似下水道的通道。通道尽头有两个箱子,右侧的箱子里有【牢房钥匙】,左侧的是宝箱怪。掉头往回走,经过一群试图伏击你的石化蜥蜴,然后穿过左侧墙上的洞口。经过两只巨鼠后,你会进入一个由近十几个狱卒守卫的大房间。从左侧的门出去,拾取龙体石,然后乘坐电梯上去。顶部有一扇你可以打开的门,这会创建一条返回篝火的捷径。 回到那个满是狱卒的房间,进入左侧那个满是游魂的房间,它就在你之前遇到巨鼠的房间对面。拾取【亵渎煤炭】交给铁匠安德烈,然后从另一扇门出去,左转进入一条走廊。杀死走廊里的宝箱怪,然后进入左侧的房间,拾取【黄王骨灰】交给侍女。离开这个房间,左侧的门口是出口,而在你前方,房间的另一边有一扇可以打开的大门,打开后会释放一名狼人敌人攻击狱卒。大门右侧是一间上锁的牢房,你之后会回到这里。 114. 通过出口离开狱卒的房间并爬下楼梯。穿过有石像鬼守卫的桥梁,然后爬上梯子到达【罪业之都】篝火处。
115. 篝火旁是《黑暗之魂2》中梯子铁匠吉利根的尸体。搜刮他的尸体可获得一个姿势和一块不死人骨片。爬下梯子,穿过墙上的洞口。前方有一座木桥通向一栋建筑。注意地板上的两个洞。建筑后方是一片沼泽,里面爬满了下水道蜈蚣。爬上梯子,来到大型石制建筑的顶部。击败屋顶上的宫廷法师,搜刮罗根卷轴。下次回到传火祭祀场时,将卷轴交给 Vinheim 的欧贝克。 116. 从屋顶可以跳到楼梯上方的一个窗户,那里通向一间牢房。使用牢房钥匙解救卡塔利纳的希夫拉。他会奖励你一块楔形石原盘,你还可以搜刮他旁边的贪婪金蛇戒指。 117.回到屋顶,爬上楼梯,左转经过两名隐形狱卒。在走廊尽头拾取狱卒的钥匙串,然后跳下去与你在伊鲁席尔地牢中遇到的巨人交战。杀死巨人可获得楔形石大碎片。巨人身后的门通向一个升降机。乘坐升降机上去,打开一条直接通往伊鲁席尔地牢营火的捷径。乘坐升降机返回,爬上附近的楼梯。在这个房间里,你会发现一只宝箱怪坐在梯子旁。爬上梯子,跳到巨人之前睡觉的地方。杀死这里的结晶蜥蜴可获得楔形石大碎片,然后返回传火祭祀场,用4块楔形石大碎片将你的火焰佣兵双剑强化至+8。 118. 传送到罪业之都营火,过桥返回伊鲁席尔地牢。使用狱卒钥匙串从满是狱卒的房间里的牢房中救出卡菈。她会传送到传火祭祀场的葛雷瑞特旁边。将奎拉娜咒术书、墓王咒术书,以及隆道尔圣典和深渊圣典交给卡菈。传送到冷冽谷的地牢篝火处,向右转两次,走下楼梯,然后使用狱卒钥匙串打开大门,拾取可以交给侍女的囚徒chief骨灰。 119. 传送到罪业之都篝火处,爬下篝火旁通往建筑物外侧的另一个梯子。走到桥中间,可以跳到一个倒塌的石制结构上。前方有四名狱卒侍女正试图用火球狙击你。 Boss的雾门就在她们身后。注意右侧的两个宝箱是宝箱怪。 120. 进入雾墙并击败巨人尤姆。如果你一直在推进希夫拉的任务线,他会前来援助。跑过 boss 并从尤姆的王座上拾取风暴管束者巨剑。装备风暴管束者进行这场战斗,并使用该剑的独特战技来击败尤姆。使用战技前必须先充能一段时间。完全充能后,再次施放战技会发射一道投射物。击败尤姆后,点燃他的篝火并与卡塔利纳的希夫拉交谈。在篝火处休息,拾取希夫拉掉落的卡塔利纳盔甲套装,并装备卡塔利纳头盔和护手。 121.将耐力等级提升至35级,达成一个临界点:装备宠爱戒指后,使用佣兵双剑的右键/L1攻击可以连续挥砍七次而不会耗尽耐力条。耐力等级无需再提升。现在你已准备好返回亚诺尔隆德。 122. 进入亚诺尔隆德主殿后方的雾门,击败“吞噬神明的阿尔德里奇”。他总会传送到房间中离你最远的角落,他的箭可以通过 sprint(冲刺)躲避。击败他后使用返乡骨片,以避免与“冷冽谷的舞娘”战斗。 123. 传送到不死聚落的“悬崖底部”营火,穿过门进入“咒蚀大树”的 boss 房间。在无主之灵希里斯的召唤印记处响应召唤,帮助她击败圣骑士霍里克。完成后,前往传火祭祀场与希里斯对话。霍里克的盔甲套装可在无主墓地篝火旁拾取,他的盾牌则位于传火祭祀场左侧他的坟墓旁。现在传送到洛斯里克高墙的冷冽谷的波尔多篝火处。 124. 前往洛斯里克高墙的艾玛房间,击败冷冽谷的舞娘。在她第一阶段时,待在她身后并避开她的抓取攻击。第二阶段时靠近她,可避开她的大部分攻击。点燃她的篝火后,爬上梯子并向左走,乘坐电梯前往妖王庭院。 妖王庭院
125. 提前从升降机跳下,落到一个俯瞰花园的阳台上,在那里可以拾取一个元素瓶碎片和一块楔形石原盘。在花园后方的左侧,有一小段楼梯通往第二个楔形石原盘。花园右侧有一个通往升降机的门。在穿过门之前,刚过门口的位置可以拾取第三个楔形石原盘。现在乘坐升降机前往被奴隶守卫的区域。该区域尽头,一扇可打开的门旁边有第四个楔形石原盘,打开这扇门会形成一条返回冷冽谷的舞娘篝火的捷径。如果你像第一次那样提前从这个升降机跳下,会到达一条隐藏路径,这是通往 boss 雾门的捷径,但那是之后的事了。 洛斯里克城
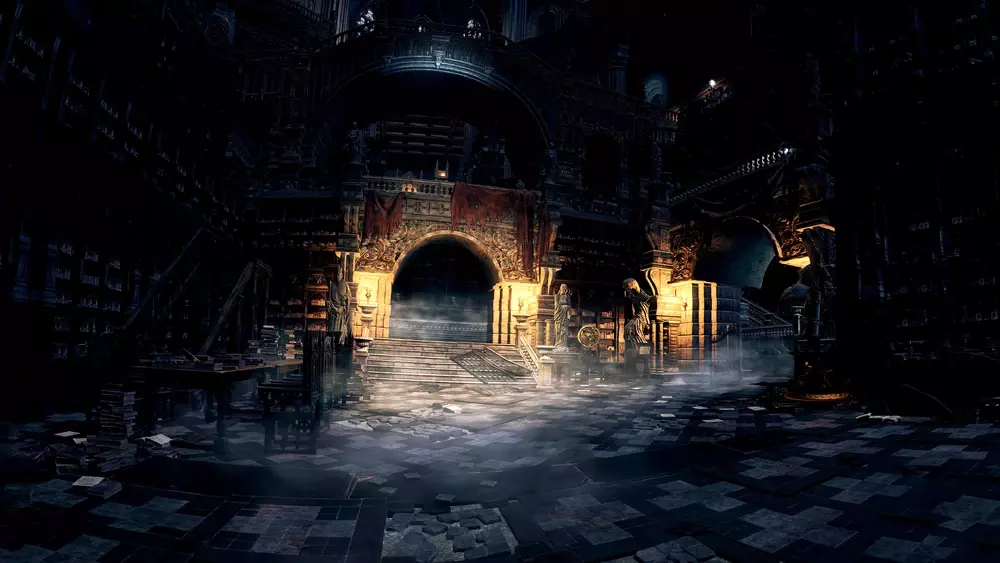
126. 从舞者篝火上方的梯子径直向前,即可到达洛斯里克城篝火。篝火不远处有三块楔形石原盘可供拾取。在一个由翼骑士守卫的房间里,爬上梯子后有一面幻影墙壁。穿过这个区域的尽头,就能抵达龙训练场篝火。返回传火祭祀场,让铁匠安德烈用六块楔形石原盘和一块楔形石大碎片将你的火焰佣兵双剑强化至+10。 127. 从龙训练场篝火出发,冲过被飞龙守卫的桥梁,在快到桥尽头时从侧面跳下。你会落在一个高台上,那里可以拾取一块不死人遗骨。向右走即可返回篝火处。再次穿过桥梁,但这次在桥的起点处直接跳下,落到另一个平台上。沿着平台向左走,登上右侧的楼梯,径直穿过庭院——那里有飞龙在喷火——进入一个光线昏暗的房间。爬上梯子,消灭控制飞龙的人之脓。楼梯上方有一个宝箱怪,附近的门后有一个拉杆,拉动它可以打开大门,形成一条返回庭院的捷径。 穿过大门后,爬上由洛斯里克骑士守卫的楼梯。来到室外后左转,可以在一个通往洛斯里克城篝火的升降机旁拾取一个太阳勋章。面对升降机前的 Boss 雾门,向左走会发现一个通往屋顶的梯子。进入由三名空心士兵守卫的窗户。经过一名洛斯里克骑士后,会看到作为太阳战士誓约首领的雕像,以及一扇可以打开的门,通向之前的雾墙。 129. 面对雾墙,再次向左转,这次从栏杆上的洞口跳下,击败控制另一只飞龙的人之脓。消灭附近的宝箱怪,夺取洛斯里克盲文圣典。将圣典交给卡利姆的伊莉娜,用总计39000灵魂购买她所有的奇迹。派葛雷瑞特去洛斯里克城掠夺。退出游戏,告诉不屈的帕奇葛雷瑞特去了哪里,然后返回雾墙。 130. 进入雾墙,击败猎龙铠甲。小心不要从这里的桥上掉下去,记住即使在 Boss 死后,你上方的朝圣者蝴蝶仍能用投射物攻击你。在侍女处花费 5000 灵魂购买莫恩的头盔并装备。现在可以从不死聚落中找到卡利姆的伊莲娜的牢房里收集莫恩的巨锤和盾牌。返回猎龙铠甲的 Boss 房间,前方就是大书库篝火,在黑手歌德哈特的尸体上可以拾取大书库钥匙。大书库
131. 进入档案馆,尝试在结晶老者消失前对其造成尽可能多的伤害。走上楼梯,你会来到一个由烛台学者守护的蜡池。将头浸入蜡中可暂时保护你免受书本造成的诅咒累积。进入右侧光线昏暗的房间,在那里你能找到一个拉杆,打开左侧的墙壁。转身,上楼后你可以推倒一个梯子来创建捷径。梯子后面有一个拉杆,拉动后会在蜡池所在的房间里显现一个装有楔形石原盘的宝箱。 132. 拉杆的对面是一个阳台。爬上阳台的梯子,再次与结晶老者战斗。老者身后的房间里,你可以击杀一名流放骑士。骑士房间外有一个通往下方桥梁的梯子。如果你还没杀死桥上的结晶老者,就去解决它。结晶老者会掉落结晶卷轴,你应该尽快把它交给 Vinheim 的欧贝克。梯子附近有一个拉杆,打开后是一条近路,而桥尽头的升降机则能开启一条更好的近路,直接返回大书库篝火处。 133. 从升降机处上楼,你可以来到书库的屋顶。径直前进,在左转走上有石像鬼守卫的斜坡之前,跳到下方有“灰心哥”(Forlorn)的走道上。然后左转,你就能看到之前与结晶老者战斗过的大书库阳台。跳到你面前的屋顶上,拾取葛雷瑞特的骨灰。将这些交给【侍女】,她就会出售【葛雷瑞特】的物品,包括他刚从【洛斯里克城】掠夺的东西。从这里跳到阳台上,回到屋顶。 134. 跑到屋顶尽头,经过所有四只【石像鬼】,然后跳到一扇破碎的彩色玻璃窗上。在这里你可以从一具尸体上 loot 最后一块【不死人骨片】,并踢倒一个梯子,创建一条返回【大书库】的捷径。从附近的门出去,经过三个敌对 NPC,有一个你可以激活的电梯,创建返回【大书库】篝火的最后一条捷径。在你面前的桥对面是 boss 的雾墙。雾墙右侧有另一个你可以激活的电梯,它会带你下到【猎龙铠甲】的 boss 房间。你可以将电梯送回上层,然后乘坐第二个平台继续向下,以获取一块楔形石原盘。 135. 返回桥上,右侧有一段楼梯通往大书库顶部。这里会有三名飞升的翼骑士俯冲下来攻击你。杀死他们三个可以获得一块楔形石原盘。在屋顶边缘可以拾取最后一块元素灰瓶碎片,现在你的治疗量应该已达到上限。在翼骑士下方,你可以跳入格特鲁德的笼子,搜刮大书库的椽木区域。 136. 将敏捷属性提升至40级。大书库是游戏中刷魂的最佳地点。可以参考下方指南中的刷魂部分。 137. 用锋利宝石为你的+10佣兵双剑进行质变。现在你的敏捷属性很高,锋利宝石能提供更大的伤害加成。准备好照明松脂来对付 bosses。与火焰武器不同,锋利武器可以附魔,进一步提升你的伤害。现在传送回冷冽谷的舞娘篝火处。 138. 前往妖王庭院的尽头,进入雾门。击败妖王欧斯罗艾斯。像对付冷冽谷的波尔多那样,待在他下方攻击。在他的 boss 房间后面,从一具穿着龙血套装的尸体上学习【古龙之道】手势。打破房间后部箱子后面的幻影墙,进入无主墓地。 无主墓地
139. 有理论认为,你所熟悉的传火祭祀场发生在未来,而无主墓地则是相对于游戏其他部分的“现在”。在灰烬墓地篝火原本所在的位置使用余火,你将被结晶女儿克里姆希尔德入侵。 140. 穿过雾墙,击败年轻且健康的英雄古达。他的部分攻击可以弹反,类似于教宗沙力万。战斗时需讲究策略,他不会给你太多治疗的时间。将他的灵魂交给库尔兰的鲁道斯,可将其转化为囚徒锁链戒指。装备囚徒锁链而非生命戒指,然后传送回英雄古达篝火处。 141. 爬上通往传火祭祀场的山丘,途经黑骑士。从传火祭祀场右侧的坟墓中获取黄蜂戒指。进入内部,从传火祭祀场篝火原本所在的位置拾取螺旋剑碎片。螺旋剑碎片的作用类似无限使用的返乡骨片,非常实用。前往卡利姆的伊莉娜通常坐着的地方,在幻影墙后方取得防火女的眼眸。你可以将其交给防火女,以获得不同的祭祀场音乐和一个结局选项。 142. 返回冷冽谷的伊鲁席尔地牢中你拾取龙体石的位置。在那里的雕像旁做出“古龙之道”姿势,即可传送到古龙顶端。 古龙顶端

143. 爬上小山,直到抵达古龙顶端篝火处。前方有一扇由蛇人守卫的大门,旁边有一个可以打开大门的拉杆。穿过大门就是古老飞龙的 boss 战。不要正面与其战斗,而是从它身边跑过去,向左进入一座建筑。沿着路径前进,躲避飞龙的火焰吐息,直到看到一个木梯,顺着木梯爬上飞龙上方的木制脚手架。从这里你可以对古老飞龙施展下落攻击,将其击杀。之后,一名蛇人召唤师会将你传送到古龙顶陵墓篝火处。 144. 从篝火出发,击杀被召唤出来的龙血骑士。接着,跑上楼梯,消灭召唤他的蛇人召唤师。回到召唤龙血骑士的地方,在那里的龙面前做出龙之路姿势,即可获得灾难戒指。龙血骑士套装现在可以在老王欧斯罗艾斯 boss 房间后方你学习龙之路姿势的地方拾取。 145. 在你与蛇人召唤师战斗的位置旁边,有一个可以启动的升降机,它会带你回到古龙顶端篝火处。返回该篝火,再次进入古老飞龙的 boss 房间。这次向右走,下楼梯,在楼梯右侧下方可以拾取到钢铁防护戒指。 146. 返回古龙顶陵寝篝火,走上楼梯,径直走出陵寝。沿着右侧的路径穿过一座桥,经过一只会出现的翼龙。先点燃前方的篝火,之后再回来对付它。穿过翼龙后的建筑里有一个蛇人召唤师。这个召唤师很可能会召唤里卡德,一个手持细剑的赤裸男子,他死后会掉落自己的剑。如果召唤出的是哈维尔骑士,暂时先不管它,前往大钟楼篝火处。哦,还有,你绝对不能敲响沿途的那口钟。它有一个巨大且诱人的拉杆,但敲响它会立即导致霍克伍德的任务线失败。 147. 从篝火处走下楼梯,向右转,进入一个有岩石蜥蜴看守梯子的小房间。爬上梯子,在建筑物的屋顶上面对哈维尔骑士。哈维尔骑士很容易被背刺。当他使用盾牌的【石肤】战技时,避开他直到效果消失。击败他后,你可以拾取他守护的【楔形石原盘】。你可以安全地从屋顶一侧跳到之前有飞龙的小山上。传送到【法兰老狼】篝火,乘坐升降机前往你与【离群恶魔】战斗过的地方。在这里你现在可以拾取【哈维尔套装】。装备【哈维尔胸甲】。 回到【大钟楼】篝火,使用【余火】。召唤【逃兵霍克伍德】,他的召唤符就在楼梯下方。在霍克伍德的帮助下,消灭所有【蛇人】。这可能有些困难,因为你必须防止霍克伍德被杀死。确保从左侧悬崖边拾取【逐龙者骨灰】。将它们交给传火祭祀场的侍女后,你就能购买几乎所有种类的楔形石。当所有蛇人都被击杀后,在古龙顶端与霍克伍德一起做出古龙之道姿势,即可获得光辉龙体石。 149. 传送到传火祭祀场,与亚斯特拉的安德烈对话,获得霍克伍德的剑草。传送到深渊监视者篝火处,击杀逃兵霍克伍德,获得光辉龙头石。他的盾牌现在可以在传火祭祀场外面他的坟墓附近拾取,就在无主墓地中你找到黄蜂戒指的同一个位置。 艾雷德尔之烬 第二部分
150. 传送到艾雷德尔礼拜堂篝火,下楼前往地下室。从下层的门出去,这里通向《黑暗之魂》中普莉希拉的旧 boss 房间——那扇过去是幻影墙壁的门。戴上银猫戒指,从 boss 房间上方的巨大树根安全跳下。使用余火,你会在这里被狂怒咒术师敦纳尔入侵。你需要使用螺旋剑碎片来脱身。 151. 接下来,在巨狼刷新的两个位置将其击杀,以在即将到来的 boss 战中永久降低其约 15% 的生命值。第一个位置在雪原篝火下方的山坡,第二个位置在米尔伍德骑士塔上方的山坡。现在传送到画中深处篝火。从右侧的边缘跳下,击杀【冠军的遗骨】。首先消灭 Boss 场地后方的三只狼,然后需要在【巨狼希夫】出现前全力输出,尽快击杀【冠军的遗骨】。【冠军的遗骨】会掉落【冠军的骨头】,可在【传火祭祀场】的篝火处焚烧,以开启在线决斗。 152. 击杀【芙莉德修女】。召唤【奴隶骑士盖尔】的灵体不会影响芙莉德的生命值,因此建议寻求他的帮助。记住芙莉德可以被背刺,当她消失时要尝试追踪她。她消失的动画会暴露她传送的方向。在战斗的第二阶段,你应该攻击【艾尔德利奇神父】,因为他的伤害吸收属性比芙莉德低。理想情况下,芙莉德会被盖尔吸引注意力。击败芙莉德后,再次与鸦人聚落居民对话可获得楔形石原盘。他已移至自己的阳台,仍在鸦人聚落营火附近。【灰烬墓地】
153. Use the bonfire that spawned in the back of Sister Frieda’s boss room to warp to the Dreg Heap bonfire. Tell the Stone-Humped Hag nearby that you have business with her to unlock her shop. 154. The Dreg Heap is covered in ash that negates fall damage. Drop down from the bonfire onto a ramp. Left from the ramp and up the stairs is a Harald Legionnaire you’ll come back to later. To the right you can drop down into a half-buried cathedral. Past the cathedral you’ll drop down to an area where an Angel will begin firing at you. Run for cover, and on the left at the end of a platform the Angel can hit you from, loot the ring of steel protection +3. 155. Past the Angel is a cathedral guarded by two Overgrown Lothric Knights. Head out the door, and take a sharp right up the hill into another building. Up the stairs and past an illusory wall is a room with a balcony. Drop down onto a walkway where you can loot the covetous silver serpent ring +3. Equip the ring in place of the +0 version you’re wearing. 156. Walk down the hill until a tower falls over, smashing into the Lothric Knight’s cathedral. You can kill the nearby Grotesque Londor Grower to despawn the Angel. Return to the cathedral and walk across the tower to find Amnesiac Lapp, whose dialogue you should exhaust. Past Lapp you can drop down on the right to a hidden area guarded by more Overgrown Lothric Knights. At the end of this area is a spot you can drop down all the way to the Earthen Peak Ruins bonfire. 157. Lapp will meet you near the bonfire and be sure to exhaust his dialogue again. Past the bonfire is an area patrolled by an Angel. Take a sharp right into a tunnel to avoid its projectiles. This leads to a toxic swamp patrolled by a third Angel. Head to the right and up a huge tree root where you can loot the ring of favor +3. Equip it in place of the +0 version you’re wearing. Drop down from here and you’ll spot a cave on the right guarded by Harald Legionnaires. Grab the titanite slab at the end of the cave. Talk to Amnesiac Lapp again after grabbing the Slab. 158. At the far side of the swamp is a series of massive tree roots that form a ramp you can climb up to the next area. First, run past it and to the right to loot the Harald curved greatsword guarded by another Harald Legionnaire. Now climb up the tree roots. You can drop down to the left onto a building and kill the Grotesque Londor Grower, despawning the Angel above. 159. Continue climbing the tree roots and your path will be blocked by Desert Pyromancer Zoey. Defeat her and run across the tree branches past her. The last Angel will try to shoot you off. Drop down the end of the branches, and below the ledge just ahead you’ll spot the Within Earthen Peak Ruins bonfire. Before you drop down to the bonfire, climb down the nearby root to a hidden area beneath the bonfire where you can kill the last Grotesque Londor Grower. Now return up the root and drop down to the bonfire. Past the bonfire is a pit you can jump down to the boss room, but first warp back to the Dreg Heap bonfire. 160. Farm the Harald Legionnaire near the Dreg Heap bonfire until it drops the Harald Legion leggings, then equip the leggings, completing your armor set. The shortest route to the Legionnaire is to jump left from the bonfire onto the ash near the deceased dragon. Be careful, as landing on the dragon itself will kill you. Legionnaires take massive damage from plunging attacks and it is the quickest way to kill them. You can climb the stairs past the Legionnaire to go for a plunging attack. For this step you should swap your Havel’s ring to the covetous gold serpent ring, your shield of want to the Crystal Sage’s rapier, your Morne’s helm to the symbol of avarice helm, and your Havel’s armor back to your lighter executioner armor to compensate for the loss of Havel’s ring. This setup will triple your item discovery stat, which you’ll need as Harald Legion armor pieces are rare drops. 161. Buy all of Orbeck of Vinheim's spells for 104,000 souls total, and talk to him several times to get the young dragoncrest ring, slumbering dragoncrest ring, and a gesture. Warp to the Dragonslayer Armor bonfire and take the lift up to the fog wall. Enter the fog wall and kill the Twin Princes. During the second phase you must deplete Lothric, Younger Prince’s health bar. This can be done by hitting Lorian from behind, but killing Lorian, Elder Prince provides a better opening. Remember to get out of the way when Prince Lothric resurrects him. Once the boss is dead, you can loot the sunless talisman at Holy Knight Hodrick’s grave outside Firelink Shrine, and Orbeck of Vinheim's ashes can be found on the top floor of the Grand Archives just before the rooftop. Give the ashes to Yuria of Londor to get the morion blade. Refrain from placing Prince Lothric’s cinders on his throne in Firelink Shrine for now. 162. Warp to the Rosaria's Bedchamber bonfire in the Cathedral of the Deep. Offer Rosaria, Mother of Rebirth a pale tongue, then talk to Leonhard the Ringfinger who will spawn behind you. Quit out, take the black eye orb, warp to Gwynevere's old bedchamber above Aldrich the Devourer’s boss room. Use the orb here and kill Leonhard the Ringfinger. Now return to the Within Earthen Peak Ruins bonfire. 163. Leap into the pit and kill the Demon Prince. The orange Demon From Below will spawn to your left, but make sure to kill the red Demon in Pain that spawns to your right first, as the Demon Prince resurrects from the last-killed demon. The Demon Prince that spawns from the orange Demon from Below uses laser attacks that provide a generous opening for you to attack the demon. The Demon Prince spawned from the red Demon in pain will use difficult-to-avoid chaos pyromancies and be more evasive. Once the Demon’s slain, loot the small envoy banner and use it to travel down to the Ringed City and the Mausoleum Lookout bonfire. The Ringed City

165. 一旦你从篝火前的楼梯下去,远处的审判者巨人就会周期性召唤一群废墟哨兵弓箭手。你必须在箭雨间隙躲在墓碑后面才能前进。从右侧的边缘跳下去,来到一条有水晶蜥蜴栖息的小路。爬过它旁边的梯子,上去找到审判者巨人并将其击杀。巨人身后的楼梯通向环印内墙篝火。 166. 与篝火附近的失忆者拉普交谈。走下楼梯,经过空洞牧师和两名环印骑士,来到由 Harald 军团士兵巡逻的环印城街道。在楼梯顶部的教堂门口与教会之枪希拉交谈,并接受她的任务去击杀巨龙。在楼梯右侧,过桥到对岸,那里通向一个由环印骑士守卫的花园区域。使用余火,在该区域尽头你会被“被弃者的探索者”阿尔瓦入侵。下到楼梯底部,来到沼泽。靠右走,你会进入一座建筑,里面有“环印城街道”营火。 167. 返回楼梯处,经过楼梯,爬上由空心牧师守卫的梯子。沿着悬崖边向右走,进入一座俯瞰沼泽的建筑。使用余火,你会被银骑士雷多入侵。击败他后,从建筑前门出来,从左侧悬崖边跳下。在这里你可以拾取哈维尔戒指+3。将其装备,替换你当前佩戴的+0版本。回到梯子处,朝另一个方向前进,经过两名环印骑士。在这片区域的尽头,你会找到失忆的拉普,他旁边可以拾取贪婪金蛇戒指+3。 168. 返回环印城街道篝火处,沿着沼泽左侧一直走到对岸。在这里你会再次与猎龙铠甲 boss 战斗。继续沿着沼泽边缘前进,你会来到一座部分坍塌的建筑,由环印骑士看守。这座建筑可作为通往俯瞰沼泽的悬崖边的斜坡。沿着悬崖边向右走,进入建筑后打开返回篝火的门。在这里你可以阅读墙上的铭文。 169. 从篝火前出发,一直走到沼泽的黑水区域中。使用白桦树枝直到你变身为漂浮的黑色人性。飘回篝火房间,穿过墙上的铭文以生成一个梯子。爬上梯子,最终你会来到【净化纪念碑】。返回【失忆的拉普】处,告诉他【净化纪念碑】的位置以恢复他的记忆。 返回篝火处,从你打开的后门出去,走上石桥。深渊之龙【吞噬黑暗的米狄尔】守护着石桥,你必须在合适的时机穿过石桥以躲避它的火焰吐息。右侧有一个洞穴,左侧有一个可以躲避火焰的 ledge。石桥顶部有一个洞穴,通向【共享坟墓】。如果你走上楼梯,可以从一个洞口跳下去,如果你处于余火状态,啜泣骑士会入侵你。这条路会带你回到入口。这次走下楼梯,不屈不挠的帕奇会欺骗你,把你推到正确的路上。爬上楼梯你会遇到一个宝箱怪,然后在楼梯顶部是共享坟墓篝火。 172. 在篝火旁的桥上击败吞噬黑暗的米狄尔。攻击它的手,当它喷火时就跑开。桥尽头的房间有三道连续的幻影墙壁。走上楼梯有一个房间,里面有一个你可以启动的电梯,它会带你回到环印城内部城墙篝火。电梯房间外面有一个环印骑士,杀死它可以获得环印骑士成对大曲剑。骑士旁边有一座石碑,你可以通过祈祷加入【教堂之枪】誓约。前方是【菲莲诺尔教堂】,但根据国王的命令,暂时不要进入。而是返回通往【环城内墙】篝火的电梯。 173. 在电梯下行到一半时,你会发现一个秘密通道。向左走,穿过一面幻影墙并下梯子后,有一个房间,从那里可以跳下进入一场 boss 战。不过暂时不要尝试挑战这个 boss。从秘密通道向右走,你可以跳下去从雕像处拾取【绿花戒指+3】。 174. 将力量属性提升到40级,此时你的总等级应该正好是125级。如果你想获得良好的 PvP 体验,就不要再继续升级了。将贪婪银蛇戒指换成钢铁防护戒指+3,把渴望之盾换回草纹盾。是时候挑战终局Boss了。初始之火的火炉

175. Return the four Lords of Cinder to their thrones in Firelink Shrine to travel to the Kiln of the First Flame. Summon Yuria of Londor to help you kill the Soul of Cinder, but summon no other phantoms. Similar to Great Swamp Cuculus, she must survive the fight if you want to loot her armor and katana where she usually stands in Firelink Shrine. A bonfire will spawn once the boss is dead, but refrain from linking the fire for now. 176. Warp to the Great Belfry bonfire and ring the bell. Drop down in front of the bell and enter the fog wall to kill the Nameless King. I find it easier to not lock on to him during the first phase of the fight. His mount, the King of Storm, takes double damage to its head. The nameless king is resistant to lightning in his second phase, and weak to dark instead, so bring human pine resin in addition to the usual lighting pine resin. He can perform an 11-hit combo in his second phase, so play cautiously and look for openings when it’s safe to attack. 177. Take the lift near the Ringed Inner Wall bonfire down to the secret doorway and kill Darkeater Midir. Like the King of Storm, Midir takes double damage when hitting its head. You should aim to stay as close to its head as possible in order to maximize your DPS uptime during openings. The first time you fight Midir, stand still and it’ll rush right to you without hitting you. Once the dragon has been slayed, return to Shira, Spear of the Church in the church in the Ringed City Streets to receive a titanite slab. 178. Now enter the Church of Filianore and kill Halflight, Spear of the Church. Halflight is an annoying boss made trivial by heavy weapons that stagger him like the Lothric knight greatsword. That’s not necessary during your first time through. In online mode, another player may be summoned in place of the boss. Once the fight is won, head up the lift and touch the embraced egg to travel to the present and light the Filianore’s Rest bonfire. Don’t go too far down the hill into the next zone or you will trigger the final boss fight. 179. Warp back to the Dreg Heap bonfire. Loot the Old Woman’s ashes from the Stone-Humped Hag’s corpse and give them to the Shrine Handmaid. 180. Head to the right past the Filianore’s Rest bonfire and kill Shira, Spear of the Church in what’s left of her old church. Her armor can now be looted from her original church in the Ringed City Streets. If you instead go left from the bonfire, you’ll find a Ringed Knight that will drop a titanite slab when first killed. 181. Head down the hill towards the thrones of the Pygmy Lords and kill Slave Knight Gael. Gael has a lot of health, but also a lot of DPS windows once you get a feel for his attack patterns. In his second phase, strafe to the side to dodge the projectiles. His sword attacks have too long a range to avoid by dodging backwards, so stay close to him. Gael will drop the Blood of the Dark Soul after being defeated. 182. Warp to the Ariandel Chapel bonfire. Climb the ladder next to the bonfire and give the Blood of the Dark Soul to the Painting Woman. You can tell her to name the painting after you. 183. Warp to the Kiln of the First Flame and interact with the bonfire to become the Dark Lord of Londor and complete the game. Soul Farming Before farming for souls, equip all of the soul absorption-boosting gear you have. Equip the highest level covetous silver serpent ring you have, equip the symbol of avarice helmet, and equip the shield of want in your offhand. Or, better yet, the mendicant’s staff farmed from summoners in Archdragon Peak, as it weighs less. Soul-boosting gear stacks multiplicatively! If you have the shield of want in one hand, after killing an enemy worth a lot of souls like a boss or an ascended winged knight, you can quickly swap your main weapon to the mendicant’s staff and you will receive its bonus as well. This is because there is a short delay between when you kill an enemy and when you receive souls from it. Keep an eye on your health, as the symbol of avarice drains 10 HP per second. The fact that the symbol of avarice obstructs your view is often more detrimental than the damage it deals over time. The symbol of avarice also increases your item discovery, so it’s useful for farming for particular items. The covetous gold serpent ring increases your item discovery, as well as the crystal Sage’s rapier, which you can equip it in your offhand. Each soul farming spot I list gets progressively more difficult, and more rewarding. It’s important to note that in NG+ enemies drop around double the souls they do in NG, only the last two farming spots I mention are viable in NG+, as killing winged knights in NG will net you way more souls than killing Ghru in NG+. After killing Iudex Gundyr: From the Tower on the Wall bonfire, go down the stairs, wait for the Lothric knight to walk out the doorway, kill the hollow assassin next to the doorway, then kill the lothric knight in the courtyard outside. Return to the bonfire to respawn the enemies and go again. Lothric Knights have a chance to drop their gear when you kill them. Not only can their gear be sold for a lot of souls, but their chest armor, gauntlets, and leggings are direct upgrades to the basic knight set. Their swords and shields can also be useful to have later on. After killing Vordt of the Boreal Valley: From the Keep Perimeter bonfire, head toward the shortcut to the Road of Sacrifices. Kill the three nearby Ghru with backstabs, then head back and rest at the bonfire to respawn them. The Ghru drop more souls than Lothric Knights in the High Wall of Lothric, and are much weaker. After killing High Lord Wolnir: From the Distant Manor bonfire, head into the Irithyll Sewers just before the room where you find Siegward of Catarina. Kill all of the Sewer Centipedes in the area, then head back to the bonfire to respawn them. This is several times more efficient than farming Ghru. After killing Yhorm the Giant: Start from the bonfire in Yhorm’s bossroom. Kill the three groups of Jailers and the two Gargoyles nearby, then rest at the bonfire and repeat. As a bonus, both the Jailers and the Gargoyles can drop their weapons which can each be sold for 500 souls. Avoid engaging Jailers and Gargoyles at the same time. Both Gargoyles can be baited away from the Jailers and fought separately. Don’t lose sight of the Gargoyles when they fly in the air, and wait for them to stop blocking with their wing before attacking them. After killing the Dragonslayer Armor: The second-best soul farming spot in the game is in the Grand Archives. Start at the Grand Archives bonfire and run up through the Grand Archives, killing all of the Candlestick Scholars. Ignore the last Scholar that you have to climb a ladder to get to, as it takes too long. Dunk your head in wax every other run. The buff should last for two runs through the Archives, and dunking your head in wax while the buff is still active will not reset the timer. Ignore the Thralls as they aren’t worth many souls. Only kill the Lothric Knights if you can do so quickly, though it’s more efficient if you can. Use the coiled sword shard to travel back to the Grand Archives bonfire to reset. Best Spot: If you have the skill, the most efficient farming spot in the game, including the DLCs, is to start at the Grand Archives bonfire and take the lift up to the rooftop guarded by the three Ascended Winged Knights. Remember to send the lift back down each time. Bait the winged knights out one-by-one and kill all three of them. They each drop a ton of souls and plenty of titanite. Don’t forget that they can be backstabbed. At high levels, a dark-infused Lothric knight sword is an extremely effective weapon to fight them with. Use the shield of want in your offhand to block, and swap your sword with a mendicant’s staff after each kill to boost soul absorption. There’s an easier, but slightly slower strategy to farm the three Ascended Winged Knights if you happen to have 10 intelligence and the scholar’s ring to boost it up to 15. Equip a slumbering dragoncrest ring, a pyromancy flame in your right hand, and a mendicant’s staff in your left hand. You’ll still need a weapon in a right-hand slot to kill them with, unless you have the 40 intelligence required to cast the sorcery “great soul dregs.” Ascended Winged Knights are weak to dark damage. Attune the “hidden body” sorcery and “rapport” pyromancy at a bonfire. Cast hidden body to significantly reduce their aggro range, and approach the knights to get them to jump down from the roof. Cast rapport on the knight wielding twinaxes which spawns closer to you than the others, then get out of its way and recast hidden body. One of the halberd-wielding knights will kill the knight you rappored, and the halberdier will be left with only a sliver of health. Kill the weakened knight and cast rapport on the third Ascended Winged Knight. Now you can kill it without it fighting back. In New Game, this farming spot isn’t much better than farming candlestick scholars and you’d probably be better off doing that, but in new game plus and beyond it is easily the best farming spot. Though how many souls do you really need? Stats
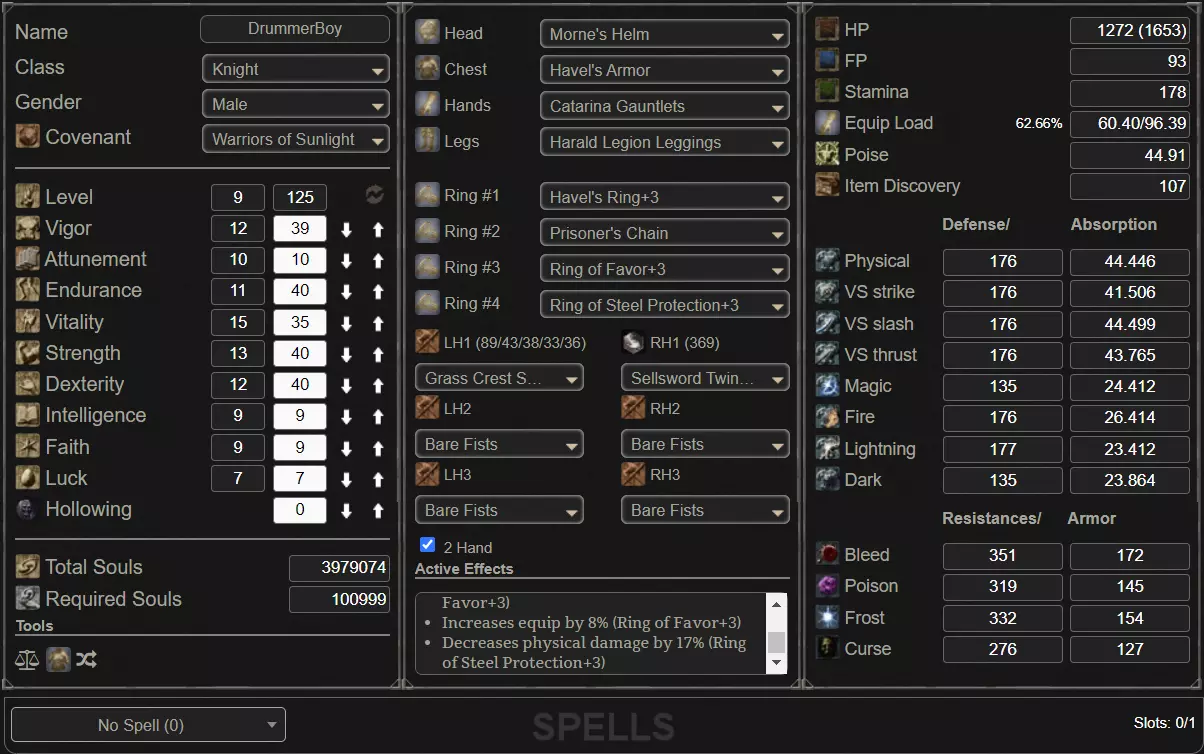
Starting as the knight class, I recommend leveling your stats in this order: 1. Level vigor and endurance to 13. 2. Level dexterity to 14. 3. Level vigor and endurance to 15. 4. Level vigor, endurance, vitality, and dexterity to 16. 5. Level endurance to 17. 6. Level vitality to 19. 7. Level intelligence to 10. 8. Level vitality to 25. 9. Level vigor to 27. 10. Level vitality to 30. 11. Level endurance to 25. 12. Level vigor to 34. 13. Level endurance to 35. 14. Level dexterity to 40. 15. Level strength to 40. The prisoner’s chain ring adds the final five points to vigor, endurance, and vitality. The sellsword twinblades have a breakpoint at 17 endurance. This means you can use one additional light attack with 17 endurance than you can with 16 before you run out of stamina. When wearing the ring of favor, there are breakpoints at 25 and 35 endurance as well. Most stats have a softcap at 40 points, which means that increasing the stat further nets diminishing returns. Leveling past soul level 125 will make it harder to match with people in multiplayer. However, the last time I checked, the soul level 200 range was still fairly active. Be warned that if you level past soul level 350, people up to the max level of 802 will be able to match with you. Anyone at max level is probably cheating. If you want to use the tears of denial miracle, which acts as a cheat death, you’ll need to level faith to 10, and attunement to 14 in order to unlock a second attunement slot. This will leave you with 34 vigor instead of 39. To use the tears of denial miracle, swap a ring to the priestess ring to meet the miracle’s faith requirement of 15 before a fight, then swap back after casting the miracle. Don’t forget to take a swig from your ashen estus flask afterwards if you have one, as tears of denial will consume most of your fp. New Game Plus Leveling If PvP isn’t really your thing and you’d rather experience new game plus, or challenge yourself to climb all the way to NG+7, the eighth and final difficulty, you’ll need to level beyond soul level 125. The first thing to do is put five points into vigor, endurance, and vitality. This will let you replace the prisoner’s chain with the life ring. Then, you should level vigor all the way up to the softcap of 50, then get vitality up to level 40 softcap. This will give you adequate defense for even NG+7. Finally, dexterity should be brought up to the softcap at level 60, and strength should go to 66. Your strength is increased by 50% when two-handing, so 66 strength will be boosted up to the hardcap of 99. This would put you at soul level 202, which is entirely achievable in new game plus, as enemies drop vastly more souls. To get the highest level version of the life ring you need to get to NG+2. The ring can be found behind Prince Lothric’s throne in the Untended Graves. By the time you reach NG+2 or 3, especially if you farm souls from the winged knights atop the grand archives, you can reach soul level 334. Past this point it costs over one million souls per level, so reaching the maximum level of 802 is not really feasible in a legitimate fashion. If you want to farm to soul level 334, as I have more than once, you can level up attunement to 40, faith to 60, and lastly intelligence to level 60. With at least 40 faith, the miracle “lightning blade” becomes a vastly stronger weapon buff than pine resins offer. If you have 50 or more faith, Yorshka’s chime is the best miracle catalyst. Unfortunately the only way to acquire it is to murder her. With 50 faith, lightning blade adds 198 lightning damage to your weapon, more than double what pine resin adds. Sellsword twinblades buffed with lightning blade is one of the best ways to defeat the NG+7 bosses. Other good spells include sacred oath, which buffs the offense and defense of you and your allies; soothing sunlight, which heals you and your allies tremendously; and deep protection, which is a body-buff, meaning it does not stack with tears of denial. Rings You should be wearing Havel's ring +3 for its 19% increase to max equip load; the prisoner's chain ring, as 15 free levels worth of stats is easily worth having 4% less damage absorption; the ring of favor +3, as it boosts your stats like the prisoner’s chain with but with zero downside, and is considered by many to be the best ring in the game; and the ring of steel protection +3 for its 17% increase to your physical damage absorption. Swap the ring of steel protection +3 for the hornet's ring in PvP, as the ring of steel protection only increases your physical absorption by 5% against players. In PvP you're better off with the bonus to critical hit damage the hornet ring gives you, or the increased max health provided by the life ring +3. Swap to the silvercat ring situationally when you expect to take fall damage, and the estus ring if you need to get as much healing out of your estus flask as possible. Armor You should be wearing Morne's helm, Havel's armor, the Catarina gauntlets, and the Harald Legion leggings. With the ring of favor +3, Havel's ring +3 and 35 vitality, you should be able to wear this armor, and wield a weapon as heavy as a Lothric knight greatsword while under 70% equip load, enabling you to medium-roll. An enormous amount of absorption and poise needs to be sacrificed in order to fast roll. Fast rolling requires you to stay under 30% equip load, so fast rolling is only recommended if you won’t expect to get hit. Swapping your chest armor to the lighter, yet still quite protective, black iron armor will let you wield a weapon as heavy as the Ringed Knight paired greatswords. Most damage in the game is standard physical damage, and thrust damage is the second most common damage type. The best armor protects you from these sources of damage above all else. While Smough’s chest armor has the highest physical absorption in the game, “fatty” armors such as Smough’s, the Harald Legion, Winged Knight, Catarina, and Exile chest armors move the player’s arms slightly out to the sides, measurably increasing their hitbox. I find the difference in stats between Smough’s and Havel’s chest armor is not enough to compensate for this deficiency. When wearing the complete armor set I recommend, you’ll have the second highest physical absorption possible. Morne’s helm and the Caterina gauntlets are tied with a few other armor pieces for highest physical absorption, but these two specifically have the highest thrust damage absorption as well. The Harald Legion leggings are one of the more difficult items to acquire in the game, but their unparalleled stats are worth it. This set has over 44 poise so when using a weapon art or wielding a weapon with hyper armor, such as hammers, greatswords, and ultra-greatswords, you can trade blows with people wielding similarly sized weapons without being staggered. You can still be staggered by taking a second hit, or trying to trade with an even heavier weapon. Building for more poise is not worth it as few players use ultras. They require a large stat investment, and in PvP their slow attacks leave the wielder open to being interrupted or backstabbed. Equipment A sharp dagger can be equipped in a main-hand slot in addition to your main weapon, so it can be swapped to when performing critical attacks. With the hornet ring equipped, a sharp dagger +10 buffed with a lightning pine bundle will one-shot players wearing light armor. The grass crest shield should go in your offhand, on your back, to get bonus stamina regeneration while two-handing or dual-wielding a weapon. It’s not meant to be used to parry or block. Note that the Lothric knight greatsword is too heavy to wear anything on your back, but you won’t miss out on that much stamina regen, only four per second. The black knight shield should be used in the offhand when wielding a straight sword like the Lothric knight sword. The iron round shield +10, farmed from hollow soldiers in the High Wall of Lothric, is the best parrying tool. It has the highest stability among small shields, and small shields have the most parry frames among the different parrying tools. Shields can be used to block one attack and reliably parry the next. Medium shields are unreliable at parrying as they have few parry frames and a slow parry animation. Consumables I recommend running 15 estus flasks +10, and zero ashen estus flasks. Melee builds don’t rely on FP much. I recommend taking five ashen estus flasks when dueling, as regular estus is prohibited. Five ashen estus flasks are the maximum allowed, and enable you to liberally use powerful weapon arts. You can only take half of your total estus with you when you are a phantom, and 15 / 2 is rounded down to seven. On top of having all four armor and ring slots occupied, you should have your estus flasks equipped on your item wheel, alongside lightning pine resin, and green blossoms for a 60s stamina regen boost. For PvP consider also bringing throwing daggers to kill tears of denial users with 1HP, undead hunter charms to stop people from healing, and firebombs to bait parryable rolling attacks, dubbed the “Barker bomb bait” by youtuber Adam Barker. Weapon Infusions For the stat distribution showcased in the “stats” section of the guide, upgrade the other weapons you found like so: the Lothric knight sword, Gottard's twinswords, claymore, and mace should be infused with a refined gem. The dagger, sellsword twinblades, and Lothric knight greatsword should be infused with a sharp gem, and the splitleaf greatsword should be infused with a heavy gem. These are the best infusions for these weapons assuming you have 40 strength and dexterity. With different stat combinations, different infusions may be better. There are only 15 titanite slabs you can find per new game cycle. It’s unwise to trade the coiled sword shard with the Crow Trader in Firelink Shrine to get one on your first playthrough though. This means you can only realistically upgrade 14 weapons to the maximum level on your first playthrough. Any shields you may block with like the black knight shield or the iron round shield should be upgraded as well. This will increase their stability, which causes you to lose less stamina when blocking. Prioritize spending titanite slabs on weapons over shields though. Elemental Matching Match the boss with the pine resin they’re weakest against for optimal results. The Curse-Rotted Greatwood is weak against fire damage, the Dragonslayer Armor is weakest against magic damage, Vordt of the Boreal Valley, the Nameless King, and all demons are weak against dark damage, and nearly every other enemy in the game, including the Nameless King's wyvern: the King of Storm, is weak to lightning damage. However, pretty much only the Nameless King and Dragonslayer Armor are actually resistant to lightning damage, so lightning pine resin works pretty well on everything else. Bundles deal more damage than resins and are quicker to use, but last 20 seconds rather than 60. Both are useful. Some enemies like the pus of man, and any maggot-type enemy, become staggered when they take fire damage. It is helpful to use charcoal pine resin to kill them quickly and avoid getting hit. In the walkthrough I recommend killing a lot of these bosses with fire-infused weapons. This is because fire weapons are adequate for killing early bosses when you’re low-level in new game. Elemental-matching bosses is really only important against late-game bosses and bosses in new game plus. Weapon Section Introduction The build I recommend is a quality build, meaning it levels strength and dexterity equally. Quality builds are melee-focused builds with many viable weapons to choose from. In this next section I discuss some weapons you can consider trying out. They’re all among the strongest in their weapon class due to their stats and movesets. Remember that straight swords are one of the only weapon classes that are best one-handed, every other weapon on this list should be used two-handed. Lastly, in my opinion heavy attacks that are not thrusts are usually not worth using. In PvP, I recommended trying to mix-and-match your main weapon to counter your opponent's weapon. Weapons with hyper armor can out-trade smaller weapons, fast weapons can interrupt very slow weapons before their hyper armor frames activate, and the defense from perseverance and the burst damage from true combos are useful against multiple opponents. True combos are attack combos that players can’t dodge-roll out of. Sellsword Twinblades Aptly nicknamed the “sellsword winblades,” sharp sellsword twinblades are pretty much the best weapons to fight large, slow moving enemies like bosses with. Sellsword twinblades are the highest dps weapon in the game when buffed with a spell or resin, due to their low stamina consumption, and the fact that the high attack speed of dual weapons’ right clicks / L1s leverage additive weapon buffs much more than slower weapons would. Sellswords are mediocre in PvP even though they get an L1, or R1, into weapon-art true combo. They simply have low range and no hyper armor. The left clicks / R1s are extremely weak, as individual curved swords are best two-handed, which you can’t do with dual weapons. Dual weapons also have lower damage to counter the high attack speed of their right clicks / L1s. Monsters’ and players’ slash absorption isn’t much higher than their physical absorption. Even enemies with thick scales and steel armor don’t have abnormally high slash resistance like the game lore would have you believe. High AR, regardless of damage type, is usually better. Weapons that deal two kinds of damage aren't penalized too severely by enemy defenses. Though weapons with three or more different damage types are heavily penalized and thus unusably weak in most cases. Lothric Knight Sword Straight swords are often thought of as the strongest weapon class for PvP, and the Lothric knight sword is considered by many to be the best straight sword, as it combines long range, respectable damage, thrusting heavy attacks, and a uniquely high critical damage multiplier. The Lothric knight sword has the second longest range among straight swords, with Gottard's twinswords being the longest. Longer weapons typically deal slightly lower damage than shorter ones to compensate for their range, but range is beneficial in PvE and extremely important in PvP. The Lothric knight sword gets uniquely high scaling when infused with a dark or chaos gem, and is a favorite among those builds. Straight swords are best one-handed and paired with a weapon-art shield like the black knight shield, as the stance weapon art is useful to break shielding opponents’ guards. The black knight shield boasts very high stability, and can be farmed from black knights near the Champion Gundyr bonfire. Be wary of spamming more than two light attacks with a straight sword when your opponent has a parrying tool, as you will likely be parried. If you think you can get in a third attack, mix it up by performing a slower heavy attack, though these can be parried too. The Claymore The refined claymore is another good, balanced weapon. It has great range and damage for a greatsword, only a bit shorter than the Onyx blade which has the longest range. Greatswords attack faster than Ultras, but unlike straight swords they have hyper-armor. The AOE of its one-handed light attacks are great for hitting multiple opponents, just remember to two-hand it in PvP or you will get parried. The claymore’s heavy attack is a long-ranged thrust that’s great to mix into your light attacks to keep your opponent on their toes. While the claymore lacks the powerful perseverance weapon art of the black knight sword, it can be buffed by pine resins, enabling it to deal much higher damage. Harald Curved Greatsword Curved greatswords are often overlooked, but they can be formidable weapons in the right hands. They’re a great counter against greatsword users as they can comfortably out-range them. Curved greatswords are slow, but not so slow that they give your opponent a big opening like ultra greatswords do. Another advantage of curved greatswords is their monstrous damage, easily rivaling their ultra-greatsword counterparts. They also boast impressive hyper-armor. Curved greatswords are an excellent weapon to bring to a slugging contest, as they will out-trade anything that’s not an ultra. The Harald curved greatsword in particular is my favorite because it has a nice balance of range and damage. It hits nearly as hard as the dreaded exile greatsword, but is lighter and has noticeably longer range. I cannot stress how important range is in a PvP scenario. The Harald curved greatsword has a scary amount of phantom range, meaning its hitbox extends beyond the sword’s actual model, so blows can clip people even if it looked like they were just out of range. The murakumo is the longest curved greatsword, but its damage is inferior to the Harald. The Harald curved greatsword has a devastating weapon-art called sever. Sever consists of several fast, close range strikes that give you immediate hyper-armor. This weapon art compensates for the curved greatsword’s relatively slow light attacks. The light attacks have good range and are great for keeping your opponent at a distance, but if they’re able to close in, hit them with the weapon art and watch their hp disappear. I personally believe this is one of the most underrated weapons. Lothric Knight Greatsword A personal favorite of mine is the sharp-infused Lothric knight ultra greatsword. While this weapon is too slow to effectively fight other players, or most non-human bosses with, nothing beats knocking around normal enemies with a giant sword. This being the strongest of the ultra greatswords in my opinion. While usually a sub-par bossing weapon, a few heavy attacks from this will fell the Nameless King’s mount, the King of Storm. This weapon is fairly unique in that it’s buffable while also dealing innate lightning damage, effectively limiting the types of pine resin you can buff it with to lighting only. Using a different element is too inefficient, even if your foe is resistant to lightning. When fighting groups of smaller monsters, ultra-greatswords are extremely effective due to their long range and high poise damage. Low-poise, humanoid bosses like the Deacons of the Deep, the Abyss Watchers, Sister Frieda, and Halflight, Spear of the Church, can be effectively interrupted and chain-staggered by heavy weapons. This sword’s thrusting heavy attack is extremely effective, and will send enemies flying when fully charged. The Lothric greatsword’s stomp weapon art is great against even the toughest enemies due to the high poise-damage it deals. Use the stomp weapon art to involuntarily induct lighter enemies into the Lothric space agency. Stomp can be tricky to land on other players, but the temporary poise stomp provides does have its uses. One tactic is that after stomping, instead of following through with the weapon art by using a heavy attack, a regular light attack can be performed. This can catch people off guard, as they probably expected you to use the slower weapon art. The Dagger The unassuming dagger actually has the most damaging single attack in the entire game: the riposte. This weapon is often found occupying players’ second weapon slot, so that it can be quickly swapped to upon performing a successful parry. This weapon’s popularity is due to it dealing the highest critical damage out of any weapon. The dagger is also so lightweight you won’t even notice you’re carrying two weapons. For the stat distribution showcased in the “stats” section of the guide, the dagger is best infused with a sharp infusion. This way it can be buffed with lightning pine bundles immediately after parrying. If you don’t want to bother with buffing it, a fire-infused dagger will deal more damage than an unbuffed sharp dagger. While players are generally weaker to dark damage than fire, the hornet ring is bugged in that its bonus does not apply specifically to dark damage dealt to other players.