换一换
换一换 


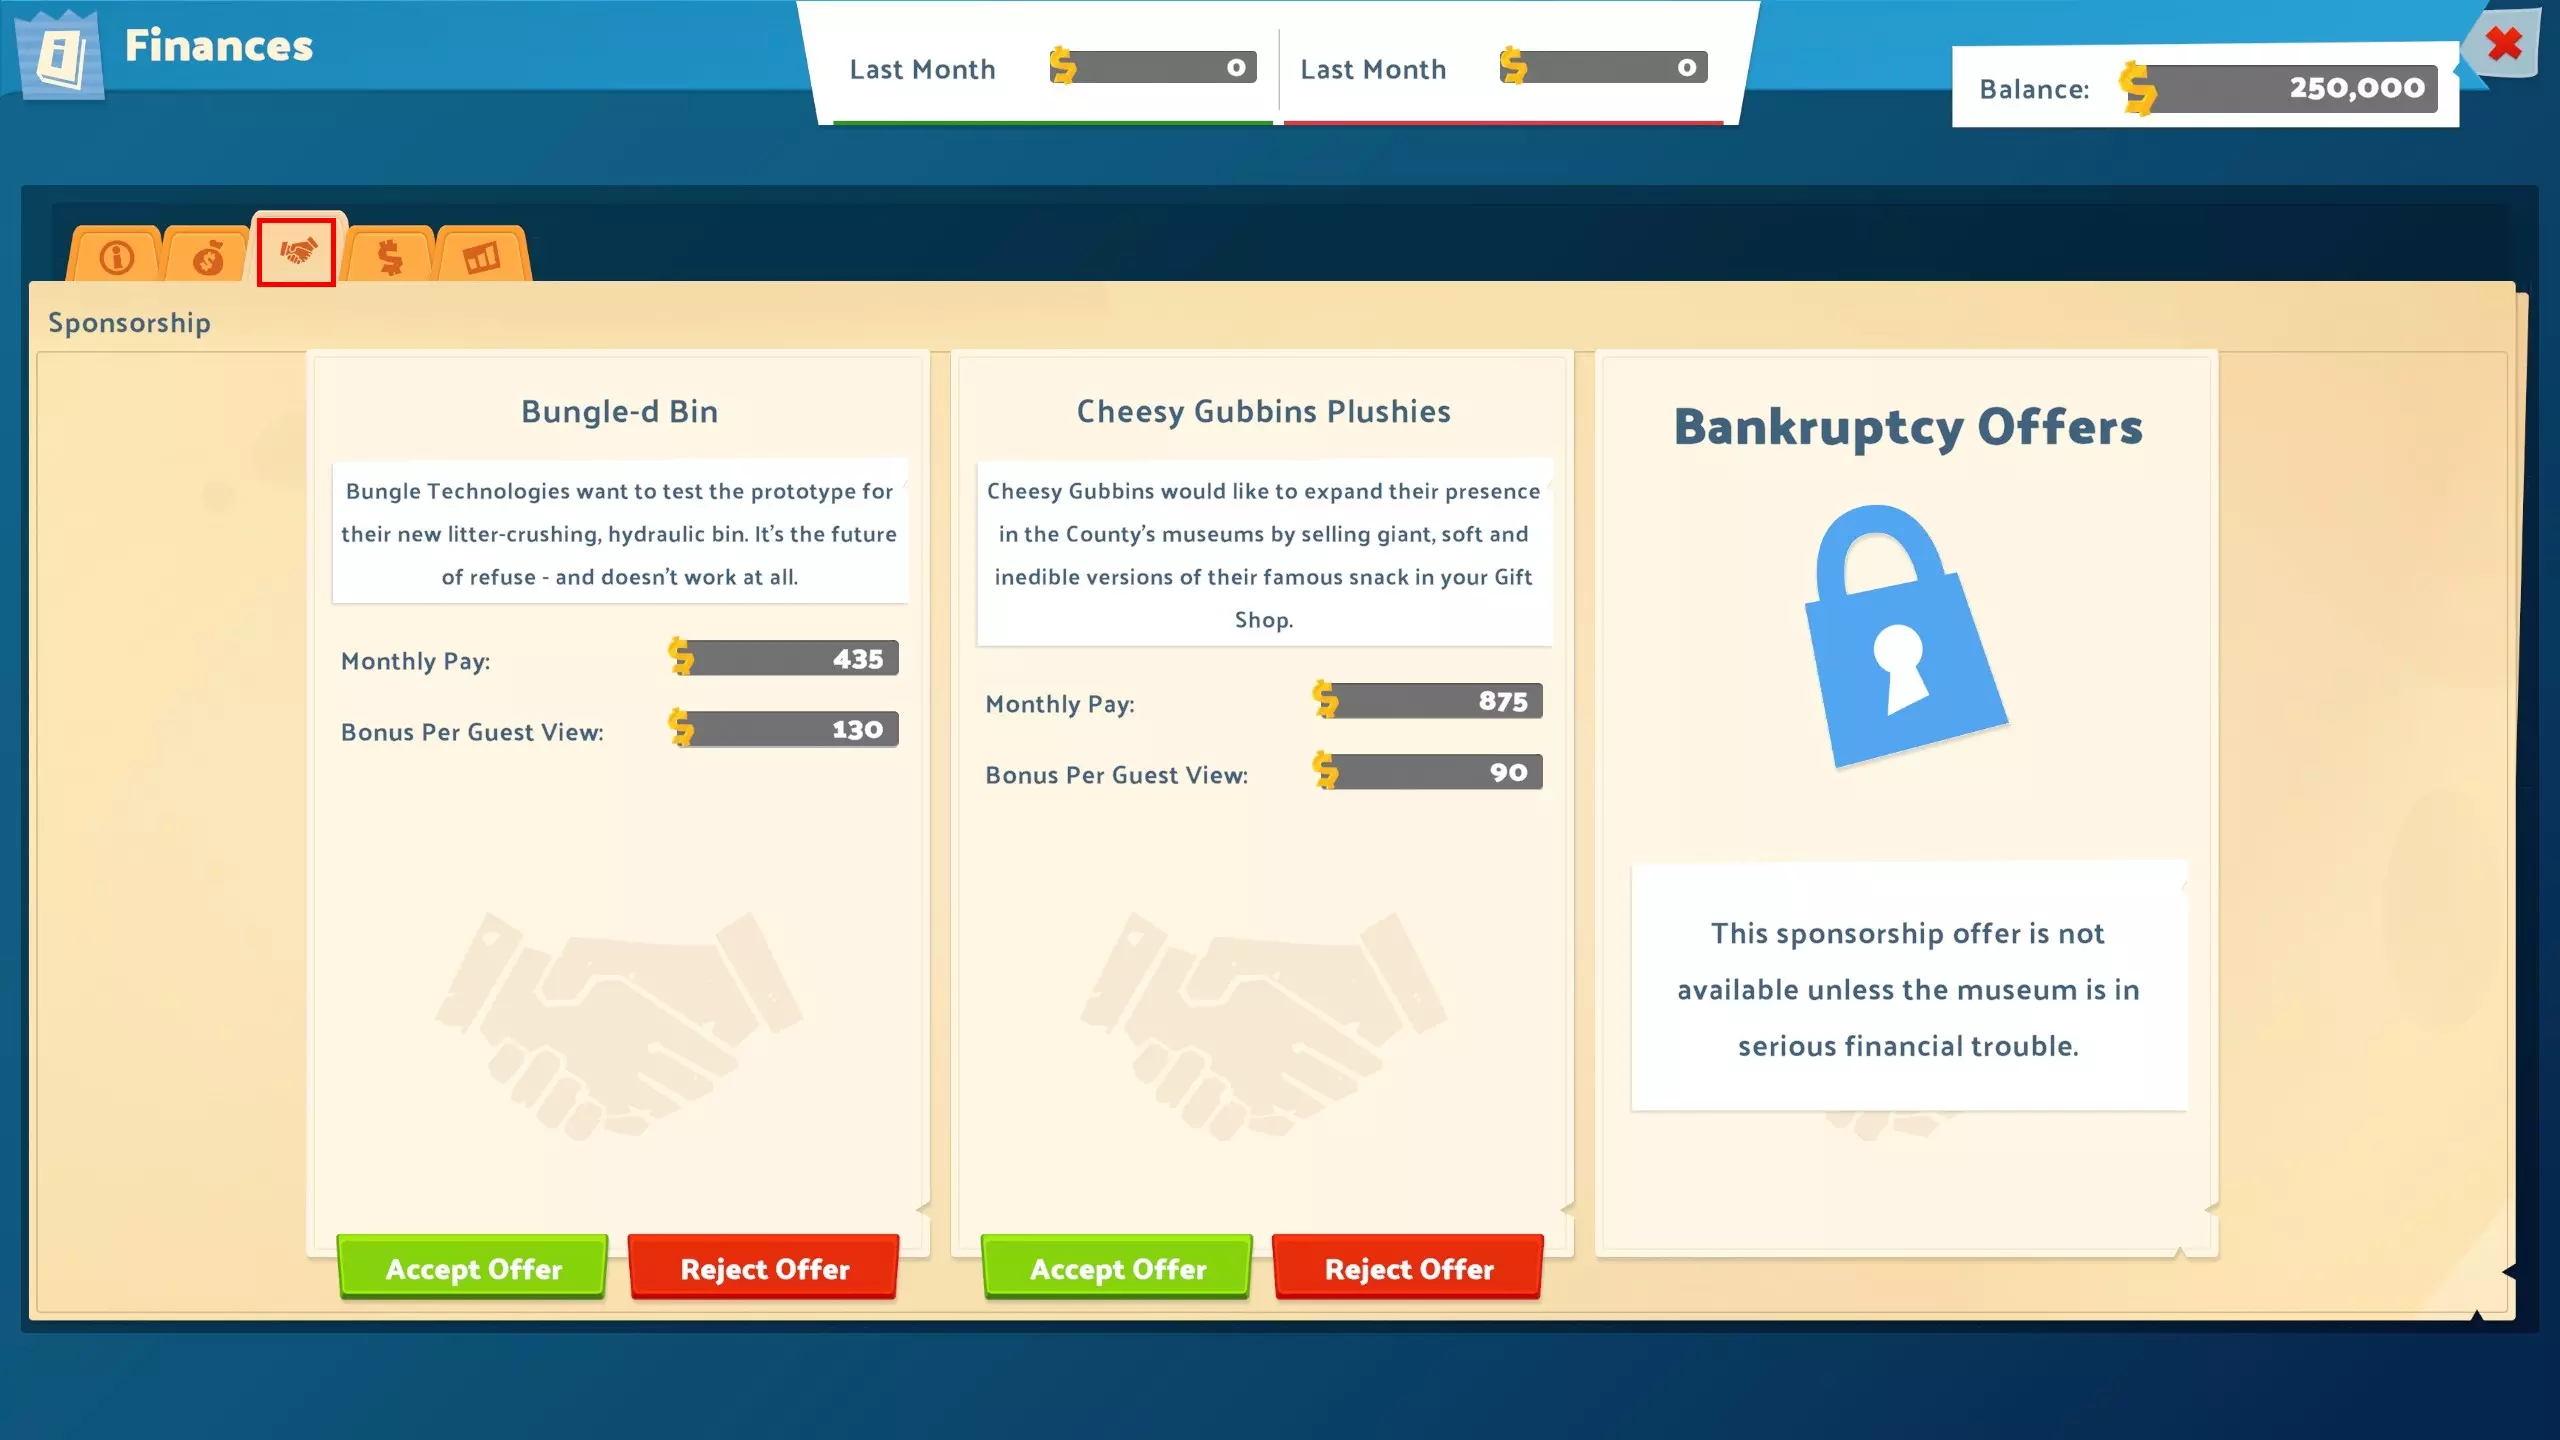
本指南汇总了一些技巧和信息,旨在帮助玩家更好地理解部分游戏机制。 简介 本指南主要收集了一些游戏技巧,您可以自由将本指南中的数据用于个人网站、维基百科等平台。 如果您发现有关游戏机制的有趣或隐藏内容,或发现任何问题,请在评论区告知我。 通用技巧 1) 在任何任务开始时,点击屏幕左下角的美元图标(管理 > 财务),然后点击握手图标(赞助)。 在该界面中,您可以接受赞助提议,通过在博物馆中放置特定物品来赚取额外资金。这些合同有相关条件且存在一些缺点,但大多数都是可控的。如果你不喜欢某个赞助,可以拒绝该提议,180天后会出现新的赞助。
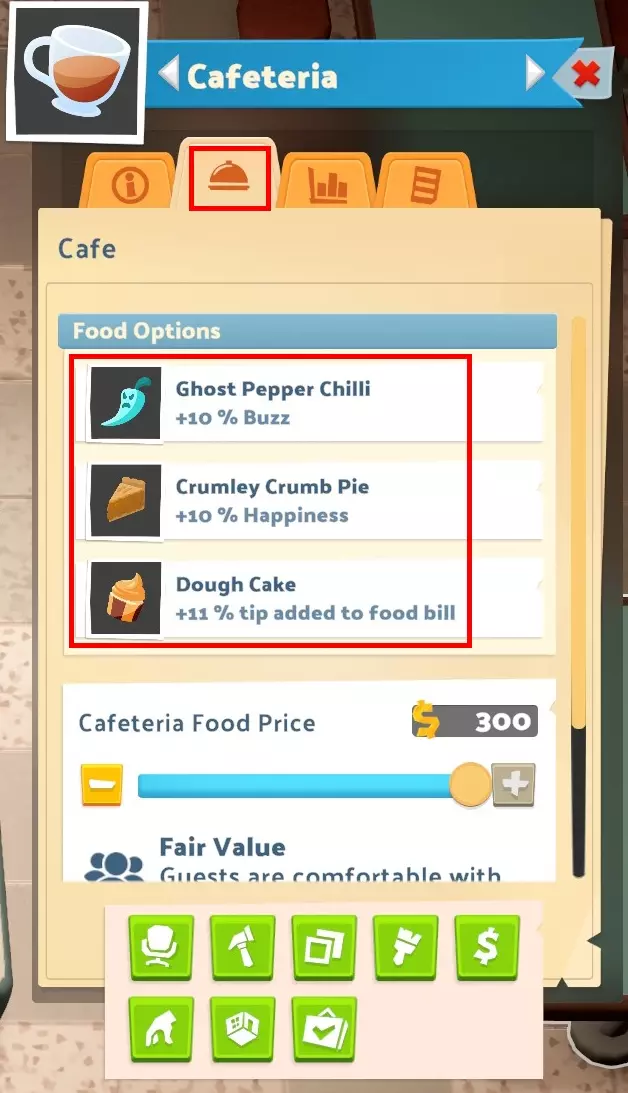
2) 尽可能避免招募有不良特质的员工,这些特质会在招募界面的【参考】类别中列出。有时由于应聘者是随机的,这可能无法避免,但请留意【雇佣员工】菜单,以便替换你手下的不良员工。以下是招募时可能出现的负面特质列表: - 坏蛋(降低附近同事5%的幸福感) - 笨拙(容易意外受伤) - 娇弱(受伤恢复速度减慢50%) - 口干舌燥(口渴速度加快) - 迟钝(削弱导游能力) - 不适合家庭(降低附近儿童的娱乐度) - 乱抛垃圾者(随意丢弃垃圾到地上) - 贪吃(饥饿速度加快) - 贪婪(薪资期望提高10%) - 愚笨(训练速度降低25%) - 敏感(讨厌探险中发生不好的事情,会在短时间内降低幸福感) - 懒鬼(休息时间更长) - 行动迟缓(移动速度减慢) - 暴躁(降低5%的幸福感) - 厕所恐惧症(使用时消耗100%厕所维护度) - 旅行疾病(探险降低25%幸福感)- 隧道视野(安保人员视野变窄)- 呕吐症(看到病人会生病)。对于从不参与探险的员工,或者能确保“脆弱”特质员工避免受伤的话,“脆弱”“晕车”和“敏感”都不算大问题。对于完全不负责导览的员工,“迟钝”特质是可以接受的。如果可能,我会避免所有其他负面特质,因为它们并非情境性的,只会降低博物馆的效率。 3)尽可能避免贷款,它们只会让你更难经营,而且有更好的存钱/赚钱方法。不过对于一些小型挑战任务,贷款可能非常有用,因为这些任务有时间限制,贷款能极大帮助获得金奖杯。4) 确保放置足够的厕所、食品机、饮料机、垃圾桶、长椅,如有可能,还需放置娱乐设施,以满足大多数基本需求并保持博物馆清洁。部分可安装在展品上的增益效果也能极大地帮助满足这些需求。 5) 自助餐厅比《双点校园》和《双点医院》中的同类设施更为实用。首先,它们能带来丰厚利润,尤其是在游客数量较多时。此外,自助餐厅不仅能解决游客的饥饿和口渴问题,还能提供多种其他益处。建成后点击该房间,再点击信息面板的第二个标签,即可更改其效果。
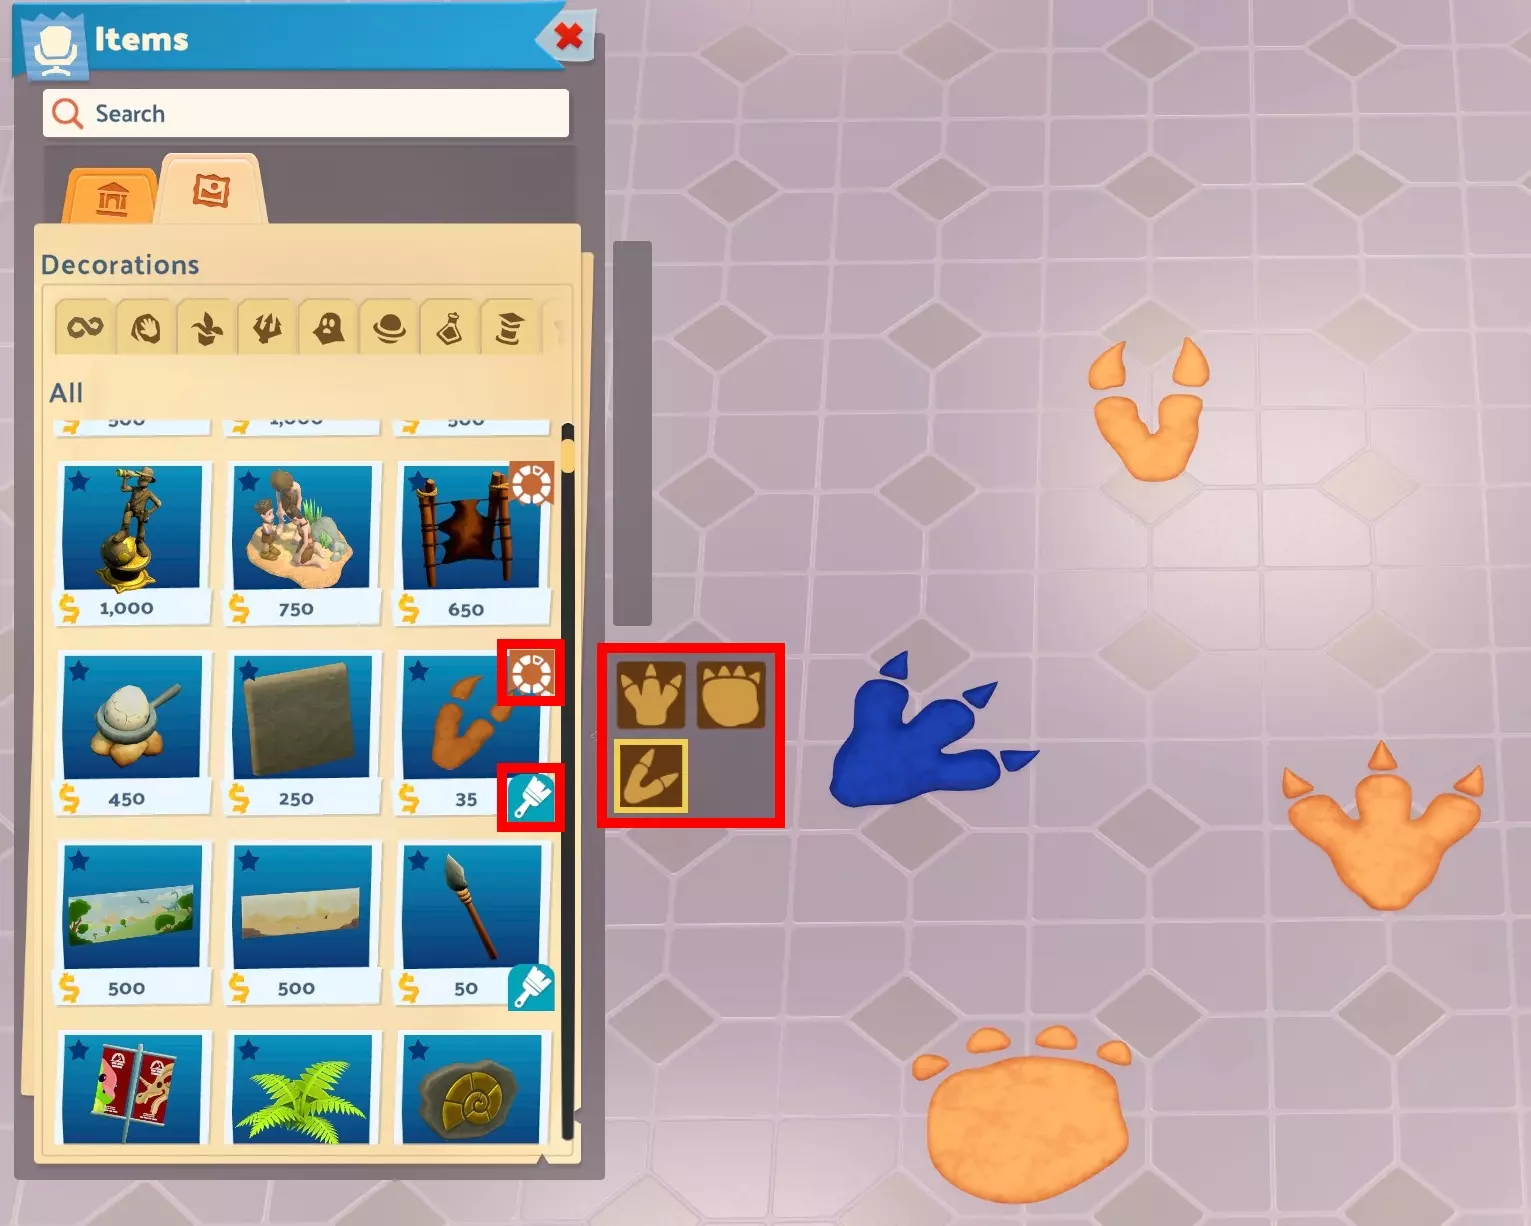
6) It's recommended to specialize and assign employees to specific tasks. It can be done via the Job Assignment tab, fourth tab from the left when selecting any employee. It's important for example to prevent assistants not having the Accomplished Admission skill to work at a ticket booth. There is also a Job Assignment tab in the Staff List menu to easily manage all of them. 7) If you have a lot of money and want an "easy" way to increase buzz and/or the museum level, just build one or several marketing rooms and launch campaigns that increase the buzz of a specific theme. Of course, you will need an assistant with the marketing skill to work in each of these rooms. It's possible to double the total buzz value of your museum with marketing. It will also increase the museum level since it also depends on the buzz value. Otherwise, there is no secret and you will just need more exhibits (and/or recruit, level up and train more employees). 8) Bonuses provided by items like "+X% Analysis Power" stack. So it can be useful to add a lot of these items to speed up or increase the effectiveness of some rooms if you have extra cash. It's especially useful to stack bonuses in the training room to make employees spend less time there. 9) The bonus from Items increasing analysis power, workshop power (and other similar effects) only affects the rooms they are placed in and not all rooms of the museum. 10) I recommend checking the prices tab in the finances menu sometimes, and when a price shows "Guests feel the current price is (definitely) worth the money", you can increase the price a bit. The Ticket Price is rarely worth increasing but for all other things like the gift shop items or the cafeteria, when the museum become good enough guests will be comfortable with the maximum price. 11) It's possible to precisely rotate and move objects (without having it snap to the "grid") by holding left Ctrl key. You can also instantly create a copy of an item already placed in the museum by holding the left Ctrl key before clicking on it. 12) Moving the mouse cursor over an item and then pressing the Del key will sell it instantly. It's great to quickly reorganize a part of the museum. 13) You can instantly pick-up an employee from the staff list directly with a right-click. This way, you avoid making the camera automatically move to the employee when you first left-click to select the employee before clicking on the Pickup button. 14) Selling a single building or even the whole museum (via the Building Foundations menu), stores exhibits in your inventory so it's a good way to rebuild one if you are unhappy with what you have done or at the start of any mission if you don't like the default setup. 15) Space management isn't as important as in other Two Point games so don't hesitate to make bigger rooms if you want. In some rooms, it's actually recommended to make them bigger since it can increase their "capacity". It's especially useful for these rooms : - Gift shops = a bigger room increases its guests capacity, so it's extremely useful and at some point you can add more checkout counters to process guests faster - Staff room = a bigger room increases how many employees can rest in this room at once - Training room = a bigger room has no intrinsic effect but adding extra training desks makes it possible to train several employees at once in a single room - Polterguest room = a bigger room increases its capacity up to 6 ghosts - Aquarium room = a bigger room increases its capacity up to 20 (can hold between 6 and 20 fish depending on their size) 16) I recommend not placing the Security Doughnuts or the Security Fuel items in the Camera Room. In theory, it looks like a great idea to have the security agent take care of their food, drink and even energy needs while working there. However, the tradeoff that makes the Toilet Comfort decrease is too strong. In practice, it will make the employee take a break much sooner because of the Toilet Comfort going below 25%. 17) Decorations have diminishing returns and barely increase the decoration gauge after putting more than 3. If your goal is to increase the gauge of a room or exhibition, it's better to use different decorations. 18) It's possible to change the color or even the shape of some objects by clicking on the circle or the brush icons. It's one of the features that many people seem to miss among others like the room copy/template, etc. Make sure to take the time to check what all buttons/tabs do.
How to earn Money ? Monthly expenses mostly come from wages (and loans) so it's actually not that hard to run a profitable museum if you don't overstaff, especially since there are a lot of ways to earn money. Only the presence of an assistant at the ticket booth is vital for guests then they just visit and do whatever they want in the museum. That's why an understaffed museum can still be fine. So the most important thing to keep in mind is to avoid recruiting too many employees if you can't afford them. If you don't overstaff, the game is actually quite easy. Here are the main ways to earn money : - Donations : this will mostly increase when adding more exhibits and improving them. Don't forget to have a 5/5 decoration score for all exhibits and try to activate their Buzz Bonuses. Make sure all exhibits are linked to a donation stand. - Gift shop : this can be very profitable. This is important to build a big enough shop to increase its guests capacity and also to have enough space to put stands for each theme present in the museum. Guests can buy several things at once making this a good way to earn money. - Cafeteria : it's another good "passive" way to earn money while taking care of the needs of people. It also provides some other benefits so it's not bad especially with increased prices. - Tours : there are 2 ways to use tours. The "intended" way by making a tour of several exhibits not too far from each others to keep the length at perfect. It increases the buzz of guest which in turn increases the money earned via donations but guests can earn buzz by themselves anyway... Unfortunately, money earned at the end of tours doesn't seem to scale with the amount of exhibits. So the other way to make money is to have short tours of only 1 exhibit of the highest possible quality and with max decoration rating. Since these tours are short, more will be performed which in turn will reward more money. - Fish farming : in the campaign, this is introduced in the Passwater Cove museum with the Egg Cup item and it's an interesting way to farm money. Money is already quite easy to manage so this way to earn money is a bit overkill. But once unlocked and setup, you can earn a ton of money with fish farming. Aquariums are also exhibits so you can earn money from them with donations too. The only downsides are that this method requires a bit of micro-management and space for big aquariums. - Expeditions : it's possible to earn money by selling some exhibits. Most expeditions are quite expensive so it's not worth it for all of them. However, exhibits from cheap and fast expeditions can sell for a good amount of money so it can be useful to do them if you really need the cash. - Sponsorships : located in the finances menu, they provide a welcome source of income with some drawbacks. This is especially useful early so don't forget to check them when you start building your museum. There are other sources of income but usually aren't as interesting or straightforward. If despite everything you are still struggling with money, take a look at your staff list and fire unnecessary employees. You don't need a lot of people for a museum to perform well. Staff specialization In TPM, each employee can learn up to 5 qualifications/skills. It's possible to learn the same skill up to 3 times. For all employees, specialization is important and in most cases they will be more efficient if they take care of specific tasks instead of all. There is no reason for example to have an assistant with the Accomplished Admission skill that boosts the ticket booth proficiency, work at a cafeteria or a gift shop when another assistant can manage it instead. So make sure to spend a bit of time on the job assignment screen to improve tasks management. Regarding common skills, "Aerodynamics" increases movement speed. It can help employees move around faster. This is mostly useful for employees not working in rooms like janitors, security guards and experts restoring exhibits since they spend most of their time moving through the museum. "Happy Thoughts" boosts the happiness of the employee. Not increasing their salary contributes a lot to their unhappiness. That being said except for some expeditions, this skill is rarely worth learning in my opinion. "Pilot Wings" reduces the expeditions length and counters some negative events. As far as I know, it's only useful during expeditions. If necessary for some expeditions and if possible, it's probably better to teach the skill to an assistant, janitor or security guard since it's their "only" expedition skill while experts have 2 other useful expeditions skills. Experts : JobsRecommended QualificationsAnalysis Room3 Analysis skills + 2 Aerodynamics skills or any other skills of your choice if the employee isn't always doing analysisTours3 Tour Guidelines skills + 2 Aerodynamics skillsExhibits Restoration3 Rapid Restoration skills + 2 Aerodynamics skillsAquarium Restoration3 Fish Whispering skills + 2 Aerodynamics skillsExpeditions3 Survey Skills + 2 Survival Skills or Pilot Wings or any other skills you may need 3 Survival Skills + 2 Survey Skills or Pilot Wings or any other skills you may need There is a weird situation with the Spirit Whispering skill. There is no job assignment for spirit restoration, so any expert that can do the basic Restoration task can enter the Polterguest rooms and take care of their restoration... Assistants : JobsRecommended QualificationsTicket Booth3 Accomplished Admission skills + 2 Aerodynamics skillsVendor (Kiosks, Cafeteria, Gift Shop, etc.)3 Customer Service skills + 2 Aerodynamics skillsMarketing Office3 Marketing skills + 2 Aerodynamics skillsExpeditions3 Pilot Wings + 2 any other skills you may need Janitors : JobsRecommended QualificationsMaintenance and Upgrade3 Mechanics skills + 2 Aerodynamics skillsWorkshop3 Workshop skills + 2 Aerodynamics skills or any other skills of your choice if the employee isn't always busyExpeditions3 Pilot Wings + 2 any other skills you may need In most museums, the skill Ghost Capture is completely useless so don't teach it unless the game tells you to do it. Regarding the Fire-Resistance skill, I recommend teaching only the level 1 skill to one janitor of your choice just to be safe. This is mostly useful in museums where you have custom science exhibits. Otherwise, in other museums the chances for a fire to happen is quite low if you have enough janitors managing the maintenance. Fires happen when some devices marked as flammable or custom science exhibits have their maintenance/corrosion jauge reach 0%. Then the fire triggers which gives a speed boost and decreases happiness of people around because of the panic. There is a timer and if the fire isn't extinguished fast enough, the device will explode and be lost. Security Guards : JobsRecommended QualificationsDonation Collection3 Aerodynamics skills + 2 Strolling Surveillance skillsCamera Room3 Camera Room skills + 2 Aerodynamics skillsCriminal Pursuit and Security Chair3 Strolling Surveillance skills + 2 Aerodynamics skills or 3 Aerodynamics skills + 2 Strolling Surveillance skillsExpeditions3 Pilot Wings + 2 any other skills you may need Regarding expeditions, some of them can require skills that aren't related to expeditions at all. For example in the Netherworld, the Happy Thoughts skill is necessary to avoid some of the negative events. So ultimately, it's near inevitable to have 1 or 2 employees with a "sub-optimal" skill set just to complete expeditions. Interesting unlockable items I will list below the items I use the most or at least that may be worth unlocking with Kudosh in my opinion. Note that some of these items are unlocked without using Kudosh in the campaign, the prices displayed are the ones from the sandbox mode. I am only talking about items that affect gameplay significantly enough, feel free to unlock any other cosmetic items you like. General Items : Large Donation Stand - K500 - $1 000 This can hold up to 5 000$ of donations compared to the 1 500 of the basic Donation Stand. It takes more space but this is very useful to reduce the workload of your security guards. Wide Info Stand - K250 - $500 It has a much bigger range than the basic Info Stand so you can place less and cover more exhibits. The Curve Info Stand has a slightly bigger range but it's a much bigger item to place. Morsel Men Machine - K150 - $5 000 A snack machine that also provides entertainment, a 2-in-1 item that is very helpful to keep guests happy. However, it reduces Toilet Comfort by 10 instead of just 5 for the basic snack machine which is manageable. Pulpitation Machine - K150 - $5 000 A drink machine that also restores energy. Once again it's quite powerful, however the drawback is quite big since it reduces Toilet Comfort by 20 instead of just 5 for the basic drink machine. The basic drink machine is probably a better choice along with benches in most cases but this Pulpitation Machine is a good way to save space. It could also be used at the same time as the Spongy Cake Ball Machine which increases Toilet Comfort but massively reduces the Drink jauge, so they somewhat complement each other... Building Foundations Item : Security Archway - K50 - $250 It's an archway that has a chance to detect thieves moving near it. Placing some at the entrances and/or outside toilets is an additional passive way to find thieves. It's not guaranteed to detect them, however each time someone passes near it seems to reroll the detection dice. So it means that you can increase the chance by having guests move through several security archways. It will be much harder for thieves to enter in the museum if they have to go through a hallway with several security archways. Room Items (not visible in the general list of items) : Coffee Counter - K250 - $2 000 Similar to the Pulpitation Machine since it also restores energy but it's better. It only reduces Toilet Comfort by 10 and also gives a temporary movement speed buff. It's great to have in the staff rooms. Training Lectern - K500 - $5 000 It's an object that increases "Training Power" which reduces the training time duration. With several of them, your employees will spend less time being unavailable which is always good. Server Cabinet - K3 000 - $10 000 It's an item that increases "Analysis Power". It's extremely expensive for an item that will only speed-up the analysis speed of exhibits. However, it remains an interesting item to add in the room when you don't know what to do with your money. Workshop Tweak/Tinker Table - K150 - $750 It's an item that increases "Workshop Power". Projects take a long time to complete and you probably will create a lot of objects especially those that help with expeditions. So having these boosting items in the room to help finish projects faster is great. Golden Toilet - K200 - $1 200 The advantage of this toilet is that it's not affected by the negative trait "Toilet Terror" that depletes toilet maintenance on use by 100%. It means that if you only have golden toilets in your museum you can safely recruit employees with the toilet terror trait without worrying about its effect. Egg Cup - K250 - $15 000 It unlocks fish farming making it possible to get more fish without expeditions. With this item, selling fish becomes a good way to earn money. Dear Curators This guide took a lot of time to research, experiment and to write so I hope it will help some of you. If you spot any issue, do not hesitate to let me know in the comments below. Thanks for reading. Yours fragrantly, Freiya