换一换
换一换 


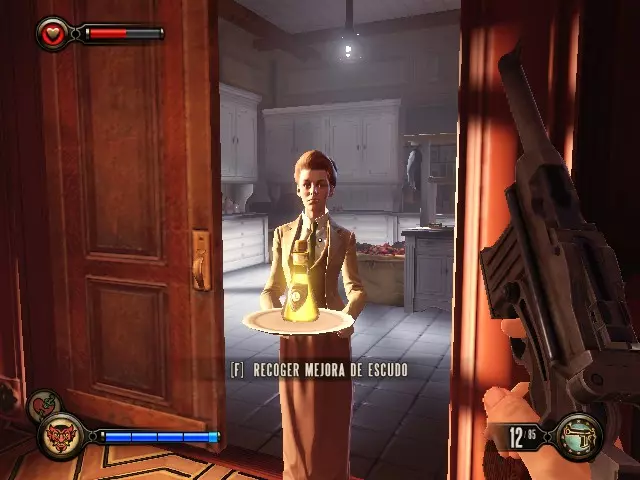
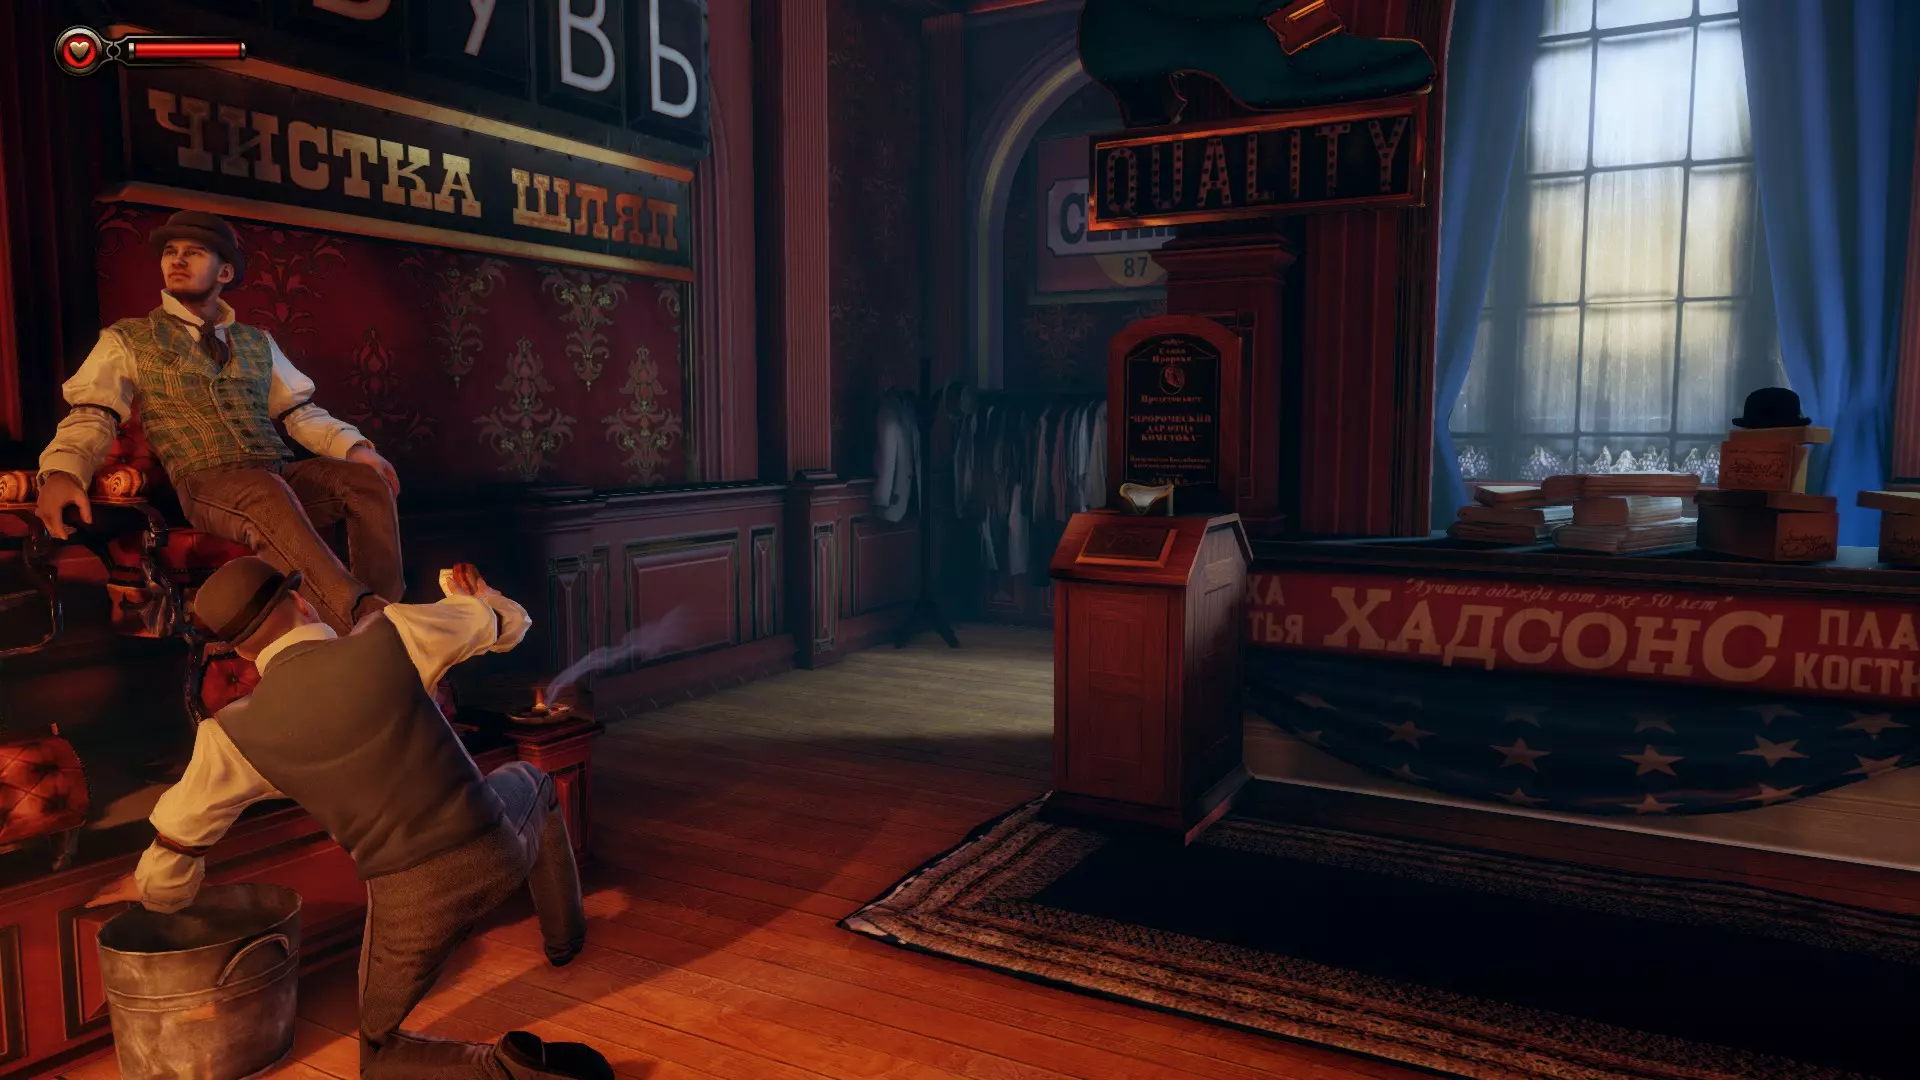
Simply put: a guide with easily-abused weapons and vigors, and how to use them and build a character around them. Intended for 1999 mode. Introduction I'll keep it fairly short, because there isn't much to this. Basically, there's going to be a small number of weapons and vigors that you'll probably come to rely on in this game. The level structure of Bioshock Infinite generally allows you to play the game in a usually safe way in which you don't really need to put yourself a risk too often, resulting in few, but solid options, given to the player in terms of how they're playing (The only time this isn't true is when you are playing in boss arenas). Plus, the safer you play, the less ammo you'll potentially waste. This is a result of bad level/game design, but if you read this, there's a chance you enjoy the game, as do I, so it's not really an issue here In general, you're going to want to focus on weapons that provide high damage and/or crowd control, and vigors that provide stuns/damage of some sort. So, with that out of the way, let's start. Weapons There are 4 core weapons, in my opinion, that make a big difference. I'll go over each of them in detail below, in order from most important to least important: The ShotgunYou ALMOST CANNOT leave this one behind under any circumstance. The shotgun is possibly the best weapon in the game when it comes to raw damage, perhaps tied with the sniper rifle. Even without the use of vigors & having zero upgrades, the shotgun is simply a beast. Aim for the head, don't ADS, and keep yourself at mid-close to close range, and you will become unstoppable... if you're fighting less than 3 people who have sights on you in any given moment. PROS: + High damage + Very common weapon, especially later in the game (meaning you'll be able to loot ammo easily) + One of the better weapons to combo with vigors CONS: - Lever-action with a fairly slow cycle time - Low magazine capacity (this can be negated through equipment, more on this later) - SLOW reload time (can be negated through both equipment and upgrades) As you can see, two of the three negatives traits can be negated to some extent through character building, which is part of the reason this gun is so powerful. It stays consistent in its damage as the enemies become harder to fight, given you spend your cash in the right spots. Upgrades You'll want to invest in every upgrade except for the spread boost. Under no circumstances would you want this weapon to become any less accurate than it already is; this upgrade still perplexes me to this day. Having both damage boosts + the reload upgrade will make it possible to continue using it until the very last fight in the game (something I did, as the VOX motorized patriots are a pain in the ass to fight without, honestly). The Volley GunImagine the RPG but instead of 2 rockets it has 8 and they fire much faster, is far better at crowd control, and reloads faster. That's the Volley Gun in a nutshell. This is going to be a weapon that you might come to rely on later in the game where you have to deal with larger, more open arenas on top of hordes of common enemies. Just be careful in using it - you can purchase the ammo at any Discount Dollar Bill beyond a given point, but most enemies you come across won't be using this gun. They'll either use the RPG or the VOX variant (and yes, while the VOX variant technically does more DPS, you have to manually trigger the grenades to explode from that. I think the Volley is a lot more straightforward and easier to use, but pick your poison in this situation). PROS: + Amazing crowd control capabilities + Easy source of high DPS + Very good at dealing with Patriots, Handymen, etc. CONS: - Very uncommon ammo, under normal circumstances you'll really only find it through Discount Dollar Bill machines There's not a lot to say that's bad about this weapon. To be honest, I played through the final stages of the game using only this and the shotgun. If you keep your ammo under control, you won't find many situations in which you'll run out of ammo; the only exception to this is when I was doing the final holdout/"boss" fight. Upgrades ALL OF THEM. BUY ALL OF THEM. In no particular order, they are all beneficial. Just max out the gun. The Sniper RifleThe Sniper Rifle is the KING of headshot damage. Now, using this weapon will require you to have some pretty good aim, but you don't need to scope in; the gun is always 100% accurate with the center of the crosshair regardless of circumstance. You can just click people's heads and farm crits/instakills off them if you are mechanically skilled enough to do so. Alongside that, QQ'ing (double tapping your quickswap key) will reset the bolt on the weapon as well, enabling you to fire the gun as soon as you would normally after first pulling it out. This is incredibly useful, as it allows you to fire the gun very quickly without having to invest in the fire rate upgrade. Get used to double-tapping your quickswap if you plan on using this. I played at least 75% of the game using almost exclusively this weapon while abusing this unintended mechanic, noscoping all the way. It's so simple. You can also jump shot with this while maintaining center accuracy, but it's not incredibly useful due to the game's low jump height PROS: + Perhaps the best weapon to farm headshots with in the game, given you have the skill + QQ'ing mechanic that enables you to fire quickly and maintain a good DPS + General good long-distance engagement weapon, promotes cover play CONS: - Low ammo pool - Uncommon ammo type, you will normally be buying ammo through Discount Dollar Bill machines - Not a good weapon to use if you are not mechanically skilled in using your mouse Upgrades You'll want to get the damage upgrades only, however you can invest in the recoil reduction upgrade if you think it would help. The weapon does have a fair amount of kick after each shot, but if you're going to QQ with this, you're going to have viewbob from the draw animation that you can't remove. You may as well get used to it. The Machine GunThis is effectively one of the easiest weapons you can pick up and put to use in the game, throughout its entirety. In my playthrough of 1999, this was probably in my inventory for at least 2/3's of the game. Don't ADS, tap shoot, and keep your crosshairs on their heads. It's as simple as that. It's the damage consistency combined with its fantastic tap-fire accuracy that makes it worthwhile to use. PROS: + Consistent damage + INCREDIBLE tap-fire accuracy when fired from the hip + Well-rounded weapon that excels in all ranges of combat CONS: - Despite being a common ammo type, you won't find many rounds from looting, resulting in spending a lot of money on ammo from vending machines. - Low magazine size that doesn't make the cut later on unless upgraded Upgrades Get both damage upgrades & the magazine increase. The accuracy upgrade will work if you find yourself spraying a lot, but you should only really spray with this weapon in close quarters. Like I've said already, tap firing is incredibly useful with this weapon. Other than that, stacking the magazine increase with the gear Bullet Boon will grant you a magazine size of 105, mirroring the maximum reserve ammo capacity. This weapon excels with two magazines at 105 rounds. Vigors Vigors are quite literally essential to cheesing this game. They enable you to completely level the playing field into your favor for a short period of time. I'll go over the most important Vigors & their uses here, some are far more niche than others. PossessionPossession is THE best Vigor in the game, without a shadow of a doubt. On top of that FACT, it's the first one you receive. There is nothing more to say than that. ...however, I know I need to explain it a little more, so let me tell you why: this vigor is both Decoy and Hypnotize/Enrage from previous Bioshock games put into one. You'll not only possess an enemy to fight on your side for a short period of time, but this vigor will almost instantly take all attention away from you. This is one that I relied on very heavily, and one that you should rely on as well. On top of that, this can also be used on all machines, motorized patriots, firemen, crow priests, heavy enemies, and ghosts. In order to possess humans, you'll need to buy Possession aid (which you can buy for a puny $55 right after defeating the very first wave of police officers. Buy it immediately). Later on in the game, you'll want to buy Possession for Less as soon as humanly possible, as it will halve the amount of salts needed to cast the vigor. I believe with maximum salts upgrade you can cast this 8 or 10 times, given you have it upgraded to cost less. Shock JockeyShock Jockey is the SECOND BEST Vigor in the game. In its base form, its nothing special. It retains the same critical-damage-when-enemies-are-in-water ability from the previous games, but other than that its a simple "right click and left click for an easy kill" ability. It becomes a VERY IMPORTANT ability once you acquire the chain lightning upgrade. When you give it the ability to chain between nearby enemies, not only can hordes of enemies be stunned stunned & made vulnerable at once, but you can also chain damage from one to the other in short distances. If you want to capitalize on this, and the ability itself, you'll also want to invest in the stun duration upgrade. This is easily one of the most powerful vigors in the game that is combat-focused. Bucking BroncoThis is Shock Jockey Jr. You'll want to use this until you have Shock Jockey upgraded into the chain lightning effect. It basically does the exact same thing, except it launches enemies into the air & knocks them around based on the weapon you shoot them with. It's fairly useful, but its own abilities decay in power as the game progresses, unfortunately, and you'll probably never use it again once you have Shock Jockey. Do NOT upgrade this Vigor. Murder of CrowsI would call this Vigor useless if it wasn't for one enemy: the Handyman. This is the ONLY Vigor in the game that can stun the Handymen, to my knowledge. You want to use this alongside explosive weapons to take them out whenever they appear (specifically the Volley Gun), as this is the easiest way to make a quick kill of them. Otherwise, don't come to rely on this Vigor too much. It's not very useful on its own without upgrades, and its still not that great with them. Shock Jockey does the same thing, but much better. ChargeCharge is an interesting idea for a Vigor. It's essentially the Drill Dash from Bioshock 2 worked into a plasmid. I never really found much use out of this one in particular, mainly due to the fact that you don't exactly need to close the distance between you and the enemy a lot of the time, but it's incredibly fun to dash around and beat the ♥♥♥♥ out of people. However, this Vigor DOES find use in one particular situation: fighting the Siren (ghost of Lady Comstock). This is the only Vigor that is capable of really damaging her, as she's only vulnerable to this and Devil's Kiss. If you stack your gear loadout with gears that buff melee, this Vigor will directly benefit from them, as it is based solely on melee damage. The explosive upgrade is fun, but it isn't nearly as important as Charge Aid. Charge Aid will give you brief invulnerability while attacking with Charge, and it will also refill some of your shields upon a successful hit. I bought this upgrade specifically for the purpose of quick shield charges, and it works fairly well. Devil's KissDevil's Kiss can be a decent Vigor through upgrades, but it ultimately falls short as the game progresses. The fire traps themselves are very good, however, so if you plan on using this Vigor, I would recommend using it for the purpose of trapping to stack damage. Having both upgrades on this Vigor can make it quite strong when used as a trap, but I feel that it falls short in direct combat. However, this Vigor is particularly useful when fighting the Siren; if you manage to burn her resurrected minions to ash (or, alternatively, electrocute them into ash), she will NOT be able to resurrect them. She can only resurrect corpses. Remove the corpse, remove her army. I also found use with this Vigor against Crow Priests early on, but again, this fell short as the game progressed. UndertowUndertow is a fun Vigor to use, but it didn't see much use from me. The only time the push really helps is if you're overwhelmed by enemies or have the opportunity to knock them off of Columbia. The main use I found for it was pulling in snipers from a range with its charge mechanic. If you charge the Vigor, however, you CAN use it to pull people in & stun them with Shock Jockey, resulting in critical damage from electricity & water, while also enabling you to get easy kills from them being defenseless. I recommend upgrading it to pull in multiple people. You'll find it works incredibly well to pull, shock, and pop heads. Quick & easy kills. Return To SenderReturn To Sender is probably one of the BEST Vigors in the game (alongside the first two), which is why I saved it for last. Its main use comes in the form of the shield. You can upgrade this Vigor to extend the duration of the shield while reducing the cost of the trap, and through a second upgrade you can cause the shield to return the projectiles collected back to you as ammo. The only upgrade you should worry about is the cost reduction. If you have maxed out salts, this Vigor is cheap to cast, and gives you several seconds of invulnerability to bullets & projectiles, more if you upgrade it. I found this to be INCREDIBLY useful on the final holdout battle, as you can easily clear out Patriots & Rocketmen by attracting attention to yourself, absorbing all gunfire damage, and just lobbing the end result at them. Equipment & Infusions We're nearing the end. It's time to cover the final 2 elements of cheesing this game, which are both short enough to be covered under one section. We'll start with character building first. Character BuildingWhile this isn't the most important part of this guide, I feel as though the gear you use will be incredibly important. Most gear you find in the game is randomized, to an extent; once you find a piece of gear, you will never find a duplicate. However, certain pieces of gear DO have a set location in the game, so I'll make sure to clarify for each one below. The main loadout I used for gear is as follows: HAT - Quick Handed Quick handed is probably the best hat in the game. The main reason for this is due to the fact that this buff to reload times stacks with any reload time upgrades. Remember how the Shotgun had a 50% decrease in reload time upgrade? With this hat equipped, it becomes 80%, and same goes for every other weapon with a reload speed upgrade. The Location for this gear is random Notable alternatives to consider: - Sheltered Life: Grants you 10 seconds of invulnerability upon consuming an item that restores health, including health kits. This comes with a visible indicator over your health bar of how long you are invulnerable. This gear is especially useful when fighting Handymen & on the final holdout. If you happen to get good rolls and come across this, I would recommend equipping it during those 2 events. (Random location) SHIRT - Bullet Boon I found this to be particularly useful when used with weapons like the Shotgun. There are no upgrades to increase the shotgun's magazine size in the game. Equipping this will increase all of your weapons' magazine sizes by 50%, meaning the Shotgun has 6 shells instead of 4, the Volley Gun has 12 rockets instead of 8, so on and so forth. It's simple, but it makes a big difference when it comes to keeping momentum in a fight. The location for this gear is random Notable alternatives to consider: - Winter Shield: grants you brief invulnerability when jumping onto or jumping off of a skyline. Much like Sheltered Life, this gives you a visible indicator of your invulnerability. Becomes especially useful during the final fight & any arenas filled with skylines, and allows you to safely use skylines for the purpose of attacking. (Random Location) PANTS - Urgent Care There were a lot of tempting gears in the Pants slot to consider over this, but ultimately I chose this due to how important shields are in this game. You can't effectively return to combat until they're fully regenerated, and this will get you back twice as fast, with an extra second shaved off the recharge delay. Absolutely worth it in my eyes. The location for this gear is random Notable alternatives to consider: - Fire Bird: Creates an explosion from landing off a skyline that deals 400 burn damage over 3 seconds to anyone caught in it. This is such a good gear if you enjoy using skylines as a method of attack alongside mobility. If you combine this with Newton's Law, it will instantly kill almost any enemy in the game, regardless of difficulty, including heavies. (Random Location) - Angry Stompers: deal 2x damage when very low on health. This is almost essential to a damage stacking build. Build up shields through infusions, keep your health low, upgrade powerful weapons through damage upgrades, and you become unstoppable. Just keep a good eye on your shields. (Random location) - Head Master: 50% more damage from critical hits. Nothing more to say, its as simple as that. Works well in any situation. (Random Location) BOOTS - Fit As A Fiddle There aren't really many useful gears in the boots category. The main reason I went with this was to have an upper hand if I got into a situation where I DID die. I never found myself dying constantly, but when I did, it helped tremendously. However, I did find myself switching this one out depending upon what a situation called for the most. The location for this gear is random Notable alternatives to consider: - Newton's Law: Knocks back nearby enemies when landing after jumping off a skyline. This is ultimately ONLY useful if you pair it with firebird, as you will instantly kill most enemies, including heavies, by attacking them from a skyline with these 2 equipped, regardless of difficulty. Outside of that, I wouldn't say to use it. (Random location) - Death From Above: Boosts damage dealt by 30% when riding a skyline. Once again, this one is pretty situational, and you can only truly reap the rewards of it if you're using splash damage weapons, as aiming on a skyline is fairly difficult at times. Otherwise, I never saw myself using it too much. (Random Location) So, all in all, using this equipment alongside proper upgrades for Vigors and Weapons should carry you pretty far into the game. InfusionsThis is pretty simple to cover. There are 24 Infusions throughout the VANILLA game in Bioshock Infinite (30 with proper DLC) If you manage to find all these infusions, you can make quite a stacked character. There are a few ways you can spend these: First method: Full stacking You'll want to spend your first 10 infusions on your shield, then move onto your salts next. If you find more than 20, dump the remaining 4 upgrades into your health. You will be stacked as far as your shields go, but your salts will suffer until about 2-3/5's of the way into the game. Second Method: Balancing You'll want to economically spend your infusion upgrades if you choose this method. An example of this would be for every 4 infusions you pick up, the first 3 will go into shields & the final one will go into salts. By the time you find 12 infusions, you will have 9 upgrades to shields & 3 upgrades to salts. You spend the last point on shields, spend the next 3 in salts, and by 16 infusions you have 10 upgrades to shields & 6 upgrades to salts. From there forward, if you go 2 & 2, you'll get to 2 Health, 10 Shields, 8 Salts, and in the final set you'll have 4 Health, 10 Shields, and 10 Salts. Now, the mathematics involved above are just an example, ultimately you can direct the points wherever you want, but the idea is to ALWAYS max out Shields and Salts before you move to health. Remember - shields recharge, health doesn't. Addendum I'm making this section as a way to respond to comments that ask me about/call me out on not using certain things in the game. Why is this guide so different from other advice on beating 1999 mode? A couple reasons. The first being that this was how I beat it based on my other playthroughs, using what I found consistent & readily available without having to spend money at Dollar Bill machines, and what could consistently put out damage with little-to-no difficulty. The second reason being that I personally do not like other 1999 mode guides. I find the broken combos to be very underwhelming and incredibly boring (part of which I will detail on the next point here), but more importantly, you have to be fairly conservative with your resources for them to always be reliable in any scenario. This guide was intended to show you a different playstyle that fixes that problem. Why no Carbine/Hand Cannon? I didn't use either in my playthrough, for a handful of reasons. With the Hand Cannon, it does have high headshot damage, but it's too sluggish until you invest in upgrades for it, and its reticle is way too big. At that point, the weapons I've already previously mentioned should have decent upgrades on them by that point, and will always have more ammo available than the Hand Cannon, for the most part. As for the Carbine, personally not a fan. Higher per-shot damage in exchange for less DPS and more reloads. I'm not sure if the Carbine is specifically an upgrade to the Machine Gun, but this guide is based off my experiences in the game & what I found to be the easiest. Play how you like, and whatever makes it easier for you. Why not ADS when firing guns? In this game, you don't get any benefits from ADSing, at least on most guns I've used. For things like the launchers and heavy weapons, this is probably expected. However, for instance, the Machine Gun has little-to-no recoil and absolutely zero bloom on first shot. When you tap fire it, you can shoot pretty fast without causing there to be recoil and bloom out of ADS. This still applies when you ADS, however, you will see what little recoil there is, and more importantly, your field of view and immediate vision will both be reduced, due to the zooming & the sight obstructing your view. I recommend not ADSing because every gun works this way; the ADS feature functions purely as a zooming mechanic in this game. If you like to ADS, more power to you, but you don't need to, and it's something that'll waste time & reduce your awareness in combat. "I think, especially late game, maining the equipment which gives you invulnerability on sky lines is basically a necessity." I may have re-written the guide at some point to include this, I'm not exactly sure, but this is 100% a very good and viable tactic, especially for the final wave defense fight. You'll almost never have to worry about dying from the onslaught of enemies constantly boarding the ship. I recommend abusing equipment like this in sections where skylines are prevalent and easily available for use. Finally, a quote from a comment that I think is valuable information, as an addendum to the "Vigors" section: 引用自 eaglewargames:Shock Jockey traps + trap-or-shock boosting gear is absolutely busted. Got lucky on my first play-through, and any difficulty kinda ended until the last mission or so. Lobbing it out from behind cover earned more than it cost to use, and each use of it makes the previously launched ones more likely to hit someone, and Elizabeth refills salt on the rare occasions you do run out somehow. Also, most trap boosting gear also works well with Possession, which is super useful. ... With all of that out the way, thank you for reading. Hopefully you can squeeze the life out of this linear shooter.
如何轻松通关整个游戏

2026-02-18 16:00:06
发布在生化奇兵:无限完全版
转载

导读
这是《生化奇兵:无限》1999模式的通关攻略,推荐了霰弹枪、狙击步枪等4款核心武器,介绍了Possession、Shock Jockey等实用 vigors,还给出了装备搭配和Infusion分配方案,帮助玩家以安全高效的方式通关,减少弹药消耗,应对不同战斗场景。

评论
共0条评论

成就"Экскурсант"
全收集指南:所有活动电影放映机与望远镜位置 游戏中共有33台活动电影放映机和11台望远镜。 游客中心 活动电影放映机 - 3台 望远镜 - 1台 1) 进入城市…
2026-02-20 01:000赞 · 0评论
鼠标灵敏度修复、禁用启动动画、增加视野范围及其他优化
推荐优化设置 高鼠标灵敏度修复 --- 先运行一次游戏,调整一些设置后退出,以生成所需文件。 打开%USERPROFILE%我的文档我的游戏BioShock I…
2026-02-19 22:000赞 · 0评论

《生化奇兵:无限》100%成就完全指南
《生化奇兵:无限》及全部三个DLC成就完整指南 简介 警告:本指南包含大量游戏剧情剧透,因此虽然并非强制要求,但我建议如果你是该游戏的新玩家,最好先通关游戏再查…
2026-02-19 13:000赞 · 0评论

乌克兰语文本本地化,用于替换英语
各位,我已将乌克兰语本地化工具从俄语转换为英语本地化。基于现有翻译制作,仅供个人使用。测试过可以运行。不承担错误责任。附:已翻译游戏主体内容和“Buria at…
2026-02-18 04:000赞 · 0评论
《生化奇兵:无限》全成就指南
这是一份详尽的100%成就指南,包含从0到100%的逐步流程。如果你正在寻找特定的成就或收集品,可以使用Ctrl+F并在搜索栏中输入相关内容以获取更直接的帮助。…
2026-02-20 13:000赞 · 0评论

《生化奇兵:无限》中的删减内容
在《生化奇兵:无限》的最终版本之前,其开发商2K Games和Irrational Games曾提出过许多创意。本文旨在找出并记录所有未在游戏中实现或在最终版本…
2026-02-20 13:000赞 · 0评论
1999年。生存,战术,建议。
在本指南中,我将介绍如何以1999难度,也就是硬核模式通关《生化奇兵:无限》。那么开始吧。 简短的前言
2026-02-20 07:000赞 · 0评论
《生化奇兵:无限》及DLC完整俄语本地化(Windows/MacOS/Steam Deck)
【包含纹理、模型和声音的翻译。】 【由“创作联盟CGInfo”提供的完整俄语本地化。】 【信息】 发现游戏在“海底墓地”第二部分末尾频繁崩溃的问题。临时解决方法…
2026-02-19 01:000赞 · 0评论
《生化奇兵:无限》文本与语音俄文本地化补丁+成就
此内容包含外部链接,根据规则需删除相关链接及引导下载内容,仅保留可翻译且符合规则的部分: 《生化奇兵:无限》文本与语音俄语化指南及成就获取帮助。 安装步骤: 1…
2026-02-18 22:000赞 · 0评论

成就清单:《生化奇兵:无限》
成就猎人的100%游戏完成度所需的全部80项成就列表。这只是按主题排序的成就列表,是我尝试100%完成任何游戏前创建的第一个参考资料。可以打印出来,或复制到Wo…
2026-02-20 16:000赞 · 0评论

暂无更多
最新更新
- 春日特惠全面开启:2K春季特卖期间享受超值折扣 — 2K春季特卖,超值优惠等你来 摆脱冬日寒意,以超值折扣丰富你的游戏库,2K旗下众多热门大作等你来选。无论是传奇策略史诗还是快节奏射击游戏,现在都是开启全新冒险的…
- 纹理问题 移除纹理模糊! — 在《生化奇兵:无限》中解决纹理模糊问题 如果你进入游戏后遇到纹理模糊的情况,别担心,按以下步骤操作即可解决: 1. 打开游戏文件夹,路径为:C: Program…
- 成就清单:《生化奇兵:无限》 — 成就猎人的100%游戏完成度所需的全部80项成就列表。这只是按主题排序的成就列表,是我尝试100%完成任何游戏前创建的第一个参考资料。可以打印出来,或复制到Wo…
- 所有收集品(视频+时间线) — 所有留声机、电影放映机和提取物
- 《生化奇兵:无限》完整俄语语音及纹理 — 《生化奇兵:无限》完整俄语本地化(主线剧情)。DLC《海葬》第一章至第二章。 预告片和评测 《生化奇兵:无限》俄语本地化项目页面
- 《生化奇兵:无限》全成就指南 — 这是一份详尽的100%成就指南,包含从0到100%的逐步流程。如果你正在寻找特定的成就或收集品,可以使用Ctrl+F并在搜索栏中输入相关内容以获取更直接的帮助。…
- 《生化奇兵:无限》中的删减内容 — 在《生化奇兵:无限》的最终版本之前,其开发商2K Games和Irrational Games曾提出过许多创意。本文旨在找出并记录所有未在游戏中实现或在最终版本…
- 1999年。生存,战术,建议。 — 在本指南中,我将介绍如何以1999难度,也就是硬核模式通关《生化奇兵:无限》。那么开始吧。 简短的前言
- 《生化奇兵:无限》中的所有秘密与彩蛋及寻找方法! — 《生化奇兵:无限》中所有可找到的秘密与彩蛋! 引言
- 成就"Экскурсант" — 全收集指南:所有活动电影放映机与望远镜位置 游戏中共有33台活动电影放映机和11台望远镜。 游客中心 活动电影放映机 - 3台 望远镜 - 1台 1) 进入城市…