换一换
换一换 


本指南包含一份逐步攻略,展示了资深玩家如何在《黑暗之魂2:原罪学者》中从零开始创建新角色。在本指南中,我将演示如何在单周目内完成所有NPC任务线(因为许多任务线都较为隐晦且容易错过),以及如何创建属性分配高效的角色。 简介 成功游玩《黑暗之魂2》的要素,一半在于技巧,另一半则是打造强大的角色。在本指南中,我将与你分享我的专业知识,教你如何做到这一点。提醒一下:将所有属性最大化以变得尽可能强大并非游戏的唯一玩法,最重要的是享受乐趣。 攻略信息 本指南假设你已具备《黑暗之魂2》的基本机制知识。一旦击败某个区域的 boss,该区域内所有 NPC 的任务线都将无法继续,因此在击败区域 boss 前完成该区域的所有任务线非常重要。 本指南强调在挑战每个 boss 前尽可能提升自身实力,通常建议先挑战较弱的 boss。你可以在相关攻略中学习轻松击败 boss 的策略。我建议大多数 Boss 战单人挑战,因为每召唤一个盟友,Boss 的生命值就会增加 100%。 升级策略 我在攻略部分详细介绍的策略是:从游戏后期区域收集楔形石,以便提前将武器升级到较高等级,然后收集香料来降低武器 buff 法术的属性要求,进一步提升伤害。在攻略中我使用的是细剑,因为它是游戏一开始就能获得的非常强力的武器,但你也可以使用任何喜欢的武器,只要调整装备使负重保持在 70% 以下。游戏后期,建议尽早前往 DLC 区域获取更好的细剑和一枚强力戒指。这些步骤是可选的。我在指南末尾的属性部分更详细地讨论了如何提升属性,但为了方便使用,我将加点顺序列在前面。如果你是新手玩家,我强烈建议每当你有足够的灵魂时,严格按照以下列出的顺序只提升下面列出的属性。 1. 将适应力提升至10。 2. 将活力提升至8。 3. 将敏捷提升至12。 4. 将生命力提升至20。 5. 将耐力提升至20。 6. 将适应力提升至17。 7. 将信仰提升至14。 8. 将智力提升至10。 9. 将专注提升至10。 10. 将敏捷提升至15。 11. 将力量提升至13。 12. 将信仰提升至25。 13. 将专注提升至13。 14. 将生命力提升至50。 15. 将信仰提升至40。 16. 将专注提升至30。 我在用鼠标和键盘,求助 好的,首先,保持冷静。《黑暗之魂2》的默认键位相当奇怪,即使与其他《黑暗之魂》系列游戏相比也是如此。若要调整键位使其与其他《黑暗之魂》游戏相似,请创建一个新角色并按照以下步骤操作。 要保存你的键位设置,你必须退出键位设置菜单,这意味着即使你将取消按钮从退格键改为Q,你也必须先按几次退格键才能保存设置。最后,自游戏发布以来存在一个bug,即即使你禁用了双击功能,每次启动游戏后仍必须打开键位设置菜单才能使该设置生效。以下是我推荐的键位更改。 键盘: 1. 将确认键设为E 2. 将取消键设为Q 3. 将功能1设为B 4. 将使用物品设为R 5.将互动设为E 鼠标: 6. 将右手攻击设为左键点击 7. 将左手攻击设为右键点击 8. 将右手重击设为Shift+左键点击 9. 将左手重击设为Shift+右键点击 10. 将使用物品设为左键双击 11. 将互动设为右键双击 12. 禁用双击 如蜜
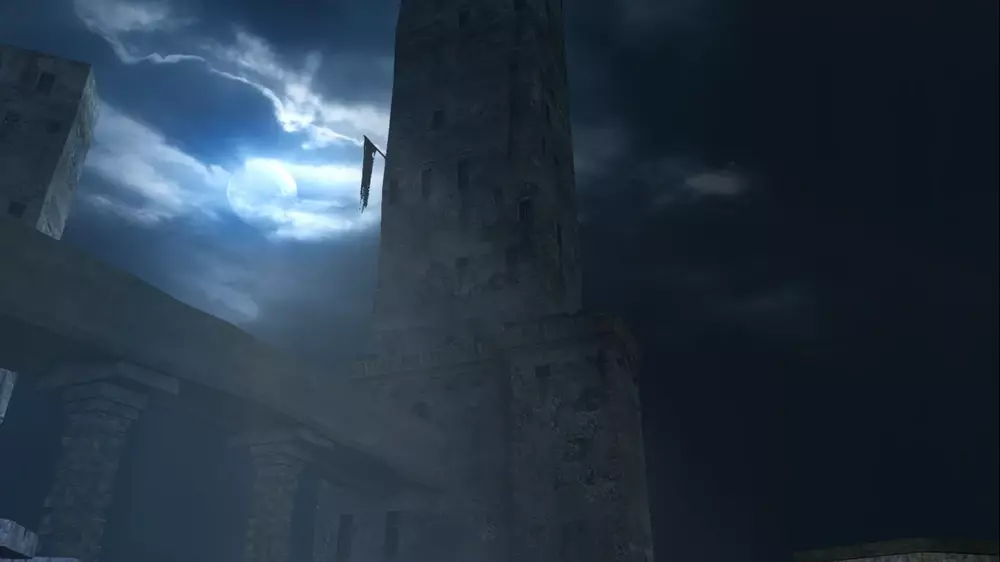
所有截图图片来源:黑暗之魂维基 fandom 依据知识共享署名-非商业性使用-相同方式共享3.0协议授权。 1. 开始新游戏后,你会出现在人口稀少的教程区域【无主之地】。如果你喜欢探索,可以在这个区域找到【黄金松脂】、【锈蚀硬币】和【小光滑丝绸石】,不过这些都不是必需品。这里还有一个食人魔,杀死它会掉落【石戒】,但你可以等以后变强了再回来拿,它并不重要。当你准备好并设置好按键后,进入【防火女】所在的房屋。 2. 与防火女对话,选择【骑士】职业。选择这个初始职业很重要,因为它拥有我推荐的build最高效的初始属性。它的初始装备也是最好的,不过这一点不太重要。我推荐选择生命戒指作为初始礼物,但你也可以选别的。要知道,有些玩家更喜欢体型娇小的女性角色,因为她们对视野的遮挡更少,不过这也不是很重要。记得双手持握阔剑以提升伤害。如果选择了生命戒指作为初始礼物,请手动装备它。离开前,上楼有一个宝箱,打开可以获得一个珍贵的人性雕像。 3. 防火女小屋的后门通向防火女的住所营火,穿过那里,有一条小路通往教程区域的其他部分。穿过道路两侧的两道雾门即可体验教程。每道雾门后都是一个小型区域,里面有一些弱小的敌人供你练习。完成后,沿着小路向上前往游戏的中心枢纽【麦酒拉】。
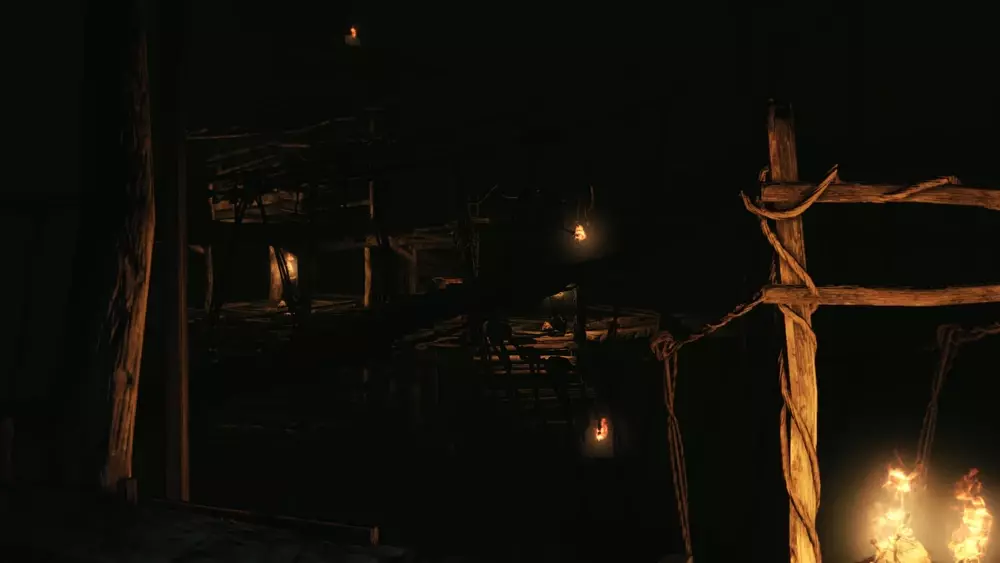
4. 到达【蜜酒镇】后,穿过左侧通往【黑森林】的隧道。道路被挡住了,但你可以和坐在关闭的大门前的【尤哥的本哈特】对话。从隧道返回,你可以从悬崖上走到一条隐藏的小路上,获得晨星锤和望远镜。 5. 沿着悬崖向上走,你可以点燃【蜜酒镇营火】。你可以随意在营火之间传送。【绿袍圣女】会在这里,和她对话可以获得【元素瓶】。这是你在整个游戏中会使用的可补充和升级的生命药水。现在你可以和【绿袍圣女】对话来提升角色等级。我在本指南末尾的属性部分详细说明了你应该提升属性的具体顺序。 6.沿着篝火旁的楼梯向上,你可以找到灰心的索尔登。与他交谈片刻即可加入青之守护者誓约。他会给予你青之印记:一枚与生命戒指类似、能提升最大生命值的戒指。记得装备这枚戒指。继续前进,篝火旁还有一间暂时无法进入的铁匠铺。在铁匠铺后方,那间门紧闭的房子里,你能找到商人甜蜜的夏奎尔。如果你想退出誓约,可以与她交谈。 7. 走过夏奎尔的房子,就是被锁住的蜜酒镇庄园,庄园前的水井是它的标志。注意不要掉进蜜酒镇正中央的深坑。攻击水井边缘顶部的石头,即可获得元素瓶碎片。再次与绿袍圣女对话,她会用这块碎片升级你的元素瓶,现在你可以在元素瓶耗尽前多喝几次。蜜酒镇的最后一栋建筑,位于夏娜洛的店铺所在庄园的另一侧,是铁匠莫格林的商店。你可以从他商店二楼的箱子里偷到一块楔形石碎片,他不会发现。 巨人陨落之森
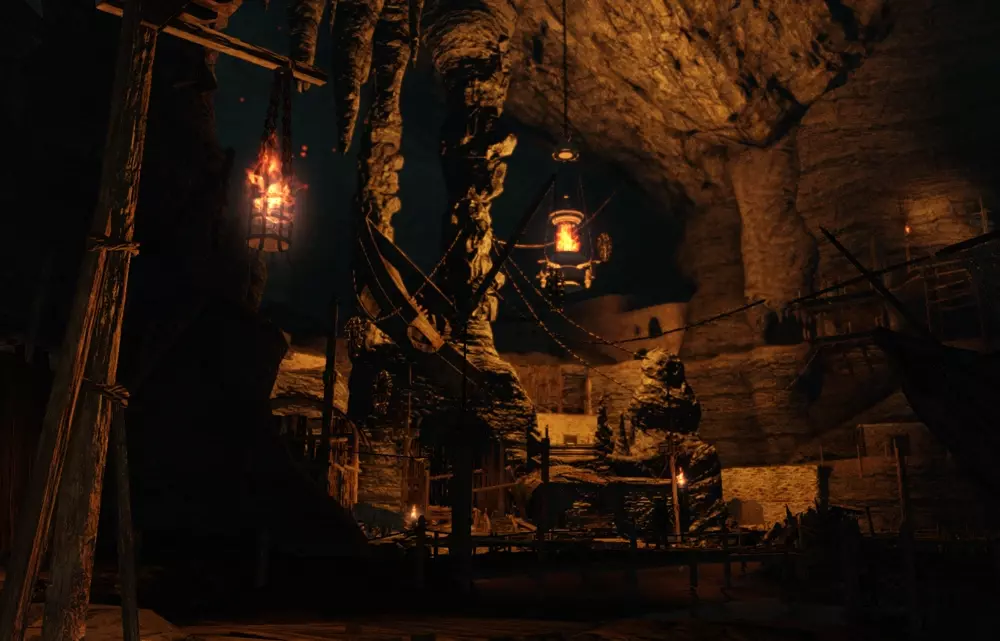
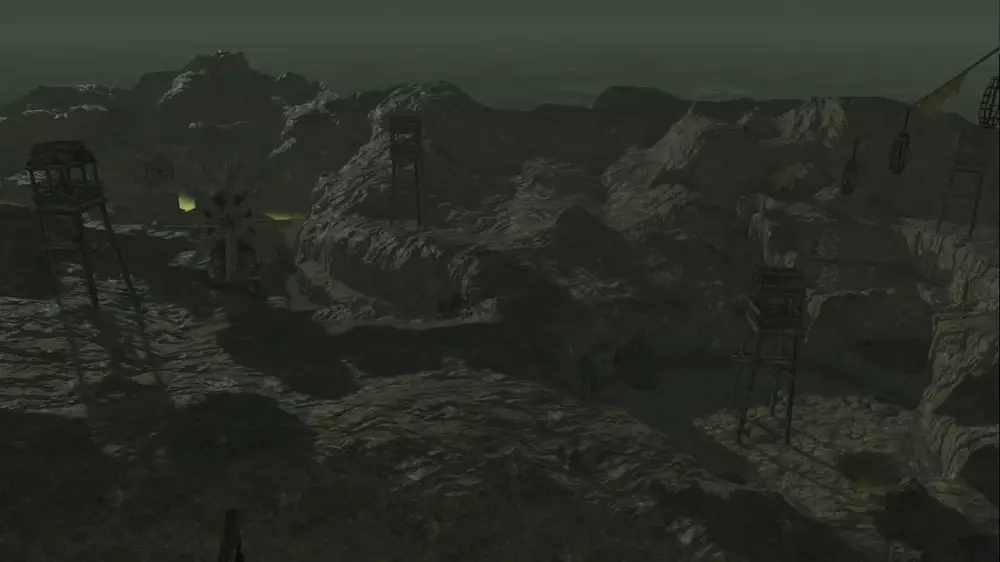
8. Head back to the bonfire. Opposite the direction of the monument is a path leading below the cliffside. This path underground takes you to the first main zone: the Forest of Fallen Giants. Past a large gate you’ll enter a cavern carved out by a river with a wooden bridge spanning it. Halfway across the bridge you can jump to a treasure chest sitting in the middle of the river which contains a human effigy. If your jump is short, you will fall to your death. Past the chest is an open area guarded by hollow soldiers and an ogre. You can run past the ogre if you don’t feel like fighting it. 9. Look for the Crestfallen’s Retreat bonfire along the right riverbank. Resting here will fully heal you, but also respawn enemies you have killed. Across a few wooden planks is a ladder leading to a circular area where a hollow soldier will pelt you with firebombs from above. There’s another ladder to your right that leads to the bomb-throwing hollow. The way forward is the doorway on the other side of the circular area that leads to a tunnel. 10. A set of stairs will take you out of the tunnel where you’ll spot a ladder. This takes you to the door to the Cardinal Tower bonfire and Merchant Hag Melentia. If you’re fast, you can climb the ladder without fighting the enemies who guard it. Buy Leningrast’s key from Melentia for 1000 souls. You can break down the door to the room upstairs by attacking it and loot the chest inside. There is also a crystal lizard in this room. These enemies drop valuable loot, and will run away from you and disappear unless you kill them first. If you miss one, rest at a bonfire and try again. 11. Optionally, if you head back out the tower door you first came in, you can drop down the cliff onto a wooden scaffold and down into a small zone. Here you’ll notice a cave where a fire longsword can be found, a weapon you don’t need. 12. Return to Majula and unlock Leningrast’s blacksmith shop with the key. Talk to him, then rest at the bonfire to get him to start working. Purchase the rapier from him for 1000 souls and equip it in place of your broadsword. Make sure you two-hand it as well for extra damage. Now have Lenigrast upgrade your rapier to +1. 13. Warp back to the Cardinal Tower bonfire and head down the ladder sticking out of the hole in the floor. To the left you’ll find a small room with a locked door, as well as the exit leading outside. Climb the ramp made of tree roots, then run past the enemies until you reach a stack of black barrels. Stand near them and a hollow soldier will detonate them with a firebomb. This will blow a hold in the wall, creating a convenient shortcut to the bonfire. Backtrack a bit, near the top of the roots is a ladder up to a platform where you can find an estus shard. Beware the Pursuer will ambush you here. Ignore him if you want, you will face him again later in a more advantageous location. 14. Head back to the tree root ramp and leap off the edge onto a rooftop. Be wary of archers scattered about and navigate down to the ground to collect a titanite shard. Climb back up to the rooftops, and jump across them in the direction of the top of the tree root ramp until you find a small cave. Enter it and talk to Cale the cartographer until he gives you the manor key. 15. From the Cardinal Tower bonfire, run out the hole in the wall and down the stairs this time. Enter the open doorway on the right, path around the ballistae pointed at the doorway, and jump down to the lower floor. There’s a booby-trapped chest containing a titanite shard here. Open it then jump away to avoid the trap. Finally, attack the nearby locked door a few times and it will be opened by the three hollow soldiers on the other side. Loot the chest they guard to get a large titanite shard and a duplicate life ring. 16. Warp back to Majula and use the manor key to enter the previously locked building. Loot a pharros’ lockstone from a corpse and three titanite shards from a chest. In the basement there is a chest containing an estus shard, bring it to the Emerald Herald to upgrade your estus flask. With the titanite shards you can have blacksmith Lenigrast upgrade your rapier to +4. If you have souls leftover from upgrading your weapon, or as soon as you can afford it, purchase the hard leather gauntlets from Maughlin the armorer for 940 souls. Equip these as they’re better than your starting gauntlets. Finally, return to Cale the cartographer in his cave and talk to him to get him to move into the manor. 17. Return to the room with the booby-trapped chest and insert the pharros’ lockstone into the stone face on the wall, which is called a Pharros’ contraption. This will spawn a spectral face on the same wall that you can attack to reveal a secret room. Loot the two chests in this room to get a titanite slab and the chloranthy ring, which you should equip alongside your other two rings. 18. Now leave that building and look to the right, you’ll spot mild-mannered Pate. Talk to Pate and head through the gate past him to meet the ambush. You’ll be funneled into a building. You’ll spot a corpse holding aromatic ooze, just past it at the bottom of the stairs is an illusory wall, a section of wall that looks real, but can be dispelled. To open an illusory wall you must touch it and press the interact button, “enter” by default, but I recommended setting it to “E” at the start of this guide. The wall should open revealing a sorcerer’s staff, which you’ll need later. Return to Pate and he will give you a small soapstone. 19. Head back towards the booby-trapped room and run past the minefield of explosive barrels and through a doorway. To the right is a locked door, so head left and open the gate leading back to the Cardinal Tower ladder. If you want to grab the rest of the loot in this area, head back to the explosive barrels and look for a ladder leading atop the stone wall in the middle of the zone. 20. Near the gate you unlocked below the Cardinal Tower is a lift leading down to the first boss: the Last Giant. Now is a great time to learn that walking behind bosses is a great way to dodge their attacks, and doesn’t cost stamina like dodging. You need all the stamina you can get to poke bosses with your rapier. Once the giant is slain you’ll receive the soldier’s key. 21. With the key in hand, return to the Cardinal Tower bonfire, climb down the ladder, and use the soldier’s key to open the locked door. Through this door is a small area containing the Soldier’s Rest bonfire. Here you can loot the leather gloves and the rest of the leather armor set, the gloves will come in handy later. Finally, return to the Cardinal Tower bonfire and use the soldier’s key to unlock the door past the explosive barrels. 22. Through the door past the explosive barrels you will encounter the second boss: The Pursuer. You can cheese him by baiting him in front of one of the ballistae, then shooting him twice with it. He’ll drop the ring of blades, which you should equip alongside your other three rings. Now head onward past the boss room and you’ll see you can jump down to the right onto a broken stone slab. Here there’s a corpse you can loot for the Drangleic mail and Drangleic leggings, which are both a big upgrade over your current armor. The Drangleic gauntlets are unfortunately too heavy to wear for now. Finally, make your way back to where you jumped off the ledge and you’ll find a crow’s nest. Interact with it to be transported to the Lost Bastille and the Tower Apart bonfire. Lost Bastille
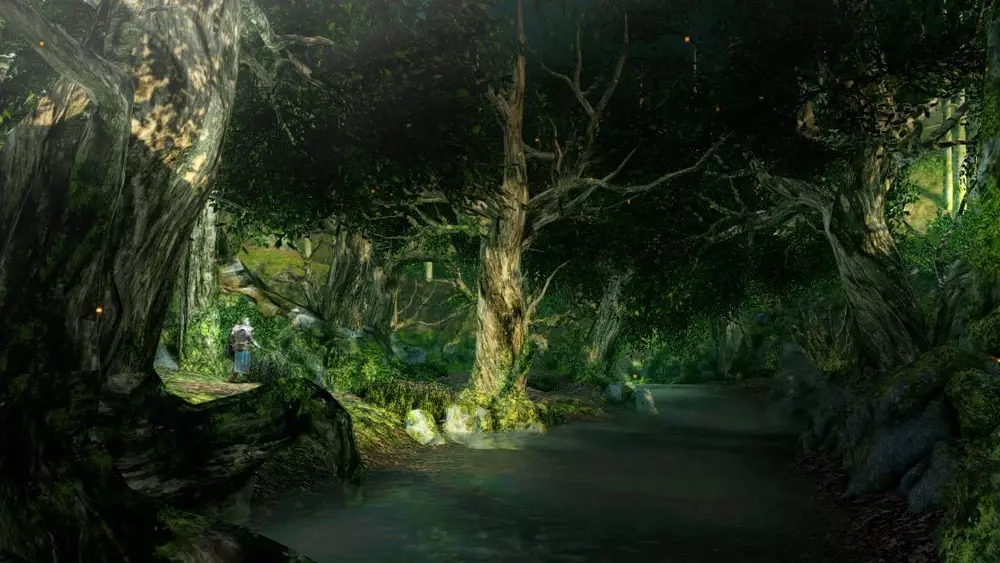
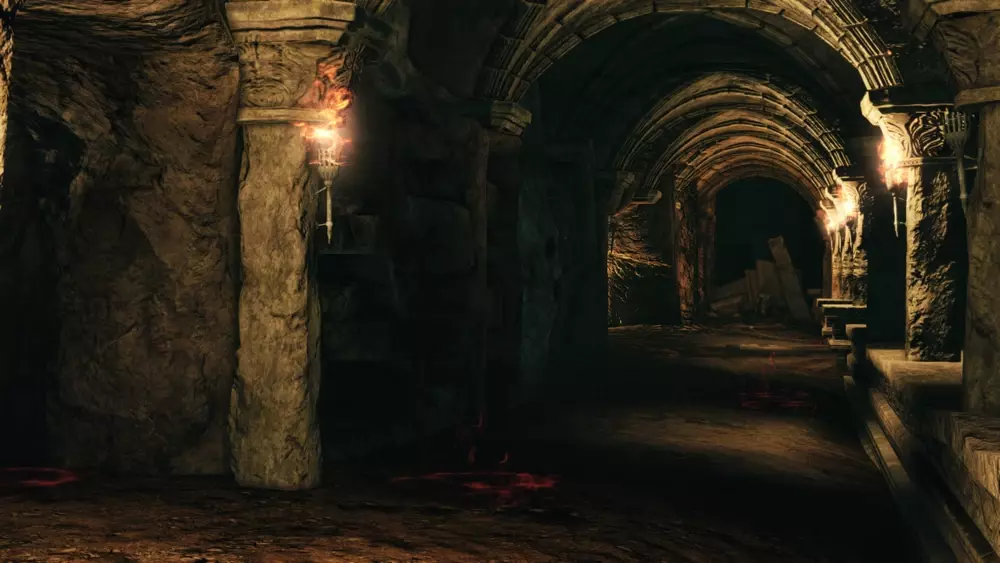
23. 从你旁边的其中一个宝箱中获取【黯淡余烬】,出门后立即右转,沿着建筑物的边缘前进。在边缘的尽头有一块【大块泰坦石碎片】。跳下去,从宝箱中拾取【贪婪银蛇戒指】和【昔日芳香之枝】。注意,【追击者】会在你身后出现,但如果你离开附近区域,它就会消失。将你的【蓝印】换成【贪婪银蛇戒指】。 24. 继续沿着路径前进,穿过一扇有 barricade 的门,与【蜜拉的鲁卡提耶】对话。从侧门出去,然后转身走上石制胸墙,爬上梯子到达鲁卡提耶所在建筑的二楼,在那里你可以拾取一块【大块泰坦石碎片】。 25.沿着小路跑,经过一名狱卒,然后将第二个狱卒正后方的爆炸桶推下楼梯。这会炸开楼梯底部的墙壁,露出【麦克杜夫的工作室】营火。营火旁边就是铁匠麦克杜夫工作室的门。在营火处点燃火把,用它点燃麦克杜夫工作室里的火盆。现在从麦克杜夫的箱子里搜刮两块大泰坦石碎片。在营火处休息,让麦克杜夫离开最后一个箱子,然后用2500灵魂向他购买一块大泰坦石碎片。现在让麦克杜夫将你的细剑强化至+6。最后,跑回楼梯,到你遇见露卡提尔的地方,从她留在箱子里的古旧钥匙。现在你可以传送回【蜜酒镇】。 【黑森林】

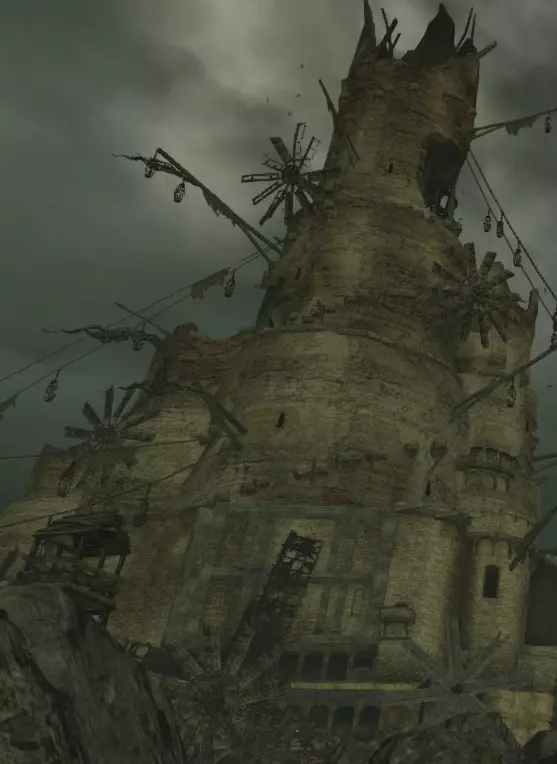
26. Leave Majula heading towards Things Betwixt and enter the tunnel to the Shaded Woods where you met Benhardt of Jugo. Use your fragrant branch of yore to unpetrify Rosabeth of Melfia. You need to give her a set of clothes for her to come to Majula. You can give her the imported set if you don’t want to part with anything valuable, or wait until you can give her something more stylish. Now talk to Benhart of Jugo so he knows the path is open. 27. Slay the two enemies hiding behind nearby doors, then pull the lever Rosabeth was blocking. This will cause several more enemies to ambush you. Dispatch them quickly, so when the gate finally opens you can focus on defeating the basilisk behind it. Past the gate, open the door on your left to find the Old Akelarre bonfire. The opposite door contains an estus shard. Take it to the Emerald Herald to upgrade your estus flask before continuing on. 28. At the end of the path you will find the ruined fork road bonfire sitting in front of a three-way fork in the path. The right-hand path takes you to the rest of the Shaded Woods. It’s difficult to see in this misty zone, and you will be stalked by practically invisible enemies. Enemies in the Shaded Woods are a bit over your level, but you can run through without fighting them. Hug the left wall until you climb a hill and come across the head of Vengarl of Forossa in a small clearing. Learn his gesture and talk to him several times and he will reward you with the helm of Vengarl. Put this on, this stylish helmet boasts high defense, and passively increases your vitality by two. 29. Starting again from the entrance to the misty area, if you instead hug the right wall you will find a chest containing the old sun ring, past it is a second chest you can loot the chloranthy ring +1 from. Swap this out for your base level ring. 30. Past the second chest is a hill leading to the Shaded Ruins where you’ll enter a long stone bridge. Turn around, and behind a ramp you can find the Shaded Ruins bonfire. If you jump out a window facing the direction you came from, you can reach a building where a Syan Knight guards a chest containing sublime bone dust. Burn it at Majula’s bonfire to increase the healing power of your estus flask. 31. At the end of the bridge, circle around and jump to the top floor of the bridge to find a chest containing a titanite chunk. Take this back to Majula and have blacksmith Leningrast upgrade your rapier to +7. 32. Warp to the cardinal tower bonfire and purchase a fragrant branch of yore from merchant hag Melentia for 12,000 souls. Talk to her several times and she’ll give you the covetous silver serpent ring +1. Swap it out for the base level version you’re wearing. Exhaust the rest of her dialogue and she’ll move to Majula. 33. Heading right from the end of the bridge, you can spot breakable boards covering a hole in the ground where weaponsmith Ornifex is locked up. Step on the boards to fall through them into the cave below, and beware of basilisks. Exit the cave onto a ledge where you’ll spot a petrified lion warrior. Use the fragrant branch of yore to unpetrify the lion warrior and kill it to get the fang key. Use this key to rescue weaponsmith Ornifex. Exhaust her dialogue and grab a fragrant branch of yore from her cell. 34. Above the ledge where the petrified lion warrior was, past the hole you fell down into Ornifex’s cave, are two towers guarding the road to the fog wall, you can loot a skeptic’s spice from one of the towers. In front of one of the towers is another hole in the ground you can drop down and talk to Darkdiver Grandahl. 35. Return to the bonfire and head left from the end of the stone bridge until you see a small building. Exit out the building’s basement door to find friendly NPC Manscorpion Tark’s area. The crystal lizard hiding here drops a boltstone that you need. The way forward is blocked by a petrified lion warrior. Unpetrify him with your fragrant branch of yore, past him is Vengarl’s body. 36. Vengarl’s body is a very strong enemy, however the rapier’s heavy attack is guaranteed to stagger him. Spam heavy attacks until he’s defeated. He drops the rest of Vengarl’s armor set. Equip Vengarl’s armor and Vengarl’s boots, but not his gloves. Instead you’ll need to equip the leather gloves in order to not be overweight. Finally, warp to McDuff’s workshop and have him infuse your rapier with lightning, which requires a boltstone. This should increase your damage against all but the most lightning-resistant foes. Heide’s Tower of Flame
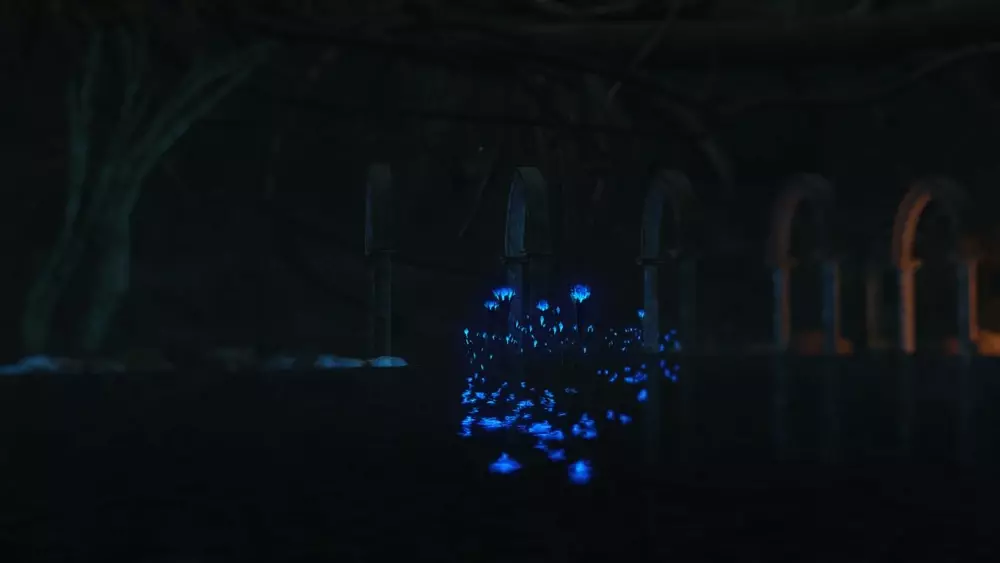
37. 穿过蜜酒镇宅邸旁的石制圆形大厅,即可到达海德巨火塔和海德废墟营火。该区域有大型古骑士和小型海德骑士。击败遇到的第三个古骑士会出现一个可拉动的拉杆。击败前方大房间内挥舞巨剑的骑士会出现第二个拉杆。拉动两个拉杆后,从大房间右侧出口出去,击败守护宝箱的海德骑士。宝箱内有束缚戒指。除非你是从不死亡的高手,否则将生命戒指换成束缚戒指。 38. 宝箱后面是一道雾墙,进入后击败龙骑兵。这是一场简单的战斗,只需待在他身后即可。在 boss 房间的顶层,你会找到【火焰之塔】营火和【林德尔特的莉西亚】。听完她的所有对话后,她会移动到【蜜酒镇】的圆形石厅。 39. 穿过【火焰之塔】后,就是前往【无人码头】的路。沿着这条路,你会发现一个由【希安骑士】守护的金属宝箱,里面装有【光辉楔形石】。在【蜜酒镇】的营火处烧掉它,可以提升你的【元素瓶】的治疗量。这条路的尽头有一个石化的敌人挡住了门口。在指南的下一部分获得【远古芳香树枝】后,你应该回到这里将他解除石化。穿过他之后,有一个装有【元素瓶碎片】的宝箱。点燃【通往海德的隐藏之路】营火后,返回【蜜酒镇】。 【阴沟】
40. 花费13400灵魂从【甜美的夏拉奎尔】处购买【银猫戒指】。装备该戒指后,你可以从【蜜酒镇】中央的深坑跳下,落在几根木梁上,从而抵达【阴沟】。装备【银猫戒指】时需暂时换下【贪婪银蛇戒指+1】,抵达【阴沟】后记得换回来。坠落受伤后记得喝【元素瓶】恢复。你会看到的第一个门通往【圣徒墓地】和【哈维尔的休息处】篝火,但无法从那里进入【阴沟】。你的目标是下方那个更难到达、通往【阴沟】的门。必须从【蜜酒镇】的顶部出发才能到达那里。 41. 进入通往【阴沟】的门,你会发现一座绳桥,桥上有一只【水晶蜥蜴】。向下跳并向左跑,然后击败守卫金属宝箱的希安士兵。宝箱内有崇高的骨尘。右侧的另一条路通向上层阴沟营火。这条路由木乃伊守卫,如果你不尽快杀死它们,它们就会爆炸。逃跑也是可行的办法。沿着木制结构向下爬,直到到达上层阴沟营火。 42. 阴沟和黑森林一样是高等级区域。这里也相当迷宫,因此可以考虑查阅相关资料来帮助导航。举着火把穿过阴沟,沿途点亮火炬。穿过两座绳桥后,有一座建筑,你可以下去,在一块木板上的尸体处找到昔日的芬芳树枝。别忘了像我之前提到的那样,在火焰塔篝火后面的区域使用这个分支路线。回到上层,穿过第三座绳桥,有一座带梯子的小塔。梯子底部附近有一个小突出平台,你可以从那里走下去,到达下方的隐藏平台。附近的罐子里面有一块楔形石原盘。继续往下走,能在一具尸体上找到元素瓶碎片。 43. 最终你会跳到一栋有雾门的建筑。建筑另一侧的墙壁上有一处可破坏的地方,打破后会露出 central gutter 篝火。建筑地板下方有几个梯子,大部分都是安全的。在阴沟底部,有可破坏的罐子,里面藏着黑溪谷的入口。进入黑溪谷后,你可以在黑溪谷入口营火前拾取另一根远古芳香树枝。
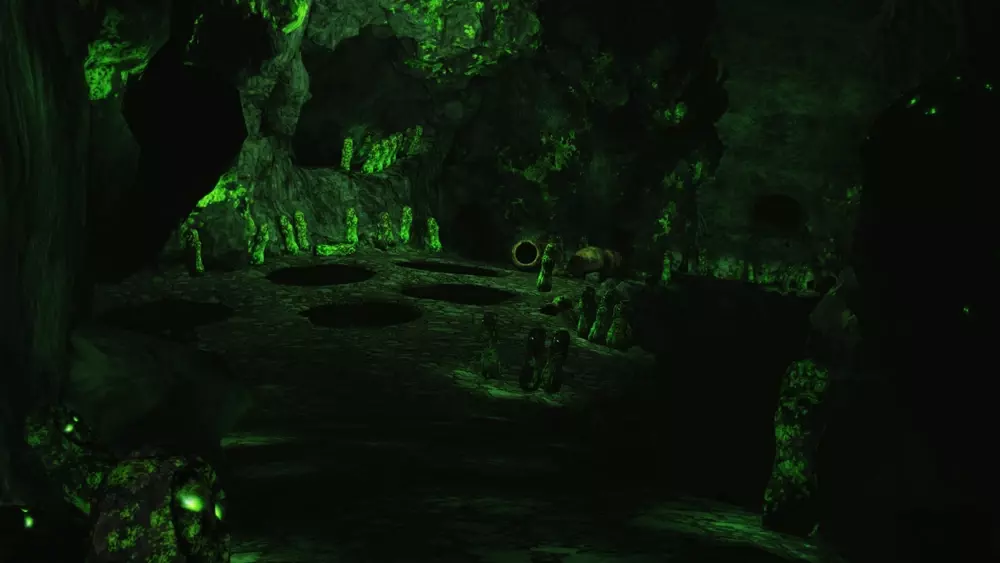
44. 在黑溪谷,吸魂鬼潜藏在油池中并会尝试伏击你。这个区域很危险,因为每座雕像都能向你喷射毒液。吸魂鬼有5%的基础概率掉落楔形石大碎片,可以刷取你所需的最后四个楔形石大碎片。完成后返回 Majula,将你的细剑强化至+10。如果你不想刷取,之后也能找到更多楔形石大碎片,但更高等级的武器会让一切变得更轻松。 45. 返回如蜜,使用思乡的树枝解除阻挡第三道雾墙的空心人的石化状态。在这里你可以从一个深坑底部拾取一个元素瓶碎片。这个区域栖息着许多石化蜥蜴,如果你不想之后购买,可以刷取它们来获得另一块楔形石原盘。 46.如果你回到巨人陨落之森的【主塔篝火】处,银猫戒指还有另一个用途。在通往【最后的巨人】 boss 房间的升降机旁,你可以跳进满是火蜥蜴的深坑。沿着隧道进入洞穴,你能从一具骷髅身上拿到【沉重铁钥匙】。不过现在不一定要这么做,你可以等到拥有更多生命值时再行动。 猎人森林
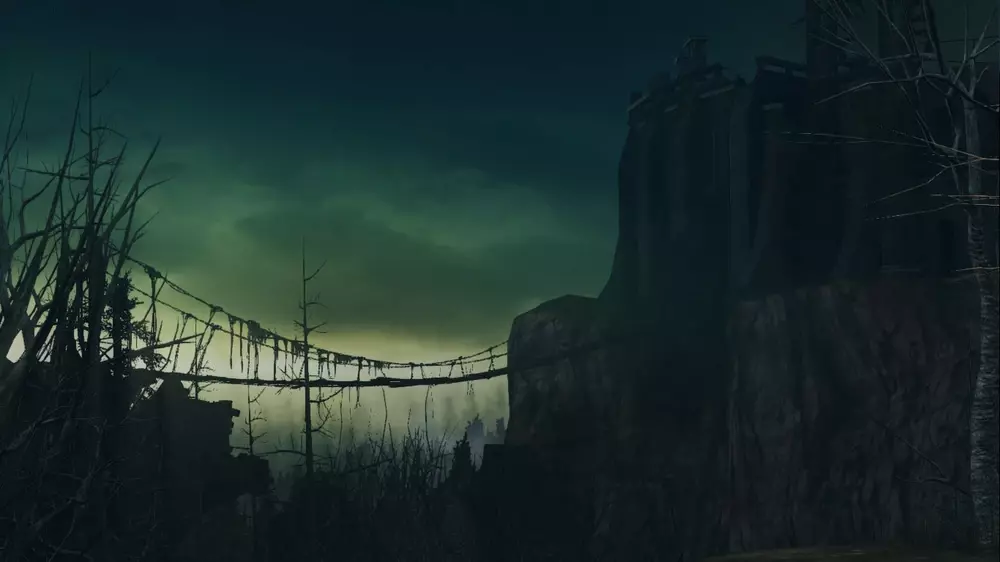
47. 在 Majula 的石制圆形大厅中与 Lindelt 的 Licia 对话,支付 2000 灵魂让她旋转大厅。这将开启通往 Huntsman’s Copse 和 Undead Refuge 篝火的道路。在篝火附近,你会发现被放逐者 Felkin。你需要 8 点智力和信仰,他才会向你出售法术。本指南稍后会提醒你,当你拥有必要属性时,从他那里花费 2700 灵魂购买黑暗武器。继续前进,穿过第一座大型建筑后,在断桥底部的凹处可以找到 Bridge Approach 篝火。从篝火出发,穿过人行桥,沿着向右弯曲的山坡向上走。你可以从边缘跳下,落到一个顶部有洞的圆形金属建筑顶上。建筑内有一个宝箱,里面装有崇高的骨尘。 48回到山顶,拉动拉杆放下金属桥,暂时忽略洞穴和上锁的建筑,而是穿过小桥,沿着悬崖边的小路前进。向左走的小路上可以拾取【不死囚笼钥匙】,但要小心入侵的NPC。继续沿着悬崖边前进,从后方进入洞穴。这里有一扇金属门,你可以从这边用拉杆打开。在门附近的尸体上可以拾取【元素瓶碎片】,附近的水晶蜥蜴会掉落【泰坦ite楔形石】(如果你还需要的话)。 现在返回洞穴前那座上锁的建筑,使用【不死囚笼钥匙】打开它,进入【不死囚笼】篝火处。与被困在这里的【流浪的克雷顿】对话,并听完他所有的台词。传送回阴影废墟,在巨大雾墙前最右侧的塔顶再次与克雷顿交谈。 无主之港
50. 你的装备应该已经足够碾压这个区域了。走上楼梯,在左边的建筑里你会找到米妲的鲁卡提耶,可以再次和她对话。从楼梯向右走,会发现一片被狗守护的空地。在这里的法洛斯装置中使用法洛斯之石,可以照亮整个码头。 51. 继续上楼,有一处悬崖,上面栖息着几只暗灵,通向几栋俯瞰码头的建筑。墙上有洞的那栋建筑里有一扇可疑的门。靠近门会触发一只暗灵破门而入,露出另一个房间。穿过这里有一个金属宝箱,里面装着巨剑,还有一个设有陷阱的木宝箱。 52. 走上一组楼梯,有一个平台,上面有一个拉杆,拉动后会召唤出载有区域Boss的船只。从这里跳下去,你会发现一栋建筑,里面有一根往昔的芬芳枝条。在区域的尽头有一座小建筑,你可以在那里找到商人“孤独的加尔万”。 53. 从这里你可以到达停泊着船只的码头,还可以放下一座桥,形成通往营火的捷径。“褶皱的卡利昂”坐在附近的码头上,但你需要8点智力才能和他对话,所以现在可以先忽略他。使用人性雕像来解除你的 Hollowing( hollowing 指角色的 Hollow 状态,即失去人性后的外观变化),这会让你看到召唤印记。在码头上找到“米拉的露卡提耶”的召唤印记并召唤她的灵体。如果在露卡提耶的灵体存活的情况下击败三个 boss,她之后会奖励你她的装备。如果她死了,你可以使用返乡骨片重试。现在前往远处码头的尽头,登上船只,击败灵活哨兵。穿过 Boss 房间后,你可以使用船上的导航装置将船航行至失落 Bastille。 失落 Bastille 第二部分 54. 乘坐电梯上去,然后在一间开放的牢房里找到流放者囚牢篝火。深入 Bastille,下一段梯子后是一个庭院,追击者会再次入侵你。在他追上你之前,向左跑,从箱子里拿到一个元素瓶碎片,然后拉动金属门旁边的拉杆打开门,创建一条通往麦克杜夫工坊的捷径。 55. 从麦克杜夫工坊出发,走上楼梯,使用一枚昔日香枝解除堵住门的王室剑士的石化状态。穿过这扇门后,你将遭遇 Boss 战:废墟哨兵。在这里采取积极进攻的策略会很有帮助。56. 击败三名哨兵后,在他们的 boss 房间内搜索四堵隐藏着战利品的幻影墙,然后从唯一的实体门离开,前往仆人宿舍篝火处。在这里你会找到一扇通往监狱高墙外的门。向左转,从悬在墙壁断裂处的一具尸体上拾取监狱钥匙。现在返回仆人宿舍,顺着梯子下到下层。击退会入侵你的追击者,使用法洛斯之石打开通往月亮钟楼的道路。在追击者附近可以拾取神父的圣铃,你之后会需要它。 57. 进入月亮钟楼后,你会遇到钟楼守卫 covenant 领袖。前往月之钟楼顶部,沿途收集三份怀疑者香料,最终你需要十一份这种香料。在钟楼顶部,敲响钟声以解锁钟楼石像鬼这个可选 Boss,击败它可以获得一些额外的灵魂。与废墟哨兵类似,这里建议采取主动进攻的策略。 58. 现在返回麦克达夫的工坊,击败或绕过追击者。他守护着一个房间,里面有会爆炸的木乃伊。使用从露卡提尔宝箱中获得的古旧钥匙,打开房间尽头的锁着的门,通往一个小庭院。绕过水井,爬上通往一座大型建筑窗户的梯子。经过一个法洛斯装置后,有一个笼式升降机。乘坐升降机上到一个满是爆炸木乃伊和可疑陶罐的房间。在这片区域你可以拾取到【怀疑者的香料】。你会看到一个巨大的门,旁边有一个拉杆可以打开它。这扇门通往【罪人塔】。 59. 从大门上楼梯,有一座雕像挡住了【史垂德的囚室】篝火。记住这个位置,稍后你需要回到这里为他解除石化。现在穿过桥梁前往【罪人塔】。进入雾门,然后爬上梯子到达【盐堡】篝火。
60. 乘坐升降机下去,使用【巴士底狱钥匙】打开所有锁着的门。在区域尽头,你可以用火炬点燃雾墙两侧的油。这样你就能锁定 Boss 了,考虑到细剑的攻击判定范围较小,这一点很重要。使用【人性雕像】后,【露卡提耶】的召唤符会出现在升降机底部。点燃油并让露卡提耶加入后,你就准备好挑战【失落罪人】了。记住,如果你之后想要露卡提耶的装备,若她死亡,你需要使用【返乡骨片】重置 Boss 战。击败失落罪人后,你可以从她守护的宝箱中拾取【芬芳的伊鲁席尔枝条】,并点燃【原初营火】。 61. 从【盐 fortress 营火】出发,返回穿过桥梁来到【失落 Bastille】,然后上楼。使用昔日的香木解除奥拉夫斯的史垂德的石化状态,并解锁史垂德的囚室营火。若你的智力达到3或以上,他会为你制作 Boss 武器。不过现在没什么用,因为你还没击败多少 Boss。先保留你的 Boss 灵魂,等确定要制作什么再说,大多数灵魂可以转化为两种不同的物品,你必须从中选择其一。由于这些物品很难获得,所以 Boss 灵魂不值得为了魂而消耗掉。 圣人墓地
62. 如果你还未解锁,再次跳下蜜酒镇的深坑,但这次进入第一个通往【哈维尔的休息处】营火的门。跑到这个小区域的尽头,击败可选 boss【王室鼠先锋】。在 boss 房间后面,你会遇到鼠王,它是鼠王誓约的领袖,你可以加入该誓约。 海德巨火塔 第二部分 63. 传送到【海德的废墟】营火。不要走右手边通往你之前击败的龙骑兵的路径,而是向左走,一路战斗穿过所有骑士,击败【地狱kite龙】。击倒龙后,会出现一个 lever(拉杆),放下吊桥,让你可以进入雾门。进入雾门并击败【古龙骑兵】。面对具有攻击性的 Boss,通常谨慎行事会更好。Boss 房间后面是蓝之 Sentinel 塔格雷,他是蓝之 Sentinel 誓约的领袖,旁边还有蓝之大教堂营火。塔格雷出售雷石,每个售价 7000 灵魂,但你需要先在狩猎森林拿到忠诚之证,他才会与你交谈。 暗影森林 第二部分 64. 返回麦酒镇,从甜蜜的夏库尔处花费 5800 灵魂购买低语戒指。传送到暗影森林,跑向蝎人塔尔克。装备低语戒指并听完他的所有对话。卸下戒指,前往该区域的雾门。如果你处于 Hollow 状态,可以选择使用人性雕像,之后你应该会在地上看到塔尔克的召唤印记。召唤他并进入雾门。击败蝎子女王娜吉卡。装备低语戒指后再次与塔克交谈,可获得往昔芳香树枝。现在返回娜杰卡的 boss 房间,前往法洛斯之门。法洛斯之门
65. 在穿过一名乳齿象战士后的小洞穴中,你会找到【巨人的休憩】营火。营火后方是一个由另一名乳齿象战士守卫的大房间。他旁边的地面上有一个【法洛斯装置】。使用【法洛斯之石】激活该装置,会打开墙上石门的底部。这里的空间足够你挤过去,然后与另一名守卫宝箱的乳齿象战士战斗,无需在其他装置上浪费【法洛斯之石】。宝箱内是【桑蒂亚尔的长矛】,一件可选武器。 66. 大房间的另一端有一个梯子,通向一条狭窄的小路。沿着小路没走多远,有一个设有陷阱的凹室,里面的宝箱中装有【楔形石原盘】。继续沿着这条小路前进,会到达【试炼终点】营火和可选 boss【王室鼠王先锋】。我建议你为这场战斗带上一些毒苔藓团。如果你能在 Boss 杀死你之前消灭王室鼠王的毒鼠仆从并治愈自己的中毒状态,这场战斗就会很简单。Boss 被击败后,返回巨人的休憩营火。爬上楼梯会带你进入下一个区域:辉石镇盖多勒,以及王室军队营地营火。
67. You’ll find yourself in a large field guarded by falconers. There’s a well at the far end of the field you can jump inside. A tunnel will lead you to a building containing a mimic you can fight. If you reverse your hollowing with a human effigy, in a nearby tent you’ll find Benhardt of Jugo’s summon sign. 68. Similar to Lucatiel of Mirrah, if Jugo’s phantom survives three boss fights he’ll give you his gear later on. Head down the road and through the spider cave until you reach a fog wall. Defeat the Prowling Magus and Congregation. Focus on the enemies that can cast spells first in this fight. Leaving the boss room you’ll spot a cave to the right and the Chapel Threshold bonfire inside of it. You can climb a ladder on the outside of the boss room to reach Cromwell the Pardoner’s room. He sells various things, but you’re after the skeptic’s spice you can loot from his room. 69. Head out of the cave with the bonfire and jump off the ledge onto the lower area with a doorway, then run to the right onto a wooden platform. Below the platform is a hollow mage who is probably shooting at you. Drop onto him, dispatch him, and loot an estus shard from the structure beside him. Return to the Chapel Threshold bonfire and you can take the two ziplines down to another cave, drop down, and you’ll find the Lower Brightstone Cove bonfire. 70. Warp back to the Chapel Threshold bonfire once more. After jumping off the first ledge, if you instead go through the doorway, you’ll come outside to another area. Here you can see a long, wooden walkway leading to a large building full of spiders. Inside the building, the lever on the left will reveal a ladder. Climb it and drop down the spider webs until you reach the fog wall. Don’t miss the simpleton’s spice near the fog wall, you’ll need to collect six of these eventually. 71. Enter the fog wall and defeat The Duke’s Dear Freja. Kill its minions first, then you’ll find you can only damage this boss by attacking its two heads. Play cautiously, as the heads are dangerous too. Continue past the boss room where you can dispatch the Duke of Tseldora and steal his fragrant branch of yore, and then light the primal bonfire. 72. Now warp back to the Shaded Woods, and use the ring of whispers to talk to Manscorpion Tark again. He will now give you the second dragon ring. Equip it in place of the ring of binding, and equip the Drangleic gauntlets. Black Gulch Part Two 73. Back in everyone’s favorite zone, light a torch at the Black Gulch Mouth bonfire, and just before the first tar pools, drop down to a hidden platform below the ledge where you can talk to Lucatiel of Mirrah. Past the first tar pools is a narrow spot where cragslippers pop out of the wall and try to push you off the cliff. Stand between the two cragslippers and carefully walk off the cliff onto a hidden platform below. You’ll spot a stone door in the cliff face. Facing the door, hug the wall and walk off the right-hand side of the platform onto a narrow ledge below. From this ledge, walk in the opposite direction onto a second platform where there is a cave in the cliffside. 74. Two great giant warriors inhabit this cave and are each formidable foes. Run into the cave to get their attention, then bait them out to the entrance of the cave. They cannot leave the cave, allowing you to employ a hit and run tactic to combat them. Once you defeat the first giant, the second should be easy. Upon defeating both you will receive the forgotten key. There is a lift in the giant’s cave you can use to leave. Now head back to the cragslippers, drop down onto the first ledge, and use the forgotten key to unlock the stone door. Here you can talk to Darkdiver Grandahl again. 75. Make your way back to Majula and decent the pit one last time. Between the doors to the Grave of Saints and the Gutter is a pair of locked stone doors you can unlock with the forgotten key. Inside is the dragon talon, which you need to access the Crown of the Sunken King DLC. There is another locked door near the Upper Gutter bonfire you can open with the forgotten key, but you don’t need any of the loot within. 76. Past the cragslippers, hug the cliff on the right and use a fragrant branch of yore to unlock the Hidden Chamber bonfire. Consume a human effigy and near the bonfire you’ll spot Lucatiel’s summon sign. Now you can enter the fog wall and defeat The Rotten. His arms can be destroyed if you hit them enough, limiting his moveset. Now you can light the primal bonfire. 77. These next two steps are optional, but they offer a permanent damage boost if you’re interested. Return to the primal bonfire and you’ll notice a glowing obelisk you can interact with. This will warp you to the Crown of the Sunken King DLC. You’ll be faced with a huge door you can use the dragon talon to unlock. Past this door is Shulva, Sanctum City, and the Sanctum Walk bonfire. I discuss this area in more detail towards the end of the walkthrough in the Shulva, Sanctum City section. DLC areas are balanced for endgame-level players, so my advice is to run through, climbing down every staircase you can find until you reach a narrow bridge leading to a massive structure. This is the Dragon Sanctum. 78. Make your way through the sanctum, past a circular, revolving, stone door, until you reach a staircase in a narrow, gray, corridor with a high ceiling. There’s a hole in the floor where you can drop down. You’ll fall into a room full of corrosive egg crawlers, fun! There’s a ladder in this room that leads to an iron chest containing Flynn’s ring. This unique ring increases your physical damage by up to 50 if your maximum equipment load is 60 or less. You can swap this out for your ring of blades. Huntsman’s Copse Part Two 79. From the Bridge Approach bonfire, cross the first footbridge, then make a sharp right and cross a second bridge. Climb the hill past an ambush, until you reach a large rope bridge. You can drop down the right side of the bridge onto a small platform and loot a token of fidelity to show Blue Sentinel Targray. Now cross the rope bridge and enter the Undead Purgatory. Now you must defeat the Executioner’s Chariot. Hide in the inlets in the walls from the chariot and make your way forward until you reach a lever that lowers a gate. The chariot will crash through the gate and you’ll be able to fight it. It’s an easy fight if you stay beside it and not in front. Past the boss is Titchy Gren who leads the Brotherhood of Blood covenant that you can join. 80. Warp to the Undead Lockaway bonfire, pass through the cave, and enter the fog wall. Now it’s time to defeat the Skeleton Lords. You’ll find alluring skulls are useful in this boss fight. Now continue on, across a metal bridge, to Harvest Valley. Harvest Valley
81. 进入【丰收谷】后,你会在【毒池营火】附近遇到石匠商人克洛伊安妮。听完她的所有对话后,她会前往【麦酒镇】。在接下来的区域,第一个毒池坑的洞穴里可以拾取【远古芳香树枝】。你还能在附近的洞穴中找到加尔万,听完他的所有对话后,他会永久移居到【法洛斯之门】。 82. 在山谷中途,你会发现一个狭窄的洞穴,里面有【矿场营火】。过了这个营火,有几个可以跳下的洞,在那里可以拾取【愚者香料】。前方区域的一条隧道里还有另一个【愚者香料】,由挥舞镰刀的不死猎人看守,此外还有一个【智者香料】。下一个区域【土之祭坛】是一座大型风车,有一座小桥通向那里。在桥的尽头,走左边的小路,通往一座破损的雕像。你可以与雕像互动,加入太阳后裔誓约。 土峰
83. 穿过土峰的入口,在建筑底部与蜜拉的鲁卡提耶交谈,可获得钢铁防护戒指+1。楼梯附近有一个小缺口,那里有一只毒甲虫守卫着。杀死它,在它身后可以拾取怀疑者的香料。现在进入雾门,击败贪婪恶魔。这是一个你可以站在它身后攻击直至其死亡的 bosses 之一。 84. 经过恶魔,穿过一座桥,你会找到土峰中央营火。在营火处点燃火把,然后点燃风车,以清除即将到来的 boss 房间内的毒气。上楼梯,在建筑外面的一个 ledge 上可以找到梯子铁匠吉利根。花费 2000 灵魂向他购买一个梯子,并听完他的所有对话,这样他就会前往 Majula。之后你可以在蜜酒镇向他购买三个梯子,以便更轻松地穿越深坑。在你遇到吉里甘的附近,可以拾取一份愚者香料。 85. 返回土之祭坛,经过吉里甘和一个设有陷阱的地板后,你会找到温厚的帕特。他的房间旁边有一个 ledge,你可以跳下去落到帕特房门后面的平台上。从那边打开门,再次与帕特交谈并耗尽他的对话。返回辉石镇塞尔多拉,从礼拜堂入口营火处跳下 ledge。进入门道,你会看到温厚的帕特正在与米拉的克雷顿战斗。杀死其中一人,另一人会奖励你一把钥匙,用于打开木制走道前区域的一扇锁着的门。现在返回土之祭坛,爬到顶部找到雾门。86. 使用人性雕像恢复肉身状态,然后召唤小丑托马斯,他的召唤印记在雾墙旁边。现在进入雾墙,击败怨毒女王米妲。托马斯会在这场战斗中承担大部分输出。 钢铁要塞
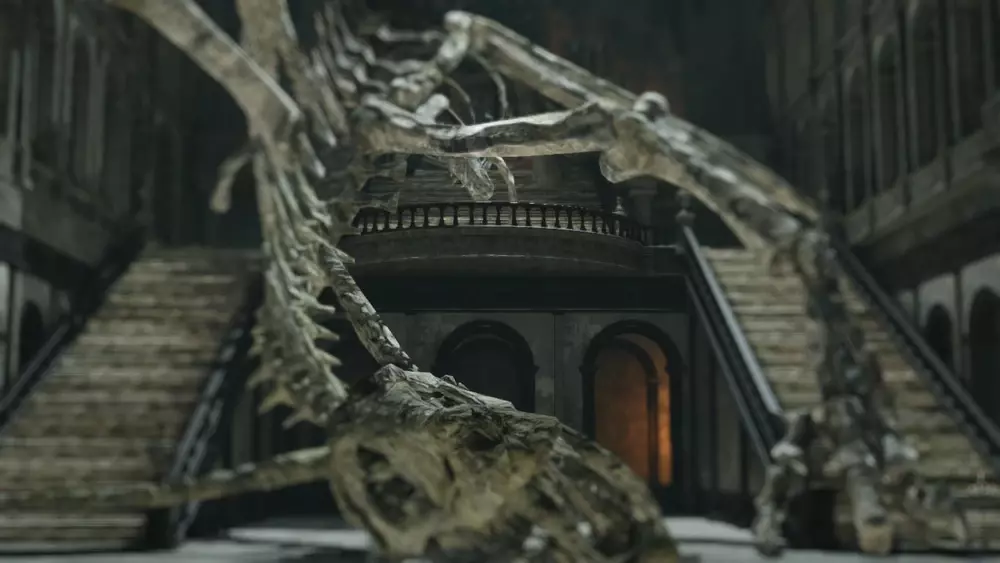
87. 穿过米妲的 Boss 房间后,有一部电梯可通往“ threshold bridge ”篝火。过桥进入要塞后右转,即可找到商人“拉纳菲尔的马杰尔”。他出售“往日圣枝”,价格为 7500 魂。也花 2500 魂购买一个“修理光粉”,因为当你从他那里购买价值 10000 魂的物品时,他会送给你“贪婪金蛇戒指 +1”,这在后期很重要。马杰尔还提供一项特殊服务,你可以花费“香料”来降低某个法术的属性要求。 88. 在马杰尔所在位置前方的下一个开阔区域,右转走上铁桥,然后左转到达一道雾门。在这里你必须击败“熔铁恶魔”。与这个 Boss 战斗时你应该谨慎行事。如果卢卡提耶在你击败其他三个可召唤她的 Boss 时仍存活,她的召唤印记会出现在雾墙附近。在铁之回廊篝火处休息后,转身返回熔铁恶魔的 Boss 房间,与追击者战斗。这次追击者会掉落【刃之戒指+1】。当你达到 150 级或任何你满意的等级后,就可以装备这个戒指来替代【贪婪银蛇戒指+1】。 89. 经过铁之回廊篝火并穿过铁桥,你会在右侧发现一扇门,门后有一个法洛斯机关。使用法洛斯之石在此生成一个梯子,爬上去即可到达太阳钟楼。你可以快速通过该区域,拾取这里的三个【愚者香料】,并敲响钟声。出口会将你传送回钢铁要塞。 90. 如果你一直按照本指南的属性加点部分进行加点,且等级达到67级或以上,那么你应该已经拥有10点咒术栏、10点智力和14点信仰,满足施放法术的要求。传送到无人港,与卡里姆的卡里隆交谈,让他移动到麦酒镇。接下来,前往狩猎森林的不死人避难所营火旁,找到异端者费尔金。向他购买【黑暗武器】咒术,花费2700灵魂。 91. 现在返回钢铁要塞的拉纳菲尔的马杰洛德处,使用6个愚者香料将【黑暗武器】的智力需求降低至10点。然后将你的多兰古雷格护手换成硬皮护手,并在副手装备魔法师杖。在营火处,装备【黑暗武器】咒术。现在,如果你使用本应是【N】键的按键来取消双手持握 rapier(细剑),你可以右键使用暗术【暗武器】为其附加 buff,使每次攻击增加50点暗属性伤害。记得在附加 buff 后再次按下【N】键,因为细剑在双手持握时威力更强。仅10点智力的情况下,【暗武器】的持续时间约为25秒,而若你有16点智力,则可持续57秒。不过这没关系,因为在篝火处休息前,【暗武器】可以施放4次,而且它通常是为 boss 战准备的。 92. 穿过法洛斯机关后,是一条悬在熔岩上方的大型铁质走道,走道后方有一个拉杆,拉动后会出现一架梯子。如果你爬上梯子,可以找到一个愚者香料,以防你之前错过了一个。这个房间的远端有一道雾墙,通向一段楼梯和一条隧道。隧道尽头是一个布满陷阱和尖刺的房间。房间里有一架梯子,梯子顶端是【艾吉尔的偶像】营火,还有一个能关闭钢铁要塞所有火焰喷射器的拉杆。 穿过现已停止运作的火焰喷射器后,有一扇通往室外的门。继续前进到雾墙处,击败【铁之古王】。战斗时要谨慎,这个 Boss 会有输出窗口,其余时间应专注于躲避。击败他后,务必点燃原初营火。 现在你已集齐四个古老灵魂,分别是【失落罪人】、【腐败物】、【公爵的宠儿弗蕾雅】和【铁之古王】,可以返回黑森林的【废路】营火了。 【多兰古雷格城堡】
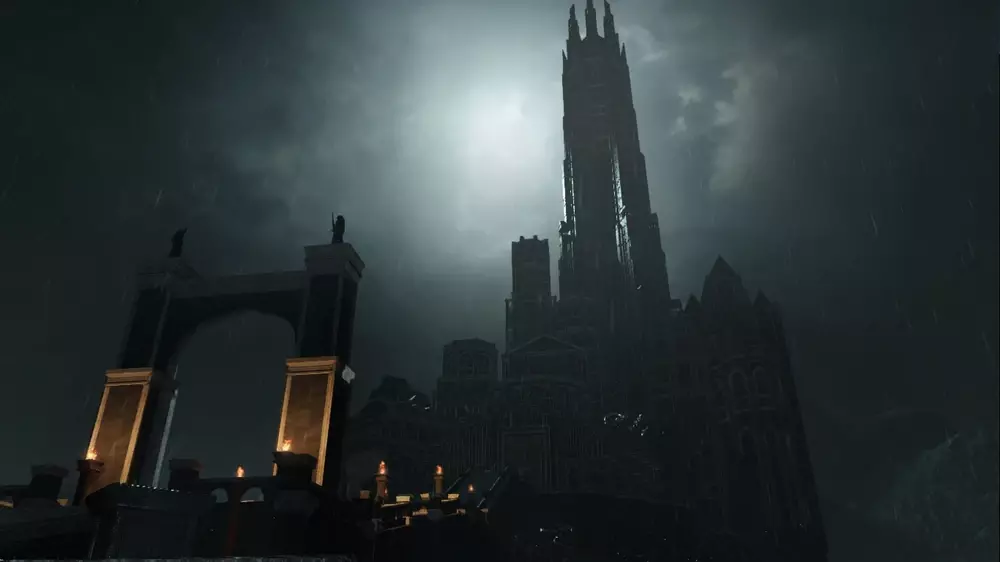
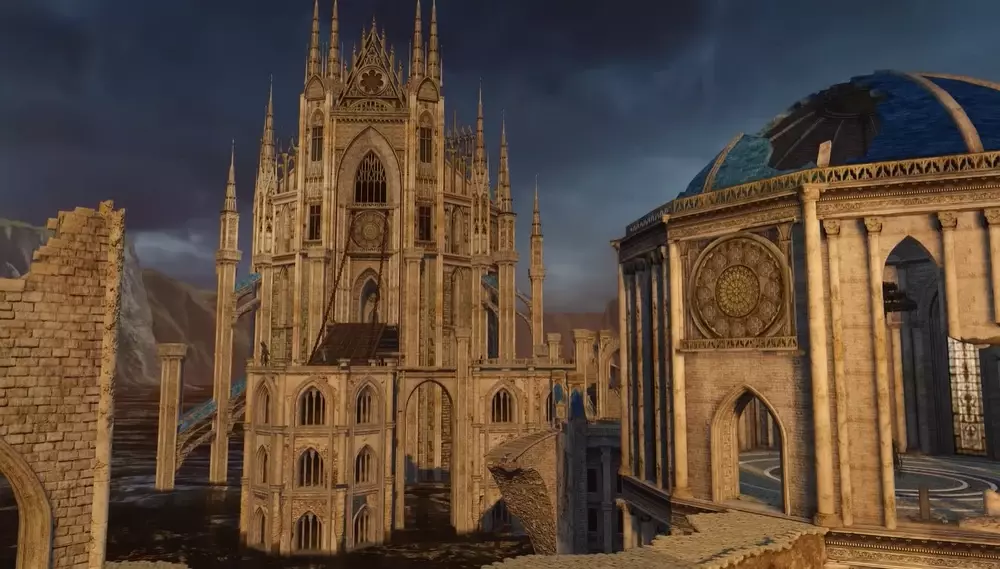
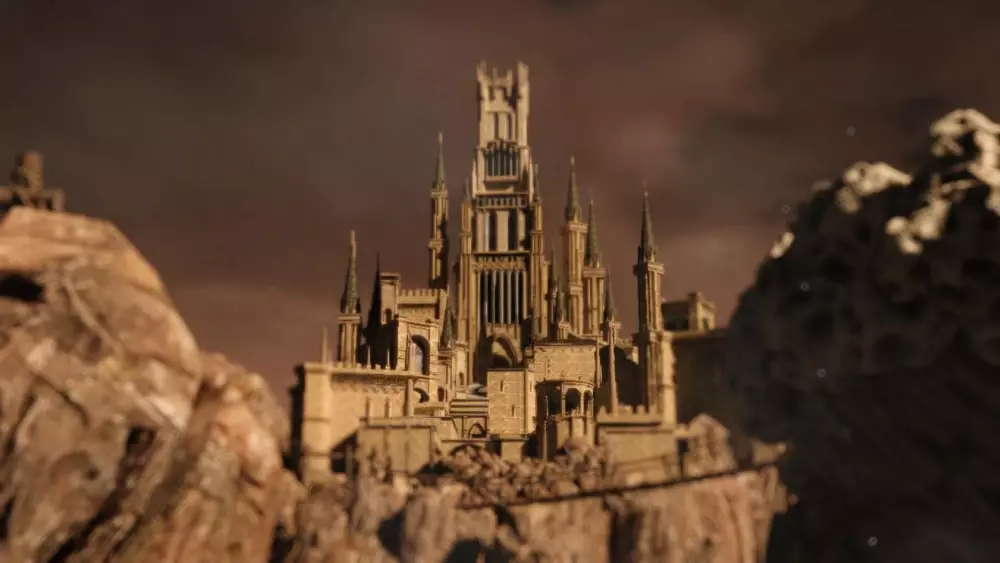
94. Take the left path from the Ruined Fork this time, which leads to the Shrine of Winter. This small building acts like a gate and will open in the presence of the four old souls. Past the shrine is the road to Drangleic Castle. To enter the castle, you will need to kill an enemy near each of the two golem statues. The golems are powered by the souls of the slain and will open the castle door for you. At this point in the guide, the path forward is pretty linear. 95. Enter the castle and talk to Chancellor Wellager on the staircase. After exhausting his dialogue he will become a merchant. Back up to the door and head left past the staircase. Spot a Syan knight blocking a door and defeat it. Loot the chest behind the door for an undead bone shard. Burn it at Majula’s bonfire and your flask should be +5: healing the maximum amount per use. There’s a ladder at the other end of the hallway leading down to the King’s Gate bonfire. 96. Past the bonfire is a room full of petrified soldiers, with three locked doors each on the right and left walls. Walking near some of the soldiers will unpetrify them. Kill one of them near a locked door to open it, similar to how the golems work. When you first enter the room and turn to the right, the rightmost door is the way forward. Past this door you can loot the frozen flower from a corpse. Most of the other doors hide a Ruin Sentinel and some treasure. 97. On the opposite wall open the rightmost door, furthest from the way forward, to reveal a hole in the floor. Drop down to reach the Under Castle Drangleic bonfire and talk to Darkdiver Grandahl for the third time. He will invite you to join the Pilgrims of the Dark covenant and will open the way to the Dark Chasm of Old. Don’t enter the Chasm yet though, instead warp to the Ruined Fork Road bonfire. 98. These next two steps are optional, but will result in you having an even better weapon than the rapier. From here, return to the Shrine of Winter and interact with it to warp to the Crown of the Ivory King DLC. You’ll notice a locked door that opens in the presence of the frozen flower you picked up, revealing Frozen Eleum Loyce, and the Outer Wall bonfire. Swap your covetous silver serpent ring +1 for your covetous gold serpent’s ring +1 you got from Magerold of Lanafir. Past the Outer Wall bonfire is a fork. Left leads to a boss fight, instead go right. The first few enemies here have a chance to drop the ice rapier that they wield. This weapon is a direct upgrade to the rapier in most circumstances. Once the ice rapier drops, swap back to the covetous silver serpent ring +1. 99. Once you find an ice rapier, warp to McDuff’s workshop and have him infuse the ice rapier with lightning. Purchase a boltstone from Blue Sentinel Targray in the Cathedral of Blue if you don’t have a boltstone. Now upgrade the ice rapier to +5 or as high as you can. You need 15 twinkling titanite in order to level it to the maximum +5. If you don’t have enough twinkling titanite yet that’s just fine, keep using the regular rapier for now. You’ll be able to farm as much titanite as you need very soon. Once your ice rapier is +5, equip it in place of your regular rapier to enjoy a sizable damage in range increase. 100. Now return to the King’s Gate bonfire in Drangleic Castle. Past where you looted the frozen flower, climb the staircase that looks over the poison pool. Towards the top you should spot a ladder you can climb down. Near the base of the ladder is an illusory wall hiding the Forgotten Chamber bonfire. Now climb back up the ladder and continue to the throne room where you can talk to Queen Nashandra. Past Nashandra is a fog wall, enter it and defeat the Dragonrider Duo. The second Dragonrider with a bow has much less health than the main one. 101. Past the boss room is the Central Castle Drangleic bonfire where you can talk to Benhart of Jugo. Further down the corridor is a tall ladder leading to a room with a golem. The next room contains two metal chests and two assassins defending them. Kite the assassins back to the golem and kill them in order to activate it. Now head past the metal chests into the large cathedral. You’ll have to defeat another Executioner’s Chariot before you can leave out the cathedral’s main doors. Walk down the stairs and open the wooden door. Inside this small building is a chest guarded by two desert pyromancers. Defeat them both and loot an estus shard from the chest. You should now have the maximum 12 estus flask charges. 102. Return to the base of the tall ladder and take the now activated lift up to Milfaneto. Loot the key to King’s Passage from one of the chests in her room and use it to open the locked door at the base of the lift. Head through that door, and if you reverse your hollowing with a human effigy, you’ll spot Benhardt of Jugo’s summon sign next to a fog wall. Now enter the fog wall and defeat the Looking Glass Knight. Strafe around the knight’s right side so he doesn’t block your attacks. You want to be aggressive and kill the knight quickly. With the knight out of the way you can take the lift down to the Shrine of Amana and the Tower of Prayer bonfire. Shrine of Amana
103. 篝火附近有一条被可破坏树枝覆盖的短路径,你可以在那里拾取一块光辉楔形石和一份怀疑者香料。走出神社,你会看到一条通往一间小屋的路。与小屋内的米法尼特交谈,并在她旁边拿起另一份怀疑者香料。沿着路径继续前进,穿过一个洞穴,就能在一座废墟建筑中找到【崩塌遗迹】篝火。 104. 该区域的古龙朝圣者和阿玛纳女祭司都有几率掉落光辉楔形石。当你清理完这个区域后,如果你还没有足够的材料,就从它们身上刷取【光辉楔形石】,直到凑齐15个,将你的【冰刺剑】完全强化到+5以便装备,然后再刷36个来强化【凡荷尔套装】的盔甲、头盔、腿甲以及【多兰古雷格臂甲】到+5。记得在刷材料期间,将【贪婪银蛇戒指+1】换成【贪婪金蛇戒指+1】。如果你不想刷太多材料,暂时将盔甲保持在+4也可以。 105. 篝火旁的道路继续向前延伸,你会注意到左边有一座由龙骑兵守卫的桥。记住这个位置,你之后还需要回到这里。桥对面是一个被水遮蔽的狭窄平台,由一名食人魔看守。这条路的尽头有一个元素瓶碎片(如果你之前漏掉了的话),还有一个宝箱,里面装着阳光之剑奇迹。回到主路并沿着它走到另一间小屋,小屋右侧的岔路上有一个同样被水遮蔽的宝箱,里面装着火焰风暴咒术。经过小屋后,主路通向另一个洞穴,里面有罗伊的安息处篝火。篝火旁是一片圆形区域,你可以在水中找到最后一份怀疑者香料。 106. 如果你的信仰至少达到25级,传送到钢铁要塞的拉纳菲尔的马杰洛处,使用11份怀疑者香料将阳光之剑奇迹的信仰需求从36降低到25。要施放该法术,你需要装备牧师圣铃来替换巫师法杖,这样就能腾出足够的装备重量来装备多兰古雷格护手。阳光之剑是比暗武器更好的伤害 buff,因为每种类型的伤害会分别受到敌人防御力的减免,而且你本身已经在造成雷电伤害了。阳光之剑的缺点是只能施放一次,而暗武器可以施放四次。你可以根据需要在它们之间切换。 107. 接下来的神殿区域守卫森严,但距离雾门不远。你必须进入雾门并击败歌唱恶魔。你只能对恶魔的面部造成伤害,利用它面部被遮挡的时间进行治疗。击败恶魔后会开启通往电梯的道路,乘坐电梯可前往不死灵庙,电梯旁的塔内还有【死者复苏】营火。 108. 击杀歌唱恶魔后还会掉落【嵌入者钥匙】。返回多兰古雷格中央城堡营火,乘坐电梯上楼找到米尔法尼托。使用【嵌入者钥匙】将她从笼子中救出。如果你需要神圣祝福,可以回到祈祷之塔营火旁小屋找米尔法尼托,而【死者复苏】营火旁的米尔法尼托会给你一个火焰种子。现在乘坐附近的电梯前往不死灵庙入口营火。 不死灵庙
109. 不要在该区域点燃火把,否则墓卫阿格戴恩会变为敌对状态。过桥前,向左跳下并爬上梯子。顶部有一个宝箱,里面装有破碎的眼球宝珠。你可以用它在麦酒拉的石制圆形大厅入侵林德尔特的莉西亚。 110. 过桥后,穿过门是一个满是墓碑的房间。在左侧房间角落可以找到不死人壕沟营火。穿过房间另一端的门,是通往墓穴尽头的路,在那里你能找到一个拉杆,可开启通往 Boss 的捷径。在某个房间里,几块墓碑会不断生成蕾雅咒术师,直到墓碑被摧毁。不要让它们数量过多。从不死人水沟营火出发,现在可以进入通往雾墙的巨大房间。在房间前方的楼梯下方,有三个游魂正等着敲响警钟。在不碰到钟的情况下杀死他们。如果你能击败房间里其余的敌人,就能安全地打开所有宝箱。准备就绪后,进入雾墙并击败王盾韦施塔德。与他战斗时要小心,当他生命值降至一半时,会给自己施加 buff,变得更加危险。韦施塔德对暗属性伤害有极高的抗性,所以如果你还没使用阳光之剑,现在应该用它来对付他。击败他之后,你会找到王凡德里克,并在凡德里克房间的后方获得国王戒指。现在传送到失落 Bastille 的 Straid’s Cell 营火,向 Olaphis 的 Straid 花费 12400 灵魂购买第二份阳光之剑奇迹。拥有 13 点专注值可以装备这两份奇迹,让你在营火休息前能施放两次。花费 3000 灵魂,他会将 Velstadt 之魂转化为神圣誓约奇迹。这个法术能使你的武器物理伤害增加 50 点,物理防御力增加 75 点,持续约 65 秒。令人沮丧的是,这个法术需要整整 4 个法术槽来装备,所以实际上你要到拥有 30 点专注值才能使用它。 Aldia’s Keep
113. 最后一次返回黑森林的“废渊分岔路”营火,走中间的路。装备国王戒指以打开通往安迪尔馆的大门。如果你在三场不同的 boss 战中都让蜜拉的露卡提耶存活下来,那么在“前庭”营火旁边你应该能找到她。在安迪尔馆的一楼,你会遇到被屏障困住的宫廷法师纳瓦兰。如果你想完成他的任务线,不要拉动杠杆释放他。如果你使用人性人像恢复人形,可以向他购买物品。否则暂时忽略纳瓦兰,你需要在游戏中更深入的地方才能完成他的任务线,届时我会进行说明。 114. 当你爬楼梯时,会注意到一个石化的食人魔挡住了你的去路。你无需浪费昔日香枝,左侧的路径可以绕过食人魔。在楼梯顶部,拉动龙雕像上的拉杆,即可到达要塞的最后区域。进入左侧第一扇门,楼梯间内有一面幻影墙,后面隐藏着仪式地点营火。要打开主走廊右侧的门,你需要点燃要塞内的所有四个 sconce(壁灯),然后返回楼梯底部的龙骨架处,即可获得阿尔迪亚的钥匙。 115. 即使看起来道路被阻挡,也要继续前进。对于食人魔来说,墙壁不过是一种“建议”。要逃离要塞,你必须击败守护龙。这场战斗对近战职业来说可能有些棘手,保持耐心即可。消灭龙后,乘坐升降机前往龙巢营火。龙巢(Dragon’s Aerie)

116. 在鹰巢入口处与绿袍使者交谈,可获得【古老羽毛】:这本质上是一个无限使用的【返乡骨片】。建议将其与【元素瓶】一起放在快捷物品栏中,会很方便。 117. 附近的滑索可以让你跳过该区域。它会带你到一座不稳定的绳桥,通往龙祭坛和【祭坛入口】篝火。如果你选择留下来探索鹰巢,这里有几只水晶蜥蜴,还有该区域三只【地狱kite飞龙】中的第一只,如果你还需要【光辉楔形石】,它们会掉落。 龙祭坛
118. 龙祭坛居住着体型庞大的龙卫和体型较小的龙骑士。若你在与龙卫的战斗中逃跑,龙骑士就会变为敌对状态。经过祭坛入口营火后,有几段楼梯,最终会通向一扇由一名挥舞巨剑的龙卫把守的小门。不要穿过这扇门,而是转身从楼梯跳到下方的庭院。穿过由另一名龙卫把守的双扇门,爬上螺旋楼梯,来到一个大房间。第三个龙戒指可以从这个房间里的箱子中拾取。将其装备,替换掉你的第二个龙戒指。箱子旁边有一个石化龙蛋,你可以拾取它。如果你想加入古龙之誓约,可以将其拿给钢铁要塞的拉纳菲尔的马杰罗看。 119.回到由挥舞巨剑的龙骑士守卫的小门处。穿过小门后是一段巨大的楼梯,通向一面雾墙。如果龙骑士处于敌对状态,这个区域会非常危险。进入雾墙,与古龙对话,即可获得灰雾之心。 巨人陨落之森 第二部分 120. 返回巨人陨落之森的红衣主教塔营火处。拥有灰雾之心后,你可以进入该区域内三具巨人尸体的记忆。这些记忆中可以找到许多高等级的消耗灵魂。在你初次遇到“温和派”帕特附近的尸体处,可以进入瓦马尔的记忆。此时有空心士兵正在攻击那具尸体。在记忆中,与德拉蒙德队长对话,然后一路跑到地图尽头,登上楼梯,那里有一名高大的巨战士守卫着一具巨人尸体。与尸体互动可获得一个巨人灵魂。 121. 奥罗的记忆可从追击者 boss 房间后面的巨人尸体处进入,靠近曾带你前往失落 Bastille 的乌鸦巢。进入记忆前,在尸体附近与尤哥的本哈特对话,进入记忆后再次对话。与第一个记忆类似,在此地图尽头也能找到一具巨人尸体。 122. 杰的记忆位于 Cardinal 塔篝火下方,在一扇需要国王戒指才能打开的门后面。装备戒指后门会打开,露出无名之地篝火和最后一具巨人尸体。进入记忆,使用人性雕像逆转你的空心化状态。你应该能在地上看到尤果的本哈特的召唤印记。穿过该区域时躲避火球,然后击败巨人王并获得巨人的共鸣。和大多数巨人战斗一样,我建议在战斗中待在他身后。巨人王身后不远处有一具尸体,你可以从中获得一个巨人之魂。击败巨人王后,你可以返回瓦马尔的记忆,与德拉蒙德队长交谈以获得多兰古雷格头盔。 古老的暗穴
123. 返回暗影森林,与暗黑潜水者格兰达尔交谈以进入远古暗穴。你在该区域的目标是使用火焰蝴蝶点燃地图中途的大型壁灯,并击败所有敌人以消除区域尽头的雾墙。雾墙会阻挡作为出口的地面洞口。首次尝试后,每次进入都需要消耗一个人性雕像。 124. 在黑溪谷与暗黑潜水者格兰达尔交谈,再次进入远古暗穴。每个地点对应暗穴的不同区域。清理完该暗穴区域后,前往龙学院下方篝火处,清理第三个区域。完成后你将被传送到暗潜者的 boss 竞技场。击败潜伏者后,与深渊潜水者格兰达尔对话,他会给予奖励。这个 boss 极具攻击性,因此你也需要采取主动进攻的策略。 龙祭坛(第二部分) 125. 返回龙祭坛,击败古龙以获取另一个巨人灵魂。集中攻击龙的后腿。当它飞至空中喷火时,向它的尾部跑去。切勿将耐力条完全耗尽,因为在耐力完全恢复前你将无法冲刺。 不死人墓穴(第二部分) 126. 返回不死人墓穴,由于你背包中的巨人灵魂已永久降低了王多兰的生命值,现在可以将他击败。确保你处于肉身状态并返回阿玛纳祭坛。在龙骑兵守卫的桥梁后方,有一扇你现在可以打开的门。在内部你可以拾取国王之魂、国王铠甲套装和国王王冠。 渴望王座
127. 拥有巨人的共鸣和国王戒指后,你就有资格进入多兰古雷格城堡王门营火旁的封印门。进入其中并击败王座监视者与守护者。如果你还没准备好立即挑战另一个 Boss,可以使用古老羽毛返回。如果你回到 Majula 的宅邸,制图师卡尔会奖励你他的盔甲套装。 128. 如果你回到渴望王座,就必须击败娜珊德拉。【束缚戒指】在这场战斗中可能很有用,因为她会持续诅咒你,降低你的最大生命值。 129. 一旦你击败娜珊德拉,就会遇到原罪学者安迪尔。这场战斗很简单,如果他脚下有火就远离。没有火时,就攻击他。当你获胜时,你将欣赏到几分钟无法跳过的制作人员名单。这是基础游戏的结局,但还有三个DLC区域可供探索,所以暂时不要开始二周目。在你的游戏流程中,你可以更早地进入DLC,但它们都是终局内容,而且这个build不需要任何DLC物品,所以我在本指南中将它们放在最后。 130. 还记得你在 Aldia's Keep 的朋友 Navlaan 吗?现在终于到了完成他任务线的时候了。在空心状态下与 Navlaan 交谈,他会要求你暗杀四个不同的 NPC 并带给他证据。不过,你可以欺骗他,在不杀死重要 NPC 的情况下获得所有四个所需物品。铁匠吉里甘是他清单上的第一个目标,你只需从他那里花费8000魂购买梯子模型,然后将其带给纳瓦兰即可。接下来,他的目标是制图师卡尔,纳瓦兰想要卡尔的头盔,击败王座监视者与守护者后你应该就能获得该头盔。 131. 下一个目标是放逐者费尔金。你知道的,就是猎龙森林的不死人避难所篝火旁那个态度粗鲁的家伙。纳瓦兰想要他的法杖,不过如果你拥有20点智力和20点信仰,费尔金会很乐意把落日法杖交给你。如果你有两个灵魂容器,可以与如蜜的防火女对话,重新分配属性点以满足智力和信仰的要求。这样你也能购买费尔金的法术。一旦你获得了他的法术和法杖,记得将属性点重置回原来的分配。当你出示纳尔瓦恩·法尔金的法杖后,他会要求查看那根古老的羽毛,这根羽毛应该是翡翠侍女在龙巢给你的。完成他的任务线后,他会赠予你混沌盔甲套装,并且现在只有在处于游魂状态时,你才能进入纳尔瓦恩的商店。 【冰之艾雷米雅斯·罗伊丝】

132. To enter the Crown of the Ivory King DLC, if you haven’t already, head to the Shrine of Winter, down the center path from the Ruined Fork Road bonfire in the Shaded Woods. Interact with its obelisk to warp to a sealed room, then use the frozen flower you picked up in Drangleic Castle to open the door to Frozen Eleum Loyce and the Outer Wall bonfire. This area is huge and you may want to consult the wiki linked at the end of this guide to help navigate it. 133. When you enter Eleum Loyce, there are two paths, left to the boss room, or right to the rest of the zone. Head right and explore first, there’s an item you need to make the boss fight easier. The map starts out pretty linear, since many side paths are blocked by walls of ice. You’ll descend a large staircase and pass through a frozen village. Up a small staircase and through a building you’ll eventually come to a three-way fork, with a path ahead of you and two open doors on either side. The path ahead leads to an icy area with four sconces you can’t light yet in front of a sealed door, while past the open door to the right is a broken floor you can jump through to reach the Abandoned Dwelling bonfire. 134. From the bonfire, head forward up a hill and through a series of stone walkways. You will eventually come to a lone, lit structure, and can pick up the eye of the priestess from the skeleton laying on the altar. Having the eye in your inventory makes invisible enemies visible, including in areas outside of the DLC like the Shaded Woods. Eventually the path will bring you back to the boss room. Keep going forward and you’ll find the Inner Wall bonfire. I recommend clearing the rest of this area now, but know you’ll have to come back later as well. 135. Warp back to the Outer Wall bonfire and enter the fog wall to defeat Aava, the King’s Pet. If you continue past the boss room you’ll be granted an audience with Alsanna, the silent oracle, who will remove the walls of ice that previously blocked your path. 136. You can take on the next boss now, but it’s easier if you loop back through the City and rescue the three knights of Eleum Loyce who will fight alongside you during the boss fight. Warp to the Outer Wall bonfire, head down to the frozen village, and next to the large bridge a lift down to the Lower Garrison bonfire. Past the bonfire you’ll find a lift leading up to a knight of Eleum Loyce you can rescue. 137. Past the Abandoned Dwelling bonfire is a staircase that used to be frozen over that leads to an area with several balconies where you can loot a priest’s chime +8. You can upgrade this to +10 and infuse it with lightning if you want, it doesn’t affect buff spells like sunlight blade but will make offensive spells deal decent damage. At the end of this area is a second knight of Eleum Loyce you can rescue. The third knight is past the Inner Wall bonfire, near the group of three golems. 138. With your knights by your side, leap into the old chaos and put the Ivory King to rest. When the fight starts, charred Loyce knights will spawn from three mirrors and attack you. Defeat them as they spawn and your knights will sacrifice themselves to destroy the mirrors. Be quick about it, you don’t want to be outnumbered when the Ivory King arrives. Once the Ivory king is defeated don’t forget to recover his crown off the floor. 139. From the Outer Wall bonfire, return to the icy area with four sconces in front of a sealed door just before the Abandoned Dwelling bonfire. Now that Alsanna has calmed the winds blowing through Eleum Loyce, you can use a flame butterfly to light the four torches and unlock the door. Through the door, watch out for two flexile sentries and pick up the garrison ward key at the end of the cave. You can also loot the unique bone fist weapon here. From the Abandoned Dwelling bonfire, you can reach the door to the Expulsion Chamber bonfire that you need the garrison ward key to unlock. 140. Next to the bonfire is a coffin you can ride to the frigid outskirts zone. In this zone the winds will periodically die down for a few seconds allowing you to see. You can spot a building in the distance, and past it two more buildings. Past the third building is a bridge made of ice leading to a fog wall. Here you can fight Lud and Zallen, the King’s pets. These two are aggressive. Consuming green blossoms that increase your stamina regeneration will give enough stamina to land attacks whilst dodging frequently. Shulva, Sanctum City

141. 若要进入【沉没之王的王冠】DLC,前往黑溪谷的腐败物 boss 房间,与原初营火旁的方尖碑互动,传送至一个密封房间。使用从 Majula 坑中宝箱获得的龙爪,打开通往舒尔瓦、圣所之城以及圣所步道营火的门。 142. 城市中的许多结构可通过攻击相应的方尖碑来移动。若要获取城市中的所有宝藏,必须利用这一机制。在城市的远端,有一排可移动的塔楼。激活它们对应的方尖碑,以搭建通往祈祷之塔营火的路径。部分方尖碑只能用弓箭或法术激活。从篝火处可以看到通往龙之圣所的楼梯和桥梁。 143. 在圣所内部,攻击相应的石制按钮可以打开或旋转门,类似于方尖碑的机制。这里用弓会很方便。在圣所的第一个房间里,你会遇到无法被伤害的幽灵圣所骑士敌人。它们的实体就在附近,摧毁实体后其幽灵就会变得可被攻击。你会遇到一个有三个此类敌人的房间,在那里可以拾取永恒圣所钥匙。 144. 在另一个地板上有尖刺的房间里,你可以从宝箱中获得龙石。从这个房间下楼后转身,你应该能看到墙上有一个可以用弓射击的按钮。这会打开你正上方的石门,露出隐藏圣所篝火。 145. 沿着楼梯一路向下,你会找到不完美者巢穴篝火。在该区域的尽头,你可以使用龙石解锁通往龙之憩和圣所内部篝火的路径。在龙之憩底部,你必须与污秽女王埃拉娜战斗。如果你采取积极进攻策略,在她召唤出过多仆从之前将其击杀,这场战斗会很轻松。 146. 埃拉娜死后,她身后的门会打开,露出最终Boss房间。在这里你将与沉睡之龙希恩战斗。和所有龙类战斗一样,待在它身后,并留意它在空中的动作。击杀巨龙后,夺回沉王王冠。 147.返回龙圣堂入口,使用永恒圣堂钥匙前往女祭司寝室篝火的顶部。在这里你会看到一条通往死者洞穴的路。洞穴中的陷阱会填充你的诅咒值,一旦诅咒值满你就会死亡,所以要快速奔跑。洞穴尽头是盗墓者、瓦格与赛拉的 boss 战。这场臭名昭著的战斗是三对一的围攻。我的建议是,那个持弓的家伙生命值最低。 烟之塔
148. To enter the Crown of the Old Iron King DLC, head to the Old Iron King’s boss room and interact with the obelisk next to the primal bonfire to warp to a sealed room. Use the heavy iron key you found in the salamander pit in the Forest of Fallen Giants to open the door to Brume Tower. Don’t forget to pick up smelter wedges before the big iron chain, you’ll need them to destroy the ashen idols found through the tower that can buff nearby enemies. You can then collect fragments of Nadalia, bride of ash’s soul where the idols stood. Scale the chain and you’ll reach the Throne Floor bonfire. 149. The first section of Brume Tower is fairly linear, even if it may not look it. As you descend the tower and its various ladders, you should find the Upper Floor bonfire. Past a fog gate, down another ladder, across a field of ash and down some stairs you’ll eventually find the Foyer bonfire. Past the Foyer bonfire, across a chain into another tower, you can retrieve the scorching iron scepter. Bring the scepter back to the Foyer bonfire and use it to activate Brume Tower’s giant lift mechanism. 150. Take the lift down one level, enter a stone passage, and pick up the tower key sitting on a ledge outside the tower guarded by three iron warriors. The key opens a nearby gate leading to the Iron Hallway Entrance bonfire. Through this area is the fog wall for the Aged Smelter Demon boss fight. It’s a stronger version of the boss you’ve beaten before. Now walk back up to the lifts and ride down another level until you reach the Lowermost Floor bonfire. 151. Before you enter the fog wall here, use your smelter wedges to destroy the four ashen idols ringing the boss room. They will constantly heal the boss if they aren’t destroyed. Once you are ready, take on the Fume Knight. Hopefully you’ve been collecting brightbugs along your journey. They are rare and should only be used when facing the absolute toughest bosses. Their damage stacks with the damage gold pine resin grants. Once you’re victorious, you can pick up the crown of the Old Iron King behind him. 152. Warp back to the Foyer bonfire and take the two lifts up. You’ll spot a gate you can unlock with the tower key. Beyond it is the Smelter Throne bonfire and a suit of samurai armor you can interact with to enter the memory of the Old Iron King. Make your way through the memory until you reach a fog wall. It’s time to fight the last boss, Sir Alonne. This is probably the hardest boss in the game, but only if you get psyched out when someone tells you something’s the hardest boss in the game. Avoid his grab attack where his sword has a gray aura. Once he grabs you he will deal extra damage for the rest of the fight. 153. You can grab one last smelter wedge from the chair in the small room past Alonne’s boss room. Return to the Foyer bonfire and use the tower key to unlock the door behind the tower mechanism. Through this door should be the last ashen idol. With all of the pieces of Nadalia’s soul together, they will fuse into her true soul, which can be transmuted. 154. With the king’s crown from the Shrine of Amana, and the three DLC crowns, return to the Undead Crypt and enter the memory of the king by interacting with King Vendrick’s discarded clothes in Vendrick’s boss room. Speak to King Vendrick inside his memory and he will consolidate the crowns’ power into the king’s crown. Now, wearing the king’s crown will prevent you from hollowing, allowing you to escape the curse of the undead, which was the whole point of the game if you weren’t paying attention. I wasn’t really paying attention either. New Game+ 155. There are higher level versions of your rings that can be obtained by entering new game+, where you keep your character but start the game over again with stronger enemies. You can enter NG+ from Majula’s bonfire menu after beating the game. The chloranthy ring +2 drops from the Executioner’s Chariot in NG+. If you’re impatient and don’t want to have to beat the game again, you can burn a bonfire ascetic at the Undead Purgatory bonfire to respawn the boss. Beware that this will permanently scale that area to one new game level above the rest of the game. 156. New game+ features unique encounters that don’t occur during your first playthrough. The ring of blades +2 drops from one of the Two Pursuers that spawn in the throne room up the stairs from the entrance of Drangleic Castle in NG+, specifically the Pursuer on the left. Alternatively, burn a bonfire ascetic in the king’s gate bonfire to scale the zone up to NG+. 157. The dragonrider gauntlets can be purchased from Magerold of Lanafir in Iron Keep after defeating the Dragonrider Duo in Drangleic Castle in NG+. These are an upgrade to the Drangleic gauntlets. You’d have to burn a bonfire ascetic in the central castle Drangleic bonfire to spawn the NG+ version of the Dragonrider Duo, but I highly recommend just going through new game+ if you’ve been enjoying Dark Souls II so far. Dark Souls II has the most feature-rich NG+ experience out of the Souls trilogy. Soul Farming Before farming for souls, equip all of the soul absorption-boosting gear you have like the covetous silver serpent ring. Soul-boosting gear stacks multiplicatively. Most enemies in Dark Souls II stop respawning after being killed 15 times. Joining the company of champions covenant makes killing enemies not count toward the 15 kill limit, but makes enemies stronger. This is still worth it if you plan to farm a large amount of souls for some reason. You can easily reach soul level 150 before beating the game without doing any soul farming though. A good early game farming spot is Heide’s Tower of Flame. Iron Keep is a decent mid-game spot, and the best location to farm souls in the endgame is probably the Dragon Shrine. Technically, if you have a bunch of bonfire ascetics, the fastest way to gain souls is by repeatedly burning a bonfire ascetic at the Place Unbeknownst bonfire to respawn the Giant Lord boss and killing him again. The Giant Lord is a fairly easy boss to defeat and drops a massive number of souls. As I’ve said before, I don’t really care for bonfire ascetics, you get tons of souls by going to NG+ and beyond. Stats

以骑士职业开局,建议按以下顺序提升属性。若加错属性,可将极为稀有的道具【灵魂容器】交给如蜜的防火女来重置属性点。 1. 将适应力提升至10 2. 将活力提升至8 3. 将敏捷提升至12 4. 将生命力提升至20 5. 将耐力提升至20 6. 将适应力提升至17 7. 将信仰提升至14 8. 将智力提升至10 9. 将专注提升至10 10. 将敏捷提升至15 11. 将力量提升至13 12. 将信仰提升至25 13. 将专注提升至13 14. 将生命力提升至50 15. 将信仰提升至40 16. 将专注提升至30 生命力和耐力在20点时会达到软上限,即超过该数值后收益会递减,而生命力的最终软上限为50点。将活力从20级提升到50级可使最大生命值增加约43.5%。装备第三龙戒指后,要达到60的最大装备重量以获得弗林戒指的全部效果,总共需要10点活力,但由于翁斯坦头盔能提供2点活力,因此只需将活力等级提升到8级即可。 16点适应力配合30点专注能将敏捷子属性提升至99,这是一个临界点,可增加闪避翻滚时的无敌帧数量。17点适应力能将敏捷提升至100,使后跳额外增加1帧无敌时间。此外,若专注为13点,则需要17点适应力才能达到96敏捷的临界点,这一点很重要,因为在游戏后期才能将专注提升到30点。戒指 装备绿花戒指+2可提升25%耐力恢复速度,刃之戒指+2可增加50点武器伤害,弗林戒指可额外增加50点武器伤害,第三龙戒指可提升7.5%最大生命值、12.5%最大耐力和装备重量上限。 盔甲 当装备弗林戒指时,文加纳的头盔、胸甲、腿甲搭配龙骑兵臂甲能提供同重量级别中最佳的防御力,这需要你将装备重量上限保持在60左右。物理伤害是敌人造成的最常见伤害类型。 关于细剑你需要知道的一切 细剑重量轻,属性要求低,在游戏初期即可获得。双手持握时的表现明显优于双持,因此你无需升级第二把细剑。它的耐力消耗非常低,高攻击速度与弗林戒指、刀刃戒指以及武器 buff 法术等固定伤害加成配合得非常好。细剑还拥有高额的暴击伤害倍率。许多敌人天生对突刺伤害脆弱,并且反击机制会使敌人和玩家在攻击时都受到额外的突刺伤害。 游戏中许多最优秀的 armor 和武器需要稀有的光辉楔形石来升级,但细剑可以用普通楔形石升级,因此即使你之后换用其他武器,升级细剑也不会在长远上造成损失。细剑的缺点在于缺乏横向挥砍招式来攻击多个敌人,同时也难以击中地面低处的敌人。不过,细剑较快的攻击速度在一定程度上弥补了这一弱点。 【恶名昭彰的冰刺剑】 冰刺剑可以说是细剑的“大哥”,许多人认为它是游戏中不考虑双持情况下的最高 dps 武器。冰刺剑比普通细剑更长,能造成出血累积,最重要的是,当它进行元素变质时,物理伤害的损失不像普通细剑那么大。未变质时,普通细剑的伤害略高于冰刺剑,但例如在进行雷电变质后,冰刺剑的伤害会显著更高。注入雷电的细剑对大多数敌人造成的伤害更高,所以就我所知,雷电冰细剑在所有情况下都更强。冰细剑拥有独特的重攻击,能发射一个投射物。如果你用投射物和剑本身同时击中敌人,他们会受到巨额伤害,但这个能力会消耗武器的大量耐久度,所以应该留到紧急情况使用。只需几次攻击就会损坏冰细剑,让你陷入无防御状态。