换一换
换一换 


Phoenicia offers excellent potential in discovery, colonisation, trade and naval warfare from early in the game. Here, I detail Phoenician strategies and counter-strategies. Introduction Following this guide requires the Gathering Storm expansion. It also assumes you have all other Civ 6 content, listed below, though it is not necessary to have these to utilise the key strategies of each civ. Pre-Rise and Fall content packs Vikings, Poland, Australia, Persia/Macedon, Nubia, Khmer/Indonesia Rise and Fall Expansion New Frontier content packs Maya/Grand Colombia, Ethiopia, Byzantium/Gauls, Babylon, Vietnam/Kublai Khan, Portugal These content packs include exclusive civs, city-states, districts, buildings, wonders, natural wonders, resources, and a disaster, but not core game mechanics - all you need is the base game and the Gathering Storm expansion for those. I have as much right to rule as my brother, and if I cannot share his throne, I shall make a greater one. Upon this hill the Phoenicians shall create their greatest work; upon this hill Carthage shall arrive. But our work is precarious - in this new land there may well be new opportunities, yet new dangers as well. As our lives depend upon the survival of Carthage, Carthage must be defended with our lives. How to use this guide This guide is divided into multiple sections explaining how best to use and play against this specific civ. The Outline details the mechanics of how the civilization's unique features work and what their start bias is if they have one. The Victory Skew section describes to what extent the civ (and its individual leaders where applicable) is inclined towards particular victory routes. This is not a rating of its power, but an indicator of the most appropriate route to victory. Multiple sections for Uniques explain in detail how to use each special bonus of the civilization. Administration describes some of the most synergistic governments, government buildings, policy cards, age bonuses, pantheons, religious beliefs, wonders, city-states and Great People for the civ. Only the ones with the most synergy with the civ's uniques are mentioned - these are not necessarily the "best" choices when playing as the civ for a given victory route. Finally, the Counter-Strategies discusses how best to play against the civ, including a consideration of leader agendas if the civ is controlled by a computer. Note that all costs (production, science, etc.) mentioned within the guide assume a game played on the normal speed settings. To modify these values for other game speeds: Online: Divide by 2 Quick: Divide by 1.5 Epic: Multiply by 1.5 Marathon: Multiply by 3 Glossary Terminology used in this guide and not in-game is explained here. AoE (Area of Effect) - Bonuses or penalties that affect multiple tiles in a set radius. Positive examples include Factories (which offer production to cities within a 6 tile radius unless they're within range of another building of the same type) and a negative example is nuclear weapons, which cause devastation over a wide radius. Beelining - Obtaining a technology or civic quickly by only researching it and its prerequisites. Some deviation is allowed in the event that taking a technology or civic off the main track provides some kind of advantage that makes up for that (either a source of extra science/culture or access to something necessary for a eureka or inspiration boost) CA (Civ Ability) - The unique ability of a civilization, shared by all its leaders. Compact empires - Civs with cities close together (typically 3-4 tile gaps between city centres). This is useful if you want to make use of districts that gain adjacency bonuses from other districts, or to maximise the potential of area-of-effect bonuses later in the game. Dispersed empires - Civs with cities that are spread out (typically 5-6 tile gaps between city centres). Civs with unique tile improvements generally favour a more dispersed empire in order to make use of them, as do civs focused on wonder construction. GPP - Short for Great Person Points. Districts, buildings and wonders generate these points and with enough you can claim a Great Person of the corresponding type. GWAM - Collective name for Great Writers, Artists and Musicians. All of them can produce Great Works that offer tourism and culture, making them important to anyone seeking a cultural victory. LA (Leader Ability) - The unique ability of a specific leader. Usually but not always, they tend to be more specific in scope than civ abilities. Some leader abilities come with an associated unique unit or infrastucture. Prebuilding - Training a unit with the intention of upgrading it to a desired unit later. An example is building Slingers and upgrading them once Archery is unlocked. Sniping - Targeting a specific city for capture directly, ignoring other enemy cities along the way. Typically used in the context of "capital sniping" - taking a civ's original capital as quickly as possible to contribute towards domination victory without leading to a drawn-out war. Start bias - The kind of terrain, terrain feature or resource a civilization is more likely to start near. This is typically used for civilizations that have early bonuses dependent on a particular terrain type. There are five tiers of start bias; civs with a tier 1 start bias are placed before civs of tier 2 and so on, increasing their odds of receiving a favourable starting location. Super-uniques - Unique units that do not replace any others. Examples include India's Varu and Mongolia's Keshigs. Tall empires - Empires that emphasise city development over expansion, usually resulting in fewer, but bigger, cities. Uniques - Collective name for civ abilities, leader abilities, unique units, unique buildings, unique districts and unique improvements. UA (Unique Ability) - A collective name for leader abilities and civ abilities. UB (Unique Building) - A special building which may only be constructed in the cities of a single civilization, which replaces a normal building and offers a special advantage on top. UD (Unique District) - A special district which may only be constructed in the cities of a single civilization, which replaces a normal district, costs half as much to build and offers some unique advantages on top. UI (Unique Improvement) - A special improvement that can only be built by the Builders of a single civilization. "UI" always refers to unique improvements in my guides and not to "user interface" or "unique infrastructure". UU (Unique Unit) - A special unit that may only be trained by a single civilization, and in some cases only when that civilization is led by a specific leader. Wide empires - Empires that emphasise expansion over city development, usually resulting in more, but smaller, cities. Outline (Part 1/2) Start Bias

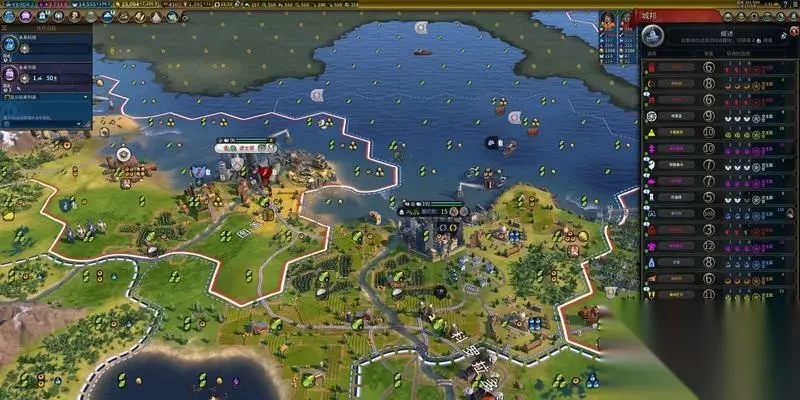
腓尼基文明有二级海岸倾向——考虑到该文明对殖民和海战的侧重,这一点可以理解。 文明能力:地中海殖民 - 初始获得远古时代【书写】科技的尤里卡加成 - 在腓尼基首都所在的同一大陆上建立的沿海城市始终拥有满忠诚度。此效果不适用于通过征服、忠诚度翻转获得的城市,或仅与湖泊相邻的城市 - 已上船的移民单位+2移动力和+2视野 - 移民单位上船或下船仅消耗1点移动力 狄多的领袖能力:迦太基的建立者

建造政府广场或其任何建筑均可使贸易路线容量各+1。拥有政府广场区域的城市在建造其他区域时获得+50%生产力。拥有迦太基港口区域的城市可进行迁都项目。完成该项目的城市将成为你的新初始首都,原初始首都则变为普通城市。宫殿、城邦加成、适用的政策卡片等均会随之转移。唯一例外是贸易署奇观,其“母大陆”判定依据为建造或夺取该奇观时首都所在的大陆。若要取得 domination victory,敌对文明需占领这座城市,而非腓尼基最初建立的城市。迁都项目的成本始终是普通区域项目的四倍,并且会随着游戏进程相应增加成本。 如果腓尼基在其政府广场区域拥有皇家学会建筑,那么迁都项目可以通过消耗建造者的次数来加速完成。建造者需要移动到柯顿区域以增加生产力。 概述(第2/2部分) 特色单位:双列桨座战船
一种古代海军近战单位,可替代桨帆船 研究 淘汰 升级自 升级至 成本 资源 维护费用

航海 科技 远古时代

制图学 科技 文艺复兴时代 无

卡拉维尔(360
) 65
ć 260
无法识别内容,已删除。
力量 远程力量 移动 射程 视野 负面属性 正面属性 35
无法识别或无法翻译,已删除。
无法识别内容,已删除。
对城市城墙和城市防御造成85%的伤害。 己方4格范围内的已上船商人单位无法被掠夺。 正面改动: 战斗力从30提升至35。 移动力从3提升至4。 独特区域:迦太基港口

古典时代特色区域,替代港口 研究需求 地形要求 建造条件 基础建造产能 维护费用 基础掠夺产出

天体导航 科技 古典时代
沿海或湖泊 无暗礁 必须与陆地相邻

çŻĺĄ

造船厂

澡港 27
ć 108
无法识别内容,已删除。
无法识别内容,已删除。
所有区域的成本会根据你的科技和文化发展进度增加。如果你拥有的特色区域数量大于或等于已解锁的特色区域类型数量,且前者除以后者的结果大于你拥有的该区域的数量,你将获得40%的折扣。 使用金币购买区域需要城市中派驻拥有【承包商】晋升的总督【雷纳(财务官)】。使用信仰购买区域需要城市中派驻拥有【神圣建筑师】晋升的总督【莫克沙(红衣主教)】。 相邻加成 其他产出 伟人点数 其他效果 2
用于相邻的市中心 1
每两个相邻区域(包括市中心)1
每相邻1个海洋资源(鱼类、鲸鱼、螃蟹、珍珠、海龟、沿海琥珀、近海石油) 存在造船厂时,相邻加成将添加至生产力 无 1
启用港口航运项目。通往该城市的国内贸易路线提供+1。
通往这座城市的国际贸易路线提供+3
允许其城市建造船只,即使城市中心位于内陆。城市建造的新海军单位将在该地格生成,除非该地格已被单位占据。陆地单位在此地格登船或从此地格登陆时,不消耗额外移动力且忽略悬崖。+50%
在该城市训练移民时 +50%
在该城市训练海军单位时 海军单位在该城市范围内进行治疗时会恢复至满血。 正面修正: - 生产费用减少50% - 在该城市训练开拓者时,生产速度提升50% - 在该城市训练海军单位时,生产速度提升50% - 海军单位在该城市范围内进行治疗时会恢复至满血。 其他修正: 该区域的建筑拥有独特外观。 胜利倾向 在本节中,会根据文明对特定胜利类型的倾向程度进行主观评分——而非其强度。评分达到3分或以上意味着该文明在该胜利路线上至少具备微弱优势。 领袖

ćĺ

ĺ¤äş¤

统治模式

ĺŽć

科技 狄多 5/10 (尚可)5/10 (尚可)9/10 (良好)5/10 (尚可)6/10 (尚可) 腓尼基在文化胜利方面具有中等优势。更多的贸易路线和城市意味着你可以广泛进行内部贸易,在单个城市堆叠大量生产力并建造奇观。你也能更轻松地利用与其他文明建立贸易路线所获得的25%旅游业绩加成。 腓尼基在外交胜利方面也能做出不错的尝试。腓尼基对殖民的倾向在军事紧急情况下很有帮助,因为他们更有可能靠近紧急目标,也更有能力对其采取行动。在紧急援助时,来自腓尼基廉价造船厂的黄金和额外贸易路线也应能提供优势。 征服胜利是腓尼基的最佳路线,不过这在很大程度上取决于地图。强大且机动的双列桨座战船具有早期速攻潜力,而造船厂提供的50%海军单位生产加成意味着在水域丰富的地图上,腓尼基可以在整个游戏中称霸。但这并不是说腓尼基在泛大陆式地图上不擅长征服胜利。即使海岸线较少,能够在不受忠诚度压力的情况下在竞争对手文明旁边的海岸定居,也能为未来的征服提供一个很好的跳板。廉价的港口意味着你可以更早获得它们提供的黄金。此外,上船的移民即使在湖泊中也能出色地侦察竞争对手的领土。在《文明6》中,腓尼基的宗教胜利很大程度上依赖于其快速训练和移动移民的能力,因为大多数信仰来源都是按城市提供的。腓尼基通常还拥有大量贸易路线,这些路线可用于对外施加额外的宗教压力。 如果出于某种原因无法实现统治胜利,腓尼基会发现科技胜利是一个不错的备选路线。更快的移民训练速度和更快的海上移动速度意味着你可以获得更多城市,并可能建立更多学院。廉价的科松区将通过古典时代和/或中世纪时代的自由探索黄金时代奉献,为科技提供相邻加成。凭借两个早期出现的独特能力,腓尼基可以选择确保一个稳定的古典时代黄金时代,或者故意推迟完成它们,直到古典游戏时代,以获得更强大的中世纪黄金时代或英雄时代。这能为你带来强大的临时优势。政府广场城市中更快的区域建造速度延伸至太空港,否则太空港的建造成本很高,而额外的贸易路线将有助于在参与太空竞赛的城市中进行叠加。 文明能力:地中海殖民地
腓尼基是游戏中最出色的殖民者之一,但与英格兰、西班牙等文明不同,它非常强调在自己的大陆进行殖民——至少在初期是这样。 腓尼基的文明能力提供了多种有助于殖民的工具,但要真正发挥作用,在很大程度上依赖于该文明的其他优势。 从【文字】科技的尤里卡时刻开始。
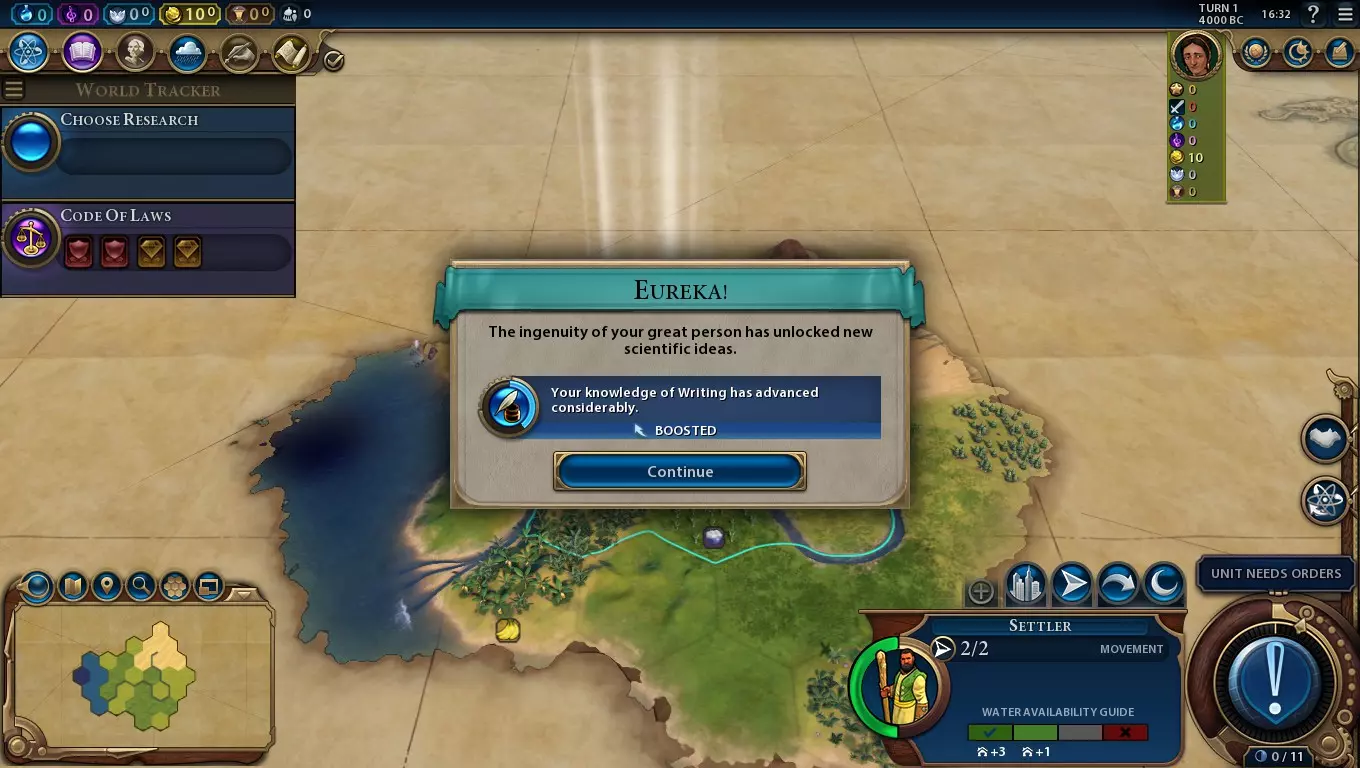
腓尼基字母是许多其他字母的前身,包括拉丁字母、阿拉伯字母、希伯来字母和西里尔字母。因此,腓尼基文明从游戏一开始就获得【书写】的尤里卡,无需先遇到其他完整文明。 在大陆或泛大陆类型的地图上,这没什么太大区别,因为【书写】的尤里卡是游戏中最容易解锁的之一。这可能意味着,如果你从远古遗迹获得免费尤里卡,你有更高的几率获得原本更难获得的尤里卡。 在岛屿地图上,这往往更有效,因为你通常会在相当长的时间内与其他完整文明隔绝。【书写】完成得更早,你就能更早建造学院,从而让科技产出有一个更强的开局。无论如何,尽早研究【写作】科技仍然是值得的。早期建造几座【学院】的成本相对较低,能让你在专注于扩张的同时,顺利解锁关键科技。 本土大陆沿海城市拥有完全忠诚度。
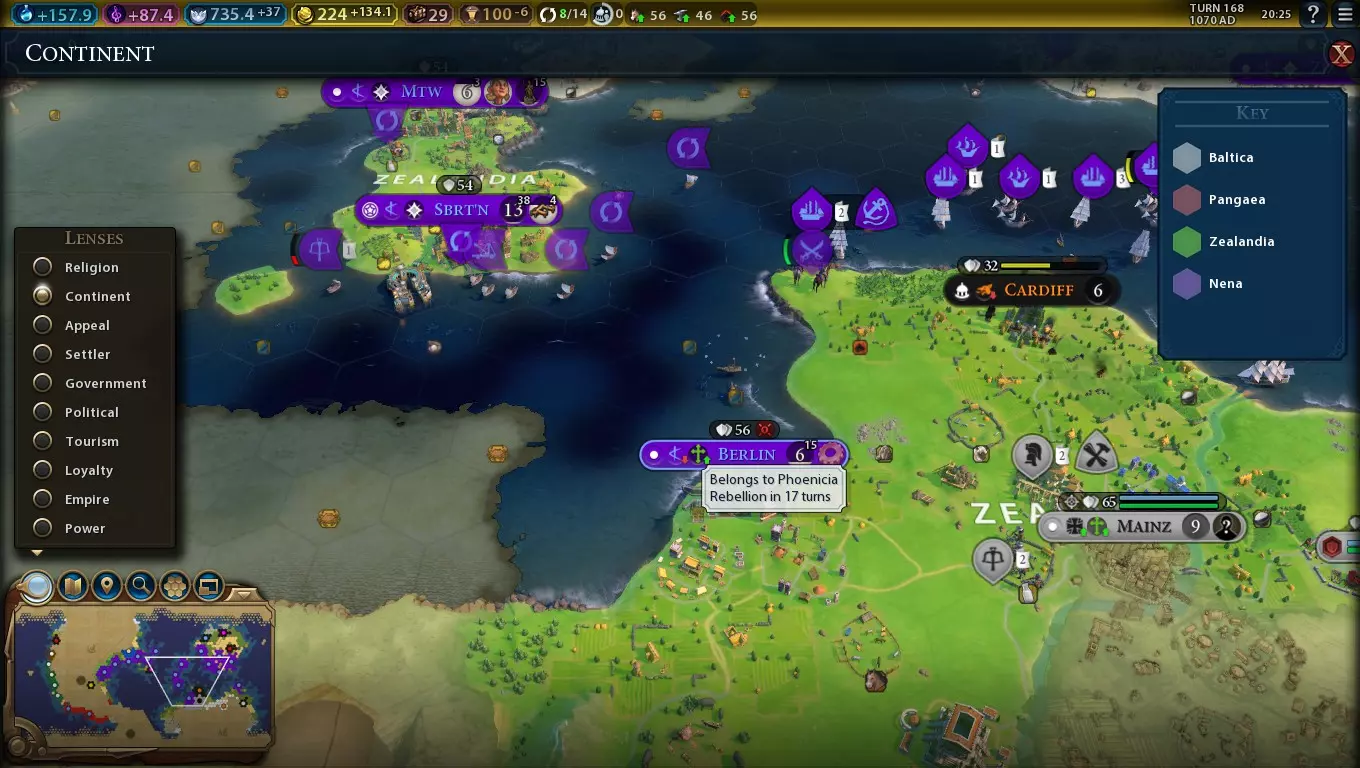
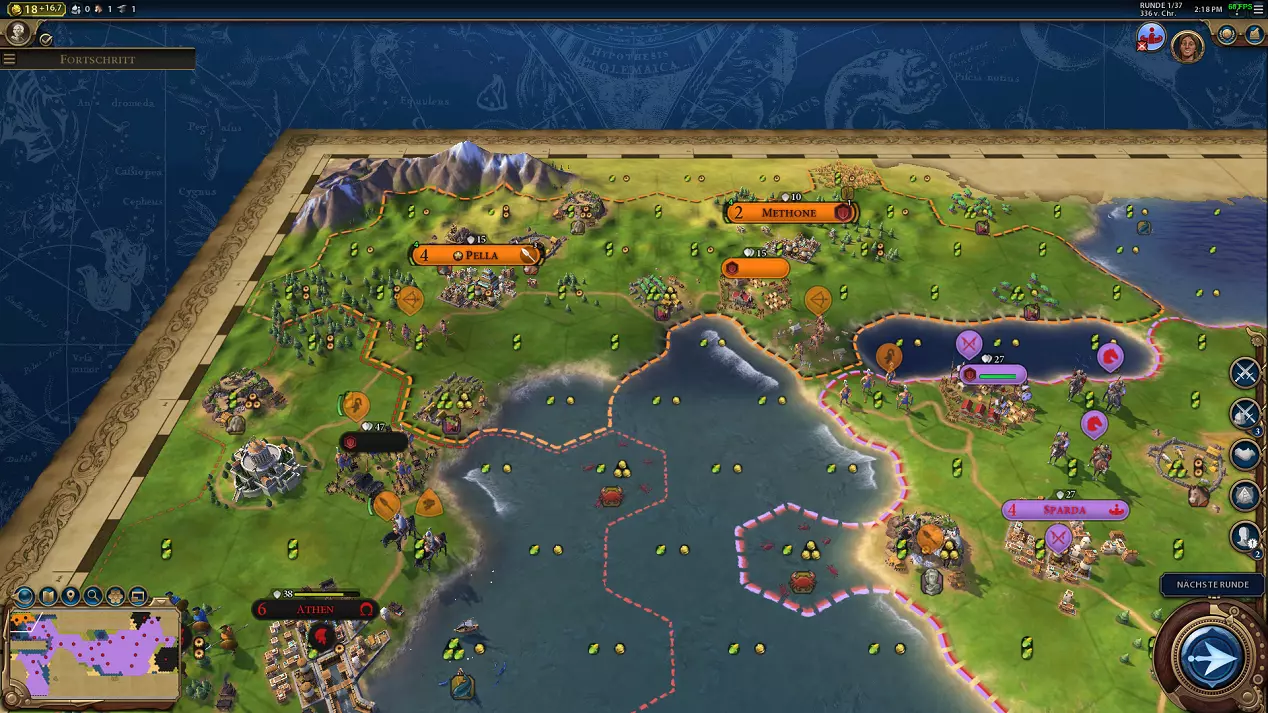
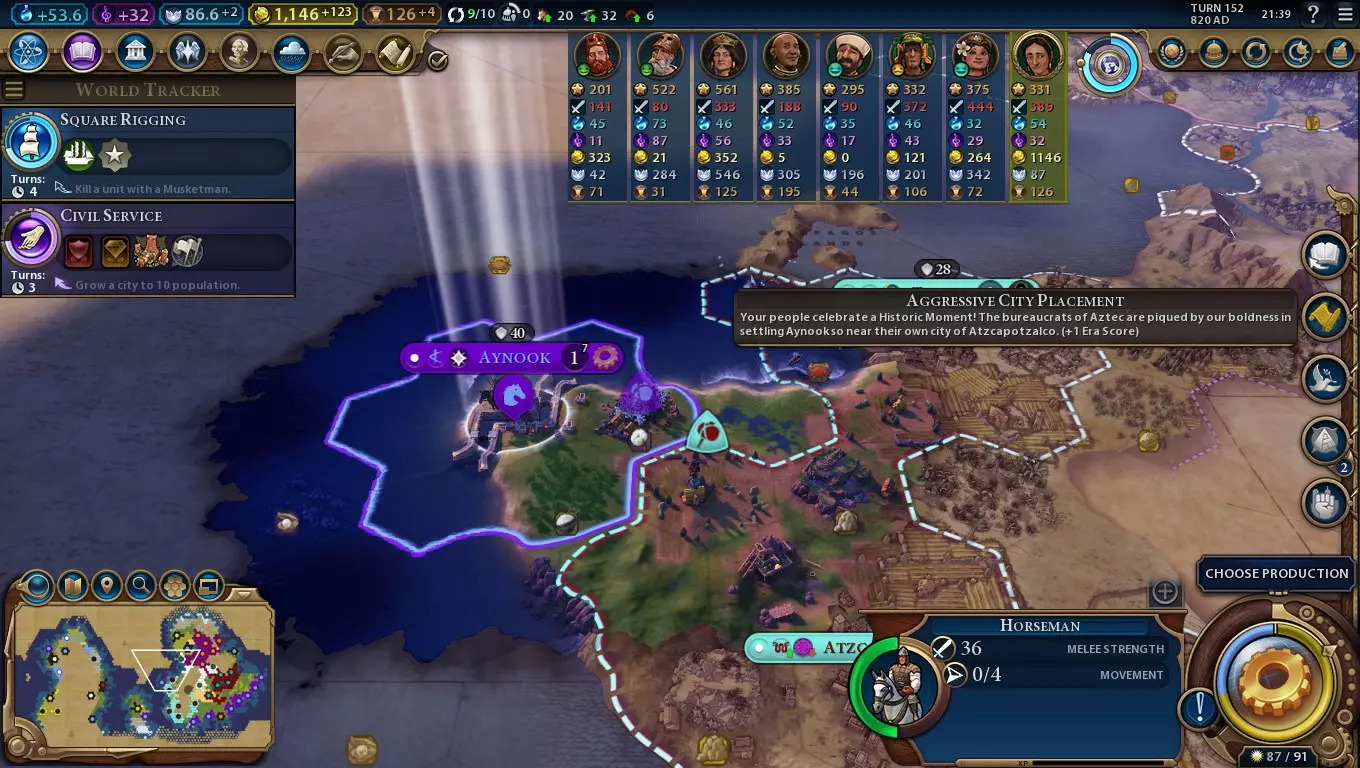
需要注意的是,这不适用于已占领的城市——我的首都斯布尔特恩与柏林位于同一大陆,但柏林仍在遭受忠诚度损失。 腓尼基在殖民方面表现出色,这一特性是其重要原因之一。在本土大陆建立新城市时完全无视忠诚度惩罚,这使得你能比大多数其他海洋文明更早地在更多海岸线上定居,还能利用前置定居策略取得显著效果。 前置定居指的是故意在靠近对手首都的位置建立城市,目的是限制对手的扩张潜力或将其作为未来入侵的跳板。在单人游戏中,向前定居往往会带来外交惩罚,而且新建的脆弱城市可能会被新邻居夺取,从而引发战争。
为了保障你的新城市安全,可以用从港口区获得的金币在那里购买军事单位,或者在附近部署海军远程单位以攻击潜在的入侵者。 无论你是否提前定居,确保拥有大量海岸线仍然是个好主意,这样你就能在许多城市建造独特的港口区。 狄多的领袖能力允许你迁移首都位置,借此你有可能将沿海忠诚度应用到另一个大陆。本指南的相关章节将更详细地介绍如何利用这一点。 移民的移动性和视野
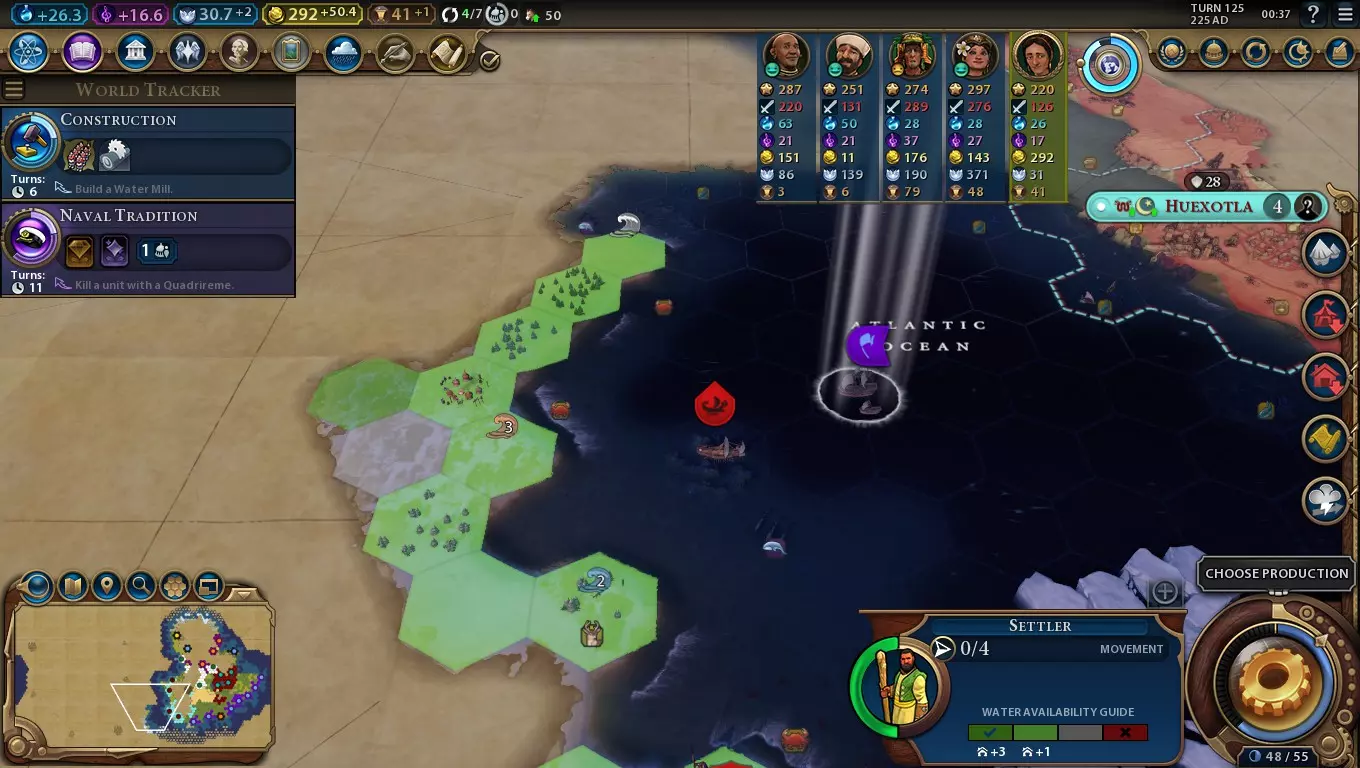
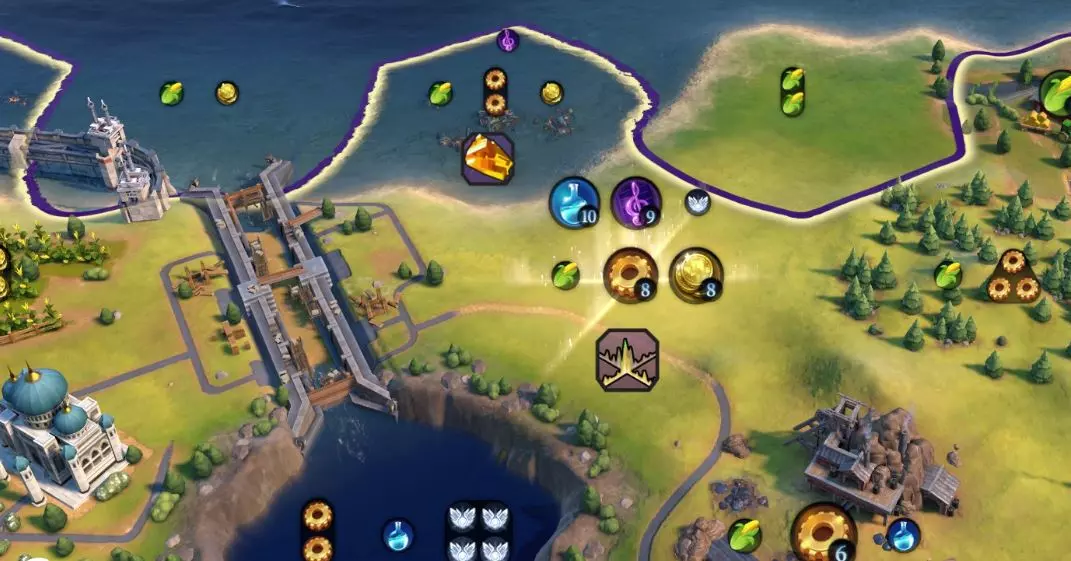
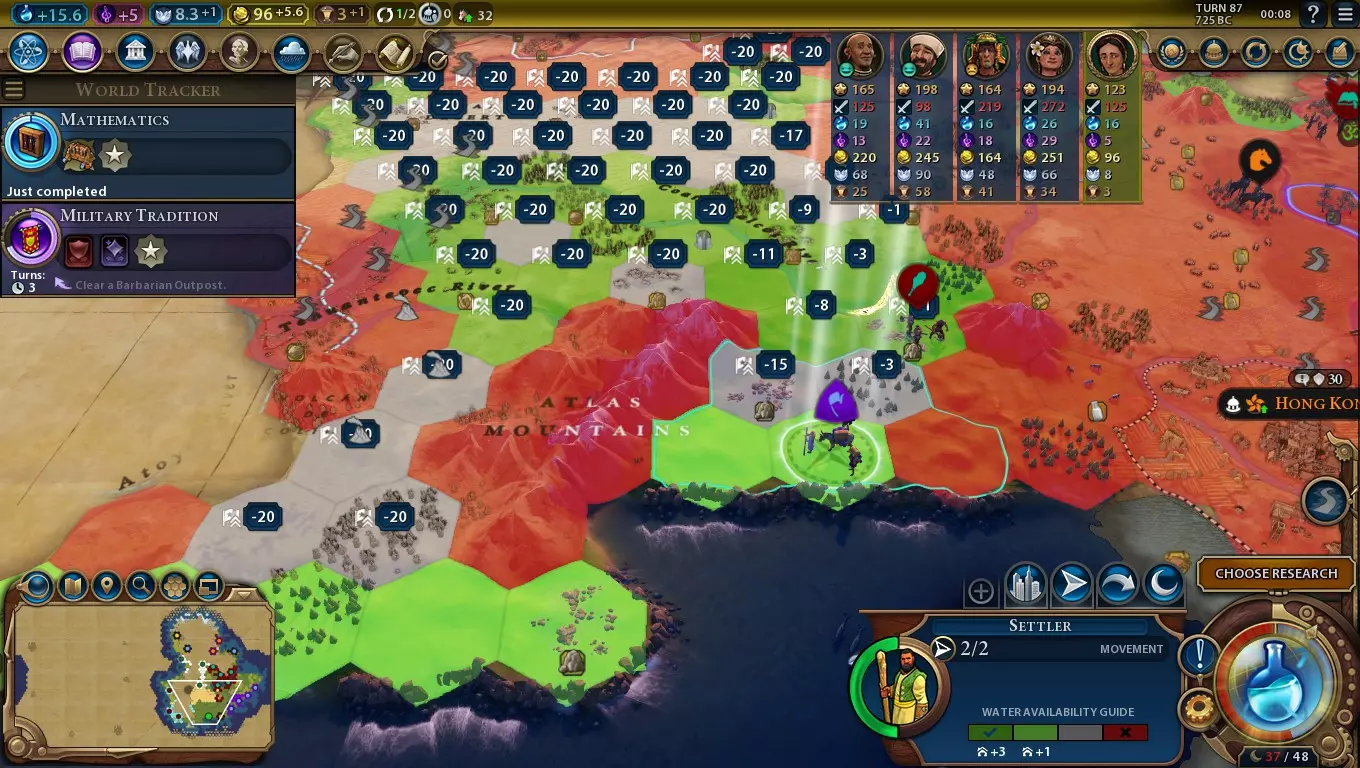
别担心,那艘蛮族船只无法接近我的移民——即便他们能接近,我的移民也有足够的视野提前发现他们,并有足够的移动力进行躲避。 通常来说,移民不应该单独行动。虽然他们3格的视野半径比大多数其他单位都要高,能帮助他们在较慢的威胁接近前发现对方,但他们较低的移动力和缺乏自卫能力使他们非常脆弱。此外,移民的高成本意味着即便有军事单位护送,也不适合将他们的额外视野用于侦察任务。 但多亏了腓尼基的文明能力,你可以让移民发挥更大的作用。从古典时代的造船术(可让移民上船)开始,他们的速度足以跟上你的三列桨战船单位,或者比蛮族的桨帆船更快,视野半径为5格!这对于即使在没有护航的情况下躲避海上威胁非常出色,再加上较低的移动成本即可上船,从训练移民的城市移动到你想要建立新城市的地点所需的时间大大减少。 此外,剩余至少2点移动力的已上船移民可以立即下船并建立城市,使他们能够避免被陆地蛮族或敌方单位捕获。 但这还不是全部!独特的科松区生产加成意味着腓尼基文明能比游戏中其他任何文明更快训练移民。这意味着你通常可以腾出一名移民来执行一些间谍任务。移民上船后拥有极大的视野范围,这使他们非常适合探索——以及刺探对手的领土。了解敌军陆军或海军的实力有助于你确定日后攻击的理想目标。 请注意,移民的这一特殊功能的实用性会随着游戏进程逐渐下降。一旦文艺复兴时期的海军单位开始出现,开拓者不应在没有护送的情况下行动——私掠船对他们来说是隐形的,而升级后的卡拉维尔帆船可能比开拓者的视野范围更具机动性,这使得开拓者在看到任何可能捕获他们的单位之前就被捕获。他们的视野范围在一段时间内仍然有用——至少在空军单位投入战场之前。总结:沿着你所在大陆的海岸广泛建立定居点。你可以在与你共享大陆的敌对文明附近建立定居点,然后在那里招募军事单位,轻松组建防御或入侵部队。在文艺复兴时代之前,已上船的移民拥有足够的移动力和视野来躲避敌方海军单位,因此他们不一定需要护航。已上船的移民可用于侦察敌对领土。狄多的领袖能力:迦太基的建立者(第1/2部分)
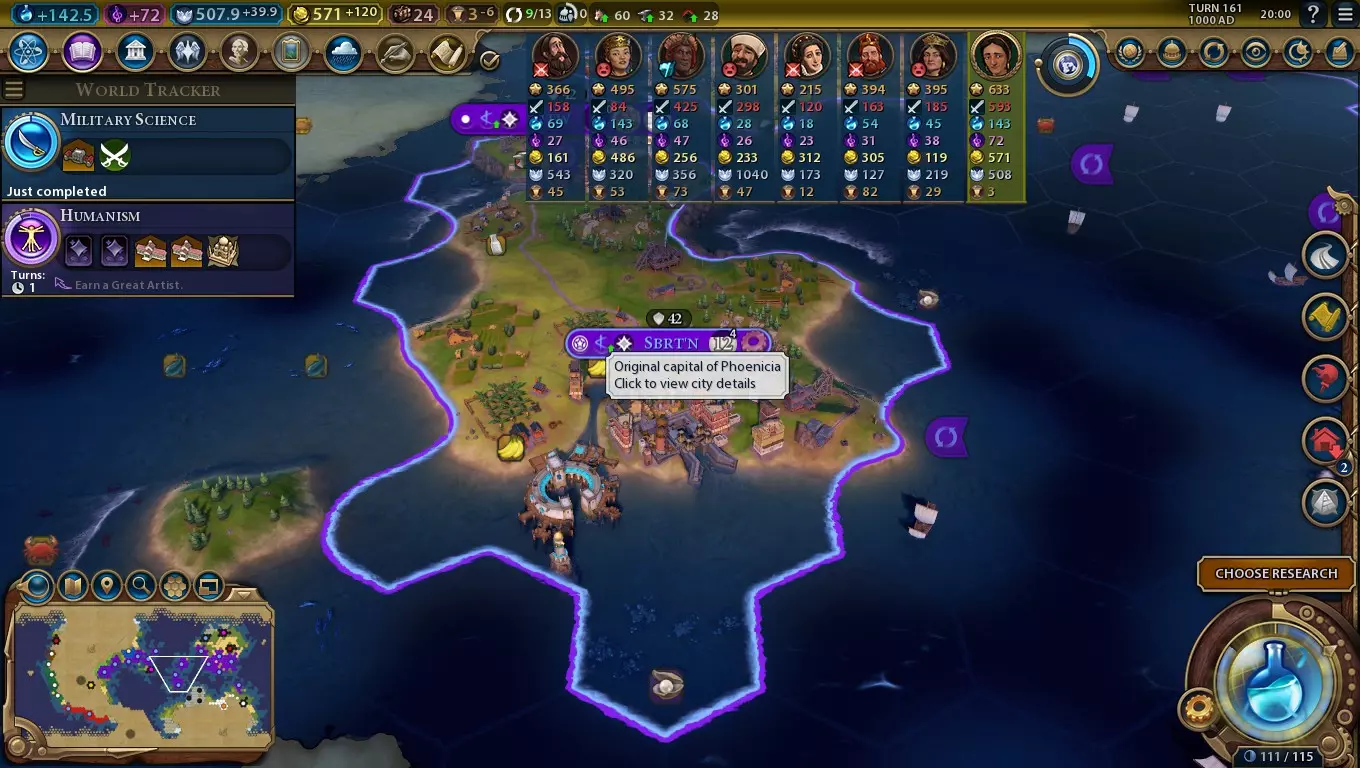
这是我的初始首都,但并非我最初最初的首都。 狄多的领袖能力建立在腓尼基文明能力和独特的迦太基港口区域之上,在殖民游戏中提供了更多优势——包括将首都迁至新大陆,并将旧城市视为殖民地的可能性。 政府广场加成: 政府广场是一个特殊区域,在整个文明中只能建造一次。其建筑提供帝国范围内的加成,但你必须谨慎选择,因为每个层级的建筑都有三种不同的选择。与其他区域不同,政府广场的建筑并非直接通过科技或市政解锁,而是在升级到新的政府层级时解锁。政府广场在远古时代的【国家劳动力】市政中解锁,该市政的启发条件要求你已建造另一个特色区域。这很容易实现,只需确保你已建造了一个【学院】区域——腓尼基的免费【书写】科技启发或许对此有帮助。 任何文明都能通过在较强大的城市建造政府广场获益,因为这些城市能更快完成各层级建筑,确保其帝国范围的加成更快生效。此外,政府广场对其他区域提供的高额相邻加成,适合规模足够大、能充分利用这一加成的城市。但对于腓尼基而言,你需要确保建造政府广场的城市同样能够通往海洋或湖泊。这样一来,城市就能同时享受先祖大厅建筑和柯松区带来的移民生产加成了! 不过,尽管这很诱人,但不要等到先祖大厅建成后再训练移民。游戏初期快速扩张,之后会有更多发展完善的城市为你的帝国提供资源,这将带来长远的回报。 腓尼基的政府广场城市能够更快地建造后续区域,这意味着可以节省更多生产力用于其他用途,比如训练移民。随着城市发展,还会增加额外的贸易路线容量——这在游戏早期尤其有用,仅靠初始区域和第一座建筑就能获得两点容量。之后,通过建造新的【科松区】和【灯塔】,你很可能会获得更多容量。 迁都
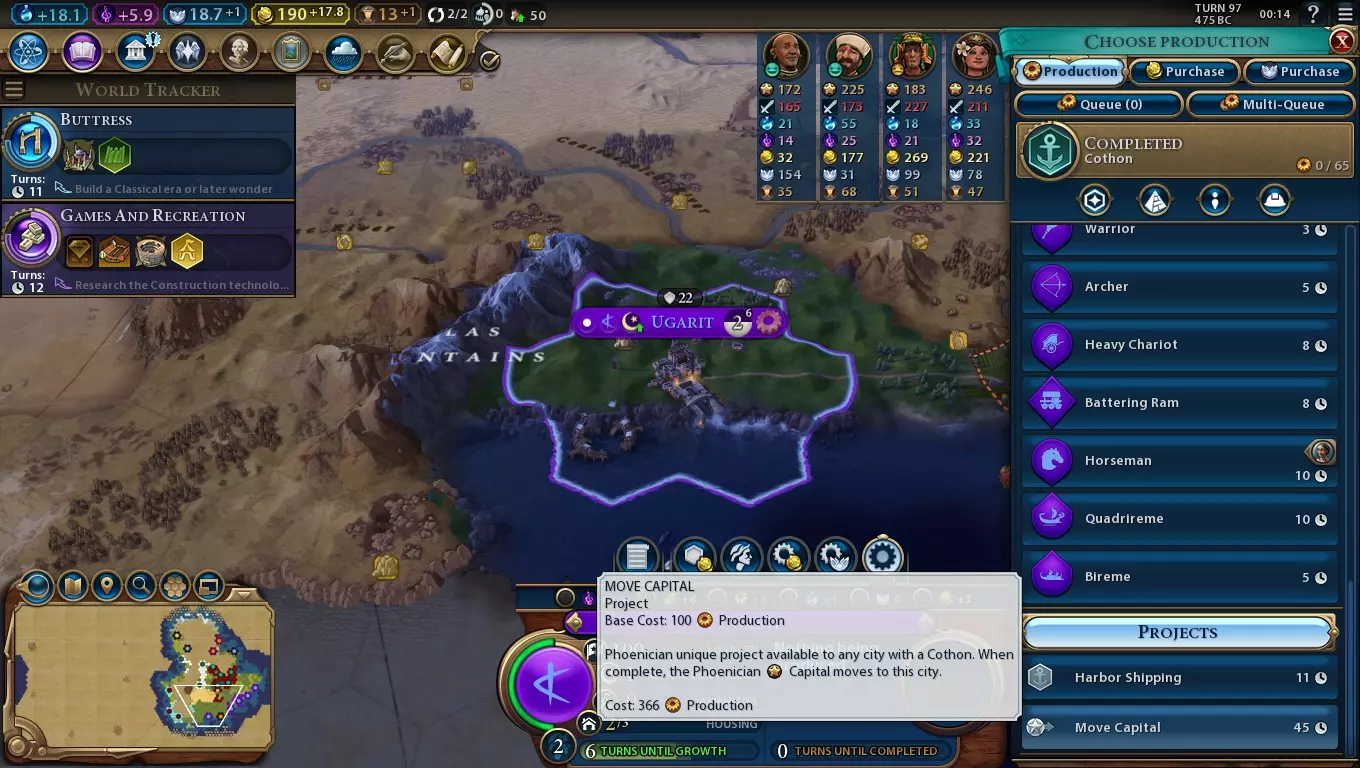
狄多拥有一项独特的能力,可以将腓尼基的首都迁移到另一座城市,但这需要付出代价。新城市必须拥有【迦太基港口】区域(因此该城市的范围内必须有海岸或湖泊),并且该项目有极高的生产力要求——是普通区域项目的四倍! 尽管成本高昂,但在一局游戏中至少迁移一次首都是值得的。这样做有多种原因: 为其他城市提供首都加成 【宫殿】以及城邦提供的1使者加成会为首都增加产出。但你的第一座城市可能并非最适合充分利用所有这些产出,尤其是当有新城市能够获得影响这些产出的修正时。例如,拥有鲁尔谷奇观的城市能更好地利用工业型和军事型城邦提供的生产力。 首都施加的忠诚度压力也比其他城市更大,平均而言,其输出量是普通城市的两倍。将首都迁至边境地区,你可以防止该城市发生叛乱,同时增加其策反敌方城市的可能性。理论上,你可以通过反复迁都来利用忠诚度压力进行扩张,但迁都所需的极高生产力成本使得投资军事单位和征服更为实际。 将旧城市变为殖民地 腓尼基将首都迁至其他大陆的最大优势在于,他们原来的“本土”大陆会被视为“海外”。这使得任何针对海外大陆城市的加成都能作用于你最古老且最发达的城市,从而为你带来比原本情况更好的收益。值得留意的加成包括: 文艺复兴时代至现代的【海外探险】黄金时代奉献,可为在外国大陆建立的城市提供每回合+3人口和+2忠诚度,并为海军单位和已登船单位增加+2移动力。 【印度群岛贸易署】奇观(需要文艺复兴时代的【制图学】科技),在有总督驻守的外国大陆城市中,所有城市可获得+15%生产力、信仰和金币。不过,就该奇观而言,【本土大陆】和【海外大陆】的判定在你完成或占领该奇观时即固定,即便之后迁都也不会改变。 【殖民办事处】外交政策卡(需文艺复兴时代【探索】市政):位于非初始首都所在大陆的城市+15%人口增长和+3忠诚度。 【贝伦塔】奇观(需文艺复兴时代【重商主义】市政):为所有位于非本土大陆的城市提供其当前可建造的最便宜建筑的免费副本。 【殖民税收】外交政策卡(需工业时代【殖民主义】市政):位于非初始首都所在大陆的城市+25%金币和+10%生产力。殖民税是最稳定的加成,考虑到游戏进行到这个阶段你应该已经拥有大量迦太基港口城市,因此能额外获得不少金币。虽然生产力加成只有10%,但鉴于生产力作为产出的多功能性,其作用不容小觑。 移动忠诚度压力免疫 腓尼基的文明能力使在其本土大陆建立的沿海城市拥有永久的完全忠诚度。这在游戏初期圈占大量土地时非常有用,但随着城市发展,它们更能通过施加忠诚度压力来相互支持,因此可能不再需要这种忠诚度加成了。这正是将其转移到新大陆的绝佳时机。
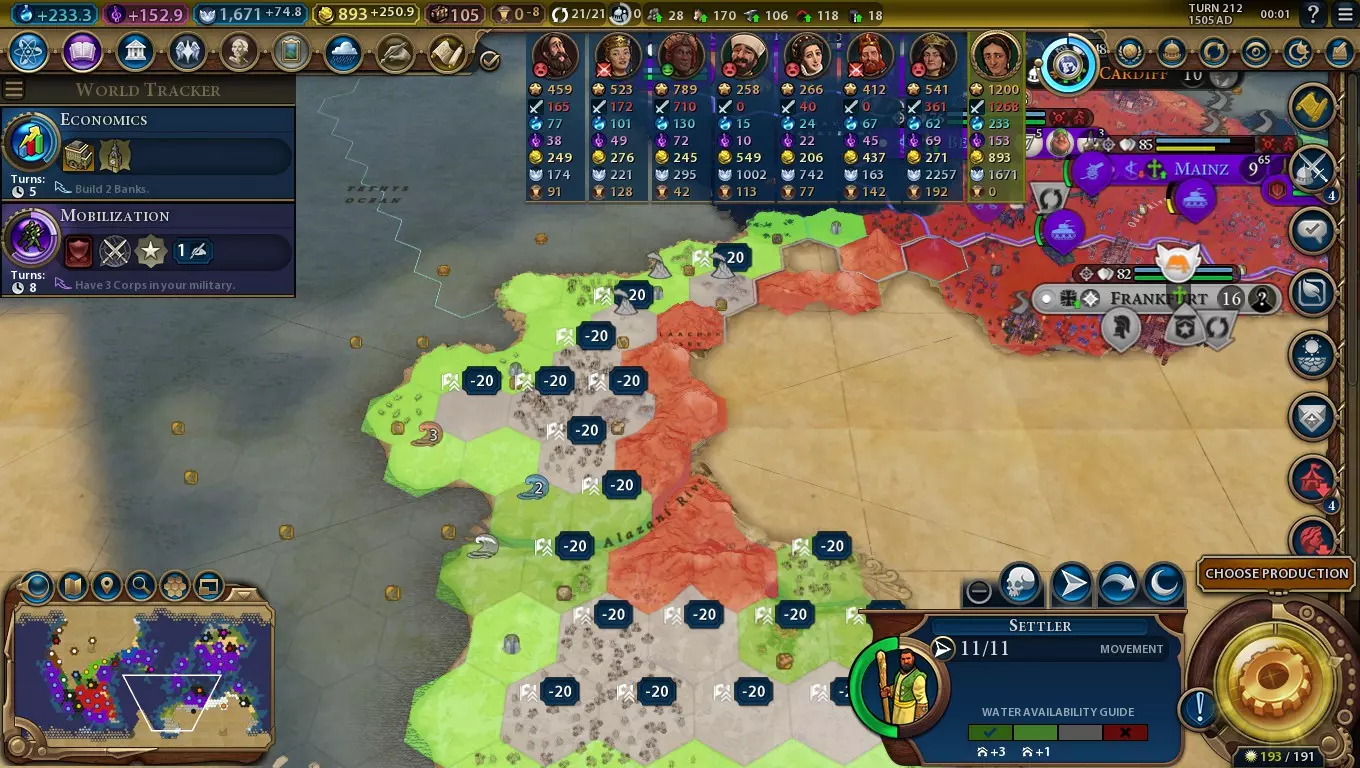
在德国的南部和西部,有一片未被开发的土地,它可以作为我一个有用的行动基地。通过将首都迁至这片大陆,我就能在那里定居,而不必担心失去自己的城市。 这项能力在岛屿密集型地图和类地行星地图中最为有效。在岛屿密集型地图上,几乎所有潜在的定居点都位于海岸边,因此你几乎可以完全不受敌人忠诚度的影响。在类地行星地图上,即使已有竞争对手,你也能控制新大陆的大部分地区。不过,即使在泛大陆地图上,两极附近往往也有未被占领的地形,那里可能会有一座沿海城市,作为发起攻击的本地行动基地。再次提醒,此加成仅适用于自行建立的城市,不适用于夺取或策反的城市。这意味着如果你打算为获得忠诚度免疫而迁都,务必确保你确实在建立新城市! 狄多领袖能力:迦太基的建立者(第二部分/共两部分) 给好战者制造麻烦 要赢得统治胜利,一个文明需要控制游戏中所有原始首都。但只要腓尼基仍拥有现有首都,他们就可以迁移被视为“原始首都”的城市,迫使好战者改变其攻击目标的计划。 将首都迁至更具防御性的位置,或远离潜在好战者的城市,可以阻止他们将你作为攻击目标。尝试将首都迁至离岸岛屿——你的海军优势将为你提供在大陆上无法获得的防御优势。或者,如果某个多山地点附近有湖泊,你可以在那里建立城市,在湖中建造科松港,然后将首都迁至此处,使其极难被攻击。 如果你已处于战争状态且需要快速迁移首都,寻找一个拥有科松港和大量森林及/或雨林的城市,然后将马格努斯总督(管家)派往那里。购买一些建造者快速清除植被,并加速完成迁移项目。 或者,你可以提前在某个城市将迁城项目推进到接近完成的状态,然后再去进行其他工作。当你的首都受到威胁时,立即切换回该项目的建设,以便及时完成它。 皇家学会: 如果你的政府广场中有皇家学会建筑(需要三级政府——共产主义、民主主义或法西斯主义,这些都需要在近现代 era 的市政中解锁),那么迁都项目可以通过消耗建造者的 charges 来加速。你每回合可以向城市的造船厂区域派遣一名建造者,这会消耗该建造者的所有 charges,每点 charge 可为项目增加其生产成本的 2%。换句话说,通过结合“公共工程”经济政策卡和派驻在该城市的梁总督(测量师),并购买建造者,你可以在 9 回合或更短时间内将首都迁至任何拥有造船厂的城市。这听起来可能不错,但要记住,建造皇家学会意味着要放弃战争部,而战争部在征服胜利游戏中有着更相关的加成(击杀单位后恢复20点生命值)。如果你在游戏后期确实急需迁都,可以考虑将商人转移到新城市,并通过内部贸易来获取额外产能。 总结:在一个能够建造迦太基港口区域的强大城市中建造政府广场,并在那里建造先祖礼堂,这样可以更有效地训练移民。不要为了建造迦太基港口和先祖礼堂而推迟训练移民——尽早建立一些城市是有帮助的。在文艺复兴时期将首都迁移到外国大陆,以便在原大陆利用殖民办事处和殖民税收政策卡。独特单位:双列桨座战船
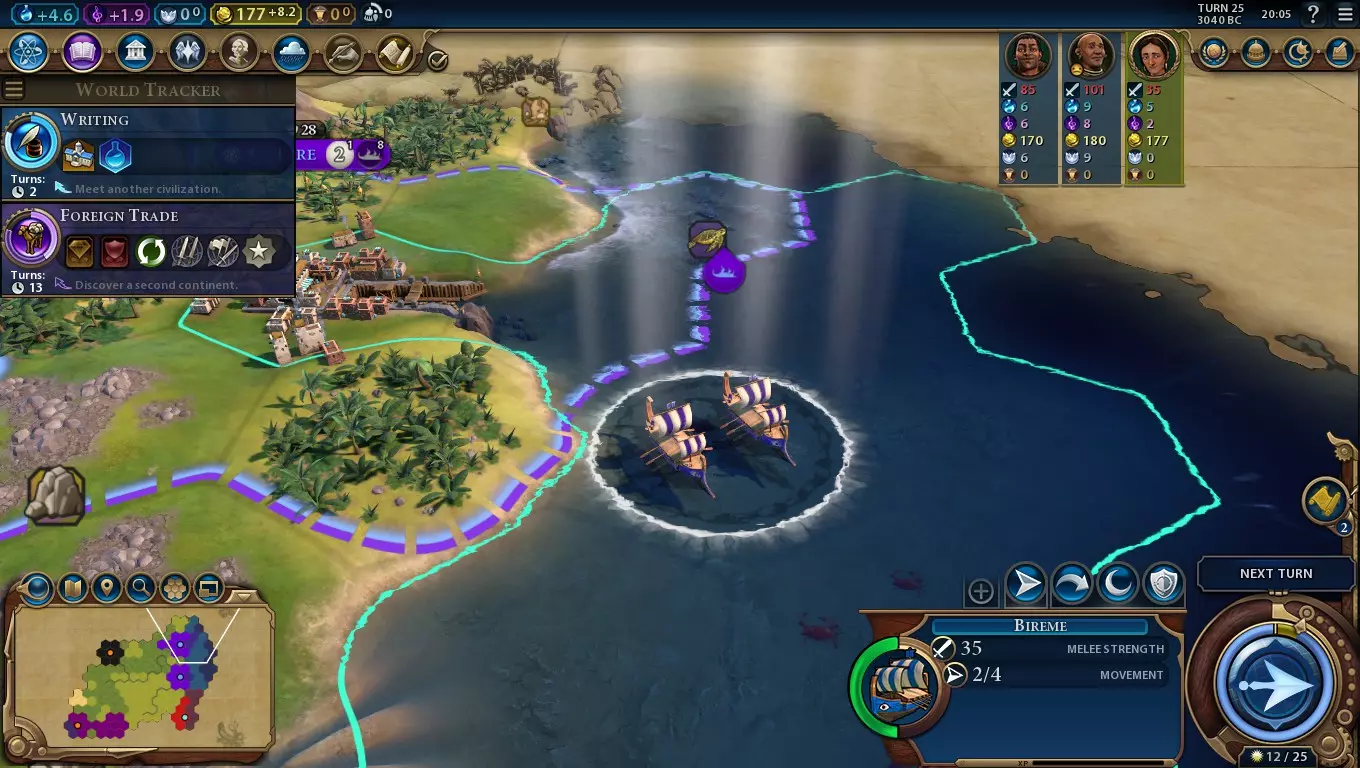
Biremes are moderately versatile naval units with a range of helpful functions - all available at an affordable cost. They'll allow Phoenicia to dominate the seas early in the game, while the Cothon district helps Phoenicia to dominate the seas in the rest of the game. Phoenicia and Golden Ages Before I go any further, it's important to note that building Phoenicia's unique unit and district might not be necessarily your best move straight away. That all comes down to how it might affect your ability to secure a strong Golden Age. In a classical or medieval-era Golden Age, you are able to select the Free Inquiry dedication. This grants you science based on the adjacency bonuses of all your Harbours (or in Phoenicia's case, Cothon districts). Building an early Bireme and rushing a Cothon district can reliably secure you a classical-era Golden Age, but you'll have relatively few Cothons to exploit the bonus. Instead, by deliberately keeping your era score low through the ancient game era (avoid destroying nearby Barbarian encampments to help with this) and avoiding building a Bireme or Cothon until the ancient game era ends, you can secure a classical-era Dark Age. You can then make use of both uniques to gain enough era score to put yourself on the path to a very powerful medieval-era Heroic Age. The main downside of Dark Ages - a loyalty penalty - is easily circumvented via Phoenicia's civ ability, while a medieval-era Heroic Age could provide masses of science as well as other yields. Plus, a classical-era Dark Age allows use of the Twilight Valour wildcard, which goes well with Biremes. All that being said, you don't have to take such a course of action. On water-heavy maps, the rushing potential of Biremes is too good to delay, and on any map the sooner you have Cothons the sooner you can use their bonus to Settler training. And being able to get a reliable classical-era Golden Age is still very useful, particularly on smaller maps where an earlier domination victory is more viable. Building Biremes With all that out of the way, all you need to build Biremes is a coastal city (or a city with a Cothon district) and the ancient-era Sailing technology. You might want to head to Writing before Sailing so you can get a Campus district up, however. With the Foreign Trade civic, you can take the Maritime Industries policy card for +100% production towards Biremes, and you can get an additional +50% later from Cothons. This makes Biremes cost essentially just 26 production each - cheaper than Warriors even with the Agoge policy card! Exploration With a base movement speed of 4, Biremes are the fastest thing in the sea until the renaissance era. This makes them great at coastal exploration until you can embark Settlers at the classical-era Shipbuilding technology, and still useful beyond that point for escorting Settlers. Support Your embarked Trader units within 4 tiles of Biremes cannot be pillaged. That's a fairly niche ability considering Phoenicia's naval supremacy means you can usually destroy enemy naval units before that becomes a problem, though there may be occasions where Barbarians rush past your defences to pillage a trade route even if they get immediately destroyed after. Even when enemy naval units become more effective, you can keep some Biremes stationed in your cities to protect nearby tiles from pillaging. If you have a string of coastal cities with Biremes inside, your coastal trade routes should be almost completely immune to pillaging! Combat Biremes have 35 strength, and can get up to 39 with the Oligarchy government. This gives them a considerable advantage over enemy Galleys and Quadriremes, and even a good shot against enemy coastal cities. If the city has walls, bring along Quadriremes as they deal full damage against them. If you're aiming for a medieval-era Heroic Age, you'll need to enter a classical-era Dark Age along the way. That allows you to pick up the Twilight Valour wildcard, which gives Biremes a +5 attack bonus at the cost of being unable to heal outside enemy territory - something they can't do anyway. Capturing a coastal city won't last long as you'll lose the city to loyalty pressures, but if the city is on your home continent, you can raze it and resettle it for a spot with maximum loyalty right next to your enemy. The Cothon district makes Settlers more affordable, so this isn't as expensive a strategy as it may at first appear. Otherwise, taking multiple coastal cities simultaneously will allow them to provide loyalty pressure to each other. Obsoletion Biremes become obsolete in combat and exploration roles once Caravels become available (at the renaissance-era Cartography technology). But they still provide nearby water-based Traders with immunity from being pillaged, and you can keep them safe by placing them in your city centres. As such, consider keeping a few Biremes around if you think enemies pillaging your trade routes is a possible risk. Conclusion While dominant in combat on water-heavy maps early on, Biremes are a relatively niche unit otherwise. They're good at exploration for a brief time before embarked Settlers come along, or defending them later, great at combat but restricted by the limited number of targets, and can prevent your Traders being pillaged - until your navy's strong enough you don't need that functionality. Unique District: Cothon

The Cothon district is central to Phoenicia's game. Aside from having all the advantages of a typical Harbour, it also offers a powerful bonus to naval unit and Settler training which allows Phoenicia to settle and conquer their way to a huge empire. Building Cothons Cothons require the classical-era Celestial Navigation technology, which has a boost requirement of improving two sea resources. That's easy to achieve by researching Sailing around the time of training your first or second Builder. Harbours provide +2 gold adjacency if next to a city centre, and Cothons are no different. As such, you should aim to settle cities directly on the coast or on a lake where possible. Try to position a city so the Cothon is also next to at least one water-based resource for an even stronger adjacency bonus. Don't worry too much about founding cities on fresh water. Cothons are cheap to build, and you can follow it up with a Lighthouse building for an impressive +3 housing if it's adjacent to the city centre. That'll also expand your trade route capacity by 1. Fast Settlers Cothons offer a 50% production bonus when training Settlers. This stacks with the Colonisation economic policy card (requires the ancient-era Early Empire civic) and the Ancestral Hall Government Plaza building (requires the classical-era Political Philosophy civic) for an impressive +150% production bonus, but only for the city with the Government Plaza. Even without the Ancestral Hall, other cities get a powerful +100% bonus. Governor Magnus (the Steward) can be granted the Provision promotion and placed in your Government Plaza city so you can train Settlers rapidly without losing any population. The main benefit of training Settlers quickly is being able to create lots of cities very rapidly. The Phoenician civ ability allows you to settle along the coasts extensively, even close to other civs, so you can get loads of spots where you can build up subsequent Cothons. More Settlers means more Cothons, and more Cothons means more money. And via the Free Inquiry Golden Age dedication, that can mean a lot of science, too - especially combined with the medieval-era Naval Infrastructure economic policy card (requires the Naval Tradition civic) which doubles Cothon adjacency. More cities will also be useful for securing strategic resources like nitre or oil, which are required to train certain naval units. A secondary benefit for training Settlers quickly is their use in exploration - at least once you have the classical-era Shipbuilding technology. Settlers are sufficiently cheap for Phoenicia that you can spare one for a bit of exploration (or spying on another civ) with their incredibly high sight range before you settle a city with one. Fast Naval Units Phoenician cities with Cothons get a 50% bonus to training all naval units. With the appropriate military policy card, that rises to 150%. Cothon cities with the policy card train naval units in 20% less time than non-Cothon cities with the policy card would train them. This means you can get five naval units for every four other civs produce! And that's before taking into account you'll tend to have significantly more coastal cities than other civs which can produce even more naval units. There's four types of naval units: Naval melee - Naval melee units overall defend better than other naval units, and unlike naval ranged and naval raider units, are capable of capturing cities. They're good against naval raiders but weak against naval ranged units. The unique Phoenician Bireme unit is an example of this. Naval ranged - Naval ranged units have strong firepower, and deal full damage against city defences (much like siege units do on land). They're excellent at clearing out land-based units and, starting with Frigates in the renaissance era, should generally be the bulk of your navy. Naval raider - Naval raider units lack mobility, but are invisible to most units and can pillage adjacent land tiles. They're decent at dealing with naval ranged units, but are countered by naval melee ones and lack defence against aircraft. If you have a renaissance, industrial or modern-era Dark Age, you can take the Letters of Marque wildcard for +100% production to naval raiders and +2 movement, but the downside (-50% trade route yields) isn't generally worth it. Aircraft Carriers - These special atomic-era units are capable of carrying two aircraft each, or more with promotions. Given how powerful aircraft are, it's a good idea to have a few in your navy eventually. While Biremes and Quadriremes can perform reasonably well against enemy cities, navies get better in the renaissance era and even more so in the modern era. That's because of the expanding attack range of naval ranged units. Frigates have a range of 2, allowing you to hit cities a tile inland or have more units contribute to the attack of a coastal tile, while Battleships and Missile Cruisers have a range of 3. Virtually every civ that owns coastal tiles will have a city in range of a Battleship's attack radius, meaning a naval advantage can virtually always help you get a foothold in enemy lands by this point in the game. Sufficiently experienced naval ranged units can gain the Coincidence Rangefinding, giving them +1 attack range. For Battleships and Missile Cruisers, this often means you can fire from a coastal city to an inland enemy one, given that a four-tile gap is the minimum distance between cities. With so many cities and so many Cothons, you can generate a lot of gold - use that gold to buy land units in the coastal cities you settle, allowing you to push your attacks further inland. This saves you having to embark military units and bring them on a slow journey overseas. Rapid Naval Healing Naval units healing in the waters of a Cothon city heal to full health, rather than healing 20 HP per turn. This is most effective defensively. A wall of naval units surrounding a city centre is a huge disincentive to attack it. Any unit that can't be killed in one turn can't be killed at all. This feature is also useful offensively. Having a coastal city near enemy lands means you have a place for naval units to rest up and heal - but if the city has a Cothon, the naval units have a lot less downtime before being able to get back into the fight. The renaissance-era Logistics military policy card (requires the Mercantilism) civic complements this ability neatly, as it provides units with +1 movement point when starting in friendly terrain - units can heal up, then get back into the fight even faster. Summary Settle nearly every city on the coast or a lake so it can get a strong Cothon adjacency bonus Use the Free Inquiry Golden Age bonus for Cothons in the classical and/or medieval era to provide bonus science. Faster-built naval units allows you to have a quantity advantage on the seas, and use that to help conquer coastal or slightly inland cities Use gold from Cothon districts to purchase military units in freshly-captured coastal cities so you can bring the fight inland. Administration - Government Note that the Administration sections strictly cover the options that have particularly good synergy with the civ's uniques. These are not necessarily the best choices, but rather options you should consider more than usual if playing this civ relative to others. Government Tier One Oligarchy's strength bonus to Bireme units makes it a decent choice, though Autocracy synergises well with Dido's bonuses to your Government Plaza city. Choose the Ancestral Hall Government Plaza building for even faster Settlers in conjunction with Cothon districts, or else the Warlord's Throne for bonus empire-wide production out of your conquests. Tier Two Merchant Republic offers a small gold bonus to complement your Cothons and a good balance of policy card slots, but is most importantly on a civic research path you'll want to follow anyway for the Colonial Offices diplomatic policy card. A good choice of tier two building is the Grand Master's Chapel. While Phoenicia lacks direct advantages to faith generation, conquest will most likely provide you with Holy Sites and a lot of faith with few uses. By allowing the purchase of land military units with faith, you can build up a bigger army in the coastal cities you capture. Tier Three Fascism offers a strength bonus and a production bonus, as well as reduced war weariness. All this makes Battleship or Missile Cruiser-led warfare greatly more effective. Democracy's bonuses to trading with allies and discount to purchasing with gold has strong synergy with the economic advantages of Cothons, however, and is the best option if domination victory doesn't look viable by this point in the game. The War Department builds on that further by allowing units to heal a little every time they score a kill. But consider also the Royal Society - it allows you to rush the Move Capital project, potentially allowing you to complete it in any city in 9 turns or less. If you intend to settle coasts in new continents late into the game, that can be rather powerful. Tier Four Synthetic Technocracy is typically your best choice. While Corporate Libertarianism has more military policy card slots, the production bonus is tricky for Phoenicia to use given their emphasis on Cothons over Encampments and Commercial Hubs, both governments have plenty of wildcards, and there's plenty of useful economic policy cards for Phoenica anyway. Synthetic Technocracy notably gives you a 30% production bonus to city projects, including the Move Capital project, and bonus power, which is useful in many ways (such as granting extra amenities to Aquatics Centres, helping you deal with war weariness). Administration - Policy Cards Policy Cards Ancient Era Caravansaries (Economic, requires Foreign Trade) - Phoenicia's trade route capacity picks up quickly early in the game thanks to Dido's leader ability and the cheap Cothon district speeding up the road to Lighthouses. As such, you can make a fair amount of money off this policy card. Colonisation (Economic, requires Early Empire) - A very useful policy card in conjunction with the Settler production bonus from Cothons, as cities will have a +100% production bonus towards them. Conscription (Military, requires State Workforce) - Having large numbers of naval units can rapidly drain your funds dry. This policy card should help with that. Maritime Industries (Military, requires Foreign Trade) - Cothon cities can now train ancient and classical-era naval units (including the unique Bireme) in 60% less time than if they had neither the district nor this policy card. Classical Era Bastions (Military, requires Defensive Tactics) - When taking a coastal city off another civ, it's a good idea to purchase a land unit there so you can start pushing inland. But if the civ has a strong enough army to immediately retake the city, that unit is lost. By boosting your city's defensive capabilities, this policy card should increase the odds you avoid that city being retaken. Veterancy (Military, requires Military Training) - Cothons and their buildings can be built faster with this policy card. Medieval Era Naval Infrastructure (Economic, requires Naval Tradition) - Doubles Cothon adjacency bonuses. Especially strong with Shipyards (for bonus production) or the Free Inquiry Golden Age dedication (for bonus science). Professional Army (Military, requires Mercenaries) - A mass-produced navy costs a lot to upgrade - consider using this policy card to lessen that cost. Retainers (Military, requires Civil Service) - Phoenicia's emphasis on settling and conquering a lot of cities places a lot of pressure on amenities, so policy cards such as this one will be very helpful. Any military land unit will do for the amenity bonus in garrisoned cities - even Scouts. Trade Confederation (Economic, requires Mercenaries) - Trading externally? You can put your many trade routes to good use with this boost to culture and science. Renaissance Era Colonial Offices (Diplomatic, requires Exploration) - Moving your capital to a new continent allows all your cities in your old continent to benefit from the growth and loyalty advantages. Liberalism (Economic, requires The Enlightenment) - Extra amenities to help handle a huge empire. Logistics (Military, requires Mercantilism) - Naval units can only heal in friendly territory - this movement speed bonus helps get them back into the fight faster. Press Gangs (Military, requires Exploration) - Cothon cities now have a 150% production bonus to pre-modern naval units. Triangular Trade (Economic, requires Mercantilism) - Adds a reasonable gold bonus to all trade routes, of which you're likely to have many. Wisselbanken (Diplomatic, requires Diplomatic Service) - Trading with an ally? Get rewards akin to internal trading while getting the full benefits of international trade. Industrial Era Colonial Taxes (Diplomatic, requires Colonialism) - A powerful reason to move your capital off your starting continent. All your established cities on your original continent will get +10% production and +25% gold! Expropriation (Economic, requires Scorched Earth) - Still founding new cities? This policy card goes nicely with Cothons to provide a +100% production bonus to Settlers. Force Modernisation (Military, requires Urbanisation) - Halves the cost of bringing your large navy up to date. Military Research (Military, requires Urbanisation) - All Seaports now add +2 science. Given they're a Harbour district building, and you'll have a lot of Cothons by this point in the game, you can get a lot out of this policy card. Modern Era Economic Union (Economic, requires Ideology) - Doubles Cothon district adjacency bonuses. Levee en Masse (Military, requires Mobilisation) - Helps you afford the maintenance costs of your huge navy. Martial Law (Wildcard, Fascism only, requires Totalitarianism) - Less amenity loss in warfare is great for a civ likely to have a huge number of cities all draining amenities. Extra loyalty helps you hold onto captured coastal cities. Propaganda (Military, requires Mass Media) - Like Martial Law, also helps reduce war weariness. Atomic Era International Waters (Military, requires Cold War) - Any naval unit except Aircraft Carriers can now be built rapidly. Sports Media (Economic, requires Professional Sports) - Can provide a few more amenities. Information Era Ecommerce (Economic, requires Globalisation) - Your many trade routes will now offer lots of gold and production. Strategic Air Force (Military, requires Globalisation) - You can now train Aircraft Carriers faster than anyone else. Administration - Age Bonuses and World Congress Age Bonuses Only bonuses with notable synergy with the civ's uniques are covered here. Free Inquiry (Golden Age, Classical to Medieval eras) - A very powerful dedication as it means all your Cothons can generate science. While a modest bonus in the classical game era, it can be huge in the medieval game era as you can stack the Naval Infrastructure economic policy card on top. Monumentality (Dedication, Classical to Renaissance eras) - A good source of era score thanks to cheap Cothons. Twilight Valour (Dark Age, Classical to Renaissance eras) - With the Oligarchy government on top, you can get Biremes up to 39 strength when attacking. They can't heal outside friendly territory anyway, so you can ignore the downside. Hic Sunt Dracones (Dedication, Renaissance to Modern eras) - Phoenicia's large navies can dominate those of other civs, making this dedication a potentially good source of era score. That being said, the Reform the Coinage dedication will generally be better. Hic Sunt Dracones (Golden Age, Renaissance to Modern eras) - Still settling new cities? Enjoy a stronger starting point for them, with bonus population and loyalty. But the main advantage of this dedication is the powerful +2 movement points for naval and embarked units. Faster naval units means you can quickly move from one coastal target to the next, while faster embarked Settlers makes them extremely effective at scouting and reaching new lands to settle. Reform the Coinage (Dedication, Renaissance to Modern eras) - With a lot of trade routes, you can get a lot of easy era score out of this dedication. Reform the Coinage (Golden Age, Renaissance to Modern eras) - Immunity to trade route pillaging (at least for a game era) means old Biremes can be promoted to something more relevant to current-era warfare, and extra gold from international trade means you can afford to do that. To Arms! (Golden Age, Industrial to Information eras) - The Golden Age War casus belli can be declared immediately after denouncing a target, offering you a reliable casus belli you can use to minimise war weariness penalties. Automated Workforce (Dark Age, Information to Future eras) - While the amenity and loyalty losses are harsh, you can use this card temporarily in order to get a boost to the Move Capital project. Cyber Warfare (Dark Age, Information to Future eras) - Still involved in warfare late in the game? You'll have Giant Death Robots to contend with, which dominate Future-era warfare. Unfortunately, Phoenicia has no advantage to building Giant Death Robots, but you can use cheap Missile Cruiser armadas and this dedication to get just enough strength to be able to survive hits from them - at least until later technologies boost their strength even further. World Congress How you should vote in the World Congress will often be specific to your game - if you have a strong rival, for example, it might be better to vote to hurt them than to help yourself. Furthermore, there may be general bonuses to your chosen victory route or gameplay which are more relevant than ones that have stronger synergy with civ-specific bonuses. Otherwise, here's a list of key votes that have high relevance for this civ relative to other civs. Border Control Treaty - Effect A (New districts built by this player act as culture bombs) on yourself. The Phoenician civ ability allows you to settle right next to rival lands, but with this resolution you can start directly taking land off them as well. Consider using Governor Reyna (the Financier) with the Contractor promotion so you can directly purchase districts, maximising the amount of culture bombs you can activate in what little time you have. Luxury Policy - Effect A (Duplicates of the chosen Luxury resource grant duplicate amenities) on whichever luxury you have the most copies of. Internal trading and Lighthouses can provide a lot of food and housing respectively to grow cities, while cheap Settlers and naval units for conquest means you can end up with a lot of cities. The combination of the two can be very draining for your amenities. As such, this is a useful resolution to get passed in your favour. Mercenary Companies - Effect B (Producing, or purchasing military units using the chosen currency type, is -50% of the cost until the next World Congress) on gold or production. Cutting the production cost of units allows you to train naval units at incredible speed, but cutting the gold cost lets you get more out of money generated from Cothon districts when buying your way to an army in freshly-captured coastal cities. Trade Policy - Effect A (Trade routes sent to the chosen player provide +4 gold to the sender. The chosen player receives +1 trade route capacity) on either yourself or an ally you trade with extensively. Either build on your trade route advantages with extra gold for international trade, or an extra trade route for yourself. Urban Development Treaty - Effect A (+100% production towards buildings in this district) on Harbour districts You'll have a lot of Cothon districts, so now you can get a lot of buildings completed there as well! World Ideology - Effect A (This government type gains a wildcard policy slot) on your own government Phoenicia has a particularly large pool of relevant policy cards, so an extra wildcard slot is very helpful. Administration - Pantheons, Religion and City-States Pantheons City Patron Goddess - Lots of new cities means lots of opportunities to exploit the production bonus of this dedication. That being said, you'll save more production if you build a district other than the Cothon first. God of the Forge - An extra boost to Bireme production, albeit a minor one. God of the Sea will almost always provide a better advantage. God of the Sea - A reliably strong pantheon for Phoenicia as you're encouraged to settle extensively next to the sea, and it makes up for the relatively low production coastal regions tend to have. Religious Settlements - The bonus Settler is very useful when developing early on, given the need to spend production on Biremes, Cothons and the Government Plaza. Religious Beliefs You can have one founder, one follower, one enhancer and one worship belief. Religious Colonisation (Enhancer) - When settling your many new cities, they can immediately start with your religion! That's especially helpful in conjunction with the Hic Sunt Draconis Golden Age dedication, where new cities start at size 4. Stupa (Worship) - A source of amenities. Tithe (Founder) - Having a lot of cities helps this belief to generate a lot of gold. Zen Meditation (Follower) - Another source of amenities. City-States Auckland (Industrial) - A huge boost to production in your many coastal cities. Bandar Brunei (Trade) - You can get a fair amount of gold if you trade extensively with other civs. Buenos Aires (Industrial) - Some bonus amenities. Cardiff (Industrial) - Your Cothons can provide you with power via their buildings, allowing you to get the benefits from powered buildings without any additional investment. Hattusa (Scientific) - Very useful for naval ranged units in particular - beyond Quadriremes, they all require strategic resources. Hong Kong (Industrial) - Allows you to complete the Move Capital project faster. Hunza (Trade) - Makes trading acrosss long distances more lucrative. Kabul (Militaristic) - Naval ranged units with the Coincidence Rangefinding promotion can attack one more tile inland - but it takes a lot of experience to get there. Being suzerain over Kabul will really help. Kumasi (Cultural) - Makes trading with city-states more lucrative. Mexico City (Industrial) - You'll tend to have a long and snaky empire due to Phoenicia's emphasis on coastal cities. As such, Entertainment Complexes and Industrial Zones won't be able to reach as many cities via their area-of-effect bonuses. Being suzerain over Mexico City helps account for that. Mogadishu (Trade) - If you're trading across oceans, Biremes won't be enough to keep your traders safe as they can be easily destroyed by Barbarians. As such, having suzerain status over Mogadishu is a good idea to avoid the risk of embarked Traders being pillaged entirely. Mohenjo Daro (Cultural) - Being suzerain over Mohenjo Daro allows you to settle right next to other civs on the same continent without worrying about fresh water access. Nan Madol (Cultural) - A powerful source of culture for coastal cities. Samarkand (Trade) - Aids your international trade gold yields. Singapore (Industrial) - If you're trading extensively, Singapore can be a good source of bonus production. Venice (Trade) - Get more gold out of your international trade routes. Zanzibar (Trade) - 12 amenities for your empire. Administration - Wonders and Great People Wonders Colossus (Classical era, Shipbuilding technology) - Phoenicia is particularly well-suited to meet the requirements of this relatively uncompetitive wonder, and you can secure even more trade route capacity from it. Great Lighthouse (Classical era, Celestial Navigation technology) - Extra movement to all naval units, giving Phoenicia an even bigger edge in the naval game. Mausoleum at Halicarnassus (Classical era, Defensive Tactics civic) - Best-used in a city with a lot of reefs and/or coastal resources, this wonder makes their coastal tiles much stronger. Alhambra (Medieval era, Castles technology) - Phoenicia benefits from a lot of military policy cards but the Merchant Republic government lacks slots for them. Angkor Wat (Medieval era, Medieval Faires civic) - Angkor Wat is more effective the more cities you have, and Phoenicia's advantages to Settler training means you'll tend to have a lot of cities by this point in the game. University of Sankore (Medieval era, Education technology) - Trade to this city and you'll get a some faith and plenty of science. Casa de Contratación (Renaissance era, Cartography technology) - Move your capital away from your starting continent before building or capturing this wonder. Once the wonder is obtained, the cities affected by its yield bonuses will be fixed, even if you move your capital again afterwards. Forbidden City (Renaissance era, Printing technology) - There's a particularly high number of relevant policy cards for Phoenicia, so this wonder can really help. Great Zimbabwe (Renaissance era, Banking technology) - Trading from this city can generate a lot of gold - though the Commercial Hub requirement can be a problem. Torre de Belém (Renaissance era, Mercantilism civic) - Be sure you move your capital before completing this wonder for the best bonuses, as it will be far more effective that way. It'll give all your cities not on your home continent a copy of the cheapest building they can struck - your more established cities will gain a lot more free production than the newer cities on other continents could. Venetian Arsenal (Renaissance era, Mass Production technology) - Build upon your naval unit training advantage with the Venetian Arsenal, which doubles your naval unit output. Big Ben (Industrial era, Economics technology) - You can save up gold from Cothons and get a large bonus with this wonder, but the bonus economic policy card slot is the better bonus on offer here. With it, you can more easily fit in key policy cards like Economic Union around other useful ones. Panama Canal (Industrial era, Steam Power technology) - Careful use of the Panama Canal allows your naval units to save time moving from target to target, or allows them to push further inland. Consider rushing this wonder with help from the industrial-era Great Engineer Gustav Eiffel if you need it near a less powerful city. Statue of Liberty (Industrial era, Civil Engineering civic) - Coastal cities on your home continent are always 100% loyal, but they might not be if you move your capital to a different continent. As such, consider building the Statue of Liberty in a location vulnerable to loyalty pressures to avoid that risk. Estádio do Maracanã (Atomic era, Professional Sports civic) - A huge empire-wide amenity bonus, which should help you with late-game war weariness. Great People Great Generals and Admirals are only mentioned if their retirement bonuses have specific synergy with the civ; not merely for providing a strength bonus to a unique unit. Classical Era Gaius Duilius (Great Admiral) - An early Bireme fleet will have an impressive 40 strength - 44 with Oligarchy, or as much as 49 when attacking with Oligarchy and Twilight Valour. Coastal cities without walls will be easily captured - and perhaps razed to the ground to be resettled with a city immune to loyalty pressures? Hanno the Navigator (Great Admiral) - Create an extremely fast Bireme. Themistocles (Great Admiral) - A permanent 20% bonus when training naval ranged units, which neatly stacks with the 50% bonus offered by Cothons, and the 100% bonus from the appropriate policy card. Trưng Trắc (Great General) - Cuts war weariness by 25% for the rest of the game. Zhang Heng (Great Scientist) - Celestial Navigation and Mathematics are both important technologies for the naval game, so rushing them faster is helpful. Medieval Era Leif Erikson (Great Admiral) - Allows you to take your strong navy across oceans sooner, and also gives you more attacking and retreating angles onto coastal cities. Ibn Fadlan (Great Merchant) - +1 trade route capacity. Rajendra Chola (Great Admiral) - Permanently adds +3 strength to all your naval units when retired, meaning you can get an edge in both quantity and quality. Zheng He (Great Admiral) - An easy source of +1 trade route capacity. Renaissance Era Francis Drake (Great Admiral) - A strong navy can also make a lot of money from plundering enemy naval trade routes. Raja Todar Mal (Great Merchant) - Gain some gold from internal trading. Santa Cruz (Great Admiral) - Your earliest shot at an armada. Make your most experienced naval ranged unit into one - that way, they'll soon have the Coincidence Rangefinding promotion and will be able to attack further inland with great power. Industrial Era Ching Shih (Great Admiral) - Piracy on the high seas will be even more effective. Horatio Nelson (Great Admiral) - Retire him in a city with a new Cothon and it'll be immediately a lot more productive. Furthermore, you'll permanently get +50% flanking bonuses for naval units, which means your advantage to naval unit production can go even further than before. Joesph Paxton (Great Engineer) - The extended range for an Entertainment Complex is especially useful if you've been largely settling around the coast of a landmass and otherwise would have few cities in range of the district. John Spilsbury (Great Merchant) - Bonus amenities, helping to deal with war weariness. Modern Era Joaquim Marques Lisboa (Great Admiral) - Permanently lowers war weariness generation by 25%. John Rockefeller (Great Merchant) - Boosts trade route gold, and also provides some oil - handy for maintaining units like Missile Cruisers. Nikola Tesla (Great Engineer) - Expands the range of an Industrial Zone - handy in coastal areas to ensure more than a couple of cities are in range. Stamford Raffles (Great Merchant) - Need a foothold in a new continent? Stamford Raffles allows you to annex a city-state, and also offers a permanent +10 loyalty boost in that city. That allows you plenty of time to move your capital there. Atomic Era Chester Nimitz (Great Admiral) - A permanent 20% bonus when training naval raiders, neatly stacking with Cothons and the appropriate military policy cards. Helena Rubenstein (Great Merchant) - Bonus amenities. Jane Drew (Great Engineer) - Extra amenities for a city. John Roebling (Great Engineer) - Extra amenities. Levi Strauss (Great Merchant) - Yet more amenities. Information Era Estée Lauder (Great Merchant) - Additional amenities. Counter-Strategies Phoenicia is great at establishing footholds close to rival lands, settling lots of cities and tends to have a numerical advantage on the seas, but will be vulnerable over land. Civilization Ability: Mediterranean Colonies If you start on the same continent as Phoenicia, they can settle right next to you without suffering loyalty pressure - but only on the coast. By filling out coastal regions near your capital, you can minimise the possible locations for them to settle. Consider settling a tile or two inland so you can prevent Phoenicia attacking you from the sea as well. Phoenicia's Settlers are excellent at exploration, which can make the civ a good target for a military alliance (tier 2 military alliances give you shared visibility). Alternatively, if Phoenicia is leaving embarked Settlers unescorted, you can catch them by bringing in naval units from multiple directions. Don't expect to catch them as they disembark, as they're able to disembark and settle a city in the same turn. Dido's Leader Ability: Founder of Carthage Phoenicia will tend to have a lot of trade routes early on, and it's likely at least a few of them will be land-based. These make them vulnerable to pillaging from cavalry units like Horsemen. Phoenicia's ability to move their original capital can be a pain for warmongers seeking a quick conquest. You can avoid this problem by attacking Phoenicia before they can expand to a second continent, or attacking Phoenicia immediately after they make the move (as it'll take time before they can move it again). Once Phoenicia moves their capital, it's unlikely to be in the same city as their Government Plaza. That means you're able to capture that city and raze it, cutting the civ off from the associated bonuses. Dido's Agenda: Sicilian Wars Dido favours settling coastal cities. She likes civs that settle inland, and dislikes civs that settle on the coast. Maritime civs will have a tough time getting along with Dido in general, but civs that don't rely so much on the coast can elect to settle a tile or two inland instead for many cities, and keep the number of cities actually on the coast to a minimum. Unique Unit: Bireme Biremes are faster and stronger than Galleys, and Phoenicia can build them in large numbers. As such, if you start near Phoenicia you might want to avoid settling spots exposed to the coast. Also avoid improving coastal resources too early so they don't get pillaged. Promoted Archers are a possible way of handling enemy Biremes, as you'll struggle to beat them on the seas early on. Catapults are even better if you have access to them. Once you have access to renaissance-era naval units, however, Phoenicia's strength bonus is lost. Biremes can also prevent you pillaging Phoenicia's trade routes, but only within a four-tile radius and only on water tiles. Light cavalry are excellent at pillaging trade routes on land, while traders away from Phoenicia's cities will often be more vulnerable. Unique District: Cothon The more coastal cities Phoenicia can settle, the more Cothons they'll have. Taking spots near the coast first prevents Phoenicia from getting the coastal cities they want, without being able to attack you with their navy. Phoenicia's Cothons have three key benefits: faster Settler training, faster naval unit construction, and full healing for naval units. Faster Settler training means Phoenicia even in peaceful games is able to found more cities than other civs, which in turn typically leads to a huge empire. Such an empire will eventually have trouble with amenities as the cities grow, so if you don't want to fight Phoenicia, you can still weaken them by refusing to trade luxuries to them. Strong naval production will give Phoenicia an edge on the seas, but not on land. If you don't think you can manage to take on Phoenicia's units on water, you can still build up Siege units as a land-based defence. Consider also placing Encampments on coastal tiles so they can provide an extra ranged attack to combat Phoenicia's navies. Full healing means if you're taking on Phoenician naval units in their own waters, you need to either pillage the Cothon district or ensure you focus on one unit at a time to destroy them in a single turn. Other Guides If you like these guides and want to send a tip, you can click here![ko-fi.com] Gathering Storm Compilation Guides Civ summaries (Start here for an introduction for all civs) Civ-specific tricks, secrets and clarifications (Ideal for more experienced players)Individual Civilization Guides America - no additional content* (Cultural/Diplomatic/Domination) America - all additional content* (Cultural/Diplomatic/Domination/Scientific) Arabia (Domination/Religious/Scientific) Australia (Domination/Scientific) Aztecs (Domination) Babylon (Cultural/Domination/Scientific) Brazil (Cultural/Domination/Religious/Scientific) Byzantium (Domination/Religious) Canada (Cultural/Diplomatic) China (Cultural/Domination/Scientific) Cree (Diplomatic) Egypt (Cultural/Diplomatic/Religious) England (Cultural/Domination/Scientific) Ethiopia (Cultural/Religious) France (Cultural/Domination) Gaul (Domination) Georgia (Diplomatic/Religious) Germany (Domination/Scientific) Gran Colombia (Domination) Greece (Cultural/Diplomatic/Domination) Hungary (Diplomatic/Domination) Inca (Religious/Scientific) India (Domination/Religious) Indonesia (Cultural/Domination/Religious/Scientific) Japan (All) Khmer (Cultural/Religious) Kongo (Cultural) Korea (Scientific) Macedon (Domination/Scientific) Mali (Diplomatic/Religious) Māori (Cultural/Religious) Mapuche (Cultural/Domination) Maya (Scientific) Mongolia (Domination) Netherlands (Scientific) Norway (Domination) Nubia (Domination) Ottomans (Domination) Persia (Cultural/Domination) Phoenicia (Domination) Poland (Cultural/Domination/Religious) Portugal (Diplomatic/Scientific) Rome (Domination) Russia (Cultural/Religious) Scotland (Scientific) Scythia (Domination/Religious) Spain (Domination/Religious/Scientific) Sumeria (Diplomatic/Domination/Scientific) Sweden (Cultural/Diplomatic) Vietnam (Cultural/Domination) Zulus (Domination)*The Teddy Roosevelt Persona Pack splits Roosevelt's leader ability in two, meaning the game with it is substantially different from without - hence two different versions of the America guide. Lincoln was added later and is only covered in the latter guide. Other civs with alternative leader personas are not split because the extra personas added in later content do not change the existing gameplay - as such the guides are perfectly usable by players without them. Rise and Fall These guides are for those with the Rise and Fall expansion, but not Gathering Storm. They are no longer updated and have not been kept up to date with patches released since Gathering Storm. To look at them, click here to open the Rise and Fall Civ Summaries guide. The "Other Guides" section of every Rise and Fall guide has links to every other Rise and Fall guide. Vanilla The Vanilla guides are for those without the Rise and Fall or Gathering Storm expansions. These guides are no longer updated and have not been kept up to date with patches released since Rise and Fall. To look at them, click here to open the Vanilla Civ Summaries guide. The "Other Guides" section of every Vanilla guide has links to every other Vanilla guide.