换一换
换一换 


An english guide to the current Seven Scenarios, including one Featured Scenario. Introduction Currently there are 7 Official Scenarios in this game. 1. All-in-One and One-in-All 2. Lies and Fraud 3. Soladnit 4. Welcome to Townsend/Tonson Town 5. Moonshade Monolith (Text Module) 6. Far Hope Park (Rules Module) 7. Cursenday's Black Carnival (Translated! In progress of writing... OwO) There are multiple Featured Scenarios, but this list is only for English Translated Modules. 1. The Enigmatic Vessel (Text Module) There will also be a summary of what you can get from the Scenario at the end, as well as generally where branches for endings take place and a brief description of the choices made to get there. Locations will be Underlined Mini Areas in Locations will be italicized Ending Branches will be underlined and italicized Well, at least I *try* to follow this format. No promises. There are way too many choices. Due to section text limit, some modules have been split into sections. The Lore section is there for people who want to delve more into the existing, established, fictional lore that is briefly mentioned/referenced in the modules. The Necronomicon is NOT real, okay? :P NOTE! This guide was written earlier, and the english translation keeps being updated. So your current version of the game might not match the module's Ending name, and perhaps some minor things mentioned before don't exist anymore. However, this still leads you to all the endings unless they added new ones. ...And if you need help, do go to the discord server. I don't get notified by comments here, it may be faster to ping me there. :) All-in-One and One-in-All This is the first module that everyone plays first. Anan is the only character allowed in this. Don't be surprised if all endings except the True Ending don't get recorded. For the sake of this module, these 'fail' endings contain extra dialogue and so are named after the dialogue for Anan's failing. Its not an ending that can be recorded. A word for you no matter where you are: If you see torches and candles, pick them up. You'll need them. Including water of any sort, that can douse fires. If not water, then a Fire Extinguisher! Castle: Young AnanMother's Bedroom There is only one person here; Anan's Mother, Grace. If you enter the room after a Man in Bandages enters it, you will encounter a Willpower Check. Failing it here will lead to the Empty Vessel Ending. Castle's Corridor On the second carpet you encounter Inspiration check. Passing it shows you stuff, failing does nothing. If you continue on without interacting with the photo for the secret path, a Man in Bandages will appear from it and go to Mother's Bedroom. Secret Path Listening gives Perception check, Success gives you some memories and dialogue. Knock, and the door will be unlocked. Entering it brings you to Secret Room. Secret Room Staying makes you do an Opposed Strength Check. Success allows you to stay and some extra dialogue, Failure makes you be pushed out(you can still enter it though). Note that if you stay, He moves further away from you, but if you get pushed out he stays near the door. The first option at least allows you to grab the gun on the desk! You will have to kill him to explore the room fully. Accepting defeat if you lose leads to the Original Regression Ending. The chest gives some memories if you pass the Inspiration check. The books on the bed give flavor text. Study Room Your grandfather, George Howard, awaits you. Providence: CampusDormitory Failing the Willpower check gives you a good dream! Oh, but success gives more dialogue and a creepy chant. You may want the parka in the wardrobe, and the money in the drawer. The desk has a thesis that references the Carcosa City(Ruled by Hastur, the King in Yellow). The horror fiction are books that Anan's friend, Amy, has recommended(pick them up and also observe them in the inventory for extra content! Observe check pass to find a Note, Fail and you lose the Note.) Carl's Room Talk to Carl to get A Key to a Ford. You will need this to progress the story. Campus gate If you go to the left, you will go to Providence: Urban Area. On the bottom right you will see the a Blond Haired Man Bullying the Black Hair man. Each time you re-enter this area, the storyline will continue. Requirements: 20 Gold, Success Craft Check on Mending Doll, Visit the area after each interaction. You will only need to visit the area a minimum of 3 times to complete this. The cat will run away if you get close to it. Caretaker: Will comment on how animals are afraid of you. Will give you a crowbar if you Checked the Manhole Cover after Talking to the man in the Library and getting the clue. Guitar Girl: Some music lines. There's some coin and a lighter on the ground next to the phone booth. Phone Booth: The phone list will give you two numbers to dial. Observing the insert coin location shows that its been tampered and might swallow coins. Failure just shows its been tampered with. Inserting coin requires you to pass a luck check to allow you to call. Railway Administration will give you a clue, the Strange Phone Number gives you a black market code. If you have a screwdriver you can open/fix the coin box! Manhole Cover: Crowbar to open. Talk to Caretaker for a crowbar. Left Notice Board: The right side shows that an antique collector is looking for a yellow badge. The contact for this can actually be found in the trash can to the left of this Notice Board. Trash Can: Pass the Observe check to get "10th Barn Street". Bat may appear here after you rummages through the can once later. Right Notice Board: The right side will tell you about a Mystery Discover Society. Campus Gate: Sewer To the right is the monster. If you read the Notice Board, you will know it is principal stone. Leaving Immediately gives you nothing. Keeping the Secret ends it at Discovering the Underworld. If you fight him, he flees, and in its place there will be an item: The Dream-Quest of Unknown. It gives Constitution +5 and Mysticism +20. Would recommend keeping the secret for storyline completion, however. Going back and talking to the man in the library will give you an item: Rabbit's Foot. Library Multiple People are here, Key Figures to Note: Amy: Responding to the note you got from the Horror Fiction Books will grant you extra dialogue(includes ending dialogue) and Trait: Ignorant Love. Talking about "10th Barn Street" will have her reference The Dunwich Horror story, and open a new location "10th Mariner Street" in Providence: Urban Area. Miss Julie: She gives you Ancient Research Data if you pass the Psychology Check. The Man Reading: Have the Mystery Discover Society Clue, and you can talk with him further. Should you choose to experience, you will get +10 Mysticism, and subsequently the Spell: Withering. Man near the police tape: Answer that it is not an Illusion for a clue, which will tell you to check the sewer. If you keep Principal's Stone Secret and talk to him again, you will be given an item: Rabbit's Foot. Mystery Writer: Only appears after you visit "10th Mariner Street". You might need the Thesis Item to trigger this dialogue, as Anan and the writer talk about Carcosa. Top Left's left Bookshelf: Oberve Check, Sports Check, +10 Sports. Top Left's right Bookshelf: Oberve Check, Concealment Check, +10 Concealment. Rightmost Desk: Magnifying Glass which gives Observation +20 on Equip! Providence: Urban AreaGrocery Passing Observe Check will grant you some dialogue.) Pharmacy If you're lucky, you can buy good medicine here if you pass the hidden dice check. You can buy alcohol here to sell... Talk to her about medicine to get herbs to the list. Passing diplomacy check if she says your condition is good actually gives you less items to buy from her, so fail it and show her your medicine diagnosis to get more items to the list. In Summary- HP Items: She shows sympathy to you. SP Items: Showing her your medical records after she says your condition is good after failing a diplomacy check. Herbs: Talking to her. Car Rental You can sell Alcohol here for a Tidy Profit, if you have it in inventory and talk to him. If you have the Black Market Code, a Dialogue will prompt here. 10th Mariner Street Short Dialogue that will grant an NPC into Campus: Library. She will be a women reading a book on a bench to the right of Miss Julie. Bridge Once you enter this area, you go to Covered Bridge. You will no longer be able to return to Providence! All-in-One and One-in-All: 2 ArkhamCovered Bridge You can take some materials from your car. You can do a concealment check at the bush in the bottom to avoid fighting 3 rats. If you move onwards without hiding, a perception check will occur. Success will then give a follow up concealment check to hide in the bush. Failure to hide will let the rats see you; hope you're fast enough to run away! Castle: PresentMother's Bedroom The right side has wood planks. You'll need it. Observing the collapsed left side will give you a photo that you can examine for a clue. Castle's Corridor You may attempt to jump over the gap with a Sports check, or use an item: Wood Plank to make a bridge. Also, any holes with webs are best avoided. You may hide behind the large rock in advance to avoid rats. (Concealment Check) Continuing without hiding will force a Perception check that needs to be passed for a Concealment check to once again hide from rats. Observing the Sculpture Successfully brings you into a fight. Avoid! However, defeating it grants you 'Defeat the Greedy' Experience. Study Room Approaching the fireplace, a crystal will fall on you. Dexterity check fail will give you the item, passing it will cause it to explode! Observing left bookshelf successfully will gives you a Swift Runestone. Observing right bookshelf successfully will give you Spirit Rune. They're useful items! Reading the right notebook will lead you to the Vanish in the Stars Ending. The notebook has a small passage that is taken from the Necronomicon written in it. It teleports you to Calaeno of Pleiades. The left notebook reveals the name of Anan's Father: Ronald. You are spirited away into the Seam of History... Seam of History Go to the future, and Afogomorn kills you. This is the Peek into the future ending. Go to the past to progress the story. Castle: PastMother's Bedroom There is only one thing to care about: The locked Drawer on the bottom left. Killing it will lead the Through The Looking Glass Ending. Taking it will give you "Truth of Misfortune" experience. Castle's Corridor Remember the tip about getting fire and water? Burn the carpets. That is, unless you're a battle maniac. Run past the first carpet and burn it-before you walk onto the second, burn it! However, Defeating the two enemies does give you "Defeat the Ripper" Experience. If you don't burn the second carpet, Perception Check Success will lure you to look into a mirror and force you into a fight. Failure lets you skip the fight. Defeating it gives you 'Defeat the Greedy' Experience, unless you already got it beforehand. Secret Path A lone torch. Nothing else. Secret Room You encounter a message... If you shift your point of view, it will lead to the Aitsu ending. There is nothing else here, if you have already checked it before. Study Room Grandpa... Pick up his cane. Open the chest. Gain 'Truth of time' experience. Go to the castle corridor until you see an hourglass to progress the story. AfogomornApproach the Eldritch Being. The end is near! Tips: If you want to use Withering, it won't work if you have Oblivion stacked once on you-it decreases skill by 5 for each stack, so that would be -5 on Mysticism, meaning you basically forget your spells as you need 30 Mysticism for Withering! The only exception are equipment that gives you spells: Aka your Recita-Stick. Feel free to spam Glory of the Stars. Even weapons here will have limited use as oblivion stacks, because that means even the brawl/shooting skills will keep your skills in negatives. The only time you will want to use Future Prediction is when Afogomorn's next move is Flame Arrow, which you can predict because Afogomorn follows a very simple pattern repetitively: Flame Chain, Flame Chain, Flame Arrow. Use Future Prediction on the second Flame Chain, and you will dodge Flame Arrow next turn. You get Time Fluctuation Stacks each time your HP hits 0 or when you get hit by Flame Arrow, so keep your HP up as much as possible and dodge all Flame Arrow attacks! As soon as Time Fluctuation hits a stack of 7, you lose the fight. TLDR Good ways to keep HP up: spirit rune heals 3 HP at start of turn, all the HP medicine you can get. Weapons: Recita-Stick(pray it hits high damages). At the start, you may consider a Machete and Crowbar, but damage tapers as Oblivion Stacks. Magic: Withering at the first turn for max dmg, Glory of the Stars or Weapons onwards(but switch to magic as oblivion stacks), Future Prediction on Second Flame Chain cast to avoid Flame Arrow Time Fluctuation Stack. The best is to use Glory of the Stars though-unless your RNG sucks and you constantly hit less than 4 damage. PS: Don't bother Willpower Luck Rerolling to pass, its terribly hard to get a success. But upon success, you do get an additional lines of dialogue, which I'll disclose here for the sake of the curious everywhere... "Your obsession, unwillingness, and pain have all erupted at this point. Your will is like a bolt of lightning that illuminates the night sky. After that, the terrifying power vanished, and your spiritual power was greatly diminished. You lost traction and continued to fall, back into the lightless sea. Your consciousness gradually blurred and sank into the deepest recesses of your soul..." The easiest method is to literally confirm the dice roll as you keep failing, and you also get additional lines of dialogue that way. There is no additional dialogue if you use up all your luck before failing-you will just get the dialogue lines for failing. Sunless Abyss It doesn't matter what you reply here. Welcome to the world of Depersonalisation! Scenario Clear: The One-in-All ending. Aria Revolver Recita Stick Undead Pendant Atlach Doll Traits: Ignorant Love Endings: The One-in-All This is only one ending that will progress the story. The rest are bad endings and will make you reload your save! Empty Vessel Original Regression Vanish in the Stars Through The Looking Glass Aitsu Lore: Yog-Sothoth, Tawil at'Umr, Aforgomon, The Ultimate Gate and the Silver Key. In fact, the Library's Gate is very likely the Ultimate Gate, and Tawil at'Umr was guarding the Silver Key. The Dunwich Horror, and the Necronomicon. If you have seen the nightmare in providence dormitory where he chants "Ygnaiih", this is a reference to the start of an incantation to call Yog-Sothoth, of which is "Ygnailh... ygnaiih... thflthkh'ngha.... Yog-Sothoth... Y'bthnk... h'ehye - n'grkdl'lh..." Which can be found in The Dunwich Horror. Also, the passage from the right notebook is taken from the Henry Armitage's Translation of the Latin translation of the Necronomicon, which was translated by Olaus Wormius. The entire passage is too long to include in this guide. Celaeno is one of the seven stars of the Pleiades. Its fourth planet is the Great Library of Celaeno, which houses stone tablets containing secrets stolen from the Great Old Ones and Elder Gods. Therefore you've been literally transported into space and died via suffocation. :) Lies and Fraud ChurchThis storyline takes place entirely inside the church, and near it. Lobby Where you start off in. To the bottom left, a locked room that you can only access if you convince your client to escape and fight the enemies after him. To the top, the church's hall. Important: The guy on the bottom left near the door? Steal from him and pick the Note. You get your first clue. This note can be later used to recruit Walker, whom will be very important unless you are good at fights. Has torches around the area. Take them all-you'll need it. In fact, take every single thing that has flames on it. You will confront some enemies if you convince your client to escape. This immediately branches to three endings. Fight the enemies leads to Princess Rose, and telling him that you're leaving to get help leads you to the street, which can lead to either All that Have Been Settled or Flower of God's Blood. Hall To the left, a confessional hall. The top right, the Preparation Room. Bottom right, Cemetery. Near the entrance, you may take Water, which allows you to douse fires. There is a statue here you should be careful of passing checks on. Sometimes its best to leave things alone. Passing Erudition Check will allow it to make an Inspiration check. Passing Inspiration check does weird things to you. Multiple people are here. Here's what they do. 1. The Client Convince him to escape with Irene after you gained enough clues. This will lead you to the princess rose ending! Only two ways to convince him: Irene's Candy, or after telling him what happened in the Preparation Room. 2. Irene You will want to talk to her about the 'purple bottle' you will find in the Cemetery, for a Clue. This Clue can convince the Client. 3. Walker, the hunter Psychology check, you can calm him down. Afterwards, telling him to go to the confessional hall(and listening in on his talk with the head priest) does not do much. If you have the note you stole from the guy in the Hall, he will give you a crowbar, and you can invite him to join your team for battles. He has a bow in his inventory and his default weapon is the gun. He sucks at it, so swap him over to use the bow. 4. Sharpen Knife guy, to the right of the entrance. He has the key to the Cemetery. Steal or Fight him for it. 5. The guy who is reading a book. Pleasing him gives you the Holy Bible: Upon using it you get Trait: Interact with cult. You may also attempt to steal from him. 6. Gambler - The guy to the right of the book reader: He sells a dagger and holy medicine. Bribe him for a way to Altar Hall early. Bribe and Don't Gamble with him. Now you can unlock the Altar Hall Directly if you wish. If you do gamble and win, he kills himself. If you gamble and lose, he leaves with your money. 7. Insane Believer - The guy immediately to the left of the entrance to this area. If you have Item: Holy Medicine on you, you can give it to him for a clue(Directs you to cemetery). Rescue does nothing. Note: After the church is detonated, you can in fact walk through spores without getting parasites(sprinting will make you have them), and enemies in this area do not Aggro as long as you don't sprint. They also De-Aggro if you stop sprinting. If you have sprint on, its considered as sprinting! Service: Nora If you had killed Noel in the Cemetery after listening to her story, Nora shows up. Failing the willpower check kills you. Refusing immediately will lead into a fight. If you win, you will still go to Anantarya Cage. Saying that you will join gives you some time to either prepare for a fight, or get the other endings. Attempting to flee will immediately kill you, sickle style. You can loot your client for 10000 Gold and an Armor. You can pick to accept or resist. Accepting will lead to you having three endings. If you check on Irene before talking to Nora, you can look for a way to protect yourself. Passing a Diplomacy Check with her by looking for a way to protect yourself leads to the Wealthy One Ending, which gives you the Trait: Wealthy One. Looking for a way to repel her and passing the concealed check will give you a way to Pledge yourself to her religion, or decide not to in the end. This leads you to Anantarya Cage... and towards the The Glitch World After Glitch ending. Without checking on Irene, accept yourself to be Baptised by Nora. This leads to the Cult Leader ending. You automatically get Trait: Cult Leader. Confessional Hall Has candles you can take here, and an item on the wall you can read. Nothing else. Cemetery Has materials here you can take. Enter with the Cemetery key... or Walker's Crowbar. The table has two parts to inspect. The bottom has medicine(take for actual medicine items), a red bottle(just text to read), and the purple bottle. Inspiration/Intelligence check for what the purple bottle is for a clue! The top part has research material to read(gives you a clue), and Research Books. Passing the check for Mysticism for the Research Book will tell you its a book about the occult, and you may then take it. As you leave the room, if you read the research materials, you will be caught by Noel. You will then have a choice on if you want to escape or ask about her motives. This will branch into two ways! Listening to her and then killing her will make you join the service as it is too late to not join. This is the first alternate ending branch. Nora will show up to crash it. Agreeing to join the service with her will allow you to join the service. Nora does not show up, and it proceeds peacefully into the hidden underground room. This will go into the Flower of God's Blood ending. Escaping directly will not make you join the service. You may continue with your game for another ending. Preparation Room Can only access by having enough Concealment skill to pass the check, or by using Walker's Crowbar. Do not enter unless you are ready to fight a monster! This areas is abundant with food items! To the right there is a table. It has a book and a dairy. Reading the book and passing the Erudition and Medicine Growth check will increase your Medicine skill. Reading the Dairy will give you a Clue that you can tell your Client about to convince him to escape. On the top near the table, the cabinet contains medicine. Take the medicine, and checking the cabinet again will let you check a cloth box. It will give a clue about Princess Rose. Corridor of Law and Sin Can only be accessed if your client has escaped, and you beat the people after him. Because they drop a key to open it. The room at the bottom left of the hall. There is some stuff you can get in the coffins along the way. You may ignite one on the left immediately to stop your pursuers, or hide in the coffin near the end towards the right. Moving forward, you will have to fight alone against a church believer. There will be a heavy wheeled door-failing the strength checks do not matter. Failing it thrice will still open the door, passing it just lets you open it once. Room of law and sin Utterly disgusting. Its a room that does not have much to take either. The tool rack has some weapons, the body is best left untouched or ignited. Attempting to search it without igniting and dousing it or passing a Dexterity check will cause you harm. On the body, there will be a flamethrower and an unimportant item. You do not need the flamethrower, unless you want it. Picking up the organs and throwing it into the pool will cause a large tentacle to kidnap you. Resisting it will cause a strength check-passing it will save yourself from the pool. Giving up will cause you to fully enter the Princess Rose Ending Lies and Fraud: 2 Flesh Room Falling into this area is a result of the above Room of Law and Sin. You will get a Trait: Panacea. The only thing you can do here is check the tentacles, the spores, the skeletons and talk to the mysterious girl. Do not inspect her closely, or you will die. This is also the place where you fight her if you pick the wrong choices! Having enough diplomacy to convince her to let you go earlier will give an alternate ending as you continue. She will give you a wreath. Choosing to stay is the only other option. Afterwards, talking to her only gives two options: Break the collar Wait Breaking the collar will cause her to immediately turn into a boss to fight you. Once you win, a dark passage appears behind her. Unfortunately you cannot bring her out. You see walker, if he went to the confessional/in your team, and end up in the Preperation Room. Waiting will eventually make her lose control as well as have a large explosion sound out, and she sends you away with a wreath as she goes berserk. Altar Hall Only can be accessed after the church is detonated, joining church service, or via Gambler's note and triggering the hidden switch. It does give additional dialogue. The Gambler's Note If you picked up the Note from the Gambler, you can enter this Area early. Its the table below the statue. Inside, as you go towards the top, you will get an Inspiration/Intelligence check to see if you'll respond, but the failing the check can also save you. Nothing happens if you don't respond. But responding to it makes you have a mysticism check, and upon failing, it forces Trait: Alienized Magic Seed. Passing this check gives you a choice to devote or reject devoting yourself for the 'Gift' of that Trait. The Gem will tempt you. You will have to pass a will power check to be able to refuse it. Refusing it gives you the Trait: Fortitude feeds on itself. If you pick up the Gem, it leads to the Flower of God's Blood ending. Because it forces you to attend church service. Church Detonation First, Note that if you put out the fire in front of the confessional hall you will get +10 Mysticism Growth! You will find the Haunter of the Dark guarding the way out. He fears the light-now is your time to use your flame items, it damages him massively when it attacks you and nullifies his damage to you. Try to attack him with an equipped torch/light weapons, and next turn you get a new action in Skills called 'Light up the battlefield'. It gives you Light stacks. Service: Noel You enter this area with Noel by agreeing to join the service with her. You can, in fact, insist to leave midway through this service if you pass a Concealed oppose dice Psychology Check and notice something is wrong. Going up will trigger the worship to begin. Choosing to chant gives you a Trait: Alienized Magic Seed and you will end up being driven away from the church to the street. If you do not, you can resist being driven away. But you can't stop the Wiseman, the priest. In any case you will end up on the street. StreetIf you have left earlier by convincing the mysterious girl, you will get out of the church by the front door. You will get the Trait: Windfall, from your client by talking to him after he ushers you out so that he may detonate the church. If you attended Noel's service, and ended up here, you get the Flower of God's Blood ending(Including leaving early). You will also get to this area after you are trapped inside the church. Your client will be here for you to get 500 fund and Trait: Windfall. If you kept Irene's secret, she will give you 30 luck. If you told your client you left to get help, you get two options when leaving the street. Actually getting people to help leads to Flower of God's Blood, and passing the Dex check will kill you first instead of helping you. If you just leave(Oh wow, cruel!) you get All that Have Been Settled. Anantarya CageTouching the Butterfly here gives you Trait: Deconstruction of reason. Not touching the butterfly and just going to the darkness kills you. Jumping off the Abyss will kill you here. Really make sure to loot your Client's body... Armor is very important here. Find items around the area to escape. Preferably things with no Malice. Like the bow at the bottom left! Ring on the right. The other 3 items will have to be approached in this order. Approaching Doll and Mask will trigger a battle. Doll Mask Wingless Bird Tips: Prepare your attacks(The literal skill), make sure walker is with you and he has ammo and uses bow. Noel will offer you a way out. Passing an Inspiration/Intelligence check will give you a choice. Failing it will trigger a fight with Sloth, a 80Hp boss that can use a move to stun all targets, and a skill that makes your damage to it be dealt to you. A tip: It doesn't seem like she does moves when you attack her sometimes, you you'll want to hit her at least once while another prepares their attack, preferably walker with a bow. Refusing will allow you to jump off into the abyss and exit this area safely. Accepting still triggers a battle with sloth. Defeating sloth continues the same storyline as Refusing to her taking a part of you. You'll end up in the Church Hall with the Bloated women. You can, in fact, choose not to engage and run out of the church to see an ending that can't be saved named Escape?!. Fight against Noya/Bloated Women. For the first round, you can do whatever-but you must grab a corpse for the second round, because she will use an instant kill attack. Afterwards, you'll want to have one character wake up Noel, and the other attacking or preparing an attack. From then on, she will occasionally end up cutting herself, so fight her! Cultes des Goules Flower of Blood Shining Trapezohedron Black Fan Traits: Panacea Interacted with Cult Windfall Alienized Magic Seed Deconstruction of reason Wealthy One Fortitude feeds on itself Cult Leader Endings: Princess Rose Flower of God's Blood The Glitch World After Glitch Rich Man (Wealthy One) Dust Settled (All that Have Been Settled) Cult Leader Escape?!(This cannot be saved, but can be read as an ending text. You die though. Happens to be one of those death endings that actually have a name.) Lore: This module focuses on Nyarlathotep. Anan even complains about him after Flower of God's Blood. He is also talked about in The Glitch World after Glitch. So these are the endings you may want to read, if you want more flavour text. His two avatars you will see here is The Haunter of the Dark, and The Bloated Women. The church here is possibly referring to The Order of the Bloated Women. Soladnit This module takes place throughout the Mansion and its areas. Its the holy ground for Spellcaster or High Mysticism Characters! You can get a gun and some ammo if you decide to open it, as you talk to Saya. The mirror, bed, and dairy can be checked. The rightmost drawer has items. Carter's BedroomOn the foot of the bed there is a table, passing the book's observe and mysticism check increases your mysticism. Left of the bed's drawer holds a portrait that the Banquet Lady wants. Check the bed for Notes you can ask someone to translate later. Observe check on the left side of the bed will give a Magic Runestone, the Right side of it(where paper is on the ground) will give you a Swift Runestone. Sherry will give you a Draft Design of the State here later on. She will then also give you the key to this room in the Second Floor Hallway. Study RoomThe top left bookshelf needs you to pass an observe check, and if you have the crystal from the car you investigated in Parking Lot and choose to fight, you will get Trait: Soul Redeem. Pass a Luck check to the left of the Desk, and you'll get Key to an Unknown Room. Bottom left bookshelf will have an Observe and Diplomacy check, passing both increases Diplomacy. Ace will be here after you checked on the Brown Crystal in Ballroom. Passing an Observe check will show that Ace hid something near the window. Check there will allow you to get the First Survivor Ending early. You will also get this ending if you tell Sherry or Saya that you're leaving. It is the only way out of the Mansion. If you tell Sherry at the last minute that you won't be leaving, you will have to pass a brawl check. This will thus lead to the New Bond Ending. Guest RoomPlace where you meet up with Saya and Sherry to progress the story. CorridorYou have to have the White Crystal from the Parking Lot to Watch the Mirror. Pass the Inspiration check, once you do, look in the reflection. Then you can find the Butler in the Ballroom. Second Floor HallwayHas a sword in chest(crowbar it). BallroomMost important area. Check all the crystals here. However, any crystal that gives something all require a mysticism check. Notable ones are: red one gives Trait: Flame Worship. Green Laurel gives a usable item. There are people around here. Key people to Note: 1. Butler (Standing by the corridor entrance) You can get a Crowbar and Key to the Study Room, if you recognised him after watching the Mirror in the Corridor and manage to stop him(subdue or threaten). 2. Lady (Dining on a table) Playing the game with her and passing the Opposing Dice Observe check yields a quest. Giving her the portrait from Carter's Bedroom completes it. 3. Architect (window guy) Having the Draft Design of the State and talking to him will tell you that there is a room underground the Parking Lot. 4. The Old Man (Magnifying glass guy) If you have the Notes from Carter's Bed, you can translate them here for some text. If you Bribe him, he gives you +5 Erudition! CourtyardLots of flowers around. Has a well. To the top left will be a maid that has the Key to the Madame's bedroom, and the Top right will lead to an area called Storage Room. Well Look at it at nighttime, and you will suffer. Staying in it will toss you into a special area named Time Fracture. You will be able to go to the bottom of it. Checking around gives you some gold and items, as well as find out Madame's clothes are here. Afterwards, a hoop will glow: you need to pass a Craft check to get an item. If you pass this, you fight Color out of Space. Tip: Using the same item you get from the craft check instant kills it. You need to pass a Sports check to get back up. Low sports characters, do not worry; there is a rope you should get from checking around. It gives Sports +50. Alternatively, craft one. Time Fracture If you go to the rightmost side you get some cool flavour text. Pick up the phone, you will have to pass a constitution check or die, then run away(or fight the creature). Go left to get out of here. Storage Room Small area to meet with Sherry and Saya after Sherry has a stomachache. That's it, and some items. Crucially you get a Tablet that temporarily Increases CON by alot. Parking LotHas a well hidden basement area on the bottom right, underneath the black car. You can investigate this Black Car for a useful White Crystal you will use in Study Room for a Trait, and the Mirror for the Key to Study Room. Other cars have some materials. You can also attempt to leave the mansion, and Ace will try to stop you. Leaving the mansion by this path is an Instant Death Ending, no matter at which point in this module. Secret Room You need to know that this place exists from the Architect, and have Key to the Unknown Room to enter this area. This place has a Mana Can item(heals all MP each turn! It is also accessible after Carter comes back. It is where Ace is after you see her beckon to you to the parking lot. This is the branching area: You decline or follow after Sherry. Branch EndingsOnce you enter the Guest room to progress the story, you'll end up in Ballroom. DO not fail willpower check. Its instant death. Go to the parking lot, and then the Secret Room to continue the story. Study Room Declining Sherry, you will end up here. Now you have a choice to leave or stay. Leaving gets you the First Survivor ending. Staying will cause Saya to attempt to force you out. Failing the Brawl check leads to the First Survivor ending. Passing will stop Sherry, she will leave you behind after you both talk to Ace. This will lead to the New Bond Ending. Courtyard Well to get to this area you have to fight Color Out of Space. Heal up before entering. Tindalos will show up, this is where the game branches into two endings. If you win against Tindalos, you get Beautiful Reality Ending. If you lose against Tindalos, you get After the catastrophe Ending. Yithian Gun Beasts in the Shadow Unaussprechlichen Kulten The Soladnit Traits: Flame Worship Soul Redeem Endings: Beautiful Reality After the catastrophe New Bond First Survivor Lore: The great race of Yith and The Shadow Out of TIme. In fact, the lady that gives you the gun might have been possibly temporarily taken over by a Yith. Hounds of Tindalos. They seek out time travellers. The Color out of Space, The story tells of this alien being tethered to the well. The Cats of Ulthar(Potentially. Sherry is Snow, and implied to have kitty powers. In this story, cats have gained sentience, but not a human body. They're implied to have devoured humans that killed their species). He supposedly looks like a giant ball of fire and is served by Flame Creatures, and is known to be a Elemental spirit of Fire. The Green God, for the piece of leaf given by then emerald laurel. For more dialogue, you will want to complete Beautiful Reality and After the catastrophe. Welcome to Townsend/Tonson Town West StreetThis place has Hotel, Nana's House?, and Grocery Store. Materials around the area. There is a bicycle to the right end of the street, you can climb up here to get additional materials and some clovers(an item that you eat to increase luck) Hotel Second Floor, Guest Room There are items in the drawer. In the corridor, you can enter the storage room, grab a key/follow merry in later. As you go down the stairs, she will be seen heading up to this room. Second Floor, Storage Room More food items, a flower pot, and at the bottom right where merry will be checking you will find Ryan's key. Use later to open a safe! You will want to check this room before you meet up with Horn in the slums, for the second time. Particularly that flower pot for a very important Story Item: Black Egg. First Floor Merry's room is behind the counter on the top right. You will have to come back here before you meet with horn for the second time in the slums, to save merry. Without the Origami Paper, you will have to fight her. With it, you can try to wake her up instead and not die while trying to do so. First Floor, Merry's Room Inside the drawer, you can find the storage room's key. The wardrobe also has useful items, like gloves. Nana's house? This house is just to the upper right next to the Hotel, and Left of the grocery store. Inside, you can observe the picture for a Clue, investigate the piano for a letter, and look through the stacks of musical score notes. This can be used later for a trait! Grocery Store The place you will see Merry enter. A man looking at the lottery will be here. Buy a lottery and talk to him to get a Clue. Alot of food items can be found here, including Merry's money. Take them if you wish. Central FountainThis place gives way to the North, East, South and West Streets. You can get water from the fountain. A man here will be hoping for a broadcast. You get a Key here. Please the old man for a clue. South StreetIn the Hobo corner you can investigate for some clues, but there doesn't seem to be much to do for him. Comforting him lets you buy items from him: If you are bad at observation checks, you may want to buy a Crowbar for later. You can get a black seed underneath his bed. Merry and Nana's Slum House The house on the left that you will find Merry in. There is a dagger under the top bed's pillow, and investigating near it will give show you some text about their past. Tyler's House You don't have to pass the corpse's medicine and SP checks. Body search him for an origami paper that wards away evil. If you don't want to fight Merry later on... You will also find the monster here if you let him out. East StreetIt has two areas: Police Station and Cliff. Police Station Has two offices, one on the right, the other on the left, as well as a prison containing a monster. Use the Crowbar or Sheriff Key to let the monster out for additional events. Right Office Lots of clues here. Most importantly, you can find the Lottery here(and write it in if you bought the lottery), and with some checks you can switch on the broadcaster. Read the plan for 1000 Gold. As you would expect, talking to the lottery guy in Grocery Store and the man at Central Fountain afterwards will now give you a black seed each. Left Office Horn will be here. If you have Ryan's key, you can open the Leftmost safe. Fountain Key(Mechanical Lock Key) for the Rightmost. Around the Table, you pass an observation check for the Sheriff's Key(If you don't have a crowbar to open the monster's cage). Progress the story by reading Ryan's notebook. Cliff You can find the musician here. If you have investigated Nana's House thoroughly, he will give you a Trait: Famous Song and a black seed. Pleasing him gives Erudition +5. North StreetThis place only has one area to go to: Wende's House. Ryan will be here, and if you have seen the monster at Tyler's house, he will fight and weaken Ryan for battle, should you decide to attempt fighting Ryan. He will have 40Hp if so, and 70Hp otherwise. His first pawstrike does not hurt too badly, but you may want to avoid his Batter or even Normal Attacks after-it is DEVASTATING(He does multiple dice). Defeating him gives you a black seed. Wende's House To the rightmost there will be two bookshelves that you can use to attempt to increase your Medicine and Erudition skills, after you pass their observation checks. The rest are flavor text to read about. If you let Horn kill Wende when meeting for the first time, it is game over. Make sure to take this if you want to have a chance at saving Wende later on. If you're on path to the Faded Eternity ending, you will visit this house a third time. This branches off to if you can save Wende, or not at the end of it. Killing her saves her, and allowing her sacrifice prevents her from showing in the Faded Eternity Ending. Tips: Equip Merder, and have Trait: Famous song. NestThere is only two ways to reach this area: Beating Ryan, or not. The story branches out here. If you have beaten Ryan, Horn will succeed in leaving a gift for Tonson-namely lacing the house with explosives and exploding it. You will fall, and reach this area. If you did not talk to Wende for the 'Signet Pendant', spider monsters will attack you. If you have not, Ryan will lead Tonson to the slums. Horn will be attacked by you involuntarily due to what Tonson had done to you, and citizens in the town will be in the Nest. Tonson takes you and everybody to the nest You decide to wait and see what happens when Tonson catches you and horn with Ryan. If Merry was saved, Ryan will attack the enemies, and after fighting them with Horn you get the Life is like a dream Ending. Nobody is saved in this ending, except you. If Merry was not saved, You die. Reload :) Resisting Tonson's Merder You have to have a spare cleanser, and Ryan must not have been killed for this to have happened. Horn will be your teammate in this fight. Fighting against Ryan and winning will lead to you having beaten Ryan and falling. For having beaten Ryan and falling This area has the Spider Stone Statue... pact. Black Seeds: Musician, Ryan, Lottery Guy, Fountain Man, Under the bed of Hobo. Black Egg: Storage Room's Flower Pot You can jump into the abyss-and reach the Life is like a dream ending, one that you can also get in the other branch ending. If you do not have the 'Signet Pendant' that Wende gives you if you visit her, monsters in this area will attack you. Summary Pearl of Nacha Pact of Kadath Badge of the King Merder Traits: Famous Song Blessing of the Spider God Endings: Faded Eternity Life is like a dream Lore: Atlach-Nacha as Spider God(Rather Obvious, the Pact to Kadath book mentions Atlach), and Hastur, the King in Yellow. It might not be obvious, but Wende uses a skill called Call to Carcosa(Hastur's Home) in battle, and the man calling her is in yellow(Hastur). Moonshade Monolith Inconsequential choices may not be written down, such as choices with extra dialogue of no relevance to affect the story plot, and searching for items/materials unless it might be of exceptional help, or just straight up nothing happens. High Constitution characters will find it easier to survive, and the opposite of this should ensure as many items with armor on them or an alternative way to not die(such as high damage). Items in NPCs inventory(Certain story points, they may be changed, interestingly enough) ----- Helene - Bandage 2 Tranquilisers Four Leafed Clover Harkins - Rabbit's Foot Brass Knuckle Screwdriver Byrd - Stimulant Saw Crowbar ----- Jungle Area- To Site Entrance You are allowed to only pick two Options total. Weapons (Pistol, Dagger, Ammunition Chest) Food (HP Recovery Decoction, 2 Water Bottle, 2 Food) Equipment (Shield, Protective Suit) Talk to Helene about Teammates Clue: Helene's Research Talk to Harkins about Greymatter Site Clue: Harkin's Lie Byrd Option Unlocks - About Harkins (Needs Clue: Harkin's Lie) Clue: A Felon's Past Talk to Byrd to progress the story. Lab Entrance- Stay Vigilent (Progresses Story!) Inspiration Check Clue: Black Tides Check the Chests Clue: Ferried Workers Check File Cabinet Clue: Unregistered Removal To Security Room Check Pass: Item: Key (For item box in Storage Area) Clue: Unused Weapons Options unlocked after Check the Chests - Report (Progresses Story!) - Follow the Blood Removes Stay Vigilent Option, Adds Check Elevator Entrance -Check Elevator Entrance Check the Ceiling Clue: As Nimble as a...? ElevatorCheck Pass Item and Clue: Black Dagger Failing gives you nothing Storage- To The Storage Room - Check the Room Say Nothing Item: A Portentous Pocket Watch (Useless. Time is slower because its broken, hah!) - Open the Chests (Needs Item: Key) Item: Magnetic Storm Grenade, Bulletproof Jacket, Machete (The Following below options lead to the same location in the end, just works out differently.) - Explore Around (Progresses Story!) Clue: Black-Blooded Monster Clue: Experiments in the Lab (Needs Clue: Helene's Research) Leads to Location: Control Area - Collapsed Area (Progresses Story!) 1st Check: Pass, Allows you to progress. Fail, Option not Available. 2nd Check: No Damage to Self, Damage if Fail 3rd ??? check: Pass, No Battle. Check Monster Clue: Black-Blooded Monster Clue: Experiments in the Lab (Needs Clue: Helene's Research) Extra Dialogue based on Clue: Black Dagger Contact Teammates (Progresses Story) NPC appears: Nila Check Pass: No HP Damage Check Failure: Leads to a ??? Check, where fail = HP Damaged, pass = no Damage(She slaps you) Leads to Location: Control Area Control Area- Absorbed Harkins (Needs Clue: A Felon's Past) Be Trustful Clue: The Rebellious Clue: Voluntary Human Subjects? Be Suspicious Nothing happens Options Unlocked - Check Monoilith (Needs Clue: Black Dagger) Clue: Terror of Monolith - Pondering Helene (Needs Clue: Experiments in the Lab) Pass Check Clue: Letter from the Deceased - Wait Silently (Talking to Nila fully)(Progresses Story!) You need Clue: The Rebellious and Clue: Voluntary Human Subjects? for the check to appear. Passing allow these Options. Without passing, it will automatically be as if you chose to Remain Silent. - Raise Your Concern Extra Dialogue, no battle. LOCATION UNLOCK: Beach - Remain Silent Battle and some Dialogue LOCATION UNLOCK: Beach Beach- Talk to Harkins Attack Battle (Winning gives his inventory) Appease Check: Pass = No Battle, Fail = Battle (Winning gives his inventory) Go to the Dark Jungle LOCATION UNLOCK: Dark Jungle Option Unlocks - To Stone Reef (Needs Clue: Don Quixote's Spear)(Essential, do this once you have Clue) About Experience before death Regardless of which you choose, its extra dialogue. I prefer The Ghost though. Dissect Harkins Clue: Dorothy's Digital Card (This is absolutely needed for an ending!) Dark Jungle- Talk to Helene Appease: Pass, Clue: Helene's Medical Kit. Fail, Nothing. - About His Intention Doesn't matter which choice. Check: Pass, No HP Damage. Fail, HP Damage. Talk to Maninitue - About the Way Out Area Unlock: Lab in the Mountain, Teammate: Maninitue Option Unlocks - About Helene (Needs Clue: Helene's Medical Kit) Area Unlock: Swamp - Go to the Swamp Goes to Swamp Location (Recommended to do this first!) - Go to lab in Mountain Goes to Lab in the Mountain Location Swamp- Track Footprints Check: Pass, Find Helene. Fail, watch monster approach Helene: stop monster = enter battle, observe = no battle. Talk to Helene Clue: The Leaving Medic Item: Frostbite (Frostbite is item that immediately kills black blood monsters.) Options Unlock - Talk to Helene (Needs Clue: Letter from the Deceased) (If you want Extra dialogue and saving Helene, you MUST use this option with this Clue.) On how to leave Clue: The Returned Medic Teammate: Helene (Note that she now has 2 Frostbite items in Inventory) Lab in the MountainTalk to Harkins Some dialogue Talk to Maninitue - About Monolith Clue: Monto's Note Area Unlock: Mountain Pass Check Lab - Check Cabinet Check: Pass, Item: Hero Medal(Needed!). Fail, nothing. - Search Around (Kinda useless unless you need the items) Check: Pass, Item: Corrodent, Sticky Stuff, Body Enchancer, Tablet in Tests Using? (Consitution Tablet) Mountain PassCheck: Pass, no battle. Fail, Battle. To Hillside (Unlocked by: Find out the attacker) ??? Check: Pass, no damage. Fail, Maninitue HP Damage. Options: Rush: ??? Check: Pass, no damage. Fail, HP Damage. Get back to Safety: No point, ignore if you intend to find out the attacker. Talk to Byrd: Check: Pass, Item: Special Shield. Fail, options: Make your move before he does(Battle)(He dies.) Clue: The Fallen Soldier Leave him at the moment(No battle) Option Unlock: - Show hero medal (Only If you left him be, or passed the check above)(Needs Item: Hero Medal) Clue: The Returned Soldier (Essential!) Teammate: Byrd - Go to MountainTop Location to MountainTop MountainTop- Look up at the Sky (Needs Clue: Black Tide) Clue: Master of the Moonshade Talk to O'Quill (Appears after Look up to the sky or Observe the Pit) Unlocks options: To the Hidden Cave, To the Spiral Stairs Option Unlocks Illusion of Harkins (Clue: The Rebellious, and Clue: Voluntary Human Subjects) - No way Nothing - Maybe he could Clue: Don Quixote's Spear (Beach option unlock)(Do IT, its really needed) - To the Hidden Cave Monto Stuff. Goes to Hidden Cave Location - To the Spiral Stairs Goes to Spiral Stairs Location Hidden Cave- Examine Body Clue: Monto's Plan - Talk to Maninitue Truth Option Unlocks: Open the Trapdoor Silence No Option Unlock - Open the Trapdoor Item: Blasting Device Clue: Demolition Device for Monolith - Enter the Tunnel Check: Pass, Option Unlock: Secret Tunnel. Fail, Nothing. - Enter Secret Tunnel Location: Pit Bottom This is the recommended way to reach Pit Bottom Location, aside from entering it via MountainTop location and accessing it through Spiral Stairs option and location. Spiral StairsIf you can't go through the secret tunnel, then this is the only other option. - Be Tough Battle. Enemies 2. - Be Tactical Check: Pass, no battle. Fail, Battle with 3 enemies. Leads to Pit Bottom Location. Moonshade Monolith: 2 Pit BottomGet ready for battles ahead. - Observe the Pit Inspiration Check: Pass, Extra Dialogue. Fail, nothing. Battle: 3 Enemies. Relatively simple. Prepare your attacks properly and successful collision attacks moves positioning of teammates hit to the back. You may want to kill the minions first. Check: Pass, nothing. Fail, Maninitue Leaves the Team(He Faints). Mini Boss Fight! If you kill Nila, O'Quill does +10 more damage. But leaving her alive isn't a good idea, because she casts withering and her willpower checks are often successful. Take your pick of the lesser evil. O'Quill will regenerate all HP on any death of teammate via one of his attacks. DO NOT allow any teammates to die, it is optimal to have everyone wear armor to prevent accidental death and allowing him to heal. Kick out squishy characters, and if your main character is squishy, either use Flesh Ward magic or items in this module such as Bulletproof Jacket and Special Shield. Do not attack with any teammates close to death, counterattacks from O'Quill count to regenerate his health if your teammate dies during it. Fear gives penalty dice. All Fear stacks are automatically removed upon attacking, dispel fear skill is useless unless your mage is casting and is being fear stacked on. O'Quill has acceleration stacks, and is vulnerable to Voorish Sign. Voorish Sign can cancel his actions, but you will have to outspeed him to do so properly. (Ending branches start from here onwards, depending on choice and clues gathered.) - Check Stone Platform Check the Slab Sense platform (Needs Clue: Master of the Moonshade) Respond Ending: Escape the Nightmare (It does have more dialogue than just picking To The Rift at this point.) Give up Nothing happens - To The Rift Leaves area. Ending: Escape the Nightmare - Destroy Monolith (Needs Clue: Demolition device for Monolith, and Clue: The Returned Solider) Picking this leads to the alternate ending. Boss Fight Ibom is a Great Old One. He has an instant kill skill. All damage against him is halved, and long range attacks against him are given bonus dice. Win with the power of Clue: Dorothy Digital Card, activated by... losing all your HP(an eventuality considering Ibom's instant kill skill: Counter-Current). Oh, you don't have the Clue? You're dead, there really isn't a way out of this one unless you're super overpowered somehow. In the attack button section, you get this cool skill called Knight Charge. Instant win button! Or just hit Ibom once, he's done for. - To The Rift Well, looks like you get to live after all. Note that based on either Clue: The Leaving Medic or Clue: The Returning Medic, there will be different Flavor Texts. Helene will not be saved for Clue: The Leaving Medic though. Ending: Let the Sun in Drowned Blood Slab The Eye of Dark Dimension Traits: None Endings: Escape the Nightmare Let the Sun in Lore: First, Let the Sun in has extra flavor text after you completed it, talking about Ibom and his motives with the Segnas. Ibom's ingame description is shown as 'Ibom, the dark one, the stoic, the great dark one, the father who was abandoned by the segnas'. Yog-Sothoth mentions that He is part of the Dark Dimension. The Segnas are Ibom's children, and He longs for them to return to Him. The Segnas, however, refused. Considering what the endings looks like, it would seem that they have returned to Him in the end... This may be related to 'The Black Stone' short story, written by Robert E. Howard. To preface this, this module is located on an unnamed island that cannot be found, and the residents seem to do rituals on the monolith that is located at the mountains. The theme of Fear as a debuff, and mentions of nightmares in the module correlates closely to this short story, as in the story there is a superstition that any who sleeps near it has nightmares for their entire life, even located at the mountains there is a Monolith. There is even a surge of black water, and the short story has a mention of 'rather than hears, the flowing of some dark subterraneous river in the night'. There are even some residents conducting rituals to the monolith! However, Ibom does not look like the toad creature(Master of the Monolith) mentioned in the story, so perhaps they might have the same origin, or the module is inspired by it. The last words of the story mentions '—what nameless shapes may even now lurk in the dark places of the world?', so there is suspicion that both are from this Dark Dimension. At the very least, the Monolith might be some 'key' to dimensions. Far Hope Park Will not have information related clues unless for story progression. Highly recommended to get all clues in one run and then try again before getting other endings. This module is special in that if you do not get the Perfect Ending, you can Try Again once you reach an Ending. This allows you to save Clues, but not Events, which may help with progressing story at an easier pace, as it has a time system. The time system: At different times, different events may occur. Actions that progress time is noted with an Hourglass, and any Movement to areas progresses Time. The moment it is supposed to reach 0, the Module ENDS.(So do not progress time when it is at 1). This guide will not show which options uses Time. Red Fog will come at DUSK, so make sure to get a certain Item by then. DoorSearch Scene -(T1)Search ticket booth lockers -Investigate ticket booth tables Starstone +2 -DUSK option: Search in Truck Starstone +3 SquareSearch Scene -(T1)Search in Fountain Starstone +2 Item: Keeper's Key -(T1)Pick up the great sword Clue: Greatsword in the Stone Item: Giant Sword Item -Talking to the clown Thrill: Horror House Relaxing: Ferris Wheel NOTE: You should follow the clown if you want an easier time at two story items(scarlet shard and memory fragment, but it is recommended to first have Clue: Lady's Stoneheart Death). Keep talking to him and following him. He will eventually run off to the Ferris Wheel once you Tell him the Truth. DUSK: Clown Enemy. Immune to damage for first 3 turns. +2 starstone, crowbar, Scarlet Shard, +State: Forced Smile (Immune to [Fracture], upon death: Restore to 1 HP and remove state) -DUSK option: View Red flower Trait: Symbiotic Illusion Flower Ferris WheelClue: Ferris Wheel Started (Clown) -Search the Stall Strange spice (When Red Fog appears at DUSK. Prevents Madness from being applied when moving around at DUSK. Must get.) -Ride Ferris Wheel Dialogue if Gioia is with you Clue: Route To manor(Not needed if you know it already) -If clown is here after running away 1. Go to the operation room, stop the ferris wheel, then talk to the clown(Alex). +State: Forced Smile, +state: Madness 1, Scarlet Shard, Memory Fragment -TRICK the cabin (Clue: Stopped Ferris Wheel) According to tkh280, if you escort Gioia and escape from Executioner, you can ambush him here for 1 Scarlet Shard. -DUSK option: Red Mist, View Stele, Read Text If Gioia is with you Item: Memory Fragment Horror HouseSearch Scene -Explore Deeper Unlocks: Open Compartment -Open Compartment Use: Keeper's Key. Area unlock: Hidden Compartment Wait/Hide choice Wait: Prompts a fight with Executioner. 72 HP boss! Has instant kill move. (Keeper's Key, Machete, Starstone +2, Scarlet Shard) Hide: Teleported to Manor. -Search Metallic Sources Clue: Horrible Executioner (An executioner hanging corpses: Fight Executioner) -(T1)Explore Surrounding Rooms Scroll of Red Sign and Scroll of Enchant Knife. (This is needed if your character is not magic, for a fight later) -View the Statue of Terror -Insert Stone Sword (Clue: Greatsword in the Stone) Starstone +2, Clue: Glass Heart Hidden CompartmentSearch Scene -Search Item Box Shattered Mask ) -(T1)Investigate Girl NPC: Gioia Accept or Reject choice Accept: Clue: Girl's Commission, Clue: Route to manor Reject: Scarlet Pendant, Clue: Enigmatic Girl (Without Gioia, the Stele in Ferris Wheel does not give Memory Fragment.) Food Zone-Search Statue Unlocks DUSK option later -Check out the prize locker Rabbit's Foot -Ask him for the ring (3 Starstones) Item: Old fashioned ring (Alternatively during DUSK, if you fight and win against him he will give you 1 Starstone for his Trades and give you the ring for free.) -Trade O'Lucky (Trades are random until you use enough Starstones and untill you cannot trade with him for more items, and it'll show up) -Launch attack at O'Lucky(You heartless monster...) Hint: You can jump into his portal when he tries to escape. o.o It teleports you to a random area, if you need that for any reason. Kill: He runs away Let go: Trades with him go from 3 Starstone to 1. Manor-Investigate Bungalows Unlocks: Mansion -Go Deep Finds a tomb, has dialogue with Gioia Clue: Alessio's Grave -DUSK option: Check out the abnormal red mist, Check red mirror Item: Memory Fragment Mansion-Investigate Bedroom Clue: Lady Stoneheart's Death -Examine Body Destruction of Route back to Manor If Gioia is with you: Item: Scarlet Pendant, Clue: Enigmatic Girl !Search Portrait (PROGRESSES STORY) Wraith as an Enemy Bring something with magic damage, she is immune to normal and blast damage. If you have the scrolls, this should be easy. Red Sign for Magic Users, Enchant Knife for Melee Users. If you are a Shooter, consider bringing the Yithian Lightning Gun from the Module Soladnit. High Willpower characters will have an easier time against her Willpower attacks. Branch EndingsThe way this Module branches endings is by Story Items. Below is a quicklist. Scarlet Pendant (Gioia) Shattered Mask of Fear (Item Box search in Hidden Compartment) Old Fashioned Ring (O'Lucky) 3 Scarlet Shards: 1 from DUSK: Clown in square OR DAY: Clown at Ferris Wheel 1 from Executioner in Horror House 1 from completing the Treasure hunt(Angel Statue triggered in Food Zone) 4 Memory Fragments: DUSK: Ferris Wheel, Food Zone, Manor Endings below are without considering Scarlet Shards and Memory Fragments. Return in Vain Ending: Run out of time to complete the Module. A Glimpse of light Ending: After defeating the Wraith, and you don't have the Old Fashioned Ring. White jade slightly flawed Ending: You have the Old Fashioned Ring. Here is where Scarlet Shards, Memory Fragments and the rest of the Story Items are included(Mask, Pendant). Note that you need at least 2 Scarlet shards and 3 memory fragments to continue. The below endings includes the items mentioned. You get Item: Energy Injected Ring, if you have enough to progress. Now that you have at least the Story Items (Mask, Ring, 2 Scarlet Shards, 3 Memory Fragments) you unlock a continuation. Area Unlock: Lake. Lake-Fight the Madness Incarnation 3 Madness Incarnations as Enemies. Tips: Do the opposite of their Debuffs on you. Tip: You can stall and win by using Flower of Blood... Intended way: Middle: Debuffs you to be unable to heal, eat items that heal to damage Back: Instant Kill based on if you fail Willpower check, pray for successful roll Front: Will have 120HP if you kill the two guys, and will now take damage normally Delirium Ending Ending: Lose to the Madness Incarnations(5+ Madness stack) Crazy Truth Ending: Win, but don't have the Scarlet Pendant The below requires the Scarlet Pendant(+items mentioned above). Then this will take place after you fought the Madness Incarnations. -Girl Gioia as Enemy Considering the chatter though, you may need some information clues. You probably have them, just in case though... Clue: Alessio's Grave Clue: Lady Stoneheart's Death Memory Return Ending: Win the Gioia Fight Space Mead Madness Mask Scarlet Memories Traits: Symbiotic Illusion Flower Endings: Return in Vain A Glimpse of light White jade slightly flawed Delirium Ending Crazy Truth Memory Return (True Ending) Lore: ??? Blood red moon, red mist, I have no idea. It links to madness and primal desires. Could be missing things as currently translation is not completely done for english. Cursenday's Black Carnival In progress of writing, please be patient :D Traits: Endings: Lore: The Enigmatic Vessel 1 This is a Featured Text Module scenario. Unimportant choices will not be mentioned. Note that any storage crystals/card can be used in inventory for additional lore dialogue. Shuttle-Open Storage Box: Ion Sword, Rail Pistol, Outer Space Worksuit -Stare at the Vessel Observing: Perception Check for a Clue: Dangers Lower Deck- The device on the floor Erudition check for Clue: Power reserve of a scanner Will give Story Item to progress. -Exchange your findings with Randy Craft Check: If you fail, you use a bomb. Otherwise, you don't use it. -Use the Lift Area: Weird Hall Area: Bridge Corridor E-Distribution Room-The device on the wall(Fix Distribution boxes) Craft Check. Clue: Burn marks on the cables Requires Temporary Cables. Make it from craft menu with Randy's help if you don't have high levels of the abilities needed. -Middle Column(Endgame Locked Option) -Suspected Device(Repair Controls) Erudition Check. Clue: Translation Template -Activate the device Can use the lift in Lower Deck now Weird Hall-Observe Figures Clue: Temporal Stasis Bridge Corridor-Search the Room First branch for ending is the following two options in this area !Leave Away Leaving ends the game early with the Ending: The beginning of the End. You get the Trait: Parasited and Trait: Severe Defeat. !Stay Here Continue on. -To the hall Area: Hall -Use the lift(Locked) Requires: Elevator card for the 3rd Floor Area: Command Room HallMost important area as it connects to every other area ingame. -Investigate the Debris Wreckage: Craft Check. Storage Crystals(1) Corpses on the ground: Battle, unlocks Storage Compartment Storage Compartment: Storage Card(2), Portable Thermite Grenade, Battery, Ammo -Middle Obselik Mysticism check. Clue: What are they afraid of? -Inspect Corridors Left Corridor: Requires Clue: The door was blown Right Corridor: Strength Check. Easier clearing on pass perhaps? Area: Right Corridor -Inspect Doors Strange Door(To the Chamber isolated by the Bonat) Area: Isolation Chamber The door to the North(To Crew Corridor): Requires Access Card(1) Area: Crew Corridor To Cryo Chamber Area: Cryo Chamber To Lab(Hidden, open lab door from Command Room) Area: Lab Right Corridor-Further Investigation Dexterity Check. Dodges ambush. -The infected Alien Access Card(1) -Try to open the Unseal Door Craft Check. Area: Cargo Cargo-Shelf A Medical Drone Set -Search Shelf Dexterity Check. Rapid-Fire plasma cannon -Shelf B(broken) Choice between Powerful blue rune and another Portable Thermite Grenade and ammo Stealth check: Avoid battle Crew Corridor-Try to open the door at end of corridor Strength check pass or Access Card(2) to open door. Area: Remote Maintenance Room -Open the Door(To the door) Craft Check, opens door. Area: Dormitory Room. Otherwise, -2hp and Locked Door -Enter Blasted Gap(Locked) Requires Clue: The Door Was Blown Sports check. Pass to dodge, fail and randy gets hit. Battle either ways Arsenal Access Card Dormitory Room-The Bloodstains Mysticism Check. -SP if pass. -Take the card Access Card(2) -Check Alien's Body Battery Remote Maintenance Room-Retrieve the Data Logs Clue: Original point of the vessel's incident Cryo Chamber-Middle Device Craft Check. Clue: The whole vessel was overloaded -Sample Can Perception Check. Notice creature, Battle. -Data Panel Clue: The truth about spores Isolation Chamber-Temporal Shield Device(Requires Clue: Original point of the vessel's incident) Clue: Illusions of a terrifying monster, -SP -The middle machine Area: Isolation Chamber? at the end is in the past areas. So I will group them together here without a heading, don't be confused. Isolation Chamber? -Leave Isolation chamber Area: Hall? Hall? -Left Corridor Area: Left Corridor? -Crew Corridor(Requires Access Card(1)) Area: Crew Corridor? Left Corridor? Luck check. Clue: Security Robots -Dissemble the security unit Elevator card for the 3rd Floor Crew Corridor? -Doors beside corridor Perception check. Hear sounds behind door to give option to open it. Opening door will use Randy's detonation charges. Perhaps using it earlier may lessen damage, not sure. Clue: The door was blown -Talk to the mist Pick a check, passing allows -Try to communicate Clue: Death, Hounds, Xenos This is pretty much it for the time machine section. If you blasted the door, the Left corridor is now open for you, and also the Crew Corridor option is now unlocked. So now we go back to the Bridge Corridor and use the Elevator card to 3rd floor. To be honest, just avoid the blasted gap in the Left Corridor, it only gives you the Arsenal Access Card via a battle that you can open in the Command Room anyway. Command RoomStealth Check: Avoid Ambush. Option to throw Thermite Grenade or Straight Ambush. Straight Ambush = Battle Thermite Grenade = Avoid Battle Operate Controls -Open the Arsenal Door Opens the Arsenal door in left corridor -Open Lab Door !Story Progressing. Opens a lab door in Hall, under the Inspect the Door. Left corridor-Try to get in Arsenal Arsenal Access Card or Open Arsenal door from the Command room. Area: Arsenal Arsenal-Further Investigation Do this first, destroy the robots. -The Racks If you didn't destroy the robots in the above option earlier, they will come to you now. Dis-Bomb The Enigmatic Vessel 2 Lab!This is the endgame area. Two options. -Take a gamble(Only seeable if you have a Portable Thermite Grenade.) Willpower check. Passing lets you drop the Portable Thermite Grenade in its JAWS! Fail, and you die. Avoid boss battle. Really. Maybe you shouldn't use it on the command room robots if you have only one. You can get up to two total for both though. 1. Storage compartment the first time in hall 2. Shelf B, in Cargo room. -Let randy inject you with the tranquiliser Battle. Be ready to fight Xhamen-Dor. I guess you want the challenge since you skipped the grenade, huh. !Tips Xhamen-Dor summons minions. Use that civilian shield to nullify some damage if you need to not die faster Focus on Xhamen-Dor first. The faster you kill them before they summon minions, the easier the fight is, because later they summon infected yith, by which I mean annoying 45hp minions that also self heal, so seriously kill Xhamen-Dor ASAP Flame worshipper trait; using cleave with summoned minions. The burn will make killing the minions faster later If you want the easiest way out, two enchanted blades will solve Xhamen-Dor for you... with Red Sign(but if you're playing this module, you can out DPS the boss, no?) Xhamen-Dor heals as well, just hit em like no tomorrow. -Data Base Storage Crystals(2) -The Damaged Fence Leave it = Trait: Unyielding Willpower/Fortitude feeds on itself -Treatment Bay !Final Stage story progression! Contest check, but not sure what it is. Randy smacks you into the treatment bay. Brings you back to E distribution room Energy Core -Plant Dis-Bomb Requires: Dis-Bomb Story branches here. You can get Ending: Run for Life here if you did not collect enough Clues about how the incident occurred. This can be done the moment you first reach hall by just going straight to the time machine to Left corridor? for the elevator card, going to the Command Room to open the Arsenal Door, going to the Arsenal door to get the Dis-Bomb, then going to the lab to fight Xhamen-Dor and then planting the Dis-Bomb. You don't get interrupted to fight Tindalos. Reminder to get a portable thermite grenade from the Debris, corpse on ground, storage compartment in hall to skip Xhamen-Dor fight. This is easily speedrunnable. Otherwise, you need Clue: Original point of the Vessel's incident, or just get all available clues. Plant the bomb, and you'll be interrupted by our time hunter... Be prepared to fight Lord Tindalos. !Tips You need to be able to deal more than 10 damage in one turn, because Tindalos heals around 10hp every start of turn. Throw the dis-bomb at the dimensional rift once you get Tindalos's HP low enough that it gets a buff where its drawing energy from the rift. Until you do this, all attacks are nullified against Tindalos. It'll show up under your attack option once Tindalos is around, say, 40hp. Celestial Surge is better for Anan to use. If you have it via bringing Recita-Aria along, it'll do okay. Don't bother with Red Sign, Tindalos will kill you every turn just as Anan revives you every death with Truth buff. And don't let forsaken by time reach 7 or you lose. Yet another DPS check fight. Tindalos has 8 Armor, use spell damage. The core of the Yith Shield Dimensional Thorn Traits: Parasited Severe Defeat Unyielding Willpower/Fortitude Feeds on Itself True Love Endings: The beginning of the End Run for Life After the Disaster (True Ending) Lore: This module is set in the 29th Century, and humans have flown to the stars as well as started investigating time. This scenario contains mentions of the Yith, Tindalos, and Xhamen-Dor. Of particular note is Xhamen-Dor who actually controls minds of those who know of its name or its true nature, turning them into undead servants-the idea is that it is now a 'meme infection', a kind of illness that spreads just by making eye contact with the infected. Lore states that Xhamen-Dor is from Carcosa, as a residue left behind by Hastur and that it feeds the living beings turned undead servants to Carcosa. Meanwhile, the Yith was investigating this infection with the use of time but it went... sideways. Traits Effects Brackets like this are: (Just additional comments from the author, or other people) that may be useful currently. Comments from the author have no (Name: Comment). Scenario TraitsThese are Descriptions of the Traits you can get from the Scenarios only! Panacea Wake After each battle ends, your HP will restore to the maximum. Sleep You are immune to bleed effect. Interacted with Cult Wake Max SP -10, Erudition -10, Mysticism +10 Sleep Intelligence +10 Windfall Wake When you luck increase, cash +20 Sleep When you luck decrease, cash -20 Alienized Magic Seed Each time you failed in POW check, the seed will grow up. You will gain a special trait when the seed mature. (Gives Trait: Ritual Modification, after failing 3 Willpower/POW checks, and also keep this seed trait. Confirmed by Ash.) Ritual Modification Legendary Creature state makes you immune to poison, fracture, and bleed. Wake Gain [Legendary Creature] state. Can't eat any food item Sleep You will not affect by [Ritual Transformation] (Ash: cannot use any items with the keyword "eat" which includes the pills that temp increase CON along with some other meds and sp restore items.) Deconstruction of reason Wake When you obtain a new [Experiences] trait, restore 1-3 SP. Sleep When you obtain a new [Experiences] trait, POW -5, Mysticism +5 Wealthy One Wake When entering the Scenario, Money +2000 Sleep Your diplomacy skill check will add one penalty dice. Unyielding Willpower/Fortitude feeds on itself Wake Your damage bonus increases by 1-3 Sleep Cult Leader Wake Mysticism +20, CON -10, when you acquired this trait SP -15 Sleep CON +10 Flame Worship Passive: When you equip a normal or agile weapon, your attack will apply burning effect to the target. (This trait works regardless of whether it is awake or asleep) Wake You will deal 1-4 more damage to the target under burning effect. Sleep When you use a melee attack to deal damage to the enemy, you enter the burning state. Soul Redeemer Wake Speed +20 Sleep For each enemy that moves ahead of you in battle, you will add 10 skill points when you do your action. Famous Song Whenever an enemy target's action causes your SP to decrease, +5 SP if in a state of Weakened or Exhausted. Blessing of the Spider God Wake Whenever a battle is won, consume 3 SP and obtain 8 luck. Sleep Whenever a battle is won, restore 1-3 SP. Symbiotic Illusion Flower In your chest, there is a strange flower that only you can see. Wake For each time your bleeding effect is triggered, you gain 1 level of [bleeding] and recover 3 SP Sleep You are always in [poisoned] during the battle and recover 3 HP at the beginning of each turn Parasited You have been parasitized by Xhamen-Dor. Wake Xhamen-Dor has seized control of your will. (-25 Willpower) Sleep You dominate your will and share a facultative symbiosis with the spores. (Heal yourself each turn) Severe Defeat Death did you apart. Wake You remain trapped in the suffering of the past. (-25 Willpower, -10 Dodge) Sleep You look forward, shedding the weight of failure. (+15 Willpower. +10 Dodge) True Love You are certain of someone who truly loves you, and you feel the same. You know they would devote themselves and their love entirely to you. Wake Willpower +15 Sleep Willpower -20 Interlude TraitsTraits that you can get from failing in increasing an ability in the interlude section. Indolent After long hours of intense study and work that exhaust your body and mind, you approach the next task in a perfunctory manner. Wake Your threshold for [Energetic] is reduced by 10. Add two penalty dice to all your ability checks in [Energetic] Status. Sleep Your threshold for [Frail] is increased by 10. Constitution +5, Willpower +5, Brawl +5. Puppet Mastery You have been controlled by others, manipulated for their gain, with no means to resist. Wake When making a contested check, your skill value in the contest decreases by 10 points. Sleep When making a contested check, your skill value in the contest increases by 10 points. Accidentally Injured You have been hurt by an accident. Perhaps the wounds will heal quickly, or perhaps they will continue to affect you... Description only Reduce your HP to 1 when you obtain this trait. When you obtain this trait for the third time, gain [Scarred - Awakened]. Antisocial You isolate yourself from the outside world, rarely if ever engaging is social interaction. Wake Reduce 1-3 SP when you fail a Diplomacy check. Sleep Restore 1-3 SP when you succeed in Diplomacy checks. Brackets like this are: (Just additional comments from the author, or other people) that may be useful currently. Comments from the author have no (Name: Comment). After entering the scenario, character gets extra items [Recita-Stick], [Aria-Revolver]. An Undead Pendant When you first time dies in the battle, you will be revived but your body will be changed a little. (Upon Death, revives and grant you [Ghoul Constitution] state with infinite duration. Ghoul Constitution: Mysticism +20, INT -30, you cannot equip weapons, unarmed attack damage becomes [4-9] and attack three times in a single turn. When hit, there will be a chance to make target bleed and expose a weakness.) Atlach Doll It cannot remove after equipped. When you equip it, your POW, INT, and DEX halved, and CON and STR doubled. Also increase the upper limit of CON and STR by 20. Shining Trapezohedron INT +20. (Grants [Resonate with his aura] state. ) Cultes des Goules Acquire spells [Voorish Sign] while equipping. When you use a melee weapon on your main hand for an active attack and the attack check is a hard success then you will cost 7 SP to make an additional check without an additional check. (You can only activate this effect once in your attack for each action) Flower of Blood At beginning of battle each turn, absorb 3 HP from the enemy with the lowest HP. Black Fan Equip: Diplomacy +15, Psychology +15, Constitution Limit +10. When in a state of Energetic, diplomacy check will always succeed. Yithian Lightning Gun The weapon of Yith, it can deal spell damage to the enemy. For people who are erudite can make better use of it. Two Handed Weapon. Uses Shoot and Erudition for attack skill check. 7-14 Damage which may also apply Unconsciousness to target. Has 10 charges. Beasts in the Shadow When you make a POW or SP Check, you will get a penalty dice. If your POW is greater than 10, your life will not reduce less than 1. For each time you trigger this effect, your POW is reduced by 5 forever. (Aryleon: Which seems useful if you have Alienized Magic Seed, and have too high of a Pow.) Unaussprechlichen Kulten Acquire spells [Create Barrier] and [Dominate] while equipping. Equip: When you cast a spell, you consume luck rather than SP and the cost is halved(rounded up). (Aryleon: Is glitched atm, if you equip it, you lose the ability to cast. The cost is halved, rounded up). (Vivi: Currently luck is not consumed on casting of spell, yet the MP cost is still halved. OP item~! But this seems to only apply to Lies and Fraud? Luck was deducted in Townsend) The Soladnit The effect of your bonus dice and penalty dice will be exchanged. In any check, there will be one bonus dice that will substitute by a penalty dice and recover 3 SP. Merder Immune stun effect. If any enemy has a debuff in the battle, you can add one bonus dice when you attack. Bade of the Old King When you use a melee weapon for an active attack, the Mysticism skill value is added to the skill check value. The Pearl of Nacha Occultism +10. Every time you start a battle, Summon a spider monster at your front position. Pact of Kadath Speed +40, incoming spell damage decreases by 3. Space Mead Restores 2 SP after use, and makes the target immune to any damage and unable to deal direct damage for 3 turns Madness Mask Armor +2, +10 to all skill values for each negative status you have in battle, and gain [Erosion] effect whenever you enter battle Scarlet Memories Intelligence Limit +10, 1 extra mana point restored per turn. If you are the last to act in your turn, spells cast this turn do not cost SP and must deal maximum damage The Eye of Dark Dimension Acquire the magic [Fear Infusion] when equipped. After you perform a magic action, if any enemy has a negative status, expend 3 Spirit Points(SP) and deal 8 Spell Damage to those enemies. (Implant Fear: All Enemies gain 2 stacks of Fear. Does not affect the Great Old Ones.) Drowned Blood Slab Acquire the magic [Nightmare Summoning] when equipped. Speed of all friendly summons +30. (Nightmare Summoning Spell: Summons a nightmare creature in front of yourself)
剧情流程攻略

导读
这是一份某克苏鲁风格游戏的英文剧情流程攻略,涵盖7个官方模组及1个已翻译特色模组,包含《All-in-One and One-in-All》《Lies and Fraud》等模组的场景探索、分支结局、道具获取、战斗技巧等内容,还介绍了各模组的克苏鲁相关设定与特质效果。

评论
共0条评论

含成就的攻略
陷入疯狂 斜体字代表你需要点击执行的动作。 粗体字代表物品 下划线代表注释 卡特·斯科特:失忆者之谜。 卡特已经……被抓住了!趁还来得及,快逃!记住所有事情可不…
2026-04-06 01:000赞 · 0评论
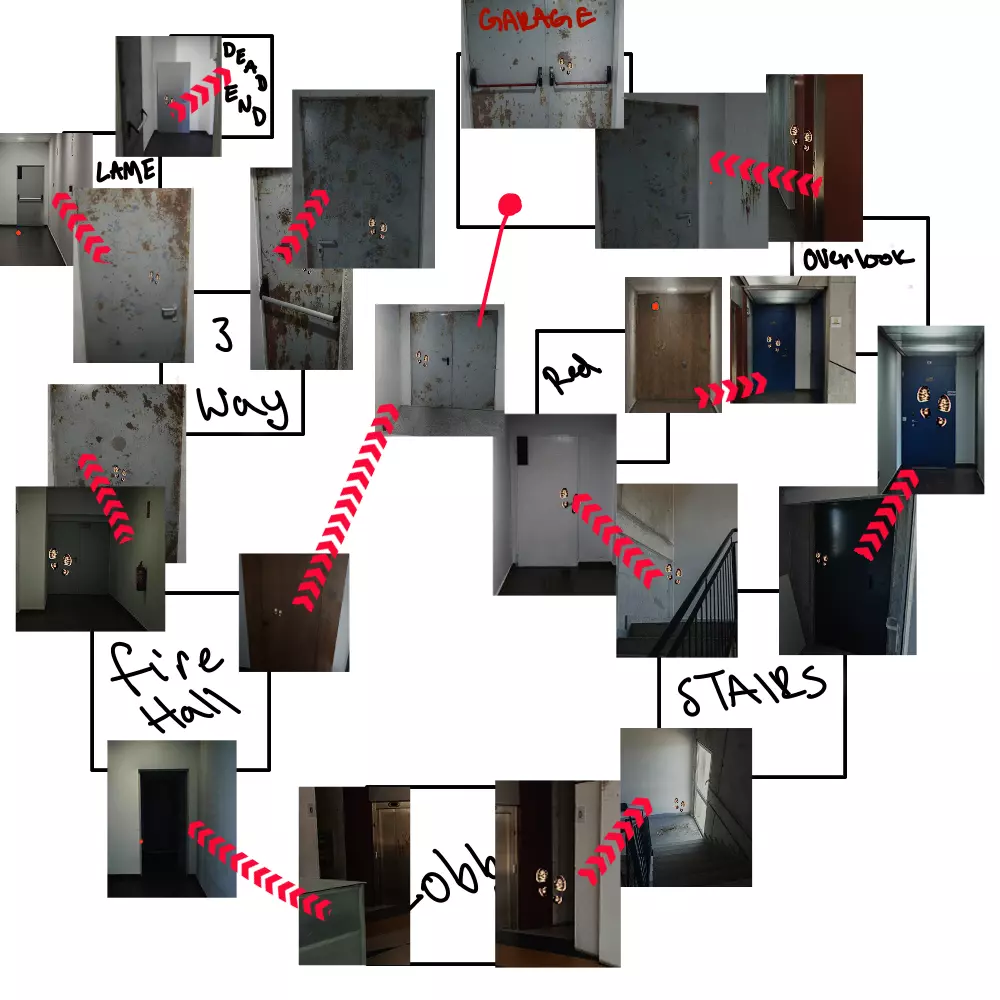
《饿殍:明末千里行》全剧情流程攻略,明末饥荒文字冒险游戏通关技巧及结局选择
《饿殍:明末千里行》怎么玩?这是一款以明末饥荒为背景的旅行题材文字冒险游戏。玩家将扮演一名盗匪,负责运送四名女孩从华州城前往洛阳城。在充满危险的千里行程中,你需…
2026-06-25 14:430赞 · 0评论
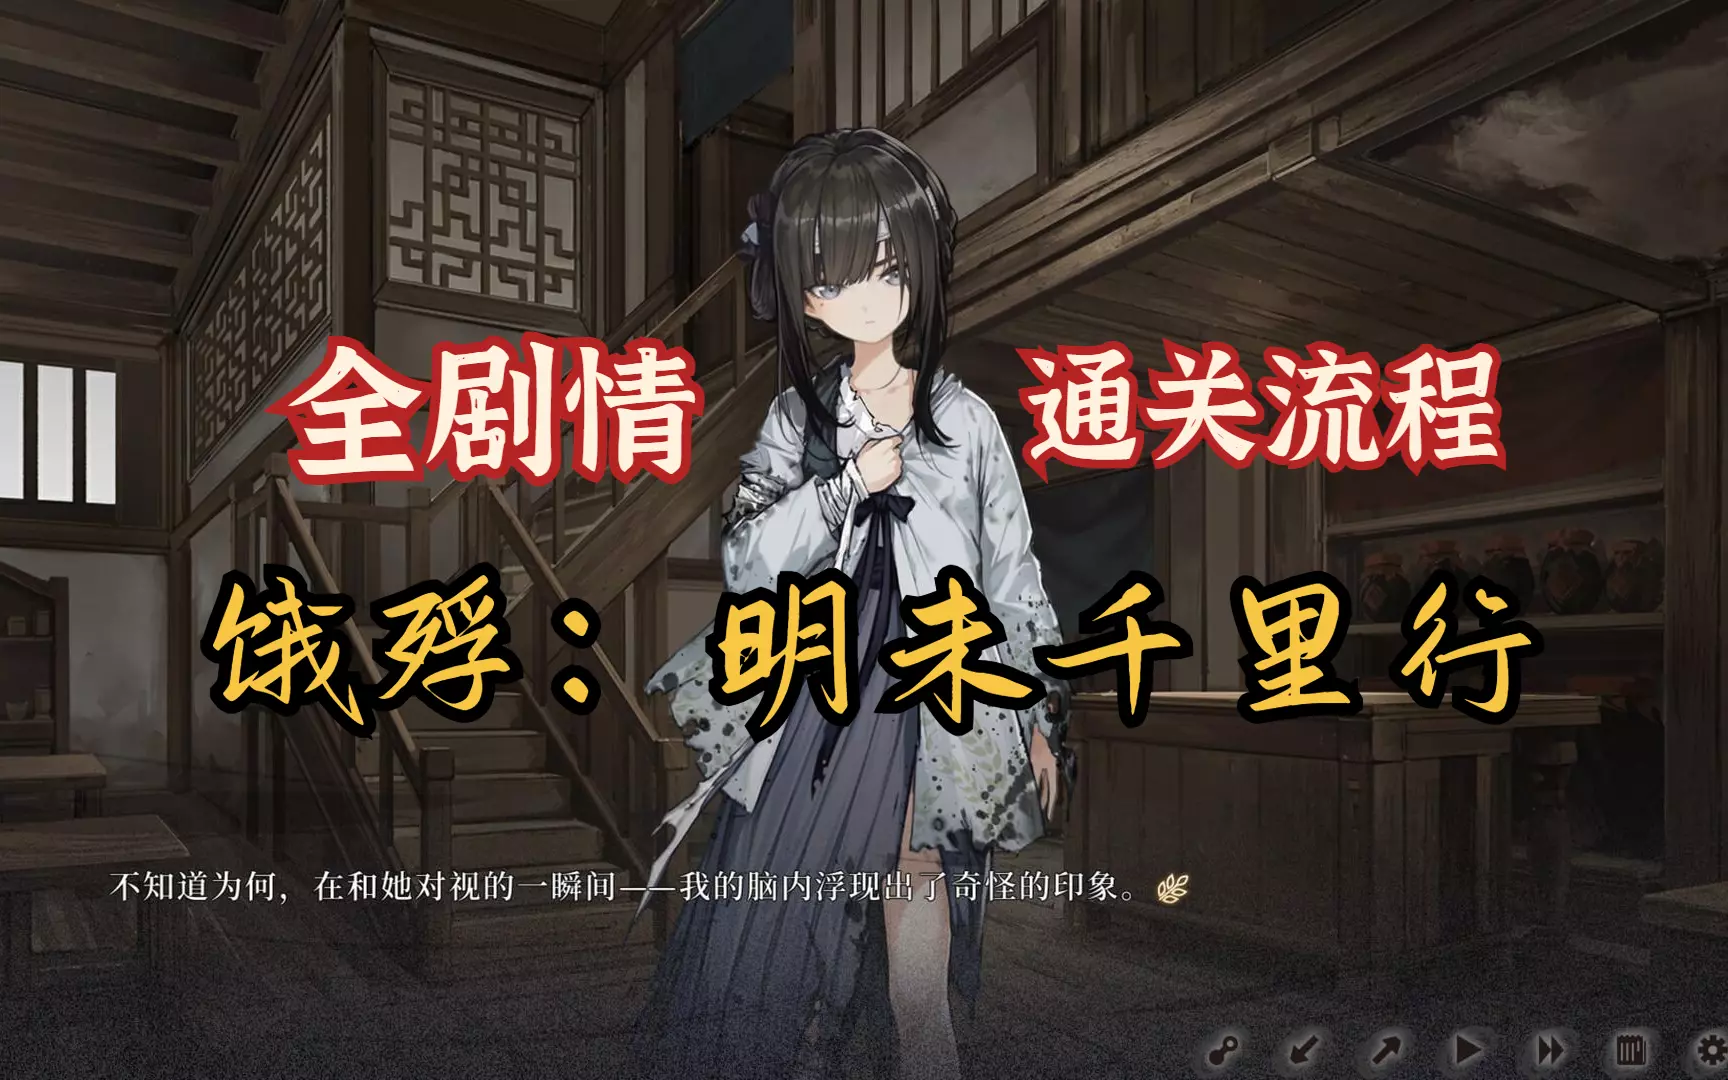
《暗区突围》新手剧情怎么过?完整剧情流程攻略与任务通关技巧
-
2026-06-25 09:270赞 · 0评论
《Defect》超级英雄派遣中心怎么玩?全剧情流程攻略,派遣任务100%成功通关指南
2026-06-24 12:400赞 · 0评论

《使命召唤10:幽灵》第一章幽灵故事实况解说,游戏剧情流程攻略
2026-06-22 17:190赞 · 0评论

《纸嫁衣2》第一章寻觅实况解说,完整剧情流程攻略,纸嫁衣2怎么玩?
-
2026-06-15 09:430赞 · 0评论
《女神异闻录5:X》联动《P5R》命运交错之时活动攻略,研究所篇上全剧情流程与全收集指南(已完结)
2026-06-12 23:070赞 · 0评论
《崩坏3》8.9版本主线「一朵玫瑰的屈膝礼」剧情解析,琪亚娜结局是什么?全剧情流程攻略
《崩坏3》8.9版本主线「一朵玫瑰的屈膝礼」剧情解析:去爱那昙花一现的美,和沉醉其中的人吧,哪怕黄昏隐入黑夜,时间完成叙别。这段感人至深的剧情讲述了琪亚娜的成长…
2026-06-12 20:150赞 · 0评论
《漫威蜘蛛侠2》游戏实况:蜘蛛兄弟联手开场激战巨型沙人,剧情流程攻略
2026-06-12 11:050赞 · 0评论

《赛博朋克2077》再见杰克支线任务怎么做?完整剧情流程与结局选择攻略
2026-06-12 08:070赞 · 0评论
暂无更多
最新更新
- 关于使用XUnity Auto Translator进行日语化的说明 — 关于使用XUnity Auto Translator进行日语化的说明。 目前,虽然已有热心人士制作的日语化MOD,但这是一种将尚未完全翻译的部分暂时进行机器翻译…
- 人格解体成就列表 — 《人格解体》成就指南 简介 本指南旨在帮助玩家完成《人格解体》的成就。由于游戏仍在体验过程中,本指南尚在制作中。若指南存在错误,欢迎在下方评论区指出。感谢您的理…
- 创建自己的调查员模型 — 本指南介绍了如何创建自定义调查员模型,并解答了一些相关问题。 注意:此方法已过时,且与游戏编辑器存在冲突。一旦我熟悉编辑器后,会更新本指南或创建新指南。 准备工…
- 《人格解体》×《卡森德拉的黑色嘉年华》全收集攻略流程图 — 这个流程图是我原本发在B站上的,有人说可以把流程图发在这里,所以我就发了,虽然其中的内容并没有英文化,外国玩家依旧难以阅读其中的内容,但仍希望这对你有所帮助。 …
- 剧情流程攻略 — An english guide to the current Seven Scenarios, including one Featured Scenario…
- 养卡指南 — 说一下心得,可能带点攻略,带点意见,带一堆剧透,小心观看。 说不定写着写着什么都写上来。 幕间 为什么要放前面?因为这是在养卡,眼光自然要长远一点(就三个能跑能…
- 谎言与欺诈流程 — 前言
- 如何在第一回合造成112点伤害 — 神秘学者build 属性 此build唯一的要求是体质最高40点(8点生命值),但我建议同时将智力提升至80点(16点魔法值)。稍后我会详细解释。 职业 神秘学…
- EA版自定义角色模型 — 在没有创意工坊的日子里,利用游戏内已有模型小乐一下。 修改方法 先在游戏内新建一个角色,然后关闭游戏。(不关闭游戏会导致修改失败!)