换一换
换一换 


《杀戮空间》服务器搭建综合指南:主要针对Linux系统,并包含安装模组/变异器及自定义地图的额外信息和见解。 简介与内容 你是否想在2023年与朋友一起玩《杀戮空间》,并希望超越主菜单中的监听服务器/“创建游戏”选项?你想要一个功能完善的服务器,带有自定义地图,能够正常运行并显示在服务器列表中,甚至能容纳几个玩家。本指南不会详细指导整个服务器托管过程,但会在需要时提供参考。重点是在基于Linux的操作系统上运行KF服务器,特别参考Debian 12系统。我还包含了一些客户端配置的建议。基础SteamCMD指令/《杀戮空间》服务器安装。 基础设置、网页管理以及2023年所需的修复。 自定义地图获取、安装及基础下载服务器设置。 基础模组/变异器安装与配置。 其他需要提及的事项:我尚未弄清楚如何在《杀戮空间》和《杀戮空间: outbreaks》之间切换。我找不到相关信息。不过你可以通过网页管理界面手动切换。 $表示在Linux中以普通用户身份使用shell,#表示以root身份使用。 我绝不是专家。但我还是想分享我所知道的,因为走到这一步已经足够艰难了。 我为Windows服务器用户留下了一些说明。我或许能在将本指南转换为Windows版本方面提供一些帮助,如果你有什么弄不明白的,可以在评论中提问。我在配置和命令中全程使用通用名称,包括:“kfuser”作为系统用户,“kf1server”作为服务器文件夹,“10.20.30.40”作为公网IP地址。 这是我的第一篇Steam指南,而且我不是特别喜欢Steam指南编辑器,哈哈哈。 其他资源: Tripwire官方的专用服务器托管指南。 《杀戮空间便携版》——一套《杀戮空间》服务器的配置文件和变异器。我没有直接使用过,但对于了解简单变异器和更高级的变异器配置思路可能有参考价值。 (2010年存档)KF-Wiki的专用服务器托管指南。对于某些当前版本的功能来说,可能已经过时。预期结果

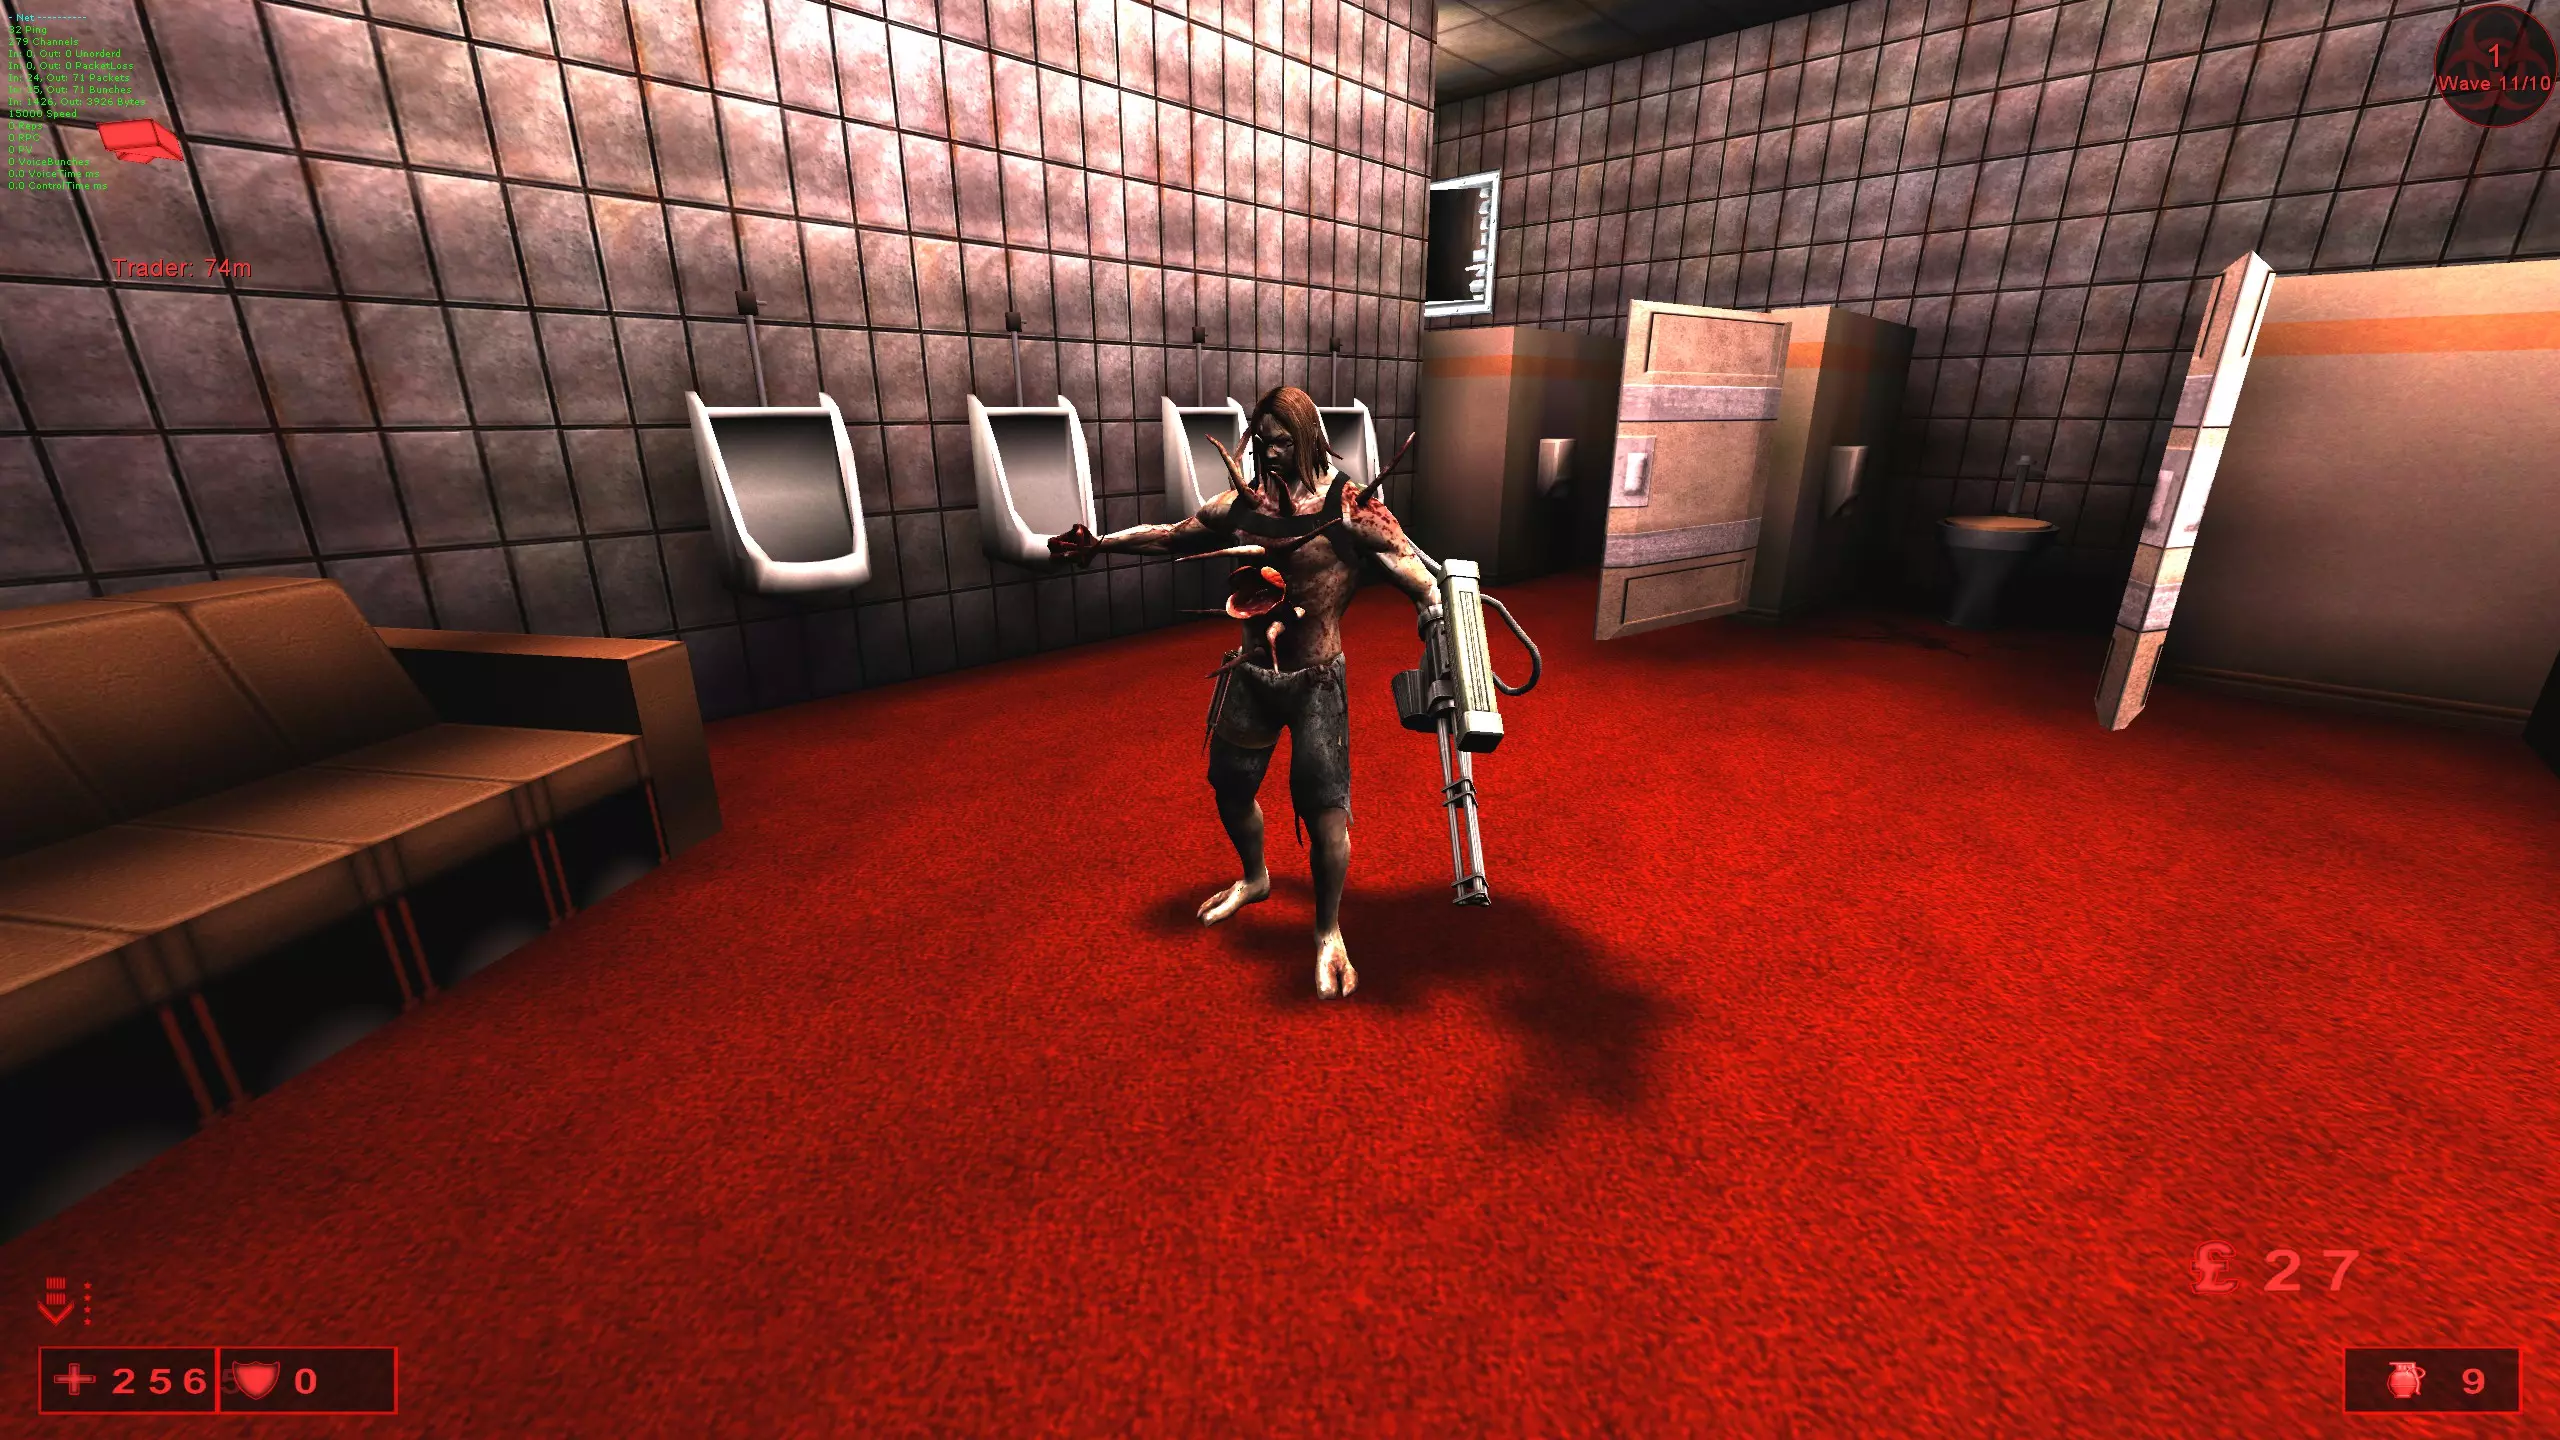
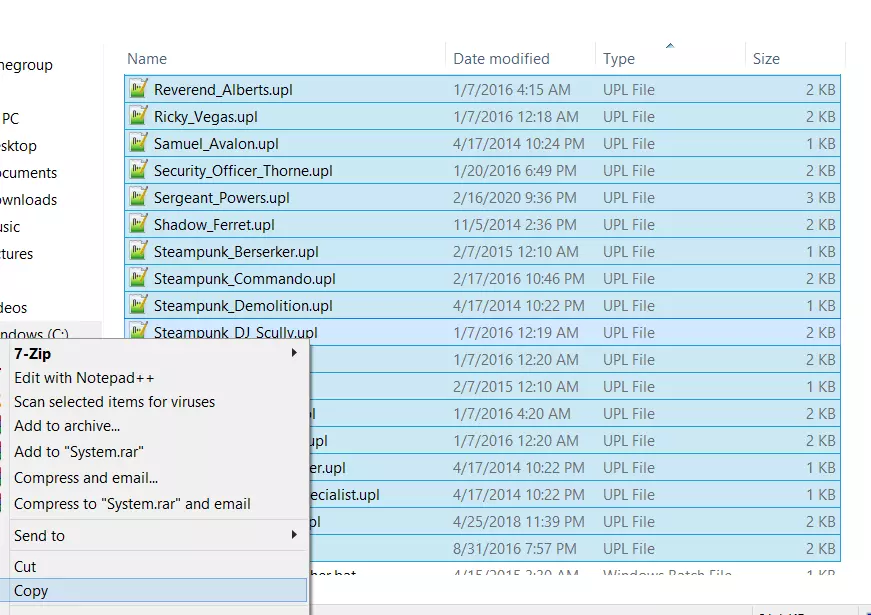
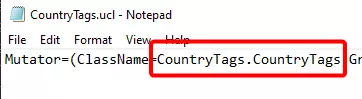
Step 0 - Server Setup, Requirements, and Preamble To run a Killing Floor server the specifications aren’t particularly stout; It uses only one thread and around 300 megabytes of RAM at most. Low end VPS services or an older computer will be fine. I’m mentioning again this guide is predominately Linux only as most dedicated servers use such operating systems. The KF server is available on Windows and is largely configured in a similar way but mentions to file paths will be different and some other procedures might have to be changed. I’ve used Debian 12 for this most recent install without much trouble. Other distributions should be fine if they have support for 32-bit applications. This needs to be enabled for Debian for example and IIRC it does for Arch too. Anything specific to distribution will be done when installing SteamCMD and other guides can be followed for your particular situation. Port forwarding is also important with the following ports needing to be opened: 7707 UDP (Game Port) 7708 UDP (Query Port) 7717 UDP (GameSpy Query Port, not sure if it's reused or not) 28852 TCP and UDP (Allows your Server to Connect to the Master Server Browser) 8075 TCP (Port set via ListenPort that your WebAdmin will run on) 20560 UDP (Steam Port) 10707 UDP (Genuinely no idea but it seems to use it) On a typical VPS install, ports are usually exposed by default. If you’ve configured a firewall, you’ll need to open them for the mentioned function. If you’re using your home network/internet you need to open these ports on your router. If this isn’t an option (in the case of student accommodations or ISP restrictions) I would strongly recommend just renting a cheap VPS. Otherwise, some VPN providers do provide port forwarding options for this use case but I can’t recommend any. Step 1 - Install SteamCMD & The KF Server SteamCMD can be installed from the repos of most distributions. To do this I will direct you to the guide on the Valve Dev Wiki which covers this well. I would also recommend checking your distributions wiki/forums for information. Do take the time to create a separate user for running SteamCMD; it can also be used for running the KF Server but you may want to create a dedicated account if you’re running other game servers. I am going to assume in this guide that you'll being using such a user's home folder to hold game files. https://developer.valvesoftware.com/wiki/SteamCMD Next is installing the server… you’d think but you first need to create a Steam account. DO NOT use your current Steam account used for playing KF or other games and create a new one. You DON’T need to buy Killing Floor on this account, you just need to login with it on SteamCMD to download the server. Past this, the account isn’t used again and I’d recommend just leaving it as a bare account with no Steam Guard for simplicity. So this is the rundown for SteamCMD: Create a folder in your home folder to contain the KF server. $ cd ~ (home directory) $ mkdir kf1server Set the install directory for Killing Floor Steam> force_install_dir /home/kfuser/kf1server/ Start SteamCMD and Login with the specific user created for SteamCMD $ steamcmd Steam> login USERNAME PASSWORD Steam will most likely also ask for a Steam guard code from the email address used to setup the account. (don't use 10 minute mail!) Download the server. Note that AppID 215360 is for Linux only. Use AppID 215350 for Windows. Steam> app_update 215360 Exit SteamCMD and check the folder for the server files. It should be a variety of folders. Steam> quit $ ls kf1server And that’s the KF server software downloaded. Running it is the next stage. Step 2 – Running a Basic Server This section will cover a basic server that'll present to the world and run fine in a totally stock configuration. This might be enough for you if you want to just run stock maps. First RunIn the new KF server folder is the ‘System’ folder which contains the executable/binary for running the server as well as map files, the configuration file, and is where mutators/mods can be installed. To start with, create a file to be used as a shell script to launch the server for the first time. $ touch kfserverstart.sh $ chmod +x kfserverstart.sh $ nano kfserverstart.sh Copy this script into it for a basic initial setup: #!/bin/bash export LD_LIBRARY_PATH=/home/kfuser/.local/share/Steam/steamcmd/linux32 /home/kfuser/kf1server/System/ucc-bin server KF-westlondon.rom?game=KFmod.KFGameType?VACSecured=true?MaxPlayers=6 -nohomedir Alternatively, screen can be used to better manage the process and is what I would recommend doing. The following configuration names the screen instance, limits it 1024 lines output and detaches it automatically. (you may need to install screen first depending on distro) #!/bin/bash export LD_LIBRARY_PATH=/home/kfuser/.local/share/Steam/steamcmd/linux32 /usr/bin/screen -d -m -S "kf1server" -h 1024 /home/kfuser/kf1server/System/ucc-bin server KF-westlondon.rom?game=KFmod.KFGameType?VACSecured=true?MaxPlayers=6 -nohomedir Run it. $ ./kfserverstart.sh The server at this point will fill your terminal with it’s start up messages and quickly move to broadcasting the games status. Screen users will not see this and can run: $ screen -ls To check if there’s a running detacted terminal. Then they can run: $ screen -r kf1server To reattach the process and see output and to... Stop the server by using a SIGINT with CTRL+C. (As far as I know this is the most graceful shutdown you’re getting. This is a sign of things to come…) Fixing The Server Listing (Or Lack Thereof)Before going any further however, an important fix is best made now. The downloaded KF server has outdated Steam libraries that don’t work at all which causes server information and the server listing not to show up in game. Fixing this is simple. Big thanks to Steam user NonstopKarnage for posting their fix for this. The three Steam library files that come with the server install are going to be backed up by being renamed and they’re going to be replaced by a symbolic link to the same files from the SteamCMD install. From the SteamCMD install directory. On my Debian 12 Setup it’s defaulted to: ~/.local/share/Steam/steamcmd/linux32/ (~ refers to the home directory of the current user, please change accordingly to your setup) All the commands to do this are as followed: $ mv ~/kf1server/System/steamclient.so ~/kf1server/System/steamclient.so.bak $ mv ~/kf1server/System/libtier0_s.so ~/kf1server/System/libtier0_s.so.bak $ mv ~/kf1server/System/libvstdlib_s.so ~/kf1server/System/libvstdlib_s.so.bak $ ln -s ~/.local/share/Steam/steamcmd/linux32/steamclient.so ~/kf1server/System/steamclient.so $ ln -s ~/.local/share/Steam/steamcmd/linux32/libtier0_s.so ~/kf1server/System/libtier0_s.so $ ln -s ~/.local/share/Steam/steamcmd/linux32/libvstdlib_s.so ~/kf1server/System/libvstdlib_s.so Setting the LD_LIBRARY_PATH to this location is also recommended and can be done with the script to start the server. I have included it in both the scripts provided so far. Server/WebAdmin ConfigurationThe server should have at this point generated KillingFloor.ini which is the main configuration file for the server. We’re going to edit this using nano (or whatever you like) to mainly enable WebAdmin for simpler configuration. Configuration of server name, game password and more can be done manually here but it can be a chore as the configuration file is formatted in a dreadful way. Also, I believe it’s the intended way for nearly all base configuration to be done. Enabling WebAdmin: For your own sanity use the find/’Where is’ option in your editor of choice. In nano this is activated using CTRL+W. Search for the title of the sections, this search is case sensitive. Search for section [UWeb.WebServer] by searching just “UWeb.WebServer”. Set “bEnabled=True” to enable the web server. You can also set the port of the web server by using setting “ListenPort=8075” where 8075 is default and can be changed to whatever you want. Keep note of this to access the server later. Admin Name: Doesn’t really matter. Just go with something you can remember. Search for section [Engine.GameReplicationInfo] and set “AdminName=YOURNAME”. Admin Password: Does matter a bit. You connect over unsecured HTTP so please do use a unique password that doesn’t mean anything anywhere else. Search for section [Engine.AccessControl] and set “AdminPassword=YOURPASSWORD”. At this point you can run the server again and connect to the web server on the IP address of the server. On a VPS this should be available in dashboard or be the same IP used to connect to the server. If you’re using a home network or configuring it on the same local network, you might be best using the local/LAN IP address (found via ifconfig) to access the server or you can see your own public/external IP address on whatismyipaddress.com Type http://10.20.30.40:8075/ where 10.20.30.40 is replaced your servers IP. You’ll be asked for a username/password. Enter the values that you’ve just configured and you’re in! WebAdmin Notes Yes it’s a product of the time and designed for low resolution monitors, do zoom in. Second it has two sections of ‘current’ and ‘defaults’. Current shows a player listing, a more advanced player listing for banning/kicking, direct access to the server console and the list of mutators. Defaults contains all the other options to do with the server such as name, game password, map lists, chat enable/disable, map voting options, kick voting options, sandbox options, game length/difficulty, list of banned players and another voting config. Most of these are self-explanatory and I would recommend setting a server name and the following options for map voting as well as setting game length to Long (for 10 waves). The Maps tab are where the map lists are configured. By default only the 5 launch(?) maps are listed and playable on the server. Maps listed on the left are installed but not listed and maps on the right are listed and therefore playable. Click the “>>” to move all the maps across and then manually select “KF-Menu” and move it back to the left with “<”. (KF-Menu is the menu screen in the client game, it’s not playable. It won’t crash the server or anything but yeah.) Setting a game password here might be of interest if you want to keep the server private. Restart Level/Map are both present on both sections of the WebAdmin interface and both do the same thing. The map is restarted and this acts as a ‘Warm Restart’ of the server. Changes made in the WebAdmin UI will apply after a map restart or natural map change, even including mutators. This is the quickest way to change difficulty for example. At this stage you have a server that’s listed in the server browser and can be used to play all official maps with friends and anyone else who wants to join. Step 2.5 - systemd Automation I ran out of space on Step 2! Anyways here's a simple configuration for a systemd unit/service so that the server can be started along with the system (enabled) and managed otherwise with systemctl. [Unit] Description=Killing Floor 1 Server After=network.target [Service] WorkingDirectory=/home/kfuser/kf1server/System/ User=kfuser Group=kfuser Type=forking Restart=always Environment=LD_LIBRARY_PATH=/home/kfuser/.local/share/Steam/steamcmd/linux32/ ExecStart=/usr/bin/screen -d -m -S "kf1server" -h 1024 /home/kfuser/kf1server/System/ucc-bin server KF-westlondon.rom?Mutator=MutLoader.MutLoader?game=KFmod.KFGameType?VACSecured=true?MaxPlayers=6 logs=./kf1dslogs.log -nohomedir [Install] WantedBy=multi-user.target Utilising this may depend on distribution of Linux. Check your respective distro's wiki for information. Link to guide for managing creating and enabling systemd services in Debian [wiki.debian.org] You can also replace the "ExecStart=" value with the location of your script file. This is up to preference but due to MutLoader, I don't find much reason to change the start command . Step 3 – Custom Maps and Download Server Okay, lets say you want to play something more homebrewed on the server. This is a long winded but simple process with a couple of steps that might cause irritation so be ready. Map Acquisition Getting maps is the first problem and step. One major bug rules this area and is a trap for many as the Steam Workshop is and has been the main place for custom maps and mods/mutators/fixes to be uploaded. However, Killing Floor won’t download Workshop items if you have more than 50 subscribed workshop items in any/all games on Steam. Not just KF, ALL games that use the Steam Workshop. So, if you were like me and had like 200 GMOD addons from 10 years ago on your account, you won’t ever get workshop maps downloaded. You might get a freak download here and there but that’s after restarting the game a lot of times and just waiting for chance. Now you have a couple choices here: Unsubscribe from all Steam Workshop items across all games to use Workshop. (Steam has a button dedicated to this). Find maps outside of the Workshop on sites like Gamebanana, ModDB or even the rare listed open directory download server. Skim through this archive I made which contains a massive number of maps for Killing Floor which were hosted on the download servers I can find. (Work In Progress) Regardless of which you choose, clients need the map files first. Killing Floor is best used with a download server, a process I will go over after map acquisition. Map Archive (quick 2025 update) Please see my archive.org upload of 700+ dependency free maps just below this paragraph.These are in a big 7z file in the .rom format. Not all of these will work but you can put them in the maps folder on your client/game and see what you like! https://archive.org/details/Killing-Floor-2009-Custom-Maps Steam WorkshopThe Workshop has the biggest collection of custom content for Killing Floor and is usually the most up to date as well. Supporting files for maps such as extra code, textures and sounds are included and you might have the listing of files used even in the description. I would recommend making a collection or faving your disgusting GMOD addons (don’t lie, I know what you people do on gm_bigcity) or other workshop items and pressing the ‘big unsubscribe all button’. Restart Steam before trying to download KF workshop content after doing the big unsubscribe. If you finish up with downloading from KF’s workshop, you can then easily resubscribe. After all that and you add a map from the workshop, you’ll get a notification in the top right corner in plain white text letting you know the map is downloaded/downloading. If you don’t see this, click on the Multiplayer tab, and go back to the main menu, this starts the download in most cases. You can check when selecting a map for solo play if it has loaded. Navigate to your games installation directory and the downloaded map will be in the ‘Maps’ folder as a .rom file. If it requires any additional files, their locations in the Sound/Texture/System folders should be mentioned in the items description most of the time. Otherwise, you can quickly check manually by looking at the modified dates of the folders and seeing if new contents have been loaded into them. What Files and Where On the server side, you’ll want to put the .rom files into the ‘Maps’ folder. (I like using WinSCP for this task) Any additional content will go into the same folders as they were on your client install. I advise you to also copy all these files as well to a separate folder/directory at this time to start the basis of the download server. All of them in one folder, no separation needed. The 1KB .ucl file in the System directory named the same as the .rom map file can be ignored as this will be generated by the server. Download Server Setup and RationaleIt’s perfectly possible that every player could download the map from the workshop and then join the server. This would require coordination within your friend group and would pretty much exclude anyone joining publicly. (Keep in mind, you’d need to tell all your friends to nuke their workshop subscribed items as well). You could even go a bit old school and even just send the map files around to each player. Ultimately the best option here is to setup a download server for connecting players to download the current custom map to their computer. Killing Floor supports this best by using a basic HTTP server/web server as a source for map downloads. You don’t need a fancy domain or website for this to be clear. This is also separate from the web server used to host the WebAdmin UI. For this, I recommend using Apache2. You can use the latest version available in your distribution. The goal is to setup a web server and the map files are best placed on the ‘root’ of the web server as defined in its configuration. I will cover this for Debian and Apache2 briefly below but you should be able to follow any guide for your distribution to setup a basic web server/website and then you can just place map files at the root of the web server’s directory. Apache2 HTTP/Web ServerApache2 on Debian already comes preconfigured to display a default webpage on port 80. It uses the directory /var/www/html/ as it’s root directory for the website. Map files can be copied or symlink-ed (using "ln -s") to this directory, keeping the case the same as the map file in the “Maps” directory. I would recommend replacing the default ‘index.html’ with a blank “index.html” file (easily created by doing “touch /var/www/html/index.html”) to make it not list the contents of the directory. KillingFloor.ini Download Server ConfigThen in KillingFloor.ini under section [IpDrv.TcpNetDriver] you need to set the following options: Under section [IpDrv.HTTPDownload] set “RedirectToURL=http://10.20.30.40:80/” where 10.20.30.40 is your IP (and desired port if set on the webserver to not be at port 80. You will also need to set "UseCompression=False" from being 'True' if you're using .rom files instead of compressed .uz2 (.rom.uz2) files. Fully cold restart the KF server after doing this and to test you can have a friend join or unsubscribe from the custom map on the workshop and delete its files from your client’s “System” directory. The map at this point should download rapidly to the client and load in like normal. Couple of notes on this ordeal Map compression is a thing that has mainly gone away with the workshop. I don’t use it for no reason other than I can't be bothered to compress each map. If you find maps online that are compressed (uz2 file format) you can decompress them and use them using the ucc-bin server binary. You can get this in the Killing Floor SDK as well but make sure it's installed in a different place to your normal Killing Floor install. Make sure that map names are the same in terms of case. You can do a soft symbolic link instead of copying map files if you wish by using “ln -s” to save on disk space on the server. In my mind, it keeps things simpler too. You can use a domain name in the RedirectToURL field for the download server without issue but still do include the port. This is useful as you can setup DynDNS with a free domain if you have a dynamic external IP address on the server; as would be the case with most home Internet setups. Maps may try to download without this but I don’t think its intended by any means. Just setup the HTTP server or instruct every player you want on the server to copy the correct files to the correct places. Step 4 – Mutators/'Mods' Mods and mutators are the same thing as far as I know. Yes, the wording confused me for too long but I’m here to fix that. My goal for my KF Server is to have a “Vanillia+” experience where some bug fixes or QoL mods are in place but otherwise no big changes are made to gameplay, economy, weapon selection, and perk progression. Therefore, I don't have deep experience with mutators but here's something to get you started with the more basic ones. Uncapping FPS/Netspeed Confighttps://steamcommunity.com/sharedfiles/filedetails/?id=971828546 Follow this Steam guide to uncap the FPS from 85 to 144 or higher. Might as well while you're messing around with this stuff. Needs configuration on both server and client! MutLoaderMutLoader is a mutator that loads other mutators and does a couple of other tasks. Rather than having a exhaustive server startup script/service you can set them all up with MutLoader to have them load automatically on the server. MutLoader can be downloaded through the workshop with its files copied to the 'System' directory on your Killing Floor Server install. You need to then edit the server launch options to include MutLoader. So add: ?Mutator=MutLoader.MutLoader To make the base command like this: ucc-bin server KF-westlondon.rom?Mutator=MutLoader.MutLoader?game=KFmod.KFGameType?VACSecured=true?MaxPlayers=6 logs=./kf1dslogs.log -nohomedir To load a mutator using MutLoader you need its class name. This can be found in the Workshop description most times but can also be found by opening the mod's .ucl file with a text editor. You want to use value from ClassName as shown below.
此MutLoader配置将在每种难度下加载CountryTags突变体,并相应更改服务器名称以匹配难度。如果添加新的突变体,也必须将其添加到每种难度中。要添加另一个突变体,只需添加另一行以“Mutator=你的突变体.类名”开头的内容。 MutLoaderV2.ini: [MutLoaderV2.MutLoader] [Settings1 MutLoaderObject] sGameTypeName=KFGameType fGameDifficulty=2.0 bAppendFaked=false bUpdateServerName=true sServerName=我的KF服务器 | 难度:普通 Mutator=CountryTags.CountryTags [Settings2 MutLoaderObject] sGameTypeName=KFGameType fGameDifficulty=4.0 bAppendFaked=false bUpdateServerName=true sServerName=我的KF服务器 | 难度:困难 Mutator=CountryTags.国家标签 [设置3 MutLoaderObject] 游戏类型名称=KFGameType 游戏难度=5.0 附加伪造=false 更新服务器名称=true 服务器名称=我的KF服务器 | 难度:自杀级 变异器=CountryTags.CountryTags [设置4 MutLoaderObject] 游戏类型名称=KFGameType 游戏难度=7.0 附加伪造=false 更新服务器名称=true 服务器名称=我的KF服务器 | 难度:地狱降临 变异器=CountryTags.CountryTags 您可以在WebAdmin界面的变异器页面下查看已加载的模组。您需要完全重新加载服务器,MutLoader才能在启动时加载新模组。(在我看来,无论如何这都是个好习惯)。 向客户端提供客户端模组...最后,对于某些模组(不包括MutLoader),您需要将它们放在下载服务器上,以便提供给客户端。对于纯服务器端模组,这不是必需的,但对于某些模组,例如伤害数字模组,你需要将它们放在客户端才能正常工作。这里也可以放置其他非地图的自定义内容。只需将所有文件复制到地图文件所在的相同位置即可! 一般做法和建议 存在许多不同用途的变异器,从修复漏洞到彻底改变游戏玩法。为了实现我提到的“原版增强”目标,我推荐此合集里的以下几个: 这个“便携版”杀戮空间安装项目还包含许多便利性修复和其他可能值得借鉴的模组。总结 希望本指南能帮助某些玩家,避免在这个过于复杂的过程中抓狂——因为很多相关信息要么已随时间流失,要么难以查找,搜索时还会出现《杀戮空间2》的内容干扰。 祝大家玩《杀戮空间:便携版》愉快!